Databases
Django officially supports the following databases:
- PostgreSQL
- MariaDB
- MySQL
- Oracle
- SQLite
There are also a number of database backends provided by third parties.
Django attempts to support as many features as possible on all database
backends. However, not all database backends are alike, and we’ve had to make
design decisions on which features to support and which assumptions we can make
safely.
This file describes some of the features that might be relevant to Django
usage. It is not intended as a replacement for server-specific documentation or
reference manuals.
General notes
Persistent connections
Persistent connections avoid the overhead of reestablishing a connection to
the database in each request. They’re controlled by the
CONN_MAX_AGE parameter which defines the maximum lifetime of a
connection. It can be set independently for each database.
The default value is 0, preserving the historical behavior of closing the
database connection at the end of each request. To enable persistent
connections, set CONN_MAX_AGE to a positive integer of seconds. For
unlimited persistent connections, set it to None.
Connection management
Django opens a connection to the database when it first makes a database
query. It keeps this connection open and reuses it in subsequent requests.
Django closes the connection once it exceeds the maximum age defined by
CONN_MAX_AGE or when it isn’t usable any longer.
In detail, Django automatically opens a connection to the database whenever it
needs one and doesn’t have one already — either because this is the first
connection, or because the previous connection was closed.
At the beginning of each request, Django closes the connection if it has
reached its maximum age. If your database terminates idle connections after
some time, you should set CONN_MAX_AGE to a lower value, so that
Django doesn’t attempt to use a connection that has been terminated by the
database server. (This problem may only affect very low traffic sites.)
At the end of each request, Django closes the connection if it has reached its
maximum age or if it is in an unrecoverable error state. If any database
errors have occurred while processing the requests, Django checks whether the
connection still works, and closes it if it doesn’t. Thus, database errors
affect at most one request per each application’s worker thread; if the
connection becomes unusable, the next request gets a fresh connection.
Setting CONN_HEALTH_CHECKS to True can be used to improve the
robustness of connection reuse and prevent errors when a connection has been
closed by the database server which is now ready to accept and serve new
connections, e.g. after database server restart. The health check is performed
only once per request and only if the database is being accessed during the
handling of the request.
Caveats
Since each thread maintains its own connection, your database must support at
least as many simultaneous connections as you have worker threads.
Sometimes a database won’t be accessed by the majority of your views, for
example because it’s the database of an external system, or thanks to caching.
In such cases, you should set CONN_MAX_AGE to a low value or even
0, because it doesn’t make sense to maintain a connection that’s unlikely
to be reused. This will help keep the number of simultaneous connections to
this database small.
The development server creates a new thread for each request it handles,
negating the effect of persistent connections. Don’t enable them during
development.
When Django establishes a connection to the database, it sets up appropriate
parameters, depending on the backend being used. If you enable persistent
connections, this setup is no longer repeated every request. If you modify
parameters such as the connection’s isolation level or time zone, you should
either restore Django’s defaults at the end of each request, force an
appropriate value at the beginning of each request, or disable persistent
connections.
Encoding
Django assumes that all databases use UTF-8 encoding. Using other encodings may
result in unexpected behavior such as “value too long” errors from your
database for data that is valid in Django. See the database specific notes
below for information on how to set up your database correctly.
PostgreSQL notes
Django supports PostgreSQL 11 and higher. psycopg2 2.8.4 or higher is
required, though the latest release is recommended.
PostgreSQL connection settings
See HOST for details.
To connect using a service name from the connection service file and a
password from the password file, you must specify them in the
OPTIONS part of your database configuration in DATABASES:
settings.py
DATABASES = {
    'default': {
        'ENGINE': 'django.db.backends.postgresql',
        'OPTIONS': {
            'service': 'my_service',
            'passfile': '.my_pgpass',
        },
    }
}
.pg_service.conf
[my_service]
host=localhost
user=USER
dbname=NAME
port=5432
.my_pgpass
localhost:5432:NAME:USER:PASSWORD
Changed in Django 4.0:
Support for connecting by a service name, and specifying a password file
was added.
Optimizing PostgreSQL’s configuration
Django needs the following parameters for its database connections:
client_encoding:'UTF8',default_transaction_isolation:'read committed'by default,
or the value set in the connection options (see below),-
timezone:-
- when
USE_TZisTrue,'UTC'by default, or the
TIME_ZONEvalue set for the connection, - when
USE_TZisFalse, the value of the global
TIME_ZONEsetting.
- when
If these parameters already have the correct values, Django won’t set them for
every new connection, which improves performance slightly. You can configure
them directly in postgresql.conf or more conveniently per database
user with ALTER ROLE.
Django will work just fine without this optimization, but each new connection
will do some additional queries to set these parameters.
Isolation level
Like PostgreSQL itself, Django defaults to the READ COMMITTED isolation
level. If you need a higher isolation level such as REPEATABLE READ or
SERIALIZABLE, set it in the OPTIONS part of your database
configuration in DATABASES:
import psycopg2.extensions

DATABASES = {
    # ...
    'OPTIONS': {
        'isolation_level': psycopg2.extensions.ISOLATION_LEVEL_SERIALIZABLE,
    },
}
Note
Under higher isolation levels, your application should be prepared to
handle exceptions raised on serialization failures. This option is
designed for advanced uses.
Indexes for varchar and text columns
When specifying db_index=True on your model fields, Django typically
outputs a single CREATE INDEX statement. However, if the database type
for the field is either varchar or text (e.g., used by CharField,
FileField, and TextField), then Django will create
an additional index that uses an appropriate PostgreSQL operator class
for the column. The extra index is necessary to correctly perform
lookups that use the LIKE operator in their SQL, as is done with the
contains and startswith lookup types.
Migration operation for adding extensions
If you need to add a PostgreSQL extension (like hstore, postgis, etc.)
using a migration, use the
CreateExtension operation.
Server-side cursors
When using QuerySet.iterator(), Django opens a server-side
cursor. By default, PostgreSQL assumes that
only the first 10% of the results of cursor queries will be fetched. The query
planner spends less time planning the query and starts returning results
faster, but this could diminish performance if more than 10% of the results are
retrieved. PostgreSQL’s assumptions on the number of rows retrieved for a
cursor query is controlled with the cursor_tuple_fraction option.
Transaction pooling and server-side cursors
Using a connection pooler in transaction pooling mode (e.g. PgBouncer)
requires disabling server-side cursors for that connection.
Server-side cursors are local to a connection and remain open at the end of a
transaction when AUTOCOMMIT is True. A
subsequent transaction may attempt to fetch more results from a server-side
cursor. In transaction pooling mode, there’s no guarantee that subsequent
transactions will use the same connection. If a different connection is used,
an error is raised when the transaction references the server-side cursor,
because server-side cursors are only accessible in the connection in which they
were created.
One solution is to disable server-side cursors for a connection in
DATABASES by setting DISABLE_SERVER_SIDE_CURSORS to True.
To benefit from server-side cursors in transaction pooling mode, you could set
up another connection to the database in order to
perform queries that use server-side cursors. This connection needs to either
be directly to the database or to a connection pooler in session pooling mode.
Another option is to wrap each QuerySet using server-side cursors in an
atomic() block, because it disables autocommit
for the duration of the transaction. This way, the server-side cursor will only
live for the duration of the transaction.
Manually-specifying values of auto-incrementing primary keys
Django uses PostgreSQL’s identity columns to store auto-incrementing primary
keys. An identity column is populated with values from a sequence that keeps
track of the next available value. Manually assigning a value to an
auto-incrementing field doesn’t update the field’s sequence, which might later
cause a conflict. For example:
>>> from django.contrib.auth.models import User
>>> User.objects.create(username='alice', pk=1)
<User: alice>
>>> # The sequence hasn't been updated; its next value is 1.
>>> User.objects.create(username='bob')
...
IntegrityError: duplicate key value violates unique constraint
"auth_user_pkey" DETAIL:  Key (id)=(1) already exists.
If you need to specify such values, reset the sequence afterward to avoid
reusing a value that’s already in the table. The sqlsequencereset
management command generates the SQL statements to do that.
Changed in Django 4.1:
In older versions, PostgreSQL’s SERIAL data type was used instead of
identity columns.
Test database templates
You can use the TEST['TEMPLATE'] setting to specify
a template (e.g. 'template0') from which to create a test database.
Speeding up test execution with non-durable settings
You can speed up test execution times by configuring PostgreSQL to be
non-durable.
Warning
This is dangerous: it will make your database more susceptible to data loss
or corruption in the case of a server crash or power loss. Only use this on
a development machine where you can easily restore the entire contents of
all databases in the cluster.
MariaDB notes
Django supports MariaDB 10.3 and higher.
To use MariaDB, use the MySQL backend, which is shared between the two. See the
MySQL notes for more details.
MySQL notes
Version support
Django supports MySQL 5.7 and higher.
Django’s inspectdb feature uses the information_schema database, which
contains detailed data on all database schemas.
Django expects the database to support Unicode (UTF-8 encoding) and delegates to
it the task of enforcing transactions and referential integrity. It is important
to be aware of the fact that the two latter ones aren’t actually enforced by
MySQL when using the MyISAM storage engine, see the next section.
Storage engines
MySQL has several storage engines. You can change the default storage engine
in the server configuration.
MySQL’s default storage engine is InnoDB. This engine is fully transactional
and supports foreign key references. It’s the recommended choice. However, the
InnoDB autoincrement counter is lost on a MySQL restart because it does not
remember the AUTO_INCREMENT value, instead recreating it as “max(id)+1”.
This may result in an inadvertent reuse of AutoField
values.
The main drawbacks of MyISAM are that it doesn’t support transactions or
enforce foreign-key constraints.
MySQL DB API Drivers
MySQL has a couple drivers that implement the Python Database API described in
PEP 249:
- mysqlclient is a native driver. It’s the recommended choice.
- MySQL Connector/Python is a pure Python driver from Oracle that does not
require the MySQL client library or any Python modules outside the standard
library.
These drivers are thread-safe and provide connection pooling.
In addition to a DB API driver, Django needs an adapter to access the database
drivers from its ORM. Django provides an adapter for mysqlclient while MySQL
Connector/Python includes its own.
MySQL Connector/Python
MySQL Connector/Python is available from the download page.
The Django adapter is available in versions 1.1.X and later. It may not
support the most recent releases of Django.
Time zone definitions
If you plan on using Django’s timezone support,
use mysql_tzinfo_to_sql to load time zone tables into the MySQL database.
This needs to be done just once for your MySQL server, not per database.
Creating your database
You can create your database using the command-line tools and this SQL:
CREATE DATABASE <dbname> CHARACTER SET utf8;
This ensures all tables and columns will use UTF-8 by default.
Collation settings
The collation setting for a column controls the order in which data is sorted
as well as what strings compare as equal. You can specify the db_collation
parameter to set the collation name of the column for
CharField and
TextField.
The collation can also be set on a database-wide level and per-table. This is
documented thoroughly in the MySQL documentation. In such cases, you must
set the collation by directly manipulating the database settings or tables.
Django doesn’t provide an API to change them.
By default, with a UTF-8 database, MySQL will use the
utf8_general_ci collation. This results in all string equality
comparisons being done in a case-insensitive manner. That is, "Fred" and
"freD" are considered equal at the database level. If you have a unique
constraint on a field, it would be illegal to try to insert both "aa" and
"AA" into the same column, since they compare as equal (and, hence,
non-unique) with the default collation. If you want case-sensitive comparisons
on a particular column or table, change the column or table to use the
utf8_bin collation.
Please note that according to MySQL Unicode Character Sets, comparisons for
the utf8_general_ci collation are faster, but slightly less correct, than
comparisons for utf8_unicode_ci. If this is acceptable for your application,
you should use utf8_general_ci because it is faster. If this is not acceptable
(for example, if you require German dictionary order), use utf8_unicode_ci
because it is more accurate.
Warning
Model formsets validate unique fields in a case-sensitive manner. Thus when
using a case-insensitive collation, a formset with unique field values that
differ only by case will pass validation, but upon calling save(), an
IntegrityError will be raised.
Connecting to the database
Refer to the settings documentation.
Connection settings are used in this order:
OPTIONS.NAME,USER,PASSWORD,HOST,
PORT- MySQL option files.
In other words, if you set the name of the database in OPTIONS,
this will take precedence over NAME, which would override
anything in a MySQL option file.
Here’s a sample configuration which uses a MySQL option file:
# settings.py
DATABASES = {
    'default': {
        'ENGINE': 'django.db.backends.mysql',
        'OPTIONS': {
            'read_default_file': '/path/to/my.cnf',
        },
    }
}


# my.cnf
[client]
database = NAME
user = USER
password = PASSWORD
default-character-set = utf8
Several other MySQLdb connection options may be useful, such as ssl,
init_command, and sql_mode.
Setting sql_mode
From MySQL 5.7 onward, the default value of the sql_mode option contains
STRICT_TRANS_TABLES. That option escalates warnings into errors when data
are truncated upon insertion, so Django highly recommends activating a
strict mode for MySQL to prevent data loss (either STRICT_TRANS_TABLES
or STRICT_ALL_TABLES).
If you need to customize the SQL mode, you can set the sql_mode variable
like other MySQL options: either in a config file or with the entry
'init_command': "SET sql_mode='STRICT_TRANS_TABLES'" in the
OPTIONS part of your database configuration in DATABASES.
Isolation level
When running concurrent loads, database transactions from different sessions
(say, separate threads handling different requests) may interact with each
other. These interactions are affected by each session’s transaction isolation
level. You can set a connection’s isolation level with an
'isolation_level' entry in the OPTIONS part of your database
configuration in DATABASES. Valid values for
this entry are the four standard isolation levels:
'read uncommitted''read committed''repeatable read''serializable'
or None to use the server’s configured isolation level. However, Django
works best with and defaults to read committed rather than MySQL’s default,
repeatable read. Data loss is possible with repeatable read. In particular,
you may see cases where get_or_create()
will raise an IntegrityError but the object won’t appear in
a subsequent get() call.
Creating your tables
When Django generates the schema, it doesn’t specify a storage engine, so
tables will be created with whatever default storage engine your database
server is configured for. The easiest solution is to set your database server’s
default storage engine to the desired engine.
If you’re using a hosting service and can’t change your server’s default
storage engine, you have a couple of options.
-
After the tables are created, execute an
ALTER TABLEstatement to
convert a table to a new storage engine (such as InnoDB):ALTER TABLE <tablename> ENGINE=INNODB;
This can be tedious if you have a lot of tables.
-
Another option is to use the
init_commandoption for MySQLdb prior to
creating your tables:'OPTIONS': { 'init_command': 'SET default_storage_engine=INNODB', }
This sets the default storage engine upon connecting to the database.
After your tables have been created, you should remove this option as it
adds a query that is only needed during table creation to each database
connection.
Table names
There are known issues in even the latest versions of MySQL that can cause the
case of a table name to be altered when certain SQL statements are executed
under certain conditions. It is recommended that you use lowercase table
names, if possible, to avoid any problems that might arise from this behavior.
Django uses lowercase table names when it auto-generates table names from
models, so this is mainly a consideration if you are overriding the table name
via the db_table parameter.
Savepoints
Both the Django ORM and MySQL (when using the InnoDB storage engine) support database savepoints.
If you use the MyISAM storage engine please be aware of the fact that you will
receive database-generated errors if you try to use the savepoint-related
methods of the transactions API. The reason
for this is that detecting the storage engine of a MySQL database/table is an
expensive operation so it was decided it isn’t worth to dynamically convert
these methods in no-op’s based in the results of such detection.
Notes on specific fields
Character fields
Any fields that are stored with VARCHAR column types may have their
max_length restricted to 255 characters if you are using unique=True
for the field. This affects CharField,
SlugField. See the MySQL documentation for more
details.
TextField limitations
MySQL can index only the first N chars of a BLOB or TEXT column. Since
TextField doesn’t have a defined length, you can’t mark it as
unique=True. MySQL will report: “BLOB/TEXT column ‘<db_column>’ used in key
specification without a key length”.
Fractional seconds support for Time and DateTime fields
MySQL can store fractional seconds, provided that the column definition
includes a fractional indication (e.g. DATETIME(6)).
Django will not upgrade existing columns to include fractional seconds if the
database server supports it. If you want to enable them on an existing database,
it’s up to you to either manually update the column on the target database, by
executing a command like:
ALTER TABLE `your_table` MODIFY `your_datetime_column` DATETIME(6)
or using a RunSQL operation in a
data migration.
TIMESTAMP columns
If you are using a legacy database that contains TIMESTAMP columns, you must
set USE_TZ = False to avoid data corruption.
inspectdb maps these columns to
DateTimeField and if you enable timezone support,
both MySQL and Django will attempt to convert the values from UTC to local time.
Row locking with QuerySet.select_for_update()
MySQL and MariaDB do not support some options to the SELECT ... FOR UPDATE
statement. If select_for_update() is used with an unsupported option, then
a NotSupportedError is raised.
| Option | MariaDB | MySQL |
|---|---|---|
SKIP LOCKED |
X (≥10.6) | X (≥8.0.1) |
NOWAIT |
X | X (≥8.0.1) |
OF |
X (≥8.0.1) | |
NO KEY |
When using select_for_update() on MySQL, make sure you filter a queryset
against at least a set of fields contained in unique constraints or only
against fields covered by indexes. Otherwise, an exclusive write lock will be
acquired over the full table for the duration of the transaction.
Automatic typecasting can cause unexpected results
When performing a query on a string type, but with an integer value, MySQL will
coerce the types of all values in the table to an integer before performing the
comparison. If your table contains the values 'abc', 'def' and you
query for WHERE mycolumn=0, both rows will match. Similarly, WHERE mycolumn=1
will match the value 'abc1'. Therefore, string type fields included in Django
will always cast the value to a string before using it in a query.
If you implement custom model fields that inherit from
Field directly, are overriding
get_prep_value(), or use
RawSQL,
extra(), or
raw(), you should ensure that you perform
appropriate typecasting.
SQLite notes
Django supports SQLite 3.9.0 and later.
SQLite provides an excellent development alternative for applications that
are predominantly read-only or require a smaller installation footprint. As
with all database servers, though, there are some differences that are
specific to SQLite that you should be aware of.
Substring matching and case sensitivity
For all SQLite versions, there is some slightly counter-intuitive behavior when
attempting to match some types of strings. These are triggered when using the
iexact or contains filters in Querysets. The behavior
splits into two cases:
1. For substring matching, all matches are done case-insensitively. That is a
filter such as filter(name__contains="aa") will match a name of "Aabb".
2. For strings containing characters outside the ASCII range, all exact string
matches are performed case-sensitively, even when the case-insensitive options
are passed into the query. So the iexact filter will behave exactly
the same as the exact filter in these cases.
Some possible workarounds for this are documented at sqlite.org, but they
aren’t utilized by the default SQLite backend in Django, as incorporating them
would be fairly difficult to do robustly. Thus, Django exposes the default
SQLite behavior and you should be aware of this when doing case-insensitive or
substring filtering.
Decimal handling
SQLite has no real decimal internal type. Decimal values are internally
converted to the REAL data type (8-byte IEEE floating point number), as
explained in the SQLite datatypes documentation, so they don’t support
correctly-rounded decimal floating point arithmetic.
“Database is locked” errors
SQLite is meant to be a lightweight database, and thus can’t support a high
level of concurrency. OperationalError: database is locked errors indicate
that your application is experiencing more concurrency than sqlite can
handle in default configuration. This error means that one thread or process has
an exclusive lock on the database connection and another thread timed out
waiting for the lock the be released.
Python’s SQLite wrapper has
a default timeout value that determines how long the second thread is allowed to
wait on the lock before it times out and raises the OperationalError: database error.
is locked
If you’re getting this error, you can solve it by:
-
Switching to another database backend. At a certain point SQLite becomes
too “lite” for real-world applications, and these sorts of concurrency
errors indicate you’ve reached that point. -
Rewriting your code to reduce concurrency and ensure that database
transactions are short-lived. -
Increase the default timeout value by setting the
timeoutdatabase
option:'OPTIONS': { # ... 'timeout': 20, # ... }
This will make SQLite wait a bit longer before throwing “database is locked”
errors; it won’t really do anything to solve them.
QuerySet.select_for_update() not supported
SQLite does not support the SELECT ... FOR UPDATE syntax. Calling it will
have no effect.
“pyformat” parameter style in raw queries not supported
For most backends, raw queries (Manager.raw() or cursor.execute())
can use the “pyformat” parameter style, where placeholders in the query
are given as '%(name)s' and the parameters are passed as a dictionary
rather than a list. SQLite does not support this.
Isolation when using QuerySet.iterator()
There are special considerations described in Isolation In SQLite when
modifying a table while iterating over it using QuerySet.iterator(). If
a row is added, changed, or deleted within the loop, then that row may or may
not appear, or may appear twice, in subsequent results fetched from the
iterator. Your code must handle this.
Enabling JSON1 extension on SQLite
To use JSONField on SQLite, you need to enable the
JSON1 extension on Python’s sqlite3 library. If the extension is
not enabled on your installation, a system error (fields.E180) will be
raised.
To enable the JSON1 extension you can follow the instruction on
the wiki page.
Oracle notes
Django supports Oracle Database Server versions 19c and higher. Version 7.0
or higher of the cx_Oracle Python driver is required.
In order for the python manage.py migrate command to work, your Oracle
database user must have privileges to run the following commands:
- CREATE TABLE
- CREATE SEQUENCE
- CREATE PROCEDURE
- CREATE TRIGGER
To run a project’s test suite, the user usually needs these additional
privileges:
- CREATE USER
- ALTER USER
- DROP USER
- CREATE TABLESPACE
- DROP TABLESPACE
- CREATE SESSION WITH ADMIN OPTION
- CREATE TABLE WITH ADMIN OPTION
- CREATE SEQUENCE WITH ADMIN OPTION
- CREATE PROCEDURE WITH ADMIN OPTION
- CREATE TRIGGER WITH ADMIN OPTION
While the RESOURCE role has the required CREATE TABLE,
CREATE SEQUENCE, CREATE PROCEDURE, and CREATE TRIGGER privileges,
and a user granted RESOURCE WITH ADMIN OPTION can grant RESOURCE, such
a user cannot grant the individual privileges (e.g. CREATE TABLE), and thus
RESOURCE WITH ADMIN OPTION is not usually sufficient for running tests.
Some test suites also create views or materialized views; to run these, the
user also needs CREATE VIEW WITH ADMIN OPTION and
CREATE MATERIALIZED VIEW WITH ADMIN OPTION privileges. In particular, this
is needed for Django’s own test suite.
All of these privileges are included in the DBA role, which is appropriate
for use on a private developer’s database.
The Oracle database backend uses the SYS.DBMS_LOB and SYS.DBMS_RANDOM
packages, so your user will require execute permissions on it. It’s normally
accessible to all users by default, but in case it is not, you’ll need to grant
permissions like so:
GRANT EXECUTE ON SYS.DBMS_LOB TO user;
GRANT EXECUTE ON SYS.DBMS_RANDOM TO user;
Connecting to the database
To connect using the service name of your Oracle database, your settings.py
file should look something like this:
DATABASES = {
    'default': {
        'ENGINE': 'django.db.backends.oracle',
        'NAME': 'xe',
        'USER': 'a_user',
        'PASSWORD': 'a_password',
        'HOST': '',
        'PORT': '',
    }
}
In this case, you should leave both HOST and PORT empty.
However, if you don’t use a tnsnames.ora file or a similar naming method
and want to connect using the SID (“xe” in this example), then fill in both
HOST and PORT like so:
DATABASES = {
    'default': {
        'ENGINE': 'django.db.backends.oracle',
        'NAME': 'xe',
        'USER': 'a_user',
        'PASSWORD': 'a_password',
        'HOST': 'dbprod01ned.mycompany.com',
        'PORT': '1540',
    }
}
You should either supply both HOST and PORT, or leave
both as empty strings. Django will use a different connect descriptor depending
on that choice.
Full DSN and Easy Connect
A Full DSN or Easy Connect string can be used in NAME if both
HOST and PORT are empty. This format is required when
using RAC or pluggable databases without tnsnames.ora, for example.
Example of an Easy Connect string:
'NAME': 'localhost:1521/orclpdb1',
Example of a full DSN string:
'NAME': (
    '(DESCRIPTION=(ADDRESS=(PROTOCOL=TCP)(HOST=localhost)(PORT=1521))'
    '(CONNECT_DATA=(SERVICE_NAME=orclpdb1)))'
),
Threaded option
If you plan to run Django in a multithreaded environment (e.g. Apache using the
default MPM module on any modern operating system), then you must set
the threaded option of your Oracle database configuration to True:
'OPTIONS': {
    'threaded': True,
},
Failure to do this may result in crashes and other odd behavior.
INSERT … RETURNING INTO
By default, the Oracle backend uses a RETURNING INTO clause to efficiently
retrieve the value of an AutoField when inserting new rows. This behavior
may result in a DatabaseError in certain unusual setups, such as when
inserting into a remote table, or into a view with an INSTEAD OF trigger.
The RETURNING INTO clause can be disabled by setting the
use_returning_into option of the database configuration to False:
'OPTIONS': {
    'use_returning_into': False,
},
In this case, the Oracle backend will use a separate SELECT query to
retrieve AutoField values.
Naming issues
Oracle imposes a name length limit of 30 characters. To accommodate this, the
backend truncates database identifiers to fit, replacing the final four
characters of the truncated name with a repeatable MD5 hash value.
Additionally, the backend turns database identifiers to all-uppercase.
To prevent these transformations (this is usually required only when dealing
with legacy databases or accessing tables which belong to other users), use
a quoted name as the value for db_table:
class LegacyModel(models.Model):
    class Meta:
        db_table = '"name_left_in_lowercase"'

class ForeignModel(models.Model):
    class Meta:
        db_table = '"OTHER_USER"."NAME_ONLY_SEEMS_OVER_30"'
Quoted names can also be used with Django’s other supported database
backends; except for Oracle, however, the quotes have no effect.
When running migrate, an ORA-06552 error may be encountered if
certain Oracle keywords are used as the name of a model field or the
value of a db_column option. Django quotes all identifiers used
in queries to prevent most such problems, but this error can still
occur when an Oracle datatype is used as a column name. In
particular, take care to avoid using the names date,
timestamp, number or float as a field name.
NULL and empty strings
Django generally prefers to use the empty string ('') rather than
NULL, but Oracle treats both identically. To get around this, the
Oracle backend ignores an explicit null option on fields that
have the empty string as a possible value and generates DDL as if
null=True. When fetching from the database, it is assumed that
a NULL value in one of these fields really means the empty
string, and the data is silently converted to reflect this assumption.
TextField limitations
The Oracle backend stores TextFields as NCLOB columns. Oracle imposes
some limitations on the usage of such LOB columns in general:
- LOB columns may not be used as primary keys.
- LOB columns may not be used in indexes.
- LOB columns may not be used in a
SELECT DISTINCTlist. This means that
attempting to use theQuerySet.distinctmethod on a model that
includesTextFieldcolumns will result in anORA-00932error when
run against Oracle. As a workaround, use theQuerySet.defermethod in
conjunction withdistinct()to preventTextFieldcolumns from being
included in theSELECT DISTINCTlist.
Subclassing the built-in database backends
Django comes with built-in database backends. You may subclass an existing
database backends to modify its behavior, features, or configuration.
Consider, for example, that you need to change a single database feature.
First, you have to create a new directory with a base module in it. For
example:
mysite/
    ...
    mydbengine/
        __init__.py
        base.py
The base.py module must contain a class named DatabaseWrapper that
subclasses an existing engine from the django.db.backends module. Here’s an
example of subclassing the PostgreSQL engine to change a feature class
allows_group_by_selected_pks_on_model:
mysite/mydbengine/base.py
from django.db.backends.postgresql import base, features

class DatabaseFeatures(features.DatabaseFeatures):
    def allows_group_by_selected_pks_on_model(self, model):
        return True

class DatabaseWrapper(base.DatabaseWrapper):
    features_class = DatabaseFeatures
Finally, you must specify a DATABASE-ENGINE in your settings.py
file:
DATABASES = {
    'default': {
        'ENGINE': 'mydbengine',
        ...
    },
}
You can see the current list of database engines by looking in
django/db/backends.
Using a 3rd-party database backend
In addition to the officially supported databases, there are backends provided
by 3rd parties that allow you to use other databases with Django:
- CockroachDB
- Firebird
- Google Cloud Spanner
- Microsoft SQL Server
- TiDB
- YugabyteDB
The Django versions and ORM features supported by these unofficial backends
vary considerably. Queries regarding the specific capabilities of these
unofficial backends, along with any support queries, should be directed to
the support channels provided by each 3rd party project.
Django is a high level full-stack open-source web framework written in Python, that encourages rapid development and clean, pragmatic design.
Django, in its ‘out-of-the-box’ state, is set up to communicate with SQLite — a lightweight relational database included with the Python distribution. So by default, Django automatically creates an SQLite database for your project.
In addition to SQLite, Django also has support for other popular databases that include PostgreSQL, MySQL, and Oracle.
However, PostgreSQL has a number of features that are not shared by the other databases Django supports, which makes it an idle choice for a Django app in production.
In this article, we will go through the integration of PostgreSQL with a Django Application.
Pre-Requirements
We are assuming you already have Django installed on your machine and one Django project up and running, if not then read the following article — Starting A Django Project
Installing PostgreSQL
Windows and macOS X users can download PostgreSQL from the official site https://www.postgresql.org/download/ and simply install it.
Note that tutorial is strictly based on Python 3
Linux User
sudo apt-get install postgresql postgresql-contribAlso, Linux users need to install some dependencies for PostgreSQL to work with Python.
sudo apt-get install libpq-dev python3-devInstall psycopg2
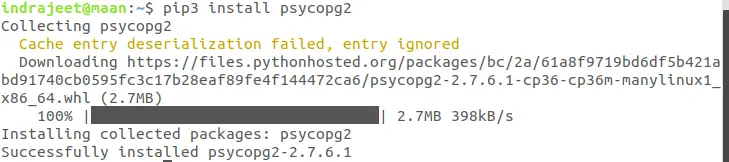
Next, we need to install the PostgreSQL database adapter to communicate to the database with Python to install it run the following command in the shell.
pip install psycopg2Create A PostgreSQL User and Database
As the default configuration of Postgres is, a user called Postgres is made on, and the user Postgres has full super admin access to entire PostgreSQL instance running on your OS.
sudo -u postgres psqlNow the terminal should be prefixed with postgres=# , The above command gets you the psql command-line interface in full admin mode.
Now let’s create a user and database.
Creating Database
CREATE DATABASE mydb;This will create a database named mydb, note that every SQL statement must end with a semicolon.
Creating User
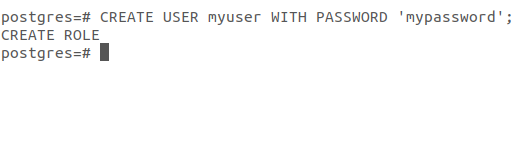
CREATE USER myuser WITH ENCRYPTED PASSWORD 'mypass';Here we are creating a user named myuser with password mypass. You can use any username and password you wish.
Modifying Connection Parameters
 ALTER ROLE myuser SET client_encoding TO 'utf8';
 ALTER ROLE myuser SET default_transaction_isolation TO 'read committed';
 ALTER ROLE myuser SET timezone TO 'UTC';
We are setting the default encoding to UTF-8, which Django expects.
We are also setting the default transaction isolation scheme to “read committed”, which blocks reads from uncommitted transactions.
Lastly, we are setting the timezone by default, our Django projects will be set to use UTC.These are essential parameters recommended by the official Django team.
Granting Permission To The User
GRANT ALL PRIVILEGES ON DATABASE mydb TO myuser;Now our user has administrative access to the database.
Now exit the SQL prompt.
qIntegrating PostgreSQL With Django
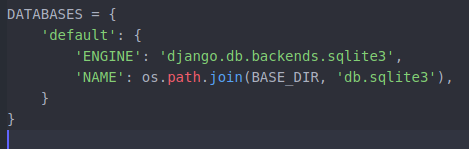
Open the settings.py file of your project and scroll straight to the database section, which should look like this.
DATABASES = {
    'default': {
        'ENGINE': 'django.db.backends.sqlite3',
        'NAME': os.path.join(BASE_DIR, 'db.sqlite3'),
    }
}
We need to update these settings to integrate our PostgreSQL with the project.
DATABASES = {
    'default': {
        'ENGINE': 'django.db.backends.postgresql_psycopg2',
        'NAME': 'mydb',
        'USER': 'myuser',
        'PASSWORD': 'mypass',
        'HOST': 'localhost',
        'PORT': '',
    }
}
Let’s quickly go over the settings,
DATABASES — This constant is a dictionary of database connection information and is required by Django. You can have multiple connections to different databases, but most of the time, you will just need an entry called default.
default — This is the default database connection configuration. You should always have a default set of connections settings.
'ENGINE': 'django.db.backends.postgresql_psycopg2' — This tells Django to use the Postgres backend. This, in turn uses psycopg2, Python’s Postgres library which we installed earlier.
'NAME': 'mydb' — The name of the database you want to connect to.
'USER': 'myuser' — The User with access to the database.
'PASSWORD': 'mypass' — The password for your database user.
'HOST': 'localhost' — The address of the database server you want to connect to.
'PORT': '' — The port you want to connect to, which by default is ‘5432’
Test The Database Connection
After updating the database configurations, it’s time to test the connection. The Django database migration process ensures all Django project logic associated with a database is reflected in the database itself.
During the first migration against the database, there are a series of migrations Django requires that create tables to keep track of administrators and sessions.
In the directory where manage.py script exists, run the following command.
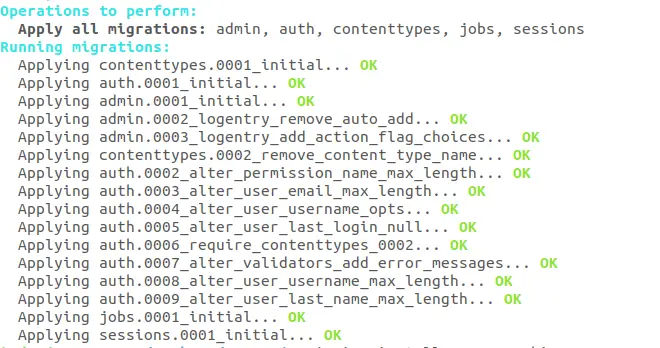
python manage.py migrateIf everything went right you should see an output like this.
Operations to perform:
  Apply all migrations: admin, auth, contenttypes, sessions
Running migrations:
  Applying contenttypes.0001_initial... OK
  Applying auth.0001_initial... OK
  Applying admin.0001_initial... OK
  Applying admin.0002_logentry_remove_auto_add... OK
  Applying admin.0003_logentry_add_action_flag_choices... OK
  Applying contenttypes.0002_remove_content_type_name... OK
  Applying auth.0002_alter_permission_name_max_length... OK
  Applying auth.0003_alter_user_email_max_length... OK
  Applying auth.0004_alter_user_username_opts... OK
  Applying auth.0005_alter_user_last_login_null... OK
  Applying auth.0006_require_contenttypes_0002... OK
  Applying auth.0007_alter_validators_add_error_messages... OK
  Applying auth.0008_alter_user_username_max_length... OK
  Applying auth.0009_alter_user_last_name_max_length... OK
  Applying auth.0010_alter_group_name_max_length... OK
  Applying auth.0011_update_proxy_permissions... OK
  Applying sessions.0001_initial... OK
Furthermore, you can now create a superuser and login to the admin dashboard.
DJANGO
integrating postgresql in django
Arch: Ubuntu and Nginx
sudo apt install libpq-dev postgresql postgresql-contrib
systemctl status postgresql.service is usually active by now if not check back installation
By default, Postgres uses an authentication scheme called “peer authentication” for local connections. Basically, this means that if the user’s operating system username john@example matches a valid Postgres username john, that user can login with no further authentication. During the Postgres installation, an operating system user named postgres was created to correspond to the postgres administrative user. We use this user to perform administrative tasks.
sudo -u postgres psql
postgres=# create database example;
CREATE DATABASE
postgres=# create user john with password 'abcxyz';
CREATE ROLE
postgres=# ALTER ROLE john SET client_encoding TO 'utf8';
postgres=# ALTER ROLE john SET default_transaction_isolation TO 'read committed';
postgres=# ALTER ROLE john SET timezone TO 'UTC';
postgres=# GRANT ALL PRIVILEGES ON DATABASE example TO john;
Postgres is now set up so that Django can connect to and manage its database information.
pip install psycopg2-binary is not recommended for production as psycopg2 has unfixed issues.
settings.py
DATABASES = {
    'default': {
        'ENGINE': 'django.db.backends.postgresql_psycopg2',
        'NAME': 'example',
        'USER': 'john',
        'PASSWORD': 'abcxyz',
        'HOST': 'localhost',
        'PORT': '5432',  can be left empty
    }
}
At the end, use these basic django migration commands to complete the integration.
python manage.py makemigrations
python manage.py migrate
Extra TODO Tips
It is highly recommended to use better methods to set critical values like NAME, USER and PASSWORD rather than using plain text like shown above in database code snippet.
One method could be using a json file to replace those contents from outside the scope of project root directories. So even in unforeseeable cases of attempted source code hijacking your critical auth details could be out of reach.
A new config.json file with corresponding key-value pairs is assumed to be created.
{
  "POSTGRES_DB": "example",
  "POSTGRES_USER": "john",
  "POSTGRES_PASSWORD": "abcxyz",
  "POSTGRES_HOST": "localhost",
  "POSTGRES_PORT": ""
}
Placing this code in settings.py to load and use config.json.
import os
import json

with open('/path to your config.json file/') as config_file:
    config = json.load(config_file)
Update database config to load the params from config.json file:
DATABASES = {
    'default': {
        'ENGINE': 'django.db.backends.postgresql_psycopg2',
        'NAME': config['POSTGRES_DB'],
        'USER': config['POSTGRES_USER'],
        'PASSWORD': config['POSTGRES_PASSWORD'],
        'HOST': config['POSTGRES_HOST'],
        'PORT': config['POSTGRES_PORT'],
    }
}
Learn how to connect a PostgreSQL database with Django App. Django is the most popular web development python framework. It is an open-source web framework and since it is written in Python programming language it is backed by a strong community of programmers. It allows for scalability, re-usability, and rapid development.
PostgreSQL is a powerful, open source object-relational database system with over 30 years of active development, it has a wide range of uses and applications throughout the field of technology. It has earned a strong reputation for its reliability, features, robustness, and fast performance.
In this tutorial, you will learn how to connect to a postgreSQL database to a django app. You’ll learn how to create your Django project in Virtual Environment. You will also learn how to edit your Django Project Settings file and connect your web application to a PostgreSQL Database.
Prerequisites – A system loaded with Windows, Ubuntu or Mac OS and a Django App whose database you wish to migrate to PostgreSQL should be loaded on your system before proceeding through this tutorial.
Connecting your Django App to a PostgreSQL Database
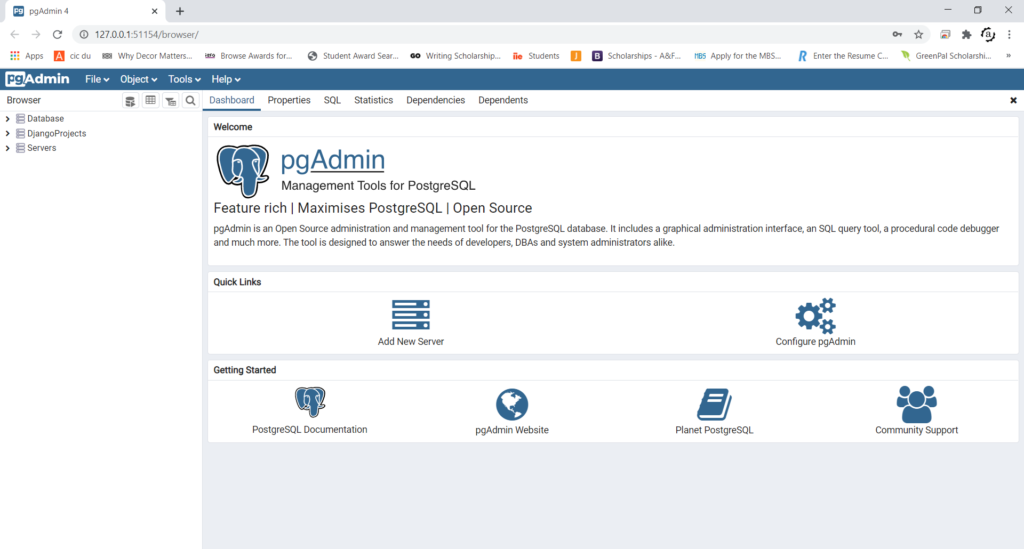
Step 1. When you open the pgadmin panel you will view a server icon in the navigation at the left side of the window. Click on it to open the databases icon. Right Click on the databases icon to create a new database and fill the prerequisites for creating the database.
Step 2. Now go to the settings.py file of the Django App. Under the settings for Databases, change the settings from sqlite3 or your current database to the following.
DATABASES={
   'default':{
      'ENGINE':'django.db.backends.sqlite3',
      'NAME':os.path.join(BASE_DIR,'db.sqlite3'),
   }
}
DATABASES={
'default':{
'ENGINE':'django.db.backends.postgresql_psycopg2',
'NAME':'project_name',
'USER':'user_name',
'PASSWORD':'password',
'HOST':'localhost',
'PORT':'',
}
}Step 3. Next we need to install an adapter for connecting our database with the Django App. We will be using psycopg2 for this purpose.

Use the command.
pip install psycopg2
To install this adapter. We will also need to install pillow in case we wish to save any pictures in our database. This can be done using.
pip install pillow
Step 4. Now run
python manage.py makemigrations
To run convert all the models into queries for the database.
Step 5. Now run
python manage.py migrate
To migrate these changes into our database.
You can go to the pgAdmin panel to check the changes on the database that you have just made in the form of tables that are visible in the following column.
Servers>PostgreSQL>Databases>DB_Name>Schema>Public>Tables
Conclusion
We have created a database and applied the configuration to our projects. Now you can create your own models and apply migrations accordingly.
The Tutorial above explains the method/steps to connect a postgreSQL database to Django app using psycopg2 adapter. This will allow us to boost the performance and security of our development.
We’ll know that SQLite is very powerful, embedded relational database management system and it offers a really amazing set of tools to manage approximately all sorts of data. But when it comes Multi-user applications (where multiple users want to use the same databases), It fails. So It is recommended to choose a fully featured relational database management system rather than SQLite.
Some examples of Fully featured RDBMS are MySQL, PostgreSQL, Oracle databases.
Django is very flexible in terms of changing databases.
So in this article, we’ll see how we can change the database from SQLite to PostgreSQL.
Prerequisites
Instead of creating everything from scratch, we’re taking the example of our previous article, in which we’re using SQLite database.
If you haven’t read our previous article yet, then here it is https://www.thecrazyprogrammer.com/2019/01/django-models.html
Let’s start.
Step 1: Install PostgreSQL
To Install PostgreSQL for Django in Ubuntu:
Open terminal and type these two commands.
sudo apt-get update
sudo apt-get install python-pip python-dev libpq-dev postgresql postgresql- contrib
To Install PostgreSQL for Django in Windows:
Download the installer from its official site: https://www.postgresql.org/download/windows/
And follow the instructions mentioned in the link. While installing you have to enter a password and a port number. Note it down.
To Install PostgreSQL for Django in Mac OS:
Like windows, you need to download the installer from its official site: https://www.postgresql.org/download/macosx/
While installing you have to enter a password and a port number. Note it down.
Step 2: Setup User and Database
Login using your password.
Here I am using a Ubuntu 18.04 and I am accessing the PostgreSQL from the terminal, So I have to switch to the user postgres that was created while installing PostgreSQL.
To switch the user to postgres, open terminal and type
sudo su – postgres
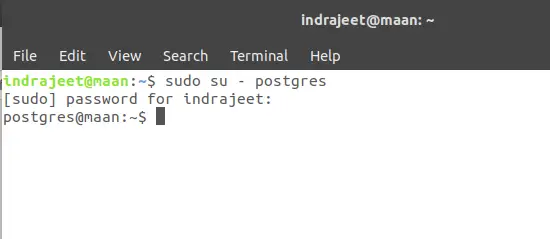
Now you’re ready to enter the shell session for the postgres user. Log into a Postgres session by typing:
psql
Now create a database by typing:
CREATE DATABASE myproject;
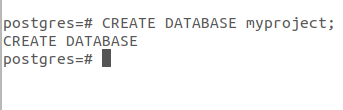
Choose the database name that is more relevant to your project. As it is just an example so I am using here myproject.
Now create a user to use the database that we’ve just created. To create a user type:
CREATE USER myuser WITH PASSWORD ‘mypassword’;
So our user and database are created.
Now, at last, give the rights to the user to access the database type:
GRANT ALL PRIVILEGES ON DATABASE myproject TO myuser;

Now just type q to get back to the postgres user’s shell session then type exit.
That’s all about database setup.
Step 4 : Install psycopg2
psycopg2 is a most popular PostgreSQL database adapter to work with Python. To install pycopg2 type:
pip install django psycopg2
Note: I am using pip3 instead of pip because I have both the versions installed in my Ubuntu Linux.
Step 5: Edit Your Project’s Settings File
Open your project’s setting file in write mode and go to the DATABASES section.
Here you can see that sqlite3 is connected with our project. To change it to PostgreSQL just change these lines as:
DATABASES = {
‘default’: {
‘ENGINE’: ‘django.db.backends.postgresql’,
‘NAME’: ‘myproject’,
‘USER’: ‘myuser,
‘PASSWORD’ : ‘mypassword’,
‘HOST’ : ‘localhost’,
‘PORT’ : ‘5432’
}
}
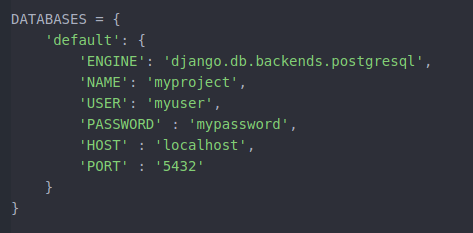
In the above code, NAME, USER, PASSWORD are name of database, name of your user and password that we’ve created while creating the user.
And PORT is same number that I recommended to note down while installing the PostgreSQL.
Step 6: Migrate Your Project
So we’ve installed PostgreSQL and configured the settings.py file. Now last step is to migrate your project.
Open your project directory in terminal and type:
python manage.py runserver
All set, test and run your project.
That’s all about changing database from SQLite to PostgreSQL.
Note: While migrating, if you’re facing a warning like:
UserWarning: The psycopg2 wheel package will be renamed from release 2.8; in order to keep installing from binary please use “pip install psycopg2-binary” instead. For details see: <http://initd.org/psycopg/docs/install.html#binary-install-from-pypi>.
“””)
You can solve this issue with installing psycopg2-binary by using following command:
pip install psycopg2-binary
If you’ve any query related to Django PostgreSQL installation and setup, please let us know in the comment box.
20 мая, 2022 12:21 пп
10 209 views
| Комментариев нет
Development, Python, Ubuntu
Django — это гибкий фреймворк для быстрого создания приложений Python. По умолчанию приложения Django хранят данные в легкой базе данных SQLite. Это неплохой вариант при небольших нагрузках или тестировании, однако в среде производства лучше использовать более сложную систему управления базами данных, поскольку она может повысить производительность.
В этом руководстве вы научитесь устанавливать и настраивать СУБД PostgreSQL (Postgres) для хранения данных приложения Django. Мы установим необходимое программное обеспечение, создадим учетные данные БД для нашего приложения, а затем запустим и настроим новый проект Django, который будет использовать этот бэкенд.
Требования
Для работы вам понадобится свежий сервер (мы используем Ubuntu 20.04, настроенный согласно этому руководству) и пользователь с привилегиями sudo.
Чтобы начать работу, войдите в систему как пользователь sudo.
1: Установка программного обеспечения
Сначала мы должны установить необходимые компоненты: pip (диспетчер пакетов Python), а также программное обеспечение базы данных и связанные с ним библиотеки.
Используем Python 3, который поставляется с Ubuntu 20.04. Запустите установку:
sudo apt update

sudo apt install python3-pip python3-dev libpq-dev postgresql postgresql-contrib
Закончив установку, вы можете перейти к настройке базы данных.
2: Создание базы данных и пользователя
По умолчанию Postgres использует схему так называемой «одноранговой аутентификации» для локальных подключений. По сути, это означает, что если имя пользователя операционной системы совпадает с именем пользователя Postgres, то такой пользователь может войти в систему без дополнительной аутентификации.
Во время установки Postgres в ОС был создан пользователь postgres, который соответствует пользователю postgres (администратору PostgreSQL). Этого пользователя необходимо использовать для выполнения административных задач. Вы можете использовать sudo и передать имя пользователя через флаг -u.
Войдите в интерактивную строку Postgres, набрав:
sudo -u postgres psql
Сначала мы создадим базу данных для проекта Django. Каждый проект должен иметь свою собственную, изолированную базу данных (из соображений безопасности). В этом руководстве мы условно назовем базу данных myproject, но в реальной среде лучше выбрать более описательное название:
CREATE DATABASE myproject;
Примечание: Все команды SQL следует заканчивать точкой с запятой.
Далее мы создадим пользователя базы данных, которого мы сможем использовать для подключения и взаимодействия с БД. Установите надежный и безопасный пароль:
CREATE USER myprojectuser WITH PASSWORD 'password';
После этого нужно изменить несколько параметров подключения только что созданного пользователя. Это ускорит операции с базой данных (необходимые значения не придется запрашивать и устанавливать при каждом соединении).
ALTER ROLE myprojectuser SET client_encoding TO 'utf8';

ALTER ROLE myprojectuser SET default_transaction_isolation TO 'read committed';

ALTER ROLE myprojectuser SET timezone TO 'UTC';
Шифрование по умолчанию нужно установить на UTF-8, именно этот тип использует Django. Схемой изоляции транзакций по умолчанию нужно выбрать read committed, она блокирует чтение транзакций, по которым не было коммитов. Также сейчас нужно установить часовой пояс. По умолчанию проекты Django используют UTC (так рекомендует сам проект Django).
Осталось только предоставить пользователю БД права доступа к базе данных, которую вы создали:
GRANT ALL PRIVILEGES ON DATABASE myproject TO myprojectuser;
Выйдите из командной строки SQL, чтобы вернуться в сеанс пользователя postgres:
q
Установка Django в виртуальную среду
Теперь, когда ваша база данных настроена, вы можете установить Django. Для большей гибкости рекомендуем установить Django и все его зависимости в виртуальную среду Python. Пакет virtualenv позволяет легко создавать такие среды.
Чтобы установить virtualenv, введите:
sudo pip3 install virtualenv
Создайте каталог для хранения вашего проекта Django и перейдите в него:
mkdir ~/myproject

cd ~/myproject
Вы можете создать виртуальную среду для хранения зависимостей Python вашего проекта Django при помощи команды:
python3 -m virtualenv myprojectenv
Эта команда установит локальную копию Python и pip в каталог myprojectenv в каталоге вашего проекта.
Прежде чем устанавливать приложения в виртуальной среде, ее необходимо активировать. Вы можете сделать это при помощи такой команды:
source myprojectenv/bin/activate
Командная строка изменится – это значит, что вы сейчас работаете в виртуальной среде. Она будет выглядеть примерно так:
(myprojectenv)user@host:~/myproject$
Как только вы запустите виртуальную среду, вы можете установить официальную версию Django с помощью pip. Установите также пакет psycopg2, который позволит нам использовать нашу базу данных Postgres:
pip install Django psycopg2
Примечание: Независимо от того, какую версию Python вы используете, в виртуальной среде следует использовать команду pip (не pip3).
Теперь вы можете запустить проект Django в каталоге myproject. Это создаст в текущем каталоге одноименный дочерний каталог для хранения самого кода и сценарий управления. Обязательно добавьте точку в конце команды, чтобы она сработала правильно:
django-admin startproject myproject .
Поддержка БД Django
Теперь, когда у вас есть проект, вам нужно настроить его для поддержки созданной вами базы данных.
Откройте главный конфигурационный файл проекта Django, расположенный в каталоге дочернего проекта:
nano ~/myproject/myproject/settings.py
В нижней части файла вы увидите раздел DATABASES, который выглядит следующим образом:
. . .

DATABASES = {
    'default': {
            'ENGINE': 'django.db.backends.sqlite3',
            'NAME': os.path.join(BASE_DIR, 'db.sqlite3'),
    }
}

. . .
В настоящее время проект использует БД SQLite. Нужно изменить это, чтобы он использовал PostgreSQL.
Во-первых, измените движок, чтобы он использовал адаптер postgresql вместо sqlite3. В качестве NAME укажите имя вашей базы данных (в данном примере она называется myproject). Также вам необходимо добавить учетные данные. Укажите имя пользователя, пароль и хост для подключения. Параметр port оставьте пустым, чтобы использовать значение по умолчанию:
. . .

DATABASES = {
    'default': {
        'ENGINE': 'django.db.backends.postgresql',
        'NAME': 'myproject',
        'USER': 'myprojectuser',
        'PASSWORD': 'password',
        'HOST': 'localhost',
        'PORT': '',
    }
}

. . .
Пока вы в этом файле, настройте директиву ALLOWED_HOSTS. Она определяет белый список адресов или доменных имен, которым разрешено подключаться к данной копии Django. Любые входящие запросы с заголовком Host, которого нет в этом списке, будут сброшены. Это помогает Django предотвратить определенный класс уязвимостей безопасности.
В приведенном ниже фрагменте есть несколько закомментированных примеров просто для демонстрации:
. . .
# The simplest case: just add the domain name(s) and IP addresses of your Django server
# ALLOWED_HOSTS = [ 'example.com', '203.0.113.5']
# To respond to 'example.com' and any subdomains, start the domain with a dot
# ALLOWED_HOSTS = ['.example.com', '203.0.113.5']
ALLOWED_HOSTS = ['your_server_domain_or_IP']
В квадратных скобках укажите IP-адреса или доменные имена, связанные с вашим сервером Django. Каждый элемент должен быть указан в кавычках и через запятую. Если вы хотите добавить в список домен и любые его поддомены, поставьте точку в начале записи.
Когда вы закончите, сохраните и закройте файл.
Перенос данных и тестирование
Теперь, когда проект Django настроен, вы можете перенести структуры данных проекта в свою новую базу данных и протестировать сервер.
Начать можно с создания миграций. Поскольку у вас еще нет фактических данных, эти команды просто создают исходную структуру базы данных:
cd ~/myproject

python manage.py makemigrations

python manage.py migrate
После создания структуры базы данных вы можете создать учетную запись администратора:
python manage.py createsuperuser
Вам будет предложено выбрать имя пользователя, указать адрес электронной почты, а также установить и подтвердить пароль этой учетной записи.
Если вы следовали руководству по начальной настройке сервера, у вас должен быть установлен брандмауэр UFW. Прежде чем вы сможете получить доступ к серверу разработки Django (он нужен для тестирования базы данных), вам необходимо открыть порт в брандмауэре.
Разрешите внешние подключения к этому порту:
sudo ufw allow 8000
Открыв порт, вы можете проверить правильность работы вашей базы данных. Запустите сервер разработки Django:
python manage.py runserver 0.0.0.0:8000
В веб-браузере откройте доменное имя или IP-адрес вашего сервера, добавив :8000, чтобы перейти на страницу Django по умолчанию:
http://server_domain_or_IP:8000
Вы должны увидеть стандартную приветственную страницу проекта.

Добавьте /admin в конец URL-адреса, и вы сможете получить доступ к форме входа в интерфейс администратора:

Введите имя пользователя и пароль, которые вы создали с помощью команды createsuperuser. После этого вы попадете в интерфейс администратора:

Когда вы закончите тестирование, вы можете остановить сервер разработки, нажав CTRL-C в окне терминала.
Получив доступ к интерфейсу администратора, мы убедились, что в нашей базе данных хранится информация об учетной записи пользователя и что к ней можно получить доступ.
Заключение
В этом мануале мы установили и настроили PostgreSQL в качестве базы данных для проекта Django. Конечно, SQLite может легко справляться с нагрузкой в среде разработки и иногда в производстве, однако большинство проектов требуют внедрения полнофункциональной системы управления базами данных.
Tags: Django, PostgreSQL, Python, Python 3, Ubuntu, Ubuntu 20.04
Для начала зайдите в свой терминал и создайте новую папку с помощью команды mkdir. Это папка, в которой будет храниться вся работа над проектом, над которым вы работаете.
Затем перейдите в эту папку, чтобы создать виртуальную среду.
1. Создайте виртуальную среду
Работа в виртуальной среде гарантирует, что вы изолируете установки Python и связанные пакеты pip, позволяя вам устанавливать и управлять собственным набором пакетов, которые не зависят от пакетов, предоставляемых системой или используемых другими проектами. В зависимости от виртуальной среды, которую вы выбрали для установки на свой компьютер, команда для создания виртуальной среды будет различаться.
В этом случае мы будем использовать virtualenv.
virtual — это имя моей виртуальной среды.
Активируйте виртуальную среду, чтобы работать в виртуальной среде:
$ source virtual/bin/activate2. Установите Джанго
Теперь вы можете установить Django в это выделенное рабочее пространство.
# This command will install the most recent version of django.
(virtual) $ pip install django
Чтобы установить конкретную версию django, укажите ее следующим образом (замените число после знака == на версию, которую вы хотите установить):
(virtual) $ pip install django==2.2.11Чтобы упростить совместную работу и отслеживать все пакеты (и их версии), которые у вас есть в настоящее время в вашей виртуальной среде, закрепите свои зависимости с помощью следующей команды. Это создаст файл requirements.txt. Вы можете запускать эту команду по отдельности, когда устанавливаете больше внешних пакетов, чтобы обновить список зависимостей.
(virtual) $ pip freeze > requirements.txt3. Создайте проект и приложение django
Django состоит из двух основных частей; проект и приложение
- Project — пакет, представляющий собой весь веб-сайт. Каталог проекта содержит настройки для всего сайта. В проекте может быть много приложений. Создайте проект с помощью следующей команды:
(virtual) $ django-admin startproject <project-name>Структура вашей папки будет выглядеть так:
example/
│
├── project/
│   ├── __init__.py
│   ├── asgi.py
│   ├── settings.py
│   ├── urls.py
│   └── wsgi.py
│
└── manage.py- App — подмодуль проекта, реализующий определенный функционал. Например, на веб-сайте может быть приложение для публикации и еще одно приложение для оплаты. Создайте приложение django с помощью следующей команды:
(virtual) $ python manage.py startapp <app-name>Будет добавлена новая папка. Структура вашей папки будет выглядеть так:
example/
│
├── app/
│   │
│   ├── migrations/
│   │   └── __init__.py
│   │
│   ├── __init__.py
│   ├── admin.py
│   ├── apps.py
│   ├── models.py
│   ├── tests.py
│   └── views.py
│
├── project/
│   ├── __init__.py
│   ├── asgi.py
│   ├── settings.py
│   ├── urls.py
│   └── wsgi.py
│
└── manage.py
4. Создайте файлы gitignore и .env
Перед добавлением git в свой проект или перед тем, как вы сможете зафиксировать сделанные вами изменения, есть некоторые файлы, которые вы не хотите отслеживать.
Файл .gitignore указывает git не отслеживать эти файлы или любые изменения, которые вы в них вносите.
example/
│
├── app/
│   │
│   ├── migrations/
│   │   └── __init__.py
│   │
│   ├── __init__.py
│   ├── admin.py
│   ├── apps.py
│   ├── models.py
│   ├── tests.py
│   └── views.py
│
├── .gitignore
├── .env
├── .env.example
|
├── project/
│   ├── __init__.py
│   ├── asgi.py
│   ├── settings.py
│   ├── urls.py
│   └── wsgi.py
│
└── manage.py
Это некоторые из файлов, которые вы добавляете в gitignore. Вы можете добавить или опустить что-либо. Например, у меня обычно есть файл .txt, который я использую для «черновой работы», который я добавляю в gitignore.
virtual/
.env
*.pyc
db.sqlite3
migrations/
media/*
Причина добавления папки миграции в gitignore — минимизировать конфликты слияния и ошибки в продакшене.
Ваш проект также содержит конфиденциальные данные, которые вы не хотите отслеживать. Такие данные, как ваш секретный ключ django или пароль вашей базы данных. Эта информация хранится в файле .env, который затем помещается в файл gitignore.
При совместной работе создайте файл .env.example, содержащий примеры данных, которые другие соавторы могут заменить своими собственными значениями для локального запуска вашего проекта. Таким образом, никто не фиксирует свои учетные данные среды, и вам не нужно менять значения каждый раз, когда вы извлекаете проект.
Содержимое .env может выглядеть так:
SECRET_KEY=generate-a-key
DEBUG=True
DB_NAME=db-name
DB_USER=username
DB_PASSWORD=your-password
DB_HOST=127.0.0.1
MODE=dev
ALLOWED_HOSTS=*
DISABLE_COLLECTSTATIC=1
Затем вы можете сослаться на эти учетные данные в файле project/settings.py следующим образом:
from decouple import config, Csv  #add this to the top


MODE=config("MODE")

SECRET_KEY = config('SECRET_KEY')

DEBUG = config('DEBUG', cast=bool)

ALLOWED_HOSTS = config('ALLOWED_HOSTS', cast=Csv())
5. База данных и settings.py
База данных по умолчанию, используемая Django из коробки, — SQLite. Для более сложных проектов вам потребуется более мощная база данных, такая как PostgreSQL.
Некоторые операционные системы могут поставляться с предустановленной программой potgres, или вам может потребоваться ее установка.
Чтобы проверить, установлен ли у вас PostgreSQL, запустите команду which psql.
- Если Postgres не установлен, вывода не будет. Вы просто получаете приглашение терминала, готовое принять другую команду:
- Если Postgres установлен, вы получите ответ с указанием пути к месту установки Postgres:
> which psql
/usr/bin/psql
Для поддержки базы данных postgres вам необходимо установить psycopg2 и две другие библиотеки. psycopg2 — это адаптер базы данных, который подключает базы данных к python.
pip install psycopg2
pip install dj-database-url
pip install python-decouple
Внесите следующие изменения в файл project/settings.py.
import dj_database_url


INSTALLED_APPS = [
    'application',  #new
    'django.contrib.admin',
    ...
]


# Database
# https://docs.djangoproject.com/en/3.1/ref/settings/#databases
if config('MODE')=="dev":
    DATABASES = {
        'default': {
            'ENGINE': 'django.db.backends.postgresql_psycopg2', #changed database from sqlite to postgresql
            'NAME': config('DB_NAME'),
            'USER': config('DB_USER'),
            'PASSWORD': config('DB_PASSWORD'),
            'HOST': config('DB_HOST'),
            'PORT': '',
        }
    }
else:
   DATABASES = {
       'default': dj_database_url.config(
           default=config('DATABASE_URL')
       )
   }

db_from_env = dj_database_url.config(conn_max_age=500)
DATABASES['default'].update(db_from_env)
6. Отслеживание версий с помощью git
Инициализируйте контроль версий с помощью команды git init. Затем добавьте и зафиксируйте свои изменения.
7. Тест
Вы будете использовать эту команду в любое время, когда вам нужно протестировать свой код в браузере. Порт по умолчанию — 127.0.0.1:8000.
Вы должны увидеть такой вывод в своем браузере:

На этом этапе вы закончили настройку каркаса для своего веб-сайта Django и можете приступить к реализации своих идей, добавляя модели, представления и шаблоны.
Сводка команд
Команды в порядке выполнения:
| Команды | Описание |
| $ virtualenv virtual | настроить виртуальную среду |
| $ source env/bin/activate | активировать виртуальную среду |
| (virtual) $ pip install django | Установите django внутри виртуальной среды |
| (virtual) $ django-admin startproject <projectname> | настроить проект Django |
| (virtual) $ python manage.py startapp <appname> | настроить приложение Django |
| (virtual) $ pip install psycopg2 | подключить базу данных к python |
| (virtual) $ pip install dj-database-url | |
| (virtual) $ pip install python-decouple | |
| (virtual) $ pip freeze > requirements.txt | зависимости и версии выводов |
| Initialize and commit to git | |
| (virtual) $ python manage.py runserver | посмотреть сайт на 127.0.0.1:8000 |
Вывод
В этой статье мы рассмотрели этапы запуска нового проекта Django с базой данных PostgreSQL, а также общие команды терминала, используемые для веб-разработки Django.
![]()
This tutorial deals with setting up a sample Django Project with PostgreSQL and not with real basics of Python or Django.
Okay, let’s start
Installing PostgreSQL:
- Search PostgreSQL on google and download it for your OS. (I’m using windows)
- Install PostgreSQL.
- Use the search bar to search pgAdmin and open it.
- It opens up in your browser.
- Create a new server and a new database, name the database ‘BookDb’ or anything you want.
- You’ll need the ENGINE, NAME, USER, PASSWORD, HOST, PORT values later so have them ready.
Setting up a new Django Project:
- Zeroth things zeroth, have Python 3.7 or something installed, explaining how to do that is outside the scope of this tutorial.
- Install Pycharm or any IDE, have a virtualenv set up.
- You’d be building a sample project for book management, we’ll be performing crud operations from the django admin site.
- Firstly, Create a new Pycharm project named ‘BookDb’ or anything you want.
- Then, start a new terminal window, we need to run some commands.
Installing Django and PostgreSQL driver:
Run the following command in the terminal:
pip install django psycopg2
Creating the Django Project:
Run the following command in the terminal:
django-admin startproject bookdb .
This creates the project.
Creating the books app:
Then, create an app. A project can have multiple apps which can be reused in different projects.
Run the following command in the terminal:
python manage.py startapp books
This creates the books app.
Creating the Book model:
This is how your books/models.py should look:
from django.db import models


class Book(models.Model):
    name = models.CharField(max_length=255)
    author = models.CharField(max_length=255)
Enter fullscreen mode
Exit fullscreen mode
Adding the books app to settings.py:
Add this to the list of INSTALLED_APPS in settings.py:
'books.apps.BooksConfig'
Creating the BookAdmin:
This is how your books/admin.py should look:
from django.contrib import admin
from .models import Book


class BookAdmin(admin.ModelAdmin):
    list_display = ('name', 'author')


admin.site.register(Book, BookAdmin)
Enter fullscreen mode
Exit fullscreen mode
Setting the DATABASES dict in settings.py:
This is how DATABASES in settings.py should probably look:
DATABASES = {
    'default': {
        'ENGINE': 'django.db.backends.postgresql_psycopg2',
        'NAME': 'Bookdb',
        'USER': 'postgres',
        'PASSWORD': 'admin',
        'HOST': 'localhost',
        'PORT': '5432',
    }
}
Enter fullscreen mode
Exit fullscreen mode
Running migrations:
Run the following commands in the terminal:
python manage.py makemigrations
python manage.py migrate
Running the project:
Run the following command in the terminal:
python manage.py runserver
Creating a superuser:
Start a new terminal window.
Then, create a superuser using which you can login to the admin site from where you can perform CRUD operations.
python manage.py createsuperuser
It asks for a username, email address and password. Enter anything you like(and remember the username and password). If it says your password doesn’t meet the required validations, just press y.
Logging in to the admin site using the created superuser:
You can see all books, add a new book, update an existing book, delete a new book from there and see the changes being reflected in the PostgreSQL database.
Thank you, that’s it for this tutorial.