![]()
Загрузить PDF
![]()
Загрузить PDF
Проигрыватель Windows Media — это стандартный аудио- и видеопроигрыватель для всех устройств, работающих под управлением Windows. И хотя его более чем достаточно для воспроизведения всех основных аудио- и видеоформатов, процесс подключения внешних субтитров не так уж прост. Вам придется либо изменить файл с внешними субтитрами, либо вставить субтитры в проигрыватель Windows Media через стороннюю программу.
-

1
Переместите файл с субтитрами в одну папку с нужным видео. Переместите или скопируйте файл с внешними субтитрами и вставьте его в папку с видео, к которому нужно добавить субтитры.
-
2
Переименуйте файл с субтитрами, чтобы его имя соответствовало имени видео. Нажмите на субтитры правой кнопкой мыши и выберите опцию «Переименовать». Введите название, которое было присвоено видеофайлу, и нажмите Enter.
-
3
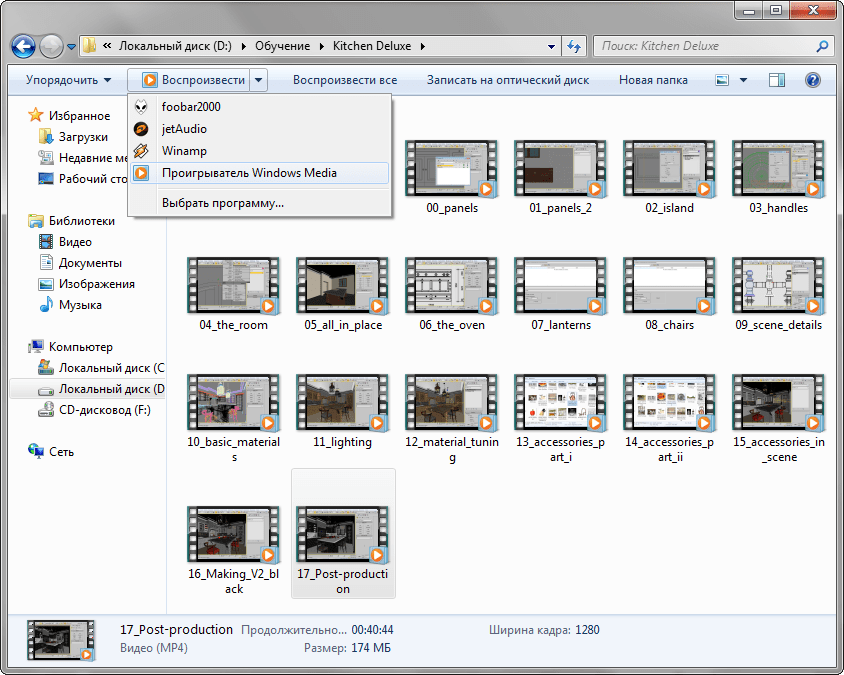
Откройте видео в проигрывателе Windows Media. Нажмите на видео правой кнопкой мыши и выберите «Открыть с помощью» > «Проигрыватель Windows Media». Если же проигрыватель Windows Media является аудио- и видеопроигрывателем по умолчанию, дважды нажмите на видеофайл.
-
4
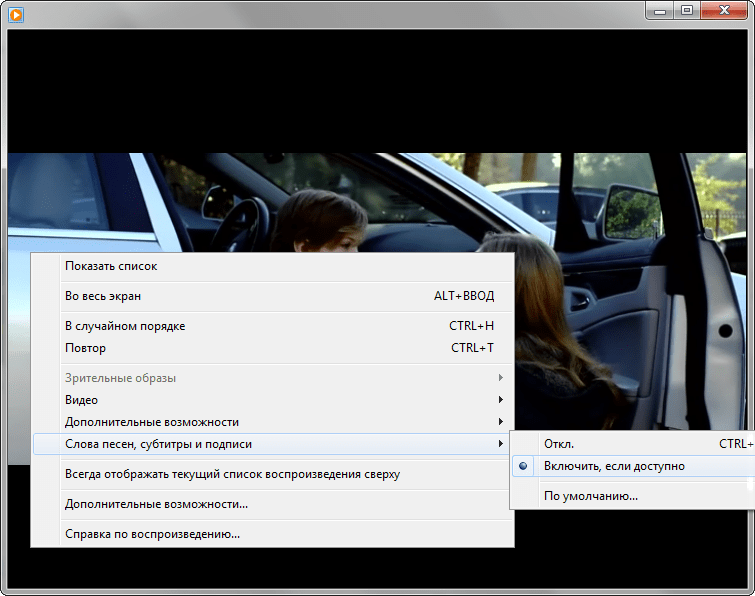
Убедитесь, что в проигрывателе Windows Media включено отображение субтитров. Нажмите правой кнопкой мыши на панель вверху проигрывателя, переместите курсор на опцию «Слова песен, субтитры и подписи» и выберите «Включить, если доступно». Закройте проигрыватель, а затем перезапустите его, чтобы включить видео с субтитрами.[1]
Реклама


-
1
Скачайте DirectVobSub. DirectVobSub — это популярная общедоступная программа для Windows, которая исправляет проблему с отображением субтитров в проигрывателе Windows Media.
- Скачайте и установите DirectVobSub с официальной страницы загрузки. Программа доступна как для 32-, так и для 64-разрядной версии Windows, так что скачайте ту версию, которая поддерживается операционной системой.
- Просканируйте DirectVobSub, если скачали его из другого источника. Так вы узнаете, не содержит ли файл вирусы или вредоносные программы.
-
2
Установите DirectVobSub. Скачав установочный файл, дважды нажмите на него левой кнопкой мыши, чтобы запустить процесс установки. Когда установка будет завершена, проигрыватель Windows Media сможет без каких-либо проблем отобразить внешние субтитры.
-
3
Переименуйте формат субтитров в «.sub». Если проигрыватель Windows Media не распознает субтитры даже после установки DirectVobSub, возможно, вам стоит изменить формат файла субтитров. Нажмите на файл с субтитрами правой кнопкой мыши, выберите «Переименовать» и измените «.srt» в конце файла на «.sub».
Реклама


Советы
- Проигрыватель Windows Media может не отобразить субтитры даже после смены имени файла с субтитрами, его формата и установки DirectVobSub. Попробуйте скачать другой медиапроигрыватеь, например, VLC Player или KMPlayer, которые предоставляют больше опций для аннотаций и субтитров.
Реклама
Об этой статье
Эту страницу просматривали 32 643 раза.
Была ли эта статья полезной?
Если вы закоренелый традиционалист и сторонним мультимедийным проигрывателям предпочитаете классический Windows Media Player, возможно вам будет интересно узнать, каким образом к просматриваемому в этом проигрывателе фильму можно подключить внешние субтитры.
Как всегда, в таких случаях мы готовы предложить вашему вниманию готовое решение. Но перед тем как мы перейдем к его рассмотрению, позвольте сделать маленькое примечание. Описываемый здесь способ действенен для Windows Media Player 12, а вот для более ранних версий он может оказаться нерабочим.
Итак, предположим, что у нас установлена соответствующая версия проигрывателя, где-то в папке лежит фильм, а где-то хранятся подготовленные или загруженные из Интернета файлы субтитров в формате STR.
Способ, надо сказать, донельзя прост. Чтобы заставить Media Player читать внешние субтитры поместите фильм и файл STR в отдельную папку, а затем переименуйте последний так, чтобы его название в точности соответствовало названию фильма. Расширения файлов, разумеется, это не касается. В нашем примере файл видео получил имя seminar.avi, а файл субтитров seminar.srt.


Теперь кликаем по видео правой клавишей мыши и в контекстном меню выбираем «Воспроизвести с помощью проигрывателя Windows Media». По идее, при воспроизведении видео файл субтитров также должен быть захвачен.
Если субтитры не показываются, делаем следующее. Сначала убедитесь, что опция воспроизведения текста в настройках проигрывателя включена. Для этого (в режиме библиотеки) кликнете правой клавишей по верхней панели выбора действий и перейдите к пункту «Слова песен, субтитры и подписи». Выберите опцию «Включить, если доступно». Проверьте корректность отображения субтитров еще раз.


Если это не принесло ожидаемого результата, возможно, вам поможет установка дополнительного программного модуля DirectVobSub (VSFilter). Он совершенно бесплатен, прост в установке и не нуждается в настройках.
Установка этого компонента помогает в 90 процентах случаем проблем с отображением внешних субтитров. Если Windows Media Player и на этот раз будет продолжать упорствовать, попробуйте немного схитрить. Измените расширение файла субтитров с SRT на SUB. Это должно окончательно решить ваши проблемы с отображением субтитров.
Поскольку в примере мы использовали случайный файл субтитров и к тому же англоязычный, к видео отображаемый текст отношения не имеет. Впрочем, это совершенно неважно, субтитры отображаются и это главное.
Скачать DirectVobSub: http://www.free-codecs.com
![]()
Многие фильмы, клипы и прочие видеофайлы имеют встроенные субтитры. Это свойство позволяет дублировать речь, записанную на видео, в виде текста, отображаемого в нижней части экрана.
Субтитры могут быть на нескольких языках, выбрать которые можно в настройках видеоплеера. Включение и отключение субтитров бывает полезно при изучении языка, или в тех случаях, когда есть проблемы со звуком.
В данной статье рассмотрим, как активировать показ субтитров в стандартном Windows Media Player. Эту программу не нужно устанавливать отдельно, так она уже интегрирована в операционную систему Windows.
Скачать последнюю версию Windows Media Player
1. Находим нужный файл и делаем на нем двойной шелчек левой клавишей мыши. Файл открывается в Windows Media Player.
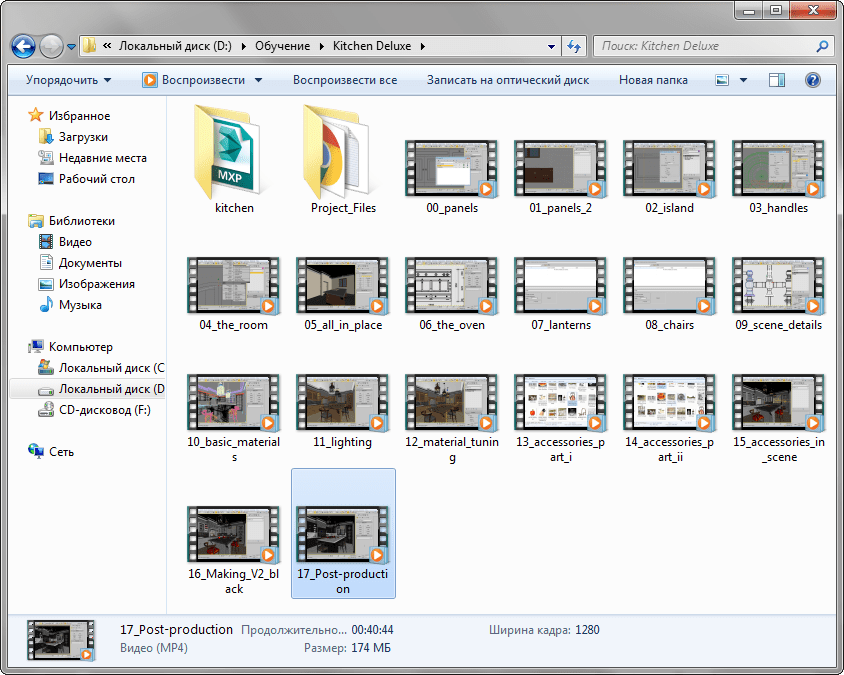
Обратите внимание, что если на вашем компьютере для просмотра видео по умолчанию используется другой видеоплеер, нужно выделить файл и выбрать для него Windows Media Player в качестве проигрывателя.
2. Делаем щелчек правой клавишей мыши по окну программы, выбираем «Слова песен, субтитры и подписи», затем «Включить, если доступно». Вот и все, субтитры появились на экране! Язык субтитров можно настроить, перейдя в диалоговое окно «По умолчанию».
Для того, чтобы моментально включить и выключить субтитры, воспользуйтесь горячими клавишами «ctrl+shift+c».
Рекомендуем прочитать: Программы для просмотра видео на компьютере
Как видим, включить субтитры в Windows Media Player оказалось проще простого. Приятного просмотра!

Еще статьи по данной теме:
Помогла ли Вам статья?
Зачем могут понадобиться субтитры? Если вы хотите посмотреть иностранный фильм, для которого еще не появился перевод, либо потренироваться в переводе с этого языка. Также это пригодится, если вы хотите услышать голоса актеров.

Вам понадобится
- — компьютер;
- — доступ в интернет;
- — Windows Media Player.
Инструкция
Выполните установку кодеков для воспроизведения фильма с субтитрами. Установите набор кодеков K-lite. Далее необходимо скачать сами субтитры. Сделать это можно на сайтах fansubs.ru, subs.com.ru. Далее распакуйте субтитры из архива (с архивами в формате *.rar и *.zip справится программа Winrar), поместите их в папку, где находится фильм.
Скачайте и установите специальный плагин, предназначенный для подключения субтитров к видеоплеерам. Лучше всего установить такой плагин, который поддерживает разные плееры и различные форматы субтитров. Например, установите DivXG400. Он обладает поддержкой практически всех известных форматов субтитров, но есть проблемы с отображением кириллицы.
Скачайте плагин DivXG400, чтобы включить субтитры в Media Player. Для этого перейдите по ссылке http://www.free-codecs.com/download/DivXG400.htm, щелкните по названию плагина, выберите место сохранения и дождитесь загрузки. После этого запустите инсталляционный файл и установите плагин на компьютер. Скопируйте файл с субтитрами в папку, в которой находится файл видеозаписи. Переименуйте файл субтитров: он должен иметь такое же название, как и видеофайл. Откройте фильм в Windows Media Player.
Выполните подключение субтитров в Media Player с помощью плагина VobSub. Он поддерживает субтитры в таких форматах: *.ssa, *.smi, *.srt, *.sub. Чтобы просматривать эти субтитры, скачайте плагин по ссылке http://sourceforge.net/project/showfiles.php?group_id=82303&package_id=84359 и установите его на компьютер.
Подключите плагин в программу Media Player, чтобы установить поддержку кириллицы, выберите версию Unicode. Далее переместите файл с субтитрами в папку с фильмом. Переименуйте файл субтитров: он должен иметь такое же название, как и файл с видео (например, фильм.srt, фильм.avi). Откройте фильм с помощью Windows Media Player.
Видео по теме
Войти на сайт
или
Забыли пароль?
Еще не зарегистрированы?
This site is protected by reCAPTCHA and the Google Privacy Policy and Terms of Service apply.
![]()
Download Article
![]()
Download Article
- Adding a Subtitle File
- Using Windows Media Player
- Using VLC Media Player
- Q&A
- Tips
- Warnings
|
|
|
|
|
This wikiHow teaches you how to use subtitles with a video on your Windows computer. Unfortunately, not all videos will display their subtitles in the Windows Media Player program. The quickest solution to this problem is to use the free VLC Media Player program to view your video, as VLC will always display subtitles as long as you’ve set up the subtitles file beforehand.
-
1
Find the video you want to use. Go to the folder location of the video that you want to view with subtitles.
-
2
Right-click the video. Doing so will prompt a drop-down menu.
Advertisement
-
3
Click Rename. This is near the bottom of the drop-down menu. You should see your video’s name become highlighted.
- If you don’t see this option, first click the video once, then right-click it again and click Rename.
-
4
Copy the video’s name. Press Ctrl+C to do so. This will ensure that, when you name your subtitle file, you use the exact spelling and formatting of the video file you want to subtitle.
- You can click anywhere away from the file or press ↵ Enter to cancel the rename and apply the original file name to your video.
-
5
Find the video’s subtitles file. Go to the folder location of the subtitles file you want to use.
- If you don’t have a subtitles file for the video, you will need to make your own before proceeding.
-
6
Rename the subtitles file to the video’s name. Right-click the subtitles file, click Rename, and press Ctrl+V to paste in the copied video name. You can then press ↵ Enter or click elsewhere to apply the name.
-
7
Place the video and the subtitles file in the same folder. In order for your subtitles file to work with your video, the video and the subtitles file must be in the same folder (e.g., on the Desktop or in the «Pictures» folder). Once both files are in the same location, you may proceed.


Advertisement
-
1
Understand that this won’t work for all videos. Depending on their encoding settings, some videos may not display subtitles in Windows Media Player. If this turns out to be the case for your video, you’ll need to use VLC Media Player instead.
-
2
Open the video in Windows Media Player. Right-click the video, select Open with, and click Windows Media Player in the resulting pop-out menu. You should see your video appear in the Windows Media Player window.
- If you don’t see Windows Media Player listed in the Open with menu, either your computer doesn’t have it installed or your video can’t be played with Windows Media Player. You’ll need to try using VLC Media Player instead.
-
3
Right-click the Windows Media Player window. Doing so prompts a drop-down menu.
-
4
Select Lyrics, captions, and subtitles. It’s in the middle of the drop-down menu. A pop-out menu will appear.
-
5
Click On if available. This is in the pop-out menu. Doing so tells Windows Media Player to use any available subtitle files.
-
6
Restart the video. Close Windows Media Player, then re-open the video in Windows Media Player. At this point, you’ll see the video’s subtitles if Windows Media Player supports subtitles for your video.
- If this doesn’t work, you’ll have to use VLC media player instead.


Advertisement
-
1
Download VLC Media Player. Go to https://www.videolan.org/vlc/index.html in your computer’s web browser, then click the orange Download VLC button on the right side of the page.
-
2
Install VLC. Double-click the VLC setup file you downloaded, click Yes when prompted, and follow the setup instructions.
-
3
Go to your video. Find the video you want to use with subtitles. This video should be in the same folder as your subtitles file from earlier.
-
4
Right-click the video. Doing so prompts a drop-down menu.
-
5
Select Open with. It’s in the drop-down menu. A pop-out menu will appear.
-
6
Click VLC media player. This is in the pop-out menu. Doing so opens your video in VLC Media Player.
-
7
Click the Subtitle tab. It’s at the top of the VLC window. A drop-down menu will appear.
-
8
Select Sub track. This is in the drop-down menu. Doing so prompts a new pop-out menu.
-
9
Click Track 1. It’s in the pop-out menu. You should see your subtitles appear on the video.


Advertisement
Add New Question
-
Question
Nothing is working for me. Any other ideas?

Download other players such as VLC or MPC that will add the subtitles to the video automatically.
Ask a Question
200 characters left
Include your email address to get a message when this question is answered.
Submit
Advertisement
Thanks for submitting a tip for review!
Advertisement
-
Windows Media Player may not be installed on your computer. If so, it’s best to use VLC Media Player instead.
Advertisement
About This Article
Thanks to all authors for creating a page that has been read 238,091 times.
Is this article up to date?
![]()
Download Article
![]()
Download Article
- Adding a Subtitle File
- Using Windows Media Player
- Using VLC Media Player
- Q&A
- Tips
- Warnings
|
|
|
|
|
This wikiHow teaches you how to use subtitles with a video on your Windows computer. Unfortunately, not all videos will display their subtitles in the Windows Media Player program. The quickest solution to this problem is to use the free VLC Media Player program to view your video, as VLC will always display subtitles as long as you’ve set up the subtitles file beforehand.
-
1
Find the video you want to use. Go to the folder location of the video that you want to view with subtitles.
-
2
Right-click the video. Doing so will prompt a drop-down menu.
Advertisement
-
3
Click Rename. This is near the bottom of the drop-down menu. You should see your video’s name become highlighted.
- If you don’t see this option, first click the video once, then right-click it again and click Rename.
-
4
Copy the video’s name. Press Ctrl+C to do so. This will ensure that, when you name your subtitle file, you use the exact spelling and formatting of the video file you want to subtitle.
- You can click anywhere away from the file or press ↵ Enter to cancel the rename and apply the original file name to your video.
-
5
Find the video’s subtitles file. Go to the folder location of the subtitles file you want to use.
- If you don’t have a subtitles file for the video, you will need to make your own before proceeding.
-
6
Rename the subtitles file to the video’s name. Right-click the subtitles file, click Rename, and press Ctrl+V to paste in the copied video name. You can then press ↵ Enter or click elsewhere to apply the name.
-
7
Place the video and the subtitles file in the same folder. In order for your subtitles file to work with your video, the video and the subtitles file must be in the same folder (e.g., on the Desktop or in the «Pictures» folder). Once both files are in the same location, you may proceed.
Advertisement
-
1
Understand that this won’t work for all videos. Depending on their encoding settings, some videos may not display subtitles in Windows Media Player. If this turns out to be the case for your video, you’ll need to use VLC Media Player instead.
-
2
Open the video in Windows Media Player. Right-click the video, select Open with, and click Windows Media Player in the resulting pop-out menu. You should see your video appear in the Windows Media Player window.
- If you don’t see Windows Media Player listed in the Open with menu, either your computer doesn’t have it installed or your video can’t be played with Windows Media Player. You’ll need to try using VLC Media Player instead.
-
3
Right-click the Windows Media Player window. Doing so prompts a drop-down menu.
-
4
Select Lyrics, captions, and subtitles. It’s in the middle of the drop-down menu. A pop-out menu will appear.
-
5
Click On if available. This is in the pop-out menu. Doing so tells Windows Media Player to use any available subtitle files.
-
6
Restart the video. Close Windows Media Player, then re-open the video in Windows Media Player. At this point, you’ll see the video’s subtitles if Windows Media Player supports subtitles for your video.
- If this doesn’t work, you’ll have to use VLC media player instead.
Advertisement
-
1
Download VLC Media Player. Go to https://www.videolan.org/vlc/index.html in your computer’s web browser, then click the orange Download VLC button on the right side of the page.
-
2
Install VLC. Double-click the VLC setup file you downloaded, click Yes when prompted, and follow the setup instructions.
-
3
Go to your video. Find the video you want to use with subtitles. This video should be in the same folder as your subtitles file from earlier.
-
4
Right-click the video. Doing so prompts a drop-down menu.
-
5
Select Open with. It’s in the drop-down menu. A pop-out menu will appear.
-
6
Click VLC media player. This is in the pop-out menu. Doing so opens your video in VLC Media Player.
-
7
Click the Subtitle tab. It’s at the top of the VLC window. A drop-down menu will appear.
-
8
Select Sub track. This is in the drop-down menu. Doing so prompts a new pop-out menu.
-
9
Click Track 1. It’s in the pop-out menu. You should see your subtitles appear on the video.
Advertisement
Add New Question
-
Question
Nothing is working for me. Any other ideas?
Download other players such as VLC or MPC that will add the subtitles to the video automatically.
Ask a Question
200 characters left
Include your email address to get a message when this question is answered.
Submit
Advertisement
Thanks for submitting a tip for review!
Advertisement
-
Windows Media Player may not be installed on your computer. If so, it’s best to use VLC Media Player instead.
Advertisement
About This Article
Thanks to all authors for creating a page that has been read 238,091 times.
Is this article up to date?
<< в приложении «& ТВ» в приложении «& ТВ» в Windows 10 можно добавлять субтитры в
SRT-файлы. Если вы правильно добавили файл, во время воспроизведения видео будет отображаться управление субтитрами «CC», позволяя включить и отключить субтитры.
-
Скопируйте SRT-файл в ту же папку библиотеки видео, что и видео, которое вы пытаетесь просмотреть. Например, если видео находится в папке «Видео» (в папке «Библиотеки»), SRT-файл также должен быть расположен там.
-
Убедитесь, что имя SRT совпадает с именем видео. Например, если ваше видео имеет название «MyVideo123.mkv», для работы ваш SRT-файл должен иметь название «MyVideo123.srt».
Если у вас по-прежнему возникают проблемы с настройкой SRT-файлов, зайхайте форум обсуждений «& тв».
Связанные проблемы
Субтитры в содержимом приложения & ТВ в Windows 10
Как приобрести или снять фильмы & ТВ-контент в Windows 10
Ресурсы технической поддержки

Домашняя & тв

Публикация на форумах

Свяжитесь с нами