Если вы считаете, что GIMP не ровня Photoshop, и не можете жить без офиса от Microsoft.

1. Wine
Название Wine расшифровывается как Wine Is Not an Emulator. Это своего рода прослойка между приложениями Windows и системой Linux. Он позволяет устанавливать и запускать многие популярные Windows-программы и работать с ними так, как будто это родные приложения Linux.
Чтобы установить Wine, воспользуйтесь соответствующей командой.
1. Ubuntu, Debian, Mint:
sudo dpkg --add-architecture i386
wget -nc https://dl.winehq.org/wine-builds/Release.key
sudo apt-key add Release.key
sudo add-apt-repository "deb https://dl.winehq.org/wine-builds/ubuntu/ artful main"
sudo apt-get update
sudo apt-get install --install-recommends winehq-stable
2. Fedora:
sudo dnf install winehq-stable
3. openSUSE:
sudo zypper install wine
4. Arch, Manjaro:
sudo pacman -S wine
Когда Wine установлен, откройте его через ваше меню приложений или с помощью команды winecfg. При первом запуске Wine может попросить установить некоторые дополнительные пакеты — позвольте ему это сделать. После этого все Windows-программы формата EXE ассоциируются в системе с Wine.
Теперь скачайте установщик нужного вам приложения Windows, найдите папку с ним в вашем файловом менеджере и откройте файл. Либо введите команду wine путь_к_приложению.
Windows-приложение запустится и будет работать так же, как и всегда. Если вы открыли установочный файл, начнётся установка приложения — как в Windows. Если программа не требует установки, вы сможете начать работать с ней немедленно.
Не все приложения могут быть установлены и запущены в Wine, хотя количество поддерживаемых впечатляет. Полный список можно посмотреть здесь.
2. Winetricks
Wine — неплохой инструмент, однако интерфейс у него оставляет желать лучшего. Если вы намучились с этой программой, но так и не добились результата, попробуйте Winetricks. У неё приятный графический интерфейс для установки и запуска Windows-приложений, в котором куда проще разобраться новичку.
Установить Winetricks можно так:
1. Ubuntu, Debian, Mint:
sudo apt-get install winetricks
2. Fedora:
sudo dnf install winetricks
3. openSUSE:
sudo zypper install winetricks
4. Arch, Manjaro:
sudo pacman -S winetricks
Winetricks позволяет установить различные версии Microsoft Office и Photoshop, плеер foobar2000 и множество других программ. Поддерживаются и такие популярные игры, как Call of Duty, Call of Duty 4, Call of Duty 5, Biohazard и Grand Theft Auto: Vice City. Некоторые программы загружаются автоматически, для других будет предложено вставить установочный носитель. И, естественно, вы можете открывать собственноручно скачанные файлы формата EXE.
3. PlayOnLinux
PlayOnLinux — ещё один удобный инструмент для запуска Windows-приложений в Linux. Как и Winetricks, он обладает простым графическим интерфейсом. Но, в отличие от него, PlayOnLinux позволяет вам выбирать конкретную версию Wine для того или иного приложения. Это полезно, если какая-то из нужных вам программ некорректно работает с новыми версиями Wine. В целом PlayOnLinux выглядит куда симпатичнее и практичнее, чем Winetricks.
Чтобы установить PlayOnLinux, выполните в терминале одну из следующих команд:
1. Ubuntu, Debian, Mint:
sudo apt-get install playonlinux
2. Fedora:
sudo dnf install playonlinux
3. OpenSUSE:
sudo zypper install playonlinux
4. Arch, Manjaro:
sudo pacman -S playonlinux
В меню установки PlayOnLinux можно найти множество предварительно сконфигурированных приложений и игр, которые вы можете загрузить и установить парой щелчков. Кроме того, PlayOnLinux можно скармливать собственные EXE-установщики. Приложение заботливо выберет за вас версию Wine и создаст значок установленной программы на рабочем столе.
4. Crossover
Изредка бесплатные PlayOnLinux и Winetricks не справляются с установкой какого-нибудь особенно привередливого приложения. В таком случае вам может помочь Crossover. Эта программа очень проста в использовании. Вам достаточно указать, какое приложение вы хотите установить, и подсунуть Crossover установочный файл. Всё остальное будет сделано за вас.
Лицензия Crossover на год стоит 39,95 доллара, но у программы есть и бесплатная пробная версия. Рекомендуется сначала установить необходимое вам приложение в ней, чтобы убедиться, что оно работает корректно.
Crossover →
5. VirtualBox
Если ваше приложение упорно отказывается запускаться в перечисленных выше программах, можно пойти на решительные меры и установить его в виртуальной машине. Учтите, что она отнимает гораздо больше системных ресурсов, поэтому использовать её стоит в крайних случаях.
Для запуска приложения в виртуалке вам понадобится установочный образ Windows в формате ISO. Загрузите и установите VirtualBox, создайте в нём виртуальную машину, укажите ей ISO с Windows, а затем просто установите систему как обычно.
Неоспоримый плюс виртуальной машины — в ней работает полноценная операционная система, а значит, запустится абсолютно всё. Минус — прожорливость в плане системных ресурсов, да и тратиться на лицензию Windows для виртуалки накладно.
VirtualBox →
Читайте также 🧐
- 6 задач, с которыми Linux справляется лучше, чем Windows
- Как реанимировать Windows и сохранить данные с помощью live-дистрибутива Linux
- Как обмениваться файлами по воздуху между Windows, macOS, Linux, iOS и Android
#статьи
- 6 июн 2022
-

0
Советы SRE-инженера про смену операционки и перенос данных: простая инструкция из 4 шагов без магии и лишних обещаний.
Иллюстрация: Wikimedia Commons / Polina Vari для Skillbox Media

Журналист, коммерческий автор и редактор. Пишет про IT, цифровой маркетинг и бизнес.
Сайт: darovska.com.

SRE-инженер. Работал системным администратором в Медицинском университете им. И. И. Мечникова. Увлекается медиафилософией, в том числе философией компьютерных игр, Unix и Open Source.
Я никогда не был фанатом Microsoft, но какое-то время чувствовал себя комфортно в рамках Windows. А полгода назад решил снова полностью перейти на Linux. Расскажу, как это было.
Первое, что я сделал, — стал читать, какие проблемы с Linux могут проявиться на моём ноутбуке. О чём речь? Например, macOS нельзя поставить никуда, кроме MacBook (хотя некоторые умудряются инсталлировать так называемый «Хакинтош»). Похожая ситуация и с Linux: его лучше ставить только на те ноутбуки, у которых нет проблем с драйверами, — и до сих пор существует железо, на котором с драйверами придётся повозиться. Если говорить о процессорах, то лучше всего Linux дружит с AMD.
Учтите: хороший ноутбук с полноценной поддержкой Linux порой стоит сопоставимо с MacBook.
Почитайте, что пишут про работу конкретной модели ноутбука с Linux на сайте производителя и профильных форумах. Если есть жалобы на то, что не получается завести звук, не работает веб-камера или тачпад, задумайтесь — а точно ли вам так нужен этот переход и сможете ли вы работать с этим конкретным ноутбуком в принципе.
И ещё одно предупреждение: обычно при установке Linux всегда чего-то не хватает — приходится это искать, качать и даже собирать из исходников. Например, если официальный драйвер работает некорректно, надо будет поискать его исходный код или даже написать драйвер самостоятельно.
Фотки, мемы, видео, документы — всё нужное, родное и близкое. Перед тем как начать перенос данных с Windows на Linux, нужно точно разобраться, где и что хранится.
Все файлики, приложения, проекты, созданные вами, рекомендую всегда держать в одном определённом месте — так вы точно ничего не забудете и не потеряете. Это та часть, которую всегда легко перенести и которая никак не зависит от типа операционной системы.
В идеале эти данные лучше хранить не на жёстком диске ноутбука или компьютера, а в облаке, отдельном хранилище или на внешнем диске. Ещё хорошая практика — объединить несколько пунктов этого списка. Такой подход к хранению позволит в принципе не бояться отказа операционной системы или выхода диска из строя.
Вкладки браузеров экспортировать довольно просто. Например, недавно я обновлял elementary OS (ну как обновлял — переустанавливал): чтобы перенести профиль Google Chrome, достаточно было скопировать папку с профилем пользователя. Большая часть моих конфигураций была доступна сразу после переустановки.
В Linux есть хорошая практика — при установке системы помещать на отдельный диск пользовательскую папку, которая называется Home. При переустановке системы директория Home не трогается, но в ней остаётся весь мусор, с прошлой установки. Сама система в корне другая, но все пользовательские файлы вашего профиля остаются в Home. Если вы используете KDE, при обновлении KDE не сильно меняется — какие-то базовые настройки сохранятся. Но всегда есть риски, что новая версия KDE работает не так и смотрит не на те переменные. Это базовый вариант, когда профиль сохраняется и подключается к новой системе. Вы устанавливаете PyCharm, а у вас уже есть все папки с проектами.
Данные так или иначе переносятся, а вот с файлами Word могут быть проблемы. То, что заточено под конкретную операционную систему, всегда будет болью для любого переезда на другую ОС. Макросы или разметка документов отличаются, потому что Microsoft пока не использует формат OpenDocument. Но это особенность экосистем: в рамках экосистемы всё неплохо работает и переносится — именно поэтому есть смысл, если телефон на Android, использовать Chromebook, ведь там есть интеграция с сервисами Google.
Данные приложений и сами приложения, настройки системы нельзя полностью перенести с одной ОС на другую — это будет сложно и точно не на 100%. Ведь даже при переходе между двумя устройствами с одной операционкой на борту абсолютно все настройки не перенести — что-то придётся заново конфигурировать вручную. Скорее всего, вам удастся перенести только данные и конфигурацию отдельных приложений — да и то не всех, потому что логика работы некоторых программ сильно зависит от ОС.
При переходе с Windows на Linux надо проверять, насколько ваши приложения в принципе поддерживаются в новой ОС — и есть ли у них вообще версии для Linux. Даже если вместо Photoshop и Corel вы уже использовали кросс-платформенные GIMP с Inkscape, части настроек вы лишитесь. А у того же Lightworks переменные окружения в Windows и Linux могут сильно отличаться — то есть настройки придётся делать заново. В LibreOffice можно перенести готовые шаблоны и макросы.
Некоторые программы вообще не портированы под Linux (те же Sony Vegas или Adobe Premiere) — хотя вы всегда можете попробовать запустить их с помощью эмулятора Wine. Правда, для этого понадобится немало свободного времени.
Когда несколько лет назад я переходил с Linux на Windows, то сразу решил использовать кросс-платформенные приложения типа Lightworks. Потому что знал: если надо будет работать под Linux, я просто перенесу все свои проекты.
Например, вместо популярного Lightroom можно поставить кросс-платформенный Darkroom. Он тоже позволяет работать с фотографиями в RAW-формате — хотя, конечно, он не настолько удобный и приятный в работе, как продукт Adobe. В общем, если есть вероятность, что придётся переходить на Linux — лучше сразу поставить кросс-платформенное ПО.
Важно: не забудьте перенести ключи SSH для всех своих виртуалок и приложений (если они у вас есть). И первое время не стоит форматировать раздел с Windows — вдруг вы что-то забыли и вам это вдруг понадобится.
Просмотрщик фотографий точно не перенесётся, потому что пути сменятся. Базу нужно закэшировать заново — это не большая проблема, но она есть. Нужно также посмотреть основные приложения, в которых вы работаете, посмотреть переносимость. После этого нужно сделать перечень приложений, которые в теории могут быть портированы на другую систему, но для них тоже надо будет менять пути.
Нужно перенести важные для работы приложения. Например, для разработчика это могут быть VS Code, GoLand, IntelliJ IDEA, PyCharm. У JetBrains много продуктов, и все они — кросс-платформенные, их несложно перенести с Windows на Linux, а на официальном сайте VS Code есть гайд для установки под Linux.
В Linux и Windows разные файловые пути, поэтому если конфигурация текстовая и в ней можно поменять пути к модулям, файлам, библиотекам — значит, можно подправить конфигурацию и сохранить настройки. Если нет — тогда нужно посмотреть, какие варианты есть, как их переносить.
С фреймворками тоже обычно больших проблем не возникает: даже .NET и PowerShell поднимаются под Linux. Однако некоторые неудобства будут — не все функции .NET и PowerShell в Linux и Windows реализованы одинаково. Я тестировал их на прошлой работе — в целом работает нормально, хотя команды немного отличаются: например, где-то будет меньше доступных параметров, потому что это всё-таки не родной для Linux язык. Как по мне, ставить PowerShell на Linux — это несколько порнографично. Правда, иногда без этого не обойтись.
Сколько я телефонов ни менял, переход на новую модель — это всего одно действие, когда ты совмещаешь два телефона, и у тебя всё подтягивается, вплоть до приложений и известных Wi-Fi-сетей. Но попробуйте так сделать с Android и iPhone — ничего не получится.

Учись бесплатно:
вебинары по программированию, маркетингу и дизайну.
Участвовать

Школа дронов для всех
Учим программировать беспилотники и управлять ими.
Узнать больше
- Download BackupMBR_linux — 8.47 KB
- Download BackupMBR_win — 8.03 KB
- Download BackupMBR_port_win — 10.03 KB
1. Who is the target reader of this article?
Recently I faced one very interesting task. I had to port an application from one platform (Windows) to another (Linux). It is an interesting topic. First, knowledge of several platforms and writing the code for them is a good experience for every developer. Secondly, writing an application for different platforms makes it widespread and needed by many. So, I would like to share my impressions concerning this process. This article is intended for everybody who wants to write a cross-platform application.
2. Our task
Receiving the project specification, we usually see only one target platform in the “Platforms” section (e.g., Windows) and that is why we enjoy its advantages and disadvantages. Let’s imagine that you receive the task where it is proposed to run the application on the other platform (e.g., Linux). Or imagine that you have to use the code, which was written for one platform, on another platform. From this point you start to face difficulties. You start to plan the porting taking into account all the specifics of the program architecture. And if the architecture was wrong from the very beginning (I mean that it did not expect the porting between the platforms), it can turn out that you have to remake a lot. Let’s examine the example of the code (file attached to this article). This program opens the PhysicalDrive0, acquires MBR and writes it to the file, then defines the disk configuration and saves it to a separate file. The code was written only for Windows with all its consequences.
Please look at the code before reading the article (BackupMBR_win.zip attached to this article). This is the project of VisualStudio2008.
There must be no difficulties in such small example. But you can meet problems even here. The code is very simple and does not require many checks, deletion processing, etc. This code is not a standard but it lets to show what you should do during the porting of your application from Windows OS to Linux OS.
3. Compilers and IDE
When porting from Windows OS to Linux OS is performed, the porting from Microsoft Visual C++ to GCC(G++) is the most commonly used. Many of you may think that GCC and G++ are two different compilers. But it is not so. GCC («GNU C Compiler») was created in 1987 by Richard Stallman and it could compile only C code at that time. With time the compiler developed and supported not only C and C++ codes but also other programming languages. Now the GCC is interpreted as «GNU Compiler Collection». G++ is a part of GCC and is used to compile *.cpp files. GCC is used, in its turn, to compile *.с files. Though, you can compile the *.cpp file using GCC by indicating specific flags. GCC and G++ compile the C++ code in the same way.
Let’s return to the porting from Visual C++ to GCC (G++). It is worth paying attention to the difference between them. GCC is stricter to the standard than the Microsoft compiler. It means that in some situation the GCC compiler returns an error message and does not compile the source code while the Microsoft compiler just returns the warning message. Let’s examine some moments that are frequently met during the porting from Visual C++ to GCC. You can google it but I would like to repeat it myself.
- Use
#ifndef/#define/#endifinstead of#pragmaonce. GCC understands the#pragmaonce directive beginning from the version 3.4. That is why check the version of your compiler. If it is lower than 3.4, there is no need to correct the following code during the porting.
#ifndef SOME_HEADER_H
#define SOME_HEADER_H


#endif // SOME_HEADER_H
- Used types. During the porting, watch the types you use because GCC doesn’t understand all of them. It is better to create a separate file in the project (e.g., types.h file) and to put there all types that GCC does not understand.
HANDLE
DWORD
BYTE
UINT
- Assembler insertions. Be careful during the porting of ASM insertions to the project for GCC. They have another appearance and syntax. GCC uses AT&T ASM. It differs from Intel ASM, which is used in Visual C++. An example is provided below (the following example is taken from http://asm.sourceforge.net//articles/linasm.html; for more information about AT&T ASM also see this reference).
|
Intel Syntax |
AT&T Syntax |
|
mov al,bl |
movb %bl,%al |
P.S. For conversion, you can use the Intel2gas utility (see http://www.niksula.hut.fi/~mtiihone/intel2gas/). But to my opinion, it is more convenient only for the high volume of the ASM code. And anyway you should bring the code to the compilable state.
- Using the
#pragmacomment directive (lib, «libname.lib»). It is convenient to hook libraries in the project with the help of this directive in Visual C++. But GCC does not contain such one. That is why, for GCC, you should define the libraries you want to hook in the command line. For example:
g++ -o TestExe.exe *.o -Llib -lm -ldl -w "lib_1.a" "lib_2.a" "lib_3.a"
As you can see, Linux libraries have *.a extension and not *.lib extension as in Windows OS. Dynamic libraries also have another extension (*.so instead of *.dll) and they link not in such way as in Windows OS. For more information about the types of libraries in Linux OS see http://www.yolinux.com/TUTORIALS/LibraryArchives-StaticAndDynamic.html.
- Macros. Macros in GCC differ from the analogous ones in Visual C++. During the code porting to GСС, check the macros in the code. It’s possible that the implementation of such macro will not be performed. In such situation, it is better to find its implementation in Visual С++ and port it to GCC. The following table provides examples of frequently used macros.
  __DATE__                __DATE__
__FILE__                __FILE__
__LINE__                __LINE__
__STDC__                __STDC__
__TIME__                __TIME__
__TIMESTAMP__            __TIMESTAMP__

__FUNCTION__            __FUNCTION__
                    __PRETTY_FUNCTION__

MSC_VER                __GNUC__
                    __GNUC_MINOR__
                    __GNUC_PATCHLEVEL__
Let’s examine them. The first six macros are implemented in both compilers in the same way and are often used in logging. The differences begin from __FUNCTION__. In Windows OS, it writes not only the name of the function (as in Linux OS) but also the namespace and the class from where the call was performed. Its analog in Linux OS is not __FUNCTION__ but __PRETTY_FUNCTION__. MSC_VER and __GNUC__ / __GNUC_MINOR__ / __GNUC_PATCHLEVEL__ also have different types of returned data. For example, MSC_VER = 1500 for Visual C++, for GNU 3.2.2 it is __GNUC__ = 3, __GNUC_MINOR__ = 2, __GNUC_PATCHLEVEL__ = 2.
If the target platform does not include the needed macro, find its implementation and port it. Macro can be also written in ASM (for the code optimization). Do not hurry and rewrite it from Intel to AT&T and vice versa. It is better to check once more if there is its implementation in С++. Also take into account that Linux OS can run on devices with ARM processor. In this case the macro, which was written under AT&T, will not work and you will have to implement it under another type of the processor.
Let’s move to IDE. There are lots of them and you have the possibility to choose. Let’s examine some of them (taking into account that the project was initially written in Visual Studio, our task is to choose IDE for working in Linux OS):
— Code::Blocks (see http://www.codeblocks.org/)

Pic.1 Code::Blocks. Start Page.
It is often proposed as the substitution of Visual Studio for those who port their project to Linux OS. IDE can open Visual Studio projects under Windows OS and Linux OS. I built a project with its help and I can say that it is very convenient.
— Eclipse/CDT (see http://www.eclipse.org/cdt/downloads.php).

Pic.2 Eclipse/CDT.
It is another free IDE. If you write in C++, download it together with the CDT plug-in. After installation IDE supports only Java by default and if you install CDT plug-in after, the auto-add-on probably will not work.
— Qt Creator (see http://qt.nokia.com/products/developer-tools).
Pic.3 QT Creator. Start Page
When I first worked with Linux I used this IDE. Its interface is simple (developers must have followed the example of XCode interface during the development of Qt Creator). And you do not have to use Qt while working in Qt Creator. Just configure the project using the *.pro file (in it, libraries that are statically linked, *.h and *.cpp files, the type of the application are defined).
— Emacs/Vim (see http://www.gnu.org/software/emacs/)
Pic.4 Emacs. Start Page
This IDE is for experienced developers under Linux OS. The problem of this IDE is that it can take long to learn how to work with Emacs. And the skills are quickly lost, as people say. You will be able to perform the majority of commands by using hot keys or the Emacs command line. Even while opening the file you will be asked to define the file path in the command line. But on the other hand, this tool is very powerful and flexible.
I introduced four IDEs that are the most popular among the developers under Linux OS. For example, I work with QtCreator but there must be no problems while working with other IDEs (do not forget about problems with Emacs). So, it is your time to choose.
I want to add a few words about the debuggers. Sometimes I did not manage to debug the code using the native IDE debugger. That is why I had to search for the alternative. I used two debuggers: Insight and kdbg. I also tried to use ddd debugger but I did not like it. So use the one you like more. With time you will find the one that will meet the maximum of your demands.
4. Porting of the application
Let’s return to the code we examined in the second part. As we can see in the API code, functions are used directly without the wrappers above the API level. You may say that it is not bad: errors are handled, the code works, so why not to leave it as it is? There is a reason not to leave as it is. When you port the application to another platform, there will be one more problem of searching API functions in the code and their replacement. For example, the CreateFileW function (disk opening and creation of the file from the MBR disk) is represented twice in the examined code. And the program is simple in itself. If the project is big and you do not use wrappers above the API level, the code will repeat itself a lot. And it means that you will have to change a lot during the porting to another platform.
That is why the first step is to write the library that contains all used APIs and that implements the methods of working with them. It must also contain all functions specific for the definite platform. Such library will have the necessary interface, and during the porting, you will have to make some corrections only in it.
Let’s examine the schemes that illustrate the thoughts mentioned above. The majority of developers extract the core of their application into the separate libraries (Business Logic) that implement the definite interface. Such library also implements the separate GUI that will use this very library. This is correct, convenient and also it works. But there is one nuance that we just mentioned.
There must be the Platform Compatibility Layer for the cross-platform applications. This is the component that will stand between the API level and the core of your application. It is necessary to include the following components in it:
- working with files;
- working with sockets;
- working with ports;
- ASCII/Unicode
- Threading API
Let’s start from the very beginning. Let’s try to port our application. We must define the code that will be included in the «Platform Compatibility Layer». The following table displays the comparison between Windows and Linux API.
Table 1. Comparing Linux and Windows API.
| Windows API |
Linux API |
HANDLE WINAPI CreateFileA(
     __in      LPCTSTR lpFileName,
     __in      DWORD dwDesiredAccess,
     __in      DWORD dwShareMode,
     __in_opt LPSECURITY_ATTRIBUTES  lpSecurityAttributes,
     __in      DWORD dwCreationDisposition,
     __in      DWORD dwFlagsAndAttributes,
     __in_opt  HANDLE hTemplateFile)
|
int open( const char* name, int flags) int open( const char* name, int flags, mode_t mode) |
BOOL WINAPI ReadFile(
     __in         HANDLE hFile,
     __out        LPVOID lpBuffer,
     __in         DWORD nNumberOfBytesToRead,
     __out_opt    LPDWORD lpNumberOfBytesRead,
     __inout_opt  LPOVERLAPPED lpOverlapped)
|
ssize_t read(
       int fd,
       void buf*,
       size_t len)
|
BOOL WINAPI WriteFile(
     __in         HANDLE hFile,
     __in         LPCVOID lpBuffer,
     __in         DWORD nNumberOfBytesToWrite,
     __out_opt    LPDWORD lpNumberOfBytesWritten,
     __inout_opt  LPOVERLAPPED lpOverlapped)
|
ssize_t write(
       int fd,
       void buf*,
       size_t count)
|
DWORD SetFilePointer(
     __in         HANDLE hFile,
     __in         LONG lDistanceToMove,
     __inout_opt  PLONG lpDistanceToMoveHigh,
     __in         DWORD dwMoveMethod)
|
off_t lseek(
       int fd,
       off_t pos,
       int origin)
|
BOOL CloseHandle(
     __in  HANDLE hObject)
|
int close( int fd) |
The first function that we use is the CreateFileA function. We need it to open the device (in this case, it is PhysycalDrive0). We call it with the following parameters:
HANDLE handle_r = ::CreateFileA("\\.\PhysicalDrive0"
                        , GENERIC_READ
                        , FILE_SHARE_READ | FILE_SHARE_WRITE
                        , 0
                        , OPEN_EXISTING
                        , FILE_ATTRIBUTE_NORMAL
                    , 0);
With the help of the first parameter we define the path of the device we are opening \\.PhysicalDrive0. In Linux OS, all devices have the format of simple files and are located in the /dev directory. There you can find the required device (it is /dev/sda device in my system). You can define the path to the device on your computer by entering the mount command in Linux terminal. This command is used for device mounting. But such command without any parameters will display all mounted devices in the system. The following example is the example of mount command for my system:
root@ubuntu:/usr/share/man$ mount
    /dev/sda1 on / type ext3 (rw)
    tmpfs on /lib/init/rw type tmpfs (rw,nosuid,mode=0755)
    proc on /proc type proc (rw,noexec,nosuid,nodev)
    ..........................................................................
    securityfs on /sys/kernel/security type securityfs (rw)
Let’s examine the first line, where:
/dev/sda1 — the path to the device file
/ — the path of the mounted filesystem
type ext3 — the filesystem type
rw — read and write permissions.
Hard drives are usually indicated as /dev/sd* and /dev/hd* in Linux OS. If the computer has three hard drives, they will be indicated as /dev/sda, /dev/sdb, /dev/sdc. The number that follows after the name of the hard drive defines the partition number on this drive. To open the disk, use the open() function.
According to the manual, this function juxtaposes the full file path with the descriptor of the file, which it returns. Descriptor is the analog of HANDLE in Windows OS. It can be used for read/write/lseek functions. If you did not manage to open/create a file, the function returns -1. Permission of file access is defined in the flags parameter. For /dev/sda, set the O_RDONLY flag (it is an analog of GENERIC_READ for CreateFileA). For more information about flags see the manual. So, for Linux OS, the open() function will look like the following:
It is more compact than in Windows OS. Now it is necessary to write the function that will be common for Windows and Linux OS. First, let’s define how this function will look like. CreateFileA can be assumed as a basis. There are three parameters out of 7 that do not change in the program:
- DWORD dwShareMode = FILE_SHARE_READ|FILE_SHARE_WRITE
- LPSECURITY_ATTRIBUTES  lpSecurityAttributes = 0
- HANDLE hTemplateFile = 0
As these parameters have the same value, we exclude them from the target function. You may say that we limit the functionality defining one and the same value to some parameters. But we did not change them in the program, those values, which are defined, are enough for us. It means that the function performs the program minimum and can cover the functionality that we need. It is worth defining here how we use one or another API function. The minimum functionality is usually enough. But on the other hand, if we want to set the FILE_SHARE_READ value to the dwSharedMode parameter, we will hit a problem. It is not enough that we must add changes to the function, but also we will have to change the number of parameters in all its calls. That is why it is necessary to define what exactly you want, for example, from CreateFileA and how you will use it. Then it will be clear how the wrapper over this function will look like.
So, we came to conclusion that the function will have 4 parameters. Now we have to confirm them on both platforms. I will port the minimum of them: GENERIC_READ (to open the file for reading) and GENERIC_WRITE (to open the file for writing). These parameters are similar to O_RDONLY and O_WRONLY parameters for the open() function. dwCreationDisposition defines the way of opening the file. I used two values: OPEN_EXISTING (the file opens; if there is no file, the error is returned) and CREATE_ALWAYS (a new file is created; if such file already exists, it is rewritten). There are no such parameters for the open() function. The closest will be the O_CREAT parameter. This flag is used for file creation and corresponds to CREATE_ALWAYS parameter. You don’t need to use the OPEN_EXISTING value for the open() function. You may say that the FILE_ATTRIBUTE_NORMAL value of the dwFlagsAndAttributes also did not change and that we have to exclude it from the parameters. But as it was mentioned earlier, the open() function has one more mode parameter. It defines the file permission, as you remember. Let’s define the FILE_ATTRIBUTE_NORMAL = 0644 parameter (the owner of the file has read and write permissions, others only read permission). It is not right as we cannot define other file permissions but it is enough for porting our application. It is a certain support point. But it is easy to correct: we just find the value correspondence for the necessary parameters for both platforms.
We compared all parameters that are interesting for us and now can start writing the function itself. What is the process of writing? We use the #ifndef/#define/#elif/#endif preprocessor directives. We use the following construction:
#ifdef WIN32

#elif __linux__

#else
    #error: unknown OS
#endif
By using this construction, we can single out parts of the code that are specific for a definite platform. With the help of this method you can single out not only the parts of functions but also the whole functions.
int do_something() { #ifdef WIN32 #elif __linux__ #else #error: unknown OS #endif } |
#ifdef WIN32 int do_something() { } #elif __linux__ int do_something() { } #else #error: unknown OS #endif |
As we can see, both methods prove its value. The first one is less readable; the second one contains more code but it is easier to make changes in it. I would advise you to use the second one but it is your right to choose. As an alternative, you can separate off all to the header files.
Let’s look how the function will look like after making all changes in it:
#include "file_io.h"


#ifdef WIN32

#elif __linux__
 #include <sys/types.h>

    #include <sys/stat.h>

    #include "unistd.h"

    #include <fcntl.h>


    #define GENERIC_READ                O_RDONLY    //read only mode
    #define GENERIC_WRITE               O_WRONLY    //write only mode
    #define CREATE_ALWAYS               O_CREAT        //create new file
    #define OPEN_EXISTING               0           //fake parameter's value
 #define FILE_ATTRIBUTE_NORMAL     0644          // file attributes
#else
    #error: unknown OS
#endif

#ifdef WIN32 // create_io_file for windows
HANDLE create_io_file(const char* file_name,
           DWORD desired_access,
           DWORD creation_despositions,
           DWORD flags_attributes)
{
        return ::CreateFileA(file_name,
                             desired_access,
                             FILE_SHARE_READ | FILE_SHARE_WRITE,
                             0,
                                creation_despositions,
                                flags_attributes,
                                0);
}
#elif __linux__ // create_io_file for Linux
HANDLE create_io_file(const char* file_name,
                      DWORD desired_access,
                      DWORD creation_despositions,
                      DWORD flags_attributes)
{
    return ::open(file_name,
                  desired_access | creation_despositions,
                  flags_attributes);

}
#else
    #error: unknown OS
#endif
As it can be seen from the code, we took into account everything mentioned above. The received create_io_file wrapper does not implement all the features of CreateFileA and open but it is an example of how you can implement the cross-platform wrapper above the API level. You can port the rest of functions in the same way (see file_io.h/file_io.cpp file).
Besides API, we used DeviceIOControl to receive the disk geometry. The get_drive_info() function is represented below:
bool get_drive_info(HANDLE _handle, drive_info ∓drive_info_)
{
    DWORD size_ = 0;
    BOOL is_accessible_ =
        ::DeviceIoControl(_handle
        , IOCTL_STORAGE_CHECK_VERIFY
        , 0
        , 0
        , 0
        , 0
        , &size_
        , 0);

    if (!is_accessible_)
    {
        return false;
    }

    DISK_GEOMETRY disk_geometry_;
    ::memset(&disk_geometry_, 0, sizeof disk_geometry_);

    BOOL is_geometry_ =
        ::DeviceIoControl(_handle
        , IOCTL_DISK_GET_DRIVE_GEOMETRY
        , 0
        , 0
        , &disk_geometry_
        , sizeof disk_geometry_
        , &size_
        , 0);

    if (!is_geometry_)
    {
        return false;
    }

    drive_info_._cylinder = disk_geometry_.Cylinders.QuadPart;
    drive_info_._type = fixed;
    drive_info_._tracks_per_cylinder = disk_geometry_.TracksPerCylinder;
    drive_info_._sectors_per_track = disk_geometry_.SectorsPerTrack;
    drive_info_._bytes_per_sector = disk_geometry_.BytesPerSector;

        drive_info_._lba_size = drive_info_._cylinder
           * drive_info_._bytes_per_sector
           * drive_info_._sectors_per_track
           * drive_info_._tracks_per_cylinder;

       return true;
}
There is an analog of DeviceIOControl in Linux. It is the ioctl function, which receives the device descriptor and can return the requested information about it. By calling DeviceIOControl with the IOCTL_DISK_GET_DRIVE_GEOMETRY parameter we receive the DISK_GEOMETRY structure as a result. It looks like the following:
typedef struct _DISK_GEOMETRY {
    LARGE_INTEGER Cylinders;
    MEDIA_TYPE MediaType;
    DWORD TracksPerCylinder;
    DWORD SectorsPerTrack;
    DWORD BytesPerSector;
} DISK_GEOMETRY, *PDISK_GEOMETRY;
To receive the similar structure with the disk geometry in Linux, call the ioctl function with the HDIO_GETGEO parameter and reference the following structure:
struct hd_geometry {
      unsigned char heads;
      unsigned char sectors;
      unsigned short cylinders;
      unsigned long start;
};
Having compared the structures, we notice the absence of one of the fields. The hd_geometry structure does not contain the BytesPerSector value. This can be corrected by calling the ioctl function with the BLKSSZGET parameter, which according to Linux sources returns the block device sector size. These are the specifics of porting this function. The final variant looks like the following:
#ifdef WIN32 bool get_drive_info(HANDLE _handle, drive_info &drive_info_) { DWORD size_ = 0; BOOL is_accessible_ = ::DeviceIoControl(_handle , IOCTL_STORAGE_CHECK_VERIFY , 0 , 0 , 0 , 0 , &size_ , 0); if (!is_accessible_) { return false; } DISK_GEOMETRY disk_geometry_; ::memset(&disk_geometry_, 0, sizeof disk_geometry_); BOOL is_geometry_ = ::DeviceIoControl(_handle , IOCTL_DISK_GET_DRIVE_GEOMETRY , 0 , 0 , &disk_geometry_ , sizeof disk_geometry_ , &size_ , 0); if (!is_geometry_) { return false; } drive_info_._cylinder = disk_geometry_.Cylinders.QuadPart; drive_info_._type = fixed; drive_info_._tracks_per_cylinder = disk_geometry_.TracksPerCylinder; drive_info_._sectors_per_track = disk_geometry_.SectorsPerTrack; drive_info_._bytes_per_sector = disk_geometry_.BytesPerSector; drive_info_._lba_size = drive_info_._cylinder * drive_info_._bytes_per_sector * drive_info_._sectors_per_track * drive_info_._tracks_per_cylinder; return true; } #elif __linux__ bool get_drive_info(HANDLE _handle, drive_info &drive_info_) { struct hd_geometry geometry; ::memset(&geometry, 0, sizeof geometry); int result = ioctl(_handle, HDIO_GETGEO, &geometry); if (result < 0) { std::cout<<"ioctl error"; return false; } drive_info_._cylinder = geometry.cylinders; drive_info_._type = fixed; drive_info_._tracks_per_cylinder = geometry.heads; drive_info_._sectors_per_track = geometry.sectors; long sector_size = 0; result = ioctl(_handle, BLKSSZGET, §or_size); if (result < 0) { std::cout<<"ioctl error"; return false; } drive_info_._bytes_per_sector = sector_size; drive_info_._lba_size = drive_info_._cylinder * drive_info_._bytes_per_sector * drive_info_._sectors_per_track * drive_info_._tracks_per_cylinder; return true; } #else #error: unknown OS #endif
There is one more function left. It is the store_drive_geometry function but it does not require the change of the code. It can be easily ported. Such effect can be achieved by using STL (see http://cplusplus.com), boost (see http://boost.org) or Qt libraries. All these libraries are cross-platform and allow writing the easily ported code. For example, in STL, the wrapper above the API level is already implemented for the work with files and the library is already cross-platform. So pay attention to using such libraries. It can make your work easier.
5. Windows->Linux. A few words
We examined only one of many components from the list that change during the porting. I would like to say a few words about the rest of them.
ASCII/Unicode. Here we can meet problems because the size of the wchar_t type in Windows is twice smaller than in Linux (2 bytes in Windows and 4 bytes in Linux). The reason is that Linux uses UTF-32 character encoding and Windows — UCS-2. The difference in character encodings can be solved by setting the GCC flag during the compilation:
-fshort-wchar
Attention should be paid to all char <-> wchar_t conversions and to the use of Unicode during the transfer between systems.
Threading API. It is better to implement it using boost or Qt libraries. It means that the work with threads has many pitfalls and it will be difficult to implement everything by yourself and it will also take you too long. That is why, as I have already said, it is better to use ready solutions.
6. The End
I tried to represent in brief some key moments that you can face during the porting of the application from Windows OS to Linux OS. I rather managed to show how to implement cross-platform wrappers for API by giving an example. You can come to one more conclusion from the information mentioned above. During the porting of applications it is worth paying attention to the ready implementations of cross-platform libraries (such as STL, boost and QT).
7. Additional materials
Look through all files attached to the article.
BackupMBR_win.zip – a project (Visual Studio 2008). An application that is to be ported to Linux OS.
BackupMBR_port_win.zip – a project (Visual Studio 2008). The cross-platform alternative of BackupMBR.
BackupMBR_linux.zip – a project (Qt Creator). The cross-platform alternative of BackupMBR that was built into the project for Linux OS.
This member has not yet provided a Biography. Assume it’s interesting and varied, and probably something to do with programming.
- Download BackupMBR_linux — 8.47 KB
- Download BackupMBR_win — 8.03 KB
- Download BackupMBR_port_win — 10.03 KB
1. Who is the target reader of this article?
Recently I faced one very interesting task. I had to port an application from one platform (Windows) to another (Linux). It is an interesting topic. First, knowledge of several platforms and writing the code for them is a good experience for every developer. Secondly, writing an application for different platforms makes it widespread and needed by many. So, I would like to share my impressions concerning this process. This article is intended for everybody who wants to write a cross-platform application.
2. Our task
Receiving the project specification, we usually see only one target platform in the “Platforms” section (e.g., Windows) and that is why we enjoy its advantages and disadvantages. Let’s imagine that you receive the task where it is proposed to run the application on the other platform (e.g., Linux). Or imagine that you have to use the code, which was written for one platform, on another platform. From this point you start to face difficulties. You start to plan the porting taking into account all the specifics of the program architecture. And if the architecture was wrong from the very beginning (I mean that it did not expect the porting between the platforms), it can turn out that you have to remake a lot. Let’s examine the example of the code (file attached to this article). This program opens the PhysicalDrive0, acquires MBR and writes it to the file, then defines the disk configuration and saves it to a separate file. The code was written only for Windows with all its consequences.
Please look at the code before reading the article (BackupMBR_win.zip attached to this article). This is the project of VisualStudio2008.
There must be no difficulties in such small example. But you can meet problems even here. The code is very simple and does not require many checks, deletion processing, etc. This code is not a standard but it lets to show what you should do during the porting of your application from Windows OS to Linux OS.
3. Compilers and IDE
When porting from Windows OS to Linux OS is performed, the porting from Microsoft Visual C++ to GCC(G++) is the most commonly used. Many of you may think that GCC and G++ are two different compilers. But it is not so. GCC («GNU C Compiler») was created in 1987 by Richard Stallman and it could compile only C code at that time. With time the compiler developed and supported not only C and C++ codes but also other programming languages. Now the GCC is interpreted as «GNU Compiler Collection». G++ is a part of GCC and is used to compile *.cpp files. GCC is used, in its turn, to compile *.с files. Though, you can compile the *.cpp file using GCC by indicating specific flags. GCC and G++ compile the C++ code in the same way.
Let’s return to the porting from Visual C++ to GCC (G++). It is worth paying attention to the difference between them. GCC is stricter to the standard than the Microsoft compiler. It means that in some situation the GCC compiler returns an error message and does not compile the source code while the Microsoft compiler just returns the warning message. Let’s examine some moments that are frequently met during the porting from Visual C++ to GCC. You can google it but I would like to repeat it myself.
- Use
#ifndef/#define/#endifinstead of#pragmaonce. GCC understands the#pragmaonce directive beginning from the version 3.4. That is why check the version of your compiler. If it is lower than 3.4, there is no need to correct the following code during the porting.
#ifndef SOME_HEADER_H
#define SOME_HEADER_H


#endif // SOME_HEADER_H
- Used types. During the porting, watch the types you use because GCC doesn’t understand all of them. It is better to create a separate file in the project (e.g., types.h file) and to put there all types that GCC does not understand.
HANDLE
DWORD
BYTE
UINT
- Assembler insertions. Be careful during the porting of ASM insertions to the project for GCC. They have another appearance and syntax. GCC uses AT&T ASM. It differs from Intel ASM, which is used in Visual C++. An example is provided below (the following example is taken from http://asm.sourceforge.net//articles/linasm.html; for more information about AT&T ASM also see this reference).
|
Intel Syntax |
AT&T Syntax |
|
mov al,bl |
movb %bl,%al |
P.S. For conversion, you can use the Intel2gas utility (see http://www.niksula.hut.fi/~mtiihone/intel2gas/). But to my opinion, it is more convenient only for the high volume of the ASM code. And anyway you should bring the code to the compilable state.
- Using the
#pragmacomment directive (lib, «libname.lib»). It is convenient to hook libraries in the project with the help of this directive in Visual C++. But GCC does not contain such one. That is why, for GCC, you should define the libraries you want to hook in the command line. For example:
g++ -o TestExe.exe *.o -Llib -lm -ldl -w "lib_1.a" "lib_2.a" "lib_3.a"
As you can see, Linux libraries have *.a extension and not *.lib extension as in Windows OS. Dynamic libraries also have another extension (*.so instead of *.dll) and they link not in such way as in Windows OS. For more information about the types of libraries in Linux OS see http://www.yolinux.com/TUTORIALS/LibraryArchives-StaticAndDynamic.html.
- Macros. Macros in GCC differ from the analogous ones in Visual C++. During the code porting to GСС, check the macros in the code. It’s possible that the implementation of such macro will not be performed. In such situation, it is better to find its implementation in Visual С++ and port it to GCC. The following table provides examples of frequently used macros.
  __DATE__                __DATE__
__FILE__                __FILE__
__LINE__                __LINE__
__STDC__                __STDC__
__TIME__                __TIME__
__TIMESTAMP__            __TIMESTAMP__

__FUNCTION__            __FUNCTION__
                    __PRETTY_FUNCTION__

MSC_VER                __GNUC__
                    __GNUC_MINOR__
                    __GNUC_PATCHLEVEL__
Let’s examine them. The first six macros are implemented in both compilers in the same way and are often used in logging. The differences begin from __FUNCTION__. In Windows OS, it writes not only the name of the function (as in Linux OS) but also the namespace and the class from where the call was performed. Its analog in Linux OS is not __FUNCTION__ but __PRETTY_FUNCTION__. MSC_VER and __GNUC__ / __GNUC_MINOR__ / __GNUC_PATCHLEVEL__ also have different types of returned data. For example, MSC_VER = 1500 for Visual C++, for GNU 3.2.2 it is __GNUC__ = 3, __GNUC_MINOR__ = 2, __GNUC_PATCHLEVEL__ = 2.
If the target platform does not include the needed macro, find its implementation and port it. Macro can be also written in ASM (for the code optimization). Do not hurry and rewrite it from Intel to AT&T and vice versa. It is better to check once more if there is its implementation in С++. Also take into account that Linux OS can run on devices with ARM processor. In this case the macro, which was written under AT&T, will not work and you will have to implement it under another type of the processor.
Let’s move to IDE. There are lots of them and you have the possibility to choose. Let’s examine some of them (taking into account that the project was initially written in Visual Studio, our task is to choose IDE for working in Linux OS):
— Code::Blocks (see http://www.codeblocks.org/)
Pic.1 Code::Blocks. Start Page.
It is often proposed as the substitution of Visual Studio for those who port their project to Linux OS. IDE can open Visual Studio projects under Windows OS and Linux OS. I built a project with its help and I can say that it is very convenient.
— Eclipse/CDT (see http://www.eclipse.org/cdt/downloads.php).
Pic.2 Eclipse/CDT.
It is another free IDE. If you write in C++, download it together with the CDT plug-in. After installation IDE supports only Java by default and if you install CDT plug-in after, the auto-add-on probably will not work.
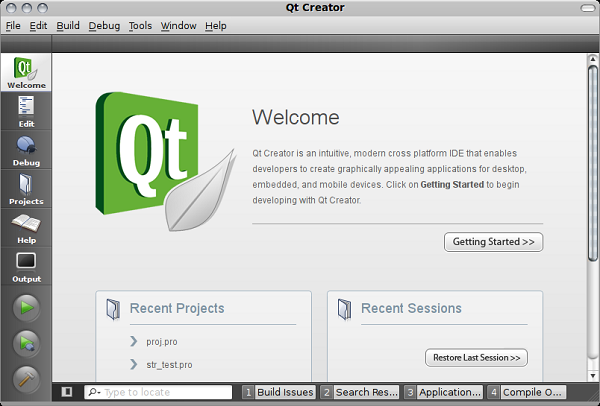
— Qt Creator (see http://qt.nokia.com/products/developer-tools).
Pic.3 QT Creator. Start Page
When I first worked with Linux I used this IDE. Its interface is simple (developers must have followed the example of XCode interface during the development of Qt Creator). And you do not have to use Qt while working in Qt Creator. Just configure the project using the *.pro file (in it, libraries that are statically linked, *.h and *.cpp files, the type of the application are defined).
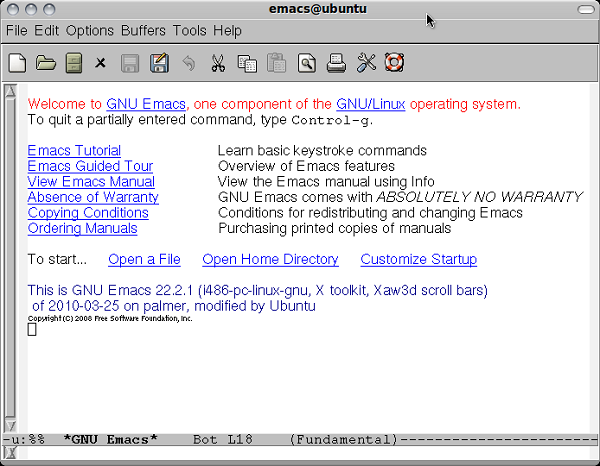
— Emacs/Vim (see http://www.gnu.org/software/emacs/)
Pic.4 Emacs. Start Page
This IDE is for experienced developers under Linux OS. The problem of this IDE is that it can take long to learn how to work with Emacs. And the skills are quickly lost, as people say. You will be able to perform the majority of commands by using hot keys or the Emacs command line. Even while opening the file you will be asked to define the file path in the command line. But on the other hand, this tool is very powerful and flexible.
I introduced four IDEs that are the most popular among the developers under Linux OS. For example, I work with QtCreator but there must be no problems while working with other IDEs (do not forget about problems with Emacs). So, it is your time to choose.
I want to add a few words about the debuggers. Sometimes I did not manage to debug the code using the native IDE debugger. That is why I had to search for the alternative. I used two debuggers: Insight and kdbg. I also tried to use ddd debugger but I did not like it. So use the one you like more. With time you will find the one that will meet the maximum of your demands.
4. Porting of the application
Let’s return to the code we examined in the second part. As we can see in the API code, functions are used directly without the wrappers above the API level. You may say that it is not bad: errors are handled, the code works, so why not to leave it as it is? There is a reason not to leave as it is. When you port the application to another platform, there will be one more problem of searching API functions in the code and their replacement. For example, the CreateFileW function (disk opening and creation of the file from the MBR disk) is represented twice in the examined code. And the program is simple in itself. If the project is big and you do not use wrappers above the API level, the code will repeat itself a lot. And it means that you will have to change a lot during the porting to another platform.
That is why the first step is to write the library that contains all used APIs and that implements the methods of working with them. It must also contain all functions specific for the definite platform. Such library will have the necessary interface, and during the porting, you will have to make some corrections only in it.
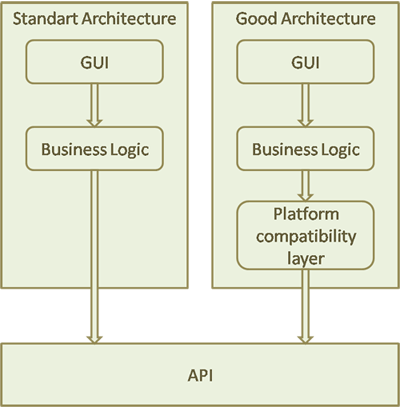
Let’s examine the schemes that illustrate the thoughts mentioned above. The majority of developers extract the core of their application into the separate libraries (Business Logic) that implement the definite interface. Such library also implements the separate GUI that will use this very library. This is correct, convenient and also it works. But there is one nuance that we just mentioned.
There must be the Platform Compatibility Layer for the cross-platform applications. This is the component that will stand between the API level and the core of your application. It is necessary to include the following components in it:
- working with files;
- working with sockets;
- working with ports;
- ASCII/Unicode
- Threading API
Let’s start from the very beginning. Let’s try to port our application. We must define the code that will be included in the «Platform Compatibility Layer». The following table displays the comparison between Windows and Linux API.
Table 1. Comparing Linux and Windows API.
| Windows API |
Linux API |
HANDLE WINAPI CreateFileA(
     __in      LPCTSTR lpFileName,
     __in      DWORD dwDesiredAccess,
     __in      DWORD dwShareMode,
     __in_opt LPSECURITY_ATTRIBUTES  lpSecurityAttributes,
     __in      DWORD dwCreationDisposition,
     __in      DWORD dwFlagsAndAttributes,
     __in_opt  HANDLE hTemplateFile)
|
int open( const char* name, int flags) int open( const char* name, int flags, mode_t mode) |
BOOL WINAPI ReadFile(
     __in         HANDLE hFile,
     __out        LPVOID lpBuffer,
     __in         DWORD nNumberOfBytesToRead,
     __out_opt    LPDWORD lpNumberOfBytesRead,
     __inout_opt  LPOVERLAPPED lpOverlapped)
|
ssize_t read(
       int fd,
       void buf*,
       size_t len)
|
BOOL WINAPI WriteFile(
     __in         HANDLE hFile,
     __in         LPCVOID lpBuffer,
     __in         DWORD nNumberOfBytesToWrite,
     __out_opt    LPDWORD lpNumberOfBytesWritten,
     __inout_opt  LPOVERLAPPED lpOverlapped)
|
ssize_t write(
       int fd,
       void buf*,
       size_t count)
|
DWORD SetFilePointer(
     __in         HANDLE hFile,
     __in         LONG lDistanceToMove,
     __inout_opt  PLONG lpDistanceToMoveHigh,
     __in         DWORD dwMoveMethod)
|
off_t lseek(
       int fd,
       off_t pos,
       int origin)
|
BOOL CloseHandle(
     __in  HANDLE hObject)
|
int close( int fd) |
The first function that we use is the CreateFileA function. We need it to open the device (in this case, it is PhysycalDrive0). We call it with the following parameters:
HANDLE handle_r = ::CreateFileA("\\.\PhysicalDrive0"
                        , GENERIC_READ
                        , FILE_SHARE_READ | FILE_SHARE_WRITE
                        , 0
                        , OPEN_EXISTING
                        , FILE_ATTRIBUTE_NORMAL
                    , 0);
With the help of the first parameter we define the path of the device we are opening \\.PhysicalDrive0. In Linux OS, all devices have the format of simple files and are located in the /dev directory. There you can find the required device (it is /dev/sda device in my system). You can define the path to the device on your computer by entering the mount command in Linux terminal. This command is used for device mounting. But such command without any parameters will display all mounted devices in the system. The following example is the example of mount command for my system:
root@ubuntu:/usr/share/man$ mount
    /dev/sda1 on / type ext3 (rw)
    tmpfs on /lib/init/rw type tmpfs (rw,nosuid,mode=0755)
    proc on /proc type proc (rw,noexec,nosuid,nodev)
    ..........................................................................
    securityfs on /sys/kernel/security type securityfs (rw)
Let’s examine the first line, where:
/dev/sda1 — the path to the device file
/ — the path of the mounted filesystem
type ext3 — the filesystem type
rw — read and write permissions.
Hard drives are usually indicated as /dev/sd* and /dev/hd* in Linux OS. If the computer has three hard drives, they will be indicated as /dev/sda, /dev/sdb, /dev/sdc. The number that follows after the name of the hard drive defines the partition number on this drive. To open the disk, use the open() function.
According to the manual, this function juxtaposes the full file path with the descriptor of the file, which it returns. Descriptor is the analog of HANDLE in Windows OS. It can be used for read/write/lseek functions. If you did not manage to open/create a file, the function returns -1. Permission of file access is defined in the flags parameter. For /dev/sda, set the O_RDONLY flag (it is an analog of GENERIC_READ for CreateFileA). For more information about flags see the manual. So, for Linux OS, the open() function will look like the following:
It is more compact than in Windows OS. Now it is necessary to write the function that will be common for Windows and Linux OS. First, let’s define how this function will look like. CreateFileA can be assumed as a basis. There are three parameters out of 7 that do not change in the program:
- DWORD dwShareMode = FILE_SHARE_READ|FILE_SHARE_WRITE
- LPSECURITY_ATTRIBUTES  lpSecurityAttributes = 0
- HANDLE hTemplateFile = 0
As these parameters have the same value, we exclude them from the target function. You may say that we limit the functionality defining one and the same value to some parameters. But we did not change them in the program, those values, which are defined, are enough for us. It means that the function performs the program minimum and can cover the functionality that we need. It is worth defining here how we use one or another API function. The minimum functionality is usually enough. But on the other hand, if we want to set the FILE_SHARE_READ value to the dwSharedMode parameter, we will hit a problem. It is not enough that we must add changes to the function, but also we will have to change the number of parameters in all its calls. That is why it is necessary to define what exactly you want, for example, from CreateFileA and how you will use it. Then it will be clear how the wrapper over this function will look like.
So, we came to conclusion that the function will have 4 parameters. Now we have to confirm them on both platforms. I will port the minimum of them: GENERIC_READ (to open the file for reading) and GENERIC_WRITE (to open the file for writing). These parameters are similar to O_RDONLY and O_WRONLY parameters for the open() function. dwCreationDisposition defines the way of opening the file. I used two values: OPEN_EXISTING (the file opens; if there is no file, the error is returned) and CREATE_ALWAYS (a new file is created; if such file already exists, it is rewritten). There are no such parameters for the open() function. The closest will be the O_CREAT parameter. This flag is used for file creation and corresponds to CREATE_ALWAYS parameter. You don’t need to use the OPEN_EXISTING value for the open() function. You may say that the FILE_ATTRIBUTE_NORMAL value of the dwFlagsAndAttributes also did not change and that we have to exclude it from the parameters. But as it was mentioned earlier, the open() function has one more mode parameter. It defines the file permission, as you remember. Let’s define the FILE_ATTRIBUTE_NORMAL = 0644 parameter (the owner of the file has read and write permissions, others only read permission). It is not right as we cannot define other file permissions but it is enough for porting our application. It is a certain support point. But it is easy to correct: we just find the value correspondence for the necessary parameters for both platforms.
We compared all parameters that are interesting for us and now can start writing the function itself. What is the process of writing? We use the #ifndef/#define/#elif/#endif preprocessor directives. We use the following construction:
#ifdef WIN32

#elif __linux__

#else
    #error: unknown OS
#endif
By using this construction, we can single out parts of the code that are specific for a definite platform. With the help of this method you can single out not only the parts of functions but also the whole functions.
int do_something() { #ifdef WIN32 #elif __linux__ #else #error: unknown OS #endif } |
#ifdef WIN32 int do_something() { } #elif __linux__ int do_something() { } #else #error: unknown OS #endif |
As we can see, both methods prove its value. The first one is less readable; the second one contains more code but it is easier to make changes in it. I would advise you to use the second one but it is your right to choose. As an alternative, you can separate off all to the header files.
Let’s look how the function will look like after making all changes in it:
#include "file_io.h"


#ifdef WIN32

#elif __linux__
 #include <sys/types.h>

    #include <sys/stat.h>

    #include "unistd.h"

    #include <fcntl.h>


    #define GENERIC_READ                O_RDONLY    //read only mode
    #define GENERIC_WRITE               O_WRONLY    //write only mode
    #define CREATE_ALWAYS               O_CREAT        //create new file
    #define OPEN_EXISTING               0           //fake parameter's value
 #define FILE_ATTRIBUTE_NORMAL     0644          // file attributes
#else
    #error: unknown OS
#endif

#ifdef WIN32 // create_io_file for windows
HANDLE create_io_file(const char* file_name,
           DWORD desired_access,
           DWORD creation_despositions,
           DWORD flags_attributes)
{
        return ::CreateFileA(file_name,
                             desired_access,
                             FILE_SHARE_READ | FILE_SHARE_WRITE,
                             0,
                                creation_despositions,
                                flags_attributes,
                                0);
}
#elif __linux__ // create_io_file for Linux
HANDLE create_io_file(const char* file_name,
                      DWORD desired_access,
                      DWORD creation_despositions,
                      DWORD flags_attributes)
{
    return ::open(file_name,
                  desired_access | creation_despositions,
                  flags_attributes);

}
#else
    #error: unknown OS
#endif
As it can be seen from the code, we took into account everything mentioned above. The received create_io_file wrapper does not implement all the features of CreateFileA and open but it is an example of how you can implement the cross-platform wrapper above the API level. You can port the rest of functions in the same way (see file_io.h/file_io.cpp file).
Besides API, we used DeviceIOControl to receive the disk geometry. The get_drive_info() function is represented below:
bool get_drive_info(HANDLE _handle, drive_info ∓drive_info_)
{
    DWORD size_ = 0;
    BOOL is_accessible_ =
        ::DeviceIoControl(_handle
        , IOCTL_STORAGE_CHECK_VERIFY
        , 0
        , 0
        , 0
        , 0
        , &size_
        , 0);

    if (!is_accessible_)
    {
        return false;
    }

    DISK_GEOMETRY disk_geometry_;
    ::memset(&disk_geometry_, 0, sizeof disk_geometry_);

    BOOL is_geometry_ =
        ::DeviceIoControl(_handle
        , IOCTL_DISK_GET_DRIVE_GEOMETRY
        , 0
        , 0
        , &disk_geometry_
        , sizeof disk_geometry_
        , &size_
        , 0);

    if (!is_geometry_)
    {
        return false;
    }

    drive_info_._cylinder = disk_geometry_.Cylinders.QuadPart;
    drive_info_._type = fixed;
    drive_info_._tracks_per_cylinder = disk_geometry_.TracksPerCylinder;
    drive_info_._sectors_per_track = disk_geometry_.SectorsPerTrack;
    drive_info_._bytes_per_sector = disk_geometry_.BytesPerSector;

        drive_info_._lba_size = drive_info_._cylinder
           * drive_info_._bytes_per_sector
           * drive_info_._sectors_per_track
           * drive_info_._tracks_per_cylinder;

       return true;
}
There is an analog of DeviceIOControl in Linux. It is the ioctl function, which receives the device descriptor and can return the requested information about it. By calling DeviceIOControl with the IOCTL_DISK_GET_DRIVE_GEOMETRY parameter we receive the DISK_GEOMETRY structure as a result. It looks like the following:
typedef struct _DISK_GEOMETRY {
    LARGE_INTEGER Cylinders;
    MEDIA_TYPE MediaType;
    DWORD TracksPerCylinder;
    DWORD SectorsPerTrack;
    DWORD BytesPerSector;
} DISK_GEOMETRY, *PDISK_GEOMETRY;
To receive the similar structure with the disk geometry in Linux, call the ioctl function with the HDIO_GETGEO parameter and reference the following structure:
struct hd_geometry {
      unsigned char heads;
      unsigned char sectors;
      unsigned short cylinders;
      unsigned long start;
};
Having compared the structures, we notice the absence of one of the fields. The hd_geometry structure does not contain the BytesPerSector value. This can be corrected by calling the ioctl function with the BLKSSZGET parameter, which according to Linux sources returns the block device sector size. These are the specifics of porting this function. The final variant looks like the following:
#ifdef WIN32 bool get_drive_info(HANDLE _handle, drive_info &drive_info_) { DWORD size_ = 0; BOOL is_accessible_ = ::DeviceIoControl(_handle , IOCTL_STORAGE_CHECK_VERIFY , 0 , 0 , 0 , 0 , &size_ , 0); if (!is_accessible_) { return false; } DISK_GEOMETRY disk_geometry_; ::memset(&disk_geometry_, 0, sizeof disk_geometry_); BOOL is_geometry_ = ::DeviceIoControl(_handle , IOCTL_DISK_GET_DRIVE_GEOMETRY , 0 , 0 , &disk_geometry_ , sizeof disk_geometry_ , &size_ , 0); if (!is_geometry_) { return false; } drive_info_._cylinder = disk_geometry_.Cylinders.QuadPart; drive_info_._type = fixed; drive_info_._tracks_per_cylinder = disk_geometry_.TracksPerCylinder; drive_info_._sectors_per_track = disk_geometry_.SectorsPerTrack; drive_info_._bytes_per_sector = disk_geometry_.BytesPerSector; drive_info_._lba_size = drive_info_._cylinder * drive_info_._bytes_per_sector * drive_info_._sectors_per_track * drive_info_._tracks_per_cylinder; return true; } #elif __linux__ bool get_drive_info(HANDLE _handle, drive_info &drive_info_) { struct hd_geometry geometry; ::memset(&geometry, 0, sizeof geometry); int result = ioctl(_handle, HDIO_GETGEO, &geometry); if (result < 0) { std::cout<<"ioctl error"; return false; } drive_info_._cylinder = geometry.cylinders; drive_info_._type = fixed; drive_info_._tracks_per_cylinder = geometry.heads; drive_info_._sectors_per_track = geometry.sectors; long sector_size = 0; result = ioctl(_handle, BLKSSZGET, §or_size); if (result < 0) { std::cout<<"ioctl error"; return false; } drive_info_._bytes_per_sector = sector_size; drive_info_._lba_size = drive_info_._cylinder * drive_info_._bytes_per_sector * drive_info_._sectors_per_track * drive_info_._tracks_per_cylinder; return true; } #else #error: unknown OS #endif
There is one more function left. It is the store_drive_geometry function but it does not require the change of the code. It can be easily ported. Such effect can be achieved by using STL (see http://cplusplus.com), boost (see http://boost.org) or Qt libraries. All these libraries are cross-platform and allow writing the easily ported code. For example, in STL, the wrapper above the API level is already implemented for the work with files and the library is already cross-platform. So pay attention to using such libraries. It can make your work easier.
5. Windows->Linux. A few words
We examined only one of many components from the list that change during the porting. I would like to say a few words about the rest of them.
ASCII/Unicode. Here we can meet problems because the size of the wchar_t type in Windows is twice smaller than in Linux (2 bytes in Windows and 4 bytes in Linux). The reason is that Linux uses UTF-32 character encoding and Windows — UCS-2. The difference in character encodings can be solved by setting the GCC flag during the compilation:
-fshort-wchar
Attention should be paid to all char <-> wchar_t conversions and to the use of Unicode during the transfer between systems.
Threading API. It is better to implement it using boost or Qt libraries. It means that the work with threads has many pitfalls and it will be difficult to implement everything by yourself and it will also take you too long. That is why, as I have already said, it is better to use ready solutions.
6. The End
I tried to represent in brief some key moments that you can face during the porting of the application from Windows OS to Linux OS. I rather managed to show how to implement cross-platform wrappers for API by giving an example. You can come to one more conclusion from the information mentioned above. During the porting of applications it is worth paying attention to the ready implementations of cross-platform libraries (such as STL, boost and QT).
7. Additional materials
Look through all files attached to the article.
BackupMBR_win.zip – a project (Visual Studio 2008). An application that is to be ported to Linux OS.
BackupMBR_port_win.zip – a project (Visual Studio 2008). The cross-platform alternative of BackupMBR.
BackupMBR_linux.zip – a project (Qt Creator). The cross-platform alternative of BackupMBR that was built into the project for Linux OS.
This member has not yet provided a Biography. Assume it’s interesting and varied, and probably something to do with programming.
Показали мне недавно интересное приложение, под которое можно разрабатывать плагины. Приложение оказалось очень полезным для научной работы, но вот незадача — приложение разработано под Windows, у меня стоит Ubuntu. Windows для разработки под это приложение от лаборатории получить пока не удалось. Чтобы не тратить время, решил освоить кросс-компиляцию и отладку этого приложения.
Итого, имеется:
Ubuntu 12.10 x64
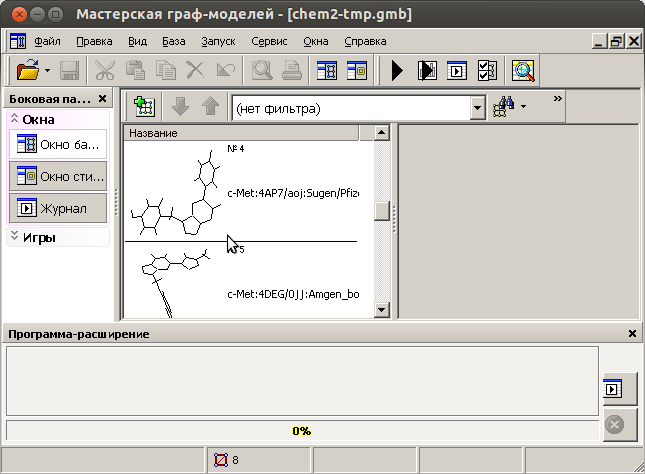
Не-юникодное приложение Мастерская Граф-Моделей (МГМ) (В командах консоли будет называться gmw.exe)
Нужно:
Разрабатывать и отлаживать плагины (dll-библиотеки), не устанавливая Windows.
И тут нам помогут Wine, Code::Blocks, портированное GDB, и boost.
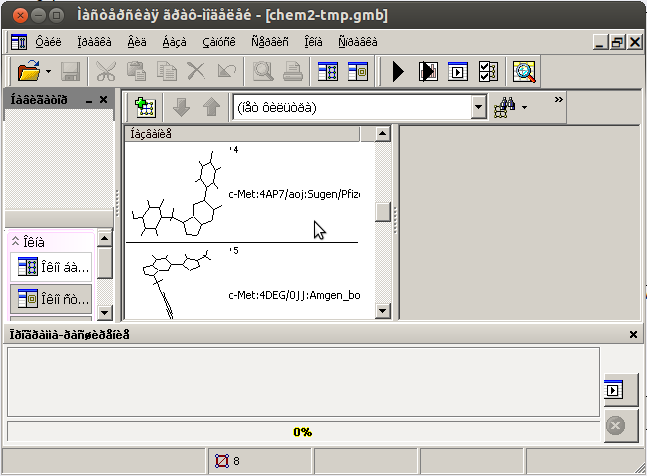
Wine, не юникодное приложение, английский интерфейс Ubuntu и русский язык
При попытке открыть не юникодное приложение под Wine
wine gmw.exe
получаются зюки следующего вида:
На эту проблему интернет очень быстро дает следующую подсказку:
LC_ALL=ru_RU.UTF-8 wine gmw.exe
В моём случае, данный подход не улучшил ситуацию ни на йоту.
Как выяснилось, русских локалей в системе не было добавлено (тыц).
sudo echo "ru_RU.UTF-8 UTF-8" >> /var/lib/locales/supported.d/ru
sudo locale-gen ru
Теперь запускаем с выше-указанной подсказкой
LC_ALL=ru_RU.UTF-8 wine gmw.exe
И, вуаля, запускается приложение с читаемым русским текстом:
Настройка IDE Code::Blocks для кросс-компиляции и отладки
Установка Code::Blocks
В дальнейшем для отладки нам потребуется менять код плагина отладки поэтому лучше сразу взять версию Code::Blocks из под svn.
Устанавливаем svn:
sudo apt-get install subversion
С помощью svn получаем код C::B, для этого переходим в папку, в которую хотим сохранить код C::B, где и набираем:
svn checkout svn://svn.berlios.de/codeblocks/trunk
Переходим в полученную папку ‘trunk’.
Компиляция C::B происходит с помощью g++, autotools, automake и некоторых других утилит, которые необходимо установить:
sudo apt-get install libtool autotools-dev automake autoconf g++ libhunspell-dev libgtk2.0-dev libgamin-dev libboost-dev
Кроме того Code::Blocks зависит от wxWidgets:
sudo apt-get install libwxgtk2.8-dev
Подстраиваем установщик под компьютер (можно запускать единожды):
sudo ./bootstrap
И дальше, устанавливаем сам codeblocks (ключ —prefix можно упустить для использования настроек по-умолчанию):
sudo ./configure --prefix={Путь по которому устанавливать} --with-contrib-plugins=all
sudo make
sudo make install
Более подробно можно посмотреть по ссылке.
Настройка компиляции и линковки
Выполняем пункты с 1 по 5 с форума Code::Blocks. После этого компиляция программ должна работать, если не используется линковка к платформо-зависмым библиотекам (линковка с boost::regexp будет рассмотрена позже).
(*) В новом Code::Blocks немного изменилось меню по сравнению с инструкцией. Настройки искать нужно в ‘Settings->Compiler…’. Для старого Code::Blocks (10.05) пункт 5 нужно выполнить полностью, для нового же (12.11) настройку касающуюся gdb в 5 пункте пока трогать не будем.
Если используется boost его лучше положить отдельно от /usr/include, т.к. по этому адресу лежит много linux-специфичных заголовочных файлов, которые мы не хотим включать в проект при компиляции под Windows.
UPD: При настройке линковки в поле «Other Linker Options» имеет смысл добавить опцию «-Wl,—subsystem,windows,—kill-at», которая помечает, что это реально Windows DLL, и, что самое главное, запрещает использовать декорирование символов (—kill-at) при экспорте функций с соглашением вызова __stdcall. Подрбнее здесь и здесь.
Начиная с пункта 7 по ссылке выше, описывается кросс-отладка, но, к сожалению, insight.exe, упоминающийся в инструкциях, найти не удается. Поэтому пойдем своим путем.
Кросс-отладка в Code::Blocks & MingW32 gdb для Windows
gdb, который является родным для линукса частично умеет отлаживать Windows приложения, правда, умеет он только останавливаться на исключениях и почти всегда игнорирует точки останова. Чтобы справиться с этими проблемами скачиваем gdb в пакете mingw32 под Windows. Для этого скачиваем и затем распаковываем и переходим в подпапку ‘bin’. Устанавливаем gdb под Windows:
wine mingw-get.exe install gdb
Теперь в этой же папке bin появился файл gdb.exe, он-то нам и нужен.
Создаем скрипт для имитации обычного gdb для этого в файл /usr/bin/i586-mingw32msvc-gdb
sudo gedit /usr/bin/i586-mingw32msvc-gdb
Заносим следующие строки:
#!/bin/sh
wine {Path to mingw}/bin/gdb.exe $@
Для старого C::B все уже настроенно, для нового же отладчик нужно настроить дополнительно. В пункте ‘Settings->Debugger’ кликаем по ‘GDB/CDB debugger’ затем по ‘Create Config’. В новом конфиге меняем команду запуска отладчика на ‘/usr/bin/i586-mingw32msvc-gdb’, остальные настройки по желанию. После этого идем в ‘Settings->Compiler…», в пункте ‘Selected Compiler’ выбираем тот компилятор, который настраивали до этого и затем на вкладке ‘Toolchain executables’ меняем ‘Debugger’ на наш свежесозданный конфиг. Теперь отладчик будет останавливаться на точках останова, хотя и остановить программу в произволльный момент не сможет (данная проблема пока еще не решена). Правда при попытке отладить,C::B выдает следующую ошибку:
The program has stopped on a breakpoint but the breakpoint format is not recognized:
0x1A0x1AZ:{ПутьДоФайлаСТочкойОстанова}/SamplePlugin.cpp:48:948:beg:0x68087599
Эта ошибка говорит о том, что плагин отладчика в C::B не понимает выдачу отладчика gdb.exe. Как выяснилось при ближайшем рассмотрении плагин отладчика имеет платформо-зависимый код, и вот тут-то и нужно вспомнить что у нас есть исходники C::B. Мы сейчас слегка подкоррекируем код этого плагина. Нужно будет поменять код только одного файла ‘{Path to svn code of Code::Blocks}/src/plugins/debuggergdb/gdb_driver.cpp’
Для этого нужно перейти в корень проекта C::B (откуда запускалась команды ./bootstrap), по умолчанию это папка ‘trunk’. И накактить патч:
patch --unified --strip=0 --forward --input=gdb_driver.cpp.patch
Ну и пересобираем Code::Blocks:
sudo ./configure --prefix={Путь по которому устанавливать} --with-contrib-plugins=all
sudo make
sudo make install
И почти все готово, остается только создать проект. Шаги 12-13 по ссылке. Если же вы хотите создать проект dll-библиотеки, то указывайти создание динамической библиотеки в мастере и переименовывайте разширение в dll.
Проверям, что в настройках проекта стоит выбранная нами цепь компилятор-линкер-отладчик. ‘{Правая клавиша на проект}-Build Options…’ пункт ‘Selected compiler’, и можно радоваться и отлаживаться. Напомню, что по какой-то причине отладчик не может быть прерван во время исполнения, т.е. все отладочные действия могут буть применены только во время останова программы. В частности нельзя поставить новую точку останова, если программа не стоит на какой-либо другой точке останова…
Линкование статической библиотеки boost’а
Библиотека boost в основном является набором заголовочных файлов, и потому никаких проблем с линковкой обычно не возникает. Но для некоторых частей boost’а необходимо линковаться к статической библиотеке, например, boost::regex. Пробуем собрать проект и получаем:
{...}/boost/regex/v4/cpp_regex_traits.hpp|1059|undefined reference to `boost::scoped_static_mutex_lock::scoped_static_mutex_lock(boost::static_mutex&, bool)'
Ошибка возникает из-за того, что мы пытаемся прилинковаться к linux билиотеке, для того чтобы построить windows-приложение.
Чтобы слинковаться нужно скомпилировать boost::regex с помощью MingW32 (про кросс-компиляцию). Скачиваем boost, распаковываем и переходим в папку с распаковынным boost’ом. Создаем файл user-config.jam в корне домашней директории:
gedit ~/user-config.jam
Со следующим содержанием:
using gcc : : i586-mingw32msvc-g++ ;
Дальше настраиваем сборку и собираем:
sudo ./bootstrap.sh --with-libraries=regex --without-icu
sudo ./b2
После выполнения последней команды у меня были ошибки «failed updating 1 target», что, правда, не мешает собираться программам.
В результате, у нас есть полностью подготовленная среда для написания, сборки и отладки Windows-приложений или Windows-библиотек из под Linux. Теперь можно приступать к работе…
Для операционных систем на базе Linux написано огромное количество программ. Несмотря на это, иногда возникает необходимость производить запуск Windows программ под Linux. В основном, это касается игр и некоторых специализированных программ, аналоги которых в Linux отсутствуют. Кроме того, некоторые пользователи, переходя с Windows на Linux, уже привыкли к определенному набору программного обеспечения и желают его использовать в дальнейшем. В этом случае предпочтительнее все же найти аналогичные программы для Linux и освоить их, поскольку в родной операционной системе программы работают обычно лучше и стабильнее. Поэтому рекомендуем запускать Windows программы под Linux только после того, как вы убедитесь, что аналогов нужных программ под Linux нет, или они вам не подходят.
Запустить программу, написанную для Windows в Linux, можно несколькими способами: с использованием Wine и продуктов на его основе, с помощью виртуальных машин и эмуляторов: VirtualBox, VMware, Parallels Workstation, QEMU. Теоретически еще есть возможность портирования программ с Windows на Linux при наличии исходного кода и навыков программирования, но этот вариант мы здесь рассматривать не будем.
Программы под Wine обычно работают быстрее, чем в виртуальных машинах. Это особенно актуально для современных 3D игр. Wine не требует установки операционной системы и позволяет быстро менять версию системы, библиотек и другие параметры. Запускать программы можно непосредственно в среде Linux. С другой стороны, для настройки Wine все равно придется потратить некоторое время и возможно неоднократно при запуске отдельных программ и игр. В виртуальных машинах запускаются оригинальные версии Windows и прочие операционные системы, которые нужно предварительно установить и настроить. Системе выделяются определенные ресурсы компьютера, эмулируется стандартное оборудование. Перед выполнением программы нужно предварительно запустить эмулятор и загрузить операционную систему, на что требуется дополнительное время. Следует отметить, что некоторые программы имеют защиту от запуска под виртуальными машинами.
Установка Wine
Мы рассмотрим установку Wine на Ubuntu и систем на ее базе (Linux Mint, Kubuntu и т.п.).Пользователи других операционных систем могут скачать Wine и прочитать инструкции по установке здесь: http://www.winehq.org/download/
Открываем терминал комбинацией клавиш Ctrl+Alt+T. Добавляем репозиторий с Wine командой:
sudo add-apt-repository ppa:ubuntu-wine/ppa
Вводим пароль администратора. В процессе установки нужно будет нажать клавишу «Enter».
Если вы будете производить апгрейд системы, например, обновлять Ubuntu 13.10 до Ubuntu 14.04, то придется повторить вышеуказанную операцию после апгрейда, поскольку в процессе обновления нестандартные репозитории удаляются.
После добавления репозитория обновляем информацию о пакетах:
sudo apt-get update
Теперь можно установить Wine командой:
sudo apt-get install wine1.7
Установится последняя, на момент написания статьи, тестовая версия программы. Для установки старой, но более стабильной версии нужно выполнить команду:
sudo apt-get install wine1.6
Возможно, когда вы будете читать эту статью, уже появятся более новые версии, тогда вместо wine1.6 или wine1.7, надо будет устанавливать wine1.8 или wine1.9. Номер текущей версии указан на официальном сайте Wine: http://www.winehq.org
Хотя можно и не указывать версию при установке, версия Wine в этом случае будет зависеть от версии операционной системы:
sudo apt-get install wine
Проверить, какая версия установилась, можно с помощью команды:
wine —version
Настройка Wine
После установки необходимо настроить программу командой:
winecfg
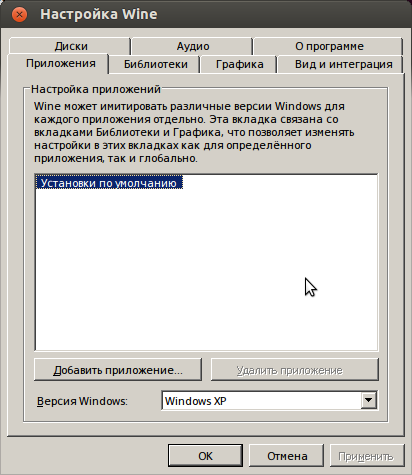
Рис. 1. Окно настроек winecfg
Это команда создаст в домашней директории пользователя каталог .wine, где будут находиться системные файлы с настройками — аналог реестра Windows и drive_c — каталог для приложений Windows. С помощью winecfg можно выбрать версии Windows по умолчанию и для отдельных приложений, версии библиотек, настроить графику и звук, интеграцию с рабочим столом, выбрать диски, с которых разрешен запуск Windows-программ.
А редактировать реестр можно с помощью привычной команды:
regedit
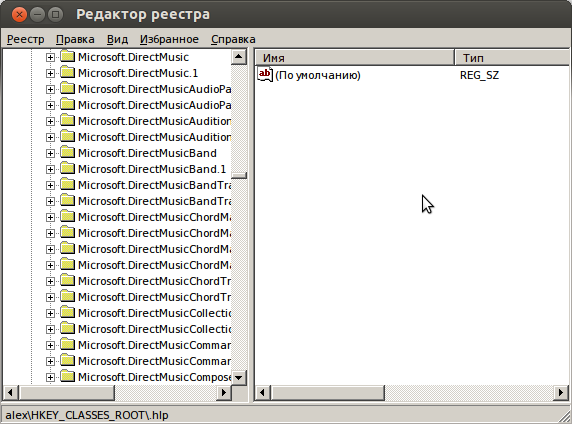
Рис. 2. Окно regedit под Wine
После такой первоначальной настройки, уже можно будет устанавливать и запускать программы с помощью Wine. Но многие программы работать не смогут, поскольку требуют определенных библиотек, шрифтов и т.д., которые придется установить отдельно. Для этого воспользуемся программой winetricks, которая входит в стандартный пакет программ Wine. Winetricks кроме шрифтов и библиотек позволяет также устанавливать популярные программы и игры и производить настройки Wine.
Попробуем установить Internet Explorer 7 с помощью winetricks, для этого наберем в терминале:
winetricks ie7
Подождем некоторое время, пока скачаются необходимые файлы и запустится программа-установщик, нажмем кнопку «Next» и подождем окончания установки. Для последующего запуска Internet Explorer нужно будет выполнить команду:
wine ‘C:Program FilesInternet Exploreriexplore’
Но лучше запускать программы из родного каталога. Переходим в каталог (если в имени файла есть пробел, то перед ним нужно ставить обратный слеш «»):
cd ~/.wine/drive_c/Program Files/Internet Explorer/
И запускаем программу:
wine iexplore.exe
Чтобы не набирать эти команды каждый раз, можно создать простейший скрипт. Переходим в домашний каталог:
cd
Создаем файл ie.sh с помощью редактора nano:
nano ie.sh
Вставляем в файл строчки:
cd ~/.wine/drive_c/Program Files/Internet Explorer/ wine iexplore.exe
Сохраняем файл — Ctrl+O и выходим из редактора — Ctrl+X. Делаем файл исполняемым:
chmod +x ie.sh
Теперь для запуска ie достаточно набрать:
~/ie.sh
А можно скопировать файл на рабочий стол и запускать его с помощью мышки:
cp ie.sh ~/Desktop/
Установка программы с CD или DVD может быть выполнена с помощью такой команды:
wine start ‘D:setup.exe’
Аналогичным образом можно установить другие программы и библиотеки. Также можно воспользоваться графическим интерфейсом программы, набрав winetricks без параметров. Потом выбрать «Select the default wineprefix».
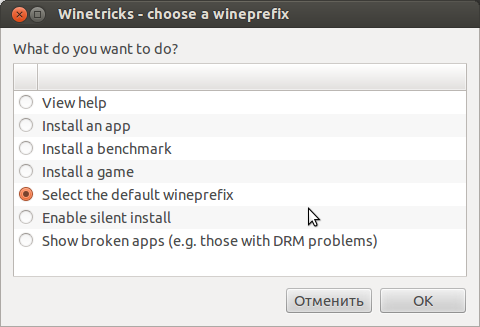
Рис. 3. Основное окно winetricks
Далее выбираем действие, которое будем производить, например, установку библиотеки (Install a Windows DLL or component):
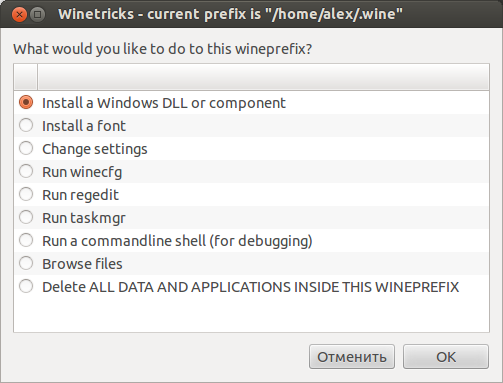
Рис. 4. Выбор действия winetricks
И отмечаем галочками библиотеки, которые необходимо установить. Можно сделать то же самое и посредством командой строки, например:
winetricks d3dx9 dotnet20
Таким образом, мы установим сразу два компонента: d3dx9 и dotnet20. Чтобы в программах корректно отображались популярные шрифты, установим их:
winetricks allfonts
С библиотеками немного сложнее. Разные программы могут потребовать отдельных настроек, определенных версий Windows и библиотек. Для этого можно создать несколько конфигураций Wine, указывая каталог с настройками с помощью переменной окружения WINEPREFIX. По умолчанию WINEPREFIX=~/.wine Для создания новых настроек в каталоге ~/.wine2 наберем:
WINEPREFIX=~/.wine2 winecfg
Таким образом, можно создать любое количество конфигураций. Для настройки и установки шрифтов и библиотек наберем:
WINEPREFIX=~/.wine2 winetricks
Для запуска установленной программы:
WINEPREFIX=~/.wine2 ‘C:/путь/к/программе/программа.exe’
Завершить выполнение программы можно с помощью команды:
killall -9 программа.exe
А чтобы завершить работу всех программ, запущенных под Wine, нужно набрать:
wineserver -k
Для удаления настроек и всех программ в префиксе ~/.wine2 нужно просто удалить каталог:
rm -r ~/.wine2
Точно также можно удалить и основной каталог Wine:
rm -r ~/.wine
Будьте внимательны, при этом удалятся также все приложения Windows, которые установлены в этот каталог!
winefile — запуск файлового менеджера, с помощью которого можно запускать Windows-приложения, копировать и удалять файлы и т.д. Узнать, какие приложения и игры запускаются под Wine и как производить настройки под конкретные приложения можно на сайте: http://appdb.winehq.org/ Сайт англоязычный. Для поиска приложений нужно выбрать в меню «Browse Apps» и ввести в поле «Name» название программы. Версии программ, которые запускаются и работают без ошибок или с несущественными проблемами, имеют рейтинг «Platinum» или «Gold». Если программа вообще не работает, то ей присваивается рейтинг «Garbage».
PlayOnLinux
PlayOnLinux — это программа, которая значительно упрощает установку и настройку Windows-приложений для запуска под Wine. Она автоматически скачивает из интернета и устанавливает все необходимые компоненты для запуска конкретных программ, а также и сами программы, если они распространяются бесплатно через интернет. В противном случае, понадобится установочный диск с программой. Устанавливаем программу любым способом, например в Ubuntu командой:
sudo apt-get install playonlinux
и запускаем ее:
playonlinux
Пользоваться программой предельно просто. Нажимаем кнопку «Установка».

Рис. 5. Основное окно PlayOnLinux
Выбираем программу, которую необходимо установить. Если не нашли нужную программу в окне выбора, можно попробовать нажать «Установить программу, отсутствующий в списке» внизу окна.
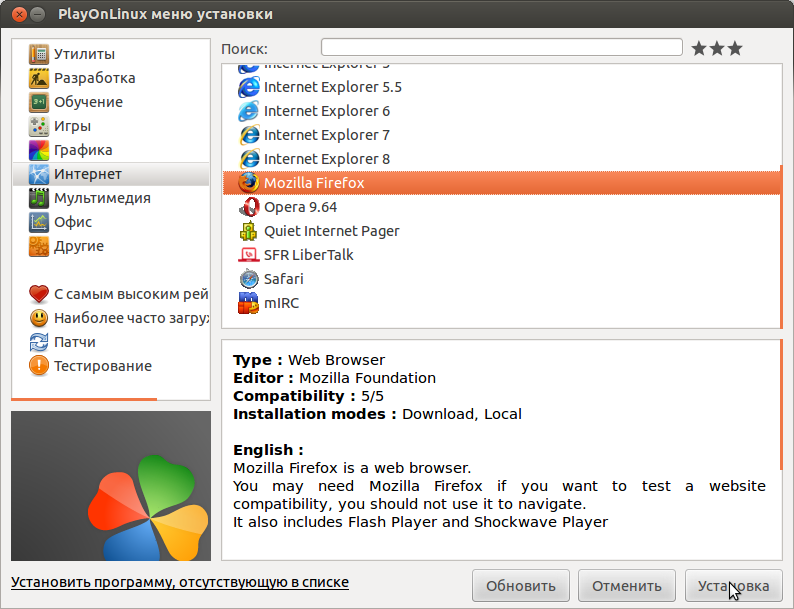
Рис. 6. Окно выбора программы PlayOnLinux
Останется несколько раз нажать кнопку «Далее», а в некоторых случаях выбрать конфигурацию программы. После установки ярлыки программ появятся в основном окне PlayOnLinux, откуда их можно будет запустить двойным кликом, либо нажатием на кнопку «Запуск». Также можно будет создать ярлыки программ Windows на рабочем столе с помощью кнопки «Ярлык».
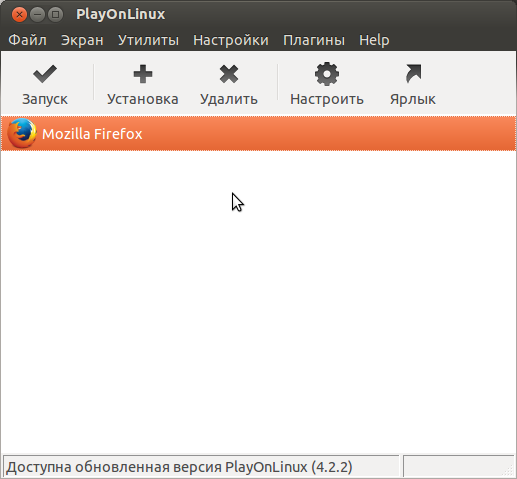
Рис. 7. Основное окно PlayOnLinux с установленной Windows-программой FireFox
Прочие программы на базе Wine
Существуют также платные программные продукты на базе Wine. CrossOver позволяет запускать под Linux различные версии Microsoft Office, Adobe Photoshop и множество других программ и игр. WINE@Etersoft нацелен в основном на поддержку популярных программ для бизнеса: 1С:Предприятие, КонсультантПлюс, ГАРАНТ и прочих. Ознакомиться с этими программами можно на официальных сайтах: http://www.codeweavers.com/products/ http://etersoft.ru/products/wine
VirtualBox
VirtualBox — одна из самых популярных программ для виртуализации, которая позволяет запускать различные операционные системы одновременно на одном компьютере. Установку VirtualBox в Ubuntu можно выполнить стандартным способом, набрав в терминале:
sudo apt-get update
sudo apt-get install dkms
sudo apt-get install virtualbox
dkms осуществляет поддержку динамических модулей ядра (vboxdrv, vboxnetflt, vboxnetadp), которые необходимы для работы VirtualBox. В других версиях Linux для установки используются соответствующие команды (yum, urpmi и т. д.), также можно использовать установочный файл или собрать программу из исходного кода. Подробнее смотрите в статье «Как устанавливать программы в Linux».
Скачать VirtualBox для различных операционных систем можно здесь: https://www.virtualbox.org/wiki/Downloads. После окончания установки добавим пользователя в группу vboxusers, вместо username необходимо указать корректное имя пользователя, под которым будет работать VirtualBox:
sudo usermod -a -G vboxusers username
Теперь можно запустить программу через меню, либо набрав в терминале:
virtualbox
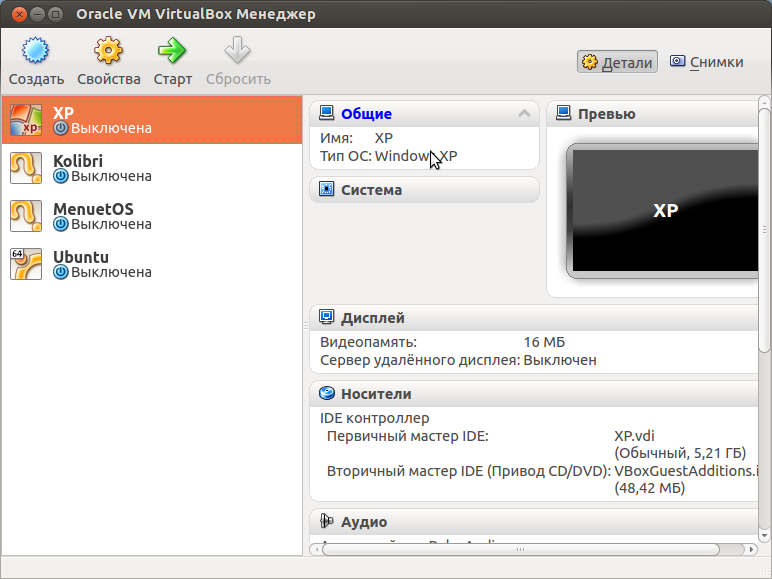
Рис. 8. Менеджер VirtualBox с уже установленными операционными системами
Теперь поставим операционную систему, для этого нужно иметь установочный диск или его образ. Нажмем кнопку «Создать», запустится мастер создания новой виртуальной машины:
Рис. 9. Мастер создания новой виртуальной машины
Нажмем кнопку «Вперед», введем имя виртуальной машины, например «Windows XP», а ниже выберем соответствующие тип и версию операционной системы:
Рис. 10. Выбор версии операционной системы
Мы выбрали Windows XP, поскольку она менее требовательна к ресурсам компьютера, занимает меньше места, быстрее загружается. Но поддержка этой системы уже официально прекращена. Естественно, можно установить и другие версии Windows, которые поддерживает VirtualBox: Windows Server 2003, Windows Vista, Windows Server 2008, Windows 7, Windows 8, Windows Server 2012. Далее выбираем объем ОЗУ, которое будет выделено виртуальной машине:
Рис. 11. Выбор объема памяти
Выбор зависит от версии ОС, объема физической памяти, планируемых задач, количества запускаемых одновременно гостевых систем. В зависимости от версии операционной системы, VirtualBox будет предлагать различные параметры по умолчанию, но они, как правило, минимальные, желательно их увеличить. В любом случае, для нормальной работы современных операционных систем необходимо не менее 1-2 Гигабайт ОЗУ (для Windows XP достаточно 512 Мбайт) и еще необходимо оставить память основной хост-системе. Далее создаем новый виртуальный жесткий диск или выбираем уже созданные ранее.
Рис. 12. Виртуальный жесткий диск
На следующем экране выбираем тип диска, по умолчанию стандартный VDI.
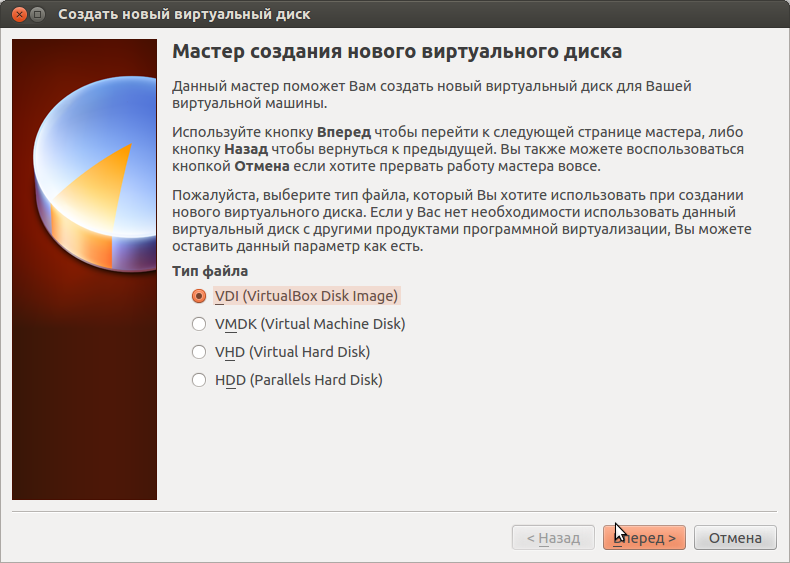
Рис. 13. Выбор типа диска
Далее указываем, что наш диск будет динамический, это позволяет сэкономить дисковое пространство физического носителя.
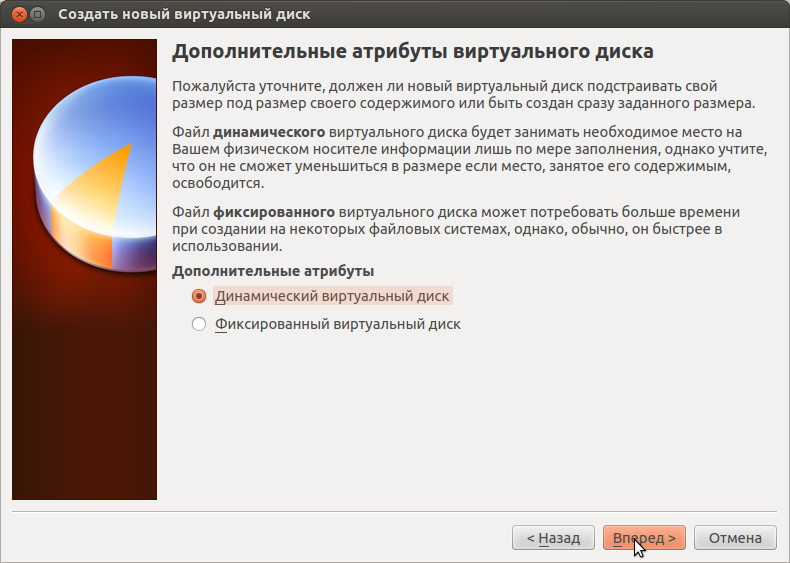
Рис. 14. Выбор атрибутов виртуального диска
Указываем размер диска, расположение оставляем по умолчанию (диск будет располагаться в папке ~/VirtualBox VMs/Имя системы.
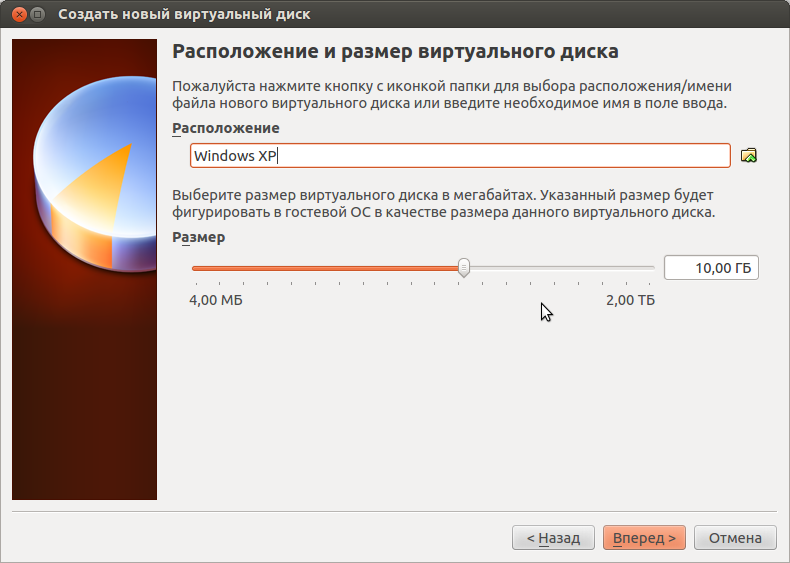
Рис. 15. Выбор расположения и размера виртуального диска
Осталось нажать кнопку «Создать».
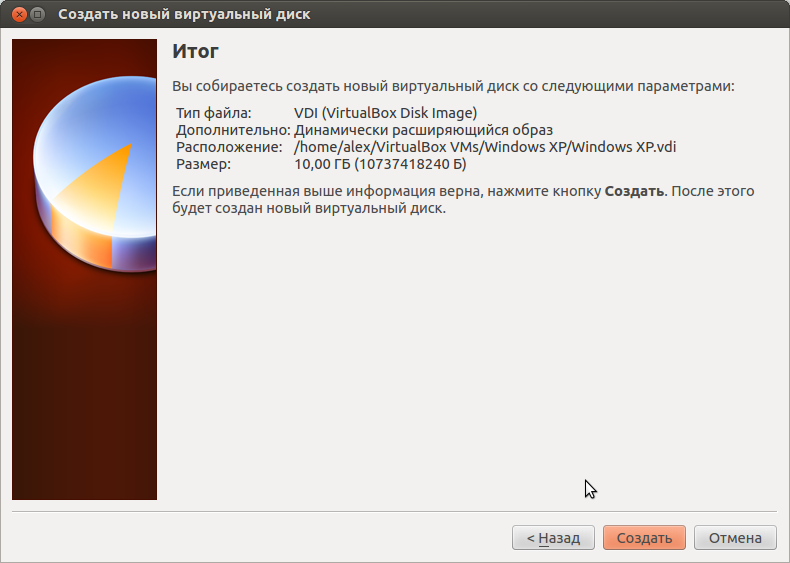
Рис. 16. Последний этап создания новой виртуальной машины
Виртуальная машины создана. Выбираем ее в менеджере VirtualBox и нажимаем кнопку «Свойства».
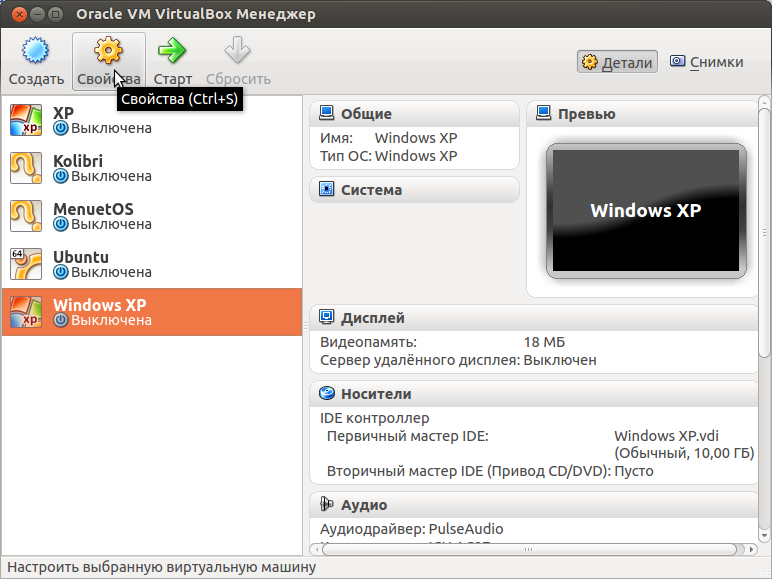
Рис. 17. Выбор системы
Тут можно подробно настроить созданную виртуальною машину. В первую очередь, необходимо указать диск, с которого будем ставить систему. Для этого нажимаем слева «Носители», выбираем пустой диск, справа кликаем на иконку диска и указываем образ дистрибутива, либо ставим галочку «Живой CD/DVD» и вставляем физический диск.
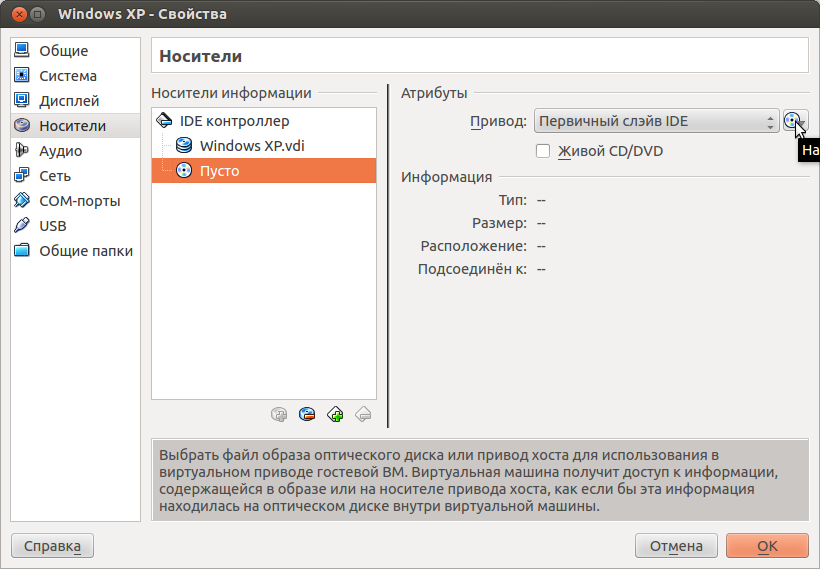
Рис. 18. Выбор установочного диска
Далее переходим на вкладку «Система → Материнская плата», проверяем порядок загрузки, CD/DVD-ROM должен быть выше жесткого диска. Если это не так, изменяем порядок загрузки стрелками.
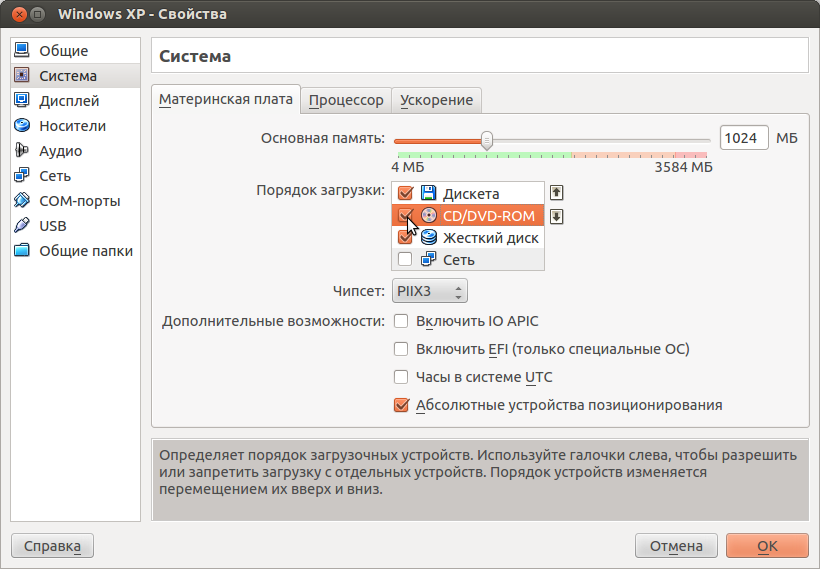
Рис. 19. Настройки системы
Если важна скорость работы с графикой, переходим на вкладку «Дисплей», увеличиваем объем видеопамяти и включаем ускорение.
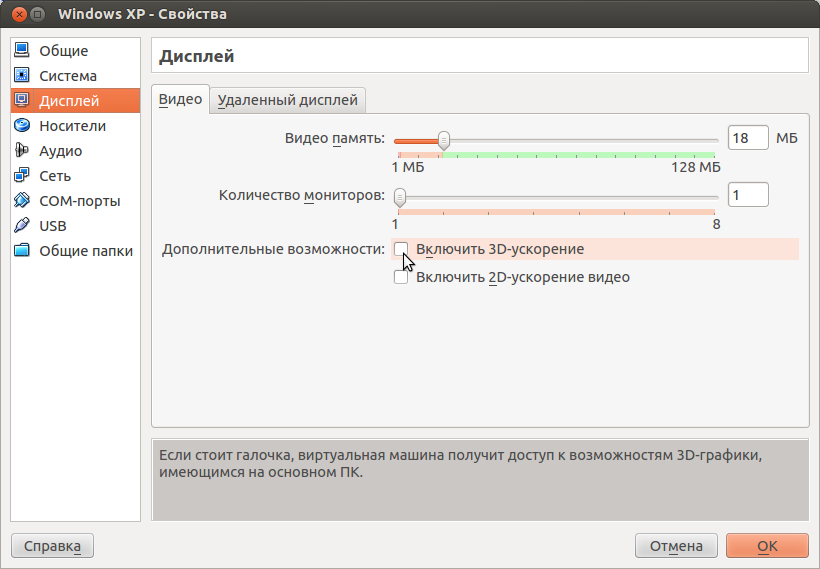
Рис. 20. Настройка параметров дисплея
Переходим обратно в VirtualBox Менеджер и нажимаем кнопку «Старт». Далее производим установку системы, как обычно. После установки гостевой системы, загружаем ее и в меню «Устройства» выбираем «Установить дополнения гостевой ОС». Вместо этого можно нажать комбинацию клавиш правый Ctrl+D. После установки дополнений система будет готова к работе.
Рис. 21. Установленная и готовая к работе система Windows XP в VirtualBox
Загрузка гостевой операционной системы после запуска VirtualBox осуществляется кнопкой «Старт». Переключение указателя мышки между основной и гостевой системой осуществляется автоматически, но можно переключить принудительно с помощью кнопки правый Ctrl (Host key — можно изменить в настройках) и правый Ctrl+I. Эта же кнопка в сочетании с различными клавишами служит для выполнения ряда функций:
Host key+F — переключение в полноэкранный режим и обратно.
Host key+Del — заменяет комбинацию Ctrl+Alt+Del.
Host key+I — отключить интеграцию мышки.
Host key+С — переключение в режим масштабирования, в котором можно задать произвольный размер окна, возврат в стандартный режим происходит с помощью той же комбинации клавиш.
Host key+D — установка дополнений гостевой операционной системы.
Host key+T — сделать снимок, сохранить состояние ОС. Восстановить систему из сохраненного состояния можно будет в основном окне менеджера VirtualBox, нажав на кнопку «Снимки». Очень удобная функция для борьбы с вирусами, тестирования и отладки программ, которые могут повредить систему. Всегда можно сделать откат системы в стабильное состояние.
Host key+S — открыть окно настроек.
Host key+R — перезагрузить систему.
Host key+Q — закрыть виртуальную машину (выйти из системы).
Wine — набор библиотек и утилит для запуска Windows программ и игр внутри Linux.
История Wine
Первая версия Wine появилась в 1993 году и изначально была разработана для запуска 16-битных приложений Windows 3.1 внутри Linux.
Основателем проекта является Боб Амштадт (Bob Amstadt). С 1994 г проект перешел под управление программиста Александра Джуллиарда (Alexandre Julliard).
Название
Название Wine (W.I.N.E) является рекурсивным акронимом фразы «Wine Is Not an Emulator» — «Вайн это не эмулятор.»
Слово wine в переводе с английского означает вино. По этой причине в терминологии программы используется понятие бутылок (см. ниже). Бутылка (или префикс) — это директория (среда) внутри которой выполняется Windows программа.
Wine это не эмулятор
Wine работает не как эмулятор и не как виртуальная машина, он не эмулирует систему Windows, не создает имитацию Windows и не пытается реализовать ее логику. Вместо этого он на лету выполняет преобразование API-вызовов Windows в POSIX-совместимые вызовы.
То есть это что-то вроде прослойки между приложениями для Windows и системой Linux, которая позволяет Windows программам выполняться так, как если бы они были изначально написаны для Linux.
Wine не создает эмуляцию Windows, вместо этого приложения Windows запускаются прямо внутри текущей операционной системы.
Wine работает не только под Linux, но и под другие POSIX-совместимые операционные системы — macOS и *BSD.
Wine также работает под Windows. В Windows его обычно используют для того, чтобы запускать старые программы в современных версиях Windows.
Среда Wine
Для текущего пользователя Wine создает в его домашней директории каталог .wine, в котором создается структура директорий аналогичная Windows.
Внутри каталога drive_c содержатся директории Program Files, ProgramData, windows, users. Там же хранится реестр.
Внутри директории windows размещаются DLL файлы (библиотеки). Это не библиотеки из Windows. Они были написаны с нуля на основе документации к Windows API и фактически реализуют функции оригинальных библиотек, но для Linux.
При работе Windows приложениям могут потребоваться дополнительные DLL библиотеки, которые не предоставлены Wine. В таком случае могут использоваться оригинальные Windows-версии таких библиотек.
Директория .wine называется «префиксом» или «бутылкой». Для некоторых программ может потребоваться создание отдельного префикса, то есть для ее работы нужны будут какие-то специфические настройки и она будет работать в среде другой директории отличной от ~/.wine. Можно создавать сколько угодно префиксов (бутылок).
Как запускать программы Windows через Wine
Чтобы запустить программу, написанную для Windows, в простейшем случае достаточно выполнить команду:
wine program.exeЧерез Wine также можно запускать установщики Windows приложений и устанавливать их прямо в Linux.
wine setup.exeСписок программ и игр, работающих через Wine
На официальном сайте Wine ведется база данных программ и игр, которые можно запустить через Wine: Wine Application Database (AppDB) — https://appdb.winehq.org.
Для каждого приложения можно получить информацию об особенностях установки, запуска и настройки данного приложения через Wine, о проблемах и багах, с которыми можно столкнуться.
База данных постоянно пополняется. В ней насчитывается более 26000 приложений. Введутся списки самых популярных приложений, они делятся на Платиновые, Золотые и Серебряные. Вот некоторые из самых популярных программ и игр, работающих через Wine (конкретную версию уточняйте в базе данных AppDB):
- Adobe Animate
- Adobe Photoshop
- Microsoft Office
- Total Commander
- Lingvo
- 1C:Предприятие
- Гарант
- КонсультантПлюс
- Final Fantasy XI Online
- StarCraft
- Warcraft III
- World of Warcraft
- Counter-Strike: Source
- EVE Online
- Half-Life 2
- Magic: The Gathering Online
- The Sims 3
- И многие многие другие…
Использование отдельных префиксов (бутылок)
Как было сказано выше, некоторые программы должны запускаться внутри своей среды, то есть должны быть изолированы от других приложений. Для этого им нужен отдельный префикс (отдельная директория среды, в которой они будут работать).
Префикс задается переменной WINEPREFIX.
Сначала создадим новый префикс. Выполняем команду:
WINEPREFIX="/home/pingvinus/.wine2/" winecfgТеперь выполняем саму программу и указываем для нее новый префикс:
WINEPREFIX="/home/pingvinus/.wine2/" wine /путь/до/файла/setup.exeУстановка недостающих библиотек (утилита Winetricks)
Очень часто для работы программ требуются дополнительные компоненты (библиотеки, шрифты), которых нет в Wine. Их можно установить самостоятельно, но это может стать очень трудоемким процессом, так как придётся искать и устанавливать каждый компонент вручную.
Для автоматического поиска и установки библиотек была создана специальная вспомогательная утилита Winetricks.
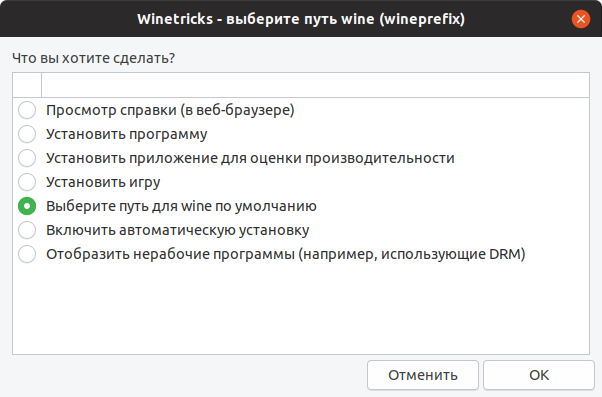
Winetricks — это графическая утилита, которая умеет автоматически скачивать и устанавливать необходимые компоненты. Также, Winetricks поддерживает автоматическую загрузку и установку некоторых игр и программ (для некоторых требуется наличие оригинального диска).
Winetricks поддерживает установку более сотни различных компонентов. Среди них — .Net Framework, Mono, DirectX, DivX и XviD кодеки, шрифты Windows и многие другие.
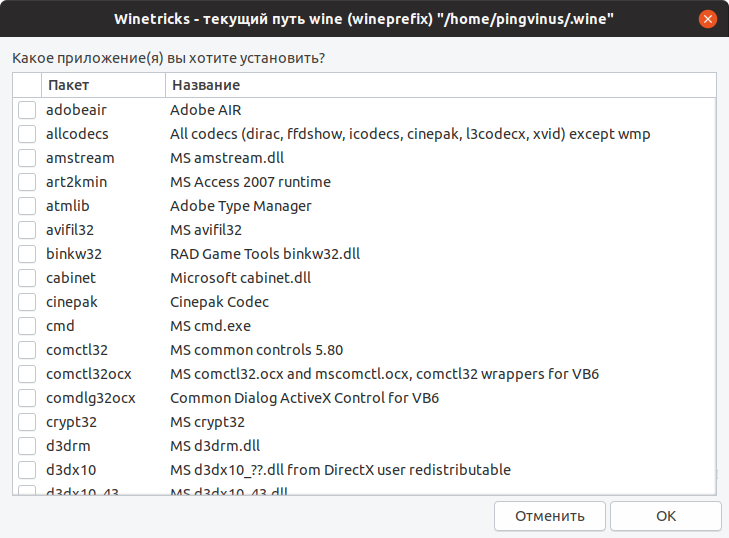
Нужно понимать, что Winetricks не является таблеткой от всех проблем и всегда могут потребоваться компоненты, которые Winetricks не поддерживает.
При первом запуске Winetricks предложит установить некоторые из часто используемых компонентов.
Заключение
На нашем сайте вы также можете ознакомиться со следующими материалами:
- Аналоги программ Windows в Linux
- Игровые клиенты и сервисы (эмуляторы) для Linux
- Виртуальные машины и эмуляторы для Linux
Установка
Установка Wine в Ubuntu Linux и Linux Mint через PPA репозиторий
Wine есть в штатных репозиториях Ubuntu, но там может содержаться не самая свежая версия, поэтому рекомендуется устанавливать программу из PPA-репозитория, предлагаемого разработчиками.
Во время установки Wine дополнительно устанавливается довольно много других зависимостей (это может быть более 100 дополнительных компонентов).
Установка Wine из штатных репозиториев Ubuntu (не самая свежая версия)
Для установки Wine из штатных репозиториев Ubuntu, выполните команду:
sudo apt install wine-stableДля установки Winetricks выполните команду:
sudo apt install winetricksУстановка Wine из PPA репозитория (рекомендуется)
Процесс установки Wine в Ubuntu Linux описан в официальном руководстве. Рассмотрим, как установить Wine в Ubuntu Linux, используя PPA репозиторий.
Если у вас 64-х битная версия системы, то нужно разрешить использование 32-х битной архитектуры. Выполняем команду:
sudo dpkg --add-architecture i386Устанавливаем ключ для репозитория — выполняем команды:
wget -nc https://dl.winehq.org/wine-builds/winehq.key
sudo apt-key add winehq.key
Добавляем сам репозиторий. Выберите команду для вашего дистрибутива:
# Ubuntu 21.04
sudo add-apt-repository 'deb https://dl.winehq.org/wine-builds/ubuntu/ hirsute main'

# Ubuntu 20.10
sudo add-apt-repository 'deb https://dl.winehq.org/wine-builds/ubuntu/ groovy main'

# Ubuntu 20.04 Linux Mint 20.x
sudo add-apt-repository 'deb https://dl.winehq.org/wine-builds/ubuntu/ focal main'

# Ubuntu 18.10:
sudo apt-add-repository 'deb https://dl.winehq.org/wine-builds/ubuntu/ cosmic main'

# Ubuntu 18.04 и Linux Mint 19.x:
sudo apt-add-repository 'deb https://dl.winehq.org/wine-builds/ubuntu/ bionic main'
Далее обновляем информацию о пакетах:
sudo apt updateУстанавливаем Wine. Для установки стабильной версии выполняем команду:
sudo apt install --install-recommends winehq-stableДля установки самой свежей, но возможно не очень стабильной версии используется команда:
sudo apt install --install-recommends winehq-develТакже можно установить Winetricks:
sudo apt install winetricksУстановка в Ubuntu (LinuxMint)
sudo apt install wine-stableУстановка в ArchLinux (Manjaro)
sudo pacman -S wineУстановка в Fedora
sudo dnf install wineУстановка в openSuse
sudo zypper install wineУстановка в Gentoo
sudo emerge -a virtual/wineРазработка
| Исходный код: |
|
| Языки программирования: |
|
Программа кроссплатформенная
Работает в:
- BSD
- Linux
- MacOS
- Windows