Рассмотрим установку Docker Desktop for Windows — это Community-версия Docker для систем Microsoft Windows.
Системные требования
- Windows 10 64-bit: Pro, Enterprise, Education (Build 16299 или выше).
Для успешного запуска Client Hyper-V в Windows 10 требуются следующие предварительные требования к оборудованию:
- 64 bit процессор c поддержкой Second Level Address Translation (SLAT).
- 4GB системной памяти.
- Поддержка аппаратной виртуализации на уровне BIOS должна быть включена в настройках BIOS.
Подготовка
Включаем функции Hyper-V Containers Window. Для этого переходим в панель управления — установка и удаление программ — включение или отключение компонентов Windows. Активируем пункт Hyper-V, который включает Hyper-V Managment Tools, Hyper-V Platform.
Также это можно выполнить через powershell или dism (все команды необходимо выполнять с правами администратора).
Powershell:
Enable-WindowsOptionalFeature -Online -FeatureName Microsoft-Hyper-V -All
DISM:
DISM /Online /Enable-Feature /All /FeatureName:Microsoft-Hyper-V
Установка
Скачиваем установщик Docker (Docker Desktop Installer) с Docker Hub.
Установка Docker Desktop включает Docker Engine, Docker CLI client, Docker Compose, Notary, Kubernetes и Credential Helper. Контейнеры и образы, созданные с помощью Docker Desktop, используются всеми учетными записями пользователей на компьютерах, на которых он установлен. Это связано с тем, что все учетные записи Windows используют одну и ту же виртуальную машину для создания и запуска контейнеров. При использовании Docker Desktop WSL 2 невозможно обмениваться контейнерами и образами между учетными записями пользователей.
Запускаем установщик Docker Desktop Installer.exe и ожидаем пока он скачает все необходимые компоненты.
После установки система потребует перезагрузки. Перезагружаемся и входим в систему.
После входа может возникнут запрос на установку дополнительного компонента WSL2. Переходим по ссылке и скачиваем необходимый пакет с официального сайта Microsoft.
После скачивания выполняем установку WSL2, после которой снова потребуется перезагрузка.
Настройка и запуск приложения
Входим в систему и ждем запуска всех служб Docker. Когда все службы будут запущены, мы увидим в трее классический значок Docker — это значит что служба установлена и запущена. Далее можно запустить приложение Docker desktop. Далее можно изменить настройки Docker при необходимости:

Рисунок 1 — Изменение параметров Docker desktop
Далее управление Docker выполняется через Powershell. Проверяем версию и выполняем тестовый запуск контейнера:

Рисунок 2 — Проверка версии Docker
После выполнения всех этих действий, Docker готов к использованию.
Нужна помощь? Настройки docker/docker swarm/docker compose мы осуществляем в рамках услуги DevOps-аутсорсинг.
Docker is a platform for creating and deploying applications in self-sufficient containers. The installation of Docker is pretty easy in Linux, but this is usually not the case with Windows. In this post, I will show you how to install Docker in Windows 10 or Windows 11 in multiple ways. You’ll learn there is indeed a way that makes the Docker Desktop installation in Windows as simple as in Linux.
Contents
- Prerequisites
- Docker with WSL2 backend
- Docker with Hyper-V backend
- Install Docker using the GUI
- Install Docker using winget
- Install Docker using PowerShell
- Author
- Recent Posts

Surender Kumar has more than twelve years of experience in server and network administration. His fields of interest are Windows Servers, Active Directory, PowerShell, web servers, networking, Linux, virtualization, and penetration testing. He loves writing for his blog.
Latest posts by Surender Kumar (see all)
- Extending LVM space in Ubuntu — Thu, Feb 2 2023
- Backup in Proxmox VE — Thu, Jan 26 2023
- Snapshots in Proxmox VE — Wed, Jan 25 2023
Prerequisites
You might already be aware that Docker relies on virtualization technology. On Windows, Docker can use either the Windows Subsystem for Linux (WSL) 2 or Hyper-V as a backend.
Docker with WSL2 backend
The current version of Docker Desktop only works on the 64-bit edition of Windows, whether you’re running Windows 10 or Windows 11. To run Docker with the WSL2 backend, your system must meet the following prerequisites:
- Windows 10: Home/Pro 21H1 (build 19043) or higher, or Enterprise/Education 20H2 (build 19042) or higher
- Windows 11: Home/Pro version 21H2 or higher, or Enterprise/Education version 21H2 or higher
- WSL2 feature enabled
- Linux kernel update package for WSL2
- For WSL2, the following are the hardware requirements:
- 64-bit CPU with second-level address translation (SLAT)
- Hardware virtualization support, which must be enabled in BIOS/UEFI
- 4 GB RAM
Docker with Hyper-V backend
To be able to run Docker with a Hyper-V backend and Windows containers, your system must meet the following prerequisites:
- Windows 10: Pro 21H1 (build 19043) or higher, or Enterprise/Education 20H2 (build 19042) or higher
- Windows 11: Pro/Enterprise/Education version 21H2 or higher
- Optional Windows features for Hyper-V and Containers must be enabled

Enable Hyper V and Containers windows features for Docker

For Hyper-V, following are the hardware requirements:
- 64-bit CPU with second-level address translation (SLAT)
- Hardware virtualization support, which must be enabled in BIOS/UEFI
- 4 GB RAM
In addition to the aforementioned requirements, if you want to run Docker in a Hyper-V guest VM, you need to enable nested virtualization by running this PowerShell command on the Hyper-V host:
Set-VMProcessor -VMName <VMName> -ExposeVirtualizationExtensions $True

Enable nested virtualization for a VM on Hyper V host using PowerShell
Make sure your VM is powered off before running this command. Without nested virtualization support, Docker will not work in a VM, and you will receive the error message shown below.

Docker desktop cannot start An unexpected error occurred
Install Docker using the GUI
To install Docker Desktop in Windows using the GUI, follow these steps:
Download Docker Desktop. You will see a configuration screen, as shown in the screenshot:

Docker desktop configuration Use WSL 2 instead of Hyper V recommended
To use Docker with the WSL 2 backend, check the box that says Use WSL 2 instead of Hyper-V (recommended). If you want to use Hyper-V instead, uncheck this option and click OK.
When the installation is complete, click the Close and Restart button to restart your computer.

Close Docker installer and restart the computer to complete installation
After restarting, you will be able to run Docker Desktop using either a shortcut or a command prompt. If you did not install WSL 2 before installing Docker, you will receive the WSL 2 installation is incomplete error when you try to start Docker.

Docker desktop error WSL 2 installation is incomplete
To fix this error, run the wsl —update command in an elevated PowerShell console, and restart your computer.

Installing WSL2 kernel updates to fix the WSL 2 installation is incomplete error
Install Docker using winget
Winget is a command-line package manager for modern versions of Windows, which works just like apt or DNF in Linux. If you have a little experience with package installation in Linux, you probably know that you usually just have to type a command and the package is ready for use. Well, winget does the exact same thing in Windows. All you need is Windows 10 1809 (build 17763) or Windows 11. To install Docker in Windows using winget, follow these steps:
Launch an elevated command prompt or PowerShell console, and type the following command:
winget install --exact --id Docker.DockerDesktop --accept-source-agreements --accept-package-agreements

Installing docker desktop in windows using winget
The —exact (or -e in short) parameter tells winget to find the package using an exact match. The installation can take a while, but it is pretty much automatic, so there is nothing you need to do but wait.
When the command is finished, open a new command prompt (or PowerShell console) and run the docker —version command.
If you try to run docker —version in the same command prompt, you will likely see The term ‘docker’ is not recognized as the name of a cmdlet, function, script file, or operable program error, as shown in the screenshot.

The term docker is not recognized as the name of a cmdlet function script file or operable program
This error occurs because your current command session (cmd or PowerShell) is still using the old environment variables. To be able to recognize the newly added Docker variable, you must reload the environment variables. Launching a new command session is the easiest way to load new variables.
Install Docker using PowerShell
To install Docker Desktop using PowerShell, follow these steps:
Download Docker Desktop.
Once the installer package is downloaded, open an elevated PowerShell console or Windows Terminal, and type the following command to start Docker installation:
Start-Process "D:Docker Desktop Installer.exe" -Wait -NoNewWindow "install --quiet --accept-license"

Installing Docker silently using PowerShell
Make sure you adjust the installer path. The -Wait parameter causes the Start-Process cmdlet to wait for the new process to finish, and the -NoNewWindow parameter prevents the new process from opening in a new window. The —quiet switch is offered by Docker’s install command and suppresses the installation information. To see the information, skip this switch. Since we are using PowerShell, notice how —quiet and other flags are enclosed in quotes along with the install command—this is very important to avoid errors. By default, Docker will use the WSL 2 backend, but you could include the —backend=hyper-v flag to use the Hyper-V backend instead.
Once the above command is finished, you will see a shortcut for Docker Desktop on your desktop. Double-click the shortcut to launch Docker.
All of these installation methods are self-sufficient, so there is nothing additional you need to do. But you may still get an error message that says Docker Desktop – Access denied. You are not allowed to use Docker. You must be in the «docker-users» group.
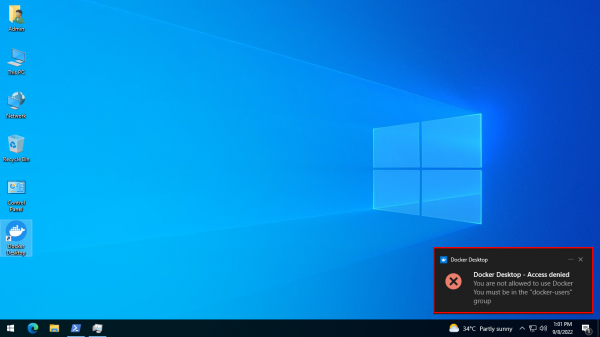
Docker Desktop – Access denied. You are not allowed to use Docker. You must be in the docker users group
If you get this error, run the following command in an elevated PowerShell console:
Add-LocalGroupMember -Group "docker-users" -Member $env:UserName -Verbose

Adding the current user to the docker users group using PowerShell
Don’t forget to log off and log on again after running this command. If you want to delegate another user to run Docker Desktop, you can specify that username with the -Member parameter instead of $env:UserName.
Subscribe to 4sysops newsletter!
That was all for this guide. You just learned how to install Docker in Windows using the GUI, winget, and PowerShell. I am curious to know which method you prefer, and why.
Эта статья даст вам полное представление о Docker Desktop для пользователей Windows и MAC. Мы изучим установку Docker Desktop на компьютерах с Windows и Mac. После установки мы также попытаемся выполнить некоторые операции Docker.
Docker Desktop — это собственное настольное приложение, разработанное Docker для пользователей Windows и MAC. Это самый простой способ запуска, сборки, отладки и тестирования приложений Dockerized.
Docker Desktop предлагает важные и наиболее полезные функции, такие как быстрые циклы редактирования, уведомления об изменениях файлов, встроенная поддержка корпоративной сети и гибкость для работы с собственным выбором прокси и VPN.
Docker Desktop состоит из инструментов для разработчика, приложения Docker, Kubernetes и синхронизации версий. Он позволяет вам создавать сертифицированные образы и шаблоны языков и инструментов.
Скорость, безопасность и выбор — все, что вам нужно для разработки и доставки контейнерных приложений, доступных на вашем рабочем столе, будет представлено вам.
Прежде чем перейти к процессу установки, давайте разберемся с его версиями.
Версии Docker
Docker в основном поставляется в двух версиях, в Community и ENterprise.
Community версия поставляется с бесплатным набором продуктов Docker. ENterprise корпоративная версия представляет собой сертифицированную контейнерную платформу, которая предоставляет коммерческим пользователям дополнительные функции, такие как безопасность образов, управление образами, оркестровка и управление средой выполнения контейнеров, но по разумной цене.
Мы начнем наше обучение с Community Edition. Контейнеры Docker, работающие в конкретной операционной системе, совместно используют ядро ОС. Это означает, что мы не можем использовать ядро Windows (хост) для запуска контейнеров Linux или наоборот. Чтобы проделать это, у нас есть Docker Desktop для Windows и MAC.
Выпуски Docker Desktop
Docker Desktop выпускается в двух вариантах.
- Stable: как видно из названия, стабильный выпуск тщательно протестирован и может быть использован при разработке более надежных приложений. Его версии полностью синхронизированы с версиями Docker Engine.
- Edge: эти версии состоят из всех новых и экспериментальных функций Docker Engine. Есть больше шансов ошибок, сбоев и проблем, которые могут возникнуть. Тем не менее, пользователи получат возможность ознакомиться с предстоящими функциями.
Docker на Windows
Есть два варианта Docker на Windows.
1. Использование Docker Toolbox
Docker Toolbox предоставляет набор легких инструментов.
- Oracle virtual box
- Docker Engine
- Docker Machine
- Docker compose
- Kitematic GUI
Вышеуказанные инструменты устраняют необходимость развертывания отдельной виртуальной машины для запуска Docker. Просто установите исполняемый файл панели инструментов Docker непосредственно в Windows и начните разработку приложений. Требуется 64-битная ОС и Windows 7 или выше с включенным режимом виртуализации.
Но опять же, панель инструментов Docker — это оригинальная поддержка, предоставляемая в Windows для запуска Docker и его устаревшего решения для всех ОС Windows, которые не соответствуют требуемой конфигурации.
2. Использование Docker Desktop
Docker Desktop — это новейшая технология, используемая для Docker в Windows. Он заменяет виртуальную машину Oracle собственной технологией виртуализации, доступной в Windows, то есть Microsoft Hyper-V.
Он по-прежнему будет запускать Docker на Linux-машине, созданной под ним. Но на этот раз вместо виртуальной машины Oracle мы использовали нативный Microsoft Hyper-V.
Установка Docker на Windows
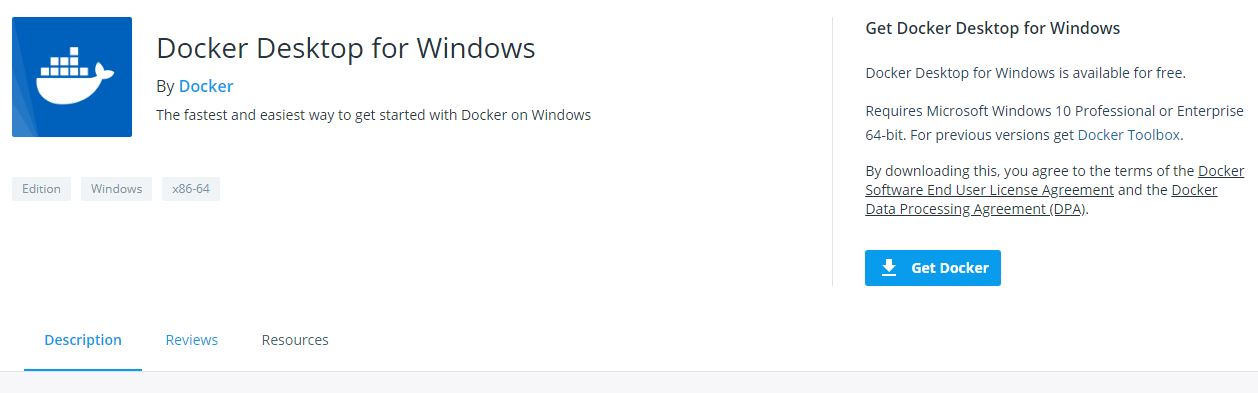
Вы можете скачать репозиторий Docker Desktop из Docker Hub.
истемные требования:
- Windows 10 или Windows Server 2016 Professional или Enterprise Edition
- Поддержка Hyper-V.
Чтобы запустить Hyper-V, оборудование должно соответствовать следующим требованиям:
- 64-битный процессор
- > = 4 ГБ ОЗУ
- Поддержка виртуализации оборудования на уровне BIOS
Следовательно, программная и аппаратная зависимость заключается в запуске Docker Desktop на Windows.
Установка Docker на macOS
Вы можете скачать репозиторий Docker Desktop из Docker Hub.
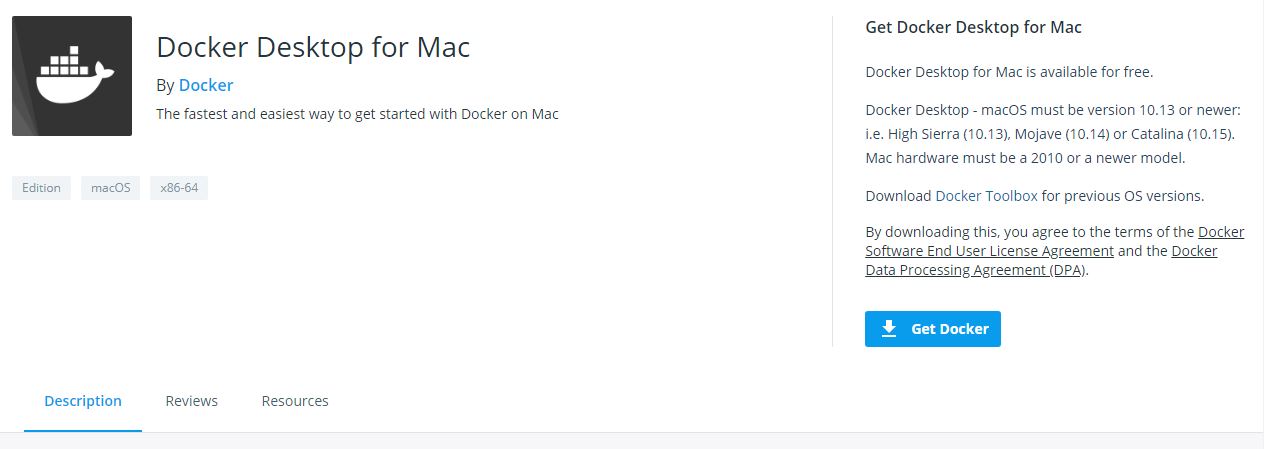
Системные требования:
- MAC Hardware 2010 или новее с аппаратной поддержкой управления памятью и неограниченным режимом. Выполните команду kern.hv_support, чтобы проверить, поддерживает ли оборудование MAC инфраструктуру гипервизора.
- MAC OS версии 10.13 или новее.
- > = 4 ГБ ОЗУ
- Virtual-Box до версии 4.3.30
Работа с образами
После установки проверьте версию установленного Docker Engine.
docker --versionDocker работает с доставкой и запуском контейнерных приложений. Вам либо нужно создать свое собственное контейнерное приложение, либо Docker поддерживает контейнерные образы в Docker Hub, и его можно легко загрузить с помощью простой команды docker run.
Здесь мы будем тянуть образ Redis.
docker pull redis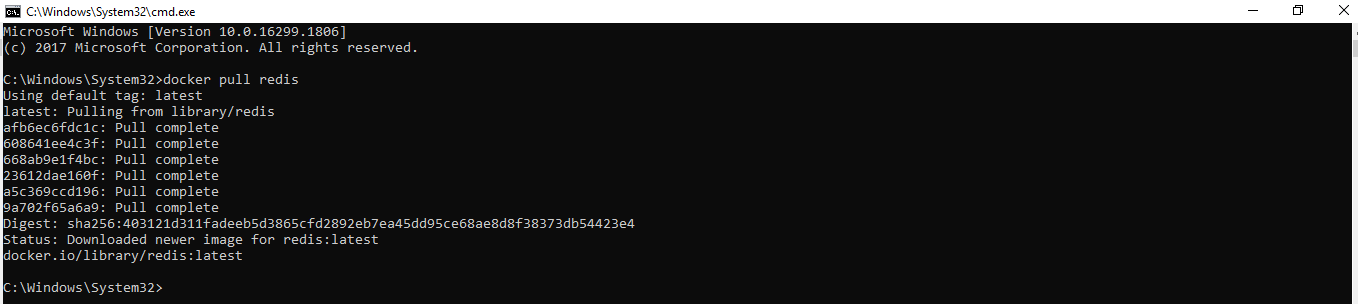
С помощью простой команды run образы можно скачивать и загружать на GitHub или Docker Hub, и любой пользователь во всем мире может получить к нему доступ и начать работать с ним.
Docker Container запускает образ Docker. Следующим шагом является запуск контейнера.
docker run -p 6379 Redis
Будет создан зашифрованный идентификатор контейнера. Вы можете быстро проверить состояние работающего экземпляра в Docker, нажав на Dashboard option.

Обязательно остановите контейнер, прежде чем удалять его из Docker Engine.

Возможности Docker Desktop
Существует множество преимуществ:
- Поддерживает широкий спектр инструментов разработки.
- Обеспечьте быстрый и оптимизированный способ создания и публикации контейнерного образа на любой облачной платформе.
- Простота установки и настройки полной среды Docker
- Повышение производительности благодаря встроенной виртуализации Hyper-V для Windows и HyperKit для MAC.
- Возможность работать в Linux через WSL 2 на компьютерах с Windows.
- Легкий доступ к работающим контейнерам в локальной сети.
- Возможность поделиться любым приложением на облачной платформе, на разных языках и в разных средах.
- Для обеспечения безопасности и актуальности выполняются автоматические обновления.
- Включены последние версии Kubernetes.
- Возможность переключения между Linux и Windows сервером на Windows.
Docker Desktop — это нативное приложение, разработанное на Windows и MAC OS для запуска, сборки и доставки контейнерных приложений или сервисов.
Однако
Docker Desktop предназначен не для производственной среды, а для рабочего стола и среды разработки.
Также рекомендуем прочитать:
- Docker для начинающих — технология контейнеров
- В чем разница между Docker и Kubernetes?
- Введение в Docker Hub и все, что вы должны знать о нем
- Как установить Docker на Ubuntu, Windows, Debian и CentOS?
- Kubernetes — Введение для начинающих
- Docker посмотреть запущенные контейнеры, запустить или остановить контейнеры
Docker for Windows now requires Microsoft’s Hyper-V. Once enabled, VirtualBox will no longer be able to run virtual machines (your VM images will still remain). You can still use docker-machine to manage remote hosts.
You have the option to import the default VM after installing Docker for Windows from the Settings menu in the System Tray.
Docker for Windows enables Hyper-V if necessary; this requires a reboot.
Requirements
Docker for Windows runs on 64-bit Windows 10 Pro, Enterprise, and Education; 1511 November update, Build 10586 or later. Docker plans to support more versions of Windows 10 in the future.
Installation
- Download Docker.
- Double-click
InstallDocker.msito run the installer. - Follow the Install Wizard: accept the license, authorize the installer, and proceed with the install.
- Click Finish to launch Docker.
- Docker starts automatically.
- Docker loads a “Welcome” window giving you tips and access to the Docker documentation.
That’s it!
Verification
The whale in the status bar indicates a running (and accessible via terminal) Docker instance.
Open PowerShell or your favorite Windows terminal (e.g., Command prompt) and enter docker run hello-world.
Windows prompts you for access every time Docker starts, allowing Docker to manage the Hyper-V VM’s. The first time Docker starts, you may need to provide the token from the Beta invitation email. When initialization completes, select About Docker from the notification area and verify you have the latest version.
From PowerShell (or your favorite Windows terminal), check the versions of docker, docker-compose, and verify your installation:
PS C:Usersusername> docker --version
PS C:Usersusername> docker-compose --version
PS C:Usersusername> docker-machine --version
Before you stop, let’s test a Dockerized webserver; from PowerShell or cmd.exe, run:
docker run -d -p 80:80 --name webserver nginx
If your host does not already have it, Docker downloads nginx from Docker Hub and starts it. As soon as the download completes, point your web browser to http://docker to view the start page. You should see:
Welcome to nginx!
If you see this page, the nginx web server is successfully installed and working. Further configuration is required.
For online documentation and support please refer to nginx.org.
Commercial support is available at nginx.com.
Thank you for using nginx.
Common Pitfalls
CPU
If your CPU does not support virtualization, or if you do not have a 64-bit CPU, you cannot run Docker locally.
Operating System
If you do not run a 64-bit version of Windows Windows 10 Pro, Enterprise, or Education; 1511 November update, Build 10586 or later, you cannot run Docker for Windows.
You can install Docker Toolbox if you have a 64-bit version of Windows 7 or later. Alternately, you do have the option to upgrade.

Next: Install Docker on Linux
Requirements and things to know before installing Docker for Linux.