Честно говоря, хотя вы, возможно, не захотите полностью работать с этим языком в этой среде для создания приложений или чего-то еще, вы можете обнаружить полезный факт, что программирование на этом языке в среде Windows предназначено только для обучения и изучения синтаксиса. Следует отметить, что никто не может Купить устройство Apple Чтобы иметь дело с этим языком, поэтому, если вы один из тех, кто работает в Окружающая среда Windows И кто может захотеть представиться на Swift Language Для начала вы нашли нужную статью.
Swift Language — это язык программирования Высокопроизводительная система с очень чистым и современным синтаксисом, обеспечивающая беспрепятственный доступ к существующим программам на C и Objective-C, по умолчанию безопасная в памяти. Несмотря на то что Из этого Свифта Однако, вдохновленный Objective-C и многими другими языками, он сам по себе не является языком, производным от C.Как полный, независимый язык, Swift объединяет основные функции, такие как управление потоком, структуры данных и функции, с высокоуровневыми структурами. такие как объекты, протоколы, замыкания и обобщения. Swift включает модули, устраняя необходимость в заголовках и повторении кода, если это необходимо.
Итак, Swift — один из самых популярных языков на данный момент, и не зря. Приложения для Mac и iOS захватывают большую часть рынка. Возможность создавать приложения для iOS изначально важна для людей, которые не хотят погружаться в глубины Objective C.
Поскольку Swift является домом для Apple, вам нужен Mac, верно? Ошибка. Хотя нет способа связать Swift в Windows «вне приложения», это не означает, что пользователи Windows не могут изучить Swift.
Вот как создать, скомпилировать и запустить простую программу Swift в Windows 10.
Что такое Свифт?
Прежде чем мы начнем, давайте посмотрим, что такое Swift на самом деле. Swift — это язык программирования, разработанный Apple. По словам Криса Латтнера, для этого потребовались идеи «из Objective-C, Rust, Haskell, Ruby, Python, C #, CLU и многих других языков программирования».
Это относительно молодой язык, выпущенный для публики в 2014 году, хотя он уже получил широкое признание. ситуация Индекс TIOBE В рейтинге лучших языков программирования в 2017 году Swift занял 11-е место, что делает его одним из самых быстрорастущих языков всех времен.
Короче говоря, если вы программируете для Mac или iOS, Swift для вас! Для более глубокого изучения использования Swift ознакомьтесь с этими причинами, по которым стоит изучить Swift.
Во-первых, нам понадобится редактор для написания нашего кода. Вы можете использовать любую удобную для вас среду IDE, хотя это не обязательно, и подойдет любой текстовый редактор. Выбор в основном зависит от личных предпочтений, хотя, если вам нужна помощь, использование этого руководства может помочь вам решить, что может помочь.
Сегодня мы будем использовать Notepad ++, потому что он бесплатный, простой и расширяемый. Скачать Блокнот ++ И вы должны его открыть. Давайте окунемся в мир программирования прямо сейчас!
Приложение Simple Swift для Windows
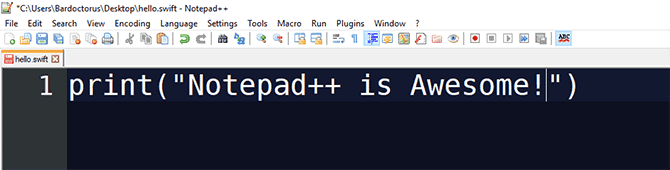
Для нашего тестового проекта сегодня мы собираемся создать простую программу, которая запускается в командной строке Windows. Начните с открытия нового файла Notepad ++. Мы начнем с вывода вопроса на экран, дождемся, пока пользователь напишет свой ответ, а затем воспользуемся этим ответом для предоставления ответа.
print("What is your name?")
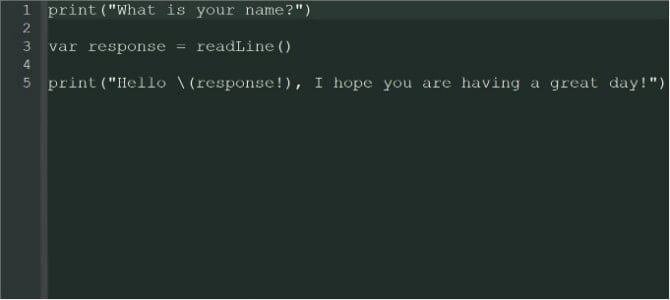
Это будет отображаться, когда программа запущена. Теперь, когда мы задали вопрос, мы должны предоставить возможность пользователю ответить. Для этого мы используем метод readline () и сохраняем ответ как переменную с именем response.
var response = readLine()
Если вы знакомы с другими языками программирования, вы можете заметить здесь небольшие отличия. Во-первых, мы можем сохранить данные, полученные из readLine, как переменную вместо того, чтобы указывать, что это будет строка. Еще одно изменение для программистов, перешедших с JavaScript или C #, — это отсутствие точек с запятой для обозначения конца строк.
может быть Пользователи Python Здесь уже больше дома!
добавить вывод
Теперь, когда эта информация хранится в переменной, мы хотим использовать ее и отобразить для пользователя. Что может быть лучше, чем пожелать отличного дня?
print("Hello (response!), I hope you are having a great day!")
Даже если у вас есть опыт работы на других языках, вы увидите здесь некоторые различия. Вместо использования оператора + вне кавычек для отображения вашей переменной вы можете использовать (имя_переменной) в кавычках. Еще одно преимущество Swift — использование необязательных значений. Эти значения трудно понять на первый взгляд, но они добавляют больше функциональности к использованию переменных в Swift.
В этом случае мы просто хотим отобразить значение как есть, поэтому мы добавляем восклицательный знак после имени переменной. отклик! Чтобы указать, что это не необязательное значение. Необязательное значение — это переменная, которой может быть присвоено или не присвоено значение. не требует. Если ему не присвоено значение, оно не будет установлено ни с чем.
Определите вопросительный знак (?) После типа значения он не является обязательным, а восклицательный знак означает, что это не так.
Ваш код будет выглядеть так:
Чтобы сохранить код, используйте Файл -> Сохранить как и выберите файл Swift. Из списка Сохранить как тип. Если в вашем списке отсутствует тип файла Swift, выберите вместо него «Все файлы» и добавьте расширение файла. swift после выбранного имени файла.
Быстрая компиляция в Windows 10
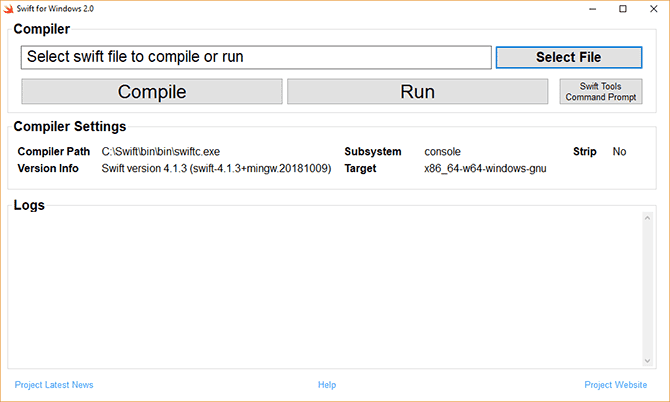
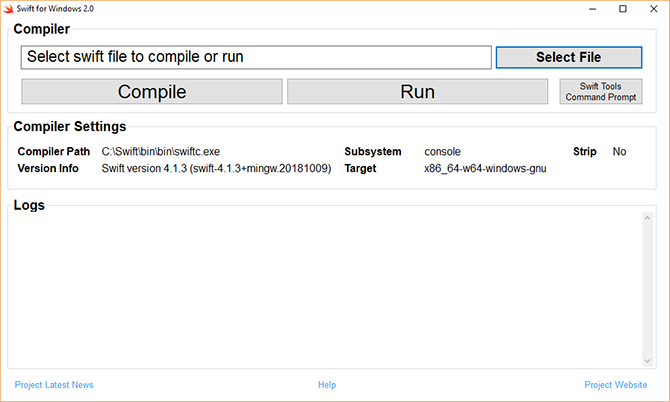
Теперь, когда у нас есть простое приложение, нам нужно его скомпилировать и запустить. Хотя встроенного способа программирования Swift в Windows 10 нет, есть обходной путь. Хан Санджин создал переводчик для Swift, и он доступен Скачать с Github. Загрузите и установите приложение Swift для Windows, следуя инструкциям по ссылке.
После установки откройте его. Нажмите кнопкуПеревести файли выберите приложение, которое вы создали ранее. Нажмите Компилировать И подождите, пока приложение скомпилируется.
Для этого апплета это должно быть почти мгновенным, хотя это может занять некоторое время, в зависимости от того, насколько сложен ваш код!
В диалоговом окне должно появиться сообщение «Преобразовано успешно». Если нет, просмотрите свой код, чтобы убедиться, что вы не допустили ошибок. После того, как код будет скомпилирован, нажмите «Выполнить», чтобы запустить программу. Программа откроется в командной строке Windows и будет выглядеть так:
Стоит отметить, что вы должны использовать приложение Swift для Windows для запуска вашего кода, EXE-файл, созданный сам по себе, не будет запускаться, даже если приложение открыто.
Проект SwiftForWindows с открытым исходным кодом предоставляет простую в использовании среду разработки для программирования приложений Swift для Windows. Проект работает с компилятором Swift для Cygwin, MSVC и MinGW.
Начните писать код на Swift в Windows уже сегодня
Если вы решите, что Swift для вас, существует множество инструментов, которые могут вам помочь. Если у вас есть базовое представление об окружающей среде, почему бы не попробовать Несколько стартап-проектов для возрождения ваших знаний؟
Getting Started
Here, you’ll find information about the how to use the Swift programming language.
If you’re new to Swift, check out A Swift Tour in
The Swift Programming Language, for a quick introduction to the
most important concepts and features of the language.
Installing Swift
The first step to using Swift is to download and install
the compiler and other required components.
Go to the Download page
and follow the instructions for your target platform.
In order to follow along with the examples below,
make sure to add Swift to your $PATH.
On macOS
The default location for the downloadable toolchain on macOS is
/Library/Developer/Toolchains.
You can make the latest installed toolchain available for use from the terminal with the following command:
$ export TOOLCHAINS=swift
To select any other installed toolchain, use its identifier in the TOOLCHAINS
variable. The identifier can be found in toolchain’s Info.plist file.
$ /usr/libexec/PlistBuddy -c "Print CFBundleIdentifier:" /Library/Developer/Toolchains/swift-4.0-RELEASE.xctoolchain/Info.plist
org.swift.4020170919

$ export TOOLCHAINS=org.swift.4020170919
On Linux
- Install required dependencies:
| Ubuntu 18.04 | Ubuntu 20.04 | Ubuntu 22.04 | CentOS 7 | Amazon Linux 2 |
|---|---|---|---|---|
|
|
|
|
|
If you installed the Swift toolchain on Linux
to a directory other than the system root,
you will need to run the following command,
using the actual path of your Swift installation:
$ export PATH=/path/to/Swift/usr/bin:"${PATH}"
On Windows
Dependencies
Swift has the following general dependencies:
-
Git (used by Swift Package Manager)
-
Python1 (used by the debugger — lldb)
Windows has the following additional platform specific dependencies:
-
Windows SDK (provides the Windows headers and import libraries)
-
Visual Studio (provides the Visual C++ SDK/Build Tools for additional headers)
Enabling Developer Mode
In order to develop applications, particularly with the Swift Package Manager, you will need to enable developer mode. Please see Microsoft’s documentation for instructions for enabling developer mode.
Installation Instructions
Install using the Windows Package Manager
The Windows Package Manager can be found in the App Store or be installed directly.
-
Install required dependencies:
The platform dependencies cannot be installed through the Windows Package Manager as the install rules do not install the components necessary. They will be installed through Visual Studio installer.
winget install Git.Git
winget install Python.Python.3 --version 3.10.2150.0

curl -sOL https://aka.ms/vs/16/release/vs_community.exe
start /w vs_community.exe --passive --wait --norestart --nocache ^
  --installPath "%ProgramFiles(x86)%Microsoft Visual Studio2019Community" ^
  --add Microsoft.VisualStudio.Component.Windows10SDK.19041 ^
  --add Microsoft.VisualStudio.Component.VC.Tools.x86.x64
del /q vs_community.exe
Start up a new Command Prompt and install the Python library six.
pip install six -
Install Swift:
Swift can be installed through the official installer directly, or using the Windows Package Manager as well. Notice that Windows Package Manager release may be behind the official release.
- Using the official installer:
- Download the latest package release.
- Run the package installer.
- Using the Windows Package Manager:
winget install Swift.Toolchain
- Using the official installer:
A Swift toolchain will be installed at %SystemDrive%LibraryDeveloperToolchainsunknown-Asserts-development.xctoolchain. A compatible Swift SDK will be installed at %SystemDrive%LibraryDeveloperPlatformsWindows.platformDeveloperSDKsWindows.sdk.
Traditional Installation
NOTE: The traditional installation process is required for Swift older than 5.4.2.
Swift has been tested with Visual Studio 2019. You will need to install Visual Studio with the following components. The installer for Swift is available in the Download section. The toolchain on Windows is installed to %SystemDrive%LibraryDeveloperToolchains.
The following Visual Studio components are required:
| Component | Visual Studio ID |
|---|---|
| MSVC v142 — VS 2019 C++ x64/x86 build tools (Latest) | Microsoft.VisualStudio.Component.VC.Tools.x86.x64 |
| Windows 10 SDK (10.0.17763.0)2 | Microsoft.VisualStudio.Component.Windows10SDK.17763 |
The following additional Visual Studio components are recommended:
| Component | Visual Studio ID |
|---|---|
| Git for Windows | Microsoft.VisualStudio.Component.Git |
| Python 3 64-bit (3.7.8) | Component.CPython.x64 |
The following additional Visual Studio component is suggested:
| Component | Visual Studio ID |
|---|---|
| C++ CMake tools for Windows | Microsoft.VisualStudio.Component.VC.CMake.Project |
Support Files
NOTE: This is only required for versions older than 5.4.2
You must use the x64 Native Tools for VS2019 Command Prompt to run the following steps. The x64 Native Tools for VS2019 Command Prompt runs the DevEnv script from Visual Studio that sets up the necessary environment variables to find the system headers.
In order to make the Windows SDK accessible to Swift, it is necessary to deploy a few files into the Windows SDK. The following will modify your Visual Studio Installation, and as such will require to be run from an (elevated) “Administrator” x86 Native Tools for VS2019 Command Prompt.
copy /Y %SDKROOT%usrshareucrt.modulemap "%UniversalCRTSdkDir%Include%UCRTVersion%ucrtmodule.modulemap"
copy /Y %SDKROOT%usrsharevisualc.modulemap "%VCToolsInstallDir%includemodule.modulemap"
copy /Y %SDKROOT%usrsharevisualc.apinotes "%VCToolsInstallDir%includevisualc.apinotes"
copy /Y %SDKROOT%usrsharewinsdk.modulemap "%UniversalCRTSdkDir%Include%UCRTVersion%ummodule.modulemap"
Because it is installing the files into the Visual Studio image, the files will need to be copied each time Visual Studio is updated.
Repairing after Visual Studio Updates
If Visual Studio is updated, you may have to repair the installation. See Microsoft’s instructions for repairing installed programs.
Swift Version
You can verify that you are running the expected version of Swift
by entering the swift command and passing the --version flag:
$ swift --version
Apple Swift version 2.2-dev (LLVM ..., Clang ..., Swift ...)
The -dev suffix on the version number
is used to indicate that it’s a development build,
not a released version.
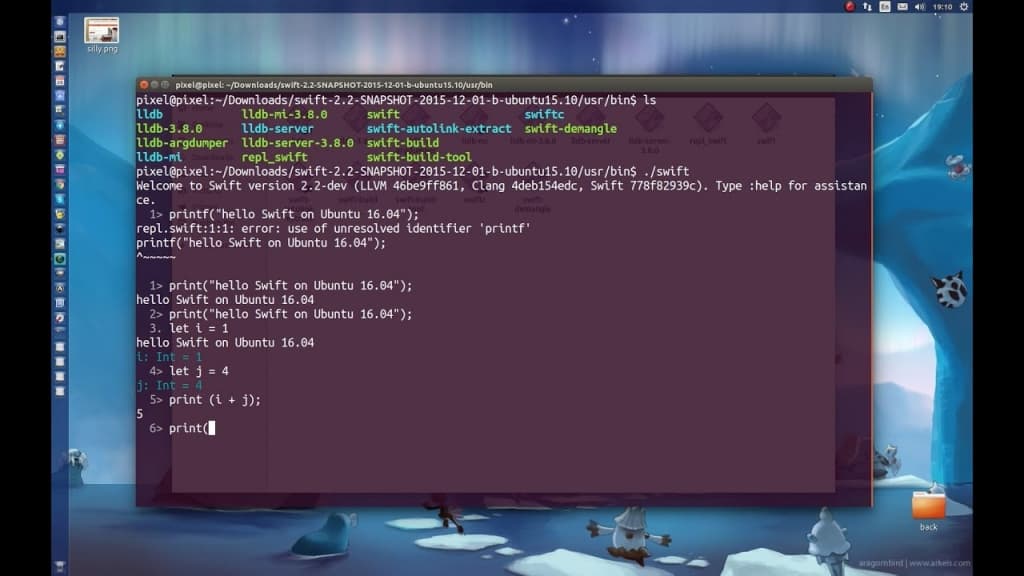
Using the REPL
If you run swift repl without any other arguments,
you’ll launch the REPL, an interactive shell
that will read, evaluate, and print the results
of any Swift code you enter.
$ swift repl
Welcome to Apple Swift version 5.7 (swiftlang-5.7.0.127.4 clang-1400.0.29.50).
Type :help for assistance.
  1>
Interacting with the REPL is a great way to experiment with Swift.
For example, if you enter the expression 1 + 2,
the result of the expression, 3, is printed on the next line:
You can assign values to constants and variables,
and use them in subsequent lines.
For instance, the String value Hello, world!
can be assigned to the constant greeting,
and then passed as an argument to the print(_:) function:
  2> let greeting = "Hello!"
greeting: String = "Hello!"
  3> print(greeting)
Hello!
If you enter an invalid expression,
the REPL will print an error showing where the problem occurred:
let answer = "forty"-"two"
error: binary operator '-' cannot be applied to two 'String' operands
let answer = "forty"-"two"
             ~~~~~~~^~~~~~
You can use the up-arrow and down-arrow keys (↑ and ↓)
to cycle through previous lines entered into the REPL.
This allows you to make a slight change to a previous expression
without retyping the entire line,
and is especially convenient for fixing errors like the one in the previous example:
let answer = "forty-two"
answer: String = "forty-two"
Another useful feature of the REPL
is that it can automatically suggest functions and methods
that can be used in a particular context.
For example, if you enter re
after a dot operator on a String value
and then hit the tab key (⇥),
the REPL will give a list of available completions
like remove(at:) and replaceSubrange(bounds:with:):
5> "Hi!".re⇥
Available completions:
	remove(at: Index) -> Character
	removeAll() -> Void
	removeAll(keepingCapacity: Bool) -> Void
	removeSubrange(bounds: ClosedRange<Index>) -> Void
	removeSubrange(bounds: Range<Index>) -> Void
	replaceSubrange(bounds: ClosedRange<Index>, with: C) -> Void
	replaceSubrange(bounds: ClosedRange<Index>, with: String) -> Void
	replaceSubrange(bounds: Range<Index>, with: C) -> Void
	replaceSubrange(bounds: Range<Index>, with: String) -> Void
	reserveCapacity(n: Int) -> Void
If you start a block of code,
such as when iterating over an array with a for-in loop,
the REPL will automatically indent the next line,
and change the prompt character from > to .
to indicate that code entered on that line
will only be evaluated when the entire code block is evaluated.
  6> let numbers = [1,2,3]
numbers: [Int] = 3 values {
  [0] = 1
  [1] = 2
  [2] = 3
}
  7> for n in numbers.reversed() {
  8.     print(n)
  9. }
3
2
1
All of the functionality of Swift is available to you from the REPL,
from writing control flow statements
to declaring and instantiating structures and classes.
You can also import any available system modules,
such as Darwin on macOS and Glibc on Linux:
On macOS
1> import Darwin
2> arc4random_uniform(10)
$R0: UInt32 = 4
On Linux
1> import Glibc
2> random() % 10
$R0: Int32 = 4
On Windows
The REPL depends on Python bindings. You must ensure that Python 3.7 is available
in the path. The following command adds Python 3.7 from Visual Studio to %PATH%
so that it can be used:
path %ProgramFiles(x86)%Microsoft Visual StudioSharedPython37_64;%PATH%
Because the Windows installation separates out the SDK from the toolchain, a few
extra parameters must be passed to the REPL. This allows you to use multiple
different SDKs with the same toolchain.
set SWIFTFLAGS=-sdk %SDKROOT% -I %SDKROOT%/usr/lib/swift -L %SDKROOT%/usr/lib/swift/windows
swift repl -target x86_64-unknown-windows-msvc %SWIFTFLAGS%
Using the Package Manager
Swift package manager provides a convention-based system for
building libraries and executables, and sharing code across different packages.
These examples assume you have made swift available in your path;
see Installing for more information.
Once available, you can invoke the package manager tools: swift package, swift run, swift build and swift test.
$ swift package --help
OVERVIEW: Perform operations on Swift packages
...
Creating a Package
To create a new Swift package, first create and enter a directory named Hello:
Every package must have a manifest file called Package.swift in its root directory.
You can create a minimal package named Hello using:
By default the init command will create a library package directory structure:
├── Package.swift
├── README.md
├── Sources
│   └── Hello
│       └── Hello.swift
└── Tests
    ├── HelloTests
    │   └── HelloTests.swift
    └── LinuxMain.swift
You can use swift build to build a package. This will download, resolve and compile dependencies mentioned
in the manifest file Package.swift.
$ swift build
Compile Swift Module 'Hello' (1 sources)
To run the tests for a package, use: swift test
$ swift test
Compile Swift Module 'HelloTests' (1 sources)
Linking ./.build/x86_64-apple-macosx10.10/debug/HelloPackageTests.xctest/Contents/MacOS/HelloPackageTests
Test Suite 'All tests' started at 2016-08-29 08:00:31.453
Test Suite 'HelloPackageTests.xctest' started at 2016-08-29 08:00:31.454
Test Suite 'HelloTests' started at 2016-08-29 08:00:31.454
Test Case '-[HelloTests.HelloTests testExample]' started.
Test Case '-[HelloTests.HelloTests testExample]' passed (0.001 seconds).
Test Suite 'HelloTests' passed at 2016-08-29 08:00:31.455.
	 Executed 1 test, with 0 failures (0 unexpected) in 0.001 (0.001) seconds
Test Suite 'HelloPackageTests.xctest' passed at 2016-08-29 08:00:31.455.
	 Executed 1 test, with 0 failures (0 unexpected) in 0.001 (0.001) seconds
Test Suite 'All tests' passed at 2016-08-29 08:00:31.455.
	 Executed 1 test, with 0 failures (0 unexpected) in 0.001 (0.002) seconds
Building an Executable
A target is considered as an executable if it contains a file named main.swift.
The package manager will compile that file into a binary executable.
In this example,
the package will produce an executable named Hello
that outputs “Hello, world!”.
First create and enter a directory called Hello:
Now run the swift package’s init command with executable type:
$ swift package init --type executable
Use the swift run command to build and run the executable:
$ swift run Hello
Compile Swift Module 'Hello' (1 sources)
Linking ./.build/x86_64-apple-macosx10.10/debug/Hello
Hello, world!
Note: Since there is only one executable in this package, we can omit the
executable name from the swift run command.
You can also compile the package by running the swift build command and then run
the binary from .build directory:
$ swift build
Compile Swift Module 'Hello' (1 sources)
Linking ./.build/x86_64-apple-macosx10.10/debug/Hello

$ .build/x86_64-apple-macosx10.10/debug/Hello
Hello, world!
As a next step, let’s define a new sayHello(name:) function
in a new source file, and have the executable call that
instead of calling print(_:) directly.
Working with Multiple Source Files
Create a new file in the Sources/Hello directory called Greeter.swift,
and enter the following code:
func sayHello(name: String) {
    print("Hello, (name)!")
}
The sayHello(name:) function takes a single String argument
and prints our “Hello” greeting before, substituting the word “World”
with the function argument.
Now, open main.swift again, and replace the existing contents with the following code:
if CommandLine.arguments.count != 2 {
    print("Usage: hello NAME")
} else {
    let name = CommandLine.arguments[1]
    sayHello(name: name)
}
Rather than using a hardcoded name as before,
main.swift now reads from the command line arguments.
And instead of invoking print(_:) directly,
main.swift now calls the sayHello(name:) method.
Because the method is part of the Hello module,
no import statement is necessary.
Run swift run and try out the new version of Hello:
$ swift run Hello `whoami`
To learn about the Swift Package Manager,
including how to build modules, import dependencies, and map system libraries,
see the Swift Package Manager section of the website.
To learn more about Package Plugins, see Getting Started with Plugins.
Using the LLDB Debugger
You can use the LLDB debugger to
run Swift programs step-by-step,
set breakpoints,
and inspect and modify program state.
As an example,
consider the following Swift code,
which defines a factorial(n:) function,
and prints the result of calling that function:
func factorial(n: Int) -> Int {
    if n <= 1 { return n }
    return n * factorial(n: n - 1)
}

let number = 4
print("(number)! is equal to (factorial(n: number))")
Create a file named Factorial.swift with the code above,
and run the swiftc command,
passing the filename as a command line argument,
along with the -g option to generate debug information.
This will create an executable named Factorial
in the current directory.
$ swiftc -g Factorial.swift
$ ls
Factorial.dSYM
Factorial.swift
Factorial*
Instead of running the Factorial program directly,
run it through the LLDB debugger
by passing it as a command line argument to the lldb command.
$ lldb Factorial
(lldb) target create "Factorial"
Current executable set to 'Factorial' (x86_64).
This will start an interactive console
that allows you to run LLDB commands.
For more information about LLDB commands,
see the LLDB Tutorial.
Set a breakpoint on line 2 of the factorial(n:) function
with the breakpoint set (b) command,
to have the process break each time the function is executed.
(lldb) b 2
Breakpoint 1: where = Factorial`Factorial.factorial (Swift.Int) -> Swift.Int + 12 at Factorial.swift:2, address = 0x0000000100000e7c
Run the process with the run (r) command.
The process will stop at the call site of the factorial(n:) function.
(lldb) r
Process 40246 resuming
Process 40246 stopped
* thread #1: tid = 0x14dfdf, 0x0000000100000e7c Factorial`Factorial.factorial (n=4) -> Swift.Int + 12 at Factorial.swift:2, queue = 'com.apple.main-thread', stop reason = breakpoint 1.1
    frame #0: 0x0000000100000e7c Factorial`Factorial.factorial (n=4) -> Swift.Int + 12 at Factorial.swift:2
   1    func factorial(n: Int) -> Int {
-> 2        if n <= 1 { return n }
   3        return n * factorial(n: n - 1)
   4    }
   5
   6    let number = 4
   7    print("(number)! is equal to (factorial(n: number))")
Use the print (p) command
to inspect the value of the n parameter.
The print command can evaluate Swift expressions as well.
(lldb) p n * n
(Int) $R1 = 16
Use the backtrace (bt) command
to show the frames leading to factorial(n:) being called.
(lldb) bt
* thread #1: tid = 0x14e393, 0x0000000100000e7c Factorial`Factorial.factorial (n=4) -> Swift.Int + 12 at Factorial.swift:2, queue = 'com.apple.main-thread', stop reason = breakpoint 1.1
  * frame #0: 0x0000000100000e7c Factorial`Factorial.factorial (n=4) -> Swift.Int + 12 at Factorial.swift:2
    frame #1: 0x0000000100000daf Factorial`main + 287 at Factorial.swift:7
    frame #2: 0x00007fff890be5ad libdyld.dylib`start + 1
    frame #3: 0x00007fff890be5ad libdyld.dylib`start + 1
Use the continue (c) command
to resume the process until the breakpoint is hit again.
(lldb) c
Process 40246 resuming
Process 40246 stopped
* thread #1: tid = 0x14e393, 0x0000000100000e7c Factorial`Factorial.factorial (n=3) -> Swift.Int + 12 at Factorial.swift:2, queue = 'com.apple.main-thread', stop reason = breakpoint 1.1
    frame #0: 0x0000000100000e7c Factorial`Factorial.factorial (n=3) -> Swift.Int + 12 at Factorial.swift:2
   1    func factorial(n: Int) -> Int {
-> 2        if n <= 1 { return n }
   3        return n * factorial(n: n - 1)
   4    }
   5
   6    let number = 4
   7    print("(number)! is equal to (factorial(n: number))")
Use the print (p) command again
to inspect the value of the n parameter
for the second call to factorial(n:).
Use the breakpoint disable (br di) command
to disable all breakpoints
and the continue (c) command
to have the process run until it exits.
(lldb) br di
All breakpoints disabled. (1 breakpoints)
(lldb) c
Process 40246 resuming
4! is equal to 24
Process 40246 exited with status = 0 (0x00000000)
Now that you’ve been introduced to the Swift REPL, build system, and debugger,
here are a few suggestions for what to do next:
- Check out the Package Manager project page
for a deep dive into the Swift build system and package manager. - Read Contributing to Swift
to learn about the different ways you can participate in the Swift community. - Go to developer.apple.com/swift
for additional Swift resources, including videos, sample code, and playgrounds.
Getting Started with Swift on Windows
One can build and run Swift natively or through the Windows Subsystem for Linux.
Native Windows
Currently there are two supported ways to build Swift for Windows.
-
To cross-compile Swift for Windows from another host operating system (using
clang), see Cross Compiling for Windows -
To build on Windows using Microsoft Visual C++ (MSVC), see Building on Windows
Windows Subsystem for Linux (WSL)
Windows Subsystem for Linux is an Ubuntu environment. Follow the instructions for building on Linux
There two versions of WSL as of November 23, 2019:
- WSL1: is the current stable version. Both Swift compilation and execution work but REPL and debugging (LLDB) hang on startup.
- WSL2: Both REPL and debugging work with WSL2. Although, WSL2 is still in development, it is available by downloading an insider build. Installing WSL2 is pretty simple if WSL1 was already installed (switch to insider, download an insider build and run some scripts). WSL2 can be installed by following this link.
Swift — один из самых популярных языков сейчас, и на то есть веские причины. Приложения для Mac и iOS занимают огромную долю рынка. Возможность создавать приложения для iOS изначально важна для людей, которые не хотят погружаться в темные глубины Objective C.
Поскольку Swift является родным для Apple, вам нужен Mac, верно? Неправильно. Хотя не существует метода «из коробки» для компиляции Swift в Windows, это не означает, что пользователи Windows не могут изучать Swift.
Вот как можно создать простую программу Swift, скомпилировать и запустить ее в Windows 10.
Что такое Свифт?
Прежде чем начать, давайте посмотрим, что же такое Swift. Swift — это язык программирования, разработанный Apple. По словам создателя проекта Криса Латтнера, для этого нужны идеи «из Objective-C, Rust, Haskell, Ruby, Python, C #, CLU и многих других».
Это относительно молодой язык, который был выпущен для публики в 2014 году, хотя он уже широко известен. Индекс лучших языков программирования TIOBE в 2017 году поставил Swift на 11-е место, что делает его одним из самых быстрорастущих языков за все время.
Короче говоря, если вы программируете для Mac или iOS, Swift для вас! Для более глубокого изучения использования Swift, взгляните на эти причины, почему Swift стоит изучать Swift стоит изучать Swift стоит изучать
Начало работы с Swift на Windows 10
Во-первых, нам понадобится редактор для написания нашего кода. Вы можете использовать любую IDE, которая вам удобна, хотя использовать ее не обязательно, и любого текстового редактора также будет достаточно. Это в основном сводится к личным предпочтениям, хотя, если вам нужна помощь, вам может помочь решение о том, как пользоваться этим руководством .
Сегодня мы собираемся использовать Notepad ++, так как он бесплатный, простой и расширяемый. Загрузите Блокнот ++ и откройте его. Давайте приступим к некоторому кодированию!

Простая программа Swift для Windows
Для нашего тестового проекта сегодня мы собираемся создать простую программу, которая будет работать в командной строке Windows. Начните с открытия нового файла Notepad ++. Мы начнем с вывода вопроса на экран, подождем, пока пользователь напечатает его ответ, а затем используем этот ответ для предоставления ответа.
print("What is your name?") Это будет отображаться при запуске программы. Теперь, когда мы задали вопрос, мы должны предоставить пользователю возможность ответить. Для этого мы используем метод readline () и сохраняем ответ как переменную с именем response .
var response = readLine()
Если вы уже знакомы с другими языками программирования, вы можете заметить здесь несколько небольших отличий. Во-первых, мы можем хранить данные, полученные из readLine, как переменную, вместо того, чтобы указывать, что это будет строка. Еще одно изменение для тех из вас, кто пришел из JavaScript или C #, — отсутствие точки с запятой для обозначения конца строки.
Пользователи Python уже могут быть здесь как дома!
Добавление вывода
Теперь, когда эта информация хранится в переменной, мы хотим использовать ее и отобразить ее пользователю. Что может быть лучше, чем пожелать им хорошего дня?
print("Hello (response!), I hope you are having a great day!")
Даже если у вас есть опыт работы на других языках, вы увидите здесь некоторые различия. Вместо того, чтобы использовать оператор + вне кавычек для отображения вашей переменной, вы используете (variableName) в кавычках. Еще одной особенностью Swift является использование дополнительных значений . Эти значения на первый взгляд сложно понять, но они расширяют функциональность использования переменных в Swift.
В этом случае мы просто хотим отобразить значение как есть, поэтому мы добавляем восклицательный знак после ответа имени переменной ! обозначить, что это не необязательное значение. Необязательное значение — это переменная, которой может или не может быть присвоено значение. Это не требует одного. Если ему не присвоено значение, то ему будет присвоено ноль.
Знак вопроса (?) После типа значения определяет его как необязательный, а восклицательный знак означает, что это не так.
Ваш код будет выглядеть примерно так:

Чтобы сохранить код, используйте « Файл»> «Сохранить как» и выберите файл Swift в меню « Тип файла» . Если в вашем меню отсутствует тип файла Swift, выберите вместо него все файлы и добавьте расширение файла .swift после выбранного имени файла.
Компиляция Swift в Windows 10
Теперь, когда у нас есть программа, мы должны быть в состоянии скомпилировать и запустить ее. Хотя нет встроенного способа программирования Swift в Windows 10, есть обходной путь. Хан Санджин создал компилятор для Swift, который можно загрузить с Github . Загрузите и установите приложение Swift для Windows, используя инструкции, приведенные в ссылке.
Как только это установлено, откройте это. Нажмите на кнопку « Выбрать файл» и выберите ранее созданную программу. Нажмите Compile и подождите, пока программа скомпилируется.

Для такой маленькой программы это должно быть почти мгновенно, хотя это может занять время в зависимости от того, насколько сложным вы сделали свой код!
Вы должны получить сообщение «Успешно скомпилировано» в диалоговом окне. Если нет, вернитесь и проверьте свой код, чтобы убедиться, что вы не допустили ошибок. После того, как код скомпилирован, нажмите Run, чтобы запустить вашу программу. Программа откроется в командной строке Windows и должна выглядеть следующим образом:

Стоит отметить, что для запуска кода необходимо использовать приложение Swift for Windows, созданный EXE- файл не будет работать автономно, даже если приложение открыто.
Начните писать код Swift в Windows сегодня
Если вы решите, что Swift для вас, есть множество инструментов , которые помогут вам. После того, как вы овладеете базовыми знаниями об окружающей среде, почему бы не попробовать несколько проектов для начинающих, чтобы воплотить свои знания в жизнь?
Если вы пользователь Linux и хотите кодировать приложения для iOS, вот как написать код в Swift с Ubuntu
В нынешнем мире программирования большую популярность набирает — объектно-ориентированный язык программирования, составленный под узкий профиль применения, для написания на нем приложений под iOS, macOS, tvOS, watchOS. Достаточно молодой Swift, разработанный компанией Apple, если Вы хотите начать изучать данный язык программирования, то Вам для начала, необходимо установить его на свой ПК, и мы рассмотрим, как это сделать в нашей статье.
Для начала давайте разберемся что же это за Swift и с чем его едят. Swift – это язык программирования, разработанный и выпущенный в 2014 году фирмой Apple. Изначально предназначен для разработки приложений под macOS и справляется со своей задачей и сейчас! Достаточно быстрый, безопасный и интерактивный язык программирования, написанный на основе C и Objective-C. Он дает возможность создавать приложения для десктопов, телефонов и серверов.

Swift очень популярный язык программирования. Уже спустя 3 года, после выпуска, встал на 11 место в рейтинге самых признанных языков программирования в TIOBE. Привлекает айтишников своей простотой, безопасностью и быстротой. Swift оптимизирован для разработки без компромиссов, с низким уровнем вхождения. Понятен даже для новичков в программировании.
У хороших Swift разработчиков должны быть хорошо развиты нестандартное и техническое мышление, креативность. Чтобы стать успешным Swift разработчиком, необходимо уметь создавать и тестировать программы, обновлять программы и создавать к ним документацию. Важно знать Английский язык, Вы должны быть способны решить спорные вопросы ориентируясь на результат, требуемый заказчиком.
Если Вы хотите выучиться Swift, то можете воспользоваться учебником от Apple, который компания выпустила сразу с самим языком программирования. Пускай книга и бесплатная, но она на Английском языке, что может затруднить начинающих разработчиков. Все же есть решение, многие опытные разработчики сами выпускают руководство по Swift, все книги находятся в свободном доступе, однако лучше подтянуть английский и прочесть официальный учебник.
Выучив Swift и потренировавшись в его использовании, Вы можете претендовать на достойную заработную плату. Так джуны программирующие на Swift получают от 60000 до 80000 тысяч рублей. В среднем же зарплата Swift разработчиков в России колеблется от 100 000 до 300 000 тысяч рублей.
Устанавливаем Swift на macOS
Начнем с компании производителя данного языка программирования и их платформы, для которой и был предназначен данный язык программирования. Macintosh Operating System – или же macOS. Это операционная система для ЭВМ выпускаемых Apple. Изначально под операционки Apple использовался Objective-C, который получился путем скрещивания C и Smalltalk, однако для упрощения работы, Apple решила создать Swift. Swift начали разрабатывать в 2010 году компанией Apple и предназначен для разработки приложений под ее ОС. Swift изначально был проприетарным языком программирования. Теперь же это язык с открытым исходным кодом. Ну и если это язык программирования, созданный Apple, то и идет он вместе с тем же mac’ом в комплекте. То есть для запуска программы нам достаточно установить playground – это Xcode, который можно скачать бесплатно с App Store.

После установки, запускаем Xcode и нажимаем Get started with playground. Вписываем название нашего проекта и указываем путь где будем его хранить. Вписываем команду print(“Hello world”) и запускаем нашу программу, во второй рабочей области интерпретатор выведет результат нашего кода. Playground автоматически выполняет введенный Вами код и интерпретирует его, достаточно удобно, не правда ли? Поздравляем, Вы написали свою первую программу на Swift и можете познавать его на практике.
Устанавливаем Swift на Linux
Linux – это бесплатная операционная система с множеством дистрибутивов. Один из самых популярных – Ubuntu. На Linux работает большая часть серверов всего мира (70% — 90%) и не только, Linux используется в смартфонах и компьютерах. Ubuntu – дистрибутив с графическим интерфейсом и набором офисных программ, предназначенный для повседневного использования. Linux имеет ряд достоинств, которые могут переманить пользователей.

Данная операционная система поможет облегчить жизнь Вашего старенького ПК не поддерживающего современные версии ОС. По сравнению с Windows и macOS, Linux бесплатная и поставляемые с ней программы тоже. Это жирный плюс, как и то, что она не требовательная и Вы можете спокойно загрузить ее себе на флешку. Терминал. Это очень полезная и удобная штука. С помощью терминала можно управлять ПК всего лишь зная нужные команды и вводя их в командную строку. По началу будет непривычно, но с практикой, Вы оцените ее достоинства. К тому же, если Вы хотите расширить свой IT-кругозор, Вам просто необходимо освоить командную строку Линукса, ведь сейчас практически все устроено на данной операционке. Как уже было отмечено, Ubuntu – это дистрибутив Linux, на который будет производиться Swift установка. Swift установить можно скачав его с официального сайта, но мы будем использовать лишь терминал, который можно открыть с помощью сочетания клавиш ctrl+alt+t. В командной строке вписываем следующее:
— wget https://swift.org/builds/swift-3.1.1-release/ubuntu1604/swift-3.1.1-RELEASE/swift-3.1.1-RELEASE-ubuntu16.04.tar.gz
Далее произведем распаковку скачанного файла и переместим все содержимое в папку /opt:
— tar xvf swift-3.1.1-RELEASE-ubuntu16.04.tar.gz
— mv swift-3.1.1-RELEASE-ubuntu16.04 /opt/swift
Следующими командами добавим переменную PATH и обновим ее:
— echo ‘export PATH=/opt/swift/usr/bin:$PATH’ >>~/.profile
— source ~/.profile
Осталось создать clang:
— sudo apt-get update
— sudo apt-get install clang
Давайте проверим правильно ли мы все сделали, для этого запросим у терминала версию нашего Swift:
— swift –version
Если мы все сделали правильно, то Ubuntu вернет нам текущую версию языка программирования. Теперь давайте напишем простую программу и запустим ее в терминале. Для этого создадим файл с расширением swift и впишем известную нам строку:
print(“Hello world!”)Сохраняем файл под именем program. Открываем командную строку и вводим следующее:
— swiftс program.swift
Данная команда компилирует наш код, чтобы интерпретировать его, используем строку:
— ./program
Теперь Вы можете спокойно постигать Swift на Вашем Linux, без каких-либо ограничений.
Устанавливаем Swift на Windows
Программировать на Swift в Windows изначально было нельзя, так как Swift имел закрытый исходный код. Но совсем недавно Apple решили открыть исходники и открыли доступ ко всей экосистеме для Windows. Теперь на Windows можно создавать программы на языке Swift, но доступен он только на Windows 10. Чтобы начать программировать на Swift, достаточно скачать сам язык программирования с официального сайта. Установив Swift на свой персональный компьютер, Вам необходим будет редактор кода с интерпретатором. VS Code – интерпретатор языка Swift для Windows и Linux. Visual Studio Code бесплатный с множеством расширений, консолью отладки, терминалом и интерпретатором. Популярный и мощный редактор кода для любой платформы. Facebook установил его как основной редактор кода в компании. После установки Swift на свой ПК, скачайте VS Code с официального сайта и также установите его. Как только установка закончится, откройте редактор и создайте файл с именем project.swift, после чего вводим известную всем команду print(“Hello world”) и нажимаем Run. Все работает? Отлично! Теперь можем программировать на Swift на Windows, благо Apple дала такую возможность.
Но что если у Вас нет Windows 10? Тогда Вы можете просто обновиться под 10 винду, заплатив за ключ активации и проделать все действия, описанные выше. Возможен такой вариант, что Вы устанавливаете виртуальную машину и загружаете на нее macOS. Но это тоже муторно. А как же Linux? Можете просто перейти на Ubuntu и установить Swift, редактор кода (тот же VS Code или Notepad++) и радоваться жизни, ведь все ПО под Linux бесплатное, как и сама операционная система. Это основные способы установки Swift на Ваш ПК.
Заключение
Мы разобрали все основные способы установки языка программирования Swift Ubuntu, на Windows и macOS. Теперь Вы можете спокойно практиковаться и писать крутые приложения под Apple на своем устройстве!
Swift is one of the hottest languages around right now, and for good reason. Mac and iOS apps take up a huge portion of the market. Being able to build iOS apps natively is a big deal for folks who don’t want to dip into the murky depths of Objective C.
Since Swift is native to Apple, you need a Mac, right? Wrong. While there is no «out of the box» method to compile Swift on Windows, that doesn’t mean that Windows users cannot learn Swift.
Here’s how to create a simple Swift program and compile and run it in Windows 10.
What Is Swift?
Before beginning, let’s look at what Swift actually is. Swift is a programming language designed by Apple. It takes ideas «from Objective-C, Rust, Haskell, Ruby, Python, C#, CLU, and far too many others to list» according to project originator Chris Lattner.
It’s a relatively young language which was released to the public in 2014, though it is already widely regarded. The TIOBE Index of top programming languages in 2017 placed Swift at number 11, making it one of the fastest growing languages of all time.
In short, if you’re programming for Mac or iOS, Swift is for you! For a more in-depth look at the uses for Swift, take a look at these reasons why Swift is worth learning.
Getting Started With Swift on Windows 10
Firstly, we are going to need an editor to write our code in. You can use any IDE you are comfortable with, though it isn’t strictly necessary to use one and any text editor will also suffice. It mostly comes down to personal preference, though if you need help deciding what to use this guide may help you.
Today we are going to use Notepad++ as it is free, simple, and extensible. Download Notepad++ and open it up. Lets get down to some coding!
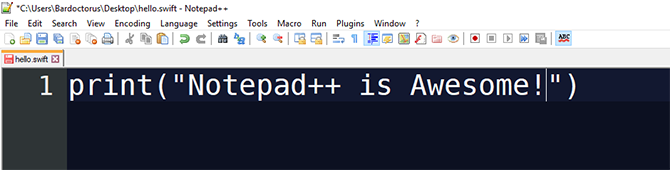
A Simple Swift for Windows Program
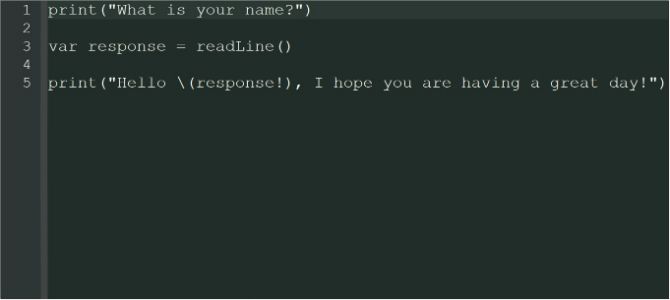
For our test project today we are going to create a simple program which will run on the Windows command line. Start by opening a new Notepad++ file. We’ll begin by printing a question to the screen, wait for the user to type their response, and then use this response to provide an answer.
print("What is your name?")
This will display when the program runs. Now that we have asked a question, we should provide a way to let the user answer. For this, we use the readline() method and store the answer as a variable called response.
var response = readLine()
If you’re already familiar with other programming languages you may notice a few small differences here. Firstly, we can store the data acquired from readLine as a var instead of having to specify that it is going to be a string. Another change for those of you coming over from JavaScript or C# is the lack of semicolons to denote the end of lines.
Python users might already be more at home here!
Adding an Output
Now that we have this information stored in a variable, we want to use it and display it back to the user. What could be nicer than wishing them a great day?
print("Hello (response!), I hope you are having a great day!")
Even if you have experience in other languages, you will see some differences here. Rather than using the + operator outside of the quotation marks to display your variable, you use (variableName) within the quotation marks. Another feature of Swift is the use of Optional Values. These values are hard to understand at first glance, but add greater functionality to the use of variables within Swift.
In this instance, we simply want to display the value as it is, so we add an exclamation mark after the variable name response! to denote that it is not an Optional Value. An optional value is a variable that may or may not get assigned a value. It doesn’t require one. If it isn’t assigned a value, then it will be assigned nil.
A question mark (?) after the value type identifies it as optional, while an exclamation means that it isn’t.
Your code will look something like this:
To save your code, use File > Save As and select Swift file from the Save As Type menu. If your menu is missing the Swift file type, select all files instead, and add the .swift file extension after your chosen filename.
Compiling Swift in Windows 10
Now that we have a program, we need to be able to compile and run it. While there is no built in way to program Swift in Windows 10, there is a work around. Han Sangjin has created a compiler for Swift which is available for download from Github. Download and install the Swift for Windows application using the instructions provided in the link.
Once it is installed, open it up. Click on the Select File button and select your previously made program. Click Compile and wait for the program to compile.
For a program this tiny it should be nearly instant, though it can take time depending on how complex you made your code!
You should receive a «Successfully compiled» message in the dialog box. If not, go back and check through your code to make sure you haven’t made any errors. Once the code compile, click Run to run your program. The program will open in the Windows Command Line, and should look like this:

It is worth noting that you must use the Swift for Windows application to run your code, the EXE file that’s created will not work stand alone, even if the application is open.
Begin Coding Swift on Windows Today
If you decide that Swift is for you, there are a wealth of tools out there to help you. Once you’ve got a basic grasp of the environment, why not try a few beginner projects to bring your knowledge to life?
If you are a Linux user looking to code iOS apps, here’s how to code in Swift with Ubuntu.
Swift is one of the hottest languages around right now, and for good reason. Mac and iOS apps take up a huge portion of the market. Being able to build iOS apps natively is a big deal for folks who don’t want to dip into the murky depths of Objective C.
Since Swift is native to Apple, you need a Mac, right? Wrong. While there is no «out of the box» method to compile Swift on Windows, that doesn’t mean that Windows users cannot learn Swift.
Here’s how to create a simple Swift program and compile and run it in Windows 10.
What Is Swift?
Before beginning, let’s look at what Swift actually is. Swift is a programming language designed by Apple. It takes ideas «from Objective-C, Rust, Haskell, Ruby, Python, C#, CLU, and far too many others to list» according to project originator Chris Lattner.
It’s a relatively young language which was released to the public in 2014, though it is already widely regarded. The TIOBE Index of top programming languages in 2017 placed Swift at number 11, making it one of the fastest growing languages of all time.
In short, if you’re programming for Mac or iOS, Swift is for you! For a more in-depth look at the uses for Swift, take a look at these reasons why Swift is worth learning.
Getting Started With Swift on Windows 10
Firstly, we are going to need an editor to write our code in. You can use any IDE you are comfortable with, though it isn’t strictly necessary to use one and any text editor will also suffice. It mostly comes down to personal preference, though if you need help deciding what to use this guide may help you.
Today we are going to use Notepad++ as it is free, simple, and extensible. Download Notepad++ and open it up. Lets get down to some coding!
A Simple Swift for Windows Program
For our test project today we are going to create a simple program which will run on the Windows command line. Start by opening a new Notepad++ file. We’ll begin by printing a question to the screen, wait for the user to type their response, and then use this response to provide an answer.
print("What is your name?")
This will display when the program runs. Now that we have asked a question, we should provide a way to let the user answer. For this, we use the readline() method and store the answer as a variable called response.
var response = readLine()
If you’re already familiar with other programming languages you may notice a few small differences here. Firstly, we can store the data acquired from readLine as a var instead of having to specify that it is going to be a string. Another change for those of you coming over from JavaScript or C# is the lack of semicolons to denote the end of lines.
Python users might already be more at home here!
Adding an Output
Now that we have this information stored in a variable, we want to use it and display it back to the user. What could be nicer than wishing them a great day?
print("Hello (response!), I hope you are having a great day!")
Even if you have experience in other languages, you will see some differences here. Rather than using the + operator outside of the quotation marks to display your variable, you use (variableName) within the quotation marks. Another feature of Swift is the use of Optional Values. These values are hard to understand at first glance, but add greater functionality to the use of variables within Swift.
In this instance, we simply want to display the value as it is, so we add an exclamation mark after the variable name response! to denote that it is not an Optional Value. An optional value is a variable that may or may not get assigned a value. It doesn’t require one. If it isn’t assigned a value, then it will be assigned nil.
A question mark (?) after the value type identifies it as optional, while an exclamation means that it isn’t.
Your code will look something like this:
To save your code, use File > Save As and select Swift file from the Save As Type menu. If your menu is missing the Swift file type, select all files instead, and add the .swift file extension after your chosen filename.
Compiling Swift in Windows 10
Now that we have a program, we need to be able to compile and run it. While there is no built in way to program Swift in Windows 10, there is a work around. Han Sangjin has created a compiler for Swift which is available for download from Github. Download and install the Swift for Windows application using the instructions provided in the link.
Once it is installed, open it up. Click on the Select File button and select your previously made program. Click Compile and wait for the program to compile.
For a program this tiny it should be nearly instant, though it can take time depending on how complex you made your code!
You should receive a «Successfully compiled» message in the dialog box. If not, go back and check through your code to make sure you haven’t made any errors. Once the code compile, click Run to run your program. The program will open in the Windows Command Line, and should look like this:
It is worth noting that you must use the Swift for Windows application to run your code, the EXE file that’s created will not work stand alone, even if the application is open.
Begin Coding Swift on Windows Today
If you decide that Swift is for you, there are a wealth of tools out there to help you. Once you’ve got a basic grasp of the environment, why not try a few beginner projects to bring your knowledge to life?
If you are a Linux user looking to code iOS apps, here’s how to code in Swift with Ubuntu.
With the release of Swift 3.0 being available for Mac OS and Windows, does this mean you can compile and run Swift code on Windows? If so what compiler do you use for Windows?
![]()
informatik01
15.8k10 gold badges74 silver badges103 bronze badges
asked Apr 17, 2016 at 9:59
![]()
1
There is an open source project on GitHub that (quote) «provides an easy-to-use development environment for Swift programming for Windows applications«: Swift for Windows.

System Requirement
- Windows 10 64bit, Windows 7 64bit
NOTE
The project was initially hosted on Microsoft CodePlex, but then moved to GitHub.
![]()
informatik01
15.8k10 gold badges74 silver badges103 bronze badges
answered May 10, 2016 at 6:25
![]()
Vineet ChoudharyVineet Choudhary
7,2573 gold badges46 silver badges72 bronze badges
0
Since Swift got open sourced, many more platforms were supported by Swift.
Linux was added shortly after it was open sourced, and just recently, the Android support for Swift was merged into the master branch.
You can track the progress of porting Swift to Windows here. As you might see, it’s not currently being worked on actively by the Swift team, there is, however, a community port on Github trying to port Swift to Windows.
answered Apr 17, 2016 at 12:47
![]()
LeandrosLeandros
16.7k9 gold badges70 silver badges108 bronze badges
0
You say:
With the release of swift 3.0 being avaliable for Mac OS and Windows
But this hasn’t been announced officially.
There’s some projects, but nothing from Apple… yet.
And anyway, the site where you read this:
swift.im/releases.html
is not about Apple’s Swift, it’s an entirely different project with, unfortunately, the same name.
![]()
answered Apr 17, 2016 at 13:15
![]()
Eric AyaEric Aya
69k35 gold badges179 silver badges250 bronze badges
1
As far as I know: Swift is available for linux and you can expect swift for Windows, Android soon in the future.
If you want to use Swift language on windows, you must be rely on web based platform. For example: http://swiftstub.com , http://www.runswiftlang.com , etc.
Silver runs on Windows and allows you to compile Swift code to Java and .NET.
answered Apr 17, 2016 at 11:18
![]()
3
- Yes, as of September 2020 Swift is available as a binary download for windows. There are even windows-specific instructions for getting started.
- The OP asked about which compiler is used. I believe the swift binary is what actually builds the code into an executable. (As of the blog post in 2020, it was
CMake, but swift packages are now supported, as well as theswift buildcommand.)
This question is quite old, so no doubt the other answers were all correct when they were written, but this shows up prominently in search results, and should probably have a community wiki answer.
Running Apple’s Swift programming language on Windows 10 is as simple as 1, 2 and 3.
- Setup the Linux Subsystem for Windows 10 Anniversary Edition
- Run
sudo apt-get install build-essential(and optionallysudo apt-get install clang) - Download, and Run swift!
Note: for each of these links you can click or scroll down for more
Alternatively, the video below demonstrates the steps in motion…
https://www.youtube.com/embed/Z0PZc7WqPtE
And that’s it.
Just note that both technologies are unstable as of September 2016
- Swift is a fairly immature programming language
- Due to the absence tools like a beautifier — though third-party tools such as Haaakon’s SwiftFormat https://github.com/haaakon/SwiftFormat does the trick
- Due to missing tangible desires such as bug reports & support from fellow Windows users of Swift (of which there is none)
- And with breaking changes each major version of Swift (which might be why the Swift 1.0 code you found won’t work on Swift 2.2 or even Swift 3.0 beta).
- And the Windows Subsystem for Linux (WSL) is still in beta, with normally trivial tasks, such as interacting with the subsystem programmatically, almost impossible: https://github.com/Microsoft/BashOnWindows/issues/
Setting up WSL
To set up the Windows subsystem for Linux, an official guide can be followed here: https://msdn.microsoft.com/en-us/commandline/wsl/install_guide
Here’s a summary:
And that’s it! A mini non-Linux environment within Windows. Similar to how OS X does it, only 10 years behind.
Takes around 30 minutes.
Those Linux commands
With how administrative/root privileges work in WSL, you don’t need «su/sudo» to run what are normally root commands (if you’ve skipped setting up the root user).
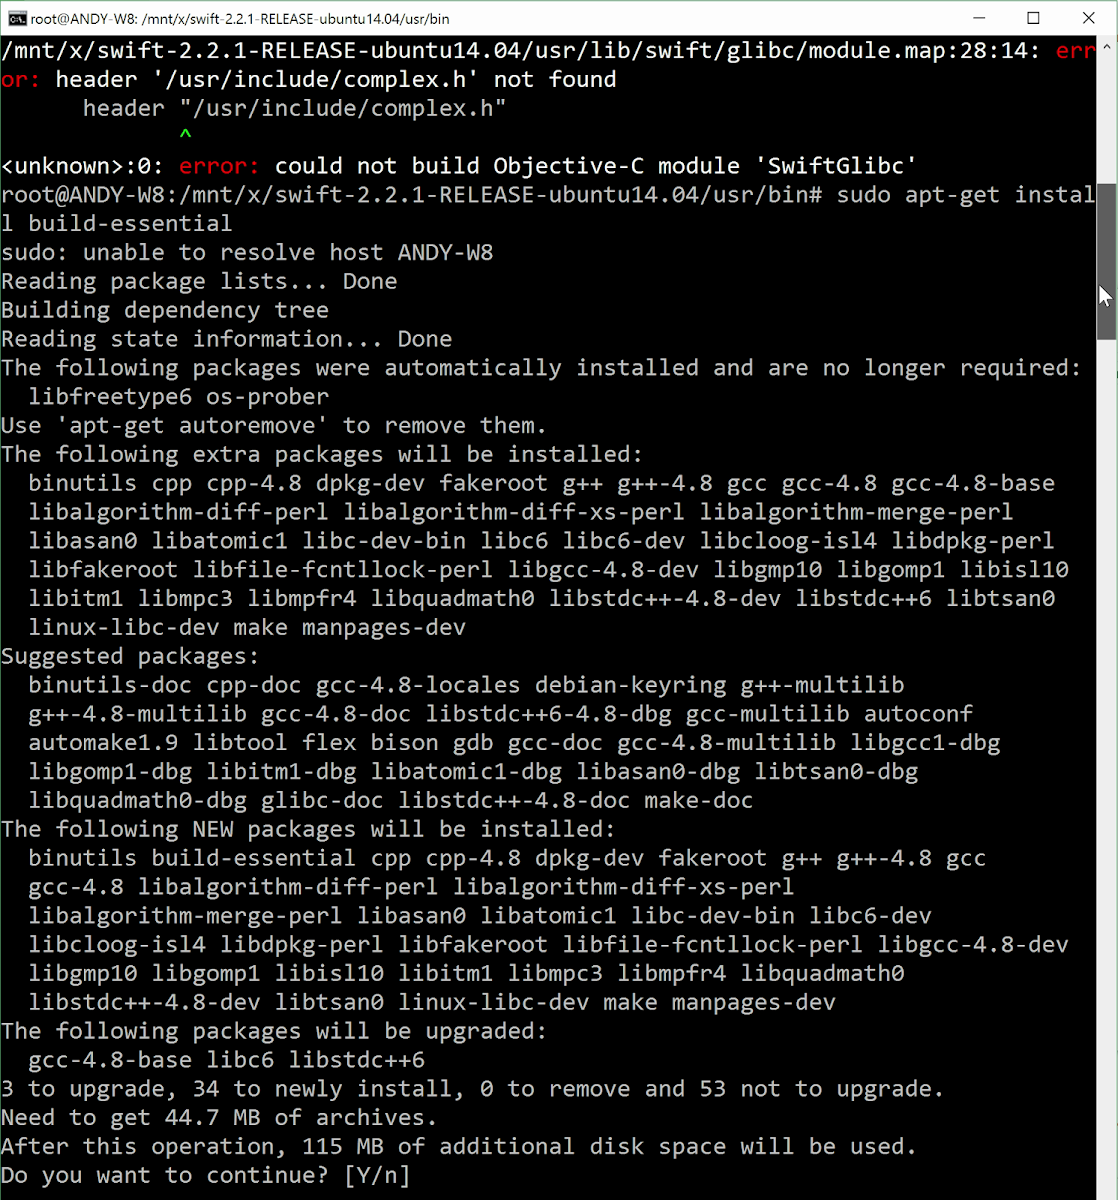
apt-get install build-essential should work on its own.
The build-essential package is required to run Swift. Without it, Swift would just fail in executing scripts. Unfortunately, this is quite a large package on Ubuntu, and even on Windows its no exception.
So run the command and wait it out, a tip to speed up the process of downloading packages is shown in the video.
Running apt-get install clang allows for Swift code compilation support in Windows via swiftc (swiftc with build-essentials alone does not work). Interestingly the resulting binary that swiftc compiles is a native Linux/Ubuntu ELF instead of a Windows exe.
Takes around 30 minutes.
Swift
Download Swift from here: https://swift.org/download/, note that you’d want the Ubuntu 14.04 version, if still offered.
Extract the archive just like you would on Ubuntu (or extract it using the Windows method, whichever you prefer), and run /usr/bin/swift through bash.
Takes around 10 minutes.
And that’s it! Swift (the programming language) running on Windows 10 using the Windows Subsystem for Linux!
Although REPL doesn’t really work, and you’re not exactly working with native Windows goodness.
Для работы со Swift он создает среду IDE, которая представляет собой не что иное, как набор инструментов и средств, которые понадобятся программистам для разработки и проектирования программного обеспечения. Они делают это, предоставляя среду, в которой они могут писать и тестировать свой код. Поэтому, если мы хотим работать со Swift в macOS или Windows, нам понадобится инструмент, который предлагает нам эту совместимость.

Содержание
- Swift, язык программирования Apple
- Кросс-платформенные программы для использования Swift
- Атом, один из самых популярных редакторов
- Sublime Text, имеет собственный пакет для Swift
- Visual Studio Code, возможность программирования Swift от Microsoft
- Расписание в macOS
- Xcode, инструмент, созданный Apple для разработки и компиляции
- AppCode, специально разработанный для разработки на Swift
- CodeRunner, легкая среда разработки для программирования с поддержкой Swift
- SCADE, программирование под Android и iOS
- Как лучше всего программировать на Swift?
Swift, язык программирования Apple
Речь идет об интуитивном, с открытым исходным кодом , бесплатный и мультипарадигмальный язык программирования, который был создан и представлен Apple в 2014 году. Он был специально разработан для разработка приложений для iOS и macOS быстро и эффективно, легко интегрируясь с Frameworks, Cocoa и Cocoa Touch, для использования в любой библиотеке, запрограммированной на Objective-C. Этот язык доступен для разработчиков, преподавателей и студентов по лицензии Apache 2.0.
Swift разработан, чтобы упростить задачу по написанию и сопровождению программ для разработчика, поддерживая предполагаемые типы данных, чтобы сделать код более чистым и менее подверженным ошибкам. Этот язык программирования был задуман как замена языков на основе C, C ++ и Objective-C с лучшими результатами. Кроме того, он находится в постоянном развитии под строгим контролем за развитием языка.
Когда дело доходит до поиска наиболее подходящего редактора для работы со Swift, при поиске наиболее подходящего редактора необходимо учитывать несколько факторов, например:
- То, что он совместим с этим языком, что-то важное для работы с ним, и не все редакторы на рынке предлагают такую возможность.
- Есть такие функции, как подсветка синтаксиса.
- Хорошего отладчика
- Автозаполнение кода поддержки
Хотя Swift — это язык программирования, принадлежащий Apple, с помощью которого можно разрабатывать приложения для macOS и iOS, это не означает, что мы не можем использовать его на компьютере с Windows, пока мы используем подходящий и совместимый инструмент.
Атом, один из самых популярных редакторов
Мы говорим о бесплатном текстовом редакторе с открытым исходным кодом для Windows, хотя его также можно использовать на других платформах, таких как macOS и Linux. Он разработан для использования всеми типами пользователей, будь то новички или продвинутые. Редактор позволит нам организовывать проекты по папкам, использовать несколько панелей одновременно и поддерживать такие языки, как C ++, PHP, JavaScript, HTML, а также Swift.
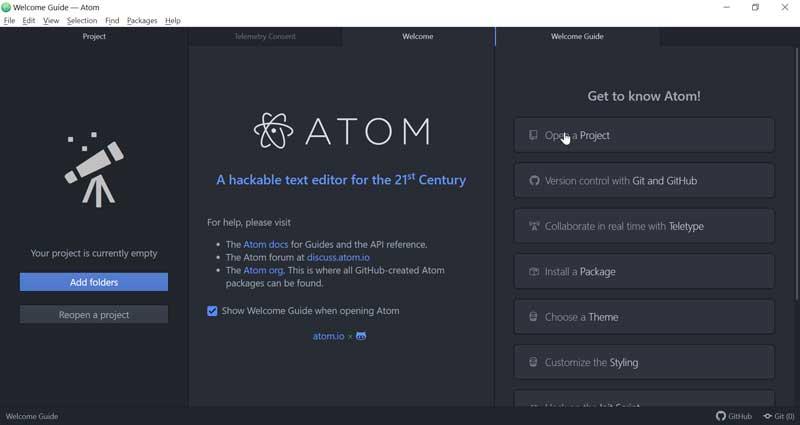
В настоящее время с Atom возможно автозаполнение кода Swift с помощью sourcekitten и сборка с помощью сборки Swift. Это также позволяет нам видеть список ошибок и предупреждений компиляции, устанавливать точки останова в коде Swift и запускать приложение, созданное в lldb. Кроме того, мы сможем проходить в точках останова. Кроме того, мы сможем взаимодействовать с lldb, используя его интерфейс командной строки.
Мы можем бесплатно скачать Atom прямо с их веб-сайт Честного ЗНАКа .
Sublime Text, имеет собственный пакет для Swift
Это текстовый редактор кода, совместимый с широким спектром языков программирования, а также с языком разметки, что делает его одним из лучших вариантов для профессионалов. Он предлагает совместимость с популярными языками программирования, такими как HTML и CSS, а также со Swift для Apple, для которого у него есть хорошо известный пакет под названием Swift-Sublime-Пакет что мы должны установить через Пакетный контроль.
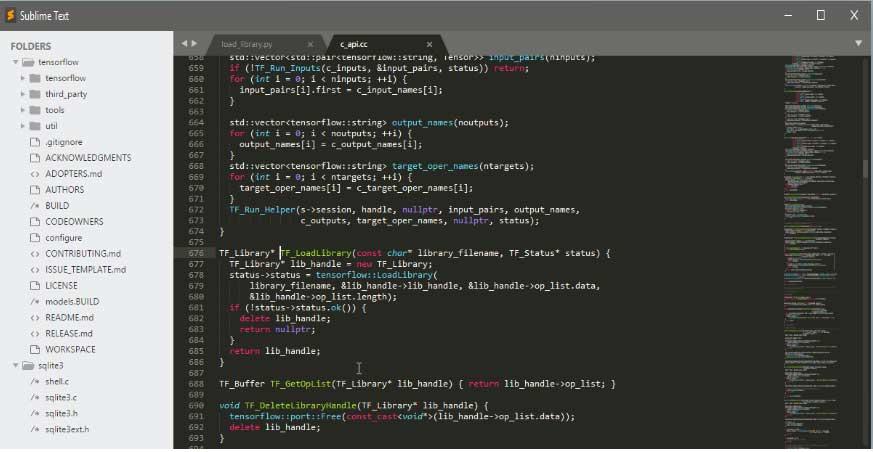
Его главный недостаток заключается в том, что это не самое интуитивно понятное приложение в мире, поэтому его использование предназначено особенно для самых продвинутых пользователей, поскольку оно способно повысить нашу производительность, как только нам удастся освоить его работу. Он имеет очень полезные функции, такие как определение стержней синтаксиса, выделение кода, выбор нескольких строк или выполнение разделенного редактирования и т. Д.
Мы можем скачать Sublime Text с веб-сайта , будучи совместимым с Windows, но также с macOS и Linux. Мы также можем получить доступ к вашему Swif-Sublime-Package из здесь .
Visual Studio Code, возможность программирования Swift от Microsoft
У Microsoft также есть собственный редактор исходного кода под названием VS Code, который отвечает за совместимость с большим количеством языков программирования, таких как C #, C ++, HTML, Java, PHP, Python, SQL и также поддержка Swift за счет использования специального расширения. Он включает в себя списки завершения, справку по сигнатуре, фрагменты, краткую информацию и определение перехода. Чтобы работать в среде Swift, мы должны установить расширение для Swift в его палитре команд.
Этот бесплатный редактор имеет несколько интерактивных функций, таких как выделение синтаксиса и автозаполнение с помощью IntelliSense, которое предоставляет нам интеллектуальное завершение на основе типов переменных, определений импортированных функций и модулей, кода отладки, проверки различий и прямых фиксаций из редактора и т. Д. Кроме того, он включает встроенный элемент управления Git, подсветку синтаксиса, интеллектуальное завершение кода, фрагменты и рефакторинг кода.
Visual Studio Code доступен для Windows и других платформ, таких как Linux и macOS, бесплатно. Мы можем скачать это из этой ссылки .
Расписание в macOS
Swift — это язык программирования, специально разработанный для работы с macOS, его естественной средой обитания. Для этого мы можем получить некоторые IDE, подобные тем, которые мы представляем ниже.
Xcode, инструмент, созданный Apple для разработки и компиляции
Речь идет об IDE, которая стала среда разработки для macOS , включающий набор инструментов, созданных Apple, направленных на разработку всех видов программного обеспечения для компании из Купертино, будь то для macOS, iOS, watchOS и tvOS. С помощью этого инструмента будет непросто написать код Swift, поскольку он предоставляет такие функции, как расширенное завершение кода, сворачивание кода, подсветка синтаксиса. Кроме того, он имеет компилятор LLVM с открытым исходным кодом для C, C ++ и Objective-C, интегрированный и доступный в Терминале.
Не менее верно и то, что это непростое приложение и у него довольно высокая кривая обучения, но как только мы овладеваем им, мы получаем взамен очень мощный инструмент. Он также требует мощного компьютера и имеет проблемы с производительностью, поэтому он всегда был в поле зрения разработчиков. Кроме того, его использование стало практически необходимым, поскольку нам нужно, чтобы он мог компилироваться.
Мы можем скачать Xcode из Мак App Store, нажав здесь .
AppCode, специально разработанный для разработки на Swift
Сейчас мы говорим об IDE для разработки Swift, Objective-C, C и C + для iOS и macOS, построенной на платформе IntelliJ IDEA от JetBrains. Он выделяется рядом очень интересных функций. Например, пока мы пишем код, статический анализ или все поддерживаемые языки будут обрабатывать каждую ошибку или отображать предупреждение. По мере написания он также будет предлагать быстрые исправления. Мы сможем быстро переходить к любому классу, функции или символу в его кодировке, а также проверять только релевантное использование во время поиска.
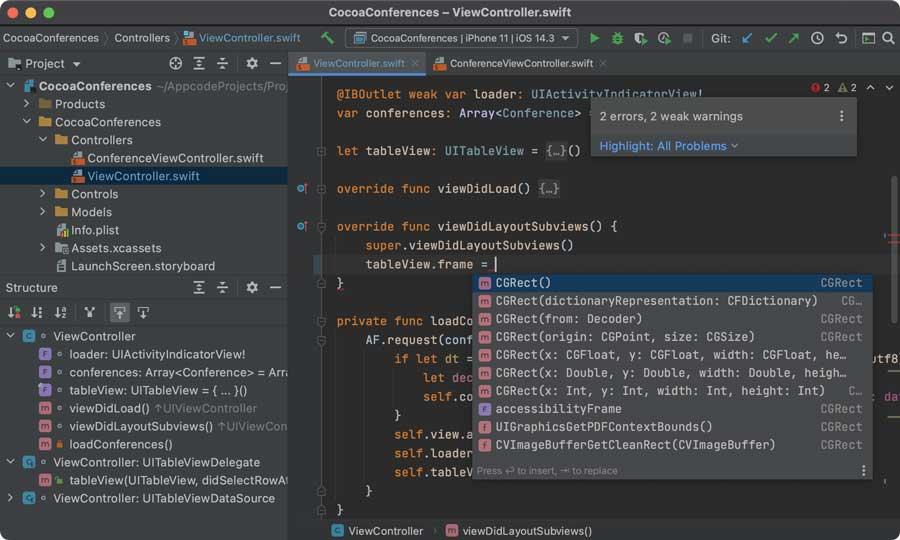
Эта IDE поддерживает платформы XCTest, Quick, Kiwi, Catch, Boost.Test и Google Test. Предоставляет встроенное средство запуска тестов вместе с мощным пользовательским интерфейсом для исследования результатов тестирования. Кроме того, он включает единый интерфейс для самых популярных VCS, включая Subvercion, Git, GitHub, Mercurial и т. Д.
Мы можем скачать 30-дневную пробную версию с их веб-сайт Честного ЗНАКа .
CodeRunner, легкая среда разработки для программирования с поддержкой Swift
Речь идет об облегченной среде IDE программирования для iOS и macOS, предназначенной для поддержки всех наиболее часто используемых языков программирования и мгновенного их выполнения. Приложение может запускать код на 25 языках, включая нечеткий поиск, заполнители с возможностью выбора табуляции и фрагменты документации. Он также имеет более 200 синтаксических режимов и множество расширенных функций редактирования.

С помощью этой IDE мы можем выполнять код на таких языках, как AppleScritpt, C, C #, Go, HTML, Java, JavaScript, PHP, Python и других. Это также позволяет нам добавить поддержку Swift. Кроме того, это позволяет нам запускать многофайловые проекты без необходимости ручной настройки.
Мы можем скачать CodeRunner из этой ссылке.
SCADE, программирование под Android и iOS
Это На основе Eclipse программа, которая компилирует исходный код Swift в собственный код с помощью компиляторов Swift для iOS и Android. SCADE отвечает за создание каждой страницы приложения как объекта, поэтому при ее создании автоматически генерируется файл .swift, который ею управляет. Кроме того, он предоставляет отличный набор визуальных элементов управления, таких как веб-управление, управление камерой, управление захватом видео, управление картой и т. Д.
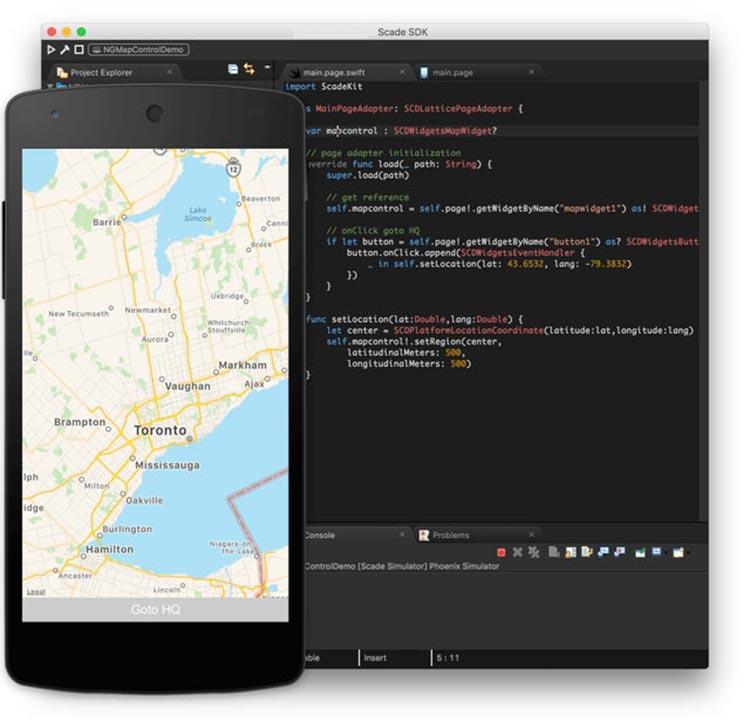
Его главный минус в том, что SCADE использует собственный API , поэтому независимо от того, насколько мы знаем Swift, нам придется изучить и изучить его, чтобы воспользоваться всеми его возможностями.
Мы можем скачать SCADE из здесь.
Как лучше всего программировать на Swift?
Как мы видим, у нас есть много возможностей для программирования на Swift, в основном в macOS, хотя мы также можем использовать некоторые многоплатформенные редакторы, так что можно будет программировать в Windows. Из всех доступных вариантов Xcode предлагает разработчикам все необходимое для создания приложений для Mac, IPad и iPhone. И дело в том, что это не только позволит нам программировать на Swift, но также станет возможным компилировать и отправлять наши приложения в App Store. Это то, что предлагают не все IDE, поэтому, безусловно, даже если мы воспользуемся другим из доступных вариантов в конце, нам придется пройти через Xcode.