XAMPP — это бесплатный инструмент с открытым исходным кодом, который в основном используется для создания локальной копии сайта на вашем компьютере в целях тестирования. Это легкое и кроссплатформенное приложение, которое упрощает веб-разработчикам тестирование его плагинов, тем и прочего. Xampp поставляется с Apache и MySQL, которые являются двумя основными компонентами для его установки. Apache используется для создания локального сервера, в то время как вы можете использовать MySQL для управления или сохранения данных на локальном сервере для веб-сайта.
Этот сервер используется для тестирования страниц PHP. Он позволяет вам создать локальный веб-сервер, где вы можете протестировать любые плагины, темы и другие вещи, прежде чем применять их на живом сайте WordPress. Таким образом, вы можете защитить свой сайт WordPress от возможных ошибок. Итак, давайте начнем и узнаем, как правильно установить и настроить XAMPP в Windows 10.
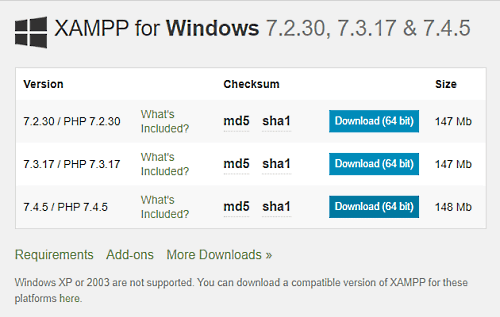
Откройте веб-браузер и перейдите на страницу загрузок Apache Friends. На следующей странице загрузите соответствующую версию для вашего ПК с Windows 10.
После загрузки перейдите в папку загрузки Проводника и запустите установщик XAMPP.
Если на экране появится окно «Контроль учетных записей», нажмите кнопку «Да», чтобы дать свое согласие.
Во время этого может появиться предупреждающее сообщение. Когда вы нажимаете кнопку «ОК», на экране открывается мастер установки XAMPP. Затем нажмите кнопку «Далее», чтобы продолжить.
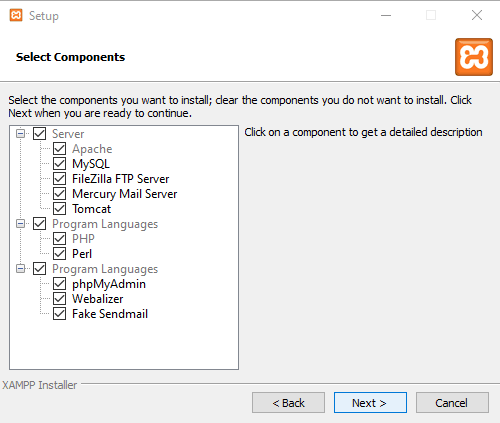
На следующем экране есть множество компонентов, которые необходимо выбрать для процесса установки.
Поскольку эти параметры необходимы для запуска программного обеспечения, оставьте его как есть и нажмите кнопку «Далее».
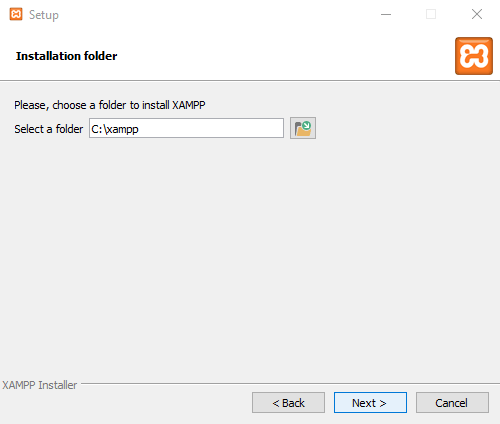
Затем выберите папку, в которую вы хотите установить файлы XAMPP.
Кстати, мы рекомендуем вам использовать установленное местоположение по умолчанию. А затем нажмите кнопку «Далее».

Поскольку панель управления XAMPP для Windows поддерживает разные языки, выберите нужный язык и нажмите «Далее».
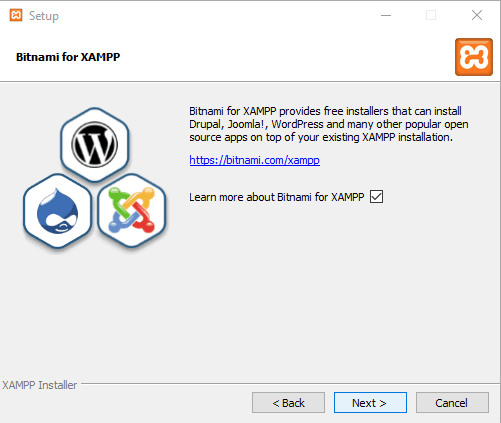
На странице Bitnami for XAMPP просто нажмите кнопку «Далее». Если вы хотите узнать о Bitnami, установите флажок рядом с пунктом Узнать больше о Bitnami для XAMPP.
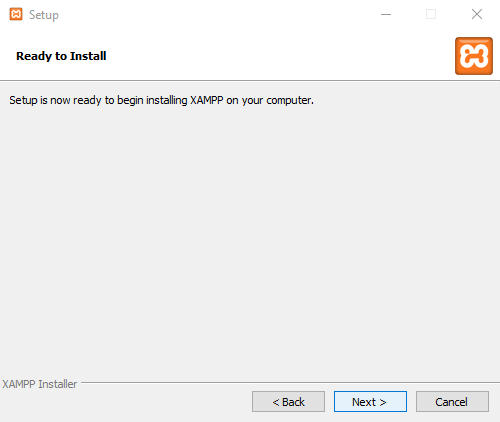
Теперь установка готова к запуску процесса установки на вашем устройстве, поэтому снова нажмите кнопку «Далее», чтобы продолжить.

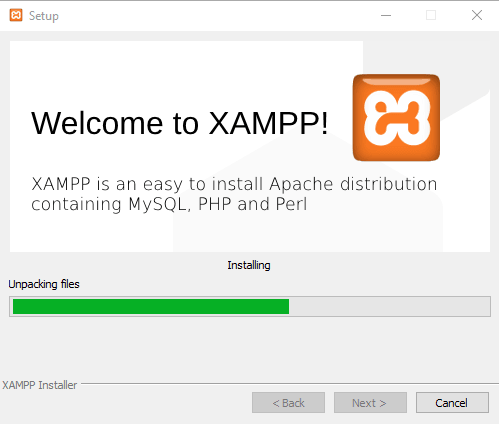
Здесь вам может понадобиться немного подождать, пока он не завершит установку.
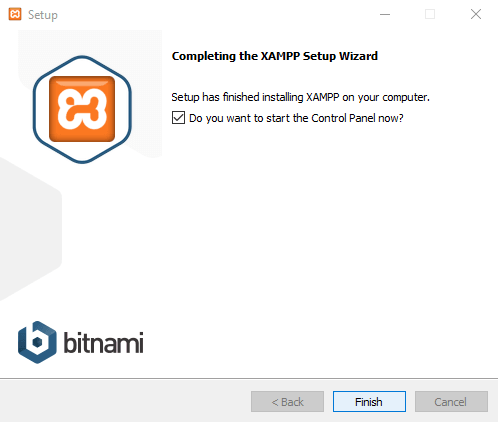
После правильной установки вам будет предложено окно с вопросом «Хотите ли вы запустить панель управления сейчас?».
Установите флажок и нажмите кнопку Готово.
Как настроить XAMPP в Windows 10
Для настройки XAMPP в Windows 10 может потребоваться запустить приложение XAMPP от имени администратора.
Итак, нажмите на кнопку «Пуск» и введите XAMPP.
При этом «Панель управления XAMPP» начинает появляться в лучшем совпадении. Теперь щелкните по нему правой кнопкой мыши и выберите «Запуск от имени администратора». Если UAC запрашивает разрешение, нажмите кнопку «Да».
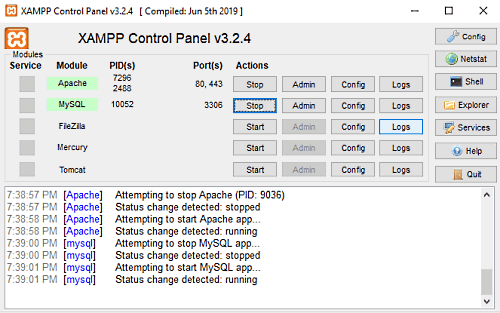
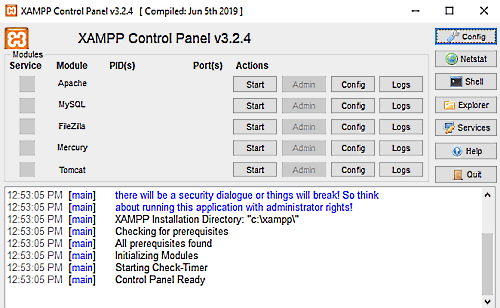
Когда откроется панель управления XAMPP, вы увидите список веб-сервисов в разделе «Модуль».
Здесь сначала необходимо активировать службы Apache и MySQL , нажав соответствующую кнопку «Пуск», которая доступна в разделе «Действия».

Здесь сначала необходимо активировать службы Apache и MySQL, нажав соответствующую кнопку «Пуск», которая доступна в столбце «Действия».
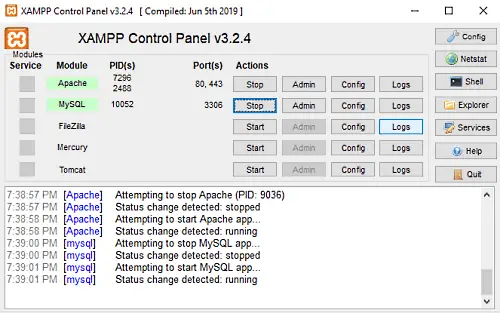
Как только вы нажмете кнопку «Пуск», PID и номер порта соответствующих служб станут видны. Кроме того, соответствующие сервисы в разделе модуля становятся зелеными.
Кроме того, вы также можете запустить другие службы, если они вам нужны.
Чтобы получить доступ к панели администрирования для каждой отдельной службы, нажмите соответствующую кнопку администратора.
В правом конце страницы вы увидите список параметров, таких как Config, Netstat, Shell и другие. Эти параметры помогут вам настроить различные аспекты панели управления XAMPP.
Нажмите на кнопку «Config», чтобы открыть окно конфигурации панели управления.

Установите флажок Модули, которые вы хотите запускать автоматически при запуске приложения. Затем нажмите кнопку Сохранить, чтобы сохранить изменения.
Рядом с кнопкой Config вы найдете кнопку Netstat. Нажав на эту кнопку, вы получите список служб, которые в данный момент получают доступ к сети.

Он состоит из имени исполняемого файла, информации об идентификаторе процесса, номера порта и соответствующего TCP/IP-адреса.
Панель управления XAMPP также предлагает вам раздел журнала каждой конкретной услуги. Это первый сервис, который вы выбираете, чтобы проверить, когда что-то не так, и функция не работает должным образом.
Вот и все. Надеюсь, что после прочтения этого руководства вам стало довольно легко установить и настроить XAMPP на Windows 10.
На чтение 15 мин Просмотров 4.7к. Опубликовано 23.02.2022
Обновлено 20.02.2022
Содержание
- Что такое XAMPP
- Загружаем XAMPP
- Установка XAMPP
- Запускаем XAMPP
- Выносим ярлыки управления на рабочий стол
- Устанавливаем пароль root в MySQL, чтобы ограничить доступ к phpMyAdmin извне
- Как создать базу данных и пользователя для CMS
- Как устанавливать CMS или создавать динамические PHP сайты.
- Настройка виртуальных хостов
- Часто задаваемые вопросы по Windows
- Где я могу изменить конфигурацию?
- Почему изменения в моем php.ini не вступили в силу?
- Помогите! В XAMPP есть вирус!
- Как настроить антивирусное приложение?
- Почему моя загрузка ЦП для Apache составляет почти 99%?
- Как отправить электронное письмо с помощью XAMPP?
- Почему некоторые приложения PHP с открытым исходным кодом не работают с XAMPP в Windows?
- Могу ли я удалить каталог «install» после установки?
- Как активировать эакселератор?
- Как исправить ошибку подключения к моему серверу MS SQL?
- Работают ли страницы Microsoft Active Server (ASP) с XAMPP?
- Как я могу заставить XAMPP работать на порту 80 под Windows 10?
- Как я могу использовать Microsoft Edge для доступа к локальным адресам в Windows 10?
- Где находятся основные файлы конфигурации XAMPP?
- Альтернативы XAMPP
Что такое XAMPP
XAMPP — это бесплатное мультиплатформенное программное обеспечение для локальной разработки и отладки сайтов. Это дистрибутив Apache, содержащий в себе MariaDB, MySQL, PHP и Perl.
Загружаем XAMPP
Перейдите на официальный сайт программы, выберете подходящий для вас вариант, в зависимости от установленной на вашем компьютере операционной системы и скачайте файл.

Установка XAMPP
Запускаем скачанный дистрибутив двойным щелчком мыши.
Если у вас Windows 7 — 11 с включенным контролем учетных записей, всплывет окошко «Контроль учетных записей», в котором вам нужно выбрать «Да». И следом за ним выйдет окно с предупреждением.

В нем написано следующее: Поскольку в вашей системе активирован контроль учетных записей (UAC), некоторые функции XAMPP могут быть ограничены. При использовании UAC избегайте установки XAMPP в C:Program Files (отсутствуют права на запись). Или отключите UAC с помощью msconfig после этой настройки. Соглашаемся нажав «Ок»
Запустится установщик — окно приветствия нажмите «Next».

На следующем шаге необходимо выбрать перечень устанавливаемых компоненты. Рекомендую оставить стандартные настройки и нажать «Далее».

В следующем шаге нужно выбрать папку для сохранения XAMPP (куда он устанавливается). По умолчанию стоит C:xampp, можете устанавливать туда, либо создать другую директорию (не на системном разделе — рекомендую) и указать ее.

Следующим шагом вы можете выбрать язык установки (выбор правда не велик: английский или немецкий).

В следующем окне Хампп говорит, что на сайте Bitnami для XAMPP есть бесплатные установщики, которые могут установить Drupal, Joomla!, WordPress и многие другие популярные приложения с открытым исходным кодом поверх существующей установки XAMPP. если оставите галку на против пункта на против надписи Learn more about Bitnami for XAMPP, откроется указанный сайт.

Жмем «Next» в следующем окне снова «Next» и ждем, пока XAMPP установится.

Если у вас Windows, то 90% что в процессе установки выскочит окно «Оповещение Безопасности Windows», разрешаем Apache доступ ко всем сетям и жмем по кнопке «Разрешить доступ».

На финальном шаге, жмем «FinisH».
Запускаем XAMPP
Когда XAMPP установлен на ваш компьютер, выберите «Начать загрузку панели управления сейчас» и нажмите «Готово».

После этого запускаем модуля Apache и MySql нажав на против них на кнопки нажмите «Start»:

На этом этапе обычно приходит оповещение о системе безопасности от Windows, но вы можете ни о чем не беспокоиться. Ставим все галочки и разрешаем доступ. После чего ваш локальный сервер XAMPP будет готов к использованию.

Чтоб проверить, все ли сделано правильно, откройте браузер и перейдите по этому адресу:
http://localhost
Если XAMPP настроен правильно, то вы должны увидеть следующее:

Выносим ярлыки управления на рабочий стол
Для того, чтобы не лазить в папку куда установлен XAMPP для его запуска (особенно если часто пользуйтесь), рекомендую вынести ярлыки на рабочий стол. Для этого перейдите в папку куда установлен локальный сервер. Щелкните правой кнопкой мыши по файлу xampp-control.exe и в контекстном меню выберите Отправить — Рабочий стол (создать ярлык).

-
Устанавливаем пароль root в MySQL, чтобы ограничить доступ к phpMyAdmin извне
- Запустите «XAMPP Shell» (командная строка), в панели управления XAMPP и выполните команду:
mysqladmin.exe -u root password secret. Это устанавливает пароль root на «secret». 

После этого идем в файл конфигурации: xamppphpMyAdminconfig.inc.php и указываем там пароль (21 строка).

Как создать базу данных и пользователя для CMS
Так как большинство CMS использует базу данных, то ее нужно создать перед установкой движка, делается это всего в несколько шагов.
Открываем панель управления (ярлык который вынесли), стартуем MySql, после чего, нажмите на кнопку «Админ»:

После этого в вашем браузере должна открыться админ-панель phpMyAdmin. В ней переходим во вкладку на «Учетные записи пользователей», на открывшейся вкладке и нажмите на ссылку «Добавить учетную запись пользователя».

На открывшейся странице, вводим / указываем:
- Имя пользователя, например myUser (запишите);
- Имя хоста: Локальный: localhost;
- Генерим пароль, нажав на кнопку «Генерировать» (запишите сгенерированный пароль);
- Ставим галки на против пунктов: «Создать базу данных с таким же именем и предоставить на неё все привилегии.» и «Предоставить все привилегии на то, что подпадает под шаблон (имя пользователя_%).»;
- Отмечаем все глобальные привилегии;
- Нажимаем «Вперед».

После этого будет создана база данных и пользователь к ней

Имя БД создается в нижнем регистре, а пользователь в обычном, учтите это при установке CMS, когда вводите данные для подключения к базе.

Так как вы можете создать сколько угодно БД и пользователей, чтобы в дальнейшем провести несколько установок различных CMS, например: WordPress, MODX, OpenCard на свой компьютер. Главное не забывайте записывать данные вот баз в блокнот.
Как устанавливать CMS или создавать динамические PHP сайты.
- Основной каталог для всех документов WWW — xampphtdocs. Если вы поместите файл «test.html» в этот каталог, вы сможете получить к нему доступ с помощью URI «http://localhost/test.html».
Не рекомендую использовать коренной каталог, лучше создайте в нем отдельные директории, для отдельных сайтов, например xampphtdocswordpress, xampphtdocsmodx.

Далее к этим каталогам можно обращаться в браузере по следующим путям http://localhost/wordpress/ и http://localhost/modx/
Настройка виртуальных хостов
Если вам не направятся адреса типа http://localhost/wordpress/ вы их спокойно можете превратить к примеру в http://wordpress.localhost/ при помощи настройки виртуальных хостов.
Чтобы создать виртуальный хост, выполните следующие действия:
- Перейдите в каталог установки XAMPP (обычно C:xampp ) и откройте файл httpd-vhosts.conf в подкаталоге apacheconfextra с помощью вашего любимого текстового редактора.
- Замените содержимое этого файла следующими директивами:
<VirtualHost *:80>
       DocumentRoot "C:/xampp/htdocs/"
       ServerName localhost
</VirtualHost>
<VirtualHost *:80>
       DocumentRoot "C:/xampp/apps/wordpress/htdocs"
       ServerName wordpress.localhost
</VirtualHost>
Он содержит два блока конфигурации виртуального хоста:
- Первый блок — это виртуальный хост по умолчанию или резервный, который используется для всех запросов, не соответствующих последующим блокам.
- Второй блок устанавливает виртуальный хост с именем wordpress.localhost . Директива DocumentRoot указывает каталог, который будет использоваться при обслуживании запросов для этого виртуального хоста (в данном случае каталог установки WordPress), а директива ServerName указывает имя пользовательского домена для виртуального хоста.
Чтобы добавить больше виртуальных хостов, просто продублируйте второй блок виртуального хоста и измените номер порта, директивы DocumentRoot и ServerName в соответствии с вашими требованиями. Например, если вы хотите использовать SSL с вашим личным доменным именем, вы можете добавить новый блок виртуального хоста для порта 443.
-
Перезапустите Apache с помощью панели управления XAMPP, чтобы изменения вступили в силу.
- На этом этапе ваш виртуальный хост настроен. Однако, если вы попытаетесь перейти к домену wordpress.localhost , ваш браузер покажет уведомление об ошибке, так как этот домен не существует в действительности. Чтобы решить эту проблему, необходимо сопоставить личный домен с локальным IP-адресом. Для этого откройте файл C:windowssystem32driversetchosts и добавьте в него следующую строку:
127.0.0.1 wordpress.localhostЭто заботится о сопоставлении доменного имени wordpress.localhost с локальным компьютером, который всегда имеет IP-адрес 127.0.0.1.
В некоторых версиях Windows вы не сможете редактировать файл C:windowssystem32driversetchosts без прав администратора. Вы можете отредактировать файл, щелкнув правой кнопкой мыши значок «Блокнот» и выбрав пункт меню «Запуск от имени администратора», затем введя учетные данные администратора (если требуется) и нажав «ОК» или «Да», чтобы продолжить.
Часто задаваемые вопросы по Windows
Где я могу изменить конфигурацию?
Почти все настройки в XAMPP можно изменить с помощью конфигурационных файлов. Просто откройте файл в текстовом редакторе и измените нужные настройки. Только FileZilla и Mercury должны быть настроены с помощью инструмента настройки приложения.
Почему изменения в моем php.ini не вступили в силу?
Если изменение в «php.ini» не имеет никакого эффекта, возможно, PHP использует другой. Вы можете проверить это с помощью phpinfo(). Перейдите к URI http://localhost/xampp/phpinfo.php и найдите «Загруженный файл конфигурации». Это значение показывает, что PHP действительно использует «php.ini».
После изменения «php.ini» вам необходимо перезапустить Apache, чтобы Apache/PHP мог прочитать новые настройки.
Помогите! В XAMPP есть вирус!
Некоторые антивирусные программы ошибочно принимают XAMPP за вирус, обычно помечая файл xampp-manager.exe. Это ложное срабатывание означает, что антивирус ошибочно идентифицировал его как вирус, хотя это не так. Прежде чем выпускать каждую новую версию XAMPP, разработчики прогоняют ее через программное обеспечение для сканирования на вирусы. На данный момент мы используем Kapersky Online Virus Scanner. Вы также можете использовать онлайн-инструмент Virus Total для сканирования XAMPP или отправить электронное письмо в службу безопасности (at) apachefriends (dot) org, если обнаружите какую-либо проблему.
Как настроить антивирусное приложение?
Мы включили все зависимости и серверы, необходимые для запуска связанного веб-приложения, поэтому вы обнаружите, что XAMPP устанавливает большое количество файлов. Если вы устанавливаете приложение XAMPP на компьютере с Windows с включенным антивирусным приложением, это может значительно замедлить установку, а также существует вероятность того, что один из серверов (веб-сервер, сервер базы данных) может быть заблокирован антивирусным программным обеспечением. . Если у вас включен антивирус, проверьте следующие параметры для запуска XAMPP без проблем с производительностью:
- Добавьте исключения в брандмауэр: для Apache, MySQL или любого другого сервера.
- Сканировать файлы при запуске: Если вы включили антивирусную проверку всех файлов, исполняемые файлы для серверов могут работать медленнее.
- Сканируйте трафик на наличие разных URL-адресов: если вы работаете с XAMPP на своем компьютере, вы можете исключить трафик «localhost» в настройках антивируса.
Почему сервер Apache не запускается в моей системе?
Эта проблема может быть одной из нескольких причин:
- Вы запустили более одного HTTP-сервера (IIS, Sambar, ZEUS и т. д.). Только один сервер может использовать порт 80. Это сообщение об ошибке указывает на проблему:
(OS 10048)... make_sock: could not bind to adress 0.0.0.0:80

no listening sockets available, shutting down - У вас есть другое программное обеспечение, такое как интернет-телефон «Skype», который также блокирует порт 80. Если проблема связана со «Skype», вы можете перейти в Skype к «Действия» -> «Параметры» -> «Подключение» -> снять галочку. в «использовать порт 80 в качестве альтернативного порта» и перезапустите Skype. Теперь это должно работать.
- У вас есть брандмауэр, который блокирует порт Apache. Не все брандмауэры совместимы с Apache, и иногда деактивации брандмауэра недостаточно, и вы должны его удалить. Это сообщение об ошибке указывает на брандмауэр:
(OS 10038)Socket operation on non-socket: make_sock: for address 0.0.0.0:80,

apr_socket_opt_set: (SO_KEEPALIVE)
Кроме того, если Apache запускается, но ваш браузер не может подключиться к нему, это может быть связано с одной из следующих причин:
- Некоторые антивирусные сканеры могут вызвать это так же, как брандмауэры могут мешать.
- У вас XP Professional без пакета обновления 1. У вас должен быть хотя бы SP1 для XAMPP.
Совет: Если у вас есть проблемы с используемыми портами, вы можете попробовать инструмент «xampp-portcheck.exe». Может быть, это может помочь.
Почему моя загрузка ЦП для Apache составляет почти 99%?
Здесь разыгрывается один из двух сценариев. Либо ваш процессор перегружен, либо вы можете через браузер подключиться к серверу, но ничего не видите (система безуспешно пытается загрузить страницу). В любом случае вы можете найти следующее сообщение в файле журнала Apache:
Child: Encountered too many AcceptEx faults accepting client connections.

winnt_mpm: falling back to 'AcceptFilter none'.
MPM возвращается к более безопасной реализации, но некоторые клиентские запросы обрабатываются неправильно. Чтобы избежать этой ошибки, используйте «AcceptFilter» с фильтром приема «none» в файле «xamppapacheconfextrahttpd-mpm.conf».
Почему не отображаются картинки и таблицы стилей?
Иногда возникают проблемы с отображением картинок и таблиц стилей. Особенно, если эти файлы расположены на сетевом диске. В этом случае вы можете включить (или добавить) один из следующих строк в файле «xamppapacheconfhttpd.conf»:
EnableSendfile off

EnableMMAP off
Эта проблема также может быть вызвана программами для регулирования пропускной способности, такими как NetLimiter.
Как отправить электронное письмо с помощью XAMPP?
Чтобы настроить XAMPP для использования включенного двоичного файла sendmail.exe для доставки электронной почты, выполните следующие действия:
- Отредактируйте файл XAMPP «php.ini». В этом файле найдите раздел [mail function] и замените его следующими директивами. При необходимости измените путь установки XAMPP.
sendmail_path = ""C:xamppsendmailsendmail.exe" -t"
- Отредактируйте файл XAMPP «sendmail.ini». В этом файле найдите раздел [sendmail] и замените его следующими директивами:
smtp_server=smtp.gmail.com

smtp_port=465

smtp_ssl=auto

error_logfile=error.log

auth_username=your-gmail-username@gmail.com

auth_password=your-gmail-password
- Перезапустите сервер Apache с помощью панели управления XAMPP.
Теперь вы можете использовать функцию PHP mail() для отправки электронной почты из вашего приложения.
Где поддержка IMAP для PHP?По умолчанию поддержка IMAP для PHP деактивирована в XAMPP из-за некоторых загадочных ошибок инициализации в некоторых домашних версиях, таких как Windows 98. Если вы работаете с системами NT, вы можете открыть файл «xamppphpphp.ini», чтобы активировать расширение php, удалив начальную точку с запятой в строке «;extension=php_imap.dll». Так должно быть:
extension=php_imap.dllТеперь перезапустите Apache, и IMAP должен заработать. Вы можете использовать одни и те же шаги для каждого расширения, которое не включено в конфигурации по умолчанию.
Почему некоторые приложения PHP с открытым исходным кодом не работают с XAMPP в Windows?
Многие PHP-приложения или расширения, написанные для Linux, не были перенесены на Windows.
Могу ли я удалить каталог «install» после установки?
Лучше не делать этого. Сценарии здесь по-прежнему необходимы для всех дополнительных пакетов (надстроек) и обновлений XAMPP.
Как активировать эакселератор?
Как и другие (Zend) расширения, вы можете активировать его в «php.ini». В этом файле включите строку «;zend_extension = «xamppphpextphp_eaccelerator.dll»». Так должно быть:
zend_extension = "xamppphpextphp_eaccelerator.dll"
Как исправить ошибку подключения к моему серверу MS SQL?
Если расширение mssql было загружено в php.ini, иногда проблемы возникают при использовании только TCP/IP. Вы можете решить эту проблему с помощью более новой «ntwdblib.dll» от Microsoft. Пожалуйста, замените старый файл в «xamppapachebin» и «xamppphp» новым. Из-за лицензии мы не можем упаковать более новую версию этого файла с помощью XAMPP.Как мне работать с расширением PHP mcrypt?Для этого мы открыли на форуме тему с примерами и возможными решениями: Тема MCrypt
Работают ли страницы Microsoft Active Server (ASP) с XAMPP?
Нет. А Apache::ASP с надстройкой Perl — это не то же самое. Apache::ASP знает только Perl-Script, но ASP из Internet Information Server (IIS) также знает обычный VBScript. Но для ASP .NET доступен сторонний модуль Apache.
Как я могу заставить XAMPP работать на порту 80 под Windows 10?
По умолчанию Windows 10 запускает Microsoft IIS на порту 80, который является тем же портом по умолчанию, который используется Apache в XAMPP. В результате Apache не может подключиться к порту 80.
Чтобы отключить запуск IIS через порт 80, выполните следующие действия:
- Откройте панель «Службы» в «Управлении компьютером».
- Найдите «Служба публикации в Интернете» и выберите ее.
- Щелкните ссылку «Остановить службу».
- Дважды щелкните имя службы.
- В поле «Тип запуска» измените тип запуска на «Отключено».
- Нажмите «ОК», чтобы сохранить изменения.
Теперь вы сможете запустить Apache в XAMPP на порту 80.
Дополнительные сведения см. в руководстве «Устранение неполадок при запуске Apache», включенном в XAMPP, или в этом сообщении на форуме .
Как я могу использовать Microsoft Edge для доступа к локальным адресам в Windows 10?
Если ваш локальный компьютер имеет имя хоста «myhost», вы не сможете получить доступ к URL-адресам, таким как http://myhost, в Microsoft Edge. Чтобы решить эту проблему, вы должны вместо этого использовать адреса http://127.0.0.1 или http://localhost.
Где находятся основные файлы конфигурации XAMPP?
Основные файлы конфигурации XAMPP расположены следующим образом:
- Файл конфигурации Apache: xamppapacheconfhttpd.conf, xamppapacheconfextrahttpd-xampp.conf
- Файл конфигурации PHP: xamppphpphp.ini
- Файл конфигурации MySQL: xamppmysqlbinmy.ini
- Файл конфигурации сервера FileZilla: xamppFileZillaFTPFileZilla Server.xml
- Файл конфигурации Apache Tomcat: xampptomcatconfserver.xml
- Файл конфигурации Apache Tomcat: xamppsendmailsendmail.ini
- Файл конфигурации Mercury Mail: xamppMercuryMailMERCURY.INI
Альтернативы XAMPP
XAMPP — далеко не единственный локальный web-сервер, дгчшие его альтернативы на мой взгляд, это OpenServer Panel и WampServer.
XAMPP is a free and open-source tool that is basically used to create a local copy of the site on your computer for testing purposes. This is a lightweight and cross-platform application that makes it quite simple for web developers to test its plugins, themes, and other things. Xampp comes with Apache and MySQL which are the two main components for its installation. Apache is used to create a local server while you can use MySQL to manage or save data on a local server for the website.
This server is used to test PHP pages. It lets you create a local webserver where you can test any plugins, themes, and other things before applying them on the live WordPress site. That way you can protect your WordPress site from getting potential errors. So, let’s get started and know the proper method to install and configure XAMPP on Windows 11/10.
Open your web browser and head over to the Apache Friends downloads page. On the next page, download the respective version for your Windows 10 PC.

Once it gets downloaded, navigate to the download folder of the File Explorer and launch the XAMPP installer.
If User Account Control prompts on the screen, click on the Yes button to give your consent.
During this, a warning message may come to appear. As you click on the OK button, it opens the XAMPP Setup Wizard on the screen. Then hit the Next button to proceed.

On the next screen, there are a variety of components that you need to select for the installation process.
Since these options are essential to run the software, therefore leave it as it is and click on the Next button.

Thereupon, select the folder location where you want to install the XAMPP files.
By the way, we recommend you use the default installed location. And then hit the Next button.
Since XAMPP Control Panel for Windows supports different languages, so select your preferred language and click Next.
On the Bitnami for XAMPP Page, just hit the Next button. In case you want to know about the Bitnami, then select the checkbox next to Learn more about Bitnami for XAMPP.

Now the setup is ready to start the installation process on your device, so again click the Next button to proceed.
Here you may need to wait for a while until it completes the installation.

After the proper installation, you will be prompted with a window asking you “Do you want to start the Control Panel now?”.
Select the checkbox and click on the Finish button.

How to Configure XAMPP on Windows 11/10
To configure the XAMPP on Windows 11/10, you may need to run the XAMPP application as an administrator.
So, click on the Start button and type XAMPP.
Doing this, the “XAMPP Control Panel” starts appearing in the best match. Now right-click on it and select Run as administrator. If UAC asks you for permission, click on the Yes button.
When the XAMPP Control Panel opens, you will see a list of web services under the Module section.
Here you first have to activate the Apache and MySQL services by clicking on the respective Start button that is available under the Actions section.
Here you first have to activate the Apache and MySQL services by clicking on the respective Start button that is available under the Actions column.
As soon as you click on the Start button, the PID and the Port number of the corresponding services become visible. Also, the respective services under the Module section turn out green.
Likewise, you can also start the other services if you need them.
In order to access the administration dashboard for every single service, click on the related Admin button.
On the right end of the page, you will see a list of options such as Config, Netstat, Shell, and others. These options help you to configure different aspects of the XAMPP Control Panel.
Click on the Config button to open the configuration window of the Control panel.
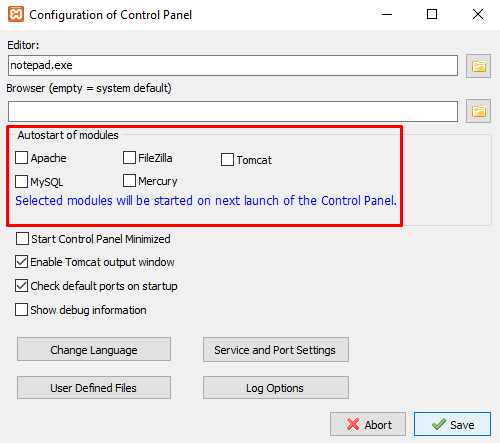
Select the checkbox of the Modules which you want to start automatically when you launch the application. Then, click on the Save button to save the changes.
Next to the Config button, you will find the Netstat button. Clicking on this button provides a list of services that are currently accessing the network.
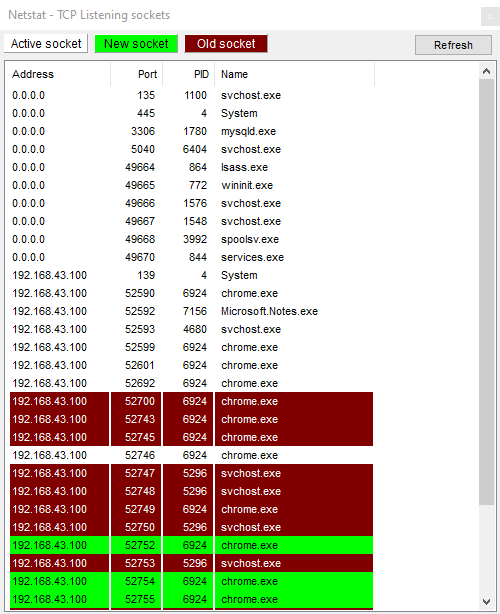
It consists of the executable file name, process ID information, port number, and their respective TCP/IP address.
XAMPP Control Panel also offers you a log section of each specific service. It is the first service you choose to check out when something is wrong and the function doesn’t work properly.
That’s it. I hope after reading this guide, it has now become pretty easy for you to install and configure the XAMPP on your Windows 11/10.
Related: Apache is not starting from XAMPP Control Panel.
XAMPP is a free and open-source tool that is basically used to create a local copy of the site on your computer for testing purposes. This is a lightweight and cross-platform application that makes it quite simple for web developers to test its plugins, themes, and other things. Xampp comes with Apache and MySQL which are the two main components for its installation. Apache is used to create a local server while you can use MySQL to manage or save data on a local server for the website.
This server is used to test PHP pages. It lets you create a local webserver where you can test any plugins, themes, and other things before applying them on the live WordPress site. That way you can protect your WordPress site from getting potential errors. So, let’s get started and know the proper method to install and configure XAMPP on Windows 11/10.
Open your web browser and head over to the Apache Friends downloads page. On the next page, download the respective version for your Windows 10 PC.
Once it gets downloaded, navigate to the download folder of the File Explorer and launch the XAMPP installer.
If User Account Control prompts on the screen, click on the Yes button to give your consent.
During this, a warning message may come to appear. As you click on the OK button, it opens the XAMPP Setup Wizard on the screen. Then hit the Next button to proceed.
On the next screen, there are a variety of components that you need to select for the installation process.
Since these options are essential to run the software, therefore leave it as it is and click on the Next button.
Thereupon, select the folder location where you want to install the XAMPP files.
By the way, we recommend you use the default installed location. And then hit the Next button.
Since XAMPP Control Panel for Windows supports different languages, so select your preferred language and click Next.
On the Bitnami for XAMPP Page, just hit the Next button. In case you want to know about the Bitnami, then select the checkbox next to Learn more about Bitnami for XAMPP.
Now the setup is ready to start the installation process on your device, so again click the Next button to proceed.
Here you may need to wait for a while until it completes the installation.
After the proper installation, you will be prompted with a window asking you “Do you want to start the Control Panel now?”.
Select the checkbox and click on the Finish button.
How to Configure XAMPP on Windows 11/10
To configure the XAMPP on Windows 11/10, you may need to run the XAMPP application as an administrator.
So, click on the Start button and type XAMPP.
Doing this, the “XAMPP Control Panel” starts appearing in the best match. Now right-click on it and select Run as administrator. If UAC asks you for permission, click on the Yes button.
When the XAMPP Control Panel opens, you will see a list of web services under the Module section.
Here you first have to activate the Apache and MySQL services by clicking on the respective Start button that is available under the Actions section.
Here you first have to activate the Apache and MySQL services by clicking on the respective Start button that is available under the Actions column.
As soon as you click on the Start button, the PID and the Port number of the corresponding services become visible. Also, the respective services under the Module section turn out green.
Likewise, you can also start the other services if you need them.
In order to access the administration dashboard for every single service, click on the related Admin button.
On the right end of the page, you will see a list of options such as Config, Netstat, Shell, and others. These options help you to configure different aspects of the XAMPP Control Panel.
Click on the Config button to open the configuration window of the Control panel.
Select the checkbox of the Modules which you want to start automatically when you launch the application. Then, click on the Save button to save the changes.
Next to the Config button, you will find the Netstat button. Clicking on this button provides a list of services that are currently accessing the network.
It consists of the executable file name, process ID information, port number, and their respective TCP/IP address.
XAMPP Control Panel also offers you a log section of each specific service. It is the first service you choose to check out when something is wrong and the function doesn’t work properly.
That’s it. I hope after reading this guide, it has now become pretty easy for you to install and configure the XAMPP on your Windows 11/10.
Related: Apache is not starting from XAMPP Control Panel.
XAMPP is a free open source software that provides an easy way for web designers and developers to install the components to run PHP-based software like WordPress, Drupal, Joomla, and others on Windows 10, Linux, and macOS.
If you are a web developer or trying to get into blogging, XAMPP will save you time and frustration manually installing and configuring Apache, MySQL, PHP, and Perl to create a testing environment on your device.
In this guide, you’ll learn the steps to install XAMPP on Windows 10, as well as the instructions to configure the web environment and fix common problems after the setup.
- How to install XAMPP on Windows 10
- How to configure XAMPP on Windows 10
- How to fix Apache not starting on XAMPP
- How to increase phpMyAdmin upload size on XAMPP
- How to change phpMyAdmin password on XAMPP
To download and install XAMPP on Windows 10, use these steps:
-
Open Apache Friends website.
-
Click the Download button for the Windows version of XAMPP and save the file on your computer.
Quick note: If you have special version requirements for PHP, download the version you need to install. If you do not have a version requirement, download the oldest version, as it may help you avoid issues trying to install PHP-based software. In addition, these instructions have been tested to work for XAMPP version 8.1.1 and older versions, but you can use this guide for other versions.
-
Double-click the downloaded file to launch the installer.
-
Click the OK button.
-
Click the Next button.

Complete XAMPP installation on Windows 10 -
XAMPP offers various components that you can install, such as MySQL, phpMyAdmin, PHP, Apache, and more. For the most part, you will be using most of these components, which means that it is recommended to leave the default options.
-
Click the Next button.
XAMPP install components -
Use the default installed location. (Or choose another folder to install the software in the “Select a folder” field.)
-
Click the Next button.
XAMPP installation location -
Select the language for the XAMPP Control Panel.
-
Click the Next button.
-
Clear the Learn more about Bitnami for XAMPP option.
-
Click the Next button.
-
Click the Next button again.
XAMPP installation wizard on Windows 10 -
Click the Allow access button to allow the app through the Windows Firewall (if applicable).
-
Click the Finish button.


Once you complete the steps, the XAMPP Control Panel will launch, and you can begin the web server environment configuration.
Install XAMPP using winget command
Alternatively, you can install XAMPP using the Windows Package Manager (winget) using Command Prompt.
To install the latest version of XAMPP on Windows 10 with the winget command, use these steps:
-
Open Start.
-
Search for Command Prompt, right-click the top result, and select the Run as administrator option.
-
(Optional) Type the following command to search for the name of the application and press Enter:
winget search xampp
Quick note: While the command is not required, the installation query must match the ID, name, or moniker of the package, which can change at any time. So, it’s good to search the application to execute the correct install command.
-
Type the following command to install XAMPP with the Windows Package Manager and press Enter:
winget install xampp

winget install XAMPP command -
Continue with the on-screen directions (if applicable).

After you complete the steps, the package manager will download the package from the specified source, and it will proceed to install the application. The device may restart automatically during this process. The installation will set up the app inside the C:xampp folder.
How to configure XAMPP on Windows 10
The XAMPP Control Panel includes three main sections. In the Modules section, you will find all the web services available. You can start each service by clicking the Start button.
When you start some of the services, including Apache and MySQL, on the right side, you’ll also see the process ID (PID) number and TCP/IP port (Port) numbers that each service is using. For example, by default, Apache uses TCP/IP port 80 and 443, while MySQL uses TCP/IP port 3306.
You can also click the Admin button to access the administration dashboard for each service and verify that everything is working correctly.

On the right side, there is a list of buttons to configure various aspects of the control panel, including the Config button to configure which modules will automatically start when you launch XAMPP.

Clicking the Netstart button will give you a list of services currently accessing the network, including TCP/IP address and port and process ID information.

In addition, there are also quick access buttons from the control panel to open the shell command-line utility, XAMPP installation folder, services, and close the app.
Lastly, you get the logs section to glance at what happens every time you start a module or change a setting. Also, this is the first place to look when something isn’t working.

The default settings should work for most people using XAMPP to create a testing environment to run a website. However, depending on your setup configuration, you may need to change the Apache server’s TCP/IP port number, the database upload size, or set the password for phpMyAdmin.
You’ll need to use the Config button for the corresponding service to change these settings. For example, you’ll need to open the httpd.conf file to change the settings on the Apache server and the my.ini file to change the MySQL settings.
How to fix Apache not starting on XAMPP
The XAMPP installation is very straightforward, but Windows 10 sometimes may not allow the Apache server to run. Usually, it’s because the World Wide Publishing Service is running on port 80 on your computer, which also happens to be the default TCP/IP port that Apaches uses on XAMPP. And two applications can’t use the same networking port.
If you run into this issue, there are a couple of ways to get around it. You can uninstall the publishing service or change the default port on Apache.
Uninstall World Wide Web Services
If you do not have any app depending on the World Wide Web Services feature, you can uninstall it with these steps:
-
Open Start.
-
Search for Control Panel, and click the top result to open the experience.
-
Click on Programs.
-
Click the Programs and Features option.
-
Click the Turn Windows features on or off option from the left pane.

Turn Windows features on or off -
Expand the Internet Information Services branch
-
Clear the World Wide Web Services option.
-
Click the OK button.

Microsoft IIS – World Wide Web Services -
Restart your computer.
-
Start the XAMPP Control Panel.
-
Click the Start button on Apache.


After you complete the steps, Apache should be able to run in port 80 on your device.
Change default Apache TCP/IP port
Instead of removing the World Wide Web Services, you can configure Apache to run on a different TCP/IP port.
To change the Apache listening port on XAMPP, use the steps:
-
Open XAMPP Control Panel.
-
On Apache, click the Config button.
-
Select the Apache (httpd.conf) option.
-
Scroll down and find the line: Listen 80.
-
Change the number 80 for another TCP/IP port number that isn’t in use. For instance, you can try port 81. (After the change, the line should read: Listen 81.)

httpd.conf change TCP/IP port number -
Save and close the httpd.conf file.
-
Click the Start button on Apache from the XAMPP Control Panel.

Once you complete the steps, the Apache server should run without issues on the new TCP/IP port specified.
The only caveat with this configuration is that you’ll need to append the TCP/IP port number on the address whenever you want to connect to your website. For example, to access the Apache server on the web browser, you will need to type: “localhost:81/dashboard” instead of “localhost/dashboard.”
Manually stop World Wide Web Publishing Service.
Another way to fix the port problem is to stop the service and change its settings to start the service manually (only).
To change the World Wide Web Publishing Service, use these steps:
-
Open Start.
-
Search for Services, and click the top result to open the experience.
-
Double-click the World Wide Web Publishing Service service.

World Wide Web Publishing Service -
Click the Stop button.
-
Change the startup type to Manual.
-
Click the Apply button.
-
Click the OK button.

World Wide Web Publishing Service settings -
Open the XAMPP Control Panel.
-
Click the Start button to run the Apache server.


The best way to get Apache working again is by uninstalling the World Wide Web Publishing Service. However, you can change the TCP/IP port number or stop the service as necessary when that is not possible.
How to increase phpMyAdmin upload size on XAMPP
Another common problem with XAMPP is the default database upload limit. For instance, developers often will copy a website for troubleshooting purposes or work on-site without disrupting the live website. However, people using WordPress or another content management software will quickly find out that they can’t upload a database because it exceeds the maximum permitted upload size, 2048 KiB.
To increase the database upload limit on phpMyAdmin, use these steps:
-
Open XAMPP Control Panel.
-
Click the Explorer button.
-
Open the php folder.
-
Open the php.ini file with any text editor.
-
Change the value for
upload_max_filesizeandpost_max_sizeto the size you want. For example:post_max_size=100Mandupload_max_filesize=100Mto import database files of up to 40MB.
PHPMyAdmin increase upload -
Click the Stop button for MySQL and Apache.
-
Click the Start button to restart Apache and MySQL.

Once you complete the steps, you should now be able to import large database files on phpMyAdmin.
How to change phpMyAdmin password on XAMPP
By default, phpMyAdmin (MySQL) uses “root” as a username without a password, which means that if you are installing a WordPress site when asked, you only need to enter root as the username and leave the password field empty.
To change the phpMyAdmin password on XAMPP, use these steps:
-
Open XAMPP Control Panel.
-
On MySQL, click the Admin button.
-
Click on the User accounts tab.
-
Click the Edit privileges link for the username root, but the one with hostname localhost.

MySQL edit root settings -
Click the Change password button.
-
Confirm a new password.

MySQL change root password -
Click the Go button.


After you complete the steps, if you try to login to phpMyAdmin, you might get an access denied message: “Cannot connect: invalid settings.”
Fix phpMyAdmin access denied message.
In the rare case that you’re having problems signing into phpMyAdmin, you’ll need to configure the config.inc.php.
To change the configuration settings in the config.inc.php file, use these steps:
-
Open XAMPP Control Panel.
-
Click the Explorer button.
-
Open the phpMyAdmin folder.
-
Open the config.inc.php file with any text editor.
-
Under the “Authentication type and info” section, update the following lines:
-
On
$cfg['Servers'][$i]['auth_type'] = 'config';replaceconfigforcookie. -
On
$cfg['Servers'][$i]['AllowNoPassword'] = true;replacetrueforfalse.
Config.inc.php Authentication type and info
-
-
Save and close the file.

Once you complete the steps, you should be able to log in to the phpMyAdmin dashboard.
Now XAMPP is configured and ready to use with any supported PHP-based software.
Update January 13, 2022: This guide was published in March 2016, and it was revised in January 2022 to make sure the information still works with the latest version of XAMPP.

Всем привет! Я снова увлекся веб-разработкой и сегодня хочу с Вами поделиться знаниями по установке и настройке локального веб-сервера XAMPP. С помощью локального веб-сервера вы сможете разработать на своем ПК рабочий сайт, протестировать его, внести какие либо изменения, а потом перенести уже рабочий сайт на хостинг.
Существует множество различных, локальных веб-серверов, но я выбрал XAMPP потому, что он является абсолютно бесплатным с открытым исходным кодом локальным веб-сервером, прост в установке и настройке, доступен для Windows, Linux и MacOS, занимает минимальный объем на жестком диске и содержит актуальную версию скриптового языка php 7.3. Надеюсь я Вас убедил, что XAMPP является хорошим локальным веб-сервером, поэтому мы будем переходить к процессу его установки.
Первым делом нам необходимо зайти на официальный сайт XAMPP https://www.apachefriends.org/ru/index.html и скачать дистрибутив под Вашу операционную систему, я буду проделываться все операции на ОС Windows 10.

- По окончанию загрузки запускаем установочный файл xampp-windows-installer и перед нами появится окно с предупреждением в котором необходимо нажать на кнопку Ок.

- В следующем окне нажимаем на кнопку Next

- Далее выбираем компоненты как на скриншоте и нажимаем на кнопку Next. Если появится окно от Брандмауера, то предоставляем разрешение нажав на кнопку разрешить доступ.

- В следующем окне оставляем папку установки программы по умолчанию т.е в корне диска С: и нажимаем Next

- Далее снимаем галочку на чекбоксе Learn more about Bitnami for XAMPP и нажимаем кнопку Next
- Ожидаем завершение установки, в конце установки нажимаем на Finish

- Выбираем английский язык так, как русского языка нет и нажимаем на кнопку Save.

Установка завершена, но чтобы не потерять панель управления XAMPP, вынесем ярлык на рабочий стол, открываем C:xampp и ищем файл xampp-control.exe нажимаем на нем правой кнопкой мыши выбираем Отправить->Рабочий стол(создать ярлык).
Добавление виртуального хоста в XAMPP
Допустим мы хотим чтобы при вводе в адресную строку mysite.ru перед нами открывался наш сайт который расположен на локальном веб-сервере, для этого проделываем следующие операции
- Находим файл hosts расположенный по адресу
C:WindowsSystem32driversetc, перетягиваем его на Рабочий стол и открываем Блокнотом или Sublime Text3 и в самую нижнюю строку добавляем 127.0.0.1 mysite.ru, далее нажимаем Файл-> Сохранить. Теперь перетаскиваем назад файл hosts в папкуC:WindowsSystem32driversetc.

- Заходим в папку C:xampphtdocs. и здесь создаем новую папку с именем mysite.ru, а внутри папки создаем файл index.html
- Теперь заходим в папку C:xamppapacheconfextra и открываем файл httpd-vhosts.conf любым текстовым редактором. В данном файле в самом низу необходимо прописать наш виртуальный хост.
<VirtualHost *:80>
ServerAdmin webmaster@dummy-host2.example.com
DocumentRoot "C:/xampp/htdocs/mysite.ru"
ServerName mysite.ru
ServerAlias www.mysite.ru
</VirtualHost>
- Далее открываем панель управления XAMPP и на модуле Apache и MySQL нажимаем Start, дожидаемся когда надпись станет зеленого цвета.
- Открываем браузер, вводим в адресную строку mysite.ru и нажимаем Enter, перед нами откроется веб странице которая расположена по адресу C:xampphtdocsmysite.ruindex.html
Готово! Мы создали локальный виртуальный хост musite.ru с которым мы можем работать как угодно. Теперь все зависит от вашего вкуса и знания различных технологий.
Как видим XAMPP действительно легок в установке и просто в использовании, надеюсь статья была полезна и Вы получили достаточно новых знаний для начала первых шагов в разработке своего собственного блога или сайта. Спасибо за внимание, жду Ваши вопросы и пожелания в комментариях, не забывайте оценивать статью с помощью нашего «звездного рейтинга», а также делиться записью с друзьями в социальных сетях. Еще хотелось бы услышать обратную связь о том, насколько Вам интересны статьи такого содержания? Продолжить ли серию статей по развертыванию различных CMS на локальный веб-сервер? Стоит ли дополнять статью видео уроком?
- 5
- 4
- 3
- 2
- 1
(2 голоса, в среднем: 5 из 5)
![]()
Загрузить PDF
![]()
Загрузить PDF
В этой статье мы расскажем вам, как установить XAMPP на компьютер с Windows 10. XAMPP — это менеджер серверов, который позволяет запускать серверы Apache, MySQL и другие с одной панели.
Шаги
-

1
-
2
Нажмите XAMPP для Windows. Эта кнопка находится посередине страницы.
- В зависимости от браузера вам, возможно, сначала придется выбрать папку для загрузки или подтвердить скачивание.
-
3
Дважды щелкните по скачанному файлу. Он должен называться примерно так: xampp-win32-7.2.4-0-VC15-installer. Файл находится в паке для загрузок (например, в папке «Загрузки» или на рабочем столе).
-
4
Нажмите Да, когда появится запрос. Откроется окно установщика XAMPP.
- Возможно, вам придется нажать «OK» во всплывающем окне, если на компьютере активирован контроль учетных записей (UAC).
-
5
Щелкните по Next (Далее). Эта опция находится внизу окна установщика.
-
6
Выберите элементы XAMPP, которые будут установлены. Просмотрите список атрибутов XAMPP в левой части окна; если вы видите атрибут, который не хотите устанавливать как часть XAMPP, снимите возле него флажок.
- По умолчанию будут установлены все атрибуты.
-
7
Щелкните по Next (Далее). Эта опция находится внизу окна.
-
8
Выберите папку для установки. Щелкните по значку в виде папки справа от предлагаемого пути установки, а затем щелкните по нужной папке на компьютере.
- Если на компьютере активирован контроль учетных записей, не устанавливайте XAMPP в папку на системном диске (например, на диске «C:»).
- Можно выбрать папку (например, «Рабочий стол»), а затем нажать «Make New Folder» (Создать новую папку), чтобы создать новую папку и выбрать ее в качестве папки для установки XAMPP.
-
9
Щелкните по OK. Так вы подтвердите, что выбранная папка является папкой для установки XAMPP.
-
10
Щелкните по Next (Далее). Вы найдете эту опцию внизу страницы.
-
11
Снимите флажок у опции «Learn more about Bitnami» (Подробнее о Bitnami), а затем нажмите Next (Далее). Эта опция находится посередине страницы.
-
12
Запустите установку XAMPP. Для этого нажмите «Next» (Далее) в нижней части окна. Запустится процесс установки файлов XAMPP в выбранную папку.
-
13
Нажмите Finish (Завершить), когда появится запрос. Эта опция находится внизу окна установщика XAMPP. Окно закроется, но откроется панель управления XAMPP, на которой можно получать доступ к своим серверам.
-
14
Выберите язык. Для этого установите флажок рядом с флагом соответствующей страны.
-
15
Щелкните по Save (Сохранить). Откроется главная страница панели управления.
-
16
Запустите XAMPP. Чтобы открыть панель управления XAMPP в будущем, откройте папку, в которую вы установили XAMPP, щелкните правой кнопкой мыши по оранжево-белому значку «Xampp-control», в меню выберите «Запуск от имени администратора», а затем нажмите «Да» в окне с запросом.
- Когда вы сделаете это, слева от каждого типа сервера (например, «Apache») появятся красные символы «X». Если щелкнуть по этому символу, вам будет предложено установить программное обеспечение для соответствующего типа сервера на компьютер — если вы согласны, нажмите «Yes» (Да).
- Обратите внимание, что двойной щелчок по значку «Xampp_start» не приведет к запуску XAMPP.
-
17
Устраните неполадки, если Apache не запускается. На некоторых компьютерах с Windows 10 Apache не запускается из-за «заблокированного порта». Это может произойти по нескольким причинам, но существует довольно простое решение:[1]
- Нажмите «Config» (Настройки) справа от «Apache».
- Выберите «Apache (httpd.conf)» в меню.
- Прокрутите вниз до раздела «Listen 80» (чтобы быстро найти его, можно нажать Ctrl+F и ввести listen 80).
- Замените 80 на любой открытый порт (например, 81 или 9080).
- Нажмите Ctrl+S, чтобы сохранить изменения, а затем закройте текстовый редактор.
- Перезапустите XAMPP, нажав «Quit» (Выйти), а затем снова запустите его от имени администратора из папки XAMPP.
Реклама


Советы
- XAMPP предоставляет доступ к различным типам серверов, включая Filezilla и Mercury.
Реклама
Предупреждения
- Если Apache запустить через порт 80, воспользоваться Skype уже не получится.
Реклама
Об этой статье
Эту страницу просматривали 7567 раз.
Была ли эта статья полезной?
Introduction
XAMPP is a free and open-source tool used by web developers in the Windows family and other platforms to set up the development and testing environment. XAMPP server comes with the XAMPP control panel to manage all its components easily.
XAMPP stands for (X) Cross-platform, (A) Apache, (M) MySQL, (P) PHP, (P) Perl and with some additional modules including phpmyadmin (for the database), FileZilla, Mercury, and Tomcat.
Once you have installed and configured the XAMPP server in your system, you can easily work with any CMS like WordPress, Joomla, drupal and more. XAMPP server works like a local server in your system that is generally used by PHP developers to test the websites (web-projects).
This tutorial will show you the various steps on how to install and configure the XAMPP server on Windows 10.
Installation Process of the XAMPP Server
Step 1
To download the XAMPP server, visit the «Apache Friends» website in your web browser.
Step 2
Click on «XAMPP for Windows». Then, navigate the downloading location and the file will be automatically downloaded.

Step 3
Double-click the downloaded file to launch the XAMPP installer.

Step 4
«Setup» window will appear on the screen. Then, click on the «Next» button.

Step 5
Select the components that you want to install and click on the «Next» button.

Note
By default, all components are selected in your XAMPP installation.
Step 6
Choose a folder to install the XAMPP and click on the «Next» button.

Step 7
Uncheck the «Learn more about Bitnami for XAMPP» option and click on the «Next» button.

Step 8
«Ready to Install» window will appear on the screen, then click on the «Next» button.

Step 9
Click on the «Finish» button.

Step 10
Select a language. (either English or German) and click on the «Save» button.

Configuration Process of XAMPP Server
Step 1
Start the XAMPP control panel through the «Run as administrator» option.
Step 2
«XAMPP Control Panel» will appear on the screen and click on «Start» action to start the «Apache» and «MySQL» modules.

Note:-
The default XAMPP server settings should work for most users. When you start the related modules (services) then, the color of the related modules (service) becomes change into the green color and the PID(s) and the Port(s) number will also be shown to the user.

Fix an Issue of Apache not Starting in XAMPP
Some of the users may face an issue with Apache and MySQL module services not working in XAMPP. However, depending on the setup configuration or usage of your system, you may need to change the port number of the Apache and the MySQL. For example, because the «World Wide Web Services» under «Internet Information Services (IIS)» is also run on port 80 in your system, which is also the default port of apache in XAMPP. And, the two servers (applications) can not use (run) the same port simultaneously. Follow the instructions below to fix the problem with Apache and MySQL services.
Method 1. Change the default port of Apache
Step 1
Open the XAMPP Control Panel.

Step 2
In Apache Module Service, click on the «Config» button.

Step 3
Click on «Apache (httpd.conf)» option.

Step 4
By pressing the «Ctrl + F» key, find the «Listen 80» and replace it with another open port (like 81 or 9080) and save the file.

Step 5
Restart the XAMPP Server.
Step 6
Again, open the «XAMPP Control Panel» and click on the start option under the «Apache» module services.

Method 2. By disabling the Internet Information Services (IIS)
Step 1
From the Start Menu, search for Control Panel.
Step 2
Click on «Programs».

Step 3
Click on the «Turn Windows Feature on or off» option.

Step 4
Uncheck (clear) the «Internet Information Services» option and click on the «OK» button.

Step 5
Click on the «Restart Now» option (This will reboot/restart your computer/laptop).
Step 6
Again, open the «XAMPP Control Panel» and click on the start option in the «Apache» module services.

Conclusion
By following any of the above methods, you can install and configure the XAMPP server on Windows 10.
I hope you enjoyed this article. Follow C# Corner to learn more new and amazing things about Windows 10.
Thanks for reading this article.
- How do I install XAMPP?
-
XAMPP for Windows exists in three different flavors:
Installer:
Probably the easiest way to install XAMPP.ZIP:
For purists: XAMPP as ordinary ZIP archive.7zip:
For purists with low bandwidth: XAMPP as 7zip archive.Note: If you extract the files, there can be false-positives virus warnings.
Using the installer:
The XAMPP control panel for start/stop Apache, MySQL, FileZilla & Mercury or install these server as services.
Installing from ZIP
Unzip the zip archives into the folder of your choice. XAMPP is extracting to the subdirectory «C:xampp» below the selected target directory. Now start the file «setup_xampp.bat», to adjust the XAMPP configuration to your system.
If you choose a root directory «C:» as target, you must not start «setup_xampp.bat».
Like with the installer version, you can now use the «XAMPP Control Panel» for additional tasks.
- Does XAMPP include MySQL or MariaDB?
-
Since XAMPP 5.5.30 and 5.6.14, XAMPP ships MariaDB instead of MySQL. The commands and tools are the same for both.
- How can I start XAMPP without setup?
-
If you extract XAMPP in a top level folder like «C:» or «D:», you can start most servers like Apache or MySQL directly without execution of the file «setup_xampp.bat».
Not using the setup script, or selecting relative paths in the setup script, is preferred if you are installing XAMPP on a usb drive. Because on each pc such a drive can have an other drive letter. You can switch from absolute to relative paths at any time with the setup script.
Using the installer from our Downloads page is the easiest way to install XAMPP. After the installation is complete, you will find XAMPP under Start | Programs | XAMPP. You can use the XAMPP Control Panel to start/stop all server and also install/uninstall services.
The XAMPP control panel for start/stop Apache, MySQL, FileZilla & Mercury or install these server as services.
- How do I start and stop XAMPP?
-
The universal control center is the «XAMPP Control Panel» (thanks www.nat32.com). It is started with:
xamppxampp-control.exeYou can also use some batchfiles to start/stop the servers:
- Apache & MySQL start:
xamppxampp_start.exe - Apache & MySQL stop:
xamppxampp_stop.exe - Apache start:
xamppapache_start.bat - Apache stop:
xamppapache_stop.bat - MySQL start:
xamppmysql_start.bat - MySQL stop:
xamppmysql_stop.bat - Mercury Mailserver start:
xamppmercury_start.bat - Mercury Mailserver stop:
xamppmercury_stop.bat - FileZilla Server start:
xamppfilezilla_start.bat - FileZilla Server stop:
xamppfilezilla_stop.bat
- Apache & MySQL start:
- How can I test that everything worked?
-
Type in the following URL at your favourite web browser:
http://localhost/orhttp://127.0.0.1/You should see the XAMPP start page, as shown below.
- How can I install a server as a service?
-
Each server in XAMPP you can install also as Windows service. You can also install it from the XAMPP Control Panel. In this case it is necessary to run the scripts or the Control Panel with Administrator privileges.
Apache service install: xamppapacheapache_installservice.bat
Apache service uninstall: xamppapacheapache_uninstallservice.bat
MySQL service install: xamppmysqlmysql_installservice.bat
MySQL service uninstall: xamppmysqlmysql_uninstallservice.bat
FileZilla service (un)install: xamppfilezilla_setup.bat
Mercury: No service installation available
- Is XAMPP production ready?
-
XAMPP is not meant for production use but only for development environments. XAMPP is configured to be open as possible to allow the developer anything he/she wants. For development environments, this is great but in a production environment, it could be fatal.
Here a list of missing security in XAMPP:
- The MySQL administrator (root) has no password.
- The MySQL daemon is accessible via network.
- ProFTPD uses the password «lampp» for user «daemon».
- The default users of Mercury and FileZilla are known.
All points can be a huge security risk. Especially if XAMPP is accessible via network and people outside your LAN. It can also help to use a firewall or a (NAT) router. In case of a router or firewall, your PC is normally not accessible via network. It is up to you to fix these problems. As a small help there is the «XAMPP Security console».
Please secure XAMPP before publishing anything online. A firewall or an external router are only sufficient for low levels of security. For slightly more security, you can run the «XAMPP Security console» and assign passwords.
If you want have your XAMPP accessible from the internet, you should go to the following URI which can fix some problems:
http://localhost/security/With the security console you can set a password for the MySQL user «root» and phpMyAdmin. You can also enable a authentication for the XAMPP demopages.
This web based tool does not fix any additional security issues! Especially the FileZilla FTP server and the Mercury mail server you must secure yourself.
- How do I uninstall XAMPP?
-
If you installed XAMPP using the installer version, please use the Uninstaller. The Uninstaller will delete all XAMPP entries from your registry and it will uninstall some installed services included with XAMPP. We highly recommend that you use the Uninstall program for removing XAMPP installations from the Installer version.Please backup all the data you want to keep before uninstalling XAMPP.
If you installed XAMPP using the ZIP and 7zip versions, shut down all XAMPP servers and exit all panels. If you installed any services, uninstall and shut them down too. Now simply delete the entire folder where XAMPP is installed. There are no registry entries and no environment variables to clean up.
- What is the «lite» version of XAMPP?
-
XAMPP Lite (means «light» as in «light-weight») is a smaller bundle of XAMPP components, which is recommended for quick work using only PHP and MySQL. Some servers or tools such as Mercury Mail and FileZilla FTP are missing in the Lite version.
- Where should I place my web content?
-
The main directory for all WWW documents is xampphtdocs. If you put a file «test.html» in this directory, you can access it with the URI «http://localhost/test.html».
And «test.php»? Just use «http://localhost/test.php». A simple testscript can be:
<?php

        echo 'Hello world';

        ?>
A new subdirectory for your web? Just make a new directory (e.g. «new») inside the directory «xampphtdocs» (best without whitespaces and only ASCII), create a test file in this directory and access it with «http://localhost/new/test.php».
Further specifics
HTML:
Executable: xampphtdocs
Allowed endings: .html .htm
=> basic packageSSI:
Executable: xampphtdocs
Allowed endings: .shtml
=> basic packageCGI:
Executable: xampphtdocs and xamppcgi-bin
Allowed endings: .cgi
=> basic packagePHP:
Executable: xampphtdocs and xamppcgi-bin
Allowed endings: .php
=> basic packagePerl:
Executable: xampphtdocs and xamppcgi-bin
Allowed endings: .pl
=> basic packageApache::ASP Perl:
Executable: xampphtdocs
Allowed endings: .asp
=> basic packageJSP Java:
Executable: xampptomcatwebappsjava (e.g.)
Allowed endings: .jsp
=> Tomcat add-onServlets Java:
Executable: xampptomcatwebappsjava (e.g.)
Allowed endings: .html (u.a)
=> Tomcat add-on - Can I move the XAMPP installation?
-
Yes. After moving of the XAMPP directory, you must execute «setup_xampp.bat». The paths in the configuration files will be adjusted with this step.
If you have installed any server as Windows service, you must first remove the Windows service, and after the moving you can install the service again.
WARNING: The configuration files from your own scripts, like PHP applications, are not adjusted. But it’s possible to write a «plug-in» for the installer. With such a plug-in, the installer can adjust such files too.
- What are «Automatic start pages» for the WWW directories?
-
The standard filename for the Apache function «DirectoryIndex» is «index.html» or «index.php». Every time you are just browsing to a folder (e.g. «http://localhost/xampp/»), and Apache can find such a file, Apache is displaying this file instead of a directory listing.
- Where can I change the configuration?
-
Almost all settings in XAMPP you can change with configuration files. Just open the file in a textedit and change the setting you want. Only FileZilla and Mercury should be configured with the application config tool.
- Why can’t XAMPP work on Windows XP SP2?
-
Microsoft delivers a better firewall with service pack 2 (SP2), which starts automatically. This firewall now blocks the necessary ports 80 (http) and 443 (https) and Apache can’t start.
The fast solution:
Disable the Microsoft firewall with the toolbar and try to start XAMPP onces more. The better solution is to define an exception within the security center.
The following ports are used for basic functionality:
Apache (HTTP): Port 80
Apache (WebDAV): Port 81
Apache (HTTPS): Port 443
MySQL: Port 3306
FileZilla (FTP): Port 21
FileZilla (Admin): Port 14147
Mercury (SMTP): Port 25
Mercury (POP3): Port 110
Mercury (IMAP): Port 143
Mercury (HTTP): Port 2224
Mercury (Finger): Port 79
Mercury (PH): Port 105
Mercury (PopPass): Port 106
Tomcat (AJP/1.3): Port 8009
Tomcat (HTTP): Port 8080 - Why doesn’t XAMPP work on Vista?
-
User Account Control (UAC)
In the directory «C:program files» you don’t have full write privileges, even as Admin. Or you have only limited privileges (e.g. for «.xampphtdocs»). In this case you can’t edit a file.
Solution: Raise your privileges within explorer (right click / security) or deactivate the user account control (UAC).You have installed Apache/MySQL in «C:xampp» as Windows service. But you can’t start/stop the services with the «XAMPP Control Panel» or can’t uninstall them.
Solution: Use the service management console from Windows or deactivate UAC.
Disabling the User Account Control (UAC)
To deactivate the UAC, use the program «msconfig». In «msconfig» go to «Tools», select «disable user account control» and verify your selection. Now you must restart Windows. At the same time, you can enable the UAC again.
- How do I check the md5 checksum?
-
To compare files, often checksums are used. A standard to create this checksum md5 (Message Digest Algorithm 5).
With this md5 checksum you can test, if your download of the XAMPP package is correct or not. Of course you need a program which can create these checksums. For Windows you can use a tool from Microsoft:
Availability and description of the File Checksum Integrity Verifier utility
It’s also possible to use any other program which can create md5 checksums, like the GNU md5sum.
As you have installed such a program (e.g. fciv.exe), you can do following steps:
- Download XAMPP (f.e. xampp-win32-1.8.2-0.exe)
- Create the checksum with:
fciv.exe xampp-win32-1.8.2-0.exe - And now you can compare this checksum with that one you can find on the XAMPP for Windows homepage.
If both checksums equal, all is ok. If not, the download is broken or the file has been changed.
- Why have changes in my php.ini not taken effect?
-
If a change in the «php.ini» has no effect, it’s possible PHP is using a different one. You can verify this with phpinfo(). Go to the URI http://localhost/xampp/phpinfo.php and search for «Loaded Configuration File». This value shows you the «php.ini» PHP is really using.
Note: After changing the «php.ini» you have to restart Apache so that Apache/PHP can read the new settings.
- Help! There is a virus in XAMPP!
-
Some antivirus programs mistake XAMPP for a virus, typically flagging the file xampp-manager.exe This is a false positive meaning that the antivirus erroneously identified it as a virus, when it is not. Before we release each new version of XAMPP we run it through virus scanning software. At the moment we are using Kapersky Online Virus Scanner. You can also use the online tool Virus Total for scanning XAMPP or send us an email to security (at) apachefriends (dot) org if you find any issue.
- How do I configure my antivirus application?
-
We have included all dependences and servers required for running the bundled web application, so you will find that XAMPP installs large numbers of files. If you are installing a XAMPP application on a Windows machine with an antivirus app enabled, this may slow down the installation significantly, and there is also a chance that one of the servers (web server, database server) may be blocked by the antivirus software. If you have an antivirus tool enabled, check the following settings for running XAMPP without performance issues:
- Add exceptions in the firewall: for Apache, MySQL or any other server.
- Scan files when executing: If you have enabled the antivirus scan for all files, the executable files for the servers may slow down.
- Scan the traffic for different URLs: If you are developing with XAMPP on your own machine, you can exclude «localhost» traffic in the Antivirus settings.
- Why doesn’t the Apache server start on my system?
-
This problem can be one of several reasons:
- You have started more then one HTTP Server (IIS, Sambar, ZEUS and so on). Only one Server can use port 80. This error message indicate the problem:
(OS 10048)... make_sock: could not bind to adress 0.0.0.0:80

no listening sockets available, shutting down - You have other software, such as the Internet Telephone «Skype» which also blocks the port 80. If the problem is «Skype», you can go in Skype to Actions —> Options —> Connection —> remove the check mark at «use port 80 for an alternate port» and restart Skype. Now it should work.
- You have a firewall which blocks the Apache port. Not all firewalls are compatible with Apache, and sometimes deactivating the firewall is not enough and you must deinstall it. This error message indicates a firewall:
(OS 10038)Socket operation on non-socket: make_sock: for address 0.0.0.0:80,

apr_socket_opt_set: (SO_KEEPALIVE)
Also if Apache can start, but your browser can’t connect to it it could be due to one of the following:
- Some virus scanners can cause this in the same way that firewalls can interfere.
- You have XP Professional without service pack 1. You must have at least SP1 for XAMPP.
Tip: If you have problems with used ports, you can try the tool «xampp-portcheck.exe». Maybe it can help.
- You have started more then one HTTP Server (IIS, Sambar, ZEUS and so on). Only one Server can use port 80. This error message indicate the problem:
- Why is my CPU load for Apache almost 99%?
-
There is one of two scenarios at play here. Either your CPU is maxing out, or you can browser connect to the server, but not see anything (the system is trying unsucessfully to load the page). In either case you can find the following message in the Apache log file:
Child: Encountered too many AcceptEx faults accepting client connections.

winnt_mpm: falling back to 'AcceptFilter none'.
The MPM falls back to a safer implementation, but some client requests were not processed correctly. In order to avoid this error, use «AcceptFilter» with accept filter «none» in the «xamppapacheconfextrahttpd-mpm.conf» file.
- Why are pictures and style-sheets not displayed?
-
Sometimes there are problems with displaying pictures and style-sheets. Especially if these files are located on a network drive. In this case you can enable (or add) one if the following lines in the file «xamppapacheconfhttpd.conf»:
EnableSendfile off

EnableMMAP off
This problem can also be caused by programs for regulating bandwidth, like NetLimiter.
- How do I send email with XAMPP?
-
To configure XAMPP to use the included sendmail.exe binary for email delivery, follow these steps:
- Edit the XAMPP «php.ini» file. Within this file, find the [mail function] section and replace it with the following directives. Change the XAMPP installation path if needed.
sendmail_path = ""C:xamppsendmailsendmail.exe" -t"
- Edit the XAMPP «sendmail.ini» file. Within this file, find the [sendmail] section and replace it with the following directives:
          smtp_server=smtp.gmail.com

          smtp_port=465

          smtp_ssl=auto

          error_logfile=error.log

          auth_username=your-gmail-username@gmail.com

          auth_password=your-gmail-password
Remember to replace the dummy values shown with your actual Gmail address and account password. If you don’t plan to use Gmail’s SMTP server, replace the SMTP host details with appropriate values for your organization or ISP’s SMTP server.
- Restart the Apache server using the XAMPP control panel.
You can now use PHP’s mail() function to send email from your application.
- Edit the XAMPP «php.ini» file. Within this file, find the [mail function] section and replace it with the following directives. Change the XAMPP installation path if needed.
- How can I set a root password in MySQL?
-
Configure it with the «XAMPP Shell» (command prompt). Open the shell from the XAMPP control pane and execute this command:
mysqladmin.exe -u root password secretThis sets the root password to ‘secret’. - Can I use my own MySQL server?
-
Yes. Simply don’t start the MySQL from the XAMPP package. Please note that two servers cannot be started on the same port. If you have set a password for «root», please do not forget to edit the file «xamppphpMyAdminconfig.inc.php».
- How do I restrict access to phpMyAdmin from the outside?
-
In the basic configuration of XAMPP, phpMyAdmin is accessible only from the same host that XAMPP is running on, at http://127.0.0.1 or http://localhost.
Before you can access the MySQL server, phpMyAdmin will prompt you for a user name and password. Don’t forget to set a password for the user «root» first.
- How do I enable access to phpMyAdmin from the outside?
-
In the basic configuration of XAMPP, phpMyAdmin is accessible only from the same host that XAMPP is running on, at http://127.0.0.1 or http://localhost.
IMPORTANT: Enabling external access for phpMyAdmin in production environments is a significant security risk. You are strongly advised to only allow access from localhost. A remote attacker could take advantage of any existing vulnerability for executing code or for modifying your data.
To enable remote access to phpMyAdmin, follow these steps:
- Edit the apacheconfextrahttpd-xampp.conf file in your XAMPP installation directory.
- Within this file, find the lines below.
              Alias /phpmyadmin "C:/xampp/phpMyAdmin/"

              <Directory "C:/xampp/phpMyAdmin">

                AllowOverride AuthConfig

                Require local
- Then replace ‘Require local’ with ‘Require all granted’.
- Restart the Apache server using the XAMPP control panel.
              Alias /phpmyadmin "C:/xampp/phpMyAdmin/"

              <Directory "C:/xampp/phpMyAdmin">

                AllowOverride AuthConfig

                Require all granted
- Where is the IMAP support for PHP?
-
As default, the IMAP support for PHP is deactivated in XAMPP due to some mysterious initialization errors with some home versions like Windows 98. If you work with NT systems, you can open the file «xamppphpphp.ini» to activate the php exstension by removing the beginning semicolon at the line «;extension=php_imap.dll». It should be:
extension=php_imap.dllNow restart Apache and IMAP should work. You can use the same steps for every extension, which is not enabled in the default configuration.
- Why don’t some PHP open source apps work with XAMPP on Windows?
-
A lot of PHP applications or extensions that have been written for Linux haven’t been ported to Windows.
- Can I delete the «install» directory after installation?
-
It’s better not to. The scripts here are still needed for all additional packages (add-ons) and upgrades of XAMPP.
- How do I activate the eaccelerator?
-
Like other (Zend) extensions, you can activate it in «php.ini». In this file, enable the line «;zend_extension = «xamppphpextphp_eaccelerator.dll»». It should be:
zend_extension = "xamppphpextphp_eaccelerator.dll" - How do I fix a connection error to my MS SQL server?
-
If the mssql extension was loaded in the php.ini, sometimes problems appear when only TCP/IP is used. You can fix that problem with a newer «ntwdblib.dll» from Microsoft. Please replace the older file in «xamppapachebin» and «xamppphp» with the new one. Because of the license, we can’t package a newer version of this file with XAMPP.
- How do I work with the PHP mcrypt extension?
-
For this, we have opened a topic in the forum with examples and possible solutions: MCrypt topic
- Do Microsoft Active Server Pages (ASP) work with XAMPP?
-
No. And Apache::ASP with the Perl Add-On is not the same. Apache::ASP only knows Perl-Script, but ASP from the Internet Information Server (IIS) also knows the normal VBScript. But for ASP .NET, there is a 3rd party Apache module available.
- How can I get XAMPP working on port 80 under Windows 10?
-
By default, Windows 10 starts Microsoft IIS on port 80, which is the same default port used by Apache in XAMPP. As a result, Apache cannot bind to port 80.
To deactivate IIS from running on port 80, follow these steps:
- Open the Services panel in Computer Management.
- Search for the ‘World Wide Web Publishing Service’ and select it.
- Click the link to ‘Stop the service’.
- Double-click the service name.
- In the ‘Startup type’ field, change the startup type to ‘Disabled’.
- Click ‘OK’ to save your changes.
You should now be able to start Apache in XAMPP on port 80.
For more information, refer to the ‘Troubleshoot Apache Startup Problems’ guide included with XAMPP or this forum post.
- How can I use Microsoft Edge to access local addresses under Windows 10?
-
If your local machine has the host name ‘myhost’, you will not be able to access URLs such as http://myhost in Microsoft Edge. To resolve this, you should instead use the addresses http://127.0.0.1 or http://localhost.
- Where are the main XAMPP configuration files?
-
The main XAMPP configuration files are located as follows:
- Apache configuration file: xamppapacheconfhttpd.conf, xamppapacheconfextrahttpd-xampp.conf
- PHP configuration file: xamppphpphp.ini
- MySQL configuration file: xamppmysqlbinmy.ini
- FileZilla Server configuration file: xamppFileZillaFTPFileZilla Server.xml
- Apache Tomcat configuration file: xampptomcatconfserver.xml
- Apache Tomcat configuration file: xamppsendmailsendmail.ini
- Mercury Mail configuration file: xamppMercuryMailMERCURY.INI


Установка и базовая настройка XAMPP под Windows 10
Для начала установим сам веб-сервер, делается это в несколько шагов:
1. Скачаем установщик XAMPP с нужной версией PHP.
2. Запускаем установщик, windows спросит, разрешать ли приложению вносить изменения — соглашаемся. В некоторых случаях может появляться такое сообщение:
Это означает, что из-за контроля учётных записей (UAC) XAMPP может неправильно установиться и просит не устанавливать его в каталог С:Program Files, либо поменять права доступа к этому каталогу. Нажимаем OK.
3. Открывается окно с приветствием, нажимаем Next >; далее нам предоставляется выбор компонентов, которые надо установить:
(если Вы ещё плохо понимаете, что это за волшебные слова — лучше оставьте всё выбранным)
После того как выбор сделан — нажимаем Next >; теперь нам предстоит выбрать, в какой директории будет установлен веб-сервер, я предпочитаю в домашнем каталоге создать папку «xampp» и уже в ней проводить установку:
(разумеется Вы можете выбрать другой каталог)
Нажимаем Next >, в следующем пункте снимаем галочку с чек-бокса (это переход на сайт bitnami), снова нажимаем Next >, и Вас спросят «всё ли введено верно, можно ли начинать установку?», если это так — опять же, нажимаете знакомую кнопку продолжения ") , и остаётся лишь ждать.
, и остаётся лишь ждать.
После того, как установка закончена, нам предлагают открыть панель XAMPP — отказываемся (нам нужен не обычный запуск, а от имени администратора) и закрываем окно (кнопка Finish).
4. (Этот шаг можно пропустить) Что бы в дальнейшем у нас не возникало каких-либо проблем с правами — настроим запуск панели управления XAMPP с правами администратора. Для этого — открываем в любом файлом менеджере каталог куда был установлен веб-сервер, находим файл xampp-control.exe, кликаем ПКМ → создать ярлык уже по ярлыку нажимаем ПКМ → свойства в открывшемся окне нажимаем дополнительно, и ставим галочку в чек-бокс «запуск от имени администратора»:
Теперь запускаем панель управления XAMPP.
5. Протестируем работу веб-сервера — нажимаем нажимаем start напротив надписи «Apache» и заходим на localhost. Если всё хорошо, должна появиться приветственная надпись XAMPP:
6. Перейдём к настройке веб-сервера. Слева от названия модуля есть чекбоксы, изначально в них должны быть красные крестики, кликнув на них поменяйте на галочки — таким образом Вы установите Apache, MySQL и т.д. в качестве служб windows.
По желанию, можно настроить панель XAMPP, так, что бы при запуске, сразу стартовали некоторые модули. Для этого надо нажать Config в правом меню:
В открывшемся окне, под заголовком Autostart of modules, Вы можете выбрать, какие модули будут запускаться вместе с программой. Выше вы можете выбрать какой редактор и браузер будут использоваться по умолчанию. Изначально по умолчанию используется notepad.exe, но я предпочитаю менять на редактор notepad++. Браузер используется тот же, что стоит в системе с статусом «default» (для этого нужно оставить строку пустой):
Вложение 1212819
Теперь настройка хоста
7. Далее осталось определиться — где будут храниться файлы разрабатываемой страницы/веб-приложения. Есть два варианта, оба рабочие.
Первый вариант.
В файловом менеджере открываем место установки XAMPP (напримеру у меня это C:UsersPanda58devxampp), далее находим каталог htdocs и как раз в нём хранятся файлы той страницы (localhost). Эти файлы можно удалить — ничего страшного не будет. Создаём тут папку, в неё добавляем файл index.php с таким содержимым:
| PHP | ||
|
Заходим на http://localhost/название_папки/ , и результат должен быть подобным:
Второй вариант. (более заморочный)
Так же, можно настроить виртуальный хост. Для этого в панели XAMPP выбираем настройку Apache (config) и первый пункт (httpd.conf). Должно открыться окно выбранного ранее вами редактора. Прокручиваем вниз и вставляем вот такую конфигурацию:
Кликните здесь для просмотра всего текста
<VirtualHost ваш_сайт.com:80>
DocumentRoot C:UsersUserxampphtdocsваша_папка
ServerName ваш_сайт.com
ServerAdmin admin@ваш_сайт.com
<Directory «C:UsersUserxampphtdocsваша_папка»>
Options Indexes FollowSymLinks
Allow from all
Require all granted
IndexIgnore /
RewriteEngine on
RewriteCond %{REQUEST_FILENAME} !-f
RewriteCond %{REQUEST_FILENAME} !-d
RewriteRule . index.php
</Directory>
</VirtualHost>
В директиве DocumentRoot и <Directory> не обязательно должен быть путь приведённый в примере, каталог с файлами сайта могут быть где угодно, к примеру L:sitesocStore. Сохраняем, закрываем.
Более подробнее о конфигурации виртуальных хостов в apache, Вы можете поискать в сети.
Далее нам нужно отредактировать файл hosts, который можно найти по этому пути: C:WindowsSystem32driversetc. Открываем файл hosts (от имени администратора) и в самый низ вставляем
Кликните здесь для просмотра всего текста
#Мой сайт
127.0.0.1 ваш_сайт.com
Сохраняем, закрываем, перезапускаем apache (нажимаем кнопку stop, потом кнопку start). Открываем браузер, вводим имя вашего сайта — готово.