Время прочтения
14 мин
Просмотры 14K
Если вы искали руководство по криптографии, лежащей в основе OpenSSL, то вы оказались в правильном месте.

Эта статья является первой в серии из двух статей, посвященных основам криптографии, используемой в OpenSSL — библиотеке инструментов промышленного уровня, популярной и в среде Linux, и за ее пределами. (Чтобы установить самую последнюю версию OpenSSL, перейдите сюда.) Что касается взаимодействия с библиотекой, то вы можете вызывать ее функции из кода, а также в вашем распоряжении есть утилиты командной строки. Примеры кода для этой статьи приведены на C — на том же языке, на котором написана сама библиотека OpenSSL.
Две статьи этой серии в совокупности охватывают такие темы, как криптографические хеши, цифровые подписи, цифровые сертификаты, а также шифрование и дешифрование. Вы можете найти код и примеры для командной строки в ZIP-архиве на моем сайте.
Начнем же мы с обзора SSL, которому библиотека OpenSSL обязана своим именем (большей его части).
Краткая история
Secure Socket Layer (SSL, слой защищенных сокетов) — это криптографический протокол, выпущенный Netscape в 1995 году. Этот протокольный уровень может располагаться поверх HTTP, тем самым добавляя в конец букву S (HTTPS), которая означает secure. Протокол SSL предоставляет различные меры обеспечения безопасности, две из которых являются основополагающими в HTTPS:
-
Взаимная аутентификация (peer authentication, также известная как mutual challenge): каждая сторона соединения аутентифицирует идентификационные данные другой стороны. Если Алиса и Боб собираются обмениваться сообщениями через SSL, то сначала каждый должен аутентифицировать идентификационные данные своего собеседника.
-
Конфиденциальность: отправитель шифрует сообщения перед их отправкой по каналу связи. Затем получатель расшифровывает каждое полученное сообщение. Этот процесс защищает сетевое взаимодействие. Даже если злоумышленник Ева перехватит зашифрованное сообщение от Алисы к Бобу (атака через посредника), то она будет не в состоянии расшифровать это сообщение из-за необходимой для этого вычислительной сложности.
Эти две ключевые меры обеспечения безопасности SSL, в свою очередь, связаны с другими, которые зачастую остаются в тени. Например, SSL поддерживает целостность сообщений, что гарантирует, что полученное сообщение совпадает с отправленным. Эта фича реализована на основе хеш-функций, которые также входят в набор инструментов OpenSSL.
SSL имеет разные версии (например, SSLv2 и SSLv3), а в 1999 году на основе SSLv3 был реализован аналогичный протокол Transport Layer Security (TLS, протокол защиты транспортного уровня). TLSv1 и SSLv3 похожи, но не настолько, чтобы работать друг с другом. Тем не менее, принято называть SSL/TLS одним и тем же протоколом. Например, функции OpenSSL часто содержат SSL в имени, даже если используется TLS, а не SSL. Кроме того, вызов утилит командной строки OpenSSL начинается со строки openssl.
Документация по OpenSSL, к сожалению, достаточно неоднородна в своей полноте, особенно если смотреть за пределами справочных страниц (man pages), которые сами по себе достаточно громоздкие, учитывая, насколько велик инструментарий OpenSSL. В этой статье я сфокусирую внимание на основных темах посредством примеров кода и командной строки. Начнем мы со знакомого всем нам примера — доступа к веб-сайту по HTTPS — и используем этот пример, чтобы разобрать основополагающие криптографические элементы.
HTTPS-клиент
Приведенная ниже программа client подключается к Google по HTTPS:
/* компиляция: gcc -o client client.c -lssl -lcrypto */

#include <stdio.h>

#include <stdlib.h>

#include <openssl/bio.h> /* Базовые потоки ввода/вывода */

#include <openssl/err.h> /* ошибки */

#include <openssl/ssl.h> /* основная библиотека */

#define BuffSize 1024


void report_and_exit(const char* msg) {
  perror(msg);
  ERR_print_errors_fp(stderr);
  exit(-1);
}


void init_ssl() {
  SSL_load_error_strings();
  SSL_library_init();
}


void cleanup(SSL_CTX* ctx, BIO* bio) {
  SSL_CTX_free(ctx);
  BIO_free_all(bio);
}


void secure_connect(const char* hostname) {
  char name[BuffSize];
  char request[BuffSize];
  char response[BuffSize];


  const SSL_METHOD* method = TLSv1_2_client_method();
  if (NULL == method) report_and_exit("TLSv1_2_client_method...");

  SSL_CTX* ctx = SSL_CTX_new(method);
  if (NULL == ctx) report_and_exit("SSL_CTX_new...");

  BIO* bio = BIO_new_ssl_connect(ctx);
  if (NULL == bio) report_and_exit("BIO_new_ssl_connect...");

  SSL* ssl = NULL;

  /* связываем канал bio, сессию SSL и конечную точку сервера */

  sprintf(name, "%s:%s", hostname, "https");
  BIO_get_ssl(bio, &ssl); /* сессия */
  SSL_set_mode(ssl, SSL_MODE_AUTO_RETRY); /* надежность */
  BIO_set_conn_hostname(bio, name); /* подготовка к подключению */

  /* пытаемся подключиться */
  if (BIO_do_connect(bio) <= 0) {
    cleanup(ctx, bio);
    report_and_exit("BIO_do_connect...");
  }


  /* проверяем хранилище доверенных сертификатов и сам сертификат */
  if (!SSL_CTX_load_verify_locations(ctx,
                                      "/etc/ssl/certs/ca-certificates.crt", /* хранилище доверенных сертификатов */


                                      "/etc/ssl/certs/")) /* больше доверенных сертификатов*/


    report_and_exit("SSL_CTX_load_verify_locations...");


  long verify_flag = SSL_get_verify_result(ssl);
  if (verify_flag != X509_V_OK)
    fprintf(stderr,
            "##### Certificate verification error (%i) but continuing...n",
            (int) verify_flag);

  /* теперь получаем домашнюю страницу в качестве проверочных данных */
  sprintf(request,
          "GET / HTTP/1.1x0Dx0AHost: %sx0Dx0Ax43onnection: Closex0Dx0Ax0Dx0A",
          hostname);
  BIO_puts(bio, request);


  /* читаем HTTP-ответ с сервера и выводим через stdout */
  while (1) {
    memset(response, '', sizeof(response));
    int n = BIO_read(bio, response, BuffSize);
    if (n <= 0) break; /* 0 — конец потока, < 0 — ошибка */


  puts(response);
  }


  cleanup(ctx, bio);
}


int main() {
  init_ssl();


  const char* hostname = "www.google.com:443";
  fprintf(stderr, "Trying an HTTPS connection to %s...n", hostname);
  secure_connect(hostname);

return 0;
}
(Прим. переводчика: этот код оказался нерабочим, исправленную версию можно посмотреть здесь)
Эту программу можно скомпилировать и запустить из командной строки (обратите внимание на строчную букву L в -lssl и -lcrypto):
gcc -o client client.c -lssl -lcryptoЭта программа пытается установить безопасное соединение с сайтом www.google.com. В рамках TLS-рукопожатия с сервером Google программа-клиент получает один или несколько цифровых сертификатов, которые она затем пытается проверить (в моей системе они проверку не проходят). Тем не менее, далее программа-клиент получает по защищенному каналу домашнюю страницу Google. Эта программа полагается на упомянутые ранее артефакты безопасности, хотя в коде можно выделить только цифровой сертификат. Остальные же артефакты пока остаются за кадром, подробнее о них мы поговорим чуть дальше.
Как правило, программа-клиент на C или C++, которая открывает (незащищенный) HTTP-канал, будет использовать такой объект, как файловый дескриптор сетевого сокета, который является конечной точкой в соединении между двумя процессами (например, программой-клиентом и сервером Google). Файловый дескриптор, в свою очередь, представляет собой неотрицательное целочисленное значение, которое идентифицирует внутри программы любую файловую конструкцию, которую эта программа открывает. Такой программе также понадобится структура для указания сведений об адресе сервера.
Ни один из этих относительно низкоуровневых объектов не встречается в программе-клиенте, поскольку библиотека OpenSSL заключает инфраструктуру сокетов и спецификацию адресов в высокоуровневые объекты безопасности. В результате мы получаем простой API. Вот какие процессы обеспечения безопасности мы можем увидеть в этом примере программы-клиента, не заглядывая под капот:
-
Программа начинается с загрузки необходимых библиотек OpenSSL, при этом моя функция
init_sslвыполняет два вызова OpenSSL:
SSL_library_init(); SSL_load_error_strings();-
Следующий шаг инициализации пытается получить контекст, информационную структуру, необходимую для установления и поддержания безопасного канала с сервером. В этом примере используется TLS1.2, что мы можем увидеть в этом вызове функции из библиотеки OpenSSL:
const SSL_METHOD* method = TLSv1_2_client_method(); /* TLS 1.2 */Если вызов выполнен успешно, то указатель method передается библиотечной функции, создающей контекст типа SSL_CTX:
SSL_CTX* ctx = SSL_CTX_new(method);Программа-клиент проверяет наличие ошибок в каждом из этих критических библиотечных вызовов, а затем завершает работу, если какой-либо вызов завершается некорректно.
-
Теперь в игру вступают два других артефакта OpenSSL: сессия безопасности (security session) типа SSL, которая от начала и до конца управляет безопасным соединением; и защищенный поток типа BIO (базовый ввод/вывод), который используется для связи с сервером. Поток BIO создается с помощью следующего вызова:
BIO* bio = BIO_new_ssl_connect(ctx);Обратите внимание, что аргументом является наша чрезвычайно важная переменная с контекстом. Тип BIO — это обертка OpenSSL для типа FILE в C. Эта обертка защищает потоки ввода/вывода между программой-клиентом и сервером Google.
-
Располагая SSL_CTX и BIO, программа затем связывает их вместе в сессии SSL. Эту работу выполняют три следующих библиотечных вызова:
BIO_get_ssl(bio, &ssl); /* получает сессию TLS */SSL_set_mode(ssl, SSL_MODE_AUTO_RETRY); /* для надежности */BIO_set_conn_hostname(bio, name); /* подготовка к соединению с Google */Само безопасное соединение устанавливается с помощью этого вызова:
BIO_do_connect(bio);Если этот последний вызов не увенчается успехом, программа-клиент завершает работу; в противном случае соединение готово для поддержки конфиденциального обмена данными между программой-клиентом и сервером Google.
Во время рукопожатия с сервером программа-клиент получает один или несколько цифровых сертификатов, удостоверяющих подлинность сервера. Однако программа-клиент не отправляет собственный сертификат, что означает одностороннюю аутентификацию. (Серверы обычно настроены не ожидать сертификата клиента.) Несмотря на неудачную проверку сертификата сервера, программа-клиент получает домашнюю страницу Google по безопасному каналу с сервером.
Почему проверка сертификата Google не заканчивается успехом? Типичная установка OpenSSL имеет каталог /etc/ssl/certs, который включает файл ca-certificates.crt. Каталог и файл содержат цифровые сертификаты, которым OpenSSL доверяет из коробки и, соответственно, составляют хранилище доверенных сертификатов (truststore). Хранилище доверенных сертификатов можно обновлять по мере необходимости, в частности, включать новые доверенные сертификаты и удалять ненадежные.
Программа-клиент получает три сертификата от сервера Google, но хранилище доверенных сертификатов OpenSSL на моей машине не содержит точных совпадений с ними. Как я в скором времени расскажу, программа-клиент не занимается, например, проверкой цифровой подписи на сертификате Google (подпись, подтверждающая сертификат). Если этой подписи доверяют, то сертификату, содержащему ее, также следует доверять. Тем не менее клиентская программа продолжает загрузку, а затем отображение домашней страницы Google. В следующем разделе мы рассмотрим это более подробно.
Скрытые механизмы безопасности в программе-клиенте
Начнем с артефакта безопасности, который мы видим в примере с клиентом — цифрового сертификата — и рассмотрим, как другие артефакты безопасности с ним связаны. Превалирующим стандартом структуры цифрового сертификата является X509, а сертификат производственного уровня выдаются центром сертификации (CA, certificate authority), таким как Verisign.
Цифровой сертификат содержит различную информацию (например, даты начала и истечения срока действия, а также доменное имя владельца), включая идентификационные данные издателя и цифровую подпись, которая представляет собой зашифрованное криптографическое хеш-значение. Сертификат также имеет незашифрованное хеш-значение, которое служит его идентифицирующим отпечаток (fingerprint).
Хеш-значение получается в результате сопоставления произвольного количества битов с хеш-суммой (digest) фиксированной длины. Что представляют собой биты (бухгалтерский отчет, роман или, может быть, фильм) не имеет значения. Например, хеш-алгоритм Message Digest версии 5 (MD5) отображает входные биты любой длины в 128-битное хеш-значение, тогда как алгоритм SHA1 (Secure Hash Algorithm версии 1) отображает входные биты в 160-битное значение. Различные входные биты приводят к разным — действительно, статистически уникальным — значениям хеш-функции. В следующей статье мы рассмотрим это более подробно и сосредоточимся на том, что именно делает хеш-функцию криптографической.
Цифровые сертификаты различаются по типу (например, корневой/root, промежуточный/intermediate и конечный/end-entity сертификаты) и образуют иерархию, отражающую эти типы. Как следует из названия, корневой сертификат находится на вершине иерархии, а сертификаты под ним наследуют любое доверие, которое имеет корневой сертификат. Библиотеки OpenSSL и большинство современных языков программирования имеют тип X509, как и функции, которые работают с такими сертификатами. Сертификат от Google имеет формат X509, и клиент проверяет, является ли этот сертификат X509_V_OK.
Сертификаты X509 основаны на инфраструктуре открытых ключей (PKI, public-key infrastructure), которая включает в себя алгоритмы (в основном доминирует RSA) для создания пар ключей: публичный ключ и его парный приватный ключ. Публичный ключ — это идентификационные данные (identity): публичный ключ Amazon идентифицирует его, а мой публичный ключ идентифицирует меня. Приватный ключ должен храниться его владельцем в секрете.
Ключи в паре имеют несколько стандартных применений. Публичный ключ можно использовать для шифрования сообщения, а приватный ключ из той же пары затем можно использовать для его расшифровки. Приватный ключ также можно использовать для подписи документа или другого электронного артефакта (например, программы или электронного письма), а затем публичный ключ из пары можно использовать для проверки этой подписи. Рассмотрим два примера.
В первом примере Алиса открывает свой публичный ключ всему миру, включая Боба. Затем Боб шифрует сообщение с помощью публичного ключа Алисы, отправляя ей зашифрованное сообщение. Сообщение, зашифрованное публичным ключом Алисы, расшифровывается ее приватным ключом, который (по идее) есть только у нее, вот так:
	           +------------------+ encrypted msg  +-------------------+
Bob's msg--->|Alice's public key|--------------->|Alice's private key|--->
Bob's msg
				     +------------------+                +-------------------+
Расшифровка сообщения без приватного ключа Алисы в принципе возможна, но на практике нереальна, учитывая надежность криптографической системы парных ключей, такой как RSA.
Теперь в качестве второго примера рассмотрим подписание документа для подтверждения его подлинности. Алгоритм подписи использует приватный ключ из пары для обработки криптографического хеша подписываемого документа:
										+-------------------+
Hash of document--->|Alice's private key|--->Alice's digital signature of the document
										+-------------------+
Предположим, что Алиса подписывает цифровой подписью контракт, отправленный Бобу. Затем Боб может использовать публичный ключ Алисы для проверки подписи:
									             							 +------------------+
Alice's digital signature of the document--->|Alice's public key|--->verified or not
                                             +------------------+
Невозможно подделать подпись Алисы без ее приватного ключа: следовательно, в интересах Алисы сохранить ее приватный ключ в тайне.
Ни один из этих элементов безопасности, за исключением цифровых сертификатов, не является явным в нашей программе-клиенте. В следующей статье подробно описаны примеры, в которых используются утилиты OpenSSL и библиотечные функции.
OpenSSL из командной строки
А пока давайте взглянем на инструменты командной строки OpenSSL: в частности, утилиту для проверки сертификатов с сервера во время TLS-рукопожатия. Вызов утилит OpenSSL начинается с команды openssl а затем добавляется комбинация аргументов и флагов для указания желаемой операции.
Рассмотрим эту команду:
openssl list-cipher-algorithmsРезультатом является список связанных алгоритмов, составляющих набор шифров (cipher suite). Ниже приведено начало списка с комментариями для разъяснения аббревиатур:
AES-128-CBC ## Advanced Encryption Standard, Cipher Block Chaining
AES-128-CBC-HMAC-SHA1 ## Hash-based Message Authentication Code с хешами SHA1
AES-128-CBC-HMAC-SHA256 ## тоже самое, но с SHA256 вместо SHA1
...
Следующая команда, используя аргумент s_client, открывает безопасное соединение с www.google.com и выводит на экран информацию об этом соединении:
openssl s_client -connect www.google.com:443 -showcertsНомер порта 443 является стандартным, который используется серверами для приема соединений HTTPS, а не HTTP. (Для HTTP стандартный порт — 80). Сетевой адрес www.google.com:443 также встречается в программе-клиенте. Если попытка подключения успешна, отображаются три цифровых сертификата от Google вместе с информацией о безопасном сеансе, используемом наборе шифров и связанных элементах. Например, вот фрагмент начала вывода, который объявляет о предстоящей цепочке сертификатов. Кодировка сертификатов — base64:
Certificate chain
 0 s:/C=US/ST=California/L=Mountain View/O=Google LLC/CN=www.google.com
 i:/C=US/O=Google Trust Services/CN=Google Internet Authority G3
-----BEGIN CERTIFICATE-----
MIIEijCCA3KgAwIBAgIQdCea9tmy/T6rK/dDD1isujANBgkqhkiG9w0BAQsFADBU
MQswCQYDVQQGEwJVUzEeMBwGA1UEChMVR29vZ2xlIFRydXN0IFNlcnZpY2VzMSUw
...
Такие крупные сайты как Google, как правило, отправляют несколько сертификатов для аутентификации.
Выходные данные заканчиваются сводной информацией о сессии TLS, включая сведения о наборе шифров:
SSL-Session:
    Protocol : TLSv1.2
    Cipher : ECDHE-RSA-AES128-GCM-SHA256
    Session-ID: A2BBF0E4991E6BBBC318774EEE37CFCB23095CC7640FFC752448D07C7F438573
...
В программе-клиенте используется протокол TLS1.2, а Session-ID однозначно идентифицирует соединение между утилитой openssl и сервером Google. Запись Cipher может быть проанализирована следующим образом:
-
ECDHE (протокол Диффи-Хеллмана на эллиптических кривых) — эффективный и действенный алгоритм для управления TLS-рукопожатием. В частности, ECDHE решает проблему распределения ключей, гарантируя, что обе стороны соединения (например, программа-клиент и веб-сервер Google) используют один и тот же ключ шифрования/дешифрования, известный как ключ сессии (session key). Следующая часть серии детальнее раскроет эту тему.
-
RSA (Rivest Shamir Adleman) — доминирующая криптосистема с публичным ключом, названная в честь трех ученых, впервые описавших эту систему в конце 1970-х годов. Пары ключей генерируются с помощью алгоритма RSA.
-
AES128 (Advanced Encryption Standard) — это блочный шифр, который шифрует и расшифровывает блоки битов. (Альтернативой является потоковый шифр, который шифрует и расшифровывает биты по одному.) Шифр является симметричным в том смысле, что для шифрования и дешифрования используется один и тот же ключ, что в первую очередь поднимает проблему распределения ключей. AES поддерживает размеры ключей 128 (используется здесь), 192 и 256 бит: чем больше ключ, тем лучше защита.
Размеры ключей для симметричных криптосистем, таких как AES, как правило, меньше, чем для асимметричных систем (на основе пары ключей), таких как RSA. Например, 1024-битный ключ RSA относительно мал, тогда как 256-битный ключ в настоящее время является самым большим для AES.
-
GCM (режим счетчика Галуа) обрабатывает повторное применение шифра (в данном случае AES128) во время защищенного общения. Блоки AES128 имеют размер всего 128 бит, и безопасный обмен данными, скорее всего, будет состоять из нескольких блоков AES128 от одной стороны к другой. GCM эффективен и обычно сочетается с AES128.
-
SHA256 (Secure Hash Algorithm с 256 бит) — это популярный криптографический алгоритм хеширования. Создаваемые хеш-значения имеют размер 256 бит, хотя с помощью SHA возможны и большие значения.
Наборы шифров находятся в постоянном развитии. Не так давно, например, Google использовала потоковый шифр RC4 (Ron’s Cipher версии 4 в честь Рона Ривеста из RSA). В RC4 теперь онаружены уязвимости, которые предположительно частично объясняют переход Google на AES128.
Подытожим
Это знакомство с OpenSSL посредством разбора безопасного веб-клиента C и различных примеров для командной строки выдвинуло на передний план несколько тем, нуждающихся в дополнительных пояснениях. Следующая статья посвящена деталям, начиная с криптографических хешей и заканчивая более полным обсуждением того, как цифровые сертификаты решают проблему распространения ключей.
Приглашаем всех желающих на открытое занятие «Встраиваем интерпретатор в приложение на C». На этом открытом уроке мы рассмотрим встраивание интерпретатора и виртуальной машины языка программирования высокого уровня в программу на C на примере скриптового языка Lua. Регистрируйтесь по ссылке.
NAME
openssl — OpenSSL command line program
SYNOPSIS
openssl command [ options … ] [ parameters … ]
openssl no-XXX [ options ]
DESCRIPTION
OpenSSL is a cryptography toolkit implementing the Secure Sockets Layer (SSL) and Transport Layer Security (TLS) network protocols and related cryptography standards required by them.
The openssl program is a command line program for using the various cryptography functions of OpenSSL’s crypto library from the shell. It can be used for
o  Creation and management of private keys, public keys and parameters
o  Public key cryptographic operations
o  Creation of X.509 certificates, CSRs and CRLs
o  Calculation of Message Digests and Message Authentication Codes
o  Encryption and Decryption with Ciphers
o  SSL/TLS Client and Server Tests
o  Handling of S/MIME signed or encrypted mail
o  Timestamp requests, generation and verification
COMMAND SUMMARY
The openssl program provides a rich variety of commands (command in the «SYNOPSIS» above). Each command can have many options and argument parameters, shown above as options and parameters.
Detailed documentation and use cases for most standard subcommands are available (e.g., openssl-x509(1)). The subcommand openssl-list(1) may be used to list subcommands.
The command no-XXX tests whether a command of the specified name is available. If no command named XXX exists, it returns 0 (success) and prints no-XXX; otherwise it returns 1 and prints XXX. In both cases, the output goes to stdout and nothing is printed to stderr. Additional command line arguments are always ignored. Since for each cipher there is a command of the same name, this provides an easy way for shell scripts to test for the availability of ciphers in the openssl program. (no-XXX is not able to detect pseudo-commands such as quit, list, or no-XXX itself.)
Configuration Option
Many commands use an external configuration file for some or all of their arguments and have a -config option to specify that file. The default name of the file is openssl.cnf in the default certificate storage area, which can be determined from the openssl-version(1) command using the -d or -a option. The environment variable OPENSSL_CONF can be used to specify a different file location or to disable loading a configuration (using the empty string).
Among others, the configuration file can be used to load modules and to specify parameters for generating certificates and random numbers. See config(5) for details.
Standard Commands
- asn1parse
-
Parse an ASN.1 sequence.
- ca
-
Certificate Authority (CA) Management.
- ciphers
-
Cipher Suite Description Determination.
- cms
-
CMS (Cryptographic Message Syntax) command.
- crl
-
Certificate Revocation List (CRL) Management.
- crl2pkcs7
-
CRL to PKCS#7 Conversion.
- dgst
-
Message Digest calculation. MAC calculations are superseded by openssl-mac(1).
- dhparam
-
Generation and Management of Diffie-Hellman Parameters. Superseded by openssl-genpkey(1) and openssl-pkeyparam(1).
- dsa
-
DSA Data Management.
- dsaparam
-
DSA Parameter Generation and Management. Superseded by openssl-genpkey(1) and openssl-pkeyparam(1).
- ec
-
EC (Elliptic curve) key processing.
- ecparam
-
EC parameter manipulation and generation.
- enc
-
Encryption, decryption, and encoding.
- engine
-
Engine (loadable module) information and manipulation.
- errstr
-
Error Number to Error String Conversion.
- fipsinstall
-
FIPS configuration installation.
- gendsa
-
Generation of DSA Private Key from Parameters. Superseded by openssl-genpkey(1) and openssl-pkey(1).
- genpkey
-
Generation of Private Key or Parameters.
- genrsa
-
Generation of RSA Private Key. Superseded by openssl-genpkey(1).
- help
-
Display information about a command’s options.
- info
-
Display diverse information built into the OpenSSL libraries.
- kdf
-
Key Derivation Functions.
- list
-
List algorithms and features.
- mac
-
Message Authentication Code Calculation.
- nseq
-
Create or examine a Netscape certificate sequence.
- ocsp
-
Online Certificate Status Protocol command.
- passwd
-
Generation of hashed passwords.
- pkcs12
-
PKCS#12 Data Management.
- pkcs7
-
PKCS#7 Data Management.
- pkcs8
-
PKCS#8 format private key conversion command.
- pkey
-
Public and private key management.
- pkeyparam
-
Public key algorithm parameter management.
- pkeyutl
-
Public key algorithm cryptographic operation command.
- prime
-
Compute prime numbers.
- rand
-
Generate pseudo-random bytes.
- rehash
-
Create symbolic links to certificate and CRL files named by the hash values.
- req
-
PKCS#10 X.509 Certificate Signing Request (CSR) Management.
- rsa
-
RSA key management.
- rsautl
-
RSA command for signing, verification, encryption, and decryption. Superseded by openssl-pkeyutl(1).
- s_client
-
This implements a generic SSL/TLS client which can establish a transparent connection to a remote server speaking SSL/TLS. It’s intended for testing purposes only and provides only rudimentary interface functionality but internally uses mostly all functionality of the OpenSSL ssl library.
- s_server
-
This implements a generic SSL/TLS server which accepts connections from remote clients speaking SSL/TLS. It’s intended for testing purposes only and provides only rudimentary interface functionality but internally uses mostly all functionality of the OpenSSL ssl library. It provides both an own command line oriented protocol for testing SSL functions and a simple HTTP response facility to emulate an SSL/TLS-aware webserver.
- s_time
-
SSL Connection Timer.
- sess_id
-
SSL Session Data Management.
- smime
-
S/MIME mail processing.
- speed
-
Algorithm Speed Measurement.
- spkac
-
SPKAC printing and generating command.
- srp
-
Maintain SRP password file. This command is deprecated.
- storeutl
-
Command to list and display certificates, keys, CRLs, etc.
- ts
-
Time Stamping Authority command.
- verify
-
X.509 Certificate Verification. See also the openssl-verification-options(1) manual page.
- version
-
OpenSSL Version Information.
- x509
-
X.509 Certificate Data Management.
Message Digest Commands
- blake2b512
-
BLAKE2b-512 Digest
- blake2s256
-
BLAKE2s-256 Digest
- md2
-
MD2 Digest
- md4
-
MD4 Digest
- md5
-
MD5 Digest
- mdc2
-
MDC2 Digest
- rmd160
-
RMD-160 Digest
- sha1
-
SHA-1 Digest
- sha224
-
SHA-2 224 Digest
- sha256
-
SHA-2 256 Digest
- sha384
-
SHA-2 384 Digest
- sha512
-
SHA-2 512 Digest
- sha3-224
-
SHA-3 224 Digest
- sha3-256
-
SHA-3 256 Digest
- sha3-384
-
SHA-3 384 Digest
- sha3-512
-
SHA-3 512 Digest
- keccak-224
-
KECCAK 224 Digest
- keccak-256
-
KECCAK 256 Digest
- keccak-384
-
KECCAK 384 Digest
- keccak-512
-
KECCAK 512 Digest
- shake128
-
SHA-3 SHAKE128 Digest
- shake256
-
SHA-3 SHAKE256 Digest
- sm3
-
SM3 Digest
Encryption, Decryption, and Encoding Commands
The following aliases provide convenient access to the most used encodings and ciphers.
Depending on how OpenSSL was configured and built, not all ciphers listed here may be present. See openssl-enc(1) for more information.
- aes128, aes-128-cbc, aes-128-cfb, aes-128-ctr, aes-128-ecb, aes-128-ofb
-
AES-128 Cipher
- aes192, aes-192-cbc, aes-192-cfb, aes-192-ctr, aes-192-ecb, aes-192-ofb
-
AES-192 Cipher
- aes256, aes-256-cbc, aes-256-cfb, aes-256-ctr, aes-256-ecb, aes-256-ofb
-
AES-256 Cipher
- aria128, aria-128-cbc, aria-128-cfb, aria-128-ctr, aria-128-ecb, aria-128-ofb
-
Aria-128 Cipher
- aria192, aria-192-cbc, aria-192-cfb, aria-192-ctr, aria-192-ecb, aria-192-ofb
-
Aria-192 Cipher
- aria256, aria-256-cbc, aria-256-cfb, aria-256-ctr, aria-256-ecb, aria-256-ofb
-
Aria-256 Cipher
- base64
-
Base64 Encoding
- bf, bf-cbc, bf-cfb, bf-ecb, bf-ofb
-
Blowfish Cipher
- camellia128, camellia-128-cbc, camellia-128-cfb, camellia-128-ctr, camellia-128-ecb, camellia-128-ofb
-
Camellia-128 Cipher
- camellia192, camellia-192-cbc, camellia-192-cfb, camellia-192-ctr, camellia-192-ecb, camellia-192-ofb
-
Camellia-192 Cipher
- camellia256, camellia-256-cbc, camellia-256-cfb, camellia-256-ctr, camellia-256-ecb, camellia-256-ofb
-
Camellia-256 Cipher
- cast, cast-cbc
-
CAST Cipher
- cast5-cbc, cast5-cfb, cast5-ecb, cast5-ofb
-
CAST5 Cipher
- chacha20
-
Chacha20 Cipher
- des, des-cbc, des-cfb, des-ecb, des-ede, des-ede-cbc, des-ede-cfb, des-ede-ofb, des-ofb
-
DES Cipher
- des3, desx, des-ede3, des-ede3-cbc, des-ede3-cfb, des-ede3-ofb
-
Triple-DES Cipher
- idea, idea-cbc, idea-cfb, idea-ecb, idea-ofb
-
IDEA Cipher
- rc2, rc2-cbc, rc2-cfb, rc2-ecb, rc2-ofb
-
RC2 Cipher
- rc4
-
RC4 Cipher
- rc5, rc5-cbc, rc5-cfb, rc5-ecb, rc5-ofb
-
RC5 Cipher
- seed, seed-cbc, seed-cfb, seed-ecb, seed-ofb
-
SEED Cipher
- sm4, sm4-cbc, sm4-cfb, sm4-ctr, sm4-ecb, sm4-ofb
-
SM4 Cipher
OPTIONS
Details of which options are available depend on the specific command. This section describes some common options with common behavior.
Common Options
- -help
-
Provides a terse summary of all options. If an option takes an argument, the «type» of argument is also given.
- —
-
This terminates the list of options. It is mostly useful if any filename parameters start with a minus sign:
openssl verify [flags...] -- -cert1.pem...
Format Options
See openssl-format-options(1) for manual page.
Pass Phrase Options
See the openssl-passphrase-options(1) manual page.
Random State Options
Prior to OpenSSL 1.1.1, it was common for applications to store information about the state of the random-number generator in a file that was loaded at startup and rewritten upon exit. On modern operating systems, this is generally no longer necessary as OpenSSL will seed itself from a trusted entropy source provided by the operating system. These flags are still supported for special platforms or circumstances that might require them.
It is generally an error to use the same seed file more than once and every use of -rand should be paired with -writerand.
- -rand files
-
A file or files containing random data used to seed the random number generator. Multiple files can be specified separated by an OS-dependent character. The separator is
;for MS-Windows,,for OpenVMS, and:for all others. Another way to specify multiple files is to repeat this flag with different filenames. - -writerand file
-
Writes the seed data to the specified file upon exit. This file can be used in a subsequent command invocation.
Certificate Verification Options
See the openssl-verification-options(1) manual page.
Name Format Options
See the openssl-namedisplay-options(1) manual page.
TLS Version Options
Several commands use SSL, TLS, or DTLS. By default, the commands use TLS and clients will offer the lowest and highest protocol version they support, and servers will pick the highest version that the client offers that is also supported by the server.
The options below can be used to limit which protocol versions are used, and whether TCP (SSL and TLS) or UDP (DTLS) is used. Note that not all protocols and flags may be available, depending on how OpenSSL was built.
- -ssl3, -tls1, -tls1_1, -tls1_2, -tls1_3, -no_ssl3, -no_tls1, -no_tls1_1, -no_tls1_2, -no_tls1_3
-
These options require or disable the use of the specified SSL or TLS protocols. When a specific TLS version is required, only that version will be offered or accepted. Only one specific protocol can be given and it cannot be combined with any of the no_ options.
- -dtls, -dtls1, -dtls1_2
-
These options specify to use DTLS instead of DLTS. With -dtls, clients will negotiate any supported DTLS protocol version. Use the -dtls1 or -dtls1_2 options to support only DTLS1.0 or DTLS1.2, respectively.
Engine Options
- -engine id
-
Load the engine identified by id and use all the methods it implements (algorithms, key storage, etc.), unless specified otherwise in the command-specific documentation or it is configured to do so, as described in «Engine Configuration» in config(5).
The engine will be used for key ids specified with -key and similar options when an option like -keyform engine is given.
A special case is the
loader_atticengine, which is meant just for internal OpenSSL testing purposes and supports loading keys, parameters, certificates, and CRLs from files. When this engine is used, files with such credentials are read via this engine. Using thefile:schema is optional; a plain file (path) name will do.
Options specifying keys, like -key and similar, can use the generic OpenSSL engine key loading URI scheme org.openssl.engine: to retrieve private keys and public keys. The URI syntax is as follows, in simplified form:
org.openssl.engine:{engineid}:{keyid}Where {engineid} is the identity/name of the engine, and {keyid} is a key identifier that’s acceptable by that engine. For example, when using an engine that interfaces against a PKCS#11 implementation, the generic key URI would be something like this (this happens to be an example for the PKCS#11 engine that’s part of OpenSC):
-key org.openssl.engine:pkcs11:label_some-private-keyAs a third possibility, for engines and providers that have implemented their own OSSL_STORE_LOADER(3), org.openssl.engine: should not be necessary. For a PKCS#11 implementation that has implemented such a loader, the PKCS#11 URI as defined in RFC 7512 should be possible to use directly:
-key pkcs11:object=some-private-key;pin-value=1234Provider Options
- -provider name
-
Load and initialize the provider identified by name. The name can be also a path to the provider module. In that case the provider name will be the specified path and not just the provider module name. Interpretation of relative paths is platform specific. The configured «MODULESDIR» path, OPENSSL_MODULES environment variable, or the path specified by -provider-path is prepended to relative paths. See provider(7) for a more detailed description.
- -provider-path path
-
Specifies the search path that is to be used for looking for providers. Equivalently, the OPENSSL_MODULES environment variable may be set.
- -propquery propq
-
Specifies the property query clause to be used when fetching algorithms from the loaded providers. See property(7) for a more detailed description.
ENVIRONMENT
The OpenSSL library can be take some configuration parameters from the environment. Some of these variables are listed below. For information about specific commands, see openssl-engine(1), openssl-rehash(1), and tsget(1).
For information about the use of environment variables in configuration, see «ENVIRONMENT» in config(5).
For information about querying or specifying CPU architecture flags, see OPENSSL_ia32cap(3), and OPENSSL_s390xcap(3).
For information about all environment variables used by the OpenSSL libraries, see openssl-env(7).
- OPENSSL_TRACE=name[,…]
-
Enable tracing output of OpenSSL library, by name. This output will only make sense if you know OpenSSL internals well. Also, it might not give you any output at all if OpenSSL was built without tracing support.
The value is a comma separated list of names, with the following available:
- TRACE
-
Traces the OpenSSL trace API itself.
- INIT
-
Traces OpenSSL library initialization and cleanup.
- TLS
-
Traces the TLS/SSL protocol.
- TLS_CIPHER
-
Traces the ciphers used by the TLS/SSL protocol.
- CONF
-
Show details about provider and engine configuration.
- ENGINE_TABLE
-
The function that is used by RSA, DSA (etc) code to select registered ENGINEs, cache defaults and functional references (etc), will generate debugging summaries.
- ENGINE_REF_COUNT
-
Reference counts in the ENGINE structure will be monitored with a line of generated for each change.
- PKCS5V2
-
Traces PKCS#5 v2 key generation.
- PKCS12_KEYGEN
-
Traces PKCS#12 key generation.
- PKCS12_DECRYPT
-
Traces PKCS#12 decryption.
- X509V3_POLICY
-
Generates the complete policy tree at various points during X.509 v3 policy evaluation.
- BN_CTX
-
Traces BIGNUM context operations.
- CMP
-
Traces CMP client and server activity.
- STORE
-
Traces STORE operations.
- DECODER
-
Traces decoder operations.
- ENCODER
-
Traces encoder operations.
- REF_COUNT
-
Traces decrementing certain ASN.1 structure references.
- HTTP
-
Traces the HTTP client and server, such as messages being sent and received.
SEE ALSO
openssl-asn1parse(1), openssl-ca(1), openssl-ciphers(1), openssl-cms(1), openssl-crl(1), openssl-crl2pkcs7(1), openssl-dgst(1), openssl-dhparam(1), openssl-dsa(1), openssl-dsaparam(1), openssl-ec(1), openssl-ecparam(1), openssl-enc(1), openssl-engine(1), openssl-errstr(1), openssl-gendsa(1), openssl-genpkey(1), openssl-genrsa(1), openssl-kdf(1), openssl-list(1), openssl-mac(1), openssl-nseq(1), openssl-ocsp(1), openssl-passwd(1), openssl-pkcs12(1), openssl-pkcs7(1), openssl-pkcs8(1), openssl-pkey(1), openssl-pkeyparam(1), openssl-pkeyutl(1), openssl-prime(1), openssl-rand(1), openssl-rehash(1), openssl-req(1), openssl-rsa(1), openssl-rsautl(1), openssl-s_client(1), openssl-s_server(1), openssl-s_time(1), openssl-sess_id(1), openssl-smime(1), openssl-speed(1), openssl-spkac(1), openssl-srp(1), openssl-storeutl(1), openssl-ts(1), openssl-verify(1), openssl-version(1), openssl-x509(1), config(5), crypto(7), openssl-env(7). ssl(7), x509v3_config(5)
HISTORY
The list —XXX-algorithms options were added in OpenSSL 1.0.0; For notes on the availability of other commands, see their individual manual pages.
The -issuer_checks option is deprecated as of OpenSSL 1.1.0 and is silently ignored.
The -xcertform and -xkeyform options are obsolete since OpenSSL 3.0 and have no effect.
The interactive mode, which could be invoked by running openssl with no further arguments, was removed in OpenSSL 3.0, and running that program with no arguments is now equivalent to openssl help.
COPYRIGHT
Copyright 2000-2022 The OpenSSL Project Authors. All Rights Reserved.
Licensed under the Apache License 2.0 (the «License»). You may not use this file except in compliance with the License. You can obtain a copy in the file LICENSE in the source distribution or at https://www.openssl.org/source/license.html.
Build and Install
This document describes installation on all supported operating
systems (the Unix/Linux family, including macOS), OpenVMS,
and Windows).
Table of Contents
- Prerequisites
- Notational Conventions
- Quick Installation Guide
- Building OpenSSL
- Installing OpenSSL
- Configuration Options
- API Level
- Cross Compile Prefix
- Build Type
- Directories
- Compiler Warnings
- Compression Algorithm Flags
- Seeding the Random Generator
- Setting the FIPS HMAC key
- Enable and Disable Features
- Displaying configuration data
- Installation Steps in Detail
- Configure
- Build
- Test
- Install
- Advanced Build Options
- Environment Variables
- Makefile Targets
- Running Selected Tests
- Troubleshooting
- Configuration Problems
- Build Failures
- Test Failures
- Notes
- Notes on multi-threading
- Notes on shared libraries
- Notes on random number generation
- Notes on assembler modules compilation
Prerequisites
To install OpenSSL, you will need:
- A «make» implementation
- Perl 5 with core modules (please read NOTES-PERL.md)
- The Perl module
Text::Template(please read NOTES-PERL.md) - an ANSI C compiler
- a development environment in the form of development libraries and C
header files - a supported operating system
For additional platform specific requirements, solutions to specific
issues and other details, please read one of these:
- Notes for UNIX-like platforms
- Notes for Android platforms
- Notes for Windows platforms
- Notes for the DOS platform with DJGPP
- Notes for the OpenVMS platform
- Notes on Perl
- Notes on Valgrind
Notational conventions
Throughout this document, we use the following conventions.
Commands
Any line starting with a dollar sign is a command line.
The dollar sign indicates the shell prompt and is not to be entered as
part of the command.
Choices
Several words in curly braces separated by pipe characters indicate a
mandatory choice, to be replaced with one of the given words.
For example, the line
$ echo { WORD1 | WORD2 | WORD3 }
represents one of the following three commands
$ echo WORD1
- or -
$ echo WORD2
- or -
$ echo WORD3
One or several words in square brackets separated by pipe characters
denote an optional choice. It is similar to the mandatory choice,
but it can also be omitted entirely.
So the line
$ echo [ WORD1 | WORD2 | WORD3 ]
represents one of the four commands
$ echo WORD1
- or -
$ echo WORD2
- or -
$ echo WORD3
- or -
$ echo
Arguments
Optional Arguments are enclosed in square brackets.
A trailing ellipsis means that more than one could be specified.
Quick Installation Guide
If you just want to get OpenSSL installed without bothering too much
about the details, here is the short version of how to build and install
OpenSSL. If any of the following steps fails, please consult the
Installation in Detail section below.
Building OpenSSL
Use the following commands to configure, build and test OpenSSL.
The testing is optional, but recommended if you intend to install
OpenSSL for production use.
Unix / Linux / macOS
$ ./Configure
$ make
$ make test
OpenVMS
Use the following commands to build OpenSSL:
$ perl Configure
$ mms
$ mms test
Windows
If you are using Visual Studio, open a Developer Command Prompt and
issue the following commands to build OpenSSL.
$ perl Configure
$ nmake
$ nmake test
As mentioned in the Choices section, you need to pick one
of the four Configure targets in the first command.
Most likely you will be using the VC-WIN64A target for 64bit Windows
binaries (AMD64) or VC-WIN32 for 32bit Windows binaries (X86).
The other two options are VC-WIN64I (Intel IA64, Itanium) and
VC-CE (Windows CE) are rather uncommon nowadays.
Installing OpenSSL
The following commands will install OpenSSL to a default system location.
Danger Zone: even if you are impatient, please read the following two
paragraphs carefully before you install OpenSSL.
For security reasons the default system location is by default not writable
for unprivileged users. So for the final installation step administrative
privileges are required. The default system location and the procedure to
obtain administrative privileges depends on the operating system.
It is recommended to compile and test OpenSSL with normal user privileges
and use administrative privileges only for the final installation step.
On some platforms OpenSSL is preinstalled as part of the Operating System.
In this case it is highly recommended not to overwrite the system versions,
because other applications or libraries might depend on it.
To avoid breaking other applications, install your copy of OpenSSL to a
different location which is not in
the global search path for system libraries.
Finally, if you plan on using the FIPS module, you need to read the
Post-installation Notes further down.
Unix / Linux / macOS
Depending on your distribution, you need to run the following command as
root user or prepend sudo to the command:
By default, OpenSSL will be installed to
More precisely, the files will be installed into the subdirectories
/usr/local/bin
/usr/local/lib
/usr/local/include
...
depending on the file type, as it is custom on Unix-like operating systems.
OpenVMS
Use the following command to install OpenSSL.
By default, OpenSSL will be installed to
Windows
If you are using Visual Studio, open the Developer Command Prompt elevated
and issue the following command.
The easiest way to elevate the Command Prompt is to press and hold down both
the <CTRL> and <SHIFT> keys while clicking the menu item in the task menu.
The default installation location is
for native binaries, or
C:Program Files (x86)OpenSSL
for 32bit binaries on 64bit Windows (WOW64).
Installing to a different location
To install OpenSSL to a different location (for example into your home
directory for testing purposes) run Configure as shown in the following
examples.
The options --prefix and --openssldir are explained in further detail in
Directories below, and the values used here are mere examples.
On Unix:
$ ./Configure --prefix=/opt/openssl --openssldir=/usr/local/ssl
On OpenVMS:
$ perl Configure --prefix=PROGRAM:[INSTALLS] --openssldir=SYS$MANAGER:[OPENSSL]
Note: if you do add options to the configuration command, please make sure
you’ve read more than just this Quick Start, such as relevant NOTES-* files,
the options outline below, as configuration options may change the outcome
in otherwise unexpected ways.
Configuration Options
There are several options to ./Configure to customize the build (note that
for Windows, the defaults for --prefix and --openssldir depend on what
configuration is used and what Windows implementation OpenSSL is built on.
For more information, see the Notes for Windows platforms.
API Level
Build the OpenSSL libraries to support the API for the specified version.
If no-deprecated is also given, don’t build with support
for deprecated APIs in or below the specified version number. For example,
adding
--api=1.1.0 no-deprecated
will remove support for all APIs that were deprecated in OpenSSL version
1.1.0 or below. This is a rather specialized option for developers.
If you just intend to remove all deprecated APIs up to the current version
entirely, just specify no-deprecated.
If --api isn’t given, it defaults to the current (minor) OpenSSL version.
Cross Compile Prefix
--cross-compile-prefix=<PREFIX>
The <PREFIX> to include in front of commands for your toolchain.
It is likely to have to end with dash, e.g. a-b-c- would invoke GNU compiler
as a-b-c-gcc, etc. Unfortunately cross-compiling is too case-specific to put
together one-size-fits-all instructions. You might have to pass more flags or
set up environment variables to actually make it work. Android and iOS cases
are discussed in corresponding Configurations/15-*.conf files. But there are
cases when this option alone is sufficient. For example to build the mingw64
target on Linux --cross-compile-prefix=x86_64-w64-mingw32- works. Naturally
provided that mingw packages are installed. Today Debian and Ubuntu users
have option to install a number of prepackaged cross-compilers along with
corresponding run-time and development packages for «alien» hardware. To give
another example --cross-compile-prefix=mipsel-linux-gnu- suffices in such
case.
For cross compilation, you must configure manually.
Also, note that --openssldir refers to target’s file system, not one you are
building on.
Build Type
Build OpenSSL with debugging symbols and zero optimization level.
Build OpenSSL without debugging symbols. This is the default.
Directories
libdir
The name of the directory under the top of the installation directory tree
(see the --prefix option) where libraries will be installed. By default
this is lib. Note that on Windows only static libraries (*.lib) will
be stored in this location. Shared libraries (*.dll) will always be
installed to the bin directory.
Some build targets have a multilib postfix set in the build configuration.
For these targets the default libdir is lib<multilib-postfix>. Please use
--libdir=lib to override the libdir if adding the postfix is undesirable.
openssldir
Directory for OpenSSL configuration files, and also the default certificate
and key store. Defaults are:
Unix:           /usr/local/ssl
Windows:        C:Program FilesCommon FilesSSL
OpenVMS:        SYS$COMMON:[OPENSSL-COMMON]
For 32bit Windows applications on Windows 64bit (WOW64), always replace
C:Program Files by C:Program Files (x86).
prefix
The top of the installation directory tree. Defaults are:
Unix:           /usr/local
Windows:        C:Program FilesOpenSSL
OpenVMS:        SYS$COMMON:[OPENSSL]
Compiler Warnings
This is a developer flag that switches on various compiler options recommended
for OpenSSL development. It only works when using gcc or clang as the compiler.
If you are developing a patch for OpenSSL then it is recommended that you use
this option where possible.
Compression Algorithm Flags
with-brotli-include
--with-brotli-include=DIR
The directory for the location of the brotli include files (i.e. the location
of the brotli include directory). This option is only necessary if
enable-brotli is used and the include files are not already
on the system include path.
with-brotli-lib
On Unix: this is the directory containing the brotli libraries.
If not provided, the system library path will be used.
The names of the libraries are:
- libbrotlicommon.a or libbrotlicommon.so
- libbrotlidec.a or libbrotlidec.so
- libbrotlienc.a or libbrotlienc.so
On Windows: this is the directory containing the brotli libraries.
If not provided, the system library path will be used.
The names of the libraries are:
- brotlicommon.lib
- brotlidec.lib
- brotlienc.lib
with-zlib-include
The directory for the location of the zlib include file. This option is only
necessary if zlib is used and the include file is not
already on the system include path.
with-zlib-lib
On Unix: this is the directory containing the zlib library.
If not provided the system library path will be used.
On Windows: this is the filename of the zlib library (with or
without a path). This flag must be provided if the
zlib-dynamic option is not also used. If zlib-dynamic is used
then this flag is optional and defaults to ZLIB1 if not provided.
On VMS: this is the filename of the zlib library (with or without a path).
This flag is optional and if not provided then GNV$LIBZSHR, GNV$LIBZSHR32
or GNV$LIBZSHR64 is used by default depending on the pointer size chosen.
with-zstd-include
The directory for the location of the Zstd include file. This option is only
necessary if enable-std is used and the include file is not
already on the system include path.
OpenSSL requires Zstd 1.4 or greater. The Linux kernel source contains a
zstd.h file that is not compatible with the 1.4.x Zstd distribution, the
compilation will generate an error if the Linux zstd.h is included before
(or instead of) the Zstd distribution header.
with-zstd-lib
On Unix: this is the directory containing the Zstd library.
If not provided the system library path will be used.
On Windows: this is the filename of the Zstd library (with or
without a path). This flag must be provided if the
enable-zstd-dynamic option is not also used.
If zstd-dynamic is used then this flag is optional and defaults
to LIBZSTD if not provided.
Seeding the Random Generator
--with-rand-seed=seed1[,seed2,...]
A comma separated list of seeding methods which will be tried by OpenSSL
in order to obtain random input (a.k.a «entropy») for seeding its
cryptographically secure random number generator (CSPRNG).
The current seeding methods are:
os
Use a trusted operating system entropy source.
This is the default method if such an entropy source exists.
getrandom
Use the getrandom(2) or equivalent system call.
devrandom
Use the first device from the DEVRANDOM list which can be opened to read
random bytes. The DEVRANDOM preprocessor constant expands to
"/dev/urandom","/dev/random","/dev/srandom"
on most unix-ish operating systems.
egd
Check for an entropy generating daemon.
This source is ignored by the FIPS provider.
rdcpu
Use the RDSEED or RDRAND command on x86 or RNDRRS command on aarch64
if provided by the CPU.
librandom
Use librandom (not implemented yet).
This source is ignored by the FIPS provider.
none
Disable automatic seeding. This is the default on some operating systems where
no suitable entropy source exists, or no support for it is implemented yet.
This option is ignored by the FIPS provider.
For more information, see the section Notes on random number generation
at the end of this document.
Setting the FIPS HMAC key
As part of its self-test validation, the FIPS module must verify itself
by performing a SHA-256 HMAC computation on itself. The default key is
the SHA256 value of «the holy handgrenade of antioch» and is sufficient
for meeting the FIPS requirements.
To change the key to a different value, use this flag. The value should
be a hex string no more than 64 characters.
Enable and Disable Features
Feature options always come in pairs, an option to enable feature
xxxx, and an option to disable it:
[ enable-xxxx | no-xxxx ]
Whether a feature is enabled or disabled by default, depends on the feature.
In the following list, always the non-default variant is documented: if
feature xxxx is disabled by default then enable-xxxx is documented and
if feature xxxx is enabled by default then no-xxxx is documented.
no-afalgeng
Don’t build the AFALG engine.
This option will be forced on a platform that does not support AFALG.
enable-ktls
Build with Kernel TLS support.
This option will enable the use of the Kernel TLS data-path, which can improve
performance and allow for the use of sendfile and splice system calls on
TLS sockets. The Kernel may use TLS accelerators if any are available on the
system. This option will be forced off on systems that do not support the
Kernel TLS data-path.
enable-asan
Build with the Address sanitiser.
This is a developer option only. It may not work on all platforms and should
never be used in production environments. It will only work when used with
gcc or clang and should be used in conjunction with the no-shared
option.
enable-acvp-tests
Build support for Automated Cryptographic Validation Protocol (ACVP)
tests.
This is required for FIPS validation purposes. Certain ACVP tests require
access to algorithm internals that are not normally accessible.
Additional information related to ACVP can be found at
https://github.com/usnistgov/ACVP.
no-asm
Do not use assembler code.
This should be viewed as debugging/troubleshooting option rather than for
production use. On some platforms a small amount of assembler code may still
be used even with this option.
no-async
Do not build support for async operations.
no-autoalginit
Don’t automatically load all supported ciphers and digests.
Typically OpenSSL will make available all of its supported ciphers and digests.
For a statically linked application this may be undesirable if small executable
size is an objective. This only affects libcrypto. Ciphers and digests will
have to be loaded manually using EVP_add_cipher() and EVP_add_digest()
if this option is used. This option will force a non-shared build.
no-autoerrinit
Don’t automatically load all libcrypto/libssl error strings.
Typically OpenSSL will automatically load human readable error strings. For a
statically linked application this may be undesirable if small executable size
is an objective.
enable-brotli
Build with support for brotli compression/decompression.
enable-brotli-dynamic
Like the enable-brotli option, but has OpenSSL load the brotli library dynamically
when needed.
This is only supported on systems where loading of shared libraries is supported.
no-autoload-config
Don’t automatically load the default openssl.cnf file.
Typically OpenSSL will automatically load a system config file which configures
default SSL options.
enable-buildtest-c++
While testing, generate C++ buildtest files that simply check that the public
OpenSSL header files are usable standalone with C++.
Enabling this option demands extra care. For any compiler flag given directly
as configuration option, you must ensure that it’s valid for both the C and
the C++ compiler. If not, the C++ build test will most likely break. As an
alternative, you can use the language specific variables, CFLAGS and CXXFLAGS.
—banner=text
Use the specified text instead of the default banner at the end of
configuration.
—w
On platforms where the choice of 32-bit or 64-bit architecture
is not explicitly specified, Configure will print a warning
message and wait for a few seconds to let you interrupt the
configuration. Using this flag skips the wait.
no-bulk
Build only some minimal set of features.
This is a developer option used internally for CI build tests of the project.
no-cached-fetch
Never cache algorithms when they are fetched from a provider. Normally, a
provider indicates if the algorithms it supplies can be cached or not. Using
this option will reduce run-time memory usage but it also introduces a
significant performance penalty. This option is primarily designed to help
with detecting incorrect reference counting.
no-capieng
Don’t build the CAPI engine.
This option will be forced if on a platform that does not support CAPI.
no-cmp
Don’t build support for Certificate Management Protocol (CMP)
and Certificate Request Message Format (CRMF).
no-cms
Don’t build support for Cryptographic Message Syntax (CMS).
no-comp
Don’t build support for SSL/TLS compression.
If this option is enabled (the default), then compression will only work if
the zlib or zlib-dynamic options are also chosen.
enable-crypto-mdebug
This now only enables the failed-malloc feature.
enable-crypto-mdebug-backtrace
This is a no-op; the project uses the compiler’s address/leak sanitizer instead.
no-ct
Don’t build support for Certificate Transparency (CT).
no-deprecated
Don’t build with support for deprecated APIs up until and including the version
given with --api (or the current version, if --api wasn’t specified).
no-dgram
Don’t build support for datagram based BIOs.
Selecting this option will also force the disabling of DTLS.
no-dso
Don’t build support for loading Dynamic Shared Objects (DSO)
enable-devcryptoeng
Build the /dev/crypto engine.
This option is automatically selected on the BSD platform, in which case it can
be disabled with no-devcryptoeng.
no-dynamic-engine
Don’t build the dynamically loaded engines.
This only has an effect in a shared build.
no-ec
Don’t build support for Elliptic Curves.
no-ec2m
Don’t build support for binary Elliptic Curves
enable-ec_nistp_64_gcc_128
Enable support for optimised implementations of some commonly used NIST
elliptic curves.
This option is only supported on platforms:
- with little-endian storage of non-byte types
- that tolerate misaligned memory references
- where the compiler:
- supports the non-standard type
__uint128_t - defines the built-in macro
__SIZEOF_INT128__
- supports the non-standard type
enable-egd
Build support for gathering entropy from the Entropy Gathering Daemon (EGD).
no-engine
Don’t build support for loading engines.
no-err
Don’t compile in any error strings.
enable-external-tests
Enable building of integration with external test suites.
This is a developer option and may not work on all platforms. The following
external test suites are currently supported:
- GOST engine test suite
- Python PYCA/Cryptography test suite
- krb5 test suite
See the file test/README-external.md
for further details.
no-filenames
Don’t compile in filename and line number information (e.g. for errors and
memory allocation).
enable-fips
Build (and install) the FIPS provider
no-fips-securitychecks
Don’t perform FIPS module run-time checks related to enforcement of security
parameters such as minimum security strength of keys.
enable-fuzz-libfuzzer, enable-fuzz-afl
Build with support for fuzzing using either libfuzzer or AFL.
These are developer options only. They may not work on all platforms and
should never be used in production environments.
See the file fuzz/README.md for further details.
no-gost
Don’t build support for GOST based ciphersuites.
Note that if this feature is enabled then GOST ciphersuites are only available
if the GOST algorithms are also available through loading an externally supplied
engine.
no-legacy
Don’t build the legacy provider.
Disabling this also disables the legacy algorithms: MD2 (already disabled by default).
no-makedepend
Don’t generate dependencies.
no-module
Don’t build any dynamically loadable engines.
This also implies no-dynamic-engine.
no-multiblock
Don’t build support for writing multiple records in one go in libssl
Note: this is a different capability to the pipelining functionality.
no-nextprotoneg
Don’t build support for the Next Protocol Negotiation (NPN) TLS extension.
no-ocsp
Don’t build support for Online Certificate Status Protocol (OCSP).
no-padlockeng
Don’t build the padlock engine.
no-hw-padlock
As synonym for no-padlockeng. Deprecated and should not be used.
no-pic
Don’t build with support for Position Independent Code.
no-pinshared
Don’t pin the shared libraries.
By default OpenSSL will attempt to stay in memory until the process exits.
This is so that libcrypto and libssl can be properly cleaned up automatically
via an atexit() handler. The handler is registered by libcrypto and cleans
up both libraries. On some platforms the atexit() handler will run on unload of
libcrypto (if it has been dynamically loaded) rather than at process exit. This
option can be used to stop OpenSSL from attempting to stay in memory until the
process exits. This could lead to crashes if either libcrypto or libssl have
already been unloaded at the point that the atexit handler is invoked, e.g. on a
platform which calls atexit() on unload of the library, and libssl is unloaded
before libcrypto then a crash is likely to happen. Applications can suppress
running of the atexit() handler at run time by using the
OPENSSL_INIT_NO_ATEXIT option to OPENSSL_init_crypto().
See the man page for it for further details.
no-posix-io
Don’t use POSIX IO capabilities.
no-psk
Don’t build support for Pre-Shared Key based ciphersuites.
no-rdrand
Don’t use hardware RDRAND capabilities.
no-rfc3779
Don’t build support for RFC3779, «X.509 Extensions for IP Addresses and
AS Identifiers».
sctp
Build support for Stream Control Transmission Protocol (SCTP).
no-shared
Do not create shared libraries, only static ones.
See Notes on shared libraries below.
no-sock
Don’t build support for socket BIOs.
no-srp
Don’t build support for Secure Remote Password (SRP) protocol or
SRP based ciphersuites.
no-srtp
Don’t build Secure Real-Time Transport Protocol (SRTP) support.
no-sse2
Exclude SSE2 code paths from 32-bit x86 assembly modules.
Normally SSE2 extension is detected at run-time, but the decision whether or not
the machine code will be executed is taken solely on CPU capability vector. This
means that if you happen to run OS kernel which does not support SSE2 extension
on Intel P4 processor, then your application might be exposed to «illegal
instruction» exception. There might be a way to enable support in kernel, e.g.
FreeBSD kernel can be compiled with CPU_ENABLE_SSE, and there is a way to
disengage SSE2 code paths upon application start-up, but if you aim for wider
«audience» running such kernel, consider no-sse2. Both the 386 and no-asm
options imply no-sse2.
no-ssl-trace
Don’t build with SSL Trace capabilities.
This removes the -trace option from s_client and s_server, and omits the
SSL_trace() function from libssl.
Disabling ssl-trace may provide a small reduction in libssl binary size.
no-static-engine
Don’t build the statically linked engines.
This only has an impact when not built «shared».
no-stdio
Don’t use anything from the C header file stdio.h that makes use of the FILE
type. Only libcrypto and libssl can be built in this way. Using this option will
suppress building the command line applications. Additionally, since the OpenSSL
tests also use the command line applications, the tests will also be skipped.
no-tests
Don’t build test programs or run any tests.
enable-tfo
Build with support for TCP Fast Open (RFC7413). Supported on Linux, macOS and FreeBSD.
enable-quic
Build with QUIC support. This is currently just for developers as the
implementation is by no means complete and usable.
no-threads
Don’t build with support for multi-threaded applications.
threads
Build with support for multi-threaded applications. Most platforms will enable
this by default. However, if on a platform where this is not the case then this
will usually require additional system-dependent options!
See Notes on multi-threading below.
no-thread-pool
Don’t build with support for thread pool functionality.
thread-pool
Build with thread pool functionality. If enabled, OpenSSL algorithms may
use the thread pool to perform parallel computation. This option in itself
does not enable OpenSSL to spawn new threads. Currently the only supported
thread pool mechanism is the default thread pool.
no-default-thread-pool
Don’t build with support for default thread pool functionality.
default-thread-pool
Build with default thread pool functionality. If enabled, OpenSSL may create
and manage threads up to a maximum number of threads authorized by the
application. Supported on POSIX compliant platforms and Windows.
enable-trace
Build with support for the integrated tracing api.
See manual pages OSSL_trace_set_channel(3) and OSSL_trace_enabled(3) for details.
no-ts
Don’t build Time Stamping (TS) Authority support.
enable-ubsan
Build with the Undefined Behaviour sanitiser (UBSAN).
This is a developer option only. It may not work on all platforms and should
never be used in production environments. It will only work when used with
gcc or clang and should be used in conjunction with the -DPEDANTIC option
(or the --strict-warnings option).
no-ui-console
Don’t build with the User Interface (UI) console method
The User Interface console method enables text based console prompts.
enable-unit-test
Enable additional unit test APIs.
This should not typically be used in production deployments.
no-uplink
Don’t build support for UPLINK interface.
enable-weak-ssl-ciphers
Build support for SSL/TLS ciphers that are considered «weak»
Enabling this includes for example the RC4 based ciphersuites.
zlib
Build with support for zlib compression/decompression.
zlib-dynamic
Like the zlib option, but has OpenSSL load the zlib library dynamically
when needed.
This is only supported on systems where loading of shared libraries is supported.
enable-zstd
Build with support for Zstd compression/decompression.
enable-zstd-dynamic
Like the enable-zstd option, but has OpenSSL load the Zstd library dynamically
when needed.
This is only supported on systems where loading of shared libraries is supported.
386
In 32-bit x86 builds, use the 80386 instruction set only in assembly modules
The default x86 code is more efficient, but requires at least an 486 processor.
Note: This doesn’t affect compiler generated code, so this option needs to be
accompanied by a corresponding compiler-specific option.
no-{protocol}
no-{ssl|ssl3|tls|tls1|tls1_1|tls1_2|tls1_3|dtls|dtls1|dtls1_2}
Don’t build support for negotiating the specified SSL/TLS protocol.
If no-tls is selected then all of tls1, tls1_1, tls1_2 and tls1_3
are disabled.
Similarly no-dtls will disable dtls1 and dtls1_2. The no-ssl option is
synonymous with no-ssl3. Note this only affects version negotiation.
OpenSSL will still provide the methods for applications to explicitly select
the individual protocol versions.
no-{protocol}-method
no-{ssl3|tls1|tls1_1|tls1_2|dtls1|dtls1_2}-method
Analogous to no-{protocol} but in addition do not build the methods for
applications to explicitly select individual protocol versions. Note that there
is no no-tls1_3-method option because there is no application method for
TLSv1.3.
Using individual protocol methods directly is deprecated. Applications should
use TLS_method() instead.
enable-{algorithm}
Build with support for the specified algorithm.
no-{algorithm}
no-{aria|bf|blake2|camellia|cast|chacha|cmac|
    des|dh|dsa|ecdh|ecdsa|idea|md4|mdc2|ocb|
    poly1305|rc2|rc4|rmd160|scrypt|seed|
    siphash|siv|sm2|sm3|sm4|whirlpool}
Build without support for the specified algorithm.
The ripemd algorithm is deprecated and if used is synonymous with rmd160.
Compiler-specific options
-Dxxx, -Ixxx, -Wp, -lxxx, -Lxxx, -Wl, -rpath, -R, -framework, -static
These system specific options will be recognised and passed through to the
compiler to allow you to define preprocessor symbols, specify additional
libraries, library directories or other compiler options. It might be worth
noting that some compilers generate code specifically for processor the
compiler currently executes on. This is not necessarily what you might have
in mind, since it might be unsuitable for execution on other, typically older,
processor. Consult your compiler documentation.
Take note of the Environment Variables documentation
below and how these flags interact with those variables.
Additional options that are not otherwise recognised are passed through as
they are to the compiler as well. Unix-style options beginning with a
- or + and Windows-style options beginning with a / are recognised.
Again, consult your compiler documentation.
If the option contains arguments separated by spaces, then the URL-style
notation %20 can be used for the space character in order to avoid having
to quote the option. For example, -opt%20arg gets expanded to -opt arg.
In fact, any ASCII character can be encoded as %xx using its hexadecimal
encoding.
Take note of the Environment Variables documentation
below and how these flags interact with those variables.
Environment Variables
Assign the given value to the environment variable VAR for Configure.
These work just like normal environment variable assignments, but are supported
on all platforms and are confined to the configuration scripts only.
These assignments override the corresponding value in the inherited environment,
if there is one.
The following variables are used as «make variables» and can be used as an
alternative to giving preprocessor, compiler and linker options directly as
configuration. The following variables are supported:
AR              The static library archiver.
ARFLAGS         Flags for the static library archiver.
AS              The assembler compiler.
ASFLAGS         Flags for the assembler compiler.
CC              The C compiler.
CFLAGS          Flags for the C compiler.
CXX             The C++ compiler.
CXXFLAGS        Flags for the C++ compiler.
CPP             The C/C++ preprocessor.
CPPFLAGS        Flags for the C/C++ preprocessor.
CPPDEFINES      List of CPP macro definitions, separated
                by a platform specific character (':' or
                space for Unix, ';' for Windows, ',' for
                VMS).  This can be used instead of using
                -D (or what corresponds to that on your
                compiler) in CPPFLAGS.
CPPINCLUDES     List of CPP inclusion directories, separated
                the same way as for CPPDEFINES.  This can
                be used instead of -I (or what corresponds
                to that on your compiler) in CPPFLAGS.
HASHBANGPERL    Perl invocation to be inserted after '#!'
                in public perl scripts (only relevant on
                Unix).
LD              The program linker (not used on Unix, $(CC)
                is used there).
LDFLAGS         Flags for the shared library, DSO and
                program linker.
LDLIBS          Extra libraries to use when linking.
                Takes the form of a space separated list
                of library specifications on Unix and
                Windows, and as a comma separated list of
                libraries on VMS.
RANLIB          The library archive indexer.
RC              The Windows resource compiler.
RCFLAGS         Flags for the Windows resource compiler.
RM              The command to remove files and directories.
These cannot be mixed with compiling/linking flags given on the command line.
In other words, something like this isn’t permitted.
$ ./Configure -DFOO CPPFLAGS=-DBAR -DCOOKIE
Backward compatibility note:
To be compatible with older configuration scripts, the environment variables
are ignored if compiling/linking flags are given on the command line, except
for the following:
AR, CC, CXX, CROSS_COMPILE, HASHBANGPERL, PERL, RANLIB, RC, and WINDRES
For example, the following command will not see -DBAR:
$ CPPFLAGS=-DBAR ./Configure -DCOOKIE
However, the following will see both set variables:
$ CC=gcc CROSS_COMPILE=x86_64-w64-mingw32- ./Configure -DCOOKIE
If CC is set, it is advisable to also set CXX to ensure both the C and C++
compiler are in the same «family». This becomes relevant with
enable-external-tests and enable-buildtest-c++.
Reconfigure
Reconfigure from earlier data.
This fetches the previous command line options and environment from data
saved in configdata.pm and runs the configuration process again, using
these options and environment. Note: NO other option is permitted together
with reconf. Note: The original configuration saves away values for ALL
environment variables that were used, and if they weren’t defined, they are
still saved away with information that they weren’t originally defined.
This information takes precedence over environment variables that are
defined when reconfiguring.
Displaying configuration data
The configuration script itself will say very little, and finishes by
creating configdata.pm. This perl module can be loaded by other scripts
to find all the configuration data, and it can also be used as a script to
display all sorts of configuration data in a human readable form.
For more information, please do:
$ ./configdata.pm --help # Unix
or
$ perl configdata.pm --help # Windows and VMS
Installation Steps in Detail
Configure OpenSSL
Automatic Configuration
In previous version, the config script determined the platform type and
compiler and then called Configure. Starting with this release, they are
the same.
Unix / Linux / macOS
$ ./Configure [options...]
OpenVMS
$ perl Configure [options...]
Windows
$ perl Configure [options...]
Manual Configuration
OpenSSL knows about a range of different operating system, hardware and
compiler combinations. To see the ones it knows about, run
$ ./Configure LIST # Unix
or
$ perl Configure LIST # All other platforms
For the remainder of this text, the Unix form will be used in all examples.
Please use the appropriate form for your platform.
Pick a suitable name from the list that matches your system. For most
operating systems there is a choice between using cc or gcc.
When you have identified your system (and if necessary compiler) use this
name as the argument to Configure. For example, a linux-elf user would
run:
$ ./Configure linux-elf [options...]
Creating your own Configuration
If your system isn’t listed, you will have to create a configuration
file named Configurations/YOURFILENAME.conf (replace YOURFILENAME
with a filename of your choosing) and add the correct
configuration for your system. See the available configs as examples
and read Configurations/README.md and
Configurations/README-design.md
for more information.
The generic configurations cc or gcc should usually work on 32 bit
Unix-like systems.
Configure creates a build file (Makefile on Unix, makefile on Windows
and descrip.mms on OpenVMS) from a suitable template in Configurations/,
and defines various macros in include/openssl/configuration.h (generated
from include/openssl/configuration.h.in.
If none of the generated build files suit your purpose, it’s possible to
write your own build file template and give its name through the environment
variable BUILDFILE. For example, Ninja build files could be supported by
writing Configurations/build.ninja.tmpl and then configure with BUILDFILE
set like this (Unix syntax shown, you’ll have to adapt for other platforms):
$ BUILDFILE=build.ninja perl Configure [options...]
Out of Tree Builds
OpenSSL can be configured to build in a build directory separate from the
source code directory. It’s done by placing yourself in some other
directory and invoking the configuration commands from there.
Unix example
$ mkdir /var/tmp/openssl-build
$ cd /var/tmp/openssl-build
$ /PATH/TO/OPENSSL/SOURCE/Configure [options...]
OpenVMS example
$ set default sys$login:
$ create/dir [.tmp.openssl-build]
$ set default [.tmp.openssl-build]
$ perl D:[PATH.TO.OPENSSL.SOURCE]Configure [options...]
Windows example
$ C:
$ mkdir temp-openssl
$ cd temp-openssl
$ perl d:PATHTOOPENSSLSOURCEConfigure [options...]
Paths can be relative just as well as absolute. Configure will do its best
to translate them to relative paths whenever possible.
Build OpenSSL
Build OpenSSL by running:
$ make                                           # Unix
$ mms                                            ! (or mmk) OpenVMS
$ nmake                                          # Windows
This will build the OpenSSL libraries (libcrypto.a and libssl.a on
Unix, corresponding on other platforms) and the OpenSSL binary
(openssl). The libraries will be built in the top-level directory,
and the binary will be in the apps/ subdirectory.
If the build fails, take a look at the Build Failures
subsection of the Troubleshooting section.
Test OpenSSL
After a successful build, and before installing, the libraries should
be tested. Run:
$ make test                                      # Unix
$ mms test                                       ! OpenVMS
$ nmake test                                     # Windows
Warning: you MUST run the tests from an unprivileged account (or disable
your privileges temporarily if your platform allows it).
See test/README.md for further details how run tests.
See test/README-dev.md for guidelines on adding tests.
Install OpenSSL
If everything tests ok, install OpenSSL with
$ make install                                   # Unix
$ mms install                                    ! OpenVMS
$ nmake install                                  # Windows
Note that in order to perform the install step above you need to have
appropriate permissions to write to the installation directory.
The above commands will install all the software components in this
directory tree under <PREFIX> (the directory given with --prefix or
its default):
Unix / Linux / macOS
bin/           Contains the openssl binary and a few other
               utility scripts.
include/openssl
               Contains the header files needed if you want
               to build your own programs that use libcrypto
               or libssl.
lib            Contains the OpenSSL library files.
lib/engines    Contains the OpenSSL dynamically loadable engines.

share/man/man1 Contains the OpenSSL command line man-pages.
share/man/man3 Contains the OpenSSL library calls man-pages.
share/man/man5 Contains the OpenSSL configuration format man-pages.
share/man/man7 Contains the OpenSSL other misc man-pages.

share/doc/openssl/html/man1
share/doc/openssl/html/man3
share/doc/openssl/html/man5
share/doc/openssl/html/man7
               Contains the HTML rendition of the man-pages.
OpenVMS
‘arch’ is replaced with the architecture name, ALPHA or IA64,
‘sover’ is replaced with the shared library version (0101 for 1.1), and
‘pz’ is replaced with the pointer size OpenSSL was built with:
[.EXE.'arch']  Contains the openssl binary.
[.EXE]         Contains a few utility scripts.
[.include.openssl]
               Contains the header files needed if you want
               to build your own programs that use libcrypto
               or libssl.
[.LIB.'arch']  Contains the OpenSSL library files.
[.ENGINES'sover''pz'.'arch']
               Contains the OpenSSL dynamically loadable engines.
[.SYS$STARTUP] Contains startup, login and shutdown scripts.
               These define appropriate logical names and
               command symbols.
[.SYSTEST]     Contains the installation verification procedure.
[.HTML]        Contains the HTML rendition of the manual pages.
Additional Directories
Additionally, install will add the following directories under
OPENSSLDIR (the directory given with --openssldir or its default)
for you convenience:
certs          Initially empty, this is the default location
               for certificate files.
private        Initially empty, this is the default location
               for private key files.
misc           Various scripts.
The installation directory should be appropriately protected to ensure
unprivileged users cannot make changes to OpenSSL binaries or files, or
install engines. If you already have a pre-installed version of OpenSSL as
part of your Operating System it is recommended that you do not overwrite
the system version and instead install to somewhere else.
Package builders who want to configure the library for standard locations,
but have the package installed somewhere else so that it can easily be
packaged, can use
$ make DESTDIR=/tmp/package-root install         # Unix
$ mms/macro="DESTDIR=TMP:[PACKAGE-ROOT]" install ! OpenVMS
The specified destination directory will be prepended to all installation
target paths.
Compatibility issues with previous OpenSSL versions
COMPILING existing applications
Starting with version 1.1.0, OpenSSL hides a number of structures that were
previously open. This includes all internal libssl structures and a number
of EVP types. Accessor functions have been added to allow controlled access
to the structures’ data.
This means that some software needs to be rewritten to adapt to the new ways
of doing things. This often amounts to allocating an instance of a structure
explicitly where you could previously allocate them on the stack as automatic
variables, and using the provided accessor functions where you would previously
access a structure’s field directly.
Some APIs have changed as well. However, older APIs have been preserved when
possible.
Post-installation Notes
With the default OpenSSL installation comes a FIPS provider module, which
needs some post-installation attention, without which it will not be usable.
This involves using the following command:
See the openssl-fipsinstall(1) manual for details and examples.
Advanced Build Options
Environment Variables
A number of environment variables can be used to provide additional control
over the build process. Typically these should be defined prior to running
Configure. Not all environment variables are relevant to all platforms.
AR
               The name of the ar executable to use.

BUILDFILE
               Use a different build file name than the platform default
               ("Makefile" on Unix-like platforms, "makefile" on native Windows,
               "descrip.mms" on OpenVMS).  This requires that there is a
               corresponding build file template.
               See [Configurations/README.md](Configurations/README.md)
               for further information.

CC
               The compiler to use. Configure will attempt to pick a default
               compiler for your platform but this choice can be overridden
               using this variable. Set it to the compiler executable you wish
               to use, e.g. gcc or clang.

CROSS_COMPILE
               This environment variable has the same meaning as for the
               "--cross-compile-prefix" Configure flag described above. If both
               are set then the Configure flag takes precedence.

HASHBANGPERL
               The command string for the Perl executable to insert in the
               #! line of perl scripts that will be publicly installed.
               Default: /usr/bin/env perl
               Note: the value of this variable is added to the same scripts
               on all platforms, but it's only relevant on Unix-like platforms.

KERNEL_BITS
               This can be the value `32` or `64` to specify the architecture
               when it is not "obvious" to the configuration. It should generally
               not be necessary to specify this environment variable.

NM
               The name of the nm executable to use.

OPENSSL_LOCAL_CONFIG_DIR
               OpenSSL comes with a database of information about how it
               should be built on different platforms as well as build file
               templates for those platforms. The database is comprised of
               ".conf" files in the Configurations directory.  The build
               file templates reside there as well as ".tmpl" files. See the
               file [Configurations/README.md](Configurations/README.md)
               for further information about the format of ".conf" files
               as well as information on the ".tmpl" files.
               In addition to the standard ".conf" and ".tmpl" files, it is
               possible to create your own ".conf" and ".tmpl" files and
               store them locally, outside the OpenSSL source tree.
               This environment variable can be set to the directory where
               these files are held and will be considered by Configure
               before it looks in the standard directories.

PERL
               The name of the Perl executable to use when building OpenSSL.
               Only needed if builing should use a different Perl executable
               than what is used to run the Configure script.

RANLIB
               The name of the ranlib executable to use.

RC
               The name of the rc executable to use. The default will be as
               defined for the target platform in the ".conf" file. If not
               defined then "windres" will be used. The WINDRES environment
               variable is synonymous to this. If both are defined then RC
               takes precedence.

WINDRES
               See RC.
Makefile Targets
The Configure script generates a Makefile in a format relevant to the specific
platform. The Makefiles provide a number of targets that can be used. Not all
targets may be available on all platforms. Only the most common targets are
described here. Examine the Makefiles themselves for the full list.
all
               The target to build all the software components and
               documentation.

build_sw
               Build all the software components.
               THIS IS THE DEFAULT TARGET.

build_docs
               Build all documentation components.

clean
               Remove all build artefacts and return the directory to a "clean"
               state.

depend
               Rebuild the dependencies in the Makefiles. This is a legacy
               option that no longer needs to be used since OpenSSL 1.1.0.

install
               Install all OpenSSL components.

install_sw
               Only install the OpenSSL software components.

install_docs
               Only install the OpenSSL documentation components.

install_man_docs
               Only install the OpenSSL man pages (Unix only).

install_html_docs
               Only install the OpenSSL HTML documentation.

install_fips
               Install the FIPS provider module configuration file.

list-tests
               Prints a list of all the self test names.

test
               Build and run the OpenSSL self tests.

uninstall
               Uninstall all OpenSSL components.

reconfigure
reconf
               Re-run the configuration process, as exactly as the last time
               as possible.

update
               This is a developer option. If you are developing a patch for
               OpenSSL you may need to use this if you want to update
               automatically generated files; add new error codes or add new
               (or change the visibility of) public API functions. (Unix only).
Running Selected Tests
You can specify a set of tests to be performed
using the make variable TESTS.
See the section Running Selected Tests of
test/README.md.
Troubleshooting
Configuration Problems
Selecting the correct target
The ./Configure script tries hard to guess your operating system, but in some
cases it does not succeed. You will see a message like the following:
$ ./Configure
Operating system: x86-whatever-minix
This system (minix) is not supported. See file INSTALL.md for details.
Even if the automatic target selection by the ./Configure script fails,
chances are that you still might find a suitable target in the Configurations
directory, which you can supply to the ./Configure command,
possibly after some adjustment.
The Configurations/ directory contains a lot of examples of such targets.
The main configuration file is 10-main.conf, which contains all targets that
are officially supported by the OpenSSL team. Other configuration files contain
targets contributed by other OpenSSL users. The list of targets can be found in
a Perl list my %targets = ( ... ).
my %targets = (
...
"target-name" => {
    inherit_from     => [ "base-target" ],
    CC               => "...",
    cflags           => add("..."),
    asm_arch         => '...',
    perlasm_scheme   => "...",
},
...
)
If you call ./Configure without arguments, it will give you a list of all
known targets. Using grep, you can lookup the target definition in the
Configurations/ directory. For example the android-x86_64 can be found in
Configurations/15-android.conf.
The directory contains two README files, which explain the general syntax and
design of the configuration files.
- Configurations/README.md
- Configurations/README-design.md
If you need further help, try to search the openssl-users mailing list
or the GitHub Issues for existing solutions. If you don’t find anything,
you can raise an issue to ask a question yourself.
More about our support resources can be found in the SUPPORT file.
Configuration Errors
If the ./Configure or ./Configure command fails with an error message,
read the error message carefully and try to figure out whether you made
a mistake (e.g., by providing a wrong option), or whether the script is
working incorrectly. If you think you encountered a bug, please
raise an issue on GitHub to file a bug report.
Along with a short description of the bug, please provide the complete
configure command line and the relevant output including the error message.
Note: To make the output readable, please add a ‘code fence’ (three backquotes
``` on a separate line) before and after your output:
 ```
 ./Configure [your arguments...]

 [output...]

 ```
Build Failures
If the build fails, look carefully at the output. Try to locate and understand
the error message. It might be that the compiler is already telling you
exactly what you need to do to fix your problem.
There may be reasons for the failure that aren’t problems in OpenSSL itself,
for example if the compiler reports missing standard or third party headers.
If the build succeeded previously, but fails after a source or configuration
change, it might be helpful to clean the build tree before attempting another
build. Use this command:
$ make clean                                     # Unix
$ mms clean                                      ! (or mmk) OpenVMS
$ nmake clean                                    # Windows
Assembler error messages can sometimes be sidestepped by using the no-asm
configuration option. See also notes.
Compiling parts of OpenSSL with gcc and others with the system compiler will
result in unresolved symbols on some systems.
If you are still having problems, try to search the openssl-users mailing
list or the GitHub Issues for existing solutions. If you think you
encountered an OpenSSL bug, please raise an issue to file a bug report.
Please take the time to review the existing issues first; maybe the bug was
already reported or has already been fixed.
Test Failures
If some tests fail, look at the output. There may be reasons for the failure
that isn’t a problem in OpenSSL itself (like an OS malfunction or a Perl issue).
You may want increased verbosity, that can be accomplished as described in
section Test Failures of test/README.md.
You may also want to selectively specify which test(s) to perform. This can be
done using the make variable TESTS as described in section Running
Selected Tests of test/README.md.
If you find a problem with OpenSSL itself, try removing any
compiler optimization flags from the CFLAGS line in the Makefile and
run make clean; make or corresponding.
To report a bug please open an issue on GitHub, at
https://github.com/openssl/openssl/issues.
Notes
Notes on multi-threading
For some systems, the OpenSSL Configure script knows what compiler options
are needed to generate a library that is suitable for multi-threaded
applications. On these systems, support for multi-threading is enabled
by default; use the no-threads option to disable (this should never be
necessary).
On other systems, to enable support for multi-threading, you will have
to specify at least two options: threads, and a system-dependent option.
(The latter is -D_REENTRANT on various systems.) The default in this
case, obviously, is not to include support for multi-threading (but
you can still use no-threads to suppress an annoying warning message
from the Configure script.)
OpenSSL provides built-in support for two threading models: pthreads (found on
most UNIX/Linux systems), and Windows threads. No other threading models are
supported. If your platform does not provide pthreads or Windows threads then
you should use Configure with the no-threads option.
For pthreads, all locks are non-recursive. In addition, in a debug build,
the mutex attribute PTHREAD_MUTEX_ERRORCHECK is used. If this is not
available on your platform, you might have to add
-DOPENSSL_NO_MUTEX_ERRORCHECK to your Configure invocation.
(On Linux PTHREAD_MUTEX_ERRORCHECK is an enum value, so a built-in
ifdef test cannot be used.)
Notes on shared libraries
For most systems the OpenSSL Configure script knows what is needed to
build shared libraries for libcrypto and libssl. On these systems
the shared libraries will be created by default. This can be suppressed and
only static libraries created by using the no-shared option. On systems
where OpenSSL does not know how to build shared libraries the no-shared
option will be forced and only static libraries will be created.
Shared libraries are named a little differently on different platforms.
One way or another, they all have the major OpenSSL version number as
part of the file name, i.e. for OpenSSL 1.1.x, 1.1 is somehow part of
the name.
On most POSIX platforms, shared libraries are named libcrypto.so.1.1
and libssl.so.1.1.
on Cygwin, shared libraries are named cygcrypto-1.1.dll and cygssl-1.1.dll
with import libraries libcrypto.dll.a and libssl.dll.a.
On Windows build with MSVC or using MingW, shared libraries are named
libcrypto-1_1.dll and libssl-1_1.dll for 32-bit Windows,
libcrypto-1_1-x64.dll and libssl-1_1-x64.dll for 64-bit x86_64 Windows,
and libcrypto-1_1-ia64.dll and libssl-1_1-ia64.dll for IA64 Windows.
With MSVC, the import libraries are named libcrypto.lib and libssl.lib,
while with MingW, they are named libcrypto.dll.a and libssl.dll.a.
On VMS, shareable images (VMS speak for shared libraries) are named
ossl$libcrypto0101_shr.exe and ossl$libssl0101_shr.exe. However, when
OpenSSL is specifically built for 32-bit pointers, the shareable images
are named ossl$libcrypto0101_shr32.exe and ossl$libssl0101_shr32.exe
instead, and when built for 64-bit pointers, they are named
ossl$libcrypto0101_shr64.exe and ossl$libssl0101_shr64.exe.
Notes on random number generation
Availability of cryptographically secure random numbers is required for
secret key generation. OpenSSL provides several options to seed the
internal CSPRNG. If not properly seeded, the internal CSPRNG will refuse
to deliver random bytes and a «PRNG not seeded error» will occur.
The seeding method can be configured using the --with-rand-seed option,
which can be used to specify a comma separated list of seed methods.
However, in most cases OpenSSL will choose a suitable default method,
so it is not necessary to explicitly provide this option. Note also
that not all methods are available on all platforms. The FIPS provider will
silently ignore seed sources that were not validated.
I) On operating systems which provide a suitable randomness source (in
form of a system call or system device), OpenSSL will use the optimal
available method to seed the CSPRNG from the operating system’s
randomness sources. This corresponds to the option --with-rand-seed=os.
II) On systems without such a suitable randomness source, automatic seeding
and reseeding is disabled (--with-rand-seed=none) and it may be necessary
to install additional support software to obtain a random seed and reseed
the CSPRNG manually. Please check out the manual pages for RAND_add(),
RAND_bytes(), RAND_egd(), and the FAQ for more information.
Notes on assembler modules compilation
Compilation of some code paths in assembler modules might depend on whether the
current assembler version supports certain ISA extensions or not. Code paths
that use the AES-NI, PCLMULQDQ, SSSE3, and SHA extensions are always assembled.
Apart from that, the minimum requirements for the assembler versions are shown
in the table below:
| ISA extension | GNU as | nasm | llvm |
|---|---|---|---|
| AVX | 2.19 | 2.09 | 3.0 |
| AVX2 | 2.22 | 2.10 | 3.1 |
| ADCX/ADOX | 2.23 | 2.10 | 3.3 |
| AVX512 | 2.25 | 2.11.8 | 3.6 (*) |
| AVX512IFMA | 2.26 | 2.11.8 | 6.0 (*) |
| VAES | 2.30 | 2.13.3 | 6.0 (*) |
(*) Even though AVX512 support was implemented in llvm 3.6, prior to version 7.0
an explicit -march flag was apparently required to compile assembly modules. But
then the compiler generates processor-specific code, which in turn contradicts
the idea of performing dispatch at run-time, which is facilitated by the special
variable OPENSSL_ia32cap. For versions older than 7.0, it is possible to work
around the problem by forcing the build procedure to use the following script:
#!/bin/sh
exec clang -no-integrated-as "$@"
instead of the real clang. In which case it doesn’t matter what clang version
is used, as it is the version of the GNU assembler that will be checked.
Generating SSL certificates can be a daunting task, one filled with frustration and sorrow. But it doesn’t have to be that way! If you have Windows 10 and OpenSSL along with a little help from this tutorial, you will be well on your way.
Not a reader? Watch this related video tutorial!
Not seeing the video? Make sure your ad blocker is disabled.
In this article, you’re going to learn how to install OpenSSL on Windows 10. Once installed, you’ll then generate SSL certificates, troubleshoot and debug certificates, and convert between formats.
Let’s begin mastering OpenSSL on Windows 10 with PowerShell!
Related: Managing Certs with Windows Certificate Manager and PowerShell
Prerequisites
In this article, you are going to learn using a hands-on approach. While OpenSSL historically is a Linux OS utility, you can use it with Windows OS as well.
- A Windows system with Local Administrator rights – The tutorial will be using Windows 10
- Windows PowerShell 5.1 (comes with Windows) or PowerShell 7
- Chocolatey – A package manager for Windows installed.
- PowerShell ISE, Visual Studio Code or any text editor of your choice
All screenshots in this guide were taken from Windows 10 build 1909 and PowerShell 7.
Installing OpenSSL on Windows 10 with PowerShell and Chocolatey
Assuming you have installed Chocolatey using the installation instructions, your first task is to install OpenSSL on Windows 10. To do this, open up your PowerShell console and run choco install OpenSSL.Lightas shown below.

That’s it! You’ve now installed OpenSSL with PowerShell.
Set up a Working Directory
This tutorial will be creating a few certificates to learn from. To ensure all of the work you do here is confined to a single folder you can clean up later, go ahead and create one.
This tutorial will store all certificates and related files in the C:certs folder. You can create a folder with PowerShell by running the below command.
New-Item -ItemType Directory -Path C:certsNow it’s time to configure OpenSSL.
Configuring OpenSSL
By default, OpenSSL on Windows 10 does not come with a configuration file. This is intentional because there are a lot of configuration options that you can customize. For the purposes of this guide, you are going to use a sample configuration that you can customize later to best suit your security requirements.
Open up PowerShell and run the below command. This command downloads a sample configuration file from MIT and saves it as openssl.cnf in the current working directory.
You can now open up the openssl.cnf file and you should see something that looks like below.
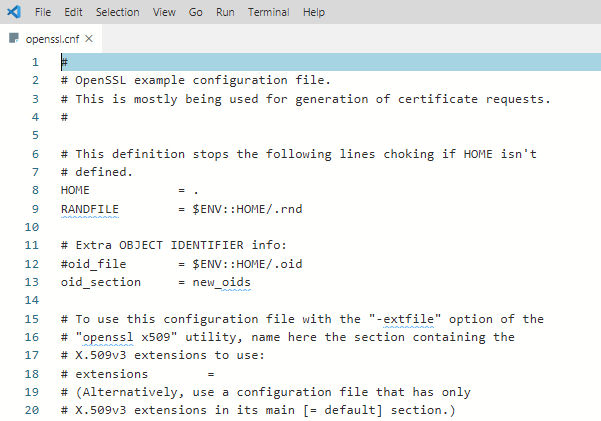
The downloaded configuration will work as-is for now. Do not use the defaults in a production environment!
Update PowerShell Profile Environment Variables
To make things go smoothly, you should modify your PowerShell profile on Windows 10. Setting up some environment variables allows you to easily switch between different versions of OpenSSL that you may have installed.
I suggest adding two environment variables to your PowerShell profile called path and OPENSSL_CONF. You will update the PATH environment variable to ensure you can run the openssl binary in any location while on the command line.
Below you’ll see a way to create a PowerShell profile if you don’t already have one. This command appends the OpenSSL binary path to your PATH and assign the configuration file path to OPENSSL_CONF.
# Add environment variables to PowerShell profile
# Test for a profile, if not found create one!
if (-not (Test-Path $profile) ) {
    New-Item -Path $profile -ItemType File -Force
}

# Edit profile to add these lines
'$env:path = "$env:path;C:Program FilesOpenSSLbin"' | Out-File $profile -Append
'$env:OPENSSL_CONF = "C:certsopenssl.cnf"' | Out-File $profile -Append
To use the environment variables, reload your profile typing . $profile or just close and reopen PowerShell.
Now you can easily invoke the openssl binary wherever you are in PowerShell as shown below.
Using OpenSSL on Windows 10 to Generate a CSR & Private Key
Before you can create an SSL certificate, you must generate a certifiate-signing request (CSR). A CSR is an encoded file that provides you with a way to share your public key with a certificate authority (CA). This file contains identifying information, a signature algorithm, and a digital signature. Let’s create your first CSR and private key.
Related: Your Guide to X509 Certificates for Mortals
To create a CSR, run the below command. OpenSSL will then prompt you to enter some identifying information as you can see in the following demonstration.
openssl req -new -out MyFirst.csr
Once complete, you will have a valid CSR and private key which can be used to issue an SSL certificate to you.
The configuration file defaults can be edited further to streamline this process should you not want to enter data every time you generate a CSR.
You can read more about the available CSR options and view sample configurations in the man pages. OpenSSL also has an active GitHub repository with examples too.
Generating RSA Key Pairs
You can also create RSA key pairs (public/private) with OpenSSL. To do so, first, create a private key using the genrsa sub-command as shown below.
When you run the command below, OpenSSL on Windows 10 will generate a RSA private key with a key length of 2048 bits. This key is generated almost immediately on modern hardware. The resulting key is output in the working directory
# generate a private key using maximum key size of 2048
# key sizes can be 512, 758, 1024, 1536 or 2048.
openssl genrsa -out rsa.private 2048
Next, generate a public key using the private key that you just created using the rsa sub-command. The syntax below will create a public key called rsa.public in the working directory from the rsa.private private key.
# generate a public key using the private key
openssl rsa -in rsa.private -out rsa.public -pubout -outform PEM
Generating a Self-Signed Certificate
On occasion you may need to generate a self-signed certificate. Self-signed certificates are fine to use for lab use but not a secure practice to use in a production environment.
Let’s create a self-signed certificate before moving onto the next task. To do so, enter the command below to create an X509 SSL certificate. This certificate will use SHA256 cryptography that will be valid for 365 days using an RSA key length of 2048 bits. The certificate will be saved to the working directory.
openssl req -x509 -sha256 -nodes -days 365 -newkey rsa:2048 -keyout privateKey.key -out certificate.crtYou are now ready to import the certificate into a browser or server.
Validating CSRs, Certificates, and Keys with OpenSSL
Checking the information in a CSR, private key, certificate, or PKCS#12 can save you time troubleshooting SSL errors. Sometimes a wrong key may have been used to create a certificate, for example. You may have the wrong identifying information in the certificate.
Let’s start by checking a CSR using the req command and some parameters:
openssl req -text -noout -verify -in .MyFirst.csr
Details such as country name, organizational name, and the email address you entered when creating the CSR at the beginning of this guide, should match precisely.
You can also check a certificate using the x509 sub-command with a couple of parameters:
openssl x509 -in .certificate.crt -text -noout | more
Converting Certificates with OpenSSL
There are occasions where an application does not use a particular certificate format. You can run into this issue with an application called HAproxy, for example that requires a PEM certificate when you may have a DER-formatted certificate (.crt .cer .der).
To demonstrate converting a certificate, let’s convert the self-signed certificate created earlier in a DER format (certificate.crt) to PEM. Use the code in the following code snippet to do so.
This command below uses the x509 sub-command with the parameter of -inform which should match the format of the -in file followed by the -out format.
openssl x509 -inform der -in .certificate.crt -out .certificate.pemYou can also reverse the order if you’d like to the DER format from PEM too as shown below.
openssl x509 -outform der -in .certificate.pem -out .certificate.derAnd last but not least, you can convert PKCS#12 to PEM and PEM to PKCS#12. This is a file type that contain private keys and certificates. To convert to PEM format, use the pkcs12 sub-command.
openssl pkcs12 -in .SomeKeyStore.pfx -out .SomeKeyStore.pem -nodesYou can convert a PEM certificate and private key to PKCS#12 format as well using -export with a few additional options. Below you are exporting a PKCS#12 formatted certificate using your private key by using SomeCertificate.crt as the input source. Using the -certfile option value MyCACert.crt allows you to validate SomeCertificate.crt.
openssl pkcs12 -export -out SomeCertificate.pfx -inkey SomePrivateKey.key -in SomeCertificate.crt -certfile MyCACert.crtTroubleshooting & Debugging
Now that you can create & convert CSR’s, certificates, and key pairs, it’s time to learn how to troubleshoot and debug them. OpenSSL comes with commands that make it a breeze to troubleshoot problems.
OpenSSL also allows you to check certificates for file integrity and test for possible data corruption. Using an MD5 checksum, you can use the following code examples to test certificates, keys and CSR’s:
# Certificates
openssl x509 -noout -modulus -in .certificate.crt | openssl md5

# Public / Private Keys
openssl rsa -noout -modulus -in .privateKey.key | openssl md5

# Certificate Server Request
openssl req -noout -modulus -in .MyFirst.csr | openssl md5

# Check an external SSL connection
openssl s_client -connect www.google.com:443
Once you have the original hash, you can then compare that original hash with a current hash to verify the certificate hasn’t been modified or corrupted.
Here’s a sample of what that code looks like when run in PowerShell:

Summary
In this article, you have learned how to install and configure OpenSSL on Windows 10, create a CSR, key pair, and SSL certificate. You have also learned how to convert between different certificate formats and do some basic troubleshooting using built-in sub-commands.
Additional Resources
- OpenSSL config man page
- OpenSSL commands
- Online SSL Checker
- Automating IIS SSL Certificate Installation with PowerShell
- How to Create Self-Signed Certificates with PowerShell
OpenSSL — проект с открытым исходным кодом, состоящий из криптографической библиотеки и набора инструментов SSL/TLS. Цитата с веб-сайта проекта:
Проект OpenSSL Project — это совместный труд по разработке надёжного полнофункционального Open Source-инструментария коммерческого класса, реализующего протоколы Secure Sockets Layer (SSL) и Transport Layer Security (TLS), а также полнофункциональную криптографическую библиотеку общего назначения. Проект управляется сообществом добровольцев со всего мира, использующим Интернет для взаимодействия, планирования и разработки инструментария OpenSSL, а также связанной с ним документации.
OpenSSL является стандартом де-факто в этой области и имеет продолжительную историю. Первоначально проект стартовал в 1995 году под названием SSLeay1, тогда его разработкой занимались Eric A. Young и Tim J. Hudson. Рождение проекта OpenSSL произошло в конце 1998 года, когда Эрик и Тим прекратили свою работу над SSLeay, чтобы работать над коммерческим инструментарием SSL/TLS под названием BSAFE SSL-C в RSA Australia.
Сегодня OpenSSL получил повсеместное распространение как на серверах, так и во многих клиентских программах. Его инструменты командной строки чаще всего выбираются для управления сертификатами, а также для их проверки. Что интересно, в браузерах исторически использовались другие библиотеки, но и это сейчас меняется, поскольку Google переводит Chrome на свой собственный форк OpenSSL, называемый BoringSSL2.
У OpenSSL две лицензии: OpenSSL и SSLeay. Обе схожи с лицензией BSD с оговорками о рекламе. Эти лицензии долгое время были источниками раздора, поскольку ни одна из них не считается совместимой с семейством лицензий GPL. Именно по этой причине программы, лицензированные по лицензии GPL, часто отдают предпочтение GnuTLS.
Начало работы
Если вы используете одну из Unix-платформ, начать работать с OpenSSL легко; практически гарантированно, что в вашей системе он уже есть. Единственная проблема, с которой вы можете столкнуться — то, что у вас может не оказаться последней версии. В данном разделе подразумевается, что вы используете Unix-платформу, потому что это естественная среда для OpenSSL.
Пользователи Windows, как правило, загружают двоичные файлы, что может немного усложнить ситуацию. В простейшем случае, если вам нужны только утилиты командной строки, на основном сайте OpenSSL для Windows-бинарников указана ссылка на сборку от Shining Light Productions3. Во всех остальных ситуациях вам необходимо убедиться, что вы не пытаетесь совместно использовать бинарники, скомпилированные на основе разных версий OpenSSL, иначе могут возникать сбои, которые трудно будет выявить и устранить. Наилучшим подходом будет использование единого пакета программ, который включает в себя всё, что вам нужно. Например, если вы хотите запускать Apache на Windows, вы можете получить требуемые бинарники в сборке Apache Lounge4.
Определение версии и конфигурации OpenSSL
Перед тем, как что-либо сделать, вам необходимо узнать, какую версию OpenSSL вы используете. Например, вот так я получаю информацию о версии с помощью команды openssl version на Ubuntu 12.04 LTS — системе, которую я буду использовать в примерах этой главы:
$ openssl version
OpenSSL 1.0.1 14 Mar 2012
На момент написания этого материала происходил переход от OpenSSL 0.9.x к OpenSSL 1.0.x. Версия 1.0.1 особенно важна, поскольку это первая версия, поддерживающая TLS 1.1 и 1.2. Поддержка более новых протоколов является частью глобального тренда, поэтому вполне вероятно, что в ближайший период мы нередко будем сталкиваться с проблемами совместимости.
Примечание: Часто сборщики различных операционных систем модифицируют исходный код OpenSSL, обычно для устранения выявленных проблем. Однако название проекта и номер версии, как правило, оставляют неизменными, и нет никаких признаков того, что данный код на самом деле является ответвлением исходного проекта и будет вести себя по-другому. Например, версия OpenSSL, используемая в Ubuntu 12.04 LTS5, основана на OpenSSL 1.0.1c. На момент написания этого материала полное имя установочного пакета было openssl 1.0.1-4ubuntu5.16, и этот пакет включал исправления для многих проблем, которые были выявлены с течением времени.
Для получения полной информации о версии используйте опцию -a:
$ openssl version -a
OpenSSL 1.0.1 14 Mar 2012
built on: Fri Jun 20 18:54:15 UTC 2014
platform: debian-amd64
options:  bn(64,64) rc4(8x,int) des(idx,cisc,16,int) blowfish(idx)
compiler: cc -fPIC -DOPENSSL_PIC -DZLIB -DOPENSSL_THREADS -D_REENTRANT -DDSO_DLFCN ↩
-DHAVE_DLFCN_H -m64 -DL_ENDIAN -DTERMIO -g -O2 -fstack-protector --param=ssp-buffer-size↩
=4 -Wformat -Wformat-security -Werror=format-security -D_FORTIFY_SOURCE=2 ↩
-Wl,-Bsymbolic-functions -Wl,-z,relro -Wa,--noexecstack -Wall -DOPENSSL_NO_TLS1_2↩
_CLIENT -DOPENSSL_MAX_TLS1_2_CIPHER_LENGTH=50 -DMD32_REG_T=int -DOPENSSL_IA32_SSE2 ↩
-DOPENSSL_BN_ASM_MONT -DOPENSSL_BN_ASM_MONT5 -DOPENSSL_BN_ASM_GF2m -DSHA1_ASM -DSHA256↩
_ASM -DSHA512_ASM -DMD5_ASM -DAES_ASM -DVPAES_ASM -DBSAES_ASM -DWHIRLPOOL_ASM -DGHASH↩
_ASM
OPENSSLDIR: "/usr/lib/ssl"
Последняя строка в данном выводе (/usr/lib/ssl) особенно интересна, поскольку она говорит вам о том, где OpenSSL будет искать собственную конфигурацию и сертификаты. В моей системе это местоположение, по существу, является псевдонимом для директории /etc/ssl, где Ubuntu хранит файлы, связанные с TLS:
lrwxrwxrwx  1 root root   14 Apr 19 09:28 certs -> /etc/ssl/certs
drwxr-xr-x  2 root root 4096 May 28 06:04 misc
lrwxrwxrwx  1 root root   20 May 22 17:07 openssl.cnf -> /etc/ssl/openssl.cnf
lrwxrwxrwx  1 root root   16 Apr 19 09:28 private -> /etc/ssl/private
Директория misc/ содержит несколько дополнительных скриптов, наиболее интересными из которых являются скрипты, позволяющие реализовать приватный центр сертификации или удостоверяющий центр (УЦ).
Сборка OpenSSL
В большинстве случаев вы будете использовать версию OpenSSL, поставляемую с операционной системой, но иногда есть веские причины для обновления. Например, ваша система могла застрять на OpenSSL 0.9.x, не поддерживающей новые версии протокола TLS, но даже если в вашей системе правильная версия OpenSSL, в ней может не быть необходимого вам функционала. Например, на Ubuntu 12.04 LTS нет поддержки SSL 2 в команде s_client. Хотя отсутствие по умолчанию поддержки этой версии SSL является правильным решением, вам может понадобиться данный функционал, если вы регулярно тестируете другие серверы на поддержку SSL 2.
Вы можете начать с загрузки самой последней версии OpenSSL (в моем случае, 1.0.1p):
$ wget http://www.openssl.org/source/openssl-1.0.1p.tar.gz
Следующий шаг — конфигурирование OpenSSL перед компиляцией. В большинстве случаев системная версия оставляется в покое и OpenSSL устанавливается в другое место. Например:
$ ./config
--prefix=/opt/openssl
--openssldir=/opt/openssl
enable-ec_nistp_64_gcc_128
Параметр enable-ec_nistp_64_gcc_128 активирует оптимизированные версии некоторых часто используемых эллиптических кривых. Данная оптимизация зависит от функции компилятора, которая не может быть обнаружена автоматически, поэтому по умолчанию этот параметр отключен.
Примечание: Если вы компилируете версию OpenSSL из ветки 1.1.x или выше, то, по крайней мере в некоторых системах, вам нужно будет использовать параметр no-shared для создания статически скомпилированных инструментов командной строки. Вы поймёте, что нужно использовать этот параметр, если (после компиляции) при попытке вызвать бинарник OpenSSL он будет жаловаться на то, что не может найти некоторые требуемые ему разделяемые библиотеки.
Затем нужно будет выполнить следующие команды:
$ make depend
$ make
$ sudo make install
В итоге в директории /opt/openssl у вас будет такое содержимое:
drwxr-xr-x 2 root root  4096 Jun  3 08:49 bin
drwxr-xr-x 2 root root  4096 Jun  3 08:49 certs
drwxr-xr-x 3 root root  4096 Jun  3 08:49 include
drwxr-xr-x 4 root root  4096 Jun  3 08:49 lib
drwxr-xr-x 6 root root  4096 Jun  3 08:48 man
drwxr-xr-x 2 root root  4096 Jun  3 08:49 misc
-rw-r--r-- 1 root root 10835 Jun  3 08:49 openssl.cnf
drwxr-xr-x 2 root root  4096 Jun  3 08:49 private
Директория private/ пуста, но это нормально: у вас ещё нет каких-либо закрытых ключей. С другой стороны, вы, вероятно, удивитесь, узнав, что директория certs/ тоже пуста. В OpenSSL не включено никаких корневых сертификатов; подразумевается, что поддержание доверенного хранилища выходит за рамки проекта. К счастью, в состав вашей операционной системы, скорее всего, уже входит доверенное хранилище, которое можно использовать. Кроме того, как мы продемонстрируем в одном из следующих разделов, вы можете без особого труда построить своё собственное.
Примечание: При компиляции программного обеспечения важно хорошо разбираться с настройками по умолчанию вашего компилятора. Пакеты, распространяемые с системой, обычно компилируются с использованием всех доступных параметров повышения безопасности, но при самостоятельной компиляции какого-то программного обеспечения нет гарантии, что будут применяться те же параметры6.
Просмотр доступных команд
OpenSSL — это криптографический инструментарий, состоящий из множества различных утилит. В моей версии я насчитал 46. Тот самый случай, когда уместно употребить фразу Швейцарский армейский нож криптографии, так оно и есть. Даже если вы будете использовать всего несколько утилит, вам следует ознакомиться со всеми доступными, поскольку неизвестно, что может понадобиться в будущем.
Специального ключевого слова для вызова справки не существует, однако справочный текст отображается всякий раз, когда вы вводите что-то, что OpenSSL не может распознать:
$ openssl help
openssl:Error: 'help' is an invalid command.

Standard commands
asn1parse         ca                ciphers           cms
crl               crl2pkcs7         dgst              dh
dhparam           dsa               dsaparam          ec
ecparam           enc               engine            errstr
gendh             gendsa            genpkey           genrsa
nseq              ocsp              passwd            pkcs12
pkcs7             pkcs8             pkey              pkeyparam
pkeyutl           prime             rand              req
rsa               rsautl            s_client          s_server
s_time            sess_id           smime             speed
spkac             srp               ts                verify
version           x509
Первая часть справки выводит список всех доступных утилит. Чтобы получить больше информации о конкретной утилите, используйте man с именем этой утилиты. Например, man ciphers выдаст подробную информацию о том, как настроены наборы алгоритмов шифрования (наборы шифров).
Вывод справки этим не заканчивается, но остальное несколько менее интересно. Во второй части вы увидите список команд для работы с дайджестами сообщений (алгоритмами хэширования):
Message Digest commands (see the `dgst’ command for more details)
md4 md5 rmd160 sha
sha1
И, наконец, в третьей части вы увидите список всех команд для работы с шифрами:
Cipher commands (see the `enc' command for more details)
aes-128-cbc       aes-128-ecb       aes-192-cbc       aes-192-ecb
aes-256-cbc       aes-256-ecb       base64            bf
bf-cbc            bf-cfb            bf-ecb            bf-ofb
camellia-128-cbc  camellia-128-ecb  camellia-192-cbc  camellia-192-ecb
camellia-256-cbc  camellia-256-ecb  cast              cast-cbc
cast5-cbc         cast5-cfb         cast5-ecb         cast5-ofb
des               des-cbc           des-cfb           des-ecb
des-ede           des-ede-cbc       des-ede-cfb       des-ede-ofb
des-ede3          des-ede3-cbc      des-ede3-cfb      des-ede3-ofb
des-ofb           des3              desx              rc2
rc2-40-cbc        rc2-64-cbc        rc2-cbc           rc2-cfb
rc2-ecb           rc2-ofb           rc4               rc4-40
seed              seed-cbc          seed-cfb          seed-ecb
seed-ofb          zlib
Построение доверенного хранилища
Вместе с OpenSSL не поставляется каких-либо доверенных корневых сертификатов (ещё говорят доверенное хранилище), так что если вы выполняете установку с нуля, то придётся поискать их где-то на стороне. Один из возможных вариантов — использовать доверенное хранилище, встроенное в вашу операционную систему. Обычно этот вариант хорош, но доверенные хранилища, имеющиеся в операционной системе по умолчанию, могут не всегда быть актуальны. Лучший (но более трудоёмкий) вариант — обратиться к Mozilla, которые прилагают много усилий для поддержания надёжного доверенного хранилища. Далее будет приведён реальный пример, как я получал доверенное хранилище для своего инструмента оценки в SSL Labs.
Поскольку проекты Mozilla с открытым исходным кодом, их доверенное хранилище можно найти в репозитории исходного кода:
https://hg.mozilla.org/mozilla-central/raw-file/tip/security/nss/lib/ckfw/builtins/certdata.txt
К сожалению, их коллекция сертификатов находится в проприетарном формате, который в исходном состоянии нам бесполезен. Если у вас нет предрассудков в смысле получения этой коллекции от третьих лиц, проект Curl предоставляет регулярно обновляемую сконвертированную в формат Privacy-Enhanced Mail (PEM) версию, которую вы можете использовать сразу:
http://curl.haxx.se/docs/caextract.html
Но даже если вы скачаете коллекцию напрямую с сайта Mozilla, вам не придётся самостоятельно писать скрипт конвертации. Такие скрипты доступны на языках Perl и Go, их использование будет описано в следующих разделах.
Примечание: Если вы всё же решите написать собственный скрипт преобразования, имейте ввиду, что файл корневых сертификатов от Mozilla фактически содержит два типа сертификатов: доверенные (являющиеся частью хранилища), а также явно недоверенные. В Mozilla используют такой механизм для запрета скомпрометированных сертификатов промежуточных УЦ (например, старых сертификатов DigiNotar). Оба описанных далее инструмента работы с файлом Mozilla достаточно разборчивы и способны исключить недоверенные сертификаты в процессе конвертации.
Конвертация с использованием Perl
Проект Curl обнародовал Perl-срипт, написанный Guenter Knauf, который может быть использован для конвертации доверенного хранилища Mozilla:
https://raw.github.com/bagder/curl/master/lib/mk-ca-bundle.pl
После скачивания и запуска скрипта он извлечёт данные сертификатов из хранилища Mozilla и преобразует их в формат PEM:
$ ./mk-ca-bundle.pl
Downloading 'certdata.txt' ...
Processing  'certdata.txt' ...
Done (156 CA certs processed, 19 untrusted skipped).
Если вы сохраняете ранее загруженные данные сертификатов, скрипт будет использовать их для определения того, что изменилось, и обрабатывать только обновления.
Конвертация с использованием Go
Если вы предпочитаете язык программирования Go, обратите внимание на инструмент конвертации от Adam Langley, который можно получить на GitHub:
https://github.com/agl/extract-nss-root-certs
Для выполнения конвертации сначала скачайте сам инструмент:
$ wget https://raw.github.com/agl/extract-nss-root-certs/master/convert_mozilla_certdata.go
А потом данные сертификатов от Mozilla:
$ wget https://hg.mozilla.org/mozilla-central/raw-file/tip/security/nss/lib/ckfw/builtins/certdata.txt --output-document certdata.txt
Наконец, переконвертируйте файл следующей командой:
$ go run convert_mozilla_certdata.go > ca-certificates
2012/06/04 09:52:29 Failed to parse certificate starting on line 23068: negative serial number
В моём случае имел место некорректный сертификат, который не смогла обработать библиотека X.509 языка Go, но обычно конвертация проходит без эксцессов. Версии Go, начиная с версии 1.6 и выше, не должны выдавать это предупреждение, поскольку они могут обрабатывать сертификаты с отрицательными серийными номерами.
Управление ключами и сертификатами
Большинство пользователей обращаются к OpenSSL, потому что хотят настроить и запустить веб-сервер с поддержкой SSL. Этот процесс состоит из трёх этапов: (1) генерация стойкого закрытого ключа, (2) создание запроса на подписание сертификата (Certificate Signing Request, CSR) и направление его в УЦ, и (3) инсталляция предоставленного УЦ сертификата в ваш веб-сервер. Об этих (и некоторых других) этапах пойдёт речь в данном разделе.
Генерация ключа
Первым шагом в подготовке к использованию асимметричного шифрования является создание закрытого ключа. Прежде чем начать, вы должны принять несколько решений:
- Ключевой алгоритм
-
OpenSSL поддерживает ключи RSA, DSA и ECDSA, но не все типы безоговорочно подходят для любого сценария использования. Например, в качестве ключа веб-сервера повсеместно используется RSA, поскольку ключи DSA по существу ограничены 1024 битами (Internet Explorer не поддерживает ничего более стойкого), а ключи ECDSA ещё не получили широкой поддержки УЦ. Для SSH везде используются DSA и RSA, поскольку ECDSA может не поддерживаться всеми клиентами.
- Размер ключа
-
Размер ключа по умолчанию может быть небезопасным, поэтому его всегда следует настраивать явно. Например, размер по умолчанию для ключей RSA всего 512 бит, что попросту небезопасно. Если в наши дни вы будете использовать на своём сервере ключ длиной 512 бит, злоумышленник, получив ваш сертификат, может простым перебором (методом «грубой силы») подобрать ваш закрытый ключ, после чего он или она сможет выдавать себя за ваш веб-сайт. В наши дни безопасными считаются ключи RSA в 2048 бит, их и нужно использовать. Также необходимо использовать ключи DSA длиной 2048 бит и не менее 256 бит для ECDSA.
- Кодовая фраза
-
Использовать кодовую фразу (passphrase) с ключом необязательно, но настоятельно рекомендуется. Защищённые ключи можно безопасно хранить, транспортировать и создавать резервные копии. С другой стороны, такие ключи неудобны, поскольку без ввода кодовой фразы их использовать нельзя. Например, запрос на ввод кодовой фразы может возникать каждый раз, когда вы захотите перезапустить ваш веб-сервер. В большинстве случаев это либо слишком неудобно, либо создаёт неприемлемые условия для доступности сервисов. Кроме того, использование защищённых ключей в рабочей среде на самом деле не сильно повышает безопасность (если вообще повышает). Это связано с тем, что после первоначальной активации закрытые ключи хранятся в незащищённом виде в памяти программы; злоумышленник, проникнувший на сервер, может получить ключи оттуда, приложив при этом лишь немного больше усилий. Так что кодовые фразы следует рассматривать только в качестве механизма защиты закрытого ключа, пока он не установлен в рабочей среде. Другими словами, нет ничего страшного в том, чтобы в рабочей среде хранить кодовые фразы рядом с ключами. Если же в рабочей среде вам требуется повышенная безопасность, стоит рассмотреть вариант с инвестированием в аппаратные решения7.
Для генерации ключа RSA используйте команду genrsa:
$ openssl genrsa -aes128 -out fd.key 2048
Generating RSA private key, 2048 bit long modulus
....+++
...................................................................................+++
e is 65537 (0x10001)
Enter pass phrase for fd.key: ****************
Verifying - Enter pass phrase for fd.key: ****************
Здесь я указал, что ключ будет защищён с помощью AES-128. Также вы можете использовать AES-192 или AES-256 (параметры -aes192 и -aes256, соответственно), но лучше воздержаться от применения других алгоритмов (DES, 3DES и SEED).
Предупреждение: Значение e, которое вы видите в выводе, относится к открытой экспоненте (public exponent), которая по умолчанию установлена в 65537. Это так называемая короткая открытая экспонента, и она значительно повышает производительность верификации RSA. При использовании параметра -3 можно выбрать в качестве открытой экспоненты число 3 и сделать верификацию ещё быстрее. Однако в истории было несколько неприятных происшествий, связанных с использованием числа 3 в качестве открытой экспоненты, поэтому, как правило, всем рекомендуется придерживаться числа 65537, обеспечивая тем самым запас прочности с исторически доказанной эффективностью.
Закрытые ключи хранятся в так называемом PEM-формате, представляющем собой просто текст:
$ cat fd.key
-----BEGIN RSA PRIVATE KEY-----
Proc-Type: 4,ENCRYPTED
DEK-Info: AES-128-CBC,01EC21976A463CE36E9DB59FF6AF689A

vERmFJzsLeAEDqWdXX4rNwogJp+y95uTnw+bOjWRw1+O1qgGqxQXPtH3LWDUz1Ym
mkpxmIwlSidVSUuUrrUzIL+V21EJ1W9iQ71SJoPOyzX7dYX5GCAwQm9Tsb40FhV/
[21 lines removed...]
4phGTprEnEwrffRnYrt7khQwrJhNsw6TTtthMhx/UCJdpQdaLW/TuylaJMWL1JRW
i321s5me5ej6Pr4fGccNOe7lZK+563d7v5znAx+Wo1C+F7YgF+g8LOQ8emC+6AVV
-----END RSA PRIVATE KEY-----
Закрытый ключ — это не просто набор случайных данных, как может показаться на первый взгляд. Структуру ключа можно увидеть, используя следующую команду rsa:
$ openssl rsa -text -in fd.key
Enter pass phrase for fd.key: ****************
Private-Key: (2048 bit)
modulus:
    00:9e:57:1c:c1:0f:45:47:22:58:1c:cf:2c:14:db:
    [...]
publicExponent: 65537 (0x10001)
privateExponent:
    1a:12:ee:41:3c:6a:84:14:3b:be:42:bf:57:8f:dc:
    [...]
prime1:
    00:c9:7e:82:e4:74:69:20:ab:80:15:99:7d:5e:49:
    [...]
prime2:
    00:c9:2c:30:95:3e:cc:a4:07:88:33:32:a5:b1:d7:
    [...]
exponent1:
    68:f4:5e:07:d3:df:42:a6:32:84:8d:bb:f0:d6:36:
    [...]
exponent2:
    5e:b8:00:b3:f4:9a:93:cc:bc:13:27:10:9e:f8:7e:
    [...]
coefficient:
    34:28:cf:72:e5:3f:52:b2:dd:44:56:84:ac:19:00:
    [...]
writing RSA key
-----BEGIN RSA PRIVATE KEY-----
[...]
-----END RSA PRIVATE KEY-----
Если вам понадобится иметь отдельно только открытую часть ключа, выделить её можно следующей командой rsa:
$ openssl rsa -in fd.key -pubout -out fd-public.key
Enter pass phrase for fd.key: ****************
Заглянув во вновь созданный файл, можно увидеть метки, ясно указывающие на то, что содержимое действительно является открытой информацией:
$ cat fd-public.key
-----BEGIN PUBLIC KEY-----
MIIBIjANBgkqhkiG9w0BAQEFAAOCAQ8AMIIBCgKCAQEAnlccwQ9FRyJYHM8sFNsY
PUHJHJzhJdwcS7kBptutf/L6OvoEAzCVHi/m0qAA4QM5BziZgnvv+FNnE3sgE5pz
iovEHJ3C959mNQmpvnedXwfcOIlbrNqdISJiP0js6mDCzYjSO1NCQoy3UpYwvwj7
0ryR1F+abARehlts/Xs/PtX3VamrljiJN6JNgFICy3ZvEhLZEKxR7oob7TnyZDrj
IHxBbqPNzeiqLCFLFPGgJPa0cH8DdovBTesvu7wr/ecsf8CYyUCdEwGkZh9DKtdU
HFa9H8tWW2mX6uwYeHCnf2HTw0E8vjtOb8oYQxlQxtL7dpFyMgrpPOoOVkZZW/P0
NQIDAQAB
-----END PUBLIC KEY-----
Лишний раз убедиться в том, что на выходе вы получили именно то, что хотели — это хорошая практика. Например, если вы забудете указать в командной строке параметр -pubout, выходной файл будет содержать ваш закрытый ключ вместо открытого.
Генерация ключа DSA происходит в два этапа: на первом создаются параметры DSA, а на втором — ключ. Можно выполнять их последовательно один за другим, но мне больше нравится использовать следующие две команды как одну:
$ openssl dsaparam -genkey 2048 | openssl dsa -out dsa.key -aes128
Generating DSA parameters, 2048 bit long prime
This could take some time
[...]
read DSA key
writing DSA key
Enter PEM pass phrase: ****************
Verifying - Enter PEM pass phrase: ****************
Этот подход позволяет мне генерировать защищённый кодовой фразой ключ, не оставляя при этом никаких временных файлов (с параметрами DSA) и/или временных ключей на диске.
Для ключей ECDSA процесс аналогичен, за исключением того, что отсутствует возможность создать ключи произвольных размеров. Вместо этого для каждого ключа вы выбираете именованную кривую (named curve), которая контролирует размер ключа, а также другие параметры EC. В следующем примере создаётся 256-битный ключ ECDSA с использованием именованной кривой secp256r1:
$ openssl ecparam -genkey -name secp256r1 | openssl ec -out ec.key -aes128
using curve name prime256v1 instead of secp256r1
read EC key
writing EC key
Enter PEM pass phrase: ****************
Verifying - Enter PEM pass phrase: ****************
OpenSSL поддерживает много именованных кривых (полный список можно получить с помощью параметра -list_curves), но для ключей веб-сервера выбор ограничен лишь двумя кривыми, которые поддерживаются всеми основными браузерами: secp256r1 (в OpenSSL используется имя prime256v1) и secp384r1.
Примечание: Если вы используете OpenSSL 1.0.2, вы можете сэкономить время, всегда генерируя ключи с помощью команды genpkey, которая была усовершенствована для поддержки различных типов ключей и параметров конфигурации. В настоящее время она представляет собой унифицированный интерфейс для генерации ключей.
Создание запроса на подписание сертификата
Получив закрытый ключ, вы можете приступить к созданию запроса на подписание сертификата (Certificate Signing Request, CSR). Это формализованный запрос в УЦ о подписании сертификата, в котором содержится открытый ключ объекта, запрашивающего сертификат, а также некоторая информация об этом объекте. Все эти данные будут частью будущего сертификата. CSR всегда подписывается закрытым ключом, соответствующим тому открытому ключу, который содержится в запросе.
Обычно создание CSR представляет собой интерактивный процесс, в ходе которого вам потребуется предоставить элементы уникального имени объекта сертификата. Внимательно читайте инструкции, выдаваемые инструментом openssl; если вы хотите оставить поле пустым, вы должны ввести в строку запроса символ точки (.), а не просто нажать клавишу «Ввод» (в этом случае OpenSSL заполнит соответствующее поле CSR значением по умолчанию). Согласие со значениями по умолчанию не имеет никакого смысла, когда при генерации CSR используется конфигурация OpenSSL по умолчанию (весьма распространённая практика). И наоборот, вполне резонно соглашаться со значениями по умолчанию, когда вы их сами задали, либо поменяв конфигурацию OpenSSL, либо предоставив свои собственные файлы конфигурации.
$ openssl req -new -key fd.key -out fd.csr
Enter pass phrase for fd.key: ****************
You are about to be asked to enter information that will be incorporated
into your certificate request.
What you are about to enter is what is called a Distinguished Name or a DN.
There are quite a few fields but you can leave some blank
For some fields there will be a default value,
If you enter '.', the field will be left blank.
-----
Country Name (2 letter code) [AU]:GB
State or Province Name (full name) [Some-State]:.
Locality Name (eg, city) []:London
Organization Name (eg, company) [Internet Widgits Pty Ltd]:Feisty Duck Ltd
Organizational Unit Name (eg, section) []:
Common Name (e.g. server FQDN or YOUR name) []:www.feistyduck.com
Email Address []:webmaster@feistyduck.com

Please enter the following 'extra' attributes
to be sent with your certificate request
A challenge password []:
An optional company name []:
Примечание: В соответствии с разделом 5.4.1 RFC 29858, проблемный пароль (challenge password) является необязательным полем, предназначенным для использования во время отзыва сертификата как способ идентификации исходного объекта, запросившего данный сертификат. Если этот пароль введен, он будет дословно включён в CSR и передан в УЦ. Редко можно найти УЦ, обрабатывающий данное поле; во всех инструкциях, которые я видел, рекомендуется оставить его незаполненным. Задание проблемного пароля никоим образом не повышает безопасность CSR. Кроме того, это поле не следует путать с кодовой фразой, которая является отдельной характеристикой.
После генерации CSR он используется для подписания своего собственного сертификата и/или отправки в публичный УЦ с просьбой подписать сертификат. Оба подхода будут описаны в последующих разделах. Но прежде чем сделать это, стоит ещё раз проверить правильность CSR. Это делается так:
$ openssl req -text -in fd.csr -noout
Certificate Request:
    Data:
        Version: 0 (0x0)
        Subject: C=GB, L=London, O=Feisty Duck Ltd, CN=www.feistyduck.com↩
/emailAddress=webmaster@feistyduck.com
        Subject Public Key Info:
            Public Key Algorithm: rsaEncryption
                Public-Key: (2048 bit)
                Modulus:
                    00:b7:fc:ca:1c:a6:c8:56:bb:a3:26:d1:df:e4:e3:
                    [ещё 16 строк...]
                    d1:57
                Exponent: 65537 (0x10001)
        Attributes:
            a0:00
    Signature Algorithm: sha1WithRSAEncryption
         a7:43:56:b2:cf:ed:c7:24:3e:36:0f:6b:88:e9:49:03:a6:91:
         [ещё 13 строк...]
         47:8b:e3:28
Создание CSR из существующего сертификата
Если вы продлеваете сертификат и не хотите вносить какие-либо изменения в представленную в нём информацию, можно упростить себе жизнь и печатать немного поменьше. С помощью следующей команды вы сможете создать новенький CSR из существующего сертификата:
$ openssl x509 -x509toreq -in fd.crt -out fd.csr -signkey fd.key
Примечание: За исключением случаев применения некоторой формы привязывания открытого ключа (public key pinning), при которых вы захотите продолжать использовать существующий ключ, лучшей практикой считается генерация нового ключа каждый раз при запросе нового сертификата. Генерация ключей — быстрая и недорогая операция, к тому же значительно снижающая ваши риски.
Автоматизированная генерация CSR
Генерация CSR не обязательно должна быть интерактивной. Используя отличный от поставляемого по умолчанию файл конфигурации OpenSSL, вы можете решить сразу две задачи: автоматизировать процесс (как объясняется в этом разделе), а также сделать некоторые вещи, которые невозможны в интерактивном режиме (мы обсудим это в последующих разделах).
Например, предположим, что вы хотите автоматизировать генерацию CSR для www.feistyduck.com. Для начала нужно создать файл fd.cnf следующего содержания:
[req]
prompt = no
distinguished_name = dn
req_extensions = ext
input_password = PASSPHRASE

[dn]
CN = www.feistyduck.com
emailAddress = webmaster@feistyduck.com
O = Feisty Duck Ltd
L = London
C = GB

[ext]
subjectAltName = DNS:www.feistyduck.com,DNS:feistyduck.com
Ну а теперь можно создать CSR прямо из командной строки:
$ openssl req -new -config fd.cnf -key fd.key -out fd.csr
Подписание своего собственного сертификата
Если вы устанавливаете TLS-сервер для внутреннего использования, вам, вероятно, нет нужды обращаться в УЦ за публично доверенным сертификатом. Гораздо проще просто использовать самоподписанный сертификат. Если вы пользуетесь браузером Firefox, при первом посещении веб-сайта можно создать исключение для вашего сертификата, после чего этот сайт будет столь же безопасен, как если бы он был защищён публично доверенным сертификатом.
Если у вас уже есть CSR, создайте сертификат следующей командой:
$ openssl x509 -req -days 365 -in fd.csr -signkey fd.key -out fd.crt
Signature ok
subject=/CN=www.feistyduck.com/emailAddress=webmaster@feistyduck.com/O=Feisty Duck Ltd↩
/L=London/C=GB
Getting Private key
Enter pass phrase for fd.key: ****************
На самом деле вам не нужно отдельно создавать CSR. С помощью следующей команды можно создать самоподписанный сертификат, имея в наличии только ключ:
$ openssl req -new -x509 -days 365 -key fd.key -out fd.crt
Чтобы не отвечать ни на какие вопросы, используйте параметр -subj для предоставления информации о субъекте сертификата в командной строке:
$ openssl req -new -x509 -days 365 -key fd.key -out fd.crt
 -subj "/C=GB/L=London/O=Feisty Duck Ltd/CN=www.feistyduck.com"
Создание сертификата, действительного для нескольких имен хостов
По умолчанию сертификаты, созданные OpenSSL, имеют только одно поле для общепринятого имени (common name) и действительны только для одного имени хоста. По этой причине, даже если у вас есть связанные веб-сайты, вы будете вынуждены использовать отдельный сертификат для каждого из них. В данной ситуации более оправданным представляется использование одного мультидоменного сертификата. Кроме того, даже если у вас один веб-сайт, необходимо убедиться, что сертификат действителен для всех возможных путей, по которым конечные пользователи могут пытаться получить к нему доступ. На практике это означает использование как минимум двух имен, одно из которых будет с префиксом www, а второе — без него (например, www.feistyduck.com и feistyduck.com).
Существует два механизма поддержки нескольких имен хостов в сертификате. Первый — перечислить все желательные имена, используя расширение X.509, которое называется Альтернативное имя субъекта (Subject Alternative Name, SAN). Второй — использовать шаблоны подстановки (wildcard). Также можно использовать комбинацию этих двух подходов (если это более удобно). На практике, для большинства сайтов можно указать просто доменное имя и шаблон подстановки для охвата всех возможных поддоменов (например, feistyduck.com и *.feistyduck.com).
Предупреждение: Когда в сертификате содержатся альтернативные имена, все общепринятые имена игнорируются. Более новые сертификаты, выпускаемые УЦ, могут даже не содержать общепринятых имён. Поэтому нужно включать все желаемые имена хостов в список альтернативных имён.
Сначала поместите информацию расширения в отдельный текстовый файл. У меня он будет называться fd.ext. В этом файле укажите имя расширения (subjectAltName) и список желаемых имён хостов, как в данном примере:
subjectAltName = DNS:*.feistyduck.com, DNS:feistyduck.com
Затем, используя команду x509, оформите сертификат, указав файл с расширением с помощью параметра -extfile:
$ openssl x509 -req -days 365
-in fd.csr -signkey fd.key -out fd.crt
-extfile fd.ext
В остальном процесс ничем не отличается от рассмотренного ранее. Но когда вы в дальнейшем исследуете сгенерированный сертификат, вы обнаружите, что он содержит расширение SAN:
 X509v3 extensions:
            X509v3 Subject Alternative Name:
                DNS:*.feistyduck.com, DNS:feistyduck.com
Исследование сертификата
На первый взгляд сертификаты могут выглядеть как куча случайных данных, но они содержат много информации; вам нужно только знать, как до неё добраться. Команда x509 делает именно это, поэтому воспользуемся ею, чтобы рассмотреть самоподписанные сертификаты, которые вы сгенерировали.
В следующем примере я использовал параметр -text для печати содержимого сертификата, а также параметр -noout, чтобы не выводить сам закодированный сертификат (что выполняется по умолчанию) и не отвлекать нас от главного:
$ openssl x509 -text -in fd.crt -noout
Certificate:
    Data:
        Version: 1 (0x0)
        Serial Number: 13073330765974645413 (0xb56dcd10f11aaaa5)
    Signature Algorithm: sha1WithRSAEncryption
        Issuer: CN=www.feistyduck.com/emailAddress=webmaster@feistyduck.com, O=Feisty ↩
Duck Ltd, L=London, C=GB
        Validity
            Not Before: Jun  4 17:57:34 2012 GMT
            Not After : Jun  4 17:57:34 2013 GMT
        Subject: CN=www.feistyduck.com/emailAddress=webmaster@feistyduck.com, O=Feisty ↩
Duck Ltd, L=London, C=GB
        Subject Public Key Info:
            Public Key Algorithm: rsaEncryption
                Public-Key: (2048 bit)
                Modulus:
                    00:b7:fc:ca:1c:a6:c8:56:bb:a3:26:d1:df:e4:e3:
                    [ещё 16 строк...]
                    d1:57
                Exponent: 65537 (0x10001)
    Signature Algorithm: sha1WithRSAEncryption
         49:70:70:41:6a:03:0f:88:1a:14:69:24:03:6a:49:10:83:20:
         [ещё 13 строк...]
         74:a1:11:86
Самоподписанные сертификаты обычно содержат только самые базовые данные сертификата, как можно увидеть на примере выше. Для сравнения, сертификаты, выданные публичными удостоверяющими центрами, гораздо интереснее, поскольку они содержат ряд дополнительных полей (добавляемых через механизм расширений X.509). Давайте их бегло рассмотрим.
Расширение Basic Constraints используется для маркировки того, что рассматриваемый сертификат является сертификатом удостоверяющего центра, у которого есть возможность подписи других сертификатов. У сертификатов, которые не являются сертификатами УЦ, это расширение будет либо опущено, либо иметь значение CA, установленное в FALSE. Это расширение является критичным, что означает, что все программы, использующие в работе сертификаты, должны понимать его значение.
X509v3 Basic Constraints: critical
    CA:FALSE
Расширения Key Usage (KU) и Extended Key Usage (EKU) ограничивают то, для чего могут быть использованы сертификаты. Если эти расширения присутствуют, то для сертификата разрешены только перечисленные варианты использования. Если эти расширения отсутствуют, значит ограничений на использование не накладывается. В примере ниже приведены типичные варианты использования для сертификата веб-сервера, который, например, нельзя использовать для подписания кода:
X509v3 Key Usage: critical
    Digital Signature, Key Encipherment
X509v3 Extended Key Usage:
    TLS Web Server Authentication, TLS Web Client Authentication
В расширении CRL Distribution Points перечислены адреса, по которым можно найти списки отзыва сертификатов (Certificate Revocation List, CRL) удостоверяющего центра. Эта информация важна в тех случаях, когда сертификаты необходимо отозвать. CRL представляют собой подписанные УЦ списки отозванных сертификатов, регулярно публикуемые через определённые промежутки времени (например, раз в семь дней).
X509v3 CRL Distribution Points:
    Full Name:
      URI:http://crl.starfieldtech.com/sfs3-20.crl
Примечание: Возможно вы заметили, что CRL доставляются по незащищённому соединению и задумались, безопасно ли пользоваться такими списками? На самом деле всё в порядке. Поскольку каждый CRL подписывается выпускающим его УЦ, браузеры могут проверить его целостность. Фактически, если бы CRL распространялись через защищённое с помощью TLS соединение, браузеры бы могли столкнуться с проблемой курицы и яйца, пытаясь проверить статус отзыва сертификата, используемого самим сервером, распространяющим CRL!
Расширение Certificate Policies используется для указания политики, в соответствии с которой был выпущен сертификат. Например, именно здесь можно найти индикаторы extended validation (EV) (как в представленном ниже примере). Эти индикаторы представлены в форме уникальных идентификаторов объектов (OID), и они являются уникальными для выпускающего УЦ. Кроме того, это расширение часто содержит один или несколько пунктов Certificate Policy Statement (CPS), которые обычно являются либо веб-страницами, либо документами PDF.
X509v3 Certificate Policies:
    Policy: 2.16.840.1.114414.1.7.23.3
    CPS: http://certificates.starfieldtech.com/repository/
Расширение Authority Information Access (AIA) обычно содержит информацию, состоящую из двух важных частей. Во первых, в нём перечислены адреса серверов-ответчиков Online Certificate Status Protocol (OCSP) удостоверяющего центра, которые могут быть использованы для проверки статуса отзыва сертификата в режиме реального времени. Данное расширение также может содержать ссылку, по которой можно найти сертификат издателя (следующий сертификат в цепочке). В наши дни сертификаты серверов редко подписываются непосредственно доверенными корневыми сертификатами УЦ, и это означает, что администраторы сервера должны включать в свою конфигурацию один или несколько промежуточных сертификатов. Здесь легко допустить ошибку, и тогда сертификат сервера будет признан недействительным. Некоторые клиенты (например, Internet Explorer) будут использовать приведённую в данном расширении информацию для исправления неполных цепочек сертификатов, но так поступают далеко не все клиенты.
Authority Information Access:
    OCSP - URI:http://ocsp.starfieldtech.com/
    CA Issuers - URI:http://certificates.starfieldtech.com/repository/sf_intermediate.crt
Расширения Subject Key Identifier и Authority Key Identifier устанавливают уникальные идентификаторы ключа субъекта и ключа удостоверяющего центра соответственно. Значение, указанное в расширении Authority Key Identifier сертификата, должно совпадать со значением, указанным в расширении Subject Key Identifier того сертификата, которым подписан рассматриваемый сертификат. Эта информация очень полезна в процессе построения пути сертификации, когда клиент пытается найти все возможные пути от конечного сертификата (серверного) до доверенного корневого сертификата. Часто удостоверяющие центры используют один закрытый ключ с более чем одним сертификатом, и это поле позволяет программам надёжно определять, какой сертификат с каким ключом может быть сопоставлен. В реальном мире многие предоставляемые серверами цепочки сертификатов являются некорректными, но это часто остаётся незамеченным, поскольку браузеры способны находить альтернативные пути доверия.
X509v3 Subject Key Identifier:
    4A:AB:1C:C3:D3:4E:F7:5B:2B:59:71:AA:20:63:D6:C9:40:FB:14:F1
X509v3 Authority Key Identifier:
    keyid:49:4B:52:27:D1:1B:BC:F2:A1:21:6A:62:7B:51:42:7A:8A:D7:D5:56
Наконец, расширение Subject Alternative Name используется для перечисления имён хостов, для которых данный сертификат является действительным. Это расширение считается необязательным. Если оно отсутствует, клиенты возвращаются к использованию информации, предоставляемой в атрибуте Common Name (CN), являющемся частью поля Subject. Если это расширение присутствует, то содержимое поля CN в процессе валидации игнорируется.
X509v3 Subject Alternative Name:
    DNS:www.feistyduck.com, DNS:feistyduck.com
Преобразование ключей и сертификатов
Закрытые ключи и сертификаты могут храниться в различных форматах, а значит вам часто придётся преобразовывать их из одного формата в другой. Наиболее распространённые форматы:
- Бинарный сертификат (DER)
-
Содержит сертификат X.509 в необработанном виде с использованием закодированных в DER структур ASN.1.
- ASCII сертификат (сертификаты) (PEM)
-
Содержит сертификат DER в кодировке base64, перед которым помещается маркер
-----BEGIN CERTIFICATE-----, а после — маркер-----END CERTIFICATE-----. Обычно в файле присутствует только один сертификат, хотя некоторые программы, в зависимости от контекста, допускают наличие более одного сертификата в файле. Например, в старых версиях веб-сервера Apache требовалось, чтобы сертификат сервера находился отдельно в одном файле, а все промежуточные сертификаты вместе — в другом файле. - Бинарный ключ (DER)
-
Содержит закрытый ключ в необработанном виде с использованием закодированных в DER структур ASN.1. OpenSSL создаёт ключи в своём собственном традиционном формате (SSLeay). Существует также альтернативный формат, называемый PKCS#8 (определён в RFC 5208), но он не получил широкого распространения. OpenSSL может преобразовывать как в формат PKCS#8, так и из него с помощью команды
pkcs8. - ASCII ключ (PEM)
-
Содержит ключ DER в кодировке base64, иногда с дополнительными метаданными (например, указанием алгоритма, используемого для парольной защиты).
- Сертификат (сертификаты) PKCS#7
-
Комплексный формат, предназначенный для транспортировки подписанных или зашифрованных данных, определён в RFC 2315. Файлы обычно имеют расширения
.p7bи.p7cи, при необходимости, могут включать целиком цепочку сертификатов. Этот формат поддерживается Java-утилитойkeytool. - Ключ и сертификат (сертификаты) PKCS#12 (PFX)
-
Комплексный формат, в котором может храниться в защищённом состоянии ключ сервера и полная цепочка сертификатов. Файлы обычно имеют расширения
.p12и.pfx. Этот формат обычно используется в продуктах Microsoft, но также может использоваться для клиентских сертификатов. В наши дни имя PFX используется как синоним для PKCS#12, хотя раньше (довольно давно) PFX указывал на другой формат (раннюю версию PKCS#12). Вряд ли вы сейчас встретите где-либо старую версию.
Преобразование в PEM и DER
Преобразование сертификата между форматами PEM и DER выполняется с помощью команды x509. Конвертация сертификата из PEM в DER:
$ openssl x509 -inform PEM -in fd.pem -outform DER -out fd.der
Конвертация сертификата из DER в PEM:
$ openssl x509 -inform DER -in fd.der -outform PEM -out fd.pem
Аналогичный синтаксис применяется для преобразования закрытых ключей между форматами DER и PEM, но в этом случае используются другие команды: rsa для ключей RSA, и dsa для ключей DSA.
Преобразование PKCS#12 (PFX)
Всего лишь одной команды достаточно для преобразования ключа и сертификатов, представленных в формате PEM, в PKCS#12. В следующем примере ключ (fd.key), сертификат (fd.crt) и промежуточные сертификаты (fd-chain.crt) конвертируются в один эквивалентный файл PKCS#12:
$ openssl pkcs12 -export
    -name "My Certificate"
    -out fd.p12
    -inkey fd.key
    -in fd.crt
    -certfile fd-chain.crt
Enter Export Password: ****************
Verifying - Enter Export Password: ****************
С обратным преобразованием не всё так просто. Можно использовать одну команду, но в этом случае вы получите всё содержимое в одном файле:
$ openssl pkcs12 -in fd.p12 -out fd.pem -nodes
Теперь вам нужно открыть полученный файл fd.pem в вашем любимом редакторе и вручную разделить на отдельные файлы с ключом, сертификатом и промежуточными сертификатами. При этом вы заметите дополнительный контент перед каждым компонентом. Например:
Bag Attributes
    localKeyID: E3 11 E4 F1 2C ED 11 66 41 1B B8 83 35 D2 DD 07 FC DE 28 76
subject=/1.3.6.1.4.1.311.60.2.1.3=GB/2.5.4.15=Private Organization/serialNumber=06694169↩
/C=GB/ST=London/L=London/O=Feisty Duck Ltd/CN=www.feistyduck.com
issuer=/C=US/ST=Arizona/L=Scottsdale/O=Starfield Technologies, Inc./OU=http:/↩
/certificates.starfieldtech.com/repository/CN=Starfield Secure Certification Authority
-----BEGIN CERTIFICATE-----
MIIF5zCCBM+gAwIBAgIHBG9JXlv9vTANBgkqhkiG9w0BAQUFADCB3DELMAkGA1UE
BhMCVVMxEDAOBgNVBAgTB0FyaXpvbmExEzARBgNVBAcTClNjb3R0c2RhbGUxJTAj
[...]
Эти дополнительные метаданные очень удобны для быстрой идентификации сертификатов. Очевидно, вы должны убедиться, что основной файл сертификата содержит конечный сертификат сервера, а не что-то ещё. Кроме того, вы также должны убедиться, что промежуточные сертификаты представлены в правильном порядке, когда сертификат, с помощью которого производилось подписание, следует за подписанным сертификатом. Если вы заметите самоподписанный корневой сертификат, можете смело его удалить или сохранить в другом месте; он не должен входить в цепочку сертификатов.
Предупреждение: Конечный результат преобразования не должен содержать ничего, кроме закодированных ключа и сертификатов. Хотя некоторые инструменты достаточно умны, чтобы проигнорировать то, что не требуется, рассчитывать на это нельзя. Оставляя лишнюю информацию в файлах PEM, вы рискуете столкнуться со сложнодиагностируемыми проблемами.
Разделение пакета на компоненты можно переложить и на OpenSSL, но при этом придётся несколько раз вызывать команду pkcs12 (и каждый раз вводить пароль к пакету):
$ openssl pkcs12 -in fd.p12 -nocerts -out fd.key -nodes
$ openssl pkcs12 -in fd.p12 -nokeys -clcerts -out fd.crt
$ openssl pkcs12 -in fd.p12 -nokeys -cacerts -out fd-chain.crt
К сожалению, такой подход не приведёт к существенной экономии времени. Вам по-прежнему придётся проверять каждый файл, чтобы убедиться, что в нём находится именно то, что нужно, а также удалить метаданные.
Преобразование PKCS#7
Для преобразования из PEM в PKCS#7 используйте команду crl2pkcs7:
$ openssl crl2pkcs7 -nocrl -out fd.p7b -certfile fd.crt -certfile fd-chain.crt
Для преобразования из PKCS#7 в PEM используйте команду pkcs7 с параметром -print_certs:
openssl pkcs7 -in fd.p7b -print_certs -out fd.pem
Как и в случае с преобразованием из PKCS#12, нужно будет отредактировать файл fd.pem, очистив его и разделив на желаемые компоненты.
Конфигурация
В этом разделе мы обсудим две темы, относящиеся к развертыванию TLS. Первая — конфигурация наборов алгоритмов шифрования или наборов шифров, в которой вы указываете, какие именно из множества доступных в TLS наборов вы хотите использовать в процессе коммуникации. Эта тема важна, поскольку практически каждая программа, использующая OpenSSL, применяет её механизм конфигурации наборов. Это означает, что изучив однажды, каким образом настраиваются наборы шифров для одной программы, вы сможете повторно использовать эти знания где угодно. Вторая тема — измерение производительности низкоуровневых криптографических операций.
Выбор набора шифров
Распространённая задача в конфигурации сервера TLS — выбор того, какие наборы шифров будут поддерживаться. Для безопасной коммуникации программному обеспечению TLS необходимо определиться, какие именно криптографические примитивы использовать для достижения своих целей (например, обеспечения конфиденциальности). Это достигается путём выбора подходящего набора шифров, на основании которого принимается ряд решений о том, как будут выполняться аутентификация, обмен ключами, шифрование и другие операции. Программы, использующие в своей работе OpenSSL, обычно применяют тот же подход к настройке наборов шифров, что и OpenSSL, просто задавая те же параметры конфигурации. Например, в настройках сервера httpd от Apache конфигурация наборов шифров может выглядеть так:
SSLHonorCipherOrder On
SSLCipherSuite "HIGH:!aNULL:@STRENGTH"
Параметр конфигурации в первой строке управляет приоритезацией наборов шифров (а также настраивает httpd на активный выбор наборов). Параметр конфигурации во второй строке управляет тем, какие наборы будут поддерживаться.
Создание хорошей конфигурации наборов может занять довольно много времени, при этом нужно учитывать множество деталей. Лучшим подходом в данном случае будет использование команды OpenSSL ciphers для определения того, какие именно наборы будут задействованы при выборе конкретной строки конфигурации.
Получение списка поддерживаемых наборов
Перед тем как продолжать, вам следует определиться с тем, какие наборы поддерживаются вашей инсталляцией OpenSSL. Для этого вызовите команду ciphers с параметром -v и указанием ключевых слов ALL:COMPLEMENTOFALL (очевидно, ALL в данном случае вовсе на означает «все»):
$ openssl ciphers -v 'ALL:COMPLEMENTOFALL'
ECDHE-RSA-AES256-GCM-SHA384    TLSv1.2 Kx=ECDH Au=RSA   Enc=AESGCM(256) Mac=AEAD
ECDHE-ECDSA-AES256-GCM-SHA384  TLSv1.2 Kx=ECDH Au=ECDSA Enc=AESGCM(256) Mac=AEAD
ECDHE-RSA-AES256-SHA384        TLSv1.2 Kx=ECDH Au=RSA   Enc=AES(256)    Mac=SHA384
ECDHE-ECDSA-AES256-SHA384      TLSv1.2 Kx=ECDH Au=ECDSA Enc=AES(256)    Mac=SHA384
ECDHE-RSA-AES256-SHA           SSLv3   Kx=ECDH Au=RSA   Enc=AES(256)    Mac=SHA1
[ещё 106 строк...]
Совет: При использовании OpenSSL 1.0.0 или более поздней версии, вы также можете применить параметр -V (в верхнем регистре), чтобы сделать вывод ещё подробнее. В этом режиме в вывод попадут также идентификаторы наборов, которые в любом случае полезно иметь под рукой. Например, OpenSSL не всегда использует для наборов шифров имена из RFC; в таких случаях вы должны использовать эти идентификаторы для обеспечения перекрёстной проверки.
В моём случае в вывод попали 111 наборов. Каждая строка содержит информацию об одном наборе в виде следующих полей:
-
Имя набора
-
Минимально допустимая версия протокола
-
Алгоритм обмена ключами
-
Алгоритм аутентификации
-
Алгоритм и стойкость шифрования
-
Алгоритм MAC (обеспечения целостности)
-
Индикатор экспортного набора
Если изменить параметр ciphers на что-то отличное от ALL:COMPLEMENTOFALL, OpenSSL покажет только те наборы, которые будут соответствовать указанной настройке. Например, вы можете запросить вывод только тех наборов шифров, которые основаны на RC4, следующей командой:
$ openssl ciphers -v 'RC4'
ECDHE-RSA-RC4-SHA    SSLv3 Kx=ECDH       Au=RSA   Enc=RC4(128) Mac=SHA1
ECDHE-ECDSA-RC4-SHA  SSLv3 Kx=ECDH       Au=ECDSA Enc=RC4(128) Mac=SHA1
AECDH-RC4-SHA        SSLv3 Kx=ECDH       Au=None  Enc=RC4(128) Mac=SHA1
ADH-RC4-MD5          SSLv3 Kx=DH         Au=None  Enc=RC4(128) Mac=MD5
ECDH-RSA-RC4-SHA     SSLv3 Kx=ECDH/RSA   Au=ECDH  Enc=RC4(128) Mac=SHA1
ECDH-ECDSA-RC4-SHA   SSLv3 Kx=ECDH/ECDSA Au=ECDH  Enc=RC4(128) Mac=SHA1
RC4-SHA              SSLv3 Kx=RSA        Au=RSA   Enc=RC4(128) Mac=SHA1
RC4-MD5              SSLv3 Kx=RSA        Au=RSA   Enc=RC4(128) Mac=MD5
PSK-RC4-SHA          SSLv3 Kx=PSK        Au=PSK   Enc=RC4(128) Mac=SHA1
EXP-ADH-RC4-MD5      SSLv3 Kx=DH(512)    Au=None  Enc=RC4(40)  Mac=MD5  export
EXP-RC4-MD5          SSLv3 Kx=RSA(512)   Au=RSA   Enc=RC4(40)  Mac=MD5  export
В выводе будут содержаться все наборы, соответствующие заданному вами ограничению, даже если они небезопасны. Очевидно, что при настройке того или иного приложения вы должны тщательно выбирать строки конфигурации, чтобы активировать только то, что безопасно. Кроме того, порядок, в котором наборы появляются в выходных данных, имеет значение. Когда вы настраиваете свой TLS-сервер на активный выбор того набора шифров, который будет использоваться при соединении (что является лучшей практикой и рекомендуемым методом), приоритет будут иметь перечисленные вначале наборы шифров.
Ключевые слова
Ключевые слова набора шифров являются базовыми строительными блоками конфигурации наборов шифров. Каждое имя набора (например, RC4-SHA) является ключевым словом, с помощью которого выбирается ровно один набор. Все остальные ключевые слова отбирают группу наборов в соответствии с некоторыми критериями. Имена ключевых слов чувствительны к регистру символов. Конечно, можно было бы просто перенаправить вас на документацию OpenSSL для просмотра всего списка ключевых слов, но оказывается, что раздел по шифрам в ней не актуален: в нём не хватает нескольких последних добавлений. По этой причине я попытался задокументировать все ключевые слова в этом разделе.
Групповые ключевые слова — это сокращения для выбора часто используемых наборов шифров. Например, при наличии ключевого слова HIGH будут отобраны только очень стойкие наборы шифров.
Таблица 1.1. Групповые ключевые слова
| Ключевое слово | Значение |
|---|---|
DEFAULT |
Список шифров по умолчанию. Определяется во время компиляции, для OpenSSL 1.0.0, как правило, ALL:!aNULL:!eNULL. При настройке отбора наборов шифров в приложении это ключевое слово должно быть указано первым в конфигурационной строке. |
COMPLEMENTOFDEFAULT |
Шифры, входящие в ALL, но не задействованные по умолчанию. В настоящий момент это ADH. Обратите внимание, что это правило не распространяется на шифры eNULL, которые не входят в ALL (если это необходимо, используйте COMPLEMENTOFALL). |
ALL |
Все наборы шифров, кроме шифров eNULL, которые должны быть включены явно. |
COMPLEMENTOFALL |
Наборы шифров, не включённые в ALL, в настоящий момент это eNULL. |
HIGH |
Наборы шифров «высокой» криптографической стойкости. В настоящий момент это означает наборы шифров с ключами, имеющими уровень криптостойкости более 128 бит, а также некоторые наборы шифров с уровнем криптостойкости в 128 бит. |
MEDIUM |
Наборы шифров «средней» криптографической стойкости, в настоящий момент некоторые из них используют шифрование с уровнем криптостойкости 128 бит. |
LOW |
Наборы шифров «низкой» криптографической стойкости. В настоящее время это те из них, в которых используются криптографические алгоритмы с уровнем криптостойкости 64 или 56 бит, за исключением экспортных наборов шифров. Небезопасные. |
EXP, EXPORT |
Экспортные криптографические алгоритмы. Включая алгоритмы с уровнем криптостойкости 40 и 56 бит. Небезопасные. |
EXPORT40 |
Экспортные алгоритмы с уровнем криптостойкости 40 бит. Небезопасные. |
EXPORT56 |
Экспортные алгоритмы с уровнем криптостойкости 56 бит. Небезопасные. |
TLSv1, SSLv3, SSLv2 |
Наборы шифров TLS 1.0, SSL 3 и SSL 2, соответственно. |
С помощью ключевых слов алгоритмов хэширования выбираются наборы, использующие конкретный алгоритм хэширования. Например, MD5 отбирает все наборы, которые для проверки целостности полагаются на MD5.
Таблица 1.2. Ключевые слова алгоритмов хэширования
| Ключевое слово | Значение |
|---|---|
MD5 |
Наборы шифров, использующие MD5. Устаревшие и небезопасные. |
SHA, SHA1 |
Наборы шифров, использующие SHA1. |
SHA256 (v1.0.0+) |
Наборы шифров, использующие SHA256. |
SHA384 (v1.0.0+) |
Наборы шифров, использующие SHA384. |
Примечание: С помощью ключевых слов алгоритмов хэширования выбираются только те наборы шифров, которые проверяют целостность данных на уровне протокола. В TLS 1.2 появилась поддержка аутентифицированного шифрования, представляющего собой механизм, который связывает шифрование с проверкой целостности. При использовании так называемых наборов AEAD (Authenticated Encryption with Associated Data), протоколу не требуется обеспечивать дополнительную проверку целостности. По этой причине вы не сможете использовать ключевые слова алгоритмов хэширования для выбора наборов AEAD (в настоящее время это наборы, в названии которых присутствует GCM). В названиях таких наборов используются суффиксы SHA256 и SHA384, но в данном случае они указывают на хэш-функции, используемые для построения используемой с набором псевдослучайной функции (что вносит некоторую путаницу).
С помощью ключевых слов аутентификации наборы выбираются на основании тех методов аутентификации, которые они используют. Сегодня для аутентификации практически во всех публичных сертификатах используется RSA. Со временем мы, вероятно, увидим очень медленный прирост использования сертификатов Elliptic Curve (ECDSA).
Табица 1.3. Ключевые слова аутентификации
| Ключевое слово | Значение |
|---|---|
aDH |
Наборы шифров, фактически использующие аутентификацию DH, то есть сертификаты содержат ключи DH. (v1.0.2+) |
aDSS, DSS |
Наборы шифров, использующие аутентификацию DSS, то есть сертификаты содержат ключи DSS. |
aECDH (v1.0.0+) |
Наборы шифров, использующие аутентификацию ECDH. |
aECDSA (v1.0.0+) |
Наборы шифров, использующие аутентификацию ECDSA. |
aNULL |
Наборы шифров, не предлагающие аутентификацию. В настоящее время это анонимные алгоритмы DH. Небезопасные. |
aRSA |
Наборы шифров, использующие аутентификацию RSA, то есть сертификаты содержат ключи RSA. |
PSK |
Наборы шифров, использующие аутентификацию PSK (Pre-Shared Key). |
SRP |
Наборы шифров, использующие аутентификацию SRP (Secure Remote Password). |
С помощью ключевых слов обмена ключами наборы выбираются на основании алгоритма обмена ключами. Когда речь заходит о наборах с эфемерным обменом по протоколу Диффи-Хеллмана, разработчики OpenSSL непоследовательны в именовании наборов и ключевых слов. В названиях наборов эфемерные алгоритмы обмена ключами, как правило обозначаются буквой E на конце названия алгоритма (например, ECDHE-RSA-RC4-SHA и DHE-RSA-AES256-SHA), а в ключевых словах отбора буква E указывается в начале (например, EECDH и EDH). Чтобы усугубить ситуацию, в некоторых старых наборах шифров буква E ставится в начале названия алгоритма обмена ключами (например, EDH-RSA-DES-CBC-SHA).
Таблица 1.4. Ключевые слова обмена ключами
| Ключевое слово | Значение |
|---|---|
ADH |
Наборы шифров с анонимным обменом DH. Небезопасные. |
AECDH (v1.0.0+) |
Наборы шифров с анонимным обменом ECDH. Небезопасные. |
DH |
Наборы шифров, использующие обмен DH (в том числе эфемерный и анонимный обмен DH). |
ECDH (v1.0.0+) |
Наборы шифров, использующие обмен ECDH (в том числе эфемерный и анонимный обмен ECDH). |
EDH (v1.0.0+) |
Наборы шифров, использующие эфемерное согласование ключей DH. |
EECDH (v1.0.0+) |
Наборы шифров, использующие эфемерный обмен ECDH. |
kECDH (v1.0.0+) |
Наборы шифров, использующие эфемерное согласование ключей ECDH. |
kEDH |
Наборы шифров, использующие эфемерное согласование ключей DH (включая анонимный обмен DH). |
kEECDH (v1.0.0+) |
Наборы шифров, использующие эфемерное согласование ключей ECDH (включая анонимный обмен ECDH). |
kRSA, RSA |
Наборы шифров, использующие алгоритм обмена ключами RSA. |
С помощью ключевых слов шифров наборы выбираются на основании используемых ими шифров.
Таблица 1.5. Ключевые слова шифров
| Ключевое слово | Значение |
|---|---|
3DES |
Наборы шифров, использующие Triple DES. Устаревшие и небезопасные. |
AES |
Наборы шифров, использующие AES. |
AESGCM (v1.0.0+) |
Наборы шифров, использующие AES GCM. |
CAMELLIA |
Наборы шифров, использующие Camellia. Устаревшие. |
DES |
Наборы шифров, использующие Single DES. Устаревшие и небезопасные. |
eNULL, NULL |
Наборы шифров не использующие шифрование. Небезопасные. |
IDEA |
Наборы шифров, использующие IDEA. Устаревшие. |
RC2 |
Наборы шифров, использующие RC2. Устаревшие и небезопасные. |
RC4 |
Наборы шифров, использующие RC4. Небезопасные. |
SEED |
Наборы шифров, использующие SEED. Устаревшие. |
Остаётся ряд наборов, которые не вписываются ни в одну из рассмотренных ранее категорий. Основная их часть связана со стандартами ГОСТ, которые актуальны для стран, входящих в Содружество Независимых Государств, образовавшееся после распада Советского Союза.
Таблица 1.6. Прочие ключевые слова
| Ключевое слово | Значение |
|---|---|
@STRENGTH |
Сортирует текущий список наборов шифров в порядке длины ключа алгоритма шифрования.. |
aGOST |
Наборы шифров, использующие аутентификацию GOST R 34.10 (как 2001, так и 94). Для работы требуется модуль обеспечения совместимости с ГОСТ. |
aGOST01 |
Наборы шифров, использующие аутентификацию GOST R 34.10-2001. |
aGOST94 |
Наборы шифров, использующие аутентификацию GOST R 34.10-94. Устаревшие. Вместо них используйте GOST R 34.10-2001. |
kGOST |
Наборы шифров, использующие обмен ключами VKO 34.10, определённый в RFC 4357. |
GOST94 |
Наборы шифров, использующие HMAC, основанный на GOST R 34.11-94. |
GOST89MAC |
Наборы шифров, использующие GOST 28147-89 MAC вместо HMAC. |
Комбинирование ключевых слов
Чаще всего вы будете использовать ключевые слова по отдельности, но также возможно комбинировать их, чтобы отбирать только те наборы, которые удовлетворяют сразу нескольким требованиям. Это делается путём соединения двух или более ключевых слов символом +. В следующем примере мы выбираем наборы, использующие RC4 и SHA:
$ openssl ciphers -v 'RC4+SHA'
ECDHE-RSA-RC4-SHA    SSLv3 Kx=ECDH       Au=RSA   Enc=RC4(128) Mac=SHA1
ECDHE-ECDSA-RC4-SHA  SSLv3 Kx=ECDH       Au=ECDSA Enc=RC4(128) Mac=SHA1
AECDH-RC4-SHA        SSLv3 Kx=ECDH       Au=None  Enc=RC4(128) Mac=SHA1
ECDH-RSA-RC4-SHA     SSLv3 Kx=ECDH/RSA   Au=ECDH  Enc=RC4(128) Mac=SHA1
ECDH-ECDSA-RC4-SHA   SSLv3 Kx=ECDH/ECDSA Au=ECDH  Enc=RC4(128) Mac=SHA1
RC4-SHA              SSLv3 Kx=RSA        Au=RSA   Enc=RC4(128) Mac=SHA1
PSK-RC4-SHA          SSLv3 Kx=PSK        Au=PSK   Enc=RC4(128) Mac=SHA1
Построение списков наборов шифров
Ключевой концепцией при построении конфигурации наборов шифров является концепция текущего списка наборов. Первоначально этот список всегда пуст, в нём нет ни одного набора шифров, но каждое ключевое слово, добавляемое вами в строку конфигурации, тем или иным способом меняет этот список. По умолчанию новые наборы добавляются в конец списка. Например, чтобы выбрать все наборы, использующие шифрование RC4 и AES, применяется такая строка конфигурации:
$ openssl ciphers -v 'RC4:AES'
Обычно для разделения ключевых слов используется символ двоеточия, но также приемлемы пробелы и запятые. Следующая команда производит тот же вывод, что и в предыдущем примере:
$ openssl ciphers -v 'RC4 AES'
Модификаторы ключевых слов
Модификаторы ключевых слов — это символы, которые можно поместить перед ключевым словом для того, чтобы изменить действие по умолчанию (добавление в список) на что-то другое. Поддерживаются следующие действия:
- Добавление в конец
-
Добавляет наборы в конец списка. Если какие-то из этих наборов уже были в текущем списке, они останутся на своей нынешней позиции. Это действие по умолчанию, выполняемое, когда перед ключевым словом нет модификатора.
- Удаление (
-) -
Удаляет все соответствующие наборы из текущего списка. Потенциально позволяет некоторым другим ключевым словам повторно ввести эти наборы позже.
- Удаление навсегда (
!) -
Удаляет все соответствующие наборы из текущего списка и предотвращает дальнейшее их добавление в помощью других ключевых слов. Этот модификатор полезен для указания тех наборов, которые вы не хотите использовать ни при каких обстоятельствах; тем самым упрощается дальнейший отбор и предотвращаются ошибки.
- Перемещение в конец (
+) -
Перемещает все соответствующие наборы в конец текущего списка. Работает только для тех наборов, которые уже в списке; новые наборы в список не добавляются. Этот модификатор полезен, если вы хотите, чтобы некоторые более слабые наборы были включены, но отдаёте предпочтение более сильным. Например, строка
RC4:+MD5включает все наборы RC4, но помещает те из них, которые основаны на MD5, в конец списка.
Сортировка
Ключевое слово @STRENGTH отличается от других ключевых слов (не зря же в его названии есть символ @): оно не добавляет и не удаляет никаких наборов, но сортирует их в порядке уменьшения стойкости шифра. Автоматическая сортировка — интересная идея, но она имеет смысл только в идеальном мире, в котором наборы шифров можно было бы сопоставить лишь по формальному уровню криптостойкости шифра.
Возьмём для примера следующую конфигурацию наборов шифров:
$ openssl ciphers -v 'DES-CBC-SHA DES-CBC3-SHA RC4-SHA AES256-SHA @STRENGTH'
AES256-SHA                     SSLv3   Kx=RSA  Au=RSA   Enc=AES(256)    Mac=SHA1
DES-CBC3-SHA                   SSLv3   Kx=RSA  Au=RSA   Enc=3DES(168)   Mac=SHA1
RC4-SHA                        SSLv3   Kx=RSA  Au=RSA   Enc=RC4(128)    Mac=SHA1
DES-CBC-SHA                    SSLv3   Kx=RSA  Au=RSA   Enc=DES(56)     Mac=SHA1
В теории вывод команды отсортирован в порядке стойкости шифров. На практике вам, скорее всего, захочется более детально контролировать этот порядок:
-
Например,
AES256-SHA(набор CBC) уязвим для атак BEAST при использовании с протоколом TLS 1.0 и более ранними версиями. Если вы хотите уменьшить вероятность атаки BEAST на стороне сервера, вы предпочтёте отдать приоритет пакету RC4-SHA, который не подвержен этой проблеме. -
Уровень криптостойкости 3DES только номинально оценивается в 168 бит; так называемая атака встреча посередине (meet-in-the-middle) уменьшает его стойкость до 112 бит9, а дальнейшие оптимизации подбора и вовсе снижают стойкость до 108 бит10. Этот факт делает
DES-CBC3-SHAхуже 128-битных наборов шифров. Строго говоря, трактовка 3DES как 168-битного шифра — это баг в OpenSSL, который был исправлен в более поздних версиях.
Обработка ошибок
При работе со своей конфигурацией вы можете столкнуться с двумя типами ошибок. Одни из них возникают в результате опечатки или попытки использовать несуществующее ключевое слово:
$ openssl ciphers -v '@HIGH'
Error in cipher list
140460843755168:error:140E6118:SSL routines:SSL_CIPHER_PROCESS_RULESTR:invalid ↩
command:ssl_ciph.c:1317:
Вывод, конечно, загадочный, но в нём содержится сообщение об ошибке.
Другая возможная ошибка состоит в том, что вы получите пустой список наборов шифров. В этом случае вывод будет примерно такой:
$ openssl ciphers -v 'SHA512'
Error in cipher list
140202299557536:error:1410D0B9:SSL routines:SSL_CTX_set_cipher_list:no cipher match:ssl↩
_lib.c:1312:
Собираем всё вместе
Для демонстрации того, как объединяются различные функции конфигурации наборов шифров, рассмотрим один законченный пример реального использования. Но не забывайте о том, что это всего лишь пример. Поскольку при выборе реальной конфигурации обычно необходимо учитывать множество аспектов, не существует такого понятия, как единственно возможная идеальная конфигурация.
По этой причине, прежде чем вы приступите к работе над своей конфигурацией, у вас должно быть чёткое представление о том, чего вы хотите достичь. В рассматриваемом случае я хотел получить достаточно безопасную и эффективную конфигурацию, которую можно определить следующим образом:
-
Используются только стойкие шифры с фактическим уровнем криптостойкости 128 бит и выше (это исключает 3DES).
-
Используются только наборы, обеспечивающие строгую аутентификацию (это исключает анонимные и экспортные наборы).
-
Не используются любые наборы, полагающиеся на уязвимые исходные алгоритмы (например, MD5).
-
Реализуется надежная поддержка прямой секретности, независимо от того, какие ключи и протоколы применяются. С этим требованием связано небольшое снижение производительности, потому что не будет возможности использовать быстрый обмен ключами RSA. Чтобы минимизировать это снижение, мы будем отдавать приоритет ECDHE, которые значительно быстрее, чем DHE.
-
Предпочтение отдаётся ECDSA над RSA. Это требование имеет смысл только при использовании в системе двух вариантов шифрования. То есть мы хотим использовать более быстрые операции ECDSA там, где это только возможно, но откатываться на RSA при взаимодействии с клиентами, которые ещё не поддерживают ECDSA.
-
При работе с клиентами TLS 1.2 предпочтение отдаётся наборам AES GCM, обеспечивающим наилучший уровень безопасности, который только может предложить TLS.
-
Поскольку недавно выяснилось, что шифры RC4 слабее, чем это считалось ранее11, поместим их в конец нашего списка. Это почти также эффективно, как и полное их отключение. Хотя BEAST всё ещё может быть проблемой в некоторых ситуациях, предполагается, что о минимизации этой атаки позаботились на стороне клиента.
Обычно лучший подход — начать с полного удаления всех компонентов и наборов, которые вы не хотите использовать; это уменьшает беспорядок и гарантирует, что нежелательные наборы не будут случайно добавлены в конфигурацию по ошибке.
Слабые наборы могут быть идентифицированы следующими ключевыми словами:
-
aNULL; без аутентификации -
eNULL; без шифрования -
LOW; наборы с низкой стойкостью -
3DES; фактическая стойкость — 108 бит -
MD5; наборы, использующие MD5 -
EXP; устаревшие экспортные наборы
Для уменьшения количества выводимых наборов я собираюсь полностью устранить все наборы DSA, PSK, SRP и ECDH, поскольку они используются крайне редко. Также я удалю шифры IDEA и SEED, которые устарели, но все еще могут поддерживаться OpenSSL. В своей конфигурации я также не буду использовать CAMELLIA, потому что он медленнее и не так хорошо поддерживается, как AES (например, на практике нет вариантов GCM или ECDHE).
!aNULL !eNULL !LOW !3DES !MD5 !EXP !DSS !PSK !SRP !kECDH !CAMELLIA !IDEA !SEED
Теперь мы можем сосредоточиться на том, чего хотим достичь. Поскольку нашим приоритетом является прямая секретность, мы можем начать с ключевых слов kEECDH и kEDH:
kEECDH kEDH !aNULL !eNULL !LOW !3DES !MD5 !EXP !DSS !PSK !SRP !kECDH !CAMELLIA !IDEA ↩
!SEED
Если протестировать эту конфигурацию, обнаружится, что наборы RSA перечислены первыми, хотя мы хотели бы видеть первыми ECDSA:
ECDHE-RSA-AES256-GCM-SHA384    TLSv1.2 Kx=ECDH Au=RSA   Enc=AESGCM(256) Mac=AEAD
ECDHE-ECDSA-AES256-GCM-SHA384  TLSv1.2 Kx=ECDH Au=ECDSA Enc=AESGCM(256) Mac=AEAD
ECDHE-RSA-AES256-SHA384        TLSv1.2 Kx=ECDH Au=RSA   Enc=AES(256)    Mac=SHA384
ECDHE-ECDSA-AES256-SHA384      TLSv1.2 Kx=ECDH Au=ECDSA Enc=AES(256)    Mac=SHA384
ECDHE-RSA-AES256-SHA           SSLv3   Kx=ECDH Au=RSA   Enc=AES(256)    Mac=SHA1
ECDHE-ECDSA-AES256-SHA         SSLv3   Kx=ECDH Au=ECDSA Enc=AES(256)    Mac=SHA1
ECDHE-RSA-AES128-GCM-SHA256    TLSv1.2 Kx=ECDH Au=RSA   Enc=AESGCM(128) Mac=AEAD
[...]
Чтобы это исправить, поместим kEECDH+ECDSA в начало конфигурации:
kEECDH+ECDSA kEECDH kEDH !aNULL !eNULL !LOW !3DES !MD5 !EXP !DSS !PSK !SRP !kECDH ↩
!CAMELLIA !IDEA !SEED
Следующая проблема — то, что более старые наборы (SSL 3) перемешаны с более новыми (TLS 1.2). Для обеспечения максимальной безопасности хотелось бы, чтобы клиенты, поддерживающие TLS 1.2, всегда согласовывали именно TLS 1.2. Чтобы переместить более старые наборы в конец списка, я использую ключевое слово +SHA (наборы TLS 1.2 всегда используют либо SHA256, либо SHA384, то есть под это условие они не попадут):
kEECDH+ECDSA kEECDH kEDH +SHA !aNULL !eNULL !LOW !3DES !MD5 !EXP !DSS !PSK !SRP !kECDH ↩
!CAMELLIA !IDEA !SEED
В таком виде конфигурация практически полностью отвечает нашим требованиям. Осталось поместить оставшиеся ещё неохваченными безопасные наборы в конец списка; сделаем это с помощью ключевого слова HIGH. Кроме того, нужно удостовериться, что наборы RC4 являются последними; с помощью ключевого слова +RC4 мы переместим уже существующие наборы RC4 в конец списка, а с помощью ключевого слова RC4 добавим туда же ещё незадействованные наборы RC4:
kEECDH+ECDSA kEECDH kEDH HIGH +SHA +RC4 RC4 !aNULL !eNULL !LOW !3DES !MD5 !EXP !DSS ↩
!PSK !SRP !kECDH !CAMELLIA !IDEA !SEED
Давайте рассмотрим окончательный результат, который состоит из 28 наборов. В первой группе у нас наборы TLS 1.2:
ECDHE-ECDSA-AES256-GCM-SHA384  TLSv1.2 Kx=ECDH Au=ECDSA Enc=AESGCM(256) Mac=AEAD
ECDHE-ECDSA-AES256-SHA384      TLSv1.2 Kx=ECDH Au=ECDSA Enc=AES(256)    Mac=SHA384
ECDHE-ECDSA-AES128-GCM-SHA256  TLSv1.2 Kx=ECDH Au=ECDSA Enc=AESGCM(128) Mac=AEAD
ECDHE-ECDSA-AES128-SHA256      TLSv1.2 Kx=ECDH Au=ECDSA Enc=AES(128)    Mac=SHA256
ECDHE-RSA-AES256-GCM-SHA384    TLSv1.2 Kx=ECDH Au=RSA   Enc=AESGCM(256) Mac=AEAD
ECDHE-RSA-AES256-SHA384        TLSv1.2 Kx=ECDH Au=RSA   Enc=AES(256)    Mac=SHA384
ECDHE-RSA-AES128-GCM-SHA256    TLSv1.2 Kx=ECDH Au=RSA   Enc=AESGCM(128) Mac=AEAD
ECDHE-RSA-AES128-SHA256        TLSv1.2 Kx=ECDH Au=RSA   Enc=AES(128)    Mac=SHA256
DHE-RSA-AES256-GCM-SHA384      TLSv1.2 Kx=DH   Au=RSA   Enc=AESGCM(256) Mac=AEAD
DHE-RSA-AES256-SHA256          TLSv1.2 Kx=DH   Au=RSA   Enc=AES(256)    Mac=SHA256
DHE-RSA-AES128-GCM-SHA256      TLSv1.2 Kx=DH   Au=RSA   Enc=AESGCM(128) Mac=AEAD
DHE-RSA-AES128-SHA256          TLSv1.2 Kx=DH   Au=RSA   Enc=AES(128)    Mac=SHA256
AES256-GCM-SHA384              TLSv1.2 Kx=RSA  Au=RSA   Enc=AESGCM(256) Mac=AEAD
AES256-SHA256                  TLSv1.2 Kx=RSA  Au=RSA   Enc=AES(256)    Mac=SHA256
AES128-GCM-SHA256              TLSv1.2 Kx=RSA  Au=RSA   Enc=AESGCM(128) Mac=AEAD
AES128-SHA256                  TLSv1.2 Kx=RSA  Au=RSA   Enc=AES(128)    Mac=SHA256
Сначала идут наборы ECDHE, затем — DHE, а за ними уже все остальные наборы TLS 1.2. В каждой из подгрупп приоритет имеют ECDSA и GCM.
Во второй группе представлены наборы, которые будут использоваться клиентами TLS 1.0. Приоритеты здесь такие же, как и в первой группе:
ECDHE-ECDSA-AES256-SHA         SSLv3   Kx=ECDH Au=ECDSA Enc=AES(256)    Mac=SHA1
ECDHE-ECDSA-AES128-SHA         SSLv3   Kx=ECDH Au=ECDSA Enc=AES(128)    Mac=SHA1
ECDHE-RSA-AES256-SHA           SSLv3   Kx=ECDH Au=RSA   Enc=AES(256)    Mac=SHA1
ECDHE-RSA-AES128-SHA           SSLv3   Kx=ECDH Au=RSA   Enc=AES(128)    Mac=SHA1
DHE-RSA-AES256-SHA             SSLv3   Kx=DH   Au=RSA   Enc=AES(256)    Mac=SHA1
DHE-RSA-AES128-SHA             SSLv3   Kx=DH   Au=RSA   Enc=AES(128)    Mac=SHA1
DHE-RSA-SEED-SHA               SSLv3   Kx=DH   Au=RSA   Enc=SEED(128  ) Mac=SHA1
AES256-SHA                     SSLv3   Kx=RSA  Au=RSA   Enc=AES(256)    Mac=SHA1
AES128-SHA                     SSLv3   Kx=RSA  Au=RSA   Enc=AES(128)    Mac=SHA1
И наконец, наборы RC4 представлены в конце списка:
ECDHE-ECDSA-RC4-SHA            SSLv3   Kx=ECDH Au=ECDSA Enc=RC4(128)    Mac=SHA1
ECDHE-RSA-RC4-SHA              SSLv3   Kx=ECDH Au=RSA   Enc=RC4(128)    Mac=SHA1
RC4-SHA                        SSLv3   Kx=RSA  Au=RSA   Enc=RC4(128)    Mac=SHA1
Рекомендуемая конфигурация
В предыдущем разделе мы разработали конфигурацию-пример для того чтобы показать, как конфигурации собираются с помощью ключевых слов наборов шифров OpenSSL. Но всё-таки она получилась не самой лучшей из всех возможных. На самом деле, нет ни одной конфигурации, которая удовлетворила бы всех. В этом разделе мы рассмотрим несколько конфигураций, из которых можно будет выбрать ту, которая вам больше подойдёт, исходя из ваших предпочтений и оценки рисков.
Принципы проектирования для всех конфигураций здесь, в основном, те же, что и в предыдущем разделе, но я собираюсь сделать пару изменений для достижения лучшей производительности. Во-первых, я собираюсь поместить наборы, шифры которых имеют уровень криптостойкости 128 бит, в начало списка. Хотя 256-битные наборы обеспечивают некоторое повышение безопасности, для большинства сайтов оно не имеет смысла и сопровождается снижением производительности. Во-вторых, я собираюсь отдать предпочтение наборам с HMAC-SHA, а не с HMAC-SHA256 и HMAC-SHA384, которые гораздо медленнее и также не обеспечивают значительного повышения безопасности.
Кроме того, я собираюсь поменять подход к конфигурированию наборов, отказавшись от использования ключевых слов в пользу непосредственно имён наборов. Концептуально, использование ключевых слов — неплохая идея: вы определяете свои требования безопасности, а библиотека делает всё остальное, и вам не приходится вдаваться в подробности о тех наборах, которые в итоге будут использоваться. К сожалению, на практике такой подход уже неэффективен, поскольку мы стали довольно разборчивы в том, какие наборы хотим включить и в каком порядке.
Использовать имена наборов в конфигурации также просто: вы просто перечисляете наборы, которые хотите применять. И когда вы будете просматривать чью-либо конфигурацию, вам сразу станет понятно, какие именно наборы используются, нет необходимости пропускать настройки через OpenSSL.
Вот моя стартовая конфигурация по умолчанию, спроектированная для обеспечения высокого уровня безопасности и хорошей производительности:
ECDHE-ECDSA-AES128-GCM-SHA256
ECDHE-ECDSA-AES256-GCM-SHA384
ECDHE-ECDSA-AES128-SHA
ECDHE-ECDSA-AES256-SHA
ECDHE-ECDSA-AES128-SHA256
ECDHE-ECDSA-AES256-SHA384
ECDHE-RSA-AES128-GCM-SHA256
ECDHE-RSA-AES256-GCM-SHA384
ECDHE-RSA-AES128-SHA
ECDHE-RSA-AES256-SHA
ECDHE-RSA-AES128-SHA256
ECDHE-RSA-AES256-SHA384
DHE-RSA-AES128-GCM-SHA256
DHE-RSA-AES256-GCM-SHA384
DHE-RSA-AES128-SHA
DHE-RSA-AES256-SHA
DHE-RSA-AES128-SHA256
DHE-RSA-AES256-SHA256
Примечание: Начиная с ветки 1.1.x, OpenSSL поддерживает наборы ChaCha20/Poly130512. Эти наборы с проверкой аутентификации (например, ECDHE-ECDSA-CHACHA20-POLY1305 и ECDHE-RSA-CHACHA20-POLY1305) обеспечивают высокий уровень безопасности и альтернативу наборам AES. Сообщается, что они обеспечивают более высокую производительность для пользователей мобильных устройств, но наборы AES GCM всё ещё работают быстрее на современных настольных компьютерах, где доступно аппаратное ускорение. Поместите их в начало списка или сразу за вашими наборами GCM, в зависимости от того, какая часть вашей аудитории использует мобильные устройства. Во время написания этого материала OpenSSL ещё не поддерживал одинаковый уровень предпочтения наборов (в отличие, например, от BoringSSL), что позволяло бы клиенту самому выбрать между наборами AES-GCM и ChaCha20.
В этой конфигурации используются только наборы с поддержкой прямой секретности и обеспечением стойкого шифрования. Большинство современных браузеров и других клиентов смогут установить соединение, но некоторые очень старые клиенты, возможно, нет. Например, старые версии Internet Explorer, работающие на Windows XP, будут выдавать ошибку.
Если вам действительна нужна поддержка очень старых клиентов (и только в этом случае), рассмотрите вариант добавления в конец списка следующих наборов шифров:
EDH-RSA-DES-CBC3-SHA
AES128-SHA
AES256-SHA
DES-CBC3-SHA
ECDHE-RSA-RC4-SHA
RC4-SHA
Большинство из этих старых наборов используют обмен ключами RSA, а значит не обеспечивают прямую секретность. Предпочтение отдаётся шифрам AES, но 3DES и (небезопасные) RC4 также поддерживаются для максимальной совместимости с как можно большим числом клиентов. Если нельзя обойтись без использования RC4, предпочтение должно отдаваться наборам с ECDHE, обеспечивающим прямую секретность.
Производительность
Как вы, скорее всего, знаете, скорость вычислений является существенным ограничивающим фактором для любой криптографической операции. В OpenSSL есть встроенный инструмент тестирования производительности, который вы можете использовать для получения представления о возможностях и ограничениях системы. Запустить тестирование можно с помощью команды speed.
Если выполнить команду speed без параметров, OpenSSL сгенерирует большое количество выводных данных, но полезного в них будет немного. Лучше тестировать только те алгоритмы, которые вас непосредственно интересуют. Например, для защиты веб-сервера вам могут понадобиться алгоритмы RC4, AES, RSA, ECDH и SHA:
$ openssl speed rc4 aes rsa ecdh sha
Вывод команды состоит из трёх частей. В первой части показан номер версии OpenSSL и параметры компиляции, с которым был собран этот экземпляр OpenSSL. Эта информация полезна, если вы тестируете различные версии OpenSSL с отличающимися параметрами компиляции:
OpenSSL 0.9.8k 25 Mar 2009
built on: Wed May 23 00:02:00 UTC 2012
options:bn(64,64) md2(int) rc4(ptr,char) des(idx,cisc,16,int) aes(partial) ↩
blowfish(ptr2)
compiler: cc -fPIC -DOPENSSL_PIC -DZLIB -DOPENSSL_THREADS -D_REENTRANT -DDSO_DLFCN ↩
-DHAVE_DLFCN_H -m64 -DL_ENDIAN -DTERMIO -O3 -Wa,--noexecstack -g -Wall -DMD32_REG_T=int ↩
-DOPENSSL_BN_ASM_MONT -DSHA1_ASM -DSHA256_ASM -DSHA512_ASM -DMD5_ASM -DAES_ASM
available timing options: TIMES TIMEB HZ=100 [sysconf value]
timing function used: times
The 'numbers' are in 1000s of bytes per second processed.
Во второй части приводятся результаты тестирования симметричной криптографии (хэш-функций и криптографических алгоритмов):
type             16 bytes     64 bytes    256 bytes   1024 bytes   8192 bytes
sha1             29275.44k    85281.86k   192290.28k   280526.68k   327553.12k
rc4             160087.81k   172435.03k   174264.75k   176521.50k   176700.62k
aes-128 cbc      90345.06k   140108.84k   170027.92k   179704.12k   182388.44k
aes-192 cbc     104770.95k   134601.12k   148900.05k   152662.30k   153941.11k
aes-256 cbc      95868.62k   116430.41k   124498.19k   127007.85k   127430.81k
sha256           23354.37k    54220.61k    99784.35k   126494.48k   138266.71k
sha512           16022.98k    64657.88k   113304.06k   178301.77k   214539.99k
Наконец, в третьей части результаты тестирования асимметричной криптографии:
                  sign    verify    sign/s verify/s
rsa  512 bits 0.000120s 0.000011s   8324.9  90730.0
rsa 1024 bits 0.000569s 0.000031s   1757.0  31897.1
rsa 2048 bits 0.003606s 0.000102s    277.3   9762.0
rsa 4096 bits 0.024072s 0.000376s     41.5   2657.4
                              op      op/s
 160 bit ecdh (secp160r1)   0.0003s   2890.2
 192 bit ecdh (nistp192)   0.0006s   1702.9
 224 bit ecdh (nistp224)   0.0006s   1743.5
 256 bit ecdh (nistp256)   0.0007s   1513.3
 384 bit ecdh (nistp384)   0.0015s    689.6
 521 bit ecdh (nistp521)   0.0029s    340.3
 163 bit ecdh (nistk163)   0.0009s   1126.2
 233 bit ecdh (nistk233)   0.0012s    818.5
 283 bit ecdh (nistk283)   0.0028s    360.2
 409 bit ecdh (nistk409)   0.0060s    166.3
 571 bit ecdh (nistk571)   0.0130s     76.8
 163 bit ecdh (nistb163)   0.0009s   1061.3
 233 bit ecdh (nistb233)   0.0013s    755.2
 283 bit ecdh (nistb283)   0.0030s    329.4
 409 bit ecdh (nistb409)   0.0067s    149.7
 571 bit ecdh (nistb571)   0.0146s     68.4
Чем может быть полезен вывод этой команды? Вы можете сравнить как опции компиляции влияют на скорость, или насколько отличается скорость работы разных версий OpenSSL на одной платформе. Например, предыдущие результаты получены на реальном сервере с использованием OpenSSL 0.9.8k (с исправлениями от поставщика дистрибутива). Я планирую перейти на OpenSSL 1.0.1h, поскольку хочу иметь поддержку TLS 1.1 и TLS 1.2; окажет ли это какое-либо влияние на производительность? Для тестирования я скачал и скомпилировал OpenSSL 1.0.1h. Давайте посмотрим:
$ ./openssl-1.0.1h speed rsa
[...]
OpenSSL 1.0.1h 5 Jun 2014
built on: Thu Jul  3 18:30:06 BST 2014
options:bn(64,64) rc4(8x,int) des(idx,cisc,16,int) aes(partial) idea(int) blowfish(idx)
compiler: gcc -DOPENSSL_THREADS -D_REENTRANT -DDSO_DLFCN -DHAVE_DLFCN_H ↩
-Wa,--noexecstack -m64 -DL_ENDIAN -DTERMIO -O3 -Wall -DOPENSSL_IA32_SSE2 -DOPENSSL_BN↩
_ASM_MONT -DOPENSSL_BN_ASM_MONT5 -DOPENSSL_BN_ASM_GF2m -DSHA1_ASM -DSHA256_ASM -DSHA512↩
_ASM -DMD5_ASM -DAES_ASM -DVPAES_ASM -DBSAES_ASM -DWHIRLPOOL_ASM -DGHASH_ASM
                  sign    verify    sign/s verify/s
rsa  512 bits 0.000102s 0.000008s   9818.0 133081.7
rsa 1024 bits 0.000326s 0.000020s   3067.2  50086.9
rsa 2048 bits 0.002209s 0.000068s    452.8  14693.6
rsa 4096 bits 0.015748s 0.000255s     63.5   3919.4
Как видите, для моего варианта использования (2048-битный ключ RSA) OpenSSL 1.0.1h почти в два раза быстрее на этом сервере: производительность возросла в 277 до 450 электронных подписей в секунду. Это означает, что в случае обновления я получу более высокую производительность. Замечательная новость!
Использовать подобные результаты тестирования для оценки производительности будущего развертывания не совсем объективно из-за большого числа факторов, влияющих на производительность в реальной жизни. Более того, многие из этих факторов лежат за пределами TLS (например, настройки HTTP Keep-Alive, кэширование и т.д.). В лучшем случае вы можете использовать эти цифры только для приблизительной оценки.
Также нельзя упускать из виду кое-что ещё. По умолчанию команда speed будет использовать только один процесс. У большинства серверов несколько ядер процессора, поэтому для определения того, как много операций TLS поддерживается сервером в целом, нужно указать в команде speed использовать несколько экземпляров в параллельном режиме. Это достигается с помощью параметра -multi. У моего сервера четыре ядра, поэтому я собираюсь использовать такую команду:
$ openssl speed -multi 4 rsa
[...]
OpenSSL 0.9.8k 25 Mar 2009
built on: Wed May 23 00:02:00 UTC 2012
options:bn(64,64) md2(int) rc4(ptr,char) des(idx,cisc,16,int) aes(partial) ↩
blowfish(ptr2)
compiler: cc -fPIC -DOPENSSL_PIC -DZLIB -DOPENSSL_THREADS -D_REENTRANT -DDSO_DLFCN ↩
-DHAVE_DLFCN_H -m64 -DL_ENDIAN -DTERMIO -O3 -Wa,--noexecstack -g -Wall -DMD32_REG_T=int ↩
-DOPENSSL_BN_ASM_MONT -DSHA1_ASM -DSHA256_ASM -DSHA512_ASM -DMD5_ASM -DAES_ASM
available timing options: TIMES TIMEB HZ=100 [sysconf value]
timing function used:
                  sign    verify    sign/s verify/s
rsa  512 bits 0.000030s 0.000003s  33264.5 363636.4
rsa 1024 bits 0.000143s 0.000008s   6977.9 125000.0
rsa 2048 bits 0.000917s 0.000027s   1090.7  37068.1
rsa 4096 bits 0.006123s 0.000094s    163.3  10652.6
Как и ожидалось, производительность возросла почти в четыре раза (я опять сужу по количеству сформированных электронных подписей RSA в секунду, поскольку эта выполняемая на сервере криптографическая операция потребляет больше всего ресурсов процессора и всегда является самым узким местом). Результат в 1090 подписей в секунду говорит о том, что этот сервер может обработать около 1000 новых TLS-соединений в секунду. В моем случае этого достаточно, даже с хорошим запасом прочности. Поскольку у меня на сервере также включено возобновление сеанса, я уверен, что он сможет поддерживать более 1000 TLS-соединений в секунду. Надеюсь, что когда-нибудь на этом сервере будет столько трафика, чтобы мне пришлось беспокоиться о производительности TLS.
Другая причина, по которой вам не следует слишком уж доверять выводу команды speed, — то, что по умолчанию она не использует наиболее быстрые из доступных реализаций шифров. В некотором смысле, вывод по умолчанию не отражает истинного состояния дел. Например, на серверах, поддерживающих установку инструкции AES-NI для ускорения вычислений AES, эта функция не будет использоваться по умолчанию при тестировании:
$ openssl speed aes-128-cbc
[...]
The 'numbers' are in 1000s of bytes per second processed.
type             16 bytes     64 bytes    256 bytes   1024 bytes   8192 bytes
aes-128 cbc      67546.70k    74183.00k    69278.82k   155942.87k   156486.38k
Для активации аппаратного ускорения нужно использовать параметр командной строки -evp:
$ openssl speed -evp aes-128-cbc
[...]
The 'numbers' are in 1000s of bytes per second processed.
type             16 bytes     64 bytes    256 bytes   1024 bytes   8192 bytes
aes-128-cbc     188523.36k   223595.37k   229763.58k   203658.58k   206452.14k
Создание частного удостоверяющего центра
Если вы хотите настроить свой собственный УЦ, всё необходимое для этого уже включено в OpenSSL. Пользовательский интерфейс этой задачи основан исключительно на командной строке и потому не очень удобен для пользователя, но, возможно, это и к лучшему. Прохождение процесса шаг за шагом очень познавательно, поскольку заставляет задуматься о каждом аспекте и даже о мельчайших деталях.
Образовательный аспект настройки частного УЦ — главная причина, по которой я бы рекомендовал этим заняться, но есть и другие. УЦ на базе OpenSSL, каким бы кустарным на первый взгляд он ни казался, вполне может удовлетворить потребности отдельного человека или небольшой группы. К примеру, в экспериментальной среде значительно лучше использовать частный УЦ, чем повсеместно пользоваться самоподписанными сертификатами. Кроме того, клиентские сертификаты, служащие для обеспечения двухфакторной аутентификации, могут значительно повысить безопасность ваших конфиденциальных веб-приложений.
Самая большая трудность в запуске частного УЦ состоит даже не в качественной настройке всего, а в обеспечении безопасности инфраструктуры. Например, корневой ключ должен храниться автономно (оффлайн), поскольку безопасность всего УЦ зависит от его конфиденциальности. С другой стороны, CRL и сертификаты ответчиков OCSP должны регулярно обновляться, что невозможно без применения корневого ключа.
По ходу работы с данным разделом вы создадите два конфигурационных файла: один для управления корневым УЦ (root-ca.conf), а другой для управления подчинённым УЦ (sub-ca.conf). Их можно создавать с нуля, следуя представленным здесь инструкциям, а можно скачать шаблоны этих конфигурационных файлов из моего GitHub-репозитория13. В последнем случае вы сэкономите какое-то время, однако при ручном составлении понимание процесса будет лучше.
Основной функционал и ограничения
Далее в этом разделе мы будем создавать частный УЦ, аналогичный по своей структуре публичным УЦ. Будет создан один корневой УЦ, от которого можно будет создавать подчинённые УЦ. Информацию об отзыве сертификатов мы будем предоставлять через CRL и ответчики OCSP. Для поддержания автономности корневого УЦ у ответчиков OCSP будут свои собственные идентификационные сущности. Это не самый простой частный удостоверяющий центр, который можно было бы организовать, но зато его защита будет построена правильным образом. В качестве бонуса мы сделаем подчинённый УЦ технически ограниченным, то есть ему будет разрешено выдавать сертификаты только для разрешённых имён хостов.
По окончании развёртывания УЦ корневой сертификат должен быть безопасно распространён среди всех предполагаемых клиентов. После этого можно начинать выпуск клиентских и серверных сертификатов. Основным ограничением данного варианта установки будет то, что ответчик OCSP предназначен главным образом для тестирования и не рассчитан на высокие нагрузки.
Создание корневого УЦ
Создание нового УЦ состоит из нескольких этапов: настройка, создание структуры каталогов и инициализация значимых для УЦ файлов, и, наконец, генерация корневых ключа и сертификата. В данном разделе мы рассмотрим весь этот процесс, а также основные операции, выполняемые в рамках УЦ.
Конфигурация корневого УЦ
Перед тем, как мы сможем приступить к собственно созданию УЦ, нам необходимо подготовить конфигурационный файл (root-ca.conf), в котором мы укажем OpenSSL, что же именно хотим получить в итоге. Большую часть времени (при повседневном использовании OpenSSL) подобные файлы конфигурации не требуются, однако для выполнения сложных операций, таких как создание корневого УЦ, они необходимы. Конфигурационные файлы OpenSSL весьма мощные; прежде чем продолжать, есть смысл ознакомиться с их возможностями (выполните man config в командной строке).
Первая часть конфигурационного файла содержит основную информацию об УЦ, такую как имя и базовый URL, а также компоненты отличительного имени УЦ. Из-за гибкости синтаксиса, эту информацию нужно предоставить лишь один раз:
[default]
name                    = root-ca
domain_suffix           = example.com
aia_url                 = http://$name.$domain_suffix/$name.crt
crl_url                 = http://$name.$domain_suffix/$name.crl
ocsp_url                = http://ocsp.$name.$domain_suffix:9080
default_ca              = ca_default
name_opt                = utf8,esc_ctrl,multiline,lname,align

[ca_dn]
countryName             = "GB"
organizationName        = "Example"
commonName              = "Root CA"
Вторая часть файла напрямую контролирует работу УЦ. Для получения полной информации о каждом параметре обратитесь к документации по команде ca (выполните man ca в командной строке). Большинство настроек говорят сами за себя; в основном мы сообщаем OpenSSL, где хотим хранить наши файлы. Поскольку этот корневой УЦ будет использоваться только для выпуска ключей и сертификатов подчиненных УЦ, я решил, что его сертификат будет действителен в течение 10 лет. Для формирования электронной подписи по умолчанию будет использован безопасный алгоритм хэширования SHA256.
Политика по умолчанию (policy_c_o_match) сконфигурирована таким образом, что все сертификаты, издаваемые данным УЦ, будут иметь те же значения в полях countryName и organizationName, что и в сертификате самого УЦ. Обычно в публичных УЦ так не делается, но для частного УЦ это вполне приемлемый вариант:
[ca_default]
home                    = .
database                = $home/db/index
serial                  = $home/db/serial
crlnumber               = $home/db/crlnumber
certificate             = $home/$name.crt
private_key             = $home/private/$name.key
RANDFILE                = $home/private/random
new_certs_dir           = $home/certs
unique_subject          = no
copy_extensions         = none
default_days            = 3650
default_crl_days        = 365
default_md              = sha256
policy                  = policy_c_o_match

[policy_c_o_match]
countryName             = match
stateOrProvinceName     = optional
organizationName        = match
organizationalUnitName  = optional
commonName              = supplied
emailAddress            = optional
Третья часть файла содержит конфигурацию для команды req, которая будет использоваться только один раз при создании самоподписанного корневого сертификата. Самой важной частью здесь являются расширения: значение в basicConstraints указывает на то, что это сертификат УЦ, а в keyUsage содержатся настройки, соответствующие этому сценарию:
[req]
default_bits            = 4096
encrypt_key             = yes
default_md              = sha256
utf8                    = yes
string_mask             = utf8only
prompt                  = no
distinguished_name      = ca_dn
req_extensions          = ca_ext

[ca_ext]
basicConstraints        = critical,CA:true
keyUsage                = critical,keyCertSign,cRLSign
subjectKeyIdentifier    = hash
В четвёртой части конфигурационного файла содержится информация, которая будет использоваться при создании сертификатов, издаваемых корневым удостоверяющим центром. Все эти сертификаты будут сертификатами УЦ (на что указывает содержимое расширения basicConstraints), но мы также задаём pathlen в ноль, а это означает, что создание дальнейших подчинённых УЦ (более глубокой вложенности) не допускается.
Все наши подчинённые УЦ будут ограничены в том смысле, что выданные ими сертификаты будут действительны только для определённых подмножеств доменных имён и только для ограниченного использования. Во-первых, в расширении extendedKeyUsage заданы только значения clientAuth и serverAuth, то есть ключи могут быть использованы только для аутентификации клиента и сервера TLS. Во-вторых, расширение nameConstraints ограничивает разрешённые имена хостов только значениями в пределах доменных имён example.com и example.org. В теории, такая настройка позволяет вам передать управление подчинёнными УЦ кому-то ещё, но при этом оставаться уверенным, что они не смогут выдавать сертификаты для произвольных имён хостов. При желании можно ограничить каждый подчинённый УЦ своим строго определённым (возможно, небольшим) пространством доменных имён. Требование об исключении двух диапазонов IP-адресов продиктовано «Базовыми требованиями» CA/Browser Forum14, в которых имеется определение технически ограниченного подчинённого УЦ.
На практике, установление ограничений на имена хостов работает не в полной мере, поскольку в настоящее время некоторые крупные платформы не распознают расширение nameConstraints. Если вы пометите это расширение как критичное, такие платформы будут отклонять ваши сертификаты. Этих проблем не возникнет, если вы не станете помечать расширение как критичное (как в нашем примере), но тогда некоторые другие платформы не будут его применять.
[sub_ca_ext]
authorityInfoAccess     = @issuer_info
authorityKeyIdentifier  = keyid:always
basicConstraints        = critical,CA:true,pathlen:0
crlDistributionPoints   = @crl_info
extendedKeyUsage        = clientAuth,serverAuth
keyUsage                = critical,keyCertSign,cRLSign
nameConstraints         = @name_constraints
subjectKeyIdentifier    = hash

[crl_info]
URI.0                   = $crl_url

[issuer_info]
caIssuers;URI.0         = $aia_url
OCSP;URI.0              = $ocsp_url

[name_constraints]
permitted;DNS.0=example.com
permitted;DNS.1=example.org
excluded;IP.0=0.0.0.0/0.0.0.0
excluded;IP.1=0:0:0:0:0:0:0:0/0:0:0:0:0:0:0:0
В финальной пятой части нашего файла указываются расширения, которые будут использоваться с сертификатом для подписи ответов OCSP. Чтобы иметь возможность запустить ответчик OCSP, мы генерируем специальный ключ (и сертификат) и делегируем ему возможность подписи OCSP. Как можно установить из расширений, этот сертификат не будет сертификатом УЦ:
[ocsp_ext]
authorityKeyIdentifier  = keyid:always
basicConstraints        = critical,CA:false
extendedKeyUsage        = OCSPSigning
keyUsage                = critical,digitalSignature
subjectKeyIdentifier    = hash
Структура каталогов корневого УЦ
На следующем шаге мы создаём определённую в предыдущем разделе структуру каталогов и инициализируем некоторые файлы, которые будут использованы при выполнении операций УЦ:
$ mkdir root-ca
$ cd root-ca
$ mkdir certs db private
$ chmod 700 private
$ touch db/index
$ openssl rand -hex 16  > db/serial
$ echo 1001 > db/crlnumber
Будут использоваться следующие поддиректории:
certs/-
Хранилище сертификатов; новые сертификаты будут размещаться здесь по мере их выдачи.
db/-
В данной директории находится база данных сертификатов (index), а также файлы, в которых хранятся серийные номера следующих сертификата и CRL. По мере необходимости OpenSSL будет создавать здесь дополнительные файлы.
private/-
В этой директории будут храниться закрытые ключи, один для корневого УЦ и ещё один для ответчика OCSP. Важно, чтобы у других пользователей не было доступа к этой директории. На самом деле, если вы собираетесь серьёзно относиться к этому УЦ, на машине, где хранятся корневые материалы, должно быть минимально возможное количество учётных записей пользователей.
Примечание: При создании нового сертификата удостоверяющего центра важно инициализировать серийные номера сертификатов с помощью генератора случайных чисел, как сделано у меня в этом разделе. Это очень полезно, если вам когда-нибудь придётся создавать и развёртывать несколько сертификатов УЦ с одинаковым отличительным именем (обычно такое случается, если вы допустили ошибку и вынуждены начинать всё заново); конфликтов не будет, потому что сертификаты будут иметь разные серийные номера.
Генерация корневого УЦ
Мы разобьём создание корневого УЦ на два этапа. На первом мы сгенерируем ключ и CSR. Вся необходимая информация будет взята из конфигурационного файла, который мы зададим в параметре -config:
$ openssl req -new
    -config root-ca.conf
    -out root-ca.csr
    -keyout private/root-ca.key
На втором этапе мы создадим самоподписанный сертификат. Параметр -extensions указывает на раздел ca_ext конфигурационного файла, активирующий расширения, предназначенные для корневого удостоверяющего центра:
$ openssl ca -selfsign
    -config root-ca.conf
    -in root-ca.csr
    -out root-ca.crt
    -extensions ca_ext
Структура файла базы данных
База данных в файле db/index представляет собой обычный текстовый файл, содержащий информацию о сертификатах, по одному сертификату в каждой строке. Сразу после создания корневого УЦ в нём будет содержаться одна строка:
V 240706115345Z 1001 unknown /C=GB/O=Example/CN=Root CA
В каждой строке шесть значений, разделённых знаками табуляции:
-
Флаг статуса (
Vдля валидного сертификата,Rдля отозванного,Eсертификата с истёкшим сроком действия). -
Дата окончания срока действия (в формате
YYMMDDHHMMSSZ). -
Дата отзыва, либо пустое поле, если сертификат не отозван.
-
Серийный номер (в шестнадцатеричном формате).
-
Расположение файла или
unknown, если оно неизвестно. -
Уникальное (отличительное) имя.
Операции, выполняемые в рамках корневого УЦ
Для генерации CRL в новом УЦ используйте параметр -gencrl команды ca:
$ openssl ca -gencrl
    -config root-ca.conf
    -out root-ca.crl
Для выпуска сертификата выполняйте команду ca с нужными параметрами. Важно, чтобы параметр -extensions указывал на требуемый раздел конфигурационного файла (вы же не собираетесь создать ещё один корневой удостоверяющий центр).
$ openssl ca
    -config root-ca.conf
    -in sub-ca.csr
    -out sub-ca.crt
    -extensions sub_ca_ext
Для отзыва сертификата используйте параметр -revoke команды ca; вам необходимо иметь копию сертификата, который вы хотите отозвать. Поскольку все сертификаты хранятся в директории certs/, вам нужно знать только его серийный номер. Если вы знаете уникальное имя субъекта сертификата, можно найти серийный номер в базе данных.
Выберите корректную причину отзыва и укажите её в параметре -crl_reason. Возможные варианты: unspecified, keyCompromise, CACompromise, affiliationChanged, superseded, cessationOfOperation, certificateHold и removeFromCRL.
$ openssl ca
    -config root-ca.conf
    -revoke certs/1002.pem
    -crl_reason keyCompromise
Создание сертификата для подписи ответов OCSP
Сначала надо создать ключ и CSR для ответчика OCSP. Поскольку ключ и будущий сертификат не будут ключом и сертификатом удостоверяющего центра, при выполнении этой оперции мы не будем ссылаться на наш конфигурационный файл:
$ openssl req -new
    -newkey rsa:2048
    -subj "/C=GB/O=Example/CN=OCSP Root Responder"
    -keyout private/root-ocsp.key
    -out root-ocsp.csr
Затем мы выпустим сертификат ответчика OCSP, используя наш корневой УЦ. В качестве значения параметра -extensions мы укажем ocsp_ext, в этом разделе конфигурационного файла заданы расширения, относящиеся к подписанию ответов OCSP. Я сократил срок действия нового сертификата до 365 дней (вместо установленных по умолчанию 3650 дней). Поскольку в подобных сертификатах OCSP не содержится информация об отзыве, они не могут быть отозваны. По этой причине целесообразно установить срок действия такого сертификата настолько коротким, насколько это возможно. Хорошим выбором будет 30 дней, при условии, что вы готовы создавать новые сертификаты с такой частотой:
$ openssl ca
    -config root-ca.conf
    -in root-ocsp.csr
    -out root-ocsp.crt
    -extensions ocsp_ext
    -days 30
Теперь мы полностью готовы к запуску ответчика OCSP. Для тестирования можно сделать это с той же машины, на которой размещается корневой УЦ, но в реальной производственной среде необходимо переместить ключ и сертификат ответчика OCSP в другое место.
$ openssl ocsp
    -port 9080
    -index db/index
    -rsigner root-ocsp.crt
    -rkey private/root-ocsp.key
    -CA root-ca.crt
    -text
Работу ответчика OCSP можно протестировать следующей командой:
$ openssl ocsp
    -issuer root-ca.crt
    -CAfile root-ca.crt
    -cert root-ocsp.crt
    -url http://127.0.0.1:9080
В выводе команды verify OK означает, что проверка подписей прошла успешно, а good — что сертификат не был отозван.
Response verify OK
root-ocsp.crt: good
        This Update: Jul  9 18:45:34 2014 GMT
Создание подчинённого УЦ
Процесс создания подчиненного УЦ во многом аналогичен тому, который мы выполняли для корневого УЦ. В этом разделе мы главным образом будем останавливаться на их различиях, всё остальное можно найти в предыдущем разделе.
Конфигурация подчинённого УЦ
Чтобы составить конфигурационный файл для подчинённого УЦ (sub-ca.conf), возьмём за основу файл, который мы использовали для корневого УЦ, и внесём в него перечисленные ниже изменения. Мы изменим имя на sub-ca и будем использовать другое отличительное имя. Ответчик OCSP будет принимать запросы на другом порту, но лишь потому, что команда ocsp не умеет работать с виртуальными хостами. Если для организации ответчика OCSP используется полноценный веб-сервер, можно вообще обойтись без специализированных портов. По умолчанию срок действия новых сертификатов составит 365 дней, свежий CRL мы будем генерировать каждые 30 дней.
Изменение параметра copy_extensions на значение copy означает, что указанные в CSR расширения будут скопированы в сертификат, но только в том случае, если аналогичные расширения не были заданы в нашей конфигурации. При такой настройке те, кто готовят CSR, могут поместить в него необходимые альтернативные имена, и информация о них будет собрана и помещена в сертификат. Эта функция может быть потенциально опасна (вы позволяете стороннему лицу иметь ограниченный прямой контроль над тем, что попадёт в сертификат), но в небольших окружениях это вполне приемлемо:
[default]
name                    = sub-ca
ocsp_url                = http://ocsp.$name.$domain_suffix:9081

[ca_dn]
countryName             = "GB"
organizationName        = "Example"
commonName              = "Sub CA"

[ca_default]
default_days            = 365
default_crl_days        = 30
copy_extensions         = copy
В конце конфигурационного файла добавим два новых профиля: для клиента и для сервера. Различия между ними будут только в расширениях keyUsage и extendedKeyUsage. Обратите внимание, что мы указали расширение basicConstraints, но задали его в false. Это сделано потому, что мы копируем расширения из CSR. Если бы мы пропустили данное расширение, то вполне могли бы получить его из CSR с тем значением, которое указано там:
[server_ext]
authorityInfoAccess     = @issuer_info
authorityKeyIdentifier  = keyid:always
basicConstraints        = critical,CA:false
crlDistributionPoints   = @crl_info
extendedKeyUsage        = clientAuth,serverAuth
keyUsage                = critical,digitalSignature,keyEncipherment
subjectKeyIdentifier    = hash

[client_ext]
authorityInfoAccess     = @issuer_info
authorityKeyIdentifier  = keyid:always
basicConstraints        = critical,CA:false
crlDistributionPoints   = @crl_info
extendedKeyUsage        = clientAuth
keyUsage                = critical,digitalSignature
subjectKeyIdentifier    = hash
После того, как вы доведёте до ума конфигурационный файл, создайте структуру каталогов, следуя тем же инструкциям, что и для корневого УЦ, только не забудьте указать другое имя директории, например, sub-ca.
Генерация подчинённого УЦ
Как и в прошлый раз, создание подчинённого УЦ будем выполнять в два этапа. На первом сгенерируем ключ и CSR. Всю необходимую информацию получим из конфигурационного файла, используя параметр -config.
$ openssl req -new
    -config sub-ca.conf
    -out sub-ca.csr
    -keyout private/sub-ca.key
На втором этапе мы воспользуемся корневым УЦ для выпуска сертификата. Параметр -extensions указывает на раздел конфигурационного файла sub_ca_ext, в котором активируются расширения, соответствующие подчинённому УЦ.
$ openssl ca
    -config root-ca.conf
    -in sub-ca.csr
    -out sub-ca.crt
    -extensions sub_ca_ext
Операции, выполняемые в рамках подчинённого УЦ
Для выпуска сертификата сервера при обработке CSR в параметре -extensions указывается server_ext:
$ openssl ca
    -config sub-ca.conf
    -in server.csr
    -out server.crt
    -extensions server_ext
Для выпуска сертификата клиента при обработке CSR в параметре -extensions указывается client_ext:
$ openssl ca
    -config sub-ca.conf
    -in client.csr
    -out client.crt
    -extensions client_ext
Примечание: При поступлении нового запроса на подписание сертификата, вся содержащаяся в нём информация должна быть представлена вам для проверки перед выполнением операции выпуска сертификата. Всегда следует проверить информацию и убедиться в том, что всё в порядке, но особенно в том случае, если CSR был подготовлен сторонним лицом. Обращайте особое внимание на отличительное имя сертификата, а также расширения basicConstraints и subjectAlternativeName.
Генерация CRL и отзыв сертификата осуществляются также, как и для корневого УЦ. Отличается лишь порт ответчика OCSP, для подчинённого УЦ это будет 9081. Рекомендуется, чтобы ответчик использовал свой собственный сертификат, что позволит избежать хранения подчинённого УЦ на общедоступном сервере.
Примечания
[1] Буквы “eay” в названии SSLeay представляют собой инициалы разработчика Eric A. Young.
[2] BoringSSL (Chromium, проверено 30 июня 2015 г.)
[3] Win32 OpenSSL (Shining Light Productions, проверено 3 июля 2014 г.)
[4] Бинарники и модули Apache 2.4 VC14 (Apache Lounge, проверено 15 июля 2015 г.)
[5] Пакет исходных кодов “openssl” в Precise (Ubuntu, проверено 3 июля 2014 г.)
[6] Компиляция с усиленной защитой в Ubuntu и Debian (Kees Cook, 3 февраля 2014 г.)
[7] Существуют организации, в которых придерживаются очень строгих требований обеспечения безопасности, в частности, защита закрытых ключей в них должна быть обеспечена любой ценой. Решением для таких организаций может стать инвестирование в Аппаратные модули безопасности (Hardware Security Module, HSM) — продукты, специально разработанные для того, чтобы сделать извлечение ключей невозможным даже при физическом доступе к серверу. Для достижения этого HSM не только генерируют и хранят ключи, но также выполняют все необходимые операции (например, генерацию электронной подписи). Обычно HSM очень дороги.
[8] RFC 2985: PKCS #9: Избранные объектные классы и типы атрибутов, версия 2.0 (M. Nystrom и B. Kaliski, ноябрь 2000 г.)
[9] Криптография/Атака «встреча посередине» (Wikibooks, проверено 31 марта 2014 г.)
[10] Публикация «Attacking Triple Encryption» («Техники атак на 3DES») (Stefan Lucks, 1998 г.)
[11] Публикация «On the Security of RC4 in TLS and WPA» («О безопасности RC4 в TLS и WPA») (AlFardan и другие, 13 марта 2013 г.)
[12] RFC 7905: Наборы алгоритмов шифрования для TLS ChaCha20-Poly1305 (Langley и другие, июнь 2016 г.)
[13] Шаблоны конфигурации УЦ для OpenSSL (GitHub-репозиторий книги «Bulletproof SSL and TLS», проверено 31 марта 2017 г.)
[14] «Базовые требования» (The CA/Browser Forum, проверено 9 июля 2014 г.)
Copyright © 2020 Feisty Duck. Все права защищены.
Переведено участниками проекта Pro-LDAP.ru в 2020 году.

Одним из самых популярных инструментов для создания и управления SSL-сертификатами является библиотека OpenSSL. В этой статье я расскажу о часто используемых командах OpenSSL.
Некоторые аббревиатуры, относящиеся к сертификатам:
- SSL – Secure Socket Layer (уровень защищённых cокетов).
- CSR – Certificate Signing Request (запрос на получение сертификата).
- TLS – Transport Layer Security (протокол защиты транспортного уровня).
- PEM – Privacy Enhanced Mail (формат файлов для хранения и отправки криптографических ключей).
- SHA – Secure Hash Algorithm (алгоритм криптографического хеширования).
- PKCS – Public-Key Cryptography Standards (стандарты криптографии с открытым ключом).
- Создание нового секретного ключа и запрос на получение сертификата
- Создание самозаверяемого сертификата
- Верификация CSR-файла
- Создание секретного RSA-ключа
- Удаление пароля-фразы из ключа
- Верификация секретного ключа
- Верификация файла сертификата
- Верификация центра сертификации
- Проверка хеш-значения сертификата
- Преобразование формата DER в PEM
- Преобразование формата PEM в DER
- Преобразование сертификата и секретного ключа в формат PKCS#12
- Создание CSR с использованием существующего секретного ключа
- Проверка содержимого сертификата в формате PKCS12
- Преобразование формата PKCS12 в PEM-сертификат
- Проверка SSL-сертификата определенного URL-адреса
- Определение версии OpenSSL
- Проверка даты истечения срока действия PEM-файла
- Проверка срока действия SSL-сертификата для URL-адреса
- Проверка, принимается ли на URL-адресеSSL V2 или V
- Проверка того, принимается ли конкретный шифр на URL-адресе
opensslreq -out geekflare.csr -newkey rsa:2048 -nodes -keyoutgeekflare.key
Команда генерирует CSR и файл 2048-битногоRSA-ключа. Если вы собираетесь использовать этот сертификат на Apache или Nginx, то необходимо отправить CSR-файл в центр сертификации. Он предоставит вам заверенный сертификат (в формате der или pem), который нужно настроить на веб-сервере Apache или Nginx.
opensslreq -x509 -sha256 -nodes -newkey rsa:2048 -keyoutgfselfsigned.key -out gfcert.pem
Команда генерирует самозаверенный сертификат и файл 2048-битного RSA-ключа. Я также включил в команду хеш-функцию sha256, поскольку она считается наиболее безопасной.
Совет: По умолчанию команда генерирует самозаверенный сертификат, действительный только один месяц. Для увеличения этого срока переопределите параметра — days.
Пример: для получения сертификата, действительного два года.
opensslreq -x509 -sha256 -nodes -days 730 -newkey rsa:2048 -keyoutgfselfsigned.key -out gfcert.pem
opensslreq -noout -text -in geekflare.csr
Верификация необходима, чтобы отправленный в регистрационный центр CSR-файл содержал всю необходимую информацию.
opensslgenrsa -out private.key 2048
Если нужно создать секретный RSA-ключ, используйте приведенную выше команду.
opensslrsa -in certkey.key -out nopassphrase.key
Если вы используете составной пароль (фразу) в файле ключа и работаете на Apache, то при каждом запуске нужно вводить секретную фразу. Если вас это раздражает, то можно использовать приведенную выше команду, чтобы удалить пароль-фразу из существующего ключа.
opensslrsa -in certkey.key –check
Если вы сомневаетесь в файле ключа, то можете использовать данную команду.
openssl x509 -in certfile.pem -text –noout
Если хотите проверить данные сертификата, такие как CN, OU и т.д., используйте приведенную выше команду, которая предоставит данные сертификата.
openssl x509 -in certfile.pem -noout -issuer -issuer_hash
Для проверки центра сертификации можно использовать приведенную выше команду.
openssl x509 -noout -hash -in bestflare.pem
openssl x509 –inform der –in sslcert.der –out sslcert.pem
Центр сертификации предоставляет SSL-сертификат в формате .der. Если вам необходимо использовать его в формате apache или .pem, примените приведенную выше команду для соответствующего преобразования.
openssl x509 –outform der –in sslcert.pem –out sslcert.der
Если необходимо изменить формат .pem на .der.
openssl pkcs12 –export –out sslcert.pfx –inkeykey.pem –in sslcert.pem
Если необходимо использовать сертификат с Java-приложением, принимающим только формат PKCS#12, примените приведенную выше команду. Она генерирует один pfx файл, содержащий сертификат и ключ.
Совет. Вы также можете включить цепочку сертификатов, передав параметр -chain, как показано в примере ниже.
openssl pkcs12 –export –out sslcert.pfx –inkeykey.pem –in sslcert.pem -chain cacert.pem
opensslreq –out certificate.csr –keyexisting.key –new
Если не хотите создавать новый секретный ключ вместо существующего, выполните приведенную выше команду.
openssl pkcs12 –info –nodes –in cert.p12
PKCS12 является двоичным форматом, поэтому вы не сможете просмотреть его содержимое в текстовом редакторе. Для просмотра файла в формате PKCS12 используйте приведенную выше команду.
openssl pkcs12 –in cert.p12 –out cert.pem
Если нужно использовать существующий файл в формате pkcs12 на Apache или только в формате pem, в этом поможет приведенная выше команда.
openssls_client -connect yoururl.com:443 –showcerts
Я часто использую эту команду для проверки SSL-сертификата URL-адреса. Это удобно для проверки данных протокола, шифрования и сертификата.
openssl x509 -noout -in certificate.pem -dates
Команда выведет дату в формате notBefore и notAfter. notAfter — это та дата, которая нужна, чтобы определить, истек ли срок действия сертификата или он еще действителен.
Пример:
[root@Chandan opt]# openssl x509 -noout -in bestflare.pem -dates
notBefore=Jul 4 14:02:45 2015 GMT
notAfter=Aug 4 09:46:42 2015 GMT
[root@Chandan opt]#
openssls_client -connect secureurl.com:443 2>/dev/null | openssl x509 -noout –enddate
Команда позволяет контролировать дату истечения срока действия SSL- сертификата удаленно или для конкретного URL-адреса.
Пример:
[root@Chandan opt]# openssls_client -connect google.com:443 2>/dev/null | openssl x509 -noout -enddate

notAfter=Dec 8 00:00:00 2015 GMT
Чтобы проверить SSL V2:
openssls_client -connect secureurl.com:443 -ssl2
Чтобы проверить SSL V3:
openssls_client -connect secureurl.com:443 –ssl3
Чтобы проверить TLS 1.0:
openssls_client -connect secureurl.com:443 –tls1
Чтобы проверить TLS 1.1:
openssls_client -connect secureurl.com:443 –tls1_1
Чтобы проверить TLS 1.2:
openssls_client -connect secureurl.com:443 –tls1_2
Если необходимо проверить, включен ли SSL V2 / V3 или нет, используйте приведенную выше команду. Если он включен, то вы получите сообщение «CONNECTED», в противном случае –сообщение «handshake failure».
openssls_client -cipher 'ECDHE-ECDSA-AES256-SHA' -connect secureurl:443
Если хотите знать, принимаются ли некоторые слабые шифры, то можете использовать приведенную выше команду.
Для этого необходимо задать шифр и URL-адрес. Если шифр будет принят, вы получите сообщение «CONNECTED», иначе – сообщение «handshake failure».
Надеюсь, что приведенные выше команды помогли вам узнать больше об использовании OpenSSL для управления SSL-сертификатами.
Build and Install
This document describes installation on all supported operating
systems (the Unix/Linux family, including macOS), OpenVMS,
and Windows).
Table of Contents
- Prerequisites
- Notational Conventions
- Quick Installation Guide
- Building OpenSSL
- Installing OpenSSL
- Configuration Options
- API Level
- Cross Compile Prefix
- Build Type
- Directories
- Compiler Warnings
- ZLib Flags
- Seeding the Random Generator
- Enable and Disable Features
- Displaying configuration data
- Installation Steps in Detail
- Configure
- Build
- Test
- Install
- Advanced Build Options
- Environment Variables
- Makefile Targets
- Running Selected Tests
- Troubleshooting
- Configuration Problems
- Build Failures
- Test Failures
- Notes
- Notes on multi-threading
- Notes on shared libraries
- Notes on random number generation
Prerequisites
To install OpenSSL, you will need:
- A make implementation
- Perl 5 with core modules (please read NOTES.PERL)
- The Perl module Text::Template (please read NOTES.PERL)
- an ANSI C compiler
- a development environment in the form of development libraries and C
header files - a supported operating system
For additional platform specific requirements, solutions to specific
issues and other details, please read one of these:
- NOTES.UNIX — notes for Unix like systems
- NOTES.VMS — notes related to OpenVMS
- NOTES.WIN — notes related to the Windows platform
- NOTES.DJGPP — building for DOS with DJGPP
- NOTES.ANDROID — building for Android platforms (using NDK)
- NOTES.VALGRIND — testing with Valgrind
- NOTES.PERL — some notes on Perl
Notational conventions
Throughout this document, we use the following conventions.
Commands
Any line starting with a dollar sign is a command line.
The dollar sign indicates the shell prompt and is not to be entered as
part of the command.
Choices
Several words in curly braces separated by pipe characters indicate a
mandatory choice, to be replaced with one of the given words.
For example, the line
$ echo { WORD1 | WORD2 | WORD3 }
represents one of the following three commands
$ echo WORD1
- or -
$ echo WORD2
- or -
$ echo WORD3
One or several words in square brackets separated by pipe characters
denote an optional choice. It is similar to the mandatory choice,
but it can also be omitted entirely.
So the line
$ echo [ WORD1 | WORD2 | WORD3 ]
represents one of the four commands
$ echo WORD1
- or -
$ echo WORD2
- or -
$ echo WORD3
- or -
$ echo
Arguments
Mandatory arguments are enclosed in double curly braces.
A simple example would be
which is to be understood to use the command type on some file name
determined by the user.
Optional Arguments are enclosed in double square brackets.
Note that the notation assumes spaces around {, }, [, ], {{, }} and
[[, ]]. This is to differentiate from OpenVMS directory
specifications, which also use [ and ], but without spaces.
Quick Installation Guide
If you just want to get OpenSSL installed without bothering too much
about the details, here is the short version of how to build and install
OpenSSL. If any of the following steps fails, please consult the
Installation in Detail section below.
Building OpenSSL
Use the following commands to configure, build and test OpenSSL.
The testing is optional, but recommended if you intend to install
OpenSSL for production use.
Unix / Linux / macOS
$ ./config
$ make
$ make test
OpenVMS
Use the following commands to build OpenSSL:
$ @config
$ mms
$ mms test
Windows
If you are using Visual Studio, open a Developer Command Prompt and
and issue the following commands to build OpenSSL.
$ perl Configure { VC-WIN32 | VC-WIN64A | VC-WIN64I | VC-CE }
$ nmake
$ nmake test
As mentioned in the Choices section, you need to pick one
of the four Configure targets in the first command.
Most likely you will be using the VC-WIN64A target for 64bit Windows
binaries (AMD64) or VC-WIN32 for 32bit Windows binaries (X86).
The other two options are VC_WIN64I (Intel IA64, Itanium) and
VC-CE (Windows CE) are rather uncommon nowadays.
Installing OpenSSL
The following commands will install OpenSSL to a default system location.
Danger Zone: even if you are impatient, please read the following two
paragraphs carefully before you install OpenSSL.
For security reasons the default system location is by default not writable
for unprivileged users. So for the final installation step administrative
privileges are required. The default system location and the procedure to
obtain administrative privileges depends on the operating sytem.
It is recommended to compile and test OpenSSL with normal user privileges
and use administrative privileges only for the final installation step.
On some platforms OpenSSL is preinstalled as part of the Operating System.
In this case it is highly recommended not to overwrite the system versions,
because other applications or libraries might depend on it.
To avoid breaking other applications, install your copy of OpenSSL to a
different location which is not in
the global search path for system libraries.
Unix / Linux / macOS
Depending on your distribution, you need to run the following command as
root user or prepend sudo to the command:
By default, OpenSSL will be installed to
More precisely, the files will be installed into the subdirectories
/usr/local/bin
/usr/local/lib
/usr/local/include
...
depending on the file type, as it is custom on Unix-like operating systems.
OpenVMS
Use the following command to install OpenSSL.
By default, OpenSSL will be installed to
SYS$COMMON:[OPENSSL-'version'...]
where ‘version’ is the OpenSSL version number with underscores instead
of periods.
Windows
If you are using Visual Studio, open the Developer Command Prompt elevated
and issue the following command.
The easiest way to elevate the Command Prompt is to press and hold down
the both the <CTRL> and <SHIFT> key while clicking the menu item in the
task menu.
The default installation location is
for native binaries, or
C:Program Files (x86)OpenSSL
for 32bit binaries on 64bit Windows (WOW64).
Installing to a different location
To install OpenSSL to a different location (for example into your home
directory for testing purposes) run config like this:
On Unix
$ ./config --prefix=/opt/openssl --openssldir=/usr/local/ssl
On OpenVMS
$ @config --prefix=PROGRAM:[INSTALLS] --openssldir=SYS$MANAGER:[OPENSSL]
Note: if you do add options to the configuration command, please make sure
you’ve read more than just this Quick Start, such as relevant NOTES.* files,
the options outline below, as configuration options may change the outcome
in otherwise unexpected ways.
Configuration Options
There are several options to ./config (or ./Configure) to customize
the build (note that for Windows, the defaults for --prefix and
--openssldir depend in what configuration is used and what Windows
implementation OpenSSL is built on. More notes on this in NOTES.WIN):
API Level
Build the OpenSSL libraries to support the API for the specified version.
If no-deprecated is also given, don’t build with support
for deprecated APIs in or below the specified version number. For example,
addding
--api=1.1.0 no-deprecated
will remove support for all APIs that were deprecated in OpenSSL version
1.1.0 or below. This is a rather specialized option for developers.
If you just intend to remove all deprecated APIs up to the current version
entirely, just specify no-deprecated.
If --api isn’t given, it defaults to the current (minor) OpenSSL version.
Cross Compile Prefix
--cross-compile-prefix=PREFIX
The PREFIX to include in front of commands for your toolchain.
It is likely to have to end with dash, e.g. a-b-c- would invoke GNU compiler as
a-b-c-gcc, etc. Unfortunately cross-compiling is too case-specific to put
together one-size-fits-all instructions. You might have to pass more flags or
set up environment variables to actually make it work. Android and iOS cases are
discussed in corresponding Configurations/15-*.conf files. But there are cases
when this option alone is sufficient. For example to build the mingw64 target on
Linux --cross-compile-prefix=x86_64-w64-mingw32- works. Naturally provided
that mingw packages are installed. Today Debian and Ubuntu users have option to
install a number of prepackaged cross-compilers along with corresponding
run-time and development packages for «alien» hardware. To give another example
--cross-compile-prefix=mipsel-linux-gnu- suffices in such case. Needless to
mention that you have to invoke ./Configure, not ./config, and pass your target
name explicitly. Also, note that --openssldir refers to target’s file system,
not one you are building on.
Build Type
Build OpenSSL with debugging symbols and zero optimization level.
Build OpenSSL without debugging symbols. This is the default.
Directories
libdir
The name of the directory under the top of the installation directory tree
(see the --prefix option) where libraries will be installed. By default
this is «lib». Note that on Windows only static libraries (*.lib) will
be stored in this location. Shared libraries (*.dll) will always be
installed to the «bin» directory.
openssldir
Directory for OpenSSL configuration files, and also the default certificate
and key store. Defaults are:
Unix:           /usr/local/ssl
Windows:        C:Program FilesCommon FilesSSL
OpenVMS:        SYS$COMMON:[OPENSSL-COMMON]
For 32bit Windows applications on Windows 64bit (WOW64), always replace
C:Program Files by C:Program Files (x86).
prefix
The top of the installation directory tree. Defaults are:
Unix:           /usr/local
Windows:        C:Program FilesOpenSSL
OpenVMS:        SYS$COMMON:[OPENSSL-'version']
Compiler Warnings
This is a developer flag that switches on various compiler options recommended
for OpenSSL development. It only works when using gcc or clang as the compiler.
If you are developing a patch for OpenSSL then it is recommended that you use
this option where possible.
ZLib Flags
with-zlib-include
The directory for the location of the zlib include file. This option is only
necessary if enable-zlib is used and the include file is not
already on the system include path.
with-zlib-lib
On Unix: this is the directory containing the zlib library.
If not provided the system library path will be used.
On Windows: this is the filename of the zlib library (with or
without a path). This flag must be provided if the
zlib-dynamic option is not also used. If zlib-dynamic is used
then this flag is optional and defaults to «ZLIB1» if not provided.
On VMS: this is the filename of the zlib library (with or without a path).
This flag is optional and if not provided then «GNV$LIBZSHR», «GNV$LIBZSHR32»
or «GNV$LIBZSHR64» is used by default depending on the pointer size chosen.
Seeding the Random Generator
--with-rand-seed=seed1[,seed2,...]
A comma separated list of seeding methods which will be tried by OpenSSL
in order to obtain random input (a.k.a «entropy») for seeding its
cryptographically secure random number generator (CSPRNG).
The current seeding methods are:
os
Use a trusted operating system entropy source.
This is the default method if such an entropy source exists.
getrandom
Use the getrandom(2) or equivalent system call.
devrandom
Use the first device from the DEVRANDOM list which can be opened to read
random bytes. The DEVRANDOM preprocessor constant expands to
"/dev/urandom","/dev/random","/dev/srandom"
on most unix-ish operating systems.
egd
Check for an entropy generating daemon.
rdcpu
Use the RDSEED or RDRAND command if provided by the CPU.
librandom
Use librandom (not implemented yet).
none
Disable automatic seeding. This is the default on some operating systems where
no suitable entropy source exists, or no support for it is implemented yet.
For more information, see the section Notes on random number generation
at the end of this document.
Enable and Disable Features
Feature options always come in pairs, an option to enable feature xxxx, and
and option to disable it:
[ enable-xxxx | no-xxxx ]
Whether a feature is enabled or disabled by default, depends on the feature.
In the following list, always the non-default variant is documented: if
feature xxxx is disabled by default then enable-xxxx is documented and
if feature xxxx is enabled by default then no-xxxx is documented.
no-afalgeng
Don’t build the AFALG engine.
This option will be forced on a platform that does not support AFALG.
enable-ktls
Build with Kernel TLS support.
This option will enable the use of the Kernel TLS data-path, which can improve
performance and allow for the use of sendfile and splice system calls on
TLS sockets. The Kernel may use TLS accelerators if any are available on the
system. This option will be forced off on systems that do not support the
Kernel TLS data-path.
enable-asan
Build with the Address sanitiser.
This is a developer option only. It may not work on all platforms and should
never be used in production environments. It will only work when used with
gcc or clang and should be used in conjunction with the no-shared
option.
no-asm
Do not use assembler code.
This should be viewed as debugging/troubleshooting option rather than for
production use. On some platforms a small amount of assembler code may still
be used even with this option.
no-async
Do not build support for async operations.
no-autoalginit
Don’t automatically load all supported ciphers and digests.
Typically OpenSSL will make available all of its supported ciphers and digests.
For a statically linked application this may be undesirable if small executable
size is an objective. This only affects libcrypto. Ciphers and digests will
have to be loaded manually using EVP_add_cipher() and EVP_add_digest() if this
option is used. This option will force a non-shared build.
no-autoerrinit
Don’t automatically load all libcrypto/libssl error strings.
Typically OpenSSL will automatically load human readable error strings. For a
statically linked application this may be undesirable if small executable size
is an objective.
no-autoload-config
Don’t automatically load the default openssl.cnf file.
Typically OpenSSL will automatically load a system config file which configures
default SSL options.
enable-buildtest-c++
While testing, generate C++ buildtest files that simply check that the public
OpenSSL header files are usable standalone with C++.
Enabling this option demands extra care. For any compiler flag given directly
as configuration option, you must ensure that it’s valid for both the C and
the C++ compiler. If not, the C++ build test will most likely break. As an
alternative, you can use the language specific variables, CFLAGS and CXXFLAGS.
no-capieng
Don’t build the CAPI engine.
This option will be forced if on a platform that does not support CAPI.
no-cmp
Don’t build support for Certificate Management Protocol (CMP).
no-cms
Don’t build support for Cryptographic Message Syntax (CMS).
no-comp
Don’t build support for SSL/TLS compression.
If this option is enabled (the default), then compression will only work if
the zlib or zlib-dynamic options are also chosen.
enable-crypto-mdebug
This now only enables the failed-malloc feature.
enable-crypto-mdebug-backtrace
This is a no-op; the project uses the compiler’s address/leak sanitizer instead.
no-ct
Don’t build support for Certificate Transparency (CT).
no-deprecated
Don’t build with support for deprecated APIs up until and including the version
given with --api (or the current version, if --api wasn’t specified).
no-dgram
Don’t build support for datagram based BIOs.
Selecting this option will also force the disabling of DTLS.
no-dso
Don’t build support for loading Dynamic Shared Objects (DSO)
enable-devcryptoeng
Build the /dev/crypto engine.
This option is automatically selected on the BSD platform, in which case it can
be disabled with no-devcryptoeng.
no-dynamic-engine
Don’t build the dynamically loaded engines.
This only has an effect in a shared build.
no-ec
Don’t build support for Elliptic Curves.
no-ec2m
Don’t build support for binary Elliptic Curves
enable-ec_nistp_64_gcc_128
Enable support for optimised implementations of some commonly used NIST
elliptic curves.
This option is only supported on platforms:
- with little-endian storage of non-byte types
- that tolerate misaligned memory references
- where the compiler:
- supports the non-standard type
__uint128_t - defines the built-in macro
__SIZEOF_INT128__
- supports the non-standard type
enable-egd
Build support for gathering entropy from the Entropy Gathering Daemon (EGD).
no-engine
Don’t build support for loading engines.
no-err
Don’t compile in any error strings.
enable-external-tests
Enable building of integration with external test suites.
This is a developer option and may not work on all platforms. The following
external test suites are currently supported:
- BoringSSL test suite
- Python PYCA/Cryptography test suite
- krb5 test suite
See the file [test/README.external]/(test/README.external) for further details.
no-filenames
Don’t compile in filename and line number information (e.g. for errors and
memory allocation).
no-fips
Don’t compile the FIPS provider
enable-fuzz-libfuzzer, enable-fuzz-afl
Build with support for fuzzing using either libfuzzer or AFL.
These are developer options only. They may not work on all platforms and
should never be used in production environments.
See the file fuzz/README.md for further details.
no-gost
Don’t build support for GOST based ciphersuites.
Note that if this feature is enabled then GOST ciphersuites are only available
if the GOST algorithms are also available through loading an externally supplied
engine.
no-legacy
Don’t build the legacy provider.
Disabling this also disables the legacy algorithms: MD2 (already disabled by default).
no-makedepend
Don’t generate dependencies.
no-module
Don’t build any dynamically loadable engines.
This also implies ‘no-dynamic-engine’.
no-multiblock
Don’t build support for writing multiple records in one go in libssl
Note: this is a different capability to the pipelining functionality.
no-nextprotoneg
Don’t build support for the Next Protocol Negotiation (NPN) TLS extension.
no-ocsp
Don’t build support for Online Certificate Status Protocol (OCSP).
no-padlockeng
Don’t build the padlock engine.
no-hw-padlock
As synonyme for no-padlockeng. Deprecated and should not be used.
no-pic
Don’t build with support for Position Independent Code.
no-pinshared
Don’t pin the shared libraries.
By default OpenSSL will attempt to stay in memory until the process exits.
This is so that libcrypto and libssl can be properly cleaned up automatically
via an atexit() handler. The handler is registered by libcrypto and cleans
up both libraries. On some platforms the atexit() handler will run on unload of
libcrypto (if it has been dynamically loaded) rather than at process exit. This
option can be used to stop OpenSSL from attempting to stay in memory until the
process exits. This could lead to crashes if either libcrypto or libssl have
already been unloaded at the point that the atexit handler is invoked, e.g. on a
platform which calls atexit() on unload of the library, and libssl is unloaded
before libcrypto then a crash is likely to happen. Applications can suppress
running of the atexit() handler at run time by using the OPENSSL_INIT_NO_ATEXIT
option to OPENSSL_init_crypto(). See the man page for it for further details.
no-posix-io
Don’t use POSIX IO capabilities.
no-psk
Don’t build support for Pre-Shared Key based ciphersuites.
no-rdrand
Don’t use hardware RDRAND capabilities.
no-rfc3779
Don’t build support for RFC3779, «X.509 Extensions for IP Addresses and
AS Identifiers».
sctp
Build support for Stream Control Transmission Protocol (SCTP).
no-shared
Do not create shared libraries, only static ones.
See Notes on shared libraries below.
no-sock
Don’t build support for socket BIOs.
no-srp
Don’t build support for Secure Remote Password (SRP) protocol or
SRP based ciphersuites.
no-srtp
Don’t build Secure Real-Time Transport Protocol (SRTP) support.
no-sse2
Exclude SSE2 code paths from 32-bit x86 assembly modules.
Normally SSE2 extension is detected at run-time, but the decision whether or not
the machine code will be executed is taken solely on CPU capability vector. This
means that if you happen to run OS kernel which does not support SSE2 extension
on Intel P4 processor, then your application might be exposed to «illegal
instruction» exception. There might be a way to enable support in kernel, e.g.
FreeBSD kernel can be compiled with CPU_ENABLE_SSE, and there is a way to
disengage SSE2 code paths upon application start-up, but if you aim for wider
«audience» running such kernel, consider no-sse2. Both the 386 and no-asm
options imply no-sse2.
enable-ssl-trace
Build with the SSL Trace capabilities.
This adds the «-trace» option to s_client and s_server.
no-static-engine
Don’t build the statically linked engines.
This only has an impact when not built «shared».
no-stdio
Don’t use anything from the C header file «stdio.h» that makes use of the «FILE»
type. Only libcrypto and libssl can be built in this way. Using this option will
suppress building the command line applications. Additionally, since the OpenSSL
tests also use the command line applications, the tests will also be skipped.
no-tests
Don’t build test programs or run any tests.
no-threads
Don’t build with support for multi-threaded applications.
threads
Build with support for multi-threaded applications. Most platforms will enable
this by default. However if on a platform where this is not the case then this
will usually require additional system-dependent options!
See Notes on multi-threading below.
enable-trace
Build with support for the integrated tracing api.
See manual pages OSSL_trace_set_channel(3) and OSSL_trace_enabled(3) for details.
no-ts
Don’t build Time Stamping (TS) Authority support.
enable-ubsan
Build with the Undefined Behaviour sanitiser (UBSAN).
This is a developer option only. It may not work on all platforms and should
never be used in production environments. It will only work when used with gcc
or clang and should be used in conjunction with the -DPEDANTIC option
(or the --strict-warnings option).
no-ui
Don’t build with the User Interface (UI) capability
The User Interface is the set of features enabling text based prompts.
enable-unit-test
Enable additional unit test APIs.
This should not typically be used in production deployments.
no-uplink
Don’t build support for UPLINK interface.
enable-weak-ssl-ciphers
Build support for SSL/TLS ciphers that are considered «weak»
Enabling this includes for example the RC4 based ciphersuites.
zlib
Build with support for zlib compression/decompression.
zlib-dynamic
Like the zlib option, but has OpenSSL load the zlib library dynamically
when needed.
This is only supported on systems where loading of shared libraries is supported.
386
In 32-bit x86 builds, use the 80386 instruction set only in assembly modules
The default x86 code is more efficient, but requires at least an 486 processor.
Note: This doesn’t affect compiler generated code, so this option needs to be
accompanied by a corresponding compiler-specific option.
no-{protocol}
no-{ssl|ssl3|tls|tls1|tls1_1|tls1_2|tls1_3|dtls|dtls1|dtls1_2}
Don’t build support for negotiating the specified SSL/TLS protocol.
If «no-tls» is selected then all of tls1, tls1_1, tls1_2 and tls1_3 are disabled.
Similarly «no-dtls» will disable dtls1 and dtls1_2. The «no-ssl» option is
synonymous with «no-ssl3». Note this only affects version negotiation.
OpenSSL will still provide the methods for applications to explicitly select
the individual protocol versions.
no-{protocol}-method
no-{ssl|ssl3|tls|tls1|tls1_1|tls1_2|tls1_3|dtls|dtls1|dtls1_2}-method
Analogous to no-{protocol} but in addition do not build the methods for
applications to explicitly select individual protocol versions. Note that there
is no «no-tls1_3-method» option because there is no application method for
TLSv1.3.
Using individual protocol methods directly is deprecated. Applications should
use TLS_method() instead.
enable-{algorithm}
Build with support for the specified algorithm.
no-{algorithm}
no-{aria|bf|blake2|camellia|cast|chacha|cmac|
    des|dh|dsa|ecdh|ecdsa|idea|md4|mdc2|ocb|
    poly1305|rc2|rc4|rmd160|scrypt|seed|
    siphash|siv|sm2|sm3|sm4|whirlpool}
Build without support for the specified algorithm.
The «ripemd» algorithm is deprecated and if used is synonymous with rmd160.
Compiler-specific options
-Dxxx, -Ixxx, -Wp, -lxxx, -Lxxx, -Wl, -rpath, -R, -framework, -static
These system specific options will be recognised and passed through to the
compiler to allow you to define preprocessor symbols, specify additional
libraries, library directories or other compiler options. It might be worth
noting that some compilers generate code specifically for processor the
compiler currently executes on. This is not necessarily what you might have
in mind, since it might be unsuitable for execution on other, typically older,
processor. Consult your compiler documentation.
Take note of the Environment Variables documentation
below and how these flags interact with those variables.
Additional options that are not otherwise recognised are passed through as
they are to the compiler as well. Unix-style options beginning with a
‘-‘ or ‘+’ and Windows-style options beginning with a ‘/’ are recognized.
Again, consult your compiler documentation.
If the option contains arguments separated by spaces, then the URL-style
notation %20 can be used for the space character in order to avoid having
to quote the option. For example, -opt%20arg gets expanded to -opt arg.
In fact, any ASCII character can be encoded as %xx using its hexadecimal
encoding.
Take note of the Environment Variables documentation
below and how these flags interact with those variables.
Environment Variables
Assign the given value to the environment variable VAR for Configure.
These work just like normal environment variable assignments, but are supported
on all platforms and are confined to the configuration scripts only.
These assignments override the corresponding value in the inherited environment,
if there is one.
The following variables are used as «make variables» and can be used as an
alternative to giving preprocessor, compiler and linker options directly as
configuration. The following variables are supported:
AR              The static library archiver.
ARFLAGS         Flags for the static library archiver.
AS              The assembler compiler.
ASFLAGS         Flags for the assembler compiler.
CC              The C compiler.
CFLAGS          Flags for the C compiler.
CXX             The C++ compiler.
CXXFLAGS        Flags for the C++ compiler.
CPP             The C/C++ preprocessor.
CPPFLAGS        Flags for the C/C++ preprocessor.
CPPDEFINES      List of CPP macro definitions, separated
                by a platform specific character (':' or
                space for Unix, ';' for Windows, ',' for
                VMS).  This can be used instead of using
                -D (or what corresponds to that on your
                compiler) in CPPFLAGS.
CPPINCLUDES     List of CPP inclusion directories, separated
                the same way as for CPPDEFINES.  This can
                be used instead of -I (or what corresponds
                to that on your compiler) in CPPFLAGS.
HASHBANGPERL    Perl invocation to be inserted after '#!'
                in public perl scripts (only relevant on
                Unix).
LD              The program linker (not used on Unix, $(CC)
                is used there).
LDFLAGS         Flags for the shared library, DSO and
                program linker.
LDLIBS          Extra libraries to use when linking.
                Takes the form of a space separated list
                of library specifications on Unix and
                Windows, and as a comma separated list of
                libraries on VMS.
RANLIB          The library archive indexer.
RC              The Windows resource compiler.
RCFLAGS         Flags for the Windows resource compiler.
RM              The command to remove files and directories.
These cannot be mixed with compiling/linking flags given on the command line.
In other words, something like this isn’t permitted.
./config -DFOO CPPFLAGS=-DBAR -DCOOKIE
Backward compatibility note:
To be compatible with older configuration scripts, the environment variables
are ignored if compiling/linking flags are given on the command line, except
for the following:
AR, CC, CXX, CROSS_COMPILE, HASHBANGPERL, PERL, RANLIB, RC, and WINDRES
For example, the following command will not see -DBAR:
CPPFLAGS=-DBAR ./config -DCOOKIE
However, the following will see both set variables:
CC=gcc CROSS_COMPILE=x86_64-w64-mingw32- ./config -DCOOKIE
If CC is set, it is advisable to also set CXX to ensure both the C and C++
compiler are in the same «family». This becomes relevant with
‘enable-external-tests’ and ‘enable-buildtest-c++’.
Reconfigure
Reconfigure from earlier data.
This fetches the previous command line options and environment from data saved
in «configdata.pm» and runs the configuration process again, using these
options and environment. Note: NO other option is permitted together with
«reconf». This means that you also MUST use «./Configure» (or what corresponds
to that on non-Unix platforms) directly to invoke this option. Note: The
original configuration saves away values for ALL environment variables that were
used, and if they weren’t defined, they are still saved away with information
that they weren’t originally defined. This information takes precedence over
environment variables that are defined when reconfiguring.
Displaying configuration data
The configuration script itself will say very little, and finishes by
creating «configdata.pm». This perl module can be loaded by other scripts
to find all the configuration data, and it can also be used as a script to
display all sorts of configuration data in a human readable form.
For more information, please do:
$ ./configdata.pm --help # Unix
or
$ perl configdata.pm --help # Windows and VMS
Installation Steps in Detail
Configure OpenSSL
Automatic Configuration
On some platform a config script is available which attempts to guess
your operating system (and compiler, if necessary) and calls the Configure
Perl script with appropriate target based on its guess. Further options can
be supplied to the config script, which will be passed on to the Configure
script.
Unix / Linux / macOS
OpenVMS
Windows
Automatic configuration is not available on Windows.
For the remainder of this text, the Unix form will be used in all examples,
please use the appropriate form for your platform.
You can run
to see whether your target is guessed correctly. If you want to use a different
compiler, you are cross-compiling for another platform, or the ./config guess
was wrong for other reasons, see the Manual Configuration
section. Oherwise continue with the Build OpenSSL section below.
On some systems, you can include debugging information as follows:
$ ./config -d [[ options ]]
Manual Configuration
OpenSSL knows about a range of different operating system, hardware and
compiler combinations. To see the ones it knows about, run
or
$ perl Configure # All other platforms
For the remainder of this text, the Unix form will be used in all examples.
Please use the appropriate form for your platform.
Pick a suitable name from the list that matches your system. For most
operating systems there is a choice between using «cc» or «gcc».
When you have identified your system (and if necessary compiler) use this
name as the argument to Configure. For example, a «linux-elf» user would
run:
$ ./Configure linux-elf [[ options ]]
Creating your own Configuration
If your system isn’t listed, you will have to create a configuration
file named Configurations/{{ something }}.conf and add the correct
configuration for your system. See the available configs as examples
and read Configurations/README and Configurations/README.design for
more information.
The generic configurations «cc» or «gcc» should usually work on 32 bit
Unix-like systems.
Configure creates a build file («Makefile» on Unix, «makefile» on Windows
and «descrip.mms» on OpenVMS) from a suitable template in Configurations,
and defines various macros in include/openssl/configuration.h (generated
from include/openssl/configuration.h.in).
Out of Tree Builds
OpenSSL can be configured to build in a build directory separate from the
source code directory. It’s done by placing yourself in some other
directory and invoking the configuration commands from there.
Unix example
$ mkdir /var/tmp/openssl-build
$ cd /var/tmp/openssl-build
$ /PATH/TO/OPENSSL/SOURCE/config [[ options ]]
or
$ /PATH/TO/OPENSSL/SOURCE/Configure {{ target }} [[ options ]]
OpenVMS example
$ set default sys$login:
$ create/dir [.tmp.openssl-build]
$ set default [.tmp.openssl-build]
$ @[PATH.TO.OPENSSL.SOURCE]config [[ options ]]
or
$ @[PATH.TO.OPENSSL.SOURCE]Configure {{ target }} [[ options ]]
Windows example
$ C:
$ mkdir temp-openssl
$ cd temp-openssl
$ perl d:PATHTOOPENSSLSOURCEConfigure {{ target }} [[ options ]]
Paths can be relative just as well as absolute. Configure will do its best
to translate them to relative paths whenever possible.
Build OpenSSL
Build OpenSSL by running:
$ make                                           # Unix
$ mms                                            ! (or mmk) OpenVMS
$ nmake                                          # Windows
This will build the OpenSSL libraries (libcrypto.a and libssl.a on
Unix, corresponding on other platforms) and the OpenSSL binary
(«openssl»). The libraries will be built in the top-level directory,
and the binary will be in the «apps» subdirectory.
If the build fails, take a look at the Build Failures
subsection of the Troubleshooting section.
Test OpenSSL
After a successful build, and before installing, the libraries should
be tested. Run:
$ make test                                      # Unix
$ mms test                                       ! OpenVMS
$ nmake test                                     # Windows
Warning: you MUST run the tests from an unprivileged account (or disable
your privileges temporarily if your platform allows it).
If some tests fail, take a look at the Test Failures
subsection of the Troubleshooting section.
Install OpenSSL
If everything tests ok, install OpenSSL with
$ make install                                   # Unix
$ mms install                                    ! OpenVMS
$ nmake install                                  # Windows
Note that in order to perform the install step above you need to have
appropriate permissions to write to the installation directory.
The above commands will install all the software components in this
directory tree under PREFIX (the directory given with --prefix or
its default):
Unix / Linux / macOS
bin/           Contains the openssl binary and a few other
               utility scripts.
include/openssl
               Contains the header files needed if you want
               to build your own programs that use libcrypto
               or libssl.
lib            Contains the OpenSSL library files.
lib/engines    Contains the OpenSSL dynamically loadable engines.

share/man/man1 Contains the OpenSSL command line man-pages.
share/man/man3 Contains the OpenSSL library calls man-pages.
share/man/man5 Contains the OpenSSL configuration format man-pages.
share/man/man7 Contains the OpenSSL other misc man-pages.

share/doc/openssl/html/man1
share/doc/openssl/html/man3
share/doc/openssl/html/man5
share/doc/openssl/html/man7
               Contains the HTML rendition of the man-pages.
OpenVMS
‘arch’ is replaced with the architecture name, «Alpha» or «ia64»,
‘sover’ is replaced with the shared library version (0101 for 1.1), and
‘pz’ is replaced with the pointer size OpenSSL was built with:
[.EXE.'arch']  Contains the openssl binary.
[.EXE]         Contains a few utility scripts.
[.include.openssl]
               Contains the header files needed if you want
               to build your own programs that use libcrypto
               or libssl.
[.LIB.'arch']  Contains the OpenSSL library files.
[.ENGINES'sover''pz'.'arch']
               Contains the OpenSSL dynamically loadable engines.
[.SYS$STARTUP] Contains startup, login and shutdown scripts.
               These define appropriate logical names and
               command symbols.
[.SYSTEST]     Contains the installation verification procedure.
[.HTML]        Contains the HTML rendition of the manual pages.
Additional Directories
Additionally, install will add the following directories under
OPENSSLDIR (the directory given with --openssldir or its default)
for you convenience:
certs          Initially empty, this is the default location
               for certificate files.
private        Initially empty, this is the default location
               for private key files.
misc           Various scripts.
The installation directory should be appropriately protected to ensure
unprivileged users cannot make changes to OpenSSL binaries or files, or
install engines. If you already have a pre-installed version of OpenSSL as
part of your Operating System it is recommended that you do not overwrite
the system version and instead install to somewhere else.
Package builders who want to configure the library for standard locations,
but have the package installed somewhere else so that it can easily be
packaged, can use
$ make DESTDIR=/tmp/package-root install # Unix
$ mms/macro=»DESTDIR=TMP:[PACKAGE-ROOT]» install ! OpenVMS
The specified destination directory will be prepended to all installation
target paths.
Compatibility issues with previous OpenSSL versions
COMPILING existing applications
Starting with version 1.1.0, OpenSSL hides a number of structures that were
previously open. This includes all internal libssl structures and a number
of EVP types. Accessor functions have been added to allow controlled access
to the structures’ data.
This means that some software needs to be rewritten to adapt to the new ways
of doing things. This often amounts to allocating an instance of a structure
explicitly where you could previously allocate them on the stack as automatic
variables, and using the provided accessor functions where you would previously
access a structure’s field directly.
Some APIs have changed as well. However, older APIs have been preserved when
possible.
Advanced Build Options
Environment Variables
A number of environment variables can be used to provide additional control
over the build process. Typically these should be defined prior to running
config or Configure. Not all environment variables are relevant to all
platforms.
AR
               The name of the ar executable to use.

BUILDFILE
               Use a different build file name than the platform default
               ("Makefile" on Unix-like platforms, "makefile" on native Windows,
               "descrip.mms" on OpenVMS).  This requires that there is a
               corresponding build file template.  See Configurations/README
               for further information.

CC
               The compiler to use. Configure will attempt to pick a default
               compiler for your platform but this choice can be overridden
               using this variable. Set it to the compiler executable you wish
               to use, e.g. "gcc" or "clang".

CROSS_COMPILE
               This environment variable has the same meaning as for the
               "--cross-compile-prefix" Configure flag described above. If both
               are set then the Configure flag takes precedence.

NM
               The name of the nm executable to use.

OPENSSL_LOCAL_CONFIG_DIR
               OpenSSL comes with a database of information about how it
               should be built on different platforms as well as build file
               templates for those platforms. The database is comprised of
               ".conf" files in the Configurations directory.  The build
               file templates reside there as well as ".tmpl" files. See the
               file Configurations/README for further information about the
               format of ".conf" files as well as information on the ".tmpl"
               files.
               In addition to the standard ".conf" and ".tmpl" files, it is
               possible to create your own ".conf" and ".tmpl" files and store
               them locally, outside the OpenSSL source tree. This environment
               variable can be set to the directory where these files are held
               and will be considered by Configure before it looks in the
               standard directories.

PERL
               The name of the Perl executable to use when building OpenSSL.
               This variable is used in config script only. Configure on the
               other hand imposes the interpreter by which it itself was
               executed on the whole build procedure.

HASHBANGPERL
               The command string for the Perl executable to insert in the
               #! line of perl scripts that will be publicly installed.
               Default: /usr/bin/env perl
               Note: the value of this variable is added to the same scripts
               on all platforms, but it's only relevant on Unix-like platforms.

RC
               The name of the rc executable to use. The default will be as
               defined for the target platform in the ".conf" file. If not
               defined then "windres" will be used. The WINDRES environment
               variable is synonymous to this. If both are defined then RC
               takes precedence.

RANLIB
               The name of the ranlib executable to use.

WINDRES
               See RC.
Makefile Targets
The Configure script generates a Makefile in a format relevant to the specific
platform. The Makefiles provide a number of targets that can be used. Not all
targets may be available on all platforms. Only the most common targets are
described here. Examine the Makefiles themselves for the full list.
all
               The target to build all the software components and
               documentation.

build_sw
               Build all the software components.
               THIS IS THE DEFAULT TARGET.

build_docs
               Build all documentation components.

clean
               Remove all build artefacts and return the directory to a "clean"
               state.

depend
               Rebuild the dependencies in the Makefiles. This is a legacy
               option that no longer needs to be used since OpenSSL 1.1.0.

install
               Install all OpenSSL components.

install_sw
               Only install the OpenSSL software components.

install_docs
               Only install the OpenSSL documentation components.

install_man_docs
               Only install the OpenSSL man pages (Unix only).

install_html_docs
               Only install the OpenSSL html documentation.

list-tests
               Prints a list of all the self test names.

test
               Build and run the OpenSSL self tests.

uninstall
               Uninstall all OpenSSL components.

reconfigure
reconf
               Re-run the configuration process, as exactly as the last time
               as possible.

update
               This is a developer option. If you are developing a patch for
               OpenSSL you may need to use this if you want to update
               automatically generated files; add new error codes or add new
               (or change the visibility of) public API functions. (Unix only).
Running Selected Tests
The make variable TESTS supports a versatile set of space separated tokens
with which you can specify a set of tests to be performed. With a «current
set of tests» in mind, initially being empty, here are the possible tokens:
 alltests      The current set of tests becomes the whole set of available
               tests (as listed when you do 'make list-tests' or similar).

 xxx           Adds the test 'xxx' to the current set of tests.

-xxx           Removes 'xxx' from the current set of tests.  If this is the
               first token in the list, the current set of tests is first
               assigned the whole set of available tests, effectively making
               this token equivalent to TESTS="alltests -xxx".

 nn            Adds the test group 'nn' (which is a number) to the current
               set of tests.

-nn            Removes the test group 'nn' from the current set of tests.
               If this is the first token in the list, the current set of
               tests is first assigned the whole set of available tests,
               effectively making this token equivalent to
               TESTS="alltests -xxx".
Also, all tokens except for «alltests» may have wildcards, such as *.
(on Unix and Windows, BSD style wildcards are supported, while on VMS,
it’s VMS style wildcards)
Examples
Run all tests except for the fuzz tests:
$ make TESTS=-test_fuzz test
or, if you want to be explicit:
$ make TESTS='alltests -test_fuzz' test
Run all tests that have a name starting with «test_ssl» but not those
starting with «test_ssl_»:
$ make TESTS='test_ssl* -test_ssl_*' test
Run only test group 10:
Run all tests except the slow group (group 99):
Run all tests in test groups 80 to 99 except for tests in group 90:
To stochastically verify that the algorithm that produces uniformly distributed
random numbers is operating correctly (with a false positive rate of 0.01%):
$ ./util/wrap.sh test/bntest -stochastic
Troubleshooting
Configuration Problems
Selecting the correct target
The ./config script tries hard to guess your operating system, but in some
cases it does not succeed. You will see a message like the following:
$ ./config
Operating system: x86-whatever-minix
This system (minix) is not supported. See file INSTALL for details.
Even if the automatic target selection by the ./config script fails, chances
are that you still might find a suitable target in the Configurations directory,
which you can supply to the ./Configure command, possibly after some adjustment.
The Configurations directory contains a lot of examples of such targets.
The main configuration file is 10-main.conf, which contains all targets that
are officially supported by the OpenSSL team. Other configuration files contain
targets contributed by other OpenSSL users. The list of targets can be found in
a Perl list my %targets = ( ... ).
my %targets = (
...
"target-name" => {
    inherit_from     => [ "base-target" ],
    CC               => "...",
    cflags           => add("..."),
    asm_arch         => '...',
    perlasm_scheme   => "...",
},
...
)
If you call .Configure without arguments, it will give you a list of all
known targets. Using grep, you can lookup the target definition in the
Configurations directory. For example the «android-x86_64» can be found in
Configurations/15-android.conf.
The directory contains two README files, which explain the general syntax and
design of the configurations files.
- Configurations/README
- Configurations/README.design
If you need further help, try to search the openssl-users mailing list
or the GitHub Issues for existing solutions. If you don’t find anything,
you can raise an issue to ask a question yourself.
More about our support resources can be found in the SUPPORT file.
Configuration Errors
If the ./config or ./Configure command fails with an error message,
read the error message carefully and try to figure out whether you made
a mistake (e.g., by providing a wrong option), or whether the script is
working incorrectly. If you think you encountered a bug, please
raise an issue on GitHub to file a bug report.
Along with a short description of the bug, please provide the complete
configure command line and the relevant output including the error message.
Note: To make the output readable, pleace add a ‘code fence’ (three backquotes
``` on a separate line) before and after your output:
 ```
 $ ./Configure [your arguments...]

 [output...]

 ```
Build Failures
If the build fails, look carefully at the output. Try to locate and understand
the error message. It might be that the compiler is already telling you
exactly what you need to do to fix your problem.
There may be reasons for the failure that aren’t problems in OpenSSL itself,
for example if the compiler reports missing standard or third party headers.
If the build succeeded previously, but fails after a source or configuration
change, it might be helpful to clean the build tree before attempting another
build. Use this command:
$ make clean                                     # Unix
$ mms clean                                      ! (or mmk) OpenVMS
$ nmake clean                                    # Windows
Assembler error messages can sometimes be sidestepped by using the
«no-asm» configuration option.
Compiling parts of OpenSSL with gcc and others with the system compiler will
result in unresolved symbols on some systems.
If you are still having problems, try to search the openssl-users mailing
list or the GitHub Issues for existing solutions. If you think you
encountered an OpenSSL bug, please raise an issue to file a bug report.
Please take the time to review the existing issues first; maybe the bug was
already reported or has already been fixed.
Test Failures
If some tests fail, look at the output. There may be reasons for the failure
that isn’t a problem in OpenSSL itself (like a malfunction with Perl).
You may want increased verbosity, that can be accomplished like this:
Verbosity on failure only (make macro VERBOSE_FAILURE or VF):
$ make VF=1 test                                 # Unix
$ mms /macro=(VF=1) test                         ! OpenVMS
$ nmake VF=1 test                                # Windows
Full verbosity (make macro VERBOSE or V):
$ make V=1 test                                  # Unix
$ mms /macro=(V=1) test                          ! OpenVMS
$ nmake V=1 test                                 # Windows
If you want to run just one or a few specific tests, you can use
the make variable TESTS to specify them, like this:
$ make TESTS='test_rsa test_dsa' test            # Unix
$ mms/macro="TESTS=test_rsa test_dsa" test       ! OpenVMS
$ nmake TESTS='test_rsa test_dsa' test           # Windows
And of course, you can combine (Unix example shown):
$ make VF=1 TESTS='test_rsa test_dsa' test
You can find the list of available tests like this:
$ make list-tests                                # Unix
$ mms list-tests                                 ! OpenVMS
$ nmake list-tests                               # Windows
Have a look at the manual for the perl module Test::Harness to
see what other HARNESS_* variables there are.
If you find a problem with OpenSSL itself, try removing any
compiler optimization flags from the CFLAGS line in Makefile and
run «make clean; make» or corresponding.
To report a bug please open an issue on GitHub, at
https://github.com/openssl/openssl/issues.
For more details on how the make variables TESTS can be used,
see section Running Selected Tests below.
Notes
Notes on multi-threading
For some systems, the OpenSSL Configure script knows what compiler options
are needed to generate a library that is suitable for multi-threaded
applications. On these systems, support for multi-threading is enabled
by default; use the «no-threads» option to disable (this should never be
necessary).
On other systems, to enable support for multi-threading, you will have
to specify at least two options: «threads», and a system-dependent option.
(The latter is «-D_REENTRANT» on various systems.) The default in this
case, obviously, is not to include support for multi-threading (but
you can still use «no-threads» to suppress an annoying warning message
from the Configure script.)
OpenSSL provides built-in support for two threading models: pthreads (found on
most UNIX/Linux systems), and Windows threads. No other threading models are
supported. If your platform does not provide pthreads or Windows threads then
you should Configure with the «no-threads» option.
Notes on shared libraries
For most systems the OpenSSL Configure script knows what is needed to
build shared libraries for libcrypto and libssl. On these systems
the shared libraries will be created by default. This can be suppressed and
only static libraries created by using the «no-shared» option. On systems
where OpenSSL does not know how to build shared libraries the «no-shared»
option will be forced and only static libraries will be created.
Shared libraries are named a little differently on different platforms.
One way or another, they all have the major OpenSSL version number as
part of the file name, i.e. for OpenSSL 1.1.x, 1.1 is somehow part of
the name.
On most POSIX platforms, shared libraries are named libcrypto.so.1.1
and libssl.so.1.1.
on Cygwin, shared libraries are named cygcrypto-1.1.dll and cygssl-1.1.dll
with import libraries libcrypto.dll.a and libssl.dll.a.
On Windows build with MSVC or using MingW, shared libraries are named
libcrypto-1_1.dll and libssl-1_1.dll for 32-bit Windows, libcrypto-1_1-x64.dll
and libssl-1_1-x64.dll for 64-bit x86_64 Windows, and libcrypto-1_1-ia64.dll
and libssl-1_1-ia64.dll for IA64 Windows. With MSVC, the import libraries
are named libcrypto.lib and libssl.lib, while with MingW, they are named
libcrypto.dll.a and libssl.dll.a.
On VMS, shareable images (VMS speak for shared libraries) are named
ossl$libcrypto0101_shr.exe and ossl$libssl0101_shr.exe. However, when
OpenSSL is specifically built for 32-bit pointers, the shareable images
are named ossl$libcrypto0101_shr32.exe and ossl$libssl0101_shr32.exe
instead, and when built for 64-bit pointers, they are named
ossl$libcrypto0101_shr64.exe and ossl$libssl0101_shr64.exe.
Notes on random number generation
Availability of cryptographically secure random numbers is required for
secret key generation. OpenSSL provides several options to seed the
internal CSPRNG. If not properly seeded, the internal CSPRNG will refuse
to deliver random bytes and a «PRNG not seeded error» will occur.
The seeding method can be configured using the --with-rand-seed option,
which can be used to specify a comma separated list of seed methods.
However in most cases OpenSSL will choose a suitable default method,
so it is not necessary to explicitly provide this option. Note also
that not all methods are available on all platforms.
I) On operating systems which provide a suitable randomness source (in
form of a system call or system device), OpenSSL will use the optimal
available method to seed the CSPRNG from the operating system’s
randomness sources. This corresponds to the option --with-rand-seed=os.
II) On systems without such a suitable randomness source, automatic seeding
and reseeding is disabled (—with-rand-seed=none) and it may be necessary
to install additional support software to obtain a random seed and reseed
the CSPRNG manually. Please check out the manual pages for RAND_add(),
RAND_bytes(), RAND_egd(), and the FAQ for more information.
OpenSSL – это криптографическая библиотека, которая является open source реализацией двух протоколов: Secure Sockets Layer (SSL) и Transport Layer Security (TLS). Данная библиотека имеет инструменты, предназначенные для генерации приватных ключей RSA и Certificate Signing Requests (CSR-запросов), управления сертификатами и выполнения кодирования/декодирования. Библиотека OpenSSL написана на C, однако существуют оболочки для широкого спектра языков программирования.
На апрель 2014 года 66% всех веб-серверов использовали OpenSSL. Инструментарий OpenSSL выпущен под лицензией Apache.
Генерация CSR запроса через OpenSSL
Генерация CSR-запроса должна проходить в строгом соответствии со следующими правилами. Во-первых, вся информация должна быть приведена на английском языке. Во-вторых, следует избегать использования следующих символов: < > ~ ! @ # $ % ^ * / ( ) ?.,&.
Поля для заполнения будут следующими:
- Country Name – ISO-кодстраны
- State or Province Name – область, где была проведена официальная регистрация компании
- Locality Name – город, где была проведена официальная регистрация компании
- Organization Name – полное название организации (без сокращений)
- Organizational Unit Name – название отдела организации
- Common Name – полное доменное имя сервера
Сгенерировать CSR-запрос в OpenSSL можно при помощи специальной команды:
openssl req -key -new cert.key -out cert.csr
Имя домена, на который совершается запрос, указывается в Common Name. Поля «A challenge password» и «An optional company name» заполнять не нужно (просто жмем enter).
Команда для создания ключа:
openssl req -batch -new -noout -newkey rsa:2048 -nodes -keyout cert.key
В случае потери пароля или файла ключа надо будет заказывать повторное создание сертификата.
Одновременное создание ключа и запроса с данными:
openssl req -batch -new -newkey rsa:2048 -nodes -keyout cert.key -subj ‘/C=RU/ST=Ivanovo/L=Ivanovo/O=Guru Project/OU=Research team/emailAddress=root@primer.com/CN=primer.com’ -out cert.csr
Удалить пароль с ключа (требуется в том случае, когда сертификат устанавливается вручную в конфигурацию Apache; в противном случае он во время запуска будет просить вновь ввести пароль):
openssl rsa -in cert.key -out cert.key
после чего указываем пароль через консоль (либо -passin pass:tv0ip4ssw0rd, что не так безопасно, поскольку пароль помещается в .history)
Посмотреть информацию CSR:
openssl req -noout -text -in cert.csr
Получить данные сертификата (чтобы установить, кем он был выдан, к примеру):
openssl x509 -noout -text -in cert.crt
Выполнить проверку соответствия ключа сертификату:
openssl x509 -noout -modulus -in cert.crt | openssl md5
openssl rsa -noout -modulus -in cert.key | openssl md5
Два значения должны быть равнозначными.
Процесс установки SSL сертификата
Процесс установки сертификата осуществляется при помощи следующих шагов.
Скопируйте выданный вам сертификат в файл, расположенный на вашем сервере Apache
После выпуска SSL-сертификата, на почтовый адрес, который вы задали, поступит электронное письмо, которое будет содержать в себе ваш сертификат. Файл с сертификатом будет называться domain.crt. Открыв файл с SSL сертификатом в обычном текстовом редакторе, вы увидите следующее (примерно):
——BEGIN CERTIFICATE——
ASb-SdGSIk3DqvPAqCAMIACAQSxALBgkqddhgrtkiG9w0BBwGg&KLPmowggHXAh
Ub7egest5u0M63v1Z2A/kFghj5CSqGSIb3DQBAs+klMF8xCzAnbijNByhTMd54vSA
(…….)
E+cFEGjgrHJgrA+eRP6XraWw8iiguUtfgrrcJgg4P6XVS4l39+l5aCEGGbauLP5W6
K99orhIhgQrlX2+KeDi+xBG2coigehIGFeQS/16S36ITcluHGY5EA+&A5ujbhgrYHS
——END CERTIFICATE——
Скопируйте данный сертификат туда же (в ту же директорию), где лежит ваш частный (приватный) ключ, назовем этот каталог /etc/ssl/crt/. В нашей ситуации приватный ключ — это private.key. Публичным ключом будет выступать domain.crt.
Задайте корневой и промежуточный сертификат
Очень важный пункт. Чтобы заслужить доверие браузеров и различных мобильных устройств к вашему SSL-сертификату, вам нужно будет задать сертификаты корневых и промежуточных ЦС (центров сертификации). Такие сертификаты обычно лежат вместе с файлом Вашего главного сертификата. Для Apache их надо объединить в ca_bundle.
Чтобы ссылка на данный файл была корректной, следует произвести следующее в необходимом разделе Virtual Host для вашего веб-сайта:
- Выполните копирование файла server.ca-bundle в каталог, в котором у вас находятся файлы сертификата и ключа (у нас это: /etc/ssl/crt/).
- Далее внесите новую строку в секцию SSL в файле httpd.conf. Если эта строка уже имеется, отредактируйте ее, чтобы она имела следующий вид: SSLCertificateChainFile /etc/ssl/crt/y_server.ca-bundle
- В том случае, если вы используете иное расположение и иные названия файлов, вам надо будет изменить путь и имена файлов. Раздел SSL в обновленном файле config теперь получит следующий вид:
<VirtualHost 293.169.10.25:443>
DocumentRoot /var/web/html3
ServerName www.leader_domain.com
SSLEngine on
SSLCertificateFile /etc/ssl3/cert/leader_domain.crt
SSLCertificateKeyFile /etc/ssl3/cert/leader_private.key
SSLCertificateChainFile /etc/ssl3/cert/leader_server.ca-bundle ***
</VirtualHost>
*** Для Apache 1.x используйте: SSLCACertificateFile /etc/ssl3/cert/leader_server.ca-bundle
- Сохраните файл config и проведите перезапуск Apache.
Другие полезные команды для работы с сертификатами в OpenSSL
Уточнить длину запроса:
echo ‘(‘ `openssl req -modulus -noout -in leader_cert.csr| cut -d’=’ -f2 | wc -c` ‘-1)*4’ | bc
Проверить состояние выдачи HTTPS:
openssl s_client -connect localhost:443 -state -debug
GET / HTTP/1.0
Для почтового адреса:
openssl s_client -connect localhost:993 -showcerts
На ОС Windows (в IIS в частности) применяется PFX-контейнер для SSL-сертификата, его можно сделать из файлов ключа и самого сертификата командой:
openssl pkcs12 -inkey -export -in certificate.crt yourcertificate.key -out yourcertificate.pfx
С помощью OpenSSL вы сможете легко провести любые операции, связанные с SSL сертификатами. Приобрести же SSL сертификат очень удобно и выгодно в компании ЛидерТелеком. Любые вопросы, связанные с выдачей сертификата, можно будет легко решить при помощи отзывчивой службы поддержки.