pgAdmin may be deployed as a web application by configuring the app to run in
server mode and then deploying it either behind a webserver running as a reverse
proxy, or using the WSGI interface.
When deployed in server mode, there are two notable differences for users:
-
Users must login before they can use pgAdmin. An initial superuser account
is created when server mode is initialised, and this user can add additional
superusers and non-superusers as required. -
File storage is restricted to a virtual root directory for each individual
user under the directory configured using theSTORAGE_DIRconfiguration
parameter. Users do not have access to the complete filesystem of the server.
The following instructions demonstrate how pgAdmin may be run as a WSGI
application under Apache HTTPD, using mod_wsgi, standalone using uWSGI
or Gunicorn, or under NGINX using using uWSGI or Gunicorn.
See also
For detailed instructions on building and configuring pgAdmin from
scratch, please see the README file in the top level directory of the source code.
For convenience, you can find the latest version of the file
here,
but be aware that this may differ from the version included with the source code
for a specific version of pgAdmin.
Requirements
Important: Some components of pgAdmin require the ability to maintain affinity
between client sessions and a specific database connection (for example, the
Query Tool in which the user might run a BEGIN command followed by a number of
DML SQL statements, and then a COMMIT). pgAdmin has been designed with built-in
connection management to handle this, however it requires that only a single
Python process is used because it is not easily possible to maintain affinity
between a client session and one of multiple WSGI worker processes.
On Windows systems, the Apache HTTP server uses a single process, multi-threaded
architecture. WSGI applications run in embedded mode, which means that only
a single process will be present on this platform in all cases.
On Unix systems, the Apache HTTP server typically uses a multi-process, single
threaded architecture (this is dependent on the MPM that is chosen at
compile time). If embedded mode is chosen for the WSGI application, then
there will be one Python environment for each Apache process, each with it’s own
connection manager which will lead to loss of connection affinity. Therefore
one should use mod_wsgi’s daemon mode, configured to use a single
process. This will launch a single instance of the WSGI application which is
utilised by all the Apache worker processes.
Whilst it is true that this is a potential performance bottleneck, in reality
pgAdmin is not a web application that’s ever likely to see heavy traffic
unlike a busy website, so in practice should not be an issue.
Future versions of pgAdmin may introduce a shared connection manager process to
overcome this limitation, however that is a significant amount of work for
little practical gain.
Configuration
In order to configure pgAdmin to run in server mode, it may be necessary to
configure the Python code to run in multi-user mode, and then to configure the
web server to find and execute the code.
See The config.py File for more information on configuration settings.
Python
From pgAdmin 4 v2 onwards, server mode is the default configuration. If running under
the desktop runtime, this is overridden automatically. There should typically be no
need to modify the configuration simply to enable server mode to work, however it may
be desirable to adjust some of the paths used.
In order to configure the Python code, follow these steps:
-
Create a
config_local.pyfile alongside the existingconfig.pyfile. -
Edit
config_local.pyand add the following settings. In most cases, the default
file locations should be appropriate:NOTE: You must ensure the directories specified are writeable by
the user that the web server processes will be running as, e.g. apache or www-data.
You may specify DATA_DIR in order to create all required directories and files
under DATA_DIR folder.LOG_FILE = '/var/log/pgadmin4/pgadmin4.log' SQLITE_PATH = '/var/lib/pgadmin4/pgadmin4.db' SESSION_DB_PATH = '/var/lib/pgadmin4/sessions' STORAGE_DIR = '/var/lib/pgadmin4/storage' AZURE_CREDENTIAL_CACHE_DIR = '/var/lib/pgadmin4/azurecredentialcache' KERBEROS_CCACHE_DIR = '/var/lib/pgadmin4/kerberoscache'
-
Run the following command to create the configuration database:
-
Change the ownership of the configuration database to the user that the web server
processes will run as, for example, assuming that the web server runs as user
www-data in group www-data, and that the SQLite path is/var/lib/pgadmin4/pgadmin4.db:# chown www-data:www-data /var/lib/pgadmin4/pgadmin4.db
Hosting
There are many possible ways to host pgAdmin in server mode. Some examples are
given below:
Apache HTTPD Configuration (Windows)
Once Apache HTTP has been configured to support mod_wsgi, the pgAdmin
application may be configured similarly to the example below:
<VirtualHost *>
    ServerName pgadmin.example.com
    WSGIScriptAlias / "C:Program FilespgAdmin4webpgAdmin4.wsgi"
    <Directory "C:Program FilespgAdmin4web">
            Order deny,allow
            Allow from all
    </Directory>
</VirtualHost>
Now open the file C:Program FilespgAdmin4webpgAdmin4.wsgi with your favorite editor and add the code
below which will activate Python virtual environment when Apache server runs.
activate_this = 'C:Program FilespgAdmin4venvScriptsactivate_this.py'
exec(open(activate_this).read())
Note: The changes made in pgAdmin4.wsgi file will revert when pgAdmin4 is either upgraded or downgraded.
Apache HTTPD Configuration (Linux/Unix)
Once Apache HTTP has been configured to support mod_wsgi, the pgAdmin
application may be configured similarly to the example below:
<VirtualHost *>
    ServerName pgadmin.example.com

    WSGIDaemonProcess pgadmin processes=1 threads=25 python-home=/path/to/python/virtualenv
    WSGIScriptAlias / /opt/pgAdmin4/web/pgAdmin4.wsgi

    <Directory /opt/pgAdmin4/web>
        WSGIProcessGroup pgadmin
        WSGIApplicationGroup %{GLOBAL}
        Order deny,allow
        Allow from all
    </Directory>
</VirtualHost>
Note: If you’re using Apache HTTPD 2.4 or later, replace the lines:
Order deny,allow
Allow from all
with:
Adjust as needed to suit your access control requirements.
Standalone Gunicorn Configuration
pgAdmin may be hosted by Gunicorn directly simply by running a command such as
the one shown below. Note that this example assumes pgAdmin was installed using
the Python Wheel (you may need to adjust the path to suit your installation):
gunicorn  --bind 0.0.0.0:80
          --workers=1
          --threads=25
          --chdir /usr/lib/python3.7/dist-packages/pgadmin4
          pgAdmin4:app
Standalone uWSGI Configuration
pgAdmin may be hosted by uWSGI directly simply by running a command such as
the one shown below. Note that this example assumes pgAdmin was installed using
the Python Wheel (you may need to adjust the path to suit your installation):
uwsgi --http-socket 0.0.0.0:80
      --processes 1
      --threads 25
      --chdir /usr/lib/python3.7/dist-packages/pgadmin4/
      --mount /=pgAdmin4:app
NGINX Configuration with Gunicorn
pgAdmin can be hosted by Gunicorn, with NGINX in front of it. Note that these
examples assume pgAdmin was installed using the Python Wheel (you may need to
adjust the path to suit your installation).
To run with pgAdmin in the root directory of the server, start Gunicorn using a
command similar to:
gunicorn --bind unix:/tmp/pgadmin4.sock
         --workers=1
         --threads=25
         --chdir /usr/lib/python3.7/dist-packages/pgadmin4
         pgAdmin4:app
And configure NGINX:
location / {
    include proxy_params;
    proxy_pass http://unix:/tmp/pgadmin4.sock;
}
Alternatively, pgAdmin can be hosted in a sub-directory (/pgadmin4 in this case)
on the server. Start Gunicorn as when using the root directory, but configure
NGINX as follows:
location /pgadmin4/ {
    include proxy_params;
    proxy_pass http://unix:/tmp/pgadmin4.sock;
    proxy_set_header X-Script-Name /pgadmin4;
}
NGINX Configuration with uWSGI
pgAdmin can be hosted by uWSGI, with NGINX in front of it. Note that these
examples assume pgAdmin was installed using the Python Wheel (you may need to
adjust the path to suit your installation).
To run with pgAdmin in the root directory of the server, start uWSGI using a
command similar to:
uwsgi --socket /tmp/pgadmin4.sock
      --processes 1
      --threads 25
      --chdir /usr/lib/python3.7/dist-packages/pgadmin4/
      --manage-script-name
      --mount /=pgAdmin4:app
And configure NGINX:
location / { try_files $uri @pgadmin4; }
location @pgadmin4 {
    include uwsgi_params;
    uwsgi_pass unix:/tmp/pgadmin4.sock;
}
Alternatively, pgAdmin can be hosted in a sub-directory (/pgadmin4 in this case)
on the server. Start uWSGI, noting that the directory name is specified in the
mount parameter:
uwsgi --socket /tmp/pgadmin4.sock
      --processes 1
      --threads 25
      --chdir /usr/lib/python3.7/dist-packages/pgadmin4/
      --manage-script-name
      --mount /pgadmin4=pgAdmin4:app
Then, configure NGINX:
location = /pgadmin4 { rewrite ^ /pgadmin4/; }
location /pgadmin4 { try_files $uri @pgadmin4; }
location @pgadmin4 {
  include uwsgi_params;
  uwsgi_pass unix:/tmp/pgadmin4.sock;
}
Additional Information
Note
pgAdmin will spawn additional Python processes from time to time, and
relies on the sys.executable variable in Python to do this. In some cases,
you may need to override that value to ensure the correct interpreter is
used, instead of the WSGI host process. For example, uWSGI offers the
–py-sys-executable command line option to achieve this.
Приветствую всех посетителей сайта Info-Comp.ru! Сегодня мы рассмотрим процесс установки pgAdmin 4 на операционную систему Windows 10, а также настроим подключение к удаленному серверу PostgreSQL.

pgAdmin 4 – бесплатная программа с графическим интерфейсом для разработки баз данных PostgreSQL.
Бесплатная, открытый исходный код
Можно использовать в Linux, macOS и Windows
Написание SQL запросов и выгрузка данных
Разработка функций, представлений и других объектов БД
Содержание
- Установка pgAdmin 4 на Windows 10
- Шаг 1 – Скачивание дистрибутива программы pgAdmin 4
- Шаг 2 – Запуск программ установки pgAdmin 4
- Шаг 3 – Принятие условий лицензионного соглашения
- Шаг 4 – Выбор каталога для установки pgAdmin 4
- Шаг 5 – Настройка ярлыка pgAdmin 4
- Шаг 6 – Запуск установки pgAdmin 4
- Шаг 7 – Завершение установки pgAdmin 4
- Запуск pgAdmin 4 в Windows 10
- Настройка русского языка в pgAdmin 4
- Настройка подключения к PostgreSQL
- Написание SQL запросов в Query Tool (Запросник)
- Видео-инструкция – Установка pgAdmin 4 на Windows 10 и настройка подключения к PostgreSQL
Если PostgreSQL устанавливается на Windows, то в процессе этой установки можно сразу же установить и pgAdmin 4, однако если предполагается, что PostgreSQL будет работать на отдельном сервере, а подключаться к нему мы будем удаленно с клиентского компьютера, например, PostgreSQL мы установили на сервер Linux, то на клиентском компьютере, с которого мы будем подключаться и работать с PostgreSQL, необходимо установить pgAdmin 4, не устанавливая при этом сам сервер PostgreSQL, так как он там просто не нужен. Именно эта ситуация и будет рассмотрена в данной статье, т.е. мы установим только pgAdmin 4, не устанавливая PostgreSQL.
Сейчас мы рассмотрим все шаги, которые необходимо выполнить, чтобы установить pgAdmin 4 на Windows 10.
Заметка! Установка и настройка PostgreSQL на Windows 10.
Шаг 1 – Скачивание дистрибутива программы pgAdmin 4
Первое, что нам нужно сделать – это скачать дистрибутив данной программы.
Для этого переходим на официальный сайт в раздел «Download».
Страница загрузки pgAdmin 4 – https://www.pgadmin.org/download/
Затем выбираем операционную систему, на которую мы будет устанавливать pgAdmin 4, в нашем случае «Windows», далее выбираем версию pgAdmin 4, актуальная версия располагается сверху.
Щелкаем по соответствующей ссылке, в результате нас перенесет на сайт PostgreSQL, так как pgAdmin – это официальный инструмент для работы с PostgreSQL, здесь нам нужно выбрать тип (т.е. разрядность) нашей операционной системы, кликаем по соответствующей ссылке.
В итоге должен загрузиться исполняемый файл (в моем случае pgadmin4-4.28-x64.exe) размером чуть более 100 мегабайт.
Заметка! Установка и настройка PostgreSQL на Linux Ubuntu Server.
Шаг 2 – Запуск программ установки pgAdmin 4
Запускаем скаченный файл.
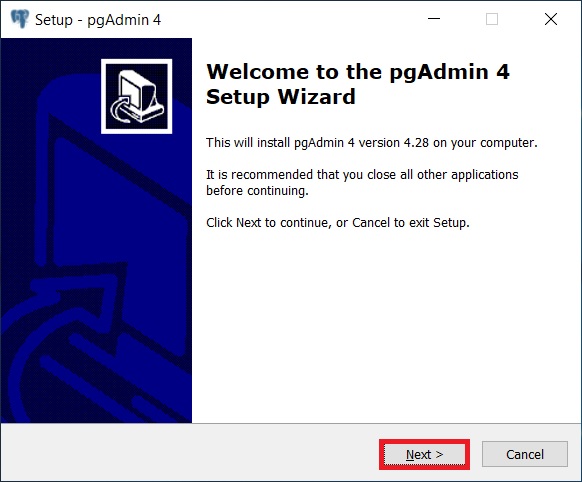
В окне приветствия нажимаем «Next».
Шаг 3 – Принятие условий лицензионного соглашения
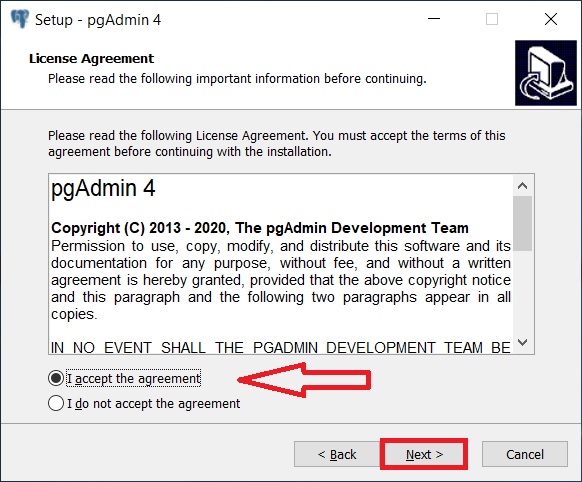
Далее, принимаем условия лицензионного соглашения, для этого отмечаем пункт «I accept the agreement» и нажимаем «Next».
Шаг 4 – Выбор каталога для установки pgAdmin 4
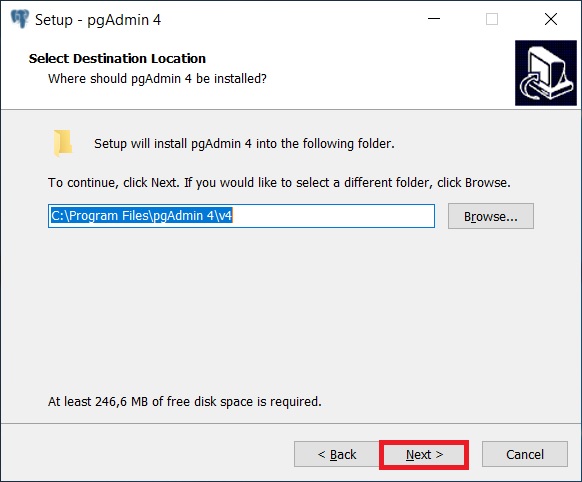
Потом мы можем указать путь к каталогу, в который будет установлена программа, однако можно оставить и по умолчанию, нажимаем «Next».
Заметка! Установка и настройка PostgreSQL на Debian 10.
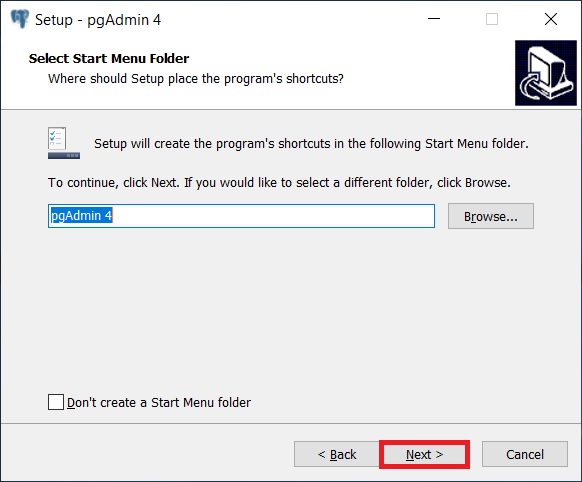
Шаг 5 – Настройка ярлыка pgAdmin 4
В данном окне в случае необходимости можно настроить ярлык для запуска pgAdmin 4.
Нажимаем «Next».
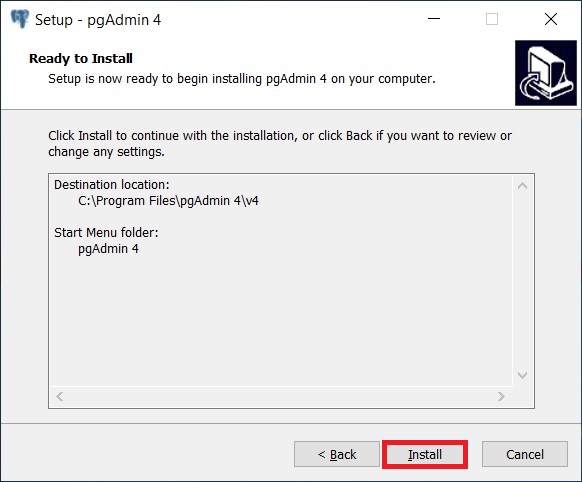
Шаг 6 – Запуск установки pgAdmin 4
Все готово для установки, нажимаем «Install».
Установка началась, она продлится буквально пару минут.
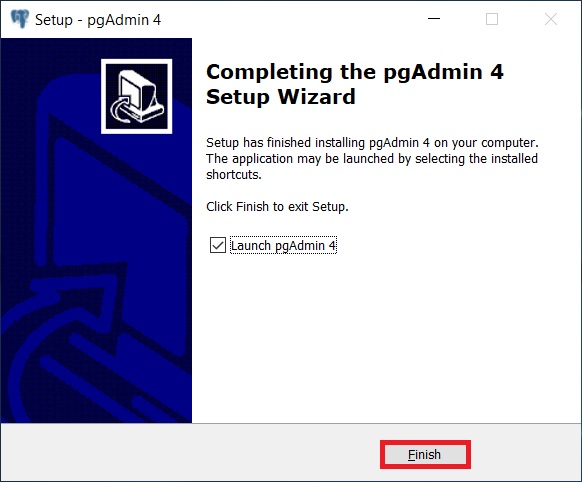
Шаг 7 – Завершение установки pgAdmin 4
Установка будет завершена, когда появится следующее окно, жмем «Finish» (если галочка «Launch pgAdmin 4» будет стоять, то после нажатия на кнопку «Finish» запустится программа pgAdmin 4).
Заметка! ТОП 5 популярных систем управления базами данных (СУБД).
Запуск pgAdmin 4 в Windows 10
Для запуска pgAdmin 4 можно использовать ярлык в меню «Пуск».
pgAdmin 4 имеет веб интерфейс, поэтому после запуска у Вас должен запуститься браузер, а в нем открыться приложение pgAdmin 4.
При первом запуске pgAdmin 4 появится окно «Set Master Password», в котором мы должны задать «мастер-пароль», это нужно для дополнительного шифрования паролей, которые мы будем сохранять, например, для того чтобы каждый раз при подключении к серверу PostgreSQL не вводить пароль пользователя (галочка «Сохранить пароль»).

Вводим и нажимаем «ОК».

После этого отобразится интерфейс pgAdmin 4.
Заметка! Как создать таблицу в PostgreSQL с помощью pgAdmin 4.
Настройка русского языка в pgAdmin 4
По умолчанию интерфейс pgAdmin 4 на английском языке, если Вас это не устраивает, Вы можете очень просто изменить язык на тот, который Вам нужен. pgAdmin 4 поддерживает много языков, в том числе и русский.
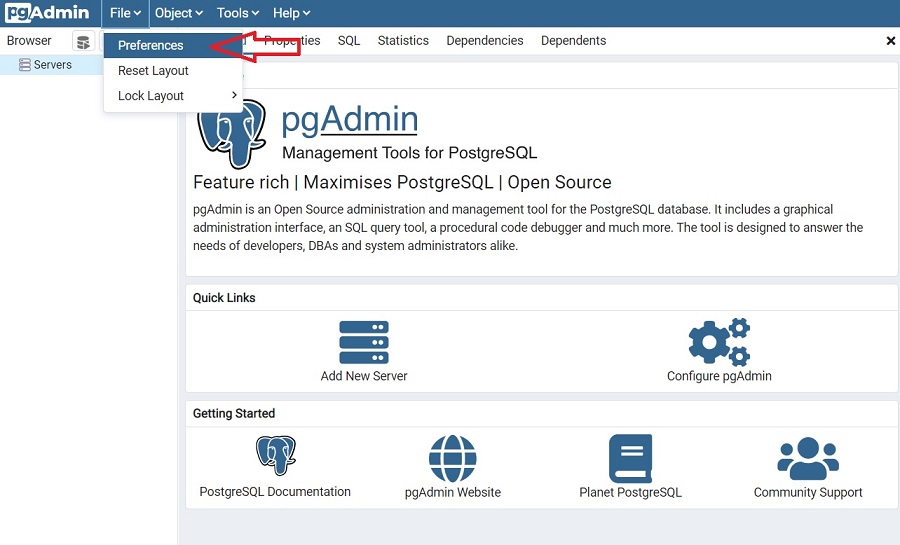
Для того чтобы изменить язык pgAdmin 4, необходимо зайти в меню «File -> Preferences».
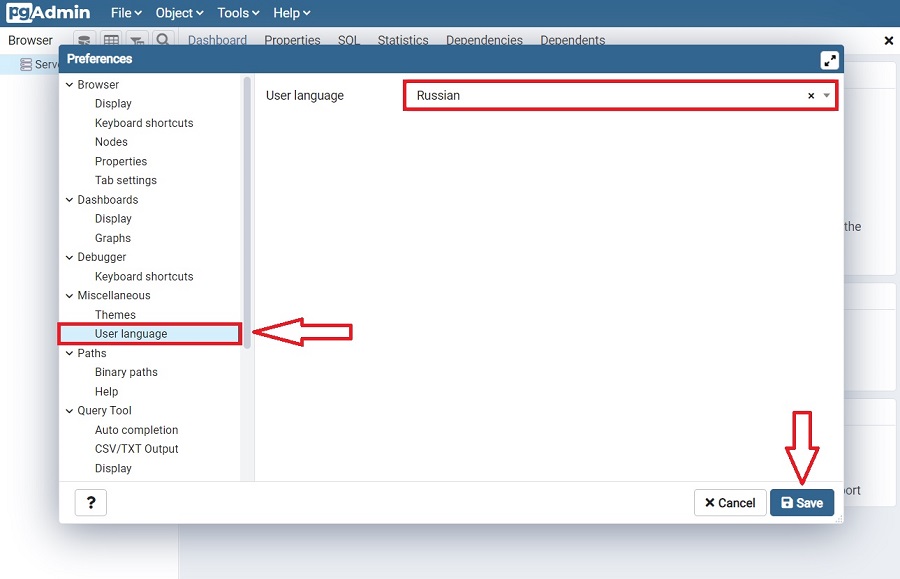
Затем найти пункт «User Languages», и в соответствующем поле выбрать значение «Russian». Для сохранения настроек нажимаем «Save», после этого перезапускаем pgAdmin 4 или просто обновляем страницу в браузере.
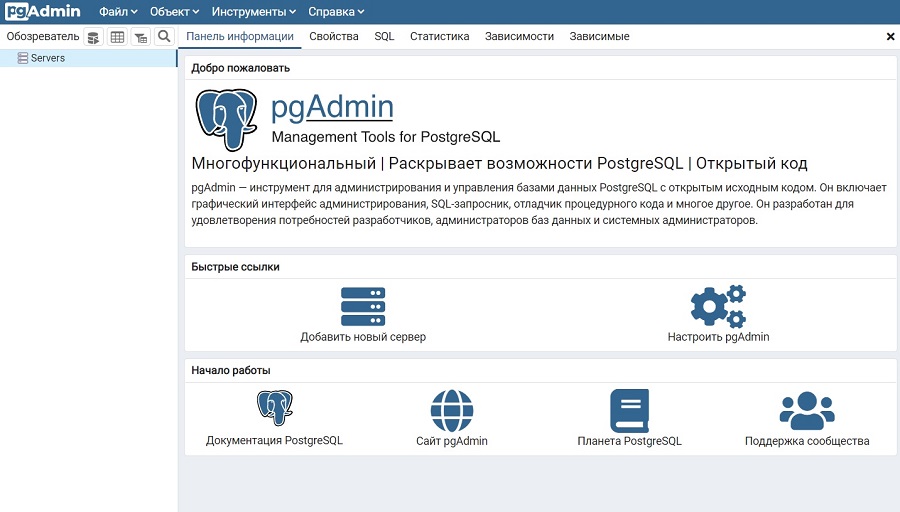
В результате pgAdmin 4 будет русифицирован.
Заметка! Как перенести базу данных PostgreSQL на другой сервер с помощью pgAdmin 4.
Настройка подключения к PostgreSQL
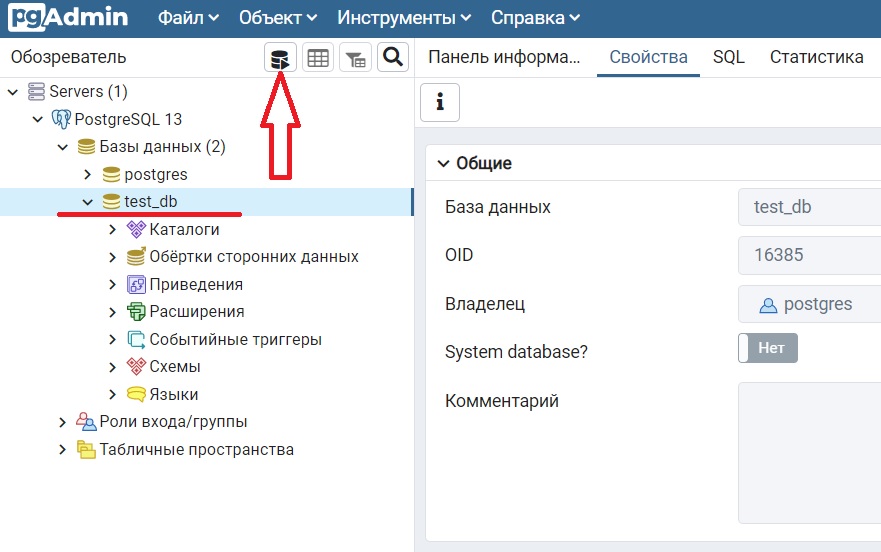
Чтобы подключиться к серверу PostgreSQL в обозревателе серверов, щелкаем по пункту «Servers» правой кнопкой мыши и выбираем «Создать -> Сервер».
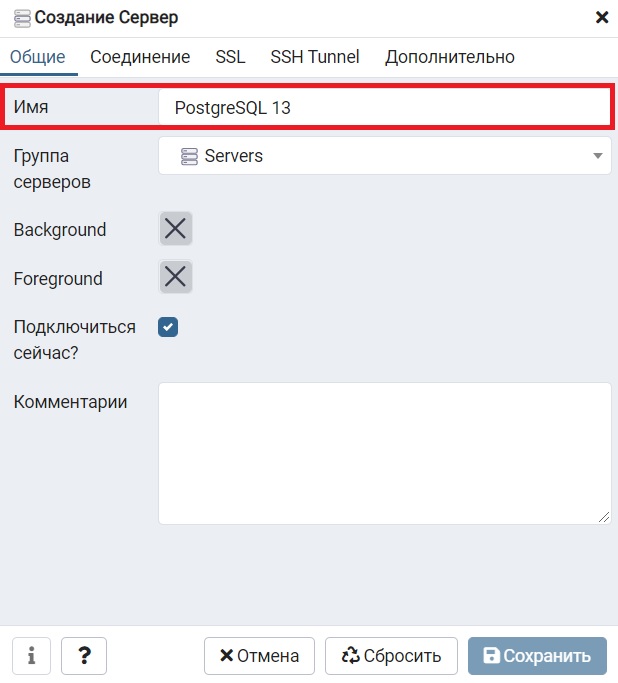
В итоге запустится окно «Создание сервера», в котором на вкладке «Общие» нам нужно ввести название сервера (это название придумываете Вы сами, оно будет отображаться в обозревателе).
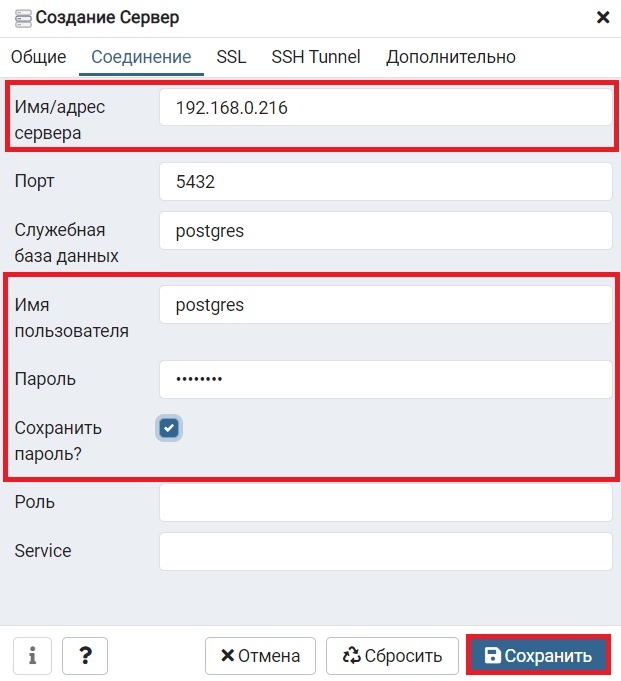
А на вкладке «Соединение» указать IP адрес сервера и данные пользователя, под которым мы подключимся к серверу. В моем случае указан системный пользователь postgres.
Ставим галочку «Сохранить пароль», для того чтобы сохранить пароль и каждый раз не вводить его (благодаря функционалу «мастер-пароля» все сохраненные таким образом пароли будут дополнительно шифроваться).
Нажимаем «Сохранить».
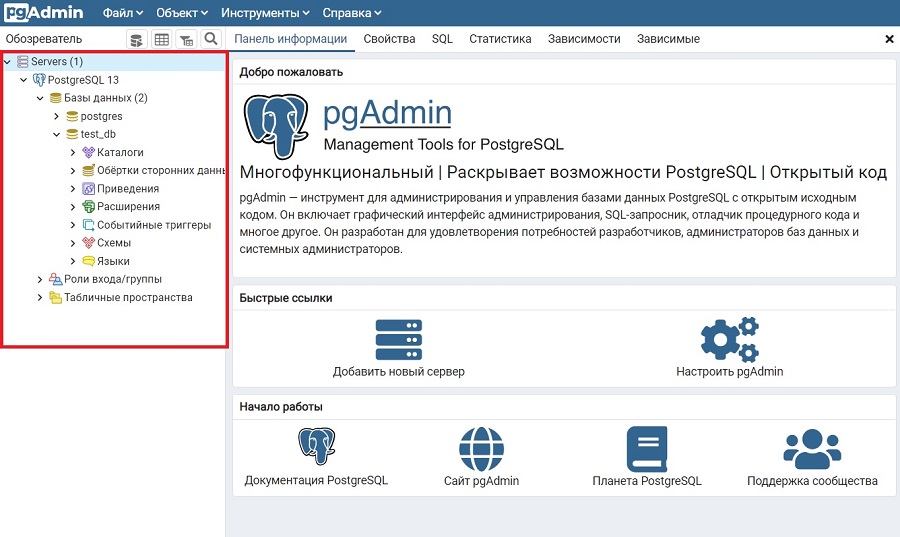
В результате мы подключимся к серверу PostgreSQL, в обозревателе будут отображены все объекты, которые расположены на данном сервере.
Заметка! Как создать составной тип данных с помощью pgAdmin 4 в PostgreSQL.
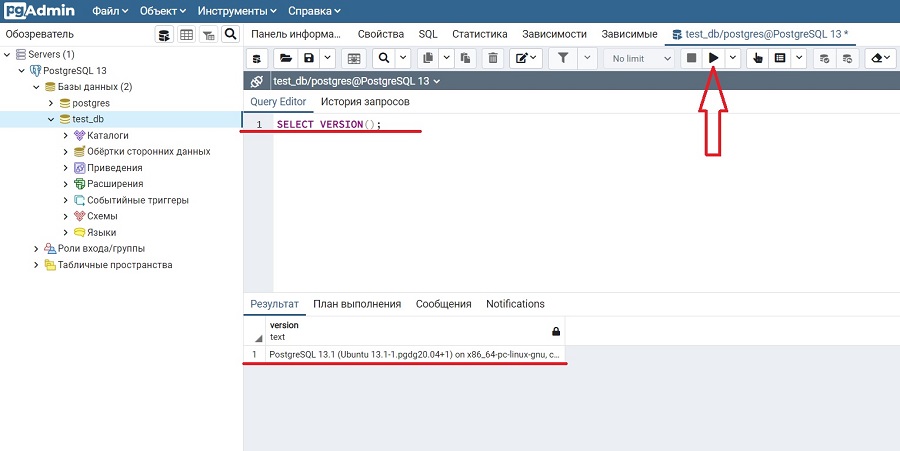
Чтобы убедиться в том, что все работает, давайте напишем простой запрос SELECT, который покажет нам версию сервера PostgreSQL.
Для написания SQL запросов в pgAdmin 4 используется инструмент Query Tool или на русском «Запросник», его можно запустить с помощью иконки на панели или из меню «Инструменты», предварительно выбрав базу данных.
Именно здесь и пишутся все SQL запросы и инструкции.
Чтобы узнать версию PostgreSQL, вводим следующий SQL запрос.
SELECT VERSION();
Для выполнения запроса нажимаем на кнопку «Выполнить» (Execute).
В результате сервер покажет нам версию PostgreSQL.
Заметка! Если Вас интересует язык SQL, то рекомендую почитать книгу «SQL код» – это самоучитель по языку SQL для начинающих программистов. В ней очень подробно рассмотрены основные конструкции языка.
Видео-инструкция – Установка pgAdmin 4 на Windows 10 и настройка подключения к PostgreSQL
На сегодня это все, надеюсь, материал был Вам полезен и интересен, пока!

pgAdmin — это приложение с открытым исходным кодом для администрирования и разработки баз данных PostgreSQL которое позволяет выполнять множество задач, начиная от мониторинга и обслуживания и заканчивая выполнением SQL-запросов. pgAdmin 4 можно установить на локальный компьютер, но в наше время, когда доступ может потребоваться в любое время и из любого места, это не очень удобно. Гораздо удобнее установить pgAdmin 4 в режиме сервера и иметь доступ к нему через браузер из любой точки мира. О том как это сделать мы расскажем в данной статье.
Научиться настраивать MikroTik с нуля или систематизировать уже имеющиеся знания можно на углубленном курсе по администрированию MikroTik. Автор курса, сертифицированный тренер MikroTik Дмитрий Скоромнов, лично проверяет лабораторные работы и контролирует прогресс каждого своего студента. В три раза больше информации, чем в вендорской программе MTCNA, более 20 часов практики и доступ навсегда.
Для установки сервера pgAdmin мы будем использовать платформу Linux и дистрибутив Debian 10, при этом также поддерживаются Debian 9 и Ubuntu 16.04 (Xenial), 18.04 (Bionic), 19.10 (Eoan), 20.04 (Focal).
Мы не рекомендуем устанавливать pgAdmin на сервер с PostgreSQL если вы используете версию СУБД отличную от размещенной в репозитории, например, если вы используете PostgreSQL для 1С, потому что pgAdmin имеет в зависимостях ряд библиотек PostgreSQL, и вы с большой долей вероятности столкнетесь с конфликтом версий. Поэтому мы рекомендуем устанавливать pgAdmin на отдельный сервер, лучше всего виртуальную машину или контейнер. Все приведенные ниже команды следует выполнять с правами суперпользователя (root) или через sudo.
Установка и настройка pgAdmin 4
Для начала установим пакет gnupg для работы с цифровыми подписями:
apt install gnupgЗатем перейдем в домашнюю директорию, скачаем и установим публичный ключ для репозитория pgAdmin:
cd
wget https://www.pgadmin.org/static/packages_pgadmin_org.pub
apt-key add packages_pgadmin_org.pub
Теперь создадим файл со списком источников пакетов и внесем туда запись о репозитории pgAdmin:
echo "deb https://ftp.postgresql.org/pub/pgadmin/pgadmin4/apt/$(lsb_release -cs) pgadmin4 main" > /etc/apt/sources.list.d/pgadmin4.listЗатем обновим список пакетов и установим сервер pgAdmin для работы в web-режиме:
apt update
apt install pgadmin4-web
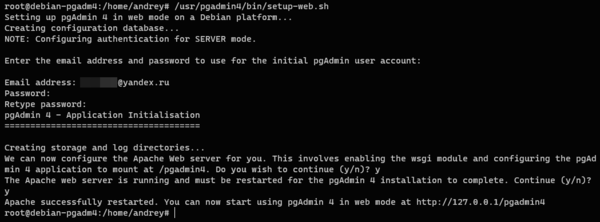
По окончании установки запустите скрипт начальной настройки сервера:
/usr/pgadmin4/bin/setup-web.shВам потребуется ответить на ряд несложных вопросов: указать адрес электронной почты, который вы будете использовать в качестве логина, пароль (уделите особое внимание его надежности), а также разрешить настроить веб-сервер Apache и перезапустить его.
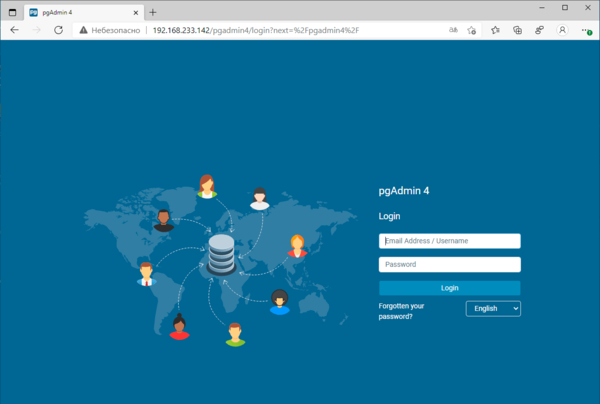
 На этом установка и первичная настройка закончена, для доступа к серверу наберите в браузере http://имя_или_ip_сервера/pgadmin4. Если все сделано правильно, то вы увидите страницу входа.
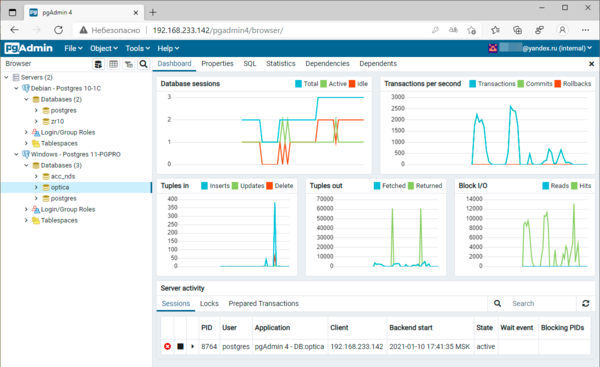
 После авторизации вы попадете в привычную среду pgAdmin, можете подключать свои сервера и работать с базами данных. Инструмент поддерживает любые версии PostgreSQL и платформы установки (Windows, Linux и т.п.). В тестовых целях мы подключили сборку PostgreSQL 10 от 1С на платформе Linux и PostgreSQL 11 от Postgres Pro установленную на Windows Server.
 Настраиваем SSL с самоподписанным сертификатом
 Настраиваем SSL с самоподписанным сертификатом
Вроде бы все хорошо, все настроено и работает. Но есть одно но! По умолчанию pgAdmin 4 работает по незащищенному протоколу HTTP, что в начале третьего десятилетия 21-го века неправильно, даже если вы работаете только в пределах локальной сети. Тем более что в случае несанкционированного доступа некто получит полный доступ ко всем вашим базам данных.
Как быть? Если у вас есть собственное доменное имя, то можно настроить работу с сертификатами от Let’s Encrypt, подробнее читайте в нашей инструкции: Настраиваем Apache для работы по HTTPS (SSL) с сертификатами Let’s Encrypt
В остальных случаях будет вполне достаточно самоподписанного сертификата. Существует расхожее мнение, что шифрование с помощью самоподписанных сертификатов ненадежно, однако это не так. Единственный и существенный недостаток данного вида сертификатов — это отсутствие доверительных отношений. Т.е. мы не знаем кем именно он выпущен и можно ли ему доверять. Для публичных сервисов такой вариант не подходит, так как злоумышленник всегда может подменить такой сертификат своим и перехватить трафик, а пользователь даже не заметит разницы. Но для служебных узлов, когда администратор всегда может убедиться в том, что этот сертификат выпущен именно этим сервером, самоподписанные сертификаты вполне имеют право на существование.
Для создания такого сертификата выполните команду:
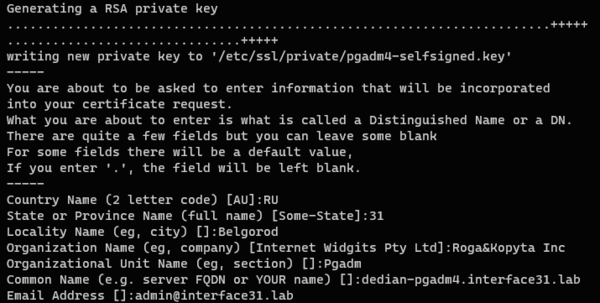
openssl req -x509 -nodes -days 3650 -newkey rsa:2048 -keyout /etc/ssl/private/pgadm4-selfsigned.key -out /etc/ssl/certs/pgadm4-selfsigned.crtНа что здесь следует обратить внимание? На ключ -days, который указывает срок действия сертификата в днях, в нашем случае мы указали 3560 дней или 10 лет,
В процессе генерации сертификата вам потребуется ответить на ряд вопросов, в большинстве их них можно указать произвольные данные и только в поле Common Name следует указать IP-адрес сервера или его FQDN-имя.
Затем откроем файл /etc/apache2/sites-available/default-ssl.conf в котором найдем и приведем к следующему виду две строки:
SSLCertificateFile      /etc/ssl/certs/pgadm4-selfsigned.crt
SSLCertificateKeyFile /etc/ssl/private/pgadm4-selfsigned.key
После чего создадим файл с настройками SSL:
touch /etc/apache2/conf-available/ssl.conf И внесем в него следующие строки:
SSLProtocol all -SSLv3 -TLSv1 -TLSv1.1
SSLCipherSuite ECDHE-ECDSA-AES128-GCM-SHA256:ECDHE-RSA-AES128-GCM-SHA256:ECDHE-ECDSA-AES256-GCM-SHA384:ECDHE-RSA-AES256-GCM-SHA384:ECDHE-ECDSA-CHACHA20-POLY1305:ECDHE-RSA-CHACHA20-POLY1305:DHE-RSA-AES128-GCM-SHA256:DHE-RSA-AES256-GCM-SHA384
SSLHonorCipherOrder off
SSLSessionTickets off

SSLUseStapling On
SSLStaplingCache "shmcb:logs/ssl_stapling(32768)"
Мы не будем в рамках данной статьи подробно разбирать эти параметры, они достаточно сложны, но для получения актуальных настроек SSL вы всегда можете воспользоваться ресурсом ssl-config.mozilla.org, рекомендуемый уровень настроек — Intermediate. Указанный выше блок получен именно оттуда.
Сохраняем изменения и включаем нужные модули, конфигурации и виртуальные хосты:
a2enmod ssl
a2enconf ssl
a2ensite default-ssl
Проверяем конфигурацию Apache на ошибки:
apachectl -tИ перезапускаем веб-сервер:
systemctl reload apache2Теперь подключимся к серверу pgAdmin 4 через браузер с явным указанием защищенного протокола https://имя_или_ip_сервера/pgadmin4:
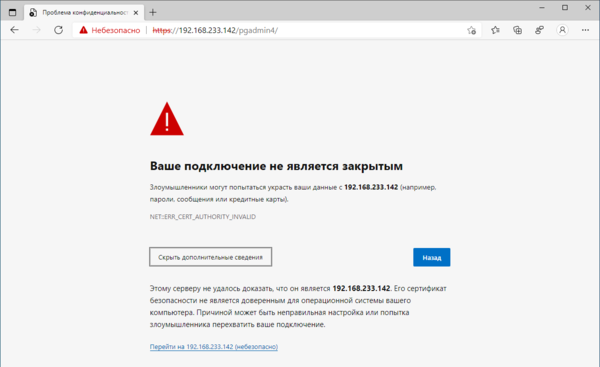 То, что мы получили предупреждение безопасности — это нормально, с точки зрения браузера наш сертификат выпущен непонятно кем и доверять ему нет никаких оснований, но мы то знаем что к чему, поэтому игнорируем это предупреждение и переходим к целевому узлу. Теперь мы можем проверить параметры подключения. Для этого воспользуемся инструментами разработчика:
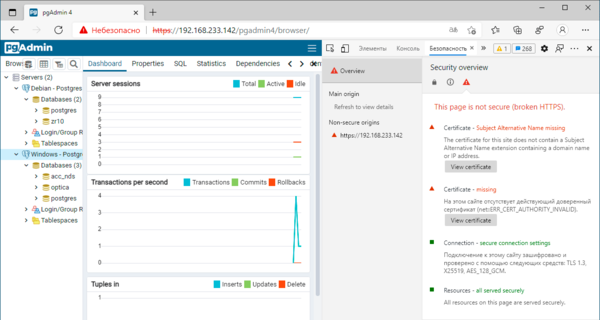 Несмотря на ряд серьезных ошибок все достаточно неплохо. Первая ошибка сообщает нам, что имя сертификата не соответствует нашему узлу, что действительно так, сертификат мы выпустили для FQDN debian-pgadm4.interface31.lab, а обращаемся к серверу по IP-адресу 192.168.233.142. Вторая ошибка предупреждает о том, что сертификат выпущен центром сертификации (CA), который не является доверенным. Но так как мы знаем кто именно выпустил данный сертификат и что указанный IP-адрес совпадает с FQDN сертификата, то смело игнорируем эти ошибки.
Следующие пункты сообщают нам о том, что соединение использует протокол TLS 1.3, прямую секретность на базе 128-битной эллиптической кривой Curve25519 и шифрование AES128-GCM, также на странице нет незащищенных элементов. Это очень неплохой результат, соответствующий современным требованиям к безопасности.
После того, как мы убедились, что наш сервер нормально работает по защищенному протоколу, настроим автоматическую переадресацию с HTTP на HTTPS. Откроем файл /etc/apache2/sites-available/000-default.conf и в пределах секции VirtualHost внесем следующие строки:
RewriteEngine On
RewriteCond %{HTTPS} off
RewriteRule (.*) https://%{HTTP_HOST}%{REQUEST_URI}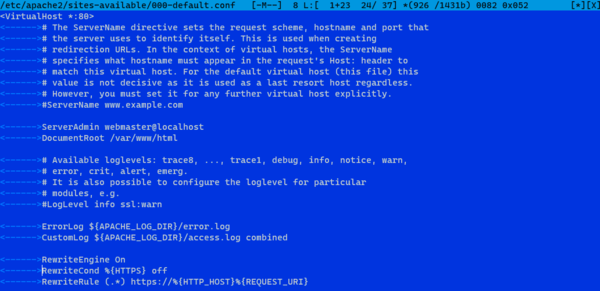 Подключим необходимые модули:
a2enmod rewriteИ перезапустим веб-сервер:
systemctl reload apache2После чего убедимся, что все запросы к нашему серверу автоматически перенаправляются на защищенную версию. Как видим, настроить pgAdmin 4 в режиме сервера достаточно несложно, получив удобный и безопасный инструмент для управления вашими базами данных.
Научиться настраивать MikroTik с нуля или систематизировать уже имеющиеся знания можно на углубленном курсе по администрированию MikroTik. Автор курса, сертифицированный тренер MikroTik Дмитрий Скоромнов, лично проверяет лабораторные работы и контролирует прогресс каждого своего студента. В три раза больше информации, чем в вендорской программе MTCNA, более 20 часов практики и доступ навсегда.
As a new Postgres user, I did not understand how to make use of Postgres on Ubuntu. So I’m just going to chime in and help out other newbies who perhaps cannot figure out how to work with Postgres on Linux. If you’re using Windows, steps should be similar.
Before you get to using PgAdmin, a bit of configuration is required. Most will happen in your terminal at first.
Open a terminal using Ctrl + Alt + T if you’re on a PC. Or just pres ALT + F1 and begin typing Terminal.
Let’s start with the basics first and make sure you have proper
installation.
1. Installing Postgres Latest
1.1 update the system software packages
sudo apt update
1.2 install latest version of PostgreSQL from default Ubuntu repositories
sudo apt install postgresql
the installer will create a new PostgreSQL collection of databases
that will be managed by a single server instance
Default data directory : /var/lib/postgresql/your-version/main
Configurations files : /etc/postgresql/your-version/main
2. Checking if Postgres Service is Installed
2.1 Check if Postgres is Active
sudo systemctl is-active postgresql
You should see : active
2.2 Check if Postgres is enabled
sudo systemctl is-enabled postgresql
You should see : enabled
2.3 Check Postgres Service status
sudo systemctl status postgresql
You should see : active (exited) marked in green
2.4 Check if Postgres is ready to accept connections
sudo pg_isready
You should see : /var/run/postgresql:5432 — accepting connections
3. Configuring Postgres Authentication
3.1 Opening the pg_hba.conf as SUPERUSER
sudo code --user-data-dir=~/root /etc/postgresql/13/main/pg_hba.conf
I’m using visual studio code so for me code is vsc codename. If you’re using vim or sublime just replace code with your text editor name.
3.2 Configuring pg_hba.conf
Notes: you shouldn’t need to change anything here, just make sure your
configuration files matches the following lines :
host    all             all             127.0.0.1/32            md5
# IPv6 local connections:
host    all             all             ::1/128                 md5
Hit save and close.
3.3 Restart Postgres Service
sudo systemctl restart postgresql
4. Create NEW Server
For me, this is where all my confusion was. Before you use PgAdmin,
you need to create a server in your terminal, then you can connect and
manager it with PgAdmin just like you would with PhpMyAdmin. It’s
actually easier.
4.1 Access the PostgreSQL database shell
sudo su - postgres
psql
You will then see this : postgres=#
4.2 Creating new server and user
postgres=# create user bob with superuser password 'admin';
That’s how you create new user and server in Postgres. Let’s move on to PgAdmin.
5. Installing pgAdmin4
5.1 Add public key for the repository
curl https://www.pgadmin.org/static/packages_pgadmin_org.pub | sudo apt-key add
Notes : if you don’t have curl your Ubuntu will give you the command to install it
5.2 create the repository configuration file
sudo sh -c 'echo "deb https://ftp.postgresql.org/pub/pgadmin/pgadmin4/apt/$(lsb_release -cs) pgadmin4 main" > /etc/apt/sources.list.d/pgadmin4.list && apt update'
5.3 install pgAdmin4
sudo apt update
sudo apt install pgadmin4
5.4 run the web setup script installed with the pgadmin4 binary package
sudo /usr/pgadmin4/bin/setup-web.sh
It will asks you for your email address and password. This email and
password is required to login to the PgAdmin4 web interface
6. Accessing pgAdmin4 Web Interface
6.1 Open your favorite browser
type in the address of the PgAdmin web interface. It usually looks like this
http://127.0.0.1/pgadmin4
Note : After installation the web setup script will tell you exactly
where to access the web interface.
When you see the login screen, enter the email and password you’ve chosen during the web setup script.
6.2 Adding New Server Connection
6.2.1 Click on Add New Server
6.2.2 Under General tab enter a name for your server. ANY name you would like, it doesn’t matter. You could enter PgServer1 or whatever. Don’t change anything else.
6.2.3 Switch to Connection Tab
Hostname/ Address : localhost
Port : 5432
Maintenance database : postgres (always)
Username :  **bob** (the username youve chosen at 4.2)
Password : admin (or any password you chose at 4.2)
Hit Save.
Voila! You should be connected successfully. If not, just open terminal and create a new user like we did at 4.2
Notes : to create databases is very easy just right click on your
servername
create > databases
Useful Resources & Tutorials
PostgreSQL Fundamentals : Queries and the likes
PostgreSQL & JSON : useful for dealing with JS apps
PostgreSQL & Nodejs : Create realtime apps with nodejs and socket.io
More PostgreSQL Nodejs
- https://github.com/supabase/realtime
- https://whatsyourssn.com/posts/real-time-app-socket-postgresql/
UPDATE 2023
While following my own tutorial I ran into certificate issues at step 5 when I tried to create the repository file. The full error I was getting was this.
I want to post the solution that worked for me here.

![]()
Mac
Posted on Jan 3, 2021
• Originally published at mcartoixa.me on Jan 3, 2021
I just set out to create a PostgreSQL database server in my home lab, that I intend to use first with Home Assistant. And just because this is my home lab, it is hosted in a Windows Server 2019 VM in Hyper-V. 😁 I then foolishly installed pgAdmin 4 on my computer with the intention to remotely manage this new server… I remember pgAdmin III as such a slick application with an installer weighing less than 15MB. 4 years later the pgAdmin 4 installer is 10 times bigger , a Flask application that runs in the browser (these are the times we live in 🤷🏻♂️) once the server has started, which can take a while.
So I decided that this (otherwise fine) piece of bloatware belonged on a web server and not on my computer. This is not very difficult once you have got the recipe (and some experience on Windows of course).
Ingredients
The ingredients are:
- a Windows Server machine. I used Windows Server 2019, but I am pretty sure the same applies to every version at least back to Windows Server 2008. Or Windows 8, for that matter.
- an instance of IIS. This can be installed as a role inside Windows Server (or as as feature in Windows 10).
- HttpPlatformHandler which is a IIS Module that can be used to manage any process on the server (we will be using Python in this case) and act as a reverse proxy.
-
pgAdmin 4:
- it can be installed anywhere, but
%ProgramFiles%is usually where programs go.
- it can be installed anywhere, but
Recipe
- Create an application pool
- Create a website
- Open the firewall
- Configure the website
- Grant rights
- Start the website
Create an application pool
As a best practice you will need a new Application Pool in IIS: this will allow us to isolate the application in a dedicated worker process with a dedicated identity. I named my pool PgAdmin:

Create a website
Then we need a new website:
- select the Application Pool that we just created.
- create a new folder under
C:inetpubcalledpgadmin. - configure your bindings as you wish: I configured my application to be accessible on port 3000. You will be able to change this later if necessary.
- do not start the website right away (there is still work to do).

Open the firewall
Make sure your application is accessible by opening the Windows Firewall if necessary (on TCP port 3000 in my case).
Configure the website
Configure the website by adding the following configuration (cf. Configure Python web apps for IIS) in a file called web.config inside the pgadmin folder that you just created (you can use Notepad):
<?xml version="1.0" encoding="utf-8"?>
<configuration>
<system.webServer>
<handlers>
<add name="PythonHandler" path="*" verb="*" modules="httpPlatformHandler" resourceType="Unspecified"/>
</handlers>
<httpPlatform
processPath="%ProgramFiles%pgAdmin 4v4runtimepython.exe"
arguments=""%ProgramFiles%pgAdmin 4v4webpgAdmin4.py""
stdoutLogEnabled="true"
stdoutLogFile="C:inetpublogspgadminpgAdmin4.log"
startupTimeLimit="60"
processesPerApplication="1">
<environmentVariables>
<environmentVariable name="PGADMIN_INT_PORT" value="%HTTP_PLATFORM_PORT%" />
<environmentVariable name="PYTHONHOME" value="%ProgramFiles%pgAdmin 4v4venv" />
<environmentVariable name="SERVER_MODE" value="True" />
</environmentVariables>
</httpPlatform>
<modules>
<remove name="WebDAVModule" />
</modules>
</system.webServer>
</configuration>
Enter fullscreen mode
Exit fullscreen mode
It is pretty straightforward but notably:
- the arguments attribute is quoted to account for the fact that the path contains spaces.
- the process outputs logs inside a folder called
C:inetpublogspgadminthat would have to be created beforehand. - pgAdmin notoriously handles a single process only.
-
HttpPlatformHandler will automatically create a process using Python and assign it a dedicated port using the
HTTP_PLATFORM_PORTenvironment variable.
Grant rights
And now we simply have to give the proper rights to our application pool user named IIS APPPOOLPgAdmin:
-
Read & Execute on the folder
%ProgramFiles%pgAdmin 4(and subfolders). -
Read & Execute on the folder
C:inetpubpgadmin.- Create a subfolder called
pgAdminand give Full Control to the user. This where the application will store its data.
- Create a subfolder called
-
Full Control on the logging folder (
C:inetpublogspgadminin my case).

Start the website
Now you can start the website. Enjoy!
Note that the application will recycle automatically every 29 hours by default, which means that the next request will take much longer while the process is restarted. Not such a bad thing by itself, but obviously this behaviour can be changed.
Also note that the logging folder should be cleaned up from time to time…
UPDATE 2021-05-29: the website configuration has been udpated for version 5 of pgAdmin… 4! Here is the configuration for version 4:
<?xml version="1.0" encoding="utf-8"?>
<configuration>
<system.webServer>
<handlers>
<add name="PythonHandler" path="*" verb="*" modules="httpPlatformHandler" resourceType="Unspecified"/>
</handlers>
<httpPlatform
processPath="%ProgramFiles%pgAdmin 4v4runtimepython.exe"
arguments=""%ProgramFiles%pgAdmin 4v4webpgAdmin4.py""
stdoutLogEnabled="true"
stdoutLogFile="C:inetpublogspgadminpgAdmin4.log"
startupTimeLimit="60"
processesPerApplication="1">
<environmentVariables>
<environmentVariable name="PGADMIN_INT_PORT" value="%HTTP_PLATFORM_PORT%" />
<environmentVariable name="PYTHONHOME" value="%ProgramFiles%pgAdmin 4v4venv" />
<environmentVariable name="SERVER_MODE" value="True" />
</environmentVariables>
</httpPlatform>
<modules>
<remove name="WebDAVModule" />
</modules>
</system.webServer>
</configuration>
Enter fullscreen mode
Exit fullscreen mode
Как новый пользователь Postgres, я не понимал, как использовать Postgres в Ubuntu. Так что я просто собираюсь вмешаться и помочь другим новичкам, которые, возможно, не могут понять, как работать с Postgres в Linux. Если вы используете Windows, действия должны быть аналогичными.
Прежде чем вы перейдете к использованию PgAdmin, необходимо немного настроить. Сначала большинство из них будет происходить в вашем терминале.
Откройте терминал с помощью Ctrl + Alt + T, если вы работаете на ПК. Или просто нажмите ALT + F1 и начните вводить Терминал.
Давайте сначала начнем с основ и убедимся, что вы правильно установили.
1. Установка последней версии Postgres
1.1 обновите системные пакеты программного обеспечения
sudo apt update
1.2 установите последнюю версию PostgreSQL из репозиториев Ubuntu по умолчанию
sudo apt install postgresql
установщик создаст новую коллекцию баз данных PostgreSQL, которой будет управлять один экземпляр сервера.
Каталог данных по умолчанию: /var/lib/postgresql/your-version/main
Файлы конфигурации: /etc/postgresql/your-version/main
2. Проверка, установлена ли служба Postgres.
2.1. Проверьте, активен ли Postgres
sudo systemctl is-active postgresql
Вы должны увидеть: активно
2.2 Проверьте, включен ли Postgres
sudo systemctl is-enabled postgresql
Вы должны увидеть: включено
2.3. Проверьте статус службы Postgres
sudo systemctl status postgresql
Вы должны увидеть: активен (завершен), отмечен зеленым
2.4. Проверьте, готов ли Postgres принимать соединения
sudo pg_isready
Вы должны увидеть: / var / run / postgresql: 5432 — прием соединений
3. Настройка аутентификации Postgres
3.1 Открытие pg_hba.conf от имени СУПЕРПОЛЬЗОВАТЕЛЯ
sudo code --user-data-dir=~/root /etc/postgresql/13/main/pg_hba.conf
Я использую код Visual Studio, поэтому для меня код — это кодовое имя vsc. Если вы используете vim или sublime, просто замените код своим именем текстового редактора.
3.2 Настройка pg_hba.conf
Примечания: вам не нужно здесь ничего менять, просто убедитесь, что ваши файлы конфигурации соответствуют следующим строкам:
host    all             all             127.0.0.1/32            md5
# IPv6 local connections:
host    all             all             ::1/128                 md5
Нажмите «Сохранить» и закройте.
3.3 Перезапустите службу Postgres
sudo systemctl restart postgresql
4. Создайте НОВЫЙ сервер.
Для меня в этом было все мое замешательство. Прежде чем использовать PgAdmin, вам необходимо создать сервер в своем терминале, затем вы можете подключиться и управлять им с помощью PgAdmin, как и с PhpMyAdmin. На самом деле это проще.
4.1 Доступ к оболочке базы данных PostgreSQL
sudo su - postgres
psql
Вы увидите это: postgres=#
4.2 Создание нового сервера и пользователя
postgres=# create user bob with superuser password 'admin';
Вот как вы создаете нового пользователя и сервер в Postgres. Перейдем к PgAdmin.
5. Установка pgAdmin4
5.1 Добавьте открытый ключ для репозитория
curl https://www.pgadmin.org/static/packages_pgadmin_org.pub | sudo apt-key add
Примечания: если у вас нет curl, ваш Ubuntu выдаст вам команду для его установки.
5.2 создайте файл конфигурации репозитория
sudo sh -c 'echo "deb https://ftp.postgresql.org/pub/pgadmin/pgadmin4/apt/$(lsb_release -cs) pgadmin4 main" > /etc/apt/sources.list.d/pgadmin4.list && apt update'
5.3 установить pgAdmin4
sudo apt update
sudo apt install pgadmin4
5.4 запустите сценарий веб-настройки, установленный с двоичным пакетом pgadmin4
sudo /usr/pgadmin4/bin/setup-web.sh
Он попросит вас ввести адрес электронной почты и пароль. Этот адрес электронной почты и пароль необходимы для входа в веб-интерфейс PgAdmin4.
6. Доступ к веб-интерфейсу pgAdmin4
6.1 Откройте свой любимый браузер
введите адрес веб-интерфейса PgAdmin. Обычно это выглядит так
http://127.0.0.1/pgadmin4
Примечание. После установки сценарий веб-настройки сообщит вам, где именно получить доступ к веб-интерфейсу.
Когда вы увидите экран входа в систему, введите адрес электронной почты и пароль, которые вы выбрали во время сценария веб-настройки.
6.2 Добавление нового подключения к серверу
6.2.1 Нажмите Добавить новый сервер.
6.2.2 На вкладке Общие введите имя вашего сервера. ЛЮБОЕ имя, которое вы хотите, не имеет значения. Вы можете ввести PgServer1 или что угодно. Больше ничего не меняй.
6.2.3 Перейдите на вкладку «Подключение»
Hostname/ Address : localhost
Port : 5432
Maintenance database : postgres (always)
Username :  **bob** (the username youve chosen at 4.2)
Password : admin (or any password you chose at 4.2)
Нажмите «Сохранить».
Вуаля! Вы должны успешно подключиться. Если нет, просто откройте терминал и создайте нового пользователя, как мы это делали в 4.2.
Примечания: создавать базы данных очень просто, просто щелкните правой кнопкой мыши имя вашего сервера.
create > databases
Полезные ресурсы и руководства
Основы PostgreSQL: запросы и т.п.
PostgreSQL и JSON: полезно для работы с приложениями JS
PostgreSQL и Nodejs: создавайте приложения в реальном времени с помощью nodejs и socket.io
Другие узлы PostgreSQL
- https://github.com/supabase/realtime
- https://whatsyourssn.com/posts/real-time-app-socket-postgresql/
person
Grogu
schedule
05.03.2021
Introduction
pgAdmin is an open-source administration and development platform for PostgreSQL and its related database management systems. Written in Python and jQuery, it supports all the features found in PostgreSQL. You can use pgAdmin to do everything from writing basic SQL queries to monitoring your databases and configuring advanced database architectures.
In this tutorial, we’ll walk through the process of installing and configuring the latest version of pgAdmin onto an Ubuntu 18.04 server, accessing pgAdmin through a web browser, and connecting it to a PostgreSQL database on your server.
Prerequisites
To complete this tutorial, you will need:
Step 1 — Installing pgAdmin and its Dependencies
As of this writing, the most recent version of pgAdmin is pgAdmin 4, while the most recent version available through the official Ubuntu repositories is pgAdmin 3. pgAdmin 3 is no longer supported though, and the project maintainers recommend installing pgAdmin 4. In this step, we will go over the process of installing the latest version of pgAdmin 4 within a virtual environment (as recommended by the project’s development team) and installing its dependencies using apt.
To begin, update your server’s package index if you haven’t done so recently:
Next, install the following dependencies. These include libgmp3-dev, a multiprecision arithmetic library; libpq-dev, which includes header files and a static library that helps communication with a PostgreSQL backend; and libapache2-mod-wsgi-py3, an Apache module that allows you to host Python-based web applications within Apache:
- sudo apt install libgmp3-dev libpq-dev libapache2-mod-wsgi-py3
Following this, create a few directories where pgAdmin will store its sessions data, storage data, and logs:
- sudo mkdir -p /var/lib/pgadmin4/sessions
- sudo mkdir /var/lib/pgadmin4/storage
- sudo mkdir /var/log/pgadmin4
Then, change ownership of these directories to your non-root user and group. This is necessary because they are currently owned by your root user, but we will install pgAdmin from a virtual environment owned by your non-root user, and the installation process involves creating some files within these directories. After the installation, however, we will change the ownership over to the www-data user and group so it can be served to the web:
- sudo chown -R sammy:sammy /var/lib/pgadmin4
- sudo chown -R sammy:sammy /var/log/pgadmin4
Next, open up your virtual environment. Navigate to the directory your programming environment is in and activate it. Following the naming conventions of the prerequisite Python 3 tutorial, we’ll go to the environments directory and activate the my_env environment:
- cd environments/
- source my_env/bin/activate
Following this, download the pgAdmin 4 source code onto your machine. To find the latest version of the source code, navigate to the pgAdmin 4 (Python Wheel) Download page and click the link for the latest version (v3.4, as of this writing). This will take you to a Downloads page on the PostgreSQL website. Once there, copy the file link that ends with .whl — the standard built-package format used for Python distributions. Then go back to your terminal and run the following wget command, making sure to replace the link with the one you copied from the PostgreSQL site, which will download the .whl file to your server:
- wget https://ftp.postgresql.org/pub/pgadmin/pgadmin4/v3.4/pip/pgadmin4-3.4-py2.py3-none-any.whl
Next install the wheel package, the reference implementation of the wheel packaging standard. A Python library, this package serves as an extension for building wheels and includes a command line tool for working with .whl files:
- python -m pip install wheel
Then install pgAdmin 4 package with the following command:
- python -m pip install pgadmin4-3.4-py2.py3-none-any.whl
That takes care of installing pgAdmin and its dependencies. Before connecting it to your database, though, there are a few changes you’ll need to make to the program’s configuration.
Step 2 — Configuring pgAdmin 4
Although pgAdmin has been installed on your server, there are still a few steps you must go through to ensure it has the permissions and configurations needed to allow it to correctly serve the web interface.
pgAdmin’s main configuration file, config.py, is read before any other configuration file. Its contents can be used as a reference point for further configuration settings that can be specified in pgAdmin’s other config files, but to avoid unforeseen errors, you should not edit the config.py file itself. We will add some configuration changes to a new file, named config_local.py, which will be read after the primary one.
Create this file now using your preferred text editor. Here, we will use nano:
- nano my_env/lib/python3.6/site-packages/pgadmin4/config_local.py
In your editor, add the following content:
environments/my_env/lib/python3.6/site-packages/pgadmin4/config_local.py
LOG_FILE = '/var/log/pgadmin4/pgadmin4.log'
SQLITE_PATH = '/var/lib/pgadmin4/pgadmin4.db'
SESSION_DB_PATH = '/var/lib/pgadmin4/sessions'
STORAGE_DIR = '/var/lib/pgadmin4/storage'
SERVER_MODE = True
Here are what these five directives do:
LOG_FILE: this defines the file in which pgAdmin’s logs will be stored.SQLITE_PATH: pgAdmin stores user-related data in an SQLite database, and this directive points the pgAdmin software to this configuration database. Because this file is located under the persistent directory/var/lib/pgadmin4/, your user data will not be lost after you upgrade.SESSION_DB_PATH: specifies which directory will be used to store session data.STORAGE_DIR: defines where pgAdmin will store other data, like backups and security certificates.SERVER_MODE: setting this directive toTruetells pgAdmin to run in Server mode, as opposed to Desktop mode.
Notice that each of these file paths point to the directories you created in Step 1.
After adding these lines, save and close the file (press CTRL + X, followed by Y and then ENTER). With those configurations in place, run the pgAdmin setup script to set your login credentials:
- python my_env/lib/python3.6/site-packages/pgadmin4/setup.py
After running this command, you will see a prompt asking for your email address and a password. These will serve as your login credentials when you access pgAdmin later on, so be sure to remember or take note of what you enter here:
Output
. . .
Enter the email address and password to use for the initial pgAdmin user account:
Email address: [email protected]
Password:
Retype password:
Following this, deactivate your virtual environment:
Recall the file paths you specified in the config_local.py file. These files are held within the directories you created in Step 1, which are currently owned by your non-root user. They must, however, be accessible by the user and group running your web server. By default on Ubuntu 18.04, these are the www-data user and group, so update the permissions on the following directories to give www-data ownership over both of them:
- sudo chown -R www-data:www-data /var/lib/pgadmin4/
- sudo chown -R www-data:www-data /var/log/pgadmin4/
With that, pgAdmin is fully configured. However, the program isn't yet being served from your server, so it remains inaccessible. To resolve this, we will configure Apache to serve pgAdmin so you can access its user interface through a web browser.
Step 3 — Configuring Apache
Step 3 — Configuring ApacheThe Apache web server uses virtual hosts to encapsulate configuration details and host more than one domain from a single server. If you followed the prerequisite Apache tutorial, you may have set up an example virtual host file under the name example.com.conf, but in this step we will create a new one from which we can serve the pgAdmin web interface.
To begin, make sure you're in your root directory:
Then create a new file in your /sites-available/ directory called pgadmin4.conf. This will be your server’s virtual host file:
- sudo nano /etc/apache2/sites-available/pgadmin4.conf
Add the following content to this file, being sure to update the highlighted parts to align with your own configuration:
/etc/apache2/sites-available/pgadmin4.conf
<VirtualHost *>
ServerName your_server_ip
WSGIDaemonProcess pgadmin processes=1 threads=25 python-home=/home/sammy/environments/my_env
WSGIScriptAlias / /home/sammy/environments/my_env/lib/python3.6/site-packages/pgadmin4/pgAdmin4.wsgi
<Directory "/home/sammy/environments/my_env/lib/python3.6/site-packages/pgadmin4/">
WSGIProcessGroup pgadmin
WSGIApplicationGroup %{GLOBAL}
Require all granted
</Directory>
</VirtualHost>
Save and close the virtual host file. Next, use the a2dissite script to disable the default virtual host file, 000-default.conf:
- sudo a2dissite 000-default.conf
Note: If you followed the prerequisite Apache tutorial, you may have already disabled 000-default.conf and set up an example virtual host configuration file (named example.com.conf in the prerequisite). If this is the case, you will need to disable the example.com.conf virtual host file with the following command:
- sudo a2dissite example.com.conf
Then use the a2ensite script to enable your pgadmin4.conf virtual host file. This will create a symbolic link from the virtual host file in the /sites-available/ directory to the /sites-enabled/ directory:
- sudo a2ensite pgadmin4.conf
Following this, test that your configuration file’s syntax is correct:
If your configuration file is all in order, you will see Syntax OK. If you see an error in the output, reopen the pgadmin4.conf file and double check that your IP address and file paths are all correct, then rerun the configtest.
Once you see Syntax OK in your output, restart the Apache service so it reads your new virtual host file:
- sudo systemctl restart apache2
pgAdmin is now fully installed and configured. Next, we'll go over how to access pgAdmin from a browser before connecting it to your PostgreSQL database.
Step 4 — Accessing pgAdmin
Step 4 — Accessing pgAdminOn your local machine, open up your preferred web browser and navigate to your server’s IP address:
http://your_server_ip
Once there, you’ll be presented with a login screen similar to the following:
Enter the login credentials you defined in Step 2, and you’ll be taken to the pgAdmin Welcome Screen:
Now that you've confirmed you can access the pgAdmin interface, all that's left to do is to connect pgAdmin to your PostgreSQL database. Before doing so, though, you'll need to make one minor change to your PostgreSQL superuser's configuration.
Step 5 — Configuring your PostgreSQL User
Step 5 — Configuring your PostgreSQL UserIf you followed the prerequisite PostgreSQL tutorial, you should already have PostgreSQL installed on your server with a new superuser role and database set up.
By default in PostgreSQL, you authenticate as database users using the "Identification Protocol," or "ident," authentication method. This involves PostgreSQL taking the client's Ubuntu username and using it as the allowed database username. This can allow for greater security in many cases, but it can also cause issues in instances where you'd like an outside program, such as pgAdmin, to connect to one of your databases. To resolve this, we will set a password for this PostgreSQL role which will allow pgAdmin to connect to your database.
From your terminal, open the PostgreSQL prompt under your superuser role:
From the PostgreSQL prompt, update the user profile to have a strong password of your choosing:
- ALTER USER sammy PASSWORD 'password';
Then exit the PostgreSQL prompt:
Next, go back to the pgAdmin 4 interface in your browser, and locate the Browser menu on the left hand side. Right-click on Servers to open a context menu, hover your mouse over Create, and click Server….
This will cause a window to pop up in your browser in which you'll enter info about your server, role, and database.
In the General tab, enter the name for this server. This can be anything you'd like, but you may find it helpful to make it something descriptive. In our example, the server is named Sammy-server-1.
Next, click on the Connection tab. In the Host name/address field, enter localhost. The Port should be set to 5432 by default, which will work for this setup, as that's the default port used by PostgreSQL.
In the Maintenance database field, enter the name of the database you'd like to connect to. Note that this database must already be created on your server. Then, enter the PostgreSQL username and password you configured previously in the Username and Password fields, respectively.
The empty fields in the other tabs are optional, and it's only necessary that you fill them in if you have a specific setup in mind in which they're required. Click the Save button, and the database will appear under the Servers in the Browser menu.
You've successfully connected pgAdmin4 to your PostgreSQL database. You can do just about anything from the pgAdmin dashboard that you would from the PostgreSQL prompt. To illustrate this, we will create an example table and populate it with some sample data through the web interface.
Step 6 — Creating a Table in the pgAdmin Dashboard
Step 6 — Creating a Table in the pgAdmin DashboardFrom the pgAdmin dashboard, locate the Browser menu on the left-hand side of the window. Click on the plus sign (+) next to Servers (1) to expand the tree menu within it. Next, click the plus sign to the left of the server you added in the previous step (Sammy-server-1 in our example), then expand Databases, the name of the database you added (sammy, in our example), and then Schemas (1). You should see a tree menu like the following:
Right-click the Tables list item, then hover your cursor over Create and click Table….
This will open up a Create-Table window. Under the General tab of this window, enter a name for the table. This can be anything you'd like, but to keep things simple we'll refer to it as table-01.
Then navigate to the Columns tab and click the + sign in the upper right corner of the window to add some columns. When adding a column, you're required to give it a Name and a Data type, and you may need to choose a Length if it's required by the data type you've selected.
Additionally, the official PostgreSQL documentation states that adding a primary key to a table is usually best practice. A primary key is a constraint that indicates a specific column or set of columns that can be used as a special identifier for rows in the table. This isn't a requirement, but if you'd like to set one or more of your columns as the primary key, toggle the switch at the far right from No to Yes.
Click the Save button to create the table.
By this point, you've created a table and added a couple columns to it. However, the columns don't yet contain any data. To add data to your new table, right-click the name of the table in the Browser menu, hover your cursor over Scripts and click on INSERT Script.
This will open a new panel on the dashboard. At the top you'll see a partially-completed INSERT statement, with the appropriate table and column names. Go ahead and replace the question marks (?) with some dummy data, being sure that the data you add aligns with the data types you selected for each column. Note that you can also add multiple rows of data by adding each row in a new set of parentheses, with each set of parentheses separated by a comma as shown in the following example.
If you'd like, feel free to replace the partially-completed INSERT script with this example INSERT statement:
INSERT INTO public."table-01"(
col1, col2, col3)
VALUES ('Juneau', 14, 337), ('Bismark', 90, 2334), ('Lansing', 51, 556);
Click on the lightning bolt icon (⚡) to execute the INSERT statement. To view the table and all the data within it, right-click the name of your table in the Browser menu once again, hover your cursor over View/Edit Data, and select All Rows.
This will open another new panel, below which, in the lower panel's Data Output tab, you can view all the data held within that table.
With that, you've successfully created a table and populated it with some data through the pgAdmin web interface. Of course, this is just one method you can use to create a table through pgAdmin. For example, it's possible to create and populate a table using SQL instead of the GUI-based method described in this step.
Conclusion
ConclusionIn this guide, you learned how to install pgAdmin 4 from a Python virtual environment, configure it, serve it to the web with Apache, and how to connect it to a PostgreSQL database. Additionally, this guide went over one method that can be used to create and populate a table, but pgAdmin can be used for much more than just creating and editing tables.
For more information on how to get the most out of all of pgAdmin's features, we encourage you to review the project's documentation. You can also learn more about PostgreSQL through our Community tutorials on the subject.
26 декабря, 2018 12:12 пп
19 555 views
| 1 комментарий
Python, Ubuntu
pgAdmin – это открытая платформа администрирования и разработки для PostgreSQL и связанных с ней систем управления базами данных. Написанная на Python и jQuery, эта платформа поддерживает все функции PostgreSQL. Вы можете использовать pgAdmin для выполнения любых задач: от написания базовых SQL-запросов до мониторинга ваших баз данных и настройки расширенных архитектур БД.
Данный мануал поможет установить и настроить последнюю версию pgAdmin на сервере Ubuntu 18.04, получить доступ к pgAdmin с помощью браузера и подключить его к БД PostgreSQL на сервере.
Требования
- Сервер Ubuntu 18.04 с пользователем sudo и настроенным брандмауэром ufw. Все это описано в этом мануале.
- Веб-сервер Apache, установленный и настроенный по этому мануалу.
- Система PostgreSQL. Чтобы установить ее на свой сервер, читайте этот мануал. Не забудьте создать новую роль и базу данных – они понадобятся вам для подключения pgAdmin к вашему экземпляру PostgreSQL.
- Python и venv. Чтобы установить эти инструменты и активировать виртуальную среду, читайте этот мануал.
1: Установка pgAdmin и его зависимостей
На момент написания этой статьи самой последней версией pgAdmin является 4, а самой последней версией, доступной через официальные репозитории Ubuntu, является pgAdmin 3. Однако pgAdmin 3 больше не поддерживается, и сопроводители проекта рекомендуют установить pgAdmin 4. Здесь мы рассмотрим процесс установки последней версии pgAdmin 4 в виртуальной среде (как рекомендовано командой разработчиков проекта) и установки его зависимостей с помощью apt.
Для начала обновите индекс пакетов:
sudo apt update
Далее установите зависимости проекта. К ним относятся libgmp3-dev (арифметическая библиотека с увеличенной точностью), libpq-dev (включает заголовочные файлы и статическую библиотеку, которая помогает взаимодействовать с бэкэндом PostgreSQL) и libapache2-mod-wsgi-py3, (модуль Apache, который позволяет размещать веб-приложения на основе Python в Apache).
sudo apt install libgmp3-dev libpq-dev libapache2-mod-wsgi-py3
После этого создайте несколько каталогов, в которых pgAdmin будет хранить данные сеансов, данные хранилища и логи:
sudo mkdir -p /var/lib/pgadmin4/sessions
sudo mkdir /var/lib/pgadmin4/storage
sudo mkdir /var/log/pgadmin4
Затем передайте права на эти каталоги пользователю и группе без полномочий root. Это необходимо, поскольку в настоящее время они принадлежат пользователю root, но права на виртуальную среду (где будет установлен pgAdmin) принадлежат вашему пользователю без прав root, и процесс установки включает создание некоторых файлов в этих каталогах. Однако после установки нужно будет передать права на каталоги пользователю и группе www-data, чтобы их можно было обслуживать в Интернете:
sudo chown -R 8host:8host /var/lib/pgadmin4
sudo chown -R 8host:8host /var/log/pgadmin4
Затем откройте свою виртуальную среду. Перейдите в каталог, в котором находится ваша среда, и активируйте ее. Следуя соглашениям об именах этого мануала Python 3, мы перейдем в каталог environments и активируем среду my_env:
cd environments/
source my_env/bin/activate
После этого загрузите исходный код pgAdmin 4 на свой компьютер. Чтобы найти последнюю версию исходного кода, перейдите на страницу загрузки pgAdmin 4 и кликните по ссылке на последнюю версию (на момент написания это версия 3.4). Вы попадете на страницу загрузок на веб-сайте PostgreSQL. Оказавшись там, скопируйте ссылку на файл, которая заканчивается на .whl – это стандартный формат, используемый для дистрибутивов Python. Затем вернитесь к своему терминалу и выполните следующую команду wget, убедившись, что указали свою ссылку, скопированную с сайта PostgreSQL. Это загрузит файл .whl на ваш сервер.
wget https://ftp.postgresql.org/pub/pgadmin/pgadmin4/v3.4/pip/pgadmin4-3.4-py2.py3-none-any.whl
Далее устанавливаем пакет wheel , реализацию стандарта упаковки. Этот пакет, являющийся библиотекой Python, служит расширением для создания wheel-пакетов и включает инструмент командной строки для работы с файлами .whl:
python -m pip install wheel
Затем установите пакет pgAdmin 4 с помощью следующей команды:
python -m pip install pgadmin4-3.4-py2.py3-none-any.whl
Эта команда устанавливает pgAdmin и его зависимости. Однако прежде чем подключить приложение к базе данных, необходимо внести несколько изменений в конфигурацию.
2: Настройка pgAdmin 4
Теперь нужно предоставить pgAdmin права и выполнить конфигурации, необходимые для правильной работы веб-интерфейса.
Основной конфигурационный файл pgAdmin – это config.py, он читается перед любым другим файлом конфигурации. Его содержимое можно использовать в качестве ориентира для дальнейшей настройки других файлов pgAdmin, но во избежание непредвиденных ошибок не следует редактировать сам файл config.py. Мы добавим некоторые изменения конфигурации в новый файл по имени config_local.py, который будет читаться после основного.
Создайте новый файл:
nano my_env/lib/python3.6/site-packages/pgadmin4/config_local.py
Добавьте в него такое содержимое:
LOG_FILE = '/var/log/pgadmin4/pgadmin4.log'
SQLITE_PATH = '/var/lib/pgadmin4/pgadmin4.db'
SESSION_DB_PATH = '/var/lib/pgadmin4/sessions'
STORAGE_DIR = '/var/lib/pgadmin4/storage'
SERVER_MODE = True
Вот что делают эти пять директив:
- LOG_FILE: определяет файл, в котором будут храниться логи pgAdmin.
- SQLITE_PATH: pgAdmin сохраняет пользовательские данные в базе данных SQLite, и эта директива указывает pgAdmin на эту базу данных. Поскольку этот файл находится в постоянном каталоге /var/lib/pgadmin4/, ваши пользовательские данные не будут потеряны после обновления.
- SESSION_DB_PATH: указывает, какой каталог будет использоваться для хранения данных сеанса.
- STORAGE_DIR: определяет, где pgAdmin будет хранить другие данные, такие как резервные копии и сертификаты безопасности.
- SERVER_MODE: если для этой директивы установлено значение True, pgAdmin будет работать в режиме сервера, а не в режиме рабочего стола.
Обратите внимание, что каждый из этих путей к файлам указывает на каталоги, созданные в разделе 1.
После добавления этих строк сохраните и закройте файл (нажмите Ctrl + X, затем Y и Enter). С этими настройками запустите сценарий установки pgAdmin, чтобы создать учетные данные для входа:
python my_env/lib/python3.6/site-packages/pgadmin4/setup.py
После выполнения этой команды вы увидите запрос на ввод адреса электронной почты и пароля. Они будут использоваться в качестве ваших учетных данных при последующем доступе к pgAdmin, поэтому обязательно запомните или запишите то, что вы вводите здесь:
. . .
Enter the email address and password to use for the initial pgAdmin user account:
Email address: 8host@example.com
Password:
Retype password:
После этого отключите виртуальную среду:
deactivate
Напомним пути к файлам, которые вы указали в файле config_local.py. Эти файлы хранятся в каталогах, созданных вами в разделе 1, которые в настоящее время принадлежат вашему пользователю без привилегий root. Однако они должны быть доступны пользователю и группе, через которых запущен ваш веб-сервер. По умолчанию в Ubuntu 18.04 это пользователь и группа www-data. Теперь нужно предоставить право собственности группе и пользователю www-data:
sudo chown -R www-data:www-data /var/lib/pgadmin4/
sudo chown -R www-data:www-data /var/log/pgadmin4/
Теперь pgAdmin полностью настроен. Однако программа еще не обслуживается вашим сервером, поэтому она остается недоступной. Далее нужно настроить Apache для обслуживания pgAdmin, чтобы вы могли получить доступ к пользовательскому интерфейсу через браузер.
3: Настройка Apache
Веб-сервер Apache использует виртуальные хосты для разделения деталей конфигурации и размещения нескольких доменов на одном сервере. Если вы следовали мануалу по Apache (упоминался в Требованиях), вы, вероятно, настроили виртуальный хост example.com.conf, но на этом этапе мы создадим новый хост, который будет обслуживать веб-интерфейс pgAdmin.
Перейдите в корневой каталог:
cd /
Затем создайте новый файл в каталоге /sites-available/ по имени pgadmin4.conf. Это будет файл виртуального хоста вашего сервера:
sudo nano /etc/apache2/sites-available/pgadmin4.conf
Добавьте в этот файл следующее содержимое, обязательно обновив выделенные красным фрагменты (укажите вместо них свои данные).
<VirtualHost *>
ServerName your_server_ip
WSGIDaemonProcess pgadmin processes=1 threads=25 python-home=/home/8host/environments/my_env
WSGIScriptAlias / /home/8host/environments/my_env/lib/python3.6/site-packages/pgadmin4/pgAdmin4.wsgi
<Directory "/home/8host/environments/my_env/lib/python3.6/site-packages/pgadmin4/">
WSGIProcessGroup pgadmin
WSGIApplicationGroup %{GLOBAL}
Require all granted
</Directory>
</VirtualHost>
Сохраните и закройте файл. Затем с помощью скрипта a2dissite отключите стандартный виртуальный хост, 000-default.conf:
sudo a2dissite 000-default.conf
Примечание: Если вы следовали мануалу по Apache, возможно, вы уже отключили 000-default.conf и настроили свой файл виртуального хоста (там он назывался example.com.conf). В этом случае вам необходимо отключить файл виртуального хоста example.com.conf с помощью следующей команды:
sudo a2dissite example.com.conf
Затем используйте скрипт a2ensite, чтобы включить виртуальный хост pgadmin4.conf. Это создаст символическую ссылку из виртуального хоста в каталоге /sites-available/ на каталог /sites-enabled/.
sudo a2ensite pgadmin4.conf
Теперь проверьте синтаксис конфигурации:
apachectl configtest
Если ваш файл конфигурации в порядке, вы увидите Syntax ОК. Если вывод сообщает об ошибке, откройте файл pgadmin4.conf и проверьте правильность вашего IP-адреса и пути к файлам, затем повторите configtest.
Когда в выводе будет Syntax ОК, перезапустите сервис Apache, чтобы он прочитал новый файл виртуального хоста:
sudo systemctl restart apache2
Теперь pgAdmin установлен и полностью настроен. Далее мы рассмотрим, как получить доступ к pgAdmin из браузера, прежде чем подключать его к базе данных PostgreSQL.
4: Доступ к pgAdmin
На локальном компьютере откройте веб-браузер и перейдите по IP-адресу вашего сервера:
http://your_server_ip
Вам будет представлен экран входа в систему:
pgAdmin 4 Login
Email Address
Password
Login
Language English
Введите учетные данные, которые вы выбрали в разделе 2, и вы попадете на приветственный экран pgAdmin.
pgAdmin version 4
Management Tools for PostgreSQL
Теперь, когда вы убедились, что можете получить доступ к интерфейсу pgAdmin, осталось только подключить pgAdmin к вашей базе данных PostgreSQL. Однако перед этим вам нужно сделать одно небольшое изменение в конфигурации суперпользователя PostgreSQL.
5: Настройка пользователя PostgreSQL
Если вы следовали мануалу по PostgreSQL из раздела Требования, на вашем сервере уже установлена система PostgreSQL с новой ролью суперпользователя и настроенной базой данных.
По умолчанию в PostgreSQL вы аутентифицируетесь как пользователь базы данных методом «Identification Protocol» или «ident». Этот метод подразумевает, что PostgreSQL берет имя пользователя Ubuntu и использует его в качестве имени пользователя базы данных. Во многих случаях это может обеспечить большую безопасность, но также может вызвать проблемы – например, если вы хотите, чтобы к одной из ваших баз данных подключалась внешняя программа типа pgAdmin. Чтобы решить эту проблему, нужно установить пароль для этой роли PostgreSQL, что позволит pgAdmin подключаться к вашей базе данных.
Откройте командную строку PostgreSQL в роли суперпользователя.
sudo -u 8host psql
Из командной строки PostgreSQL обновите профиль пользователя, чтобы выбрать надежный пароль:
ALTER USER 8host PASSWORD 'password';
Затем выйдите из командной строки PostgreSQL:
q
Вернитесь к интерфейсу pgAdmin 4 в вашем браузере и найдите меню Browser с левой стороны. Щелкните правой кнопкой мыши на Servers, чтобы открыть контекстное меню, наведите курсор мыши на Create и выберите Server….
После этого в вашем браузере появится окно, в которое вы введете информацию о сервере, роли и базе данных.
Во вкладке General введите имя этого сервера. Это может быть любое имя, но лучше выбрать что-то описательное. В данном примере сервер называется 8host-server-1.
Далее откройте вкладку Connection. В поле Host name/address введите localhost. В поле по умолчанию Port должен быть установлен номер 5432, что подходит для этой настройки (это порт по умолчанию для PostgreSQL).
В поле Maintenance database введите имя базы данных, к которой вы хотите подключиться. Обратите внимание, что эта база данных уже должна быть создана на вашем сервере. Затем введите имя пользователя и пароль PostgreSQL, которые вы выбрали ранее, в поля Username и Password соответственно.
Пустые поля в других вкладках являются необязательными, и их необходимо заполнять только в том случае, если у вас есть особые настройки. Нажмите кнопку Save, и база данных появится в разделе Servers в меню Browser.
Вы успешно подключили pgAdmin4 к своей базе данных PostgreSQL. Теперь практически все, что вы делали из командной строки PostgreSQL, вы можете делать через панель управления pgAdmin. Чтобы проиллюстрировать это, мы создадим пример таблицы и заполним ее некоторыми тестовыми данными.
6: Создание таблицы через панель управления pgAdmin
В панели инструментов pgAdmin найдите меню Browser в левой части окна. Нажмите на знак плюс рядом с Servers (1), чтобы развернуть древовидное меню. Затем нажмите знак плюса слева от сервера, который вы добавили в предыдущем разделе (в нашем примере он называется 8host-server-1), затем разверните Databases, выберите имя добавленной вами базы данных (в нашем примере 8host), а затем Schemas (1). Вы должны увидеть древовидное меню.
Кликните правой кнопкой мыши на элемент списка Tables, затем наведите курсор на Create и нажмите Table….
Это откроет окно Create-Table. Во вкладке General этого окна введите имя таблицы. Вы можете выбрать любое имя, но для простоты мы назовем ее table-01.
Затем перейдите во вкладку Columns и нажмите на значок «+» в правом верхнем углу, чтобы добавить несколько столбцов. При добавлении столбца необходимо указать имя и тип данных (Name и Data type), также может потребоваться выбрать длину (Length, если этого требует тип данных, который вы выбрали).
Кроме того, в официальной документации PostgreSQL говорится, что обычно рекомендуется добавлять в таблицу первичный ключ. Первичный ключ – это ограничение, определяющее конкретный столбец или набор столбцов, которые можно использовать в качестве специального идентификатора для строк в таблице. Это не является обязательным требованием, но если вы хотите выбрать один или несколько столбцов в качестве первичного ключа, щелкните переключатель справа с No на Yes.
Нажмите кнопку Сохранить, чтобы создать таблицу.
Вы создали таблицу и добавили в нее пару столбцов. Однако столбцы еще не содержат никаких данных. Чтобы добавить данные в новую таблицу, щелкните правой кнопкой мыши на имя таблицы в меню Browser, наведите курсор на Scripts и нажмите INSERT Script.
Это откроет новую панель. Вверху вы увидите частично заполненный оператор INSERT с соответствующими именами таблиц и столбцов. Замените вопросительные знаки (?) любыми фиктивными данными, убедившись, что добавляемые вами данные соответствуют типу каждого столбца. Обратите внимание, вы также можете добавить несколько строк данных: для этого поместите каждую строку в новый набор скобок, разделив их запятой, как показано в следующем примере.
INSERT INTO public."table-01"(
    col1, col2, col3)
    VALUES ('Juneau', 14, 337), ('Bismark', 90, 2334), ('Lansing', 51, 556);
Нажмите на значок молнии (⚡), чтобы выполнить INSERT. Чтобы просмотреть таблицу и все данные в ней, еще раз щелкните правой кнопкой мыши на имя вашей таблицы в меню Browser, наведите курсор на View/Edit Data и выберите All Rows.
Откроется еще одна новая панель, в нижней части которой во вкладке Data Output можно просмотреть все данные, хранящиеся в этой таблице.
Вы создали таблицу и заполнили ее некоторыми данными через веб-интерфейс pgAdmin. Конечно, это только один метод создания таблицы через pgAdmin. Например, можно также создать и заполнить таблицу с помощью SQL вместо GUI интерфейса.
Заключение
В этом мануале вы узнали, как установить pgAdmin 4 в виртуальной среде Python, настроить и обслуживать его с помощью Apache и как подключить его к базе данных PostgreSQL. Кроме того, в этом мануале был описан один метод создания и заполнения таблицы, но pgAdmin можно использовать не только для создания и редактирования таблиц.
Чтобы найти дополнительную информацию о том, как получить максимальную отдачу от pgAdmin, ознакомьтесь с документацией проекта. Вы также можете узнать больше о PostgreSQL в нашем Информатории.
Tags: pgAdmin, pgAdmin 4, PostgreSQL, Ubuntu 18.04