iCloud — облачное хранилище от компании Apple использующее на MacOS и iOS. Также, есть две версии, UWP и Win32 для Windows 10. Система Windows 10 поддерживает свои собственные прогрессивные приложения UWP, которые загружаются и устанавливаются из Microsoft Store. Некоторые пользователи, которые установили программу iCloud Win32 через инсталлятор, могут обнаружить, что кнопка «Удалить» не кликабельна.
Вы должны понимать, что программы установленные через Microsoft Store это UWP приложения, а программы установленные через инсталлятор (.exe) — это Win32 программы, и по сути они разные по архитектуре, но одинаковы по функциональности и дизайну. Давайте разберем, как удалить UWP и Win32 iCloud из Windows 10.
Удалить iCloud, установленный из Apple
Если вы скачали и установили программу iCloud с сайта Apple, то это Win32 приложение. Чтобы его удалить, в первую очередь рекомендую выйти из учетной записи iCloud, чтобы в дальнейшем не было ошибок синхронизации на других связанных устройствах. Как только вышли из учетной записи, то откройте:
- «Параметры» > «Приложения» > «Приложения и возможности».
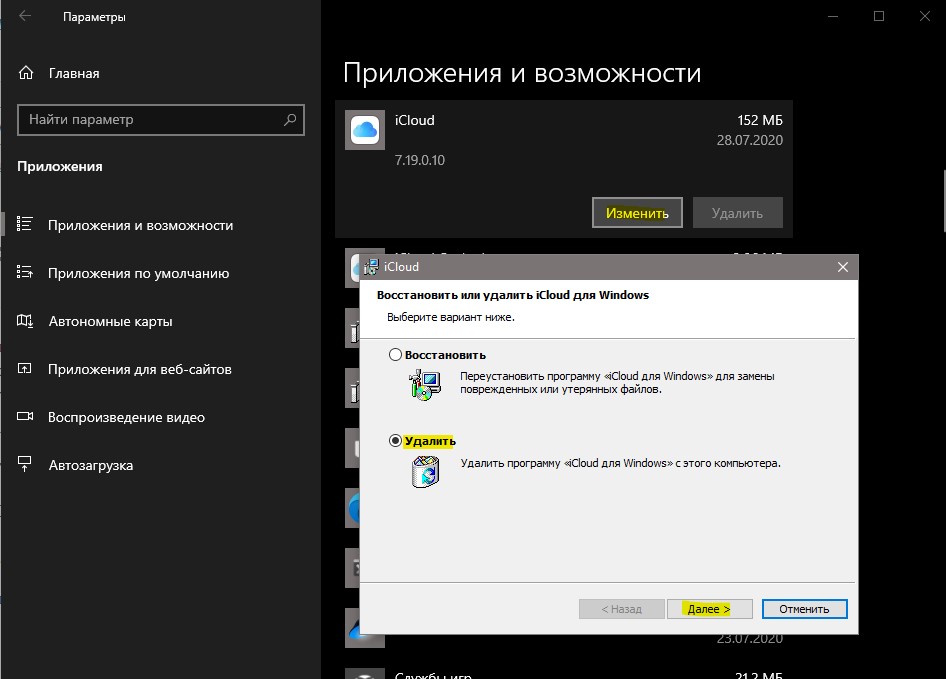
- Справа в списке найдите iCloud и нажмите «Изменить«.
- В появившимся окне установите «Удалить» и нажмите «Далее».
Удалить iCloud, установленный из Microsoft Store
Если вы установили программу iCloud скаченную из Microsoft Store (магазин windows), то это UWP приложение. Для удаления откройте:
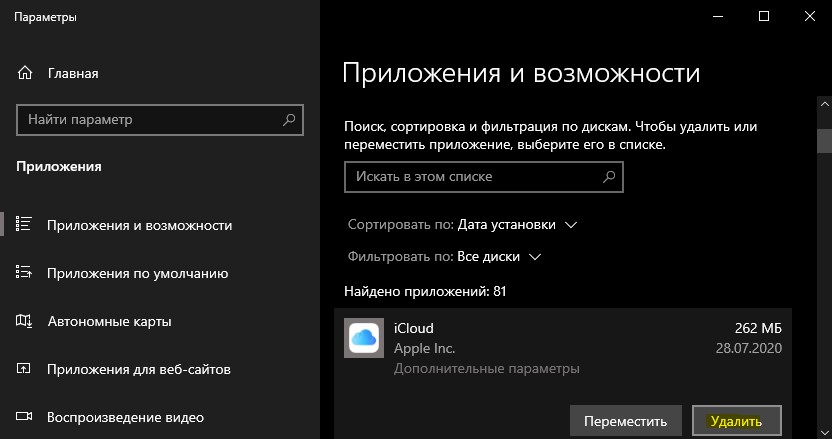
- Параметры > Приложения > Приложения и возможности.
- Справа в списке найдите iCloud, выделите его одним нажатием мыши, и нажмите «Удалить«.
Смотрите еще:
- Bonjour — Что это за программа в Windows
- Удалить все, что связано с Xbox из Windows 10
- Как удалить сеть WiFi в Windows 10
- Web Companion — Что это за программа? Как её удалить?
- Как удалить NVIDIA GeForce Experience в Windows 10
[ Telegram | Поддержать ]
![]()
Download Article
![]()
Download Article
The iCloud for Windows app is a great way to interface with your iCloud account on a Windows PC. If you need to uninstall it for any reason, you can easily do so using the Windows Control Panel. You should back up the local data to iCloud first. While it’s pretty easy to uninstall iCloud with Control Panel, it does leave behind some residual files. You can do a more thorough uninstall using an uninstaller program like Revo Uninstaller. This wikiHow teaches you how to uninstall iCloud for Windows using Control Panel and Revo Uninstaller.[1]
-

1
Click the Windows Start button
. It’s typically in the lower-left corner of the screen in the taskbar. This opens the Windows Start menu.
-
2
Type iCloud. This searches for the iCloud app in the Windows Start menu. The iCloud icon will be displayed at the top of the Windows Start menu. It has a blue logo that resembles a white cloud.
Advertisement
-
3
Click on iCloud. It appears at the top of the Windows Start menu when type «iCloud.» Click this icon to launch iCloud.
-
4
Select the data to back up. Do so by checking the boxes next to «iCloud Drive,» «Photos,» «Mail, Contacts, Calendars, and Tasks,» and/or «Bookmarks.»
-
5
Click on Apply. It’s in the lower-right corner of the dialog box. This saves all the data you selected to your iCloud account.
-
6
Click on Sign out. When your data has finished uploading, sign out with the button in the lower-left corner of the screen.


Advertisement
-
1
Click the Windows Start button
. It’s typically in the lower-left corner of the screen in the taskbar. This opens the Windows Start menu. Using the Control Panel to uninstall iCloud will remove the bulk of the program. However, some residual files may still be left behind. Using a program like Revo Uninstaller will uninstall the program and search for residual files and registry items left behind.
- Uninstalling iCloud requires an admin password. If you’re not logged into your PC as an admin, log out and log back in as an admin.
-
2
Type Control Panel. This searches for the Windows Control Panel in the Start menu.
-
3
Click Control Panel. It appears at the top of the Windows Start menu when you type «Control Panel.» It has an icon that resembles a computer screen with a pie chart.
-
4
Click Uninstall a program. It’s in the «Programs» section of the Control Panel dialog box.
- On Windows 7 or XP, click on Programs and then click on Program and Features.[2]
- On Windows 7 or XP, click on Programs and then click on Program and Features.[2]
-
5
Check the «iCloud» box. All programs are listed alphabetically.
-
6
Click on Change. It’s above the pane that contains the list of programs. It’s at the top of the list of programs in the center.
- On Windows 7 or XP, click on Uninstall.
-
7
Click on Ok. This dialog box confirms you want to make a change to iCloud.
-
8
Click on the «Remove» radio button. It’s the second option in the dialog box.
-
9
Click on Next. It’s in the lower-right of the dialog box.
-
10
Click on Yes. Doing so confirms that you want to uninstall iCloud from your PC.
-
11
Click on Finish. iCloud for Windows has now been uninstalled and deleted from your PC.[3]


Advertisement
-
1
Download and install Revo Uninstaller. Revo Uninstaller is a free program that uninstalls programs and searches for residual files and registry items left behind after a program is uninstalled. There is a free version and a Pro version of Revo Uninstaller. You can try the Pro version free for 30 days. The Pro version allows you to search for residual files from programs that have already been uninstalled as well as create a back-up of your system before uninstalling anything in case anything goes wrong. Use the following steps to download and install the free version:
- Go to https://www.revouninstaller.com/ in a web browser.
- Click Free Downloads.
- Click Free Download in the «Freeware» column or click Free Trial in the «Pro» column.
- Select your language and click Ok.
- Read and click the radio option next to I accept the agreement. Then click Next.
- Select and install location and click Next.
- Check or uncheck «Create a desktop shortcut» and click Next.
- Click Install.
-
2
Create a System Restore Point. Since Revo Uninstaller will search your system files and registry for residual files left behind, it’s a good idea to create a system restore point before doing an uninstall using Revo Uninstaller. This allows you to return to your current system configuration if Revo accidentally uninstalls any critical files or registry items. The Pro version of Revo Uninstaller lets you create a restore point using the app. If you are using the free version, go ahead and use the following steps to create a system restore point:
- Click the Windows Start menu.
- Type «Create a Restore Point.»
- Click Create a Restore Point in the Windows Start menu.
- Click the hard drive Windows is installed on.
- Click Create.
- Type a name for the restore point.
- Click Create.
-
3
Close all programs and apps that are running. It’s a good idea to close all apps that are running before you uninstalling any programs with Revo Uninstaller. Click any programs running in the taskbar and click the «X» icon, or click the option to close the program in the File menu.
-
4
Open Revo Uninstaller. To open Revo Uninstaller, click the Windows Start menu and type «Revo.» You should see Revo Uninstaller appear at the top of the Windows Start menu. Click Revo Uninstaller to open it. It has an icon that resembles the contents of a box going into a trash bin with an «R» on it.
-
5
Click Windows Apps. It has an icon that resembles the Windows logo. It’s the second option in the Panel at the top. This will load a list of Windows apps installed on your computer. Allow a few minutes for it to load.
-
6
Scroll down and click iCloud. All programs are listed in alphabetical order. Scroll down and click the iCloud app to select it.
-
7
Click Uninstall. It’s the button that resembles a Window with an «X» on it at the panel at the top. Click this icon to uninstall the program.
-
8
Click Continue. It’s the button in the lower-right corner. This will launch a PowerShell window that will automatically run the command to uninstall iCloud.
- If Revo Uninstaller launches an uninstaller app, follow the instructions to finish the install process.
-
9
Click Scan. This option is displayed at the bottom of Revo Scanner once iCloud is finished installing. Click this option to scan for residual files left over. Allow a few minutes for Revo Scanner to finish scanning your system.
-
10
Uncheck any items you don’t want to delete. Look over the list of leftover files and registry items that Revo Uninstaller lists. Uncheck any items that you don’t want to uninstall.
-
11
Click Delete. This deletes all the leftover registry items found by Revo Uninstaller.
-
12
Click Finish. This closes Revo Uninstaller. You have successfully uninstalled iCloud and deleted any residual files leftover.


Advertisement
Add New Question
-
Question
Will removing iCloud from Windows 10 remove photos, notes, etc. from my computer?

It will only remove information stored in your iCloud account. Information stored on your computer will be safe.
Ask a Question
200 characters left
Include your email address to get a message when this question is answered.
Submit
Advertisement
Video
Thanks for submitting a tip for review!
References
About This Article
Article SummaryX
1. Open iCloud and Back up all your local data.
2. Click Sign Out at the bottom.
3. Click the Windows Start button.
4. Type «Control Panel» and click Control Panel to open it.
5. Click Uninstall a program.
6. Scroll down and click iCloud.
7. Click Change at the top of the screen.
8. Select «Remove» and click Next.
9. Click Yes to confirm you want to uninstall iCloud.
10. Click Finish.
Did this summary help you?
Thanks to all authors for creating a page that has been read 208,846 times.
If you buy through links on our site, we may earn a commission.
Is this article up to date?
![]()
Download Article
![]()
Download Article
The iCloud for Windows app is a great way to interface with your iCloud account on a Windows PC. If you need to uninstall it for any reason, you can easily do so using the Windows Control Panel. You should back up the local data to iCloud first. While it’s pretty easy to uninstall iCloud with Control Panel, it does leave behind some residual files. You can do a more thorough uninstall using an uninstaller program like Revo Uninstaller. This wikiHow teaches you how to uninstall iCloud for Windows using Control Panel and Revo Uninstaller.[1]
-
1
Click the Windows Start button
. It’s typically in the lower-left corner of the screen in the taskbar. This opens the Windows Start menu.
-
2
Type iCloud. This searches for the iCloud app in the Windows Start menu. The iCloud icon will be displayed at the top of the Windows Start menu. It has a blue logo that resembles a white cloud.
Advertisement
-
3
Click on iCloud. It appears at the top of the Windows Start menu when type «iCloud.» Click this icon to launch iCloud.
-
4
Select the data to back up. Do so by checking the boxes next to «iCloud Drive,» «Photos,» «Mail, Contacts, Calendars, and Tasks,» and/or «Bookmarks.»
-
5
Click on Apply. It’s in the lower-right corner of the dialog box. This saves all the data you selected to your iCloud account.
-
6
Click on Sign out. When your data has finished uploading, sign out with the button in the lower-left corner of the screen.
Advertisement
-
1
Click the Windows Start button
. It’s typically in the lower-left corner of the screen in the taskbar. This opens the Windows Start menu. Using the Control Panel to uninstall iCloud will remove the bulk of the program. However, some residual files may still be left behind. Using a program like Revo Uninstaller will uninstall the program and search for residual files and registry items left behind.
- Uninstalling iCloud requires an admin password. If you’re not logged into your PC as an admin, log out and log back in as an admin.
-
2
Type Control Panel. This searches for the Windows Control Panel in the Start menu.
-
3
Click Control Panel. It appears at the top of the Windows Start menu when you type «Control Panel.» It has an icon that resembles a computer screen with a pie chart.
-
4
Click Uninstall a program. It’s in the «Programs» section of the Control Panel dialog box.
- On Windows 7 or XP, click on Programs and then click on Program and Features.[2]
- On Windows 7 or XP, click on Programs and then click on Program and Features.[2]
-
5
Check the «iCloud» box. All programs are listed alphabetically.
-
6
Click on Change. It’s above the pane that contains the list of programs. It’s at the top of the list of programs in the center.
- On Windows 7 or XP, click on Uninstall.
-
7
Click on Ok. This dialog box confirms you want to make a change to iCloud.
-
8
Click on the «Remove» radio button. It’s the second option in the dialog box.
-
9
Click on Next. It’s in the lower-right of the dialog box.
-
10
Click on Yes. Doing so confirms that you want to uninstall iCloud from your PC.
-
11
Click on Finish. iCloud for Windows has now been uninstalled and deleted from your PC.[3]
Advertisement
-
1
Download and install Revo Uninstaller. Revo Uninstaller is a free program that uninstalls programs and searches for residual files and registry items left behind after a program is uninstalled. There is a free version and a Pro version of Revo Uninstaller. You can try the Pro version free for 30 days. The Pro version allows you to search for residual files from programs that have already been uninstalled as well as create a back-up of your system before uninstalling anything in case anything goes wrong. Use the following steps to download and install the free version:
- Go to https://www.revouninstaller.com/ in a web browser.
- Click Free Downloads.
- Click Free Download in the «Freeware» column or click Free Trial in the «Pro» column.
- Select your language and click Ok.
- Read and click the radio option next to I accept the agreement. Then click Next.
- Select and install location and click Next.
- Check or uncheck «Create a desktop shortcut» and click Next.
- Click Install.
-
2
Create a System Restore Point. Since Revo Uninstaller will search your system files and registry for residual files left behind, it’s a good idea to create a system restore point before doing an uninstall using Revo Uninstaller. This allows you to return to your current system configuration if Revo accidentally uninstalls any critical files or registry items. The Pro version of Revo Uninstaller lets you create a restore point using the app. If you are using the free version, go ahead and use the following steps to create a system restore point:
- Click the Windows Start menu.
- Type «Create a Restore Point.»
- Click Create a Restore Point in the Windows Start menu.
- Click the hard drive Windows is installed on.
- Click Create.
- Type a name for the restore point.
- Click Create.
-
3
Close all programs and apps that are running. It’s a good idea to close all apps that are running before you uninstalling any programs with Revo Uninstaller. Click any programs running in the taskbar and click the «X» icon, or click the option to close the program in the File menu.
-
4
Open Revo Uninstaller. To open Revo Uninstaller, click the Windows Start menu and type «Revo.» You should see Revo Uninstaller appear at the top of the Windows Start menu. Click Revo Uninstaller to open it. It has an icon that resembles the contents of a box going into a trash bin with an «R» on it.
-
5
Click Windows Apps. It has an icon that resembles the Windows logo. It’s the second option in the Panel at the top. This will load a list of Windows apps installed on your computer. Allow a few minutes for it to load.
-
6
Scroll down and click iCloud. All programs are listed in alphabetical order. Scroll down and click the iCloud app to select it.
-
7
Click Uninstall. It’s the button that resembles a Window with an «X» on it at the panel at the top. Click this icon to uninstall the program.
-
8
Click Continue. It’s the button in the lower-right corner. This will launch a PowerShell window that will automatically run the command to uninstall iCloud.
- If Revo Uninstaller launches an uninstaller app, follow the instructions to finish the install process.
-
9
Click Scan. This option is displayed at the bottom of Revo Scanner once iCloud is finished installing. Click this option to scan for residual files left over. Allow a few minutes for Revo Scanner to finish scanning your system.
-
10
Uncheck any items you don’t want to delete. Look over the list of leftover files and registry items that Revo Uninstaller lists. Uncheck any items that you don’t want to uninstall.
-
11
Click Delete. This deletes all the leftover registry items found by Revo Uninstaller.
-
12
Click Finish. This closes Revo Uninstaller. You have successfully uninstalled iCloud and deleted any residual files leftover.
Advertisement
Add New Question
-
Question
Will removing iCloud from Windows 10 remove photos, notes, etc. from my computer?
It will only remove information stored in your iCloud account. Information stored on your computer will be safe.
Ask a Question
200 characters left
Include your email address to get a message when this question is answered.
Submit
Advertisement
Video
Thanks for submitting a tip for review!
References
About This Article
Article SummaryX
1. Open iCloud and Back up all your local data.
2. Click Sign Out at the bottom.
3. Click the Windows Start button.
4. Type «Control Panel» and click Control Panel to open it.
5. Click Uninstall a program.
6. Scroll down and click iCloud.
7. Click Change at the top of the screen.
8. Select «Remove» and click Next.
9. Click Yes to confirm you want to uninstall iCloud.
10. Click Finish.
Did this summary help you?
Thanks to all authors for creating a page that has been read 208,846 times.
If you buy through links on our site, we may earn a commission.
Is this article up to date?
Using iCloud is usually associated with Apple products and their respective operating systems such as Mac OS X and iOS. However, there is a Windows version of iCloud which works just as it should.
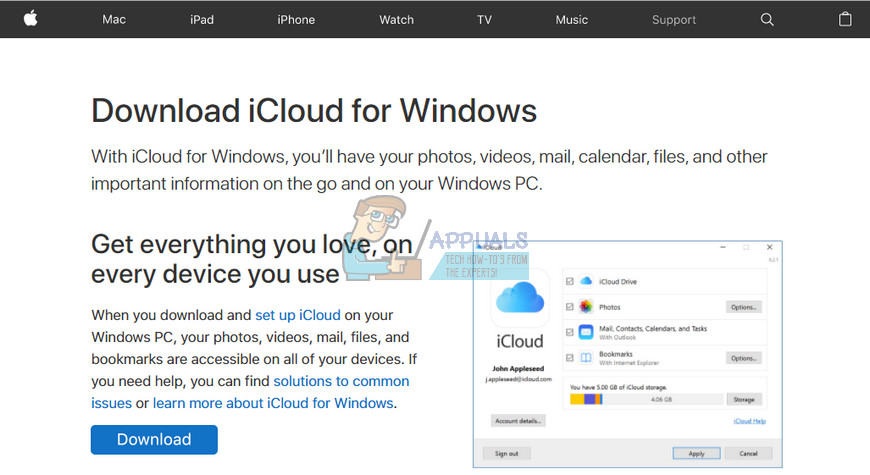
All you need to do is download its installer from Apple’s official site, install it, and use your Apple ID in order to sign in to use it and select just which features would like to sync across your devices. Also, you will need to use and setup iCloud on all of the devices you would like to keep synced. However, certain issues may arise with this program so let’s see just what can happen.
Uninstalling iCloud on Windows
A lot of users have reported that they have uninstalled iCloud on their Windows PCs but they are still receiving iCloud related error messages such as:
“The Shared library “Cloud Music Library” is not responding”
“iCloud music library can’t be enabled”
“iCloud Verification Failed / The request timed out”
“iCloud Error: A critical syncing error with iCloud has been detected. iCloud syncing with Day One has been disabled.”
This shouldn’t happen because people have uninstalled it using its uninstaller but somehow pieces of it have remained on their computer. These pieces are not impossible to remove but make sure you follow the instructions from below carefully and do try each one before giving up.
Solution 1: Uninstalling Through Control Panel/Settings
This is probably the first thing you tried yourself but let’s try this again in order to make sure we tried to uninstall it the conventional way. If this method helps you deal with iCloud-related error messages, you don’t have to continue with other solutions.
- First of all, make sure you are logged in with an administrator account as you won’t be able to delete programs using any other account.
- Backup the data you want to save because deleting iCloud will remove it.
- Open iCloud and check the boxes next to data you want to backup and click Apply.
- As soon as your data has been uploaded to iCloud, click on the Sign out button located in the lower left corner.
- Click on the Start menu and open Control Panel by searching for it. Alternatively, you can click on the gear icon in order to open settings if you are using Windows 10.
- In Control Panel, select to View as: Category at the top right corner and click on Uninstall a Program under the Programs section.
- If you are using the Settings app, clicking on Apps should immediately open a list of all installed programs on your PC.
- Locate iCloud in Control Panel or Settings and click on Uninstall.
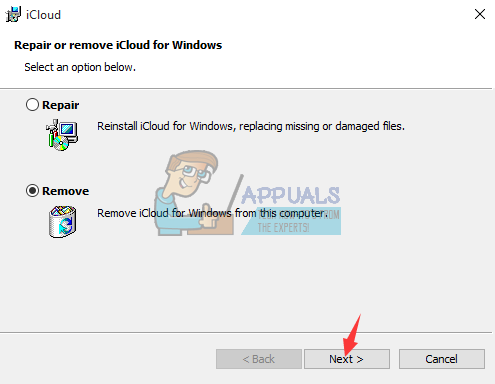
- iCloud’s uninstall wizard should open with two options: Repair and Remove. Select Remove and click Next in order to uninstall the program.
- A message will pop up asking “Do you want to completely remove iCloud for Windows?” Choose Yes.
- Click Finish when the uninstalled completes the process and restart your computer to see whether errors will still appear.
Solution 2: Running the Downloaded Installer
There has been a discussion at Apple Forums where users stated that uninstalling using Control Panel or Settings won’t get the job done properly. Instead, people said that you need to run the installer you downloaded in order to install the program to your PC. This is definitely something you should try and it won’t take a long time.
- Open your Downloads folder or the folder you used to download the iCloud installer to. You can also try and search for the file by typing “iCloudSetup.exe” in your Search bar.
- If you have already deleted the file, you can redownload it by visiting Apple’s site.
- Run the file you located or downloaded and you should again be prompted with Remove and Repair options just like in the Solution 1.
- Follow steps 6-8 in order to uninstall iCloud from your computer.
- Restart your computer and wait to see if everything is okay now.
Solution 3: Locating the Hidden Uninstaller
There is also a way to find the uninstaller and delete iCloud from your computer permanently by locating it on your hard drive. However, if previous installers failed to load properly or if they opened an error message, this solution might not work either but it’s worth giving it a show since this helped a couple of people get rid of iCloud.
- Open My Computer (or This PC) and navigate to your Local Disk C: drive.
- Click on the View tab at the top of the window and check the box next to Hidden Items.
- Navigate to ProgramData >> Apple >> Installer Cache >> iCloud Control Panel #.#.#.## where hashes represent the installed version of the program and it depends from computer to computer.
- Locate the icloud64.msi if your Windows version is 64 bit or look for icloud32.msi if your OS is 32 bit.
- Run this file and the installer should appear.
- Follow the steps 6, 7, and 8 from Solution 1 in order to uninstall iCloud.
- Reboot your computer and check for errors.
Solution 4: Using Advanced Uninstaller Pro to Remove iCloud
There are a lot of different uninstallers designed to replace Control Panel and Settings as they often get unresponsive and they sometimes freeze in the middle of the uninstallation process. You don’t have to use this particular uninstaller but this one was able to help people who were dealing with this problem in particular and that is exactly why we recommend it.
- Download Advanced Uninstaller Pro from their official website
- Locate the file you downloaded, double-click on it, and follow the instructions on screen in order to uninstall it. Be careful not to install any additional programs you might be prompted to install and uncheck them all. Select Custom Installation and uncheck everything except Advanced Uninstaller Pro.
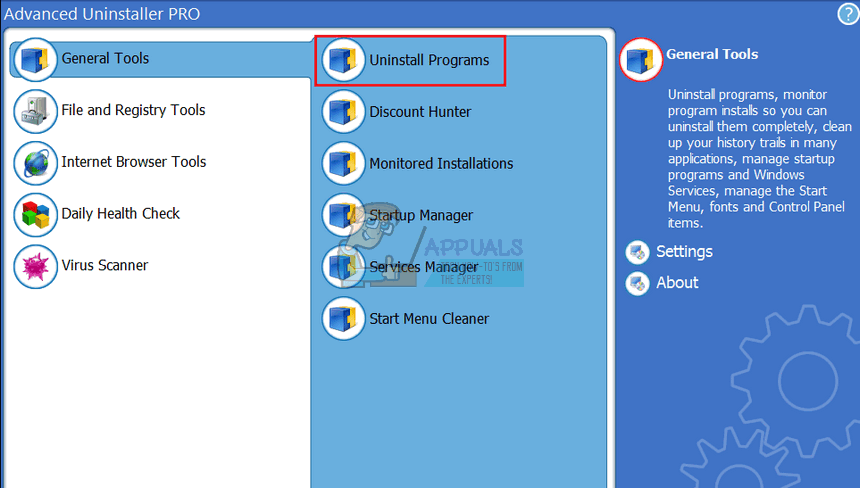
- Open the program and open General Tools.
- Under General Tools, click on Uninstall Programs and a list of all your installed programs should appear.
- Select iCloud and click the Uninstall button located to the left under the information about the program you selected.
- After clicking on the Uninstall button, the uninstaller will probably fail since it’s either displaying an error message or it has already been used or deleted.
- However, this program implements a scanner whose purpose is to scan your hard drive and your registry for leftovers. It will locate these files and you can click on Select All and remove them.
- Reboot your PC and check to see if your issue persists.
Solution 5: Using Windows PowerShell
Windows PowerShell is a powerful tool which can help you automate tasks using a command-line shell and a scripting language which was built using .NET Framework and .NET Core. It used to be exclusive to Windows but it was made open-source and now it’s available to all platforms. You can use PowerShell to uninstall various apps and you can even use it to delete preinstalled Windows Apps such as Photos, Video, Calculator, etc.
- Type PowerShell in your Search bar, right-click on the first result, and select Run as administrator.
- Copy and paste the following command in order to receive the full list of the apps you have installed along with detailed info regarding every single one: Get-AppxPackage
- Wait for the list to load and try to search for iCloud. This might take a while but be patient while you look through the installed apps.
- When you find it, copy everything next to the PackageFullName line by selecting the entire text and using the Ctrl + C key combination.
- Use the following command in order to uninstall iCloud from your PC. Replace the bolded PackageFullName with the actual name you just copied and click Enter.
Remove-AppxPackage -package PackageFullName
- Restart your computer and see if there are any changes regarding the error messages.
Solution 6: The Aftermath
This solution includes deleting the leftover files after completing any of the solutions above or after completing all of them. However, since we have used several different methods, you shouldn’t be able to find many files related to iCloud. Still, it’s worth to check just in case as these leftover files may simply be the ones which are causing all of these iCloud-related errors even though iCloud is not even installed on your Computer.
- Navigate to following folders and delete everything related to iCloud. Be careful not to delete anything related to other Apple software you may have installed:
My Computer >> C: >> Program Files (x86) >> Common Files >> Apple
My Computer >> C: >> Program Files (x86) >> Apple Software Update
My Computer >> C: >> Program Files (x86) >> Bonjour
My Computer >> C: >> Program Files (x86) >> Common Files >> Apple >> Internet Services
My Computer >> C: >> Program Files >> Common Files >> Apple >> Internet Services
- Check from iCloud entries in registry by typing “regedit” in the Search bar and opening the Registry Editor.
- Backup your registry by clicking on File >> Export… and save the current state of your registry somewhere.
- Look under HKEY_CURRENT_USERSoftware and HKEY_LOCAL_MACHINESoftware for folders related to iCloud and delete them.
- Click on Edit >> Find and search for “iCloud” and delete everything you can find related to iCloud.
- Restart your computer and your problems should be gone by now.

Kevin Arrows
Kevin is a dynamic and self-motivated information technology professional, with a Thorough knowledge of all facets pertaining to network infrastructure design, implementation and administration. Superior record of delivering simultaneous large-scale mission critical projects on time and under budget.
Клиентское приложение облака от Apple для Windows размещает свою папку строго на системном разделе. Когда растет ваше облачное хранилище, эта папка тоже растет, оставляя системе все меньше места. В этой статье мы расскажем как переместить iCloud на диск D.
Устанавливаем клиентское приложение iCloud
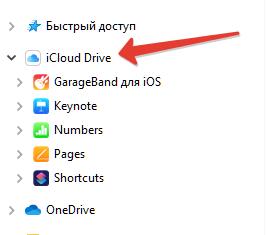
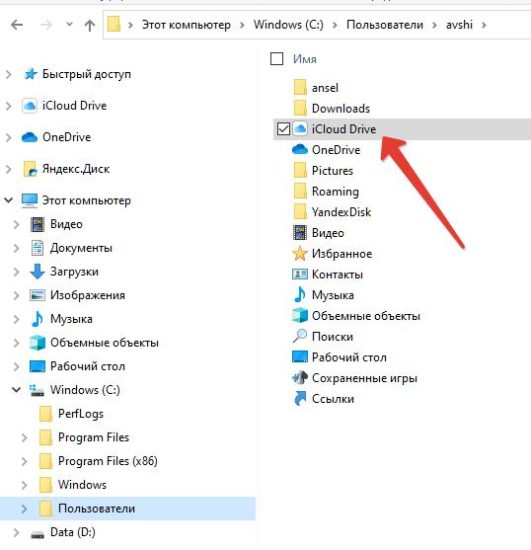
Скачать клиентскую программу для Windows можно по этой ссылке из магазина приложений Microsoft. Сразу после установки и первого запуска в Проводнике появится ярлык iCloud Drive.
А на диске C появится папка iCloud.
В ней постепенно станут появляться файлы.
Создаем папку облака Apple на диске D
Тут без хитростей. Заходим в стандартный Проводник, в Мой компьютер, диск D. Создаем папку с именем iCloudDrive.
Теоретически можно скопировать ее с диска С.
Но у меня это не получилось, так как нужно было бы остановить в Диспетчере задач все фоновые процессы, связанные с клиентом iCloud.
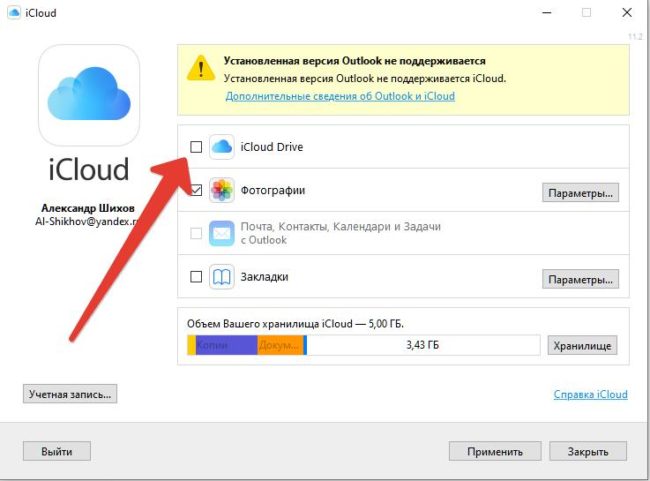
Выключаем синхронизацию
Чтобы обмануть облачного клиента, нам нужно выключить в Настройках синхронизацию.
После отключения появится сообщение, что все файлы из локальной папки будут удалены.
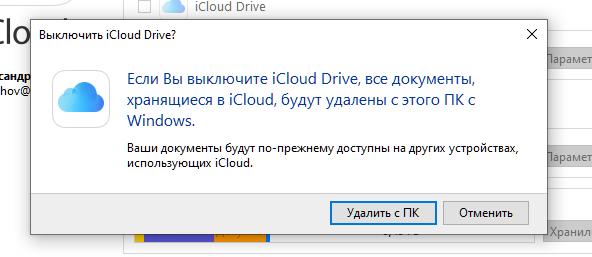
Соглашаемся, и после окончания процедуры удаления переходим к переназначению папки.
Создаем ссылку для новой папки на D
Теперь главный этап. Мы переназначим папку iCloud Drive с диска C на D. Делается это в Командной строке.

Делать операцию создания ссылки лучше из под прав Администратора. Общая команда примерно такая:
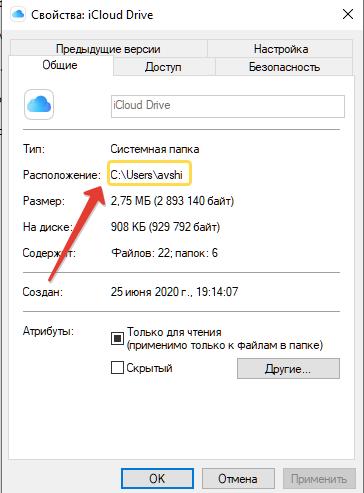
mklink /J «C:UsersПользовательiCloudDrive» «D:iCloudDrive»
Вместо Пользователь используйте имя текущего пользователя. Его можно подсмотреть в свойствах папки, которую сам клиент создал себе на диске C.
После этого шага, возможно, нужна перезагрузка, но у меня сработало и без нее.
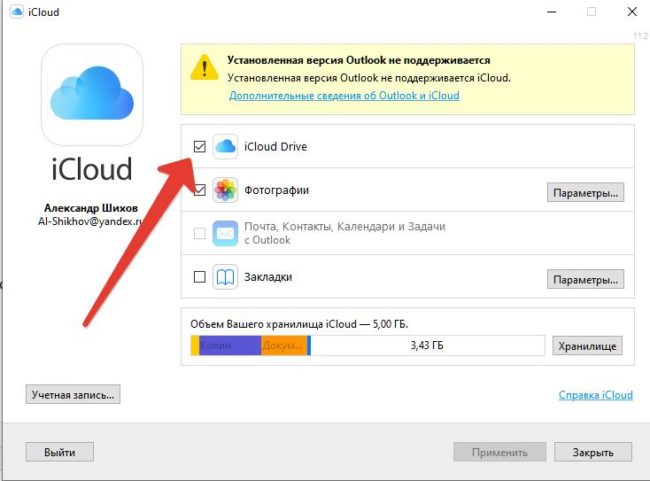
Осталось включить синхронизацию в настройках клиента iCloud, и новые файлы будут уже отправляться на другой, не системный, раздел накопителя.
Перемещение папки облачного хранилища от Apple позволит вам сэкономить место на диске C.
Многие обладатели техники Apple регулярно используют «облачное» хранилище iCloud, чтобы сохранять там самые разные файлы. Здесь можно размещать видео, фотографии и многое другое на постоянной основе. Это дает возможность освободить память своего устройства, а также заходить в хранилище с любого «яблочного» девайса. Но как можно использовать iCloud на компьютерах или ноутбуках с операционной системой Windows?

Устанавливаем iCloud на Windows
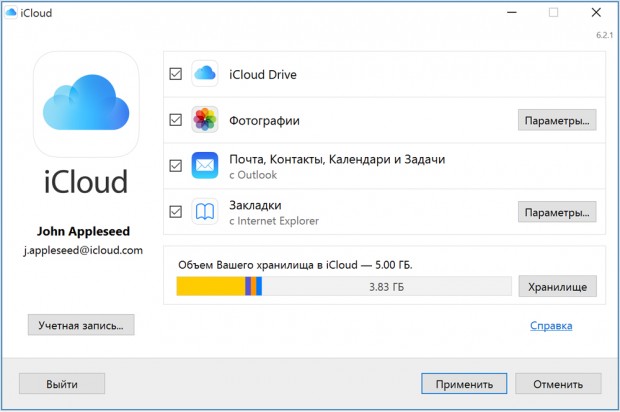
Для начала нужно иметь скачанное приложение iCloud, которое предназначается именно для ОС Windows. Его достаточно легко найти в интернете, причем в свободном доступе (например, здесь). Обязательно стоит проверить работоспособность iCloud на своем мобильном аппарате. Теперь можно устанавливать программу на свой ПК. Процесс инсталляции может быть как автоматическим, так и ручным. В последнем случае при открытом приложении необходимо зайти в «Проводник», а затем использовать файл настройки данного сервиса и осуществить перезагрузку.
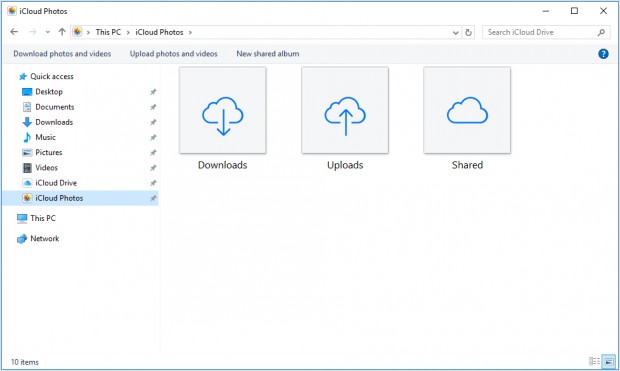
После удачной установки потребуется произвести вход в iCloud с помощью Apple ID и пароля. Если удалось войти в систему, то пользователю сразу же предстоит настроить программу. Например, можно выбрать iCloud Drive, фотографии, закладки Chrome и Outlook, чтобы иметь возможность соединить данные сервисы вместе с «облачным» приложением. Отдельно стоит упомянуть «Фото» iCloud. Соответствующая папка сразу же появится в стандартном «Проводнике». Именно сюда будут «прилетать» фотографии, картинки и видеоролики, если осуществить «Выгрузку». Если же произвести «Загрузку» таких файлов, то их получится найти в программе «Фото» для Apple-устройств.
А вот как происходит поиск фото в iCloud на компьютерах с Windows. В «семерке» нужно выбрать «Пуск» и «Изображения», а затем в «Избранном» отыскать «Фото» iCloud. Еще проще дела обстоят с Windows 8 – главный экран, «Фото» iCloud. А в «десятке» данное приложение доступно через «Пуск».
Если вы пользуетесь iCloud Drive, то соответствующая папка в Windows появится непосредственно в «Проводнике». Именно туда будут отправляться разнообразные документы, сохраненные через данный сервис. Примечательно, что все Apple-гаджеты будут копировать в автоматическом режиме файлы, которые находятся в такой папке. И это действительно удобно.
Синхронизируем информацию через Outlook
При помощи Microsoft Outlook можно быстро синхронизировать данные на самых разных девайсах с поддержкой iCloud. Речь идет о напоминаниях, контактах и электронных почтах, а также календарях. Предварительно нужно проверить, работает ли «Почта» iCloud на iOS-аппаратах. Теперь в iCloud для Windows нужно отметить пункт «… с Outlook», а потом нажать «Применить». С этого момента в окне почты от Microsoft будет отображаться новый аккаунт. Остается на iOS-устройствах активировать почту через настройки «облачного» сервиса. На Mac все необходимое находится в системных настройках.
Как обновить iCloud для Windows
Хочется иметь самую свежую версию iCloud для «винды»? Тогда ее нужно регулярно обновлять. Такая возможность доступна через приложение Apple Software Update. Вот что надо сделать:
- Откройте Apple Software Update;
- В меню «Правка» необходимо перейти в настройки;
- Устанавливаем определенный временной интервал для проверки наличия обновлений.
Как удалить iCloud для Windows
Если это необходимо, то клиент «облачного» сервиса всегда можно без проблем удалить. На всякий случай рекомендуем сохранить копию программы. После этого можно покинуть свою учетную запись, чтобы сделать следующее:
- Вызываем «Панель управления».
- Находим «Удаление программы».
- Выбираем iCloud, а затем жмем «Удалить».
- Остается лишь подтвердить свое действие.
Главные преимущества iCloud на Windows
И, конечно же, стоит выделить основные достоинства этого продвинутого сервиса. Такой официальный клиент дает отличную возможность хранить видео и фотографии абсолютно безопасно. Более того, можно не только загружать и скачивать файлы, но и просматривать контент через свой аккаунт. И речь идет как об устройствах с iOS, так и о Windows-машинах. Присутствует и специальная функция, открывающая общий доступ к iCloud. Это позволит вашим друзьям и родственникам оставлять заметки или комментарии к фото и видео, а также добавлять собственные файлы.
Данный клиент способен синхронизировать не только картинки и ролики, но и почту на Windows и iOS-аппаратах. Синхронизации поддаются даже закладки браузеров, напоминания, контакты и календари. Пользователь сможет удалять определенные файлы, регулировать настройки, а также выбирать тарифный план. В некоторых случаях понадобится встроенная программа Outlook, которая есть буквально на каждом Windows-компьютере. Таким образом, вы получаете тесную интеграцию между ноутбуком или компьютером на операционной системе от Microsoft и iOS-гаджетами в виде общего «облачного» хранилища.
Увеличиваем свободное место
После активации iCloud в вашем распоряжении будет около 5 Гб свободного места в «облаке». Хранилище данного объема предоставляется автоматически, причем совершенно бесплатно. Конечно, на первых порах 5 Гб может хватить, но потом обязательно захочется расширить пространство для файлов. Но для этого уже необходимо приобрести конкретный тарифный план. Самый дешевый из них (50 Гб) стоит порядка 1,19 доллара в месяц, а самый дорогой (2 Тб) – 12 долларов ежемесячно.
Инструкция по увеличению объема стандартного хранилища:
- Заходим в iCloud для ОС Windows;
- Выбираем «Хранилище», а потом переходим в раздел «Просмотреть учетную запись»;
- Потребуется ввести информацию для Apple ID;
- Подбираем себе тарифный план и нажимаем «Далее».
Нужно отметить, что тарифы на 200 Гб и 2 Тб можно выбирать для всей семьи, если вы вместе пользуетесь гаджетами Apple. Так получится существенно сэкономить, используя функцию «Семейный доступ». Сумма в рамках тарифного плана списывается каждый месяц автоматически с вашей банковской карточки. Если же тариф захочется поменять, то это в любой момент можно сделать через клиент, установленный на смартфонах компьютерах или ноутбуках под управлением Windows и iOS.
Содержание
- — Как удалить iCloud drive с моего ПК?
- — Что произойдет, если я удалю iCloud со своего компьютера?
- — Как полностью удалить iCloud из Windows?
- — Нужен ли мне iCloud на моем компьютере?
- — Как отключить синхронизацию фотографий из iCloud на моем ПК?
- — Могу ли я удалить фотографии iCloud на моем компьютере?
- — Как мне выйти из iCloud на моем ПК?
- — Как я могу удалить свою учетную запись iCloud?
- — Как исправить ошибки восстановления и установки iCloud для Windows 10?
- — Выпускает ли Microsoft Windows 11?
- — Что лучше iCloud или Google Drive?
- — Могу ли я установить iCloud на свой компьютер?
- — Могу ли я использовать iCloud в Windows 10?
Выберите меню «Пуск»> «Панель управления». Щелкните «Программы», затем щелкните «Программы и компоненты». Щелкните iCloud, щелкните Удалить, затем следуйте инструкциям на экране.
Об этой статье
- Нажмите «Выйти» внизу.
- Нажмите кнопку «Пуск» в Windows.
- Введите «Панель управления» и нажмите «Панель управления», чтобы открыть ее.
- Щелкните Удалить программу.
- Прокрутите вниз и щелкните iCloud.
- Щелкните Изменить вверху экрана.
- Выберите «Удалить» и нажмите «Далее».
- Нажмите Да, чтобы подтвердить, что вы хотите удалить iCloud.
Что произойдет, если я удалю iCloud со своего компьютера?
Вы больше не сможете получить доступ к своим файлам или фотографиям iCloud прямо на вашем компьютере. Если вам нужен файл / фотография из iCloud на вашем ПК, вы можете перейти на iCloud.com в своем браузере. Оттуда вы можете получить доступ ко всему в iCloud, как это было на вашем компьютере.
Как полностью удалить iCloud из Windows?
На компьютере с Windows выйдите из iCloud для Windows. Откройте «Приложения и функции» в «Системных настройках». Найдите iCloud, нажмите удалить, затем следуйте инструкциям на экране. Если вы также настроили iCloud Mail в Outlook, найдите iCloud Outlook, нажмите «Изменить», выберите «Удалить» и следуйте инструкциям на экране.
Нужен ли мне iCloud на моем компьютере?
iCloud — важный компонент во вселенной Apple. Вы используете его для обмена файлами iCloud Drive, синхронизации контактов, устройства и другие личные данные, чтобы получить доступ к ряду услуг Apple и для доступа к ключевым приложениям, таким как Фотографии и Почта. Вы также можете использовать ограниченные возможности совместной работы и совместного использования.
Как отключить синхронизацию фотографий из iCloud на моем ПК?
Компания рекомендует вам перейдите в «Настройки»> «iCloud», затем нажмите, чтобы отключить функции iCloud. (см. изображение справа). Вы хотите, чтобы эти зеленые кнопки стали серыми, чтобы убедиться, что они выключены. Но обратите внимание, что настройки фотографий находятся внизу и имеют другую кнопку — выключите и ее!
Могу ли я удалить фотографии iCloud на моем компьютере?
На компьютере с Windows откройте проводник, затем щелкните «Фотографии iCloud» на панели навигации. Если вы не видите «Фото iCloud», щелкните «Изображения» на панели навигации, затем дважды щелкните iCloud Фото. Выберите фотографии или видео, которые хотите удалить, затем нажмите клавишу «Удалить».
Как мне выйти из iCloud на моем ПК?
Как выйти из своей онлайн-учетной записи iCloud в каждом браузере, в который вы вошли
- Откройте iCloud.com в веб-браузере и при необходимости войдите в систему, используя свой Apple ID.
- Нажмите «Настройки учетной записи», которые вы найдете под аватаром вашей учетной записи в середине страницы.
- Внизу страницы нажмите «Выйти из всех браузеров».
Как я могу удалить свою учетную запись iCloud?
На устройстве: войдите в iCloud и выделите «Устройства». Выберите устройство и нажмите «Удалить из учетной записи». Онлайн: Войдите в iCloud> Управление учетной записью> Управление конфиденциальностью> Запрос на удаление вашей учетной записи.
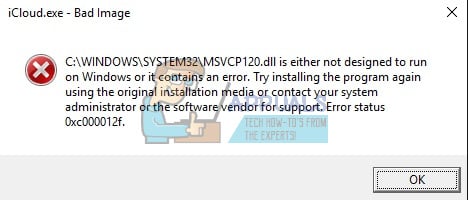
Как исправить ошибки восстановления и установки iCloud для Windows 10?
Пока исправление не будет официально выпущено, попробуйте следующие обходные пути, чтобы заставить iCloud работать на вашем компьютере с Windows 10:
- Удалите старые версии iCloud. …
- Установите iCloud от имени администратора. …
- Запустите стороннее средство устранения неполадок по установке и удалению. …
- Получите пакет Windows Media. …
- Проверьте настройки проигрывателя Windows Media.
Выпускает ли Microsoft Windows 11?
Операционная система Microsoft для настольных ПК следующего поколения, Windows 11, уже доступна в бета-версии и будет выпущена праздник 2021 (хотя, возможно, не для обновлений). В течение следующих нескольких месяцев участники программы предварительной оценки Windows смогут опробовать все новые функции и наблюдать за развитием платформы.
Что лучше iCloud или Google Drive?
iCloud — более безопасная платформа, хотя Google Диск в последнее время сделал несколько необходимых шагов вперед. Обе платформы позволяют использовать многофакторную аутентификацию, которую мы настоятельно рекомендуем. Почти все данные, хранящиеся на серверах iCloud, зашифрованы как при передаче, так и при хранении по 128-битному стандарту AES.
Могу ли я установить iCloud на свой компьютер?
iCloud для Windows позволяет вам получать доступ к вашим файлам, фотографиям, контактам, календарям и многому другому на ваших устройствах Apple и ПК с Windows. Загрузите iCloud для Windows. … iCloud может быть доступен не во всех регионах, а функции могут отличаться. Если вы используете управляемый Apple ID, iCloud для Windows не поддерживается.
Могу ли я использовать iCloud в Windows 10?
Загрузите iCloud для Windows на свой компьютер. Windows 10: Перейти в Microsoft Store чтобы загрузить iCloud для Windows. Более ранние версии Windows *: загрузите iCloud для Windows с сайта apple.com. Если он не устанавливается автоматически, перейдите в проводник и откройте программу установки iCloud.
Интересные материалы:
Яндекс Диск опасен?
Яндекс Мессенджер зашифрован?
Яндекс настоящий?
Яндекс обозреватель хорош?
Яном или брат лучше?
Яноме такой же, как Брат?
Январь — хорошее время для посещения Европы?
Янвэнь надежен?
Япония — марионетка США?
Японская сталь лучше?