Here you can find all the information you’ll need to begin using Browsersync. We have extensive information covering
command-line usage, the API, Grunt/Gulp integrations and all available options.
In this section:
- Installation
- Requirements
- Windows Users
- Incorrect external url
Installation
^ TOP
Global Install
If you would like to run Browsersync from the command line in any directory, it
can be installed globally with the following command.
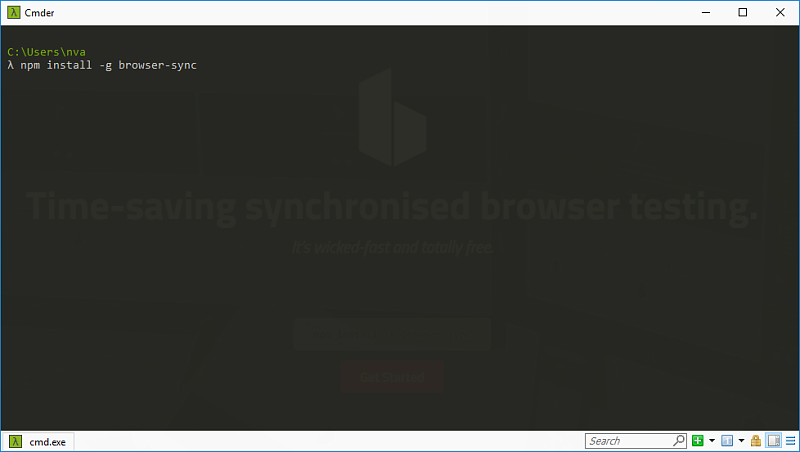
$ npm install -g browser-sync
Local Install
This is the prefered way to use Browsersync — installing it locally to each project. This
way the dependency can be added to your package.json file and everyone on your team.
$ npm install browser-sync --save-dev
WARNING — do not use sudo! If you’re running Mac OSX and encounter problems when trying to install Browsersync — either
globally or locally, it’s almost always because you have problems with npm permissions. Checkout their docs
for a guide on how to fix this once and for all — it only takes 2 minutes 
Requirements
^ TOP
Browsersync works by injecting an asynchronous script tag (<script async>...</script>) right after the <body> tag
during initial request. In order for this to work properly the <body> tag must be present. Alternatively you
can provide a custom rule for the snippet using snippetOptions
Windows users
^ TOP
Having trouble installing Browsersync on Windows? The most common reason for npm to throw
errors when compiling Browsersync is that some of the dependencies
(e.g. node-gyp need Visual C++ runtime libraries.
The way to resolve this is to install Visual Studio.
At the time of this writing (Feb 2015) the compilation works fine with
Visual Studio 2013 Update 4.
You can then tell npm which version of Visual Studio you are using by the following command:
npm install -g browser-sync --msvs_version=2013
After installation of Visual Studio npm should not throw errors any longer, but only issue warnings.
As far as we can tell, they do not impact Browsersync.
Incorrect External URL
^ TOP
Sometimes, depending on your network, your OS will report multiple external IP addresses. If this happens, currently
Browsersync just picks the first one and hopes for the best.
You could use a tool like dev-ip to list all possible external URLs on your
machine, and then provide the host option in your configuration
This site is open source on Github & we welcome corrections/improvements.
Статья написана студентом Хекслета. Мнение автора может не совпадать с позицией редакции
Друзья! Хочу поделиться очень полезной штукой для верстальщиков — browser-sync. Она позволяет синхронизировать работу окон браузера.
Обычный процесс верстки проходит так — открываем Sublime Text 3, вносим изменения, сохраняем, открываем браузер, обновляем страницу и смотрим результат. И так во всех браузерах. Это довольно долгий процесс. Но есть способ упросить этот процесс. Для этого существует browser-sync. С его помощью вы можете открыть Sublime Text 3, внести изменения, сохранить и смотреть результат сразу во всех браузерах без обновления страниц. Это очень удобно. Рекомендую всем.
Чтобы его установить, для начала нужно установить Node.js, далее в консоли выполнить следующую команду npm install -g browser-sync. Готово! Browser-sync установлен. Теперь займемся его настройкой.
Откроем в консоли папку с проектом. В консоли вводим browser-sync start --server --files "*.css, *.html". Если есть еще какие-то файлы с другими расширениями, то дописываем их в данную строчку.
Далее в браузере откроется страница проекта. Чтобы открыть в других браузерах данную страницу, достаточно скопировать url из адресной строки.
Более подробно о работе browser-sync вы можете узнать на странице https://www.browsersync.io/.
Вдохновившись
этой серией статей, меня посетила идея приобщить всех знакомых дизайнеров/верстальщиков/разработчиков к великому к консоли. И начать я решил с самого вкусного — с синхронизации браузеров. На самом деле, утилит, каким-то образом помогающих работать веб-девелоперам, много и рассказать про каждую просто невозможно, но ведь главное в этом деле заинтересовать;)
Вспомните, как обычно происходит верстка макета? Вносим изменения в css. Сохраняем. Переключаемся на Chrome. Обновляем страницу. Тестируем. Переключаемся на Firefox. Обновляем страницу. Тестируем. Переключаемся на IE. Обновляем страницу. Тестируем. Повторяем сначала.
Каждый может делать это по-разному, но суть останется прежней: тестирование в разных браузерах очень долгий и муторный процесс. Но мы с вами сейчас попробуем его немного оптимизировать. И в этом нам поможет утилита
browser-sync. Как можно прочитать на их сайте, программа умеет не только отслеживать изменения в файлах проекта и автоматически перезагружать вкладки, но и позволяет синхронизировать навигацию в каждом браузере. Вот так это работает:

Более того, можно тестировать на нескольких устройствах, использующих общее подключение: телефоны, планшеты, компьютеры с разными мониторами. Все что нужно для их синхронизации: открыть url, предоставляемый этой утилитой.
Установка browser sync
Надеюсь я успел вас достаточно заинтересовать, потому что почти все, что мы будем делать ниже, может испугать:) Нужная нам утилита является модулем для
Node.js. Для её установки нам потребуется пакетный менеджер
npm, поставляемый с нодой. Кто знает что это такое, может сразу перейти на сайт http://www.browsersync.io/ и следуя простым инструкциям (нет, действительно, всего три шага) установить и настроить. Для тех кто никогда не слышал ни о npm, ни о Node.js, быстро пробежимся по установке.
Для начала идем на сайт Node.js, скачиваем и устанавливаем. Тут ничего сложного: далее, далее, далее, готово. Откройте консоль (я пользуюсь встроенный в PhpStorm) и выполните команду:
npm install -g browser-sync
Это команда установит browser-sync. Если в консоли появилось «‘npm’ не является внутренней или внешней командой…», просто перезагрузите компьютер и попробуйте снова.
Если все прошло удачно, поздравляю, все установлено и готово к работе. Ничего ведь сложного?
Настройка browser sync
Теперь откроем в консоли папку проекта (Shift + правый клик на папке, дальше — Открыть окно команд) и запустим browser-sync. Тут есть два варианта: если вы верстаете статичные файлы (*.html, *.css и др.) и если вы делаете динамику (*.php, например). В первом случае, для запуска утилиты в серверном режиме, выполните команду:
browser-sync start --server --files "*.css, *.html"
В консоли вы увидите url адреса для синхронизации, а также в вашем браузере по умолчанию откроется вкладка с индексовой страницей проекта:

Помните, я говорил, что можно синхронизировать навигацию всех браузеров? Настраивается это здесь: переход по ссылкам, отправка форм, скроллинг.

Теперь, если вы используете локальный сервер, и вам нужно синхронизировать браузеры при изменении php (или других) файлов, необходимо использовать режим proxy:
browser-sync start --proxy "myproject.dev" --files "*.css, *.html, *.php, *.js"
Browser-sync имеет множество настроек, описывать их я не буду, просто дам ссылку:
http://www.browsersync.io/docs/command-line/. Там же можно посмотреть и примеры использования.
Для выхода из программы, в окне консоли нажмите Ctrl+C, и введите y в ответ на подтверждение выхода.
0
28.04.201813:5028.04.2018 13:50:55
![]()
Для того чтобы постоянно не обновлять страницу во время верстки, а страница обновлялась самостоятельно при внесении изменений — мы автоматизируем этот процесс.
Для начала установим node.js, переходим на сайт nodejs.org, скачиваем и устанавливаем, версию лучше выбрать LTS т.к. она более стабильная.
Теперь можно установить пакет browsersync, открываем консоль и вписываем:
npm install -g browser-sync
После непродолжительной установки, мы можем начать пользоваться этим пакетом.
Переходим в директорию с нашим проектом использую команду CD.
cd f:OneDriveWORCsitesnikovit.ru
Например чтобы перейти в директорию на диске F, мы сначала меняем диск командой:
cd /d f:
а затем переходим в нужную директорию командой:
cd f:OneDriveWORCsitesnikovit.ru
И запускаем сервер browser-sync командой:
browser-sync start -s -f "*.html, *.php, css/*.css"ключи запуска:
-s — browser-sync работает в режиме сервера
-f — отслеживает изменения в файлах
— *.html, *.php — изменения в файлах html и php
— изменения в файлах css в папке css
Теперь при изменении файлов страница автоматически перезагрузиться в браузере.
28.04.201813:5028.04.2018 13:50:55
Теги: разработка

![]()
Keep multiple browsers & devices in sync when building websites.
Follow @Browsersync on twitter for news & updates.
Features
Please visit browsersync.io for a full run-down of features
Requirements
Browsersync works by injecting an asynchronous script tag (<script async>...</script>) right after the <body> tag
during initial request. In order for this to work properly the <body> tag must be present. Alternatively you
can provide a custom rule for the snippet using snippetOptions
Upgrading from 1.x to 2.x ?
Providing you haven’t accessed any internal properties, everything will just work as
there are no breaking changes to the public API. Internally however, we now use an
immutable data structure for storing/retrieving options. So whereas before you could access urls like this…
browserSync({server: true}, function(err, bs) {
  console.log(bs.options.urls.local);
});
… you now access them in the following way:
browserSync({server: true}, function(err, bs) {
  console.log(bs.options.getIn(["urls", "local"]));
});
Install and trouble shooting
browsersync.io docs
Integrations / recipes
Browsersync recipes
Support
If you’ve found Browser-sync useful and would like to contribute to its continued development & support, please feel free to send a donation of any size — it would be greatly appreciated!
Support via PayPal
Supported by
Originally supported by JH — they provided financial support as well as access to a professional designer to help with Branding.
Apache 2
Copyright (c) 2021 Shane Osbourne
Содержание
- Browsersync Documentation
- Installation ^ TOP
- Global Install
- Local Install
- Requirements ^ TOP
- Windows users ^ TOP
- Incorrect External URL ^ TOP
- Browsersync options
- ui ^ TOP
- files ^ TOP
- watchEvents ^ TOP
- watch ^ TOP
- ignore ^ TOP
- single ^ TOP
- watchOptions ^ TOP
- server ^ TOP
- proxy ^ TOP
- port ^ TOP
- middleware ^ TOP
- serveStatic ^ TOP
- serveStaticOptions ^ TOP
- https ^ TOP
- httpModule ^ TOP
- cwd ^ TOP
- callbacks ^ TOP
- ghostMode ^ TOP
- logLevel ^ TOP
- logPrefix ^ TOP
- logConnections ^ TOP
- logFileChanges ^ TOP
- logSnippet ^ TOP
- snippet ^ TOP
- snippetOptions ^ TOP
- rewriteRules ^ TOP
- tunnel ^ TOP
- online ^ TOP
- open ^ TOP
- browser ^ TOP
- cors ^ TOP
- xip ^ TOP
- reloadOnRestart ^ TOP
- notify ^ TOP
Browsersync Documentation
Here you can find all the information you’ll need to begin using Browsersync. We have extensive information covering command-line usage, the API, Grunt/Gulp integrations and all available options.
In this section:
Installation ^ TOP
Global Install
If you would like to run Browsersync from the command line in any directory, it can be installed globally with the following command.
Local Install
Requirements ^ TOP
Browsersync works by injecting an asynchronous script tag ( ) right after the tag during initial request. In order for this to work properly the tag must be present. Alternatively you can provide a custom rule for the snippet using snippetOptions
Windows users ^ TOP
Having trouble installing Browsersync on Windows? The most common reason for npm to throw errors when compiling Browsersync is that some of the dependencies (e.g. node-gyp need Visual C++ runtime libraries.
The way to resolve this is to install Visual Studio. At the time of this writing (Feb 2015) the compilation works fine with Visual Studio 2013 Update 4. You can then tell npm which version of Visual Studio you are using by the following command:
After installation of Visual Studio npm should not throw errors any longer, but only issue warnings. As far as we can tell, they do not impact Browsersync.
Incorrect External URL ^ TOP
Sometimes, depending on your network, your OS will report multiple external IP addresses. If this happens, currently Browsersync just picks the first one and hopes for the best.
You could use a tool like dev-ip to list all possible external URLs on your machine, and then provide the host option in your configuration
This site is open source on Github & we welcome corrections/improvements.
Источник
Browsersync options
These are all the options that you can configure when using Browsersync. Create a single object and pass it as the first argument (for GulpJS and normal API usage). If you’re using Grunt, you can still use all of these options, but you need to provide them as detailed in the Browsersync Grunt Documentation
ui ^ TOP
Note: requires at least version 2.0.0
Browsersync includes a user-interface that is accessed via a separate port. The UI allows to controls all devices, push sync updates and much more.
files ^ TOP
Browsersync can watch your files as you work. Changes you make will either be injected into the page (CSS & images) or will cause all browsers to do a full-page refresh.
watchEvents ^ TOP
Note: requires at least version 2.18.8
watch ^ TOP
Note: requires at least version 2.23.0
ignore ^ TOP
Note: requires at least version 2.23.0
Patterns for any watchers to ignore. Anything provided here will end up inside watchOptions.ignored
single ^ TOP
Note: requires at least version 2.23.0
Serve an index.html file for all non-asset routes. Useful when using client-routers
watchOptions ^ TOP
Note: requires at least version 2.6.0
File watching options that get passed along to Chokidar. Check their docs for available options
server ^ TOP
Use the built-in static server for basic HTML/JS/CSS websites.
proxy ^ TOP
Proxy an EXISTING vhost. Browsersync will wrap your vhost with a proxy URL to view your site.
port ^ TOP
middleware ^ TOP
serveStatic ^ TOP
Note: requires at least version 2.8.0
Add additional directories from which static files should be served. Should only be used in proxy or snippet mode.
serveStaticOptions ^ TOP
Note: requires at least version 2.17.0
https ^ TOP
Note: requires at least version 1.3.0
httpModule ^ TOP
Note: requires at least version 2.18.0
cwd ^ TOP
Note: requires at least version 2.23.0
Current working directory
callbacks ^ TOP
Note: Only the ready callback is currently supported here.
ghostMode ^ TOP
Clicks, Scrolls & Form inputs on any device will be mirrored to all others.
logLevel ^ TOP
Can be either «info», «debug», «warn», or «silent»
logPrefix ^ TOP
Note: requires at least version 1.5.1
Change the console logging prefix. Useful if you’re creating your own project based on Browsersync
logConnections ^ TOP
logFileChanges ^ TOP
logSnippet ^ TOP
Note: requires at least version 1.5.2
Log the snippet to the console when you’re in snippet mode (no proxy/server)
snippet ^ TOP
snippetOptions ^ TOP
Note: requires at least version 2.0.0
You can control how the snippet is injected onto each page via a custom regex + function. You can also provide patterns for certain urls that should be ignored from the snippet injection.
rewriteRules ^ TOP
Note: requires at least version 2.4.0
Add additional HTML rewriting rules.
tunnel ^ TOP
online ^ TOP
Some features of Browsersync (such as xip & tunnel ) require an internet connection, but if you’re working offline, you can reduce start-up time by setting this option to false
open ^ TOP
browser ^ TOP
cors ^ TOP
Note: requires at least version 2.16.0
Add HTTP access control (CORS) headers to assets served by Browsersync.
xip ^ TOP
reloadOnRestart ^ TOP
Reload each browser when Browsersync is restarted.
notify ^ TOP
The small pop-over notifications in the browser are not always needed/wanted.
Источник
Are you a front-end developer? Or, do you write HTML, CSS, or JS to create web pages? Or maybe you develop WordPress themes with Xampp, Wamp, or Mamp to power your localhost.
If yes, how do you check your edits on a browser?
If you are like most people, you write code in your editor, save it, and refresh the browser to view the changes. But isn’t it slow and unproductive?
So in this post, I will show you a tool called Browsersync, which enables live-reloading. With it, your browser refreshes automatically as you type code in your editor. Isn’t it cool?
If you like watching things instead of learning, here is the video:
Below, I will show you the steps I used to install and run Browsersync on my machine.
The Setup
I will use a Windows system for this guide, but you can use Browsersync on any operating system, including Mac and Linux.
- Operating System: Windows 10
- Localhost: Xampp
- Code Editor: Microsoft Visual Studio Code
- The web page we’re building: An HTML page based on HTML5Boilerplate.com
Step 1: Start the server & open the project folder
It is obvious. You’ve to start the server and open the project folder to start developing.
As I am using Xampp, the first step is to open the Xampp control panel and start the Apache server.

Next, the sample web page I created is located inside the htdocs folder of xampp – htdocs/mysite. So, open that folder in Visual Studio Code (or your favorite code editor).

The site is just a simple HTML page I downloaded from the HTML5Boilerplate website. It includes an index.html file at the root, main.css inside the CSS/ folder, javascript files inside the js/ folder, and many other files. Here is the file structure:

Now, if we edit the code, for example, if I change the background color in css/main.css, I have to reload the Chrome browser to view that change.

Step 2: Install Node.js & NPM (Node Package Manager)
Browsersync.io is available as an NPM package. That means it needs Node.js running on our system to work.
So, go to Nodejs.org website, and download the appropriate installer. Here, I download the 64-bit LTS version for the Windows operating system. Then run the installer to install Node.js on your system.


If it’s the first time you hear about Node, it is a javascript runtime environment. If that too doesn’t make sense, it allows you to run javascript outside a browser, including on servers. Earlier, Javascript was only a front-end scripting language meant to be run on the browser. That’s when node.js came and changed the game.
Once the installation is complete, open the Windows CMD or terminal. Navigate to the project folder inside xampp, and then run the following commands:
cd path/to/xampp/htdocs/mysite/
node -v
npm -v

Keep the command line open. Now we can install browser-sync.
Step 3: Install Browsersync
If you visit the site browsersync.io, at the top, you can see the command to install it.

So enter it in the command line:
npm install -g browser-syncWhat it does is, it globally installs the browser-sync CLI (command line interface) on your system. Once it is installed, you can verify it:
browser-sync --versionIt will display the version of the CLI you’ve just installed.

Step 4: Run Browsersync
Run the following command to initiate browser-sync:
browser-sync start --proxy “localhost/mysite/” --files “*.html” “css/*.css” “js/*.js” --browser “chrome”
It will open a new tab on Google Chrome with the address:
http://localhost:3000/mysite/

Note the number 3000 in the address. That means, browser-sync connects on port 3000 over our apache, which is on port 80.
Let us see what the command does:
- start: initiates a server and load the site on the browser(s)
- –proxy: include this option to wrap browser-sync around your existing localhost.
- –files: include the list of files browser-sync should watch. Browsersync will reload the browser when these files change.
- –browser: the browser in which the site should be opened. If you omit this option, bs will connect with the default browser (e.g., Edge in Windows). You can also include multiple browsers in the list. For example, if you want to check the site on both Chrome and Firefox, add – “chrome firefox”. It will open both browsers. Not just opening, the windows will be completely in sync, including scrolling, clicking, and other window events.
Apart from these, there are a lot more options available in the documentation. But as far as we are concerned, these are the main ones.
Now, if you edit the CSS, js, or HTML file, the browser reloads instantly, and the changes will be live.
Also, make sure to disable the cache in Chrome Developer Tools.
In addition to this method, you can also use Browsersync with other task runners like Gulp or Grunt. It is quite handy as you can run all your tasks in just one command, including live-reloading – no need to run a separate command every time.
If you haven’t yet tried Gulp, I suggest you do it, as it is really a time-saver.
Running Browsersync as part of Gulp (optional)
The first step is to install the gulp-cli. For that, run the following command:
npm install -g gulp-cliIt will install the Gulp CLI globally on your system. Next, navigate to your project folder, and install gulp locally.
cd your/project/folder/
npm install gulp --save-dev
To install both gulp and browser-sync in one command, run this instead:
npm install gulp browser-sync --save-dev
Next, we have to create a gulpfile.js file at the root of your project directory.
var gulp = require('gulp');
var browserSync = require('browser-sync').create();
gulp.task('browserSync', function(){

browserSync.init({
    proxy: 'localhost/mysite',
    browser: 'chrome',

    files: [
        "css/*.css", "*.html", "js/*.js"
    ]

});

});

// create other tasks if any

gulp.task('default', gulp.series('browserSync', function(){

//include the code for your default task

}));

Then, back in the command line, run a simple command:
gulp

Conclusion
So, that’s how I implement live reloading while I develop websites. And these days, I prefer to run the task using Gulp, rather than the default command.
There are a few other packages as well, which you can use to enable live-reloading, but that required installing a browser extension to work, which I don’t like that much.
So, I hope the post has helped you to implement live-reloading on your environment.