
Здравствуйте, уважаемые читатели! Здесь пойдет речь об установке среды разработки программ на C++ — Code::Blocks. Данная программа бесплатная, но от этого она не становится мало функциональной пустышкой. В ней присутствуют множество функций для разработки небольших программ на C++, а также серьезных проектов. Вместе с ней в комплекте можно скачать компилятор MinGW, который необходим для компиляции ваших программ.
Скачивание необходимых файлов
В начале нам нужно скачать на компьютер файл необходимый для установки Code::Blocks и MinGW. Благо, на официальном сайте Code::Blocks, нам предоставляют возможность скачать и установить оба компонента одним кликом (может двумя). Для скачивания следуем инструкции:
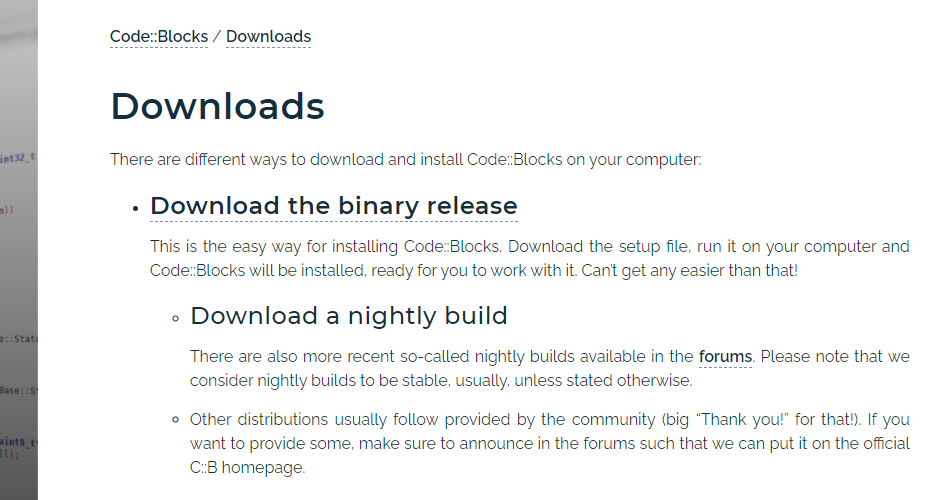
- Переходим на официальный сайт данной IDE (http://www.codeblocks.org/downloads).
- Здесь у вас есть выбор способа установки, но я вам советую кликнуть по ссылке Download the binary release. Это самый простой способ из присутствующих, о котором дальше и пойдет речь.
- На открывшийся странице выберите свою операционною систему или найдите ее самостоятельно, пролистав вручную.
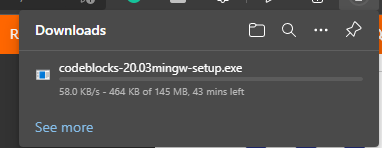
- Теперь в таблице с возможными файлами для установки выбираем тот, в названии которого присутствует mingw (например, codeblocks-<версия>mingw-setup.exe).
- Сохраните файл и дождитесь окончания загрузки. Файл весит не много, так что заскучать не успеете 🙂 .
Установка Code::Blocks
После скачивания установочного файла можем приступать к самой установке программы. Для этого нам потребуется совершить пару телодвижений:
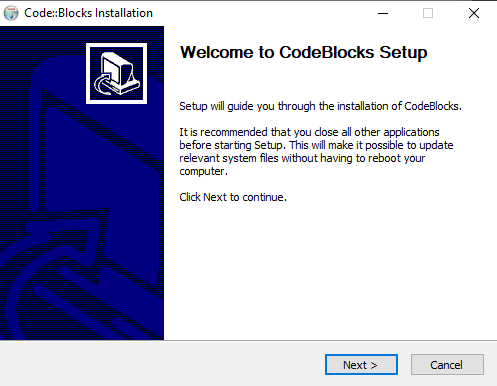
- Открываем пакет установки Code::Blocks.
- Жмем Next >.
- Жмем I Agree.
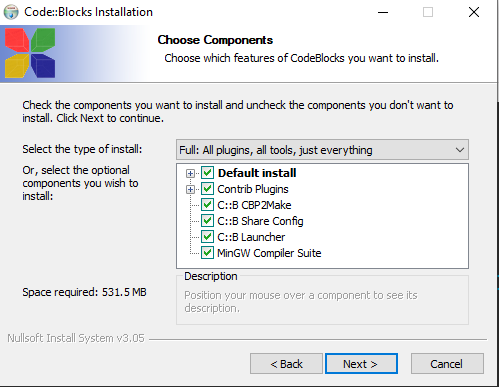
- Здесь мы можем выбрать различные виды установки либо настроить ее самостоятельно. Я предпочитаю Full версию установки. Жмем Next >.
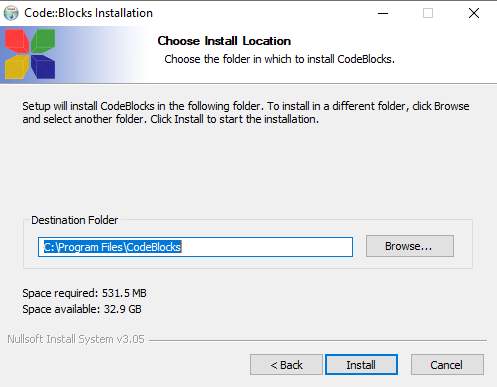
- Можете выбрать другой каталог установки Code::Blocks вместо стандартного. Жмем Install.
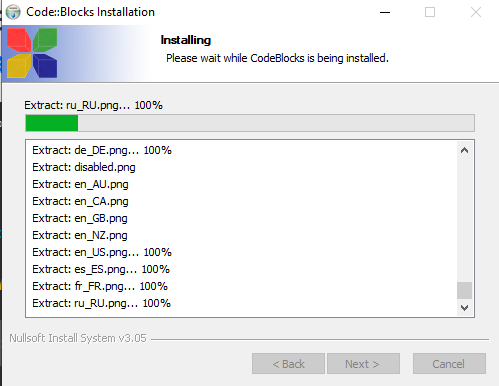
- Ждем…
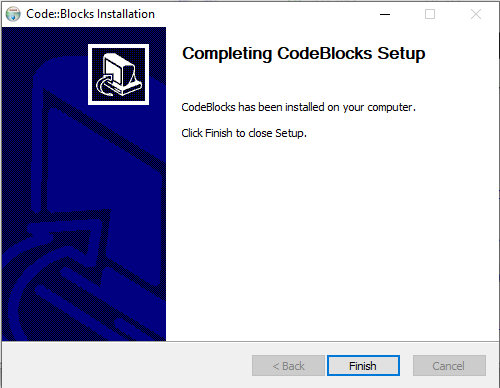
- Жмем Finish!
Теперь у вас установлена полноценная среда разработки Code::Blocks!
Однако на этом еще не все. Остался последний штрих.
При первом запуске у вас попросят указать, какие расширения файлов будут привязаны к Code::Blocks по умолчанию. Здесь особой разницы нет. Я выбираю Yes, associate Code::Blocks with C/C++ file types.
Если мы все правильно сделали, то должны увидеть экран приветствия:

Чтобы окончательна удостоверится в работоспособности IDE, давайте запустим тестовою программу.
Для этого жмем File -> New -> File… После чего открывается диалоговое окно:

- Выбираем C/C++ source. Жмем Go.
- Жмем Next >. Можем поставить галочку Skip this page next time чтобы в следующий раз лишний раз не пролистывать эту страницу.
- Выбираем C++ и идем дальше.
- Выбираем расположения файла и жмем Finish!
Теперь у вас должно открыться окно для написания кода. Скопируйте или напишите сами данный код:
|
#include <iostream> using namespace std; int main() { cout << «Hello, world!» << endl; return 0; } |
Теперь для запуска программы нажмите кнопку F9 (компиляция и запуск). У вас должно появится окно где будет написано наше тестовое сообщение:
Hello, world!
Process returned 0 (0x0) execution time : 0.020 s
Press any key to continue.
Вот и наше тестовое сообщение!
Возможные ошибки
Довольно распространенной проблемой является отсутствия компилятора по указанному пути в настройках Code::Blocks. У этой проблемы есть две причины:
- Либо вы установили пакет без MinGW. Соответственно вернитесь вверх и проверьте правильность выполненных шагов.
- Возможно, автоматические прописанный путь к компилятору является неверным. Тогда укажите путь к компилятору самостоятельно (он должен быт в директории установленного Code::Blocks, которую вы указывали при установке): Settings -> Compiler -> Global compiler settings -> Toolchain executables:

Если это не решило проблему, то пишите в комментарии свою проблему (также дополняйте сообщения скриншотами ошибок) и мы обязательно поможем ее решить.
Ну а на этом все! Удачи!
If you are running Windows, it can be a bit confusing to get Code Blocks to run. Especially if you get mixed up in the GCC compiler installation stuff. Also, if you downloaded only the .exe of the IDE CodeBlock’s official site without the fancy extra files. A few years ago when I was trying to execute my first C program, I ran into a bunch of compiler errors and didn’t understand what was going wrong.
Mind you, this was the first time I was typing code on my computer. I just didn’t know that we were supposed to set up the GCC compiler separately. So I had to configure the compiler manually and it was a bit time-consuming.
In this post, I will try to present a solution to that problem. Just follow the steps below. This the most efficient and the easiest method to get Code Blocks up and running in a jiffy.
What’s the fastest and easiest way to install and set up Code Blocks with the GCC compiler?
Simple. Download this file and follow the steps below. It is preconfigured with the GCC compiler binary files so we will be up and running in a couple of minutes. We will explain the manual process of custom installing the IDE and the compiler later. Not for the sake of efficiency, of course. Just because knowing the intricacies involved in downloading the GCC compiler is a handy tool and will help you understand the basics of setting up IDEs. Select the full installation option from the second installation window.

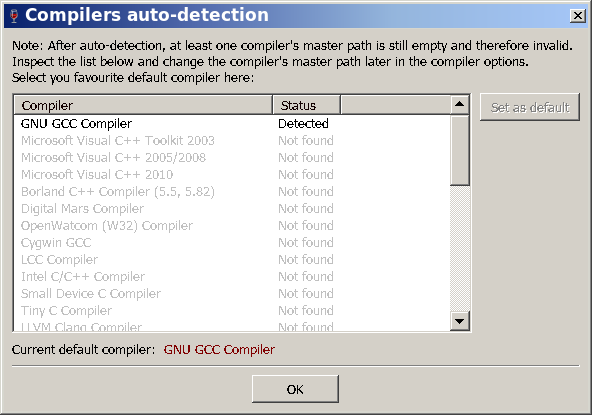
Once that’s done, a window like the one above should pop-up on your screen. This is the auto-compiler detection window that will locate all the compilers in the installation folder and ask you to select the default one. Select GNU GCC and click Ok.
Technically, this should complete your installation process. However, if for some reason, you don’t see any automatic compiler detection window, here’s what you can do. 
Start code blocks normally. Head on to the Settings drop-down menu and select Compiler. Then inside the settings window, navigate to the tab titled ‘Toolchain executables’. Under the field ‘Compiler’s installation directory’, ensure that the last folder in the selected path is MinGW. Cross-reference with the image below and check if your program files are similarly labeled. That should fix most of the issues with the compiler installation.


Step 1: Under the tab titles ‘Start here’, click on ‘Create a new project’. This will create a new project folder to store all the different code files.

Step 2: Select Empty project from the different categories displayed in the menu box. Don’t worry about the other options, we will get to know them later in this course.

Step 3: Enter the name of your project, this will be the folder where your individual files will be stored. Also, make a folder on your drive for the code you will write. In the long run, it pays off to organize your files neatly.

Step 4: Make sure that the selected compiler is the one we just installed. Check the boxes as shown in the screenshot to create the debug files.

Step 5: From the topmost toolbar, select the new file icon and create an empty file. This is where we’ll be writing the code. If you can’t see any toolbars, head on to the ‘View’ drop-down, select toolbars and select Main and Compiler, the toolbars should now appear on your screen. Similarly, if you can’t see the Manager window on the left and the Log window at the bottom, you can select to view them from the ‘View’ drop-down.

Step 6: Save the file with the extension ‘.c’ and your desired filename. Notice how the default folder is the project folder we created in step 2.

Step 7: Check the boxes shown below to include the files in the Debug folders.

Step 8: Write the code for Hello World and click the Build and Run icon located in the toolbar on the top. The icon has a yellow gear and a green play logo.

Step 9: You have successfully written your first C program. Join our free C programming course and get better at C!

Are you still having issues with the compiler?
Please comment below and I’ll be glad to help you out. And if you are not facing any problems and have successfully executed your HelloWorld code, don’t get too comfortable, the course is just beginning!
Can I just skip this software and have an online IDE, please?
Yep! You can compile all of your C code in your browser. There are many online IDEs on the web, but this one is my favorite. Using an online IDE just cuts through the hassle when you are not looking for any extra features except executing some code.
About the author
Umair has a Bachelor’s Degree in Electronics and Telecommunication Engineering. He also holds a Post-Graduate Diploma in Embedded System Design from the Centre of Development of Advanced Computing (Pune, India). Currently, Umair is pursuing his MS in Electronics Engineering from the University of Hertfordshire (Hatfield, UK).
— Advertisement —
Hello, how are you? Today we’re going to talk a bit about Code::Blocks. This is an open-source integrated development environment that supports multiple compilers, including GCC, Clang and Visual C++. Also, it is based on the WxWidgets graphical interface platform. Consequently, it can be used freely in different operating systems. In addition, it is licensed under the GNU General Public License. CodeBlocks is a very powerful tool for developing programs in C++. In this post, we will see how to install CodeBlocks on Windows 10.
Downloading CodeBlocks.
To download the most recent version of the program, just click on the following link. On the download page, there are several versions to download. In theory, all should work properly. However, I have experienced problems with some of them. Therefore, I recommend the installer with the setup that also includes the MINGW compiler:

Once downloaded the file, just double click on it to start the installation.

Next, accept the license:

On the next screen are all the options available for installation. It is possible to select them according to the needs of the user. However, it is preferable to leave the default options and do a complete installation. This increases the stability of the program:

Then the installation path of the program appears. It is possible to leave the default path or set a custom address:

After setting the parameters, the wizard will start the installation.

After the process is finished, press Next to close the window and launch the program.

Configuring the compiler on CodeBlocks
After launching the program, it is necessary to make some configurations. First, CodeBlocks automatically detects the compilers present in the system. If there are none, then the program compiler is set.

Testing CodeBlocks.
Once the program is configured, it is time to create the first project. With this intention, please click on Create a New Project

Immediately an assistant will be opened to guide us during the creation of the project. Please click Next to start the process.

In the next window, select the type of project to start. In that case, please select Console Application.

Next, select the type of language to use. For the purposes of this example, select C++.

Next is the project configuration window. Here you assign the name to the project. In addition, select the folder where the project will be saved.

Below are options for the compiler and other elements of the project. Additionally, leave all options by default and press Finish to continue.

Back to the initial screen, please locate the Workspace menu in the left column. Forthwith, scroll until you get the main.cpp file. Then double click on it and you will see the file with the classic Hello World.

To compile and run the program, click on the icon shown in the image below. Accordingly, just wait a few moments until the file is displayed in a pop-up window.

Conclusion
After finishing the post, we have seen how to install CodeBlocks on Windows 10. It is designed to be very extensible and completely configurable to the needs of developers. In addition, this IDE has been built around a complementary framework. All right, that’s it for now. I hope you find this post useful. Before saying goodbye I invite you to review our post about enabling PING in Windows Server 2019.
Код :: Блоки это бесплатная IDE с открытым исходным кодом; он устанавливается на C ++ с использованием wxWdigets в качестве инструментария графического интерфейса. Code :: Blocks поддерживает такие компиляторы, как C, C ++ и Fortran. Плагины расширяют Code :: Blocks; его функции и возможности характеризуются установкой и написанием плагина. Это программное обеспечение для программирования.
Code :: Blocks поддерживает Windows, Linux, Mac и все операционные системы.
- Компилятор: Компилятор — это компьютерное программное обеспечение, которое переводит исходные коды в инструкции на машинном языке, понятные цифровому компьютеру. Программное обеспечение Code :: Block поддерживает несколько компиляторов, таких как; GCC (MingW / GNU GCC), MSVC ++, Borland C ++ 5.5, Цифровой Марс, Лязг, и больше.
- Отладчик: Отладчик — это компьютерное программное обеспечение, которое помогает обнаруживать и исправлять ошибки в другом программном обеспечении. Функция отладчика в пользовательском дампе памяти Code :: Code, просмотр реестров ЦП и многие другие функции.
- Интерфейс: Интерфейс — это два или более отдельных компонента компьютерной системы, которые обмениваются информацией. В Code :: Blocks функции, предлагаемые для интерфейса, представляют собой сворачивание кода для C, C ++, Фортран, XML и многие другие файлы, интерфейс с вкладками, интеллектуальный отступ, внешние настраиваемые «инструменты» и многое другое.
В этом уроке мы расскажем, как:
- Как скачать Code :: Blocks.
- Как установить Code :: Blocks.
1]Как скачать Code :: Blocks
В этом руководстве мы собираемся загрузить программное обеспечение Code :: Blocks.
Откройте браузер по вашему выбору и введите поисковую систему Код :: Блоки и нажмите Войти.
Однажды на Скачать страницу, выберите загрузить Бинарный выпуск. Вы перейдете на другую страницу.
Где вы видите «Пожалуйста, выберите установочный пакет в зависимости от вашей платформы,» Выбрать Windows XP / Vista / 7 / 8.x / 10.
Он автоматически перейдет туда, где находятся загрузки Windows. Выберите любой из вариантов в зависимости от вашего ПК или того, что вы предпочитаете.
В статье выбираем codeblocks-20.03-32bit-setup.exe.
Чтобы загрузить эту установку, вы можете выбрать ссылку для загрузки Code :: Block либо из FossHub или Sourceforge.net, в правой части страницы. Мы выбрали Sourceforge.net.
Он будет перенесен на сайт Sourceforge.net, но появится диалоговое окно для Скачать щелкнуть Сохранять файл.
Программное обеспечение загружено.
2]Как установить Code :: Block
Войдите в Проводник и дважды щелкните установочный файл в вашем Скачать папка.
Откроется окно с вопросом: «Вы хотите разрешить следующей программе от неизвестного издателя вносить изменения в этот компьютер?. » Нажмите да.
А Код :: Блоки появится диалоговое окно установки с указанием добро пожаловать в code :: Block Setup. Нажмите Следующий.
Окно Dialog Wizard демонстрирует лицензия и срок соглашения. Нажмите Я согласен.
Теперь выберите Составные части, тогда Следующий. В этом руководстве мы ничего не меняем в компонентах, потому что они уже выбраны по умолчанию.
Теперь нажмите Установить.
Программа начнет Установить.
Появится небольшое диалоговое окно с вопросом «если вы хотите запустить Code :: Blocks сейчас », Выбрать да.
На этом установка завершена Следующий.
Затем нажмите Заканчивать.
Программа установлена.
Мы надеемся, что этот пост окажется для вас полезным.
In this article, we will look into the process of installing code blocks for C++ on windows.
Installation Code Blocks for C++ on Windows:
Follow the below steps to install Code Blocks for C++ on windows:
Step 1: Open Your Web Browser
Step 2: Go to the Search Panel and Search for “Code Blocks”
Step 3: Click on the First Result shown on the Search Engine or click on this link.

Step 4: Click on the “Downloads” Section.

Step 5: Click On “Download the binary release”.
Step 6: As per this Date, the Latest Version of Code Blocks is 20.03. Now here you’ll find several download options
- codeblocks-20.03-setup.exe : It is a standard executable file that is easier to install.
- codeblocks-20.03-nosetup.zip : It is a zip file which you do not have to install , you can just unzip and run it.
I’ll suggest you download the file with MinGW written on it (“codeblocks-20.03mingw-setup.exe”) as MinGW is a Compiler that is needed to run the Program. If you download the normal setup file then you have to download The compiler separately.

Step 7: Click on Sourceforge.net under the Download Section of your desired file.
Step 8: then Download should begin within some seconds.
Step 9: When the download is completed, Open Your Code Blocks Setup File.
Step 10: Click on Next.
Step 11: Click on I agree.

Step 12: Click On Next ( you need to have at least 600 MB free storage on your drive for the installation).
Step 13: Select your Destination and Click on Install
Step 14: Once Installation gets completed, click on Next and then Click on Finish
Now You Code Blocks have been installed.
To Set the Environment Path of GCC compiler
Step 1: Go to your Code Blocks MinGW installation folder location ( For me it is C:Program FilesCodeBlocksMinGWbin) and copy the address
Step 2: Go to Search Panel and type “Edit System environment variables”
Step 3: Click On Environment Variables
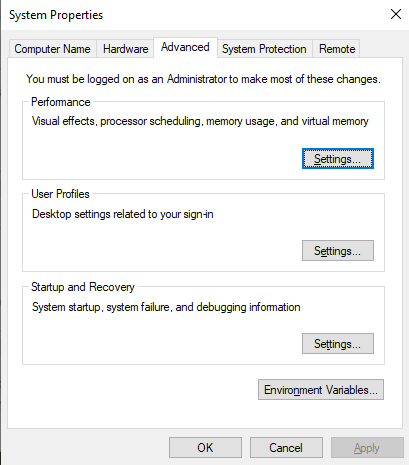
Step 4: Under System variables, Click on Path and Select Edit
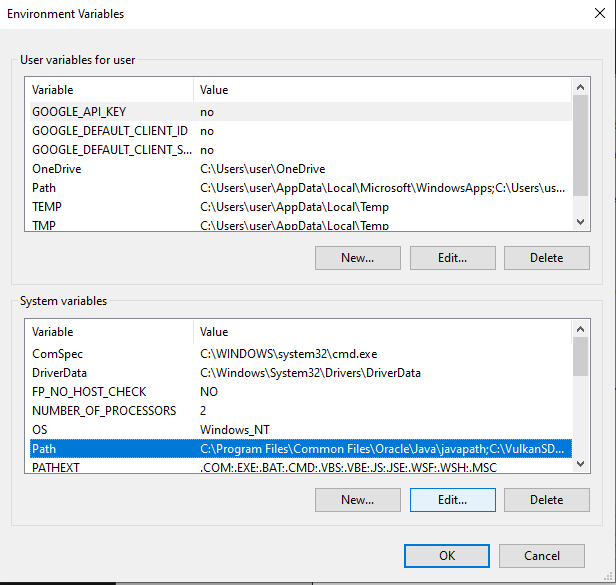
Step 5: Click on New and Paste the Address into it and click on OK

Now Code Blocks will automatically detect GCC Compiler.
Установка и настройка в Windows
- Вариант 1 (более корректный, но трудоемкий): установка с официального сайта
Code::Blocks скачивается со страницы загрузки официального сайта. Рекомендуется выбрать codeblocks-20.03-setup.exe (установщик), codeblocks-20.03-setup-noadmin.exe (установщик на компьютер без административного доступа, например публичный) или codeblocks-20.03-nosetup.zip (архив, для опытных пользователей), можно скачивать с любого предложенного зеркала.
Компилятор MinGW (сборка TDM) Также скачивается с официального сайта. Рекомендуется выбрать tdm-gcc-webdl.exe или tdm64-gcc.
Библиотека OpenBGI скачивается с официального сайта и собирается вручную (для опытных разработчиков) или используется подготовленный К. К. Смирновым вариант — исправление библиотеки, сделанное для поддержки символов кириллицы, за что ему отдельное спасибо: установщик, архив, исходный код (для самостоятельной сборки). Установить (распаковать) нужно в ту папку, в которой установлен MinGW, например, C:Program FilesCodeBlocksMinGW, C:TDM-GCC-64 и т.д.
- Вариант 2 (более простой): установка подготовленного пакета
Пакет содержит все три продукта в том виде: установщик или самораспаковывающийся архив или архив<(для опытных пользователей).
Установщий можно использовать как для установки для всех пользователей (требуется административный доступ), так и тольво для одного пользователя
Распаковку архивов можно проводить в любую папку, права администратора не требуется.
Самораспаковывающийся архив запросит папку, в которую будет установлен пакет из Code::Blocks, MinGW и OpenBGI, ярлыки не создаются (требуется создать в ручную или запускать из папки установки). Пожалуйста, не пытайтесь распаковать этот архив поверх имеющейся установки программы, укажите папку, в которой подпапки CodeBlocks нет.
На новых версиях Windows использование самораспаковывающегося архива и установщика может быть затруднено, они могут работать крайне медленно, nак как эти файлы еще не известны защитнику Windows.
Для установки на домашних компьютерах начинающим пользователям рекомендуется скачать подготовленный установщик и использовать его.
Для установки на общественных компьютерах начинающим пользователям рекомендуется скачать подготовленный самораспаковывающийся архив и использовать его (установить в свою рабочую папку).
После установки приложение готово к разработке программ на языке C из графического окружения (Code::Blocks). Компиляция с помощью MinGW-GCC и запуск получаемых приложений из командной строки может потребовать прописания в переменной окружения PATH пути к каталогу bin из связки TDM
Первый запуск
При первом запуске Code::Blocks обнаружит имеющиеся в системе компиляторы. Надо проследить, чтобы GNU GCC Compiler был установлен по умолчанию (красная строка внизу окна).
Если это не так, нужно найти этот компилятор в списке, кликнуть мышью и нажать кнопку Set as Default справа.
Далее программа запросит возможность ассоциации файлов исходного кода C/C++ (при открытии из проводника Windows): в этом нет необходимости (No, leave everything as it is), так как на самом деле при разработке лучше использовать проекты, а не отдельные файлы исходного кода.
This tutorial is about how to install Codeblocks on your local Environment or PC with Windows, Mac or on Linux.
CodeBlocks is a cross-platform, open-source, free IDE that supports GCC, Visual C++, and Clang compilers. Codeblocks developed in C++ using wxWidgets for Windows and Linux as the GUI toolkit. It is oriented towards C, C++, and Fortran with custom build system support.
Latest Codeblocks for MAC version is 13.12 released in 2013 and has been ported to FreeBSD, OpenBSD and Solaris.
Features of CodeBlocks
- It supports multiple compilers including GCC, MinGW, Microsoft Visual C++, LLVM Clang, Intel C++ compiler, Borland C++, LCC and Watcom.
- CodeBlocks IDE was originally designed for the C++ language but also support other programming languages with a plugin system.
- Has features like syntax highlighting, code folding, C++ code completion, class browser, a hex editor and many other utilities.
- Editor supports font, size selection and custom syntax highlighting colors.
- CodeBlocks debugger allows the user to debug their program by accessing local function symbol and argument display, custom memory dump, CPU registers, thread switching, user-defined watches, disassembly, call stack and GNU Debugger Interface.
- Files opened are organized into tabs.
- CodeBlocks uses custom build system storing information in XML-based project files.
- Visit codeblocks.org. Click Download from menu than click on download the binary release.
- Go to your operating platform section (e.g., Windows XP / Vista / 7 / 8.x / 10) than Download the installer with GCC Compiler, e.g., codeblocks-17.12mingw-setup.exe or Click here to download.
- Double-Click to run the downloaded installer and Click Next on pop-up window. Now Click on “I Agree” to accept license agreement.

- On new pop-up don’t do anything just click Next and then change installation directory if you want (default directory recommended). Click Install.

- Wait for a minute for installation to complete. A new pop-up asks you to run Codeblocks, Click YES then it show the compiler Codeblocks detected click OK.

- Now we have install Codeblocks on windows.
We need to verify Compiler and Debugger path (this step is optional).
- Go to menu options Click on Setting >> Compiler. In Selected Compiler by default it shows GNU GCC Compiler. Now select tab “Toolchain Executables” from below tabs and Check the Compiler’s Installation Directory sets to “
C:Program FilescodeblocksMinGW.

- Similarly, for debugger path. Settings >> Debugger >> GDB/CDB debugger >> Default . In Executable path should be
C:Program FilescodeblocksMinGWbingdb.exeorC:MinGWbingdb.exeif you have installed MinGW compiler before installing Codeblocks.

Notes: If you encountered problem running debugger with CodeBlocks do clean installation. Uninstall Codeblocks and then first install MinGW ( Go here to Install MinGW on Windows ) and then install Codeblocks.
First C/C++ Program on CodeBlocks
- Open CodeBlocks than from menu click on File >> New >> Project.

- From Pop-up click on ‘Console application’ then click on GO >> Next.
- Select in which language (C/C++) you want to try your first program then click on Next.

- Give name to project (e.g. hellocodies) then in next column select path where you want to save your files. Then click Next.
- On next just click finish.
- You can see in left bar a project got created expand source than double click main.cpp or main.c to open your file. By default, a simple hello world program is written.

- To compile program click on Build(see below screenshot), any error will be shown in below log & error tab than click on run a green play button to run program or there is also Build & run button for single click next to these two button(refer below screenshot).

Try below simple program for C and C++ to find sum of two integers.
C Example
#include<stdio.h>

int main(){
int a=10, b=5;

printf("Sum a+b = %d",a+b);

return 0;

}
// OUTPUT in C
Sum a+b = 15
C++ Example
#include<iostream>
using namespace std;

int main(){
int a=10, b=5;

cout<<"Sum a+b = "<<a+b;

return 0;
}
// OUTPUT in C++
Sum a+b = 15Note: This procedure for writing your first program in CodeBlocks is same for Windows, Mac and on Linux.
Install CodeBlocks IDE on Mac OS X
Installing Codeblock on mac is single step process but more involves extra things besides downloading the file. To install Codeblock on Mac you need Xcode because Mac version it relies on Xcode distribution from Apple for its compiler.
Install Xcode on Mac
- To install Xcode goto Appstore and enter ‘Xcode’ in search bar and click on app.
- Click on GET and on Install App than enter your apple ID and password to download Xcode.

- After download complete open the application then agrees to License agreement and Enter password to complete Xcode installation.

- Installing just Xcode isn’t enough as we also need GCC compiler for that. Goto Apple developers site and login with your ID.
- Search for Command line tools and download the dmg file.
- Once download complete, you’ll get a package file (.pkg) as shown . Just double-click it and Accept all defaults to complete installation.
Let’s Install CodeBlocks now
- Go to codeblocks.org. Click Download from menu than click on download the binary release.
- Than go to your operating platform section (e.g., Mac OS X) than click on link opposite to CodeBlocks-13.12-mac.zip to download the package or Click here to download.
- Now extract the downloaded file and open a New Finder window than click on Application and move the extracted CodeBlocks file here (In applications).

- We need authorize CodeBlocks to run. Now goto system preference >> security & privacy.
- Now under general tab we need to click on lock pad shown below and enter password to unlock.

- In “Allow app downloaded from” click on open anyway, a window appears showing verification process.

- then a new window open asking to run CodeBlocks click on OPEN.

- When first time it opens all compilers get detected you need to click on OK or you can change compiler.
- We have successfully installed CodeBlocks on your Mac a simple program shown below to try the compiler.
Install CodeBlocks on Linux/Ubuntu
Installing codeblocks on Linux is easiest than both Mac and Windows because it is already present in package repository by default, all you need to do is just update or install stable version.
- Open Terminal and type the following commands one by one.
sudo add-apt-repository ppa:damien-moore/codeblocks-stable
sudo apt update
sudo apt install codeblocks codeblocks-contrib
- After the installation open Codeblocks, on first launch like mac and windows it will detect compilers present on system.
- Select the according to your preference or leave it for default then click OK.