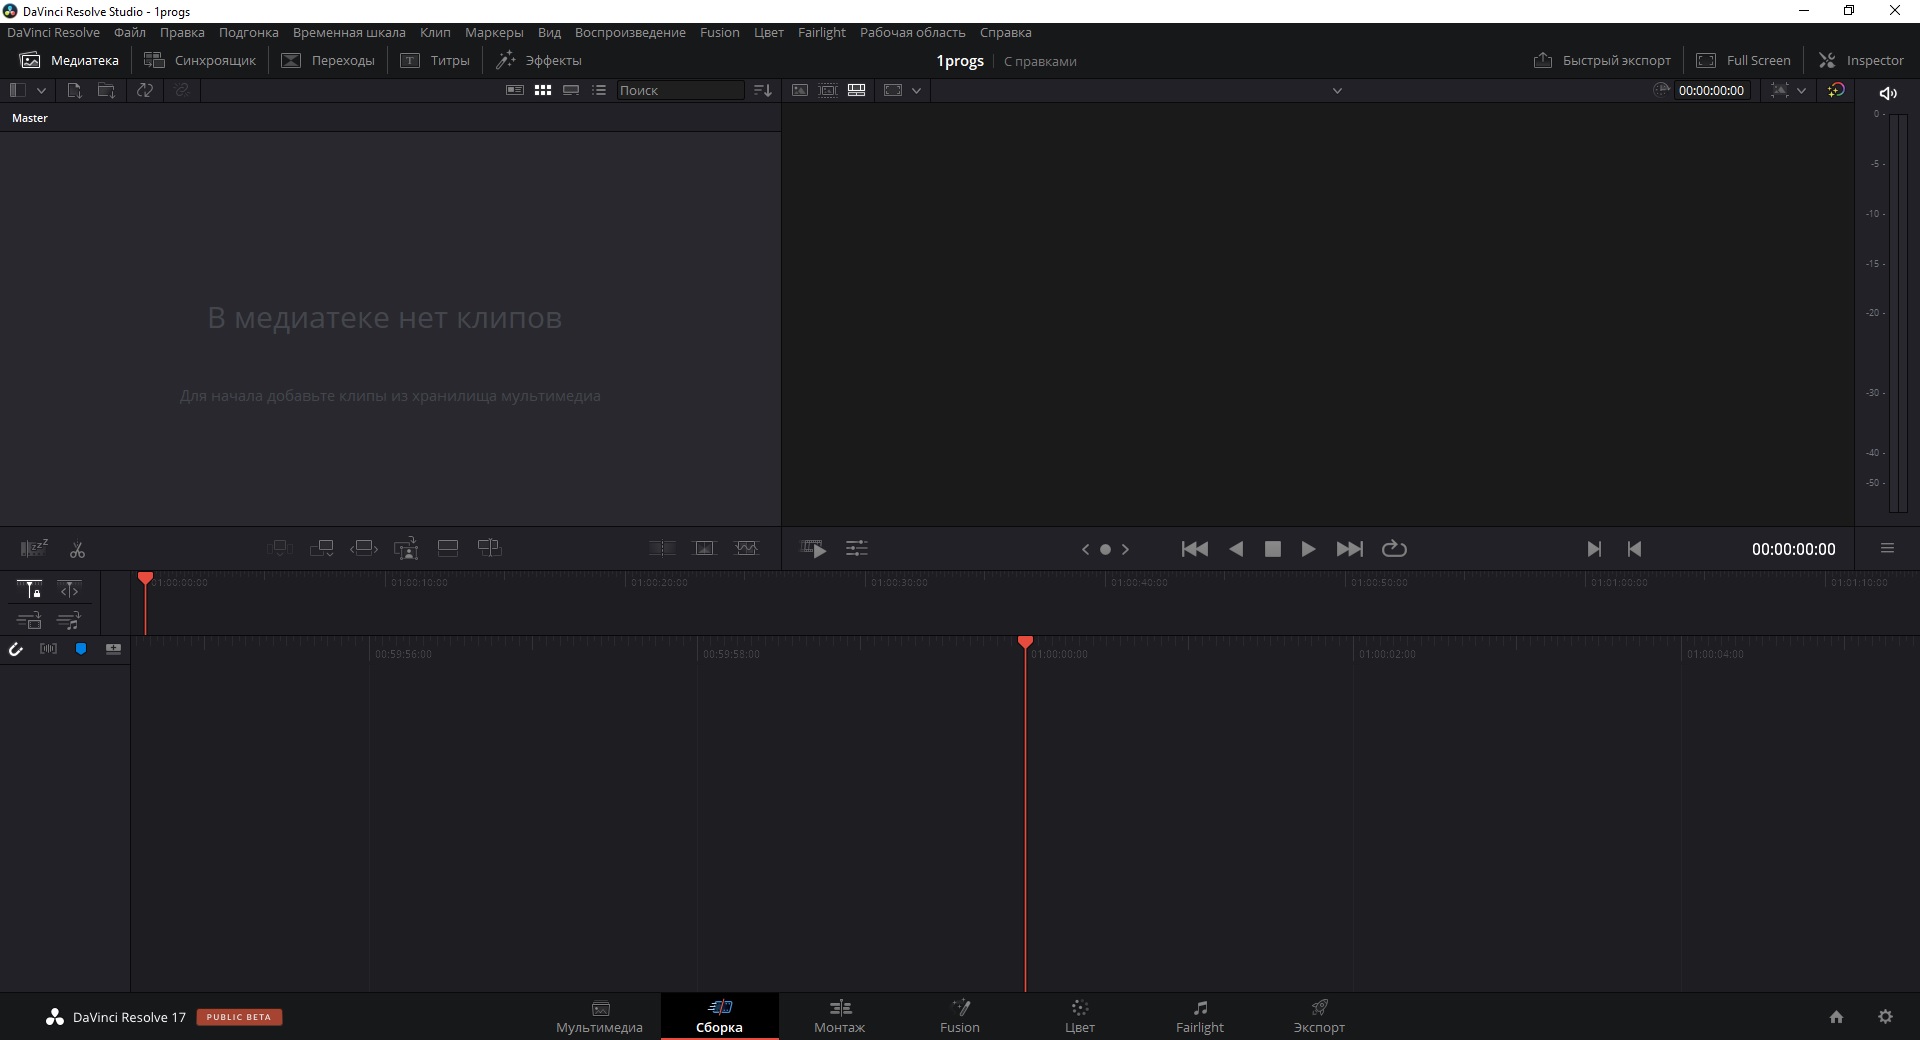
Видеоредактор DaVinci Resolve скачивается бесплатно с русской версией меню для Windows 10, 8, 7 (XP не поддерживается).
Последний релиз программы «весит» более 1,5 Гб и распространяется в виде ZIP архива. Для инсталляции DaVinci Resolve:
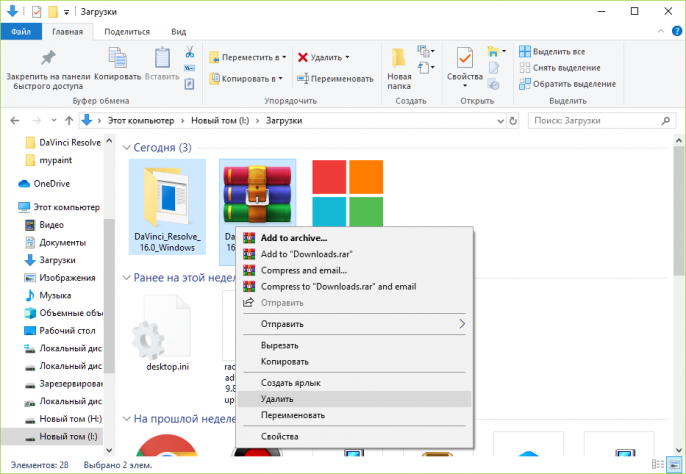
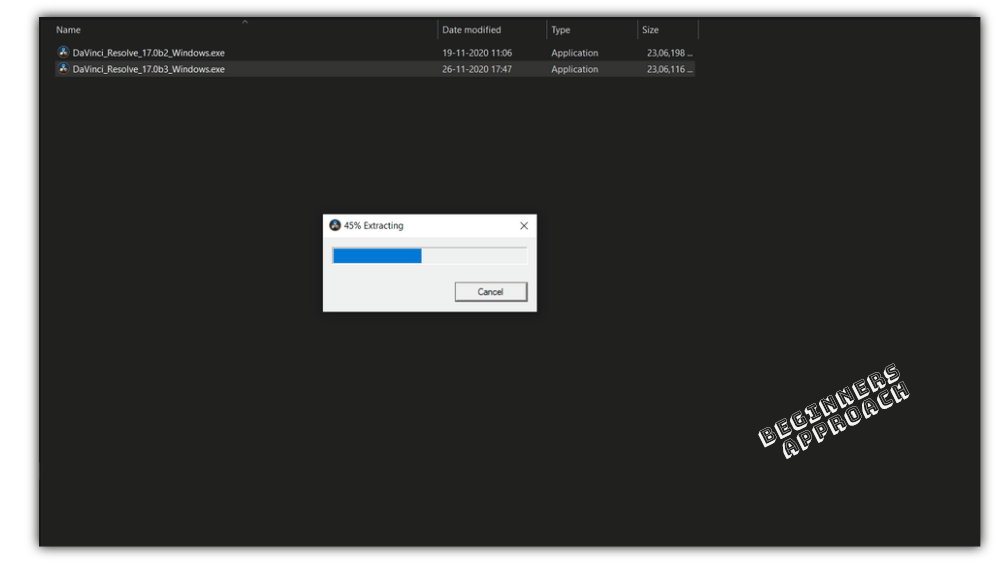
Загрузите архив в любую папку. Распакуйте его с помощью утилиты-архиватора. Для этого кликните правой кнопкой мыши на сжатый файл и выберите команду Распаковать.
Выбрать лучший архиватор вы можете по ссылке.
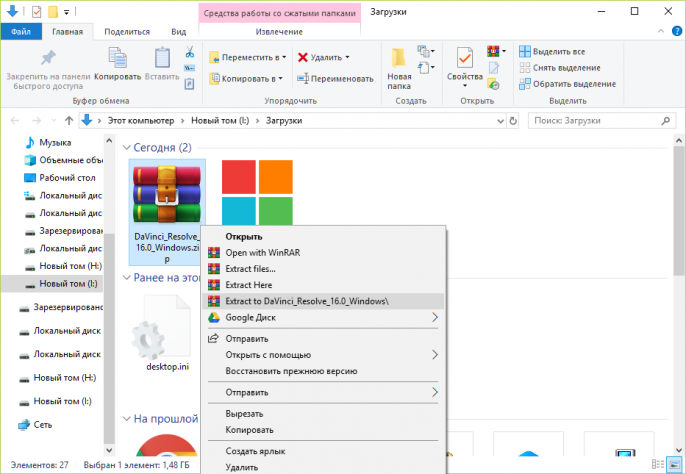
Подождите, пока извлекутся библиотеки. В итоге рядом с файлом-архивов появится директория с таким же названием. Войдите в нее.
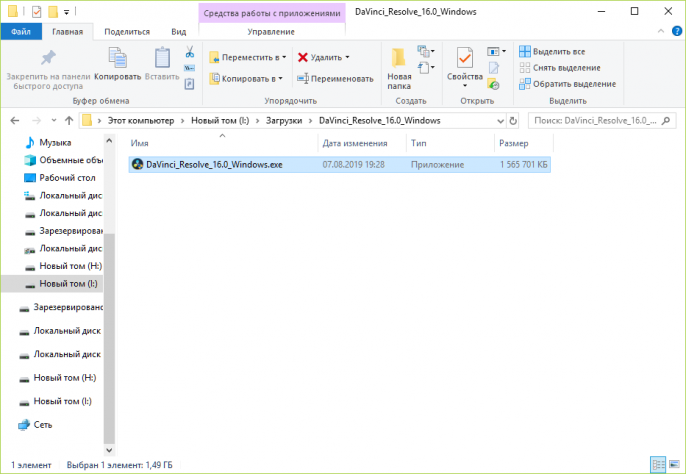
Откройте исполнимый файл с именем редактора.
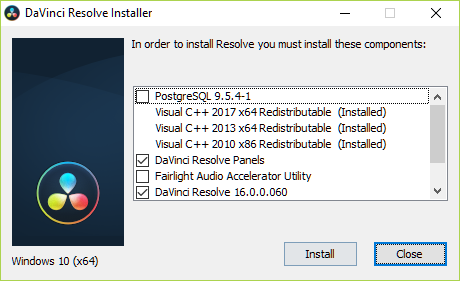
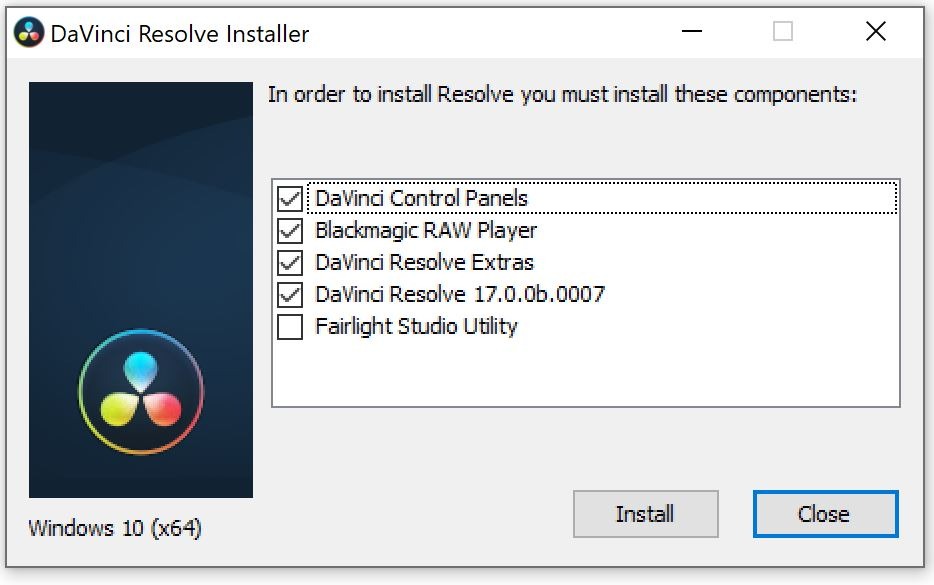
Запустится окно с выбором компонентов для инсталляции. Рекомендуем не менять настройки по умолчанию. Нажмите Install.
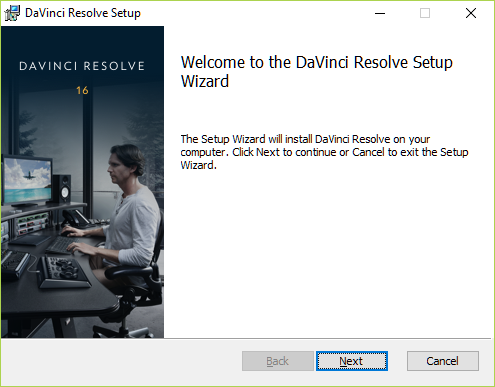
В новом окне откроется Мастер установки. Нажмите Next.
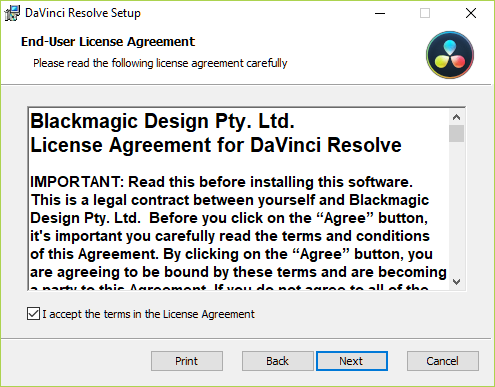
Поставьте галочку – примите лицензионное соглашение. Кликните на кнопку Next.
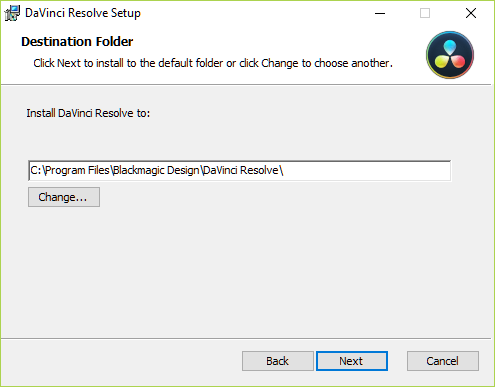
Если нужно – поменяйте директорию для инсталляции с помощью кнопки Change…
Нажмите Next.
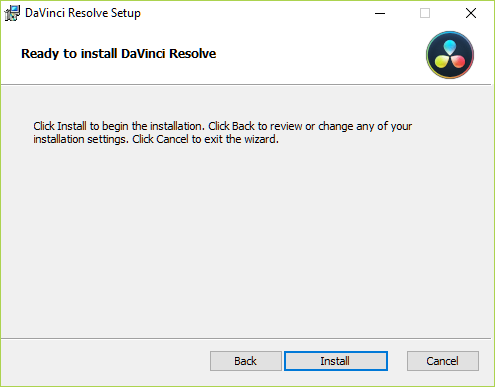
Кликните на кнопку Install и дождитесь завершения процесса установки.
Для того, чтоб не хранить на диске ненужные данные, можете удалить с него загруженный файл и распакованную папку.
25
окт
2021
- Информация о материале
-
Автор: Долматов Вячеслав
- Просмотров: 1631

Blackmagic Design DaVinci Resolve Studio 17.4 Win x64 — представляет собой уникальную программу для монтажа, цветокоррекции, наложения визуальных эффектов, создания графики и постобработки звука, в единой программной среде.
Скачать Blackmagic Design DaVinci Resolve Studio 17.4 Win x64 можно по ссылкам, приведённым ниже:
DaVinci_Resolve_Studio 17.4_x64.part1.rar
DaVinci_Resolve_Studio 17.4_x64.part2.rar
DaVinci_Resolve_Studio 17.4_x64.part3.rar
Поскольку программа имеет довольно внушительный размер, для удобства скачивания, файлы “порезаны” на три части. Скачивать следует все (три) части архива и разметить их в одной папке. Для того, что бы распаковать архив, на распаковку следует запустить его первую часть “DaVinci_Resolve_Studio 17.4_x64.part1.rar”. При условии, что все части архива размещены в одной папке, вторая и третья часть будут обнаружены архиватором и подключены к распаковке – автоматически.
Crack для лицензирования программы, вложен в архив.
Внимание.
Перед тем как распаковать архив, отключите антивирус, потому как файл Patch.exe необходимый для лицензирования программы, воспринимается антивирусом как вредоносный и будет удалён во время распаковки архива.
Установка Blackmagic Design DaVinci Resolve Studio 17.4 Win x64.
Для того, что бы начать установку программы, от имени администратора запустите файл DaVinci_Resolve_Studio_17.4_x64.exe, который Вы увидите сразу после распаковки архива:

Не надолго появиться панель распаковки файлов:

После чего откроется панель инсталлятора программы:

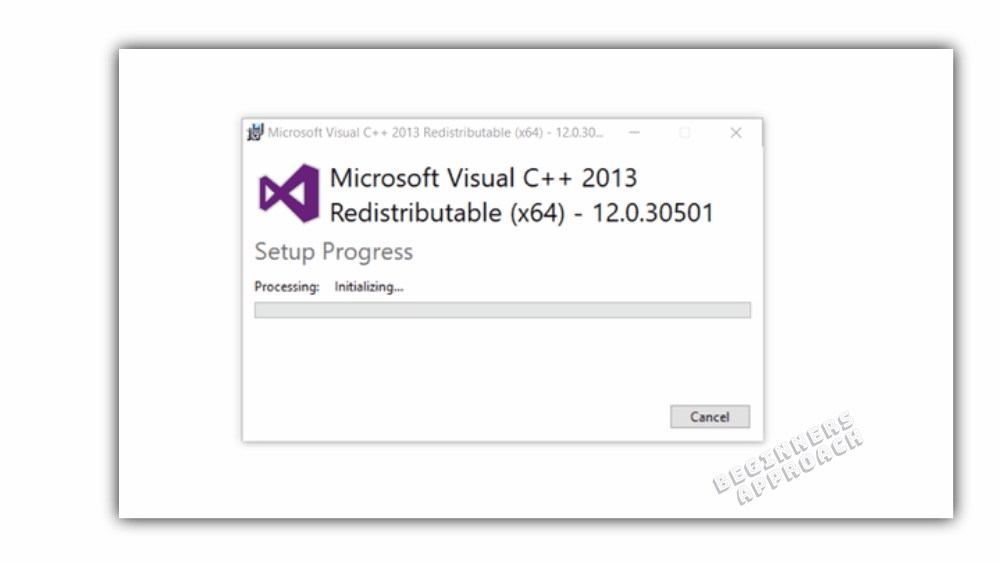
В зависимости от установленных на Вашем компьютере компонентов, необходимых для нормального функционирования DaVinci Resolve Studio 17.4, инсталлятор сам определяет, каких компонентов программы ему не хватает и, соответственно, какие компоненты ему следует установить. Поэтому галочки у необходимых для установки компонентов, он проставляет сам. В этот процесс Вам не следует вмешиваться, здесь просто нажмите на кнопку Install.
Начнётся установка программы. Сначала, пред установкой основных компонентов программы, будут установлены необходимые файлы Microsoft Visial C++:

Затем появиться панель установки основных компонентов программы. Здесь нажмите на кнопку Next:

В панели лицензионного соглашения поставьте галочку возле I accept the terms in the License Agreement и нажмите на кнопку Next:

Откроется панель, в которой можно изменить директорию установки программы. По умолчанию, программа будет установлена в директорию C:Program FilesBlackmagic DesignDaVinci Resolve. Не меняйте её без понимания того, что Вы делаете и нажмите на кнопку Next:

Появиться панель, информирующая о том, что всё готово для установки программы. Здесь нажмите на кнопку Install:

Запуститься процесс инсталляции DaVinci Resolve Studio 17.4:

По окончанию установки, появиться панель информирующая, что установка основных компонентов программы завершена. Нажмите на кнопку Finish, тем самым, завершив установку основных компонентов программы.

На этом окончательная установка программы ещё не закончена!
Снова откроется панель установки Microsoft Visial C++:

Дождитесь окончания установки Microsoft Visial C++.
После того как установка компонентов Microsoft Visial C++ будет завершена, откроется панель, в которой Вы увидите предложение перезагрузить компьютер. Компьютер мы перезагрузим несколько позже, а сейчас нажмите на кнопку Нет:

В панели завершения установки, нажмите кнопку OK, тем самым, завершив установку программы:

Лицензирование Blackmagic Design DaVinci Resolve Studio 17.4 Win x64.
Откройте папку Crack и скопируйте расположенный там файл Patch.exe:

Вставьте скопированный файл в директорию установки программы (надеюсь Вы ещё не забыли, что по умолчанию, директория установки программы C:Program FilesBlackmagic DesignDaVinci Resolve):

Теперь запустите файл Patch.exe от имени администратора (обязательно от имени администратора!!!):

Убедитесь, что в панели patch Davinci Resolve Studio 17.4, имя файла, который следует пропатчить — Resolve.exe (имя находится и подставляется в поле [Filename], автоматически), затем нажмите на кнопку Patch:

Убедитесь, что патч корректно отработал (о чём свидетельствует сообщение PATCHING DONE), затем нажмите на кнопку Exit:

Теперь из директории установки программы, удалите файл Patch.exe. Он исполнил всё то, для чего был предназначен и более нам не понадобится. Если вы его не удалите, то за Вас это сделает антивирус, когда его обнаружит.
На этом установка и лицензирование Blackmagic Design DaVinci Resolve Studio 17.4 Win x64 – завершены.
Настало время перезагрузить компьютер. Сделайте это сейчас.
Далее следует настроить параметры программы. Ниже я покажу пример того, как это можно сделать. Вам настраивать программу по тем же лекалам – не обязательно, поэту всё изложенное ниже носит исключительно ознакомительный характер и всё что там будет написано, можно не выполнять. К тому же любые настройки всегда можно изменить.
Настройка параметров программы.
Запустите программу с ярлыка, образовавшегося на рабочем столе, в процессе её установки.
В открывшейся панели настроек, в верхнем правом углу, вы увидите разворачивающийся свиток, в котором представлен набор языковых пакетов, на котором может работать программа:

По умолчанию там будет английский язык. Разверните свиток и выберите тот язык, который Вам подходит (я выберу русский), затем нажмите на кнопку Продолжить:

Затем нажмите на кнопку Быстрая настройка:

На следующем этапе будет произведена проверка операционной системы и графической карты, установленных на Вашем компьютере. Если всё окажется не таким уж древним и устаревшим, Вы увидите зелёные галочки возле соответствующих компонентов. Что бы пойти дальше, нажмите на кнопку Продолжить:

Далее следует выбрать разрешение, в котором Вы предполагаете создавать Ваш проект. Я выберу разрешение FULL HD с разрешением 1920×1080 (Вы выбирайте на Ваш вкус) и нажму на кнопку Продолжить:

Затем следует выбрать директорию для хранения медиафайлов и нажать на кнопку Продолжить:

На следующем этапе настройки программы следует выбрать раскладку клавиатуры. Возможно, Вы работаете в программе Adobe Premiere Pro и привыкли к “быстрым клавишам” этой программы, тогда в качестве настроек Вам нужно выбрать раскладку для этой программы. Я выберу раскладку под DaVinci Resolve и нажму на кнопку Продолжить:

На этом настройка параметров программы завершена и Вам осталось нажать кнопку Начать:

Откроется панель запуска программы:

Затем на экране Вашего компьютера развернётся Blackmagic Design DaVinci Resolve Studio 17.4 Win x64 и Вам останется только насладиться её работой.
Вот и всё!
Wondering how to install DaVinci Resolve for free?
Follow this step-by-step guide to quickly get started on how to download and install Resolve on Windows 10.
The process for installing both DaVinci Resolve versions 18 and 17 are the same.
If this is your first time installation of Resolve, you can proceed further.
But if this is your update from a previous version to a new version, then you need to take a backup of your database – which is critical.
Read about updating DaVinci Resolve to latest version here.
Let’s dive right in!
How to Download DaVinci Resolve version 18/17?
- Navigate to BlackMagic Design Support Center.
- Click on “DaVinci Resolve and Fusion Software” under “Select a Product Family”.
- Under “Latest Downloads“, check for the latest version.

- Click on “Windows” button below the required version, e.g., “DaVinci Resolve 18 Public Beta”. ( I am assuming you require the free version. If you want the paid version, click on the Windows button below the “Studio” version.)
- Fill your details:

- Click on “Register & Download“.
- The file will be downloaded to your system as a zip file.
Related Articles:
Set up DaVinci Resolve 18 the Right Way (& Fix Issues)
Is the Free Version of DaVinci Resolve Safe? (Here’s What You Should Know)
Quickly Update DaVinci Resolve (& Things You Should Know!)
Can My Laptop Run DaVinci Resolve? (Explained for Beginners)
How to Install DaVinci Resolve 18 or 17 on Windows 10?
The process for installing DaVinci Resolve version 18 and 17 are same.
- Extract the downloaded zip file.
- Double click on the .exe file.
- The process will start with the installation of “Microsoft Visual C++ Redistributable” (if you don’t have already in your computer, which is a pre-requisite)
- Make sure to install all the necessary pre-requisite steps.
- In the “DaVinci Resolve Installer” window, uncheck all the options except “DaVinci Resolve 17.0…”.
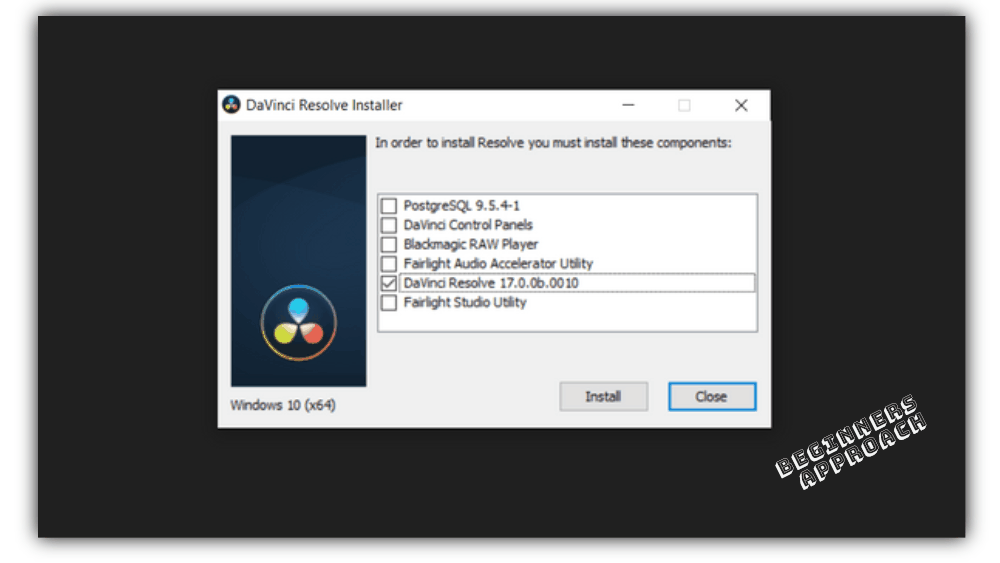
- Click on “Install“.
- Click on “Next” in the “Welcome to the DaVinci Resolve Setup Wizard“.
- Read and then Accept the license agreement.
- Click on “Install“.
- The installation will start.
- Then you will get the below screen:
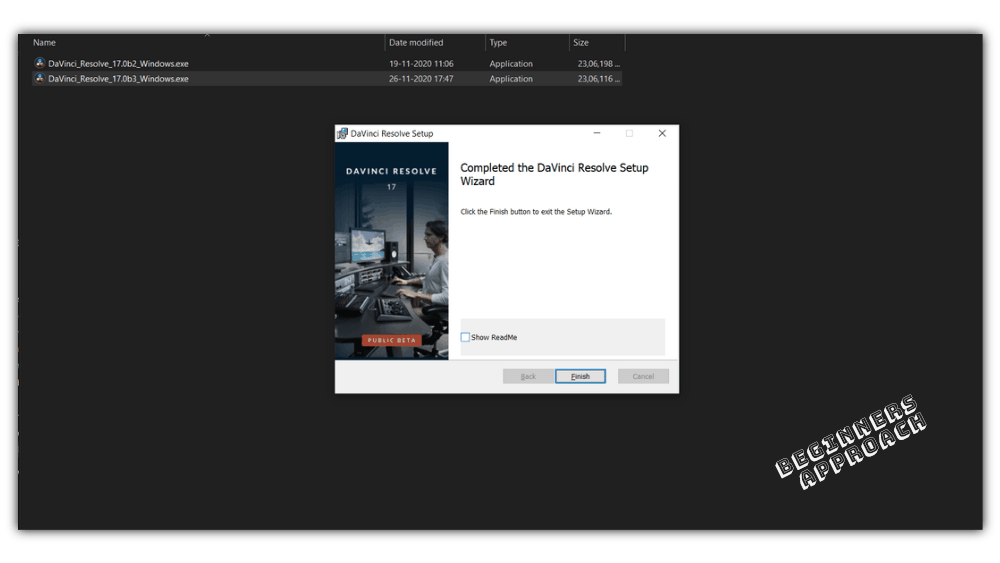
- Click on “Finish“.
- Click on “Ok” for “Installation Complete”.
- Done!
- Launch your DaVinci Resolve and start playing with it.

If this your first Resolve installation, you’ll get the “Welcome tour” screen:
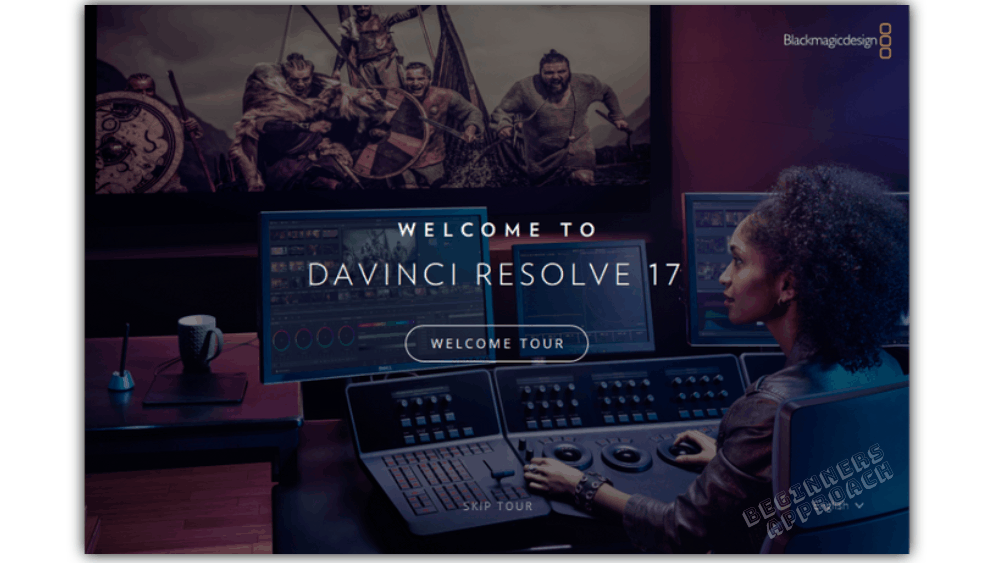
- You can skip the tour.
- In the next step, you might get a “Quick Setup” window. You can click on it or skip.
- If you click, then Resolve will do a quick system check – operating system and graphics card – to see if your computer is good enough to run it.
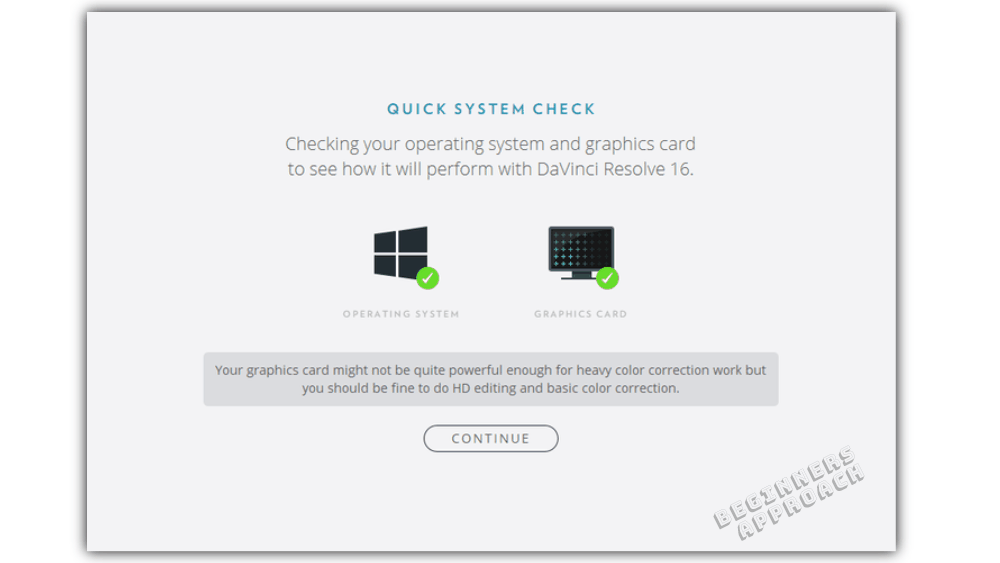
- Click on “Continue“. In the next window, Resolve will ask to set up your project.
- Choose the relevant resolution. (You could always change later.)
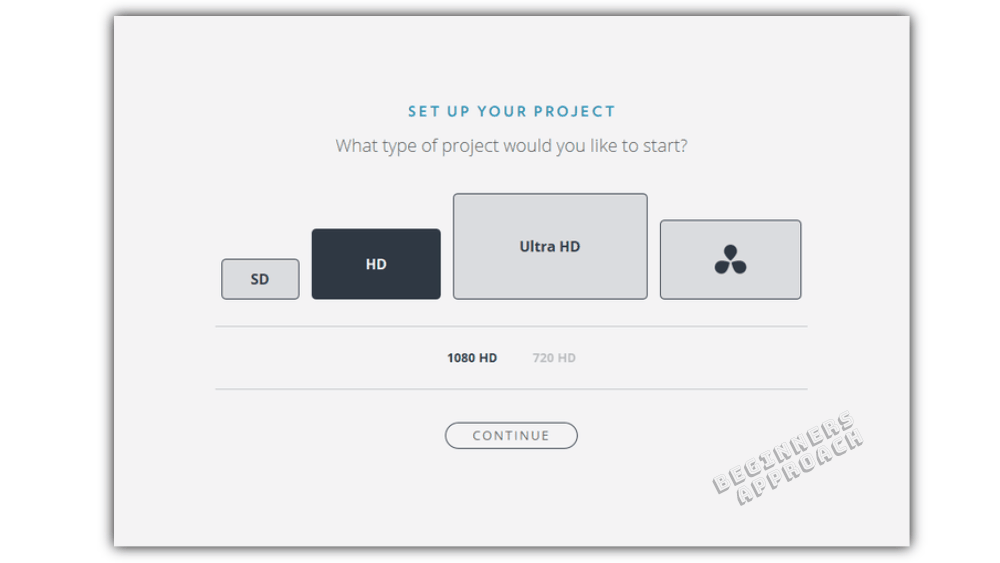
- Click on “Continue“.
- In the next window, Resolve will ask you to select your media storage folder.
- After that, Resolve will ask you to select keyboard layout. Select whichever applies to you. If you’re a beginner, select DaVinci Resolve layout.
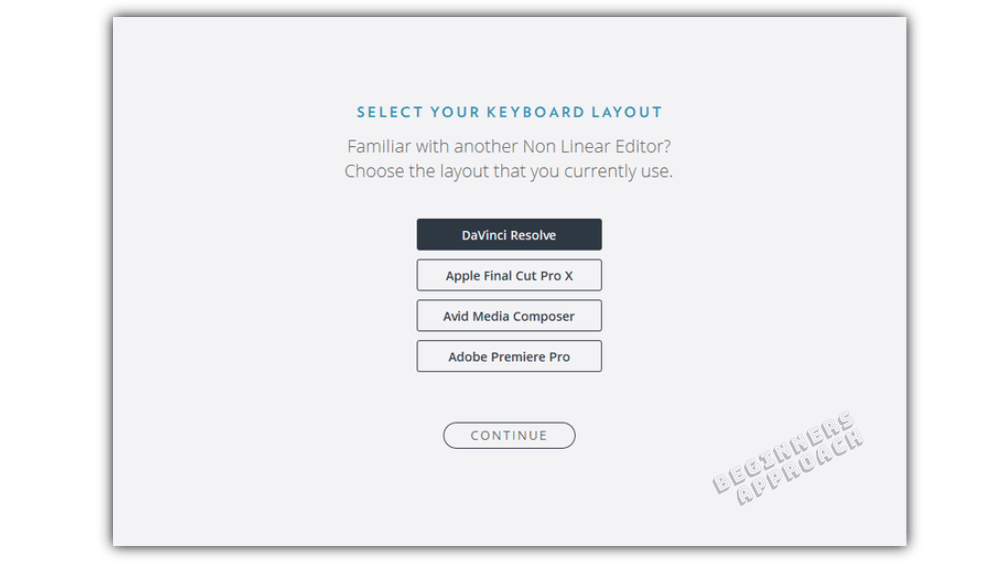
- Click on “Continue” and you’re all set.
- DaVinci Resolve should successfully launch.
If DaVinci Resolve doesn’t launch or start, then check this out – “14 Ways to Fix DaVinci Resolve Not Opening Issue“, where I discuss in depth on various fixes like doing a clean un-install, updating graphics drivers, etc.
Related Articles:
DaVinci Resolve & Free Stuff (Important Things You Should Know!)
How to Make DaVinci Resolve Use GPU (Helpful Tips!)
Is DaVinci Resolve Good for YouTube? (Things You Should Know)
Is DaVinci Resolve Good for Gaming Videos? (From a Gamer!)
How Long Does DaVinci Resolve Take to Install?
A first time brand new DaVinci Resolve installation will take around 5 to 10 minutes. Installation involving updates to latest build will be within 5 minutes.
Do I Need to Install DaVinci Resolve Panels?
No need to install DaVinci Control Panels during the installation process unless you have hardware panels like DaVinci Resolve Micro, Mini, or Advanced panels.
DaVinci Resolve Won’t Install on Windows 10
If you get any error messages while installing Resolve:
- Make sure to restart your computer and then try installing again. Sometimes a Windows update could interfere with the installation.
- Make sure you have installed the pre-requisite files like “Microsoft Visual C++ Redistributables“.
- If the issue still persists, try to download and install the previous version from the BlackMagic Design Support Center.
After successfully installing and launching DaVinci Resolve, you might face the below issues:
- Resolve can crash during startup, importing, editing or exporting. Click on (How to Troubleshoot): DaVinci Resolve Keeps Crashing!, to solve the issue.
- Recover your lost projects which could be due to a crash, accidental deleting or hard-disk failure. Click on How To Recover DaVinci Resolve Lost Projects (Crash Recovery!)
- Importing smart phones’ footage or highly compressed h.265 videos can cause “Media Offline” issues. Here are 6 Ways to Fix DaVinci Resolve Media Offline Issue [NEW].
- If you face any issues related to GPU, then read “Most Common DaVinci Resolve GPU Issues (& How to Fix Them)“
- If you would like to know where does Resolve store your project files. Then click on 3 Quick Steps to Find DaVinci Resolve Project Files in Your System.
Davinchi Resolve – это популярный и широко используемый видеоредактор. Оно широко используется людьми, занимающимися видео монтажом, ведь программа позволяет быстро и профессионально это сделать. В данной статье мы поговорим про установку ДаВинчи Резолв, системные требования, а также основные характеристики этой утилиты.

Системные требования Davinci Resolve
Для работы с данным софтом необходима 64-битная версия Windows 8.1 и выше. Минимальный объём памяти 8 гигабайтов, рекомендуемый – 16. Это стандартные требования практически для любого приложения.
Установка
Поговорим подробнее про то, как устанавливается программа Davinci Resolve.
- Перейдите на официальный сайт разработчика.
- Пролистав открывшуюся страницу практически до самого конца, нажмите на ссылку «Загрузить» рядом с бесплатной версией. В отличие от платной, в ней отсутствуют некоторые функции. Однако некоторым пользователям они могут вовсе не понадобиться.

Официальный сайт Davinci Resolve
- Далее вас попросят заполнить анкету. Корректно напишите правдивую информацию о вас и нажмите Зарегистрироваться и загрузить.

Заполнение анкеты на сайте
- После этого начнётся скачивание архива, в котором и находится необходимый файл. Как и с помощью чего можно распаковать архивы, вы можете почитать в нашей другой статье.

- Далее вас попросит выбрать файлы для дальнейшей загрузки. Рекомендуется не снимать галочки со всех компонентов Visual++, а вот Panels лучше не устанавливать.
- После этого вам будет продемонстрировано небольшое вступление, после которого можно кликнуть Quick Setup для быстрой настройки. Во время этого процесса вы сможете указать разрешение создаваемого вами проекта.
- Как и во многих других программах, в Davinci Resolve можно использовать горячие клавиши. Именно на данном этапе вы как раз сможете их задать.

Процесс установки завершён. Перед вами откроется главное окно Давинчи Резолв.
Подготовка Davinci Resolve к работе
Давайте познакомимся с интерфейсом программы, чтобы знать, как в ней работать.
Интерфейс программы состоит из четырёх частей, переход между которыми можно осуществлять кнопкой в нижней части экрана.
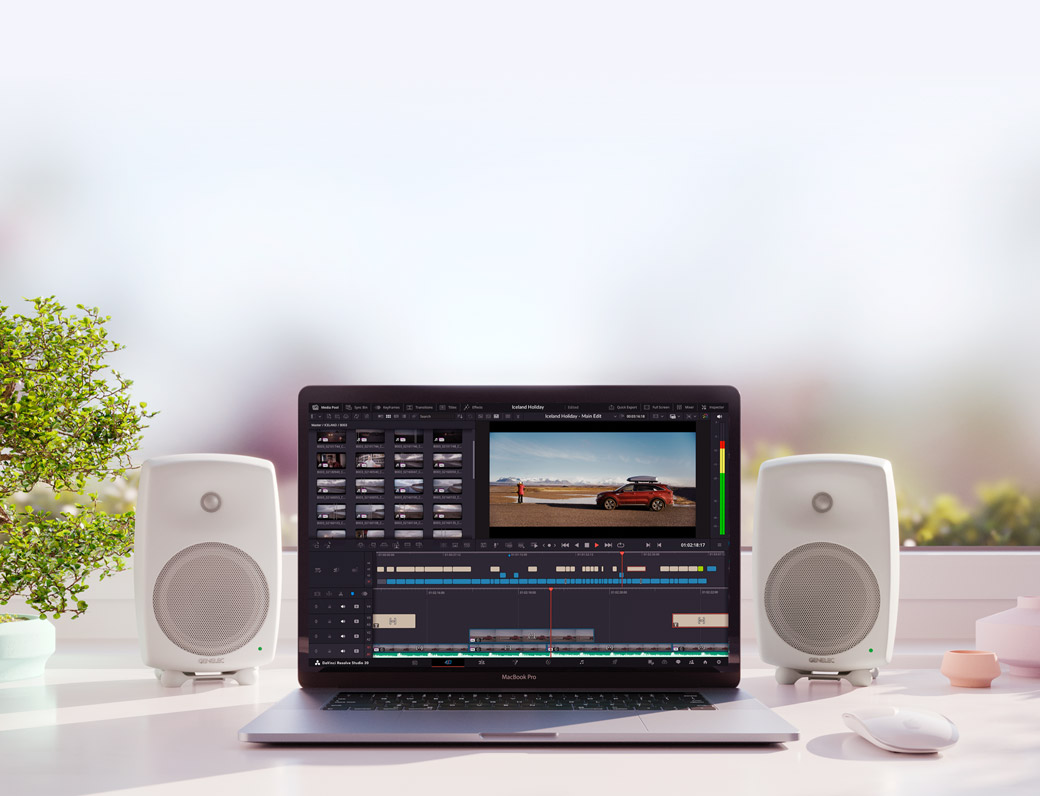
- Media. Он служит для добавления клипов и их начального просмотра. Почему-то ДаВинчи не воспроизводит формат AVI, однако с другими расширениями такой проблемы нет.
Для настройки проекта кликните на значок шестерёнки в нижнем правом углу. В новом окне вы увидите множество параметров. Настройте те, которые нужны именно вам. Если вам надо сделать глобальные изменения в приложении, то воспользуйтесь вкладкой Preferences.

Окно программы DaVinci Resolve
Вверху слева находится проводник, с помощью которого вы можете находить ваши файлы и перемещать их в рабочую область.
- Edit. Здесь находится всё самое необходимое для редактирования видео – эффекты, переходы, титры и многое другое. Чтобы переместить ваш файл на линейку воспроизведения, просто перетащите его в данную область.
- Color. Здесь вы сможете найти все инструменты, необходимые для цветокоррекции. Некоторые пользователи считают, что Davinci лучше всех справляется с данной задачей.
- Deliver. Тут уже происходит экспорт готового материала и всё остальное, связанное с этим процессом. С AVI тут вновь выйдет проблема. Вам будет показываться сообщение о том, что формат не поддерживается, в то время, как он есть. Возможно, что это связано с использованием бесплатной версии.
Подведём итоги. Такая программа, как Давинчи Резолв идеально подойдёт для редактирования видеофайла. Вы без особого труда сможете наложить аудио на видеодорожку, склеить или обрезать материал, наложить различные интересные эффекты.
Новичок с лёгкостью разберётся в интерфейсе утилиты, потратив на это около 20 минут, так как он абсолютно идентичен с другими видеоредакторами. Единственное недопонимание может возникнуть из-за английского языка, однако базовых знаний вам вполне будет достаточно.
В папке, где находилась утилита, также находится очень полезный PDF документ. Он представляет собой около тысячи страниц с подробным разбором всех эффектов. Разумеется, что весь текст будет написан тоже на английском языке.
В заключение стоит отметить, что Davinci Resolve – это прекрасный выбор для тех, кто хочет получить уникальную профессиональную программу для видеомонтажа и готов потратить некоторое время на подробное изучение её параметров.
Надеемся, что у вас не осталось никаких вопросов. Если же они у вас есть, то пишите их в комментариях.
Your browser does not support HTML5 video.
![]()
![]()
DaVinci Resolve 18
Professional Editing, Color, Effects and Audio Post!
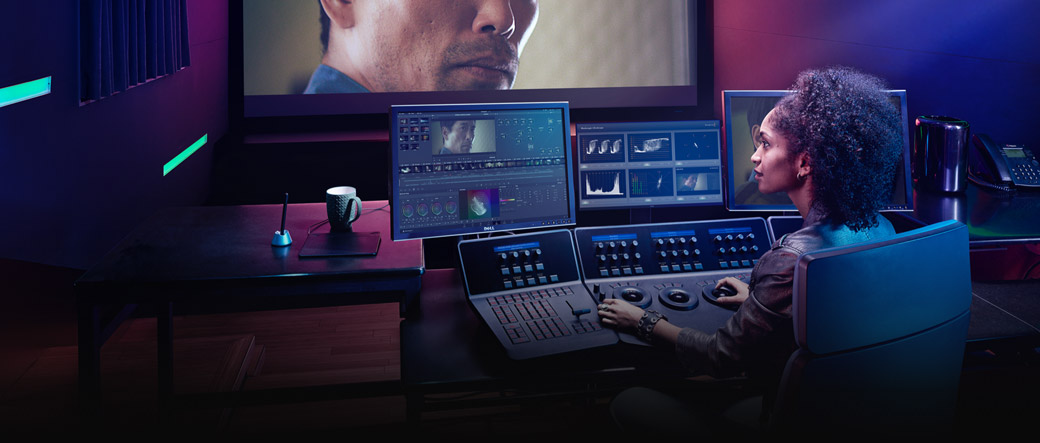
DaVinci Resolve is the world’s only solution that combines editing, color correction, visual effects, motion graphics and audio post production all in one software tool! Its elegant, modern interface is fast to learn and easy for new users, yet powerful for professionals. DaVinci Resolve lets you work faster and at a higher quality because you don’t have to learn multiple apps or switch software for different tasks. That means you can work with camera original quality images throughout the entire process. It’s like having your own post production studio in a single app! Best of all, by learning DaVinci Resolve, you’re learning how to use the exact same tools used by Hollywood professionals!
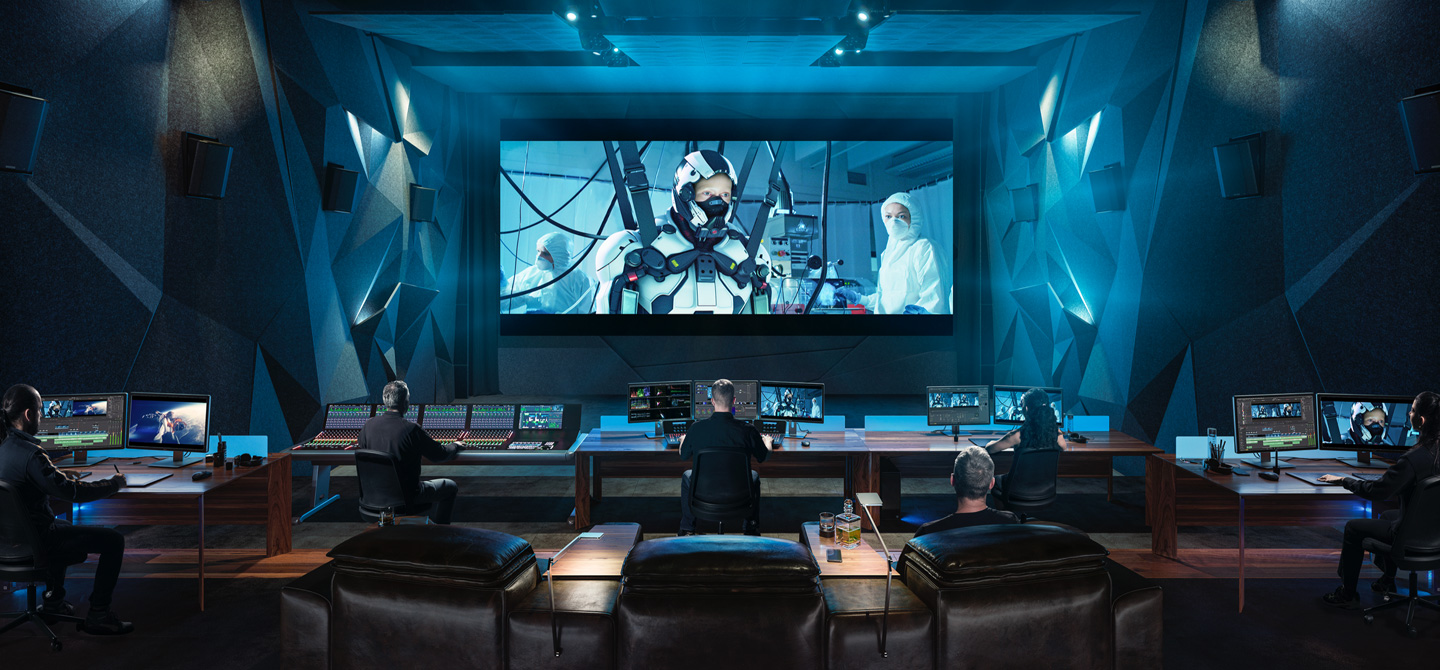
Hollywood’s #1 Post Solution
High end professionals working on feature films and television shows use DaVinci Resolve more than any other solution! That’s because it’s known for incredible quality and creative tools that are light years beyond the competition. You get DaVinci’s Emmy™ award winning image technology with 32‑bit float processing, patented YRGB color science and a massive wide gamut color space for the latest HDR workflows. You also get the legendary quality of Fairlight audio processing for the best sound in the industry! With DaVinci Resolve, you get the same tools professional colorists, editors, VFX artists and sound engineers use every day to finish your favorite films and streaming television shows!
What’s New in DaVinci Resolve 18
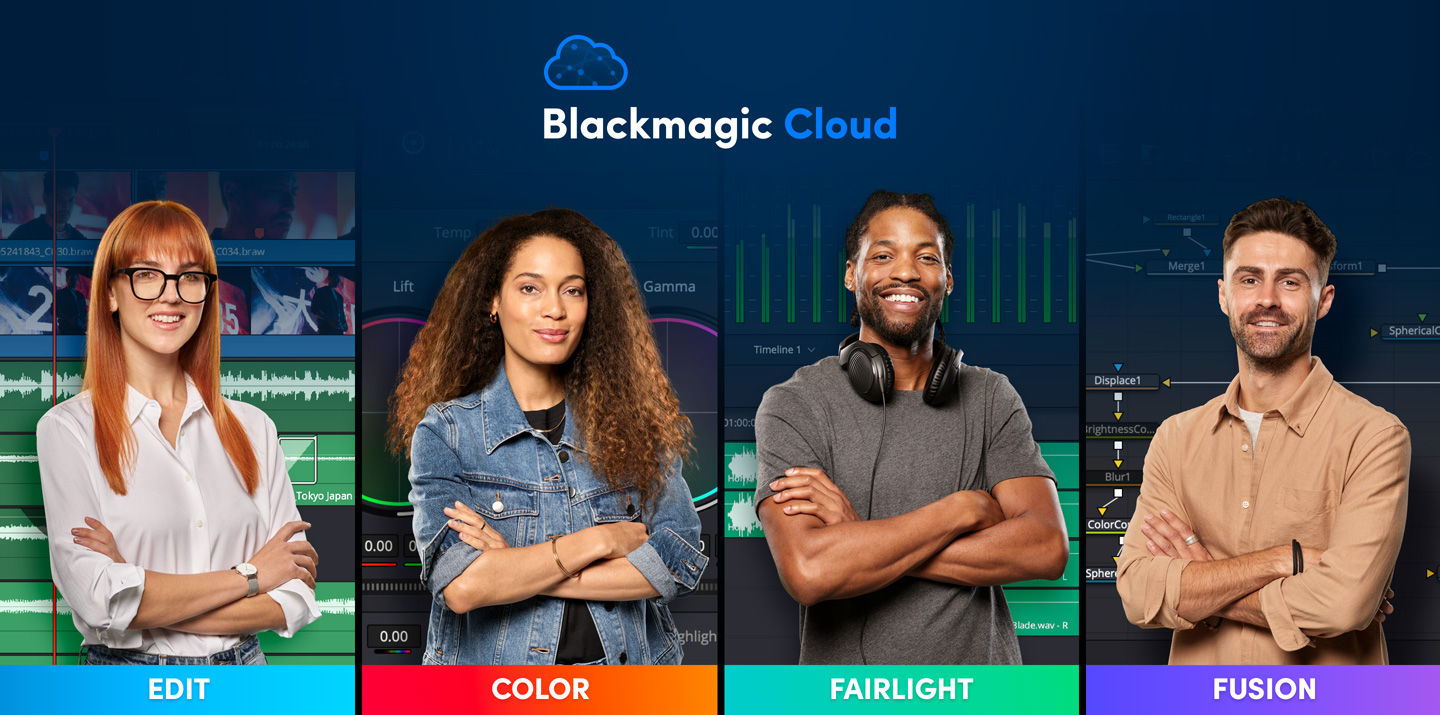
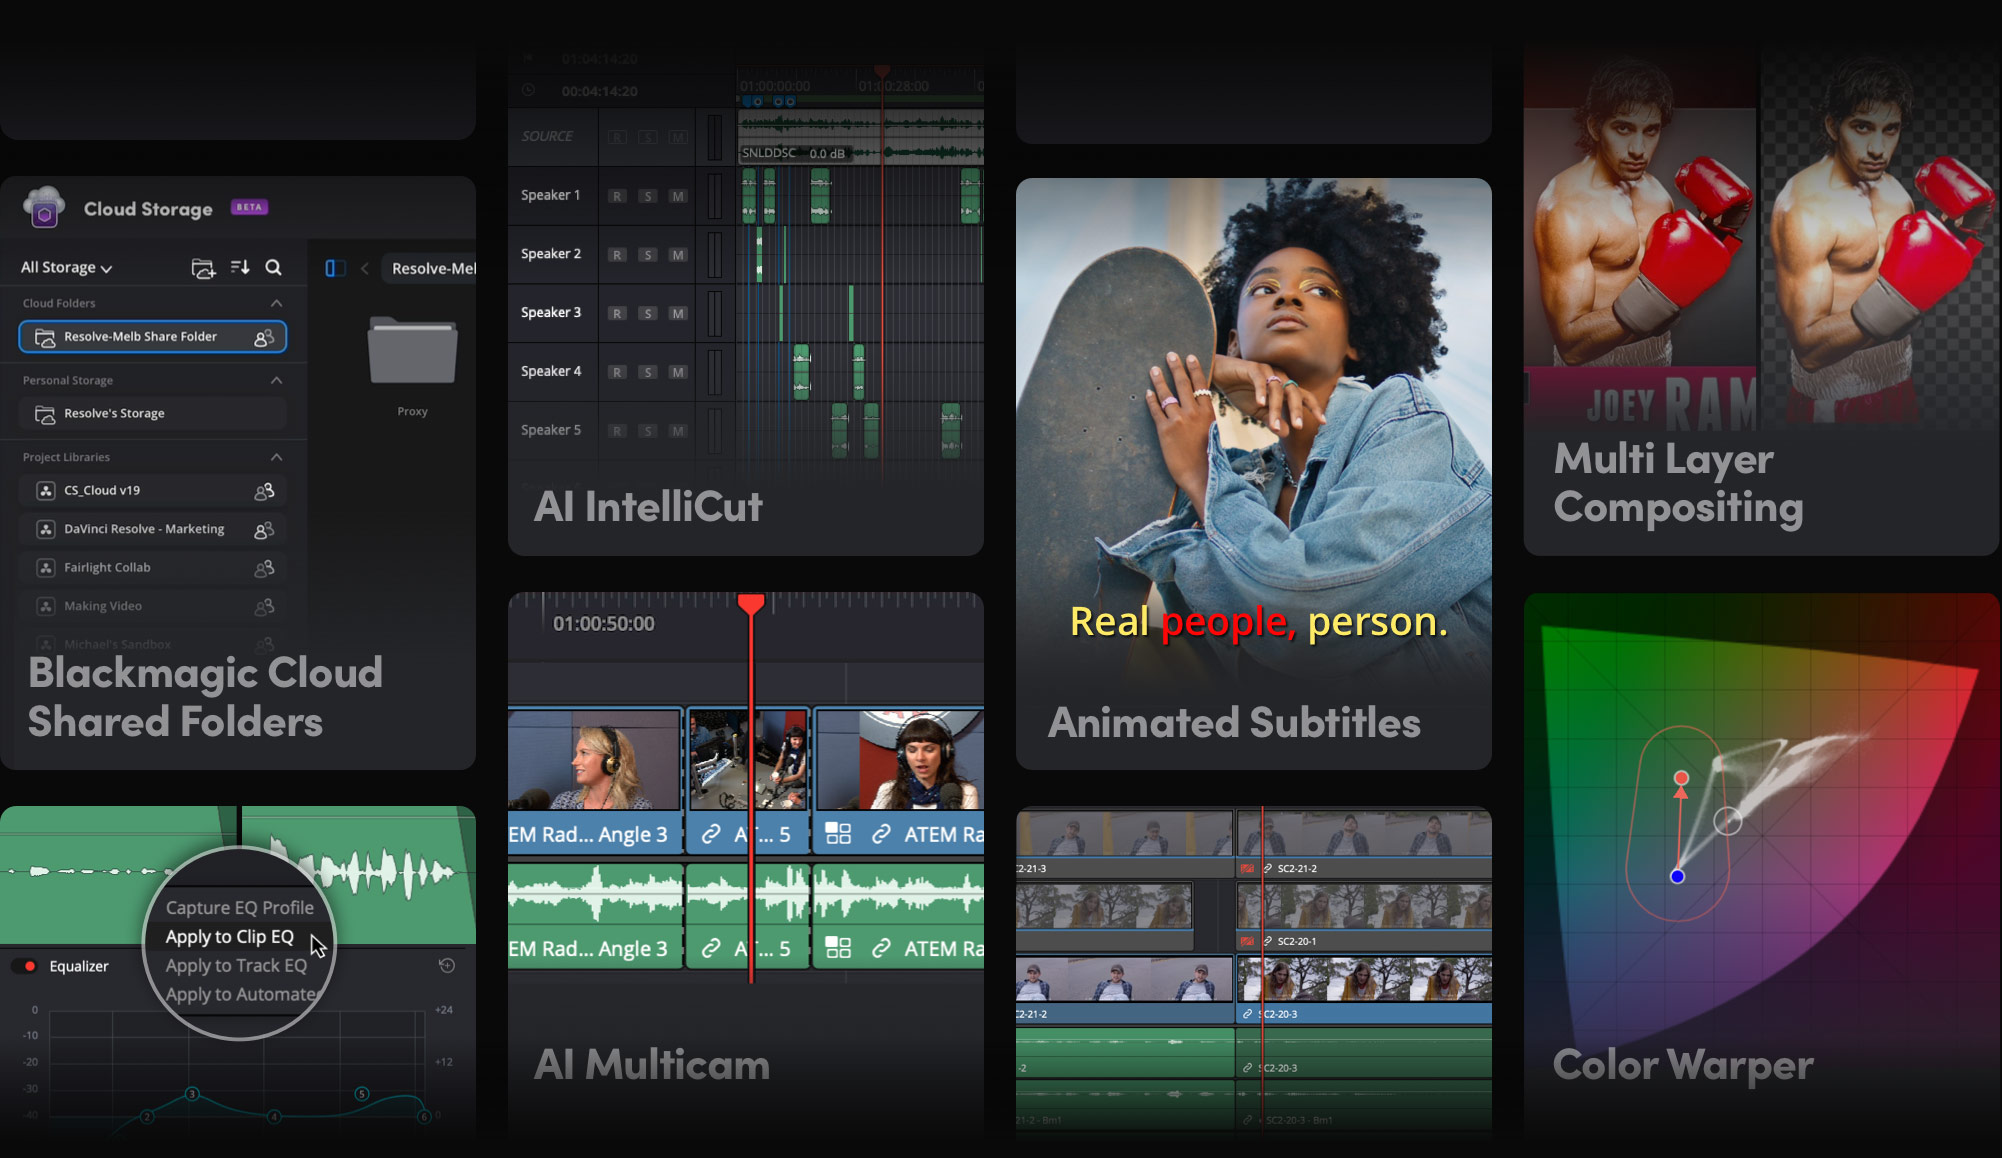
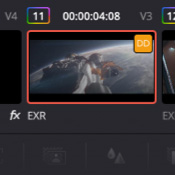
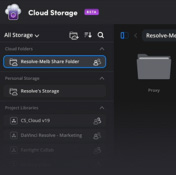
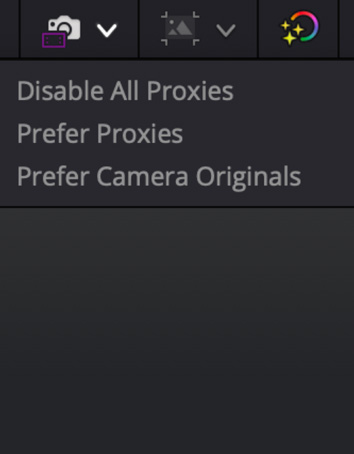
DaVinci Resolve 18 features a whole new way of remote collaboration using cloud based workflows! You can host project libraries using Blackmagic Cloud and collaborate on the same timeline, in real time with multiple users all over the world. The Proxy Generator app creates and manages proxies for you. DaVinci Resolve has a new proxy menu, which makes working with them automatic. You can relink original media and proxies in a single click! Apple Neural Engine support allows up to 30x faster playback on Apple Mac M1 models. DaVinci Resolve 18 includes new Resolve FX such as ultra beauty and 3D depth maps, improved subtitling for editors, Fairlight fixed bus to FlexBus conversion and more! Learn More
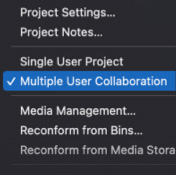
Multi User Collaboration
DaVinci Resolve is the only solution that lets you grow and build your own multi user post production studio! The newly redesigned project libraries are built for real time local and remote collaboration. While the new Blackmagic Cloud lets you host and access your projects from anywhere in the world. Now you can collaborate with editors, colorists, visual effects artists, and sound engineers all working together at the same time. Best of all, you no longer have to import and export files, translate projects, lose work, or conform and manage changes. DaVinci Resolve is the only application in the world that lets everyone work together in parallel on the same project and at the same time! Learn More
Update Notifications
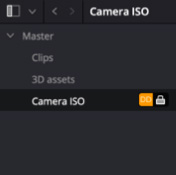
Clips and Bin Locking
Multi User Timelines
Built-in Chat
Blackmagic Cloud
DaVinci Resolve 18 Cut Page
1/5
All In One Solution for Post Production
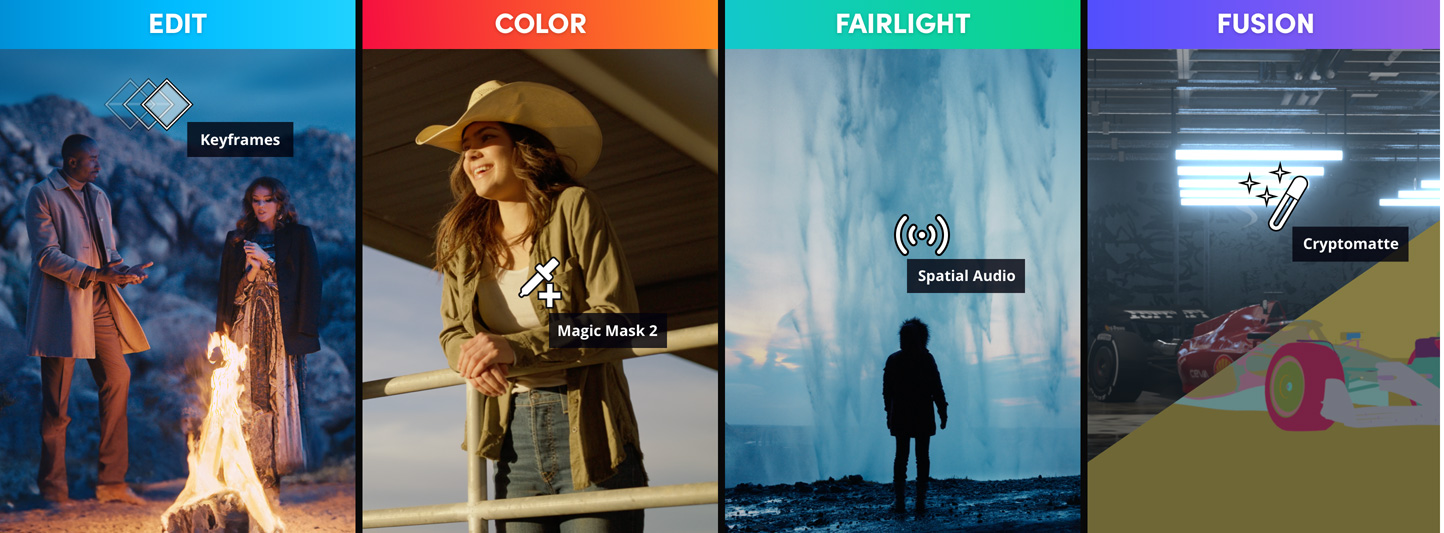
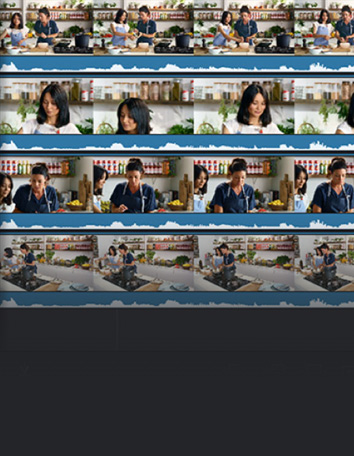
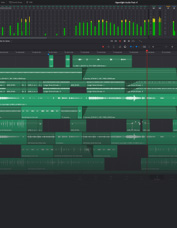
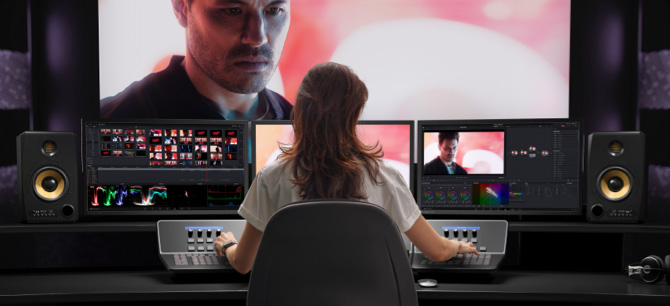
DaVinci Resolve is divided into «pages», each of which gives you a dedicated workspace and tools for a specific task. Editing is done on the cut and edit pages, visual effects and motion graphics on the Fusion page, color correction on the color page, audio on the Fairlight page, and media organization and output on the media and deliver pages. All it takes is a single click to switch between tasks!

Media
Cut

Edit

Fusion

Color

Fairlight

Deliver
Edit
The world’s fastest and most advanced professional NLE.
The edit page is the world’s most advanced professional non-linear editor. The familiar track layout, dual monitor design and traditional workflow makes it easy for new users to learn while still being powerful enough for professional editors. It’s perfect for larger projects such as feature films, television shows, streaming, commercials, documentaries and more. The edit page features drag and drop editing, context sensitive automatic trimming tools, fully customizable keyboard shortcuts so you can work faster, and a library full of hundreds of titles, transitions, and effects that you can add and animate. You also get complete media management, organization and timeline management tools. Learn More
Responsive
Project Libraries
Professional
Trimming
Functions
Robust
Proxy Editing
Customisable
Effects and Titles
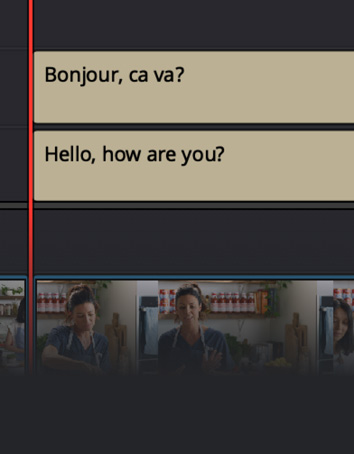
Subtitles and
Closed Captioning
Cut
Designed for editors to turn around work fast!
The cut page is perfect for projects with tight deadlines that you have to turn around quickly. It’s also great for documentary work. The cut page has a streamlined interface that’s fast to learn and designed for speed. Features such as source tape, dual timelines, fast review, and smart editing tools help you work faster than ever. The sync bin and source overwrite tools are the fastest way to edit multicam programs, making it easy to create perfectly synchronized cut aways! Everything on the cut page is action based so every click does something. That means you’ll spend more time editing and less time hunting for commands. Plus, the scalable interface is great for portable editing! Learn More
Source Tape
Source Overwrite
Audio Trim View
Smart Reframe
Multicam Editing
Color
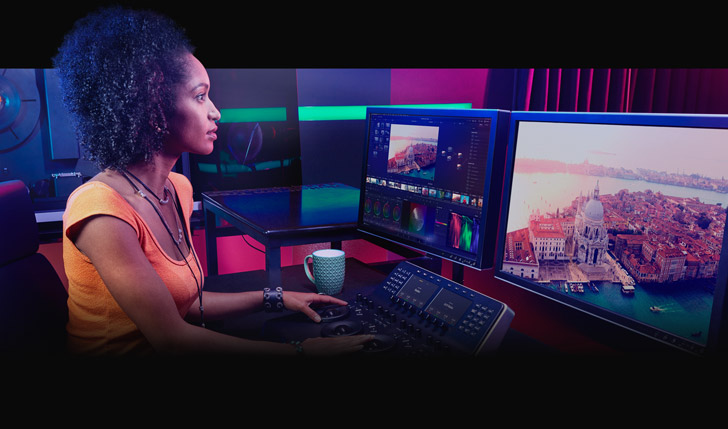
Hollywood’s favorite color corrector!
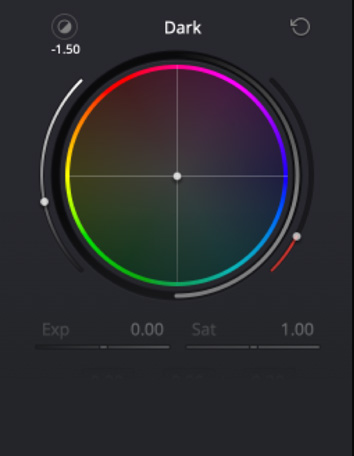
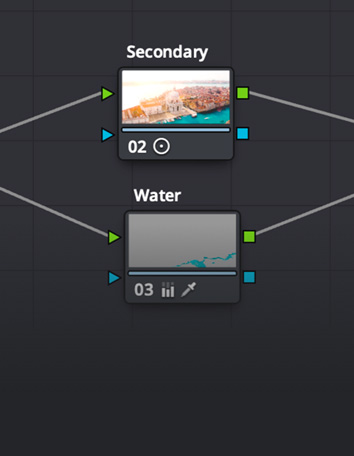
The DaVinci Resolve color page is Hollywood’s most advanced color corrector and has been used to color and finish more high end feature films and television shows than any other system! It’s also approachable with features designed to make it easier for new users to get great results while they continue to learn the advanced tools. For example, new primary control sliders will be familiar to anyone who’s used image editing software, making it easy to adjust contrast, temperature, midtone detail, saturation and more. The color page has an incredible range of primary and secondary color grading features including PowerWindows™, qualifiers, tracking, advanced HDR grading tools and more! Learn More
HDR Color Wheels
Custom Curves
Node Editor
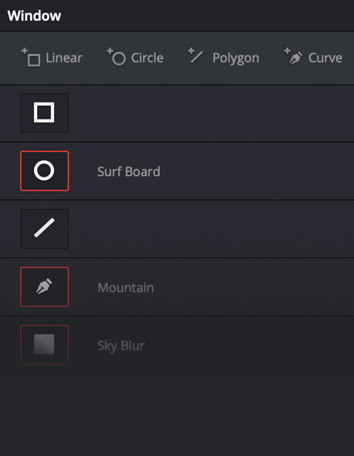
Power Windows
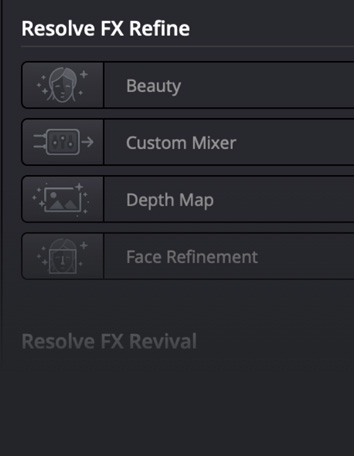
Resolve FX
Fusion
Cinematic quality visual effects and motion graphics!
The Fusion page lets you create cinematic visual effects and broadcast quality motion graphics right inside of DaVinci Resolve! Fusion features a node based workflow that makes it faster and easier to create sophisticated effects and animations than you could ever create using a layer based approach. You get hundreds of 2D and 3D tools for visual effects and motion graphics, along with advanced animation curve and keyframe editors that allow you to create incredibly organic and realistic animations. Fusion has everything from point, planar and 3D camera tracking to rotoscope and keying tools for creating photorealistic composites, stunning animated titles, 3D particle systems and more! Learn More
Working
with Nodes
True
3D Workspace

Animate 2D and 3D Titles

Deep Pixel
Compositing

Virtual Set
Extensions
Fairlight
Professional tools designed for audio post production.
The Fairlight page features hundreds of pro tools for audio post production. It’s like having a professional digital audio workstation (DAW) built into your editing and color system! Familiar keyboard based editing tools let you work extremely fast, especially if you’re moving to Fairlight from another system. The incredible new Fairlight Audio Core lets you work with up to 2,000 tracks at a time with realtime effects, EQ, and dynamics processing! You get sample accurate editing tools, advanced ADR and Foley, and Fairlight FX such as reverb, de-esser, hum remover and more. You can mix and master stereo, 5.1, 7.1, and even the latest immersive 3D audio formats, all within the same project! Learn More
Professional ADR toolset
Mix 2,000
Tracks in Realtime
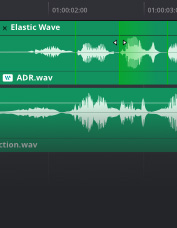
Elastic
Wave Retiming
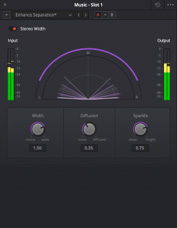
Fairlight FX
and Plugins
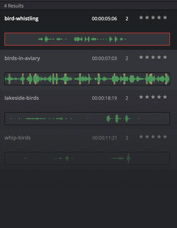
Free
Sound Library
Media and Delivery
Incredibly wide format support, finishing and mastering!
The media and delivery pages have everything you need to import, manage and deliver final projects. The media page is a dedicated full screen workspace that lets you prepare footage, sync clips, organize media into bins and add metadata before you start editing. Use the clone palette to ensure every bit of data in the camera media cards is copied during backup. During edit or grading, stream video outputs to a remote client monitor via DeckLink. You can output and upload files to YouTube, Vimeo and Twitter from anywhere page using the quick export tool. The deliver page gives you total control over all encoding options and formats, along with a render queue for exporting multiple jobs! Learn More
Automatic
A/V Syncing
Smart Metadata
Management
Render Options
Remote
Rendering

Workflow Plugins

Resolve FX
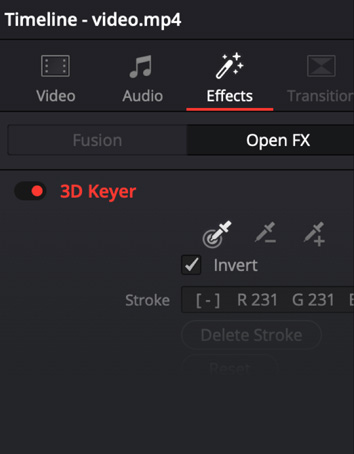
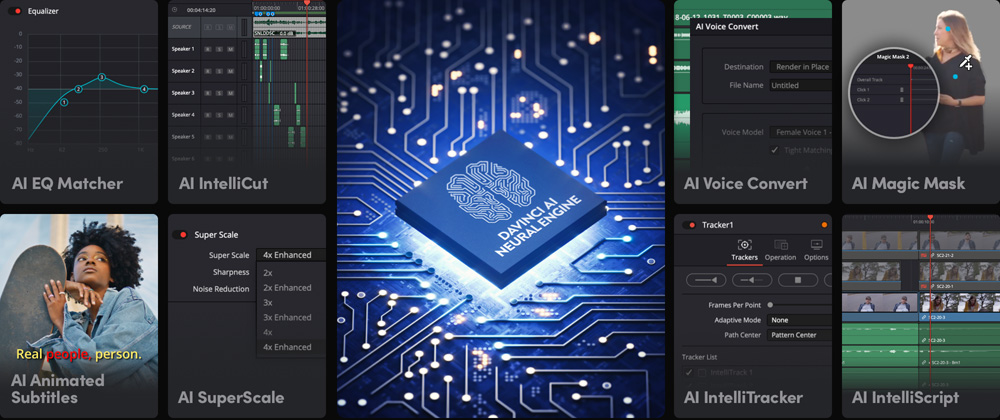
DaVinci Resolve Studio 18 features over 100 GPU and CPU accelerated Resolve FX such as blurs, light effects, noise, image restoration, beauty enhancement, stylize and more! Version 18 adds even more plugins for depth map generation, surface tracking, fast noise, and despilling. There’s even improvements to the beauty effect, edge detection and lens reflections. Automatically generate a 3D matte of a scene with the depth map FX to grade or add effects to a background or foreground. Track the movement of textured surfaces with the surface tracker effect to apply images to t-shirts, flags and faces! All Resolve FX effects can be applied and animated in the cut, edit, Fusion and color pages!

DaVinci Neural Engine
The DaVinci Neural Engine uses state of the art deep neural networks and machine learning, along with artificial intelligence to power features such as facial recognition, object detection, smart reframing, speed warp retiming, super scale up‑scaling, auto color and color matching and more! The DaVinci Neural Engine is entirely cross platform, using the latest GPU innovations for AI and deep learning to provide unparalleled performance and quality. The DaVinci Neural Engine provides simple tools to solve complex, repetitive and time consuming problems. For example, it enables facial recognition to sort and organize clips into bins based on people in the shot, to reframe shots and more.
Works with 3rd Party Plug‑Ins and Storage
With all the different workflows and systems available, you need a post production solution that’s compatible and open enough to handle anything! DaVinci Resolve can be used with any type of storage ranging from direct attached hard drives to NAS and SAN systems. You can extend DaVinci Resolve with third party Open FX and audio plugins, or add third party title and motion graphics templates. New workflow integration and encoding APIs let developers integrate workflow and asset management systems with DaVinci Resolve. Plus, it works with all major file formats and post production software, making it easy to move files between DaVinci Resolve, Final Cut Pro, Media Composer, and Premiere Pro.
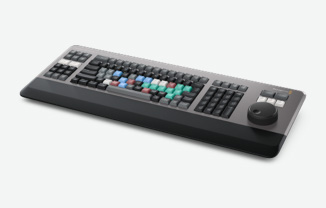
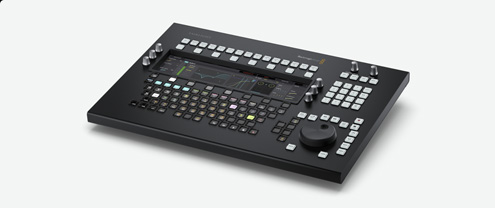
DaVinci Resolve Editor Keyboards
DaVinci Resolve keyboards have been designed as an alternative way to edit that’s much faster than a mouse because you can use both hands at the same time! The DaVinci Speed Editor features dedicated edit function keys on the left and a high quality search dial with electronic clutch and transport controls on the right. You can use the search dial and source tape buttons with your right hand to locate shots, while simultaneously marking in and out points, performing edits and live trimming with your left hand. All without touching the mouse! The DaVinci Resolve Editor Keyboard adds a QWERTY keyboard with color coded shortcut keycaps, designed for editors who spend hours each day editing. Learn More

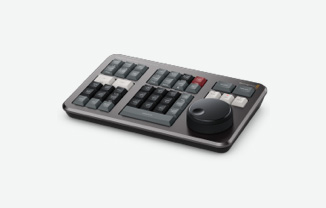
DaVinci Resolve Speed Editor — $395
DaVinci Resolve Editor Keyboard — $595
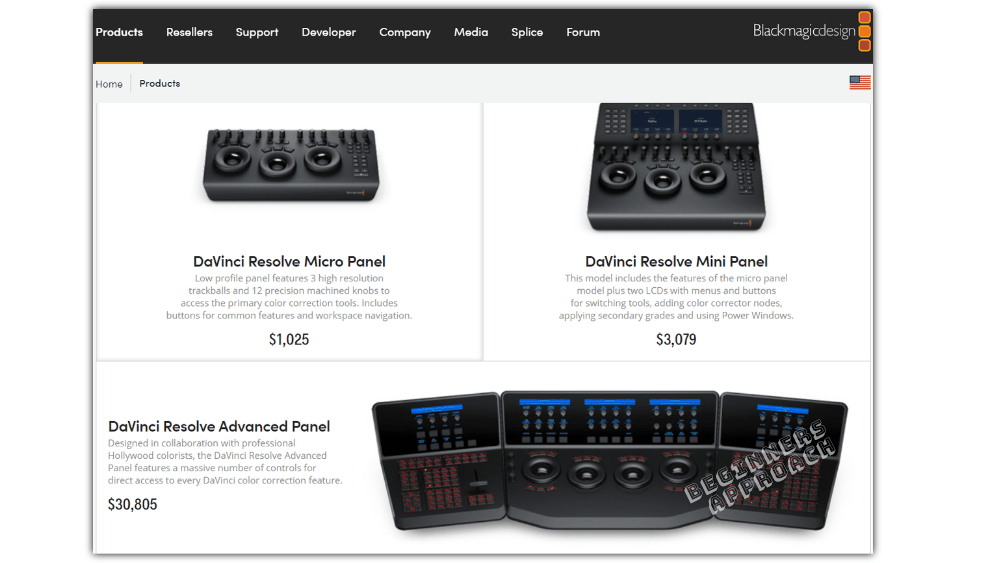
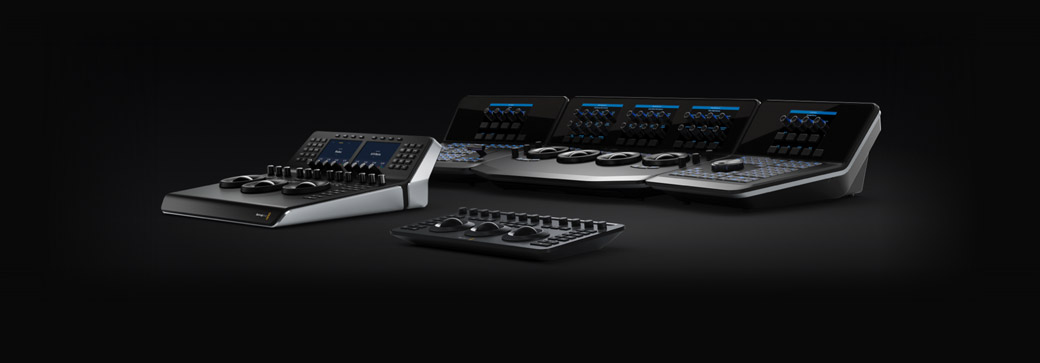
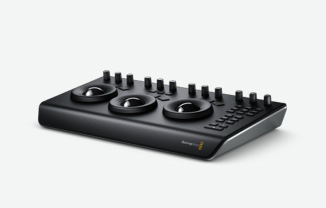
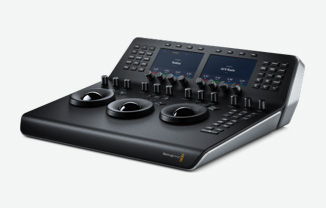
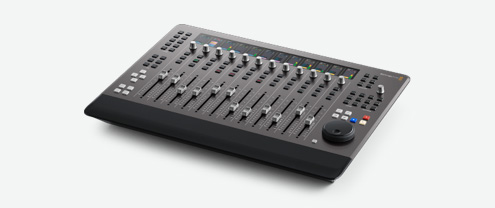
DaVinci Resolve Color Panels
DaVinci Resolve color panels let you adjust multiple parameters at once so you can create unique looks that are impossible with a mouse and keyboard. The incredibly small DaVinci Resolve Micro Panel is great for new colorists just getting started or anyone that needs a portable panel. It features 3 high quality trackballs, knobs for primary adjustment controls and buttons for playback and navigation. The DaVinci Resolve Mini Panel features additional controls and screens for accessing virtually all palettes and tools. For the ultimate in control, the DaVinci Resolve Advanced Panel gives high end professional colorists access to every single feature and command mapped to a specific button! Learn More
DaVinci Resolve Mini Panel
DaVinci Resolve Micro Panel
DaVinci Resolve Advanced Panel
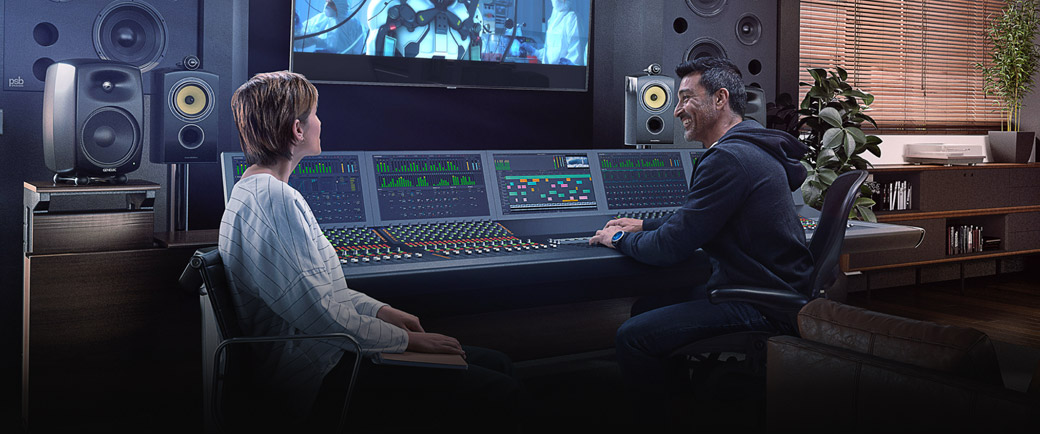
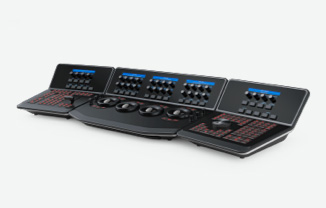
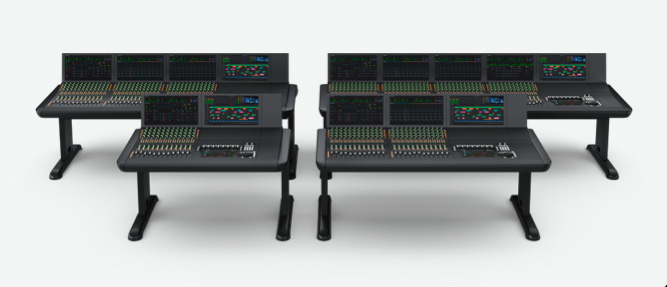
Fairlight Professional Audio Consoles
Designed in collaboration with professional sound engineers, Fairlight hardware consoles streamline your workflow, acting as a natural extension of the software. The intuitive, task based design adapts automatically, putting the controls you need right at your fingertips when you need them. That means you’ll spend more time being creative and work faster than using just a mouse and keyboard! The Fairlight Desktop Console is a complete mixing console that’s ideal for use in home studios, small suites or on the road. You can also install Fairlight Studio Console components into your own desk or purchase a pre‑configured multi bay Fairlight console for dedicated audio suites and scoring stages! Learn More
Download DaVinci Resolve Free!
The best creative tools shouldn’t be limited to Hollywood. That’s why there’s a free version of DaVinci Resolve, so you can learn how to use the same tools that professional Hollywood artists use. DaVinci Resolve is designed to inspire creativity so you can focus on doing your best work. Once you learn the software and start using it for more work, you can purchase DaVinci Resolve Studio which adds tons of additional effects, 3D and more. Adding an editor keyboard, color control panel, or audio console lets you work even faster because you can use both hands at the same time, allowing you to be more creative and do things that are impossible with a mouse!
Two Great Versions

DaVinci Resolve
DaVinci Resolve is the world’s only all in one solution for editing, color, VFX, motion graphics and audio! The free version works with virtually all 8‑bit video formats at up to 60fps in resolutions as high as Ultra HD 3840 x 2160. The free version includes multi-user collaboration and HDR grading!
![]()
Free Download Now
DaVinci Resolve Studio
Includes everything in the free version plus the DaVinci Neural Engine, dozens of additional Resolve FX, temporal and spatial noise reduction, stereoscopic 3D, film grain, optical blur and mist effects, and more. It also supports 10‑bit video at up to 120 frames per second and resolutions beyond 4K.
![]()
Buy Online Now $295
DaVinci Resolve 18
Software
DaVinci Resolve 18
Hollywood’s most popular solution for editing, visual effects, motion graphics, color correction and audio post production, all in a single software tool for Mac, Windows and Linux!
Free
DaVinci Resolve Studio 18
The most powerful DaVinci Resolve adds DaVinci Neural Engine for automatic AI region tracking, stereoscopic tools, more Resolve FX filters, more Fairlight FX audio plugins and advanced HDR grading.
$295
Editor Keyboards
DaVinci Resolve Speed Editor
Includes large search dial in a design that includes only the specific keys needed for editing. Includes Bluetooth with battery for wireless use so it’s more portable than a full sized keyboard!
$395
DaVinci Resolve Editor Keyboard
Full sized traditional QWERTY editor keyboard in a premium metal design. Featuring a metal search dial with clutch, plus extra edit, trim and timecode keys. Can be installed inset for flush mounting.
$595
Color Panels
DaVinci Resolve Micro Panel
Low profile panel features 3 high resolution trackballs and 12 precision machined knobs to access the primary color correction tools. Includes buttons for common features and workspace navigation.
$859
DaVinci Resolve Mini Panel
This model includes the features of the micro panel model plus two LCDs with menus and buttons for switching tools, adding color corrector nodes, applying secondary grades and using Power Windows.
$2,115
DaVinci Resolve Advanced Panel
Designed in collaboration with professional Hollywood colorists, the DaVinci Resolve Advanced Panel features a massive number of controls for direct access to every DaVinci color correction feature.
$27,585
Fairlight Audio Consoles
Fairlight Desktop Console
Portable audio control surface includes 12 premium touch sensitive flying faders, channel LCDs for advanced processing, automation and transport controls plus HDMI for an external graphics display.
$3,139
Fairlight Desktop Audio Editor
Get incredibly fast audio editing for sound engineers working on tight deadlines! Includes LCD screen, touch sensitive control knobs, built in search dial and full keyboard with multi function keys.
$4,485
Fairlight Advanced Consoles
Used by Hollywood and broadcasters, these large consoles make it easy to mix large projects with a massive number of channels and tracks. Modular design allows customizing 2, 3, 4, or 5 bay consoles!
From $21,995
Fairlight Studio Console Bundles
Fairlight Console Bundle 2 Bay
Complete Fairlight studio console with 1 channel fader, 1 channel control, 1 audio editor, 2 LCD monitors and 2 bay chassis.
$21,995
Fairlight Console Bundle 3 Bay
Complete Fairlight studio console with 2 channel faders, 2 channel controls, 1 audio editor, 3 LCD monitors and 3 bay chassis.
$29,995
Fairlight Console Bundle 4 Bay
Complete Fairlight studio console with 3 channel faders, 3 channel controls, 1 audio editor, 4 LCD monitors and 4 bay chassis.
$39,995
Fairlight Console Bundle 5 Bay
Complete Fairlight studio console with 4 channel faders, 4 channel controls, 1 audio editor, 5 LCD monitors and 5 bay chassis.
$48,995
Fairlight Console Chassis Leg Kit 0 Deg
Fairlight studio console legs at 0º angle for when you require a flat working surface. Required for all Fairlight Studio Consoles.
$395
Fairlight Console Chassis Leg Kit 8 Deg
Fairlight studio console legs at 8º angle for when you require a slightly angled working surface. Required for all Fairlight Studio Consoles.
$395
Fairlight Studio Console Individual Modules
Fairlight Console Channel Fader
Features 12 motorized faders, rotary control knobs illuminated buttons for pan, solo, mute and call, plus bank select buttons.
$4,075
Fairlight Console Channel Control
12 groups of touch sensitive rotary control knobs and illuminated buttons, assignable to fader strips, single channel or master bus.
$2,495
Fairlight Console Audio Editor
Get quick access to virtually every Fairlight feature! Includes a 12” LCD, graphical keyboard, macro keys, transport controls and more.
$4,535
Fairlight Console LCD Monitor
Features HDMI, SDI inputs for video and computer monitoring and Ethernet for graphics display of channel status and meters.
$1,295
Fairlight Studio Console Unpopulated Chassis
Fairlight Console Chassis 2 Bay
Empty 2 bay Fairlight studio console chassis that can be populated with various faders, channel controls, edit and LCD monitors.
$8,595
Fairlight Console Chassis 3 Bay
Empty 3 bay Fairlight studio console chassis that can be populated with various faders, channel controls, edit and LCD monitors.
$9,595
Fairlight Console Chassis 4 Bay
Empty 4 bay Fairlight studio console chassis that can be populated with various faders, channel controls, edit and LCD monitors.
$10,995
Fairlight Console Chassis 5 Bay
Empty 5 bay Fairlight studio console chassis that can be populated with various faders, channel controls, edit and LCD monitors.
$12,995
Accessories For Custom Furniture
Fairlight HDMI Monitor Interface
Use alternative HDMI or SDI televisions and monitors when building a Fairlight studio console.
$269
Fairlight Console Mounting Bar 2 Bay
Mounting bar with locating pins to allow correct alignment of bay modules when building a custom 2 bay Fairlight console.
$375
Fairlight Console Mounting Bar 3 Bay
Mounting bar with locating pins to allow correct alignment of bay modules when building a custom 3 bay Fairlight console.
$465
Fairlight Console Mounting Bar 4 Bay
Mounting bar with locating pins to allow correct alignment of bay modules when building a custom 4 bay Fairlight console.
$535
Fairlight Console Mounting Bar 5 Bay
Mounting bar with locating pins to allow correct alignment of bay modules when building a custom 5 bay Fairlight console.
$605
Fairlight Console Side Arm Kit
Side arm kit mounts into Fairlight console mounting bar and holds each fader, channel control and LCD monitor module.
$235
Fairlight Narrow Blank Kit
Blank 1/3rd wide bay for building a custom console with the extra 1/3rd section. Includes blank infill panels.
$495
Fairlight Console Channel Rack Kit
Allows mounting standard 19 inch rack mount equipment in the channel control area of the Fairlight studio console.
$239
Fairlight Console Channel Control Blank
Blank panel to fill in the channel control area of the Fairlight studio console.
$185
Fairlight Console LCD Monitor Blank
Blank panel to fill in the LCD monitor area of the Fairlight studio console when you’re not using the standard Fairlight LCD monitor.
$425
Fairlight Console Channel Fader Blank
Blank panel to fill in the fader control area of the Fairlight studio console.
$199
Fairlight Audio Interfaces
Fairlight Audio MADI Upgrade
Adds 3 MADI I/O connections to the single MADI on the accelerator card, for a total of 256 inputs and outputs at 24 bit and 48kHz.
$199
Fairlight Audio Accelerator
Add up to 2,000 tracks with real time processing of EQ, dynamics, 6 plug‑ins per track, plus MADI for extra 64 inputs and outputs.
$1,135
Fairlight Audio Interface
Adds analog and digital connections, preamps for mics and instruments, sample rate conversion and sync at any standard frame rate.
$2,375
As you might already know, Blackmagic Design just released the new version of DaVinci Resolve video editing software.
The new version is DaVinci Resolve 17 and it comes with a lot of new awesome features.
But, this version is in public beta, so expect that it might have issues and possibly crash a lot.
I was looking on how to download and install DaVinci Resolve 17 and thought to make a tutorial for those who have not done it yet and who are planning to.
Software that’s in open beta, also called public beta, is free for anyone to download without an invite or special permission from the developers. A beta test is a limited release of a product or service with the goal of finding bugs before the final release.
So, if you are looking on how to download DaVinci Resolve 17 or how to upgrade from DaVinci Resolve 16 to version 17, this is the right place for you.
Note: this article shows you how to install DaVinci Resolve 17 on a Windows machine, but the process should be similar for other operating systems as well.
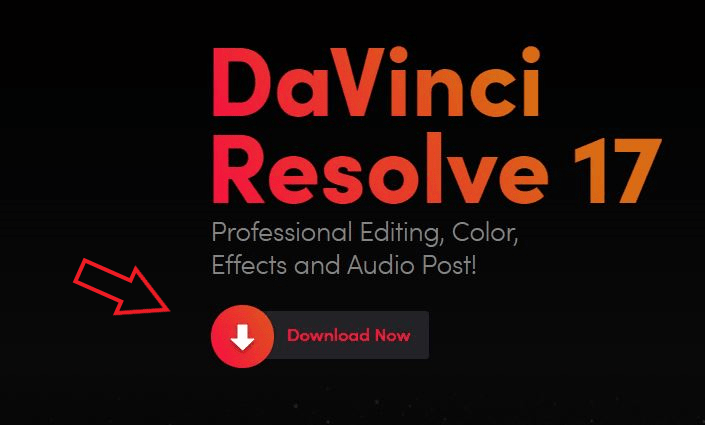
Download DaVinci Resolve 17
On the browser of your choice browse to the following link:
https://www.blackmagicdesign.com/products/davinciresolve/
Then, click on the button “Download Now”.
And you will be presented with 4 sections (DaVinci Resolve 17 Beta, DaVinci Resolve Studio 17 Beta, DaVinci Resolve 16 and DaVinci Resolve Studio 16), each having three additional buttons that allow you to download the Mac OS X, Windows or Linux version accordingly.
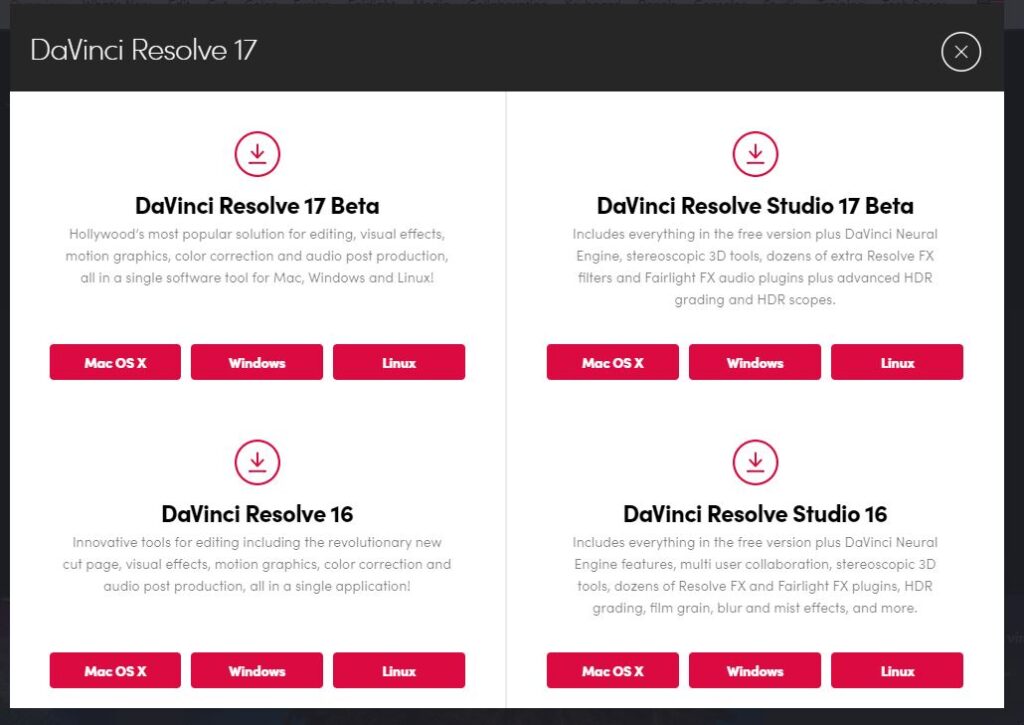
Depending on which version you are using (Free or the paid Studio version), you will click on the button that applies for you.
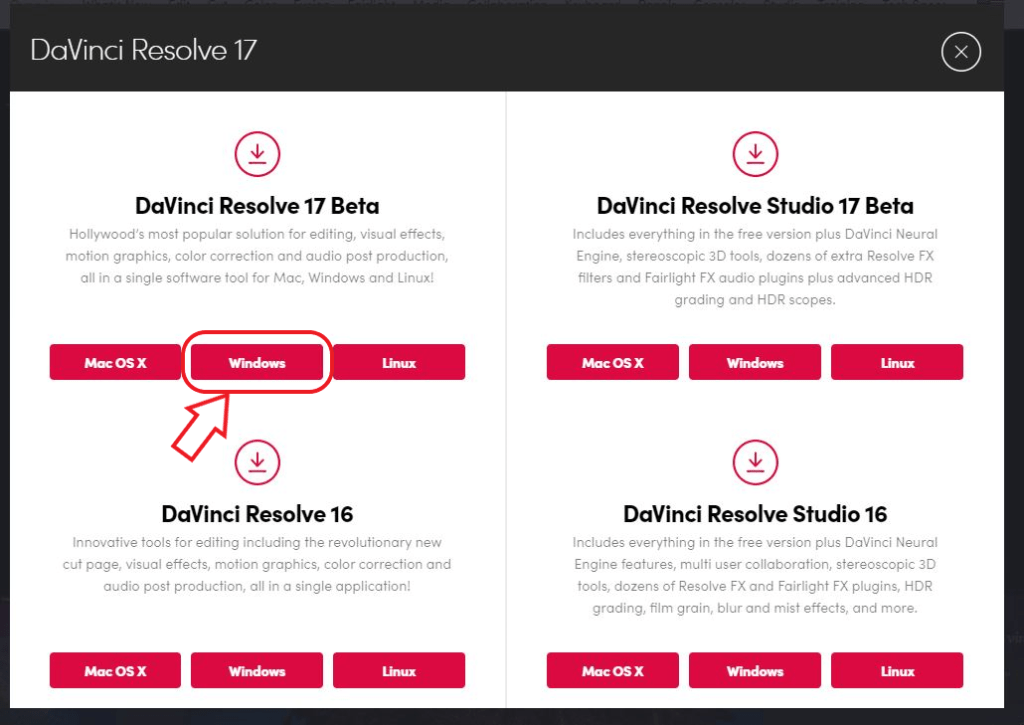
Since, I use the Free version of DaVinci Resolve, I will click on the DaVinci Resolve 17 Beta version. And, since I use Windows as my operating system I will click on the Windows button.
If you already have a product key for the Studio version, then choose one of the buttons in the DaVinci Resolve Studio 17 Beta section.
You will need to fill out a form and then click on the “Register and Download” button.
Once, you fill it the following window will appear:
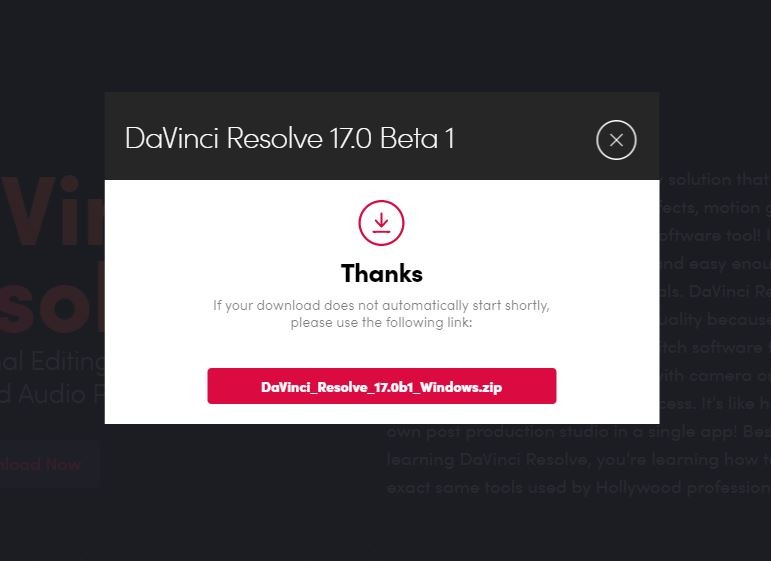
Click on the “DaVinci_Resolve_17.0b1_Windiws.zip”, to take the zipped file.
The file size is around 2.18 GB, so depending on your Internet speed, you will have to wait a while.
Installing DaVinci Resolve 17
Once, downloaded, you need to find the zip file and extract or unzip it.
Get inside the extracted folder and double click on the Application file.
After a while, the DaVinci Resolve Installer dialog will popup where you have some options to choose.
Note: if you have DaVinci Resolve 16 installed, then this process will upgrade to DaVinci Resolve 17, so it is a good idea to do a backup of your projects and databases, before you proceed with the next step
Check the options that apply for you and of course don’t uncheck the ones that were already checked and hit Install.
And now, DaVinci Resolve 17 is ready to be install. In the dialog boxes hit the “Next” button in a couple of times. Accept the License Agreement and wait a while.
Congratulations, you’ve just installed DaVinci Resolve 17 Beta.
Upgrading from DaVinci Resolve 16 to 17
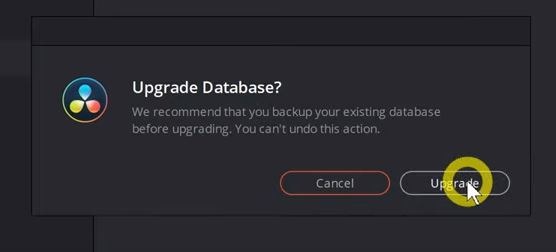
If you already have DaVinci Resolve 16 installed and you are upgrading to Resolve 17, then the first time you open DaVinci Resolve 17 the “Upgrade Database?” dialog box should appear.
If so, hit “Upgrade” to finish the process.
And, there you have it, just like that, you are now upgraded to DaVinci Resolve 17.
Last Note: some of the plugins, transitions or titles might not work, until they are updated to work with DaVinci Resolve 17, but most of them will work perfectly and of course all the new features that come with the new version.
Hope you will like the new DaVinci Resolve 17 (Public Beta) version and looking forward to new more stable versions of this awesome video editing software.
Let me know if you installation works and also I’d like to hear of your Resolve 17 impressions.
Thanks for stopping by to check and read this article!

We use cookies on our website to give you the most relevant experience by remembering your preferences and repeat visits. By clicking “Accept”, you consent to the use of ALL the cookies.
Видеоредактор DaVinci Resolve скачивается бесплатно с русской версией меню для Windows 10, 8, 7 (XP не поддерживается).
Последний релиз программы «весит» более 1,5 Гб и распространяется в виде ZIP архива. Для инсталляции DaVinci Resolve:
Загрузите архив в любую папку. Распакуйте его с помощью утилиты-архиватора. Для этого кликните правой кнопкой мыши на сжатый файл и выберите команду Распаковать.
Выбрать лучший архиватор вы можете по ссылке.
Подождите, пока извлекутся библиотеки. В итоге рядом с файлом-архивов появится директория с таким же названием. Войдите в нее.
Откройте исполнимый файл с именем редактора.
Запустится окно с выбором компонентов для инсталляции. Рекомендуем не менять настройки по умолчанию. Нажмите Install.
В новом окне откроется Мастер установки. Нажмите Next.
Поставьте галочку – примите лицензионное соглашение. Кликните на кнопку Next.
Если нужно – поменяйте директорию для инсталляции с помощью кнопки Change…
Кликните на кнопку Install и дождитесь завершения процесса установки.
Для того, чтоб не хранить на диске ненужные данные, можете удалить с него загруженный файл и распакованную папку.
Установка Davinci Resolve и работа в видеоредакторе
Davinchi Resolve – это популярный и широко используемый видеоредактор. Оно широко используется людьми, занимающимися видео монтажом, ведь программа позволяет быстро и профессионально это сделать. В данной статье мы поговорим про установку ДаВинчи Резолв, системные требования, а также основные характеристики этой утилиты.
Системные требования Davinci Resolve
Для работы с данным софтом необходима 64-битная версия Windows 8.1 и выше. Минимальный объём памяти 8 гигабайтов, рекомендуемый – 16. Это стандартные требования практически для любого приложения.
Установка
Поговорим подробнее про то, как устанавливается программа Davinci Resolve.
- Перейдите на официальный сайт разработчика.
- Пролистав открывшуюся страницу практически до самого конца, нажмите на ссылку «Загрузить» рядом с бесплатной версией. В отличие от платной, в ней отсутствуют некоторые функции. Однако некоторым пользователям они могут вовсе не понадобиться.
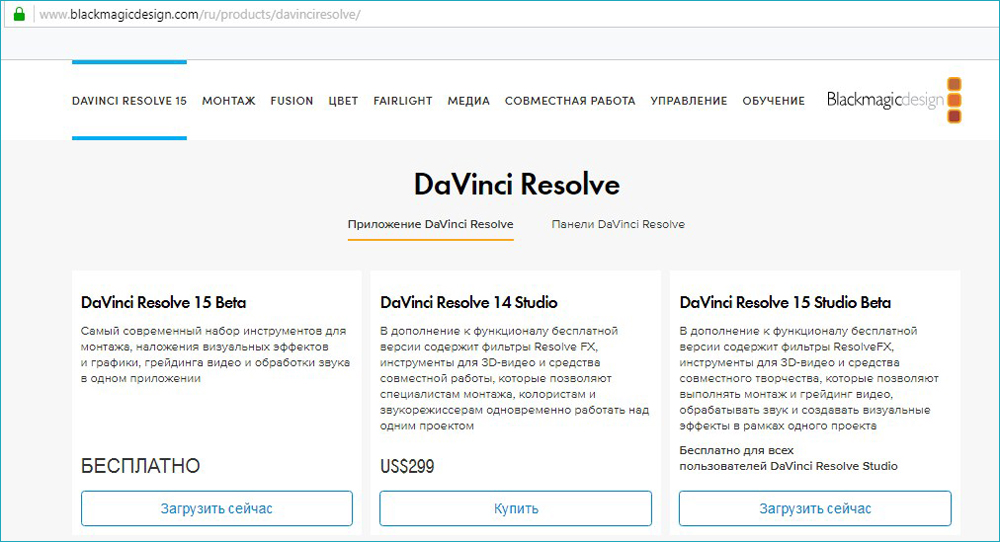
Официальный сайт Davinci Resolve
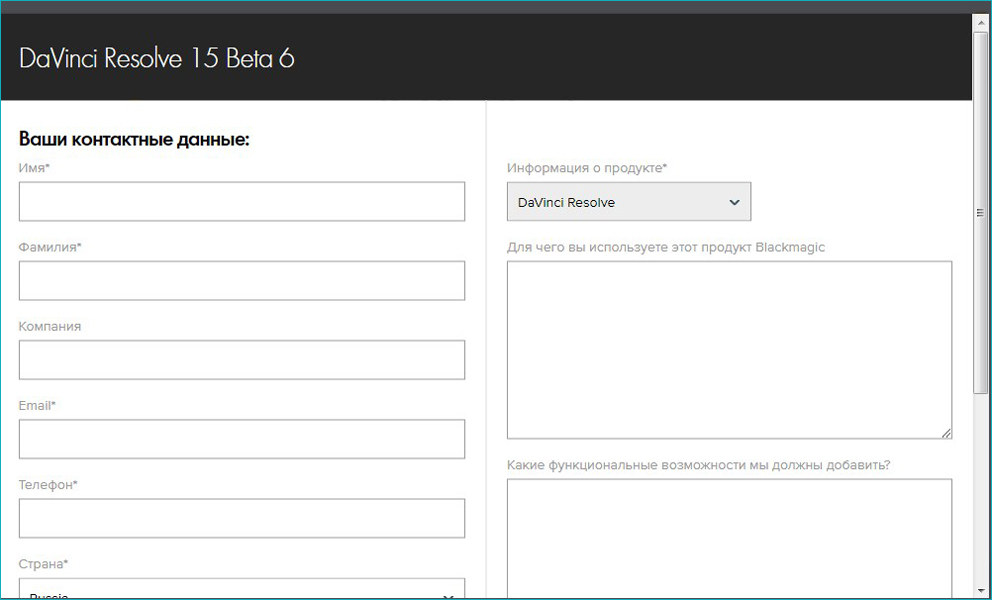
Заполнение анкеты на сайте
Процесс установки завершён. Перед вами откроется главное окно Давинчи Резолв.
Подготовка Davinci Resolve к работе
Давайте познакомимся с интерфейсом программы, чтобы знать, как в ней работать.
Интерфейс программы состоит из четырёх частей, переход между которыми можно осуществлять кнопкой в нижней части экрана.
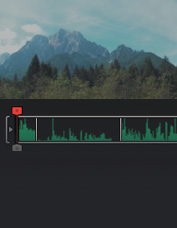
- Media. Он служит для добавления клипов и их начального просмотра. Почему-то ДаВинчи не воспроизводит формат AVI, однако с другими расширениями такой проблемы нет.
Для настройки проекта кликните на значок шестерёнки в нижнем правом углу. В новом окне вы увидите множество параметров. Настройте те, которые нужны именно вам. Если вам надо сделать глобальные изменения в приложении, то воспользуйтесь вкладкой Preferences.
Окно программы DaVinci Resolve
Вверху слева находится проводник, с помощью которого вы можете находить ваши файлы и перемещать их в рабочую область.
- Edit. Здесь находится всё самое необходимое для редактирования видео – эффекты, переходы, титры и многое другое. Чтобы переместить ваш файл на линейку воспроизведения, просто перетащите его в данную область.
- Color. Здесь вы сможете найти все инструменты, необходимые для цветокоррекции. Некоторые пользователи считают, что Davinci лучше всех справляется с данной задачей.
- Deliver. Тут уже происходит экспорт готового материала и всё остальное, связанное с этим процессом. С AVI тут вновь выйдет проблема. Вам будет показываться сообщение о том, что формат не поддерживается, в то время, как он есть. Возможно, что это связано с использованием бесплатной версии.
Подведём итоги. Такая программа, как Давинчи Резолв идеально подойдёт для редактирования видеофайла. Вы без особого труда сможете наложить аудио на видеодорожку, склеить или обрезать материал, наложить различные интересные эффекты.
Новичок с лёгкостью разберётся в интерфейсе утилиты, потратив на это около 20 минут, так как он абсолютно идентичен с другими видеоредакторами. Единственное недопонимание может возникнуть из-за английского языка, однако базовых знаний вам вполне будет достаточно.
В папке, где находилась утилита, также находится очень полезный PDF документ. Он представляет собой около тысячи страниц с подробным разбором всех эффектов. Разумеется, что весь текст будет написан тоже на английском языке.
В заключение стоит отметить, что Davinci Resolve – это прекрасный выбор для тех, кто хочет получить уникальную профессиональную программу для видеомонтажа и готов потратить некоторое время на подробное изучение её параметров.
Надеемся, что у вас не осталось никаких вопросов. Если же они у вас есть, то пишите их в комментариях.
DaVinci Resolve — профессиональный бесплатный видеоредактор

Если вам требуется профессиональный видеоредактор для нелинейного монтажа, при этом нужен именно бесплатный редактор, DaVinci Resolve, возможно, будет лучшим выбором в вашем случае. При условии, что вас не смущает отсутствие русского языка интерфейса и вы имеете опыт (или готовы научиться) работы в других профессиональных инструментах для редактирования видео.
В этом кратком обзоре — о процессе установки видеоредактора DaVinci Resolve, о том, как организован интерфейс программы и немного о доступных функциях (немного — потому что я все-таки не инженер видеомонтажа и всего не знаю сам). Редактор доступен в версиях для Windows, MacOS и Linux.
Если требуется что-то попроще для выполнения базовых задач по редактированию личного видео и на русском языке, рекомендую к ознакомлению: Лучшие бесплатные видеоредакторы.
Установка и первый запуск DaVinci Resolve
На официальном сайте доступно две версии программы DaVinci Resolve — бесплатная и платная. Ограничения бесплатного редактора — отсутствие поддержки 4K разрешения, шумоподавления и размытия в движении.

После выбора бесплатной версии процесс дальнейшей установки и первого запуска будет выглядеть следующим образом:
- Заполните регистрационную форму и нажмите кнопку «Зарегистрироваться и загрузить».
- Будет загружен ZIP-архив (около 500 Мб), содержащий установщик DaVinci Resolve. Распакуйте его и запустите.
- При установке будет предложено дополнительно установить необходимые компоненты Visual C++ (в случае если они не будут обнаружены на вашем компьютере, при их наличии рядом будет отображаться «Installed»). А вот DaVinci Panels устанавливать не требуется (это ПО для работы с оборудованием от DaVinci для инженеров видеомонтажа).

- После установки и запуска сначала будут продемонстрирована своего рода «заставка», а в следующем окне можно нажать Quick Setup для быстрой настройки (при следующих запусках будет открываться окно со списком проектов).
- Во время быстрой настройки сначала можно будет задать разрешение вашего проекта.
- Второй этап — более интересный: позволяет задать параметры клавиатуры (сочетания клавиш) аналогичные привычному профессиональному видеоредактору: Adobe Premiere Pro, Apple Final Cut Pro X и Avid Media Composer.


По завершении откроется главное окно видеоредактора DaVinci Resolve.
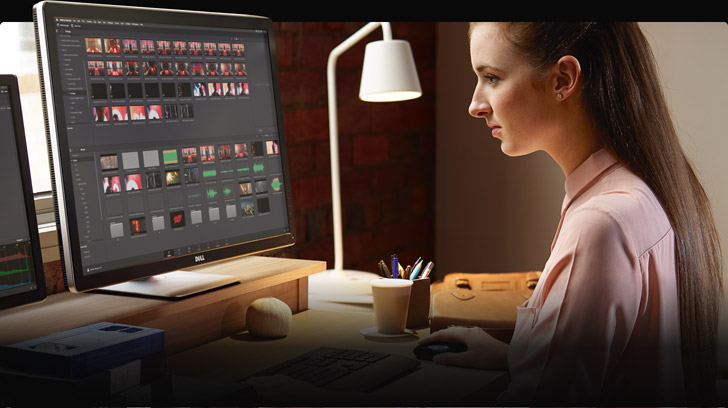
Интерфейс видеоредактора
Интерфейс видеоредактора DaVinci Resolve организован в виде 4-х разделов, переключение между которыми выполняется кнопками внизу окна.
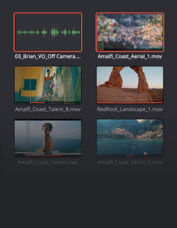
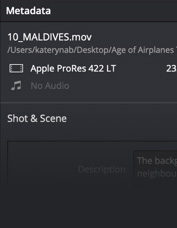
Media — добавление, организация и предварительный просмотр клипов (аудио, видео, изображений) в проекте. Примечание: по неизвестной мне причине, DaVinci не видит и не импортирует видео в контейнерах AVI (но для тех из них, которые закодированы с помощью MPEG-4, H.264 срабатывает простое изменение расширения на .mp4).

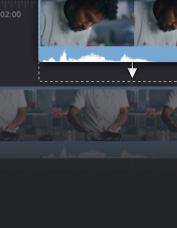
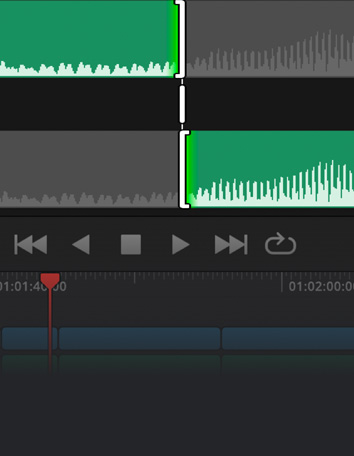
Edit — монтажный стол, работа с проектом, переходы, эффекты, титры, маски — т.е. все то, что нужно для редактирования видео.

Color — инструменты цветокоррекции. Судя по обзорам — здесь DaVinci Resolve чуть ли не лучшее ПО для этих целей, но я в этом совершенно не разбираюсь, чтобы подтвердить или опровергнуть.

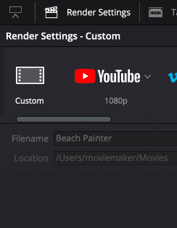
Deliver — экспорт готового видео, настройка формата рендеринга, готовые пресеты с возможностью настройки, предварительный просмотр готового проекта (экспорт AVI, как и импорт на вкладке «Media» не сработал, с сообщением о том, что формат не поддерживается, хотя его выбор доступен. Возможно, еще одно ограничение бесплатной версии).

Как было отмечено в начале статьи, я не являюсь профессионалом видеомонтажа, но с точки зрения пользователя, который использует Adobe Premiere для того, чтобы совместить несколько видео, где-то вырезать их части, где-то ускорить, добавить переходы видео и затухания звука, наложить логотип и «отцепить» звуковую дорожку от видео — все работает как нужно.
При этом для того, чтобы разобраться как выполнить все перечисленные задачи мне потребовалось не более 15 минут (из которых 5-7 я пытался понять, почему DaVinci Resolve не видит мои AVI): контекстные меню, расположение элементов и логика действий почти та же, к которой я привык. Правда здесь стоит учитывать, что Premiere я также использую на английском языке.
Дополнительно, в папке с установленной программой, в подпапке «Documents» вы найдете файл «DaVinci Resolve.pdf», представляющий собой учебник объемом в 1000 страниц по использованию всех функций видеоредактора (на английском).
Подводя итог: для тех, кто хочет получить профессиональную бесплатную программу для редактирования видео и готов изучить ее возможности, DaVinci Resolve — отличный выбор (тут я опираюсь не столько на свой взгляд, сколько на изучение почти десятка обзоров от специалистов нелинейного монтажа).

Blackmagic Design Davinci Resolve Studio – это удобный редактор видео, который может выполнять широкий спектр различных функций, в частности используется для того чтобы проводить цветовую коррекцию видео на профессиональном уровне. Если вы ищите, где можно скачать Davinci Resolve Studio, то это вы имеете возможность сделать на данной странице.
Есть возможность вести работу вместе с иными приложениями. Именно поэтому редактор является универсальным вариантом для того чтобы получить отличные результаты на стадии после обработки.
Скачать бесплатно DaVinci Resolve Studio 18.1.3.0008 + crack
Инструкция по активации
- Перед установкой рекомендуется удалить все предыдущие версии, почистив реестр. Отключить интернет и антивирус. Установить программу
- Поместить файлы из папки Crack с заменой в папку с программой
[свернуть]
Пароль ко всем архивам: 1progs
Эта программа смогла собрать в себе воедино разнообразные средства для того чтобы:
- проводить монтаж;
- задавать цветовые оттенки;
- проводить наложение звуковых эффектов;
- осуществлять финишную обработку;
- создавать финальный продукт.
Необходимо отметить, что данный редактор идет платным. Но также есть и бесплатная его версия. Пользуясь последней, нет возможности в работе применять полный перечень функций. Но, тем не менее, базовые средства в бесплатной версии присущи.
Желаете попробовать в работе данный редактор и ощутить безграничные возможности действий с видео? Для этого вам нужно лишь скачать Davinci Resolve 15 Studio торрент.
Аналоги программы вы всегда можете найти в наших подборках: