About GitHub Desktop installation
You can install GitHub Desktop on supported operating systems, which currently include macOS 10.12 or later and Windows 7 64-bit or later. If you have an account on GitHub or GitHub Enterprise, you can connect your account to GitHub Desktop. For more information about creating an account, see «Signing up for a new GitHub account» or contact your GitHub Enterprise site administrator.
If you are a network administrator, you can deploy GitHub Desktop to computers running Windows on an Active Directory-managed network by using the Windows Installer package file (.msi) with Group Policy or another remote installation system.
The Windows Installer package extracts the standalone installer (.exe) and configures Windows to install GitHub Desktop the next time a user signs in to their workstation. Users must have permissions to install GitHub Desktop in their user directory.
If a user runs the Windows Installer package for GitHub Desktop directly, to complete the installation, the user must sign out of their workstation and then sign back in.
Downloading and installing GitHub Desktop
You can install GitHub Desktop on macOS 10.12 or later.
- Visit the download page for GitHub Desktop.
- Click Download for macOS.

- In your computer’s
Downloadsfolder, double-click the GitHub Desktop zip file.
- After the file has been unzipped, double-click GitHub Desktop.
- GitHub Desktop will launch after installation is complete.


You can install GitHub Desktop on Windows 7 64-bit or later.
Warning: You must have a 64-bit operating system to run GitHub Desktop.
- Visit the download page for GitHub Desktop.
- Click Download for Windows.
- In your computer’s
Downloadsfolder, double-click the GitHub Desktop setup file.
- GitHub Desktop will launch after installation is complete.


Сведения об установке GitHub Desktop
Вы можете установить GitHub Desktop в поддерживаемых операционных системах, к которым в настоящее время относятся macOS 10.12 или более поздней версии и Windows 7 64-разрядная или более поздняя версия. Если у вас есть учетная запись на сайте GitHub или в GitHub Enterprise, вы можете подключить ее к GitHub Desktop. Дополнительные сведения о создании учетной записи см. в разделе Регистрация для новой учетной записи GitHub или обратитесь к своему администратору сайта GitHub Enterprise.
Если вы являетесь администратором сети, вы можете развернуть GitHub Desktop на компьютерах, работающих под управлением ОС Windows в сети, управляемой Active Directory, с помощью файла пакета установщика Windows (.msi) с групповой политикой или другой системой удаленной установки.
Пакет установщика Windows извлекает автономный установщик (.exe) и настраивает Windows для установки GitHub Desktop при следующем входе пользователя на рабочую станцию. У пользователей должны быть разрешения на установку GitHub Desktop в свой каталог пользователя.
Если пользователь запускает пакет установщика Windows для GitHub Desktop напрямую, то для завершения установки пользователь должен выйти из рабочей станции, а затем снова войти.
Скачивание и установка GitHub Desktop
GitHub Desktop можно установить в macOS 10.12 или более поздней версии.
- Посетите страницу для скачивания GitHub Desktop.
- Нажмите Скачать версию для macOS.
- На компьютере в папке
Downloadsдважды щелкните ZIP-файл GitHub Desktop .
- После извлечения файла архива дважды щелкните GitHub Desktop .
- GitHub Desktop запустится после завершения установки.
GitHub Desktop можно установить в Windows 7 64-разрядная или более поздняя версия.
Предупреждение. Для запуска GitHub Desktop должна быть установлена 64-разрядная операционная система.
- Посетите страницу для скачивания GitHub Desktop.
- Нажмите Скачать версию для Windows.
- На компьютере в папке
Downloadsдважды щелкните файл установки GitHub Desktop .
- GitHub Desktop запустится после завершения установки.
Introduction
GitHub Desktop is an application that enables you to interact with GitHub using a GUI instead of the command line or a web browser. GitHub Desktop encourages you and your team to collaborate using best practices with Git and GitHub. You can use GitHub Desktop to complete most Git commands from your desktop with visual confirmation of changes. You can push to, pull from, and clone remote repositories with GitHub Desktop, and use collaborative tools such as attributing commits and creating pull requests.
This guide will help you get started with GitHub Desktop by setting up the application, authenticating your account, configuring basic settings, and introducing the fundamentals of managing projects with GitHub Desktop. You will be able to use GitHub Desktop to collaborate on projects and connect to remote repositories after working through this guide.
You might find it helpful to have a basic understanding of Git and GitHub before getting started with GitHub Desktop. For more information, see the following articles.
- «Using Git»
- «Learning about GitHub»
- «Getting started with GitHub»
GitHub Desktop is an open source project. You can see the roadmap, contribute to the project, or open an issue to provide feedback or feature requests. For more information, see the desktop/desktop repository.
Part 1: Installing and authenticating
You can install GitHub Desktop on any supported operating system. For more information, see «Supported operating systems.»
To install GitHub Desktop, visit the download page for GitHub Desktop. For more information, see «Installing GitHub Desktop.»
After you have installed GitHub Desktop, you can authenticate the application with your account on GitHub or GitHub Enterprise. Authenticating allows you to connect to remote repositories on GitHub or GitHub Enterprise.
-
Before you can authenticate to GitHub or GitHub Enterprise, you will need an account. For more information about creating an account, see «Signing up for a new GitHub account» or contact your GitHub Enterprise site administrator.
-
In the GitHub Desktop drop-down menu, click Preferences. In the preferences window, click Accounts and follow the steps to sign in. For more information on authenticating, see «Authenticating to GitHub.»

-
Before you can authenticate to GitHub or GitHub Enterprise, you will need an account. For more information about creating an account, see «Signing up for a new GitHub account» or contact your GitHub Enterprise site administrator.
-
In the File drop-down menu, click Options. In the options window, click Accounts and follow the steps to sign in. For more information on authenticating, see «Authenticating to GitHub.»

Part 2: Configuring and customizing GitHub Desktop
After you install GitHub Desktop, you can configure and customize the app to best suit your needs.
You can connect or remove accounts on GitHub or GitHub Enterprise, choose a default text editor or shell, edit your Git configuration, change the appearance of GitHub Desktop, customize system dialog boxes, and set privacy preferences in the GitHub Desktop Preferences window. For more information, see «Configuring basic settings.»

You can connect or remove accounts on GitHub or GitHub Enterprise, choose a default text editor or shell, edit your Git configuration, change the appearance of GitHub Desktop, customize system dialog boxes, and set privacy preferences in the GitHub Desktop Options window. For more information, see «Configuring basic settings.»

Part 3: Contributing to projects with GitHub Desktop
After installing, authenticating, and configuring the app, you are ready to start using GitHub Desktop. You can create, add, or clone repositories and use GitHub Desktop to manage contributions to your repositories.
Creating, adding, and cloning repositories
You can create a new repository by selecting the File menu and clicking New repository…. For more information, see «Creating your first repository using GitHub Desktop.»
You can add a repository from your local computer by selecting the File menu and clicking Add Local Repository…. For more information, see «Adding a repository from your local computer to GitHub Desktop.»
You can clone a repository from GitHub by selecting the File menu and clicking Clone Repository…. For more information, see «Cloning and Forking Repositories from GitHub Desktop.»


Making changes in a branch
You can use GitHub Desktop to create a branch of a project. Branches isolate your development work from other branches in the repository, so that you can safely experiment with changes. For more information, see «Managing branches.»

After you make changes to a branch, you can review them in GitHub Desktop and make a commit to keep track of your changes. For more information, see «Committing and reviewing changes to your project.»

If you want to access your changes remotely or share them with other people, you can push your commits to GitHub. For more information, see «Pushing changes to GitHub.»
Collaborating with GitHub Desktop
You can use GitHub Desktop to create issues or pull requests to collaborate on projects with other people. Issues help you keep track of ideas and discuss possible changes to projects. Pull requests let you share your proposed changes with others, receive feedback, and merge changes into a project. For more information, see «Creating an issue or pull request.»»
You can view your own or your collaborator’s pull requests in GitHub Desktop. Viewing a pull request in GitHub Desktop lets you see any proposed changes and make additional changes by opening the project’s files and repositories in your default text editor. For more information, see «Viewing a pull request in GitHub Desktop.»
Keeping your local repository in sync
When you make changes to your local repositories or when other people make changes to the remote repositories, you will need to sync your local copy of the project with the remote repository. GitHub Desktop can keep your local copy of a project in sync with the remote version by pushing and pulling commits. For more information, see «Syncing your branch.»
Further reading
- «Installing and authenticating to GitHub Desktop»
- «Contributing and collaborating using GitHub Desktop»
Введение
В этой инструкции покажем, как установить Git на Windows, и поможем выбрать правильные параметры при установке. Затем создадим репозиторий и зафиксируем в нем изменения. Все это поможет вам сделать первые шаги в освоении Git.
Git — это одна из самых популярных систем контроля версий (VCS). Такие системы помогают разработчикам хранить и версионировать исходный код приложений, настройки систем и другие текстовые файлы. И хотя ничего не мешает использовать VCS в других областях, чаще всего они применяются именно в IT.
Каждое состояние файлов в Git можно зафиксировать (сделать коммит), причем это навсегда останется в истории репозитория. Поэтому можно в любой момент посмотреть историю изменений файлов, сравнить различные версии и отменить отдельные изменения.
Также Git упрощает ведение параллельной разработки несколькими членами команды. Для этого используется ветвление. Условно можно сказать, что в Git-репозитории есть одна основная ветка, в которой хранится текущая стабильная версия исходного кода. Когда разработчик хочет изменить этот код, он «откалывает» себе отдельную ветку от основной и работает в ней. Когда работа закончена, он «вливает» изменения в основную ветку, чтобы его доработками смогли воспользоваться другие члены команды.
На самом деле все это описание довольно грубое, и по работе с Git можно написать не одну статью. На официальном сайте Git есть бесплатная электронная книга, в том числе она переведена на русский язык. А в этой статье мы сосредоточимся на установке Git в Windows и его первоначальной настройке.
Установка Git в Windows
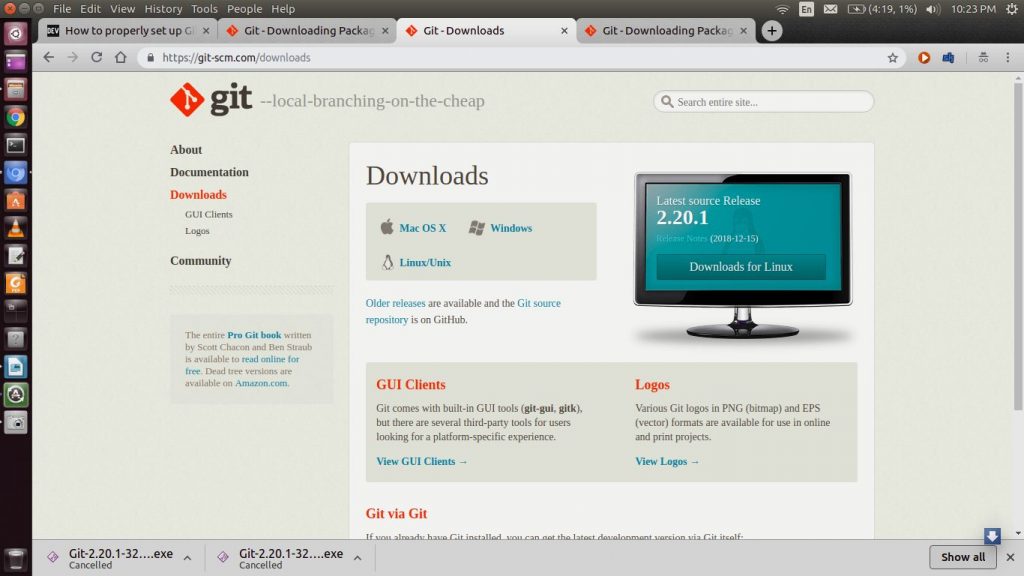
Переходим на официальный сайт Git, в раздел загрузок. Мы увидим несколько вариантов установки: разные разрядности, портативная версия и даже установка из исходников. Мы выберем Standalone-версию, для этого проще всего нажать ссылку Click here to download, она всегда ведет на самую актуальную версию. Запускаем скачанный файл.
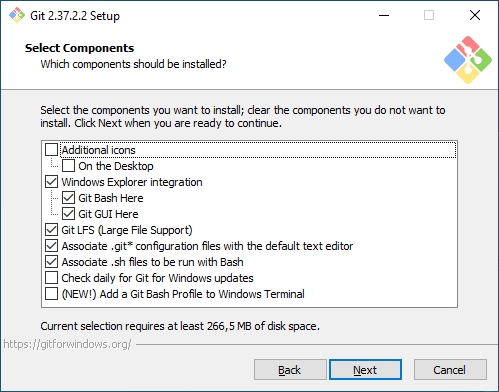
Выбор компонентов. Первый экран — выбор компонентов для установки. Если вам нужны дополнительные иконки на рабочем столе, или если вы хотите, чтобы Git ежедневно проверял наличие новой версии, — отметьте соответствующие опции. Остальные параметры лучше оставить по умолчанию.
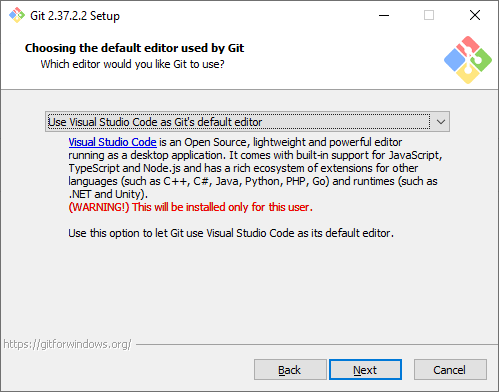
Текстовый редактор по умолчанию. Необходимо выбрать редактор, который будет использовать Git — например, когда вы будете писать сообщение для коммита. Это не обязательно должен быть редактор, в котором вы планируете писать исходный код.
По умолчанию в установщике выбран Vim — консольный текстовый редактор, который для многих может показаться сложным в освоении. Если вы не знакомы с Vim и при этом хотите именно консольный редактор — выберите nano. Если у вас уже установлен какой-нибудь текстовый редактор — выбирайте его. Мы для примера будем использовать VSCode.
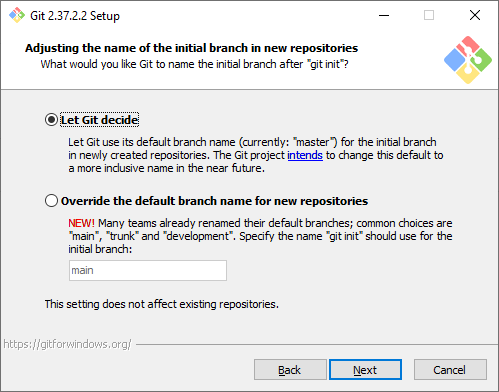
Название первой ветки. Тут нужно выбрать, как Git будет называть первую ветку в каждом репозитории. Раньше такая ветка всегда называлась master, но со временем это стало напоминать о временах рабства, и многие проекты и компании стали переименовывать ветки в своих репозиториях. Поэтому разработчики Git добавили эту опцию, чтобы название первой ветки можно было изменить. Мы будем придерживаться старого поведения и оставим название master.
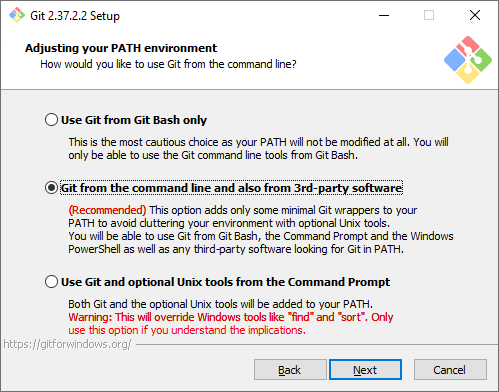
Способ использования Git. Первая опция сделает Git доступным только из командной строки Git Bash. Это не очень удобно, потому что не позволит пользоваться Git-ом из других оболочек или интегрировать его с редактором кода. Вторая опция самая оптимальная (ее мы и выберем) — она позволяет работать с Git-ом из разных оболочек и интегрировать его с другими приложениями. Третья опция кроме установки Git также «перезапишет» некоторые системные команды Windows аналогами из Unix, и эту опцию нужно выбирать только если вы точно понимаете, что делаете.
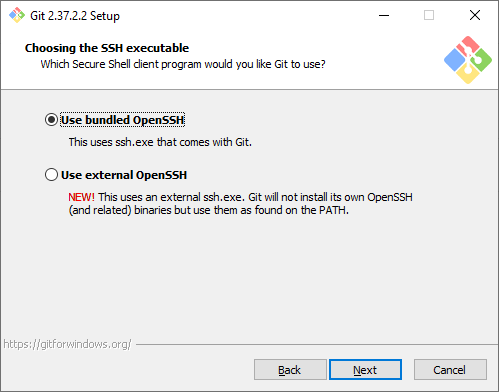
Выбор SSH-клиента. Изначально Git поставлялся со встроенным SSH-клиентом, но недавно появилась опция, где можно использовать внешний клиент. Если у вас уже что-то установлено на компьютере — можете выбрать вторую опцию. Мы же остановимся на первой, так как предварительно ничего не устанавливали.
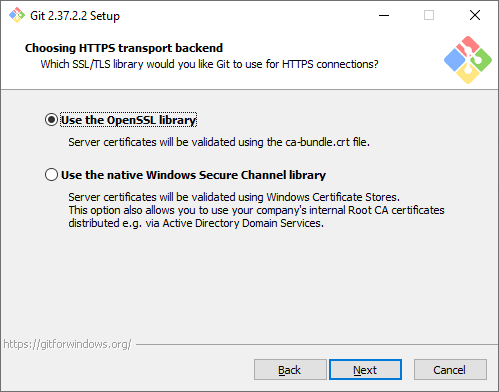
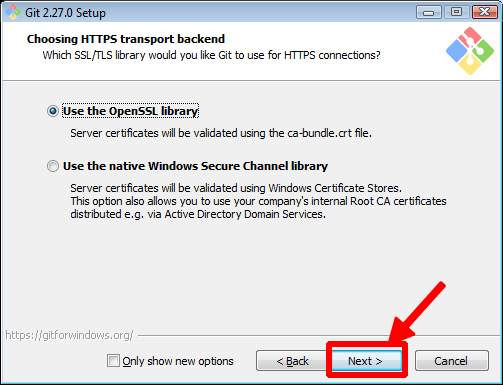
Выбор SSL/TLS библиотеки. По умолчанию Git будет использовать свою OpenSSL библиотеку с заранее определенным списком корневых сертификатов. Обычно этого достаточно, но если вам нужно работать со внутренними репозиториям внутри компании, которые используют самоподписанные сертификаты, выберите вторую опцию. Тогда Git будет использовать библиотеку и сертификаты из вашей операционной системы.
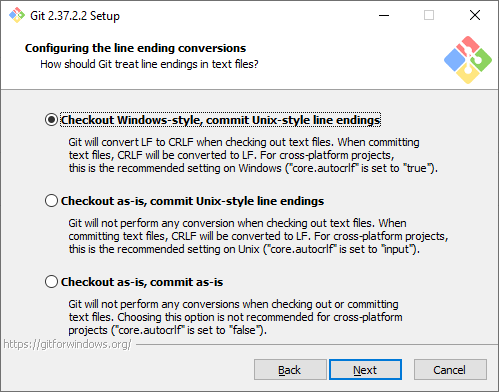
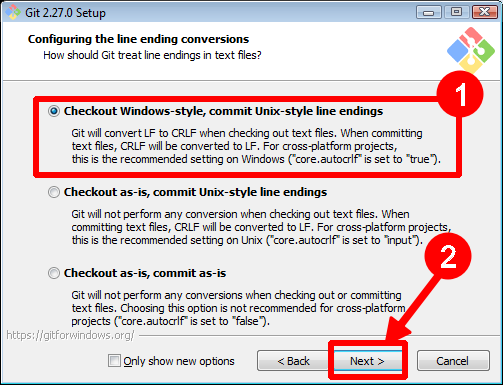
Символы перевода строки. Существует два основных способа формирования конца строки в файлах — CRLF и LF. Первый используется в Windows, второй — в Unix-like системах. Первая опция позволяет извлекать файлы из репозитория в Windows-стиле, при этом отправлять файлы в репозиторий в Unix-стиле. Мы рекомендуем использовать этот вариант, потому что он лучше всего подходит для кросс-платформенной команды, когда над одним кодом могут работать разработчики на разных ОС.
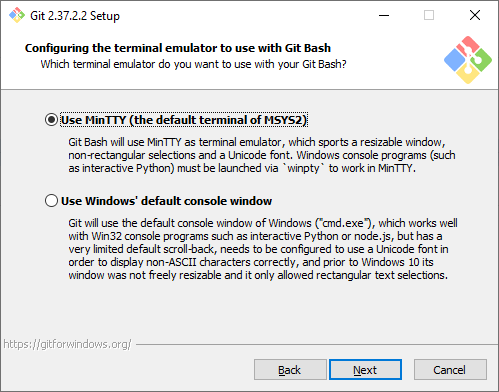
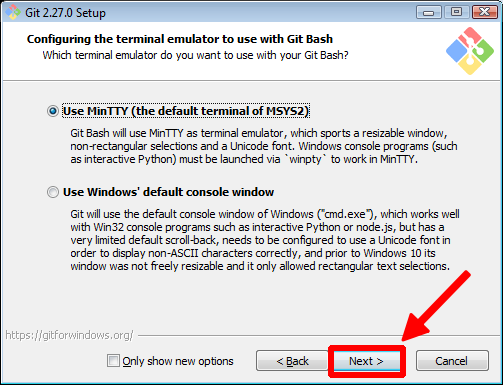
Эмулятор терминала. Эмулятор, который будет использоваться в командной строке Git Bash. MinTTY — удобный вариант, поэтому он выбран по умолчанию. Встроенный эмулятор CMD не очень удобен, у него есть некоторые ограничения, поэтому выбирайте его, только если делаете это осознанно.
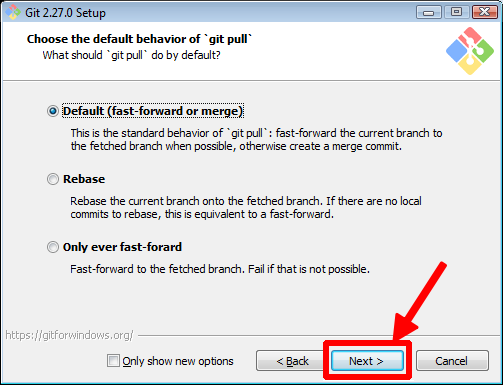
Стратегия git pull. Первая опция будет пытаться обновить историю коммитов без создания коммитов слияния. Это самый оптимальный и часто используемый вариант, оставим его.

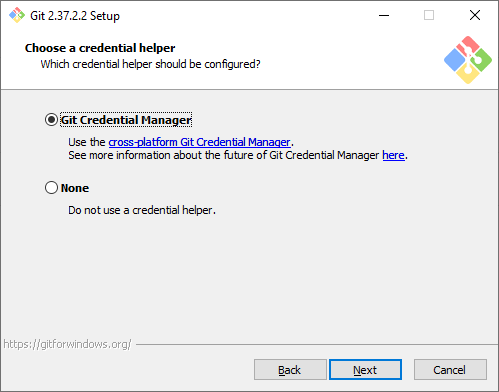
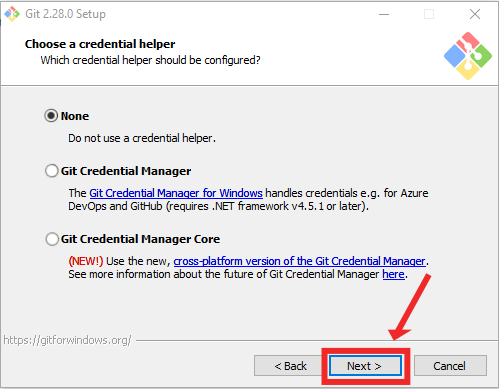
Credential Manager. Установка этого параметра позволит Git запоминать логины и пароли для подключения к удаленным репозиториям (например, GitHub, GitLab или корпоративное хранилище) и не вводить их постоянно.
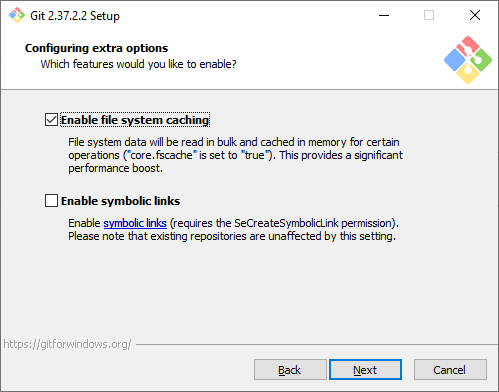
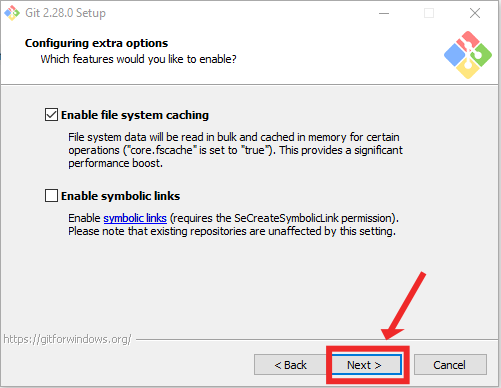
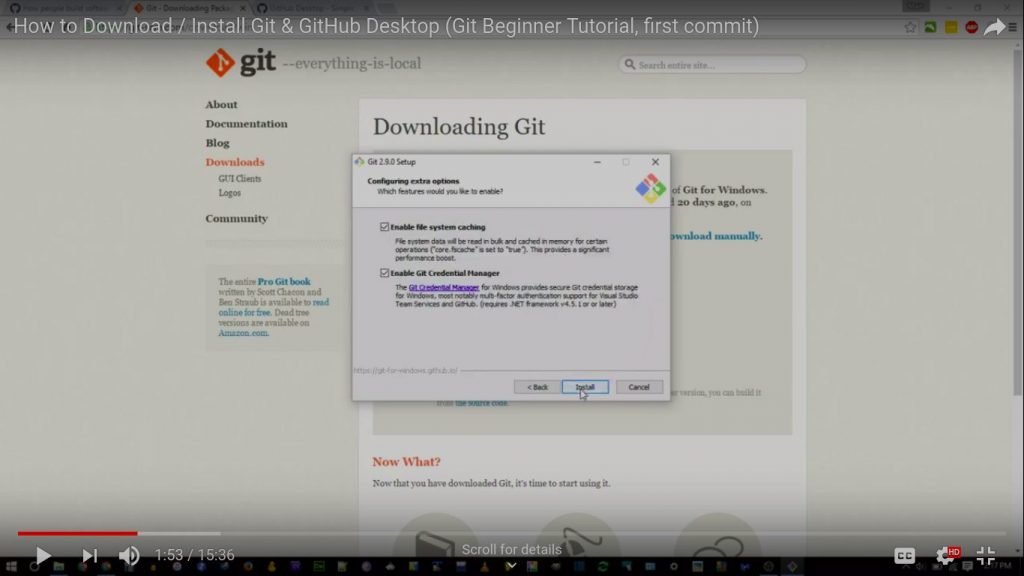
Дополнительные настройки. Кэширование позволит ускорить работу Git, эту опцию рекомендуем оставить. А вот символические ссылки нам не нужны.
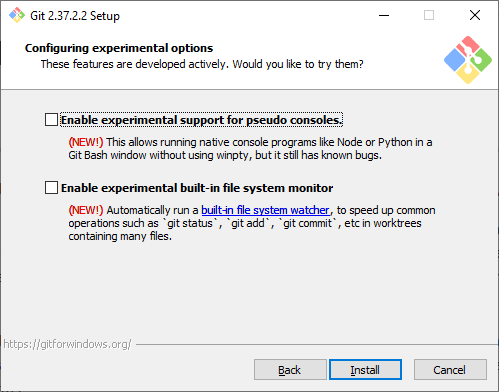
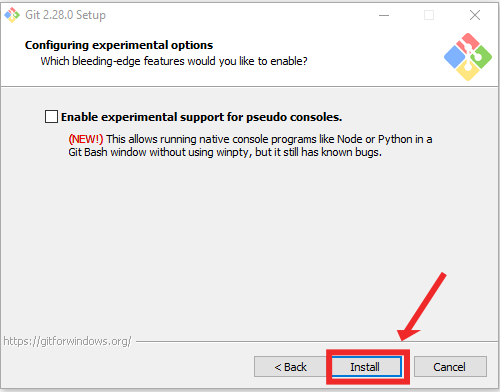
Экспериментальные настройки. Эти опции еще не переведены в стабильную стадию, поэтому их использование рекомендуется, только если вы точно понимаете, что делаете. Мы не будем ничего отмечать.
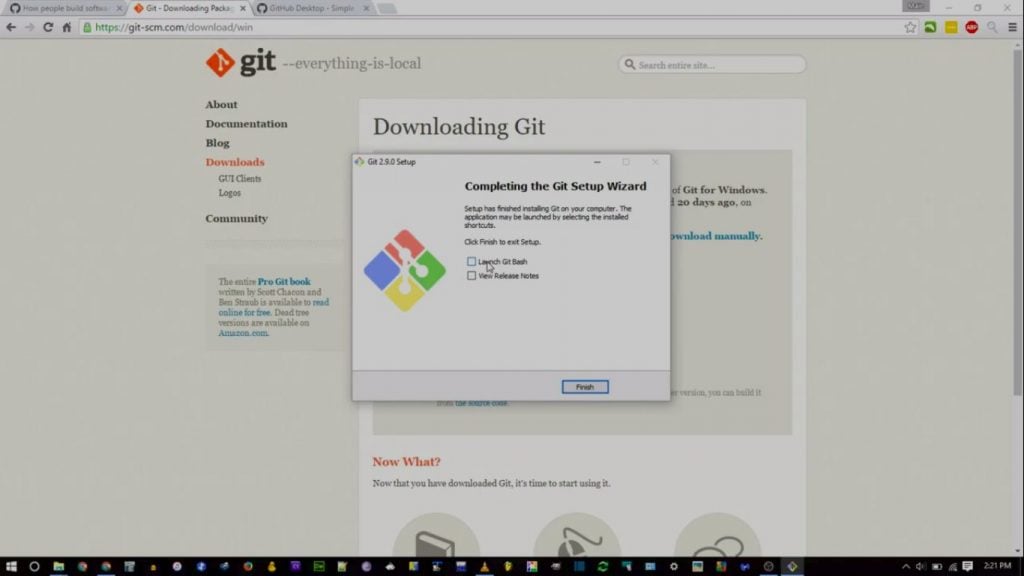
Git установлен и готов к работе.
Установка в различные дистрибутивы Linux
Также коротко покажем, как можно установить Git в различные дистрибутивы Linux. Как правило, самостоятельно скачивать ничего не нужно, достаточно воспользоваться встроенным в дистрибутив пакетным менеджером.
Debian
pt-get install gitUbuntu
add-apt-repository ppa:git-core/ppa # apt update; apt install gitFedora 21
yum install gitFedora 22+
dnf install gitGentoo
emerge --ask --verbose dev-vcs/gitArch Linux
man -S gitOpenSUSE
ypper install gitMageia
rpmi gitFreeBSD
pkg install gitOpenBSD
g_add gitRHEL, CentOS, Oracle Linux и др.
Как правило, пакетный установит довольно старую версию Git, поэтому рекомендуется собирать Git из исходных кодов, или воспользоваться сторонним репозиторием IUS Community.
Первоначальная настройка и создание репозитория
Перед началом работы с Git нужно указать свое имя и email, которые в дальнейшем будут записываться в историю изменений при каждом коммите. В будущем это позволит понять, кто именно внес те или иные изменения.
Откроем любое из приложений — Git Bash или Git CMD. Первое — это командная строка в стиле Linux, второе — командная строка в стиле Windows. Выбирайте то, что вам ближе. Мы выберем Git Bash и выполним две команды:
git config --global user.email "git-user@selectel.ru"
git config --global user.name "Selectel Git User"
Теперь Git полностью готов к работе. Давайте создадим репозиторий и зафиксируем в нем первое изменение (сделаем коммит). Для начала создадим каталог для будущего репозитория и сразу перейдем в него:
mkdir first-repo && cd first-repoСоздаем новый репозиторий в этом каталоге:
git initУвидим ответ:
Initialized empty Git repository in C:/Users/git_user/first-repo/.git/.Это означает, что в директории создан новый репозиторий. Далее создадим текстовый файл, назовем его README.md, и напишем в нем любой текст. Но сам по себе этот файл не попадет в следующий коммит. Мы должны проиндексировать изменения, то есть явно сказать Git-у, что этот файл нужно учитывать в следующем коммите:
git add README.mdДалее введем команду:
git commitОткроется текстовый редактор, который мы выбирали на этапе установки Git. Тут нам нужно ввести комментарий для коммита, то есть кратко описать изменение, которое мы сделали. Мы напишем такой комментарий:
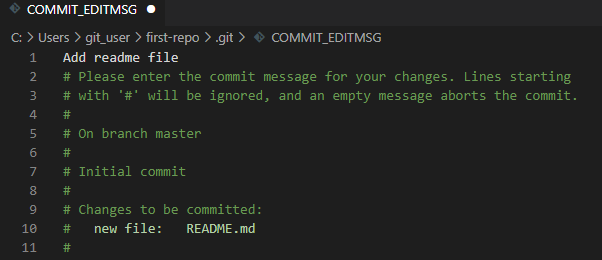
Обратите внимание, что Git автоматически добавил небольшую подсказку в это окно. При этом она не войдет в коммит, потому что в начале строки стоит символ решетки, и Git проигнорирует ее. Но она может быть полезна для дополнительной проверки: мы видим название текущей ветки и список файлов, которые войдут в коммит.
Сохраним файл и закроем редактор. Увидим примерно следующее сообщение:
[master (root-commit) 2b8f7a5] Add readme file
 1 file changed, 3 insertions(+)
 create mode 100644 README.md
Мы успешно сделали первый коммит.
Работа с Git в визуальном интерфейсе
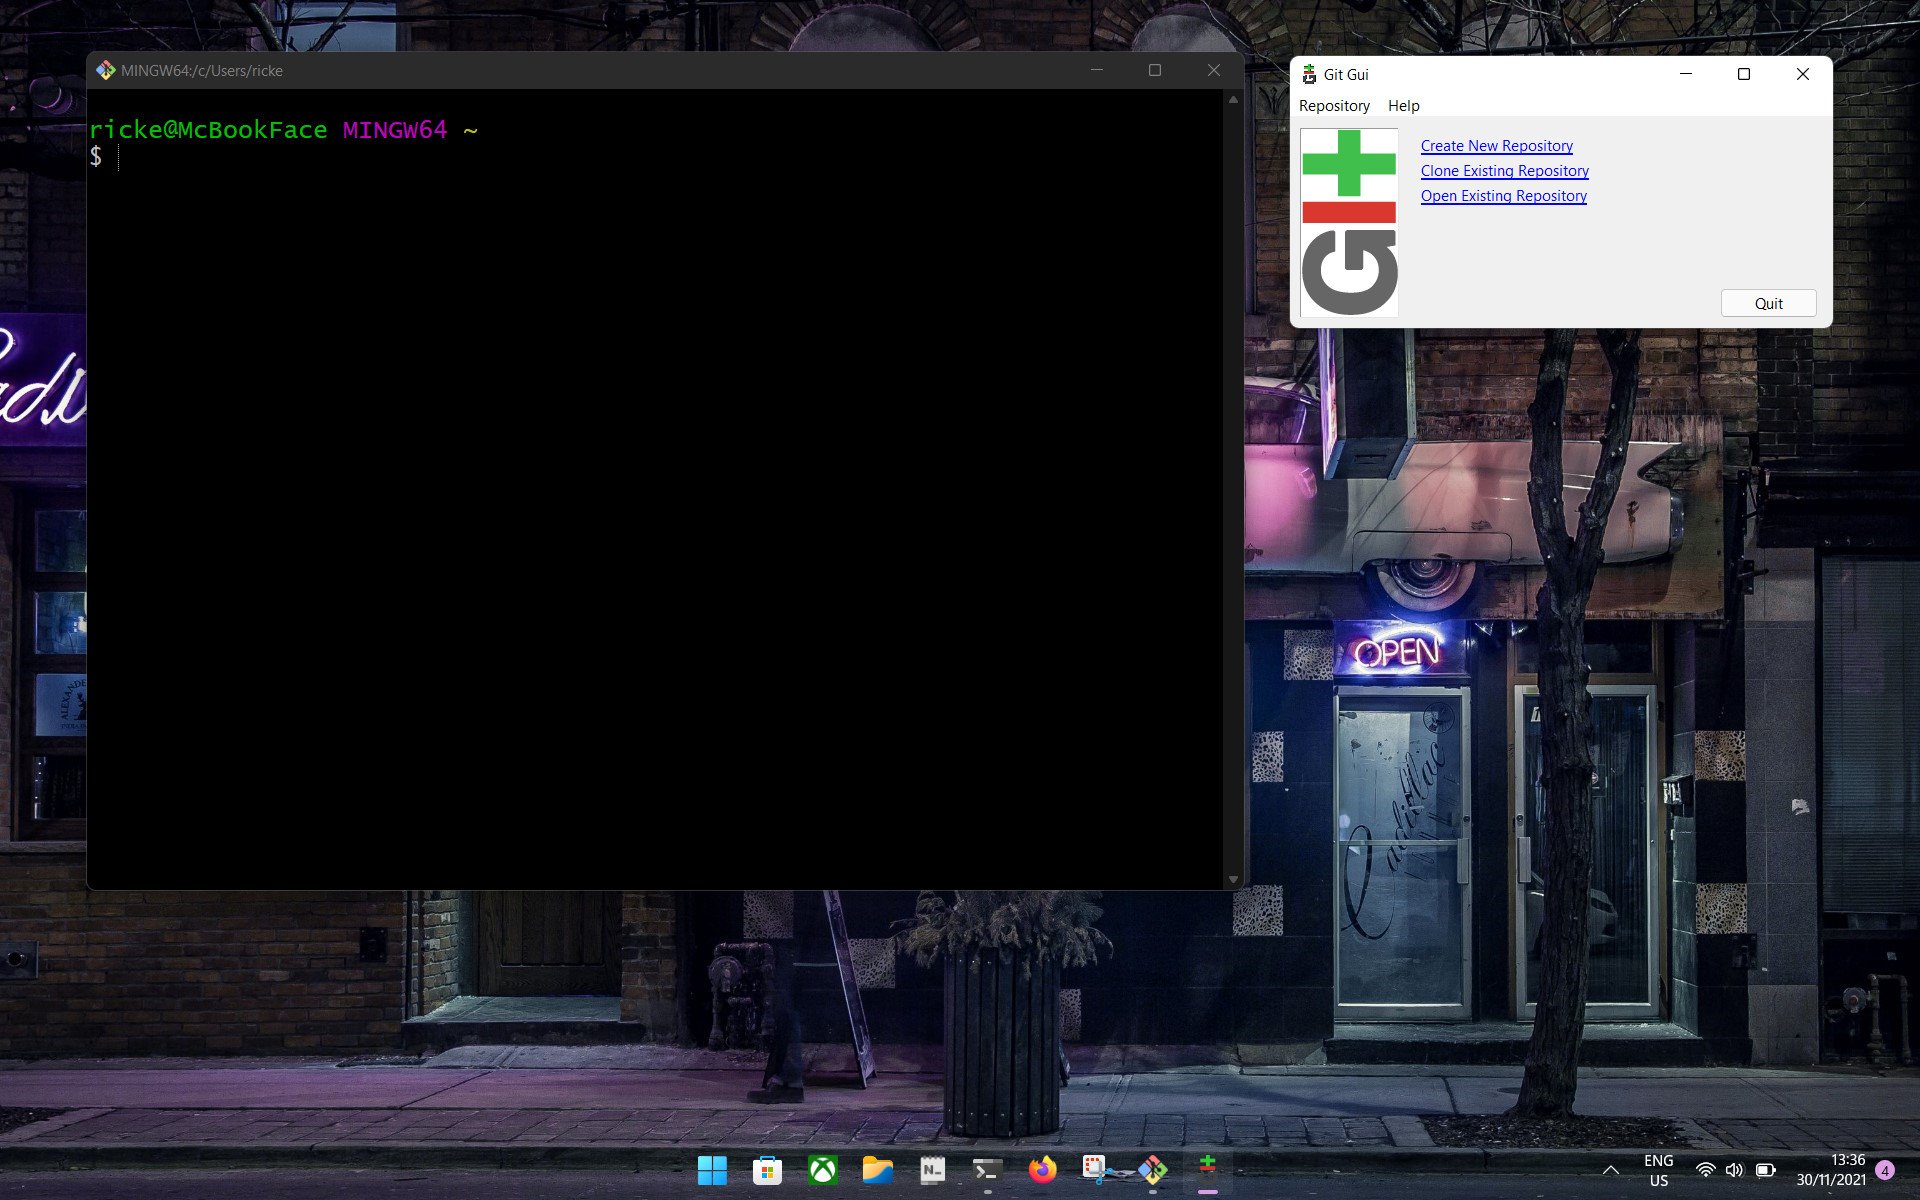
Сам по себе Git — это утилита командной строки. Но не всем может быть удобно запоминать и писать команды в терминале, поэтому часто разработчики пользуются графическим интерфейсом. Есть несколько вариантов:
- Встроенный GUI. В базовой установке Git есть две простые утилиты: gitk и git gui. Но у них довольно старый интерфейс и пользоваться ими не всегда удобно.
- Отдельные графические утилиты. Они могут быть понятны и красивы, но неудобны тем, что код нужно писать в одной программе, а для работы с Git нужно переключаться в другую. Примеры таких программ: GitKraken, Sourcetree, GitAtomic. Большой список таких клиентов есть на официальном сайте Git.
- Встроенные в IDE или текстовый редактор. В большинстве популярных редакторов кода или IDE уже есть поддержка Git. Как правило, ничего дополнительно настраивать не нужно. Мы рассмотрим именно такой вариант на примере редактора VSCode.
Откроем директорию с репозиторием в редакторе VSCode. Внесите любое изменение в файл README.md и сохраните изменения. Обратите внимание, что в левой части редактора кое-что изменилось:
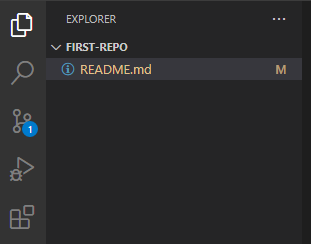
- Файл README.md подсветился желтым цветом, а рядом с ним появилась буква M (означает Modified — изменен).
- На панели Source Code появилась цифра 1, означающая, что есть одно изменение, которое можно зафиксировать.
Перейдем на панель Source Code. Слева находится список файлов, которые были изменены. Если кликнем на файл, то увидим какие именно изменения мы внесли: в этом случае добавили новую строчку This is the second commit.

Теперь давайте зафиксируем наши изменения. Рядом с названием файла нажмем на «плюс», чтобы проиндексировать его. Это аналогично команде git add, которую мы выполняли ранее. Затем в поле Message внесем комментарий и нажмем кнопку Commit. Это аналогично команде git commit.
Поздравляем, вы сделали уже два коммита в свой репозиторий!
Заключение
Итак, мы рассмотрели процесс установки Git под Windows, рассказали об основных параметрах установки и последующей настройки. Увидели, как репозиторий и внести в него первый коммит. Познакомились с работой в командной строке и с помощью графического интерфейса.

(Image credit: GitHub)
The Microsoft-owned GitHub platform is the largest of its kind for sharing and collaborating on a variety of code projects. It’s also completely free to use for individuals and if a repository is public, anyone can clone it and use the files within.
GitHub is used for a variety of reasons, not least as a way to distribute your own code. One of the absolute basics is cloning a repository from GitHub to your local machine. If you’ve never done this before it could seem like a foreign concept, but it’s really easy to do.
Whether you want to use regular old Windows or the Windows Subsystem for Linux (WSL) this is what you need to know.
Installing Git onto your PC
The main tool you’ll be using with GitHub is Git. This can be confusing, but Git is the tool and GitHub is the service that interacts with it; Git is completely separate and has nothing to do with Microsoft.
The basic definition of Git is that it’s a version control tool, allowing multiple people to interact with the same files independently with the option to merge changes into the master branch.
Git is also the tool that we’ll be using to clone a GitHub repo from the cloud to a local machine.
To install Git on Windows you can simply go to the website and download the executable, or if you want to use the Windows Package Manager, open up a new PowerShell window and enter
winget install git.
In WSL distros like Ubuntu and Debian you can install Git using the command
sudo apt install git. It should already be installed when you set up your WSL installation, but if it isn’t this command is all you need.
On Windows, the Git installation will come with its own terminal. You can use this if you wish, but you can also just interact with it inside PowerShell. Especially if it’s an environment you’re already comfortable with.
How to clone a GitHub repo to your PC
Cloning is one of the most basic functions of Git and one that you can use happily without getting in the weeds too much if all you’re interested in is being able to pull content from GitHub. Cloning is essentially downloading, in so much as you point your local Git client at the destination on GitHub and it will pull the content down, creating a new directory on your local machine.
Whether you’re working within PowerShell using Git for Windows or you’re inside WSL, the commands you need are the same. Git is platform-agnostic, so you can learn it once and use it everywhere.
When you clone the repo in the terminal, it will create your local folder inside whatever directory your command line is in at that point. So if you want to put it somewhere specific, find the right location in File Explorer then right-click and open in PowerShell/Windows Terminal. WSL distros can also access the Windows filesystem so if you’re using Linux on your Windows box, the same idea applies. It will only save to the Linux file system if you tell it to.
Cloning from GitHub basically requires you to get a web address to feed into the Git client. For this example, we’re going to clone the Microsoft Visual Studio Code repo.
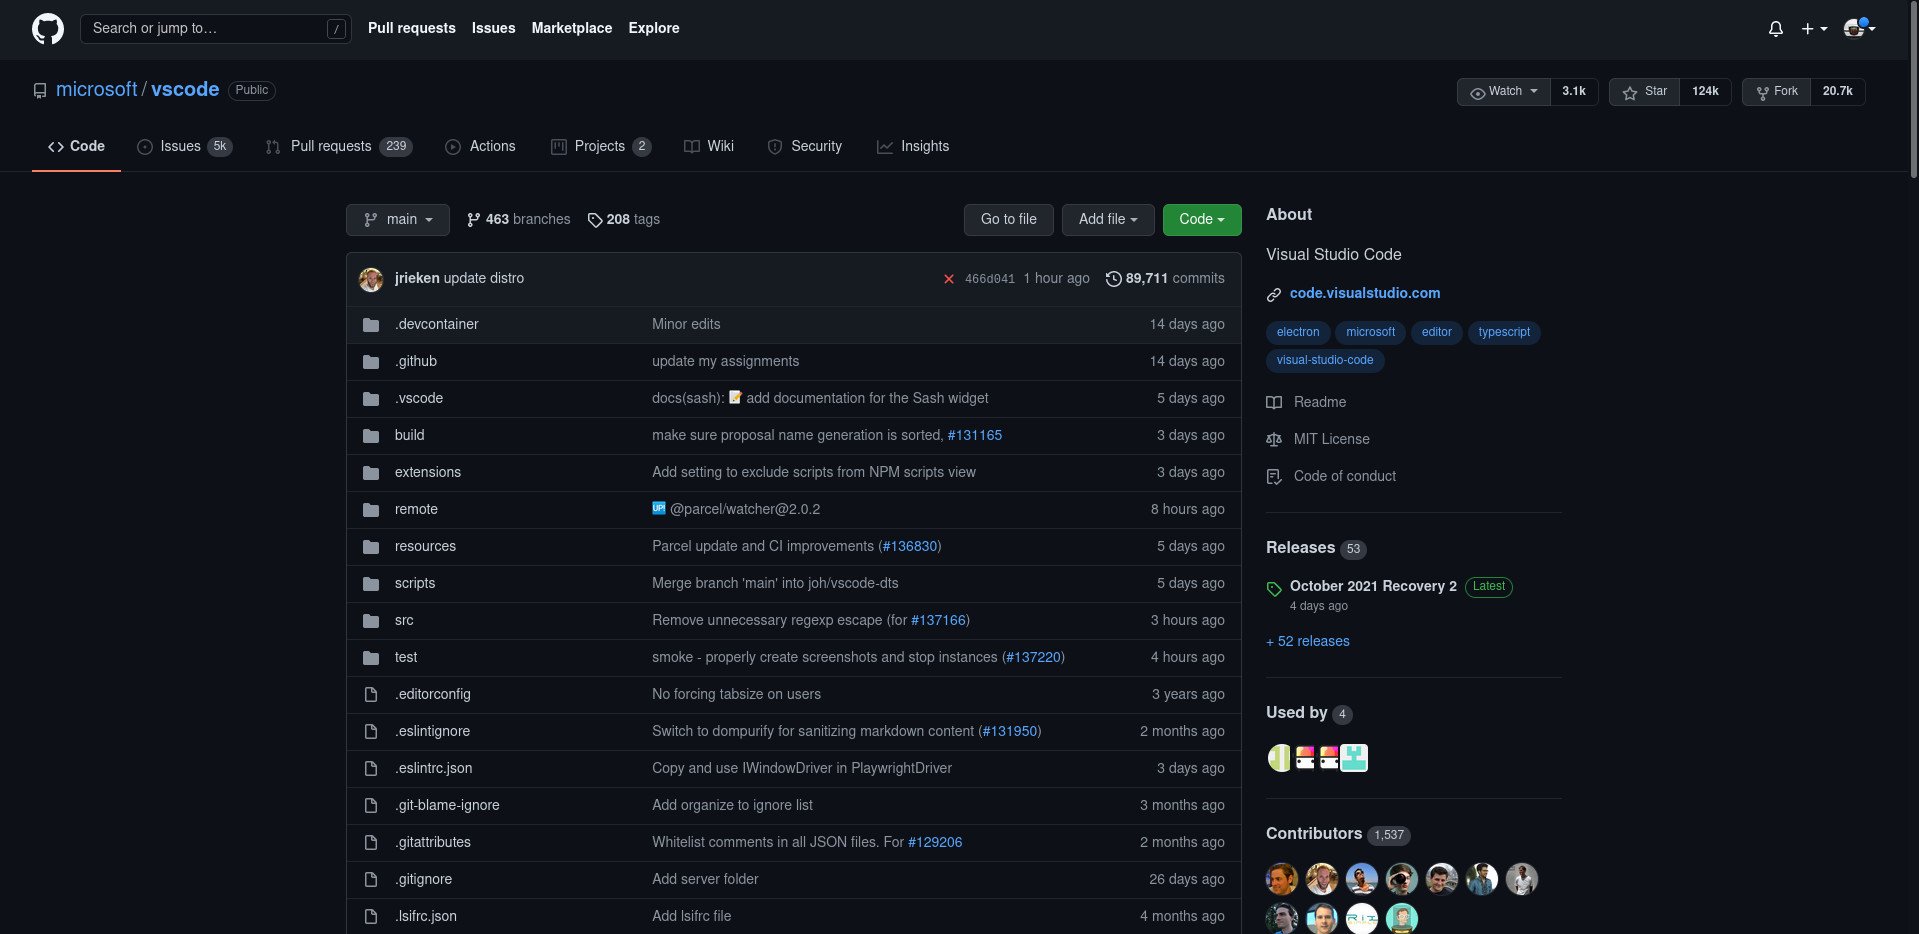
- Find the repo you want on the GitHub website. For this example, we’re using https://github.com/microsoft/vscode
- Click the button labeled Code.
- Select HTTPS.
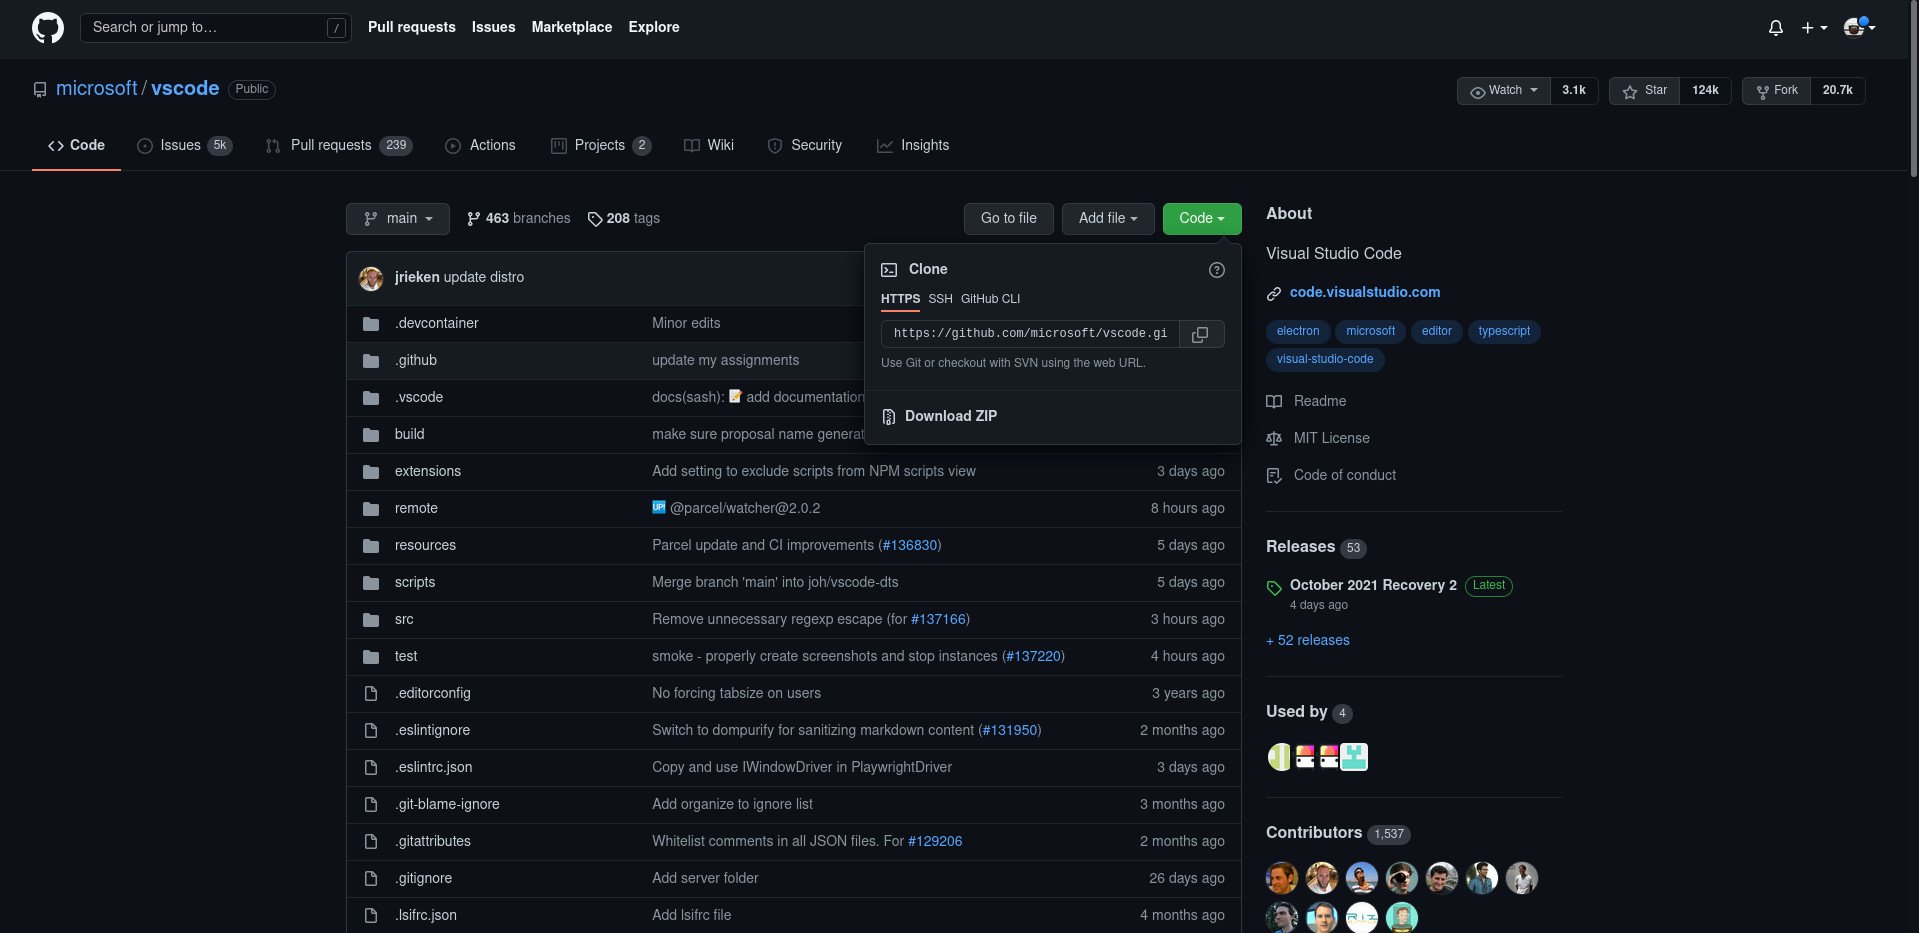
- Copy the URL.
- Open up your chosen terminal. Whether it’s WSL or PowerShell the Git commands are the same.
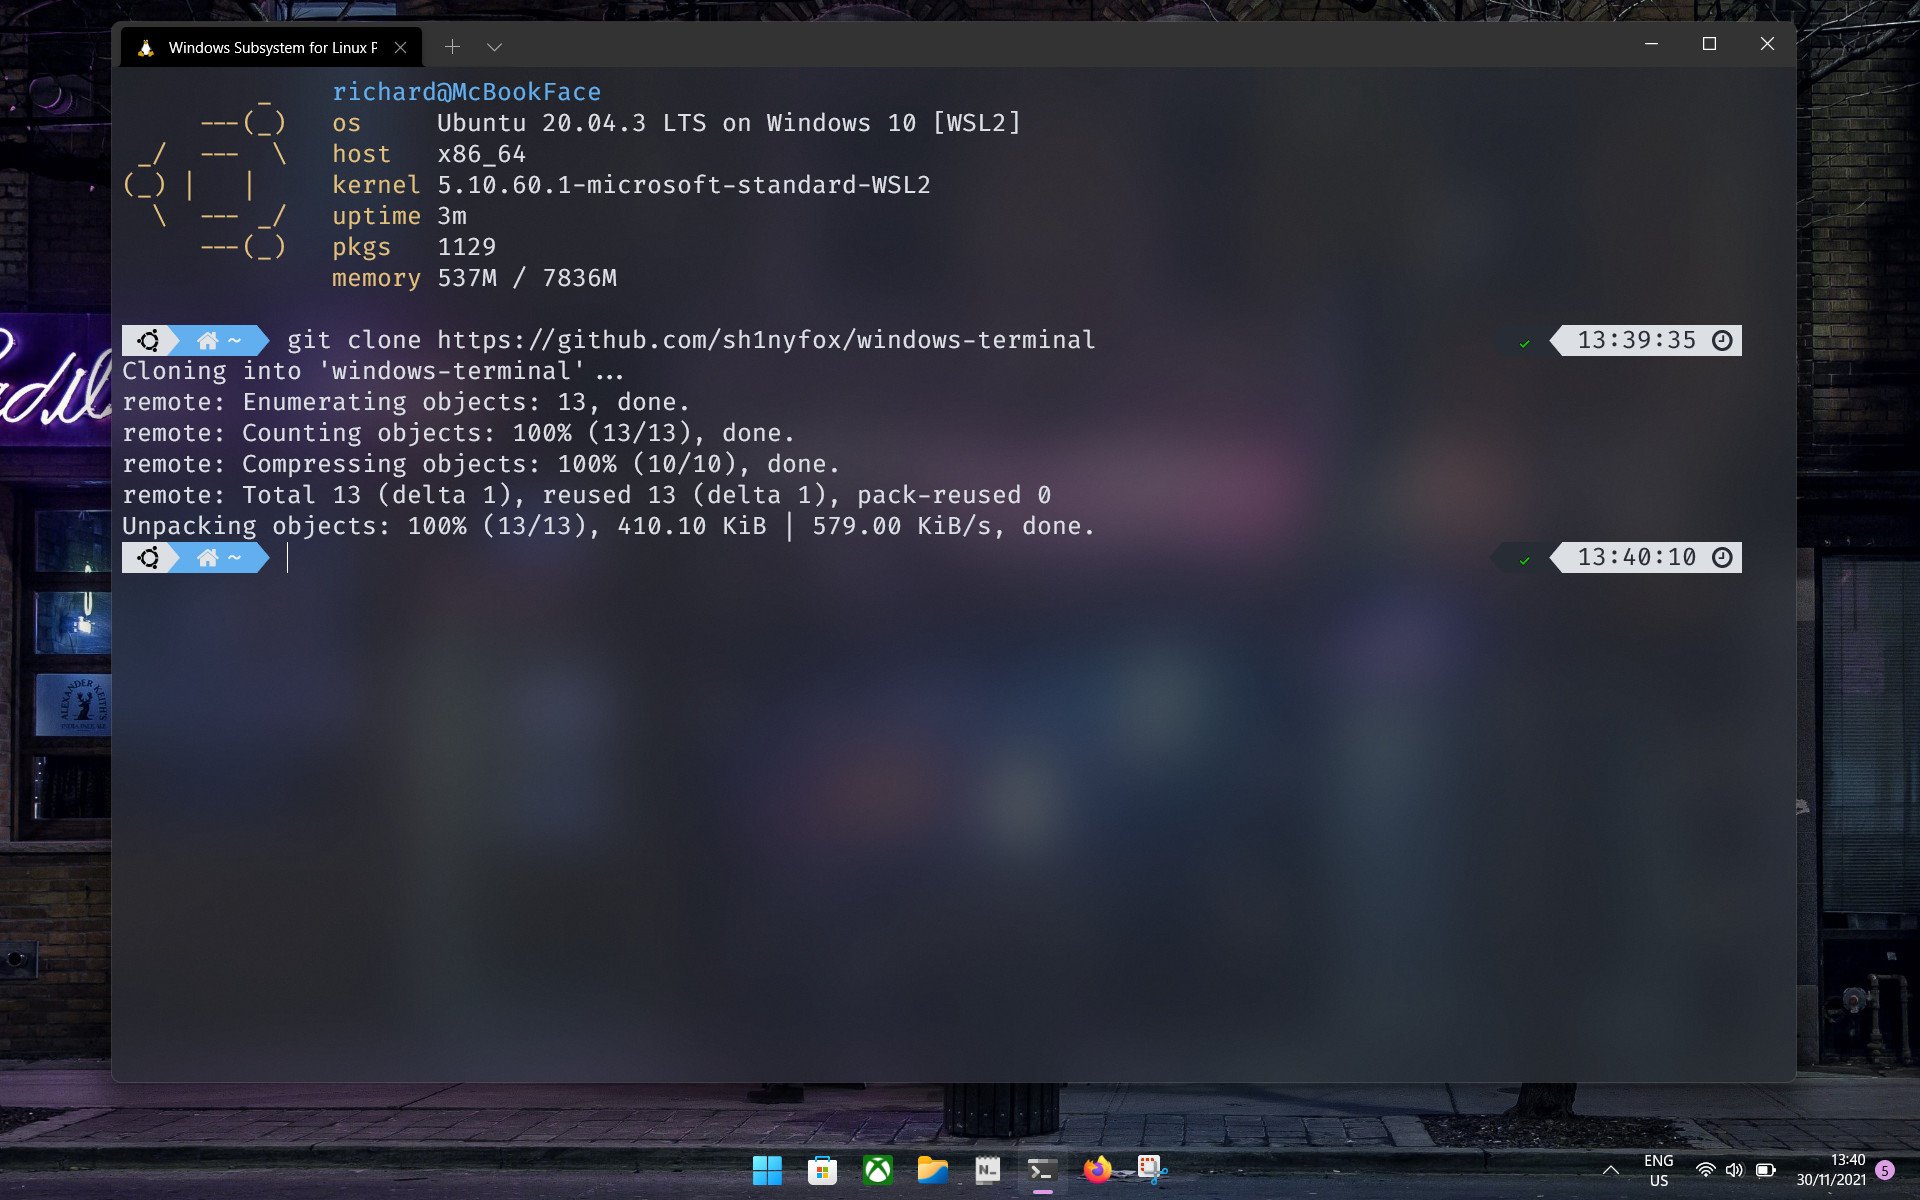
- In the terminal enter
git clone https://github.com/microsoft/vscode
Git will now pull the entire contents of the chosen repository down to your local machine. It doesn’t pick and choose; you get the whole lot. You’ll also get the README.md file which is used to create any text and instructions on the front page of the repo.
You now have a local copy of a GitHub repository, but what if it gets updated? Everything you pull from GitHub will be an initialized Git repository, with files inside that allow it to interact with Git, and in turn, allow you to pull updates. It allows much more but as this tutorial is only focused on cloning, updates are all we’re interested in.
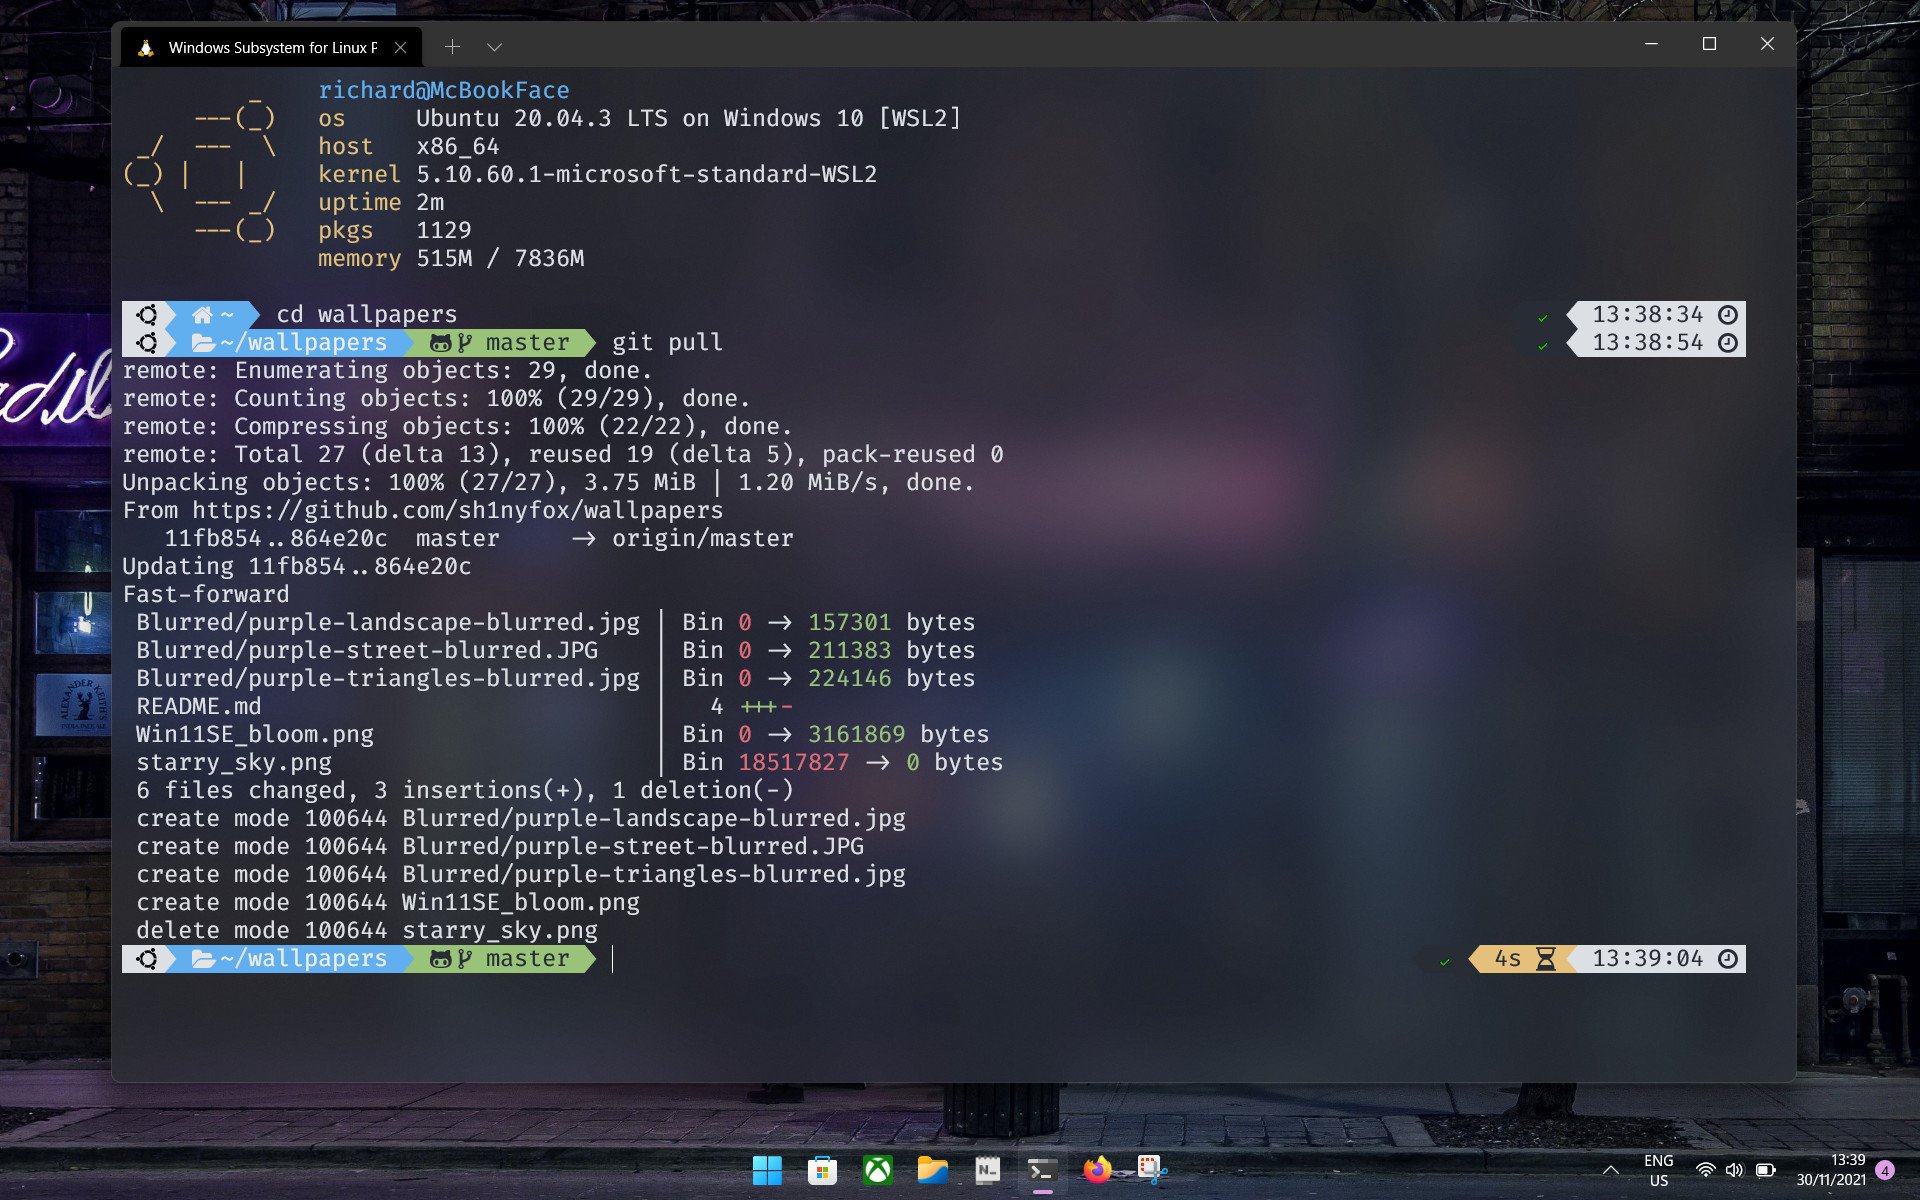
To get the latest update to a GitHub repository, open up your terminal inside the folder you initially cloned (using the steps above if it’s easier) and enter
git pull. That’s all there is to it, and Git will now compare your copy of the repository to that hosted on GitHub and will download any changes.
You now know how to clone and pull updates from any GitHub repository. Unless you have the right permissions you won’t be able to make any changes to the hosted files, so anything you do locally is totally fine. Go forth and clone!
Get the best of Windows Central in in your inbox, every day!
Richard Devine is a Managing Editor at Windows Central with over a decade of experience. A former Project Manager and long-term tech addict, he joined Mobile Nations in 2011 and has been found on Android Central and iMore as well as Windows Central. Currently, you’ll find him steering the site’s coverage of all manner of PC hardware and reviews. Find him on Mastodon at mstdn.social/@richdevine
guides
Оглавление
- Windows
- Mac OS
- Linux
Windows
Скачайте установочный файл
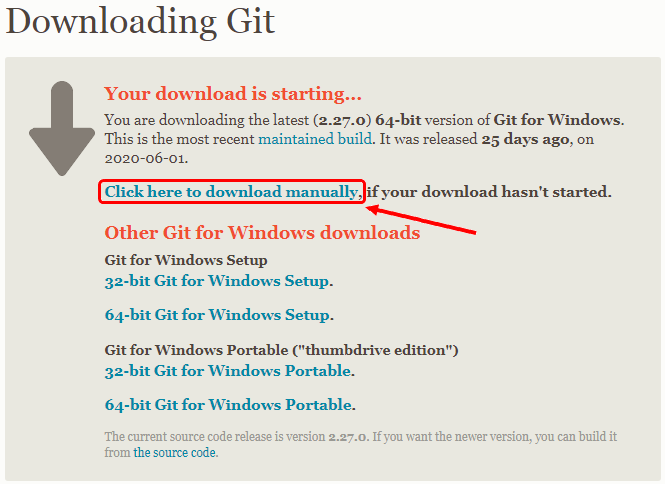
Перейдите по ссылке Git Windows. Скачивание установочного exe-файла для вашей операционной системы должно начаться автоматически. Если этого не произошло, нажмите на ссылку “click here to download manually” (как показано на скриншоте):
1. Запустите установку
Запустите скачанный на предыдущем шаге exe-файл. Дождитесь появления экрана установки.
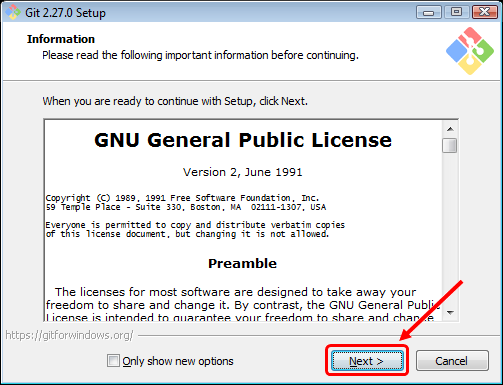
2. Лицензионное соглашение
На первом экране вам предложат согласиться с условиями лицензии GNU GPL. Внимательно их прочитайте, после чего нажмите кнопку Next (как показано на скриншоте):
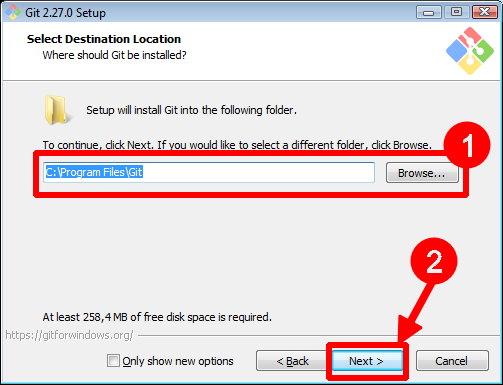
3. Путь установки
Выберите путь для установки Git (лучше его оставить по умолчанию) и нажмите кнопку Next (как показано на скриншоте):
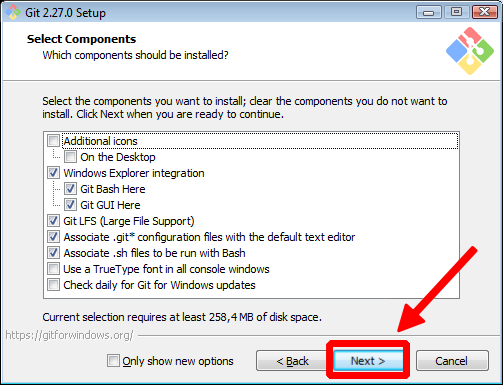
4. Компоненты для установки
Удостоверьтесь, что выбранные опции (флажки) соответствуют приведённым на скриншоте (они выбраны по умолчанию) и нажмите кнопку Next (как показано на скриншоте):
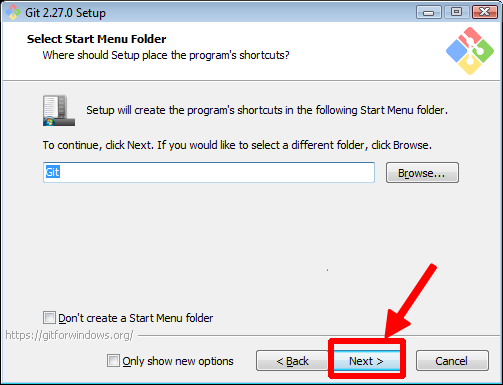
5. Имя пункта меню в Пуск
Оставьте значение по умолчанию Git и нажмите кнопку Next (как показано на скриншоте):
6. Редактор по умолчанию
Выбранный по умолчанию редактор (Vim) достаточно тяжёл для новичков, поэтому выберите из выпадающего списка опцию Nano Editor и нажмите кнопку Next (как показано на скриншоте):
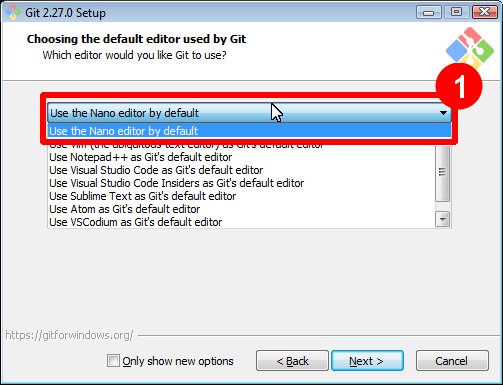
Чуть позже в рамках нашего курса настроим Git на использование другого редактора.
7. Переменная окружения PATH
На данном этапе необходимо выбрать, добавлять ли Git в переменную окружения PATH. Это набор путей файловой системы, в которой ищутся запускаемые файлы. Если для вас это звучит не понятно — не расстраивайтесь, эта информация нам не особо нужна. Выберите опцию Windows Promt и нажмите кнопку Next (как показано на скриншоте):
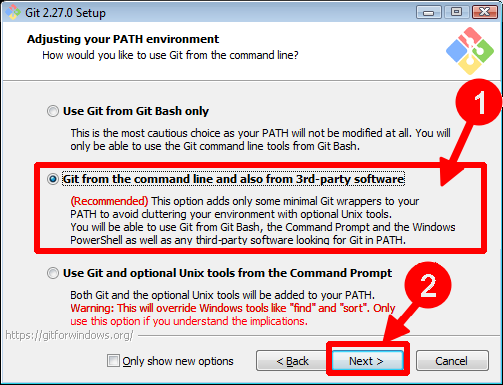
❗️ Внешний вид этого пункта может отличаться в новых версиях. Выбирайте пункт с подписью Recommended
8. HTTPS
Необходимо выбрать библиотеку, которая будет использована для HTTPS-соединений. Оставьте выбранной опцию OpenSSL и нажмите кнопку Next (как показано на скриншоте):
9. Символы окончания строки
Символы, обозначающие окончание строки различаются в Windows и Unix-подобных ОС (Mac OS, Linux, FreeBSD), поэтому выберите опцию Checkout Windows-style, commit Unix-style line-endings и нажмите кнопку Next (как показано на скриншоте):
10. Терминал
На данном экране вам предлагают выбрать какой терминал (командную строку) вы будете использовать с Git. Оставьте выбранной по умолчанию опцию MinTTY и нажмите кнопку Next (как показано на скриншоте):
11. git pull
Поведение по умолчанию для git pull. Оставьте выбранной опцию Default (fast-forward or merge) и нажмите кнопку Next (как показано на скриншоте):
12. Credential Manager
Выберите значение None и нажмите кнопку Next (как показано на скриншоте):
Убедитесь, что установлен флажок только на Enable file system caching и нажмите кнопку Next (как показано на скриншоте):
14. Экспериментальные опции
Убедитесь, что все экспериментальные опции отключены и нажмите кнопку Install (как показано на скриншоте):
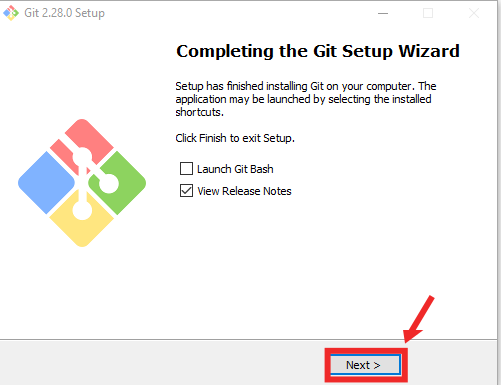
15. Завершение установки
Дождитесь завершения установки и нажмите кнопку Next (как показано на скриншоте):
Проверка установки
Кликните правой кнопкой мыши на любой папке в Windows, в открывшемся контекстном меню должны появиться две новых опции (как показано на скриншоте):

Выберите опцию Git Bash Here. Вы должны увидеть окошко, похожее на то, что показано на скриншоте:
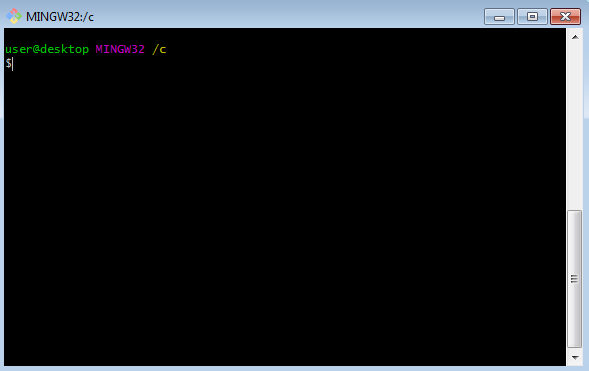
Где user — имя вашего пользователя, desktop — имя вашего компьютера.
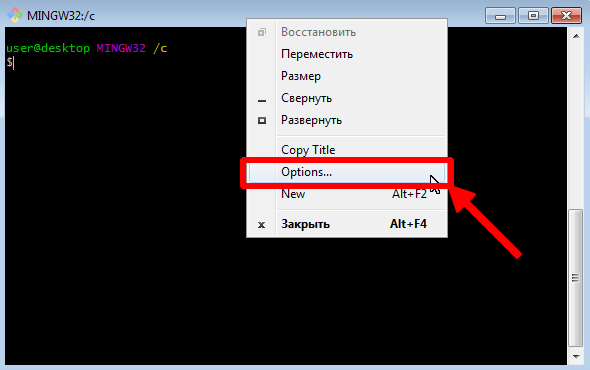
Вы можете настроить фон, шрифты, цвета и остальные параметры кликнув на заголовке окна правой кнопкой мыши и выбрав из выпадающего меню пункт Options (как показано на скриншоте):
Если что-то пошло не так
Вы можете удалить Git через Панель Управления и установить его заново. В любом случае, обязательно сделайте скриншот ошибки и пришлите его и номер шага (на котором произошла ошибка) нашим ассистентам — они вам обязательно помогут.
Mac OS
Есть несколько вариантов:
- Если вы используете Homebrew
- Если вы не используете Homebrew
Установка через Hombebrew
Откройте терминал и запустите команду brew install git
Установка не через Homebrew
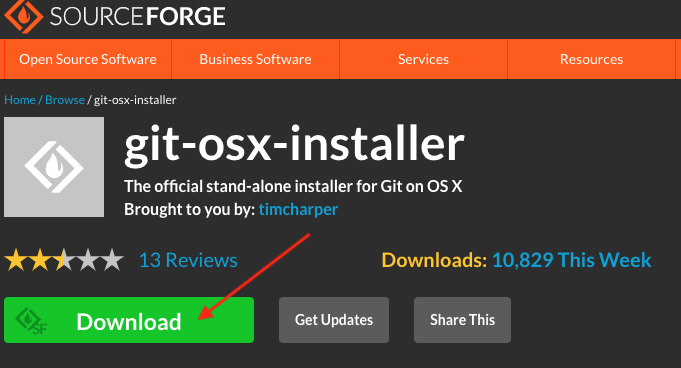
Скачайте установочный файл
Перейдите по ссылке Git Mac. Скачивание установочного dmg-файла для вашей операционной системы должно начаться автоматически. Если этого не произошло, нажмите на ссылку в разделе Building from Source (как показано на скриншоте).
Далее нажмите кнопку Download (как на скриншоте ниже)
1. Запустите установку
Откройте двойным кликом на скачанном dmg-файле установочный образ. Вы должны увидеть содержимое образа (как показано на скриншоте ниже). Удерживая клавишу Ctrl двойным кликом откройте установочный файл:
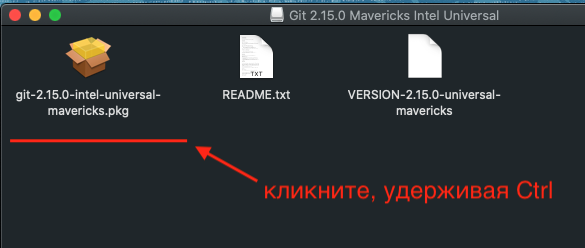
Если вы видите на экране окно, в котором нет кнопки открыть (как на скриншоте ниже), значит вы не удерживали клавишу Ctrl при открытии. Попробуйте ещё раз.
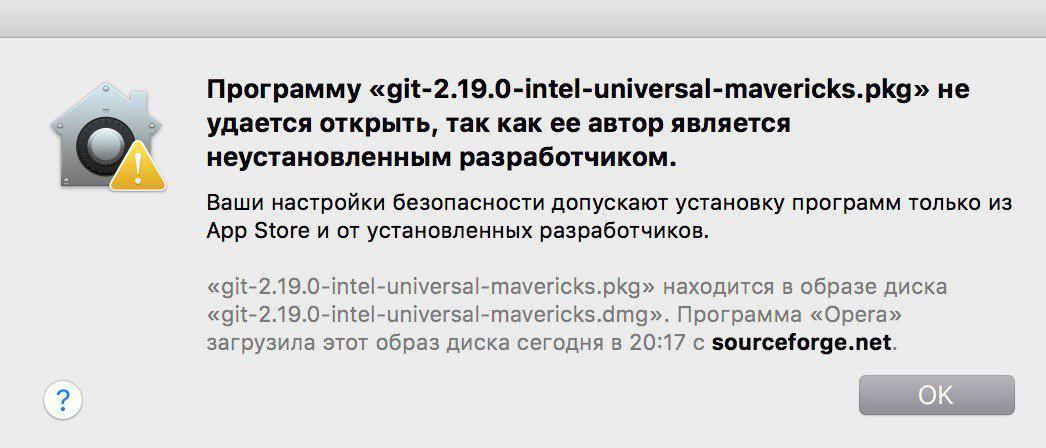
В открывшемся окне нажмите кнопку Открыть (как на скриншоте ниже).

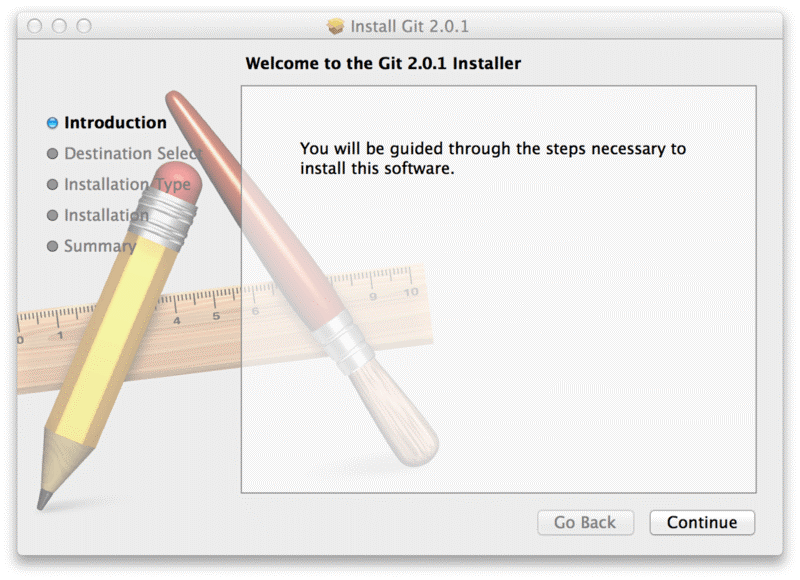
2. Установите Git
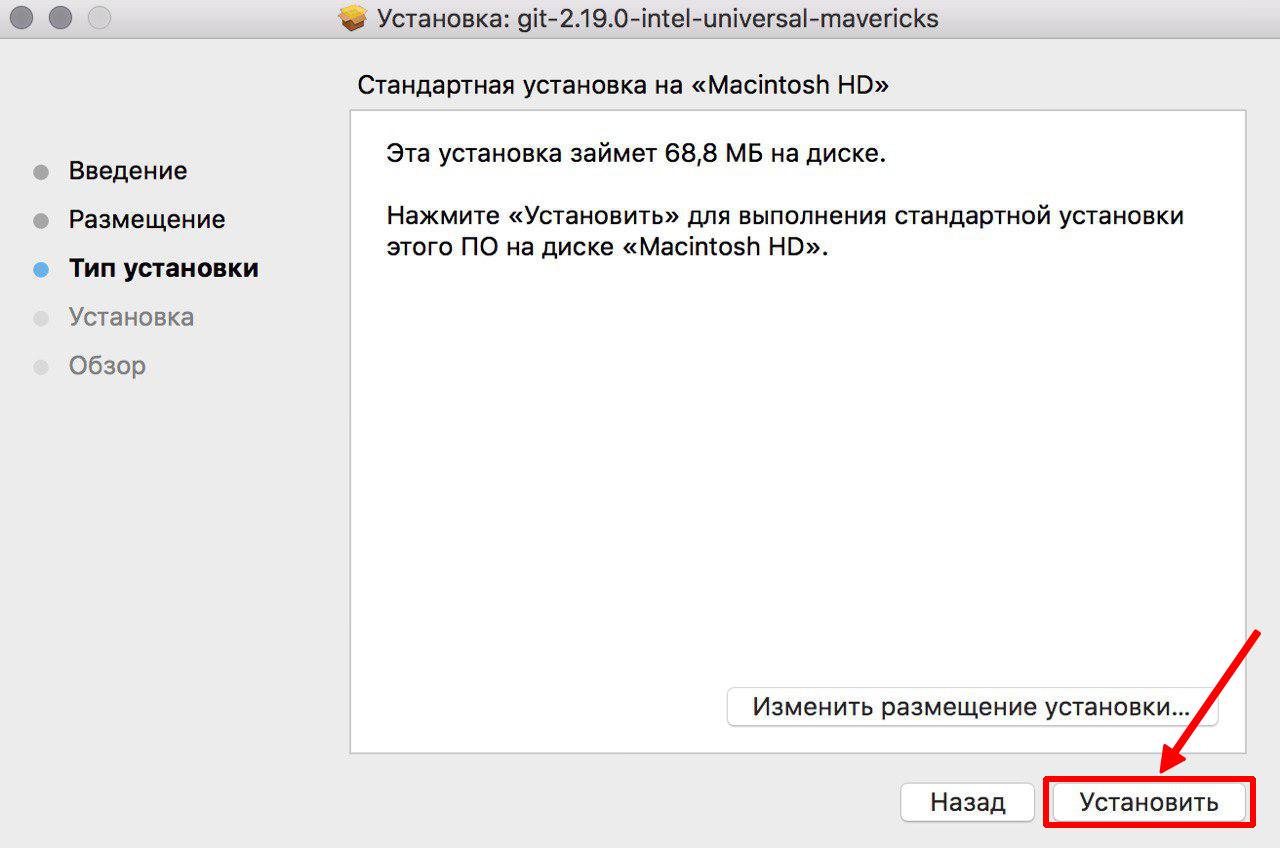
В открывшемся окне нажмите кнопку Продолжить (как на скриншоте ниже).
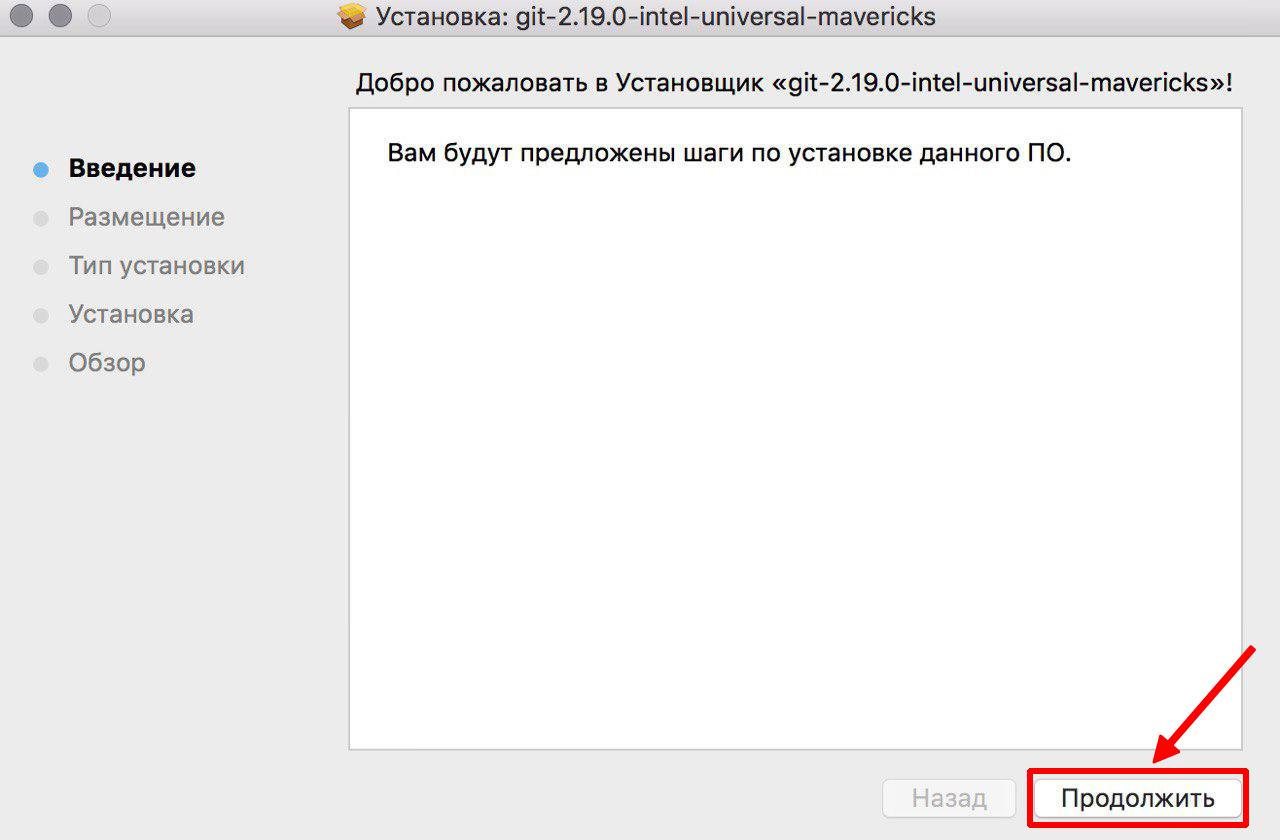
Во всех остальных окнах оставьте настройки по умолчанию и нажимайте на кнопки Продолжить или Установить (как на скриншоте ниже).
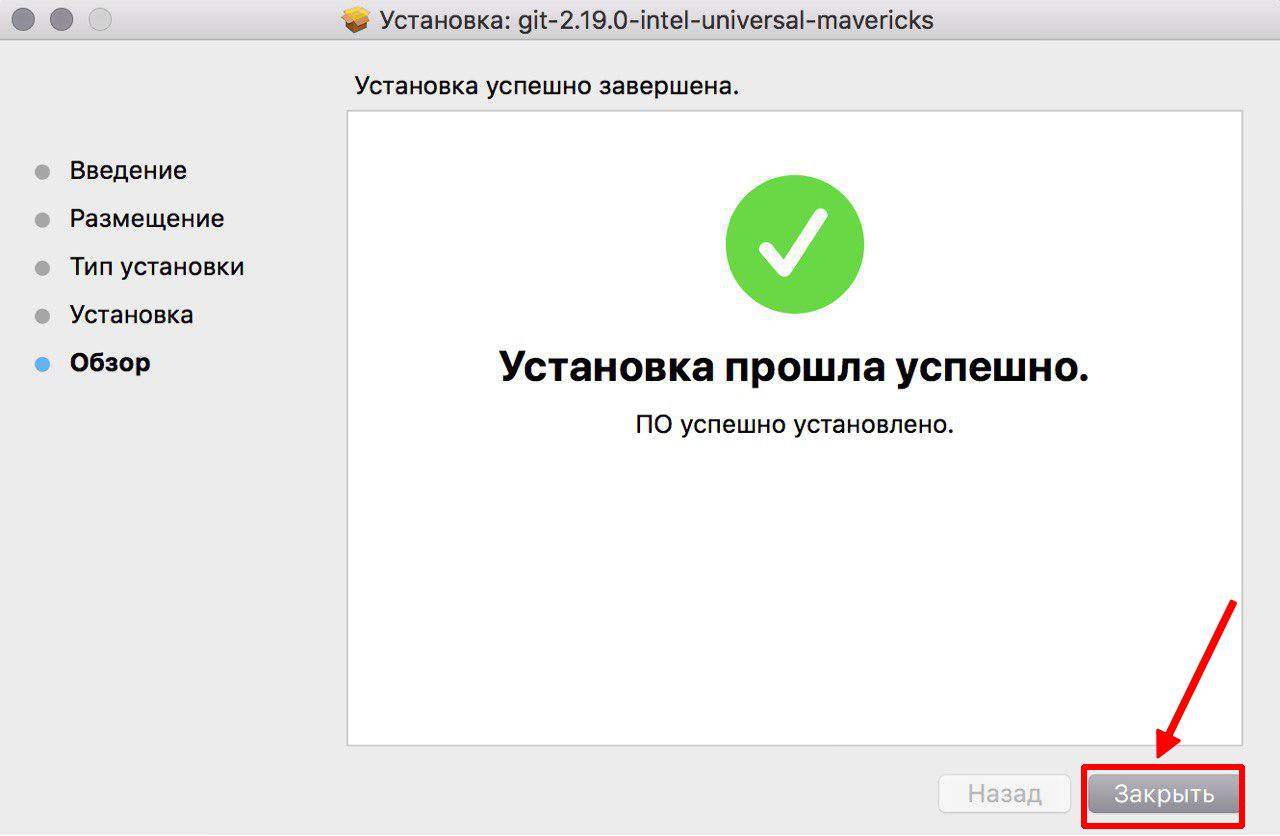
По завершении установки нажмите на кнопку Закрыть (как на скриншоте ниже).
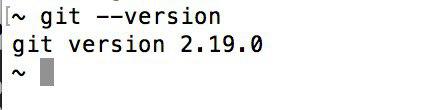
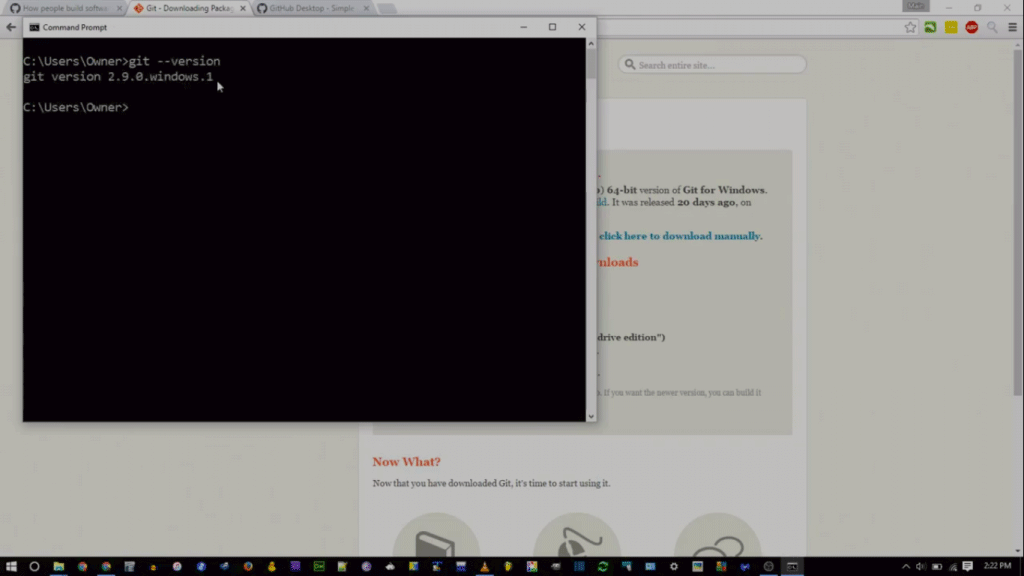
Проверка установки
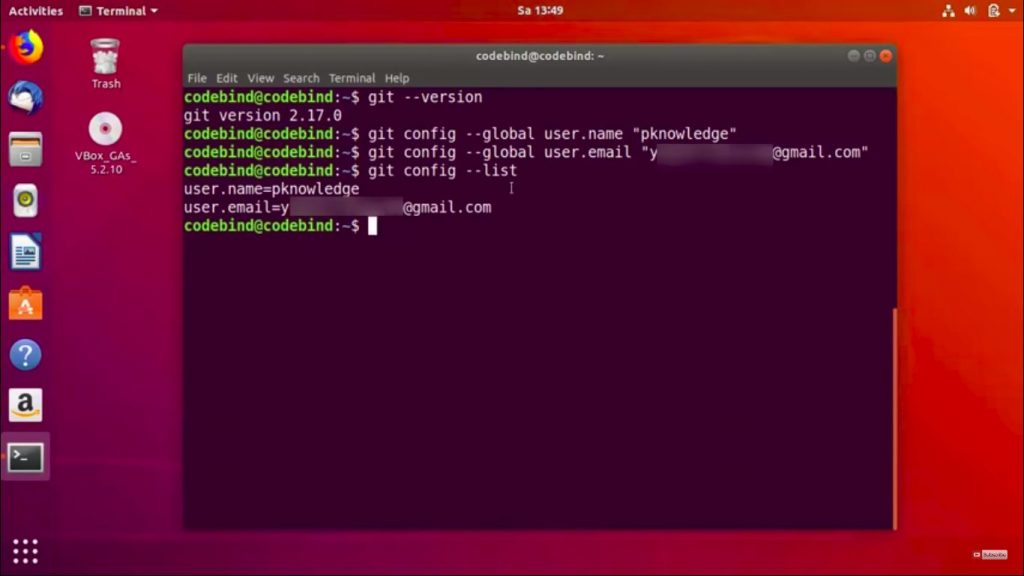
Откройте программу Terminal и вбейте команду git --version, если вы увидели версию (как на скриншоте ниже), то установка прошла успешно. Обратите внимание, ваша версия может быть новее.
Linux
Откройте терминал и в зависимости от используемого вами дистрибутива запустите от лица суперпользователя команду на установку git:
- Debian/Ubuntu:
apt-get install git - Fedora:
yum install gitилиdnf install git
Дождитесь окончания установки и введите команду: git --version
Если на экране отобразиться версия, то установка прошла успешно.
Если что-то пошло не так
Если вы застряли на каком-то шаге, произошла ошибка или что-то пошло не так, обязательно напишите аспирантам, приложив скриншот ошибки и указав на каком шаге она произошла. Мы вам обязательно поможем!

Git for Windows aims at providing a thin, native set of tools that brings full-fledged Git SCM functionality.
Steps to Install Github
Below are the detailed steps to install GitHub on windows
Step 1: Navigate to the download page of official git website https://git-scm.com/downloads and download Git client for windows.
Step 2: By running the installer file, the wizard will progress with the usual following steps :
– Welcome screen
– License agreement
– Installation folder
– Choose the components to be installed.
– Start menu configuration
along with these, wizards proceeds further with configuration specifics, which will be explained in the consequent steps.
Step 3: Adding the PATH environment
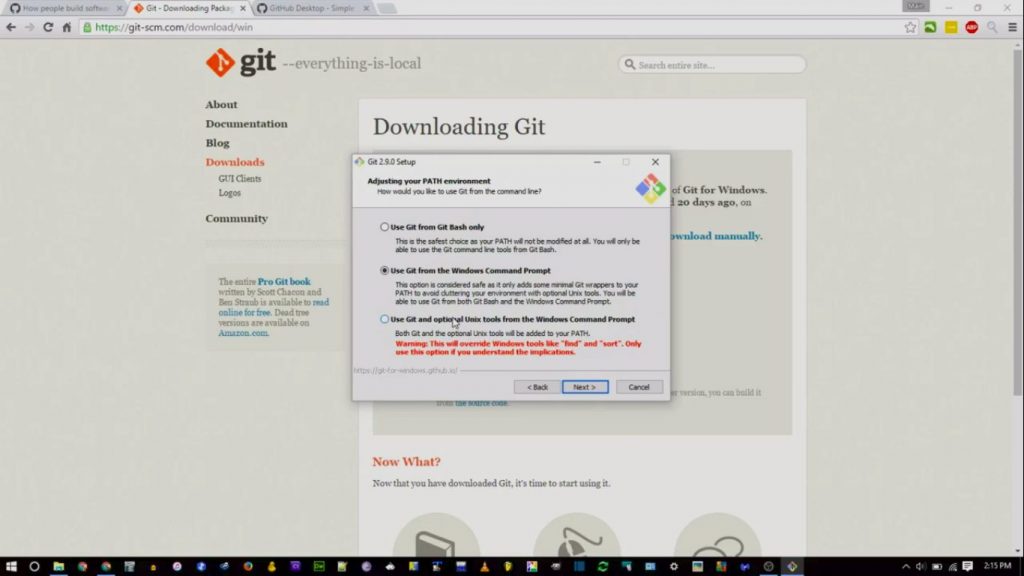
By default, the installer will choose ‘Use Github from Github Bash Only’.
‘Use Github from the Windows Command Prompt’ will prevent the user from using Unix commands and allows you to run with windows prompt.
‘Use Github and optional UNIX tools from the windows command prompt’ enables usage of Github from Windows prompt also aided with few UNIX commands
Step 4: Configuring the line ending conversions
In this step, we specify how GitHub should treat line feed because deducing new lines varies with different operating system.
Windows and MacOS utilizes rn whereas Linux uses just n. They are represented in general as CRLF(Carriage Return Line Feed) and LF(Line Feed) respectively.
For now, we will move with the first option.

Step 5: Configure the terminal emulator to use with Git Bash.
we have two options :
– Use MinTTY
– Use default cmd.exe of Windows OS.
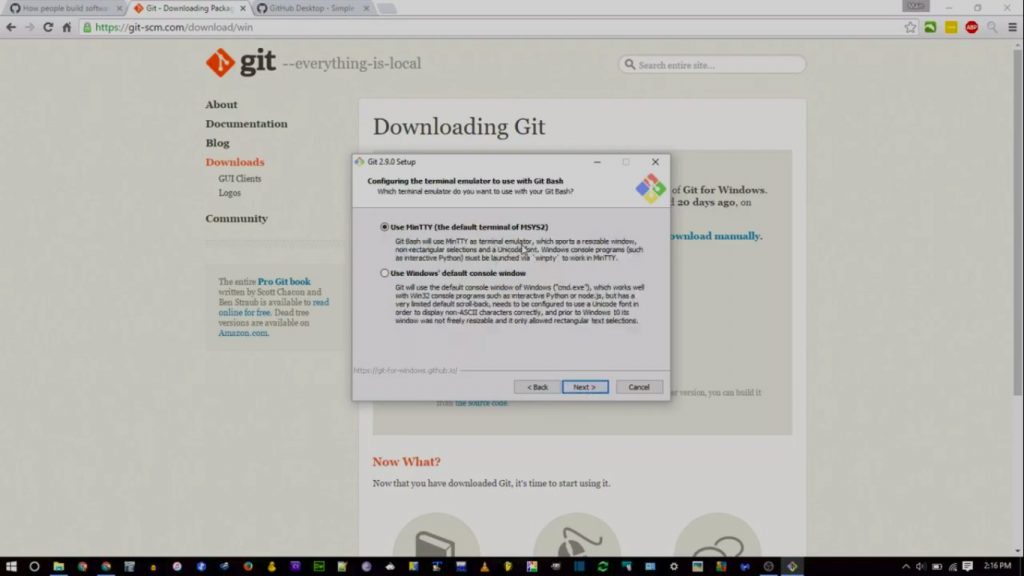
If you are comfortable with the Linux command line, the former option is recommended, otherwise opt for the second. As the wizard explains, the console window has few limitations such as fixed windows width, the scroll-back is limited and displays only up till certain range for navigating through command history and explicit configuration is required to use Non-ASCII Character, whereas MinTTY doesn’t hold any such restraints.
Step 6: Configuring extra options.
This step includes two options :
– File system caching
– Git credential manager
Step 6.1)
File System Caching: Enabling caching will improve application performance
Step 6.2)
Git credential manager: The function of GCM is to store credentials in the Windows Credentials Manager to avoid repeated authorizations and validations
As the installation gets completed, click Finish to exit the setup.
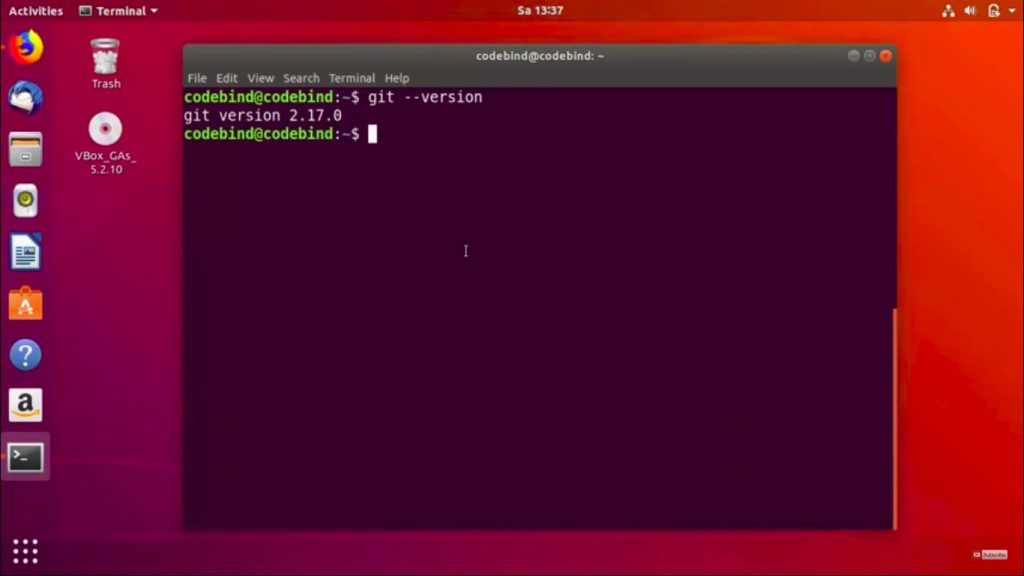
After being set up, we need to test it to make sure the software has been installed and can run Github well. To check, open the console and run the command git –version, which should return the git version running as shown below :
Note: git –-help provides help/manual information about Git.
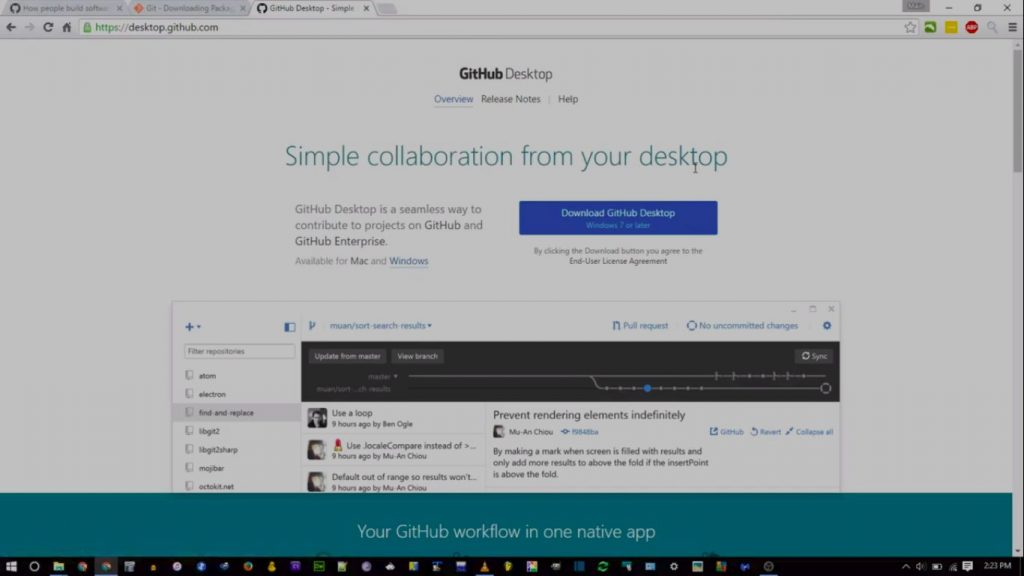
Setting up GUI based GitHub for Windows (GIT desktop)
GitHub Desktop is a Graphical desktop application which enables adding files and other related git operations.
This GUI aided application can be downloaded in https://desktop.github.com/
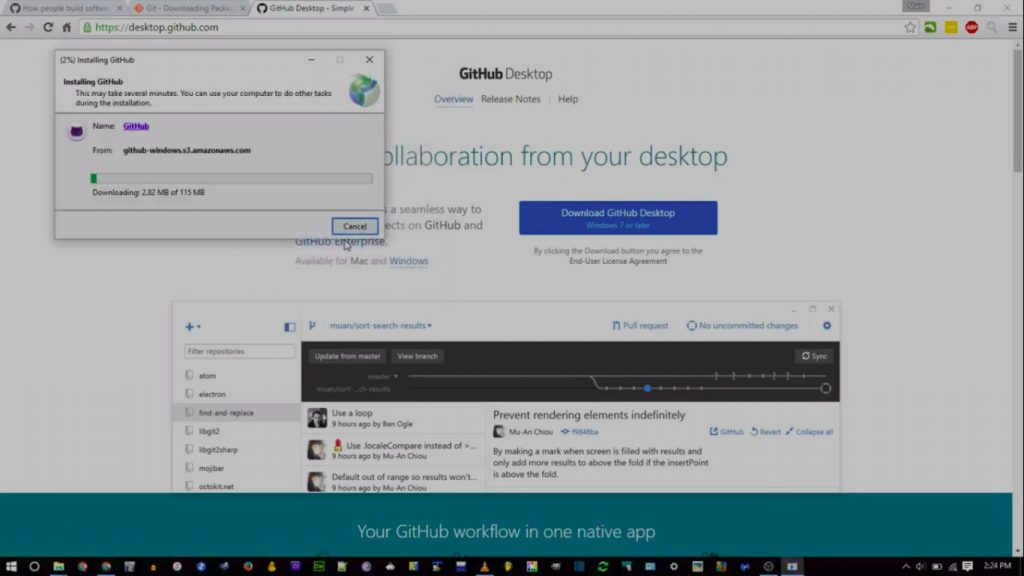
You can use the GitHub Desktop client locally without connecting to a remote repository.
With the GitHub Desktop app, it is extremely simple to initialize a repository, stage files, and issue commit
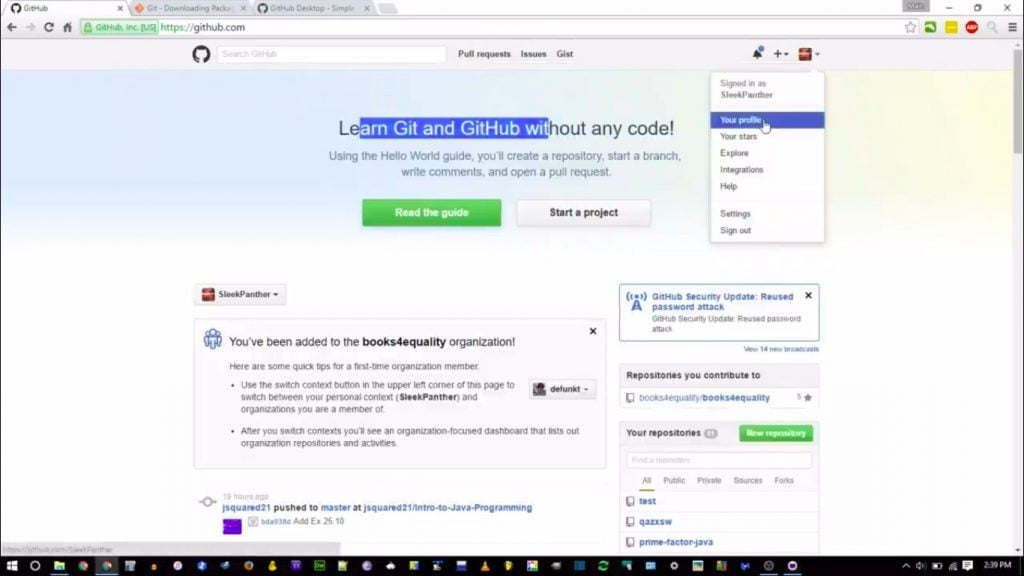
Step 1: Login
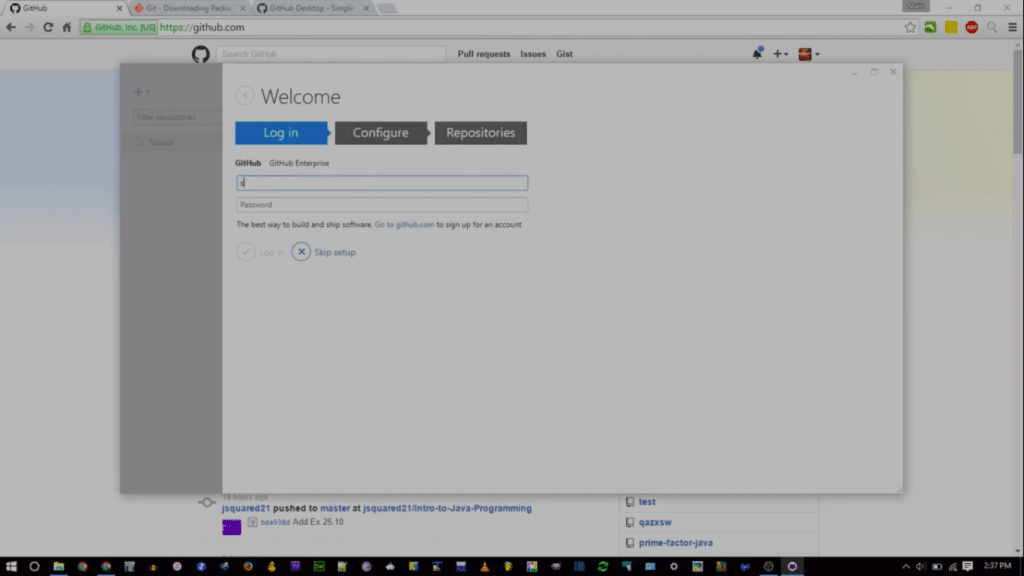
Feed the GitHub credentials
If you do not have a GitHub account, you can signup for one at http://github.com
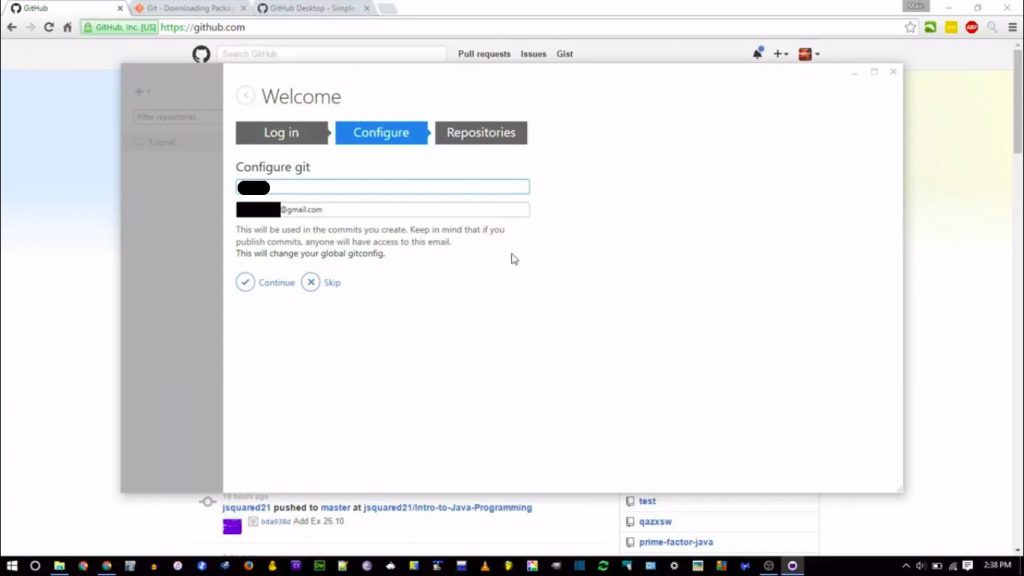
Step 2: Configure
You will be prompted to enter the Full name and the mail id.
The commits proceeded with the current account will be associated with the name and mail id given.
Step 3: Repositories

Navigate to github.com and create a new repository as shown below :
Specify the name and visibility of repository
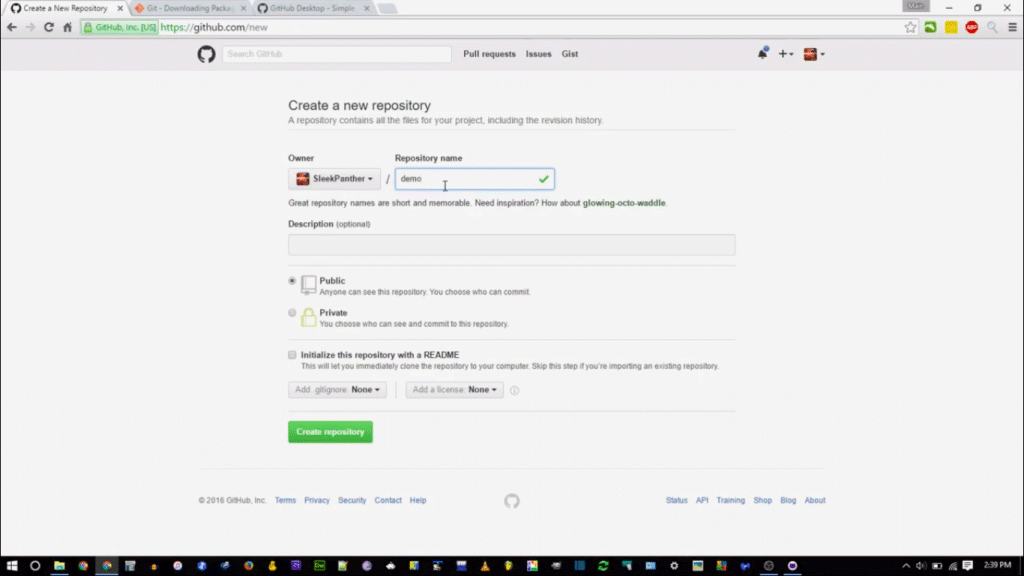
once the repository is created, click on ‘Set up in Desktop’ which will launch the application.
Required directory/folder is selected where the repository is ought to be stored.
How to Install Github for Linux?
The following command will aid how to download and install Github for Linux:
sudo apt-get install git
The above command is for Ubuntu and works for Ubuntu 16.04 to Ubuntu 18.04 LTS. Unlike windows, GitHub does not specifically support GUI based desktop client for Linux, but you can opt for a few third party proprietary tools GitKraken or GitBlade or Cycligent Git Tool. Also, there is an active fork of the repository which provides pre-built Linux binaries, which can be downloaded from
https://github.com/shiftkey/desktop
Here we will walk-through command-line Git configuration
Configuring GitHub
After you install Github, use the following two commands by replacing “user_name” with your GitHub username and replacing “email_id” with your email-id you used to create your GitHub account.
git config –global user.name “user_name”
git config –global user.email “email_id”
If you do not have a GitHub, you can signup for one at http://github.com
Creating a Local Repository
Create a folder on your system. This will act as a local repository which will later hit the GitHub website. For doing so, the following command is used :
git init testGit
Upon successful creation of repository following will be displayed:
Initialized empty Git repository in /home/codebind/testGit/.git/
This line may vary depending on your system. So here, testGit is the folder that is created and “init” makes the folder a GitHub repository. Change the directory to this newly created folder:
cd testGit
configured account credentials of the git can be found in a .gitconfig file.
once the account is set up, you can create the workspace directory and get on with the git operations.
codebind@codebind:-$mkdir gitWorkspace
codebind@codebind:-$cd gitWorkspace/
codebind@codebind:-/gitWorkspace$
How to Install Github on MacOS
The easiest way to Install Github on MacOS among several ways is probably via Xcode Command Line Tools. You can feed the following command :
$ git –version
If Git is not installed, it will prompt you to install it.
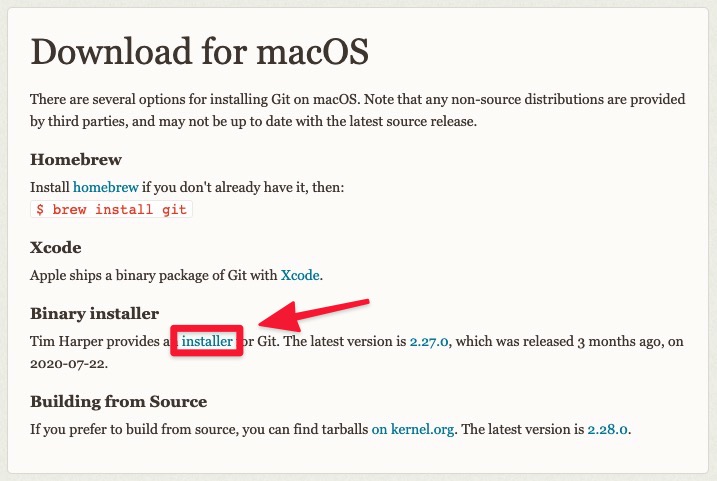
If you want a more up to date version, you can also install it using a binary installer. A macOS Git installer is provided at the Git website, at https://git-scm.com/download/mac.
Git tool for mac also provisions command line environment. You can download from the GitHub for Mac website, at http://mac.github.com
Recommended Articles
This has been a guide on How to Install Github?. Here we have discussed the basic instructions and different steps to install Github on Linux and macOS. You may also look at the following article to learn more –
- Jira vs Github
- JIRA Interview Questions
- What is Hub?