Table of Contents
- Introduction
- Prerequisites
- System Requirements
- Downloading Intel HAXM
- Installing Standalone Intel HAXM on Windows
- Installing HAXM silently on Windows
- Installing Intel HAXM on Windows via Android Studio
- Removing Intel HAXM
- Using Intel HAXM
- Troubleshooting
- Tips and Tricks
Introduction
This document will guide you through installing the Intel Hardware Accelerated Execution Manager (Intel HAXM), a hardware-assisted virtualization engine (hypervisor) that uses Intel Virtualization Technology (Intel VT) to speed up Android development.
Prerequisites
Intel HAXM requires the Android SDK to be installed (version 17 or higher). For more information, refer to the Android developer website (https://developer.android.com/studio/index.html).
System Requirements
Hardware Requirements:
- Intel processor with support for Intel VT-x, Intel EM64T (Intel 64), and Execute Disable (XD) Bit functionality
- At least 4 GB of available RAM, 8 GB recommended
Supported Operating Systems:
- Microsoft Windows 10 64-bit
- Microsoft Windows 8 and 8.1 64-bit
- Microsoft Windows 7 64-bit*
Important: Intel HAXM cannot be used on systems without an Intel processor, or with an Intel processor that lacks the hardware features described in the «Hardware Requirements» section above.
To determine the capabilities of your Intel processor, visit http://ark.intel.com.
Additionally, Intel HAXM can be used only with Android x86 and x86_64 emulator images provided by Intel.
Intel HAXM cannot be used with ARM Android emulator images or non-Intel x86 or x86_64 Android emulator images.
[*] For Windows 7 Service Pack 1, Microsoft security update KB3033929 is required when upgrading HAXM to the latest version (see Known Issues for details). Otherwise, keep using HAXM v7.3.2 instead.
Downloading Intel HAXM
Overview
Intel HAXM can be installed either through the Android SDK Manager (recommended), or manually, by downloading the installer from Intel’s website.
Note:
Intel HAXM does not currently check for updates automatically. To get the latest version, download the Intel HAXM package using the Android SDK Manager (recommended) or from the Intel Developer Zone Android developer site.
Downloading Manually
- Go to https://github.com/intel/haxm/releases.
- Choose the Intel HAXM installer package for your platform.
- Extract the installer and follow installation instructions for your platform.
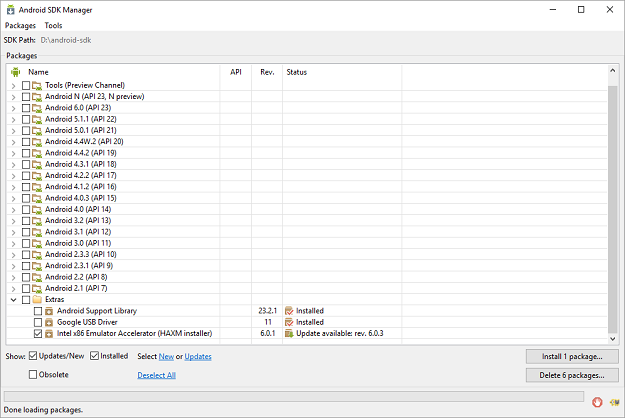
Downloading through Android SDK Manager
- Start the Android SDK Manager.
- Under Extras, check the box next to «Intel x86 Emulator Accelerator (HAXM).»

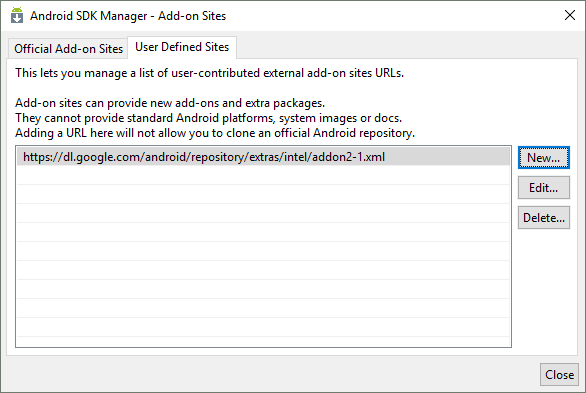
If there is no such option, manually add https://dl.google.com/android/repository/extras/intel/addon2-1.xml to the SDK Manager’s list of add-on sites via Tools > Manage Add-on Sites… > User Defined Sites > New… - Click the «Install package…» button.
- Review the Intel Corporation license agreement. If you accept the terms, select Accept and click Install.
- The SDK Manager will download the installer to the «extras» directory, under the main SDK directory. Even though the SDK manager says «Installed» it actually means that the Intel HAXM executable was downloaded. You will still need to run the installer from the «extras» directory to get it installed.
- Run the installer inside the <sdk install location>/extras/intel/Hardware_Accelerated_Execution_Manager/ directory and follow the installation instructions for your platform.
Installing Standalone Intel HAXM on Windows
Warning: Intel HAXM installation will fail if your system does not meet the system requirements, including support for Intel processor features, such as Intel Virtualization Technology (Intel VT).
- Download the installer package from https://github.com/intel/haxm/releases or using the SDK manager.
- Run the installer (and accept the UAC prompt, if applicable).
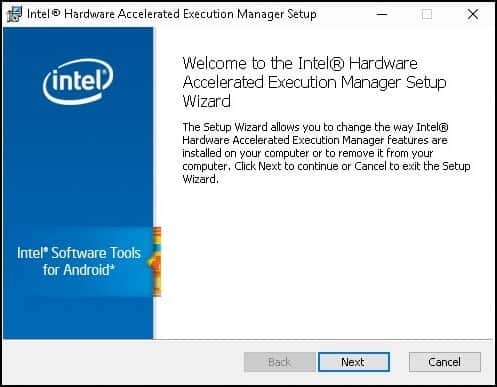
If an older version Intel HAXM is already installed, you will see a notification dialog: Click «Yes» to upgrade Intel HAXM, or click «No» to exit the installation and keep the currently installed version of Intel HAXM. - You will see a setup wizard screen:
Click «Install»
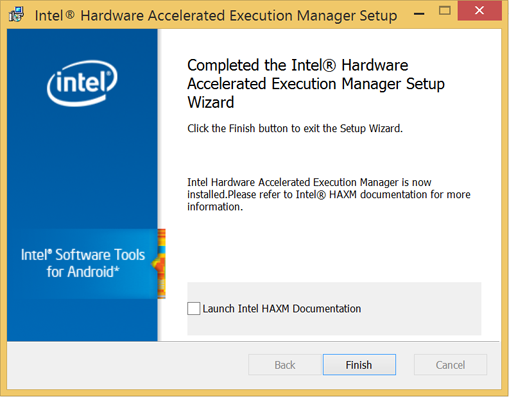
Note: You can access the documentation by clicking Intel HAXM Documentation - When the Intel HAXM installation is finished, you will see the completion screen:
Click «Finish» to exit the installer. Intel HAXM is now installed and ready to use.
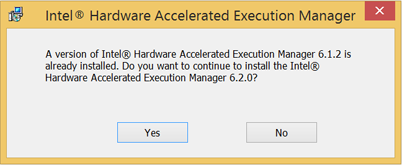 Click «Yes» to upgrade Intel HAXM, or click «No» to exit the installation and keep the currently installed version of Intel HAXM.
 Click «Finish» to exit the installer. Intel HAXM is now installed and ready to use.
To verify that Intel HAXM is running, open a Command Prompt window with administrator privileges (Run as Administrator) and execute the following command:
sc query intelhaxm
If Intel HAXM is working, the command will show a status message indicating that the state is: «4 RUNNING».
To stop or start Intel HAXM, use these commands:
Stop:
sc stop intelhaxm
Start:
sc start intelhaxm
Installing HAXM silently on Windows
- Download the installer package from https://github.com/intel/haxm/releases and extract it locally.
- Enter the extracted folder and run below command in an elevated Command Prompt or Windows PowerShell.
> silent_install.bat
The installer will check the system environment first. If the installation is successful, it will output as below.
Intel HAXM installed successfully!
The installer executable itself also supports to run in silent mode by passing /S on the Command Prompt or Windows PowerShell, e.g.,
> haxm-7.7.0-setup.exe /S
Please note that the parameter /S must be in uppercase.
Installing Intel HAXM on Windows via Android Studio
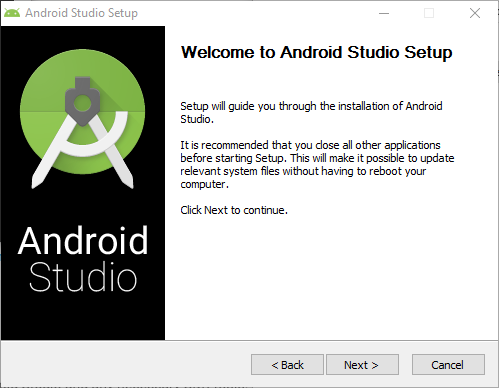
- Download the Android Studio installer package from http://developer.android.com/sdk/index.html
- Run the Android Studio installer
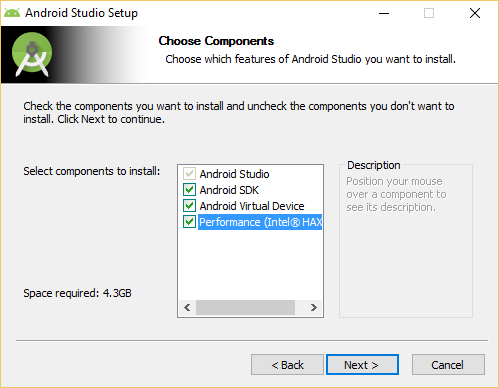
- Select Performance (Intel HAXM) and click Next
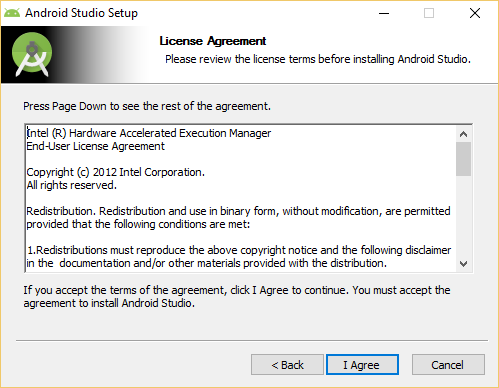
- Accept the Android SDK License Agreement and the Intel HAXM License Agreement
- Select the install location for Android Studio and Android SDK (if you do not have it already on your system).
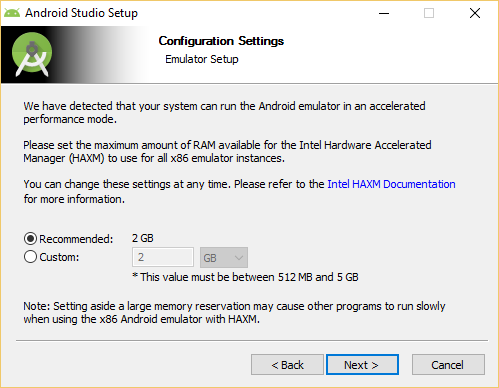
- Configure the amount of RAM available for Intel HAXM
Note: This setting is obsolete since Intel HAXM 6.2.0. - Click Next and then Install. Wait until the installation has finished. Intel HAXM is now installed and ready to use.
To verify that Intel HAXM is running, open a Command Prompt window with administrator privileges (Run as Administrator) and execute the following command:
sc query intelhaxm
If Intel HAXM is working, the command will show a status message indicating that the state is: «4 RUNNING».
To stop or start Intel HAXM, use these commands:
Stop:
sc stop intelhaxm
Start:
sc start intelhaxm
Removing Intel HAXM
Warning: Close all instances of the Android x86 emulator before removing Intel HAXM. Intel HAXM cannot be removed while in use.
To uninstall Intel HAXM, use Uninstall a program in the Control Panel or uninstall in silent mode as below.
- Launch an elevated Command Prompt or Windows PowerShell.
- Enter the extracted folder of installer package, which is previously downloaded from https://github.com/intel/haxm/releases, and run below command.
> silent_install.bat -u
Important: Removing Intel HAXM will disable acceleration of all Intel x86 Android emulators. Existing x86 Android Virtual Devices will not boot.
Installing Intel HAXM again will re-enable Android emulator acceleration.
Using Intel HAXM
Intel HAXM requires an Android x86 system image provided by Intel. These images can be downloaded through the Android SDK manager or manually from the Intel Developer Zone website.
Intel x86 Android emulator images will automatically be executed using the «emulator-x86» binary, provided with the Android SDK. If Intel HAXM is installed and working, emulation will be accelerated by Intel HAXM (using Intel Virtualization Technology).
Troubleshooting
Execute Disable Bit capability error
When installing Intel HAXM, you may encounter an error regarding Execute Disable Bit support.
This error message can be triggered by the following conditions:
- Execute Disable Bit is not supported by your computer’s processor.
- Execute Disable Bit is not enabled.
Execute Disable Bit is not supported
Intel HAXM requires an Intel processor with Execute Disable Bit functionality and cannot be used on systems lacking this hardware feature. To determine the capabilities of your Intel processor, visit http://ark.intel.com.
Execute Disable Bit is not enabled
In some cases, Execute Disable Bit may be disabled in the system BIOS and must be enabled within the BIOS setup utility. To access the BIOS setup utility, a setup key must be pressed during the computer’s boot sequence. This key is dependent on which BIOS is used but it is typically the F2, Delete, or Esc key. Within the BIOS setup utility, Execute Disable Bit may be identified by the terms «XD», «Execute Disable», «No Execute», or «Hardware DEP», depending on the BIOS used.
Windows hosts may need to enable DEP (Data Execution Prevention) in addition to Execute Disable Bit, as described in this Microsoft KB article: http://support.microsoft.com/kb/875352.
For specific information on entering BIOS setup and enabling Execute Disable Bit, please contact your hardware manufacturer.
Intel Virtualization Technology (Intel VT-x) capability
When installing Intel HAXM, you may encounter an error regarding Intel VT-x support.
This error message can be triggered by the following conditions:
- Intel VT-x is not supported by your computer’s processor
- Intel VT-x is not enabled
Intel VT-x is not supported
Intel HAXM requires an Intel processor with Intel VT-x functionality and cannot be used on systems lacking this hardware feature. To determine the capabilities of your Intel processor, visit? http://ark.intel.com.
Intel VT-x not enabled
In some cases, Intel VT-x may be disabled in the system BIOS and must be enabled within the BIOS setup utility. To access the BIOS setup utility, a key must be pressed during the computer’s boot sequence. This key is dependent on which BIOS is used but it is typically the F2, Delete, or Esc key. Within the BIOS setup utility, Intel VT may be identified by the terms «VT», «Virtualization Technology», or «VT-d.» Make sure to enable all of the Virtualization features.
For specific information on entering BIOS setup and enabling Intel VT, please contact your hardware manufacturer.
Tips and Tricks
Below are some recommendations to get the best experience out of the Android emulator using the Intel HAXM driver.
- Enable the GPU acceleration in the AVD Manager for your image. The Intel HAXM driver executes most CPU instructions natively through Intel Virtualization Technology in the processor and the GPU acceleration offloads the OpenGL calls to the host GPU.
- Make sure the «ANDROID_SDK_ROOT» environment variable is set either in Control Panel > System > Advanced System Settings > Environment Variables or manually each time a new command prompt is launched. The <sdk install location> below typically refers to «c:Users<your username>AppDataLocalAndroidsdk»
- set ANDROID_SDK_ROOT=<sdk install location>
- Launch the emulator from the command line to get more verbose output. Use the following command:
- %ANDROID_SDK_ROOT%toolsemulator –avd <avd_name> -verbose –show-kernel
- It is recommended to disable Hyper-V on Windows 8, 8.1 and 10. As Sandbox,Windows Hypervisor Platform(WHPX) and Windows Subsystem for Linux 2 (WSL2) conflict with HAXM, please disable them on Windows 10 build 1903 or higher version.The best way to disable Hyper-V is as below,
- Open an elevated (i.e. Run as administrator) Command Prompt.
- $bcdedit /set hypervisorlaunchtype off
- Reboot your machine
- Avast Antivirus may interfere with HAXM and cause Android Emulator or QEMU to run very slowly. A workaround is to uncheck «Use nested virtualization where available» in Avast Settings > Troubleshooting.
- More command line options for booting the emulator can be found at Android developer website.
Android Studio told me to install HAXM, so I downloaded it and when I went to install, it said This computer does not support Intel Virtualization Technology. After some search, I found that if you uncheck Hyper-V in control panel, all will be well. The problem I’m facing is, it isn’t even checked. Is there any other way to fix this issue or does my computer just really not support VT-X?
- android
- android-studio
- intel
- hyper-v
- haxm
![]()
asked Sep 14, 2015 at 13:38
![]()
Connor VanceConnor Vance
1732 gold badges2 silver badges6 bronze badges
2
-
only Intel CPU support HAXM. I have AMD CPU and I faced same problem. You might try to use Android ARM instead HAXM.
Sep 14, 2015 at 14:08
3 Answers
answered Oct 2, 2015 at 4:22
![]()
answered Jul 8, 2017 at 22:10
![]()
HydTechieHydTechie
76710 silver badges17 bronze badges
0
answered Mar 26, 2021 at 13:27
![]()
Вопрос:
При установке пакета IntelHaxm-Android я получаю следующую ошибку, несмотря на то, что Hyper-V отключен: 
Из изображения видно, что гипер-v отключен. Процессором является Intel i7-6700, который определенно поддерживает VT-x, а виртуализация включена в BIOS.
Любые идеи о том, как решить эту проблему?
Ответ №1
У меня была аналогичная проблема, которая была решена этим ответом с форума
это то, что я сделал для установки haxm 1.1.4 на win 8.1 Pro 64-bit. вы можете протестировать его с помощью или без админ-привилегий, я сделал это с ними: – | (это означает запуск cmd и любого другого exe в режиме администратора)
I. Preparing——————————————————— (Дополнительно: проверьте или измените настройки BIOS для Intel VT, отключите гипер-v,… как указано в других ответах.)
- загрузить и извлечь файл в папку
- cmd → sfc/SCANNOW
- перезагружать
- cmd → Bcdedit -set TESTSIGNING ON
- перезагружать
II. Installation—————————————————– 1. запустите install-android.exe в папке извлеченного файла и установите 1.1, если вы не получили сообщение об ошибке, предыдущие шаги обработали ошибку – продолжайте до III. 1.2, если вы получили сообщение об ошибке НЕ нажмите кнопку “ОК” при возникновении ошибки 3. перейдите в папку C:Program FilesIntelHAXM и скопируйте все файлы, кроме *.tmp, в новую папку 4. затем продолжите/завершите настройку (щелкните OK и закончить) 5. Скопируйте файлы из новой папки в C:Program FilesIntelHAXM и удалите *.tmp 6. перейдите в папку C:Program FilesIntelHAXM, щелкните правой кнопкой мыши на inf файле и выберите установку окна с установкой драйвера. установить драйвер. он должен сказать ОК, тогда..
Подсказка: вот что изменило для меня! Запуск “HaxInst64.exe/i intelhaxm.inf 1”, а также с параметром 4 в консоли не всплывал окно установки драйвера
III. Test———————————————————— 1. cmd → sc query intelhaxm, он должен показать службу 2. reboot 3. cmd → sc query intelhaxm, он должен сказать, что работает служба.
Внутривенно Reset———————————————————— 1. cmd → Bcdedit -set TESTSIGNING OFF 2. перезагрузка
Ответ №2
Hyper-V предотвращает запуск HAXM на вашем компьютере. У вас есть два варианта:
Содержание
- Удалить Hyper-V
- (если вы вообще не используете Hyper-V)
- Создайте альтернативную конфигурацию Windows 10 с отключенным Hyper-V
- (если вам нужно использовать Hyper-V для других целей)
Удалить Hyper-V
(если вы вообще не используете Hyper-V)
-
Откройте окно PowerShell в качестве администратора и выполните команду:
Disable-WindowsOptionalFeature -Online -FeatureName Microsoft-Hyper-V -
Перезагрузите компьютер и вуаля – вы можете использовать HAXM или VirtualBox.
Создайте альтернативную конфигурацию Windows 10 с отключенным Hyper-V
(если вам нужно использовать Hyper-V для других целей)
- Откройте командную строку в качестве администратора.
-
Клонировать существующую конфигурацию (с установленной и включенной Hyper-V) и дать ей осмысленное описание:
BCDEDIT /copy {current} /d "Hyper-V enabled" -
Отключить Hyper-V в текущей конфигурации:
BCDEDIT /set {current} hypervisorlaunchtype off -
Переименовать текущую конфигурацию:
BCDEDIT /set {current} description "Hyper-V disabled" - Перезапустите компьютер и выберите конфигурацию с отключенным Hyper-V для запуска HAXM.
HAXM Installation Failed is a very common error that occurs when installing Android Studio. This guide explains what is Intel HAXM and how to install Intel HAXM. We will also look at various issues that may result in HAXM installation failed error and how to solve them.
Table of Contents
- What is Intel HAXM
- Why HAXM Installation Fails
- Android emulator is already running
- The processor is not Intel-based
- OS Not supported
- Disable the Hyper-V Manager
- Hyper-V might not be disabled
- Virtualization is disabled in Bios
- PC Does not support Virtualisation
- Antivirus interferes with HAXM Installation
- How to Install HAXM
- Installing from Android SDK Manager
- Direct Download & Install
- Check if Intel HAXM Can be installed
- Check if HAXM is installed
- Reference
- Summary
What is Intel HAXM
The HAXM stands for Hardware Accelerated Execution Manager. It is a cross-platform hardware-assisted virtualization engine (hypervisor), The Android Emulator use HAXM in intel platforms to speedup & improve performance
Why HAXM Installation Fails
The Android Studio Installs Intel HAXM when you install Android Studio. But you may get the HAXM Installation Failed message because of the following reasons
- Android emulator is already running
- The processor is not Intel-based
- Unsupported OS
- Hyper-V Manager must be disabled
- Virtualization must be enabled in Bios ( VT-x )
- The PC must support Virtualisation
- Antivirus (Avast) may interfere with HAXM Installation

Android emulator is already running
You should stop the Android emulator, if it is already running.
You can stop it from the AVD Manager. On the action, column click down-arrow on the right and click Stop. This stops the emulator.
Or you can restart the computer.
The processor is not Intel-based
Intel HAXM cannot be used on systems without an Intel processor. Even if the processor is Intel, it still needs to have the support VT-x, EM64T, and Execute Disable Bit
For AMD Based PC, you can use the Hyper-V to run the Android Emulator
OS Not supported
- Supported Windows OS is 7, 8, 8.1 & 10.
- Supported macOS is 10.12, 10.13 & 10.14
- Only 64 bit OS is supported.
Disable the Hyper-V Manager
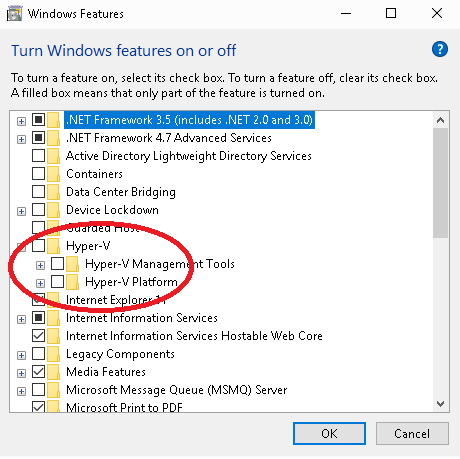
Hyper-V is another Virtualisation technique just like Intel HAXM. You cannot use both at the same time. Hence, It is necessary to Disable Hyper-V. You can follow these steps to disable Hyper-V
- Go to Control Panel -> Programs and Features -> Turn Windows features on or off
- From the window disable Hyper-V options
- Reboot your machine
Hyper-V might not be disabled
If you have windows 10 features such as Device Guard and Credential Guard is enabled, it can prevent Hyper-V from being completely disabled.
The Device Guard and Credential Guard hardware readiness tool released by Microsoft can disable the said Windows 10 features along with Hyper-V:
- Download the latest version of the Device Guard and Credential Guard hardware readiness tool.
- Unzip
- Open the Command Prompt using Run as administrator
- Run the following command
@powershell -ExecutionPolicy RemoteSigned -Command "X:pathtodgreadiness_v3.6DG_Readiness_Tool_v3.6.ps1 -Disable"- Reboot.
Virtualization is disabled in Bios
If virtualization is disabled in the BIOS, you need to enable it.
Turn off the PC and then turn it On. Press either F2, DEL, F10 ( The key may differ in your PC) key to enter the BIOS at the startup. You will likely to see a message at the startup regarding the key to press to enter the BIOS
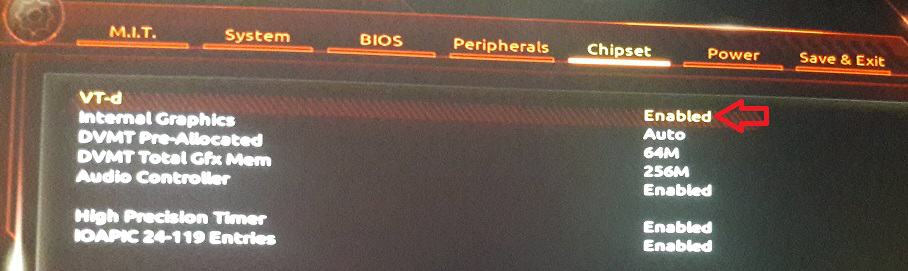
You may see the Virtualisation under any of the following menus.
- Chipset
- Northbridge
- Advanced Chipset Control
- Advanced CPU Configuration
The feature may go by the name
- VT-x
- VT-d (as in the above image)
- Intel Virtualization Technology
- Intel VT
- Virtualization Extensions
- Vanderpool
PC Does not support Virtualisation
Your CPU may not support Virtualisation. You can refer to Does My Processor Support Intel® Virtualization Technology? article to check if your PC Supports Virtualisation
Antivirus interferes with HAXM Installation
The Avast Antivirus interferes with the HAXM installation. It may also slow down the Android Emulator. The workaround is goto Avast Settings > Troubleshooting and uncheck “Use nested virtualization where available” option
How to Install HAXM
There are two ways in which you can install Intel HAXM.
- Using the Android SDK Manager
- Direct Download & Install
Installing from Android SDK Manager
Go to Android SDK Manager (Tools -> SDK Manager) and select SDK Tools. You will find the Intel x86 Emulator Accelerator HAXM installer listed here. Select it and click on OK.
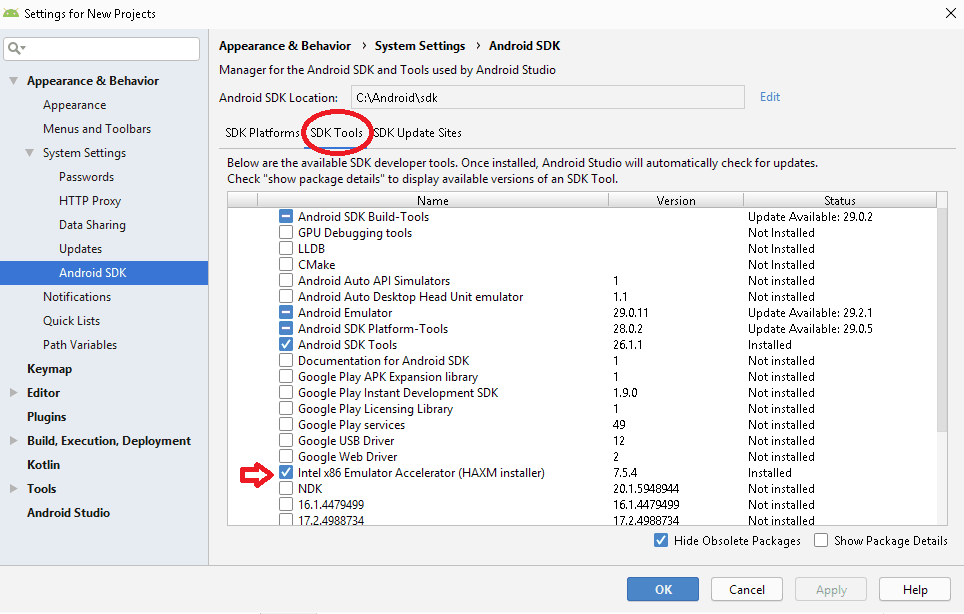
The clicking OK button does not install the HAXM Always. But it will copy the downloaded files to the under the SDK Location/sdk/extras/intel/Hardware_Accelerated_Execution_Manager/
You can then click on the intelhaxm-android.exe to install as shown below
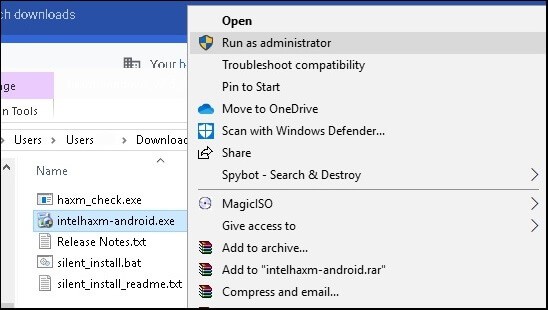
Direct Download & Install
You can directly download the Installer from the link HAXM Releases
Once you unzip the file, you will find the intelhaxm-android.exe
Welcome to the Intel HAXM setup wizard
Click on Next to complete the installation.
Check if Intel HAXM Can be installed
Use the haxm_check.exe to check if VT is supported in your PC

Check if HAXM is installed
Finally, you need to check if HAXM is installed and running. You can do it from the command prompt by using the command

Reference
- HAXM
- Direct Download Link of HAXM
- Does My Processor Support Intel® Virtualization Technology?
- Device Guard and Credential Guard hardware readiness tool
- Android Emulator – AMD Processor & Hyper-V Support
- What is HyperVisor
- EM64T
- Execute Disable Bit
- VT-x
Summary
Installing Intel HAXM is a must if you want to run Android Emulator in Windows PC. Without which the Android Emulator will run very slowly. It is installed, when Android Studio is installed, but you get the HAXM Installation Failed error message. The most common error is due to the fact that Virtualisation is not enabled on your PC. Or because HyperVisor is running or the processor is not intel based. We learned how to solve all these issues in this guide
Примечание. При прямой загрузке некоторых файлов, которые зависят от SDK и HAXM, от среды Android в Android Studio, может показаться, что файл haxm был загружен, но не установлен, что приводит к неудачному запуску симулятора avd!
Как показано ниже:
$./emulator64-x86 -avd 32_QVGA_ADP2_API_25
sh: 1: glxinfo: not found
failed to create drawable
getGLES2ExtensionString: Could not create GLES 2.x Pbuffer!
Failed to obtain GLES 2.x extensions string!
Could not initialize emulated framebuffer
emulator: ERROR: Could not initialize OpenglES emulation, use '-gpu off' to disable it.Preface:
1.Intel HAXM (Hardware Accelerated Execution Manager), то есть менеджер аппаратного ускорения исполнения Intel (IntelHAXM) Это аппаратный виртуальный механизм (гипервизор), использующий аппаратное ускорение на основе технологии виртуализации Intel (VT), поэтому ЦП должен поддерживать VT и ограничен ЦП Intel.
2HAXM, используемый вместе с образом эмулятора Intel Android x86 и официальным диспетчером Android SDK, позволяет ускорить моделирование приложений Android в системах, поддерживающих технологию виртуализации Intel.
Процесс установки выглядит следующим образом:
11. Откройте File Settings android SDK SDK Tools в Android Studio, загрузите HAXM (хотя он показывает Установлено), как показано ниже:

23. Затем откройте проводник, введите каталог Android_SDK extras intel Hardware_Accelerated_Execution_Manager, найдите и запустите intelhaxm-android.exe, чтобы установить его, следуйте инструкциям на экране и устанавливайте его шаг за шагом (достаточно установить параметр 1024M, необходимо изменить параметр Может быть переустановлен один раз). Как показано ниже:
нота: «Android_SDK» на картинке назван мной сам, поэтому вы должны войти в подкаталог после дополнений и т. Д. В соответствии с корневым каталогом SDK, который вы первоначально установили.
Общий путь установки по умолчанию: C: Users Администратор AppData Local Android sdk

После успешной установки, как показано на рисунке:

Skip to content
Recently, I have been experimenting with fast virtualization open-source software called Qemu. Before long I discovered that Qemu performs better if we use a hypervisor so that the virtual machines have direct access to the hardware. If you are using Qemu on a Windows host then you can use Intel’s HAXM hypervisor which is acronym for Intel Hardware Accelerated Execution Manager. You can install HAXM in Windows and then you can use it in Qemu and other virtualization software like Android Studio.
Unfortunately, when I tried to install HAXM on my Windows 10 PC, it failed with an error – “The computer does not support Intel Virtualization Technology (VT-x) or it is being exclusively used by Hyper-V. HAXM cannot be installed”. It mentions to disable Hyper-V from Windows Features.

If you have also come across the same error then you can proceed using the following steps:
- Open an elevated command prompt (Win+X then select Command Prompt (Admin)) and enter the following commands:
dism.exe /online /Disable-Feature:Microsoft-Hyper-V
bcdedit /set hypervisorlaunchtype off

- Download Device Guard and Credentials Guard readiness tool from https://www.microsoft.com/en-us/download/details.aspx?id=53337. Extract its contents to a folder, e.g., D:dgreadiness_v3.6.
- In the elevated command prompt, enter this command:
@powershell -ExecutionPolicy RemoteSigned -Command "D:dgreadiness_v3.6DG_Readiness_Tool_v3.6.ps1 -Disable"

- Restart your Widows PC. At boot when asked, disable Device Guard and Credentials Guard by pressing Windows key.
- When Windows has started, you should check whether your PC is ready for installing HAXM. This is done by downloading the latest version of HAXM from https://github.com/intel/haxm/releases/latest extracting it to a folder and launching haxm_check.exe. It should show YES for both VT and NX support.

- Now you can finish installing HAXM on your Windows 10 PC by running intelhaxm-android.exe. After this, you should be ready to use HAXM hypervisor in Qemu without any problems.


HAXM is available for those Intel processors only that come with VT-x technology built inside. It is a great alternative for KVM which is used under Linux.
We use cookies on our website to give you the most relevant experience by remembering your preferences and repeat visits. By clicking “Accept”, you consent to the use of ALL the cookies.
| title | description | zone_pivot_groups | ms.prod | ms.assetid | ms.technology | author | ms.author | ms.date |
|---|---|---|---|---|---|---|---|---|
|
Android Emulator Troubleshooting |
This article explains how to diagnose and work around problems that may occur when using the Android Emulator. |
platform |
xamarin |
4F053CC9-9378-47CB-8002-978A6558C4D0 |
xamarin-android |
davidortinau |
daortin |
08/27/2018 |
Android emulator troubleshooting
This article describes the most common warning messages and issues
that occur while configuring and running the Android Emulator. In
addition, it describes solutions for resolving these errors as well as
various troubleshooting tips to help you diagnose emulator problems.
::: zone pivot=»windows»
Deployment issues on Windows
Some error messages may be displayed by the emulator when you deploy
your app. The most common errors and solutions are explained here.
Deployment errors
If you see an error about a failure to install the APK on the emulator
or a failure to run the Android Debug Bridge (adb), verify that the
Android SDK can connect to your emulator. To verify emulator
connectivity, use the following steps:
-
Launch the emulator from the Android Device Manager (select
your virtual device and click Start). -
Open a command prompt and go to the folder where adb is
installed. If the Android SDK is installed at its default location,
adb is located at
C:Program Files (x86)Androidandroid-sdkplatform-toolsadb.exe;
if not, modify this path for the location of the Android SDK on your
computer. -
Type the following command:
-
If the emulator is accessible from the Android SDK, the emulator
should appear in the list of attached devices. For example:List of devices attached emulator-5554 device
-
If the emulator does not appear in this list, start the Android
SDK Manager, apply all updates, then try launching the
emulator again.
MMIO access error
If the message An MMIO access error has occurred is displayed,
restart the emulator.
Missing Google Play Services
If the virtual device you are running in the emulator does not have
Google Play Services or Google Play Store installed, this condition is
often caused by creating a virtual device without including these
packages. When you create a virtual device (see
Managing Virtual Devices with the Android Device Manager),
be sure to select one or both of the following options:
- Google APIs – includes Google Play Services in the virtual device.
- Google Play Store – includes Google Play Store in the virtual device.
For example, this virtual device will include Google Play Services and Google Play Store:

[!NOTE]
Google Play Store images are available only for some base device types such
as Pixel, Pixel 2, Nexus 5, and Nexus 5X.
Performance issues
Performance issues are typically caused by one of the following problems:
-
The emulator is running without hardware acceleration.
-
The virtual device running in the emulator is not using an x86-based system image.
The following sections cover these scenarios in more detail.
Hardware acceleration is not enabled
If hardware acceleration is not enabled, starting a virtual device from
the Device Manager will produce a dialog with an error message
indicating that the Windows Hypervisor Platform (WHPX) is not
configured properly:

If this error message is displayed, see
Hardware acceleration issues below for steps you
can take to verify and enable hardware acceleration.
Acceleration is enabled but the emulator runs too slowly
A common cause for this problem is not using an x86-based image in your
virtual device (AVD). When you create a virtual device (see
Managing Virtual Devices with the Android Device Manager),
be sure to select an x86-based system image:

Hardware acceleration issues
Whether you are using Hyper-V or HAXM for hardware acceleration, you
may run into configuration problems or conflicts with other software on
your computer. You can verify that hardware acceleration is enabled
(and which acceleration method the emulator is using) by opening a
command prompt and entering the following command:
"C:Program Files (x86)Androidandroid-sdkemulatoremulator-check.exe" accel
This command assumes that the Android SDK is installed at the default
location of C:Program Files (x86)Androidandroid-sdk; if not,
modify the above path for the location of the Android SDK on your
computer.
Hardware acceleration not available
If Hyper-V is available, a message like the following example will be
returned from the emulator-check.exe accel command:
HAXM is not installed, but Windows Hypervisor Platform is available.
If HAXM is available, a message like the following example will be
returned:
HAXM version 6.2.1 (4) is installed and usable.
If hardware acceleration is not available, a message like the following
example will be displayed (the emulator looks for HAXM if it is unable
to find Hyper-V):
HAXM is not installed on this machine
If hardware acceleration is not available, see
Accelerating with Hyper-V
to learn how to enable hardware acceleration on your computer.
Incorrect BIOS settings
If the BIOS has not been configured properly to support hardware
acceleration, a message similar to the following example will be
displayed when you run the emulator-check.exe accel command:
VT feature disabled in BIOS/UEFI
To correct this problem, reboot into your computer’s BIOS and enable the
following options:
- Virtualization Technology (may have a different label depending on motherboard manufacturer).
- Hardware Enforced Data Execution Prevention.
If hardware acceleration is enabled and the BIOS is configured
properly, the emulator should run successfully with hardware acceleration.
However, problems may still result due to issues that are specific to
Hyper-V and HAXM, as explained next.
Hyper-V issues
In some cases, enabling both Hyper-V and Windows Hypervisor
Platform in the Turn Windows features on or off dialog may not
properly enable Hyper-V. To verify that Hyper-V is enabled, use the
following steps:
-
Enter powershell in the Windows search box.
-
Right-click Windows PowerShell in the search results and select
Run as administrator. -
In the PowerShell console, enter the following command:
Get-WindowsOptionalFeature -FeatureName Microsoft-Hyper-V-All -Online
If Hyper-V is not enabled, a message similar to the following example will be
displayed to indicate that the state of Hyper-V is Disabled:FeatureName : Microsoft-Hyper-V-All DisplayName : Hyper-V Description : Provides services and management tools for creating and running virtual machines and their resources. RestartRequired : Possible State : Disabled CustomProperties : -
In the PowerShell console, enter the following command:
Get-WindowsOptionalFeature -FeatureName HypervisorPlatform -Online
If the Hypervisor is not enabled, a message similar to the following example will be
displayed to indicate that the state of HypervisorPlatform is Disabled:FeatureName : HypervisorPlatform DisplayName : Windows Hypervisor Platform Description : Enables virtualization software to run on the Windows hypervisor RestartRequired : Possible State : Disabled CustomProperties :
If Hyper-V and/or HypervisorPlatform are not enabled, use the following
PowerShell commands to enable them:
Enable-WindowsOptionalFeature -Online -FeatureName Microsoft-Hyper-V -All
Enable-WindowsOptionalFeature -Online -FeatureName HypervisorPlatform -All
After these commands complete, reboot.
For more information about enabling Hyper-V (including techniques for
enabling Hyper-V using the Deployment Image Servicing and Management
tool), see
Install Hyper-V.
HAXM issues
HAXM issues are often the result of conflicts with other virtualization
technologies, incorrect settings, or an out-of-date HAXM driver.
HAXM process is not running
If HAXM is installed, you can verify that the HAXM process is running
by opening a command prompt and entering the following command:
If the HAXM process is running, you should see output similar
to the following result:
SERVICE_NAME: intelhaxm
    TYPE               : 1  KERNEL_DRIVER
    STATE              : 4  RUNNING
                            (STOPPABLE, NOT_PAUSABLE, IGNORES_SHUTDOWN)
    WIN32_EXIT_CODE    : 0  (0x0)
    SERVICE_EXIT_CODE  : 0  (0x0)
    CHECKPOINT         : 0x0
    WAIT_HINT          : 0x0
If STATE is not set to RUNNING, see
How to Use the Intel Hardware Accelerated Execution Manager to resolve the problem.
HAXM virtualization conflicts
HAXM can conflict with other technologies that use virtualization,
such as Hyper-V, Windows Device Guard, and some antivirus software:
-
Hyper-V – If you are using a version of Windows before the
Windows 10 April 2018 update (build 1803) and Hyper-V is enabled,
follow the steps in Disabling Hyper-V so that
HAXM can be enabled. -
Device Guard – Device Guard and Credential Guard can
prevent Hyper-V from being disabled on Windows machines. To disable
Device Guard and Credential Guard, see
Disabling Device Guard. -
Antivirus Software – If you are running antivirus software
that uses hardware-assisted virtualization (such as Avast), disable
or uninstall this software, reboot, and retry the Android
emulator.
Incorrect BIOS settings
If you are using HAXM on a Windows PC, HAXM will not work unless
virtualization technology (Intel VT-x) is enabled in the BIOS. If VT-x
is disabled, you will get an error similar to the following when you
attempt to start the Android Emulator:
This computer meets the requirements for HAXM, but Intel
Virtualization Technology (VT-x) is not turned on.
To correct this error, boot the computer into the BIOS, enable both
VT-x and SLAT (Second-Level Address Translation), then restart the
computer back into Windows.
Disabling Hyper-V
If you are using a version of Windows before the Windows 10
April 2018 Update (build 1803) and Hyper-V is enabled, you must disable
Hyper-V and reboot your computer to install and use HAXM. If you
are using Windows 10 April 2018 Update (build 1803) or later, Android
Emulator version 27.2.7 or later can use Hyper-V (instead of HAXM) for
hardware acceleration, so it is not necessary to disable Hyper-V.
You can disable Hyper-V from the Control Panel by following these
steps:
-
Enter windows features in the Windows
search box and select Turn Windows features on or off in
the search results. -
Uncheck Hyper-V:
-
Restart the computer.

Alternately, you can use the following PowerShell command to disable
the Hyper-V Hypervisor:
Disable-WindowsOptionalFeature -Online -FeatureName Microsoft-Hyper-V-Hypervisor
Intel HAXM and Microsoft Hyper-V cannot both be active at the same
time. Unfortunately, there is no way to switch between Hyper-V
and HAXM without restarting your computer.
In some cases, using the above steps will not succeed in disabling
Hyper-V if Device Guard and Credential Guard are enabled. If you are
unable to disable Hyper-V (or it seems to be disabled but HAXM
installation still fails), use the steps in the next section to disable
Device Guard and Credential Guard.
Disabling Device Guard
Device Guard and Credential Guard can prevent Hyper-V from being
disabled on Windows machines. This situation is often a problem for
domain-joined machines that are configured and controlled by an owning
organization. On Windows 10, use the following steps to see if Device
Guard is running:
-
Enter System info in the Windows search box and select
System Information in the search results. -
In the System Summary, look to see if Device Guard
Virtualization based security is present and is in the Running
state:

If Device Guard is enabled, use the following steps to disable it:
-
Ensure that Hyper-V is disabled (under Turn Windows Features
on or off) as described in the previous section. -
In the Windows Search Box, enter gpedit.msc and select the Edit
group policy search result. These steps launch the Local Group
Policy Editor. -
In the Local Group Policy Editor, navigate to Computer
Configuration > Administrative Templates > System > Device Guard: -
Change Turn On Virtualization Based Security to Disabled (as
shown above) and exit the Local Group Policy Editor. -
In the Windows Search Box, enter cmd. When Command Prompt appears
in the search results, right-click Command Prompt and select
Run as Administrator. -
Copy and paste the following commands into the command prompt window
(if drive Z: is in use, pick an unused drive letter to use
instead):mountvol Z: /s copy %WINDIR%System32SecConfig.efi Z:EFIMicrosoftBootSecConfig.efi /Y bcdedit /create {0cb3b571-2f2e-4343-a879-d86a476d7215} /d "DebugTool" /application osloader bcdedit /set {0cb3b571-2f2e-4343-a879-d86a476d7215} path "EFIMicrosoftBootSecConfig.efi" bcdedit /set {bootmgr} bootsequence {0cb3b571-2f2e-4343-a879-d86a476d7215} bcdedit /set {0cb3b571-2f2e-4343-a879-d86a476d7215} loadoptions DISABLE-LSA-ISO,DISABLE-VBS bcdedit /set {0cb3b571-2f2e-4343-a879-d86a476d7215} device partition=Z: mountvol Z: /d
-
Restart your computer. On the boot screen, you should see a prompt similar to
the following message:Do you want to disable Credential Guard?
Press the indicated key to disable Credential Guard as prompted.
-
After the computer reboots, check again to ensure that Hyper-V is
disabled (as described in the previous steps).

If Hyper-V is still not disabled, the policies of your domain-joined
computer may prevent you from disabling Device Guard or Credential
Guard. In this case, you can request an exemption from your domain
administrator to allow you to opt out of Credential Guard. Alternately,
you can use a computer that is not domain-joined if you must use HAXM.
Additional troubleshooting tips
The following suggestions are often helpful in diagnosing Android
emulator issues.
Starting the emulator from the command line
If the emulator is not already running, you can start it from the
command line (rather than from within Visual Studio) to view its
output. Typically, Android emulator AVD images are stored at the
following location (replace username with your Windows user name):
C:Usersusername.androidavd
You can launch the emulator with an AVD image from this location by
passing in the folder name of the AVD. For example, this command launches
an AVD named Pixel_API_27:
"C:Program Files (x86)Androidandroid-sdkemulatoremulator.exe" -partition-size 512 -no-boot-anim -verbose -feature WindowsHypervisorPlatform -avd Pixel_API_27 -prop monodroid.avdname=Pixel_API_27
This example assumes that the Android SDK is installed at the default
location of C:Program Files (x86)Androidandroid-sdk; if not,
modify the above path for the location of the Android SDK on your
computer.
When you run this command, it will produce many lines of output while
the emulator starts up. In particular, lines such as the following
example will be printed if hardware acceleration is enabled and working
properly (in this example, HAXM is used for hardware acceleration):
emulator: CPU Acceleration: working
emulator: CPU Acceleration status: HAXM version 6.2.1 (4) is installed and usable.
Viewing Device Manager logs
Often you can diagnose emulator problems by viewing the Device Manager
logs. These logs are written to the following location:
C:UsersusernameAppDataLocalXamarinLogs16.0
You can view each DeviceManager.log file by using a text
editor such as Notepad. The following example log entry indicates that
HAXM was not found on the computer:
Component Intel x86 Emulator Accelerator (HAXM installer) r6.2.1 [Extra: (Intel Corporation)] not present on the system
::: zone-end
::: zone pivot=»macos»
Deployment issues on macOS
Some error messages may be displayed by the emulator when you deploy
your app. The most common errors and solutions are explained below.
Deployment errors
If you see an error about a failure to install the APK on the emulator
or a failure to run the Android Debug Bridge (adb), verify that the
Android SDK can connect to your emulator. To verify connectivity, use
the following steps:
-
Launch the emulator from the Android Device Manager (select
your virtual device and click Start). -
Open a command prompt and go to the folder where adb is
installed. If the Android SDK is installed at its default location,
adb is located at
~/Library/Developer/Xamarin/android-sdk-macosx/platform-tools/adb;
if not, modify this path for the location of the Android SDK on your
computer. -
Type the following command:
-
If the emulator is accessible from the Android SDK, the emulator
should appear in the list of attached devices. For example:List of devices attached emulator-5554 device
-
If the emulator does not appear in this list, start the Android
SDK Manager, apply all updates, then try launching the
emulator again.
MMIO access error
If An MMIO access error has occurred is displayed,
restart the emulator.
Missing Google Play Services
If the virtual device you are running in the emulator does not have
Google Play Services or Google Play Store installed, this condition is
usually caused by creating a virtual device without including these
packages. When you create a virtual device (see
Managing Virtual Devices with the Android Device Manager),
be sure to select one or both of the following:
- Google APIs – includes Google Play Services in the virtual device.
- Google Play Store – includes Google Play Store in the virtual device.
For example, this virtual device will include Google Play Services and Google Play Store:

[!NOTE]
Google Play Store images are available only for some base device types such
as Pixel, Pixel 2, Nexus 5, and Nexus 5X.
Performance issues
Performance issues are typically caused by one of the following problems:
-
The emulator is running without hardware acceleration.
-
The virtual device running in the emulator is not using an x86-based system image.
The following sections cover these scenarios in more detail.
Hardware acceleration is not enabled
If hardware acceleration is not enabled, a dialog may pop up with a
message such as device will run unaccelerated when you deploy your
app to the Android emulator. If you are not certain whether hardware
acceleration is enabled on your computer (or you would like to know
which technology is providing the acceleration), see
Hardware acceleration issues below for steps you can
take to verify and enable hardware acceleration.
Acceleration is enabled but the emulator runs too slowly
A common cause for this problem is not using an x86-based image in your
virtual device. When you create virtual device (see
Managing Virtual Devices with the Android Device Manager),
be sure to select an x86-based system image:

Hardware acceleration issues
Whether you are using the Hypervisor Framework or HAXM for hardware
acceleration of the emulator, you may run into problems caused by
installation issues or an out-of-date version of macOS. The following
sections can help you resolve this issue.
Hypervisor Framework issues
If you are using macOS 10.10 or later on a newer Mac, the Android
emulator will automatically use the Hypervisor Framework for hardware
acceleration. However, some older Macs or Macs running a version of
macOS earlier than 10.10 may not provide Hypervisor Framework support.
To determine whether or not your Mac supports the Hypervisor Framework,
open a Terminal and enter the following command:
If your Mac supports the Hypervisor Framework, the above command will
return the following result:
If the Hypervisor Framework is not available on your Mac, you can
follow the steps in Accelerating with HAXM
to use HAXM for acceleration instead.
HAXM issues
If the Android Emulator does not start properly, this problem is often
caused by problems with HAXM. HAXM issues are often the result of
conflicts with other virtualization technologies, incorrect settings,
or an out-of-date HAXM driver. Try reinstalling the HAXM driver, using
the steps detailed in
Installing HAXM.
Additional troubleshooting tips
The following suggestions are often helpful in diagnosing Android
emulator issues.
Starting the emulator from the command line
If the emulator is not already running, you can start it from the
command line (rather than from within Visual Studio for Mac) to view
its output. Typically, Android emulator AVD images are stored at the
following location:
~/.android/avd
You can launch the emulator with an AVD image from this location by
passing in the folder name of the AVD. For example, this command
launches an AVD named Pixel_2_API_28:
~/Library/Developer/Xamarin/android-sdk-macosx/emulator/emulator -partition-size 512 -no-boot-anim -verbose -feature WindowsHypervisorPlatform -avd Pixel_2_API_28 -prop monodroid.avdname=Pixel_2_API_28
If the Android SDK is installed at its default location, the emulator
is located in the
~/Library/Developer/Xamarin/android-sdk-macosx/emulator directory;
if not, modify this path for the location of the Android SDK on your
Mac.
When you run this command, it will produce many lines of output while
the emulator starts up. In particular, lines such as the following
example will be printed if hardware acceleration is enabled and working
properly (in this example, Hypervisor Framework is used for hardware
acceleration):
emulator: CPU Acceleration: working
emulator: CPU Acceleration status: Hypervisor.Framework OS X Version 10.13
Issues with Naming Intent Extras
When you set Intent Extras in your Android Run Configuration, only A-Z, a-z, ‘_’, ‘-‘, and numbers are supported. Additionally, all key values must be unique.
Viewing Device Manager logs
Often you can diagnose emulator problems by viewing the Device Manager
logs. These logs are written to the following location:
~/Library/Logs/XamarinDeviceManager
You can view each Android Devices.log file by double-clicking it to
open it in the Console app. The following example log entry indicates
that HAXM was not found:
Component Intel x86 Emulator Accelerator (HAXM installer) r6.2.1 [Extra: (Intel Corporation)] not present on the system
::: zone-end
| title | description | zone_pivot_groups | ms.prod | ms.assetid | ms.technology | author | ms.author | ms.date |
|---|---|---|---|---|---|---|---|---|
|
Android Emulator Troubleshooting |
This article explains how to diagnose and work around problems that may occur when using the Android Emulator. |
platform |
xamarin |
4F053CC9-9378-47CB-8002-978A6558C4D0 |
xamarin-android |
davidortinau |
daortin |
08/27/2018 |
Android emulator troubleshooting
This article describes the most common warning messages and issues
that occur while configuring and running the Android Emulator. In
addition, it describes solutions for resolving these errors as well as
various troubleshooting tips to help you diagnose emulator problems.
::: zone pivot=»windows»
Deployment issues on Windows
Some error messages may be displayed by the emulator when you deploy
your app. The most common errors and solutions are explained here.
Deployment errors
If you see an error about a failure to install the APK on the emulator
or a failure to run the Android Debug Bridge (adb), verify that the
Android SDK can connect to your emulator. To verify emulator
connectivity, use the following steps:
-
Launch the emulator from the Android Device Manager (select
your virtual device and click Start). -
Open a command prompt and go to the folder where adb is
installed. If the Android SDK is installed at its default location,
adb is located at
C:Program Files (x86)Androidandroid-sdkplatform-toolsadb.exe;
if not, modify this path for the location of the Android SDK on your
computer. -
Type the following command:
-
If the emulator is accessible from the Android SDK, the emulator
should appear in the list of attached devices. For example:List of devices attached emulator-5554 device
-
If the emulator does not appear in this list, start the Android
SDK Manager, apply all updates, then try launching the
emulator again.
MMIO access error
If the message An MMIO access error has occurred is displayed,
restart the emulator.
Missing Google Play Services
If the virtual device you are running in the emulator does not have
Google Play Services or Google Play Store installed, this condition is
often caused by creating a virtual device without including these
packages. When you create a virtual device (see
Managing Virtual Devices with the Android Device Manager),
be sure to select one or both of the following options:
- Google APIs – includes Google Play Services in the virtual device.
- Google Play Store – includes Google Play Store in the virtual device.
For example, this virtual device will include Google Play Services and Google Play Store:
[!NOTE]
Google Play Store images are available only for some base device types such
as Pixel, Pixel 2, Nexus 5, and Nexus 5X.
Performance issues
Performance issues are typically caused by one of the following problems:
-
The emulator is running without hardware acceleration.
-
The virtual device running in the emulator is not using an x86-based system image.
The following sections cover these scenarios in more detail.
Hardware acceleration is not enabled
If hardware acceleration is not enabled, starting a virtual device from
the Device Manager will produce a dialog with an error message
indicating that the Windows Hypervisor Platform (WHPX) is not
configured properly:
If this error message is displayed, see
Hardware acceleration issues below for steps you
can take to verify and enable hardware acceleration.
Acceleration is enabled but the emulator runs too slowly
A common cause for this problem is not using an x86-based image in your
virtual device (AVD). When you create a virtual device (see
Managing Virtual Devices with the Android Device Manager),
be sure to select an x86-based system image:
Hardware acceleration issues
Whether you are using Hyper-V or HAXM for hardware acceleration, you
may run into configuration problems or conflicts with other software on
your computer. You can verify that hardware acceleration is enabled
(and which acceleration method the emulator is using) by opening a
command prompt and entering the following command:
"C:Program Files (x86)Androidandroid-sdkemulatoremulator-check.exe" accel
This command assumes that the Android SDK is installed at the default
location of C:Program Files (x86)Androidandroid-sdk; if not,
modify the above path for the location of the Android SDK on your
computer.
Hardware acceleration not available
If Hyper-V is available, a message like the following example will be
returned from the emulator-check.exe accel command:
HAXM is not installed, but Windows Hypervisor Platform is available.
If HAXM is available, a message like the following example will be
returned:
HAXM version 6.2.1 (4) is installed and usable.
If hardware acceleration is not available, a message like the following
example will be displayed (the emulator looks for HAXM if it is unable
to find Hyper-V):
HAXM is not installed on this machine
If hardware acceleration is not available, see
Accelerating with Hyper-V
to learn how to enable hardware acceleration on your computer.
Incorrect BIOS settings
If the BIOS has not been configured properly to support hardware
acceleration, a message similar to the following example will be
displayed when you run the emulator-check.exe accel command:
VT feature disabled in BIOS/UEFI
To correct this problem, reboot into your computer’s BIOS and enable the
following options:
- Virtualization Technology (may have a different label depending on motherboard manufacturer).
- Hardware Enforced Data Execution Prevention.
If hardware acceleration is enabled and the BIOS is configured
properly, the emulator should run successfully with hardware acceleration.
However, problems may still result due to issues that are specific to
Hyper-V and HAXM, as explained next.
Hyper-V issues
In some cases, enabling both Hyper-V and Windows Hypervisor
Platform in the Turn Windows features on or off dialog may not
properly enable Hyper-V. To verify that Hyper-V is enabled, use the
following steps:
-
Enter powershell in the Windows search box.
-
Right-click Windows PowerShell in the search results and select
Run as administrator. -
In the PowerShell console, enter the following command:
Get-WindowsOptionalFeature -FeatureName Microsoft-Hyper-V-All -Online
If Hyper-V is not enabled, a message similar to the following example will be
displayed to indicate that the state of Hyper-V is Disabled:FeatureName : Microsoft-Hyper-V-All DisplayName : Hyper-V Description : Provides services and management tools for creating and running virtual machines and their resources. RestartRequired : Possible State : Disabled CustomProperties : -
In the PowerShell console, enter the following command:
Get-WindowsOptionalFeature -FeatureName HypervisorPlatform -Online
If the Hypervisor is not enabled, a message similar to the following example will be
displayed to indicate that the state of HypervisorPlatform is Disabled:FeatureName : HypervisorPlatform DisplayName : Windows Hypervisor Platform Description : Enables virtualization software to run on the Windows hypervisor RestartRequired : Possible State : Disabled CustomProperties :
If Hyper-V and/or HypervisorPlatform are not enabled, use the following
PowerShell commands to enable them:
Enable-WindowsOptionalFeature -Online -FeatureName Microsoft-Hyper-V -All
Enable-WindowsOptionalFeature -Online -FeatureName HypervisorPlatform -All
After these commands complete, reboot.
For more information about enabling Hyper-V (including techniques for
enabling Hyper-V using the Deployment Image Servicing and Management
tool), see
Install Hyper-V.
HAXM issues
HAXM issues are often the result of conflicts with other virtualization
technologies, incorrect settings, or an out-of-date HAXM driver.
HAXM process is not running
If HAXM is installed, you can verify that the HAXM process is running
by opening a command prompt and entering the following command:
If the HAXM process is running, you should see output similar
to the following result:
SERVICE_NAME: intelhaxm
    TYPE               : 1  KERNEL_DRIVER
    STATE              : 4  RUNNING
                            (STOPPABLE, NOT_PAUSABLE, IGNORES_SHUTDOWN)
    WIN32_EXIT_CODE    : 0  (0x0)
    SERVICE_EXIT_CODE  : 0  (0x0)
    CHECKPOINT         : 0x0
    WAIT_HINT          : 0x0
If STATE is not set to RUNNING, see
How to Use the Intel Hardware Accelerated Execution Manager to resolve the problem.
HAXM virtualization conflicts
HAXM can conflict with other technologies that use virtualization,
such as Hyper-V, Windows Device Guard, and some antivirus software:
-
Hyper-V – If you are using a version of Windows before the
Windows 10 April 2018 update (build 1803) and Hyper-V is enabled,
follow the steps in Disabling Hyper-V so that
HAXM can be enabled. -
Device Guard – Device Guard and Credential Guard can
prevent Hyper-V from being disabled on Windows machines. To disable
Device Guard and Credential Guard, see
Disabling Device Guard. -
Antivirus Software – If you are running antivirus software
that uses hardware-assisted virtualization (such as Avast), disable
or uninstall this software, reboot, and retry the Android
emulator.
Incorrect BIOS settings
If you are using HAXM on a Windows PC, HAXM will not work unless
virtualization technology (Intel VT-x) is enabled in the BIOS. If VT-x
is disabled, you will get an error similar to the following when you
attempt to start the Android Emulator:
This computer meets the requirements for HAXM, but Intel
Virtualization Technology (VT-x) is not turned on.
To correct this error, boot the computer into the BIOS, enable both
VT-x and SLAT (Second-Level Address Translation), then restart the
computer back into Windows.
Disabling Hyper-V
If you are using a version of Windows before the Windows 10
April 2018 Update (build 1803) and Hyper-V is enabled, you must disable
Hyper-V and reboot your computer to install and use HAXM. If you
are using Windows 10 April 2018 Update (build 1803) or later, Android
Emulator version 27.2.7 or later can use Hyper-V (instead of HAXM) for
hardware acceleration, so it is not necessary to disable Hyper-V.
You can disable Hyper-V from the Control Panel by following these
steps:
-
Enter windows features in the Windows
search box and select Turn Windows features on or off in
the search results. -
Uncheck Hyper-V:
-
Restart the computer.
Alternately, you can use the following PowerShell command to disable
the Hyper-V Hypervisor:
Disable-WindowsOptionalFeature -Online -FeatureName Microsoft-Hyper-V-Hypervisor
Intel HAXM and Microsoft Hyper-V cannot both be active at the same
time. Unfortunately, there is no way to switch between Hyper-V
and HAXM without restarting your computer.
In some cases, using the above steps will not succeed in disabling
Hyper-V if Device Guard and Credential Guard are enabled. If you are
unable to disable Hyper-V (or it seems to be disabled but HAXM
installation still fails), use the steps in the next section to disable
Device Guard and Credential Guard.
Disabling Device Guard
Device Guard and Credential Guard can prevent Hyper-V from being
disabled on Windows machines. This situation is often a problem for
domain-joined machines that are configured and controlled by an owning
organization. On Windows 10, use the following steps to see if Device
Guard is running:
-
Enter System info in the Windows search box and select
System Information in the search results. -
In the System Summary, look to see if Device Guard
Virtualization based security is present and is in the Running
state:
If Device Guard is enabled, use the following steps to disable it:
-
Ensure that Hyper-V is disabled (under Turn Windows Features
on or off) as described in the previous section. -
In the Windows Search Box, enter gpedit.msc and select the Edit
group policy search result. These steps launch the Local Group
Policy Editor. -
In the Local Group Policy Editor, navigate to Computer
Configuration > Administrative Templates > System > Device Guard: -
Change Turn On Virtualization Based Security to Disabled (as
shown above) and exit the Local Group Policy Editor. -
In the Windows Search Box, enter cmd. When Command Prompt appears
in the search results, right-click Command Prompt and select
Run as Administrator. -
Copy and paste the following commands into the command prompt window
(if drive Z: is in use, pick an unused drive letter to use
instead):mountvol Z: /s copy %WINDIR%System32SecConfig.efi Z:EFIMicrosoftBootSecConfig.efi /Y bcdedit /create {0cb3b571-2f2e-4343-a879-d86a476d7215} /d "DebugTool" /application osloader bcdedit /set {0cb3b571-2f2e-4343-a879-d86a476d7215} path "EFIMicrosoftBootSecConfig.efi" bcdedit /set {bootmgr} bootsequence {0cb3b571-2f2e-4343-a879-d86a476d7215} bcdedit /set {0cb3b571-2f2e-4343-a879-d86a476d7215} loadoptions DISABLE-LSA-ISO,DISABLE-VBS bcdedit /set {0cb3b571-2f2e-4343-a879-d86a476d7215} device partition=Z: mountvol Z: /d
-
Restart your computer. On the boot screen, you should see a prompt similar to
the following message:Do you want to disable Credential Guard?
Press the indicated key to disable Credential Guard as prompted.
-
After the computer reboots, check again to ensure that Hyper-V is
disabled (as described in the previous steps).
If Hyper-V is still not disabled, the policies of your domain-joined
computer may prevent you from disabling Device Guard or Credential
Guard. In this case, you can request an exemption from your domain
administrator to allow you to opt out of Credential Guard. Alternately,
you can use a computer that is not domain-joined if you must use HAXM.
Additional troubleshooting tips
The following suggestions are often helpful in diagnosing Android
emulator issues.
Starting the emulator from the command line
If the emulator is not already running, you can start it from the
command line (rather than from within Visual Studio) to view its
output. Typically, Android emulator AVD images are stored at the
following location (replace username with your Windows user name):
C:Usersusername.androidavd
You can launch the emulator with an AVD image from this location by
passing in the folder name of the AVD. For example, this command launches
an AVD named Pixel_API_27:
"C:Program Files (x86)Androidandroid-sdkemulatoremulator.exe" -partition-size 512 -no-boot-anim -verbose -feature WindowsHypervisorPlatform -avd Pixel_API_27 -prop monodroid.avdname=Pixel_API_27
This example assumes that the Android SDK is installed at the default
location of C:Program Files (x86)Androidandroid-sdk; if not,
modify the above path for the location of the Android SDK on your
computer.
When you run this command, it will produce many lines of output while
the emulator starts up. In particular, lines such as the following
example will be printed if hardware acceleration is enabled and working
properly (in this example, HAXM is used for hardware acceleration):
emulator: CPU Acceleration: working
emulator: CPU Acceleration status: HAXM version 6.2.1 (4) is installed and usable.
Viewing Device Manager logs
Often you can diagnose emulator problems by viewing the Device Manager
logs. These logs are written to the following location:
C:UsersusernameAppDataLocalXamarinLogs16.0
You can view each DeviceManager.log file by using a text
editor such as Notepad. The following example log entry indicates that
HAXM was not found on the computer:
Component Intel x86 Emulator Accelerator (HAXM installer) r6.2.1 [Extra: (Intel Corporation)] not present on the system
::: zone-end
::: zone pivot=»macos»
Deployment issues on macOS
Some error messages may be displayed by the emulator when you deploy
your app. The most common errors and solutions are explained below.
Deployment errors
If you see an error about a failure to install the APK on the emulator
or a failure to run the Android Debug Bridge (adb), verify that the
Android SDK can connect to your emulator. To verify connectivity, use
the following steps:
-
Launch the emulator from the Android Device Manager (select
your virtual device and click Start). -
Open a command prompt and go to the folder where adb is
installed. If the Android SDK is installed at its default location,
adb is located at
~/Library/Developer/Xamarin/android-sdk-macosx/platform-tools/adb;
if not, modify this path for the location of the Android SDK on your
computer. -
Type the following command:
-
If the emulator is accessible from the Android SDK, the emulator
should appear in the list of attached devices. For example:List of devices attached emulator-5554 device
-
If the emulator does not appear in this list, start the Android
SDK Manager, apply all updates, then try launching the
emulator again.
MMIO access error
If An MMIO access error has occurred is displayed,
restart the emulator.
Missing Google Play Services
If the virtual device you are running in the emulator does not have
Google Play Services or Google Play Store installed, this condition is
usually caused by creating a virtual device without including these
packages. When you create a virtual device (see
Managing Virtual Devices with the Android Device Manager),
be sure to select one or both of the following:
- Google APIs – includes Google Play Services in the virtual device.
- Google Play Store – includes Google Play Store in the virtual device.
For example, this virtual device will include Google Play Services and Google Play Store:
[!NOTE]
Google Play Store images are available only for some base device types such
as Pixel, Pixel 2, Nexus 5, and Nexus 5X.
Performance issues
Performance issues are typically caused by one of the following problems:
-
The emulator is running without hardware acceleration.
-
The virtual device running in the emulator is not using an x86-based system image.
The following sections cover these scenarios in more detail.
Hardware acceleration is not enabled
If hardware acceleration is not enabled, a dialog may pop up with a
message such as device will run unaccelerated when you deploy your
app to the Android emulator. If you are not certain whether hardware
acceleration is enabled on your computer (or you would like to know
which technology is providing the acceleration), see
Hardware acceleration issues below for steps you can
take to verify and enable hardware acceleration.
Acceleration is enabled but the emulator runs too slowly
A common cause for this problem is not using an x86-based image in your
virtual device. When you create virtual device (see
Managing Virtual Devices with the Android Device Manager),
be sure to select an x86-based system image:
Hardware acceleration issues
Whether you are using the Hypervisor Framework or HAXM for hardware
acceleration of the emulator, you may run into problems caused by
installation issues or an out-of-date version of macOS. The following
sections can help you resolve this issue.
Hypervisor Framework issues
If you are using macOS 10.10 or later on a newer Mac, the Android
emulator will automatically use the Hypervisor Framework for hardware
acceleration. However, some older Macs or Macs running a version of
macOS earlier than 10.10 may not provide Hypervisor Framework support.
To determine whether or not your Mac supports the Hypervisor Framework,
open a Terminal and enter the following command:
If your Mac supports the Hypervisor Framework, the above command will
return the following result:
If the Hypervisor Framework is not available on your Mac, you can
follow the steps in Accelerating with HAXM
to use HAXM for acceleration instead.
HAXM issues
If the Android Emulator does not start properly, this problem is often
caused by problems with HAXM. HAXM issues are often the result of
conflicts with other virtualization technologies, incorrect settings,
or an out-of-date HAXM driver. Try reinstalling the HAXM driver, using
the steps detailed in
Installing HAXM.
Additional troubleshooting tips
The following suggestions are often helpful in diagnosing Android
emulator issues.
Starting the emulator from the command line
If the emulator is not already running, you can start it from the
command line (rather than from within Visual Studio for Mac) to view
its output. Typically, Android emulator AVD images are stored at the
following location:
~/.android/avd
You can launch the emulator with an AVD image from this location by
passing in the folder name of the AVD. For example, this command
launches an AVD named Pixel_2_API_28:
~/Library/Developer/Xamarin/android-sdk-macosx/emulator/emulator -partition-size 512 -no-boot-anim -verbose -feature WindowsHypervisorPlatform -avd Pixel_2_API_28 -prop monodroid.avdname=Pixel_2_API_28
If the Android SDK is installed at its default location, the emulator
is located in the
~/Library/Developer/Xamarin/android-sdk-macosx/emulator directory;
if not, modify this path for the location of the Android SDK on your
Mac.
When you run this command, it will produce many lines of output while
the emulator starts up. In particular, lines such as the following
example will be printed if hardware acceleration is enabled and working
properly (in this example, Hypervisor Framework is used for hardware
acceleration):
emulator: CPU Acceleration: working
emulator: CPU Acceleration status: Hypervisor.Framework OS X Version 10.13
Issues with Naming Intent Extras
When you set Intent Extras in your Android Run Configuration, only A-Z, a-z, ‘_’, ‘-‘, and numbers are supported. Additionally, all key values must be unique.
Viewing Device Manager logs
Often you can diagnose emulator problems by viewing the Device Manager
logs. These logs are written to the following location:
~/Library/Logs/XamarinDeviceManager
You can view each Android Devices.log file by double-clicking it to
open it in the Console app. The following example log entry indicates
that HAXM was not found:
Component Intel x86 Emulator Accelerator (HAXM installer) r6.2.1 [Extra: (Intel Corporation)] not present on the system
::: zone-end