Для того, чтобы писать программы на C/C++ обычно достаточно установить какую-нибудь интерактивную среду разработки (IDE), например, Visual Studio или Eclipse, однако иногда (обычно в целях обучения студентов) требуется создавать программы в обыкновенном текстовом редакторе и компилировать приложение, используя консоль и компилятор gcc. В Unix системах он обычно установлен прямо «из коробки», а вот на Windows системах такой роскоши не наблюдается. Более того, у многих пользователей возникает множество проблем при установке компилятора. Поэтому нами было принято решение написать данную статью, чтобы помочь всем тем, кому пришлось или приходится мучаться с установкой этого компилятора на Windows.
Кстати, если вдруг на вашей Unix системе не установлен GCC, то поставить его можно командой sudo apt install gcc, введя свой пароль и согласившись на установку.
0. Прежде чем поставить компилятор GCC
Перед тем как приступить к установке этого компилятора на ваш компьютер, убедитесь в том, что GCC ещё не установлен на нём. Для этого откройте консоль (нажмите Win + R, введите в появившемся окне cmd и нажмите клавишу Enter) и введите следующую команду: gcc --version и нажмите Enter. Если компилятор уже установлен, то выполненная команда выдаст примерно следующую информацию:
gcc (GCC) 8.1.0
Copyright (C) 2018 Free Software Foundation, Inc.
This is free software; see the source for copying conditions.  There is NO
warranty; not even for MERCHANTABILITY or FITNESS FOR A PARTICULAR PURPOSE.
Если в окне консоли появилось сообщение с версией компилятора и другая информация о GCC (второй скриншот), значит компилятор уже установлен и больше дополнительно ничего делать не нужно. А вот если вывод командной строки такой:
"gcc" не является внутренней или внешней
командой, исполняемой программой или пакетным файлом
— значит GCC ещё не установлен в системе, поэтому двигаемся дальше.

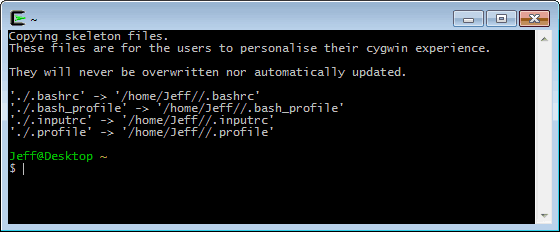
Появившееся окно консоли
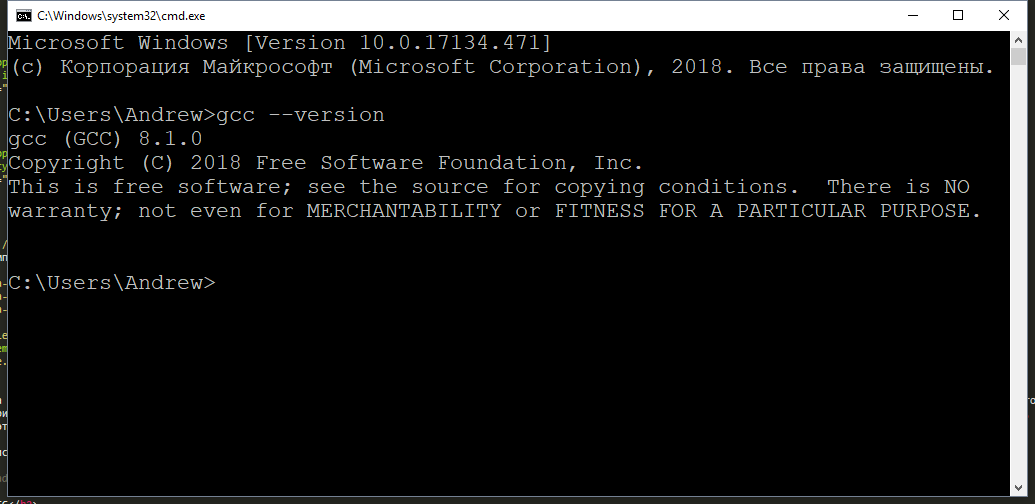
GCC уже установлен
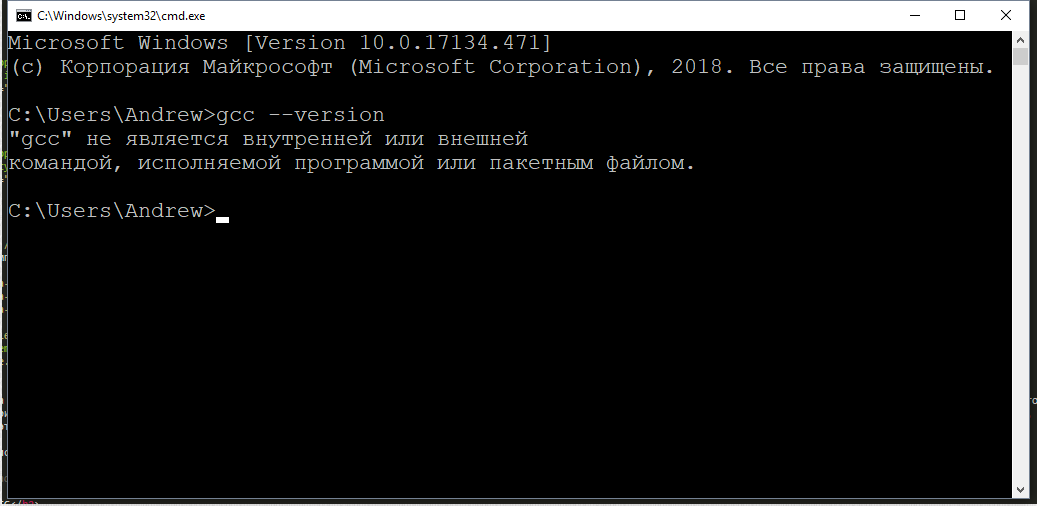
GCC не установлен
1. Скачиваем установщик компилятора
Чтобы поставить GCC на операционную систему Windows, необходимо скачать установочный файл для него. Сделать это можно здесь: equation.com/servlet/equation.cmd?fa=fortran. Найдите в таблице версию компилятора, которая вам больше нравится (мы рекомендуем скачивать самую последнюю, на текущий момент — это версия 8.2.0) и скачайте установщик для вашей системы (32 или 64 бит).
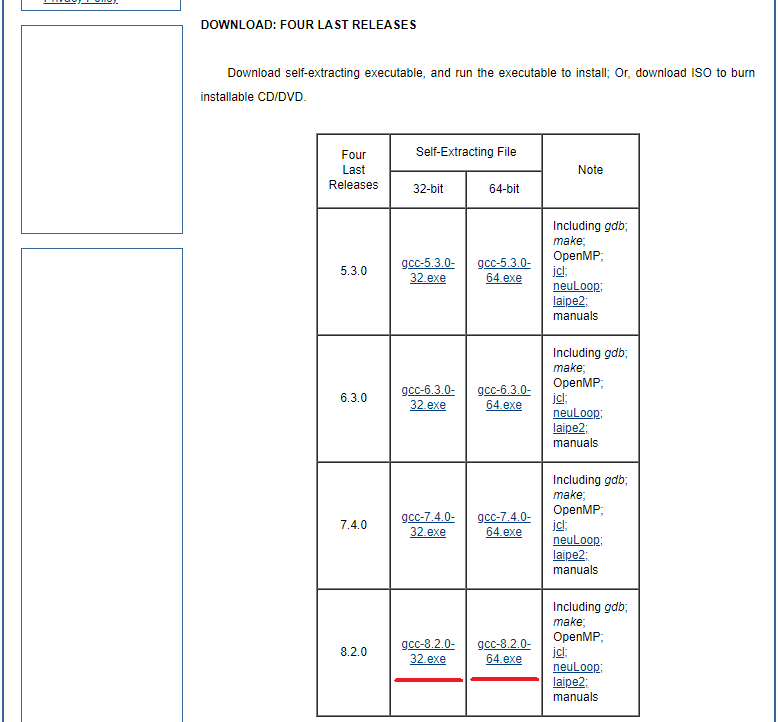
Выбор установочного файла
2. Установка GCC
После того, как файл был скачан, откройте в проводнике папку, в которую был скачан установщик и запустите его, кликнув по файлу дважды левой кнопкой мыши. Появится окно, требующее подтверждения действия. В нём нужно выбрать да (иначе ничего ставиться не будет).
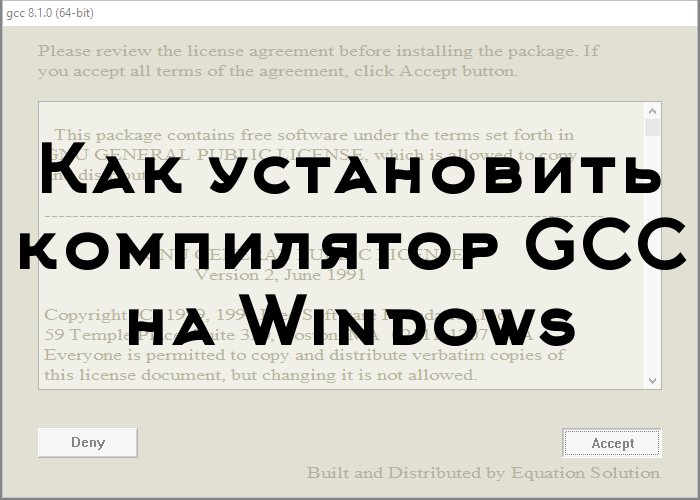
Установщик начнёт работу и отобразит окно с консолью, а также окно с бежевым фоном, в котором попросит прочесть и принять (или отклонить) лицензионное соглашение. Нажимаем Accept.
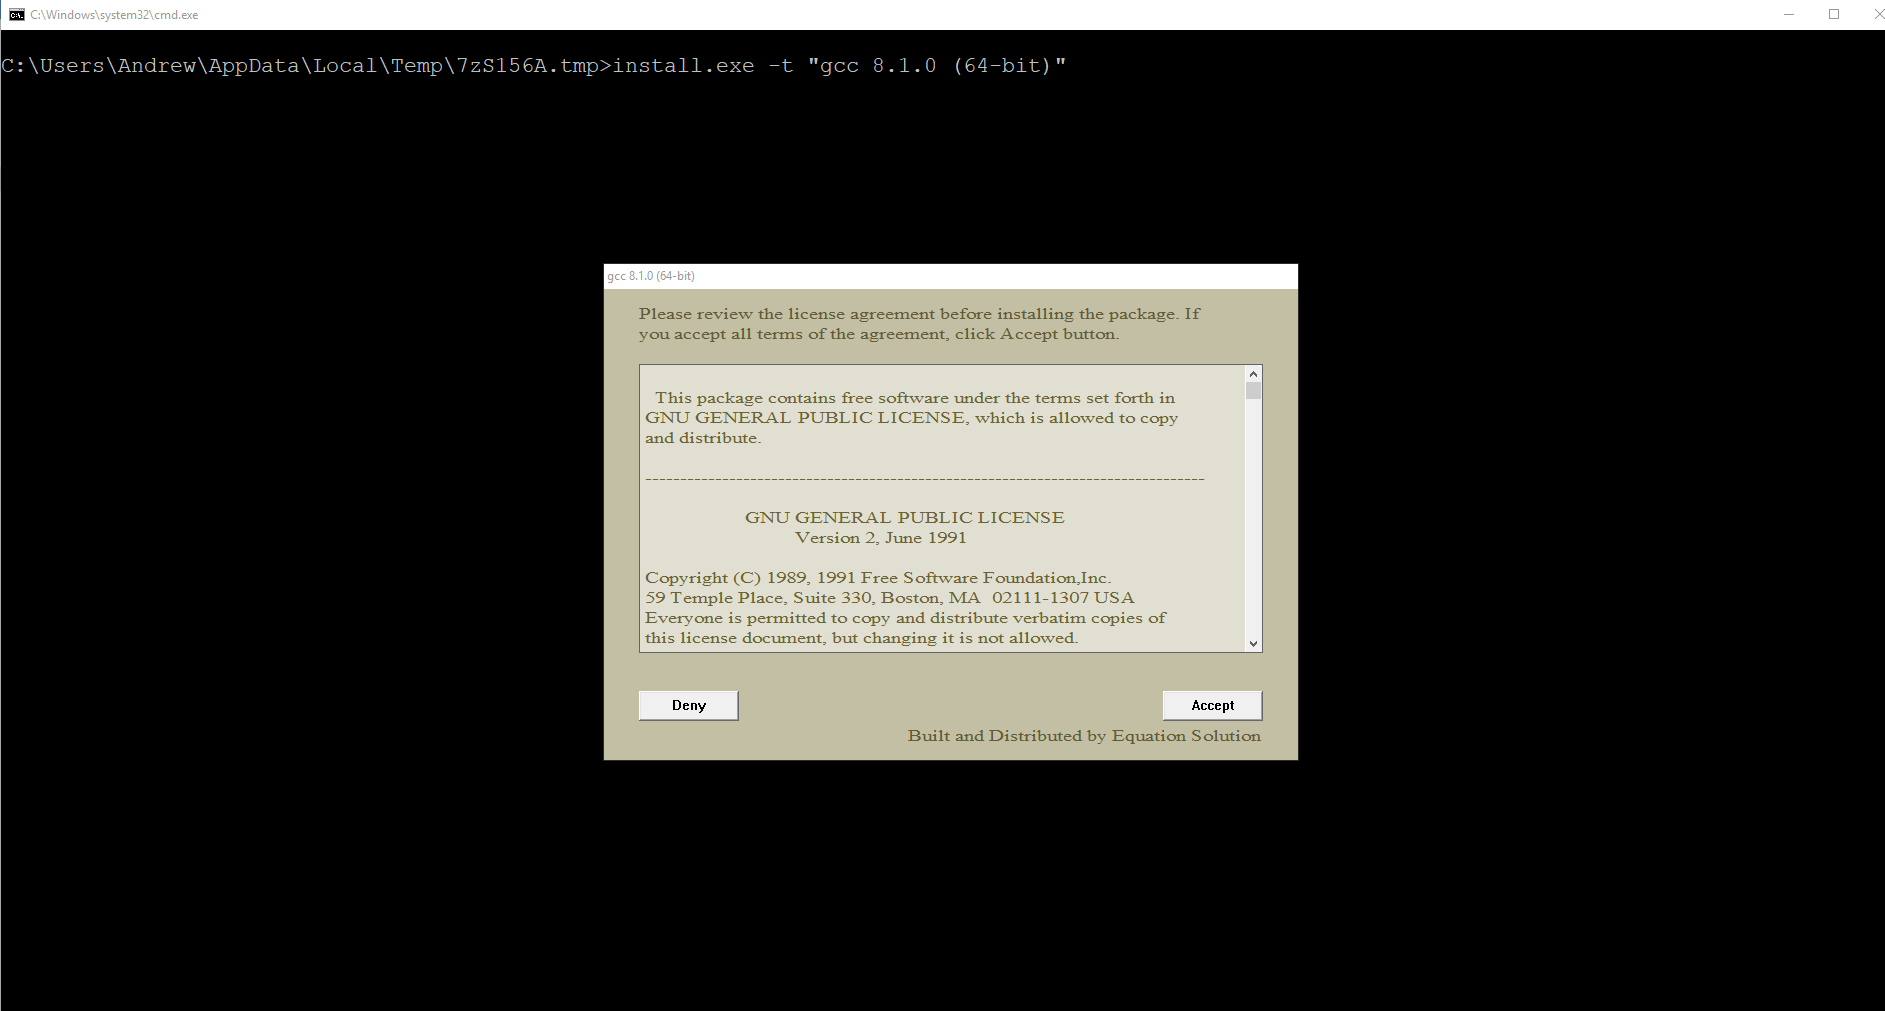
Открывшееся окно с установщиком
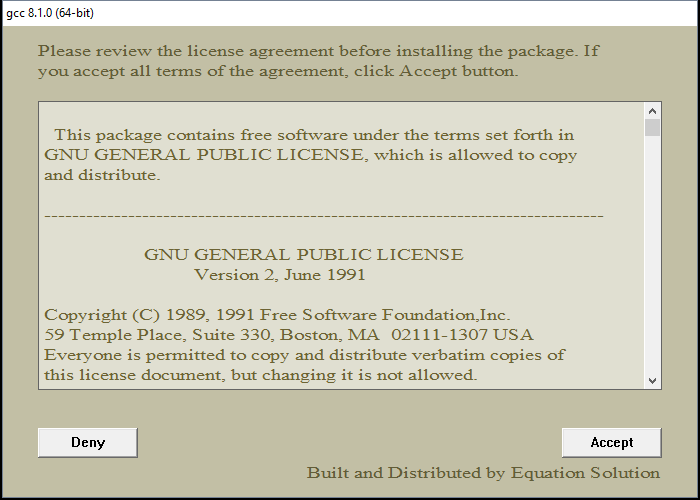
Принимаем лицензионное соглашение
После этого установщик попросит выбрать путь для установки, предложив по умолчанию путь C:mingw. Если вам категорически не нравится этот путь — измените его на более подходящий на ваш взгляд, в противном же случае просто нажмите Install.
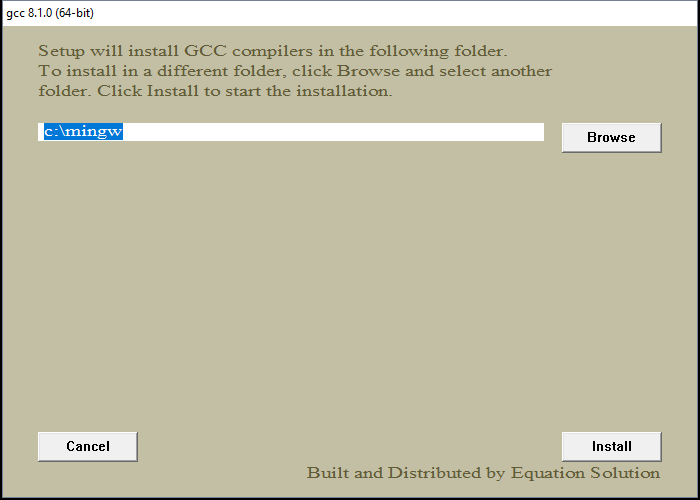
Выбор папки для установки
Теперь остаётся только дождаться окончания распаковки архивов и установки их на компьютер. Как только все файлы будут установлены, инсталятор сообщит об этом, после чего нужно будет нажать на кнопку Finish.
Распаковка файлов и установка
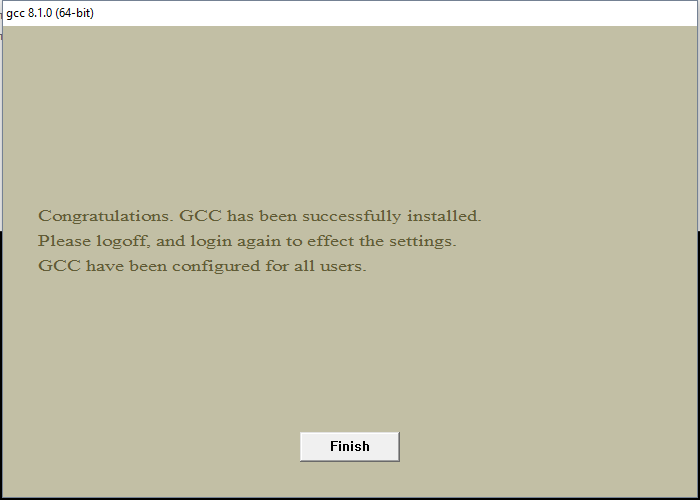
Окончание установки
3. Проверка установки
По завершении работы установщика перезагрузите компьютер и вновь откройте окно командной строки, введите команду gcc --version и нажмите Enter. На этот раз ответ от этой команды должен будет совпадать со вторым скриншотом из пункта 0. Если это не так, то скорее всего работа установщика была некорректно или преждевременно завершена, так что просто начните установку заново.
GCC установлен
Поздравляем! Теперь на вашем компьютере установлен компилятор GCC и вы можете писать программы на языках C и C++, а компилировать их через командную строку!
4. Бонус. Компиляция программ с помощью GCC
Теперь, когда у вас установлен компилятор GCC, вы можете создавать программы на C/C++, используя только текстовый редактор и консоль. Для этого создайте новый файл и назовите его как угодно (например, hello_world). Задайте ему расширение .c вместо .txt. Напишите (или скопируйте) текст программы на С в этот файл. Откройте командную строку (Win + R, cmd) и введите следующую команду gcc hello_world.c и нажмите Enter. Если код не содержит ошибок, то результатом команды будет пустота. В противном же случае вы увидите все ошибки, который нашёл компилятор в программе с указанием места этой ошибки. При этом в проводнике появится файл a.out.exe, который будет являться исполняемым файлом для написанной программы. Чтобы запустить его введите в консоли a.out (для Unix-систем нужно писать ./a.out) и нажмите Enter.
Что ещё за a.out? Непонятно!
По умолчанию при компиляции программ GCC в качестве результата создаём исполняемый файл с именем a.out (если такой уже есть, то b.out и т.д.). Это может быть не очень удобно, если у вас в папке лежит сразу много программ, которые нужно скомпилировать и затем запустить. Неудобно хотя бы тем, что разобраться, что такое a.out, а что такое b.out и c.out может быть непросто. Именно поэтому мы рекомендуем компилировать программы с явным указанием имени выходного файла. делается это так: gcc имя_файла.c -o имя_программы.
В результате выполнения такой программы вместо a.out будет создаваться файл с именем, заданным в имя_программы. Например, если для файла hello_world.c мы хотим получить программу hello, то компилировать нужно такой командой: gcc hello_world.c -o hello.
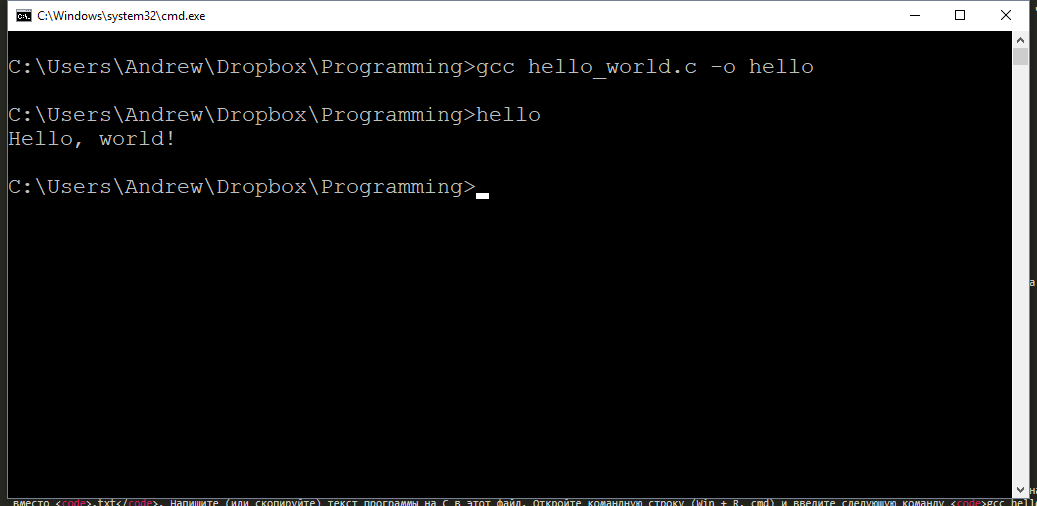
Результат компиляции и запуска программы
Используя понятные имена выходных программ (исполняемых файлов), вы гарантируете себе простоту работы и сокращение времени на разбирательство спустя долгое время.
Возможно, также будет интересно: как установить Sublime Text для работы с C/C++.

Программист, сооснователь programforyou.ru, в постоянном поиске новых задач и алгоритмов
Языки программирования: Python, C, C++, Pascal, C#, Javascript
Выпускник МГУ им. М.В. Ломоносова
The latest version of this document is always available at
https://gcc.gnu.org/install/.
It refers to the current development sources, instructions for
specific released versions are included with the sources.
This document describes the generic installation procedure for GCC as well
as detailing some target specific installation instructions.
GCC includes several components that previously were separate distributions
with their own installation instructions. This document supersedes all
package-specific installation instructions.
Before starting the build/install procedure please check the
host/target specific installation notes.
We recommend you browse the entire generic installation instructions before
you proceed.
Lists of successful builds for released versions of GCC are
available at https://gcc.gnu.org/buildstat.html.
These lists are updated as new information becomes available.
The installation procedure itself is broken into five steps.
- Prerequisites
- Downloading the source
- Configuration
- Building
- Testing (optional)
- Final install
Please note that GCC does not support ‘make uninstall’ and probably
won’t do so in the near future as this would open a can of worms. Instead,
we suggest that you install GCC into a directory of its own and simply
remove that directory when you do not need that specific version of GCC
any longer, and, if shared libraries are installed there as well, no
more binaries exist that use them.
Return to the GCC Installation page
Copyright © 1988-2023 Free Software Foundation, Inc.
Permission is granted to copy, distribute and/or modify this document
under the terms of the GNU Free Documentation License, Version 1.3 or
any later version published by the Free Software Foundation; with no
Invariant Sections, the Front-Cover texts being (a) (see below), and
with the Back-Cover Texts being (b) (see below). A copy of the
license is included in the section entitled “GNU
Free Documentation License”.
(a) The FSF’s Front-Cover Text is:
A GNU Manual
(b) The FSF’s Back-Cover Text is:
You have freedom to copy and modify this GNU Manual, like GNU
software. Copies published by the Free Software Foundation raise
funds for GNU development.
Последнее обновление: 30.01.2023
Установка компилятора
Рассмотрим создание первой простейшей программы на C++ с помощью компилятора g++, который на сегодняшний день является одим из
наиболее популярных компиляторов для C++, доступен для разных платформ и который распространяется в рамках пакета компиляторов GCC. Более подробную информацию о g++ можно получить на официальном сайте проекта https://gcc.gnu.org/.
Набор компиляторов GCC распространяется в различных версиях. Для Windows одной из наиболее популярных версий является пакет средств для разработки от
некоммерческого проекта MSYS2. Следует отметить, что для MSYS2 требуется 64-битная версия Windows 7 и выше (то есть Vista, XP и более ранние версии не подходят)
Итак, загрузим программу установки MSYS2 с официального сайта MSYS2:
После загрузки запустим программу установки:
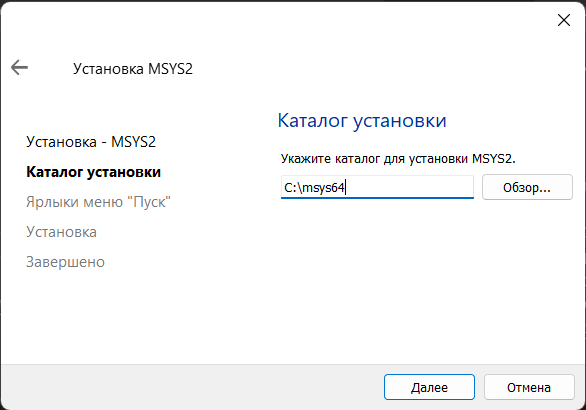
На первом шаге установки будет предложено установить каталог для установки. По умолчанию это каталог C:msys64:
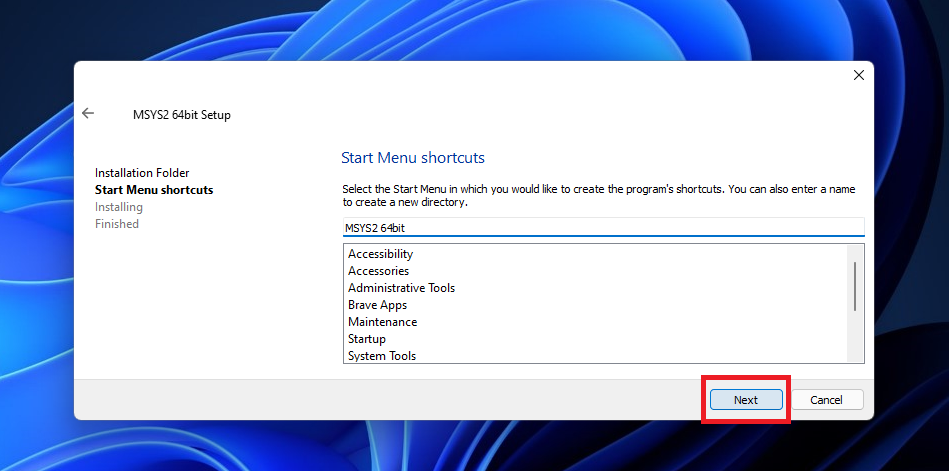
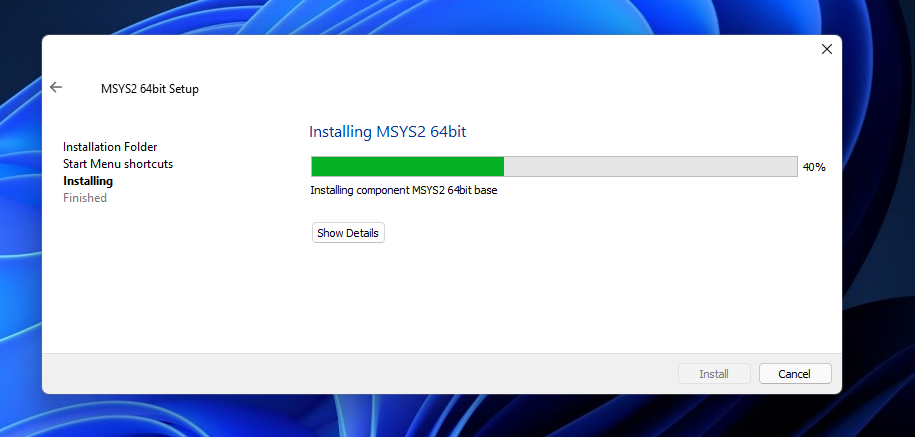
Оставим каталог установки по умолчанию (при желании можно изменить). На следующем шаге устанавливаются настройки для ярлыка для меню Пуск, и затем собственно будет произведена установка.
После завершения установки нам отобразить финальное окно, в котором нажмем на кнопку Завершить

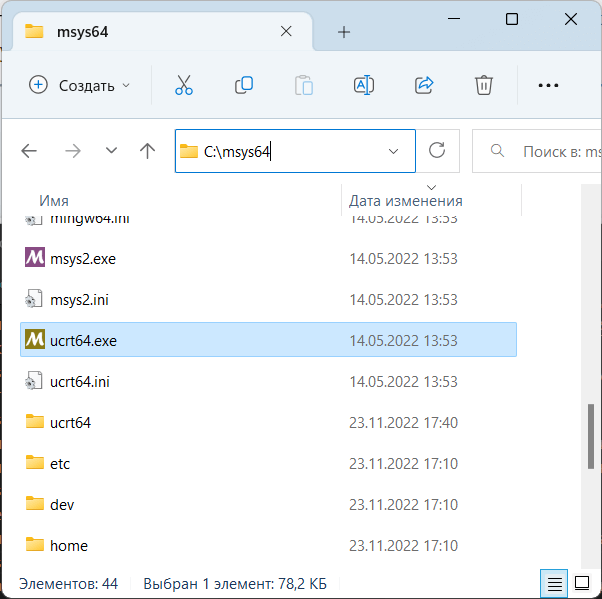
После завершения установки запустится консольное приложение MSYS2.exe. Если по каким-то причинам оно не запустилось,
то в папке установки C:/msys64 надо найти файл usrt_64.exe:
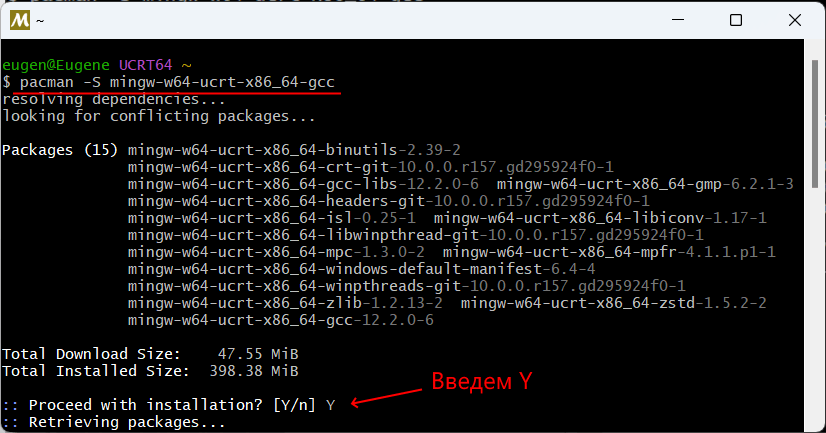
Теперь нам надо установить собственно набор компиляторов GCC. Для этого введем в этом приложении следующую команду:
pacman -S mingw-w64-ucrt-x86_64-gcc
Для управления пакетами MSYS2 использует пакетный менеджер Packman. И данная команда говорит пакетному менелжеру packman установить пакет mingw-w64-ucrt-x86_64-gcc,
который представляет набор компиляторов GCC (название устанавливаемого пакета указывается после параметра -S).
и после завершения установки мы можем приступать к программированию на языке C++. Если мы откроем каталог установки и зайдем в нем в папку C:msys64ucrt64bin,
то найдем там все необходимые файлы компиляторов:
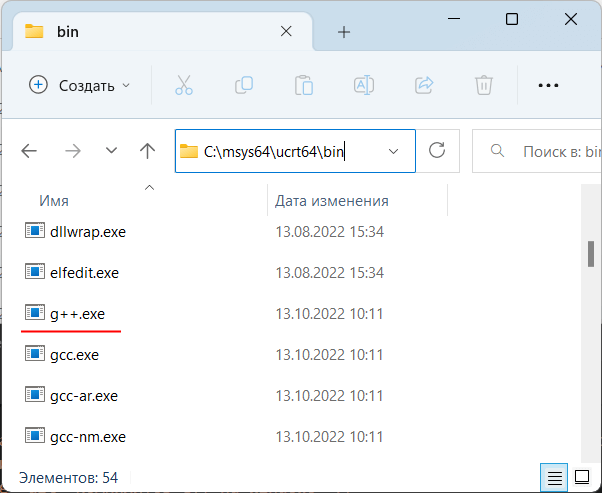
В частности, файл g++.exe как раз и будет представлять компилятор для языка С++.
Далее для упрощения запуска компилятора мы можем добавить путь к нему в Переменные среды. Для этого можно в окне поиска в Windows ввести «изменение переменных среды текущего пользователя»:
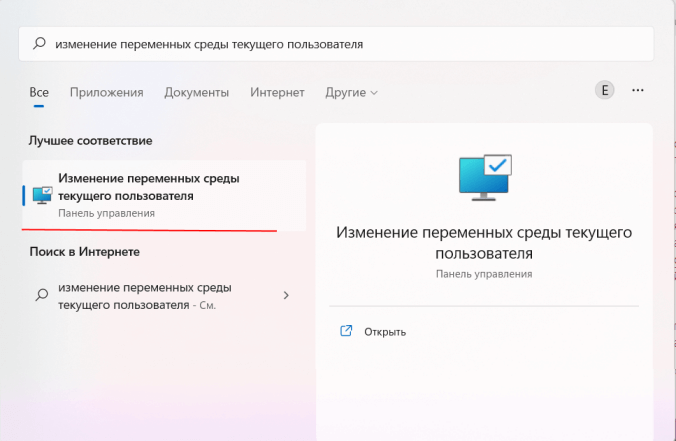
Нам откроется окно Переменныех среды:
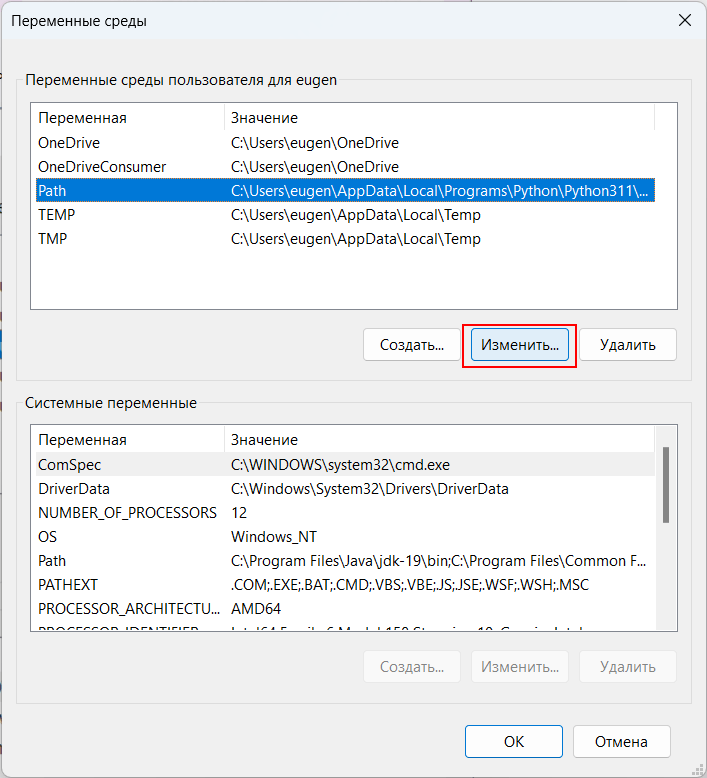
И добавим путь к компилятору C:msys64ucrt64bin:

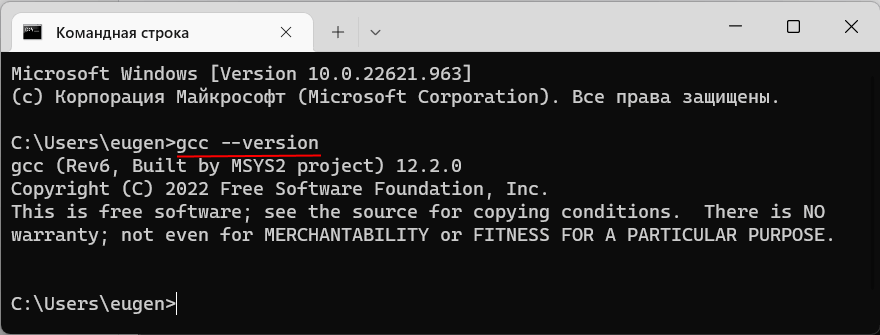
Чтобы убедиться, что набор компиляторов GCC успешно установлен, введем следующую команду:
В этом случае нам должна отобразиться версия компиляторов
Создание первой программы
Итак, компилятор установлен, и теперь мы можем написать первую программу. Для этого потребуется любой текстовый редактор для набора исходного кода.
Можно взять распространенный редактор Visual Studio Code или даже обычный встроенный Блокнот.
Итак, создадим на жестком диске С папку для исходных файлов. А в этой папке создадим новый текстовый файл, который переименуем в
hello.cpp. То есть по сути файлы исходного кода на С++ — это обычные текстовые файлы, которые, как правило, имеют расширение
cpp.
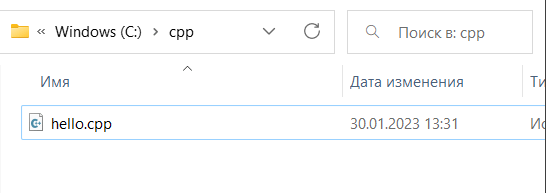
В моем случае файл hello.cpp находится в папке C:cpp.
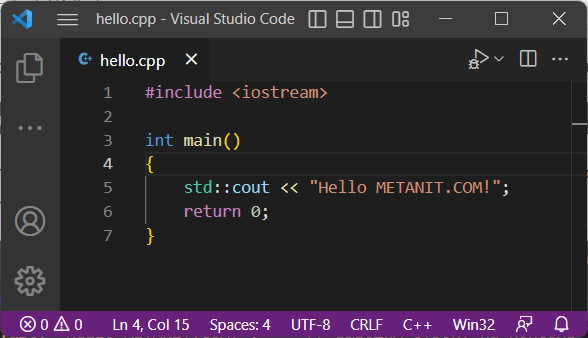
Теперь определим в файле hello.cpp простейший код, который будет выводить строку на консоль:
#include <iostream>        		// подключаем заголовочный файл iostream

int main()							// определяем функцию main
{									// начало функции
	std::cout << "Hello METANIT.COM!";	 // выводим строку на консоль
	return 0;						// выходим из функции
}									// конец функции
Для вывода строки на консоль необходимо подключить нужный функционал. Для этого в начале файла идет строка
#include <iostream>
Данная строка представляет директиву препроцессора, которая позволяет подключить библиотеку iostream. Эта библиотека нужна для вывода строки на консоль.
Далее идет определение функции main. Функция main должна присутствовать в любой программе на С++, с нее
собственно и начинается выполнение приложения.
Функция main состоит из четырех элементов:
-
Тип возвращаемого значения. В данном случае это тип int. Этот тип указывает, что функция должна
возвращать целое число. -
Имя функции. В данном случае функция называется main.
-
Список параметров. После имени функции в скобках идет список параметров. Но в данном случае скобки пустые, то есть
функция main не принимает параметров. -
Тело функции. После списка параметров в фигурных скобках идет тело функции. Здесь и определяются собственно те
действия, которые выполняет функция main.{ std::cout << "Hello METANIT.COM!"; return 0; }
В теле функции происходит вывод строки на консоль. Для обращения к консоли используется стандартный поток вывода std::cout.
С помощью оператора << в этот поток (в данном случае фактически на консоль) передается строка символов, которую надо вывести на консоль, то есть «Hello METANIT.COM!».
В конце осуществляем выход из функции с помощью оператора return. Так как функция должна возвращать целое число, то после return указывается число 0.
Ноль используется в качестве индикатора успешного завершения программы.
После каждой инструкции в языке C++ ставятся точка с запятой.
Каждая строка снабжена комментарием. Все, что написано после двойного слеша // представляет комментарий. Комментарий не учитывается при компиляции приложения, и
не является частью программного кода, а служат лишь для его описания. Комментарий позволяет понять, что делает программа.
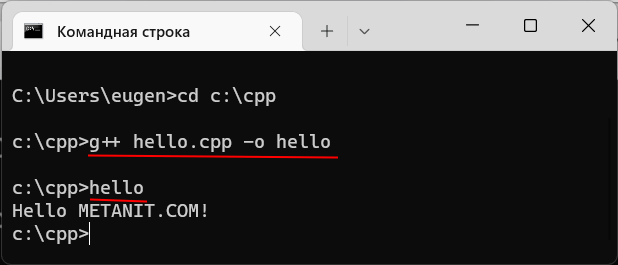
Теперь скомпилируем этот файл. Для этого откроем командную строку Windows и вначале с помощью команды cd перейдем к папке с исходным файлом:
Чтобы скомпилировать исходный код, необходимо компилятору gcc передать в качестве параметра файл hello.cpp:
Дополнительный необязательный параметр -o hello указывает, что скомпилированный файл будет называться hello.exe. Если не указать этот параметр, то файл будет называться по умолчанию — a.exe.
После выполнения этой команды будет скомпилирован исполняемый файл, который в Windows по умолчанию называется hello.exe. И мы можем обратиться к этому файлу, и в этом случае консоль выведет
строку «Hello METANIT.COM!», собственно как и прописано в коде.
Если вместо командной строки используется оболочка PowerShell, то для запуска файла надо прописать «./hello».
Стоит отметить, что мы можем совместить компиляцию и выполнение следующей командой:
g++ hello.cpp -o hello.exe & hello.exe
11 mins read
Follow these steps to install g++ (the GNU C++ compiler) for Windows. There is no room for creativity here; you must follow the directions exactly.
- Pick the drive and a folder in which you want to install g++. I’ll assume that it is C:, but you can choose a different one. If you choose a different drive or a different folder, you’ll need to adapt the directions below accordingly.
- Download full.exe, an about 14 megabyte executable, to C:full.exe by right-clicking on the link. Use Save Link As… or Save Target As… Be sure the browser saves the file as C:full.exe.
- Run the downloaded executable. This will install g++ (and a lot of other things that you don’t really need) on your hard drive. Go to the C: drive using Windows Explorer and double-click on full.exe. Or, open a DOS command prompt window (Start > Programs > Command Prompt), connect to the C: drive using the cd command, and type full.
- Locate where the bin folder was created for the g++ installation. On my Windows machine, it was created in the following path: C:cygnuscygwin-b20H-i586-cygwin32bin You now should add it to the PATH environment variable. You do that by following: Start -> Control Panel -> System -> Advanced -> Environment Variables At this point you can see the PATH variable either in the User Variables or in the System Variables. Add the g++ path into the PATH variable. You add it to the end of the existing value separated by a semicolon (‘;’). Make sure that you do not lose the original value. You are just appending more to the end separated by a semicolon.
- Restart your computer. A Cygnus Solutions entry will appear in your Programs menu, and an icon may appear on your desktop. Don’t use them! You will use it using the g++ command on a DOS command prompt as explained below.
You should now be able to run g++ from a DOS command prompt window. For example, to compile a file called C:minehello.cpp, connect to the C:mine folder and enter
g++ -g hello.cpp -o hello -lm
You’ll then be able to run the compiled program by entering hello in the DOS command prompt window.
If you’ve installed Emacs as described here, you will also be able to run g++ from Emacs. If, when you do this, Emacs tries to compile with the command make -k, you made a mistake during the Emacs installation. (If you try to compile a C program, e.g., hello.c instead of a C++ program, e.g., hello.cpp, it will try to make -k. In that case enter the compile command, gcc -g hello.c -o hello -lm, manually. After you try it manually once, from the second time on it will do the right thing automatically.) If you want to learn how to run g++ on emacs, see here.
If you’d like to learn more about where this free compiler came from, we downloaded it from an older site of http://sourceware.org/cygwin/.
If you wish to clean up a little, you may delete the file: full.exe at this point. Your g++ compiler is installed under C:cygnus.
Several modern C++ features are currently missing from Visual Studio Express, and from the system GCC compiler provided with many of today’s Linux distributions. Generic lambdas – also known as polymorphic lambdas – are one such feature. This feature is, however, available in the latest versions of GCC and Clang.
The following guide will help you install the latest GCC on Windows, so you can experiment with generic lambdas and other cutting-edge C++ features. You’ll need to compile GCC from sources, but that’s not a problem. Depending on the speed of your machine, you can have the latest GCC up and running in as little as 15 minutes.
The steps are:
- Install Cygwin, which gives us a Unix-like environment running on Windows.
- Install a set of Cygwin packages required for building GCC.
- From within Cygwin, download the GCC source code, and build and install it.
- Test the new GCC compiler in C++14 mode using the
-std=c++14option.
You can also install native GCC compilers from the MinGW-w64 project without needing Cygwin.
1. Install Cygwin
First, download and run either the 32- or 64-bit version of the Cygwin installer, depending on your version of Windows. Cygwin’s setup wizard will walk you through a series of steps. If your machine is located behind a proxy server, make sure to check “Use Internet Explorer Proxy Settings” when you get to the “Select Your Internet Connection” step.
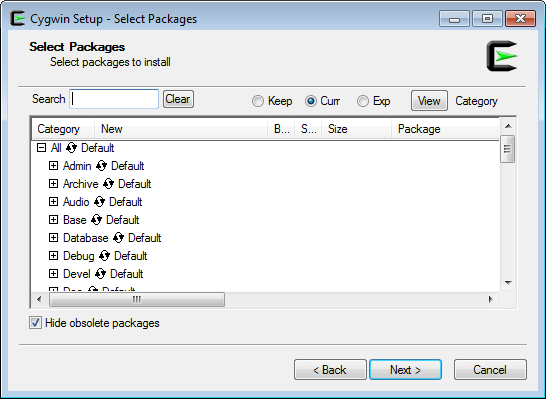
When you reach the “Select Packages” step (shown below), don’t bother selecting any packages yet. Just go ahead and click Next. We’ll add additional packages from the command line later.
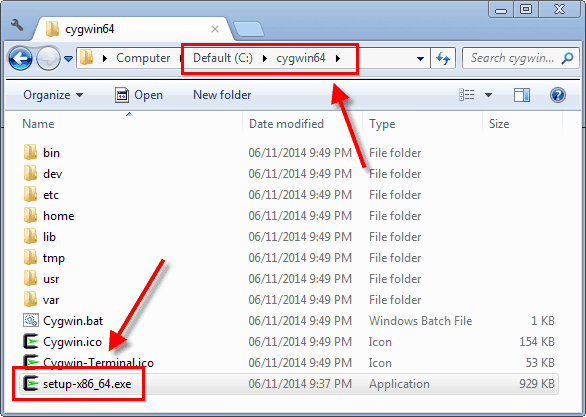
After the Cygwin installer completes, it’s very important to keep the installer around. The installer is an executable named either setup-x86.exe or setup-x86_64.exe, and you’ll need it to add or remove Cygwin packages in the future. I suggest moving the installer to the same folder where you installed Cygwin itself; typically C:cygwin or C:cygwin64.
If you already have Cygwin installed, it’s a good idea to re-run the installer to make sure it has the latest available packages. Alternatively, you can install a new instance of Cygwin in a different folder.
2. Install Required Cygwin Packages
Next, you’ll need to add several packages to Cygwin. You can add them all in one fell swoop. Just open a Command Prompt (in Windows), navigate to the folder where the Cygwin installer is located, and run the following command:
C:cygwin64>setup-x86_64.exe -q -P wget -P gcc-g++ -P make -P diffutils -P libmpfr-devel -P libgmp-devel -P libmpc-devel
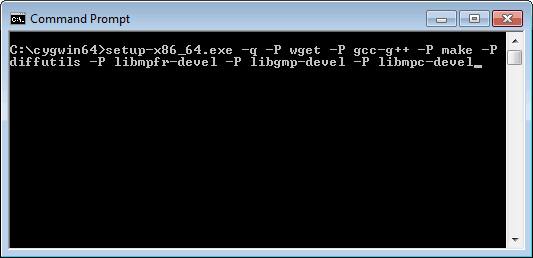
A window will pop up and download all the required packages along with their dependencies.
At this point, you now have a working GCC compiler on your system. It’s not the latest version of GCC; it’s whatever version the Cygwin maintainers chose as their system compiler. At the time of writing, that’s GCC 4.8.3. To get a more recent version of GCC, you’ll have to compile it yourself, using the GCC compiler you already have.
3. Download, Build and Install the Latest GCC
Open a Cygwin terminal, either from the Start menu or by running Cygwin.bat from the Cygwin installation folder.
If your machine is located behind a proxy server, you must run the following command from the Cygwin terminal before proceeding – otherwise, wget won’t work. This step is not needed if your machine is directly connected to the Internet.
export http_proxy=$HTTP_PROXY https_proxy=$HTTP_PROXY ftp_proxy=$HTTP_PROXY
To download and extract the latest GCC source code, enter the following commands in the Cygwin terminal. If you’re following this guide at a later date, there will surely be a more recent version of GCC available. I used 4.9.2, but you can use any version you like. Keep in mind, though, that it’s always best to have the latest Cygwin packages installed when building the latest GCC. Be patient with the tar command; it takes several minutes.
wget http://ftpmirror.gnu.org/gcc/gcc-4.9.2/gcc-4.9.2.tar.gz
tar xf gcc-4.9.2.tar.gz
That will create a subdirectory named gcc-4.9.2. Next, we’ll configure our GCC build. As the GCC documentation recommends, it’s best to configure and build GCC in another directory outside gcc-4.9.2, so that’s what we’ll do.
mkdir build-gcc
cd build-gcc
../gcc-4.9.2/configure --program-suffix=-4.9.2 --enable-languages=c,c++ --disable-bootstrap --disable-shared
Here’s a description of the command-line options passed to configure:
- The
--program-suffix=-4.9.2option means that once our new GCC is installed, we’ll run it asg++-4.9.2. This will make it easier for the new GCC compiler to coexist alongside the system GCC compiler provided by Cygwin. - The
--enable-languages=c,c++option means that only the C and C++ compilers will be built. Compilers for other languages, such as Fortran, Java and Go, will be excluded. This will save compile time. - The
--disable-bootstrapoption means that we only want to build the new compiler once. If we don’t specify--disable-bootstrap, the new compiler will be built three times, for testing and performance reasons. However, the system GCC compiler (4.8.3) provided by Cygwin is pretty recent, so--disable-bootstrapis good enough for our purposes. This will save a significant amount of compile time. - The
--disable-sharedoption means that we don’t want to build the new standard C++ runtime library as a DLL that’s shared with other C++ applications on the system. It’s totally possible to make C++ executables work with such DLLs, but it takes care not to introduce conflicts with C++ executables created by older or newer versions of GCC. That’s something distribution maintainers need to worry about; not us. Let’s just avoid the additional headache. - By default, the new version of GCC will be installed to
/usr/localin Cygwin’s virtual filesystem. This will make it easier to launch the new GCC since/usr/local/binis already listed in Cygwin’sPATHenvironment variable. However, if you’re using an existing Cygwin installation, it might prove difficult to uninstall GCC from/usr/locallater on (if you so choose), since that directory tends to contain files from several different packages. If you prefer to install the new GCC to a different directory, add the option--prefix=/path/to/directoryto the aboveconfigurecommand.
We’re not going to build a new Binutils, which GCC relies on, because the existing Binutils provided by Cygwin is already quite recent. We’re also skipping a couple of packages, namely ISL and CLooG, which means that the new compiler won’t be able to use any of the Graphite loop optimizations.
Next, we’ll actually build the new GCC compiler suite, including C, C++, and the standard C++ library. This is the longest step.
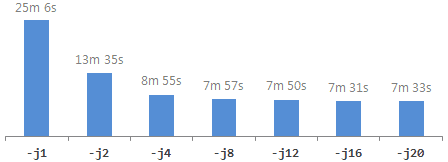
The -j4 option lets the build process spawn up to four child processes in parallel. If your machine’s CPU has at least four hardware threads, this option makes the build process run significantly faster. The main downside is that it jumbles the output messages generated during the build process. If your CPU has even more hardware threads, you can specify a higher number with -j. For comparison, I tried various numbers on a Xeon-based machine having 12 hardware threads, and got the following build times:
Be warned: I encountered a segmentation fault the first time I ran with -j4. Bad luck on my part. If that happens to you, running the same command a second time should allow the build process to finish successfully. Also, when specifying higher numbers with -j, there are often strange error messages at the end of the build process involving “jobserver tokens”, but they’re harmless.
Once that’s finished, install the new compiler:
This installs several executables to /usr/local/bin; it installs the standard C++ library’s include files to /usr/local/include/c++/4.9.2; and it installs the static standard C++ library to /usr/local/lib, among other things. Interestingly, it does not install a new standard C library! The new compiler will continue to use the existing system C library that came with Cygwin.
If later, you decide to uninstall the new GCC compiler, you have several options:
- If you installed GCC to a directory other than
/usr/local, and that directory contains no other files, you can simply delete that directory. - If you installed GCC to
/usr/local, and there are files from other packages mixed into the same directory tree, you can run thelist_modifications.pyscript from this post to determine which files are safe to delete from/usr/local. - You can simply uninstall Cygwin itself, by deleting the
C:cygwin64folder in Windows, along with its associated Start menu entry.
4. Test the New Compiler
All right, let’s compile some code that uses generic lambdas! Generic lambdas are part of the C++14 standard. They let you pass arguments to lambda functions as auto (or any templated type), like the one highlighted below. Create a file named test.cpp with the following contents:
#include <iostream>

int main()
{
    auto lambda = [](auto x){ return x; };
    std::cout << lambda("Hello generic lambda!n");
    return 0;
}
You can add files to your home directory in Cygwin using any Windows-based text editor; just save them to the folder C:cygwin64homeJeff (or similar) in Windows.
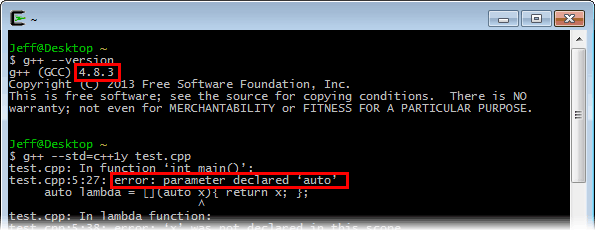
First, let’s see what happens when we try to compile it using the system GCC compiler provided by Cygwin:
g++ --version
g++ -std=c++1y test.cpp
If the system compiler version is less than 4.9, compilation will fail:
Now, let’s try it again using our freshly built GCC compiler. The new compiler is already configured to locate its include files in /usr/local/include/c++/4.9.2 and its static libraries in /usr/local/lib. All we need to do is run it:
g++-4.9.2 -std=c++14 test.cpp
./a.exe

It works!
https://preshing.com/20141108/how-to-install-the-latest-gcc-on-windows/

![]()
GCC, abbreviation for ‘GNU Compiler Collection’ (thanks @saphirakai
) (and not Gulf Cooperation Council, like I’d assumed) is a necessity if you (or your pesky college) is into C Programming.
Almost all Linux distros come pre-installed with it so they are out of the trouble. But for those of you who were constant users of Windows and Command Prompt, and never felt the necessity for a C compiler, GCC seems to come out of the blue and a tough nut to install. 1000 rage-quits later, I present you this article.
This article is written so that the installation process is made easier than most of the trashy articles I had to go through.
Installation
-
Go to MinGW official website and click on ‘Downloads’ on the left panel. You’ll be redirected to the site which hosts the files.
Important Edit: MinGW official website is now down (as of 24th March 2021). Hence, instead of their official website, download from MinGW SourceForge page - Look for mingw-get-setup.exe for downloading. Download it and launch the installer. Accept the terms and move on.
- You’ll now see that the installer is connecting to the Internet and downloading a lot of tiny and small files. Wait till it ends.
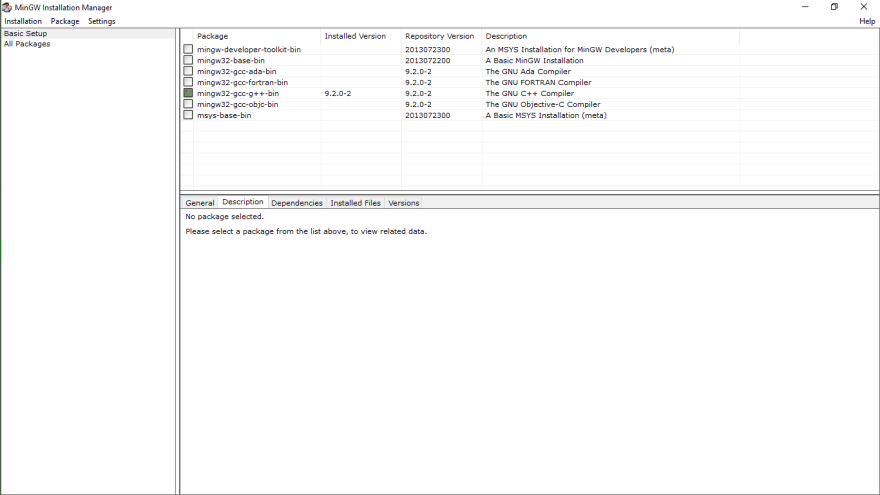
- Right when it ends (which won’t take long), you’ll be presented a window with title MinGW Installation Manager. You should be in the ‘Basic Setup’ tab by default when it launches. If not, click on Basic Setup.
- Out of the numerous check boxes presented to you on the right side, tick «mingw32-gcc-g++-bin«. If you are prompted with a menu, click on Mark for Install.
- Then on the top left corner click on Installation > Apply Changes. And wait while it downloads a billion files and installs them.
- Now you gotta edit your «Environment Variables» as well, so that gcc works in cmd no matter the file location.
- For that go to Windows Explorer > Right click on This PC > Properties > Advanced system settings > Environment Variables or you could just search for «Environment Variables» in Windows Search…
-
At the bottom «System Variables» panel, look for a Variable named «Path» and double click on it. Some systems show a good UI for adding a New Path easily (by clicking New), else you just need to add ; at the end and add the following path
C:MinGWbin(This is assuming you didn’t manually change any installation paths and went with just clicking ‘Next’ during installation)
-
Click on OK, and OK and close the other windows. Open a Command Prompt Terminal and try typing
gcc --versionand press Enter.If you get something like
gcc (MinGW.org GCC Build-2) 9.2.0
Copyright (C) 2019 Free Software Foundation, Inc.
This is free software; see the source for copying conditions.
There is NO warranty; not even for MERCHANTABILITY or FITNESS
FOR A PARTICULAR PURPOSE.
gcc has been successfully installed in your PC. Enjoy!
Cheers and happy coding!

Yes, this is technically an “ad”, but really we just want to ask if you want to join DEV. We have 900k+ developers reading, posting, and enjoying community, and would love to have you. Create an account and continue your coding journey.
If you want to run C or C++ programs in your Windows operating system, then you need to have the right compilers.
The MinGW compiler is a well known and widely used software for installing GCC and G++ compilers for the C and C++ programming languages.
But many devs face difficulties when installing the compiler, so I am going to show you all the steps to do so in this article with screenshots to help you get it done.
I will be using Windows 11, but the same process is applicable for all other Windows operating systems unless you are using Windows XP (You need to change some steps in Windows XP).
If you’d like to watch the video I made on this topic as well, here it is:
Install MSYS2
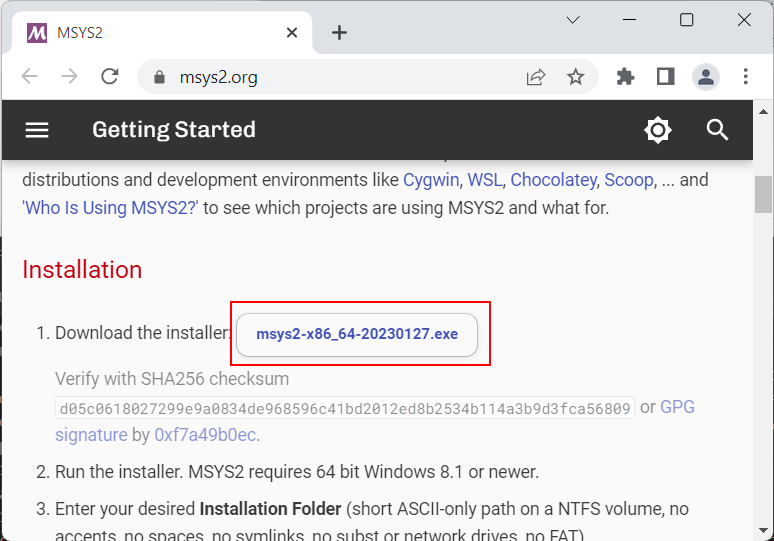
Firstly we need to download an executable file from MSYS2. Go to the official website of MSYS2: https://www.msys2.org/. The website looks like below as of today.
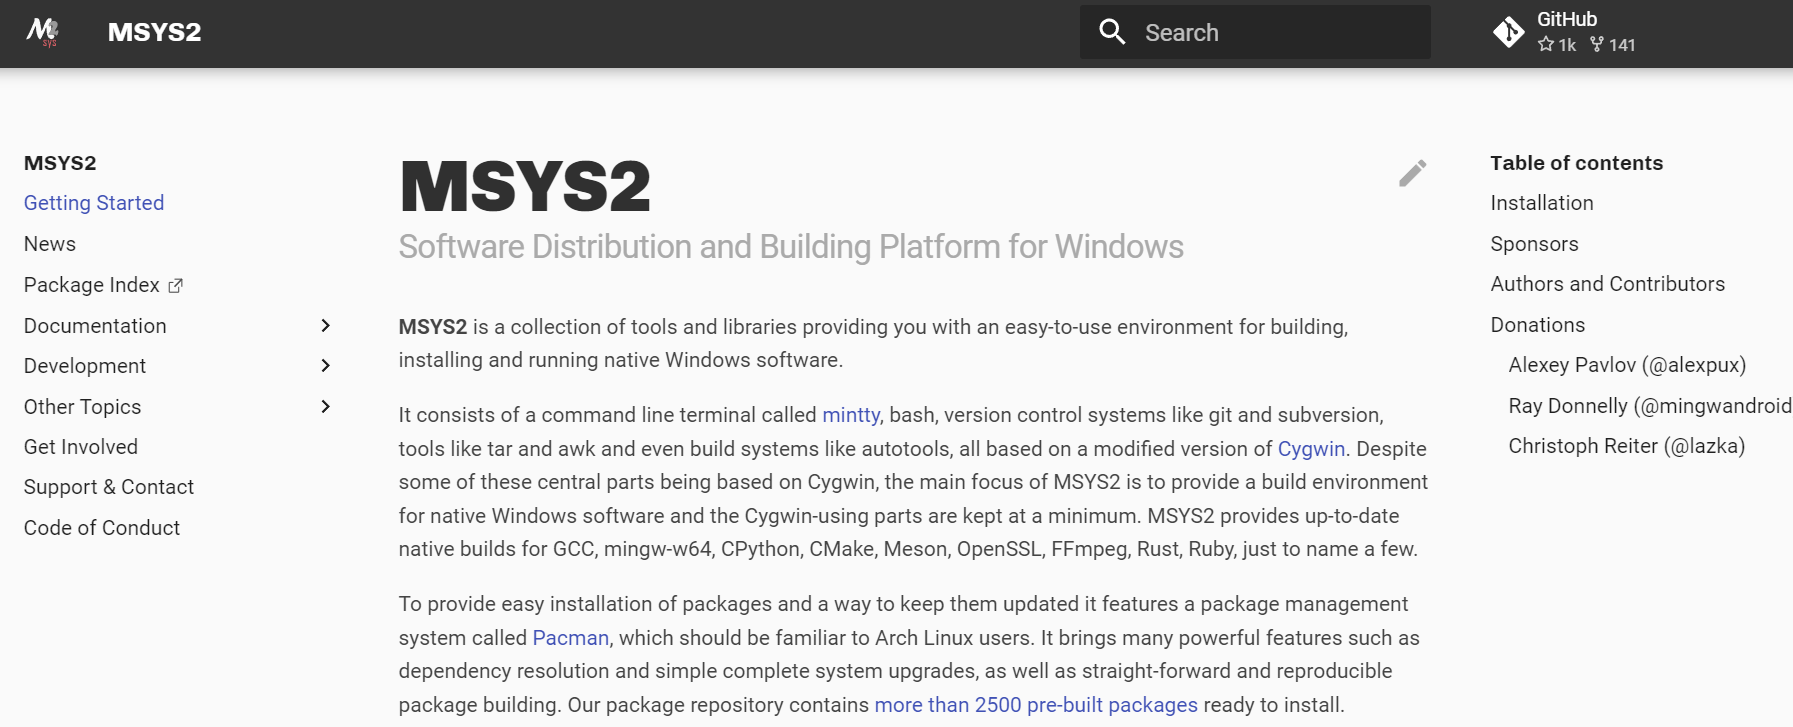
Scroll down a little bit until you find the download button for the executable file.
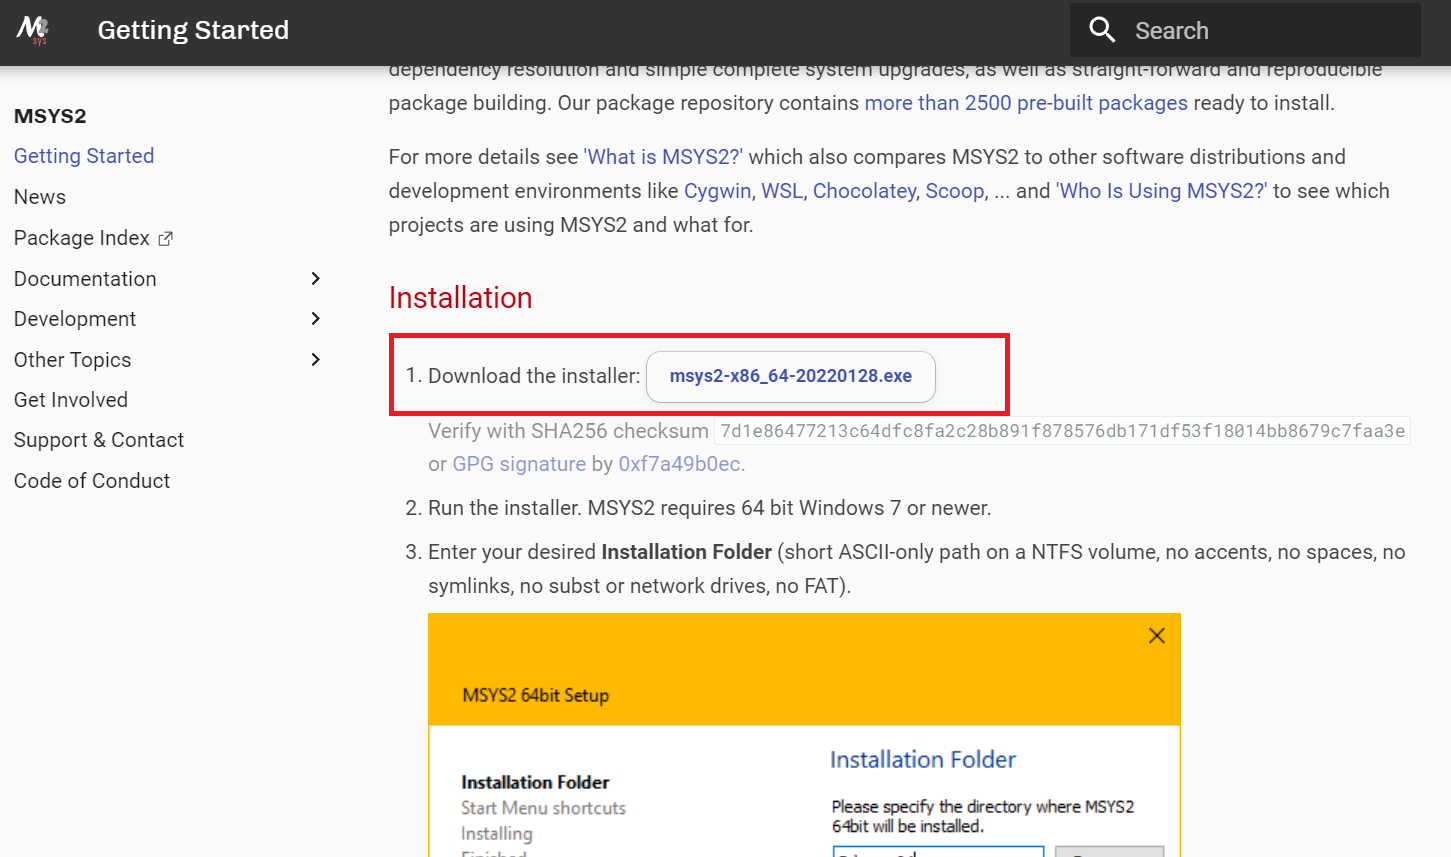
Simply click on the installer button and save the installer file in any place you want.
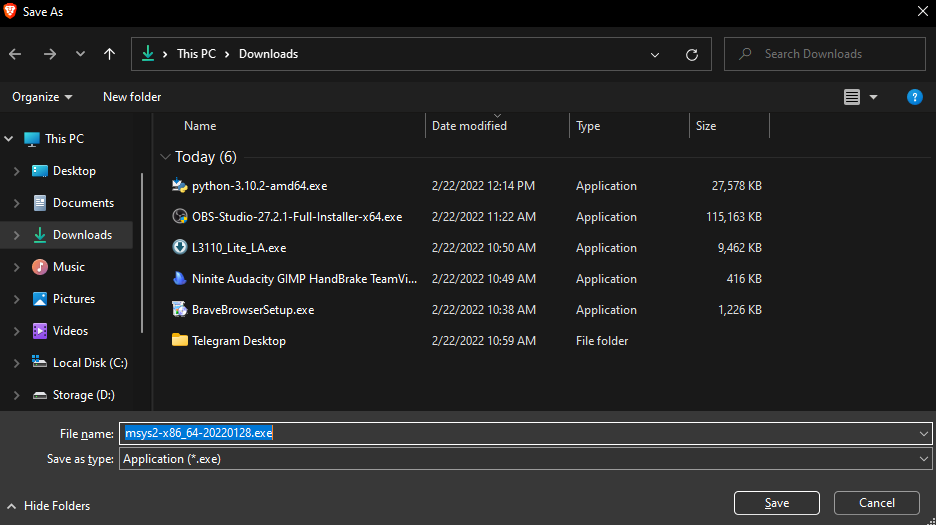
Finish downloading the executable file. It should not take much time depending on your internet speed.
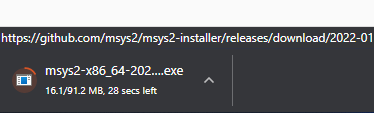
After downloading the file, we will get this executable file.
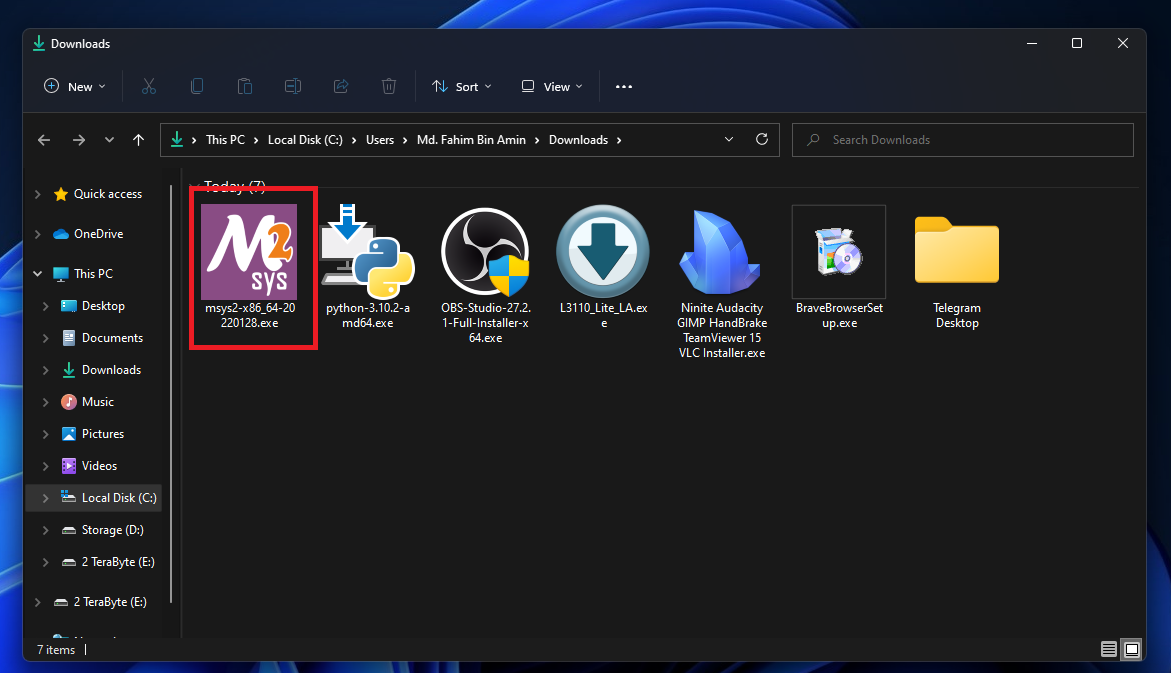
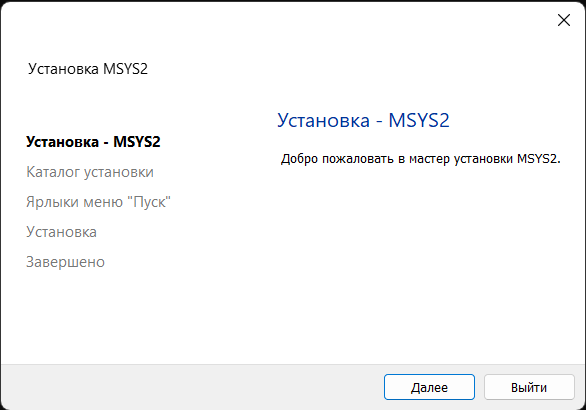
Double click on the executable file. Then click Next.
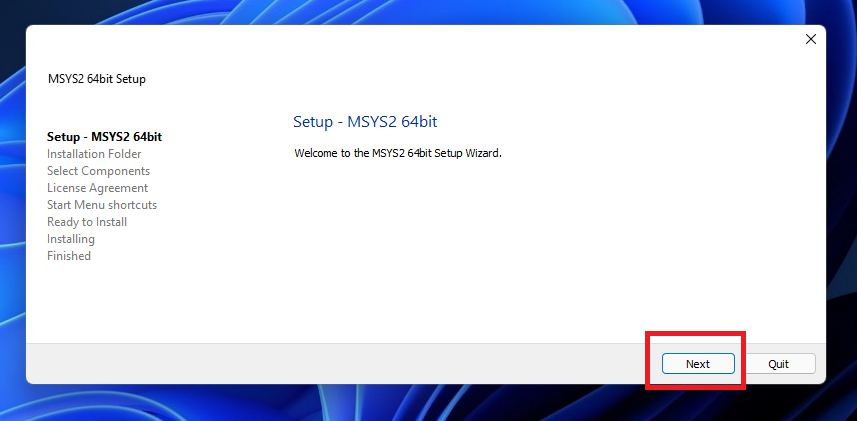
Keep the name as it is, and click Next.
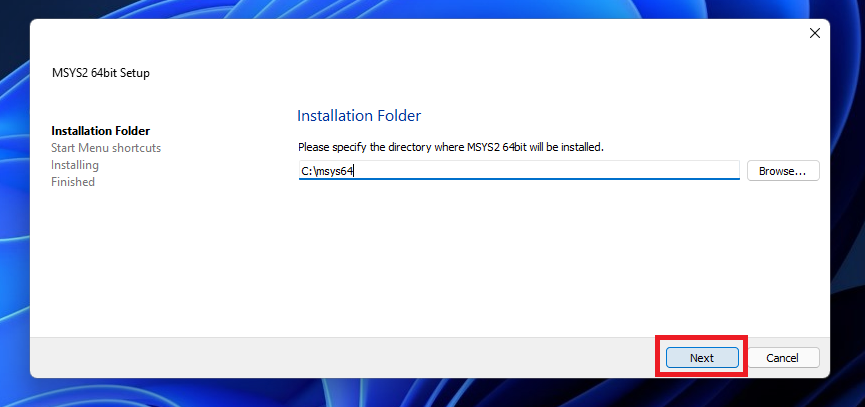
Keep all this as it is, and click Next.
Give it some time to finish the installation process.
If you keep the checkmark, then the MSYS2 terminal will open once you click Finish.
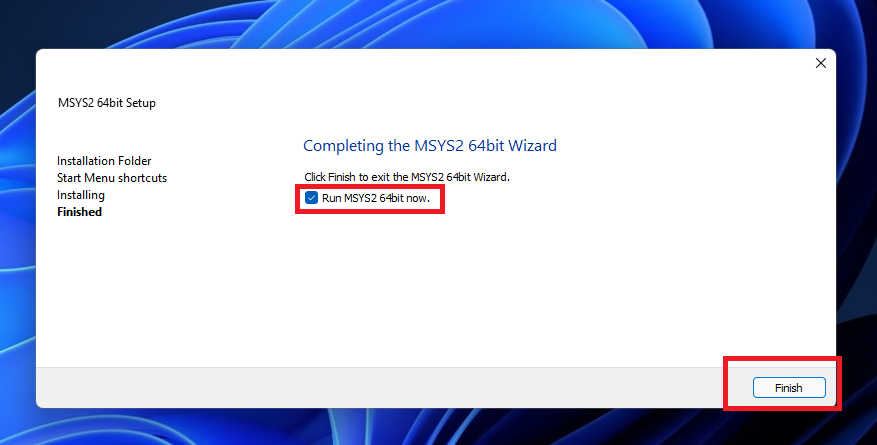
I prefer to do it this way, but if you want to do the remaining tasks later, then you need to open the terminal by yourself from the start menu.
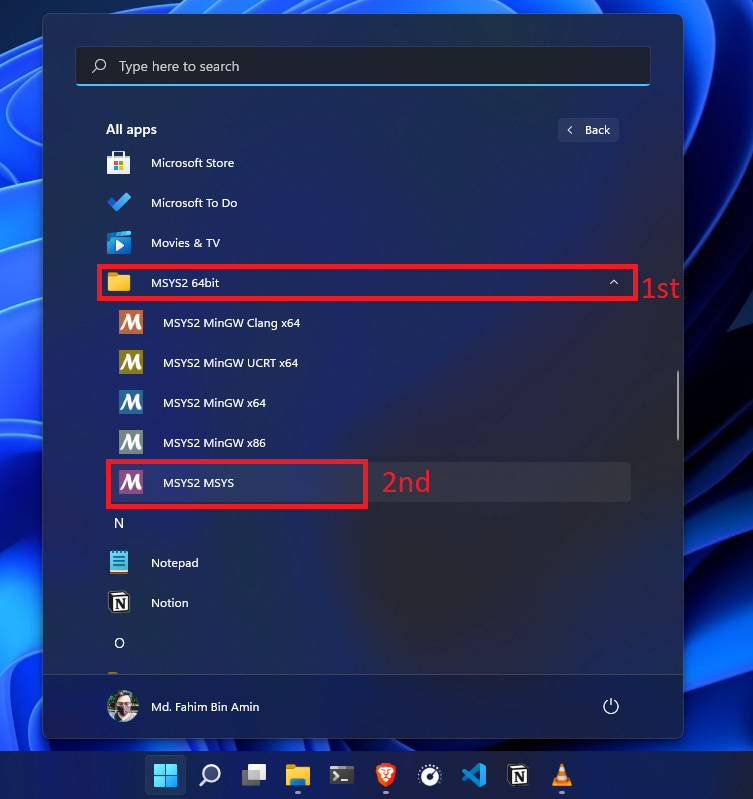
In that case, you have to click the start button > Search for MSYS2 and click on the terminal like in the following picture:

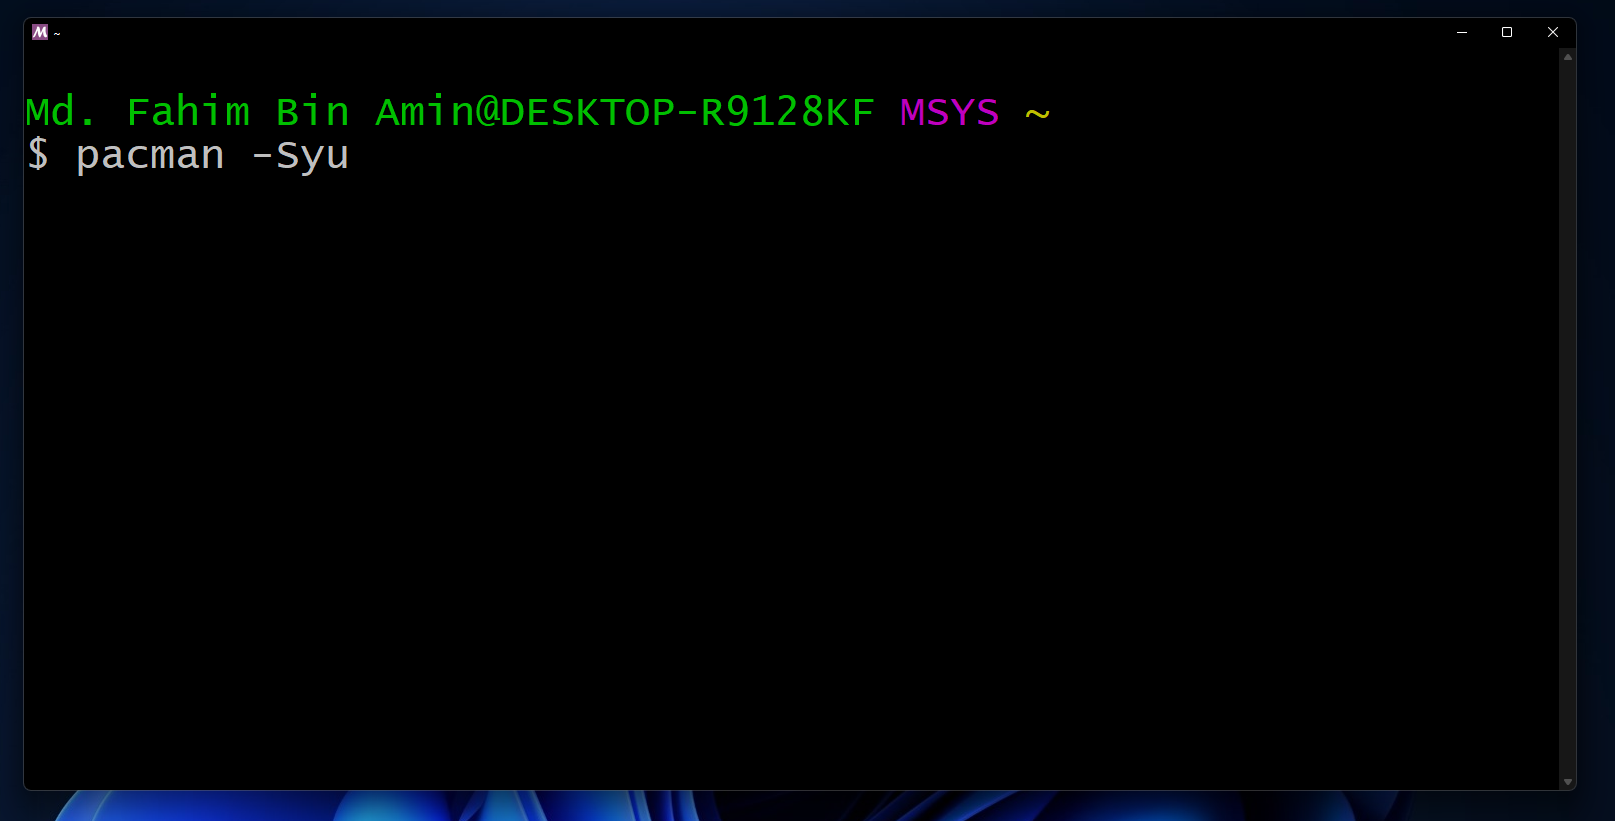
Let me assume that we have opened the MSYS2 MSYS terminal successfully.
Apply the command pacman -Syu to update the package database and the base packages.
Type Y and press the enter key if you get this type of installation prompt.
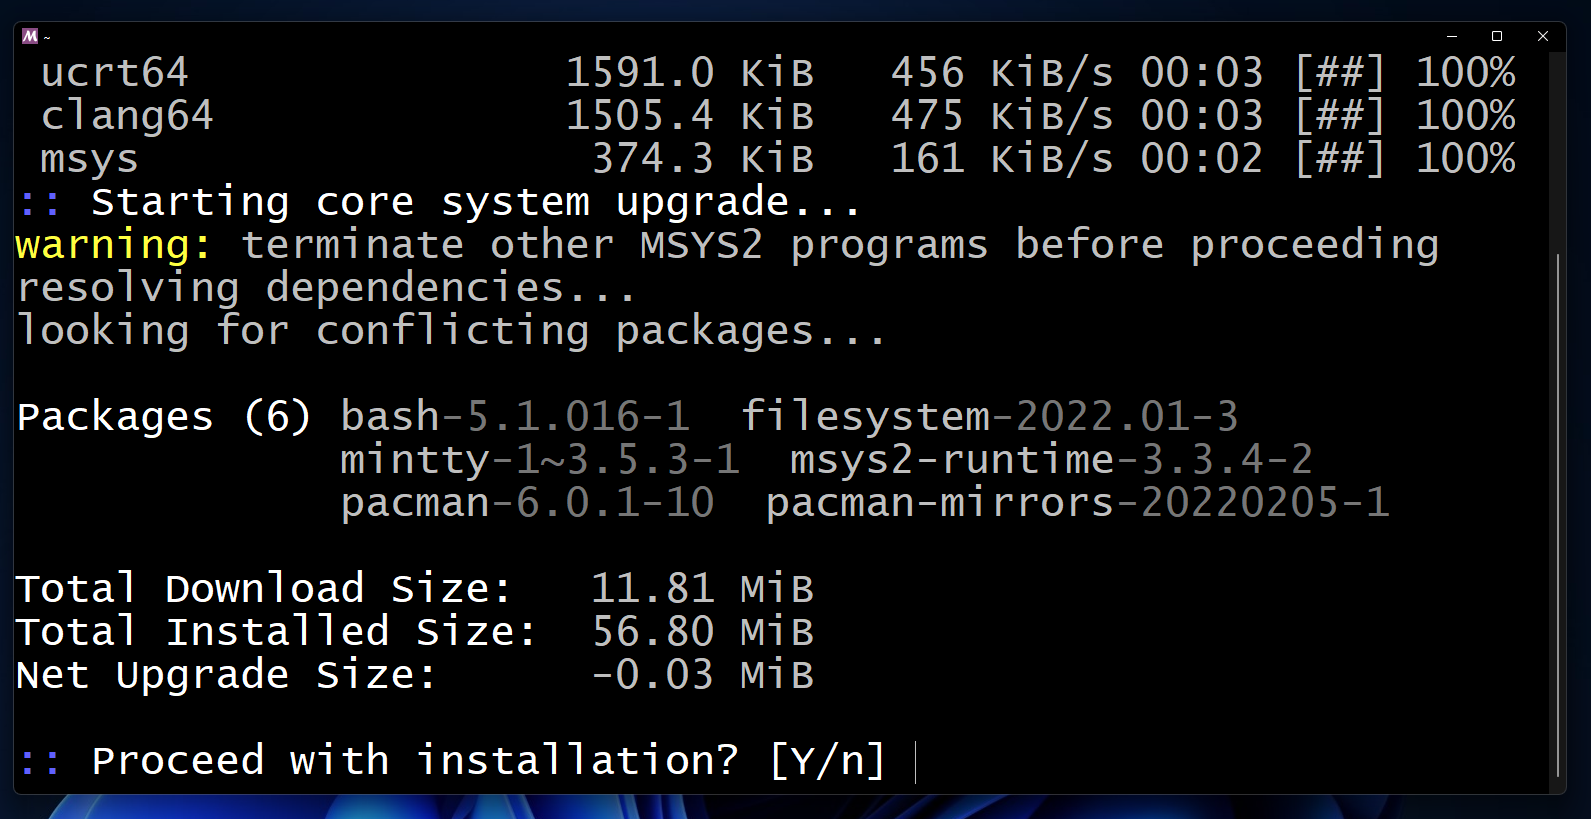


Type Y and press the enter key.
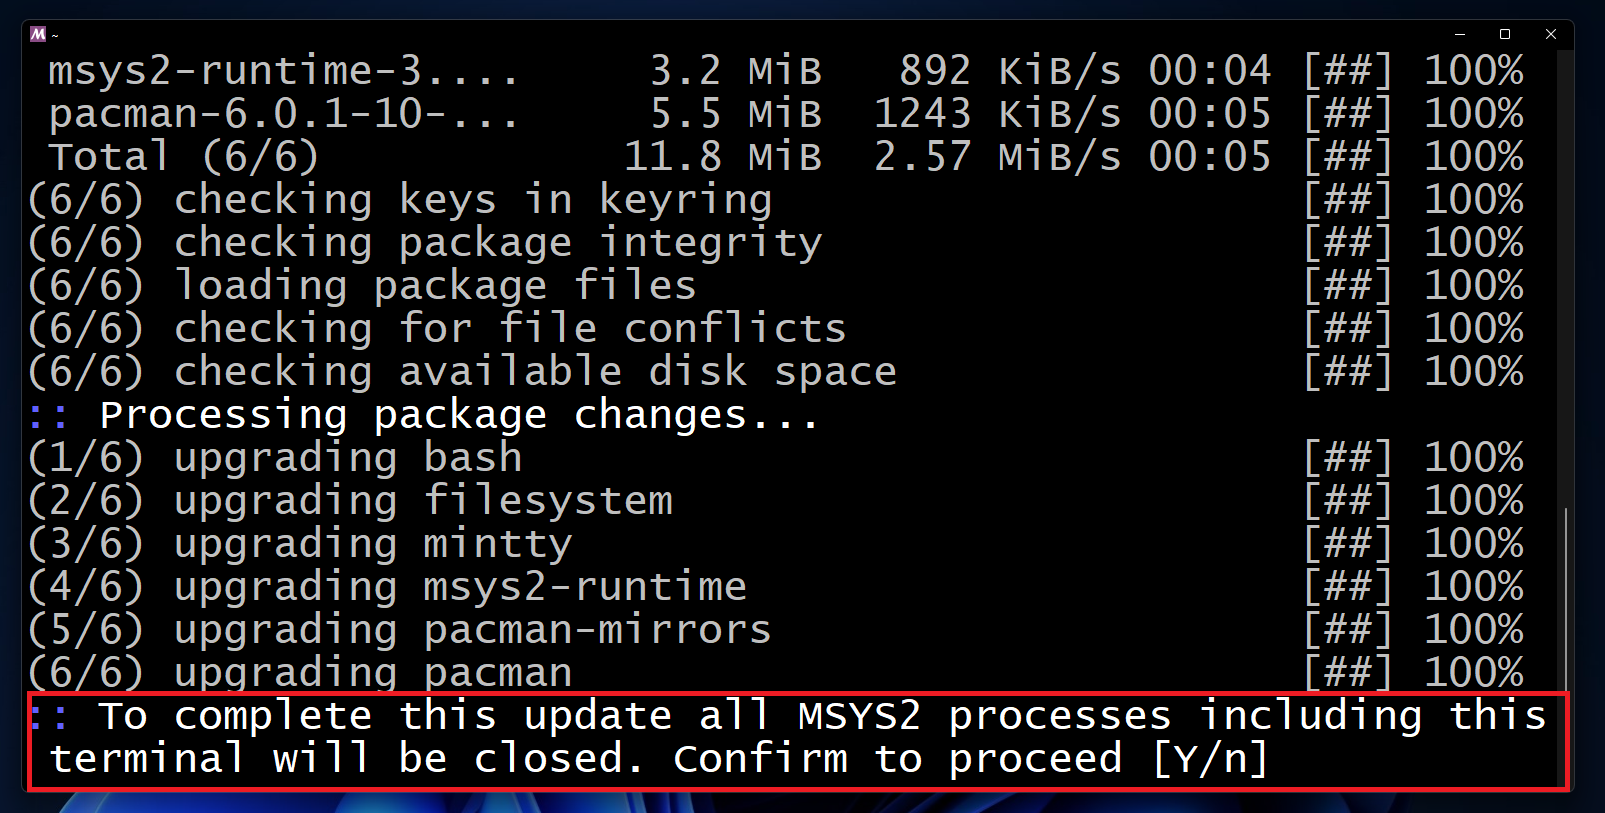
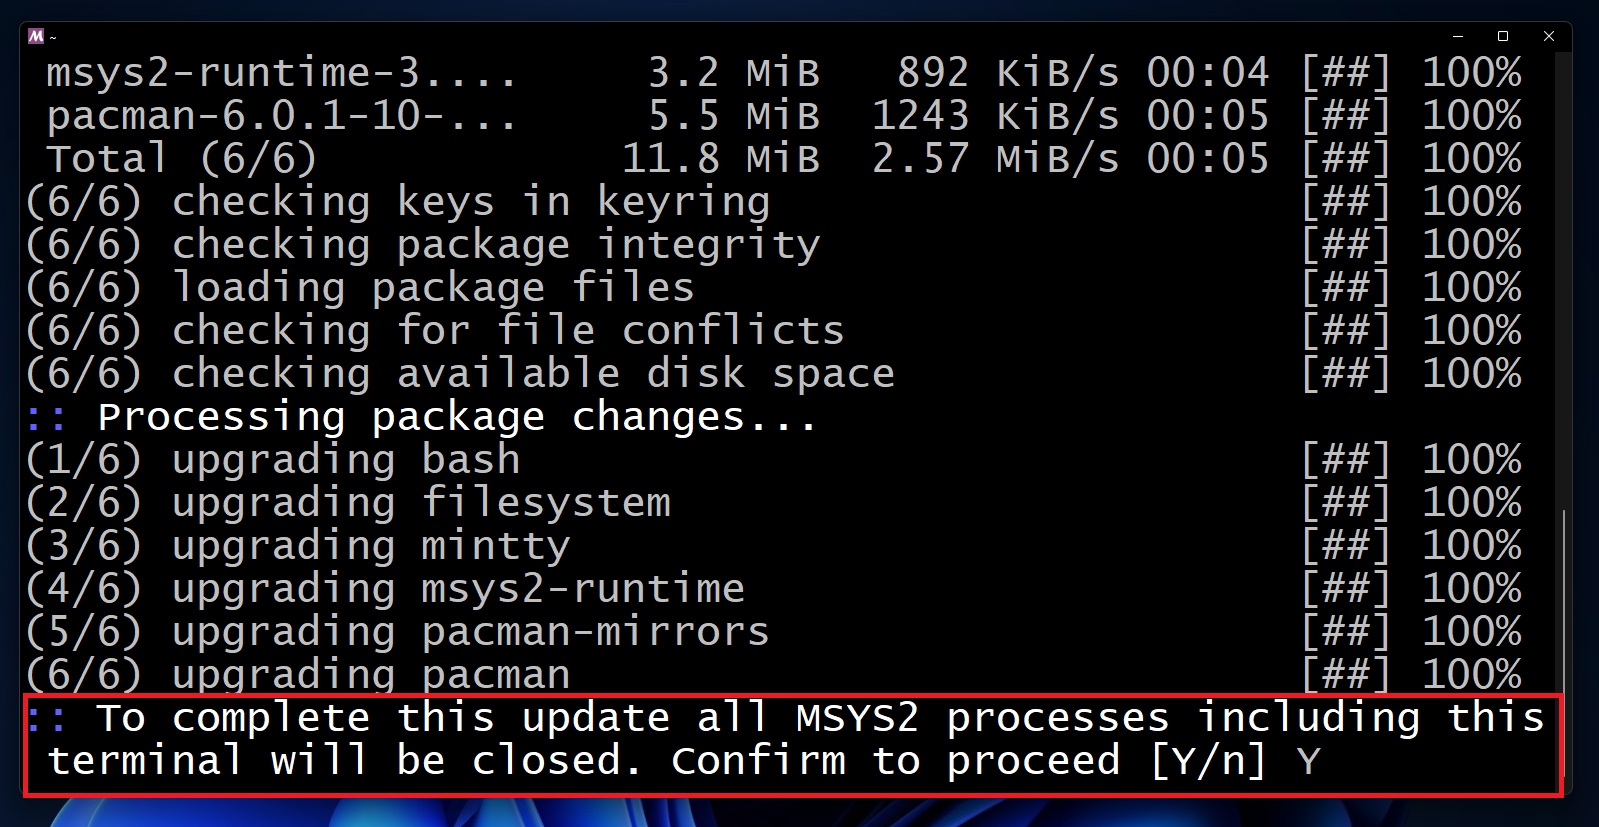
The terminal will be closed. We have to open the terminal manually and update the rest of the packages.
Click the start button.
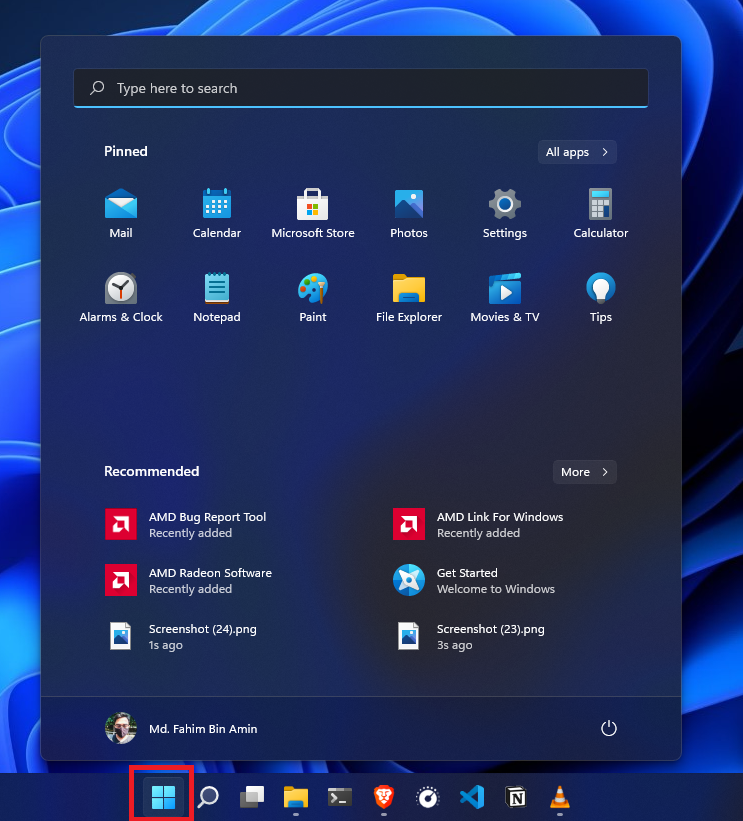
Search the folder named MSYS2 64bit. Click on the folder to expand and get the terminal. Open the terminal by clicking MSYS2 MSYS.
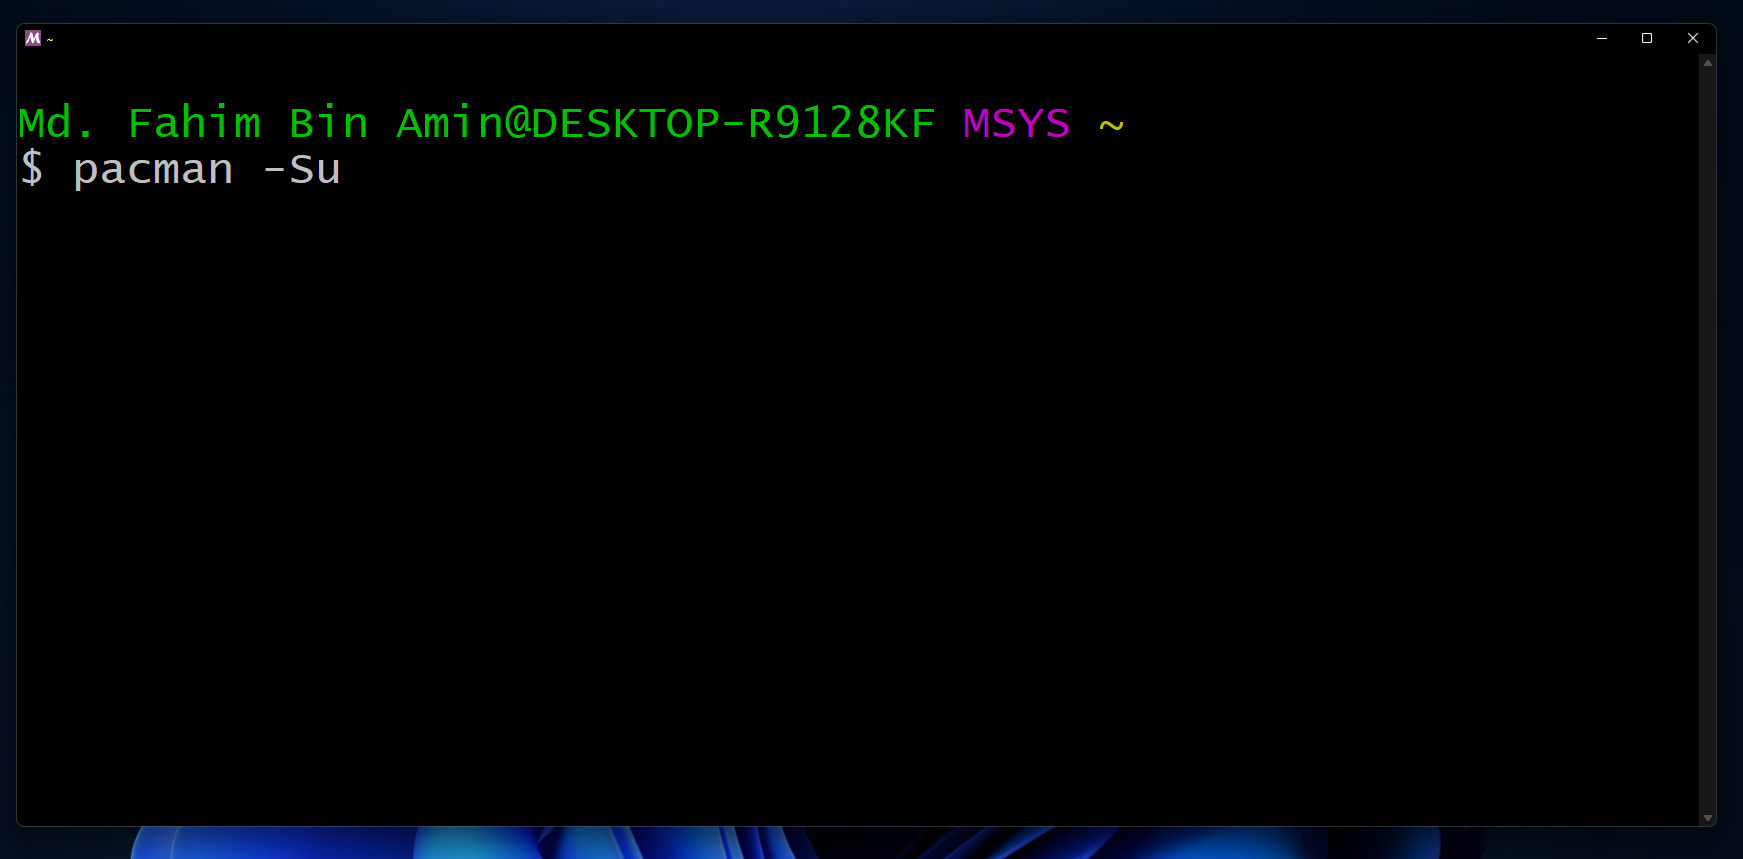
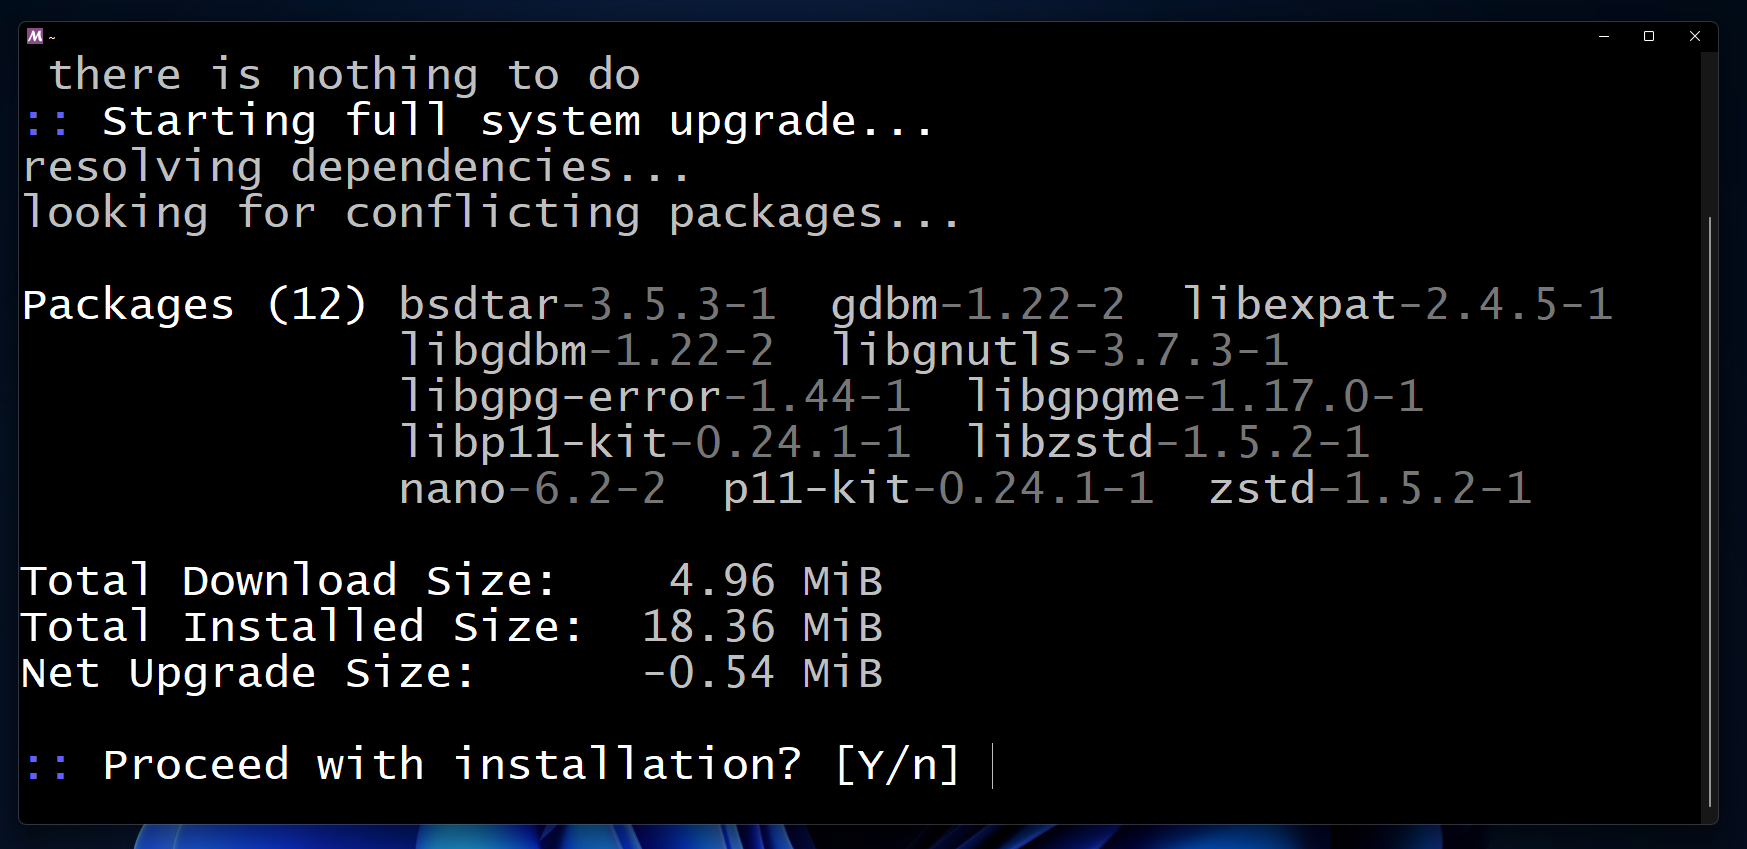
Update the rest of the packages by applying the command, pacman -Su. You might need to apply the command pacman -Sy if the terminal tells you to do that.
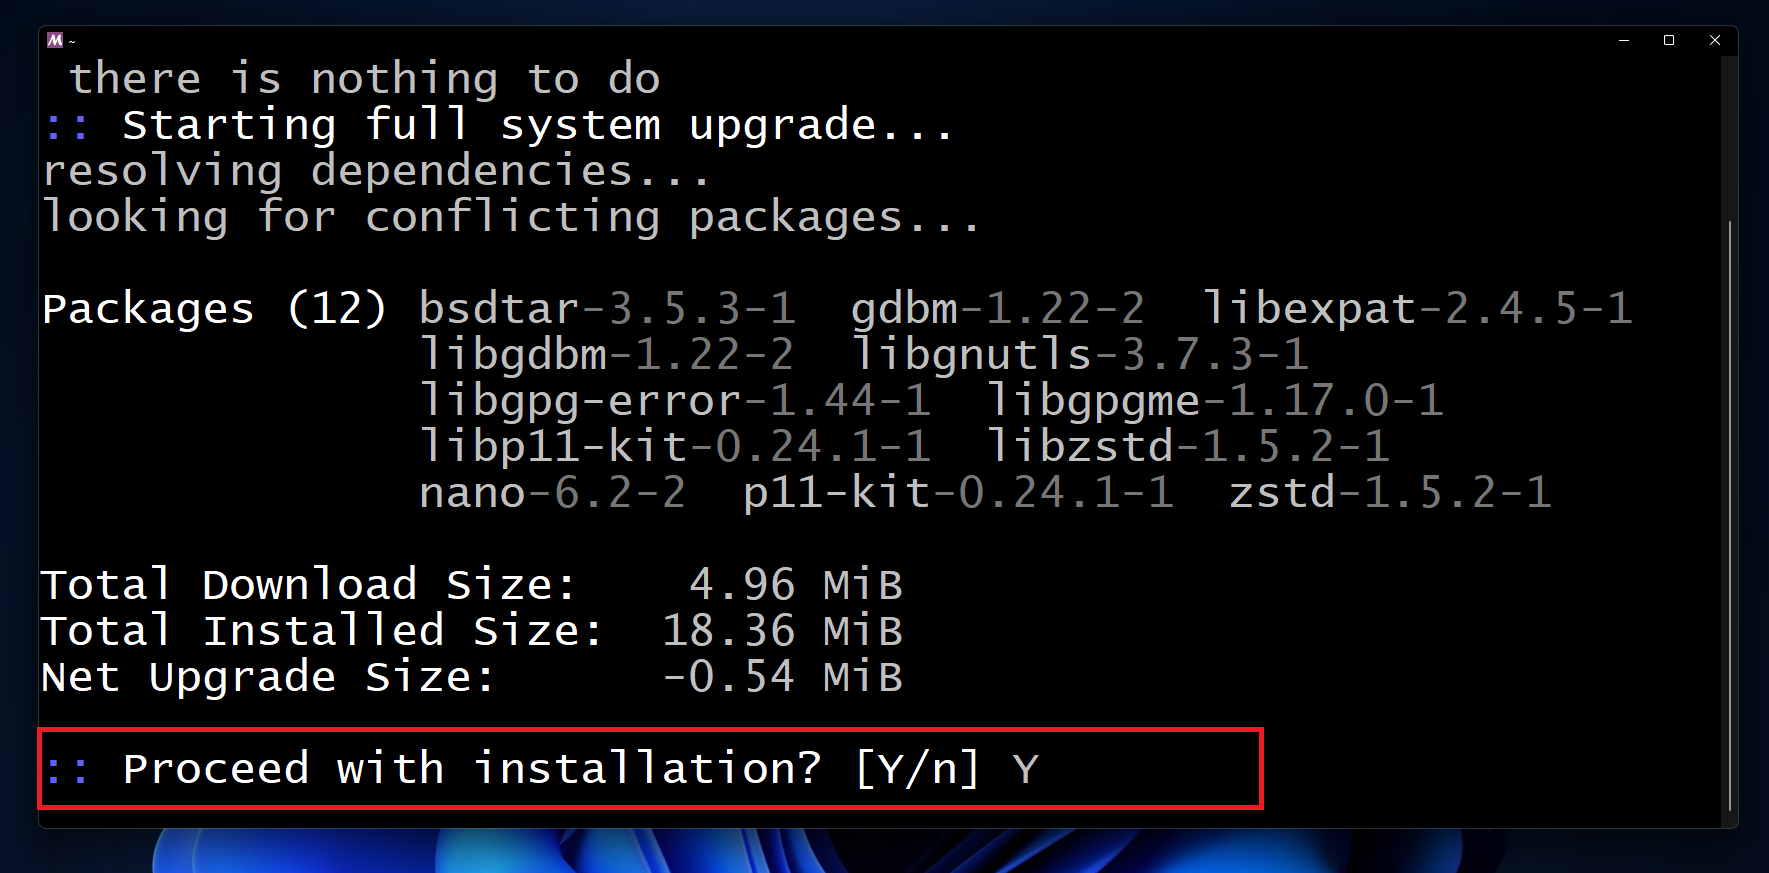
If you get any installation prompt, then you need to type Y or y and press the enter key.
Wait a little to finish the installation.
Close the window after finishing the installation.
Click the start button. Find the MSYS2 64bit folder. Click on that folder to expand it.
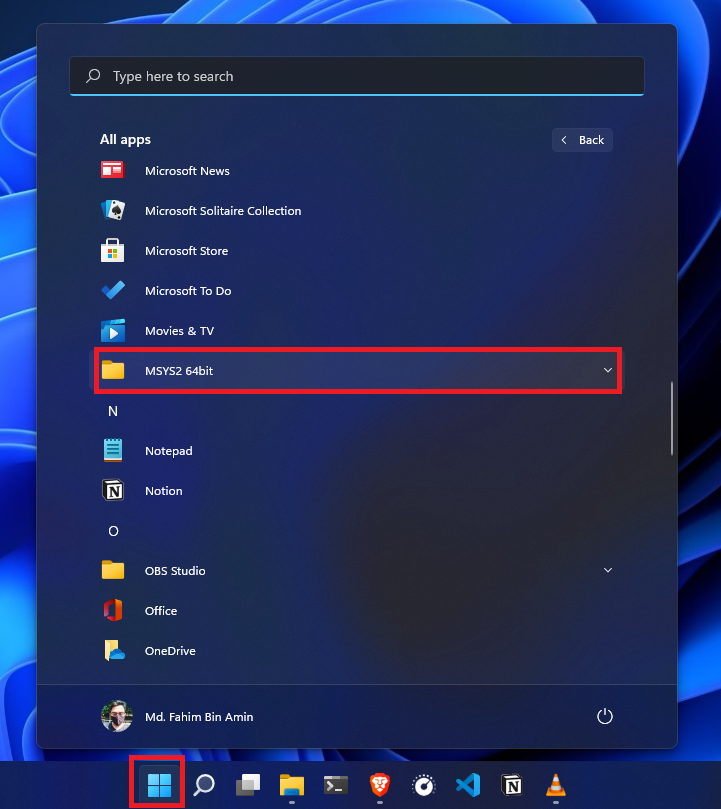
If you are using a 64 bit operating system like I am, then we need to use the MSYS2 MinGW x64 terminal. Click on the terminal to open that.
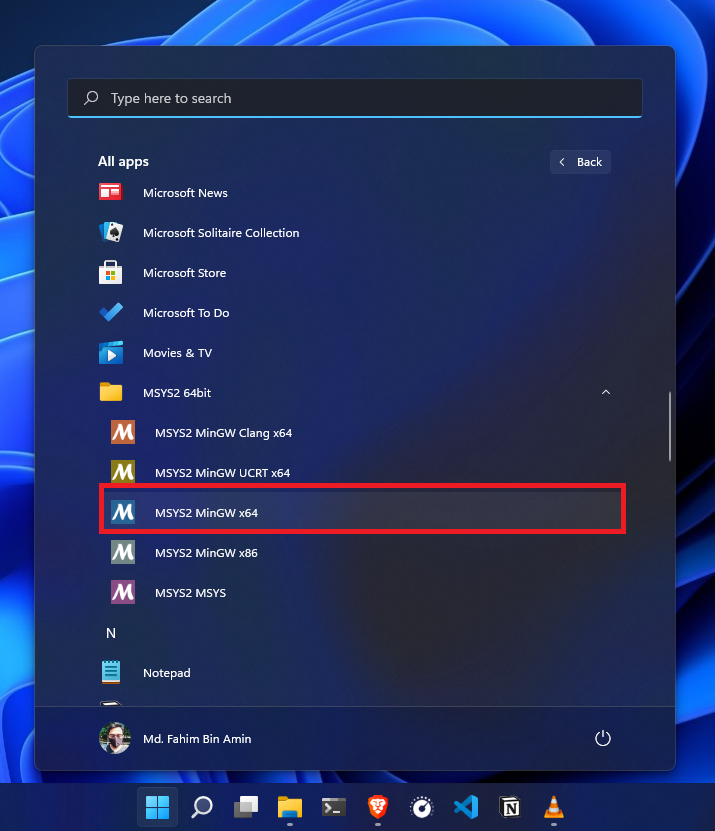
⚠️ But, if you are using a 32 bit operating system, then you have to use the MSYS2 MinGW x86 terminal. Then, you need to open that terminal.

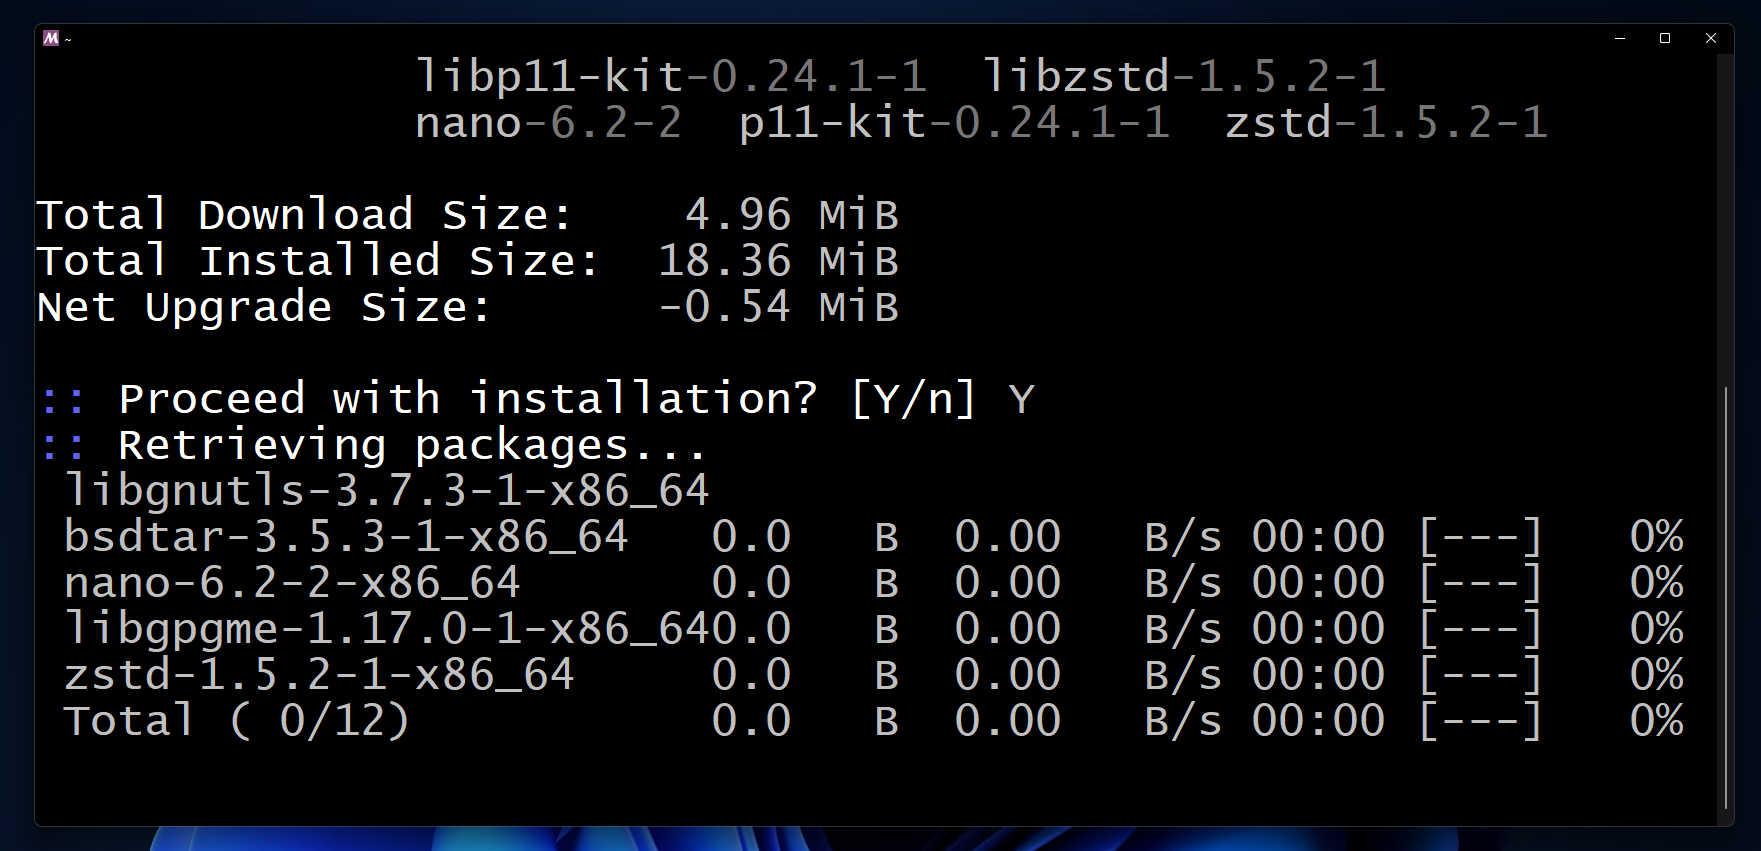
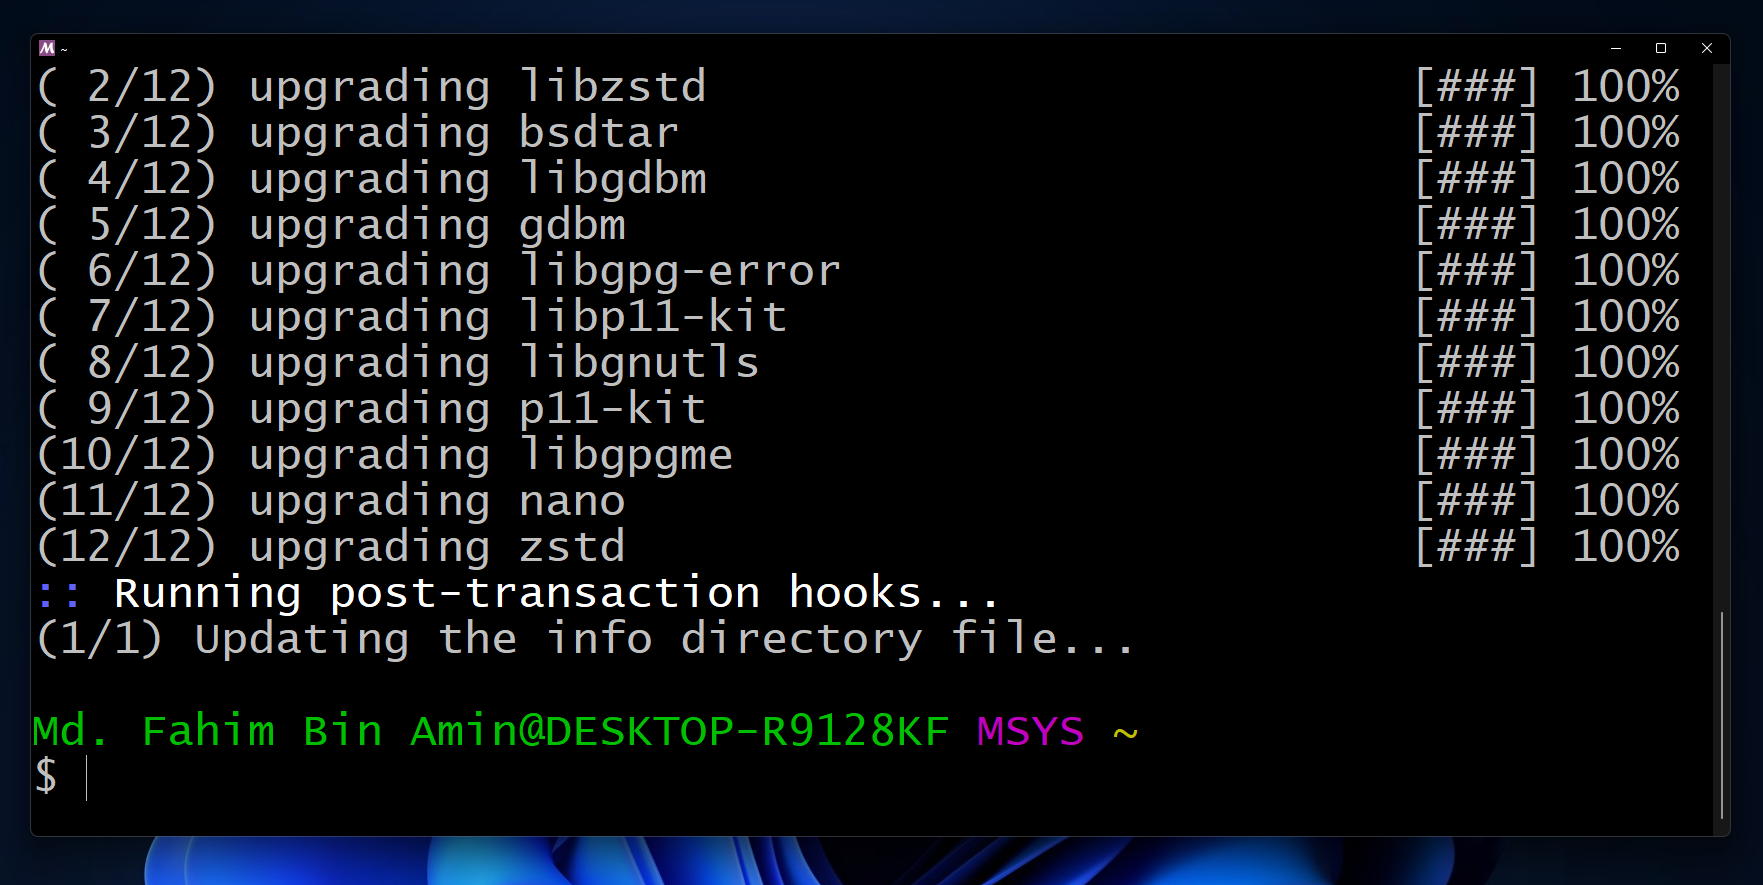
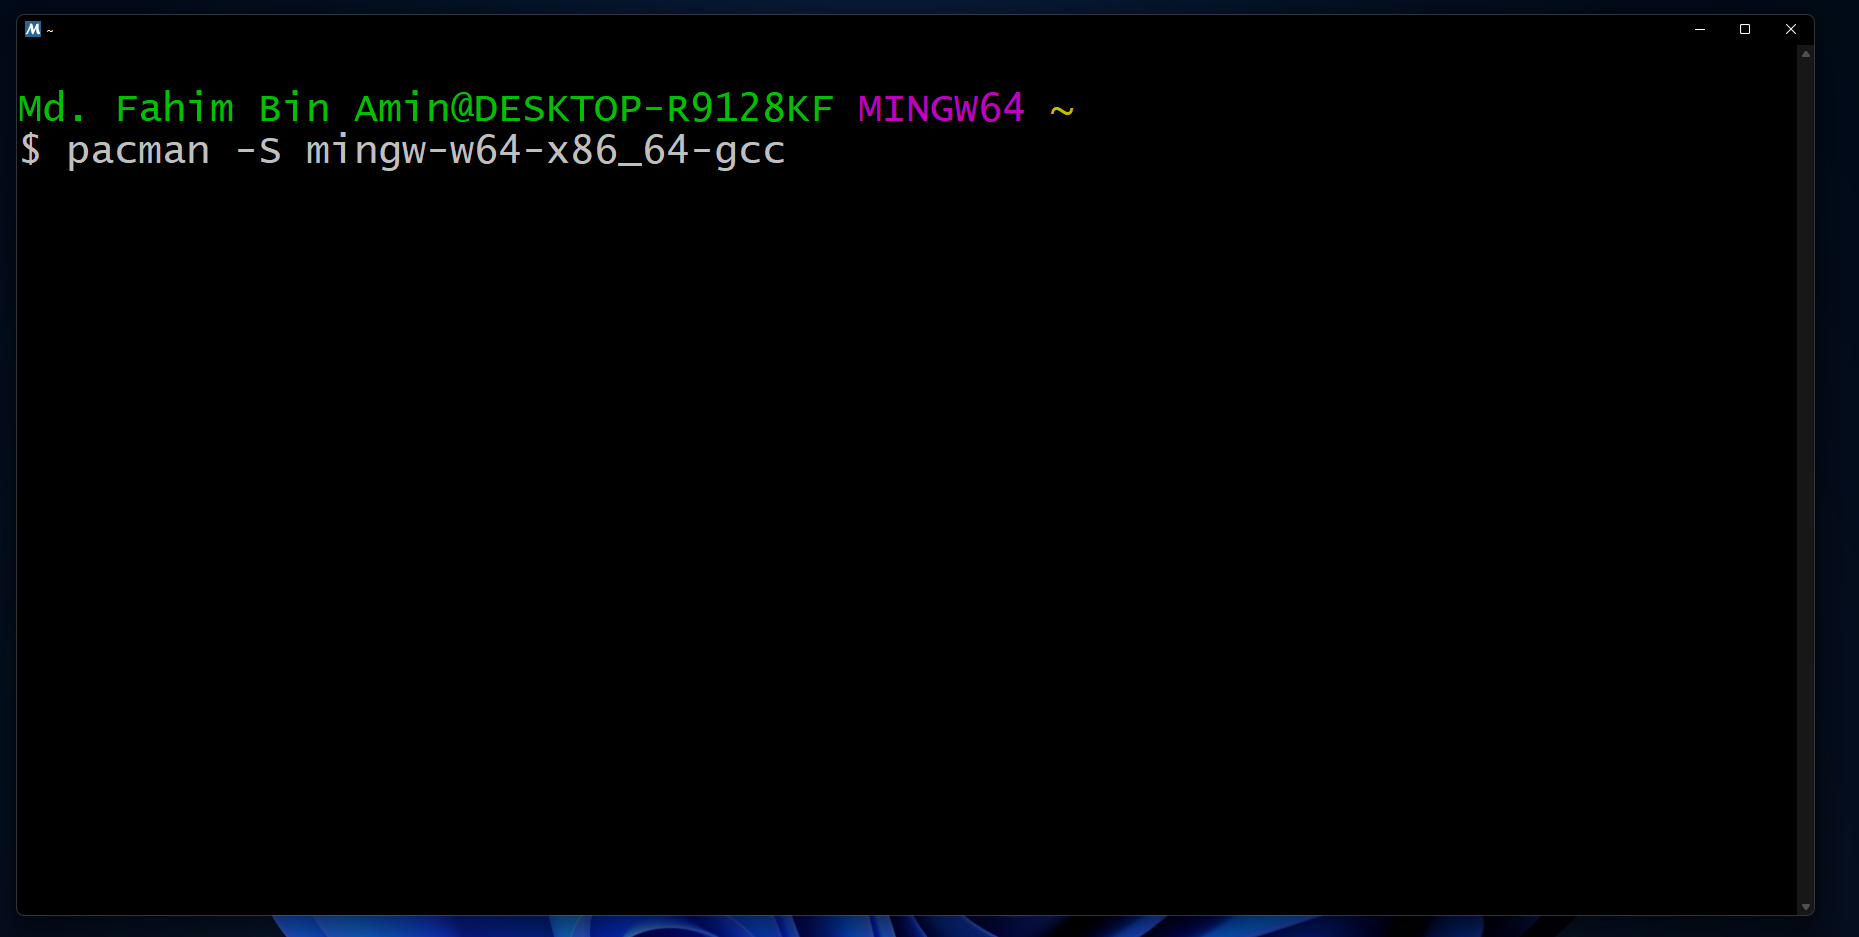
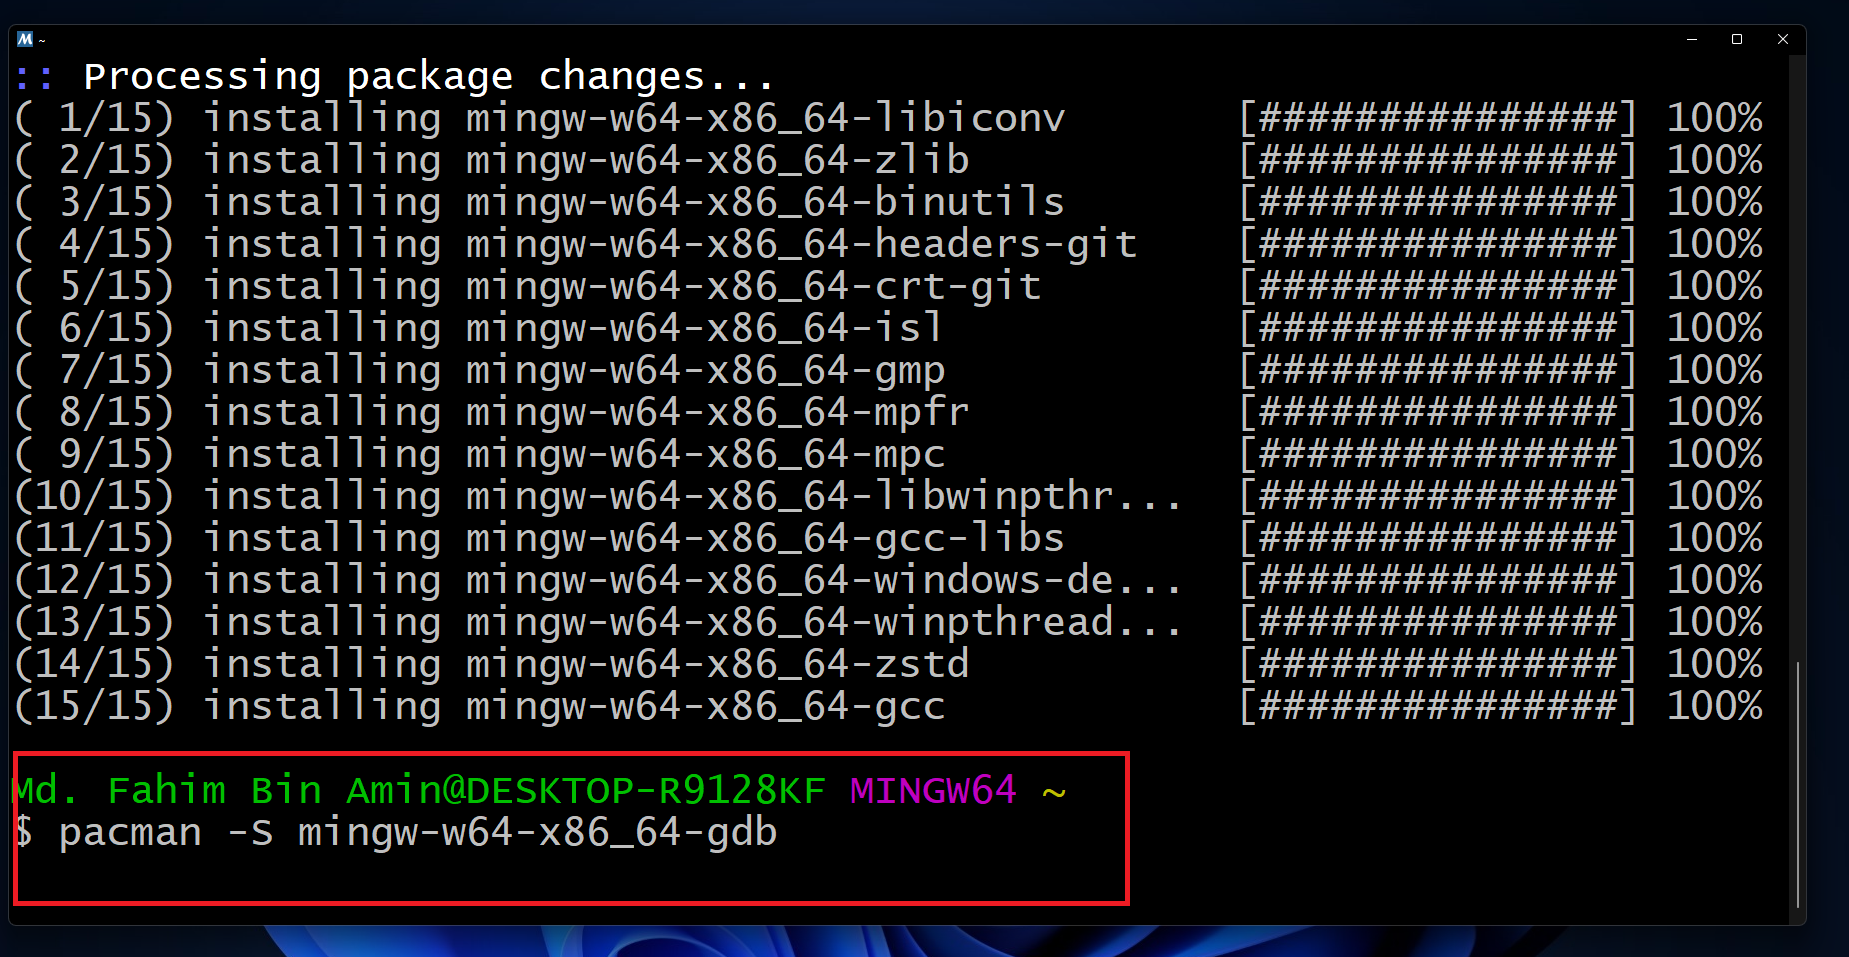
As I am using a 64 bit operating system, I have opened the terminal for 64 bit. Apply the command pacman -S mingw-w64-x86_64-gcc to install the compilers.
⚠️ If you are using a 32 bit operating system, then you have to apply the command pacman -S mingw-w64-i686-gcc in your 32 bit terminal.
Wait for a little while.
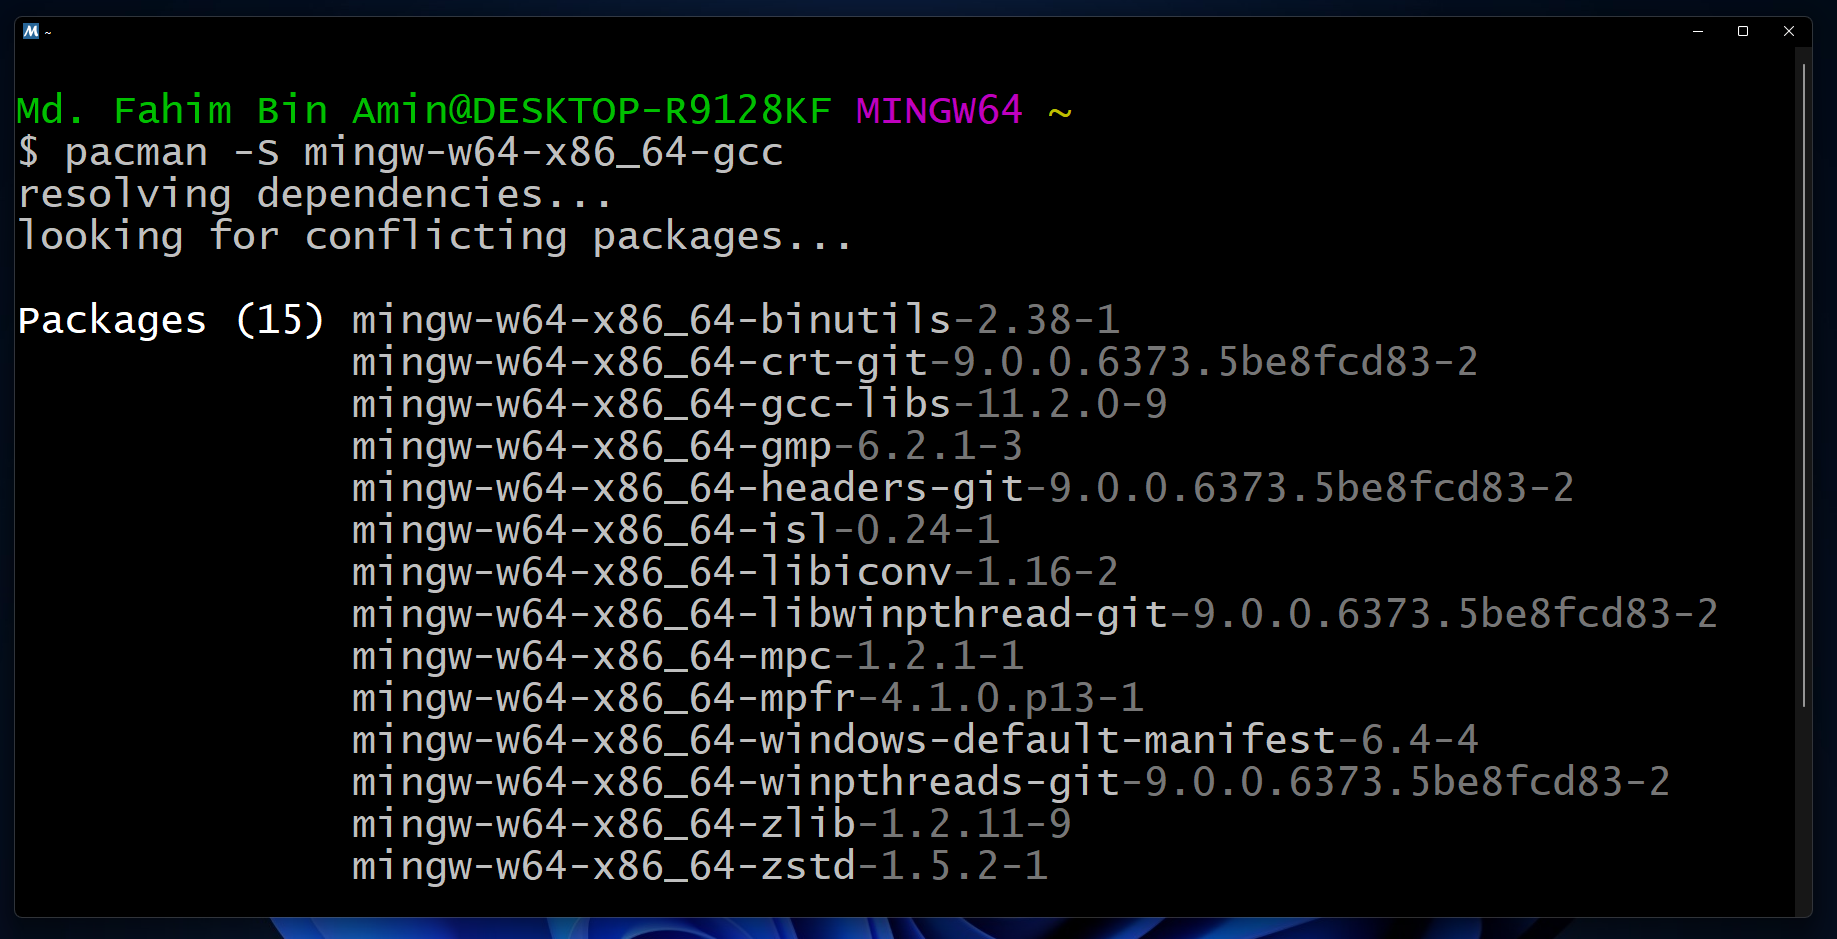
Type Y or y and press the enter key if you get the installation prompts.
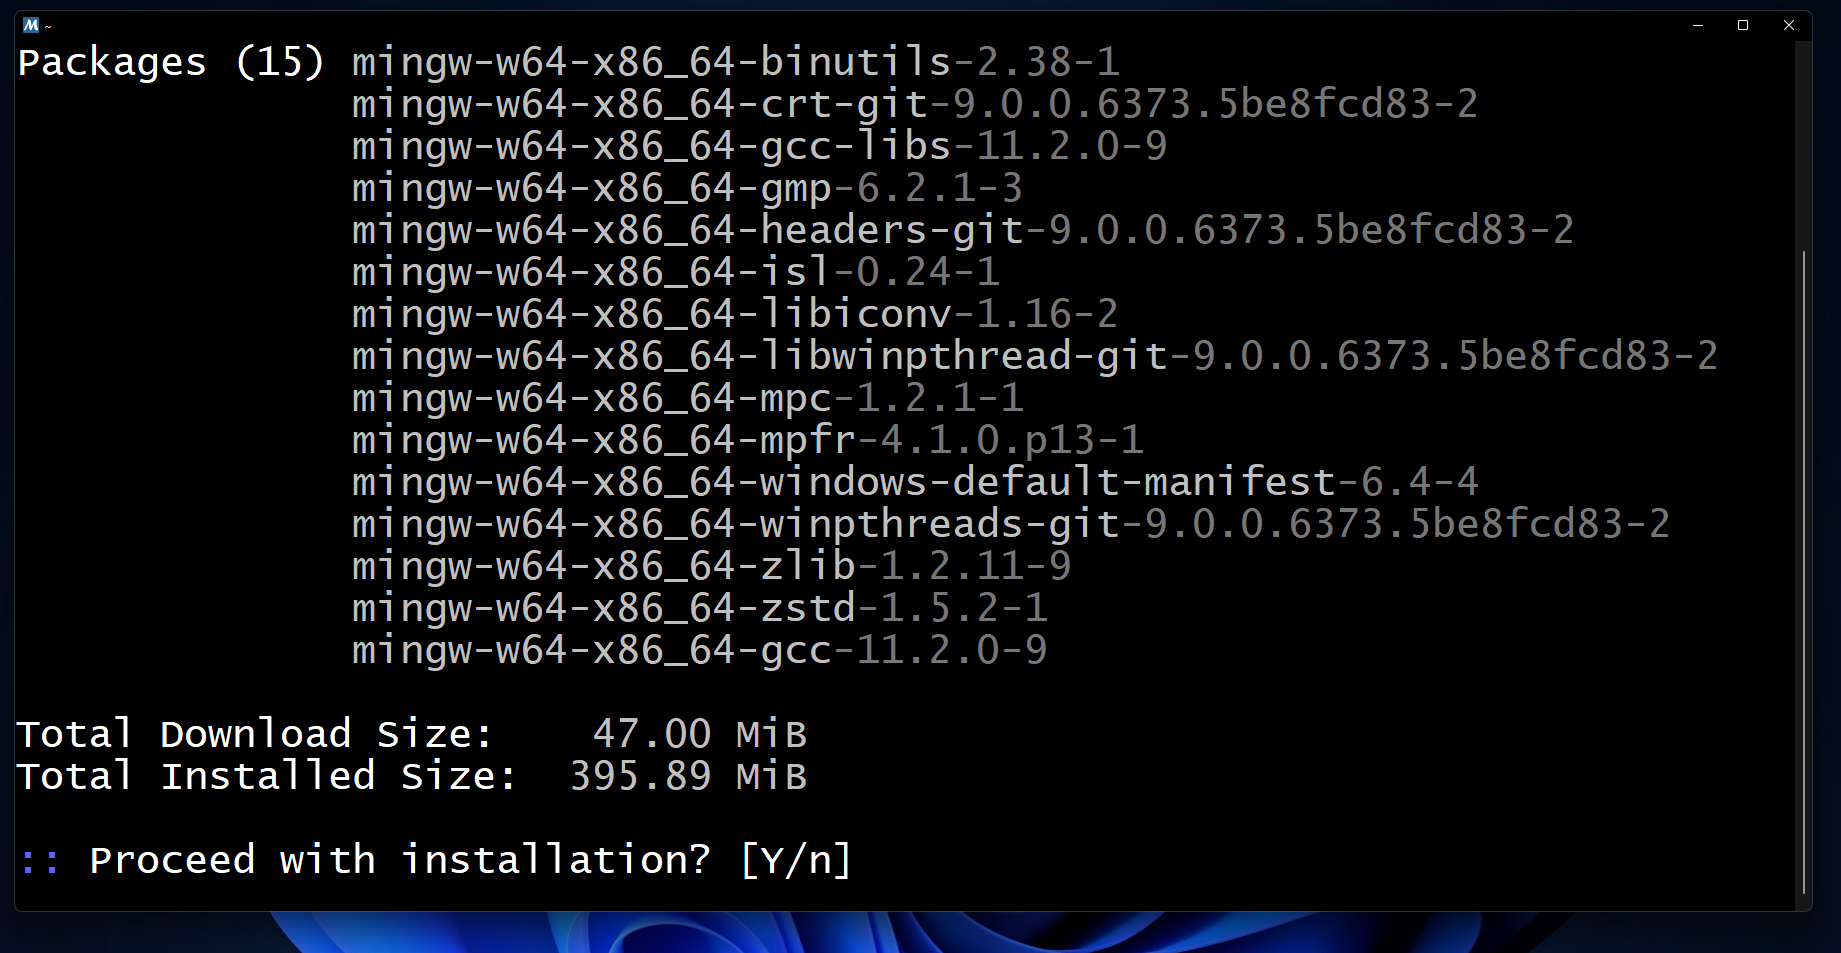

Give it some time to finish the installation process.
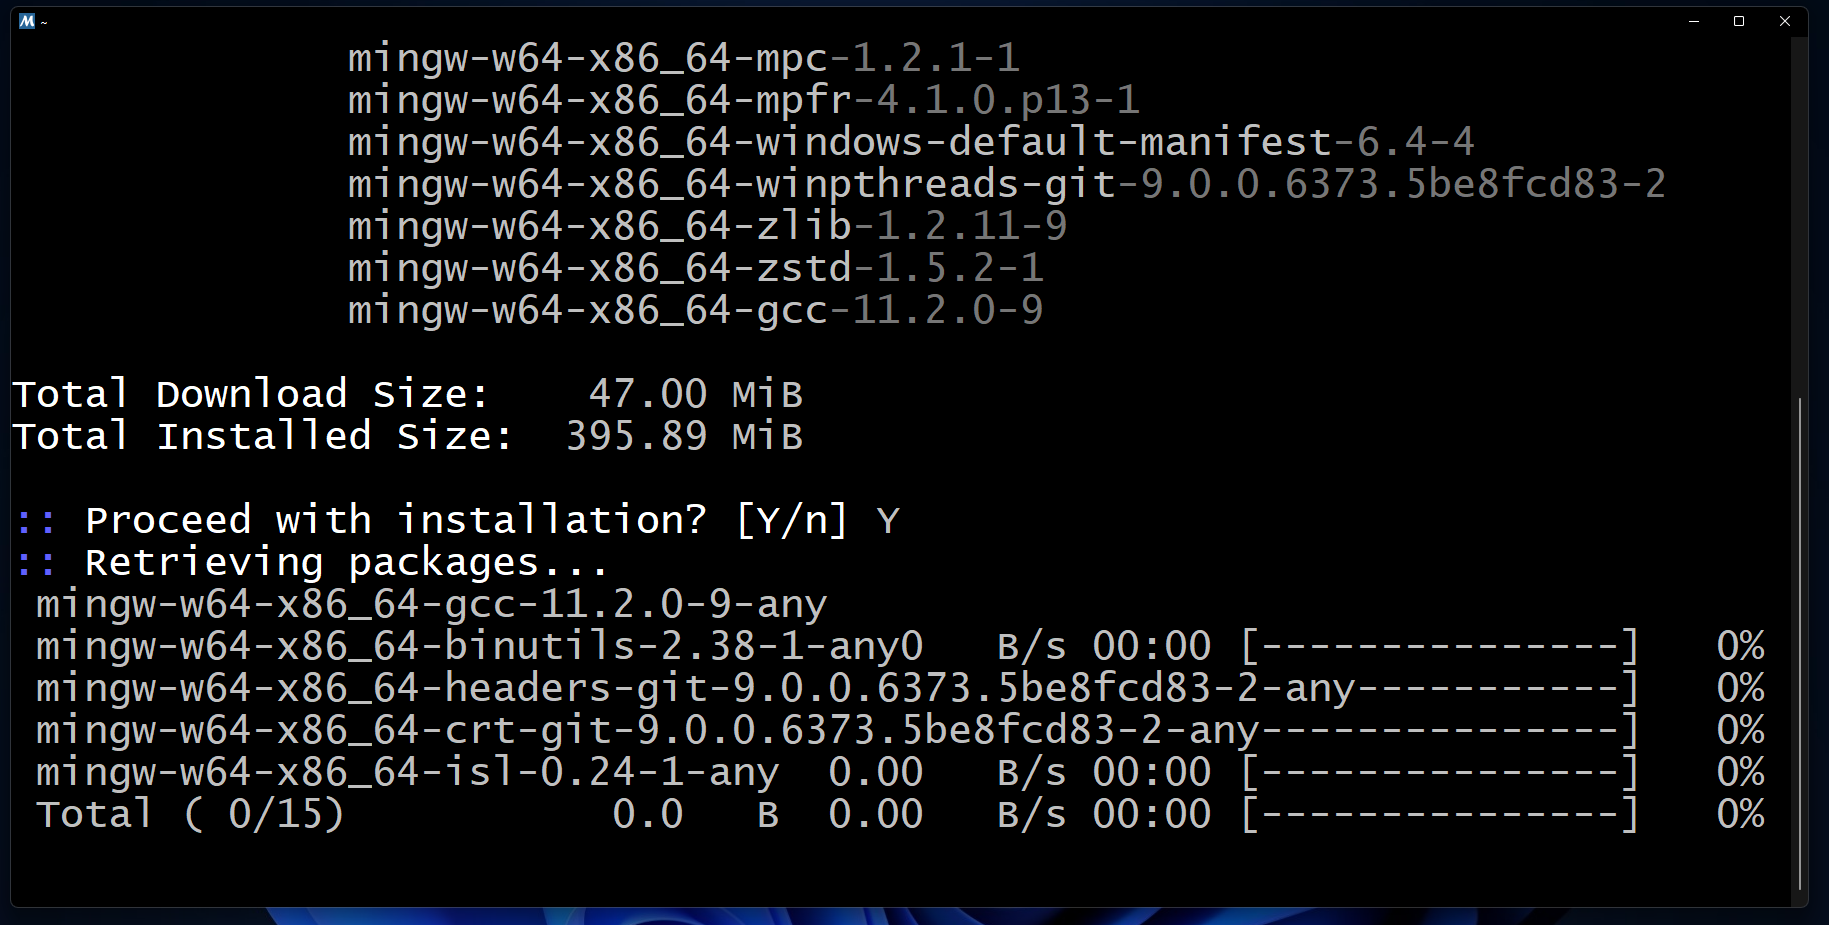

You’ve now finished installing the compilers.
How to Install the Debugger
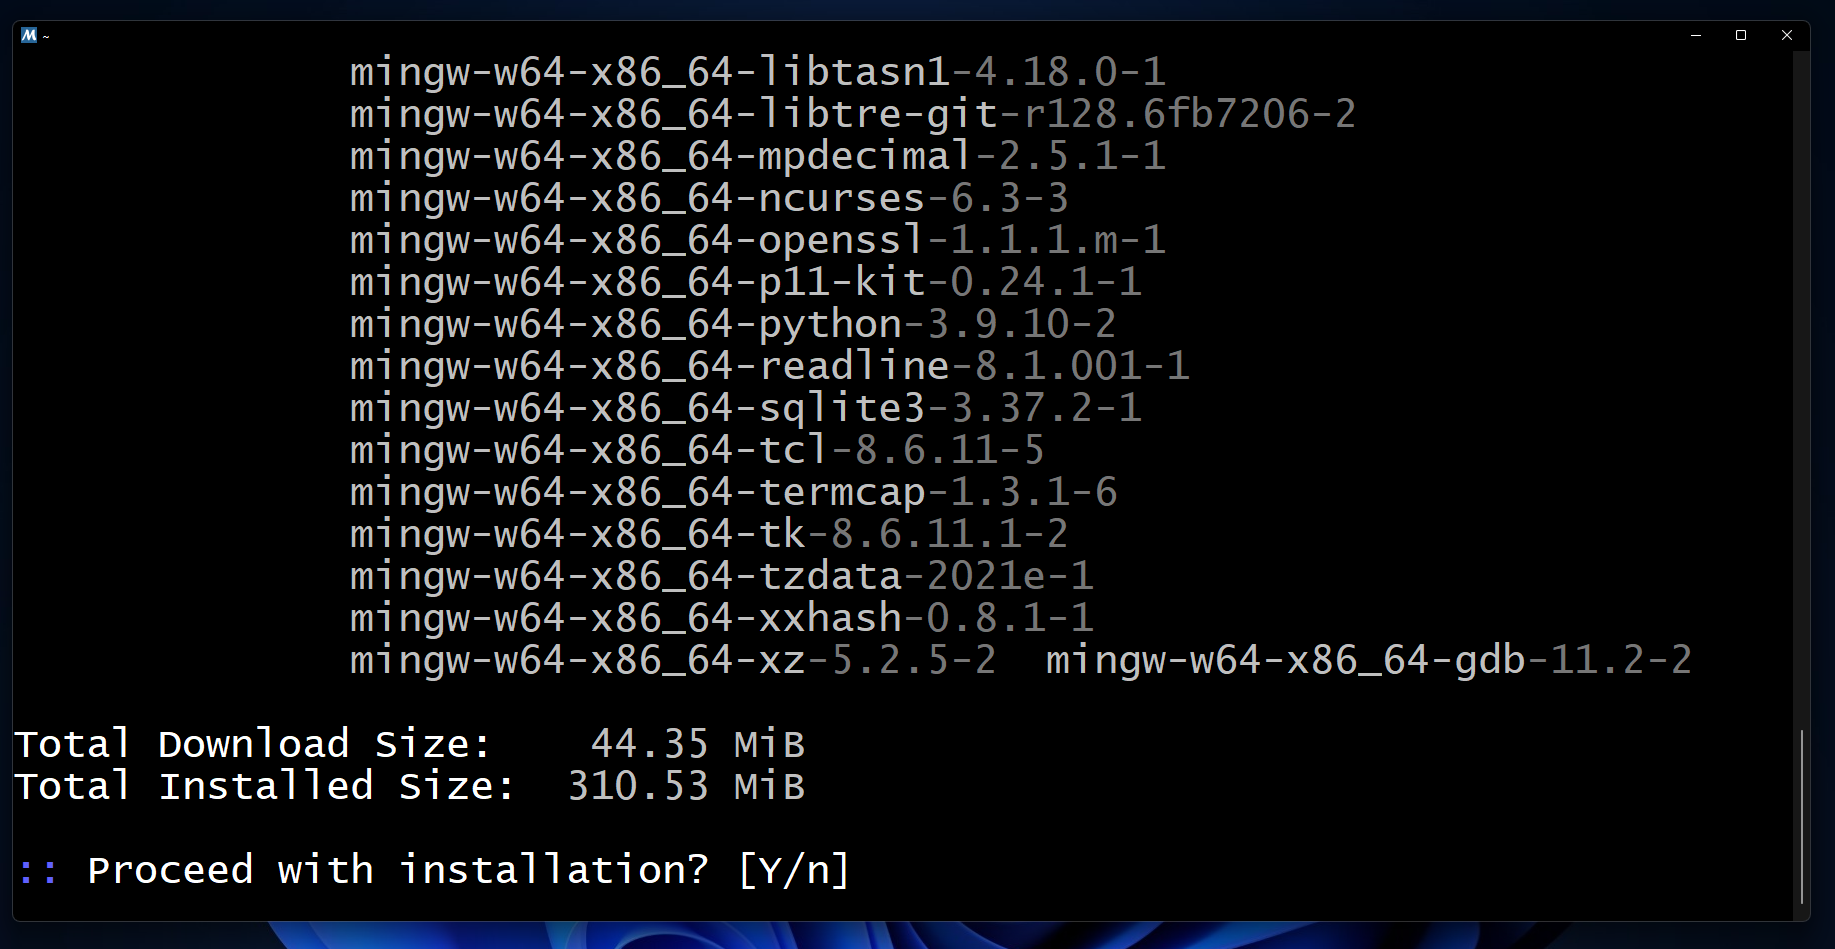
If you are using a 64 bit operating system like I am, then you have to apply the command pacman -S mingw-w64-x86_64-gdb.
⚠️ If you are using a 32 bit operating system, then you have to apply the command pacman -S mingw-w64-i686-gdb in your 32 bit terminal.
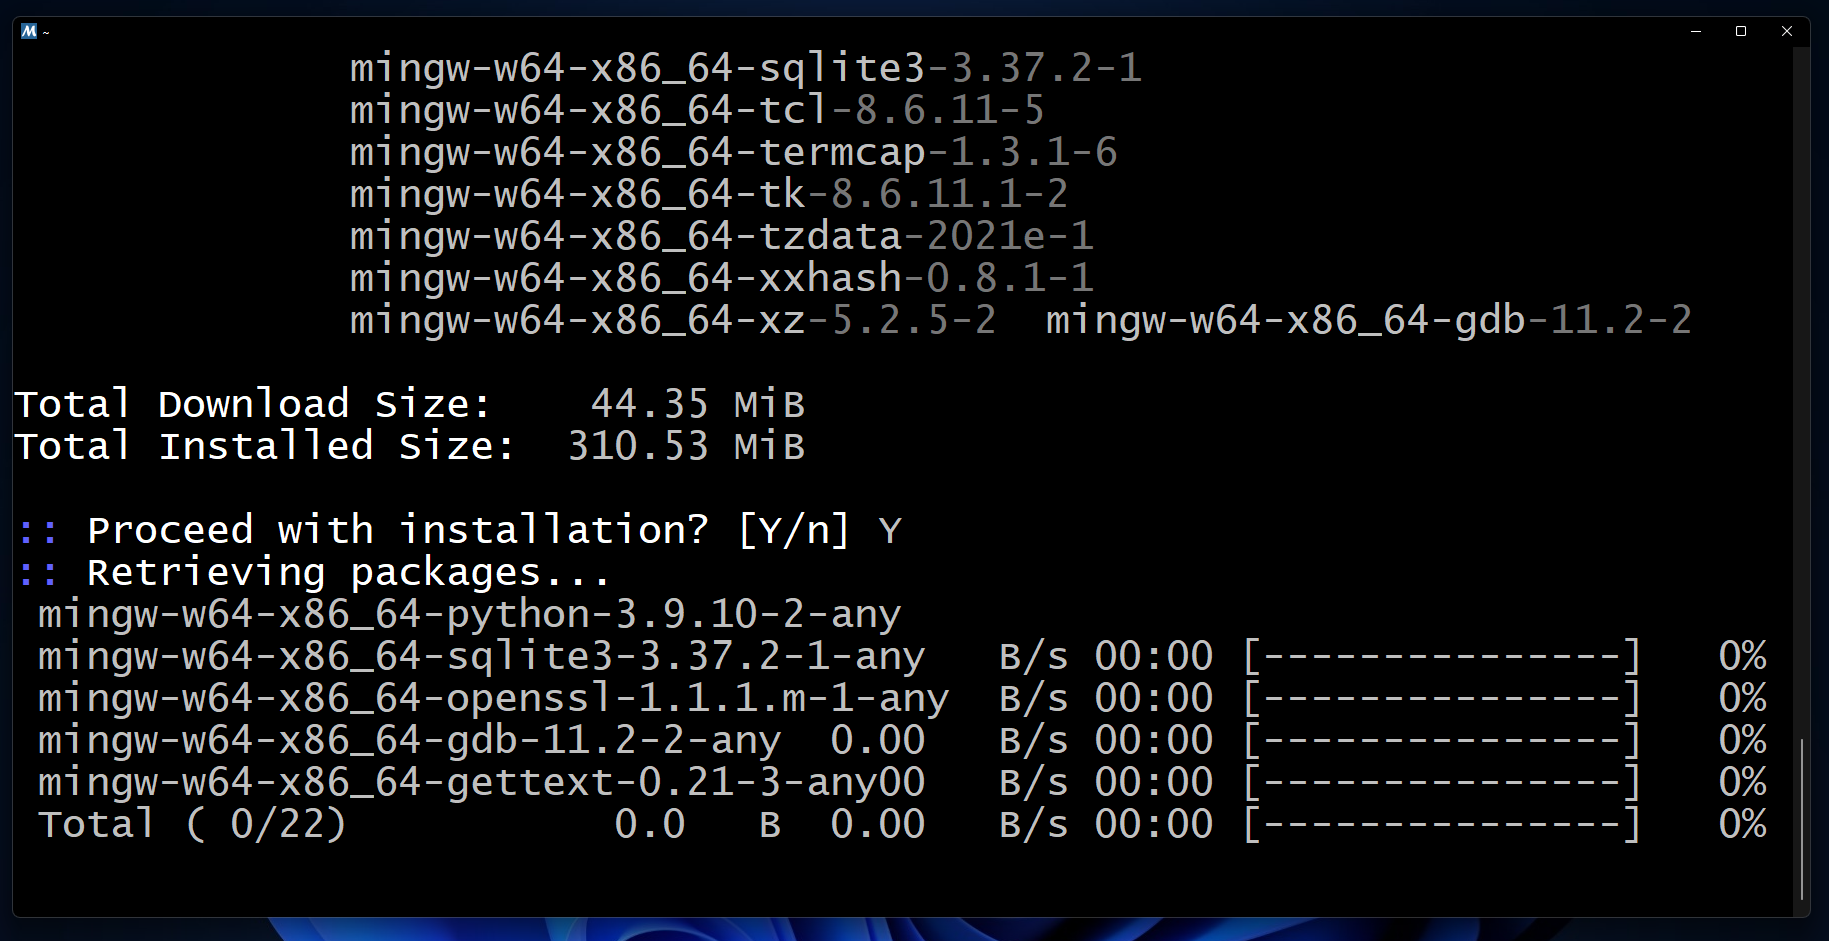
If you get any installation prompt, then simply type Y or y and press the enter key.

Give it some time to finish the installation.
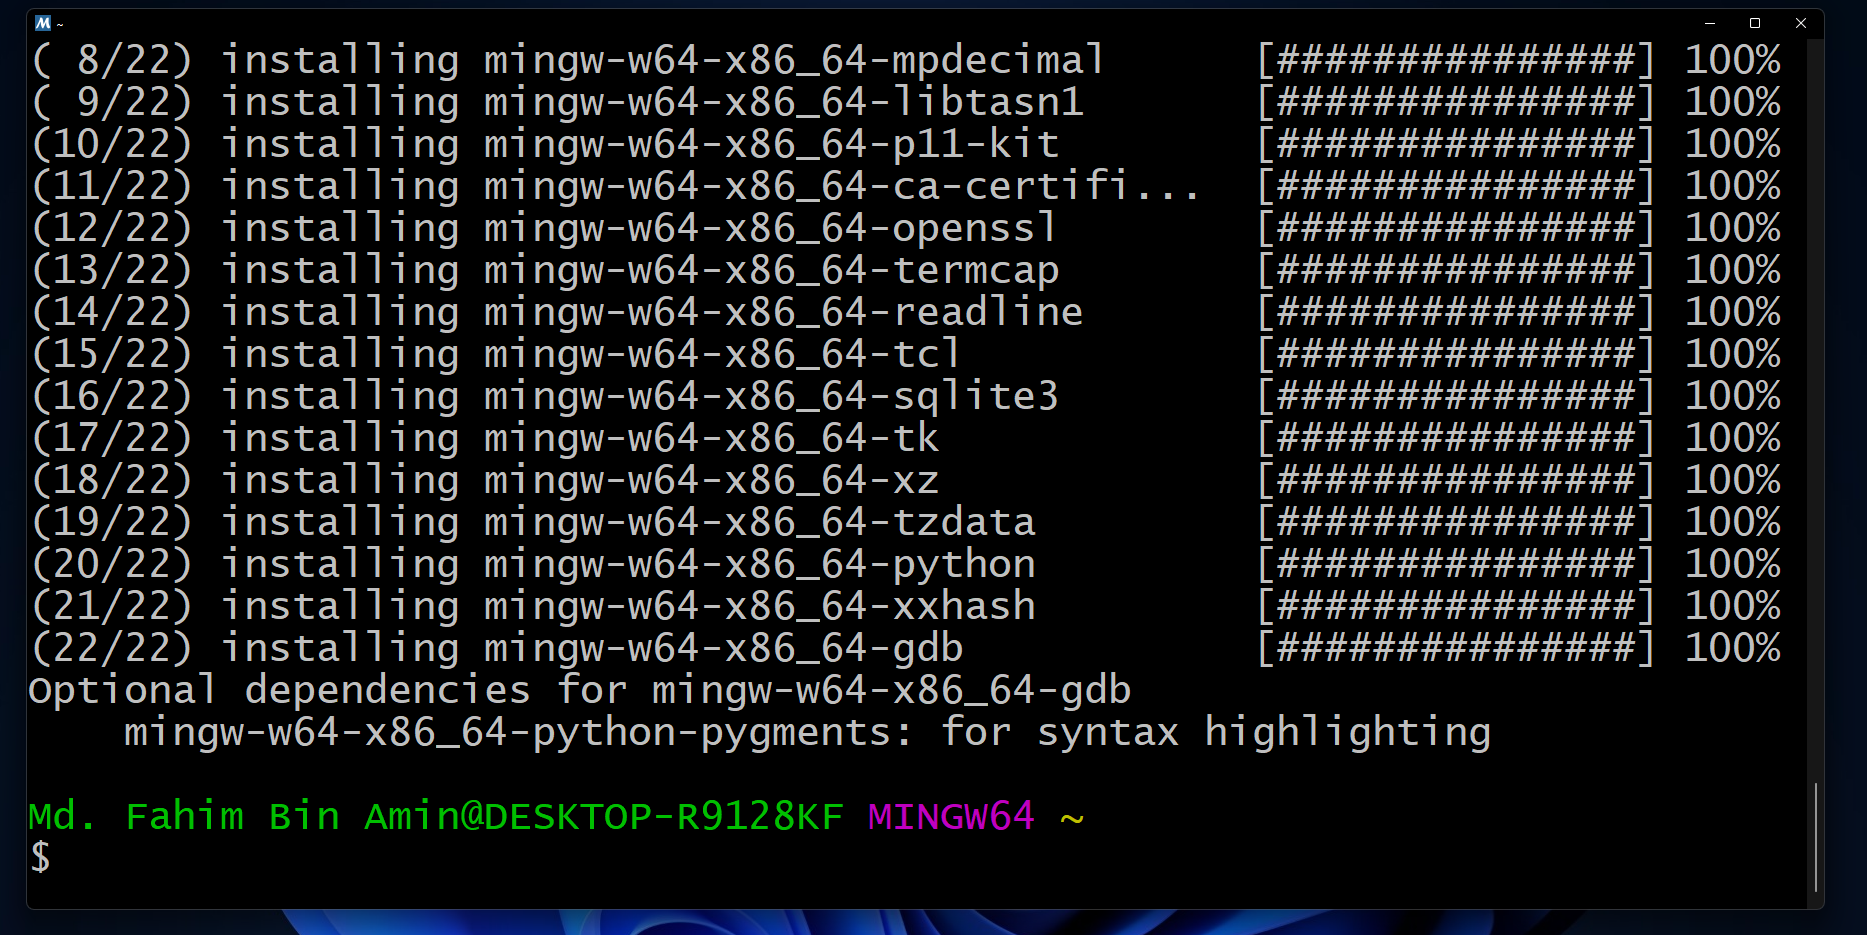
You can close the terminal.
How to Add the Directory to the Path of the Environment Variables
Open the file explorer.
I am assuming that you have installed the MSYS into the default directory like I have. If you used custom directories, then you need to go to the directory where you installed it.

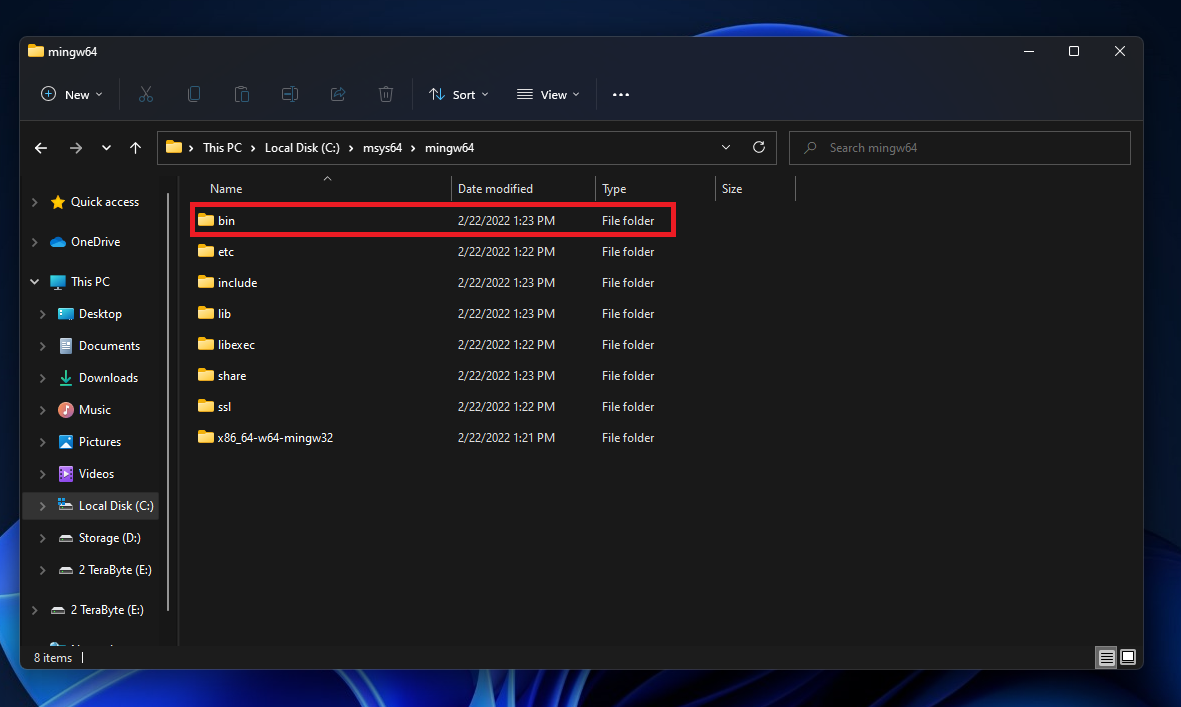
If you are using a 64 bit operating system like I am, then go to the mingw64 folder.
⚠️ If you are using a 32 bit operating system, then go to the mingw32 folder.

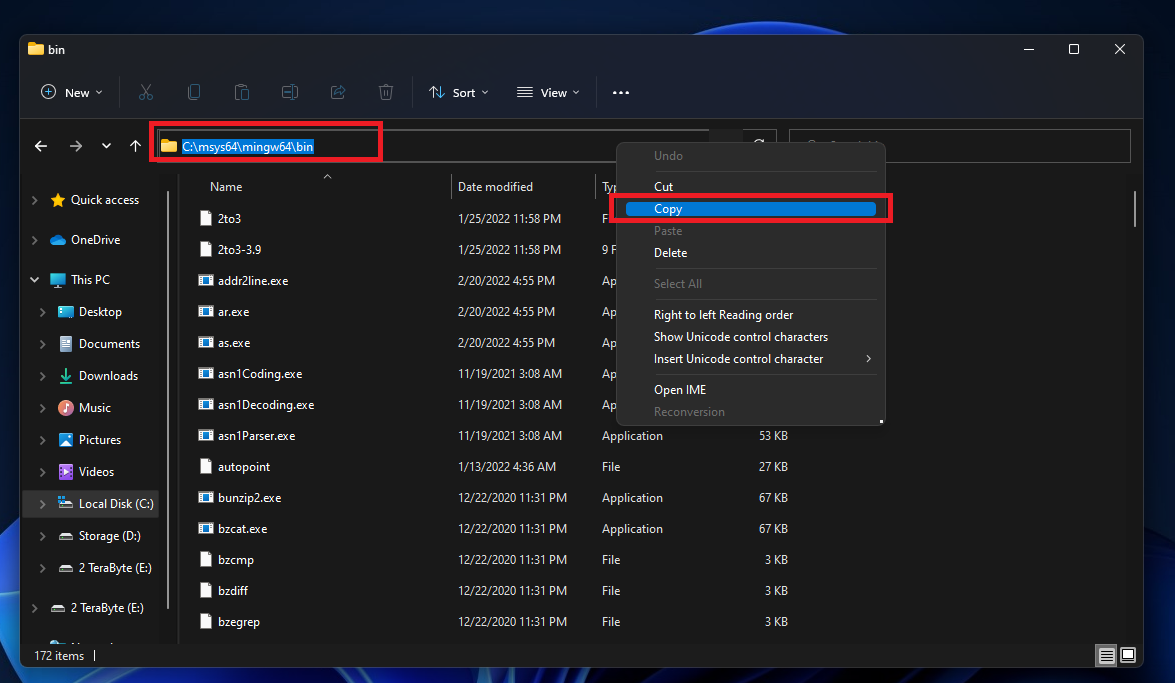
We have to go to the binary folder now. Go to the bin folder.
⚠️ If you are using a 32 bit operating system, then you have to go into your mingw32 folder > bin folder.
Copy the directory.
⚠️ If you are using a 32 bit operating system, and you also installed the MSYS2 in the default directory, then your directory should be like the following:
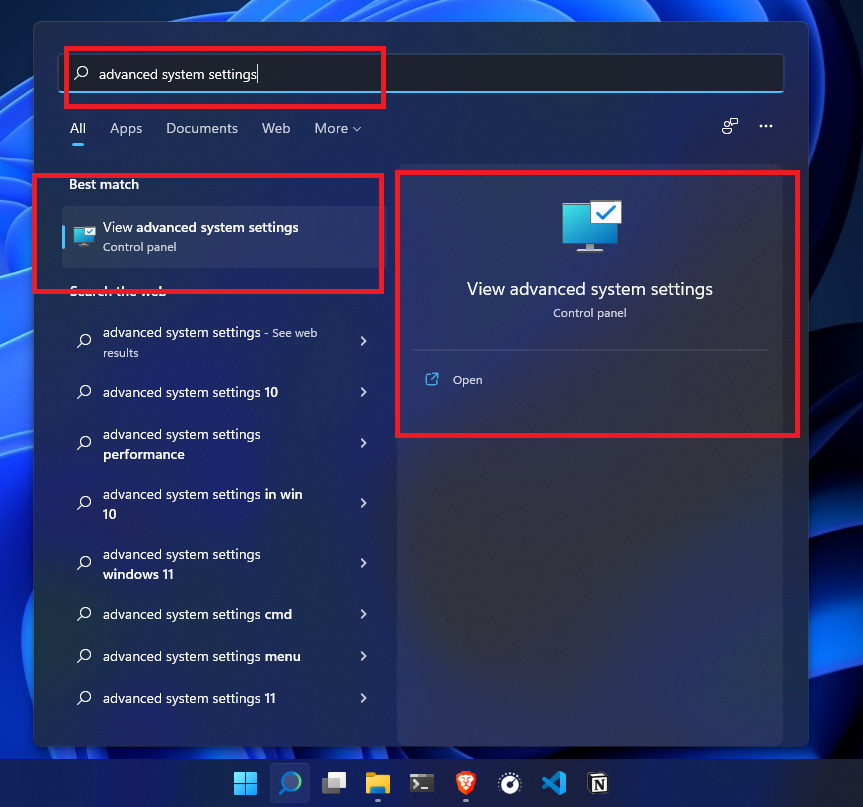
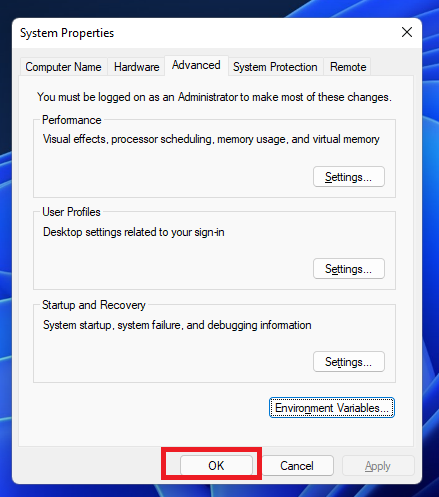
C:msys64mingw32binOpen the Advanced System Settings. You can do that in many ways. A simple way is to simply click the start button and search for it like the below screenshot.
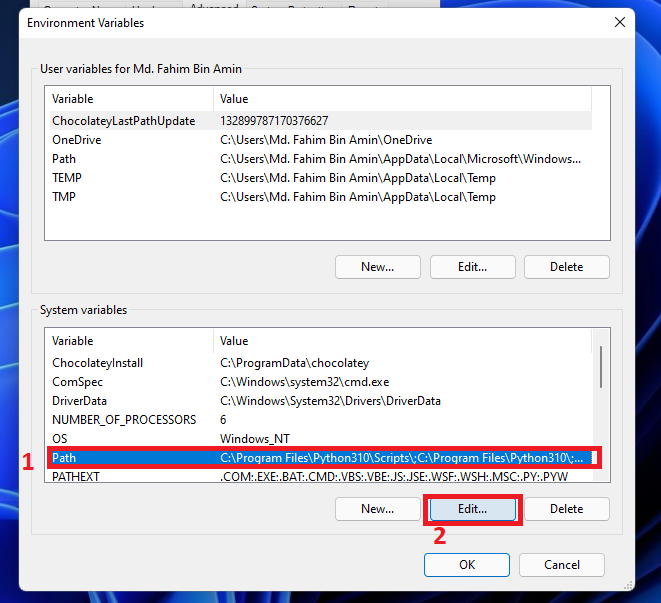
Click Environment Variables from the Advanced tab.
Click on Path and select that. Then click Edit.
A window will appear as below:
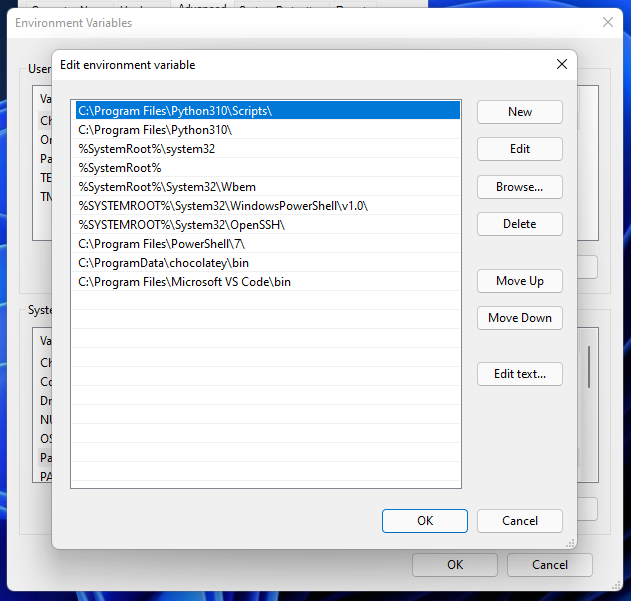
Click New.
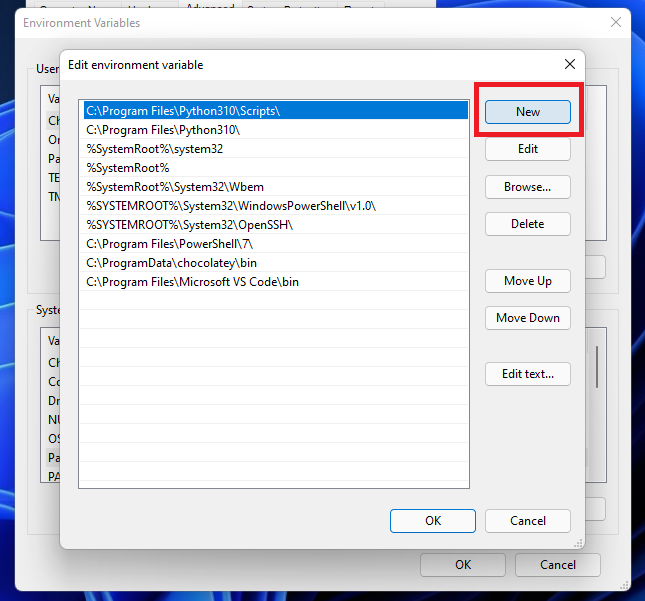
A blank box will appear.
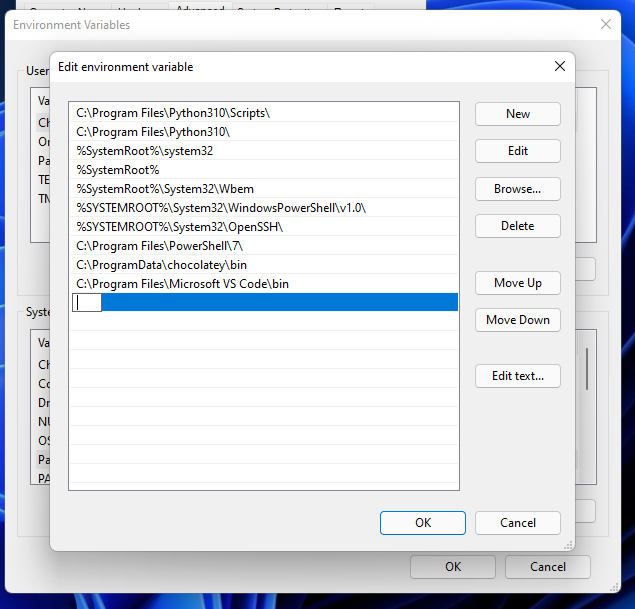
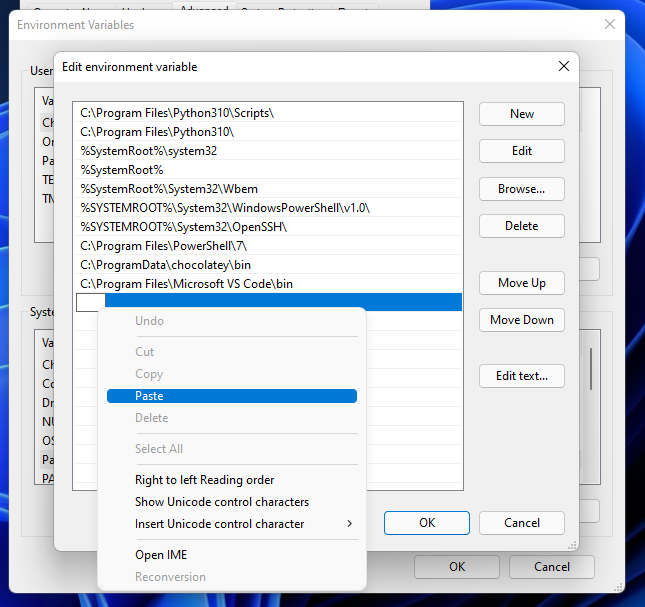
Paste the directory here.
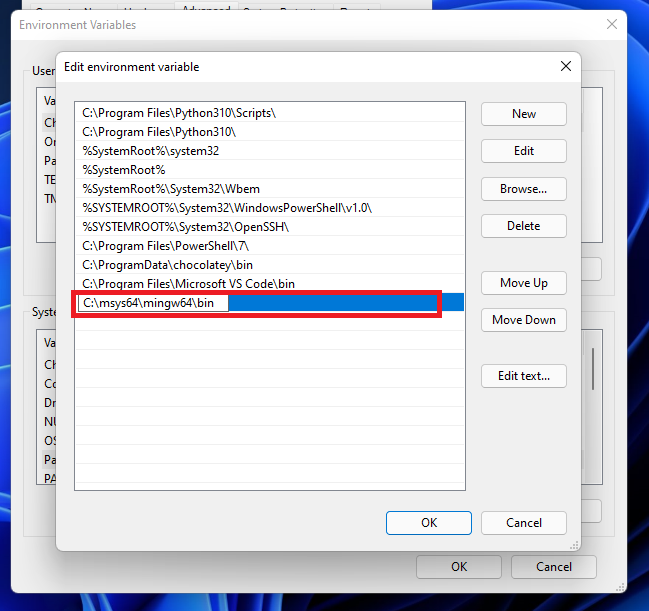
Click OK.
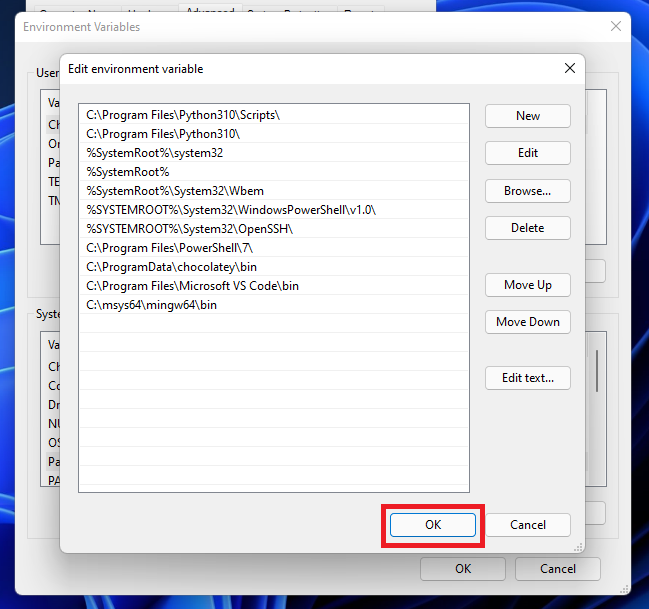
Click OK.
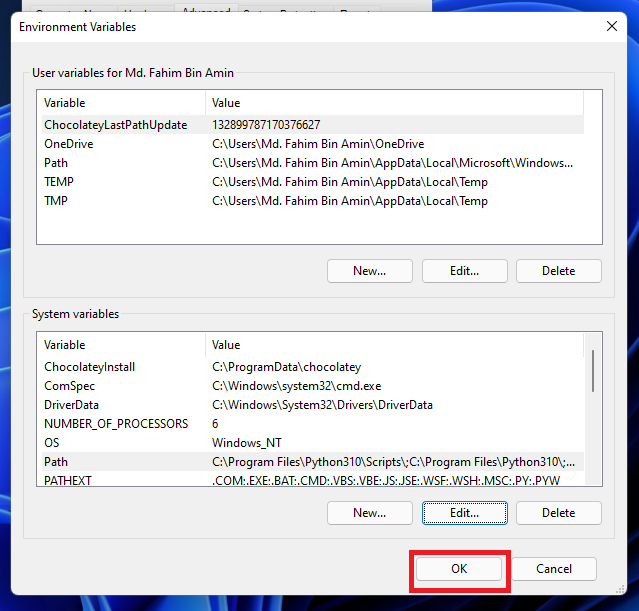
Click OK.
If you want to get all the steps in a video, then you can watch this video as well.
Check the Install
Now it is time to check whether we have successfully installed all of the above or not.
Open the terminal / PowerShell / CMD and apply the commands serially:
For checking the GCC version:
gcc --version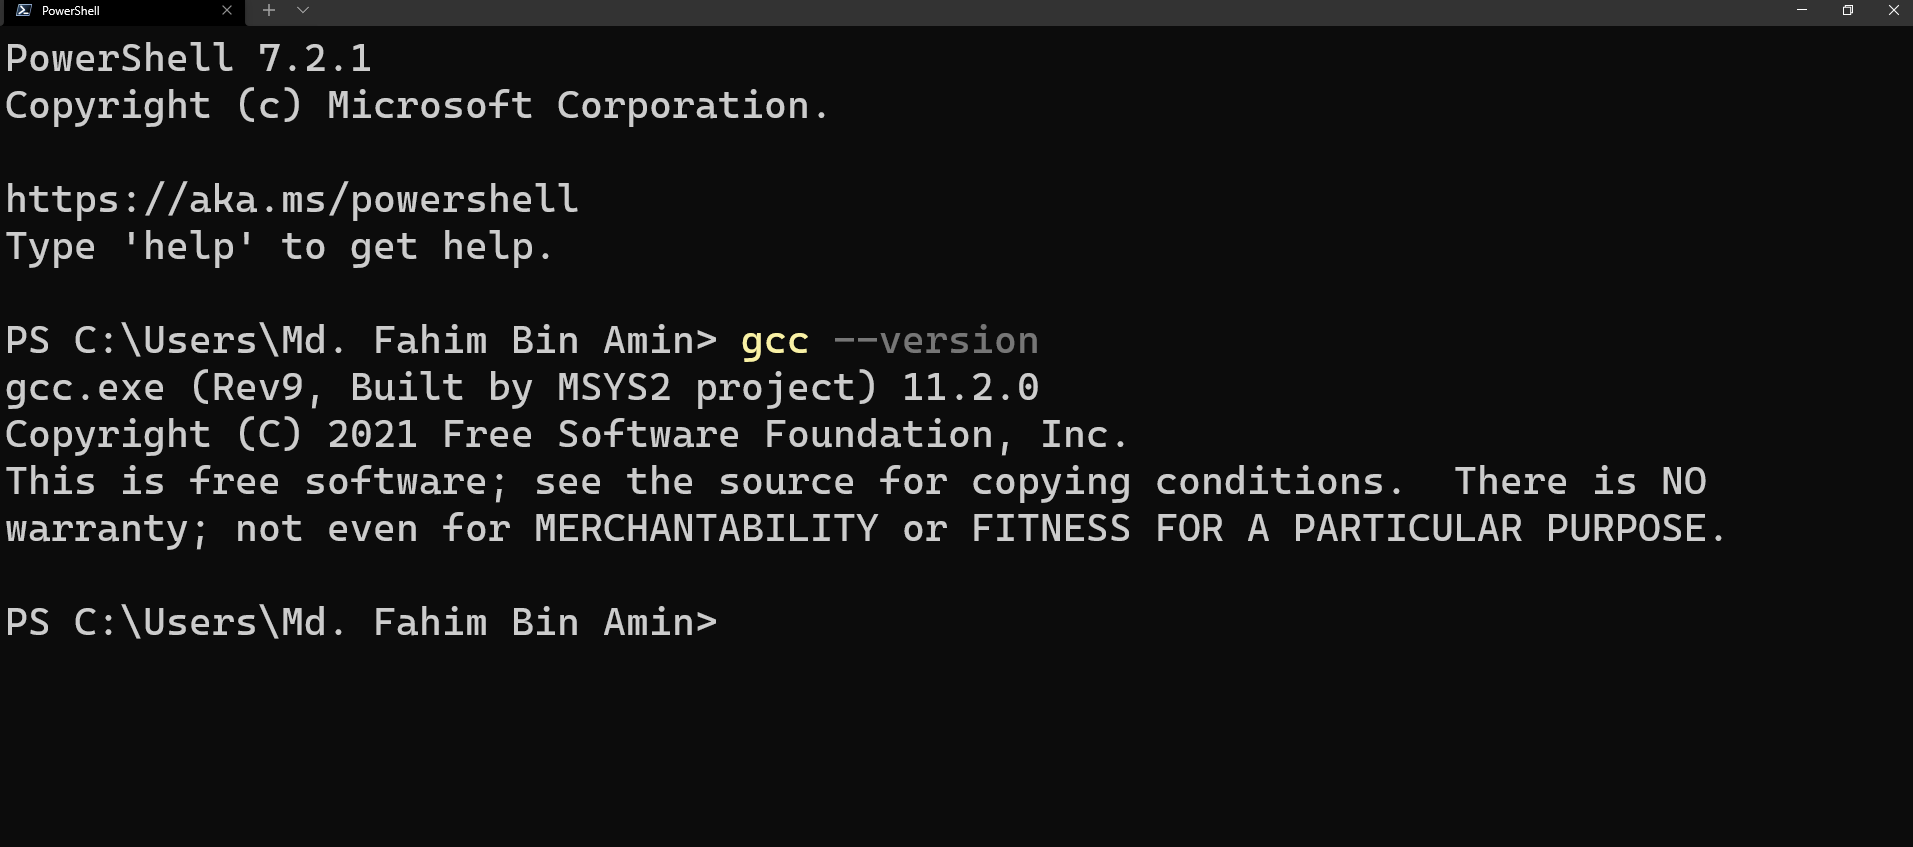
For checking the G++ version:
g++ --version
For checking the GDB version:
gdb --version
Conclusion
I hope this article helps you install your compilers on the Windows operating system for C and C++ programs.
Thanks a lot for reading the entire article. If you have any suggestions then you may get in touch with me through my twitter or LinkedIn accounts.
If you are into open source, then you can also follow me on GitHub as I am very active in contributing to open source projects.
If you like programming-related tutorials, then I have two YouTube channels. In one channel, I publish Bengali content regularly, whereas I publish English content regularly in my other channel.
Have a wonderful day!
Learn to code for free. freeCodeCamp’s open source curriculum has helped more than 40,000 people get jobs as developers. Get started
If you want to run C or C++ programs in your Windows operating system, then you need to have the right compilers.
The MinGW compiler is a well known and widely used software for installing GCC and G++ compilers for the C and C++ programming languages.
But many devs face difficulties when installing the compiler, so I am going to show you all the steps to do so in this article with screenshots to help you get it done.
I will be using Windows 11, but the same process is applicable for all other Windows operating systems unless you are using Windows XP (You need to change some steps in Windows XP).
If you’d like to watch the video I made on this topic as well, here it is:
Install MSYS2
Firstly we need to download an executable file from MSYS2. Go to the official website of MSYS2: https://www.msys2.org/. The website looks like below as of today.
Scroll down a little bit until you find the download button for the executable file.
Simply click on the installer button and save the installer file in any place you want.
Finish downloading the executable file. It should not take much time depending on your internet speed.
After downloading the file, we will get this executable file.
Double click on the executable file. Then click Next.
Keep the name as it is, and click Next.
Keep all this as it is, and click Next.
Give it some time to finish the installation process.
If you keep the checkmark, then the MSYS2 terminal will open once you click Finish.
I prefer to do it this way, but if you want to do the remaining tasks later, then you need to open the terminal by yourself from the start menu.
In that case, you have to click the start button > Search for MSYS2 and click on the terminal like in the following picture:
Let me assume that we have opened the MSYS2 MSYS terminal successfully.
Apply the command pacman -Syu to update the package database and the base packages.
Type Y and press the enter key if you get this type of installation prompt.
Type Y and press the enter key.
The terminal will be closed. We have to open the terminal manually and update the rest of the packages.
Click the start button.
Search the folder named MSYS2 64bit. Click on the folder to expand and get the terminal. Open the terminal by clicking MSYS2 MSYS.
Update the rest of the packages by applying the command, pacman -Su. You might need to apply the command pacman -Sy if the terminal tells you to do that.
If you get any installation prompt, then you need to type Y or y and press the enter key.
Wait a little to finish the installation.
Close the window after finishing the installation.
Click the start button. Find the MSYS2 64bit folder. Click on that folder to expand it.
If you are using a 64 bit operating system like I am, then we need to use the MSYS2 MinGW x64 terminal. Click on the terminal to open that.
⚠️ But, if you are using a 32 bit operating system, then you have to use the MSYS2 MinGW x86 terminal. Then, you need to open that terminal.
As I am using a 64 bit operating system, I have opened the terminal for 64 bit. Apply the command pacman -S mingw-w64-x86_64-gcc to install the compilers.
⚠️ If you are using a 32 bit operating system, then you have to apply the command pacman -S mingw-w64-i686-gcc in your 32 bit terminal.
Wait for a little while.
Type Y or y and press the enter key if you get the installation prompts.
Give it some time to finish the installation process.
You’ve now finished installing the compilers.
How to Install the Debugger
If you are using a 64 bit operating system like I am, then you have to apply the command pacman -S mingw-w64-x86_64-gdb.
⚠️ If you are using a 32 bit operating system, then you have to apply the command pacman -S mingw-w64-i686-gdb in your 32 bit terminal.
If you get any installation prompt, then simply type Y or y and press the enter key.
Give it some time to finish the installation.
You can close the terminal.
How to Add the Directory to the Path of the Environment Variables
Open the file explorer.
I am assuming that you have installed the MSYS into the default directory like I have. If you used custom directories, then you need to go to the directory where you installed it.
If you are using a 64 bit operating system like I am, then go to the mingw64 folder.
⚠️ If you are using a 32 bit operating system, then go to the mingw32 folder.
We have to go to the binary folder now. Go to the bin folder.
⚠️ If you are using a 32 bit operating system, then you have to go into your mingw32 folder > bin folder.
Copy the directory.
⚠️ If you are using a 32 bit operating system, and you also installed the MSYS2 in the default directory, then your directory should be like the following:
C:msys64mingw32binOpen the Advanced System Settings. You can do that in many ways. A simple way is to simply click the start button and search for it like the below screenshot.
Click Environment Variables from the Advanced tab.
Click on Path and select that. Then click Edit.
A window will appear as below:
Click New.
A blank box will appear.
Paste the directory here.
Click OK.
Click OK.
Click OK.
If you want to get all the steps in a video, then you can watch this video as well.
Check the Install
Now it is time to check whether we have successfully installed all of the above or not.
Open the terminal / PowerShell / CMD and apply the commands serially:
For checking the GCC version:
gcc --version
For checking the G++ version:
g++ --version
For checking the GDB version:
gdb --version
Conclusion
I hope this article helps you install your compilers on the Windows operating system for C and C++ programs.
Thanks a lot for reading the entire article. If you have any suggestions then you may get in touch with me through my twitter or LinkedIn accounts.
If you are into open source, then you can also follow me on GitHub as I am very active in contributing to open source projects.
If you like programming-related tutorials, then I have two YouTube channels. In one channel, I publish Bengali content regularly, whereas I publish English content regularly in my other channel.
Have a wonderful day!
Learn to code for free. freeCodeCamp’s open source curriculum has helped more than 40,000 people get jobs as developers. Get started
На чтение 4 мин. Опубликовано 21.07.2021
Программа на любом высокоуровневом языке программирования (ЯП) должна быть скомпилирована. Компиляция – это процесс превращения изначального кода программы в последовательность нулей и единиц, то есть в машинный код. Сегодня поговорим о главном и основном компиляторе для C-подобных ЯП – gcc.
Что особенного в gcc компиляторе
Если быть точнее, то gcc– это целое семейство компиляторов, каждый из которых подходит для определенного языка.
Основные преимущества:
- написан на C – значит максимально оптимизирован;
- подходит почти для всех c-подобных языков: Ada, C, C++, Java, Fortran, Goи т.д.;
- кроссплатформенность;
- поддерживается и сегодня (последняя версия вышла весной 2021 года);
- компактный;
- работает через интерфейс консоли.
Это лишь неполный список преимуществ. Особую ценность для профессиональных разработчиков представляет открытый исходный код. Каждый желающий сможет настроить компилятор под свои нужды.
Установка gcc и g++ на windows
Установить компилятор можно отдельно, а можно в комплекте с любой IDE. Обо всем по порядку.
Отдельная установка
Отличный вариант если вы хотите писать код в текстовом редакторе, а компилировать через консоль.
Алгоритм установки:
- Проверяем наличие компилятора в системе. Для этого откройте командную строку и введите «gcc —version». Если отобразилась версия компилятора, то ничего не делаем. Компилятор уже установлен в системе.
- Если его все же нет, то переходим на сайт http://www.equation.com/servlet/equation.cmd?fa=fortran
- В таблице выбираем нужную версию. Совет: Выбирайте предпоследнюю версию, потому что она более стабильная и отлаженная.
- Компилятор устанавливается как обычная программа. Читаем соглашение, выбираем путь установки, жмем далее.
- Проверяем установку. Снова вводим «gcc–version». Должна отобразиться текущая версия компилятора.
Если не устанавливается какая-то версия, то попробуйте установить другую.
Установка вместе с другими программами
В данном случае устанавливается целая IDE, в которой помимо самого компилятора есть функции рефакторинга, отладки и т.д. Подходит для тех, кто серьезно взялся за это дело. Ниже представлены самые популярные IDE с поддержкой gcc:
- code::Blocks;
- Dev-C++;
- Eclipse;
- Netbeans.
Первые два в основном используются для обучения, а последние уже в профессиональных целях.
Компиляция программы на gcc
Давайте создадим файл «main.cpp» и добавим в него следующий код на C++:
#include <iostream>
using namespace std;
int main()
{
cout<<«Hello World»;
return 0;
}
Код просто выводит сообщение «HelloWorld» в консоль. Чтобы превратить этот файл в исполняемую программу, нам необходимо открыть командную строку и прописать путь к директории с файлом. Вводим следующую команду «gcc main.cpp -o main». По итогу в той же директории создастся новый исполняемый файл.
Существует множество аргументов для команды gcc, о них вы можете узнать на официальном сайте компилятора.
Установка на других операционных системах
Установка в Linux
Во многих UNIX-подобных системах компилятор установлен «из коробки», потому проблема отпадает сама. Но даже если gcc не установлен, решается это всего одной командой «sudoaptinstallgcc». Система попросит пароль, а после автоматически установит компилятор.
Установка в MacOS
Самый оптимальный метод установки – это загрузка IDEXCode. Если Вы не желаете устанавливать целую IDEради одного компилятора, то тогда вам необходимо установить отдельные компоненты вручную. Для этого откройте терминал и введите следующую команду:
sudo install -pkgXcode.mpkg -target /
Введите пароль и ждите автоматической установки.
Проблемы при работе с GCC компилятором
Несмотря на следование всем инструкциям, компилятор все еще не работает? Есть ряд решений для каждого отдельного случая.
Код не компилируется компилятором
Проверьте работоспособность кода в онлайн компиляторе. Возможно ошибка в самом синтаксисе, а не в компиляторе. Исправьте все ошибки и попробуйте снова. Но если код легко компилируется только в онлайн компиляторе, то дело в установленной версии gcc. Удалите ее и скачайте более новую.
«gcc» не является внутренней или внешней командой
Обычно проблема возникает, когда установочный файл был закрыт преждевременно или, когда не был прописан путь к компилятору. Самое простое решение – переустановка компилятора. Не помогло? Тогда попробуйте прописать путь к файлу компилятора через PATH. Чтобы это сделать:
- Откройте свойства компьютера (нажмите ПКМ по значку «мой компьютер» и нажмите свойства).
- Выберите «дополнительные параметры системы».
- Откройте раздел «переменные среды».
- Нажмите создать под вкладкой «переменные среды пользователя».
- В поле «имя переменно» введите «gcc», а в поле значение переменной путь к файлу.
Если вы все сделали правильно, то должно сработать.
Заключение
Gcc компилятор прост в обращении и отлично подойдет для новичков и профессионалов.
If you are a developer and trying to compile your C/C++ program in command prompt, then this article will help you to install gcc compiler and g++ compiler on your Windows 10 computer in order to compile your code. If these compilers are not installed, you will get error “gcc is not recognized as an internal or external command“.
Before we proceed with the installation steps, you must know about these tools.
- Minimalist GNU for Windows (MinGW): It is a development environment for Windows applications.
- gcc compiler: Use this compiler to compile C programs.
- g++ compiler: Use this compiler to compile C++ programs.
gcc and g++ compiler along with other compilers comes together as a package when you install MinGW tool. So, you are required to download and install MinGW tool on your development environment.
Here is a step by step guide.
Step 1: Download MinGW tool
You can download the installable from MinGW official website or from any other trusted source.
On the official website, click on Downloads tab on the top right corner. Under the Download List section, look for the Windows download button as shown below and download the setup file.
![]()
The mingw-get-setup.exe file gets downloaded to your computer in the downloads folder.
Step 2: Steps to install MinGW
- Right-click on the mingw-get-setup.exe file and run as administrator.
- In the MinGW Installation Manager Setup Tool window, click on Install.
- By default the installation directory is set as C:MinGW. You can change the installation directory by clicking on the Change button and selecting a different folder.
- Click on Continue button to start the installation.
- Once the installation is complete, click the Continue button to close MinGW Installation Manager Setup Tool.
Step 3: Install packages in MinGW / Install gcc compiler
Once you install MinGW, open MinGW Installation Manager from Windows start menu that contains the list of packages you can install.
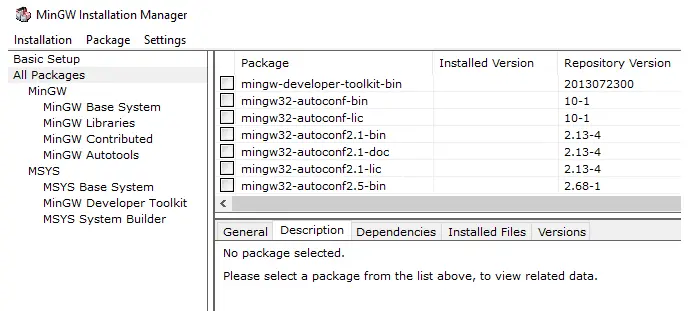
Select the packages you want to install and right-click and choose Mark for Installation. Make sure to mark all GNU C Compiler as shown below.
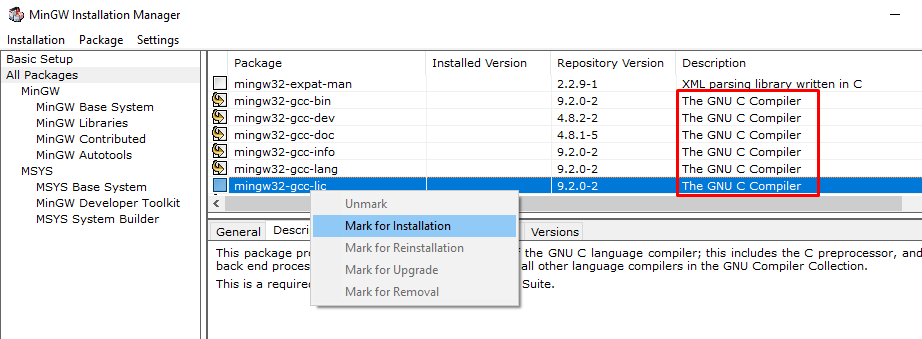
Note: After installation, if you want to remove, upgrade or reinstall certain packages, then you can use MinGW Installation Manager and choose respective option by right-clicking on the package.
Once you mark all packages for installation click on Installation menu and select Apply Changes.
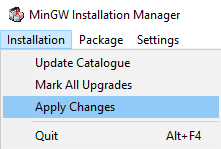
In the Schedule of Pending Actions window, click on Apply button. It starts installing marked packages on your local environment.
Step 4: Set up environment variable for MinGW
Once the MinGW setup is complete and the gcc and g++ compiler packages are installed, you must set the PATH variable for your computer.
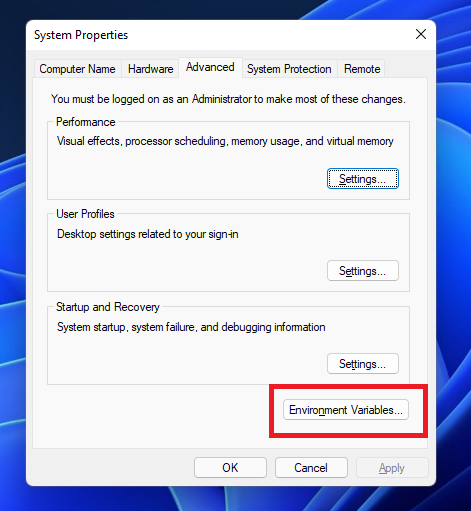
- Go to Control Panel → System and Security → System or right-click on This PC → Properties.
- Click on Advanced system settings. It opens System Properties dialog box.
- In System Properties window, under Advanced tab, click on “Environment Variables…” button to open environment variables window.
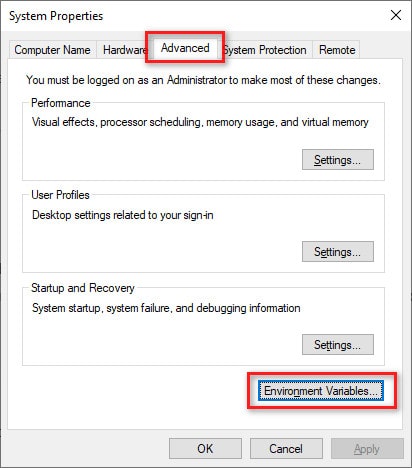
- Under System variables section, edit the path variable and append gcc compiler path up to bin folder.
Note: The bin folder contains executable files of the compiler.

Step 5: Test installation of gcc and g++ compiler
To test if the gcc compiler or the g++ compiler is installed correctly, open a command prompt and type the following command.
For gcc compiler: gcc –v
For g++ compiler: g++ -v

If these commands return the version of the compiler, then it means you have installed gcc and g++ compilers correctly.
If you are getting an error message “gcc is not recognized as an internal or external command” then click on below link to resolve the error.
Fix: gcc is not recognized as an internal or external command, operable program or batch file.
Final words:
These are all the steps you need to follow in order to install gcc compiler and g++ compiler on your computer and execute your C/C++ program in command prompt. If you have any questions or issues, do let us know in the comments section.
Cheers !!!
Using GCC with MinGW
In this tutorial, you configure Visual Studio Code to use the GCC C++ compiler (g++) and GDB debugger from mingw-w64 to create programs that run on Windows.
After configuring VS Code, you will compile and debug a simple Hello World program in VS Code. This tutorial does not teach you about GCC, GDB, Mingw-w64, or the C++ language. For those subjects, there are many good resources available on the Web.
If you have any problems, feel free to file an issue for this tutorial in the VS Code documentation repository.
Prerequisites
To successfully complete this tutorial, you must do the following steps:
-
Install Visual Studio Code.
-
Install the C/C++ extension for VS Code. You can install the C/C++ extension by searching for ‘c++’ in the Extensions view (⇧⌘X (Windows, Linux Ctrl+Shift+X)).

-
Get the latest version of Mingw-w64 via MSYS2, which provides up-to-date native builds of GCC, Mingw-w64, and other helpful C++ tools and libraries. You can download the latest installer from the MSYS2 page or use this link to the installer.
-
Follow the Installation instructions on the MSYS2 website to install Mingw-w64. Take care to run each required Start menu and
pacmancommand. -
Install the Mingw-w64 toolchain (
pacman -S --needed base-devel mingw-w64-x86_64-toolchain). Run thepacmancommand in a MSYS2 terminal. Accept the default to install all the members in thetoolchaingroup. -
Add the path to your Mingw-w64
binfolder to the WindowsPATHenvironment variable by using the following steps:- In the Windows search bar, type ‘settings’ to open your Windows Settings.
- Search for Edit environment variables for your account.
- Choose the
Pathvariable in your User variables and then select Edit. - Select New and add the Mingw-w64 destination folder path to the system path. The exact path depends on which version of Mingw-w64 you have installed and where you installed it. If you used the settings above to install Mingw-w64, then add this to the path:
C:msys64mingw64bin. - Select OK to save the updated PATH. You will need to reopen any console windows for the new PATH location to be available.

Check your MinGW installation
To check that your Mingw-w64 tools are correctly installed and available, open a new Command Prompt and type:
gcc --version
g++ --version
gdb --version
- If you don’t see the expected output or
g++orgdbis not a recognized command, make sure your PATH entry matches the Mingw-w64 binary location where the compilers are located. If the compilers do not exist at that PATH entry, make sure you followed the instructions on the MSYS2 website to install Mingw-w64. - If
gcchas the correct output but notgdb, then you need to install the packages you are missing from the Mingw-w64 toolset.- Missing the
mingw-w64-gdbpackage is one cause of the «The value of miDebuggerPath is invalid.» message upon attempted compilation if your PATH is correct.
- Missing the
Create Hello World
From a Windows command prompt, create an empty folder called projects where you can place all your VS Code projects. Then create a sub-folder called helloworld, navigate into it, and open VS Code in that folder by entering the following commands:
mkdir projects
cd projects
mkdir helloworld
cd helloworld
code .
The «code .» command opens VS Code in the current working folder, which becomes your «workspace». Accept the Workspace Trust dialog by selecting Yes, I trust the authors since this is a folder you created.
As you go through the tutorial, you will see three files created in a .vscode folder in the workspace:
tasks.json(build instructions)launch.json(debugger settings)c_cpp_properties.json(compiler path and IntelliSense settings)
Add a source code file
In the File Explorer title bar, select the New File button and name the file helloworld.cpp.

Add hello world source code
Now paste in this source code:
#include <iostream>
#include <vector>
#include <string>

using namespace std;

int main()
{
    vector<string> msg {"Hello", "C++", "World", "from", "VS Code", "and the C++ extension!"};

    for (const string& word : msg)
    {
        cout << word << " ";
    }
    cout << endl;
}
Now press ⌘S (Windows, Linux Ctrl+S) to save the file. Notice how the file you just added appears in the File Explorer view (⇧⌘E (Windows, Linux Ctrl+Shift+E)) in the side bar of VS Code:

You can also enable Auto Save to automatically save your file changes, by checking Auto Save in the main File menu.
The Activity Bar on the far left lets you open different views such as Search, Source Control, and Run. You’ll look at the Run view later in this tutorial. You can find out more about the other views in the VS Code User Interface documentation.
Note: When you save or open a C++ file, you may see a notification from the C/C++ extension about the availability of an Insiders version, which lets you test new features and fixes. You can ignore this notification by selecting the
X(Clear Notification).
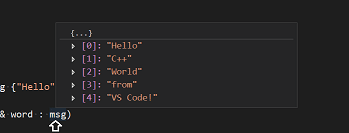
Explore IntelliSense
In your new helloworld.cpp file, hover over vector or string to see type information. After the declaration of the msg variable, start typing msg. as you would when calling a member function. You should immediately see a completion list that shows all the member functions, and a window that shows the type information for the msg object:
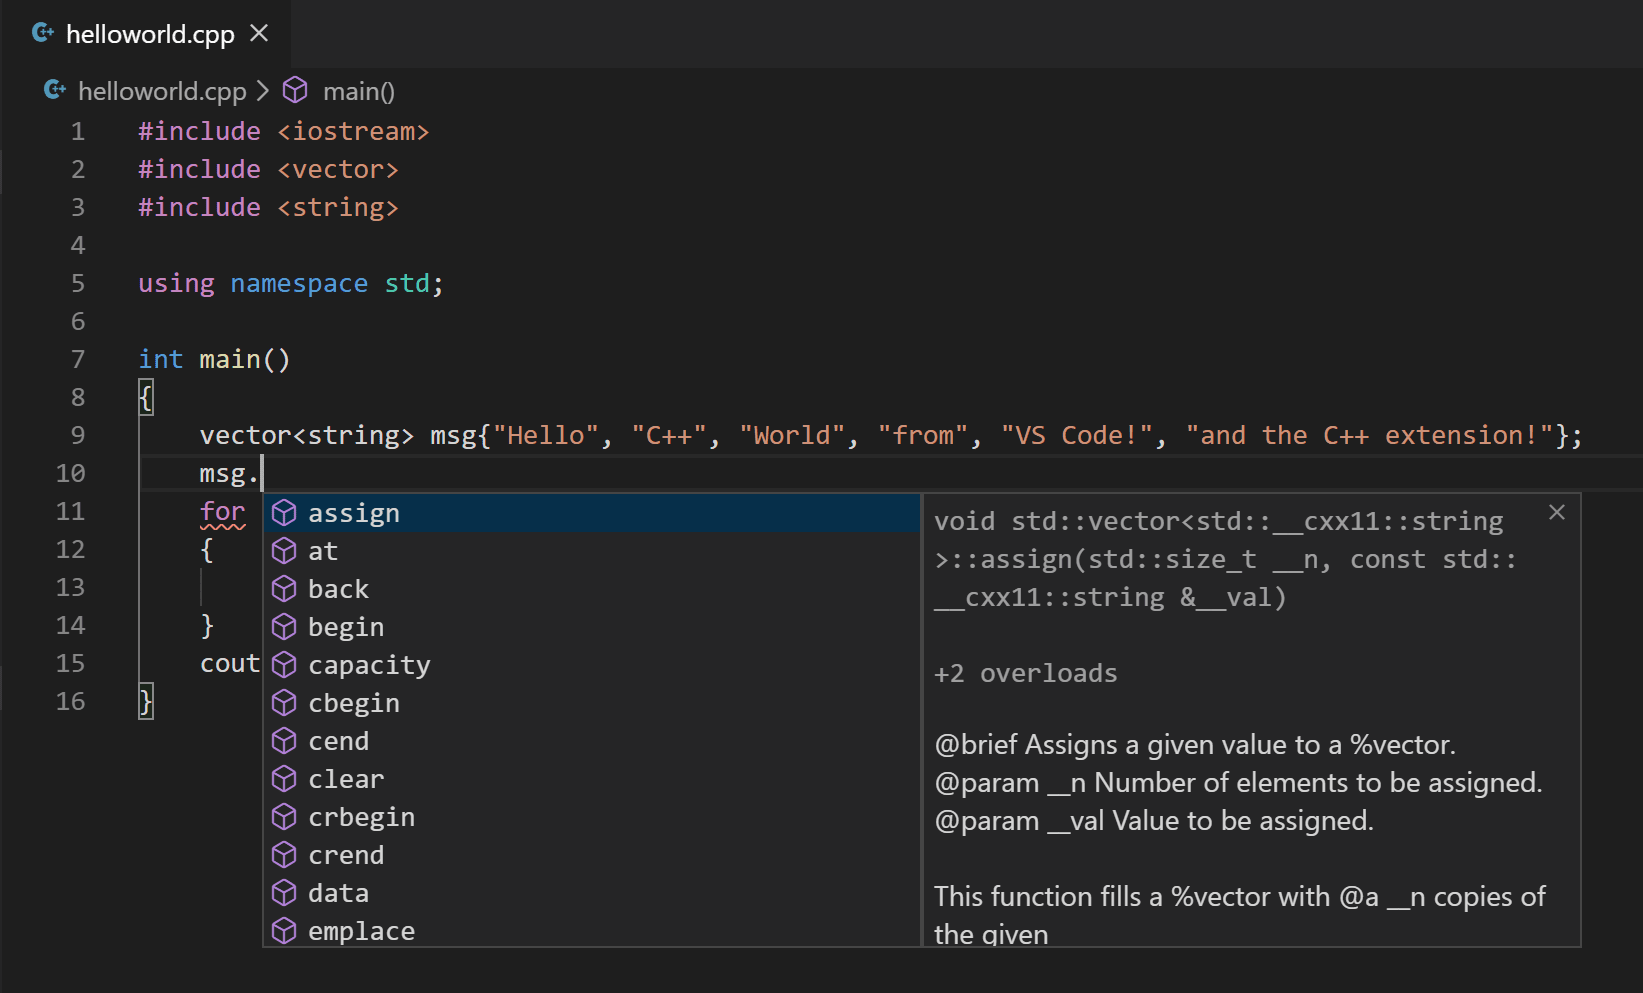
You can press the Tab key to insert the selected member; then, when you add the opening parenthesis, you will see information about any arguments that the function requires.
Run helloworld.cpp
Remember, the C++ extension uses the C++ compiler you have installed on your machine to build your program. Make sure you have a C++ compiler installed before attempting to run and debug helloworld.cpp in VS Code.
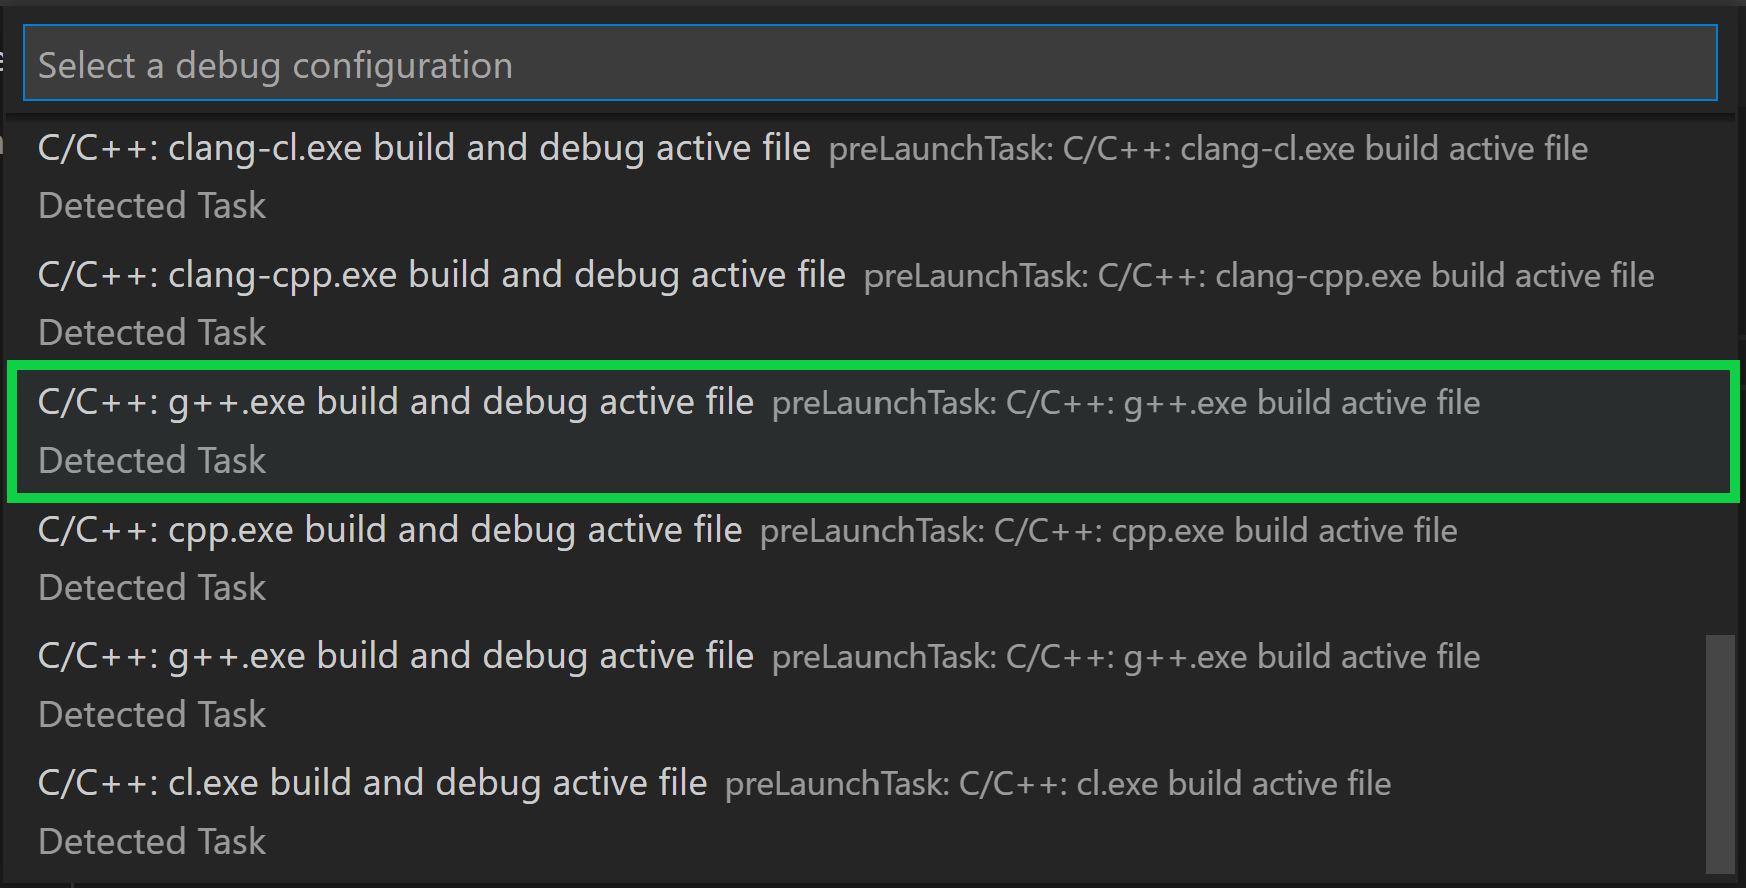
-
Open
helloworld.cppso that it is the active file. -
Press the play button in the top right corner of the editor.
-
Choose C/C++: g++.exe build and debug active file from the list of detected compilers on your system.
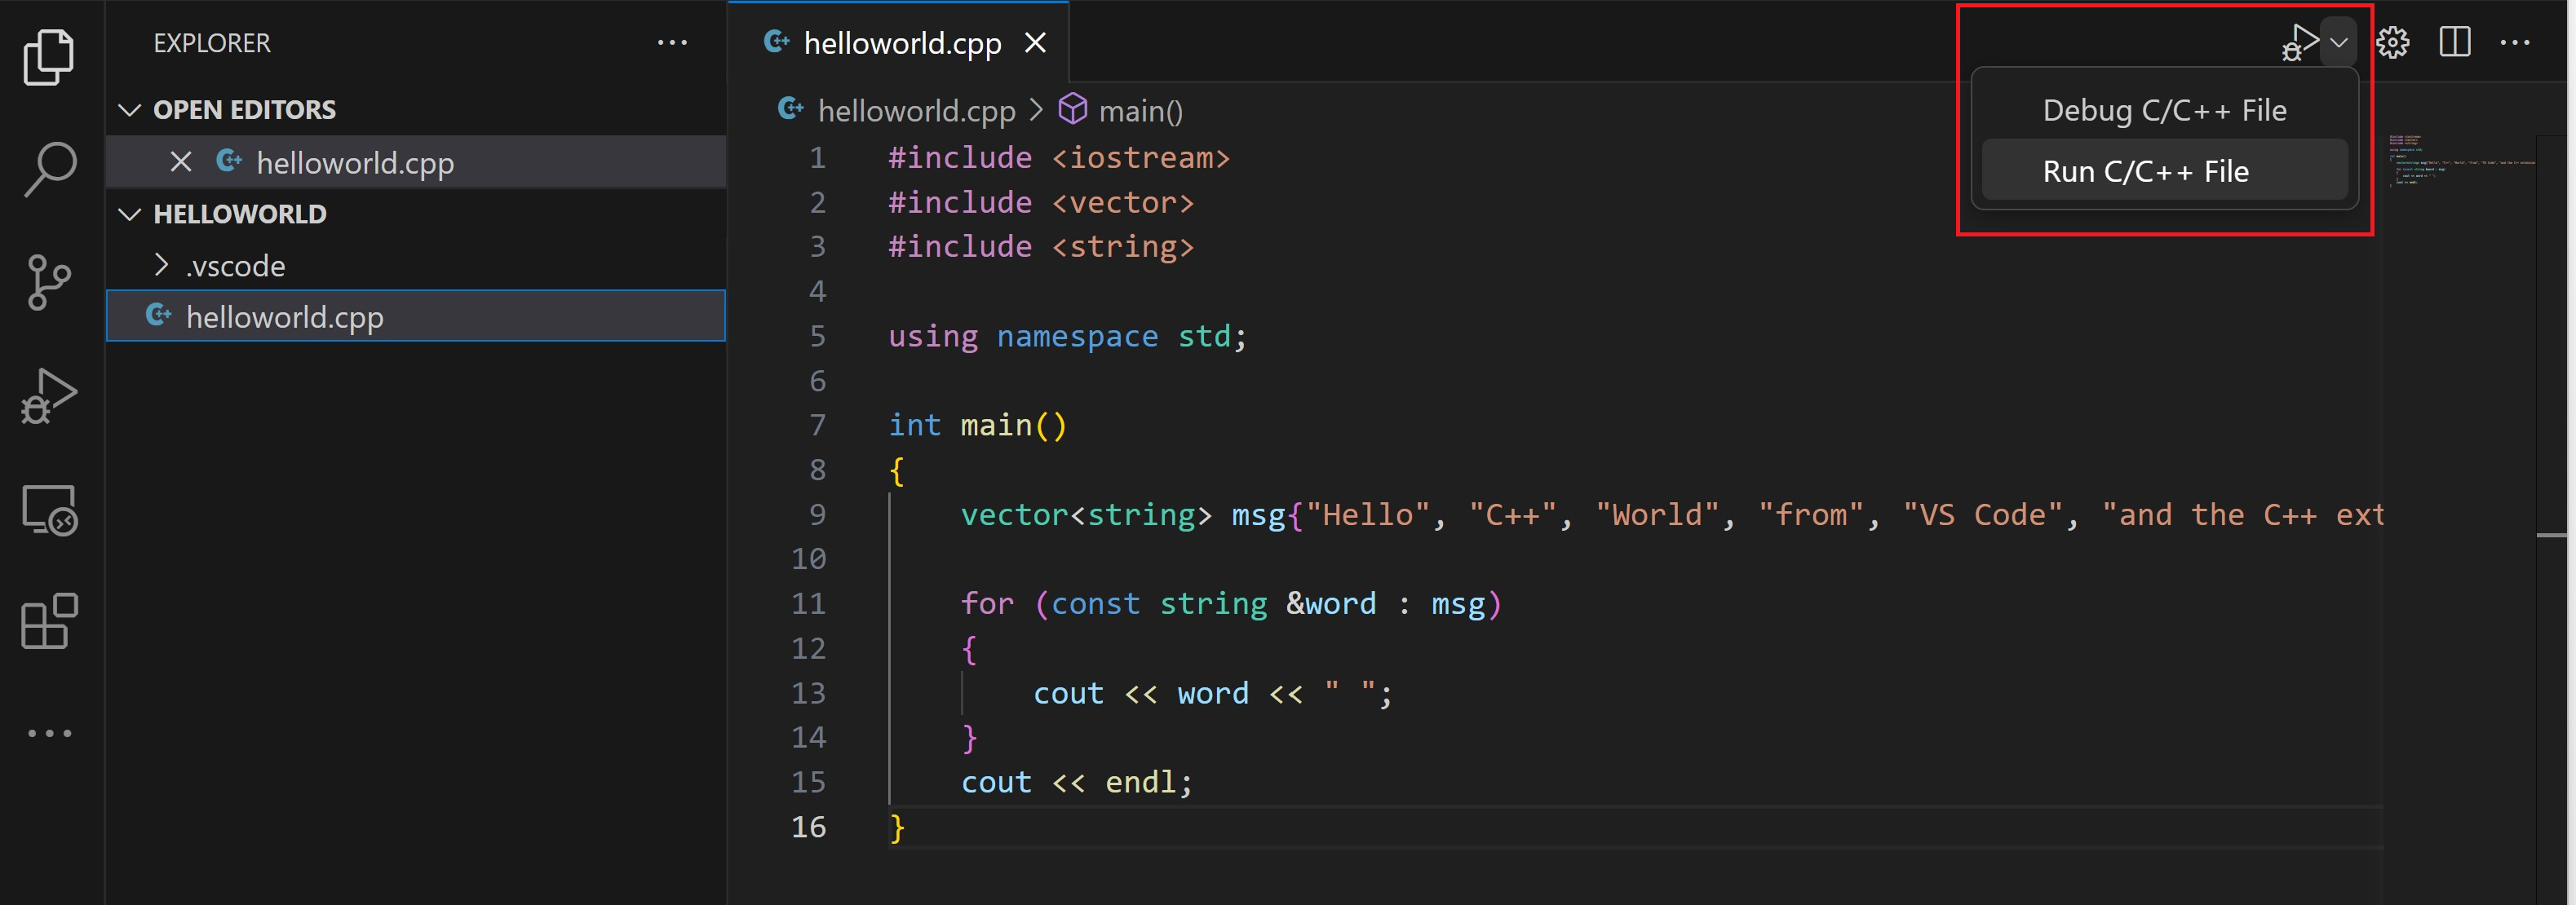
You’ll only be asked to choose a compiler the first time you run helloworld.cpp. This compiler will be set as the «default» compiler in tasks.json file.
-
After the build succeeds, your program’s output will appear in the integrated Terminal.

The first time you run your program, the C++ extension creates tasks.json, which you’ll find in your project’s .vscode folder. tasks.json stores build configurations.
Your new tasks.json file should look similar to the JSON below:
{
  "tasks": [
    {
      "type": "cppbuild",
      "label": "C/C++: g++.exe build active file",
      "command": "C:\msys64\mingw64\bin\g++.exe",
      "args": [
        "-fdiagnostics-color=always",
        "-g",
        "${file}",
        "-o",
        "${fileDirname}\${fileBasenameNoExtension}.exe"
      ],
      "options": {
        "cwd": "${fileDirname}"
      },
      "problemMatcher": ["$gcc"],
      "group": {
        "kind": "build",
        "isDefault": true
      },
      "detail": "Task generated by Debugger."
    }
  ],
  "version": "2.0.0"
}
Note: You can learn more about
tasks.jsonvariables in the variables reference.
The command setting specifies the program to run; in this case that is g++.
The args array specifies the command-line arguments that will be passed to g++. These arguments must be specified in the order expected by the compiler.
This task tells g++ to take the active file (${file}), compile it, and create an executable file in the current directory (${fileDirname}) with the same name as the active file but with the .exe extension (${fileBasenameNoExtension}.exe), resulting in helloworld.exe for our example.
The label value is what you will see in the tasks list; you can name this whatever you like.
The detail value is what you will as the description of the task in the tasks list. It’s highly recommended to rename this value to differentiate it from similar tasks.
From now on, the play button will read from tasks.json to figure out how to build and run your program. You can define multiple build tasks in tasks.json, and whichever task is marked as the default will be used by the play button. In case you need to change the default compiler, you can run Tasks: Configure default build task. Alternatively you can modify the tasks.json file and remove the default by replacing this segment:
    "group": {
        "kind": "build",
        "isDefault": true
    },
with this:
"group": "build",
Modifying tasks.json
You can modify your tasks.json to build multiple C++ files by using an argument like "${workspaceFolder}/*.cpp" instead of ${file}.This will build all .cpp files in your current folder. You can also modify the output filename by replacing "${fileDirname}\${fileBasenameNoExtension}.exe" with a hard-coded filename (for example "${workspaceFolder}\myProgram.exe").
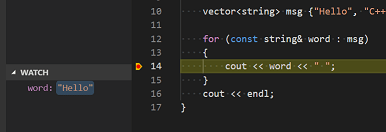
Debug helloworld.cpp
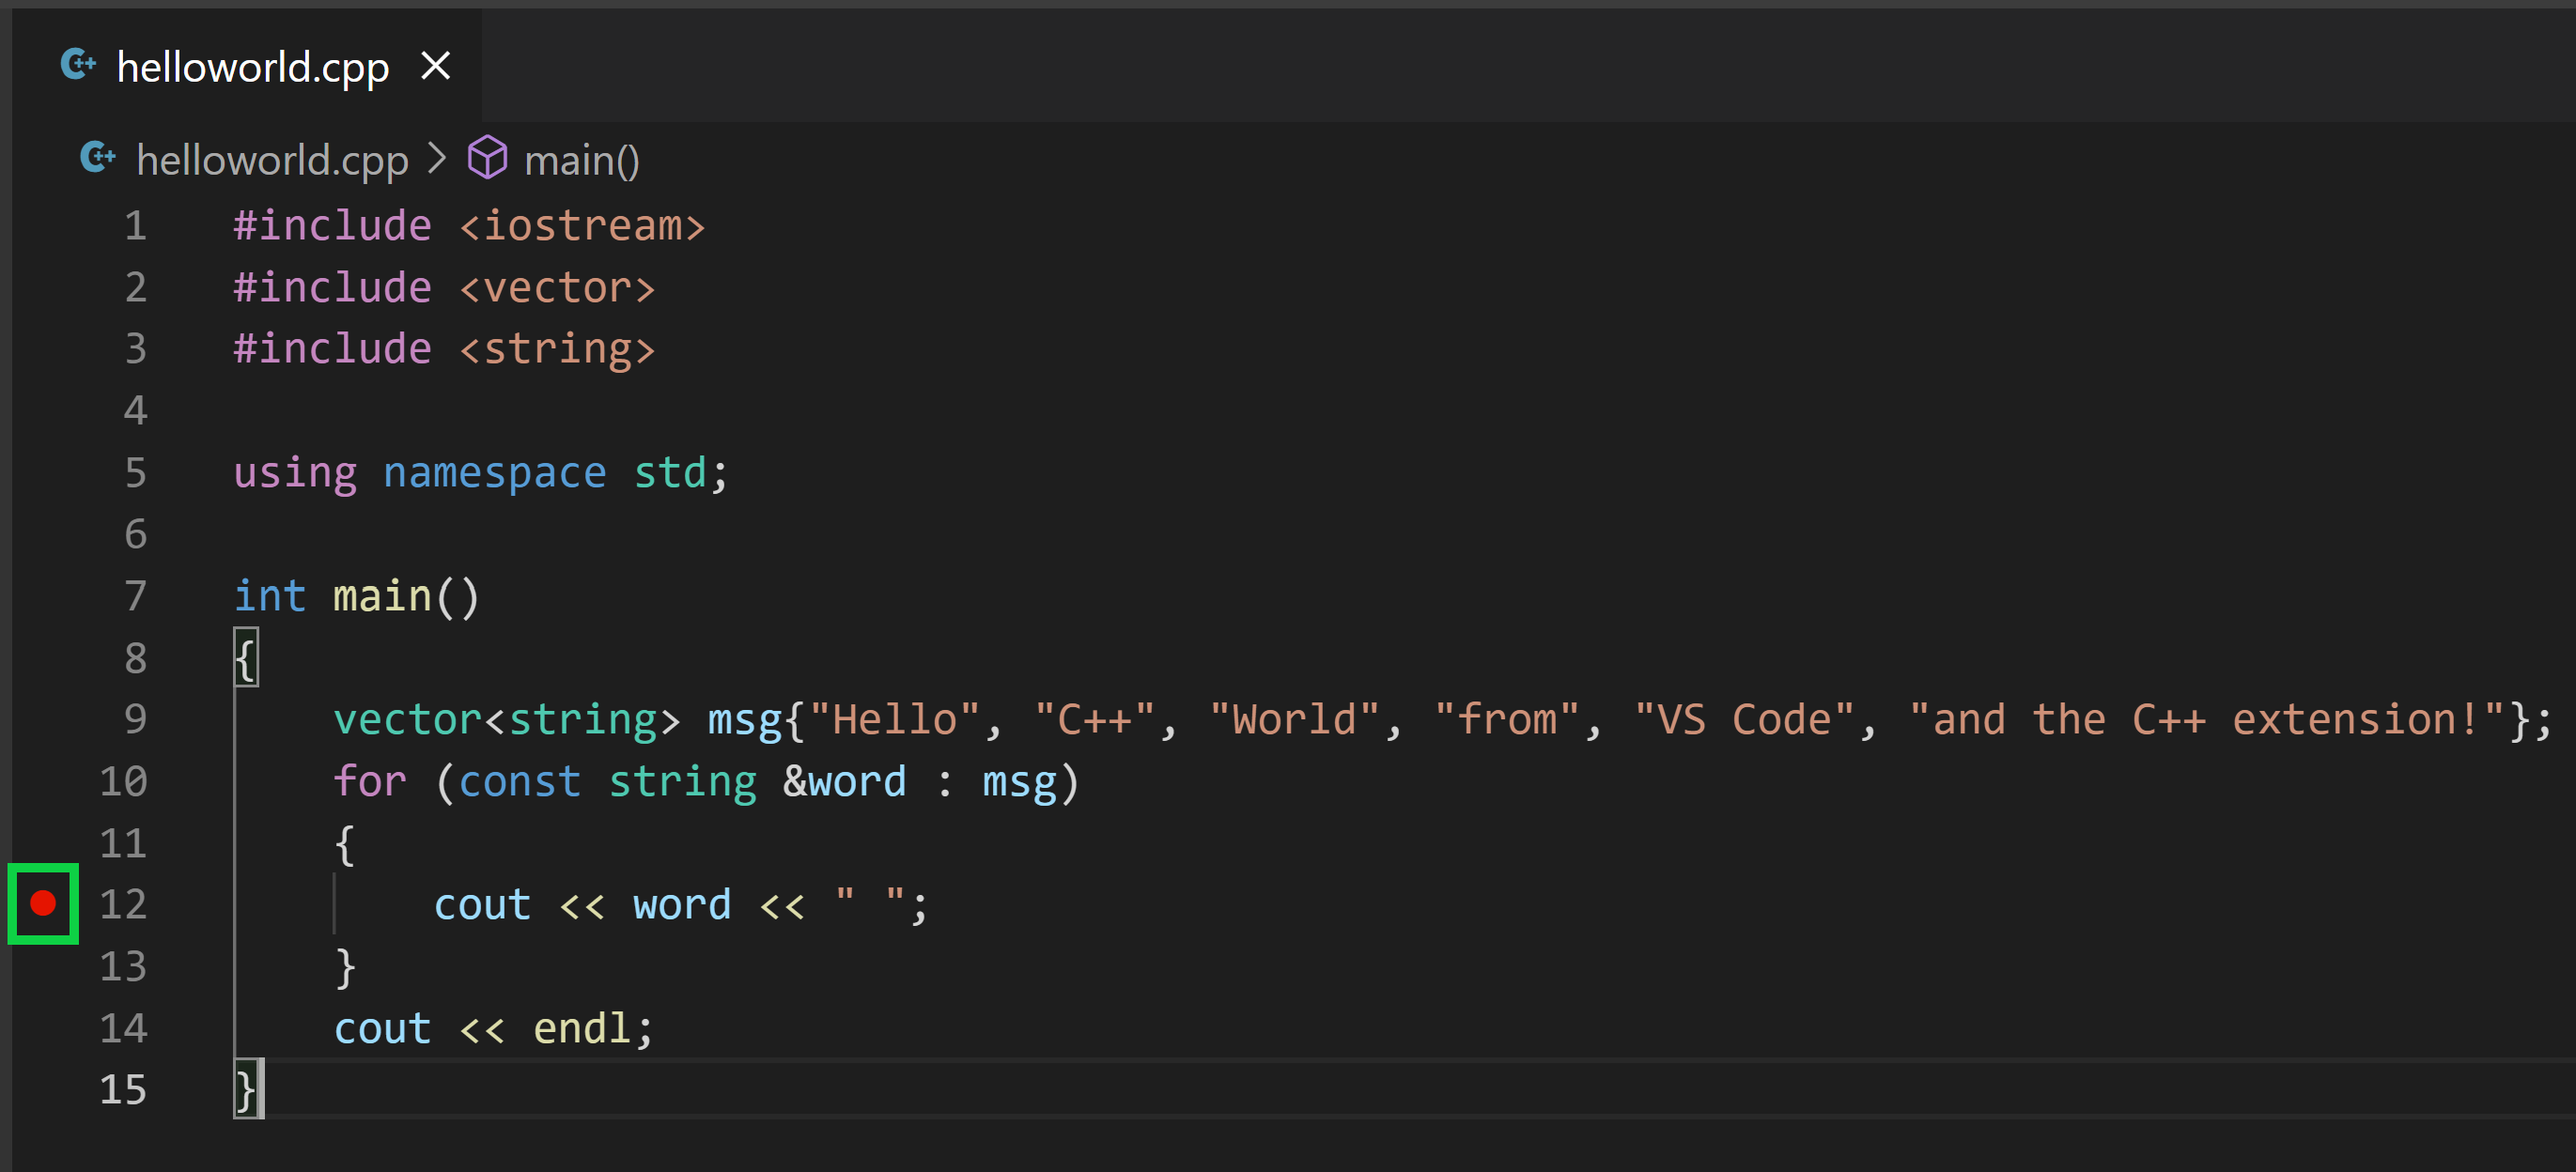
- Go back to
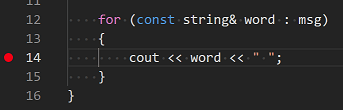
helloworld.cppso that it is the active file. - Set a breakpoint by clicking on the editor margin or using F9 on the current line.
- From the drop-down next to the play button, select Debug C/C++ File.
- Choose C/C++: g++ build and debug active file from the list of detected compilers on your system (you’ll only be asked to choose a compiler the first time you run/debug
helloworld.cpp).
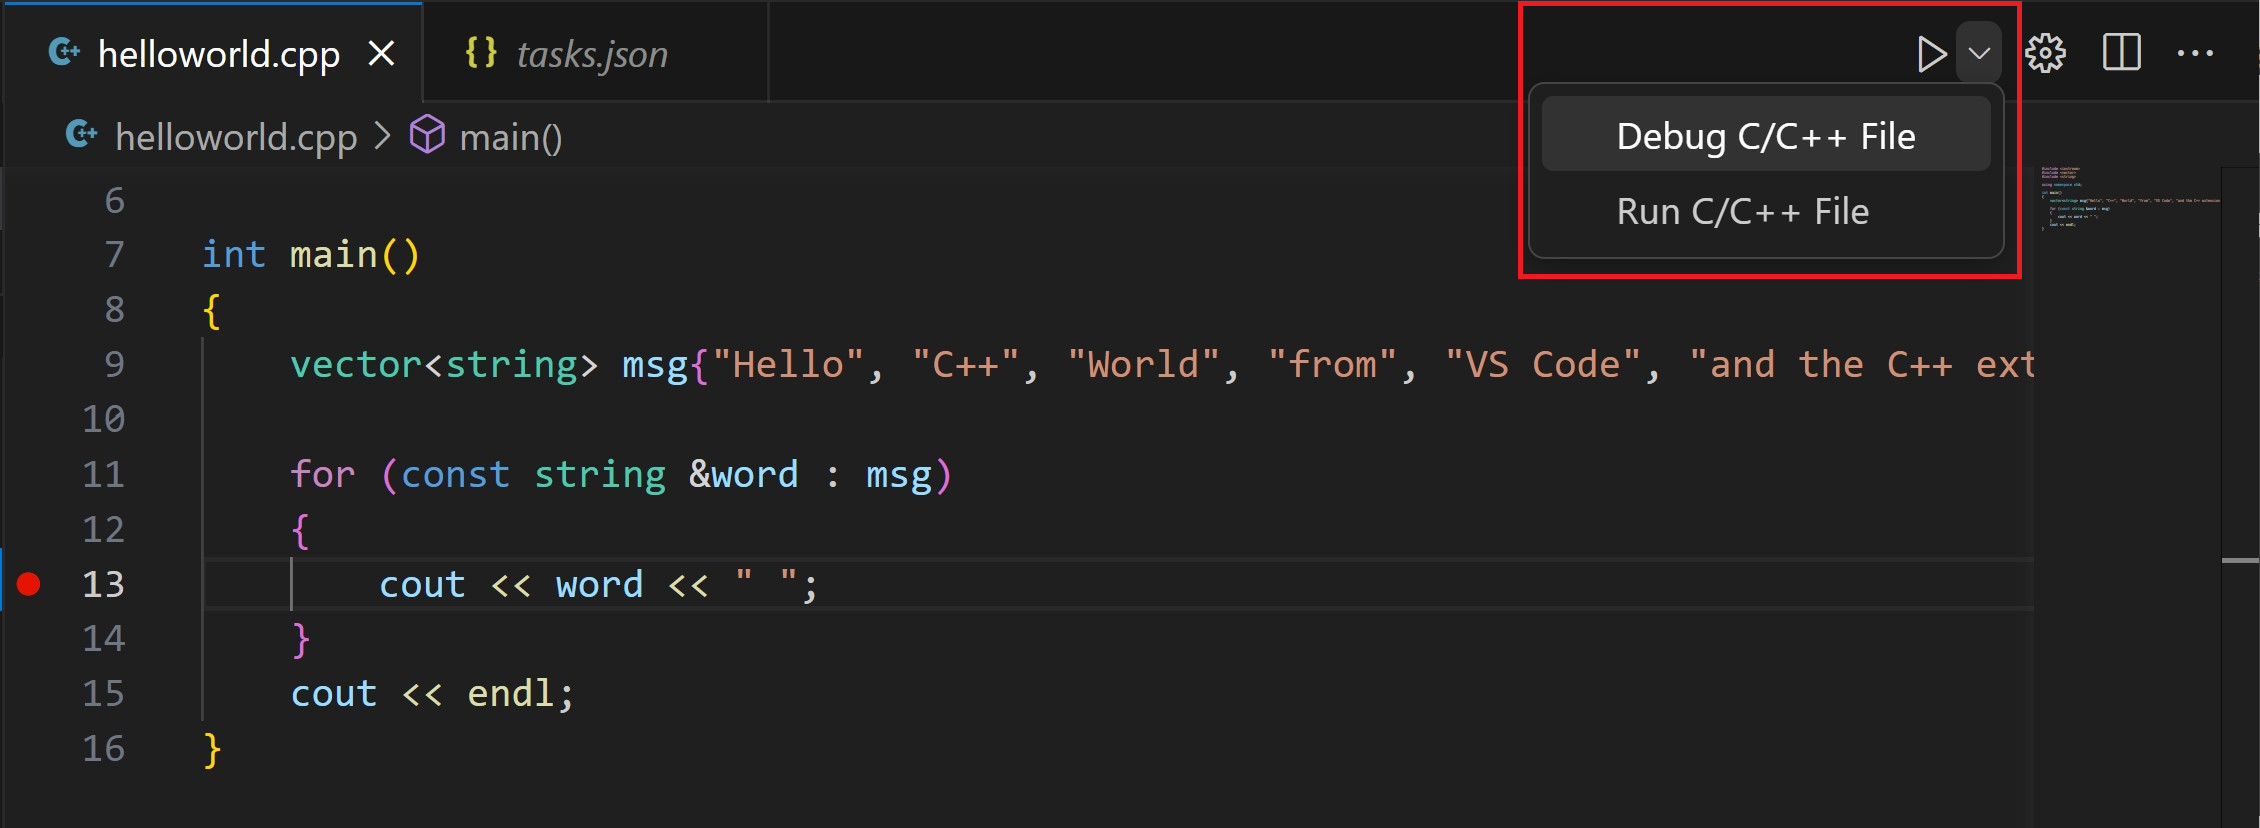
The play button has two modes: Run C/C++ File and Debug C/C++ File. It will default to the last-used mode. If you see the debug icon in the play button, you can just click the play button to debug, instead of using the drop-down.

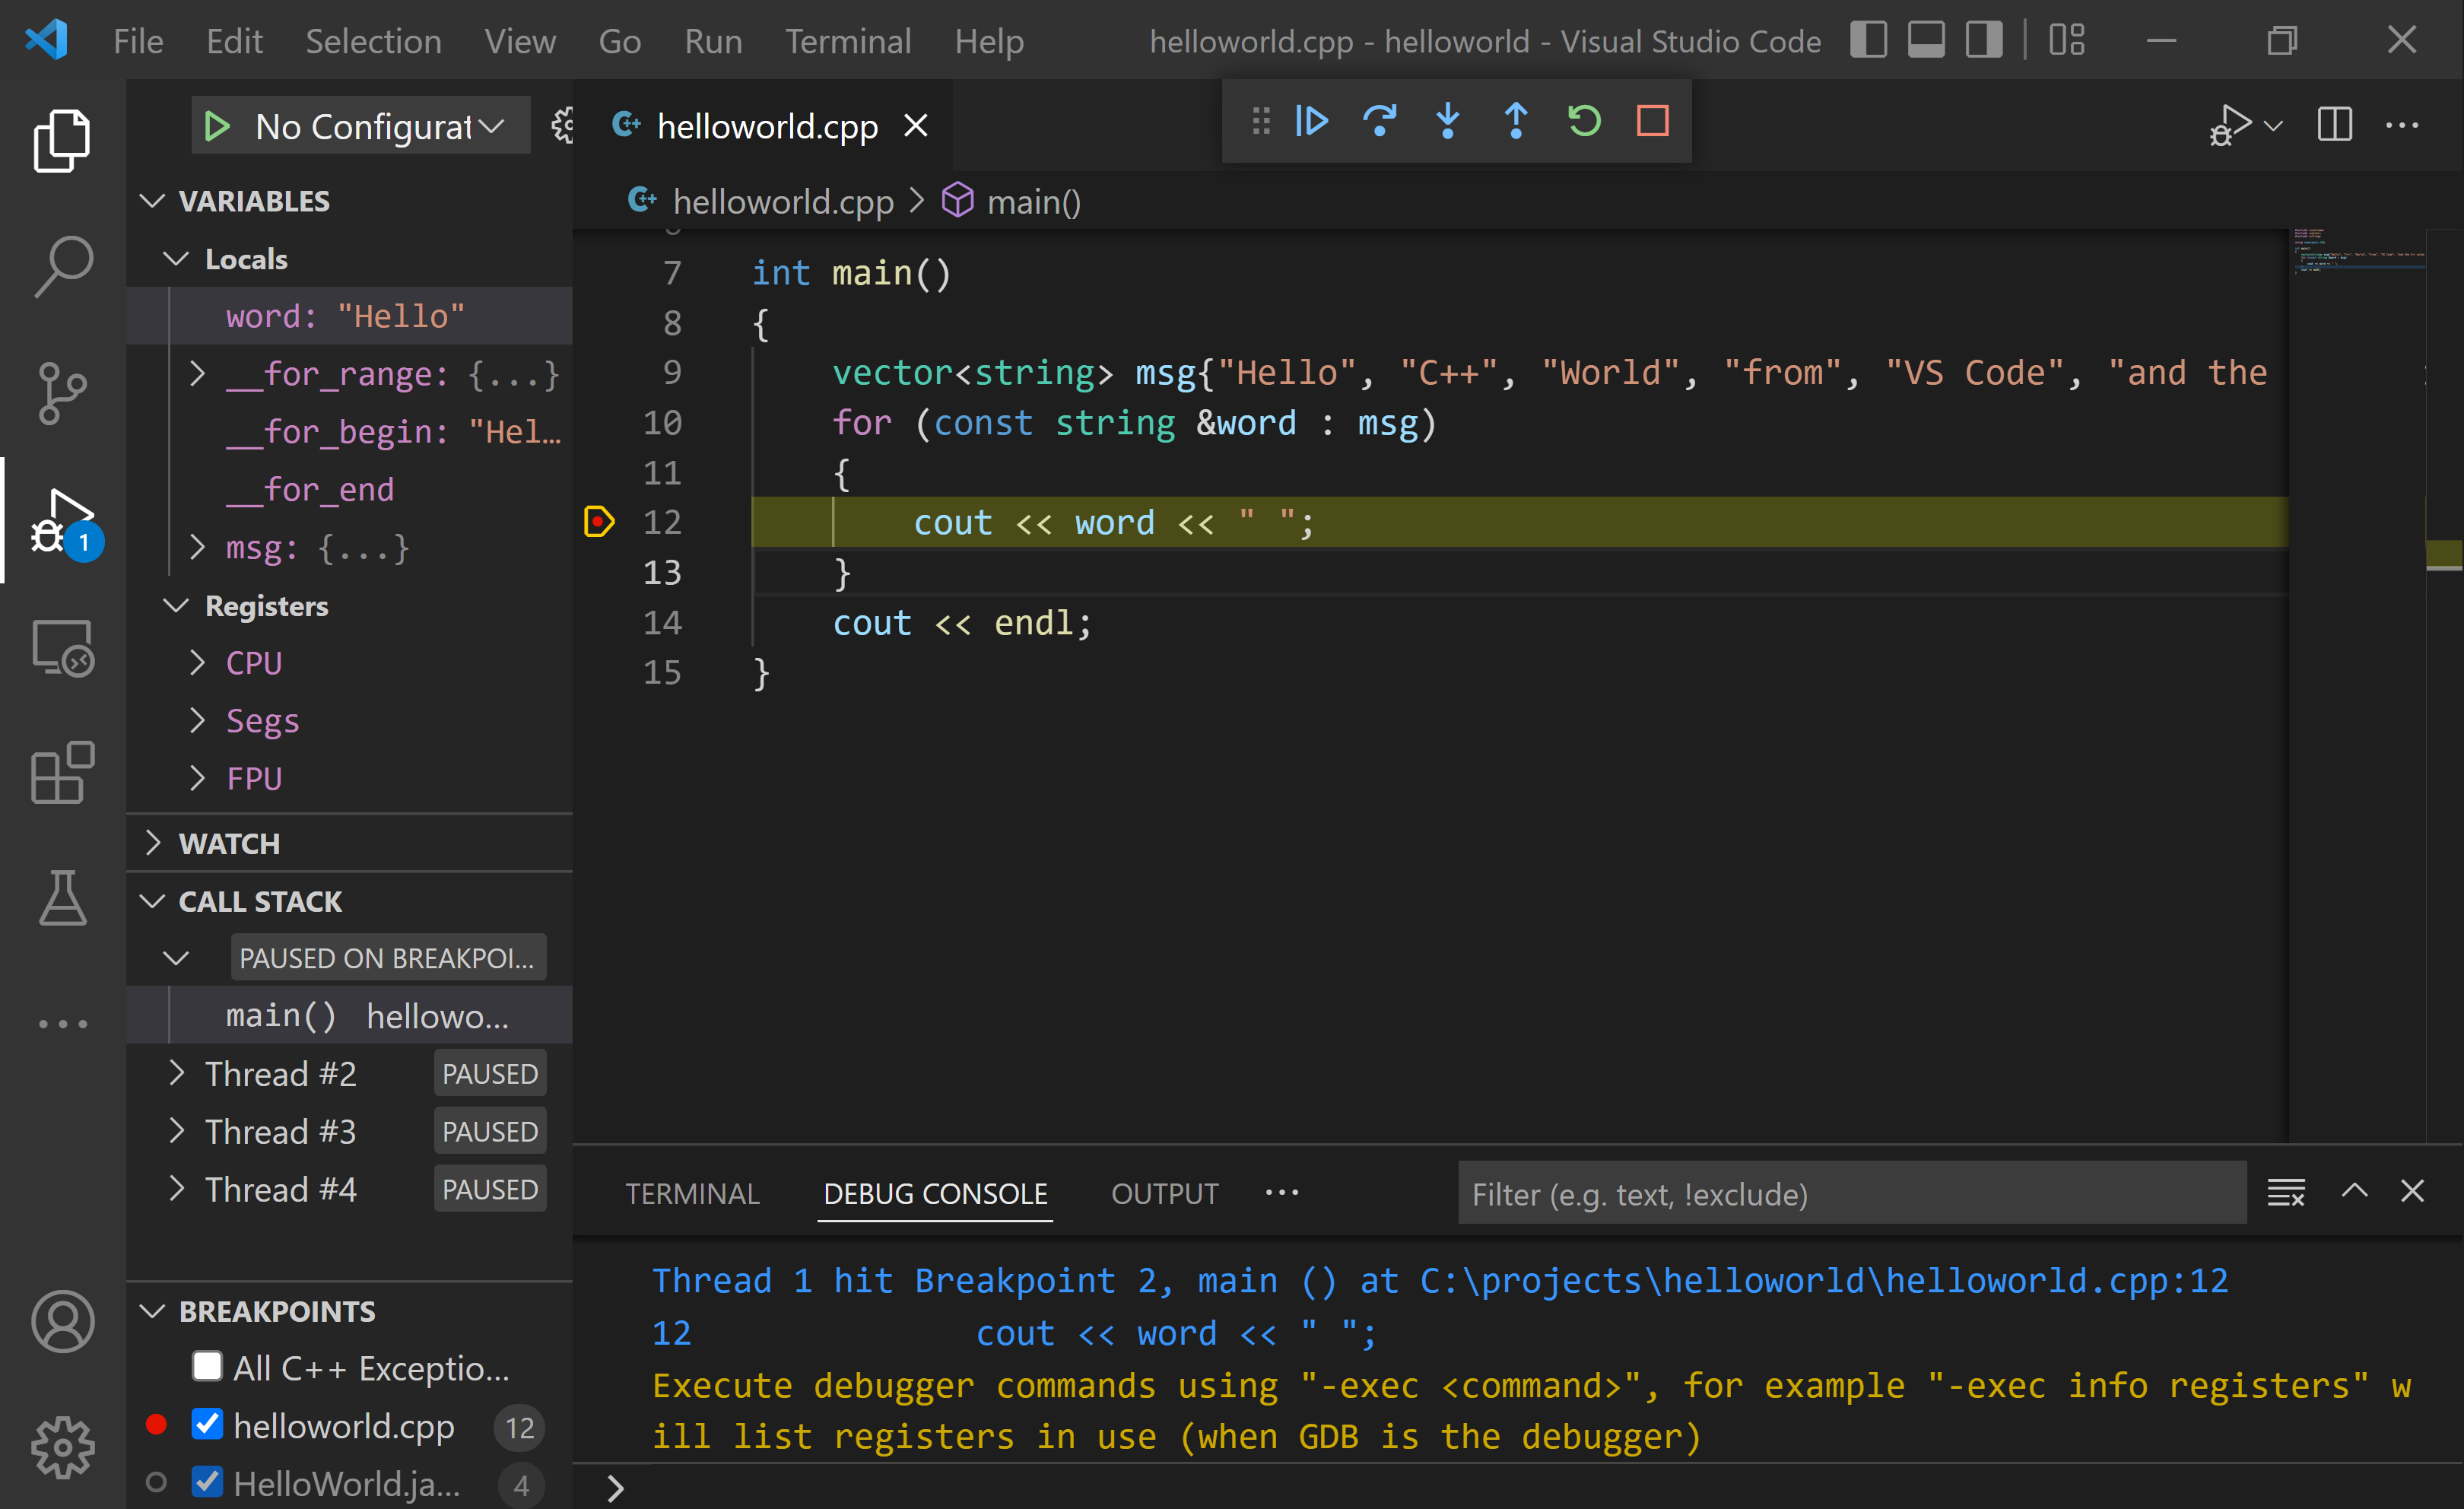
Explore the debugger
Before you start stepping through the code, let’s take a moment to notice several changes in the user interface:
-
The Integrated Terminal appears at the bottom of the source code editor. In the Debug Output tab, you see output that indicates the debugger is up and running.
-
The editor highlights the line where you set a breakpoint before starting the debugger:
-
The Run and Debug view on the left shows debugging information. You’ll see an example later in the tutorial.
-
At the top of the code editor, a debugging control panel appears. You can move this around the screen by grabbing the dots on the left side.

Step through the code
Now you’re ready to start stepping through the code.
-
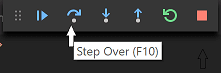
Click or press the Step over icon in the debugging control panel.
This will advance program execution to the first line of the for loop, and skip over all the internal function calls within the
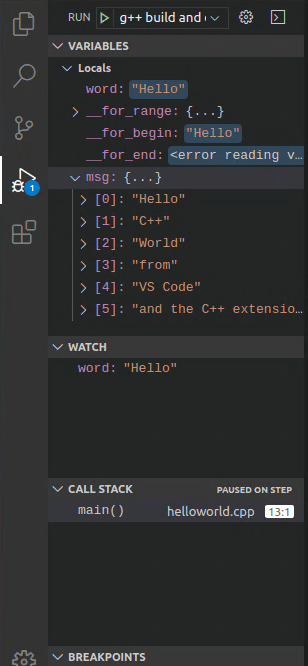
vectorandstringclasses that are invoked when themsgvariable is created and initialized. Notice the change in the Variables window on the left.In this case, the errors are expected because, although the variable names for the loop are now visible to the debugger, the statement has not executed yet, so there is nothing to read at this point. The contents of
msgare visible, however, because that statement has completed. -
Press Step over again to advance to the next statement in this program (skipping over all the internal code that is executed to initialize the loop). Now, the Variables window shows information about the loop variables.
-
Press Step over again to execute the
coutstatement. (Note that as of the March 2019 release, the C++ extension does not print any output to the Debug Console until the loop exits.) -
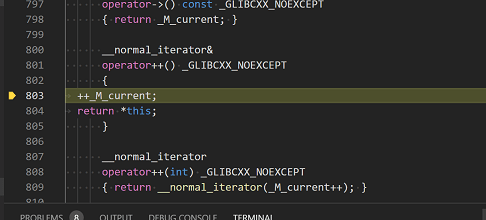
If you like, you can keep pressing Step over until all the words in the vector have been printed to the console. But if you are curious, try pressing the Step Into button to step through source code in the C++ standard library!
To return to your own code, one way is to keep pressing Step over. Another way is to set a breakpoint in your code by switching to the
helloworld.cpptab in the code editor, putting the insertion point somewhere on thecoutstatement inside the loop, and pressing F9. A red dot appears in the gutter on the left to indicate that a breakpoint has been set on this line.Then press F5 to start execution from the current line in the standard library header. Execution will break on
cout. If you like, you can press F9 again to toggle off the breakpoint.When the loop has completed, you can see the output in the Integrated Terminal, along with some other diagnostic information that is output by GDB.

Set a watch
Sometimes you might want to keep track of the value of a variable as your program executes. You can do this by setting a watch on the variable.
-
Place the insertion point inside the loop. In the Watch window, click the plus sign and in the text box, type
word, which is the name of the loop variable. Now view the Watch window as you step through the loop. -
Add another watch by adding this statement before the loop:
int i = 0;. Then, inside the loop, add this statement:++i;. Now add a watch forias you did in the previous step. -
To quickly view the value of any variable while execution is paused on a breakpoint, you can hover over it with the mouse pointer.
Customize debugging with launch.json
When you debug with the play button or F5, the C++ extension creates a dynamic debug configuration on the fly.
There are cases where you’d want to customize your debug configuration, such as specifying arguments to pass to the program at runtime. You can define custom debug configurations in a launch.json file.
To create launch.json, choose Add Debug Configuration from the play button drop-down menu.

You’ll then see a dropdown for various predefined debugging configurations. Choose C/C++: g++.exe build and debug active file.
VS Code creates a launch.json file, which looks something like this:
{
  "version": "0.2.0",
  "configurations": [
    {
      "name": "C/C++: g++.exe build and debug active file",
      "type": "cppdbg",
      "request": "launch",
      "program": "${fileDirname}\${fileBasenameNoExtension}.exe",
      "args": [],
      "stopAtEntry": false,
      "cwd": "${fileDirname}",
      "environment": [],
      "externalConsole": false,
      "MIMode": "gdb",
      "miDebuggerPath": "C:\msys64\mingw64\bin\gdb.exe",
      "setupCommands": [
        {
          "description": "Enable pretty-printing for gdb",
          "text": "-enable-pretty-printing",
          "ignoreFailures": true
        }
      ],
      "preLaunchTask": "C/C++: g++.exe build active file"
    }
  ]
}
In the JSON above, program specifies the program you want to debug. Here it is set to the active file folder (${fileDirname}) and active filename with the .exe extension (${fileBasenameNoExtension}.exe), which if helloworld.cpp is the active file will be helloworld.exe. The args property is an array of arguments to pass to the program at runtime.
By default, the C++ extension won’t add any breakpoints to your source code and the stopAtEntry value is set to false.
Change the stopAtEntry value to true to cause the debugger to stop on the main method when you start debugging.
From now on, the play button and F5 will read from your
launch.jsonfile when launching your program for debugging.
C/C++ configurations
If you want more control over the C/C++ extension, you can create a c_cpp_properties.json file, which will allow you to change settings such as the path to the compiler, include paths, C++ standard (default is C++17), and more.
You can view the C/C++ configuration UI by running the command C/C++: Edit Configurations (UI) from the Command Palette (⇧⌘P (Windows, Linux Ctrl+Shift+P)).

This opens the C/C++ Configurations page. When you make changes here, VS Code writes them to a file called c_cpp_properties.json in the .vscode folder.
Here, we’ve changed the Configuration name to GCC, set the Compiler path dropdown to the g++ compiler, and the IntelliSense mode to match the compiler (gcc-x64).

Visual Studio Code places these settings in .vscodec_cpp_properties.json. If you open that file directly, it should look something like this:
{
  "configurations": [
    {
      "name": "GCC",
      "includePath": ["${workspaceFolder}/**"],
      "defines": ["_DEBUG", "UNICODE", "_UNICODE"],
      "windowsSdkVersion": "10.0.18362.0",
      "compilerPath": "C:/msys64/mingw64/bin/g++.exe",
      "cStandard": "c17",
      "cppStandard": "c++17",
      "intelliSenseMode": "windows-gcc-x64"
    }
  ],
  "version": 4
}
You only need to add to the Include path array setting if your program includes header files that are not in your workspace or in the standard library path.
Compiler path
The extension uses the compilerPath setting to infer the path to the C++ standard library header files. When the extension knows where to find those files, it can provide features like smart completions and Go to Definition navigation.
The C/C++ extension attempts to populate compilerPath with the default compiler location based on what it finds on your system. The extension looks in several common compiler locations.
The compilerPath search order is:
- First check for the Microsoft Visual C++ compiler
- Then look for g++ on Windows Subsystem for Linux (WSL)
- Then g++ for Mingw-w64.
If you have Visual Studio or WSL installed, you may need to change compilerPath to match the preferred compiler for your project. For example, if you installed Mingw-w64 version 8.1.0 using the i686 architecture, Win32 threading, and sjlj exception handling install options, the path would look like this: C:Program Files (x86)mingw-w64i686-8.1.0-win32-sjlj-rt_v6-rev0mingw64bing++.exe.
Troubleshooting
MSYS2 is installed, but g++ and gdb are still not found
You must follow the steps on the MSYS2 website and use the MSYS CLI to install Mingw-w64, which contains those tools. You will also need to install the full Mingw-w64 toolchain (pacman -S --needed base-devel mingw-w64-x86_64-toolchain) to get the gdb debugger.
MinGW 32-bit
If you need a 32-bit version of the MinGW toolset, consult the Downloading section on the MSYS2 wiki. It includes links to both 32-bit and 64-bit installation options.
Next steps
- Explore the VS Code User Guide.
- Review the Overview of the C++ extension.
- Create a new workspace, copy your
.vscodeJSON files to it, adjust the necessary settings for the new workspace path, program name, and so on, and start coding!
5/13/2022