![]() В данной статье будет приведена пошаговая инструкция по установке и первоначальной настройке Microsoft Windows Server 2012. Установка данной версии Windows Server не сильно отличается от установки Microsoft Windows Server 2008 R2 или даже установки Windows 8, однако из-за ряда особенностей я покажу процесс установки полностью, от начала и до конца.
В данной статье будет приведена пошаговая инструкция по установке и первоначальной настройке Microsoft Windows Server 2012. Установка данной версии Windows Server не сильно отличается от установки Microsoft Windows Server 2008 R2 или даже установки Windows 8, однако из-за ряда особенностей я покажу процесс установки полностью, от начала и до конца.
0. Оглавление
- Что понадобится
- Установка Microsoft Windows Server 2012
- Первоначальная настройка Microsoft Windows Server 2012
1. Что понадобится
- Установочный диск Microsoft Windows Server 2012 (скачать можно здесь)
- Рабочий ключ для активации Windows Server 2012
2. Установка Microsoft Windows Server 2012
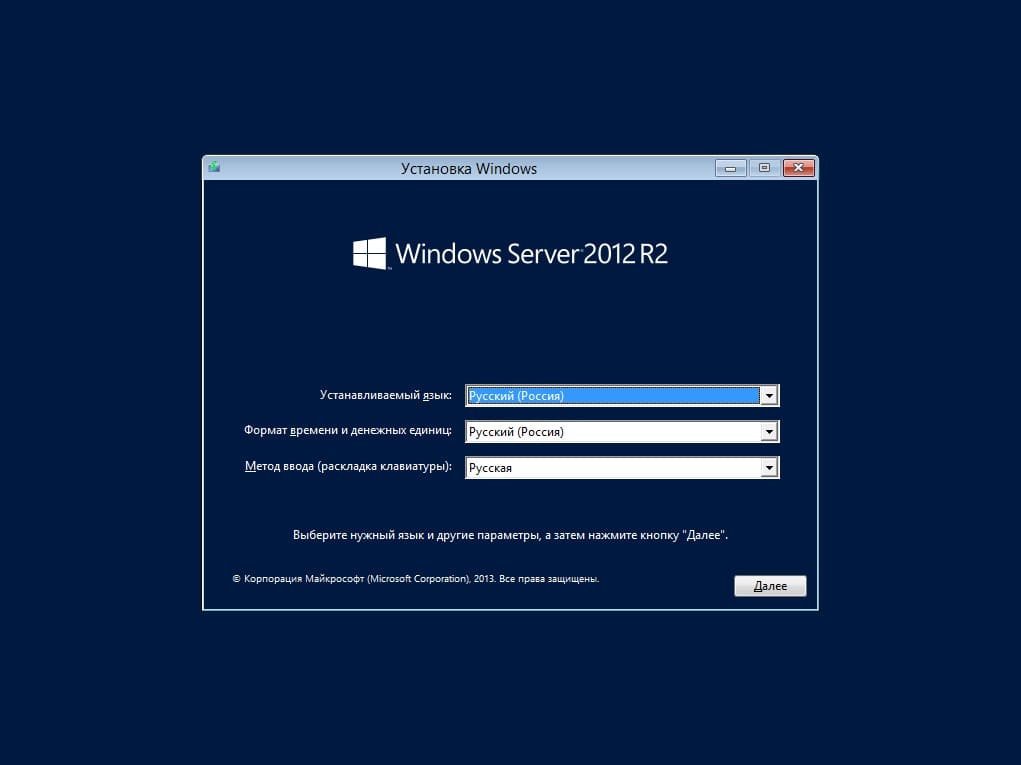
Вставляем установочный диск Microsoft Windows Server 2012 в DVD-привод компьютера и загружаемся с него (для этого в BIOS компьютера необходимо поставить первичную загрузку с CD-ROM). После непродолжительной загрузки попадаем на окно выбора языка. Выбираем нужные параметры (по умолчанию язык, формат времени и денежных единиц и раскладку клавиатуры оставляем русскую) и нажимаем «Далее» (Next) .

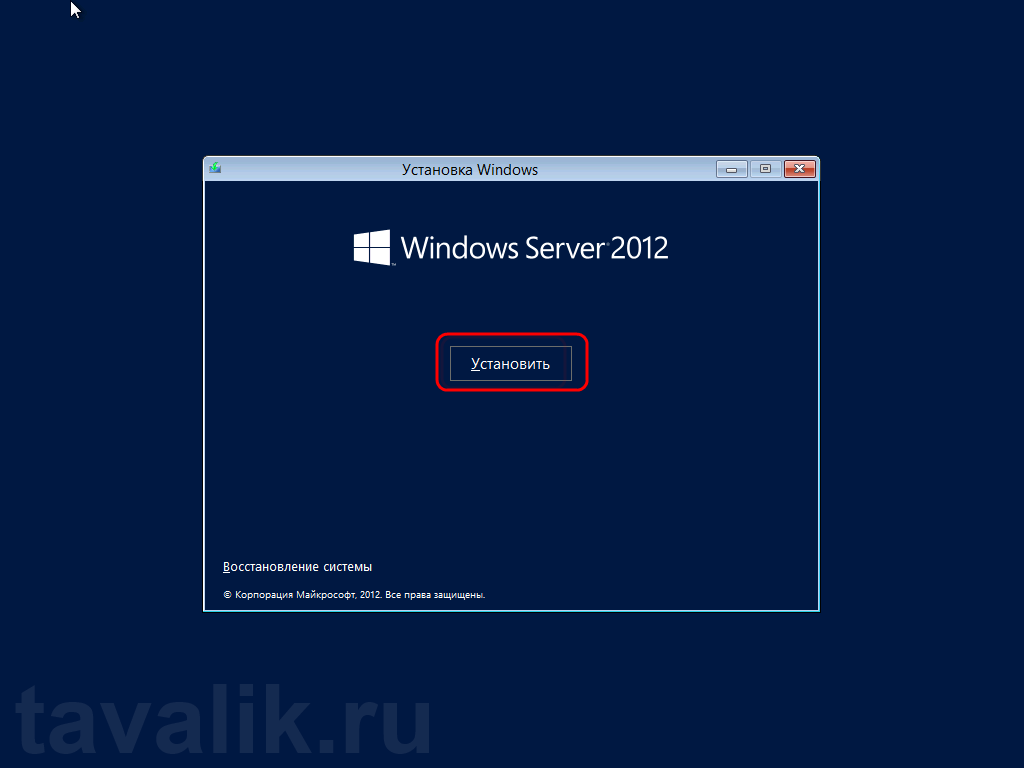
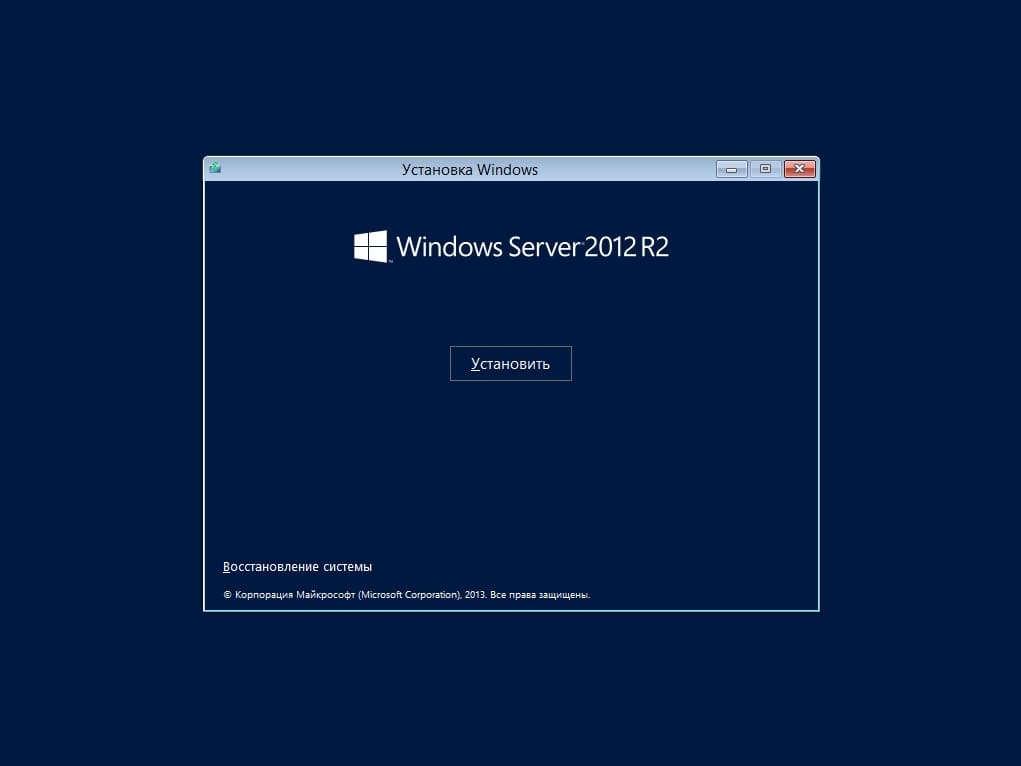
В следующем окне, для первичной установки Windows Server нажимаем «Установить» (Install now) .
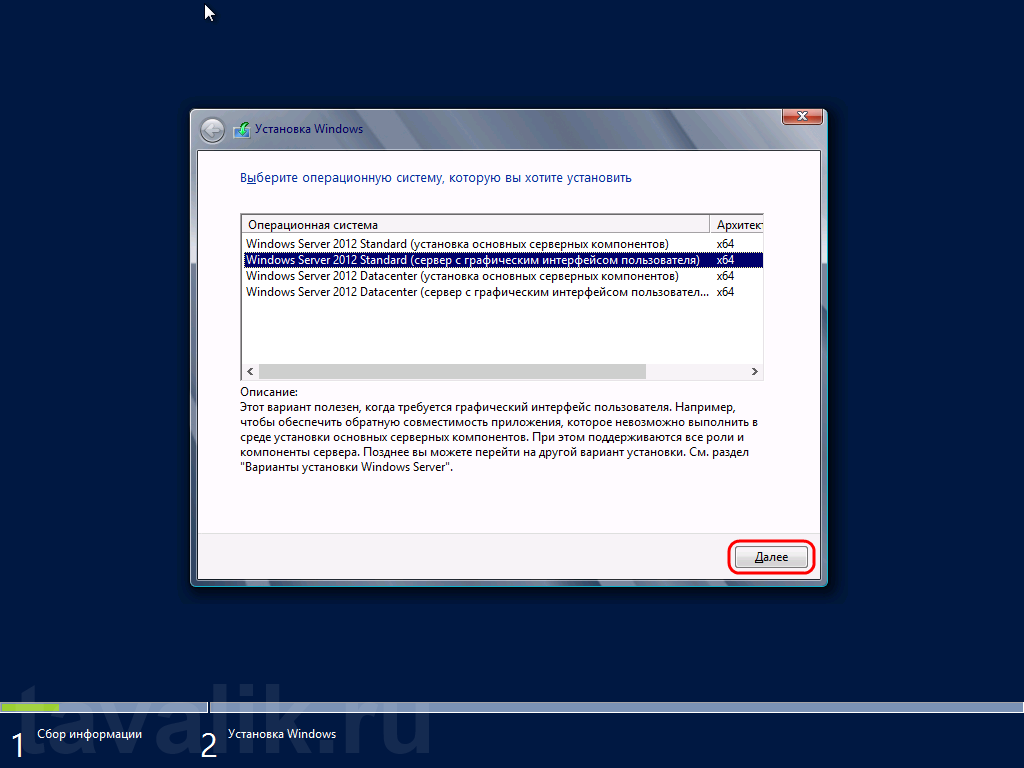
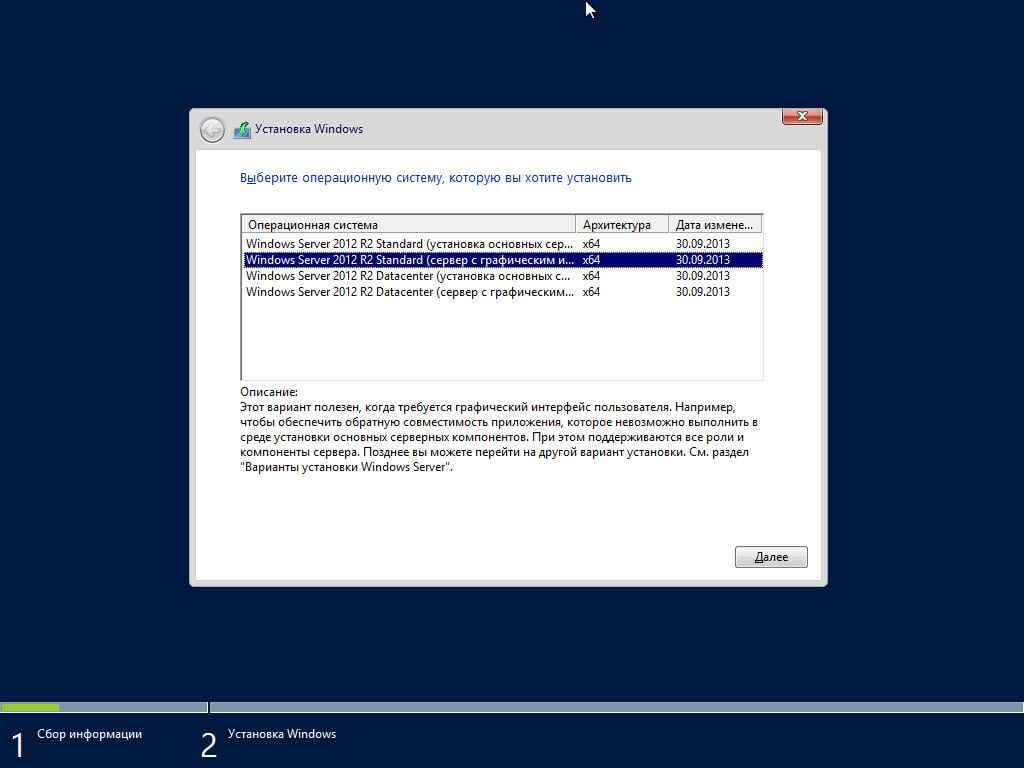
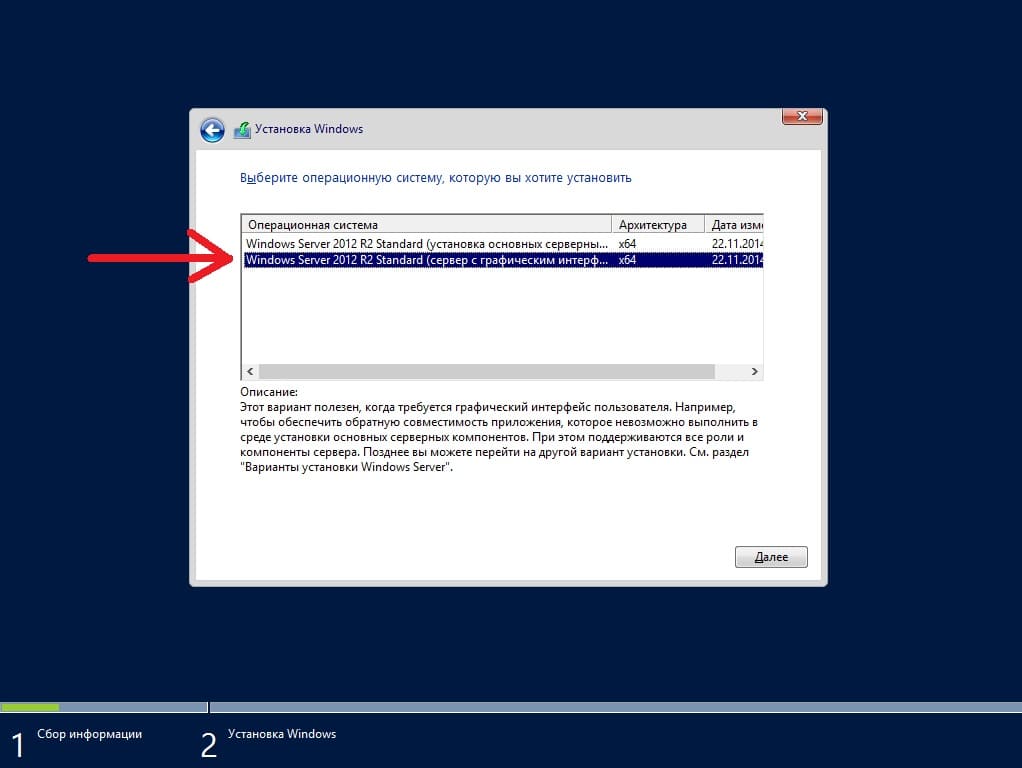
Теперь необходимо выбрать выпуск операционной системы, который будем устанавливать (об отличии различных выпусков Windows Server 2012 можно прочитать, например, здесь). Выбрав нужный выпуск, жмем «Далее» (Next) .
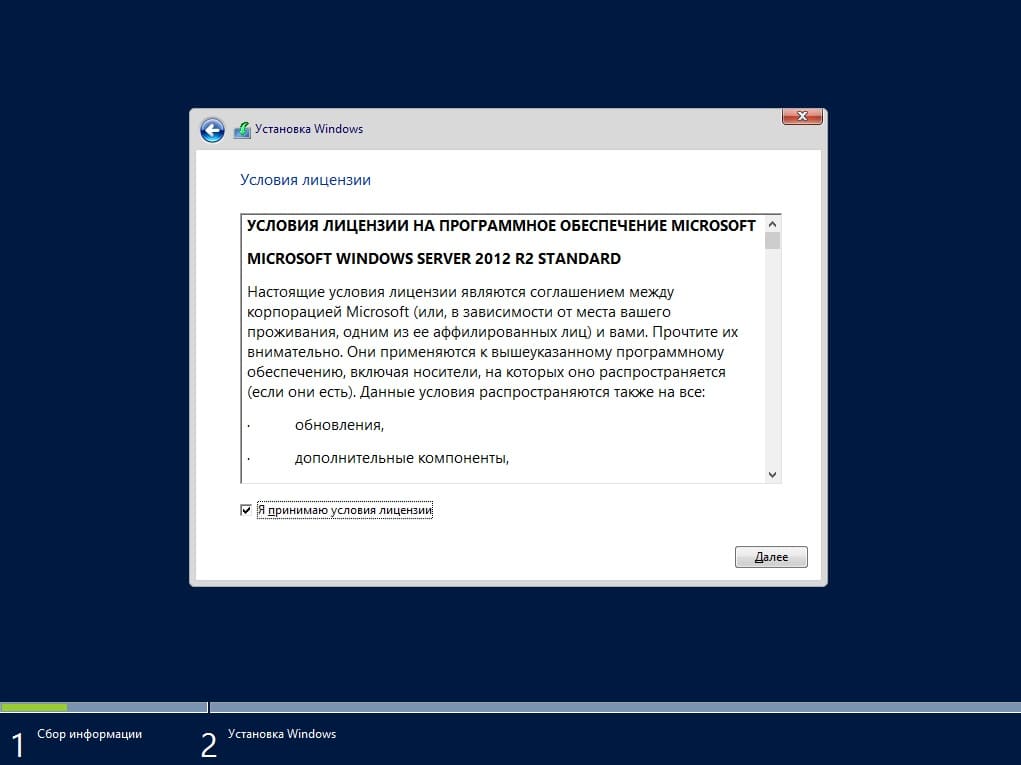
Соглашаемся с условиями лицензионного соглашения, установив флаг «Я принимаю условия лицензии» (I accept the license terms) и жмем «Далее» (Next) .

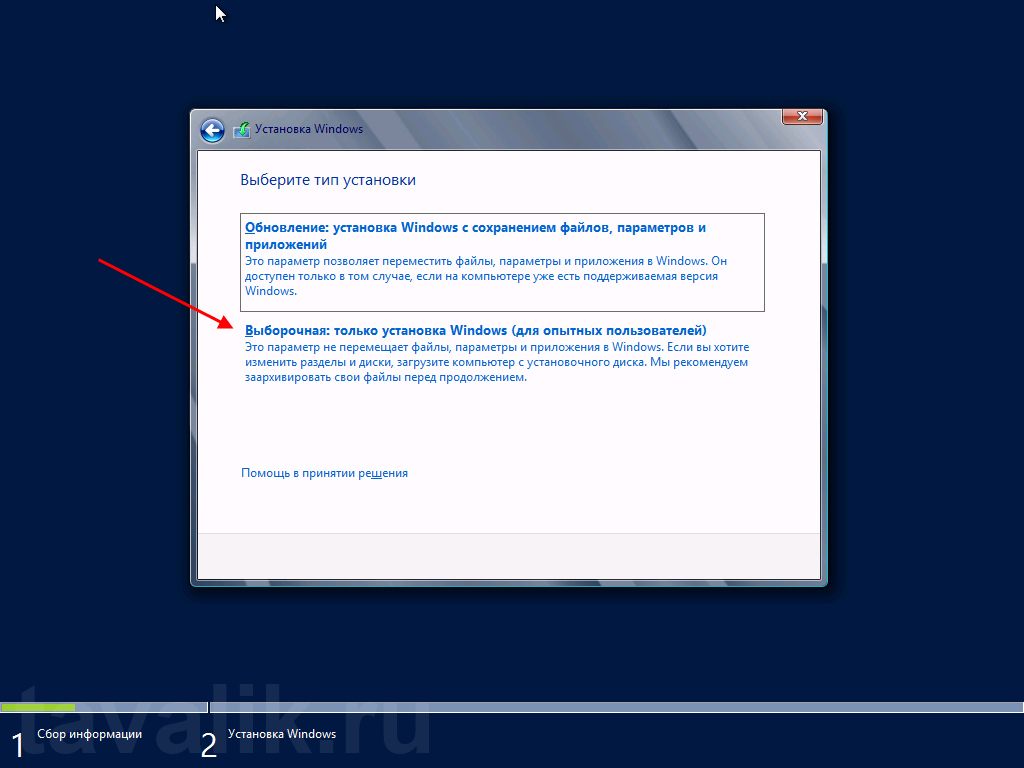
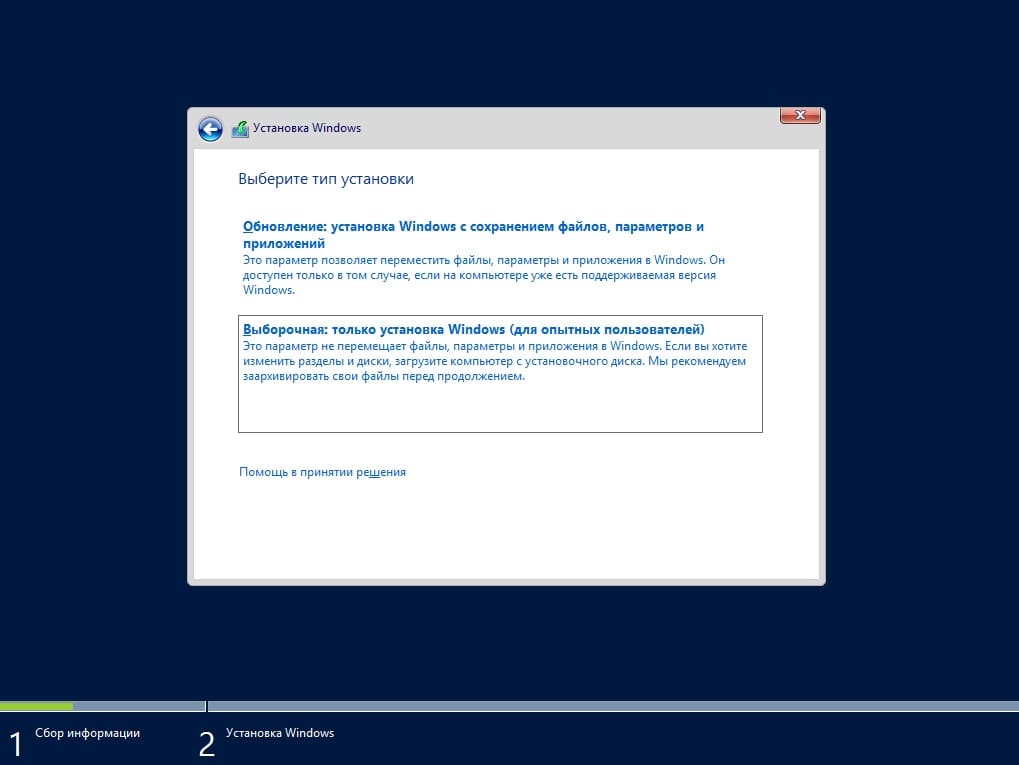
На следующем шаге необходим выбрать тип установки. Для чистой установки Windows Server 2012 выбираем «Выборочная: только установка Windows…» (Custom: Install Windows only) .
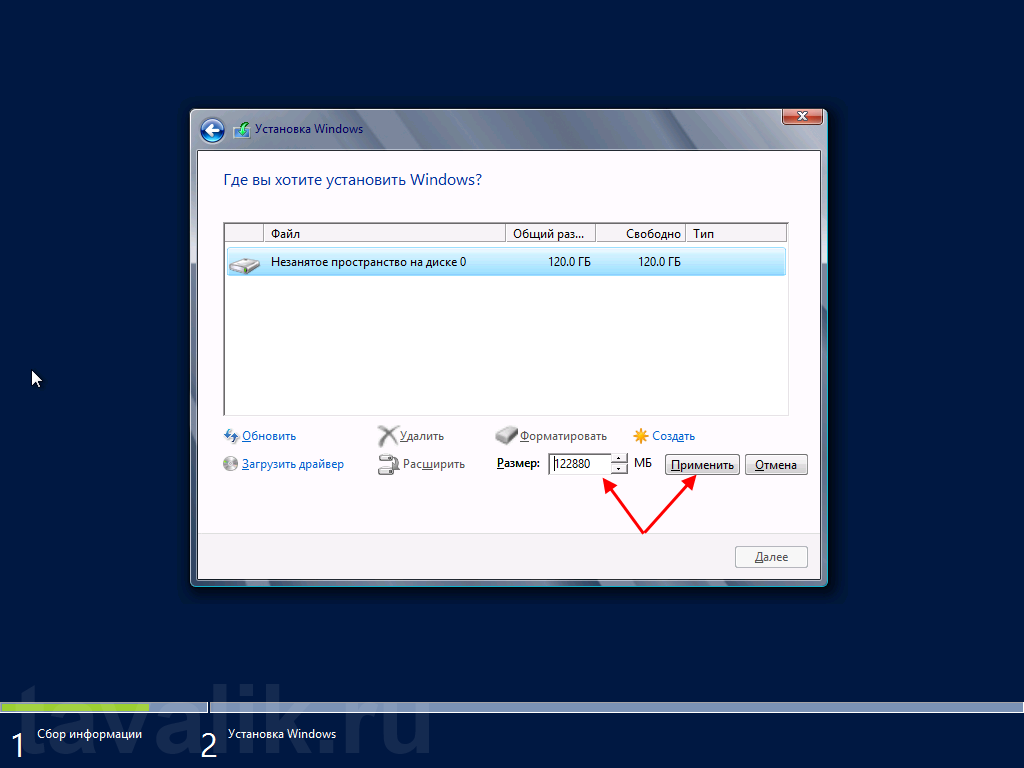
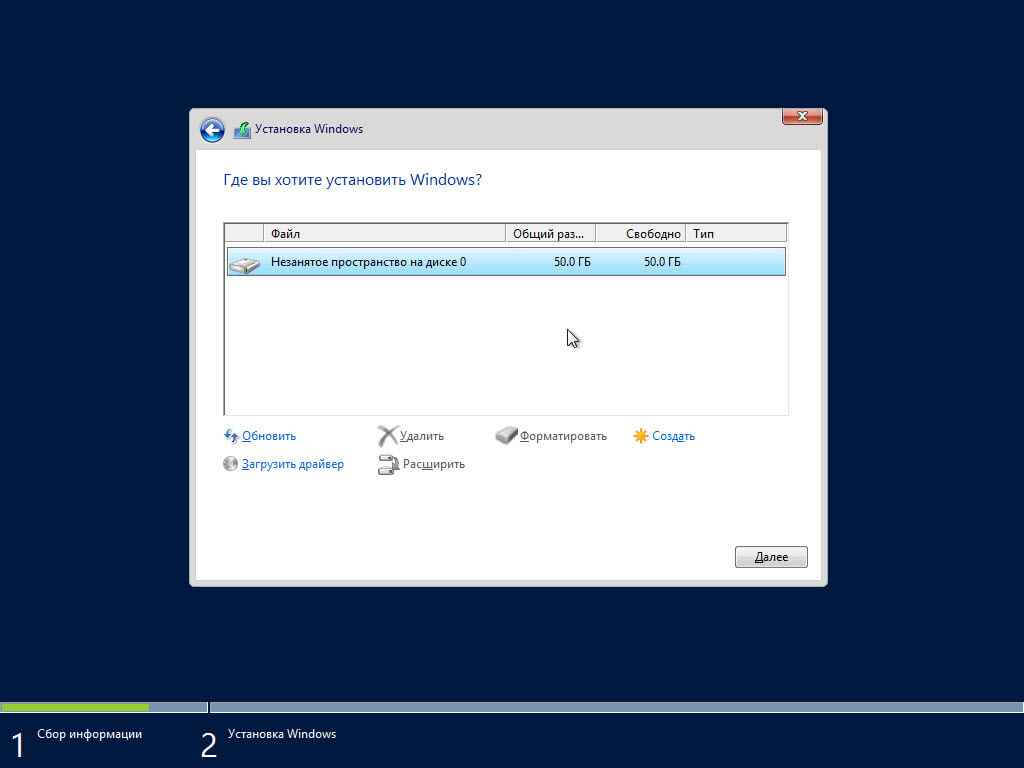
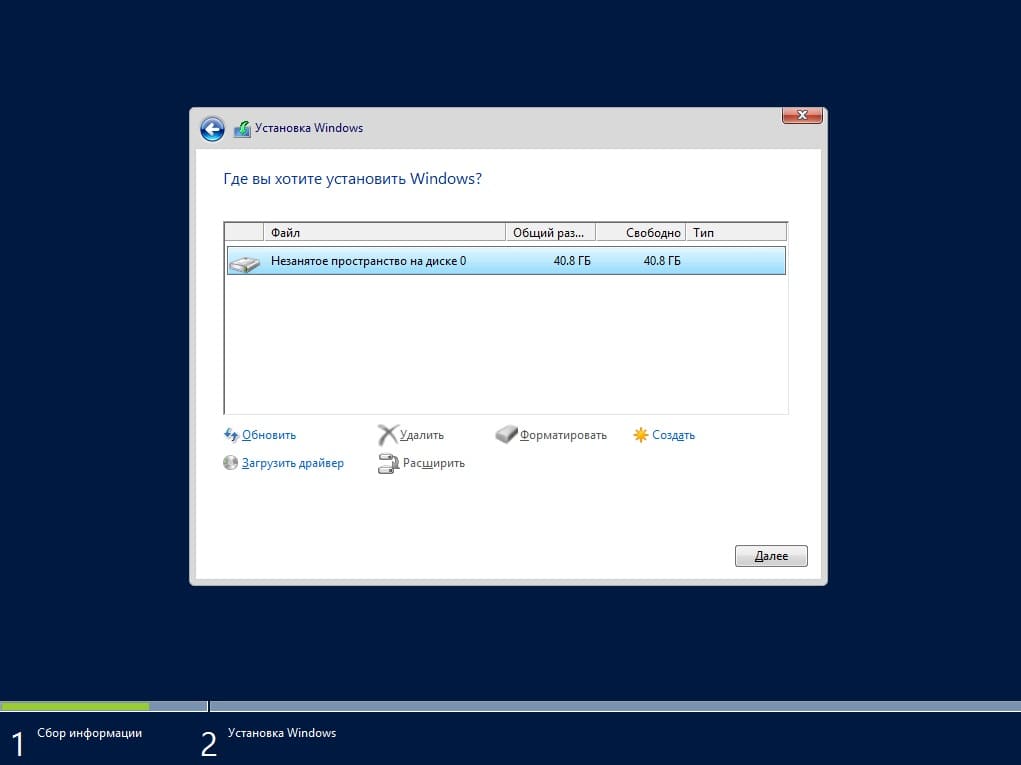
Теперь разметим жесткий диск для установки, если это не было сделано раннее. Для этого выберем незанятое пространство на каком-либо физическом жестком диске в списке и нажмем «Создать» (New).

Введем размер создаваемого логического диска (по умолчанию полный объем) и нажмем «Применить» (Apply).
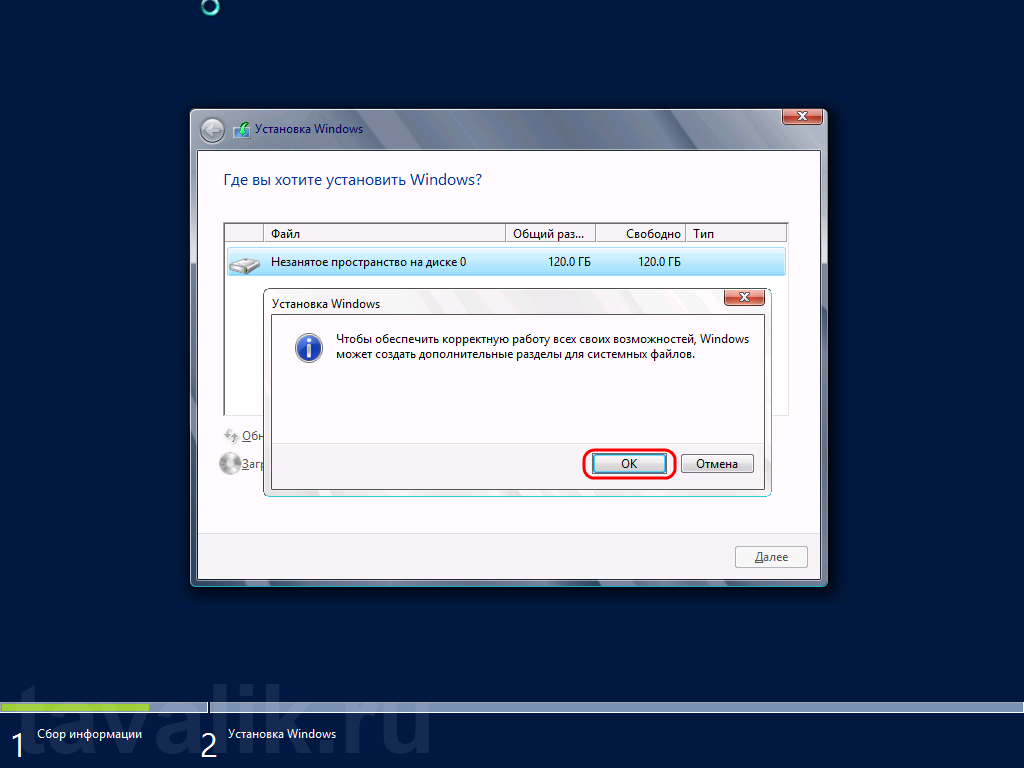
Также согласимся на создание дополнительных разделов для системных файлов, нажав «ОК» в появившемся окне.
После вышеописанных действий, вместо неразмеченной области должны появиться 2 раздела: Системный (System) и Основной (Primary). Выбираем основной раздел для установки Windows и жмем «Далее» (Next).

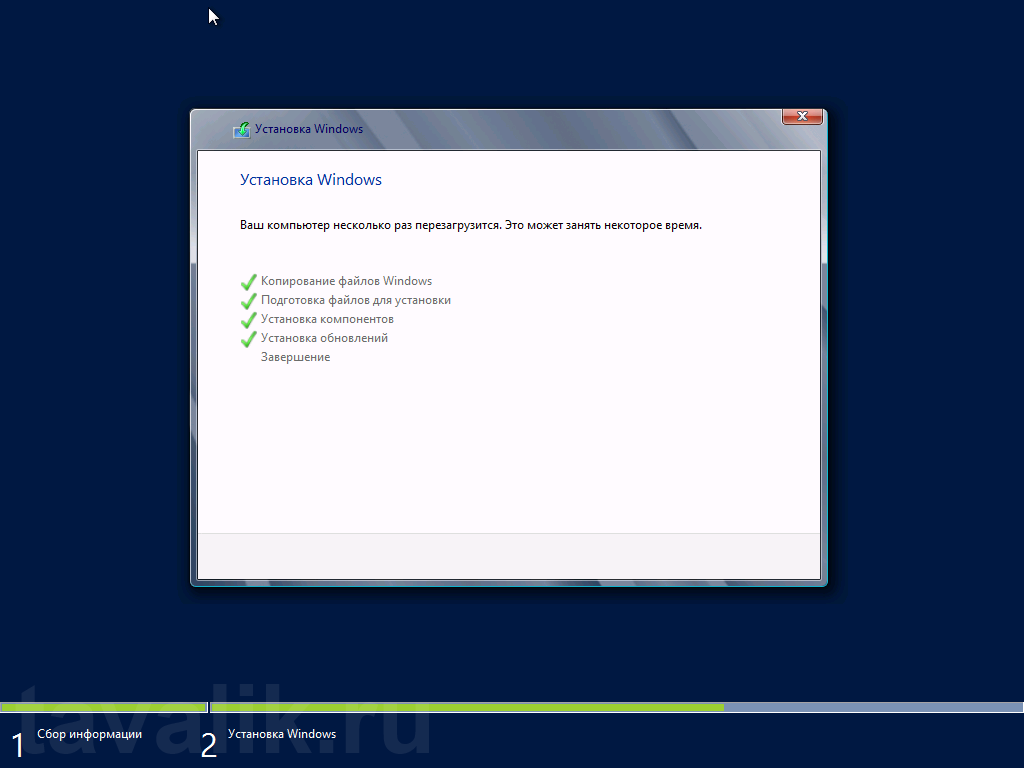
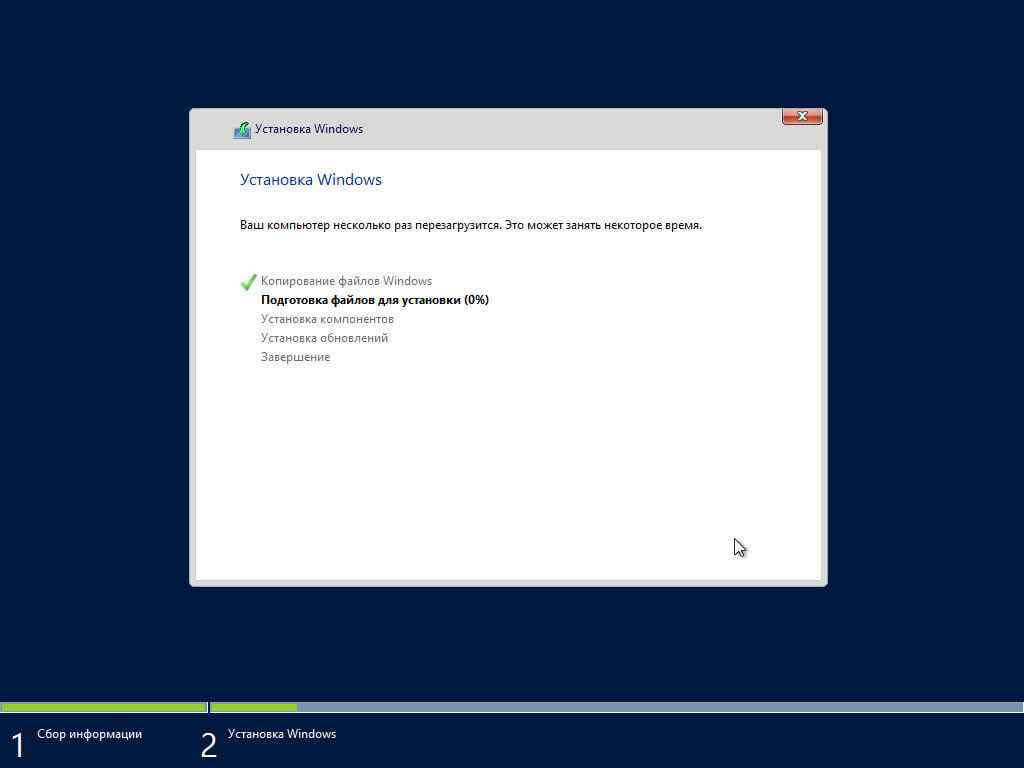
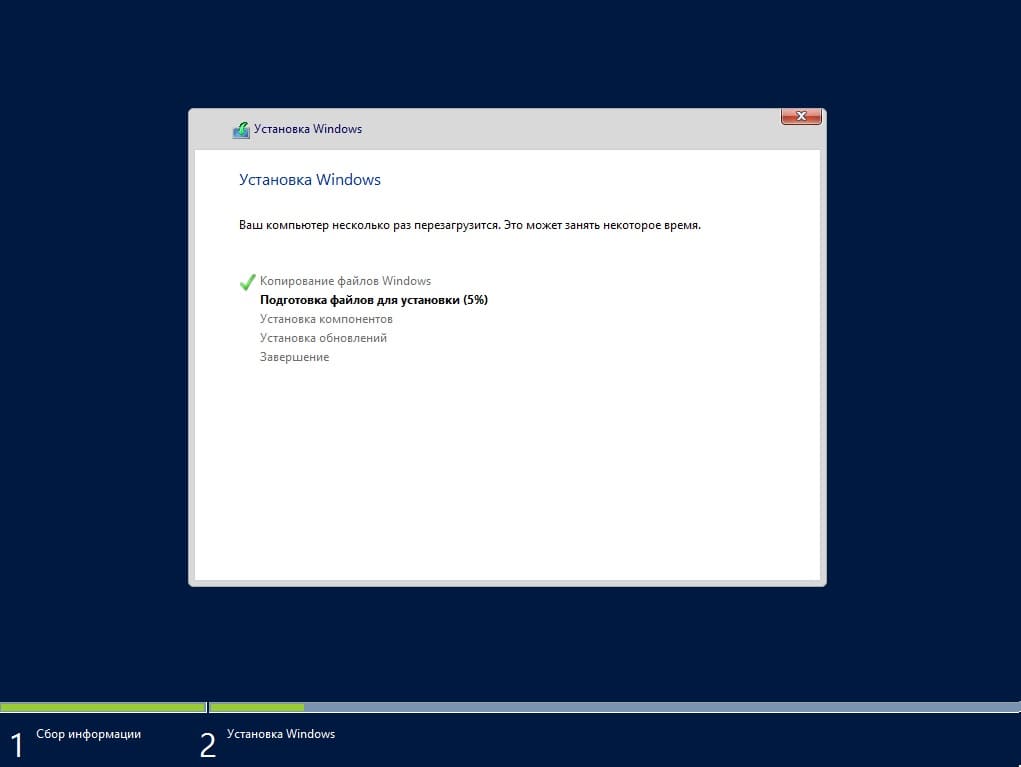
Дожидаемся завершения установки компонент Windows Server 2012.
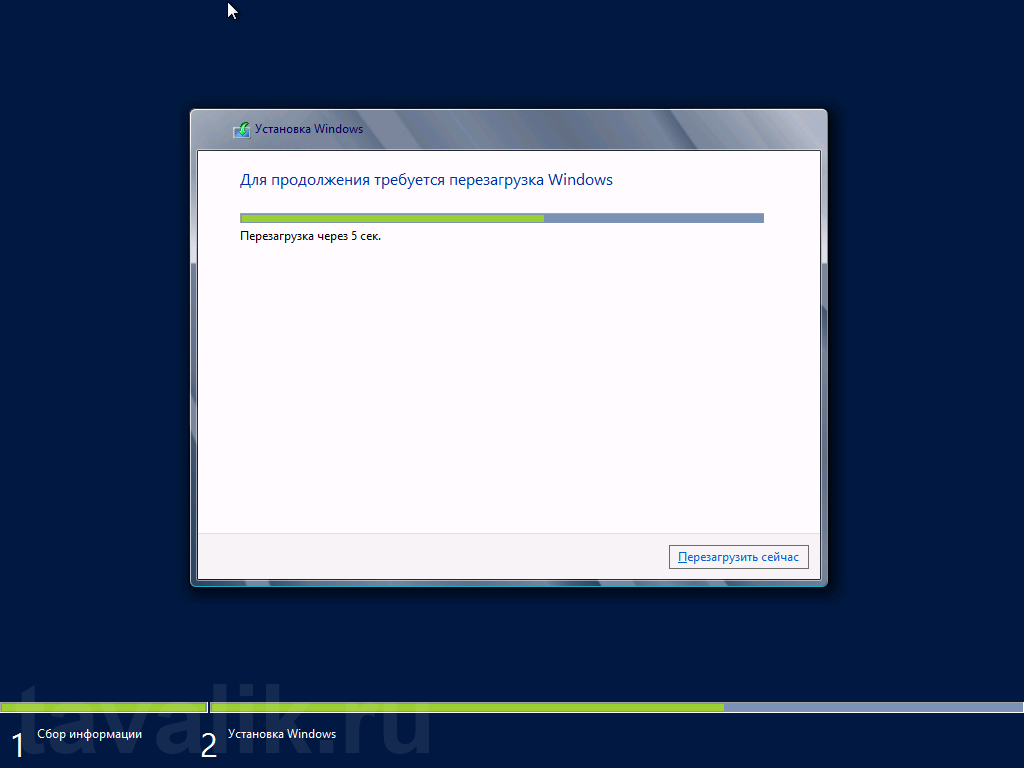
По завершении установки компьютер будет перезагружен.
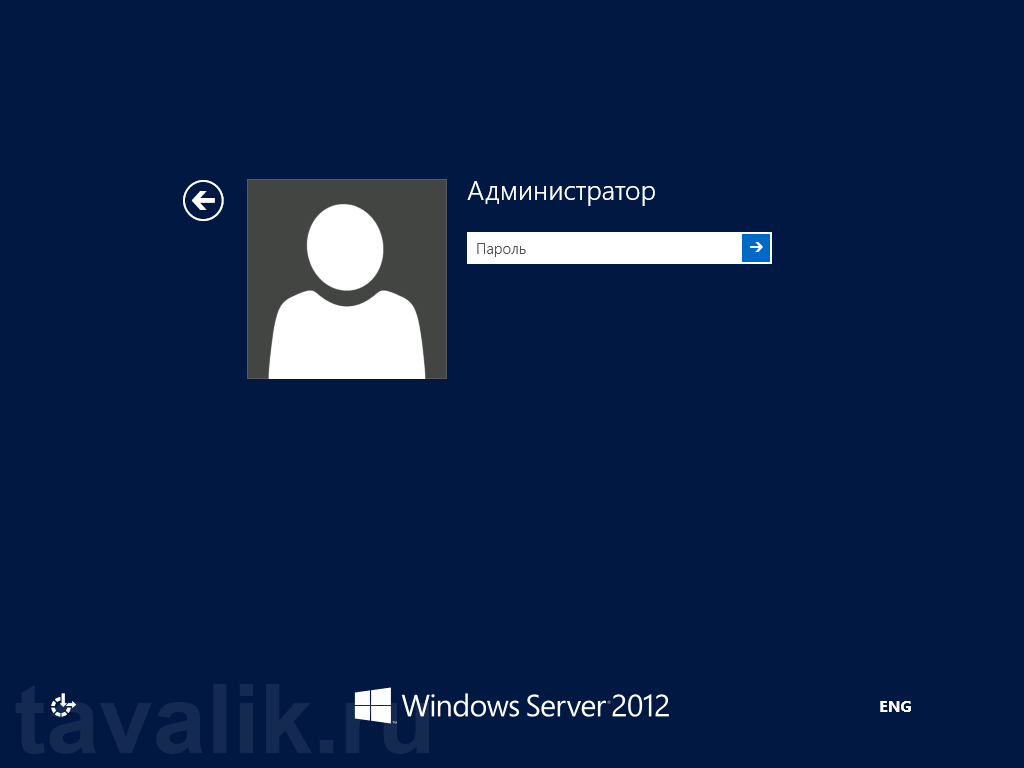
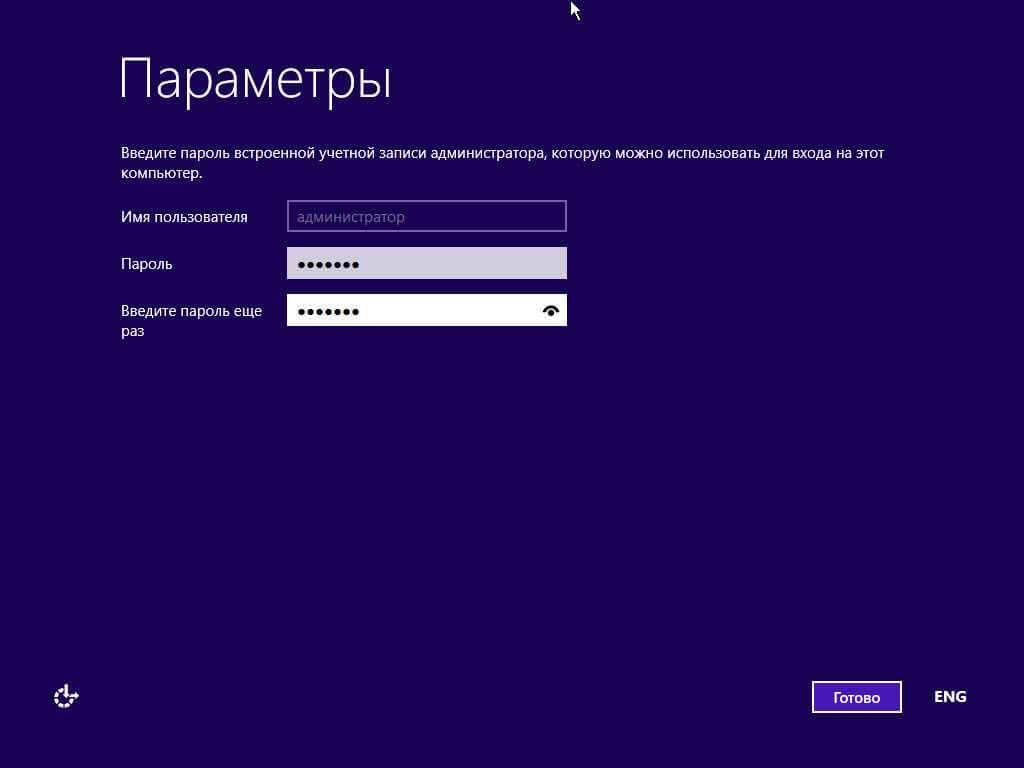
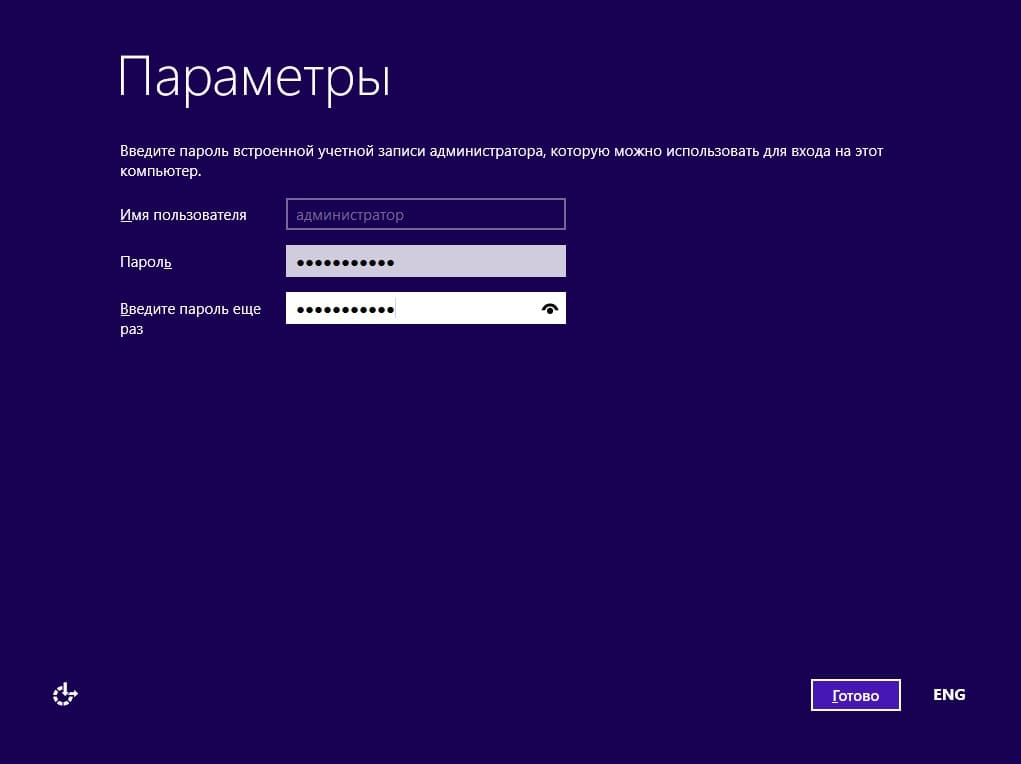
После перезагрузки система предложит ввести пароль для учетной записи «Администратор» (Administrator) . По умолчанию пароль должен отвечать требованиям безопасности паролей, а именно:
- Не содержать имени учетной записи пользователя или частей полного имени пользователя длиной более двух рядом стоящих знаков
- Иметь длину не менее 6 знаков
- Содержать знаки трех из четырех перечисленных ниже категорий:
- Латинские заглавные буквы (от A до Z)
- Латинские строчные буквы (от a до z)
- Цифры (от 0 до 9)
- Отличающиеся от букв и цифр знаки (например, !, $, #, %)
(О том, как потом изменить политику паролей, можно прочитать в статье Изменение политики паролей в Windows Server 2012 R2)
Рекомендую сразу записать пароль в отведенное для хранения паролей место. Для этого удобно использовать различные менеджеры паролей, например бесплатную программу KeePass.
Вводим пароль администратора и жмем «Готово» (Finish) .

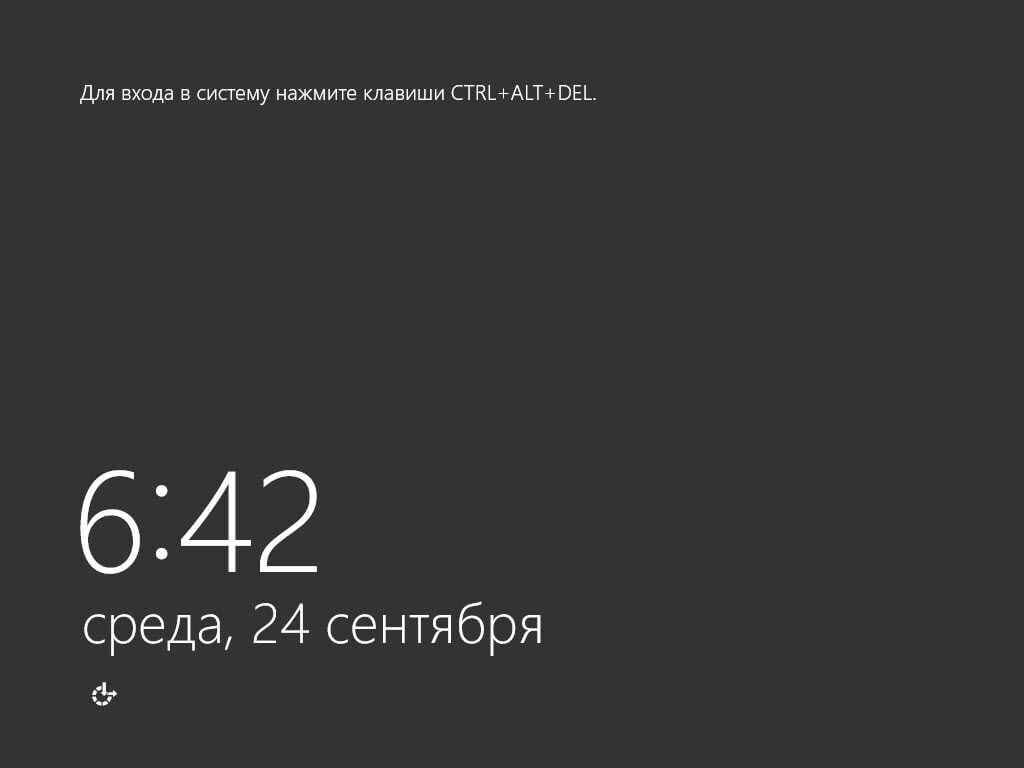
Далее попадем на стартовое окно Windows Server 2012. Нажимаем одновременно CTRL, ALT и DEL

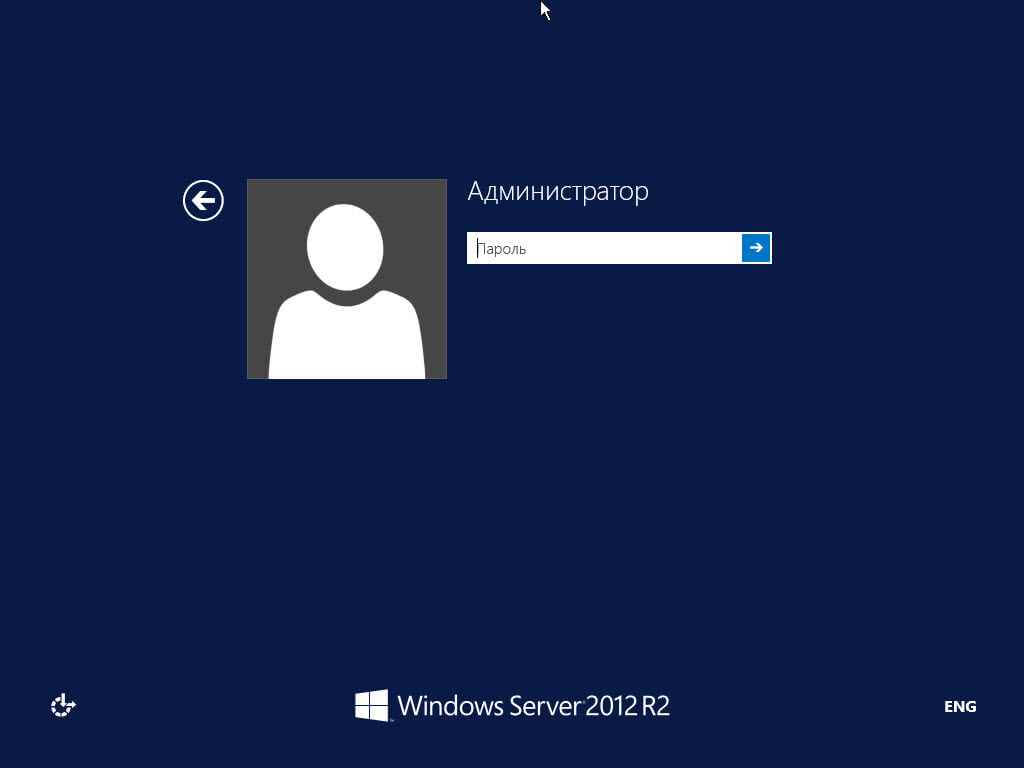
и входим в Windows под учетной записью Администратора, введя установленный на предыдущем шаге пароль.
3. Первоначальная настройка Microsoft Windows Server 2012
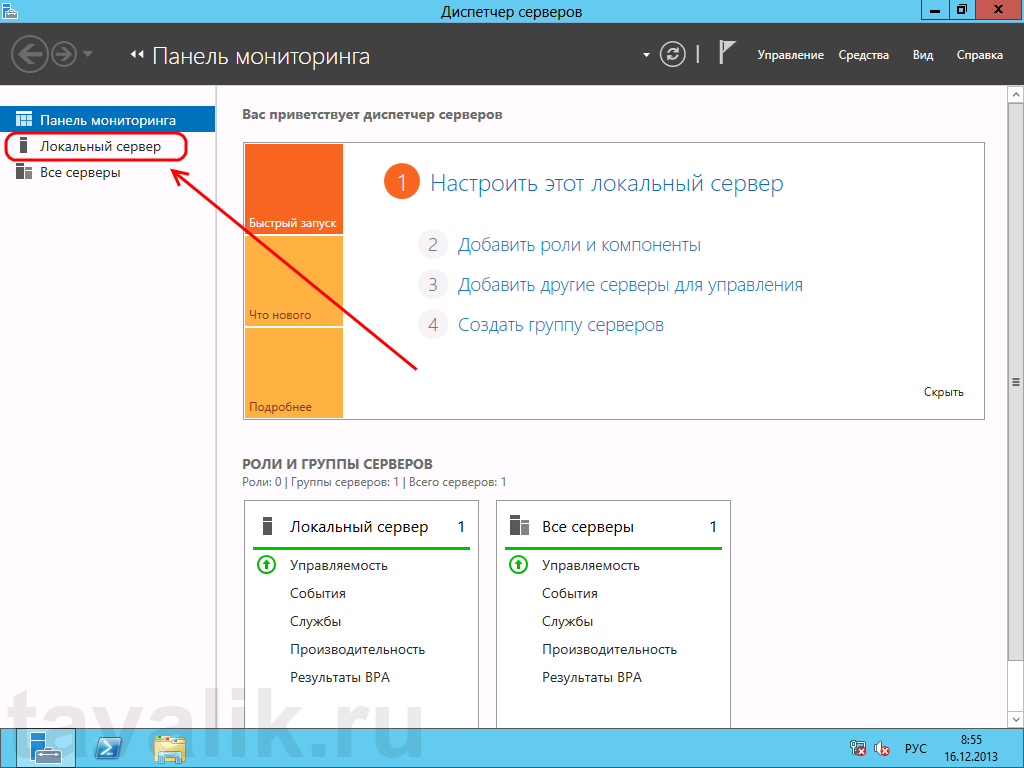
Первое, что мы увидим после входа в систему будет заметно модифицированный со времен Windows Server 2008 R2 диспетчер серверов (Server Manager). Для настройки текущего локального сервера выберем вкладку «Локальный сервер» (Local Server) в панели вкладок слева.
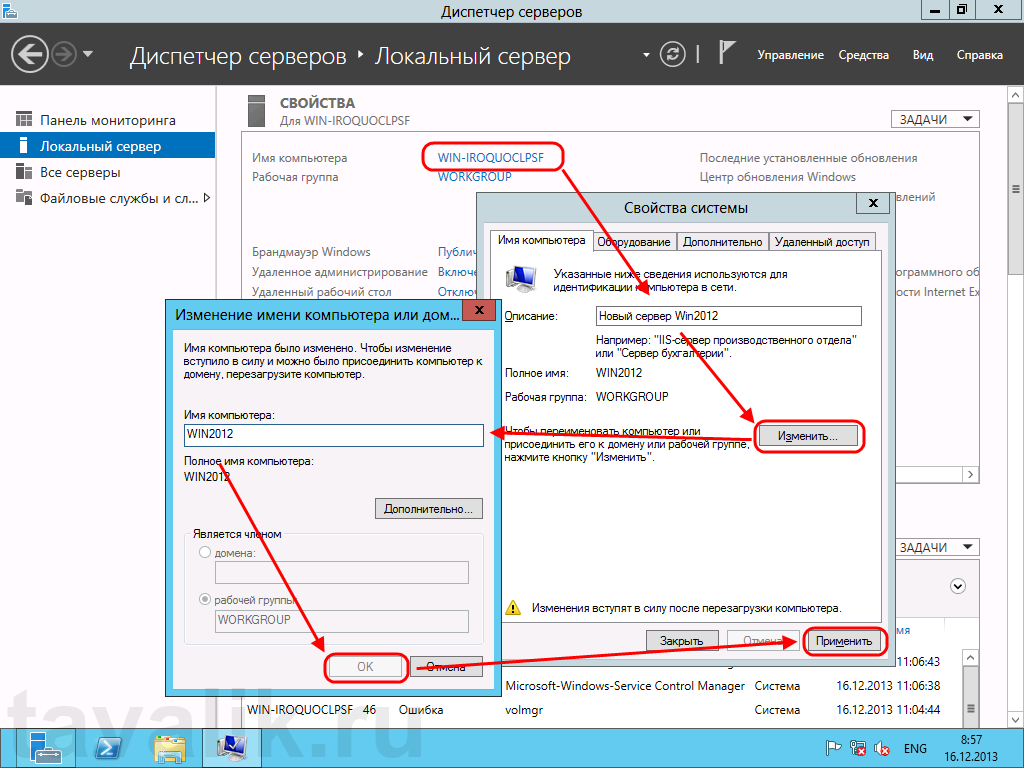
Начнем изменение параметров локального сервера с изменения имени компьютера. Для этого кликнем по текущему имени компьютера в окне «Свойства» (Properties) . Откроется окно «Свойства системы» (System Properties) на закладке «Имя компьютера» (Computer Name) . Нажмем кнопку «Изменить…» (Change…) и введем новое имя сервера в появившемся окне. После чего закроем все окна нажав последовательно «ОК» и «Применить» (Apply) .
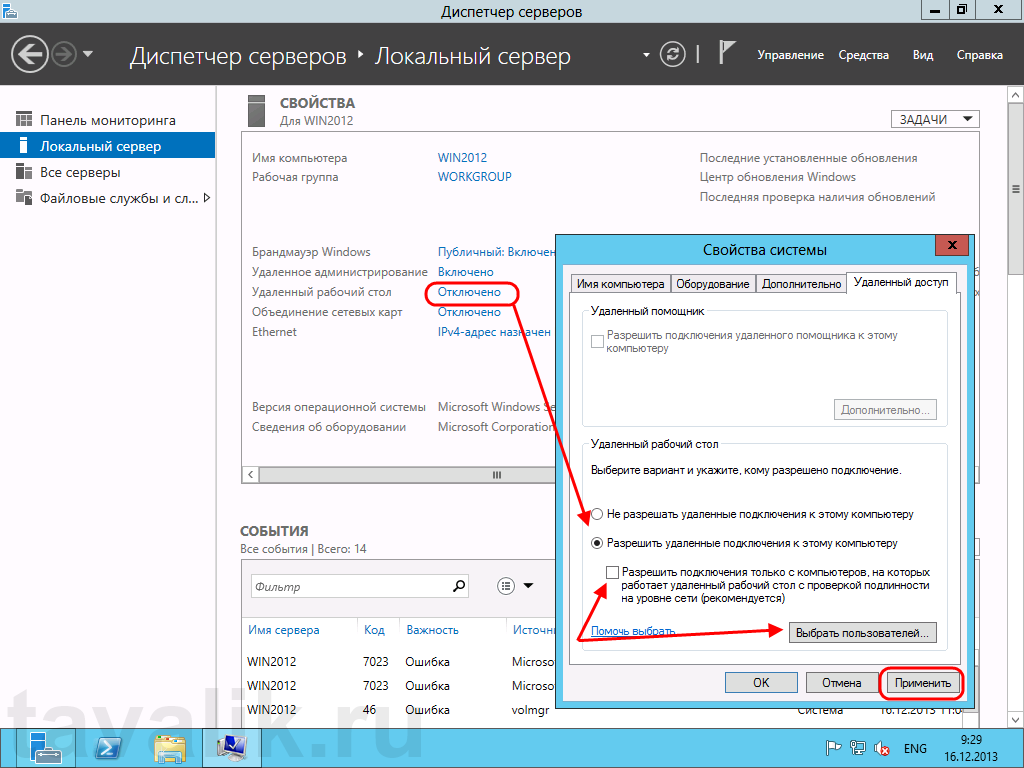
Далее, разрешим удаленный доступ к текущему серверу. Для этого кликнем по ссылке напротив «Удаленный рабочий стол» (Remote Desktop) в окне свойств. Откроется уже знакомое окно «Свойства системы» (System Properties) на вкладке «Удаленный доступ» (Remote) . Установим переключатель в «Разрешить удаленное подключение к этому компьютеру» (Allow remote connections to this computer) . По умолчанию только пользователи группы «Администраторы» (Administrators) имеет доступ к удаленному рабочему столу (для добавления пользователей необходимо нажать на «Выбрать пользователей…» (Select Users) и добавить пользователей системы из списка), после чего нажимаем «Применить» (Apply) . Подключение к серверу осуществляется с помощью встроенного в Windows RDP-клиента.
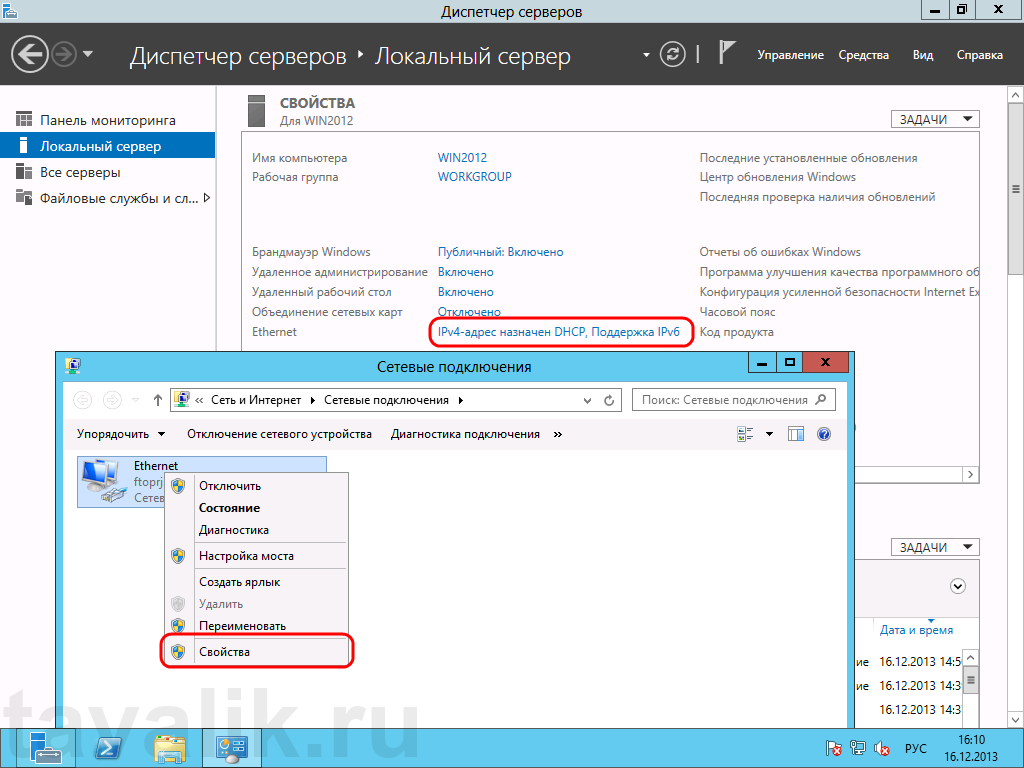
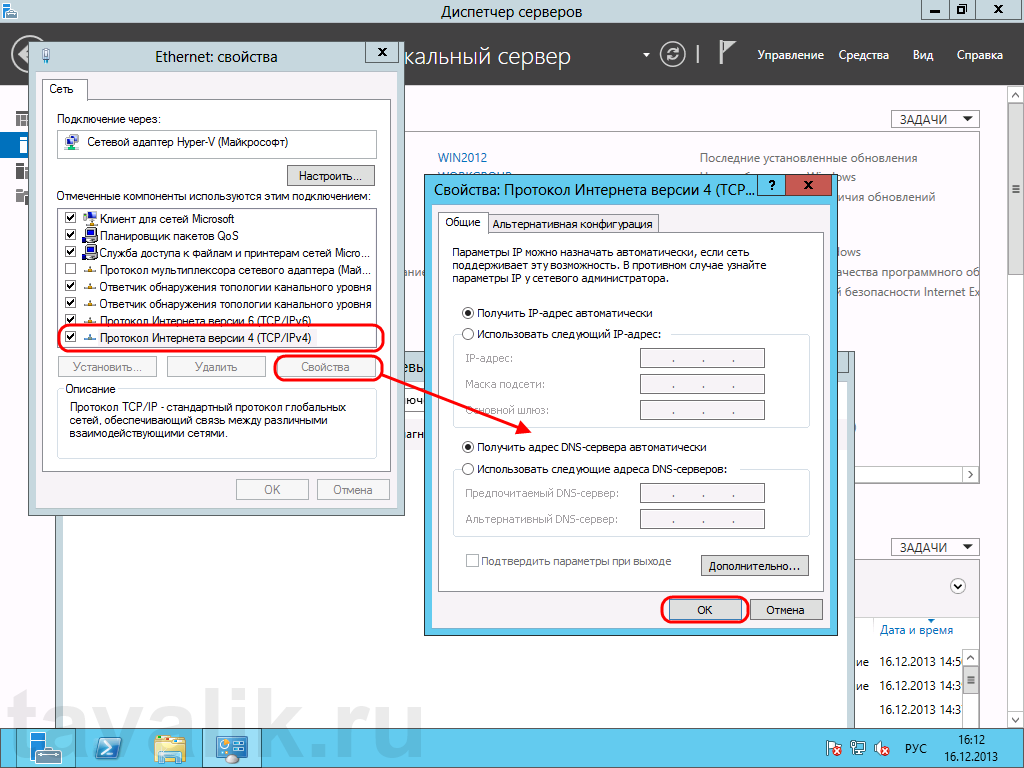
Настроим параметры сети. Для этого кликнем по ссылке напротив пункта «Ethernet» . Откроются сетевые подключения текущего компьютера. Кликаем правой кнопкой мыши по текущему активному сетевому адаптеру и в контекстном меню выбираем «Свойства» (Properties) .
Откроются свойства сетевого соединения. Выберем в списке компонент «Протокол интернета версии 4 (TCP/IPv4)» (Internet Protocol Version 4 (TCP/IPv4)) (и снова нажмем «Свойства» (Properties) . В открывшемся окне можно задать нужные параметры IP. Это может быть динамический IP, если в сети есть DHCP-сервер, либо статический IP, который можно задать самостоятельно. Когда параметры IP установлены, жмем «ОК» для сохранения настроек.
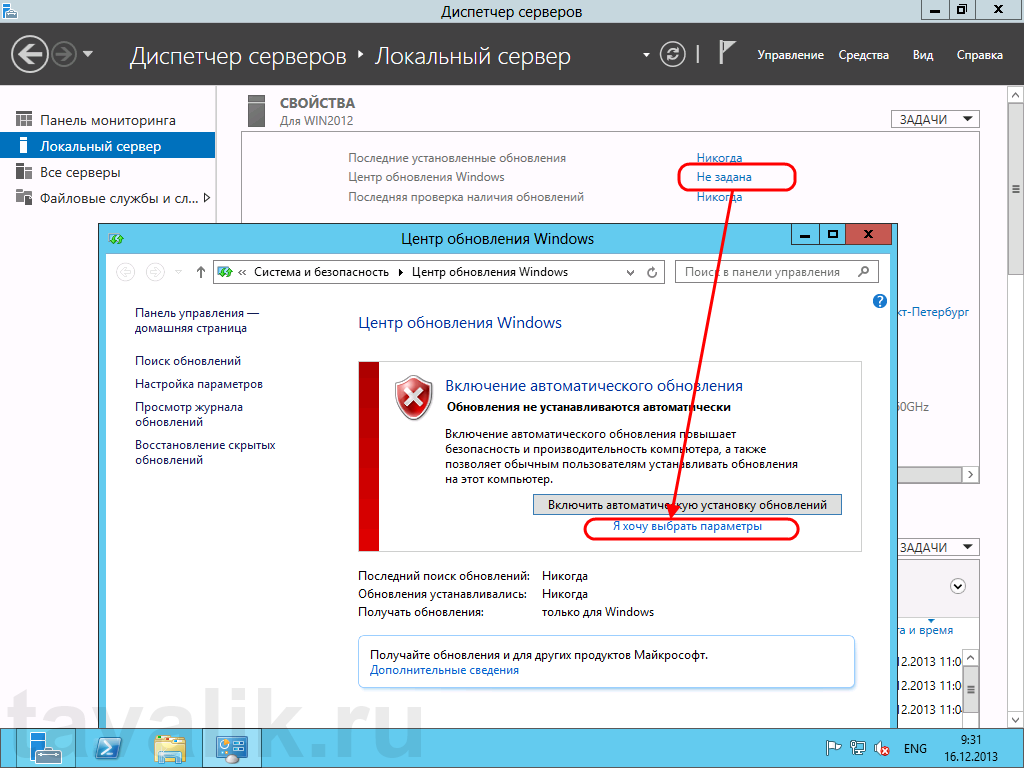
На следующем шаге выберем параметры обновления Windows Server 2012. Для этого пройдем по ссылке напротив пункта «Центр обновления Windows» (Windows Update), чтобы открыть соответствующую оснастку. Здесь кликнем на «Я хочу выбрать параметры» (Let me choose my settings) .
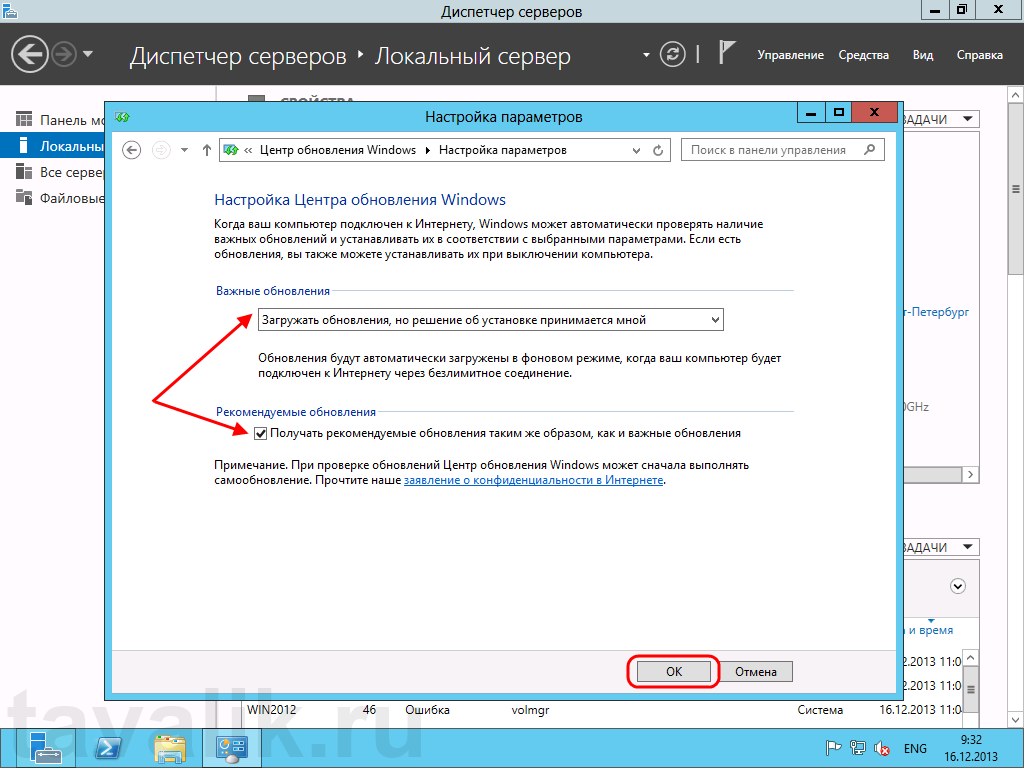
В открывшемся окне выберем необходимые параметры центра обновлений Windows. Я обычно устанавливаю:
- Важные обновления: «Загружать обновления, но решение об установке принимается мной» (Check for updates but let me choose whether to download and install them).
- Рекомендованные обновления: «Получать рекомендованные обновления таким же образом, как и важные обновления» (Give me recommended updates the same way I recieve important updates) .
После того, как параметры установлены, жмем «ОК» для сохранения настроек.
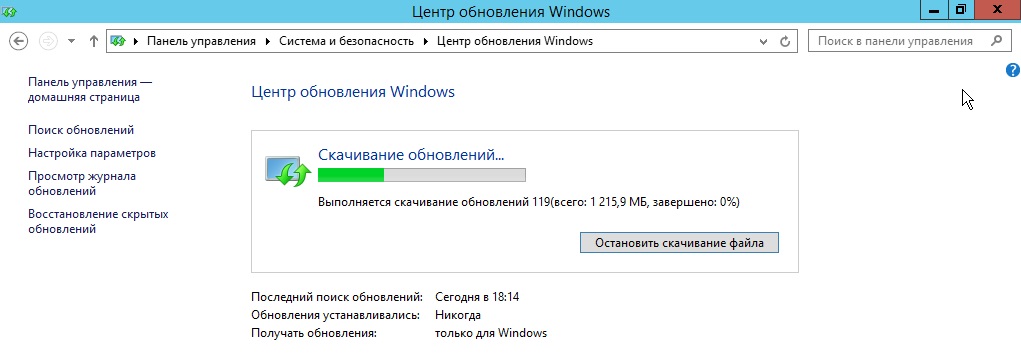
После чего Windows выполнит поиск доступных обновлений. Отметим все обновления в списке и нажмем «Установить» (Install) для запуска процесса установки.

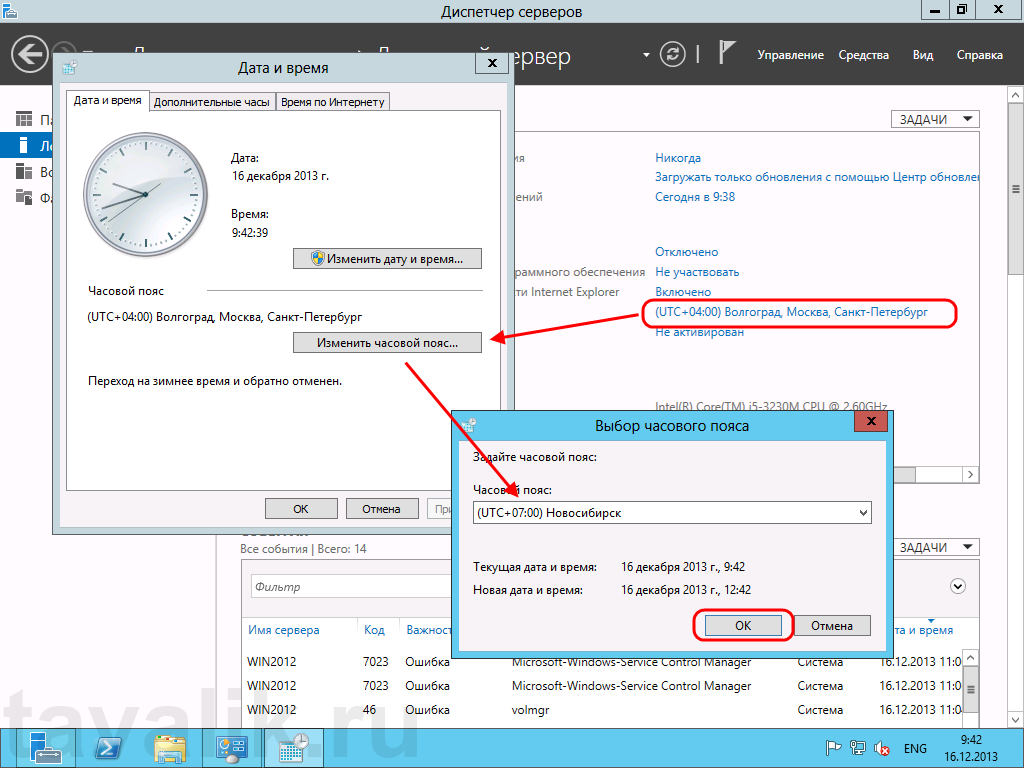
Пока происходит загрузка и установка обновлений продолжим настройку сервера. Пройдем по ссылке напротив пункта «Дата и время» (Time zone) для установки этих параметров. Для изменения даты и времени нажмем «Изменить дату и время…» (Change date and time…) в открывшемся окне, и «Изменить часовой пояс…» (Change time zone…) для изменения часового пояса соответственно. Определившись с настройками закрываем все окна кнопкой «ОК» .
Ну и напоследок нам осталось только активировать Windows Server 2012. Для этого жмем на ссылку в пункте «Код продукта» (Product ID). Откроется окно «Активация Windows» (Windows Activation) (в котором необходимо ввести текущий ключ продукта и нажать кнопку «Активировать» (Activate).
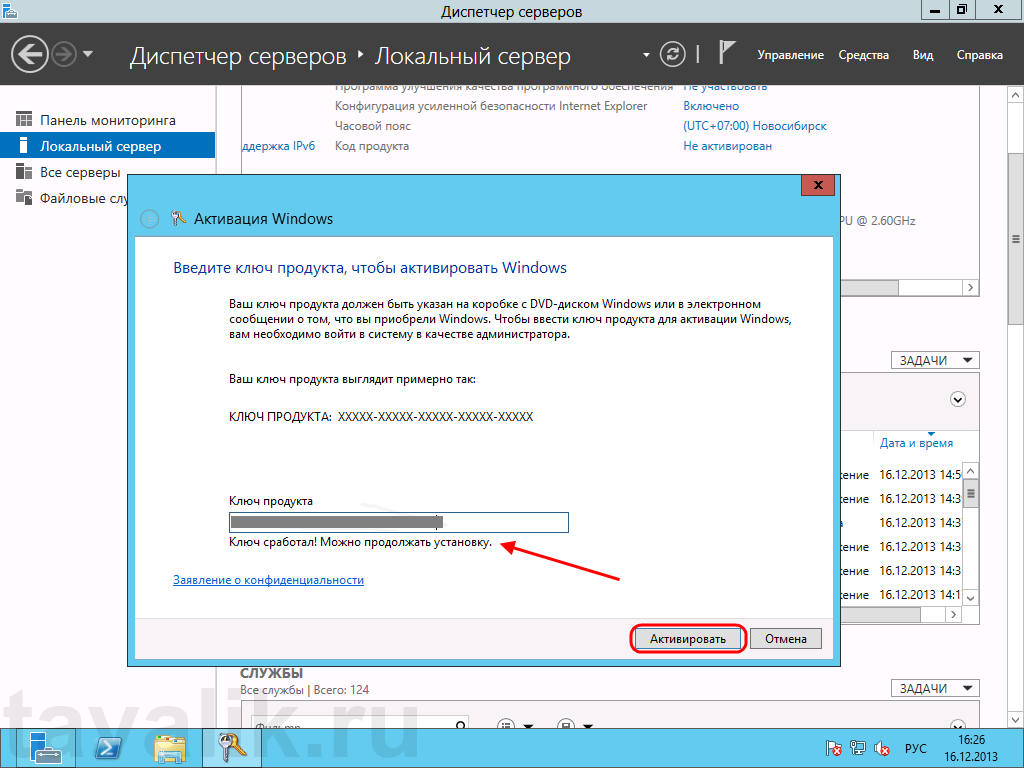
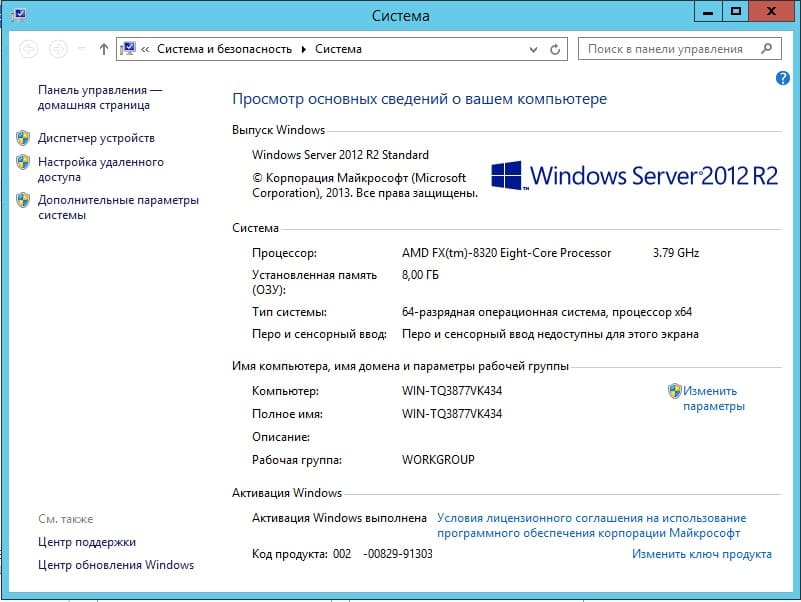
Если код соответствует выбранной версии Windows Server 2012, через некоторое время появится сообщение об успешной активации Windows, а напротив пункта «Код продукта» (Product ID) мы должны увидеть текущий код и статус «(активировано)» (activated) .

Вот и все. На этом установка и первоначальная настройка Microsoft Windows Server 2012 закончена. Осталось только дождаться установки текущих обновлений, перезагрузить сервер, затем повторить процедуру снова, до тех пор, пока все необходимые обновления не будут установлены.
Обновлено 27.08.2018
 Установка windows server 2012 R2, очень простая и понятная, но как повелось, если вы делаете это впервые, то у вас могут возникнуть некоторые вопросы, на которые я как автор этой статьи хотел бы ответить и показать, что вы легко с этим справитесь. Это только страшное название сервер, но если вы уже имели опыт инсталляции клиентских платформ, например, Windows 7, то вы увидите всю дружелюбность процесса. Вставляем диск или флешку, как его подготовить тут. В биосе выбираем загрузку и нашего носителя (об этом подробно тут). Стартуем.
Установка windows server 2012 r2, пошаговая инструкция
Перед нами «Черный квадрат Малевича» с белым ползунком, обычно он пробегает быстро, но если у вас медленный USB носитель, то придется подождать.

Как установить windows server 2012R2-01
Когда ползунок пробежит, появится модный логотип от Microsoft.
Чтобы продолжилась установка windows server 2012 r2, нажмите кнопку по центру «установить».
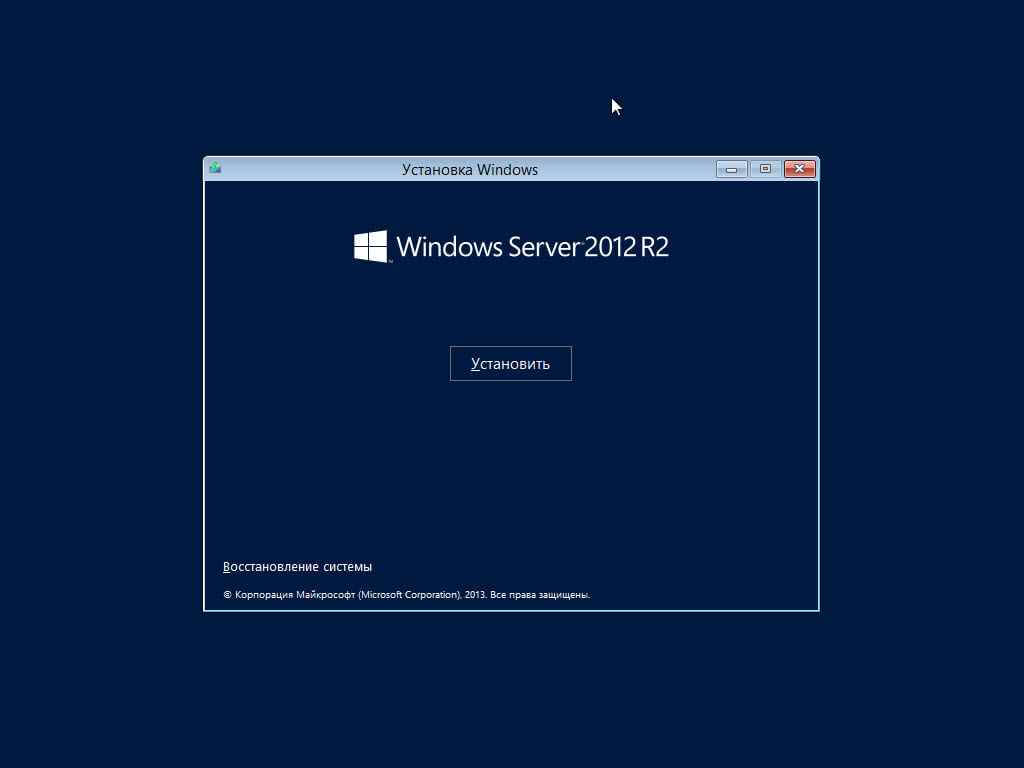
Как установить windows server 2012R2-03

Как установить windows server 2012R2-04
Выбираем нужную редакцию и жмем далее. Тут представлены версии:
- Имеющие графический интерфейс (рабочий стол и все остальное)
- Core версия, состоящая из одной командной строки.
Как установить windows server 2012R2-05
Соглашаемся с лицензионным соглашением.

Как установить windows server 2012R2-06
Выбираем «Выборочная: только установка Windows».

Как установить windows server 2012R2-07
Выбираем нужный диск, задаем ему нужный размер и жмем Далее.
Как установить windows server 2012R2-08
Начнется установка Windows Server 2012 R2.
Как установить windows server 2012R2-09
После перезагрузки, первое что нам нужно, это задать пароль локального администратора. Задавайте сложный пароль, в котором должна быть:
- Большая буква
- Маленькая буква
- Цифра
- Спецсимвол
Как установить windows server 2012R2-10
Логинимся и видим наш рабочий стол, на этом установку можно считать выполненной.
Как установить windows server 2012R2-11
Как установить windows server 2012R2-12
При первом входе у вас откроется «Диспетчер серверов», новая консоль от Microsoft,

Как установить windows server 2012R2-13
Вот так вот просто установить windows server 2012R2, для этого даже не нужно быть инженером Microsoft. Далее производится базовая настройка Windows Server 2012 R2, советую почитать.
Материал сайта pyatilistnik.org
- 03.03.2020
В данной статье пошагово со скриншотами рассмотрим процесс установки Windows Server 2012r2, в зависимости от версии Standard или Datacenter процесс установки не отличается.
Первое, что нам нужно сделать — это скачать сам дистрибутив. Скачать оригинальный дистрибутив Windows Server 2012r2 версий Standard и Datacenter можете в нашем каталоге.
Далее, данный дистрибутив нужно записать на флешку, сделав ее загрузочной. Ознакомиться с инструкцией как это сделать можете на следующей странице.
После загружаемся на загрузочную флешку из под Bios/UEFI и начинаем установку. Первое окно установки будет с выбором языка и пр. языковых настроек.
Нажимаем «Установить».
Далее, при установке у Вас запросят ввести лицензионный ключ активации. Если у Вас нет ключа активации, то приобрести его можете в нашем интернет-магазине, версии Standard и Datacenter, менее чем за 2 тыс. рублей. Доставка ключа активации на Вашу электронную почту в течении нескольких часов. Ознакомиться со всеми версиями Windows Server в продаже можете в нашем каталоге.
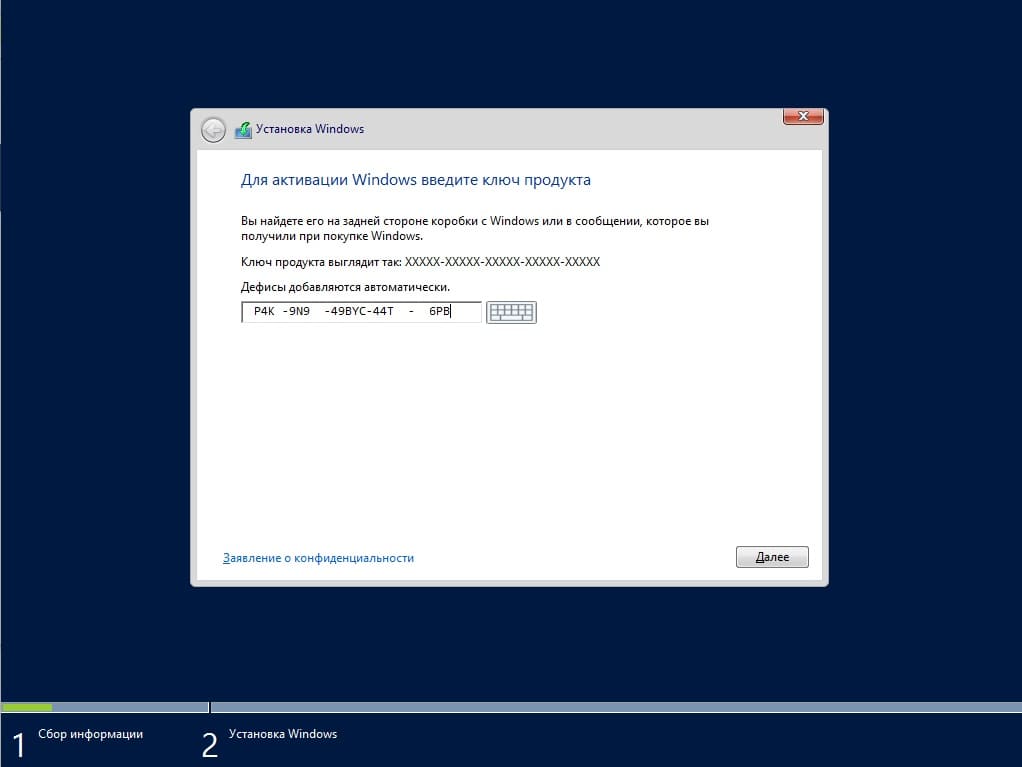
После ввода ключа (в нашем случае автоматически определилось, что ключ был Standard версии), у Вас будет выбор установки. С графическим интерфейсом, или без. Выбираем для удобства «С графическим».
Соглашаемся с лицензионным соглашением.
Далее выбираем пункт «Выборочная установка». Т.к мы устанавливаем с нуля, чистую операционную систему.
Выбираем Ваш целевой жесткий диск, на который будет установлена система. В нашем случае диск один, выбираем его и жмем «Далее».
Ждем завершения копирования файлов и установки. Во время установки, Ваш ПК перезагрузится несколько раз.
После установки у Вас запросят в обязательном порядке придумать Ваш пароль администратора. Вводите его два раза и нажимаете «Готово».
После будет последняя подготовка параметров, которая занимает несколько минут.

На этом все. Теперь можете зайти в меню «Свойства системы» и проверить Вашу ОС. А так же, проверить активирована ли она. Если Вы в начале установки системы ввели Ваш ключ корректно, то все должно пройти успешно.
А так же, после завершения установки рекомендуем сразу найти, загрузить и установить все актуальные обновления для Windows Server 2012r2. Сделать это можете в меню «Панель управления» => Система и безопасность => Центр обновления Windows.
Всех приветствую, мои уважаемые соратники по компьютерной теме, постоянные читатели, а также начинающие программисты.
Сегодня мы поговорим о таком моменте, как установка windows server 2012 r2. Да, для вас может быть и в новинку узнать, что ОС бывают и серверного типа, однако, все проще, чем кажется, и я вам все подробно объясню. Поехали!
Зачем нужна серверная операционная система?

Давайте с вами представим, какой нужен компьютер для дома? Для чего он вообще нужен? Поиграть, поработать, создать картинку, обработать фотки, послушать музыку, посмотреть фильм, напечатать текст и посерфить в интернете и конечно же поиграть. По большому счету это все.
А теперь представим, что имеется огромный офисный комплекс со множеством компьютеров. Управляться все они должны одним мощным ПК. Он будет администрировать и координировать всю работу, хранить информацию, обеспечивать безопасность и давать мощность всем клиентским точкам.

Для этого не подойдет простой, даже очень мощный ноутбук. Таким целям служат специальные станции, называемые серверами. Например, dell poweredge t30. В нем стоит огромное количество операционной памяти, несколько процессоров, работающих синхронной, также всегда имеет жесткий диск, размером от 4 до 32 терабайт (иногда и меньше). Это не игровой ПК, а именно рабочий. И операционная система для него тоже серверная. Она имеет намного больше настроек, чем та, которую мы все привыкли использовать дома. Особенно это касается безопасности и сетевых параметров.
Создание загрузочной флешки

Для того, чтобы установить такую ОС с флешки, нам потребуется сам образ системы, который моно скачать вот тут. Нужен сам носитель, размером более 4 гигабайт. Плюс к этому, качаем вот отсюда софтинку USB DVD Download Tool.
Открываем ее и нажимаем кнопочку обзора.

Далее ищем и открываем наш образ с серверной операционной системой.

Теперь нажимаем кнопочку некст.

В следующем окошке выбираем куда мы будем записывать. В нашем случае это ЮСБ-девайс. Дальше продолжаем прожиг.

Теперь полностью стираем контейнер.

В табличке предупреждением соглашаемся и идем дальше.

Должно начаться форматирование. Об этом будет свидетельствовать вот эта надпись.

Далее стартанет процесс копирование файлов из образа на сам носитель.

Закончится он вот такой табличкой.

Все, носитель готов. Кстати вот видео с инструкцией.
Установка
Инсталлировать такую операционку можно как на основной компьютер или на virtualbox. Рассмотрим процесс с нуля.
Итак, загружаемся с нашего носителя. Видим вот такую табличку. В не выбираем нужный язык. Я выбираю русский, вы можете поставить любой удобный для вас. Потом жмем кнопку далее.

В следующем окошке просто щелкаем кнопу установки. Другой тут в принципе и нет.

Теперь нужно определиться с разрядностью. Если сервер новый и мощный, то рекомендую ставить 64-разрядную систему.
Это кстати пригодиться и в работе на vmware. Если же машинка достаточно слабая для серверной работы, то выбираем 32-ух битную версию.
Жмем далее.

Теперь принимаем условия лицензии. Советую, кстати, почитать для расширения кругозора. Жмем на кнопку следующего этапа.

Далее, так как мы ставим операционную систему с нуля, то выбираем нижнюю строчку. Не ошибитесь, а то просто обновите систему, что делать не рекомендуется.

Теперь нужно разделиться диск. Изначально он будет выглядеть как полностью незанятое пространство. Выбираем его и жмем кнопку создать.

Ставим максимальный размер и создаем хард. Не стоит делить винчестер на несколько логических разделов. Мы все же ставим серверную операционную систему, а не совсем обычную.

По завершению процесса выскочит табличка, в которой мы нажимаем ОК.

Опять жмем далее и переходим к следующему этапу.

Дальше пойдет копирование файлов, их распаковка и установка. Дожидаемся окончания.

Потом появится таймер, компьютер уйдет в перезагрузку.

Дальше нам нужно назвать учетную запись и поставить пароль. Второе в принципе не обязательно, но если собираетесь работать в офисе, то я рекомендую это сделать. Потом нажмите на кнопку готово.

Следующие, что вы увидите – стартовое окно системы.

Вводим пароль, который устанавливали ранее. Перепишите его в блокнот на всякий случай.

Все. Установка завершена.
Настройка
Так как у нас не просто компьютер, а сервер, то в нем находится массив raid 1 supermicro. Не самый мощный, но вполне годный для работы. Проведем оптимизацию и настройку. Заходим в панель монитора и выбираем там локальный сервер.

Теперь нажимаем на имя компьютера, в самом верху. В открывавшейся табличке меняем его. Ниже есть кнопка изменить, клацаем по ней. В открывшемся окне вбиваем новое имя, потом кликаем ОК и в предыдущем окне жмем применить.

Теперь, в строчке удаленного рабочего стола нажимаем на параметр отключено, в новом окне ставим кружочек в лунке разрешить. Дальше ставите галку снизу, выбираете себя как одного пользователя и жмете кнопку применить.

Теперь идем в параметры сетевых подключений. На адаптере жмем правой кнопкой мыши и открываем свойства.

В строке протокола интернета четвертой версии ставим галку, жмем свойства и выставляем параметры под автоматическое получение всех необходимых данных.

Далее, в предыдущем главном окне видим строчку центра обновления с отключенными параметрами. Щелкаем на синюю ссылку, переходим в сам центр и включаем функцию.

Выставляем на загрузку всех данных с уведомлением пользователя, ниже ставим галку как на рисунке и жмем ОК.

Как только система скачает обновы, она выведет их список. В плане безопасности я вам настоятельно рекомендую установить их все. Особенно если вы планируете пользоваться серверной операционной системой в какой-либо крупной компании.

Теперь, в поле с часовым поясом нажимаем левой кнопкой мыши и настраиваем часы. Как только все готово – жмем ОК.

Далее вбиваем ключ продукта. Обычно он расположен прямо на коробке с виндой. Но так как у нас его нет, рекомендую поискать в сети варианты решения этой проблемы. Я думаю вы понимаете, о чем я говорю. Кстати вот ссылка на статью с моего блога по этой теме.

После активации должна появиться вот такая вот надпись.

Вот и все, наша операционная система полностью готова к использованию.
Заключение

Теперь вы знаете, как можно поставить настоящую серверную операционную систему на компьютер. Этот способ подойдет и для oracle. По большому счету, проблема может возникнуть только одна – инсталляция на gpt-диск. Решить ее поможет данное видео.
Там показано на примере семерки, но и вы сможете использовать эти советы. На этом все, мои уважаемые системные администраторы, программисты и просто читатели. Статья будет полезна все, поэтому поделитесь ей со знакомым в одноклассниках или фейсбуке. А также подписывайтесь на обновление моего блога. До скорых встреч и удачи вам!

Материалы по теме
![]()
Download Article
![]()
Download Article
Windows Server 2012 R2 operating system has features that support domain enterprise networks of varying sizes, but to realize the benefits of these features, you must first install, configure, and test it.
-

1
Create the operating system media.
- Create the operating system media, if you do not already have a DVD with Windows Server 2012 R2; however, if you download it, be sure to copy the product key, because you will need it for the installation.
- Download Windows Server 2012 R2 from Microsoft and save it onto your hard drive.
- Make a backup copy of the .iso file by copying it onto a DVD from the hard disk.
-
2
Start operating system installation.
- Place the Windows Server 2012 R2 DVD in the CD/DVD drive.
- Power on the machine to boot the operating system from the DVD.
- Watch the screen as the system boots from the Windows Server 2012 R2 DVD. After booting begins, you will see the display Loading files… followed by the Windows Server 2012 R2 Setup screen.
- Expand the drop down and review optional preferences; they include the language you can select for the installation.
- Click Next to display the options, Install now or Repair your computer.
Advertisement
-
3
Install or Upgrade.
- Observe that with these Windows Setup options, you choose either first time install or repair an existing operating system.
- Click Install now to display the product key request.
-
4
Type OS installation key.
- Take note that if you are using a DVD from a textbook, you may not need a key.
- Type the installation key.
- Click Next so you can choose the operating system version to install.
-
5
Select the OS version to install.
- Notice that depending on the DVD you are using, you may see a slightly different set of options. However, regardless of which DVD, Windows Server 2012 R2 Server Cores is the default.
- Select Windows Server 2012 R2 Standard (GUI installation), with the arrow key or mouse.
- Click Next to display the license agreement.
-
6
Select license terms.
- Review the Microsoft license agreement.
- Click the checkbox next to I accept the license terms.
- Click Next to display options, upgrade or custom install.
-
7
Configure upgrade or custom install.
- Review the notes for these options because they are very different; upgrade lets you upgrade a qualified Windows OS. Whereas with custom, you can install the OS on a newly created space.
- Click Custom to manage disk space and display the disk configuration.
- Highlight where you would like to install the operating system; you can use the arrow key, or mouse.
- Click Next to display Installing Windows screen followed by password Settings.
-
8
Create password.
- Create Administrator password at Windows Setup Settings prompt..
- Type the password, such as Passworda10.
- Click Finish to display the Sign in screen.
-
9
Log on to the server.
- Note that this action, display the password prompt, will depend on the installed environment, real or virtual.
- Click Ctrl+Alt+Delete to display the password prompt.
- Observe that this is the password you created earlier.
- Type the password for Administrator.
- Click the arrow to display Networks so you can tell setup how to configure network parameters.
-
10
Configure Network Settings.
- Configure network visibility is needed even if you plan to isolate the server; your intentions must be know to network settings.
- Click Yes so your computer is visible to other network devices.
-
11
Verify Installation complete.
- Verify the display of Server Manager indicating the installation is complete.
- Continue to learn more.


Advertisement
- These steps demonstrate how to configure TCP/IP settings, which are needed to verify network connectivity with another machine, such as Windows 7.
-
1
Minimize Server Manager.
- Click Minimize to minimize Server Manager, which is displayed when the OS completes booting.
-
2
Display menu items.
- Notice that when Server Manager is minimized, you will see the Recycle Bin and Taskbar; there are also menu items, such as Start, that are visible when the mouse is located at the bottom right.
- Move your mouse along the taskbar to the right and hover it to the right of the time and date; this action displays a number of icons, and to see their names, such as Search, Start, and Settings move the mouse straight up. If the icons are not shown, slightly move the mouse in any direction to display them.
- Click Start to display its contents.
-
3
Display Control Panel contents.
- Notice that Start shows a number of icons, such as Control Panel.
- Click Control Panel to display its contents.
-
4
Display Network and Internet links.
- Notice that items are shown in categories, but you can change how they are displayed.
- Click Network and Internet to display the screen containing their links.
-
5
Display Network and Sharing links.
- Notice there are two options, but only the first lets you configure the network adapter.
- Click Network and Sharing Center to display its options.
-
6
Display Network Connections (Ethernet) Properties.
- Notice there are several options in the left pane, but your main interest is on the adapter settings.
- Click Change adapter settings to display Network Connections.
- Notice that this computer has one NIC.
- Right click Ethernet and click Properties to display its properties.
-
7
Display TCP/IP Properties.
- Notice there are a number of protocol options for configuring network settings.
- Highlight Internet Protocol Version 4 (TCP/IPv4).
- Click Properties to display TCP/IP Properties.
- Notice that the default TCP/IPv4 configuration for network interface is DHCP client.
- Click Use the following IP address.
- Notice that the boxes are no longer grayed.
-
8
Configure TCP/IP settings.
- Notice there are a number of textboxes, but to test connectivity, only the IP address and subnet mask are needed.
- Type 172.16.150.10 in IP address field.
- Change the entry in Subnet mask to 255.255.255.0.
- Click OK.
- Click Close.
- Click close (X) to close both Network Connections and Network and Sharing Center.


Advertisement
- After the OS is installed and network parameters configured, it is time to test both activities; an important test is to verify the server can communicate with another machine, such as a Windows 7 client, and the client can communicate with the server; you can do this using the Command Prompt, and after testing is complete, you can shutdown the server.
-
1
Verify Connectivity.
- Display Start.
- Click the down arrow to display several Apps.
- Scroll right.
- Click the Command Prompt.
- Ping the second machine.
- From the second machine, ping the server.
-
2
Shutdown server.
- Display Start.
- Click Settings to display its contents.
- Click Power.
- Click Shutdown.
- Follow the displayed instructions to complete the shutdown.


Advertisement
Ask a Question
200 characters left
Include your email address to get a message when this question is answered.
Submit
Advertisement
-
Installation: Since it is unlikely you are dual booting a virtual machine, the following bullets apply only if you are installing the server on a physical machine.
- If an OS is already installed on the machine, you may see Press any key to boot from CD/DVD; this is your opportunity to boot from the CD/DVD drive.
- If an OS is already installed on the machine, and you do not see Press any key to boot from CD/DVD, you will have to reconfigure the boot process to boot form the CD/DVD drive.
- If an OS it not on the machine, the boot process goes directly to the CD/DVD drive and begins booting.
- If you are installing from a DVD that came with a textbook, you may not need a product key.
- Depending on the DVD you are using, such as one that came with a textbook, or one from Microsoft, you may see a slightly different selection menu; be sure not to select Server Core but GUI instead.
-
If you have an existing operating system that you want to upgrade, when prompted, you would select Upgrade, but in this case select Custom so you can customize the disk for installation.
-
The configuration shown will depend on the partition and unallocated space on your disk(s). Notice that you are given a number of disk options, but they are not always enabled; it depends on whether a partition or unallocated space is highlighted; if a partition is highlighted all except New are enabled, and if an unallocated space is highlighted, all are grayed, except New.
Show More Tips
Thanks for submitting a tip for review!
Advertisement
-
When partitioning the disks, Next does not depend on a selection; this means whichever space is highlighted, partition or unallocated, and you click Next, setup formats the space, copy the necessary operating system files, and install the operating system. Everything on that partition will be lost.
-
When partitioning the disks, if you select Delete, setup will delete the highlighted partition and label it unallocated; you will then have to use New to create a partition for the install, or click Next to install. Also, note that if you click Next, setup uses the entire highlighted space for the install, but if you do not want to use the entire space, to install the operating system, use New to create the partition size from the unallocated space.
Advertisement
Things You’ll Need
- DVD you created with the .iso for Windows Server 2012 R2.
- DVD with a Windows client, such as Windows 7.
- One physical machine on which you can install and configure two virtual machines: one server and one client.
- Virtual machine software, such as VirtualBox.
References
- Microsoft. (2013, June 24). System Requirements and Installation Information for Windows Server 2012 R2. Retrieved from TechNet: http://technet.microsoft.com/en-us/library/dn303418.aspx
- Microsoft. (2013, June 24). Windows Server Installation Options. Retrieved from TechNet: http://technet.microsoft.com/en-us/library/hh831786.aspx
About This Article
Thanks to all authors for creating a page that has been read 56,241 times.
Is this article up to date?
![]()
Download Article
![]()
Download Article
Windows Server 2012 R2 operating system has features that support domain enterprise networks of varying sizes, but to realize the benefits of these features, you must first install, configure, and test it.
-
1
Create the operating system media.
- Create the operating system media, if you do not already have a DVD with Windows Server 2012 R2; however, if you download it, be sure to copy the product key, because you will need it for the installation.
- Download Windows Server 2012 R2 from Microsoft and save it onto your hard drive.
- Make a backup copy of the .iso file by copying it onto a DVD from the hard disk.
-
2
Start operating system installation.
- Place the Windows Server 2012 R2 DVD in the CD/DVD drive.
- Power on the machine to boot the operating system from the DVD.
- Watch the screen as the system boots from the Windows Server 2012 R2 DVD. After booting begins, you will see the display Loading files… followed by the Windows Server 2012 R2 Setup screen.
- Expand the drop down and review optional preferences; they include the language you can select for the installation.
- Click Next to display the options, Install now or Repair your computer.
Advertisement
-
3
Install or Upgrade.
- Observe that with these Windows Setup options, you choose either first time install or repair an existing operating system.
- Click Install now to display the product key request.
-
4
Type OS installation key.
- Take note that if you are using a DVD from a textbook, you may not need a key.
- Type the installation key.
- Click Next so you can choose the operating system version to install.
-
5
Select the OS version to install.
- Notice that depending on the DVD you are using, you may see a slightly different set of options. However, regardless of which DVD, Windows Server 2012 R2 Server Cores is the default.
- Select Windows Server 2012 R2 Standard (GUI installation), with the arrow key or mouse.
- Click Next to display the license agreement.
-
6
Select license terms.
- Review the Microsoft license agreement.
- Click the checkbox next to I accept the license terms.
- Click Next to display options, upgrade or custom install.
-
7
Configure upgrade or custom install.
- Review the notes for these options because they are very different; upgrade lets you upgrade a qualified Windows OS. Whereas with custom, you can install the OS on a newly created space.
- Click Custom to manage disk space and display the disk configuration.
- Highlight where you would like to install the operating system; you can use the arrow key, or mouse.
- Click Next to display Installing Windows screen followed by password Settings.
-
8
Create password.
- Create Administrator password at Windows Setup Settings prompt..
- Type the password, such as Passworda10.
- Click Finish to display the Sign in screen.
-
9
Log on to the server.
- Note that this action, display the password prompt, will depend on the installed environment, real or virtual.
- Click Ctrl+Alt+Delete to display the password prompt.
- Observe that this is the password you created earlier.
- Type the password for Administrator.
- Click the arrow to display Networks so you can tell setup how to configure network parameters.
-
10
Configure Network Settings.
- Configure network visibility is needed even if you plan to isolate the server; your intentions must be know to network settings.
- Click Yes so your computer is visible to other network devices.
-
11
Verify Installation complete.
- Verify the display of Server Manager indicating the installation is complete.
- Continue to learn more.
Advertisement
- These steps demonstrate how to configure TCP/IP settings, which are needed to verify network connectivity with another machine, such as Windows 7.
-
1
Minimize Server Manager.
- Click Minimize to minimize Server Manager, which is displayed when the OS completes booting.
-
2
Display menu items.
- Notice that when Server Manager is minimized, you will see the Recycle Bin and Taskbar; there are also menu items, such as Start, that are visible when the mouse is located at the bottom right.
- Move your mouse along the taskbar to the right and hover it to the right of the time and date; this action displays a number of icons, and to see their names, such as Search, Start, and Settings move the mouse straight up. If the icons are not shown, slightly move the mouse in any direction to display them.
- Click Start to display its contents.
-
3
Display Control Panel contents.
- Notice that Start shows a number of icons, such as Control Panel.
- Click Control Panel to display its contents.
-
4
Display Network and Internet links.
- Notice that items are shown in categories, but you can change how they are displayed.
- Click Network and Internet to display the screen containing their links.
-
5
Display Network and Sharing links.
- Notice there are two options, but only the first lets you configure the network adapter.
- Click Network and Sharing Center to display its options.
-
6
Display Network Connections (Ethernet) Properties.
- Notice there are several options in the left pane, but your main interest is on the adapter settings.
- Click Change adapter settings to display Network Connections.
- Notice that this computer has one NIC.
- Right click Ethernet and click Properties to display its properties.
-
7
Display TCP/IP Properties.
- Notice there are a number of protocol options for configuring network settings.
- Highlight Internet Protocol Version 4 (TCP/IPv4).
- Click Properties to display TCP/IP Properties.
- Notice that the default TCP/IPv4 configuration for network interface is DHCP client.
- Click Use the following IP address.
- Notice that the boxes are no longer grayed.
-
8
Configure TCP/IP settings.
- Notice there are a number of textboxes, but to test connectivity, only the IP address and subnet mask are needed.
- Type 172.16.150.10 in IP address field.
- Change the entry in Subnet mask to 255.255.255.0.
- Click OK.
- Click Close.
- Click close (X) to close both Network Connections and Network and Sharing Center.
Advertisement
- After the OS is installed and network parameters configured, it is time to test both activities; an important test is to verify the server can communicate with another machine, such as a Windows 7 client, and the client can communicate with the server; you can do this using the Command Prompt, and after testing is complete, you can shutdown the server.
-
1
Verify Connectivity.
- Display Start.
- Click the down arrow to display several Apps.
- Scroll right.
- Click the Command Prompt.
- Ping the second machine.
- From the second machine, ping the server.
-
2
Shutdown server.
- Display Start.
- Click Settings to display its contents.
- Click Power.
- Click Shutdown.
- Follow the displayed instructions to complete the shutdown.
Advertisement
Ask a Question
200 characters left
Include your email address to get a message when this question is answered.
Submit
Advertisement
-
Installation: Since it is unlikely you are dual booting a virtual machine, the following bullets apply only if you are installing the server on a physical machine.
- If an OS is already installed on the machine, you may see Press any key to boot from CD/DVD; this is your opportunity to boot from the CD/DVD drive.
- If an OS is already installed on the machine, and you do not see Press any key to boot from CD/DVD, you will have to reconfigure the boot process to boot form the CD/DVD drive.
- If an OS it not on the machine, the boot process goes directly to the CD/DVD drive and begins booting.
- If you are installing from a DVD that came with a textbook, you may not need a product key.
- Depending on the DVD you are using, such as one that came with a textbook, or one from Microsoft, you may see a slightly different selection menu; be sure not to select Server Core but GUI instead.
-
If you have an existing operating system that you want to upgrade, when prompted, you would select Upgrade, but in this case select Custom so you can customize the disk for installation.
-
The configuration shown will depend on the partition and unallocated space on your disk(s). Notice that you are given a number of disk options, but they are not always enabled; it depends on whether a partition or unallocated space is highlighted; if a partition is highlighted all except New are enabled, and if an unallocated space is highlighted, all are grayed, except New.
Show More Tips
Thanks for submitting a tip for review!
Advertisement
-
When partitioning the disks, Next does not depend on a selection; this means whichever space is highlighted, partition or unallocated, and you click Next, setup formats the space, copy the necessary operating system files, and install the operating system. Everything on that partition will be lost.
-
When partitioning the disks, if you select Delete, setup will delete the highlighted partition and label it unallocated; you will then have to use New to create a partition for the install, or click Next to install. Also, note that if you click Next, setup uses the entire highlighted space for the install, but if you do not want to use the entire space, to install the operating system, use New to create the partition size from the unallocated space.
Advertisement
Things You’ll Need
- DVD you created with the .iso for Windows Server 2012 R2.
- DVD with a Windows client, such as Windows 7.
- One physical machine on which you can install and configure two virtual machines: one server and one client.
- Virtual machine software, such as VirtualBox.
References
- Microsoft. (2013, June 24). System Requirements and Installation Information for Windows Server 2012 R2. Retrieved from TechNet: http://technet.microsoft.com/en-us/library/dn303418.aspx
- Microsoft. (2013, June 24). Windows Server Installation Options. Retrieved from TechNet: http://technet.microsoft.com/en-us/library/hh831786.aspx
About This Article
Thanks to all authors for creating a page that has been read 56,241 times.
Is this article up to date?
Привет друзья! Мы начинаем цикл статей об операционной системе Windows Server 2012. Цель такая — установить Windows 7 или Windows 8 не с помощью какого-либо носителя (диска, флешки), а по сети.
В прошлой статье мы с Вами узнали с подробностями что такое сервер и для чего он нужен. Ещё мы узнали, что на компьютер используемый в качестве сервера устанавливают специальную серверную операционную систему Windows Server 2012 от Майкрософт или бесплатную Linux сервер. Windows Server 2012 в свою очередь имеет четыре редакции.
В этой же статье мы с Вами установим на наш компьютер операционную систему Windows Server 2012 стандарт.
После установки Windows Server 2012 читайте следующие наши статьи по этой теме
1) Что такое сервер и для чего он нужен (ссылка выше)
2) Установка Windows Server 2012 (сегодняшняя статья)
Бонус
Скачать Windows Server 2012 можно в
Центре пробного ПО Майкрософт
, после установки операционной системы вы сможете ей пользоваться без каких-либо ограничений 180 дней.

Установка Windows Server 2012
1) Загружаем компьютер с установочного диска Windows Server 2012

2) Выбираем нужные параметры, жмем далее

3) Нажимаем установить

4) Начинается установка

5) Выбираем редакцию Standard с графическим интерфейсом, жмем далее

6) Соглашаемся с лицензионным соглашением

7) Выбираем Выборочная: только установка Windows (для опытных пользователей)
 Выбираем куда устанавливать

9) Настраиваем дисковое пространство, жмем настройка диска. В моем примере я отведу под систему 35000 мб, нажимаем применить

10) Появляется окно с запросом на создание дополнительного раздела для системных файлов. Соглашаемся

11) Получается следующая картина

12) Создаем еще один раздел на нераспределенном пространстве

13) Разделы созданы. Систему устанавливаем на второй раздел

14) Идет установка

15) Установка

16) Перезагрузка

17) Идет подготовка устройств

18) Как видим, имя пользователя система устанавливает сама, нужно только ввести пароль, нажимаем готово (имя компьютера система тоже не предлагает ввести, как так она генерирует его самостоятельно)

19) Нажимаем сочетание клавиш CTRL+ALT+DEL

20) Вводим пароль администратора и производим вход

21) Вход успешно выполнен, система установлена
