Время прочтения
2 мин
Просмотры 48K
Здесь вы найдете пошаговый пример установки библиотеки OpenCV на Python.
- Установка Python
- Установка виртуальной среды
- Установка OpenCV + jupiterlab, numpy, matplotlib
- Тестирование
Все тестировала на планшете Microsoft Surface, Windows 10 Pro, c 64-битной операционной системой.
Предположим, что на вашем устройстве ничего не установлено заранее.
- Сначала установим Python.
Скачиваем нужную версию и запускаем .exe файл. Не забываем установить галочку add path. Я установила Python 3.7.3 от 25 марта 2019 г., потому что новая на данный момент версия Python 3.7.4 от 8го июля 2019 г. работала некорректно, а именно в терминале некоторые команды зависали. Открываем командную строку. - Устанавливаем virtualenv.
Виртуальная среда нам нужна для того, чтобы для каждого отдельного проекта была своя «комната» со своими версиями установленных библиотек, которые не будут зависеть от других проектов и путаться между собой.
Пакеты будем устанавливать с помощью pip. Он в последнее время сразу идет с Python, но обычно требуется его обновить командой:
python -m pip install --upgrade pip
Обновили pip, теперь установим виртуальную среду:
pip install virtualenv
Командойcdперейдите в папку, в которой хотите создать среду и введите команду:
mkdir opencvtutorial_env— так мы создали среду с названием opencvtutorial_env.
Далее вводим командуvirtualenv opencvtutorial_envи для активации перейдите в папку среды и далее с помощью Tab до activate.
.opencvtutorial_envScriptsactivate - Установим библиотеки OpenCV-Python, Numpy и Matplotlib, которые понадобятся для тестирования функций opencv.
Самый легкий и быстрый вариант установки у меня получился с неофициальной версии. Устанавливаем его командой:
pip install opencv-python
Вместе с opencv-python в подарок с этим пакетом идет numpy. Дополнительно установим matplotlib:pip install matplotlib. - Установим
pip install jupyterlabи запустим его командойjupyter notebook.
Теперь осталось проверить все ли у нас работает. В открывшемся окне создаем новый Python 3 файл, и запускаем команду:
import cv2 as cv
print( cv.__version__ )
Если выходит версия opencv, то поздравляю, можно тестировать туториалы c официального сайта. Мои примеры работ по туториалам можно найти здесь.
Теги:
- opencv-python
- computer vision
- компьютерное зрение
- python3
- virtualenv
+6
Комментарии
1

OpenCV on Wheels
Pre-built CPU-only OpenCV packages for Python.
Check the manual build section if you wish to compile the bindings from source to enable additional modules such as CUDA.
Installation and Usage
-
If you have previous/other manually installed (= not installed via
pip) version of OpenCV installed (e.g. cv2 module in the root of Python’s site-packages), remove it before installation to avoid conflicts. -
Make sure that your
pipversion is up-to-date (19.3 is the minimum supported version):pip install --upgrade pip. Check version withpip -V. For example Linux distributions ship usually with very oldpipversions which cause a lot of unexpected problems especially with themanylinuxformat. -
Select the correct package for your environment:
There are four different packages (see options 1, 2, 3 and 4 below) and you should SELECT ONLY ONE OF THEM. Do not install multiple different packages in the same environment. There is no plugin architecture: all the packages use the same namespace (
cv2). If you installed multiple different packages in the same environment, uninstall them all withpip uninstalland reinstall only one package.a. Packages for standard desktop environments (Windows, macOS, almost any GNU/Linux distribution)
- Option 1 — Main modules package:
pip install opencv-python - Option 2 — Full package (contains both main modules and contrib/extra modules):
pip install opencv-contrib-python(check contrib/extra modules listing from OpenCV documentation)
b. Packages for server (headless) environments (such as Docker, cloud environments etc.), no GUI library dependencies
These packages are smaller than the two other packages above because they do not contain any GUI functionality (not compiled with Qt / other GUI components). This means that the packages avoid a heavy dependency chain to X11 libraries and you will have for example smaller Docker images as a result. You should always use these packages if you do not use
cv2.imshowet al. or you are using some other package (such as PyQt) than OpenCV to create your GUI.- Option 3 — Headless main modules package:
pip install opencv-python-headless - Option 4 — Headless full package (contains both main modules and contrib/extra modules):
pip install opencv-contrib-python-headless(check contrib/extra modules listing from OpenCV documentation)
- Option 1 — Main modules package:
-
Import the package:
import cv2All packages contain Haar cascade files.
cv2.data.haarcascadescan be used as a shortcut to the data folder. For example:cv2.CascadeClassifier(cv2.data.haarcascades + "haarcascade_frontalface_default.xml") -
Read OpenCV documentation
-
Before opening a new issue, read the FAQ below and have a look at the other issues which are already open.
Frequently Asked Questions
Q: Do I need to install also OpenCV separately?
A: No, the packages are special wheel binary packages and they already contain statically built OpenCV binaries.
Q: Pip install fails with ModuleNotFoundError: No module named 'skbuild'?
Since opencv-python version 4.3.0.*, manylinux1 wheels were replaced by manylinux2014 wheels. If your pip is too old, it will try to use the new source distribution introduced in 4.3.0.38 to manually build OpenCV because it does not know how to install manylinux2014 wheels. However, source build will also fail because of too old pip because it does not understand build dependencies in pyproject.toml. To use the new manylinux2014 pre-built wheels (or to build from source), your pip version must be >= 19.3. Please upgrade pip with pip install --upgrade pip.
Q: Import fails on Windows: ImportError: DLL load failed: The specified module could not be found.?
A: If the import fails on Windows, make sure you have Visual C++ redistributable 2015 installed. If you are using older Windows version than Windows 10 and latest system updates are not installed, Universal C Runtime might be also required.
Windows N and KN editions do not include Media Feature Pack which is required by OpenCV. If you are using Windows N or KN edition, please install also Windows Media Feature Pack.
If you have Windows Server 2012+, media DLLs are probably missing too; please install the Feature called «Media Foundation» in the Server Manager. Beware, some posts advise to install «Windows Server Essentials Media Pack», but this one requires the «Windows Server Essentials Experience» role, and this role will deeply affect your Windows Server configuration (by enforcing active directory integration etc.); so just installing the «Media Foundation» should be a safer choice.
If the above does not help, check if you are using Anaconda. Old Anaconda versions have a bug which causes the error, see this issue for a manual fix.
If you still encounter the error after you have checked all the previous solutions, download Dependencies and open the cv2.pyd (located usually at C:UsersusernameAppDataLocalProgramsPythonPythonXXLibsite-packagescv2) file with it to debug missing DLL issues.
Q: I have some other import errors?
A: Make sure you have removed old manual installations of OpenCV Python bindings (cv2.so or cv2.pyd in site-packages).
Q: Function foo() or method bar() returns wrong result, throws exception or crashes interpreter. What should I do?
A: The repository contains only OpenCV-Python package build scripts, but not OpenCV itself. Python bindings for OpenCV are developed in official OpenCV repository and it’s the best place to report issues. Also please check {OpenCV wiki](https://github.com/opencv/opencv/wiki) and the official OpenCV forum before file new bugs.
Q: Why the packages do not include non-free algorithms?
A: Non-free algorithms such as SURF are not included in these packages because they are patented / non-free and therefore cannot be distributed as built binaries. Note that SIFT is included in the builds due to patent expiration since OpenCV versions 4.3.0 and 3.4.10. See this issue for more info: https://github.com/skvark/opencv-python/issues/126
Q: Why the package and import are different (opencv-python vs. cv2)?
A: It’s easier for users to understand opencv-python than cv2 and it makes it easier to find the package with search engines. cv2 (old interface in old OpenCV versions was named as cv) is the name that OpenCV developers chose when they created the binding generators. This is kept as the import name to be consistent with different kind of tutorials around the internet. Changing the import name or behaviour would be also confusing to experienced users who are accustomed to the import cv2.
Documentation for opencv-python
The aim of this repository is to provide means to package each new OpenCV release for the most used Python versions and platforms.
CI build process
The project is structured like a normal Python package with a standard setup.py file.
The build process for a single entry in the build matrices is as follows (see for example .github/workflows/build_wheels_linux.yml file):
-
In Linux and MacOS build: get OpenCV’s optional C dependencies that we compile against
-
Checkout repository and submodules
- OpenCV is included as submodule and the version is updated
manually by maintainers when a new OpenCV release has been made - Contrib modules are also included as a submodule
- OpenCV is included as submodule and the version is updated
-
Find OpenCV version from the sources
-
Build OpenCV
- tests are disabled, otherwise build time increases too much
- there are 4 build matrix entries for each build combination: with and without contrib modules, with and without GUI (headless)
- Linux builds run in manylinux Docker containers (CentOS 5)
- source distributions are separate entries in the build matrix
-
Rearrange OpenCV’s build result, add our custom files and generate wheel
-
Linux and macOS wheels are transformed with auditwheel and delocate, correspondingly
-
Install the generated wheel
-
Test that Python can import the library and run some sanity checks
-
Use twine to upload the generated wheel to PyPI (only in release builds)
Steps 1—4 are handled by pip wheel.
The build can be customized with environment variables. In addition to any variables that OpenCV’s build accepts, we recognize:
CI_BUILD. Set to1to emulate the CI environment build behaviour. Used only in CI builds to force certain build flags on insetup.py. Do not use this unless you know what you are doing.ENABLE_CONTRIBandENABLE_HEADLESS. Set to1to build the contrib and/or headless versionENABLE_JAVA, Set to1to enable the Java client build. This is disabled by default.CMAKE_ARGS. Additional arguments for OpenCV’s CMake invocation. You can use this to make a custom build.
See the next section for more info about manual builds outside the CI environment.
Manual builds
If some dependency is not enabled in the pre-built wheels, you can also run the build locally to create a custom wheel.
- Clone this repository:
git clone --recursive https://github.com/opencv/opencv-python.git cd opencv-python- you can use
gitto checkout some other version of OpenCV in theopencvandopencv_contribsubmodules if needed
- you can use
- Add custom Cmake flags if needed, for example:
export CMAKE_ARGS="-DSOME_FLAG=ON -DSOME_OTHER_FLAG=OFF"(in Windows you need to set environment variables differently depending on Command Line or PowerShell) - Select the package flavor which you wish to build with
ENABLE_CONTRIBandENABLE_HEADLESS: i.e.export ENABLE_CONTRIB=1if you wish to buildopencv-contrib-python - Run
pip wheel . --verbose. NOTE: make sure you have the latestpipversion, thepip wheelcommand replaces the oldpython setup.py bdist_wheelcommand which does not supportpyproject.toml.- this might take anything from 5 minutes to over 2 hours depending on your hardware
- You’ll have the wheel file in the
distfolder and you can do with that whatever you wish- Optional: on Linux use some of the
manylinuximages as a build hosts if maximum portability is needed and runauditwheelfor the wheel after build - Optional: on macOS use
delocate(same asauditwheelbut for macOS) for better portability
- Optional: on Linux use some of the
Manual debug builds
In order to build opencv-python in an unoptimized debug build, you need to side-step the normal process a bit.
- Install the packages
scikit-buildandnumpyvia pip. - Run the command
python setup.py bdist_wheel --build-type=Debug. - Install the generated wheel file in the
dist/folder withpip install dist/wheelname.whl.
If you would like the build produce all compiler commands, then the following combination of flags and environment variables has been tested to work on Linux:
export CMAKE_ARGS='-DCMAKE_VERBOSE_MAKEFILE=ON'
export VERBOSE=1

python3 setup.py bdist_wheel --build-type=Debug
See this issue for more discussion: https://github.com/opencv/opencv-python/issues/424
Source distributions
Since OpenCV version 4.3.0, also source distributions are provided in PyPI. This means that if your system is not compatible with any of the wheels in PyPI, pip will attempt to build OpenCV from sources. If you need a OpenCV version which is not available in PyPI as a source distribution, please follow the manual build guidance above instead of this one.
You can also force pip to build the wheels from the source distribution. Some examples:
pip install --no-binary opencv-python opencv-pythonpip install --no-binary :all: opencv-python
If you need contrib modules or headless version, just change the package name (step 4 in the previous section is not needed). However, any additional CMake flags can be provided via environment variables as described in step 3 of the manual build section. If none are provided, OpenCV’s CMake scripts will attempt to find and enable any suitable dependencies. Headless distributions have hard coded CMake flags which disable all possible GUI dependencies.
On slow systems such as Raspberry Pi the full build may take several hours. On a 8-core Ryzen 7 3700X the build takes about 6 minutes.
Licensing
Opencv-python package (scripts in this repository) is available under MIT license.
OpenCV itself is available under Apache 2 license.
Third party package licenses are at LICENSE-3RD-PARTY.txt.
All wheels ship with FFmpeg licensed under the LGPLv2.1.
Non-headless Linux wheels ship with Qt 5 licensed under the LGPLv3.
The packages include also other binaries. Full list of licenses can be found from LICENSE-3RD-PARTY.txt.
Versioning
find_version.py script searches for the version information from OpenCV sources and appends also a revision number specific to this repository to the version string. It saves the version information to version.py file under cv2 in addition to some other flags.
Releases
A release is made and uploaded to PyPI when a new tag is pushed to master branch. These tags differentiate packages (this repo might have modifications but OpenCV version stays same) and should be incremented sequentially. In practice, release version numbers look like this:
cv_major.cv_minor.cv_revision.package_revision e.g. 3.1.0.0
The master branch follows OpenCV master branch releases. 3.4 branch follows OpenCV 3.4 bugfix releases.
Development builds
Every commit to the master branch of this repo will be built. Possible build artifacts use local version identifiers:
cv_major.cv_minor.cv_revision+git_hash_of_this_repo e.g. 3.1.0+14a8d39
These artifacts can’t be and will not be uploaded to PyPI.
Manylinux wheels
Linux wheels are built using manylinux2014. These wheels should work out of the box for most of the distros (which use GNU C standard library) out there since they are built against an old version of glibc.
The default manylinux2014 images have been extended with some OpenCV dependencies. See Docker folder for more info.
Supported Python versions
Python 3.x compatible pre-built wheels are provided for the officially supported Python versions (not in EOL):
- 3.6
- 3.7
- 3.8
- 3.9
- 3.10
Backward compatibility
Starting from 4.2.0 and 3.4.9 builds the macOS Travis build environment was updated to XCode 9.4. The change effectively dropped support for older than 10.13 macOS versions.
Starting from 4.3.0 and 3.4.10 builds the Linux build environment was updated from manylinux1 to manylinux2014. This dropped support for old Linux distributions.
Introduction and Overview
This document contains instructions for installing and migrating to the latest release of OpenCV (version 3) and the Python bindings. In addition to some API changes, there are also changes to the Python interface (e.g. removal of cv2.cv) that may require changes in existing code to work with the new version of the cv2 module. After installation, see the next page, Migration & Changes, for details regarding the changes to the module and for help migrating existing Python code to the new version.
This page covers installing OpenCV 3 on Windows (using pre-built binaries) and Linux (compiled from source), including the Python interface (the cv2 module). OpenCV can be downloaded from the official OpenCV website. Note that this guide is written based on OpenCV version 3.1.0. After installation, it is recommended that you can check the version of OpenCV that Python is using:
import cv2
print cv2.__version__

# Should print 3.0.0-rc1 or newer.
Note that although OpenCV 3 is the latest release, by convention, the module is still named cv2.
Installing on Windows (pre-built binaries)
Using pre-built binaries is the quickest way to get a Python OpenCV environment up and running on Windows. Currently, only the Python 2 version of the cv2 module is built and included in the latest Windows release. Support for Python 3 (as well as adding other non-standard features/modules), requires compiling from source — see the official OpenCV documentation for details.
Downloading OpenCV and Python
To begin, download OpenCV for Windows (version 3.1, opencv-3.1.0.exe), and extract it to a directory of your choice. The Windows build includes both a 32-bit and 64-bit module for Python 2.7.
Before continuing, ensure that you have a working Python 2.7 installation, which can be downloaded from the Python website. This guide was tested using Python 2.7.9 (x86 installer / x64 installer). When installing, it is recommended that you allow the installer to add Python to your PATH environment variable, so you can run python and pip from a command prompt.
Installing Module Dependencies
The Python OpenCV cv2 module requires both the NumPy and SciPy stack. To get this, first ensure that you have a working python environment, and have pip installed (if not, use the links above, and ensure the Python folder is in your PATH variable).
Christoph Gohlke currently provides some (unofficial) pre-built Python packages for Windows, including NumPy and SciPy. Download the latest stable versions of NumPy and SciPy, and install them by calling pip install [module].whl from a command prompt. Note that you should download the version corresponding to your Python environment (2.7 in this case) and word length. For example, on 32-bit systems/interpreters:
pip install numpy-1.9.2+mkl-cp27-none-win32.whl
pip install scipy-0.15.1-cp27-none-win32.whl
And for 64-bit systems/interpreters:
pip install numpy-1.9.2+mkl-cp27-none-win_amd64.whl
pip install scipy-0.15.1-cp27-none-win_amd64.whl
After installing, you should be able to run import numpy and import scipy from a Python interpreter to verify that the modules were installed correctly. You can check what versions of NumPy and SciPy are installed from numpy.__version__ and scipy.__version__, respectively.
Installing Python-OpenCV Module
Lastly, we need to copy the OpenCV module into the local Python packages. In the files extracted from opencv-3.0.0-rc1.exe, go to the folder opencvbuildpython2.7, and open either the x86 (for 32-bit) or x64 (for 64-bit) folder. In each, there will be a cv2.pyd file.
Copy cv2.pyd directly into the Libsite-packages directory of your Python installation. For most users, this will be found at:
C:Python27Libsite-packages
Lastly, ensure that the OpenCV .dll files are somewhere in your system’s %PATH%, especially the opencv_ffmpeg310.dll (or opencv_ffmpeg310_64.dll for 64-bit systems) file required for loading video files.
Continue on to the Verifying Installation section to ensure everything was installed correctly, and the new version of OpenCV is being used. Also be sure to check out the next page, Migration & Changes, for details about the changes to the module and updating existing code.
Installing on Linux (compiling from source)
Although this guide is written for Ubuntu 12.04/14.04 and other variants (e.g. Xubuntu/Lubuntu/Kubuntu), the process should largely be the same on other versions, as well as similar Debian-like Linux distributions. Pay attention to the output of each command to ensure everything worked correctly, and if there are any issues during the build process, see the bottom of this document for possible mitigations
Downloading OpenCV
To begin, download OpenCV for Linux (version 3.1.0, opencv-3.1.0.zip), and extract it to a directory of your choice (e.g. ~/opencv-src). Create a build folder inside the folder where the archive was extracted (the directory containing the CMakeLists.txt file), and open a terminal session there. For example:
# Assuming the files were extracted to ~/opencv-src/...
cd ~/opencv-src
mkdir build
cd build
Execute all of following commands from the build sub-folder itself, so the compiled files will be placed there.
Installing Build Dependencies
To compile OpenCV, we must ensure that the required dependencies are available, including the build tools themselves. We can get the required ones using apt on Ubuntu, but first, ensure the package list is up-to-date by running apt-get update. Next, execute the following commands to get the required packages (see below for a one-line list of all):
sudo apt-get install cmake build-essential pkg-config

sudo apt-get install libgtk2.0-dev libtbb-dev

sudo apt-get install python-dev python-numpy python-scipy

sudo apt-get install libjasper-dev libjpeg-dev libpng-dev libtiff-dev

sudo apt-get install libavcodec-dev libavutil-dev libavformat-dev libswscale-dev

sudo apt-get install libdc1394-22-dev libv4l-dev
In single line:
sudo apt-get install cmake build-essential pkg-config libgtk2.0-dev libtbb-dev python-dev python-numpy python-scipy libjasper-dev libjpeg-dev libpng-dev libtiff-dev libavcodec-dev libavutil-dev libavformat-dev libswscale-dev libdc1394-22-dev libv4l-dev
Note that for additional OpenCV modules/features (e.g. GPU/CUDA support, or Python 3 module), you will need to download the respective development/SDK packages for those libraries as well. The dependencies listed above only cover building OpenCV itself and the Python 2.7 cv2 module.
Compiling and Installing OpenCV
Now that we have the required build dependencies, run cmake (again, in the build/ directory we created) to generate the Makefile to build OpenCV:
cmake -D CMAKE_BUILD_TYPE=Release -D CMAKE_INSTALL_PREFIX=/usr/local ..
If there are any errors, ensure that you downloaded all the required packages — the output should help track down what is missing. To ensure the Python module will be built, you should see python2 in the list of configured modules after running cmake:
[...]

--     Linker flags (Release):
--     Linker flags (Debug):
--     Precompiled headers:      YES
--
--   OpenCV modules:
--     To be built:              hal core flann imgproc ml [...] python2

[...]
If you do not see the python2 module listed, in the «To be built» list, check that you have the proper Python development packages installed, remove all files from the build/ folder, and try running the cmake command again.
Now, we can build OpenCV (and the Python module) using make, and install it to our system:
Ensure that the build was successful after calling make, and check the output before installing. If you run into build issues/errors, again ensure that you have all the required dependencies and header files on your system. If there are actual build issues with OpenCV itself, see the Linux Build Issues section below for some possible workarounds.
When installing OpenCV 3.0-rc1 on Ubuntu 12.04, I ran into build errors regarding some missing codec #define entries. As mentioned, the steps to do this are detailed below should you run into the same problem (the problem should be solved in version 3.1.0 and above). Ubuntu 14.04 and above should build successfully without requiring any modifications.
If the build was successful, but you can’t import cv2 from a Python shell after running make install, you can install the module manually by copying the cv2.so file we just built in the build/lib/ folder to /usr/local/lib/python2.7/dist-packages/. From the build/ folder, this can be done by:
sudo cp lib/cv2.so /usr/local/lib/python2.7/dist-packages/
After this step, the cv2 module is installed, and can now be imported by your Python environment. Continue on to the Verifying Installation section to ensure everything was installed correctly, and more importantly, that the correct version of OpenCV is being used by Python. You can also check out the next page, Migration & Changes, for details about changes to the cv2 module, and what changes need to be made to existing code to run with the updated module.
Verifying Installation
As mentioned previously, you can verify that the cv2 module was installed correctly by executing the following in a Python shell:
import cv2
print cv2.__version__
If the correct version string is printed (3.0.0-rc1 or newer if you used a more recent version), everything is installed correctly at this point!
Note that there are some major changes to the cv2 module hierarchy itself, and Python programs written with OpenCV 2.4.x in mind may not work properly anymore. See the next section, Migration & Changes for details about the changes, and how to modify programs to deal with the changes.
Linux Build Issues
On some systems you may run into issues when compiling OpenCV itself, depending on what packages are available. If the proper header files are available, but build issues still arise, try to see if there are any workarounds below for the problem.
Undefined AV_CODEC_ID_... in ffmpeg_codecs.hpp
If you run into an issue where build errors are caused by certain codecs not being defined, you can download a more recent version of ffmpeg_codecs.hpp from here, and replace it in the source code you downloaded/extracted in the modules/videoio/src/ folder.
Alternatively, you can declare them manually by editing the ffmpeg_codecs.hpp file itself by adding the missing codec entry for H263I, and renaming WNV to WNV1. You can see what changes have to be made by viewing this commit from the OpenCV GitHub project.
Once the file is updated, you can call make again from the build/ folder, and OpenCV should finish compiling without error now.
Prerequisite: Python Language Introduction OpenCV is the huge open-source library for computer vision, machine learning, and image processing and now it plays a major role in real-time operation which is very important in today’s systems. By using it, one can process images and videos to identify objects, faces, or even the handwriting of a human. When it integrated with various libraries, such as Numpy, python is capable of processing the OpenCV array structure for analysis. To Identify image patterns and its various features we use vector space and perform mathematical operations on these features. To install OpenCV, one must have Python and PIP, preinstalled on their system. To check if your system already contains Python, go through the following instructions: Open the Command line(search for cmd in the Run dialog( + R). Now run the following command:
python --version
If Python is already installed, it will generate a message with the Python version available.  If Python is not present, go through How to install Python on Windows? and follow the instructions provided. PIP is a package management system used to install and manage software packages/libraries written in Python. These files are stored in a large “on-line repository” termed as Python Package Index (PyPI). To check if PIP is already installed on your system, just go to the command line and execute the following command:
pip -V
 If PIP is not present, go through How to install PIP on Windows? and follow the instructions provided.
Downloading and Installing OpenCV:
OpenCV can be directly downloaded and installed with the use of pip (package manager). To install OpenCV, just go to the command-line and type the following command:
pip install opencv-python
Beginning with the installation:
To check if OpenCV is correctly installed, just run the following commands to perform a version check:
python
>>>import cv2
>>>print(cv2.__version__)

В статье разберем, как установить библиотеку OpenCV на компьютеры с операционной системой Windows и MacOS.
Установка OpenCV на компьютер с ОС Windows
- Установить Python со встроенными библиотеками.
- После установки Python нажимаем на комбинацию кнопок Win+R. В открывшемся окне нужно прописать:
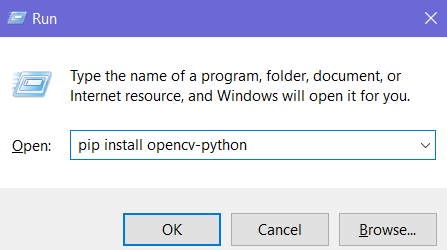
Начнётся скачивание и установка:
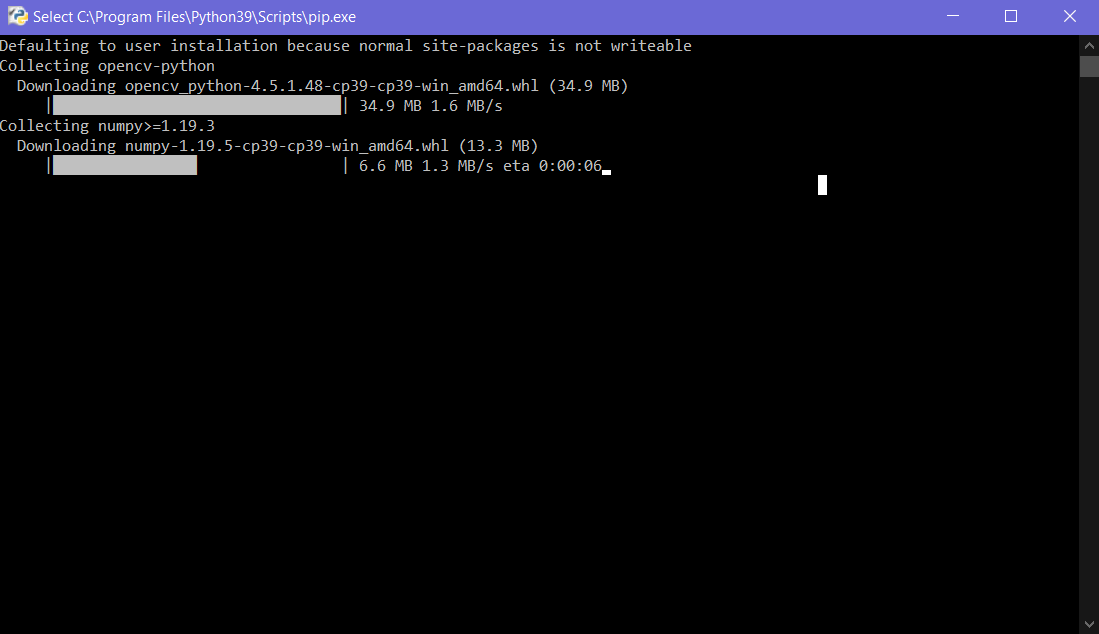
Готово! Библиотека OpenCV установлена на ваш Windows-компьютер.
Для установки OpenCV на компьютер с ОС Linux вводим такую же команду.
Установка OpenCV на MacOS
- Установить Python со встроенными библиотеками для своей операционной системы.
Если у Вас уже установлен Python, рекомендуем переустановить и обязательно поставить галочку у пункта «добавить в PATH».
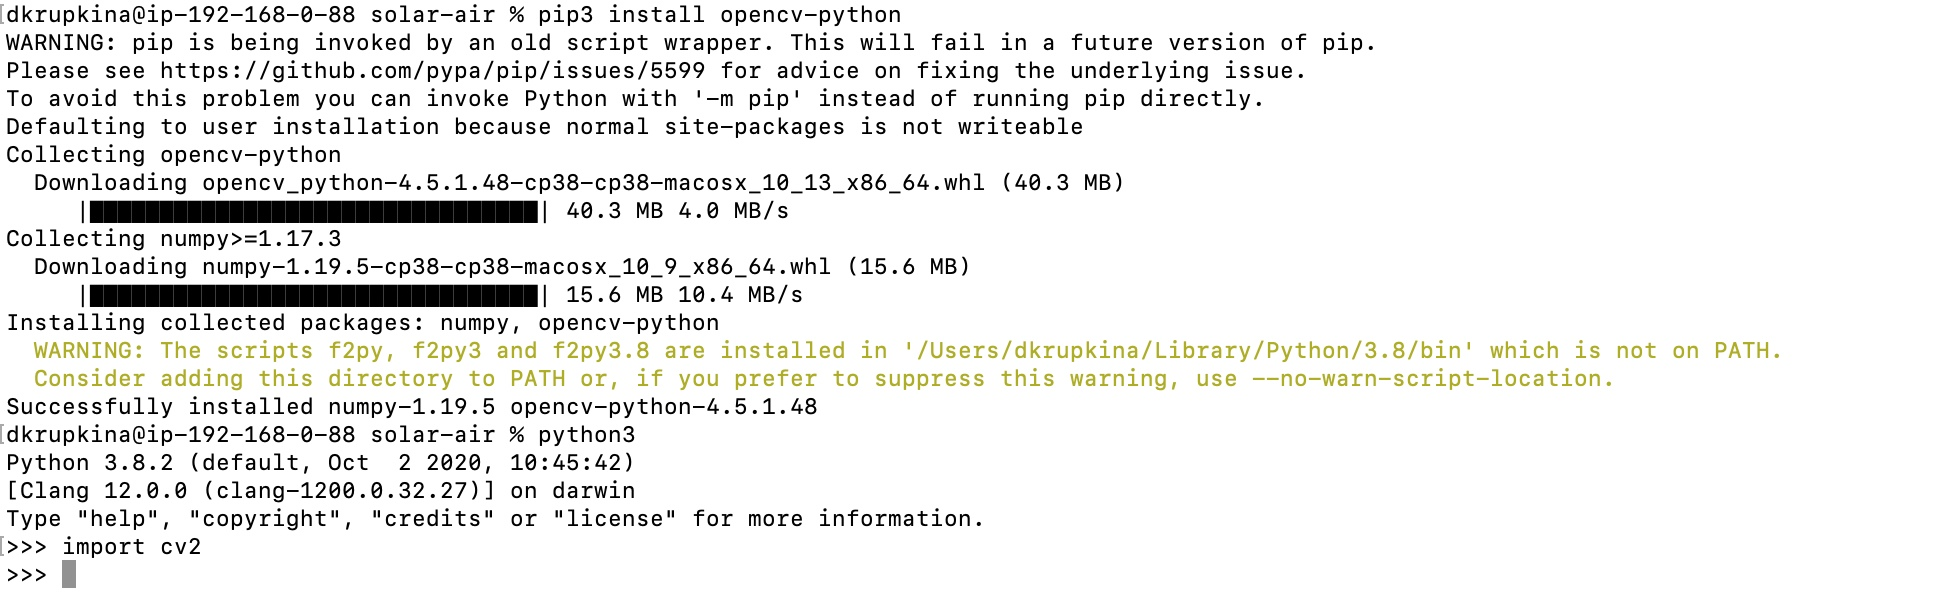
2. Открываем терминал и пишем туда несколько команд:
pip install --upgrade pip
pip install opencv-python
После ввода произойдёт скачивание и установка.
Проверка установки
Для проверки откроем Python и напишем:
Если ошибок нет, значит, OpenCV установился.
Курсы Робикс, в которых изучается этот материал.
- Duckietown: робот с системой Автопилота
В данном руководстве поговорим и разберем подробно способы установки OpenCV.
Установка OpenCV с помощью Anaconda
Первый шаг — загрузить последнюю версию графического установщика Anaconda для Windows с официального сайта. Выберите свой битовый графический установщик. Вам предлагается установить версию 3.7, работающую с Python 3.

Выберите графический бит-установщик

После его установки откройте приглашение Anaconda и введите следующую команду.
conda install -c conda-forge opencv

Нажмите кнопку Enter, и он загрузит всю связанную конфигурацию OpenCV.

OpenCV — это библиотека Python, поэтому необходимо установить Python в систему и установить OpenCV с помощью команды pip:
pip install opencv-contrib-python --upgrade
Мы можем установить его без дополнительных модулей с помощью следующей команды:
pip install opencv-python

Откройте командную строку и введите следующий код, чтобы проверить, установлен ли OpenCV.

Установка OpenCV в MacOS
В этом разделе мы узнаем об установке OpenCV на macOS с помощью файла Homebrew. Преимущество использования Homebrew заключается в том, что он упрощает процесс установки. Для установки требуется несколько команд. Шаги установки следующие:
- Шаг 1: Установите инструменты командной строки Xcode.
Чтобы установить Xcode, введите следующую команду в терминале.
sudo xcode-select --install
Чтобы убедиться, что он успешно установлен, введите следующую команду.
sudo xcode-select -p
Если он показывает /Application/Xcode.app/Content/Developer, мы можем двигаться дальше.
- Шаг 2: Установите Homebrew.
Чтобы установить Homebrew, введите следующую команду в терминале:
ruby -e "$(curl -fsSL https://raw.github.com/Homebrew/homebrew/go/install)"
Сценарий оболочки .bashrc находится в вашем домашнем каталоге, который Bash запускает всякий раз, когда он используется в интерактивном режиме. Мы можем найти домашний каталог, используя следующую команду.
echo $HOME
Он должен отображать вывод, например:
/Users/MATHEW
- Шаг 3: Установите Python 3.
Чтобы начать работать с OpenCV, необходимо установить Python. Чтобы установить Python 3 с помощью Homebrew, введите следующую команду:
brew install python3
Чтобы проверить версию Python, выполните следующую команду:
python3 --version
Отобразится версия загруженного Python.
- Шаг 4. Установите OpenCV.
Чтобы установить OpenCV3, введите следующую команду:
brew install opencv3 -with-contrib -with-python3
Настройка виртуальной среды Python 3
Пакеты virtualenv и virtualenvwrapper предоставляют возможность устанавливать виртуальные среды. Важно настроить виртуальную среду для работы с несколькими проектами, не внося конфликт в их зависимости.
Для установки virtualenv и virtualenvwrapper мы используем pip (менеджер пакетов Python):
pip3 install virtualenv and virtualenv virtualenvwrapper
Нам также нужно обновить ~/.bashrc:
#virtualenv/VirtualenvWrapper
VIRTUALENVWRAPPER_PYTHON ='/user/local/bin/python3'
Source/user/local/bin/virtualenvwrapper.sh
export WORKON_HOME = $HOME/.virtualenvs
Теперь мы можем создать виртуальную среду Python 3:
mkvirtualenv cv3 -p python3
Мы можем получить доступ к OpenCV, используя следующую команду.
workon cv3
Приведенная выше команда активирует OpenCV в системе.


Изучаю Python вместе с вами, читаю, собираю и записываю информацию опытных программистов.
In this blog post, we will be installing OpenCV on Windows for C++ and Python. The C++ installation is done with the help of custom setup exe files. Whereas Python installation is done with Anaconda.
Installing OpenCV from source takes up a lot of time. Depending on your hardware, and the installation configuration, it can take anywhere from 5 minutes up to 2 hours.
Moreover, the installation is not a cakewalk. Hence, we have come up with a solution for Windows users – OpenCV Windows installers. These installers will only work for installing OpenCV for C++. If you want to install OpenCV for Python, you’ll find the information later in the blog.
If you want to install OpenCV 4 on Windows from source, then check out this blog post.
Table of Contents
Install OpenCV on Windows for CPP
Step 1: Prerequisites
You need Visual Studio pre-installed on your system. You can download the latest version of Visual Studio from here. Otherwise, you can find older versions from here.
Step 2: Download the Installer
Once you have set up Visual Studio on your system, download the installer according to the Visual Studio version you have installed.
I’ve partnered exclusively with OpenCV.org to bring you official courses in AI, Computer Vision, and Deep Learning to take you on a structured path from first steps to mastery.
Step 3: Install OpenCV on Windows
Once you download the installer, double click it to run the installer. Before the installer starts, it’ll ask you permission to run the executable. Click on More info and then on Run anyway.


The installer starts with a welcome screen. Click on Next to read the License.

If you accept the license, click on I accept the agreement and click on Next.

Next, it’ll ask you to choose the installation folder. You can install OpenCV anywhere on the system. The default location is C:.

Finally, the installer will ask you for confirmation to install OpenCV on the system. Click on Install to continue.


After OpenCV is installed, you can exit the installer.

Step 4: Execute a sample code
Once the OpenCV installation is completed, you can start coding right away. We have provided with a sample code to test the installation. Below is the code snippet.
You can download the code using this link.
#include <opencv2/opencv.hpp>
using namespace cv;

int main(void) {

	// Read image in GrayScale mode
	Mat image = imread("boy.jpg", 0);

	// Save grayscale image
	imwrite("boyGray.jpg", image);

	// To display the image
	imshow("Grayscale Image", image);
	waitKey(0);

	return 0;
}
Download Code
To easily follow along this tutorial, please download code by clicking on the button below. It’s FREE!
If you plan on executing C++ code using Cmake, then download and install from here (windows win64-x64 Installer), and follow instructions below. The third line specifies the Visual Studio version on your system.
mkdir build
cd build
cmake -G "Visual Studio 16 2019" ..
cmake --build . --config Release
cd ..
.buildReleasesampleCode.exe
The above code reads an input image as grayscale, writes it to the disk, and displays it. Following are input and output to the code.


How are the installers different from Official OpenCV Installers for Windows
These are general-purpose installers, which can install and uninstall OpenCV in under 15 seconds. It’s a quick and clean approach to install OpenCV for your Windows system. You can test out the latest OpenCV version and see if it’s for you. Otherwise, you can install OpenCV without configuring and waiting for hours on end for it to install.
Although the installers are useful for new users, or users who want one-click install, or simply for the ones who struggle with the installation, but these are not the official installers. You can find the official OpenCV binaries from here. There are differences between the installers which we provide and the OpenCV official binaries
- Contrib modules: The official binaries do not contain
opencv_contribmodules. The installer which we provide does. - Additional setup: The official binaries require additional setup, i.e., editing the environment variables, and using the correct folder address. Our installers will not require additional setup.
- Size: Official binaries are larger in size. They take about 1.21GB. The installers which we provide take around 367MB.
- List of libraries: If you code in Visual Studio, we have provided you with the list of libraries, in Debug and Release mode, as a separate text file. It is available in the root directory of the installation.
- No availability for VS16: The official binaries are not available for VS16, only for VS14 and VS15. Our installers are created for VS14, VS15, and VS16.
Install OpenCV on Windows for Python
Step 1: Install Anaconda for Python 3

While installing Anaconda make sure that you check both options:
- Add Anaconda to my
PATHenvironment variable - Register Anaconda as my default Python
Step 2: Create a Virtual Environment
We will use Virtual Environment to install Python libraries. It is generally a good practice in order to separate your project environment and global environment.
Open the command prompt or Power shell and execute the following command.
conda create --name virtualenv python=3.8Step 3: Install OpenCV on Windows
Activate the environment we created just now (virtualenv) and install all the required libraries using the commands below.
conda activate virtualenv
pip install opencv-contrib-python
And that’s it. OpenCV has been installed on your system. To close the virtual environment, use conda deactivate.
Step 4: Test Installation
Next, we will check whether the installation was successful. From the command prompt execute the following commands.
# activate environment
conda activate virtualenv

# start python prompt
python

# import cv2 and print version
import cv2
print(cv2.__version__)

# If OpenCV is installed correctly, the above command should output OpenCV version.

# Exit and deactivate environment
exit()
conda deactivate
Summary
In this blog post, we installed OpenCV on Windows with the quickest and easiest method. For C++, we used a simple .exe installer and installed in under 30 seconds. For Python, we used Anaconda as the package manager and installed OpenCV in a virtual environment. We also executed sample programs for both, C++ and Python, to test the installation. This concludes the OpenCV installation.
Subscribe & Download Code
If you liked this article and would like to download code (C++ and Python) and example images used in this post, please click here. Alternately, sign up to receive a free Computer Vision Resource Guide. In our newsletter, we share OpenCV tutorials and examples written in C++/Python, and Computer Vision and Machine Learning algorithms and news.
I need to install cv2 for a script that has been written for me. I tried pip install cv2 and pip install open_cv and got the same problem — a warning message from dist.py and complains about zlib being not found. No cv2 installed. I also tried pyopenvc and pip install opencv-python.
So, I went to the opencv site and downloaded the relevant exe. Ran it — generated a heap of subdirectories and a make file and stuff.
What do I do now?
![]()
AMC
2,6027 gold badges12 silver badges34 bronze badges
asked Aug 15, 2018 at 4:34
![]()
Install opencv-python (which is an unofficial pre-built OpenCV package for Python) by issuing the following command:
pip install opencv-python
![]()
worbel
6,48912 gold badges52 silver badges63 bronze badges
answered Oct 18, 2018 at 18:17
![]()
EiconicEiconic
3,1861 gold badge9 silver badges19 bronze badges
4
run the following command by creating a virtual enviroment using python 3 and run
pip3 install opencv-python
to check it has installed correctly run
python3 -c "import cv2"
answered May 26, 2019 at 17:05
![]()
HamzaMushtaqHamzaMushtaq
1,59413 silver badges13 bronze badges
In pip package management, there are 4 different OpenCV packages all using the same namespace, cv2. Although they are not officially supported by OpenCV.org, they are commonly used in developers’ community. You could install any of them using the following command:
pip install PACKAGE_NAME
where PACKAGE_NAME can be
opencv-python(only contains main modules)opencv-contrib-python(contains both main and contrib modules)opencv-python-headless(same asopencv-pythonbut without GUI functionality)opencv-contrib-python-headless(same asopencv-contrib-pythonbut without GUI functionality)
You should only install one of them depending on your needs. If you accidentally installed multiple of them in the same environment, you can remove them using pip uninstall before installing the correct one again.
For more details, you can refer to the project description of OpenCV on Wheels.
As of 2021, all of these 4 packages are official OpenCV projects. Source: OpenCV Website.
![]()
answered Jun 18, 2020 at 23:15
![]()
Jack ChanJack Chan
1,02710 silver badges15 bronze badges
0
To Install the Current Latest version of OpenCV then use the below commands:
Use this Command:
pip install --upgrade opencv-python
If you’re facing problem in above command then try this :
pip install --upgrade opencv-contrib-python
To check the version of installed OpenCV:
import cv2
print(cv2.__version__)
answered Apr 22, 2021 at 8:22
![]()
Amar KumarAmar Kumar
2,2242 gold badges23 silver badges33 bronze badges
2
Simply use this for the so far latest version 4.1.0.
pip install opencv-contrib-python==4.1.0.25
For the default version use this:
pip install opencv-contrib-python
If you have a new Raspberry Pi and want to install OpenCV then this tutorial would be a good choice.
For Ubuntu/Linux users:
sudo apt install python3-opencv
answered Sep 2, 2019 at 4:07
![]()
TreesTrees
1,19710 silver badges19 bronze badges
As of 10/22/2019, I think the best answer is simply
conda install opencv
It appears opencv is now in the main Anaconda channel.
To see which packages (including opencv) are in the main Anaconda channel go to Anaconda Package Lists and follow the link corresponding to your python version and os version.
answered Oct 22, 2019 at 19:05
![]()
user3731622user3731622
4,6176 gold badges42 silver badges78 bronze badges
Everybody struggles initially while installing OpenCV. OpenCV requires a lot of dependencies in the backend. The best way to start with OpenCV is, install it in a virtual environment. I suggest that you use the Python Anaconda distribution and create a virtual environment using it. Then inside the virtual environment, you can install OpenCV using this command:
conda install -c conda-forge opencv
![]()
KetZoomer
2,5733 gold badges14 silver badges39 bronze badges
answered May 26, 2019 at 6:34
![]()
1
Please follow the command:
pip install opencv-python
then if you want to use:
import cv2
If it’s not worked due to any update, please follow the documentation
answered Dec 30, 2021 at 17:45
![]()
Make a virtual enviroment using python3
virtualenv env_name --python="python3"
and run the following command
pip3 install opencv-python
to check it has installed correctly run
python3 -c "import cv2"
answered May 26, 2019 at 0:59
![]()
HamzaMushtaqHamzaMushtaq
1,59413 silver badges13 bronze badges
To install open_cv you can go to this website or do this,
pip install opencv-contrib-python --upgrade
pip install opencv-python
You can test it by:
C:> python
>>> import cv2
>>> print(cv2.__version__)
'4.5.1' # your version may be a newer one
answered Mar 1, 2021 at 23:13
![]()
You can install opencv the normal way:
pip install opencv-python
If you are getting errors, you can do this:
pip install opencv-python-headless
answered Feb 11, 2021 at 23:38
![]()
la39zzla39zz
2463 silver badges7 bronze badges
-
Open anaconda command prompt and type in below command.
conda install -c conda-forge opencv -
Once the ‘Solving environment’ is done. It will ask to download dependencies. Type ‘y’.
-
It will install all the dependencies and then you are ready to code.
![]()
answered Feb 24, 2019 at 4:26
![]()
user3136136user3136136
2472 silver badges9 bronze badges
1
I recommend this for Python 3: Please install it this way with pip
pip3 install opencv-python
This will download and install the latest version of OpenCV.
![]()
colidyre
3,76112 gold badges36 silver badges48 bronze badges
answered Feb 29, 2020 at 16:57
![]()
TManTMan
412 bronze badges
You could try using below command-
pip install opencv-contrib-python
It will basically download the compatible version. If this command fails, you could upgrade you pip using below command-
python -m pip install –upgrade pip
If you need a pictorial guide, head over to Simple Steps to Install OpenCV in Windows
You can also try installing OpenCV from prebuilt binaries from the official OpenCV site.
answered Jun 10, 2020 at 16:41
![]()
->pip install opencv-python you can use this.
But if this code does not working then you can check python version on cmd and anaconda because they are different. So you type command in anaconda prompt and cmd, it will work. You can check this -> pip list
![]()
marc_s
722k173 gold badges1320 silver badges1442 bronze badges
answered Feb 10, 2022 at 6:52
![]()
- Open terminal
- Run the following command
pip install --trusted-host=pypi.org --trusted-host=files.pythonhosted.org opencv-python. - Hope it will work.
answered Jul 24, 2019 at 11:57
![]()
Installing cv2 or opencv-python using pip is sometimes a problem. I was having the same problem of installing cv2 with pip. The installation wasn’t a problem the problem was to import cv2 after installation. I was getting an Import Error so to fix this i import main from pip to install opencv-python. Try to run the following code in your python file then opencv-python will be installed
from pip._internal import main as install
try:
    import cv2
except ImportError as e:
    install(["install", "opencv-python"])
finally:
    pass
I hope this will help someone
answered Oct 26, 2020 at 14:03
![]()
crispengaricrispengari
6,8294 gold badges40 silver badges47 bronze badges
As a reference it might help someone… On Debian system I hard to do the following:
apt-get install -y libsm6 libxext6 libxrender-dev
pip3 install opencv-python
python3 -c "import cv2"
answered Jun 15, 2020 at 10:01
![]()
user3719458user3719458
3463 silver badges12 bronze badges
On Ubuntu you can install it for the system Python with
sudo apt install python3-opencv
answered Oct 23, 2020 at 14:28
![]()
if you are using Pycharm navigate settings > Project:name > Project interpreter just search the module by name(in this case OpenCV-python) and install it. worked for me
answered Feb 21, 2020 at 10:16
![]()
1
In case you use aarch64 platform with ARM64 cpu — and/or docker
On a development board on ARM64, no python-opencv version were found at all
version: NONE.
I’ve had to build from source. This allowed to include CUDA support.
In my case it was already available on the board but it wasn’t found on the development environment.
If compiling from source is out of reach, there are Dockers
Of course compiling will take some time (few hours on ARM core), but it is worthy process to know as most open source tools can be built this way in case of issues.
answered Jun 9, 2020 at 13:43
![]()
AlsushiAlsushi
3523 silver badges12 bronze badges
I’ve had this problem in Google Colab, It only worked with this specific package version.
!pip install "opencv-python-headless<4.3"
answered Mar 7, 2022 at 21:31
![]()
malekmalek
9541 gold badge10 silver badges17 bronze badges
There are two options-
pip install cv2
or
pip install opencv-python
Hope it helps.
answered Jul 2, 2019 at 11:03
![]()
В этом руководстве мы узнаем, как использовать библиотеку OpenCV в Python. OpenCV – это библиотека с открытым исходным кодом, которая поддерживается несколькими платформами, включая Windows, Linux и MacOS, а также доступна для использования на нескольких других языках. Однако он чаще всего используется в Python для приложений машинного обучения, особенно в области компьютерного зрения.
Помимо кроссплатформенной поддержки и доступности на нескольких других компьютерных языках, что позволяет использовать разработанные на нем приложения в разных системах, OpenCV также, по сравнению с другими такими библиотеками, довольно эффективен с точки зрения вычислений, поскольку он использует вектор операций для большинства своих функций.
Рассмотрим установку OpenCV на Mac, Windows и Linux, операции с изображениями, арифметику изображений, сглаживание изображений и геометрические преобразования с использованием OpenCV.
Примечание. Поскольку мы собираемся использовать OpenCV на языке Python, неявно требуется, чтобы на вашей рабочей станции уже был установлен Python (версия 3). В зависимости от вашей ОС выполните одну из следующих команд, чтобы установить библиотеку OpenCV в вашей системе:
Windows
$ pip install opencv-python
MacOS
$ brew install opencv3 --with-contrib --with-python3
Linux
$ sudo apt-get install libopencv-dev python-opencv
Чтобы проверить, была ли ваша установка успешной, выполните следующую команду либо в оболочке Python, либо в командной строке или терминале:
import cv2
Если вы не получаете сообщение об ошибке при импорте cv2, значит, он был установлен правильно.
Основные операции с изображениями
Теперь, когда мы установили OpenCV на наши рабочие станции, давайте займемся некоторыми функциями, которые предлагает OpenCV.
Отображение изображения
Отображение изображения с помощью OpenCV – это двухэтапный процесс. Сначала мы должны его загрузить, а затем отобразить. Обе операции выполняются последовательно с использованием разных функций.
Чтобы отобразить изображение, нам нужно знать две вещи:
- Путь к изображению (работают как абсолютные, так и относительные пути).
- Режим чтения (чтение, запись и т.д.).
Для чтения или загрузки изображения мы будем использовать функцию cv2.imread(), имеющую два варианта. Первый – IMREAD_GRAYSCALE, который, как следует из названия, преобразует изображение в оттенки серого перед его чтением. Второй – IMREAD_UNCHANGED, который загружает изображение без вырезания альфа-канала. По умолчанию IMREAD_COLOR просто считывает цветное изображение, используя только каналы RGB.
Приведем пример кода:
import cv2

my_bike = cv2.imread('bike.png')
Это загрузит изображение велосипеда из файловой системы и сохранит его в переменной my_bike для дальнейших операций.
Примечание. Если вы получили сообщение об ошибке из приведенного выше кода, это может быть вызвано только тремя причинами. Во-первых, вы указали неверный путь, во-вторых, указанный вами файл изображения не существует, а во-вторых, что тип изображения (jpg, jpeg и png) в пути к изображению неверен.
Теперь давайте отобразим только что прочитанное изображение. Это можно сделать с помощью функции cv2.imshow().
cv2.imshow('my_bike', my_bike)
Первый параметр функции imshow() – это имя строки, которую вы хотите отобразить в окне изображения. Второй параметр – это обработчик изображения, который мы создали с помощью функции cv2.imread().
Сохранение
Сохранение изображения – очень часто используемая функция, так как нам может потребоваться обновить изображение и сохранить изменения в файловой системе для дальнейшего использования. OpenCV имеет функцию cv2.imwrite() для сохранения изображений.
Вот пример:
cv2.imwrite('bike.png', my_bike)
Здесь мы указываем имя и текущее местоположение изображения. Полученное изображение автоматически сохраняется в текущем рабочем каталоге.
Арифметические операции
Арифметические операции с изображениями относятся к сложению, вычитанию, умножению или делению нескольких изображений для создания нового изображения, которое представляет собой арифметическую комбинацию входных изображений. Арифметика изображений имеет множество применений, таких как добавление водяного знака к изображению, создание смешанной комбинации двух изображений, применение различных типов фильтров изображений и т.д.
Хотя существует множество операций, которые вы можете выполнять, мы покажем здесь только два примера, так как это позволит вам применить концепцию к другим арифметическим операциям, доступным в OpenCV. Первым примером будет добавление двух изображений, а вторым примером будет смешивание двух изображений.
Давайте закодируем эти два примера:
Добавление
import cv2

# Read in the two images
image_1 = cv2.imread('bike.jpg')
image_2 = cv2.imread('car.jpg')

# Sum the two image arrays for all channels
result = cv2.add(image_1, image_2)

cv2.imshow('result', result)
cv2.waitKey(0)
cv2.destroyAllWindows()
Команда waitKey будет ждать, пока вы нажмете клавишу, прежде чем она перейдет к следующей команде. Это полезно для того, чтобы программа продолжала отображать ваше изображение до тех пор, пока не будет нажата клавиша, в противном случае оно будет отображаться на долю секунды, а затем быстро исчезнет после того, как программа прекратит выполнение.
Смешивание
Смешивание изображений аналогично добавлению изображений, за исключением того, что можно управлять вкладом каждого изображения в новое результирующее изображение. По сути, если мы хотим, чтобы одно изображение было более сфокусированным, а другое – более тусклым при объединении, мы будем использовать смешивание, а не простое добавление.
Давайте закодируем это, чтобы прояснить дальше:
import cv2

# Read in the two images
image_1 = cv2.imread('bike.jpg')
image_2 = cv2.imread('car.jpg')

result = cv2.addWeighted(image_1, 0.9, image_2, 0.1)

cv2.imshow('result', result)
cv2.waitKey(0) # Wait for the user to press a key before continuing
cv2.destroyAllWindows()
Сумма весов, присвоенных функции addWeighted, должна быть равна 1.0. Вы также можете указать в конце скалярное значение, которое будет добавлено ко всем значениям пикселей полученного изображения.
Примечание: изображения могут быть любого типа, однако он должен быть одинаковым для всех изображений. Например, если вы используете формат PNG, все изображения, используемые для вычислений, также должны быть в формате PNG.
Сглаживание
Сглаживание изображений – очень полезная функция, которая в основном выполняется перед передачей изображений в модель машинного обучения. В основном это делается для удаления шумовых и высокочастотных элементов из изображений путем пропускания изображения через фильтр нижних частот. Существует множество фильтров, в том числе прямоугольный фильтр (усредняющий фильтр), медианный фильтр, модовый фильтр, фильтр Гаусса и многие другие. Однако, чтобы понять сглаживание изображения и то, как это сделать с помощью OpenCV, мы рассмотрим только блочный фильтр.
Допустим, у вас есть изображение размером 10×10, и вы хотите пропустить его через фильтр 3×3 или усредняющий, как бы вы это сделали?
Вы начнете с верхнего левого угла изображения, поместите туда свой фильтр 3×3 и замените центральный элемент средним значением всех 9 элементов. Это был первый шаг, теперь вы переместите свой фильтр на один шаг вправо и повторите тот же процесс, пока не покроете все изображение. Ниже для справки приведены примеры изображения 10×10 и усредняющего фильтра 3×3:
Фильтр:

Фильтр применяется к изображению 10×10:

Теперь, когда мы обсудили, как это работает, давайте попробуем и посмотрим, как мы можем применять различные фильтры к нашему изображению с помощью OpenCV. Внимательно прочтите комментарии, чтобы узнать, какая строка кода используется для какого фильтра:
import cv2

# Load the original image
original_image = cv2.imread('my_bike.png')

# Filter by passing image through 3x3 averaging filter
average_image = cv2.blur(original_image,(3,3))

# Apply 3x3 gaussian filter on the original image
gaussian_image = cv2.GaussianBlur((original_image,(3,3),0))

# Apply 3x3 median filter on the original image
median_image = cv2.medianBlur(original_image,3)
Примечание. Вы можете просмотреть полученные изображения, используя следующий дополнительный код:
import matplotlib.pyplot as plt

plt.imshow(average_image)
plt.show()
Преобразование изображений
Это последняя, но одна из самых важных тем, которые мы собираемся затронуть с помощью OpenCV. У него много приложений, но одно из самых распространенных в настоящее время – машинное обучение для увеличения данных, то есть, когда у вас нехватка набора данных, вы увеличиваете и трансформируете доступные в настоящее время изображения, чтобы сделать их отличными от вашего существующего набора данных. Это эффективно увеличивает размер вашего набора данных и может помочь в повышении точности вашей модели.
Список возможных преобразований длинный, включая масштабирование, аффинность, вращение, перевод и т.д. мы рассмотрим только два из них, используя OpenCV, чтобы получить общее представление. Однако OpenCV предоставляет вспомогательные функции для широкого их круга. Начнем с масштабирования.
Масштабирование
Проще говоря, масштабирование – это просто изменение размера вашего изображения, то есть его увеличение или уменьшение. resize – это функция, используемая для масштабирования изображений в OpenCV. У изменения размера есть три типа: INTER_CUBIC, INTER_LINEAR и INTER_AREA. Давайте закодируем пример, использующий эти функции для масштабирования. Пожалуйста, внимательно прочтите код, комментарии и описания, поскольку они объяснят, что именно происходит в коде:
import cv2
import numpy as np
import matplotlib.pyplot as plt

image = cv2.imread('my_bike.jpg')

# Scale up/expand both width and height by factor of 2
result_1 = cv2.resize(image, None, fx=2, fy=2, interpolation=cv2.INTER_CUBIC)

# Scale down/shrink both width and height by factor of 2
result_2 = cv2.resize(image, None, fx=2, fy=2, interpolation=cv2.INTER_AREA)

# Display the resulting images
plt.imshow(result_1)
plt.imshow(result_2)
plt.show()
Здесь, в функции изменения размера, параметр fx in представляет масштабный коэффициент для ширины, fy представляет масштабный коэффициент по высоте, а интерполяция определяет функцию, которая будет использоваться для масштабирования (сжатие или расширение).
Вращение
Вращение позволяет нам перемещать изображение вокруг оси на определенный заданный угол.
Прежде чем мы узнаем, как вращать наши изображения с помощью кода, мы должны знать, что существует матрица вращения, которая используется для выполнения этого преобразования. Мы не будем вдаваться в подробности этого, поскольку OpenCV позволяет нам очень просто вычислить эту матрицу с помощью одного вызова функции. Вы увидите это в приведенном ниже коде:
import cv2
import matplotlib.pyplot as plt

# Load the image of a bike
image = cv2.imread('my_bike.jpg',0)

# Rows and columns
r, c = image.shape

matrix = cv2.getRotationMatrix2D((cols/2,rows/2), 180, 1)
result = cv2.warpAffine(image,matrix,(c,r))

# Display resulting rotation
plt.imshow(result)
plt.show()
В функции getRotationMatrix2D 180 указывает степень поворота изображения, 1 – коэффициент масштабирования, вызов функции вернет матрицу поворота в переменной matrix.
Вызов функции warpAffine использует матрицу, которую мы вычислили из предыдущего метода, для поворота изображения в соответствии с нашими требованиями.
Заключение
В заключение давайте еще раз подчеркнем некоторые важные моменты, которые мы обсуждали в этой статье. OpenCV – это библиотека, доступная на нескольких языках, которая в основном используется вместе с NumPy, SciPy и Matplotlib, как мы видели в некоторых из приведенных выше примеров. Некоторые из его функций такие же, как в Matlab, и он также поддерживает векторизованные операции, что увеличивает вычислительную эффективность.
Кроме того, OpenCV – одна из лучших библиотек для области компьютерного зрения, и после прочтения этой статьи вы сможете продолжить поиск некоторых приложений компьютерного зрения и обучения, которые были разработаны с использованием OpenCV.