-
Configuration
The first step of the installation procedure is to configure the source tree for your system and choose the options you would like. This is done by running the
configurescript. For a default installation simply enter:./configureThis script will run a number of tests to determine values for various system dependent variables and detect any quirks of your operating system, and finally will create several files in the build tree to record what it found.
You can also run
configurein a directory outside the source tree, and then build there, if you want to keep the build directory separate from the original source files. This procedure is called a VPATH build. Here’s how:mkdir build_dircd build_dir/path/to/source/tree/configure [options go here]makeThe default configuration will build the server and utilities, as well as all client applications and interfaces that require only a C compiler. All files will be installed under
/usr/local/pgsqlby default.You can customize the build and installation process by supplying one or more command line options to
configure. Typically you would customize the install location, or the set of optional features that are built.configurehas a large number of options, which are described in Section 17.4.1.Also,
configureresponds to certain environment variables, as described in Section 17.4.2. These provide additional ways to customize the configuration. -
Build
To start the build, type either of:
makemake all(Remember to use GNU make.) The build will take a few minutes depending on your hardware.
If you want to build everything that can be built, including the documentation (HTML and man pages), and the additional modules (
contrib), type instead:make worldIf you want to build everything that can be built, including the additional modules (
contrib), but without the documentation, type instead:make world-binIf you want to invoke the build from another makefile rather than manually, you must unset
MAKELEVELor set it to zero, for instance like this:build-postgresql: $(MAKE) -C postgresql MAKELEVEL=0 allFailure to do that can lead to strange error messages, typically about missing header files.
-
Regression Tests
If you want to test the newly built server before you install it, you can run the regression tests at this point. The regression tests are a test suite to verify that PostgreSQL runs on your machine in the way the developers expected it to. Type:
make check(This won’t work as root; do it as an unprivileged user.) See Chapter 33 for detailed information about interpreting the test results. You can repeat this test at any later time by issuing the same command.
-
Installing the Files
Note
If you are upgrading an existing system be sure to read Section 19.6, which has instructions about upgrading a cluster.
To install PostgreSQL enter:
make installThis will install files into the directories that were specified in Step 1. Make sure that you have appropriate permissions to write into that area. Normally you need to do this step as root. Alternatively, you can create the target directories in advance and arrange for appropriate permissions to be granted.
To install the documentation (HTML and man pages), enter:
make install-docsIf you built the world above, type instead:
make install-worldThis also installs the documentation.
If you built the world without the documentation above, type instead:
make install-world-binYou can use
make install-stripinstead ofmake installto strip the executable files and libraries as they are installed. This will save some space. If you built with debugging support, stripping will effectively remove the debugging support, so it should only be done if debugging is no longer needed.install-striptries to do a reasonable job saving space, but it does not have perfect knowledge of how to strip every unneeded byte from an executable file, so if you want to save all the disk space you possibly can, you will have to do manual work.The standard installation provides all the header files needed for client application development as well as for server-side program development, such as custom functions or data types written in C.
Client-only installation: If you want to install only the client applications and interface libraries, then you can use these commands:
make -C src/bin installmake -C src/include installmake -C src/interfaces installmake -C doc installsrc/binhas a few binaries for server-only use, but they are small.
Uninstallation: To undo the installation use the command make uninstall. However, this will not remove any created directories.
Cleaning: After the installation you can free disk space by removing the built files from the source tree with the command make clean. This will preserve the files made by the configure program, so that you can rebuild everything with make later on. To reset the source tree to the state in which it was distributed, use make distclean. If you are going to build for several platforms within the same source tree you must do this and re-configure for each platform. (Alternatively, use a separate build tree for each platform, so that the source tree remains unmodified.)
If you perform a build and then discover that your configure options were wrong, or if you change anything that configure investigates (for example, software upgrades), then it’s a good idea to do make distclean before reconfiguring and rebuilding. Without this, your changes in configuration choices might not propagate everywhere they need to.
17.4.1. configure Options
configure‘s command line options are explained below. This list is not exhaustive (use ./configure --help to get one that is). The options not covered here are meant for advanced use-cases such as cross-compilation, and are documented in the standard Autoconf documentation.
17.4.1.1. Installation Locations
These options control where make install will put the files. The --prefix option is sufficient for most cases. If you have special needs, you can customize the installation subdirectories with the other options described in this section. Beware however that changing the relative locations of the different subdirectories may render the installation non-relocatable, meaning you won’t be able to move it after installation. (The man and doc locations are not affected by this restriction.) For relocatable installs, you might want to use the --disable-rpath option described later.
--prefix=PREFIX-
Install all files under the directory
PREFIXinstead of/usr/local/pgsql. The actual files will be installed into various subdirectories; no files will ever be installed directly into thePREFIXdirectory. --exec-prefix=EXEC-PREFIX-
You can install architecture-dependent files under a different prefix,
EXEC-PREFIX, than whatPREFIXwas set to. This can be useful to share architecture-independent files between hosts. If you omit this, thenEXEC-PREFIXis set equal toPREFIXand both architecture-dependent and independent files will be installed under the same tree, which is probably what you want. --bindir=DIRECTORY-
Specifies the directory for executable programs. The default is
EXEC-PREFIX/bin/usr/local/pgsql/bin. --sysconfdir=DIRECTORY-
Sets the directory for various configuration files,
PREFIX/etc --libdir=DIRECTORY-
Sets the location to install libraries and dynamically loadable modules. The default is
EXEC-PREFIX/lib --includedir=DIRECTORY-
Sets the directory for installing C and C++ header files. The default is
PREFIX/include --datarootdir=DIRECTORY-
Sets the root directory for various types of read-only data files. This only sets the default for some of the following options. The default is
PREFIX/share --datadir=DIRECTORY-
Sets the directory for read-only data files used by the installed programs. The default is
DATAROOTDIR --localedir=DIRECTORY-
Sets the directory for installing locale data, in particular message translation catalog files. The default is
DATAROOTDIR/locale --mandir=DIRECTORY-
The man pages that come with PostgreSQL will be installed under this directory, in their respective
mansubdirectories. The default isxDATAROOTDIR/man --docdir=DIRECTORY-
Sets the root directory for installing documentation files, except “man” pages. This only sets the default for the following options. The default value for this option is
DATAROOTDIR/doc/postgresql --htmldir=DIRECTORY-
The HTML-formatted documentation for PostgreSQL will be installed under this directory. The default is
DATAROOTDIR
Note
Care has been taken to make it possible to install PostgreSQL into shared installation locations (such as /usr/local/include) without interfering with the namespace of the rest of the system. First, the string “/postgresql” is automatically appended to datadir, sysconfdir, and docdir, unless the fully expanded directory name already contains the string “postgres” or “pgsql”. For example, if you choose /usr/local as prefix, the documentation will be installed in /usr/local/doc/postgresql, but if the prefix is /opt/postgres, then it will be in /opt/postgres/doc. The public C header files of the client interfaces are installed into includedir and are namespace-clean. The internal header files and the server header files are installed into private directories under includedir. See the documentation of each interface for information about how to access its header files. Finally, a private subdirectory will also be created, if appropriate, under libdir for dynamically loadable modules.
17.4.1.2. PostgreSQL Features
The options described in this section enable building of various PostgreSQL features that are not built by default. Most of these are non-default only because they require additional software, as described in Section 17.2.
--enable-nls[=LANGUAGES]-
Enables Native Language Support (NLS), that is, the ability to display a program’s messages in a language other than English.
LANGUAGESis an optional space-separated list of codes of the languages that you want supported, for example--enable-nls='de fr'. (The intersection between your list and the set of actually provided translations will be computed automatically.) If you do not specify a list, then all available translations are installed.To use this option, you will need an implementation of the Gettext API.
--with-perl-
Build the PL/Perl server-side language.
--with-python-
Build the PL/Python server-side language.
--with-tcl-
Build the PL/Tcl server-side language.
--with-tclconfig=DIRECTORY-
Tcl installs the file
tclConfig.sh, which contains configuration information needed to build modules interfacing to Tcl. This file is normally found automatically at a well-known location, but if you want to use a different version of Tcl you can specify the directory in which to look fortclConfig.sh. --with-icu-
Build with support for the ICU library, enabling use of ICU collation features (see Section 24.2). This requires the ICU4C package to be installed. The minimum required version of ICU4C is currently 4.2.
By default, pkg-config will be used to find the required compilation options. This is supported for ICU4C version 4.6 and later. For older versions, or if pkg-config is not available, the variables
ICU_CFLAGSandICU_LIBScan be specified toconfigure, like in this example:./configure ... --with-icu ICU_CFLAGS='-I/some/where/include' ICU_LIBS='-L/some/where/lib -licui18n -licuuc -licudata'
(If ICU4C is in the default search path for the compiler, then you still need to specify nonempty strings in order to avoid use of pkg-config, for example,
ICU_CFLAGS=' '.) --with-llvm-
Build with support for LLVM based JIT compilation (see Chapter 32). This requires the LLVM library to be installed. The minimum required version of LLVM is currently 3.9.
llvm-configwill be used to find the required compilation options.llvm-config, and thenllvm-config-$major-$minorfor all supported versions, will be searched for in yourPATH. If that would not yield the desired program, useLLVM_CONFIGto specify a path to the correctllvm-config. For example./configure ... --with-llvm LLVM_CONFIG='/path/to/llvm/bin/llvm-config'
LLVM support requires a compatible
clangcompiler (specified, if necessary, using theCLANGenvironment variable), and a working C++ compiler (specified, if necessary, using theCXXenvironment variable). --with-lz4-
Build with LZ4 compression support.
--with-zstd-
Build with Zstandard compression support.
--with-ssl=LIBRARY-
Build with support for SSL (encrypted) connections. The only
LIBRARYsupported isopenssl. This requires the OpenSSL package to be installed.configurewill check for the required header files and libraries to make sure that your OpenSSL installation is sufficient before proceeding. --with-openssl-
Obsolete equivalent of
--with-ssl=openssl. --with-gssapi-
Build with support for GSSAPI authentication. On many systems, the GSSAPI system (usually a part of the Kerberos installation) is not installed in a location that is searched by default (e.g.,
/usr/include,/usr/lib), so you must use the options--with-includesand--with-librariesin addition to this option.configurewill check for the required header files and libraries to make sure that your GSSAPI installation is sufficient before proceeding. --with-ldap-
Build with LDAP support for authentication and connection parameter lookup (see Section 34.18 and Section 21.10 for more information). On Unix, this requires the OpenLDAP package to be installed. On Windows, the default WinLDAP library is used.
configurewill check for the required header files and libraries to make sure that your OpenLDAP installation is sufficient before proceeding. --with-pam-
Build with PAM (Pluggable Authentication Modules) support.
--with-bsd-auth-
Build with BSD Authentication support. (The BSD Authentication framework is currently only available on OpenBSD.)
--with-systemd-
Build with support for systemd service notifications. This improves integration if the server is started under systemd but has no impact otherwise; see Section 19.3 for more information. libsystemd and the associated header files need to be installed to use this option.
--with-bonjour-
Build with support for Bonjour automatic service discovery. This requires Bonjour support in your operating system. Recommended on macOS.
--with-uuid=LIBRARY-
Build the uuid-ossp module (which provides functions to generate UUIDs), using the specified UUID library.
LIBRARYmust be one of:-
bsdto use the UUID functions found in FreeBSD and some other BSD-derived systems -
e2fsto use the UUID library created by thee2fsprogsproject; this library is present in most Linux systems and in macOS, and can be obtained for other platforms as well -
osspto use the OSSP UUID library
-
--with-ossp-uuid-
Obsolete equivalent of
--with-uuid=ossp. --with-libxml-
Build with libxml2, enabling SQL/XML support. Libxml2 version 2.6.23 or later is required for this feature.
To detect the required compiler and linker options, PostgreSQL will query
pkg-config, if that is installed and knows about libxml2. Otherwise the programxml2-config, which is installed by libxml2, will be used if it is found. Use ofpkg-configis preferred, because it can deal with multi-architecture installations better.To use a libxml2 installation that is in an unusual location, you can set
pkg-config-related environment variables (see its documentation), or set the environment variableXML2_CONFIGto point to thexml2-configprogram belonging to the libxml2 installation, or set the variablesXML2_CFLAGSandXML2_LIBS. (Ifpkg-configis installed, then to override its idea of where libxml2 is you must either setXML2_CONFIGor set bothXML2_CFLAGSandXML2_LIBSto nonempty strings.) --with-libxslt-
Build with libxslt, enabling the xml2 module to perform XSL transformations of XML.
--with-libxmlmust be specified as well.
17.4.1.3. Anti-Features
The options described in this section allow disabling certain PostgreSQL features that are built by default, but which might need to be turned off if the required software or system features are not available. Using these options is not recommended unless really necessary.
--without-readline-
Prevents use of the Readline library (and libedit as well). This option disables command-line editing and history in psql.
--with-libedit-preferred-
Favors the use of the BSD-licensed libedit library rather than GPL-licensed Readline. This option is significant only if you have both libraries installed; the default in that case is to use Readline.
--without-zlib-
Prevents use of the Zlib library. This disables support for compressed archives in pg_dump and pg_restore.
--disable-spinlocks-
Allow the build to succeed even if PostgreSQL has no CPU spinlock support for the platform. The lack of spinlock support will result in very poor performance; therefore, this option should only be used if the build aborts and informs you that the platform lacks spinlock support. If this option is required to build PostgreSQL on your platform, please report the problem to the PostgreSQL developers.
--disable-atomics-
Disable use of CPU atomic operations. This option does nothing on platforms that lack such operations. On platforms that do have them, this will result in poor performance. This option is only useful for debugging or making performance comparisons.
--disable-thread-safety-
Disable the thread-safety of client libraries. This prevents concurrent threads in libpq and ECPG programs from safely controlling their private connection handles. Use this only on platforms with deficient threading support.
17.4.1.4. Build Process Details
--with-includes=DIRECTORIES-
DIRECTORIESis a colon-separated list of directories that will be added to the list the compiler searches for header files. If you have optional packages (such as GNU Readline) installed in a non-standard location, you have to use this option and probably also the corresponding--with-librariesoption.Example:
--with-includes=/opt/gnu/include:/usr/sup/include. --with-libraries=DIRECTORIES-
DIRECTORIESis a colon-separated list of directories to search for libraries. You will probably have to use this option (and the corresponding--with-includesoption) if you have packages installed in non-standard locations.Example:
--with-libraries=/opt/gnu/lib:/usr/sup/lib. --with-system-tzdata=DIRECTORY-
PostgreSQL includes its own time zone database, which it requires for date and time operations. This time zone database is in fact compatible with the IANA time zone database provided by many operating systems such as FreeBSD, Linux, and Solaris, so it would be redundant to install it again. When this option is used, the system-supplied time zone database in
DIRECTORYis used instead of the one included in the PostgreSQL source distribution.DIRECTORYmust be specified as an absolute path./usr/share/zoneinfois a likely directory on some operating systems. Note that the installation routine will not detect mismatching or erroneous time zone data. If you use this option, you are advised to run the regression tests to verify that the time zone data you have pointed to works correctly with PostgreSQL.This option is mainly aimed at binary package distributors who know their target operating system well. The main advantage of using this option is that the PostgreSQL package won’t need to be upgraded whenever any of the many local daylight-saving time rules change. Another advantage is that PostgreSQL can be cross-compiled more straightforwardly if the time zone database files do not need to be built during the installation.
--with-extra-version=STRING-
Append
STRINGto the PostgreSQL version number. You can use this, for example, to mark binaries built from unreleased Git snapshots or containing custom patches with an extra version string, such as agit describeidentifier or a distribution package release number. --disable-rpath-
Do not mark PostgreSQL‘s executables to indicate that they should search for shared libraries in the installation’s library directory (see
--libdir). On most platforms, this marking uses an absolute path to the library directory, so that it will be unhelpful if you relocate the installation later. However, you will then need to provide some other way for the executables to find the shared libraries. Typically this requires configuring the operating system’s dynamic linker to search the library directory; see Section 17.5.1 for more detail.
17.4.1.5. Miscellaneous
It’s fairly common, particularly for test builds, to adjust the default port number with --with-pgport. The other options in this section are recommended only for advanced users.
--with-pgport=NUMBER-
Set
NUMBERas the default port number for server and clients. The default is 5432. The port can always be changed later on, but if you specify it here then both server and clients will have the same default compiled in, which can be very convenient. Usually the only good reason to select a non-default value is if you intend to run multiple PostgreSQL servers on the same machine. --with-krb-srvnam=NAME-
The default name of the Kerberos service principal used by GSSAPI.
postgresis the default. There’s usually no reason to change this unless you are building for a Windows environment, in which case it must be set to upper casePOSTGRES. --with-segsize=SEGSIZE-
Set the segment size, in gigabytes. Large tables are divided into multiple operating-system files, each of size equal to the segment size. This avoids problems with file size limits that exist on many platforms. The default segment size, 1 gigabyte, is safe on all supported platforms. If your operating system has “largefile” support (which most do, nowadays), you can use a larger segment size. This can be helpful to reduce the number of file descriptors consumed when working with very large tables. But be careful not to select a value larger than is supported by your platform and the file systems you intend to use. Other tools you might wish to use, such as tar, could also set limits on the usable file size. It is recommended, though not absolutely required, that this value be a power of 2. Note that changing this value breaks on-disk database compatibility, meaning you cannot use
pg_upgradeto upgrade to a build with a different segment size. --with-blocksize=BLOCKSIZE-
Set the block size, in kilobytes. This is the unit of storage and I/O within tables. The default, 8 kilobytes, is suitable for most situations; but other values may be useful in special cases. The value must be a power of 2 between 1 and 32 (kilobytes). Note that changing this value breaks on-disk database compatibility, meaning you cannot use
pg_upgradeto upgrade to a build with a different block size. --with-wal-blocksize=BLOCKSIZE-
Set the WAL block size, in kilobytes. This is the unit of storage and I/O within the WAL log. The default, 8 kilobytes, is suitable for most situations; but other values may be useful in special cases. The value must be a power of 2 between 1 and 64 (kilobytes). Note that changing this value breaks on-disk database compatibility, meaning you cannot use
pg_upgradeto upgrade to a build with a different WAL block size.
17.4.1.6. Developer Options
Most of the options in this section are only of interest for developing or debugging PostgreSQL. They are not recommended for production builds, except for --enable-debug, which can be useful to enable detailed bug reports in the unlucky event that you encounter a bug. On platforms supporting DTrace, --enable-dtrace may also be reasonable to use in production.
When building an installation that will be used to develop code inside the server, it is recommended to use at least the options --enable-debug and --enable-cassert.
--enable-debug-
Compiles all programs and libraries with debugging symbols. This means that you can run the programs in a debugger to analyze problems. This enlarges the size of the installed executables considerably, and on non-GCC compilers it usually also disables compiler optimization, causing slowdowns. However, having the symbols available is extremely helpful for dealing with any problems that might arise. Currently, this option is recommended for production installations only if you use GCC. But you should always have it on if you are doing development work or running a beta version.
--enable-cassert-
Enables assertion checks in the server, which test for many “cannot happen” conditions. This is invaluable for code development purposes, but the tests can slow down the server significantly. Also, having the tests turned on won’t necessarily enhance the stability of your server! The assertion checks are not categorized for severity, and so what might be a relatively harmless bug will still lead to server restarts if it triggers an assertion failure. This option is not recommended for production use, but you should have it on for development work or when running a beta version.
--enable-tap-tests-
Enable tests using the Perl TAP tools. This requires a Perl installation and the Perl module
IPC::Run. See Section 33.4 for more information. --enable-depend-
Enables automatic dependency tracking. With this option, the makefiles are set up so that all affected object files will be rebuilt when any header file is changed. This is useful if you are doing development work, but is just wasted overhead if you intend only to compile once and install. At present, this option only works with GCC.
--enable-coverage-
If using GCC, all programs and libraries are compiled with code coverage testing instrumentation. When run, they generate files in the build directory with code coverage metrics. See Section 33.5 for more information. This option is for use only with GCC and when doing development work.
--enable-profiling-
If using GCC, all programs and libraries are compiled so they can be profiled. On backend exit, a subdirectory will be created that contains the
gmon.outfile containing profile data. This option is for use only with GCC and when doing development work. --enable-dtrace-
Compiles PostgreSQL with support for the dynamic tracing tool DTrace. See Section 28.5 for more information.
To point to the
dtraceprogram, the environment variableDTRACEcan be set. This will often be necessary becausedtraceis typically installed under/usr/sbin, which might not be in yourPATH.Extra command-line options for the
dtraceprogram can be specified in the environment variableDTRACEFLAGS. On Solaris, to include DTrace support in a 64-bit binary, you must specifyDTRACEFLAGS="-64". For example, using the GCC compiler:./configure CC='gcc -m64' --enable-dtrace DTRACEFLAGS='-64' ...
Using Sun’s compiler:
./configure CC='/opt/SUNWspro/bin/cc -xtarget=native64' --enable-dtrace DTRACEFLAGS='-64' ...
17.4.2. configure Environment Variables
In addition to the ordinary command-line options described above, configure responds to a number of environment variables. You can specify environment variables on the configure command line, for example:
./configure CC=/opt/bin/gcc CFLAGS='-O2 -pipe'
In this usage an environment variable is little different from a command-line option. You can also set such variables beforehand:
export CC=/opt/bin/gccexport CFLAGS='-O2 -pipe'./configure
This usage can be convenient because many programs’ configuration scripts respond to these variables in similar ways.
The most commonly used of these environment variables are CC and CFLAGS. If you prefer a C compiler different from the one configure picks, you can set the variable CC to the program of your choice. By default, configure will pick gcc if available, else the platform’s default (usually cc). Similarly, you can override the default compiler flags if needed with the CFLAGS variable.
Here is a list of the significant variables that can be set in this manner:
BISON-
Bison program
CC-
C compiler
CFLAGS-
options to pass to the C compiler
CLANG-
path to
clangprogram used to process source code for inlining when compiling with--with-llvm CPP-
C preprocessor
CPPFLAGS-
options to pass to the C preprocessor
CXX-
C++ compiler
CXXFLAGS-
options to pass to the C++ compiler
DTRACE-
location of the
dtraceprogram DTRACEFLAGS-
options to pass to the
dtraceprogram FLEX-
Flex program
LDFLAGS-
options to use when linking either executables or shared libraries
LDFLAGS_EX-
additional options for linking executables only
LDFLAGS_SL-
additional options for linking shared libraries only
LLVM_CONFIG-
llvm-configprogram used to locate the LLVM installation MSGFMT-
msgfmtprogram for native language support PERL-
Perl interpreter program. This will be used to determine the dependencies for building PL/Perl. The default is
perl. PYTHON-
Python interpreter program. This will be used to determine the dependencies for building PL/Python. If this is not set, the following are probed in this order:
python3 python. TCLSH-
Tcl interpreter program. This will be used to determine the dependencies for building PL/Tcl. If this is not set, the following are probed in this order:
tclsh tcl tclsh8.6 tclsh86 tclsh8.5 tclsh85 tclsh8.4 tclsh84. XML2_CONFIG-
xml2-configprogram used to locate the libxml2 installation
Sometimes it is useful to add compiler flags after-the-fact to the set that were chosen by configure. An important example is that gcc‘s -Werror option cannot be included in the CFLAGS passed to configure, because it will break many of configure‘s built-in tests. To add such flags, include them in the COPT environment variable while running make. The contents of COPT are added to both the CFLAGS and LDFLAGS options set up by configure. For example, you could do
make COPT='-Werror'
or
export COPT='-Werror'make
Note
If using GCC, it is best to build with an optimization level of at least -O1, because using no optimization (-O0) disables some important compiler warnings (such as the use of uninitialized variables). However, non-zero optimization levels can complicate debugging because stepping through compiled code will usually not match up one-to-one with source code lines. If you get confused while trying to debug optimized code, recompile the specific files of interest with -O0. An easy way to do this is by passing an option to make: make PROFILE=-O0 file.o.
The COPT and PROFILE environment variables are actually handled identically by the PostgreSQL makefiles. Which to use is a matter of preference, but a common habit among developers is to use PROFILE for one-time flag adjustments, while COPT might be kept set all the time.
Сейчас мы с Вами рассмотрим процесс установки новой версии СУБД PostgreSQL 9.5 на операционную систему Windows 7, а также узнаем, что нового появилось в этой версии и где ее можно скачать.
07.01.2016 года вышла новая версия СУБД PostgreSQL, а именно PostgreSQL 9.5, но прежде чем приступать к рассмотрению новых возможностей предлагаю вспомнить, что вообще такое PostgreSQL, а потом уже перейти к установке и обзору новой версии.
Содержание
- Что такое PostgreSQL?
- Что нового в PostgreSQL 9.5?
- Где скачать PostgreSQL 9.5 для Windows 7?
- Установка PostgreSQL 9.5 на Windows 7
- Шаг 1
- Шаг 2
- Шаг 3
- Шаг 4
- Шаг 5
- Шаг 6
- Шаг 7
- Шаг 8
- Запускаем pgAdmin и проверяем работу PostgreSQL 9.5
PostgreSQL — это бесплатная и популярная во всем мире объектно-реляционная система управления базами данных (СУБД). PostgreSQL реализована для многих операционных систем, например, таких как: Linux, Solaris, Windows. В ней используется процедурное расширение языка SQL PL/pgSQL.
Заметка! Что такое СУБД.
Что нового в PostgreSQL 9.5?
В данной версии появилось достаточно много новых возможностей, которые будут очень полезны для разработчиков, вот некоторые из них:
- INSERT, ON CONFLICT UPDATE (UPSERT) – данная возможность позволяет обработать ситуацию, когда осуществить добавления данных через INSERT нельзя, например, из-за нарушения уникальности или недопустимости значения в одном из полей. Другими словами, вместо того чтобы выдавать ошибку можно просто пропустить выполнение оператора, т.е. ничего не делать или изменить связанные с ключевым полем данные, т.е. в случае, когда запись уже существует, вместо INSERT выполнить UPDATE;
- ROLLUP, CUBE и GROUPING SETS – эти операторы расширяют возможности GROUP BY, а именно позволяют формировать отчеты, т.е. писать запросы, в которых можно добавлять строки с промежуточным и общим итогом, а также объединять результаты нескольких группировок в один набор данных. В Microsoft SQL Server аналогичные операторы существуют уже достаточно давно, и мы с Вами их подробно рассматривали вот в этом материале;
- Row-Level Security (RLS) – это так называемая «Политика безопасности на уровне строк» т.е. теперь можно ограничивать доступ к данным в таблице;
- BRIN-индексы – это новый тип индексов, который предназначен для обработки очень больших таблиц, в которых определенные столбцы естественным образом отсортированы;
- Ускоренная сортировка – в PostgreSQL 9.5 при сортировке теперь используется так называемый алгоритм «сокращенных ключей», который позволяет в несколько раз быстрей сортировать текстовые данные и данные типа NUMERIC.
Более подробно обо всех нововведениях в PostgreSQL 9.5 можете посмотреть на странице в «PostgreSQL Wiki» вот она What’s new in PostgreSQL 9.5.
Где скачать PostgreSQL 9.5 для Windows 7?
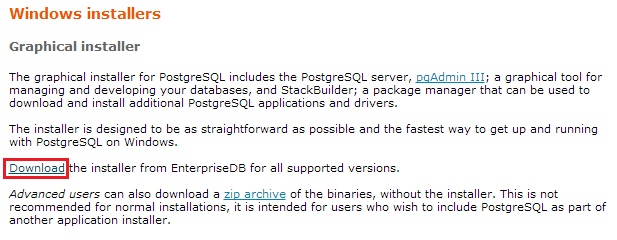
Скачать PostgreSQL 9.5 можно со страницы загрузки официального сайта вот здесь — http://www.postgresql.org/download/windows/
После того как Вы перешли на страницу необходимо нажать «Download»
Затем Вас перенаправят на страницу выбора версии PostgreSQL, в нашем случае мы в разделе «Version 9.5.0» выбираем «Win x86-32» для 32 разрядной Windows или «Win x86-64» для 64 разрядной. У меня 32 разрядная Windows 7, поэтому я и щелкаю по кнопке «Win x86-32».
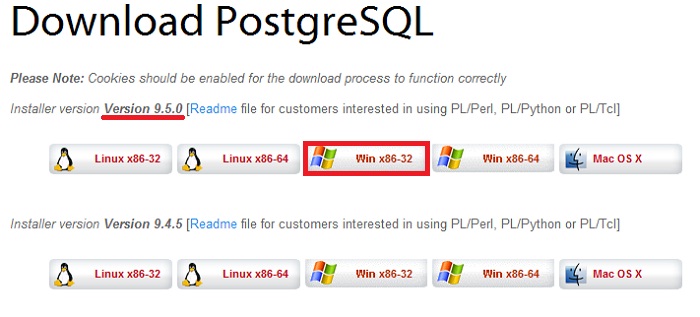
В итоге загрузится файл postgresql-9.5.0-1-windows.exe, который мы и будем использовать для установки PostgreSQL.
Заметка! Установка и настройка PostgreSQL 12 на Debian 10.
Установка PostgreSQL 9.5 на Windows 7
Итак, давайте перейдем к установке PostgreSQL 9.5, мы, кстати, с Вами ранее уже рассматривали установку PostgreSQL, например, для начинающих я показывал, как можно установить PostgreSQL на Linux OpenSUSE 13.2, а в материале «Установка PostgreSQL 9.4 на CentOS 7.1» мы разбирали, как можно реализовать так называемый сервер СУБД с использованием PostgreSQL и операционной системы Linux на примере дистрибутива CentOS 7.1. Установку PostgreSQL на операционную систему Windows мы не рассматривали, поэтому сегодня мы и будем устанавливать PostgreSQL 9.5 на Windows 7.
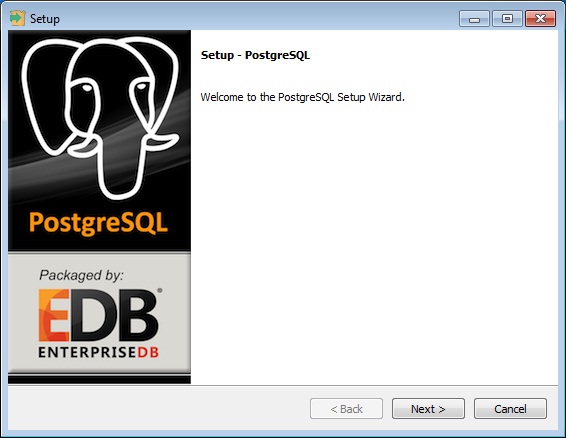
Шаг 1
Запускаем скаченный файл (postgresql-9.5.0-1-windows.exe). В итоге запустится программа установки и первое окно это окно «Приветствия», жмем «Next».
Шаг 2
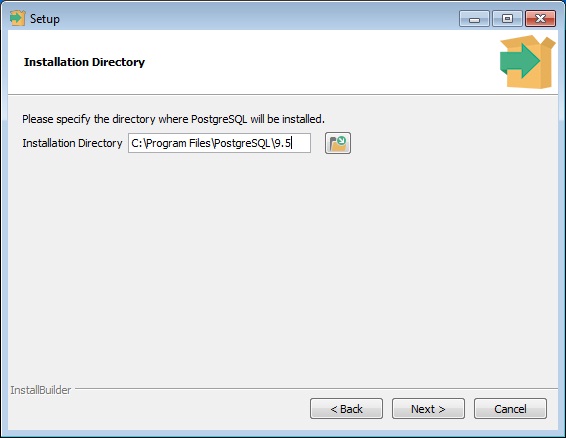
В следующем окне мы указываем каталог, в который необходимо установить PostgreSQL, я оставлю по умолчанию (т.е. на диск C), жмем «Next».
Шаг 3
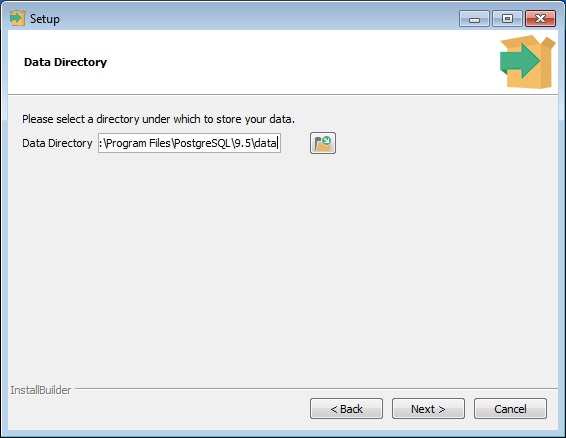
Далее указываем каталог, в котором по умолчанию будут располагаться файлы баз данных. Другими словами здесь при установке Вы можете изменить директорию для хранения файлов баз данных, это может потребоваться в тех случаях, когда количество баз данных будет большое или их размер, т.е. объем будет значительным, как Вы понимаете в этих случаях лучше указать отдельный диск достаточного объема. В моем случае это тестовая установка, поэтому я оставлю по умолчанию, жмем «Next».
Заметка! Как перенести базу данных PostgreSQL на другой сервер с помощью pgAdmin 4.
Шаг 4
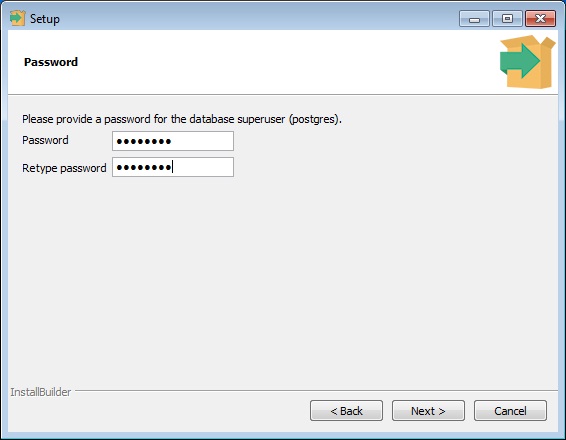
Затем придумываем, вводим и запоминаем пароль для пользователя postgres (необходимо вводить один и тот же пароль в два поля, для подтверждения), именно этот пользователь является своего рода «Суперпользователем» т.е. главным администратором, жмем «Next».
Шаг 5
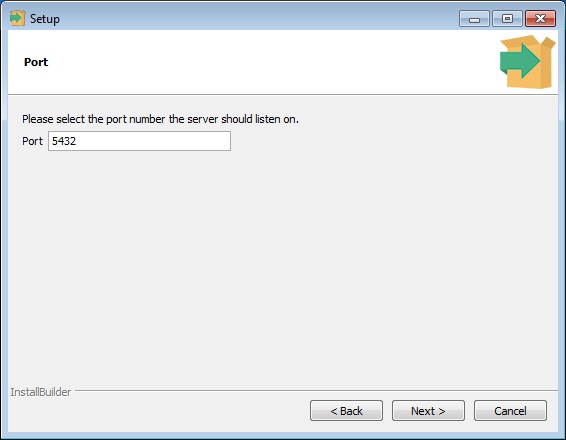
Далее указываем порт, на котором будет работать наш экземпляр PostgreSQL, я снова оставлю по умолчанию, т.е. 5432, жмем «Next».

Шаг 6
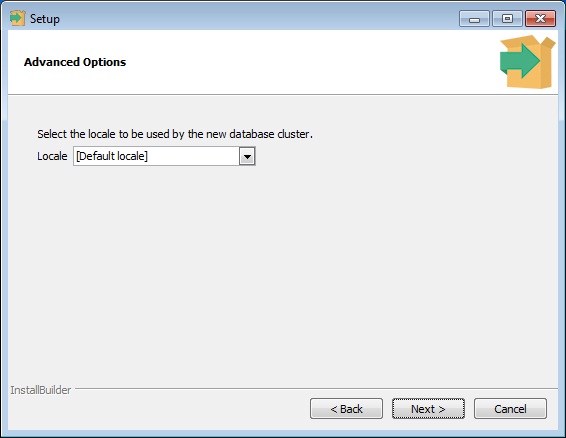
Потом указываем Locale (данный параметр определяет кодировку данных в базе), если оставить по умолчанию, то кодировка данных в базах данных будет UTF-8, но если Вам необходимо чтобы кодировка была другая допустим Windows-1251, то необходимо выбрать «Russia, Russia», я оставлю по умолчанию, т.е. «Default locale», жмем «Next».
Шаг 7
Все готово для установки, жмем «Next».
Установка началась, процесс будет длиться буквально пару минут.
Шаг 8
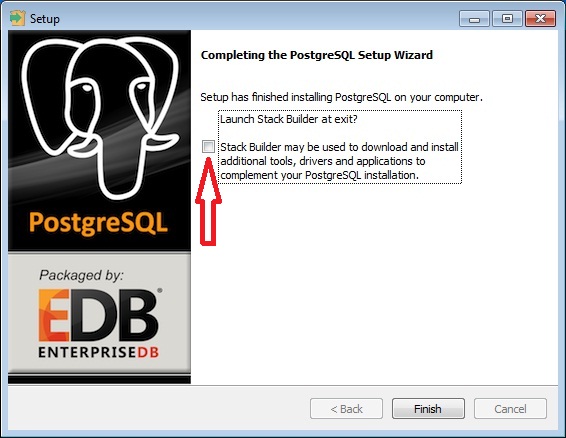
Установка будет завершена и на последнем окне нам предложат запустить инструмент (Stack Builder) для установки дополнительных компонентов PostgreSQL, если Вы не хотите ничего дополнительного устанавливать, необходимо снять соответствующую галочку, жмем «Finish».
Заметка! Как создать таблицу в PostgreSQL с помощью pgAdmin 4.
Запускаем pgAdmin и проверяем работу PostgreSQL 9.5
В состав инсталлятора PostgreSQL 9.5 включен pgAdmin 1.22.0, т.е. дополнительно, отдельно устанавливать pgAdmin на компьютер, на который Вы устанавливаете PostgreSQL 9.5, не нужно.
Если кто не знает pgAdmin это специальная графическая среда программирования и администрирования для СУБД PostgreSQL.
Для того чтобы запустить pgAdmin нажимаем «Пуск ->Все программы ->PostgreSQL 9.5 ->pgAdmin III»
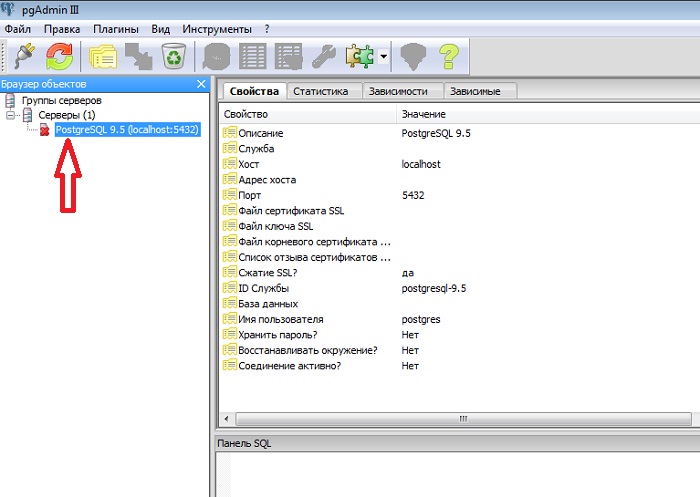
У нас уже будет отображен локальный сервер мы к нему и должны подключиться, щелкаем двойным кликом по «PostgreSQL 9.5 (localhost:5432)».
Заметка! Если Вас интересует язык SQL, то рекомендую почитать книгу «SQL код» – это самоучитель по языку SQL для начинающих программистов. В ней язык SQL рассматривается как стандарт, чтобы после прочтения данной книги можно было работать с языком SQL в любой системе управления базами данных.
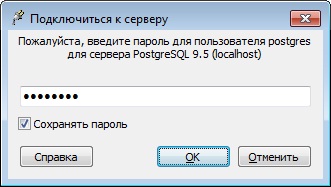
Затем необходимо ввести пароль, который мы придумали, когда устанавливали PostgreSQL 9.5 (чтобы не вводить пароль каждый раз можете поставить галочку «Сохранять пароль»). Жмем «ОК».
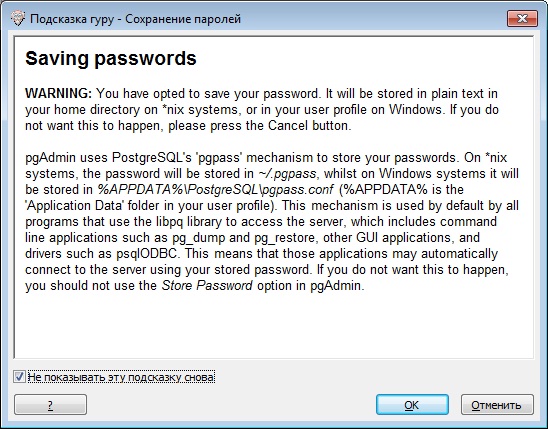
Если галочку «Сохранять пароль» Вы поставили, то далее появится окно с предупреждением того, что сохранение паролей небезопасно, так как пароль будет храниться в виде простого текста в файле pgpass.conf который расположен в директории профиля пользователя Windows. Жмем «ОК».
И если установка прошла успешно, то далее у Вас произойдет подключение к серверу PostgreSQL.
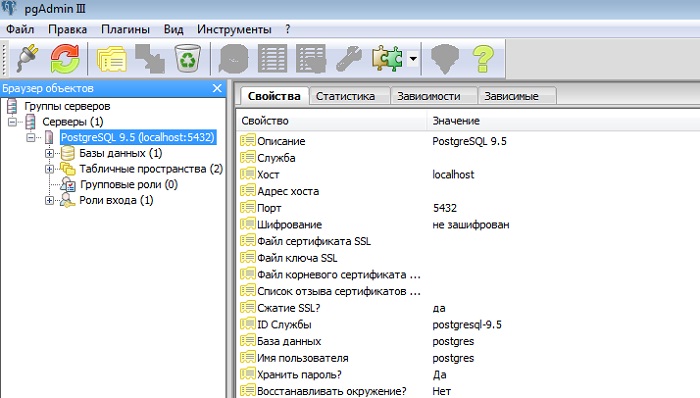
Чтобы посмотреть на версию PostgreSQL, давайте напишем простой SQL запрос в базе данных, которая создается по умолчанию, т.е. в postgres.
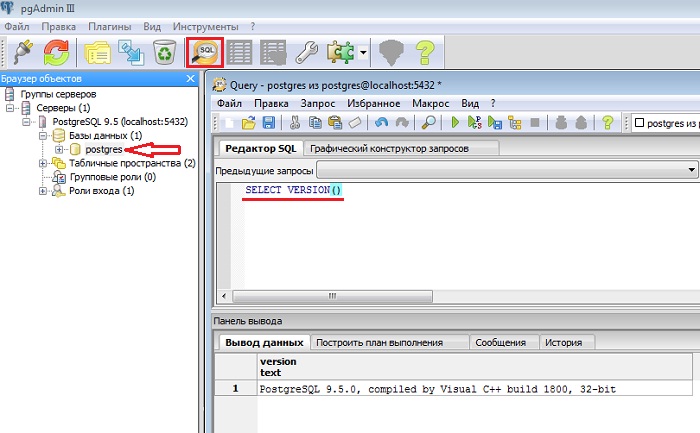
Заметка! Как создать составной тип данных в PostgreSQL.
На этом у меня все, удачи!
Маленькое предисловие
С момента выхода прошлой статьи об установке PostgreSQL 8.3 на Windows XP прошло уже довольно много времени. Надеюсь, что она помогла части людей произвести это нехитрое действие. Статья расползлась по другим сайтам, некоторые из которых просто и незатейливо выкинули из неё отметку об авторе. Тем не менее, пришла пора снова написать об одном и том же, хотя установка PostgreSQL и тогда не вызывала никаких проблем, как не вызывает их и сейчас.
Проблема в том, что надо хотя бы обладать какими-то базовыми знаниями в администрировании PostgreSQL, чтобы устанавливать сервер PostgreSQL. На форуме постоянно задают вопросы не зная даже элементарных вещей и основ. Особенно свирепствуют игроки покера и владельцы программы Holdem Manager, которые мало того, что ничего кроме покера не знают, так и знать не хотят. Например, я ведь не прихожу на покерный форум не читая правил покера и не требую на пальцах объяснить мне как выйграть миллион. Мне же тоже не очень интересно поддерживать пользователей коммерческих программ на бесплатной основе, тем более, что эти пользователи никогда ничего не сделают полезного для сообщества PostgreSQL, выступая исключительно как потребители.
Итак! Страдальцами Windows посвящается….
Версии PostgreSQL 9.x и исходные данные
Начиная с версии 9.0 для Windows предоставляются собранные версии как 32-bit так и 64-bit. В данной статье рассматривалась установка 64-битной версии PostgreSQL 9.0.1 на 64-битную версию Windows 7 Home Basic. Установка производилось от пользователя, имеющего административные права. Не вижу причин и каких-либо препятствий, по которым установка 32-битной версии чем-то отличалась от 64-битной, а также каких-то принципиальных различий между Windows 7 Home Basic и другими редакциями Windows 7.
Поехали
Берём архив с установкой PostgreSQL. Я взял версию 9.0.1 прямо с этой странички. Сохраняем в любой временный каталог, например c:tmp. Запускаем. После стандартного предупреждения Windows о том, что мы пытаемся запустить приложение от стороннего разработчика, на что мы отвечаем утвердительно, начинается процесс установки:

Как видим, сперва появляется картинка, о том, что Windows конфигурирует библиотеку Visual C++. Не зная подробностей, рискну предположить, что эта библиотека распространяется с PostgreSQL для Windows, потому что PostgreSQL на платформе Windows компилировался на Visual C++. Тем не менее, появляется следующая картинка, уже более имеющая отношение к установке:

Это начальное диалоговое окно, предлагающее вам начать установку. Щёлкаем по Next и получаем следующее окно:

В этом диалоговом окне вам предлагается указать каталог, в который будет устанавливаться PostgreSQL. Лично меня вполне устроил путь, предложенный по умолчанию инсталлятором, поэтому я нажал Next и получил следующее окно:

В этом диалоговом окне вам предлагается указать каталог, в котором будут хранится файлы с базами данных. Это довольно удобно и разработчики логично предположили, что многие могут захотеть хранить данные на других дисках, скажем более быстрых, для увеличения производительности БД. Раньше, конечно, это тоже можно было настроить через файл конфигурации, но теперь это можно сделать уже на этапе установки. Лично меня вполне устроил путь, предложенный по умолчанию инсталлятором, поэтому я нажал Next и получил следующее окно:

Ну вот мы и добрались до первого и многочисленного источника вопросов на форуме. Просто куча народу спрашивает какой пароль вводить? Неужели так трудно прочитать что написано? Ну да, я понимаю, что кто-то в школе на уроках английского тупо спал, а кто-то изучал немецкий, но ведь есть же языковые инструменты Google, где в большинстве случаев можно быстро получить вполне осмысленный перевод непонятной английской фразы! Опять ломает? Ладно, перевожу специально для таких: «Пожалуйста, предоставьте пароль для суперпользователя баз данных (postgres) и учётной записи службы (postgres). Если учётная запись службы уже существует в Windows, вы должны ввести текущий пароль этой учётной записи. Если данная учётная запись не существует, она будет создана, когда вы нажмёте Next«
Всё ещё непонятно? Тогда для тех, кто не читал документацию, объясняю на пальцах. Есть в Windows учётные записи пользователей. Наверняка вы сейчас работаете под одной из них, ибо учётная запись всегда имеет имя пользователя. Так вот, PostgreSQL в Windows работает не от администратора, а тоже от имени учётной записи пользователя, имя которого postgres. Сделано это было прежде всего из соображений безопасности, чтобы никакие вредители не смогли получить права администратора, даже если они каким-то образом найдут дыру в безопасности самого PostgreSQL. Далее. В самой СУБД PostgreSQL есть такой специальный пользователь — суперпользователь, который имеет максимальные права внутри СУБД, т.е. может создавать или удалять любые базы данных и любых пользователей. Он тоже имеет имя postgres. Несмотря на то, что имена пользователей учётной записи и суперпользователя PostgreSQL одинаковы — это разные пользователи, никак не связанные друг с другом. Но для того, чтобы вы потом не путались с разными паролями, вам предлагают задать один и тот же пароль для них обоих.
Многие спрашивают: а что делать, если мы ставим PostgreSQL повторно, а старый пароль забыли? Интересно, а голову они дома не забывают, когда уходят на работу или погулять? Иначе как раздолбайством такое не назовёшь. Однако, читайте внимательно специальный FAQ, там есть ответ на вопрос, что можно сделать в таком случае.
Итак, пароль ввели, поехали дальше Next:

В этом окне вам предлагается указать другой порт TCP/IP для PostgreSQL. Не вижу причин менять тот, который предлагается по умолчанию. Щёлкаем Next:

В этом окне вам предлагается выбрать локаль, с использованием которой будет инициализирован кластер баз данных и которая в дальнейшем будет использоваться по умолчанию при создании других баз данных. Это довольно важный шаг, ибо локаль определяет такой важный параметр как кодировка данных в базах. На картинке вы видите, что я выбрал «Russia, Russia». В этом случае, кодировка вашей БД будет windows-1251. Возможно, это именно то, что вам нужно, но большинство людей всё-таки предпочитает работать с кодировкой UTF-8. Эта кодировка будет установлена в том случае, если в данном окне вы выберите локаль по умолчанию: «by default». Перед тем как выбрать локаль хорошенько подумайте. Если вы устанавливаете PostgreSQL для обеспечения работы какого-либо приложения, прочтите документацию к нему, возможно это приложение требует какую-то конкретную кодировку. После того, как вы выбрали локаль, щёлкаете Next:

Инсталлятор вам радостно говорит. что он типа готов наконец начать установку. Щёлкаем Next. Начинается процесс копирования файлов в указанный ранее каталог. После чего в этом же окошке вы увидите:

где советую обратить внимание на слова: «Initialising database cluster» (инициализирую кластер баз данных), означающие, что копирование файлов закончено и создаётся первая база данных, которая будет затем использоваться как шаблон для всех остальных баз. Через некоторое время эта надпись сменяется на «starting database server» (запускаю сервер баз данных), что означает запуск службы сервера PostgreSQL. После чего появляется окно окончания установки:

Здесь нам предлагается ещё запустить инструмент установки дополнительных компонентов PostgreSQL, но мне это не интересно, поэтому снимаю галочку и щёлкаю на Finish
Это всё! Установка завершена! Особо параноидальные товарищи, могут запустить Диспетчер Задач, щёлкнуть по вкладке Службы и убедиться, что PostgreSQL работает:

Вопросы по pgAdminIII
Многие задают вопрос. Вот я запустил pgAdminIII, ярлык на который появляется в меню Пуск сразу после установки, а там мне рисует картинку, где сервер PostgreSQL перечёркнут красным крестиком, вот так:

«памажите, добрые люди, а чо делать та?»
Ну хотя бы соединение с сервером установить для начала, для чего тупо дважды щёлкнуть по этому самому значку сервера, перечёркнутому красным крестиком. Появится окошко, в котором вас попросит ввести пароль для пользователя postgres, тот самый пароль который вы вводили раннее, при установке. Если вы введёте его правильно, красный крестик исчезнет и окно pgAdminIII примет вид:

Подключение к серверу PostgreSQL с помощью утилиты командной строки psql
Показываю на картинке:

Обратите внимание, что утилите ЯВНО нужно указать с каким пользователем производить подключение к серверу и опять же ввести тот самый пароль, о котором так много писалось выше.
Ещё обратите внимание на предупреждающее сообщение о несовпадении текущей кодировки в консоли и кодировки сервера. Дело в том, что согласно нашей установке мы выбрали ранее локаль Russia, Russia, что привело к выбору кодировки windows-1251, но консоль (командная строка) Windows работает в кодировке cp866 и это надо понимать и учитывать при дальнейшей работе
В заключение
На предмет возможных грабель при установке (и откуда их только берут и как умудряются наступить) не забудьте прочитать раздел «Проблемы при установке» в моём специальном FAQ.
Авторские права
Автором данного документа является: Виктор Вислобоков
Первоначальное местоположение данного документа: http://postgresql.ru.net/docs/win7_inst.html
Разрешается свободное использование данного документа в электронном виде, копирование, распространение, размещение на web-сайтах при условии обязательного сохранения данного раздела об авторских правах, а также при условии открытого и бесплатного доступа к этому документу. Любое коммерческое использование материалов данного документа, а также использование в печатных изданиях разрешается только с письменного согласия автора.
| Вложение | Размер |
|---|---|
| 1.png | 10.29 kb |
| 2.png | 53.18 kb |
| 3.png | 14.9 kb |
| 4.png | 14.13 kb |
| 5.png | 15.84 kb |
| 6.png | 11.82 kb |
| 7.png | 13 kb |
| 8.png | 12.24 kb |
| 9.png | 14.74 kb |
| 10.png | 58.79 kb |
| 11.png | 37.64 kb |
| 12.png | 42.12 kb |
| 13.png | 43.56 kb |
| 14.png | 11.42 kb |
Today I was helping a colleague of mine to install and configure PostgreSQL 9.1 to his laptop which was running on Windows 7. We had several problems with the one click installer and after the installation process was finished, we could not start the PostgreSQL database.
Since we could not solve this problem in a reasonable amount of time, we had to use the binary zip distribution. The installation process was quite straightforward but it took some time because I could not find a decent tutorial about it. This blog entry is written to fill that void. Also, even though this blog entry describes the installation process of PostgreSQL 9.1, these instructions should be valid for older versions of PostgreSQL as well.
The required steps are described with more details in later Sections of this blog entry.
Preparing the PostgreSQL 9.1 Installation
This process has two steps:
- Download and install the Microsoft Visual C++ 2008 redistributable package.
- Download and unpack the PostgreSQL binary distribution.
These steps are described with more details in the following.
The first step (installing the Microsoft Visual C++ 2008 redistributable package) might not be required anymore. One reader said that he was able to run PostgreSQL without installing it. However, another reader claimed that he had to install Microsoft Visual C++ 2013 redistributable package before he could run PostgreSQL 9.5.
Nevertheless, I will leave it here because you still need to do it if you install older PostgreSQL versions by using the binary zip distribution. I am not sure which PostgreSQL versions require the Microsoft Visual C++ 2008 distributable package, but if I remember correctly, I had to install it when I installed PostgreSQL 9.1.
Downloading the Microsoft Visual C++ 2008 Redistributable Package
The first step is to download and install the Microsoft Visual C++ 2008 redistributable package.
Downloading and Unpacking the PostgreSQL binary distribution
The second step is to download the binary zip distribution.
After you have downloaded the binary zip distribution, you can unzip the binary distribution to the preferred directory. When this is done, the target directory should contain a directory called ‘pgsql’. This directory contains the binaries of PostgreSQL 9.1. I will refer this directory simply as POSTGRESQL_ROOT (Remember to replace the string POSTGRESQL_ROOT with the actual directory path of you installation when following these instructions).
The next step is to create the data and log directories for your PostgreSQL installation. This is done by creating the following directories to the POSTGRESQL_ROOT directory:
- The ‘data’ directory contains the data files of your PostgreSQL installation.
- The ‘log’ directory contains the logs of your PostgreSQL installation.
You have now finished the needed preparations and can move on to the next phase of the installation process.
Configuring the PostgreSQL 9.1 Installation
The next step is to create a new PostgreSQL database cluster. You can do this by using the initdb command which is found from the POSTGRESQL_ROOTbin directory. You can create the database cluster by running the following command from the bin directory of your PostgreSQL installation:
initdb -U postgres -A password -E utf8 -W -D POSTGRESQL_ROOTdata
The command line parameters of the initdb command are described in following:
- -U postgres means that the superuser account of your database is called ‘postgres’.
- -A password means that password authentication is used.
- -E utf8 means that the default encoding will be UTF-8.
- -W means that you will enter the superuser password manually.
- -D POSTGRESQL_ROOTdata specifies the data directory of your PostgreSQL installation.
After you have successfully created the database cluster, your PostgreSQL installation is ready to be used. You can start and stop your database instance by using the following commands:
The database can be started by running the following command:
"POSTGRESQL_ROOT/bin/pg_ctl" -D "POSTGRESQL_ROOT/data" -l "POSTGRESQL_ROOT/log/pgsql.log" start
The database can be stopped by running the following command:
"POSTGRESQL_ROOT/bin/pg_ctl" -D "POSTGRESQL_ROOT/data" -l "POSTGRESQL_ROOT/log/pgsql.log" stop
To make things as easy as possible, you should create new shortcuts to your desktop and use them for starting and stopping the database server.
Note: If you want to run PostgreSQL as a service, you should run the following command:
POSTGRESQL_ROOT/bin/pg_ctl.exe register -N "postgresql" -U "NT AUTHORITYNetworkService" -D "POSTGRESQL_ROOT/data" -w
After you have done this, you can start the service by using the Services panel.
Congratulations
Your PostgreSQL 9.1 installation should now be functional. The next step is to start the database server by using the created shortcut and verify that you can connect to your database instance. You can use the PgAdmin database management tool for this task and congratulate yourself for a job well done.
Системы управления реляционными базами данных (СУБД) могут хранить большой объем данных, используя табличную структуру базы данных. РСУБД широко используются для выполнения операций с базами данных, таких как создание, администрирование и управление малыми и большими рабочими нагрузками.
PostgreSQL — фантастический инструмент для использования, но запустить его в Windows может быть немного сложно. Таким образом, позвольте нам рассказать вам, как настроить PostgreSQL в Windows и как можно скорее приступить к работе с базой данных.
PostgreSQL — это программное обеспечение для управления базами данных, основанное на SQL. Это программное обеспечение корпоративного уровня известно своей универсальностью и масштабируемостью. Его гибкость позволяет одновременно обрабатывать различные уровни рабочих нагрузок с одной или нескольких машин. Более того, он может без проблем работать со всем складом одновременно работающих пользователей.
PostgreSQL заслужил прочную репутацию благодаря своей проверенной архитектуре, надежности, целостности данных, надежным наборам функций и расширяемости. Приверженность сообществу разработчиков ПО с открытым исходным кодом позволяет этому ПО постоянно предлагать высокопроизводительные и инновационные решения.
Как установить PostgreSQL в Windows
Процесс установки PostgreSQL в Windows немного отличается от его аналогов в Linux. Вам необходимо установить сервер базы данных Postgre и графический инструмент для администрирования базы данных.
Хотя вы можете загрузить их оба по отдельности, вам все равно придется настраивать их вместе, что само по себе может стать проблемой. Поэтому лучше всего загрузить и установить комплектный установщик.
Чтобы запустить установку, посетите официальный Сайт PostgreSQL и выберите Скачать. На следующей странице выберите Windows, поскольку мы загружаем совместимую версию для ОС Windows.
На странице установщика Windows нажмите Загрузить установщик. В разделе «Поддержка платформы» вы найдете некоторую релевантную информацию для каждой из выпущенных версий. Лучше всего отметить последнюю версию, доступную для скачивания.
Нажав на «Загрузить установщик», вы попадете на страницу загрузки базы данных PostgreSQL. В зависимости от версии вашего компьютера вы можете выбрать Windows x86-64 или Windows x86-32.
Выберите последнюю версию PostgreSQL в диалоговом окне и нажмите кнопку загрузки рядом с ней. Это должно начать загрузку установки.
После загрузки EXE-файла щелкните по нему, чтобы начать установку. Программа установки спросит вас о целевом каталоге и деталях компонента.
Из списка компонентов вы можете выбрать одно из следующего:
-
Сервер PostgreSQL
-
pgAdmin4
-
Строитель стека
-
Инструменты командной строки
Связанный: Как установить и настроить Microsoft SQL Server на Ubuntu
Рекомендуется установить все четыре флажка, поскольку каждое приложение будет полезно в ближайшем будущем.
На следующем экране вам нужно будет установить супер-пароль для суперпользователя базы данных. Создайте пароль и нажмите Далее.
На следующем экране оставьте номер порта без изменений и нажмите Далее. Вы должны увидеть сводку перед установкой, в которой перечислены все детали, которые вы настроили. Просмотрите каждый аспект установки и, если все в порядке, нажмите «Далее».
Появится диалоговое окно «Готово к установке». Щелкните Далее, чтобы начать установку.
Подключение к PostgreSQL с помощью pgAdmin4
Есть два способа подключить PostgreSQL к серверу. Вы можете использовать обычный метод командной строки или инструмент pgAdmin, который предварительно загружается после процесса установки в Windows.
Подключение к PostgreSQL с помощью приложения pgAdmin
-
Запустите приложение pgAdmin из папки с файлами программы или с помощью функции поиска Windows.
-
Войдите в клиент pgAdmin, используя мастер-пароль, который вы использовали в процессе установки.
-
Нажмите на опцию Create Server и введите необходимые данные, такие как Host, Port, Maintenance Database, Username и Password.
-
Нажмите на опцию Сохранить. Созданный сервер теперь отображается на вкладке слева.
-
Дважды щелкните имя сервера и введите пароль для подключения к серверу PostgreSQL.
Подключение к PostgreSQL с помощью командного окна
После установки вы можете найти оболочку SQL (PSQL) в меню «Пуск». Здесь вы будете вводить любые соответствующие команды SQL.
Чтобы вывести список всех доступных баз данных с помощью PSQL, введите l и нажмите Enter.
Как создать новую базу данных в PostgreSQL
Чтобы создать новую базу данных, введите CREATE DATABASE test, где test — это имя базы данных.
Чтобы получить доступ к новой базе данных, закройте терминал PSQL и снова откройте его. Приложение запомнит имя сервера, порт, имя пользователя и пароль, которые вы использовали в прошлый раз.
Перед повторным подключением измените имя Postgres на имя установленной вами базы данных, затем нажмите Enter.
Как создавать и отображать таблицы в PostgreSQL
Чтобы создать таблицу в существующей базе данных, используйте следующую команду:
СОЗДАТЬ ТАБЛИЦУ ЛИЦО (
ID BIGSERIAL NOT NULL PRIMARY KEY,
ИМЯ VARCHAR (100) НЕ NULL,
COUNTRY VARCHAR (50) NOT NULL);
Эта команда создаст таблицу person в тесте базы данных и также добавит к ней несколько имен переменных. Настройте эти переменные в соответствии со своими потребностями.
Чтобы вывести список всех таблиц в базе данных, используйте команду dt. Если вы используете эту команду с приведенным выше примером, вы заметите, что в базе данных Test есть только одна таблица с именем Person.
Связанный: Как создать таблицу в SQL
Как изменить учетные данные корневого пользователя
Вы можете изменить пароль Postgres после входа в систему как пользователь root. Для этого используйте следующую команду:
ALTER USER postgres PASSWORD ‘newpassword’;
Измените новый пароль на пароль по вашему выбору.
Создание и удаление роли пользователя в PostgreSQL
Многие люди одновременно работают над проектом с разными ролями. Вы можете создавать разные роли, которые имеют разный доступ в PostgreSQL, используя консоль Windows. Вы также можете выбрать, следует ли предоставлять статус суперпользователя вновь созданной роли.
Чтобы предоставить кому-либо доступ, запустите консоль Windows и измените каталог по умолчанию на каталог bin PostgreSQL (например, C: Program Files PostgreSQL 9.0 bin) или добавьте этот каталог в переменную среды Path.
Теперь используйте в консоли следующий код:
createuser.exe —createdb —username postgres —no-createrole —pwprompt openpg
Вы можете изменить команды, чтобы изменить привилегии ролей. Вам будет предложено выбрать статус суперпользователя для роли. Введите y для Да или n для Нет, а затем назначьте пароль для создания новой роли.
Вы можете удалить роль пользователя из списка других пользователей, используя следующую команду:
УДАЛИТЬ имя ПОЛЬЗОВАТЕЛЯ [, …];
Работа с PostgreSQL в Windows
PostgreSQL — невероятный инструмент для надежного и надежного управления базами данных. Процесс установки Windows относительно прост и требует всего нескольких щелчков мышью для настройки и запуска.
Как установить PostgreSQL? Для Microsoft Windows, Mac OS X и Linux существует один установщик. Его можно скачать здесь. Кликните по иконке нужной версии установки PostgreSQL, соответствующей вашей операционной системе.
В некоторых из инструкций предполагается, что вы устанавливаете PostgreSQL 9.1. Если устанавливаете более новую версию, замените в этих инструкциях 9.1 на номер инсталлируемой вами версии СУБД.
- Запустите установку
- Настройка PostgreSQL
- Перезапустите службу PostgreSQL
- Настройка типов данных
- Создайте пользователя csadmin
- Дополнительная настройка
Когда программа попросит выбрать один из вариантов, сделайте следующее:
- Когда вас попросят выбрать локаль, выберите UTF-8. Если варианта UTF-8 в списке нет, выберите вариант UTF-8 в списке локалей для языка. Например, en_US.UTF-8 для английского языка США;
- Если программа попросит установить StackBuilder – он инсталлирует некоторые дополнительные инструменты Web, репликации и ODBC, которые не требуются для CollectionSpace. Но может потребоваться инсталляция некоторых модулей PostgreSQL, таких как PostGIS.
Обратите внимание, что некоторые из перечисленных выше параметров могут не отображаться в зависимости от версии PostgreSQL и операционной системы.
Чтобы установленный PostgreSQL работал с CollectionSpace, необходимо настроить пользователей и изменить некоторые параметры.
- Найдите конфигурационный файл pg_hba.conf. Он расположен в подкаталоге data каталога, в котором установлена PostgreSQL;
- Откройте этот файл в текстовом редакторе и следуйте приведенным ниже инструкциям;
В Mac OS X по умолчанию это папка /Library/PostgreSQL/9.1.
В Mac OS X нужно иметь права супер пользователя, чтобы редактировать любой из следующих файлов конфигурации.
- Убедитесь, что для «local section» указано последнее слово md5, а не ident:
# "local" is for Unix domain socket connections only
local   all             all                                     md5
- Измените раздел «IPv4 local connections» следующим образом:
# IPv4 local connections:
host    all             csadmin         samehost                md5
Это ограничивает набор пользователей PostgreSQL, которым предоставляется локальный доступ к трем базам данных, используемым CollectionSpace: jbossdb, nuxeo и cspace. Например, только пользователь с именем cspace или супер пользователь PostgreSQL с именем postgres может получить доступ к базе данных cspace с локальной машины.
При установке PostgreSQL 9.x на Windows 7 может не принять термин samehost в столбце CIDR-ADDRESS. Если это произойдет, используйте адресную форму 127.0.0.1/32:
# IPv4 local connections:
host    all             csadmin        127.0.0.1/32            md5
- Убедитесь, что записи в разделе «IPv6 local connections» отключены. В качестве первого символа в строках указывается символ хэш (#), если только в вашей системе не активен IPv6:
# IPv6 local connections:
#host    all             all             ::1/128                 md5
Современные системы, работающие под управлением Windows 7 и Windows Vista, могут поставляться с включенным по умолчанию IPv6. Если в вашей системе включен IPv6, можно поэкспериментировать со следующей конфигурацией — указать ::1/128 для адреса localhost:
# IPv6 local connections:

host    all             csadmin        ::1/128                 md5
- Если нужно разрешить создание отчетов при подключении к БД с удаленных хостов, тогда следует добавить запись, подобную приведенной ниже, но указав свой адрес подсети. Приведенная ниже конфигурация позволит создавать отчеты удаленно с хостов в определенной подсети UC Berkeley. Для получения дополнительной информации о том, как указать адрес подсети, ознакомьтесь с документацией по pg_hba.conf для используемого релиза PostgreSQL.
host all cspace_reader 169.229.0.0/16 md5
Чтобы автор отчетов мог работать, придется внести еще одно изменение в значение listen_addresses в файле postgresql.conf. Подробнее о поиске этого файла рассказано ниже.
Если вы можете контролировать доступ к PostgreSQL через брандмауэр, то проще ввести значение listen_addresses «*». Для большей безопасности можно ввести список разделенных запятыми IP-адресов, с которых будут связываться авторы отчетов.
Далее после PostgreSQL установки и настройки Windows нужно внести изменения в конфигурационный файл PostgreSQL:
- Найдите файл postgresql.conf, находящийся в папке data каталога, в котором установлен PostgreSQL;
- Откройте этот файл в текстовом редакторе и внесите следующие изменения:
max_prepared_transactions = 64
Значение переменной max_prepared_transactions, равное 64, может оказаться большим для вашей системы. Если это так, установите меньшее значение.
Если это значение действительно слишком велико для вашей системы, вы получите сообщение об ошибке при перезапуске PostgreSQL:
Restarting PostgreSQL … database server: main The PostgreSQL server failed to start. Please check the log output … FATAL: could not create shared memory segment: …
Если при запуске сервера после установки PostgreSQL выводятся сообщения об ошибках, обратитесь к разделу «Сбои при запуске сервера» в документации PostgreSQL по запуску сервера.
Linux:
Если вы являетесь пользователем root или sudo, можно выполнить следующую команду:
service postgresql restart
Mac:
Убедитесь, что вы являетесь пользователем postgres:
sudo su - postgres
pg_ctl restart -D /Library/PostgreSQL/9.1/data
Флаг -D указывает местоположение каталога данных PostgreSQL, который также может быть установлен как переменная среды PGDATA. По умолчанию его можно найти по адресу /Library/PostgreSQL/9.1/data.
Если при попытке запустить pg_ctl вы получаете сообщение об ошибке «not found», попробуйте указать полный путь к этому файлу в подкаталоге bin каталога, в котором установлен PostgreSQL. Например: /Library/PostgreSQL/9.1/bin/pg_ctl restart -D /Library/PostgreSQL/9.1/data
Чтобы добавить PGDATA в качестве глобальной переменной среды в / etc / profile, выполните следующие шаги:
sudo vi /etc/profile
Затем добавьте следующую строку:
export PGDATA=»/Library/PostgreSQL/9.1/data»
После этого можно будет выполнить предыдущую команду для перезапуска сервера PostgreSQL без флага -D.
Windows:
При установке PostgreSQL Windows у вас должны быть права администратора. Кликните правой кнопкой мыши по ярлыку «Мой компьютер» и выберите пункт «Управление». В пользовательском интерфейсе «Управление» выберите «Службы и приложения» — «Службы». Найдите службу PostgreSQL («postgresql-9.0 — PostgreSQL Server 9.0»), выберите ее и нажмите на кнопку «Перезапустить службу».
Откройте консоль PostgreSQL для базы данных template1:
Если при попытке запустить psql на экране появится сообщение not found», попробуйте указать полный путь к этому файлу в подкаталоге bin; например на Mac OS X: /Library/PostgreSQL/9.1/bin/psql.
Linux:
Выполните в консоли две следующие команды:
su - postgres
psql -d template1   #open the database template1
Mac:
Под пользователем postgres выполните следующие две команды:
Sudo su - postgres
Psql -d template1
При первом запуске команды psql на OS X 10.8.X вы можете увидеть сообщение об ошибке:
dyld: Library not loaded: @loader_path/../lib/libssl.dylib
  Referenced from: /usr/lib/libpq.5.dylib
  Reason: Incompatible library version: libpq.5.dylib requires version 1.0.0 or later, but libssl.0.9.8.dylib provides version 0.9.8
Это связано с тем, как Homebrew в Mac OS X и Mountain Lion конфликтуют с определенными системными библиотеками. Решение этой проблемы заключается в том, чтобы скопировать и связать версии библиотеки. PostgreSQL упакован в /usr/lib, где библиотеки хранятся в Mountain Lion.
sudo cp /Library/PostgreSQL/9.1/lib/libssl.1.0.0.dylib /usr/lib
sudo cp /Library/PostgreSQL/9.1/lib/libcrypto.1.0.0.dylib /usr/lib
sudo ln -fs /usr/lib/libssl.1.0.0.dylib /usr/lib/libssl.dylib
sudo ln -fs /usr/lib/libcrypto.1.0.0.dylib /usr/lib/libcrypto.dylib
Еще одним решением может стать пересмотр Homebrew и проверка совместимости с Mountain Lion.
При установке PostgreSQL на Mac OS X в один клик создается ярлык для оболочки PostgreSQL в каталоге Applications / PostgreSQL 9.0 /. Нажмите SQL Shell (psql).app, чтобы открыть новое окно терминала с запущенным psql.
Из этого окна терминала можно получить доступ к базе данных template1, введя:
psql c template1
Windows:
psql запускается из командной строки (cmd) Windows. Убедитесь, что путь к папке postgres bin хранится в переменной PATH, или просто вызовите ее с полным путем к месту расположения исполняемого файла psql:
psql -d template1 -U postgres
Выполните команды консоли:
CREATE FUNCTION pg_catalog.text(integer) RETURNS text STRICT IMMUTABLE LANGUAGE SQL AS 'SELECT textin(int4out($1));';
CREATE CAST (integer AS text) WITH FUNCTION pg_catalog.text(integer) AS IMPLICIT;
COMMENT ON FUNCTION pg_catalog.text(integer) IS 'convert integer to text';

CREATE FUNCTION pg_catalog.text(bigint) RETURNS text STRICT IMMUTABLE LANGUAGE SQL AS 'SELECT textin(int8out($1));';
CREATE CAST (bigint AS text) WITH FUNCTION pg_catalog.text(bigint) AS IMPLICIT;
COMMENT ON FUNCTION pg_catalog.text(bigint) IS 'convert bigint to text';
Для PostgreSQL установки и настройки в командной строке psql (заканчивающейся на #) переключитесь с базы данных template1 на postgres, введя следующее:
c postgres
Введите следующую команду, чтобы создать пользователя csadmin с соответствующими привилегиями. Не забудьте заменить пароль replacemewithyourpassword в приведенном ниже примере на пароль по вашему выбору.
CREATE ROLE csadmin LOGIN PASSWORD ‘replacemewithyourpassword’ SUPERUSER INHERIT NOCREATEDB NOCREATEROLE NOREPLICATION;
В результате вы должны увидеть сообщение, подобное этому: CREATE ROLE.
Закройте программу psql, введя q (или нажав Ctrl + d).
Теперь перезапустите сервер PostgreSQL еще раз (как описано выше).
Дополнительная настройка базы данных является необязательной! CollectionSpace будет выполняться, даже если ни одно из описанных ниже действий не будет выполнено.
Ниже приведена обобщенная версия инструкций, размещенных здесь. Если вы хотите получить более подробную информацию, пожалуйста, обратитесь к этой странице.
PostgreSQL установка и настройка Windows выполняется через postgresql.conf. Откройте этот файл в текстовом редакторе и отредактируйте следующие значения:
shared_buffers = 512MB
Теперь через командную строку задайте значение kernel.shmmax. Оно должно как минимум равняться shared_buffer + 128MB:
sysctl kernel.shmmax=650000000
Затем перезапустите сервер PostgreSQL. Если на экране появится сообщение об ошибке, то нужно будет увеличить значение kernel.shmax.
Затем необходимо определить окончательное значение shmmax:
Откройте файл /etc/sysctl.conf.
vim /etc/sysctl.conf
И добавьте следующую строку — заменив значение для shmmax:
kernel.shmmax = 650000000
Наконец, установите необходимое значение cache_size:
Для этого запустите (и выведите статистику в мегабайтах):
free -m
В результате на экране вы увидите что-то наподобие этого:
free -m
             total       used       free     shared    buffers     cached
Mem:          4096       3302        793          0       253        1226
-/+ buffers/cache:       1822       2273
Swap:          511        216        295
Эффективное значение для cache_size определяется путем сложения значений buffers и cached. В приведенном выше примере:
253 + 1226 = 1479
К этому числу добавляется значение shared_buffers, поэтому в общей сложности мы получаем:
1479 + 512 = 1991 ~ 2 ГБ
Снова отредактируйте файл postgres.conf и установите эффективный размер кэша — значение, выведенное нами в предыдущих шагах:
effective_cache_size = 2GB
Также задайте следующие значения:
work_mem = 16MB                         # min 64kB
maintenance_work_mem = 32MB             # min 1MB
random_page_cost = 2.0
Перезагрузите установленный PostgreSQL, чтобы изменения вступили в силу.
Мы закончили настройку PostgreSQL. Обратите внимание, что приведенные в этом разделе значения являются примерными. Их необходимо устанавливать в соответствии с настройками вашей системы. Более подробную информацию о настройках можно найти здесь.
Let’s install PostgreSQL onto your operating system.
As an open source object-relational database management system, PostgreSQL available for MacOS, Linux, and Windows.
Goal for each Operating System
The goal will be to run the following command successfully from the command line (regardless of the OS):
psql -U postgres
This should open the psql interactive shell and print a prompt that looks like:
postgres=#
Installation per OS:
MacOS:
Let’s walk through installing PostgreSQL with the postgresapp on Mac.
- Visit http://postgresapp.com/
- Download the most recent version —> Click «Download»
- Open the application, and click «initialize» to create a new PostgreSQL server
- Ensure that the Postgres.app bin folder has been added to your $PATH;
4.1) In the command line, enter:echo "$PATH"
4.2) Search through the output and make sure Postgres.app/Contents/Version/latest/bin is there
in order to ensure that this directory’s executables are callable from any directory in bash. - In the command line, enter:
lsof -i tcp:5432, and ensure that the postgresCOMMANDappears.
This checks if the Postgres server is now running on port 5432 under the namelocalhost:postgresql
Linux:
- Acquire the source code:
wget ftp://ftp.postgresql.org/pub/source/v9.3.2/postgresql-9.3.2.tar.bz2 - Install the packages needed for building Postgres:
sudo apt-get install build-essential libreadline-dev zlib1g-dev flex bison libxml2-dev libxslt-dev libssl-dev
Windows:
- Download the installer specified by EnterpriseDB for all supported PostgreSQL versions. The installer is available here:
https://www.postgresql.org/download/windows/