
Requests — это элегантная и простая HTTP-библиотека для Python, созданная для людей. Одна из самых известных библиотек для python, используемых разработчиками по всему миру. Эта статья посвящена тому, как можно установить библиотеку python в Windows/ Linux/ macOS и т.д.
Установка
Windows
Для установки запросов в Windows потребуется Python (желательно последней версии), поэтому, если у вас не установлен python, перейдите к – Как загрузить и установить последнюю версию Python в Windows. Теперь откройте командную строку из окна и выполните следующую команду:
python -m pip install requestsБум..!! Теперь все готово, библиотека запросов успешно загружена.
Linux
Для установки запросов в Linux потребуется Python (предпочтительно последней версии) и последняя версия pip, поэтому, если у вас не установлен python, перейдите к – Как загрузить и установить последнюю версию Python в Linux. Чтобы установить pip в linux – Как установить PIP в Linux?.
pip install requestsmacOS
Для установки запросов на Mac потребуется Python (предпочтительно последней версии) и pip последней версии, поэтому, если у вас не установлен python, перейдите к – Как загрузить и установить последнюю версию Python на mac«. Для установки pip mac Os
sudo easy_install pip sudo pip install --upgrade pip Теперь для установки запросов:
pip install requestsАльтернативный общий метод
Последний способ установки запросов в любой операционной системе-захватить базовые файлы и установить запросы вручную, и запросы активно разрабатываются на GitHub, где код всегда доступен. Для кода – посетите здесь.
Вы можете либо клонировать общедоступный репозиторий:
git clone git://github.com/psf/requests.gitИли скачайте tarball:
curl -OL https://github.com/psf/requests/tarball/master
# optionally, zipball is also available (for Windows users).
Как только у вас появится копия исходного кода, вы сможете легко встроить его в свой собственный пакет Python или установить в пакеты вашего сайта:
cd requests
pip install
Для документации библиотеки запросов – посетите здесь
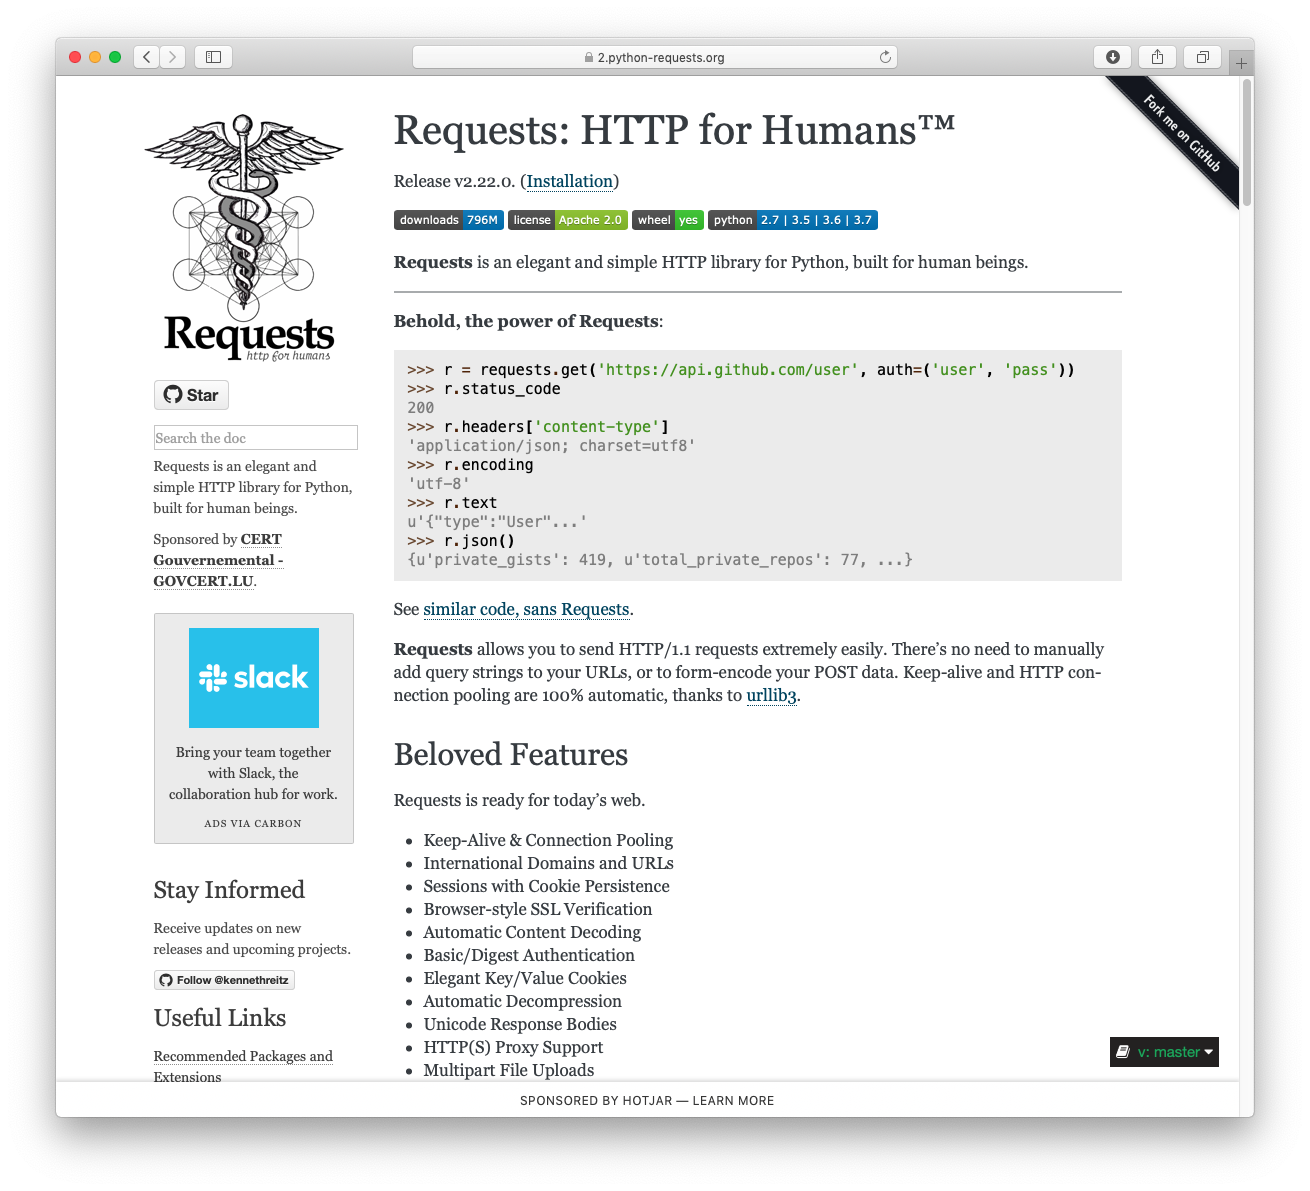
Requests is a simple, yet elegant, HTTP library.
>>> import requests
>>> r = requests.get('https://httpbin.org/basic-auth/user/pass', auth=('user', 'pass'))
>>> r.status_code
200
>>> r.headers['content-type']
'application/json; charset=utf8'
>>> r.encoding
'utf-8'
>>> r.text
'{"authenticated": true, ...'
>>> r.json()
{'authenticated': True, ...}
Requests allows you to send HTTP/1.1 requests extremely easily. There’s no need to manually add query strings to your URLs, or to form-encode your PUT & POST data — but nowadays, just use the json method!
Requests is one of the most downloaded Python packages today, pulling in around 30M downloads / week— according to GitHub, Requests is currently depended upon by 1,000,000+ repositories. You may certainly put your trust in this code.

Installing Requests and Supported Versions
Requests is available on PyPI:
$ python -m pip install requests
Requests officially supports Python 3.7+.
Supported Features & Best–Practices
Requests is ready for the demands of building robust and reliable HTTP–speaking applications, for the needs of today.
- Keep-Alive & Connection Pooling
- International Domains and URLs
- Sessions with Cookie Persistence
- Browser-style TLS/SSL Verification
- Basic & Digest Authentication
- Familiar
dict–like Cookies - Automatic Content Decompression and Decoding
- Multi-part File Uploads
- SOCKS Proxy Support
- Connection Timeouts
- Streaming Downloads
- Automatic honoring of
.netrc - Chunked HTTP Requests
API Reference and User Guide available on Read the Docs
Cloning the repository
When cloning the Requests repository, you may need to add the -c fetch.fsck.badTimezone=ignore flag to avoid an error about a bad commit (see
this issue for more background):
git clone -c fetch.fsck.badTimezone=ignore https://github.com/psf/requests.git
You can also apply this setting to your global Git config:
git config --global fetch.fsck.badTimezone ignore
Requests
Requests is a simple, yet elegant, HTTP library.
>>> import requests
>>> r = requests.get('https://httpbin.org/basic-auth/user/pass', auth=('user', 'pass'))
>>> r.status_code
200
>>> r.headers['content-type']
'application/json; charset=utf8'
>>> r.encoding
'utf-8'
>>> r.text
'{"authenticated": true, ...'
>>> r.json()
{'authenticated': True, ...}
Requests allows you to send HTTP/1.1 requests extremely easily. There’s no need to manually add query strings to your URLs, or to form-encode your PUT & POST data — but nowadays, just use the json method!
Requests is one of the most downloaded Python packages today, pulling in around 30M downloads / week— according to GitHub, Requests is currently depended upon by 1,000,000+ repositories. You may certainly put your trust in this code.
Installing Requests and Supported Versions
Requests is available on PyPI:
$ python -m pip install requests
Requests officially supports Python 3.7+.
Supported Features & Best–Practices
Requests is ready for the demands of building robust and reliable HTTP–speaking applications, for the needs of today.
- Keep-Alive & Connection Pooling
- International Domains and URLs
- Sessions with Cookie Persistence
- Browser-style TLS/SSL Verification
- Basic & Digest Authentication
- Familiar
dict–like Cookies - Automatic Content Decompression and Decoding
- Multi-part File Uploads
- SOCKS Proxy Support
- Connection Timeouts
- Streaming Downloads
- Automatic honoring of
.netrc - Chunked HTTP Requests
API Reference and User Guide available on Read the Docs
Cloning the repository
When cloning the Requests repository, you may need to add the -c fetch.fsck.badTimezone=ignore flag to avoid an error about a bad commit (see
this issue for more background):
git clone -c fetch.fsck.badTimezone=ignore https://github.com/psf/requests.git
You can also apply this setting to your global Git config:
git config --global fetch.fsck.badTimezone ignore


Requests is an elegant and simple HTTP library for Python, built for human beings. One of the most famous libraries for python used by developers al over the world. This article revolves around how one can install requests library of python in Windows/ Linux/ macOS, etc.
Installation
Windows
For installing requests in windows, one would require Python (preferably latest version), so if you don’t have python installed, head to – How to download and install Python Latest Version on Windows. Now open command prompt from the windows and run following command –
python -m pip install requests
Booom..!! Done Now, requests library is downloaded successfully.
Linux
For installing requests in linux, one would require Python (preferably latest version) and pip latest version, so if you don’t have python installed, head to – How to download and install Python Latest Version on Linux. To install pip in linux – How to install PIP in Linux?. Now run,
pip install requests
macOS
For installing requests in mac, one would require Python (preferably latest version) and pip latest version, so if you don’t have python installed, head to – How to download and install Python Latest Version on mac. To install pip mac Os. Run,
sudo easy_install pip
sudo pip install --upgrade pip
Now to install requests,
pip install requests
Alternative common method
THe last method for installation of requests on any operating system is to grab the base files and install requests manually and Requests is actively developed on GitHub, where the code is always available. For code – visit here.
You can either clone the public repository:
git clone git://github.com/psf/requests.git
Or, download the tarball:
curl -OL https://github.com/psf/requests/tarball/master
# optionally, zipball is also available (for Windows users).
Once you have a copy of the source, you can embed it in your own Python package, or install it into your site-packages easily:
cd requests
pip install .
For documentation of requests library – visit here
In this tutorial, you’ll learn how to install the popular requests package in Python, including on Windows, macOS, and Linux. The requests library is a popular HTTP library that can handle generating different types of requests, including GET, POST, and PUT requests. The library is available for Python 3 from the Python Package Index (PyPI).
By the end of this tutorial, you’ll have learned:
- How to install the requests library in Python for Windows, macOS, and Linux using the
pippackage manager - How to install the
requestslibrary using a Virtual Environment and a requirements.txt file - How to install
requestsfrom Github
What is the Python requests Library?
The Python requests library is a Python library that handles making HTTP requests. The library is well known for being simple and elegant, by abstracting away much of the complexity of working with HTTP requests. The library is also one of the more popular libraries available in Python: it currently draws around 30,000,000 downloads per week and is in use by over 1,000,000 repositories on Github.
How to Install requests on Windows Using pip
The simplest way to install the requests library on Windows is to use the Python pip package manager. In order to install the latest version of the library, you can simply call the following command in the command prompt:
python -m pip install requestsTo install a specific version of the library, such as version 2.28.1, you can write the following command:
python -m pip install requests==2.28.1It’s as easy as that! In the following section, you’ll learn how to install the requests library on macOS using the pip package manager.
How to Install requests on macOS Using pip
Similar to the Windows method, the simplest way to install the requests library on macOS is by using the pip package manager. On macOS, this is done by using the Terminal application. When in the Terminal application, simply run the following command:
pip install requestsSimilar to installing a specific version on Windows, to install a specific version of the library, such as version 2.28.1, you can write the following command:
pip install requests==2.28.1In the following section, you’ll learn how to install the requests library on Linux.
How to Install requests on Linux Using pip
To install the requests library using the pip package manager on Linux, you can use the terminal application. When the application is open, you can run the following command:
pip install requestsSimilar to the above example, to install a specific version of the library, such as version 2.28.1, you can write the following command:
pip install requests==2.28.1In the following section, you’ll learn how to install the requests library in a virtual environment.
How to Install requests in a Virtual Environment
Using a virtual environment is a good idea for many reasons. For one, it allows you to better understand what versions of libraries you’re using. Additionally, it allows you to keep a cleaner development environment.
Installing the requests library in a virtual environment works the same as the methods above, though we first have to create and activate the virtual environment. You can create and activate the environment on Windows using the method below:
python -m venv venv
.venvScriptsactivate
On macOS, you can write the following:
virtualenv venv
source venv/bin/activate
Once the environment has been created, you can use any of the pip methods shown above to install the requests library. This is summarized in the code block below:
# On Windows:
python -m pip install requests

# On macOS or Linux
pip install requests
In the following section, you’ll learn how to install the library using a requirements.txt file.
How to Install requests With requirements.txt
Using a requirements.txt file is particularly helpful when sharing your code with others via source code management tools, such as Github. The file provides the ability to easily track and identify the packages that you use in a project.
In order to use the requirements.txt file to install the requests library, you can insert a file name requirements.txt to the root folder of your project. In the file, include a line containing requests.
From there, you can use the pip package manager to install all libraries listed in the file. This can be done using the following command:
pip install -r requirements.txtIn the final section below, you’ll learn how to install the requests library directly from Github source code.
How to Install requests from Github
If you have Git installed, you can install the requests library directly from the source code. This allows you to install the library from its code directly.
In order to do that, you can use the pip package manager, though you pass in the URL to the source code directly.
pip install github.com/kennethreitz/requests.gitDoing this can help you feel confident that the code you’re installing is the code you want to use.
Conclusion
In this tutorial, you learned how to install the requests library on Windows, macOS, and Linux. You first learned how to install the library using the pip package manager. Then, you learned how to install the library in a virtual environment. Finally, you learned how to install the library using a requirements.txt file as well as directly from Github.
Additional Resources
To learn more about related topics, check out the tutorials below:
- Python requests: GET Request Explained
- Python requests: POST Request Explained
- Python requests Response Object Explained
Requests — это модуль для языка Python, который используют для упрощения работы с HTTP-запросами. Он удобнее и проще встроенного Urllib настолько, что даже в документации Python рекомендовано использовать Requests.
Установка библиотеки Requests
Самый простой вариант установки сторонних пакетов в Python — использовать pip — систему управления пакетами. Обычно pip предустанавливается вместе с интерпретатором. Если его нет — можно скачать. Для этого нужно ввести в командную строку:
Linux / MacOS
python -m ensurepip --upgrade
Windows
py -m ensurepip --upgrade
Когда pip установлен, для установки модуля Requests нужно ввести команду:
pip install requests
Как настроить библиотеку Requests. Библиотека не требует дополнительной настройки — ею можно сразу же пользоваться.
Начало работы. Давайте рассмотрим пример простейшего запроса в модуле Requests:
import requests # делаем запрос на чтение страницы https://sky.pro/media/
response = requests.get('https://sky.pro/media/')
print(response.ok)  # проверяем успешен ли запрос?
print(response.text)  # выводим полученный ответ на экран
А вот как сделать то же самое, но при помощи встроенной библиотеки Urllib:
from urllib.request import urlopen

# открываем запрос на чтение страницы http://sky.pro/media
with urlopen('http://sky.pro/media') as response:
   response_status = response.status  # сохраняем статус запроса в переменную
   html = response.read()  # вычитываем ответ в переменную

print(response_status == 200)  # проверяем успешен ли запрос
print(html.decode())  # выводим полученный ответ на экран
Модуль Requests в Python упрощает и автоматизирует многие действия, которые в стандартной библиотеке надо делать самостоятельно. Именно за это её любят и используют многие разработчики.
Давайте разберёмся, как работать с Requests, и из чего состоят HTTP-запросы.
Методы HTTP-запросов
HTTP — это протокол передачи информации в интернете. Он описывает правила и формат общения между двумя сторонами. Например, как браузеру описать запрос, а серверу — сформировать ответ. HTTP — это текстовый протокол, поэтому его может прочитать и человек.
Давайте разберем простейший запрос:
GET /media/ HTTP/1.1
Host: sky.pro
Первая строка формирует запрос: мы говорим серверу, что хотим прочитать (GET) ресурс по адресу /media/. В конце указывается версия протокола: HTTP/1.1.
Начиная со второй строки передается дополнительная информация, которая называется заголовками. Она опциональная — кроме заголовка Host. Он указывает домен, на котором находится запрашиваемый ресурс.
HTTP-ответ выглядит аналогично:
HTTP/1.1 200 OK
Content-Type: text/html
<тело ответа>
В первой строке указывается версия протокола и код ответа — статус, который описывает результат запроса. В следующих строках, так же, как и в запросе, перечисляются заголовки. В данном случае сервер говорит, что в ответе находится HTML-страница (Content-Type: text/html).
И в самом конце находится тело ответа: файл, HTML-страница или ничего. Браузер отрисовывает тело ответа — это уже то, что видит человек, когда загружает страницу.
Методы HTTP-запросов нужны, чтобы объяснить серверу, какое действие мы хотим совершить над ресурсом. Ресурс — это цель HTTP-запроса. Это может быть документ, фотография или просто веб-страница.
Разберем на примерах распространённые методы — в чём их суть и чем они отличаются. Важно: ниже разбираются механизмы работы каждого метода в том виде, в котором они описаны в спецификации. На практике поведение может отличаться, но такое встречается нечасто.
OPTIONS
Метод OPTIONS нужен, чтобы спросить сервер о том, какие методы поддерживает ресурс. Он редко используется напрямую, обычно вызывается браузером автоматически. Поддерживается не всеми сайтами/ресурсами. Пример:
HTTP-ответ выглядит аналогично:
import requests
response = requests.options('https://httpbin.org')
print(response.text)  # будет пустым
print(response.headers['Allow'])  # 'HEAD, GET, OPTIONS'
GET
GET — самый распространённый HTTP-метод. Его используют для чтения интернет-ресурса. Браузер отправляет метод GET, когда мы открываем какой-либо сайт. Пример:
import requests
response = requests.get('https://httpbin.org/get')
print(response.text)
POST
Метод POST используют для отправки на сервер данных, которые передаются в теле запроса. Для этого при вызове requests.post() надо указать аргумент data, который принимает на вход словарь, список кортежей, байты или файл.
Если для передачи данных используется формат JSON, вместо data можно указать json. Это просто удобная конвенция, которая правильно формирует отправляемый запрос. Пример:
import requests
data_response = requests.post('https://httpbin.org/post', data={'foo': 'bar'})
print(data_response.text)  # переданные данные находятся по ключу form
json_response = requests.post('https://httpbin.org/post', json={'foo': 'bar'})
print(data_response.text)  # ключ form пустой, теперь данные лежат в json
HEAD
Этот метод очень похож на GET — с той лишь разницей, что HEAD возвращает пустое тело ответа. Он нужен, когда нужно посмотреть только на заголовки, не загружая ответ целиком.
Например, мы хотим иметь свежую версию PDF-файла с расписанием автобусов. Файл хранится на каком-то сайте и периодически обновляется. Вместо того, чтобы каждый раз скачивать и сверять файл вручную, можно использовать метод HEAD. Он поможет быстро проверить дату изменения файла по заголовкам ответа.
import requests
response = requests.get('https://httpbin.org/head')
print(response.text)  # ответ будет пустым
print(response.headers)
PUT
Метод PUT очень похож на POST — с той разницей, что несколько последовательных вызовов PUT должны приводить к одному и тому же результату.
POST этого не гарантирует и может привести к неожиданным результатам, например к дублированию созданной сущности.
import requests
response = requests.put('https://httpbin.org/put', data={'foo': 'bar'})
print(response.text)
PATCH
PATCH аналогичен методу POST, но с двумя отличиями: он используется для частичных изменений ресурса и его нельзя использовать в HTML-формах.
В теле запроса передается набор модификаций, которые надо применить.
import requests
response = requests.patch('https://httpbin.org/patch', data={'foo': 'bar'})
print(response.text)
DELETE
Метод используется для удаления ресурса. Поддерживает передачу данных, однако не требует её: тело запроса может быть пустым.
Как и PUT, последовательный вызов DELETE должен приводить к одному и тому же результату.
import requests
response = requests.delete('https://httpbin.org/delete')
print(response.text)
HTTP-коды состояний
Каждый ответ HTTP-запроса обязательно имеет код состояния — трехзначное число, которое как-то характеризует полученный результат. По этому коду можно понять, всё ли успешно отработало, и если произошла ошибка, то почему.
Всего выделяют пять групп кодов состояний:
1хх-коды.
К этой группе относятся информационные коды состояний. Они сообщают клиенту о промежуточном статусе запроса и не являются финальным результатом.
Их немного, и останавливаться на них мы не будем, потому что они встречаются нечасто.
2хх-коды.
Коды из этой группы означают, что запрос принят и обработан сервером без ошибок:
- 200 OK — запрос выполнен успешно. Чаще всего встречается именно это число.
- 201 Created — в результате запроса был создан новый ресурс. Как правило, этим кодом отвечают на POST- и иногда PUT-запросы.
- 202 Accepted — запрос принят, но ещё не выполнен. Используется, когда по какой-то причине сервер не может выполнить его сразу. Например, если обработку делает какой-то сторонний процесс, который выполняется раз в день.
- 204 No Content — указывает, что тело ответа пустое, но заголовки могут содержать полезную информацию. Не используется с методом HEAD, поскольку ответ на него всегда должен быть пустым.
3хх-коды.
Это группа кодов перенаправления. Это значит, что клиенту нужно сделать какое-то действие, чтобы запрос продолжил выполняться:
- 301 Moved Permanently — URL запрашиваемого ресурса изменился, новый URL содержится в ответе.
- 302 Found — аналогичен предыдущему коду. Отличие в том, что URL изменился временно. При этом статусе состояния поисковые системы не будут менять ссылку в своей поисковой выдаче на новую.
- 304 Not Modified — означает, что содержимое ресурса было закешировано, его содержимое не поменялось и запрос можно не продолжать.
4хх-коды.
Это коды ошибок, которые допустил клиент при формировании запроса:
- 400 Bad Request — запрос сформирован с ошибкой, поэтому сервер не может его обработать. Причин может быть много, но чаще всего ошибку надо искать в теле запроса.
- 401 Unauthorized — для продолжения необходимо залогиниться.
- 403 Forbidden — пользователь залогинен, но у него нет прав для доступа к ресурсу.
- 404 Not Found — всем известный код: страница не найдена. Некоторые сайты могут возвращать 404 вместо 403, чтобы скрыть информацию от неавторизованных пользователей.
- 405 Method Not Allowed — данный ресурс не поддерживает метод запроса. Например, так бывает, если разработчик хочет отправить PUT-запрос на ресурс, который его не поддерживает.
- 429 Too Many Requests — означает, что сработал защитный механизм: он ограничивает слишком частые запросы от одного пользователя. Таким образом защищаются от DDoS- или brute-force-атак.
5хх-коды.
Это ошибки, которые возникли на сервере во время выполнения запроса:
- 500 Internal Server Error — на сервере произошла неожиданная ошибка. Как правило, происходит из-за того, что в коде сервера возникает исключение.
- 502 Bad Gateway — возникает, если на сервере используется обратный прокси, который не смог достучаться до приложения.
- 503 Service Unavailable — сервер пока не готов обработать запрос. В ответе также может содержаться информация о том, когда сервис станет доступен.
- 504 Gateway Timeout — эта ошибка означает, что обратный прокси не смог получить ответ за отведенное время (обычно — 60 секунд).
Заголовки, текст ответа и файлы Cookie
Теперь рассмотрим, как работать с запросами и ответами в Requests. Чтобы увидеть результат HTTP-запроса, можно использовать один из трех способов.
Выбор способа зависит от того, какие данные мы получили. В непонятной ситуации можно использовать атрибут text, который возвращает содержимое в виде строки:
import requests
response = requests.get('https://httpbin.org/get')
print(response.text)
Если заранее известно, что ответ будет в формате JSON, можно использовать одноименный атрибут, который автоматически распарсит ответ и вернет его в виде словаря:
json_response = response.json()
print(json_response)
Обратите внимание, как изменится вывод функции print().
Наконец, если ответом на запрос является файл, стоит использовать атрибут content, который возвращает байты:
import requests
response = requests.get('https://httpbin.org/image/jpeg')
print(response.content)
Попробуйте вывести на экран response.text для предыдущего запроса и сравните результат.
Заголовок — это дополнительная информация, которой обмениваются клиент и сервер. В заголовках могут содержаться: размер ответа (Content-Length), формат передаваемых данных (Content-Type) или информация о клиенте (User-Agent).
Полный список очень длинный, знать их все необязательно, а часть и вовсе подставляется автоматом. Например, модуль Requests зачастую сам проставляет Content-Type — формат передаваемых данных.
Заголовок состоит из названия и значения, которые разделяются двоеточием, поэтому удобнее всего передавать их в виде словаря. Рассмотрим на примере, как это работает:
import requests
response = requests.get('https://httpbin.org/image', headers={'Accept': 'image/jpeg'})
print(response.headers)
Здесь мы передали заголовок, который указывает, в каком формате мы хотим получить изображение. Попробуйте поменять значение на image/png и посмотрите, как изменится ответ.
Так же можно посмотреть и на заголовки запроса:
print(response.request.headers)
Обратите внимание, что Requests сам подставил информацию о клиенте — User-Agent.
Cookie (куки) — это информация, которую сервер отправляет браузеру для хранения. Они позволяют зафиксировать некоторое состояние. Например, в куки может храниться информация о том, что пользователь уже залогинен. Она хранится в браузере и передается на сервер при каждом запросе, поэтому нам не нужно каждый раз проходить авторизацию заново.
Работать с куками в модуле Requests очень просто:
import requests
response = requests.get('https://httpbin.org/cookies', cookies={'foo': 'bar'})
print(response.text)
Посмотреть, какие куки пришли от сервера, можно при помощи атрибута cookies объекта Response:
print(response.cookies)
Как отправлять запросы при помощи Python Requests
Рассмотрим несколько частых примеров использования модуля Requests, чтобы понять, как отправлять запросы.
Скачивание файлов
import requests
response = requests.get('https://www.python.org/static/img/python-logo.png')
with open('python_logo.png', 'wb') as image:
    image.write(response.content)
Выше описан не самый эффективный способ скачивания файлов. Если файл окажется большого размера, код выше загрузит результат целиком в оперативную память. В лучшем случае программа упадет с ошибкой, в худшем — всё намертво зависнет.
Вот как это можно исправить:
import requests
response = requests.get('https://www.python.org/static/img/python-logo@2x.png', stream=True)

with open('python_logo.png', 'wb') as image:
    for chunk in response.iter_content(chunk_size=1024):
        image.write(chunk)
В этом варианте мы используем параметр stream=True, который открывает соединение, но не скачивает содержимое. Затем мы задаем размер чанка — кусочка информации, который будет скачиваться за одну итерацию цикла, и делаем его равным 1 Кб (1024 байт). Модуль Requests сам закрывает соединение после прочтения последнего чанка.
Чтобы заранее узнать размер файла, можно воспользоваться методом HEAD. Эта информация передается в заголовке ‘Content-Length’ и исчисляется в байтах.
import requests
head_response = requests.head('https://www.python.org/static/img/python-logo@2x.png')
image_size = int(head_response.headers['Content-Length'])
print('Размер загружаемого файла: {0} кб'.format(image_size / 1024))
Авторизация на сайте
Рассмотрим два способа авторизации, которые встречаются чаще всего: Basic Auth и Bearer Auth. В обоих случаях механизм очень похожий — запрос должен передать заголовок ‘Authorization’ с каким-то значением. Для Basic Auth — это логин и пароль, закодированные в base64, для Bearer — токен, который мы получили на сайте заранее.
Для базовой авторизации у модуля Requests есть очень удобный параметр auth=, который делает всю работу за нас:
import requests
response = requests.get('https://httpbin.org/basic-auth/foo/bar')
print(response.status_code)  # 401
response = requests.get('https://httpbin.org/basic-auth/foo/bar', auth=('foo', 'bar'))
print(response.status_code)  # 200
print(response.request.headers[‘Authorization’])  # 'Basic Zm9vOmJhcg=='
Обратите внимание, что модуль Requests сам добавил заголовок Authorization и подставил туда закодированные логин и пароль.
Для Bearer Auth нам придется добавлять его самостоятельно:
import requests
response = requests.get('https://httpbin.org/bearer')
print(response.status_code)  # 401
headers = {'Authorization': 'Bearer some_token'}
response = requests.get('https://httpbin.org/bearer', headers=headers)
print(response.status_code)  # 200
У каждого API своя спецификация — вместо Bearer может быть Token или что-то другое. Поэтому важно внимательно читать документацию сервиса.
Мультискачивание
Напишем код, который умеет скачивать сразу несколько файлов. Для этого вынесем работу с модулем Requests в отдельную функцию и параметризируем место сохранения файла.
Не забывайте про сохранение файла по чанкам, чтобы крупные файлы не загружались в память целиком.
import requests
def download_file(url, save_path):
    response = requests.get(url, stream=True)
    with open(save_path, 'wb') as file:
        for chunk in response.iter_content(chunk_size=1024):
            file.write(chunk)
download_list = [
    'https://cdn.pixabay.com/photo/2022/04/10/19/33/house-7124141_1280.jpg',
    'https://cdn.pixabay.com/photo/2022/08/05/18/50/houseplant-7367379_1280.jpg',
    'https://cdn.pixabay.com/photo/2022/06/09/04/53/ride-7251713_1280.png',
]

for url in download_list:
    save_path = url.split('/')[-1]
    download_file(url, save_path)
Заключение
Модуль Requests — мощный инструмент, с которым разработчик может сделать сложный HTTP-запрос всего в пару строк. У него интуитивно понятный интерфейс, поэтому он так популярен в сообществе Python.
С помощью модуля реквест можно выполнить множество функций: от авторизации на сайте до скачивания нескольких файлов одновременно.
Python web development is preferable for many developers even tough if it is one of the oldest yet leading programming languages. Python thrives to keep up with the latest technological advancements along with its desirable features. One such great feature is its substantial number of easily available libraries. All you need to do is install the libraries, and start importing them at the beginning of your code. Moreover, you can install any number of libraries to your code according to your need.
Installing a library is not that complex as it sounds. So, here is a descriptive tutorial on how to install a requests library in Python.
What is the request library?
A Request library in Python handles the HTTP calls, where it simplifies the way to send the data on HTTP request and handles the same back in response. It eases the ways to carry out the CRUD operation and other HTTP call activities, such as data scraping. There is no restriction with the data it carries, it can carry everything from header to form data, query parameters, multipart files and others.
Request Library – Installation:
Firstly, before starting with the installation process, make sure that Python and pip were installed prior to ‘request’ module installation. To install the ‘requests’ library for Python, we can use any one of the following methods:
Here is the installation procedure for different operating systems.
Linux
$ pip install requests
In Linux, If you require root permission, use ‘sudo’. Alternatively, you can also use pipenv to install requests library, where pipenv is used to automatically manage the packages during the course of installation/uninstallation.
$ pip install pipenv
Windows
The Windows users need to navigate to the Python directory, and then install the request module as follows:
> python -m pip install requests
Mac
For MacOS, install Python through ‘Home Brew’. Thereafter, install pip and request module (which is the same as Linux installation process.)
Usage of Request Library
Once the installation part is over, you can execute the following functions with the help of request library.
1.Verify Python Installation
To verify that Python installed on the machine, try the below one:
$ python --version
If the version of Python is not returned, refer Python installation process and proceed with ‘request’ module installation process. For Python 3x, use the command python3 rather python.
$ python3 --version
We are using Python 2x in this blog for experimenting the request module installation. So, you can see this python keyword being in use throughout the article.
2. Access to Python Over Terminal
To access Python over command line, simply type python and hit enter to explore the request module (which is priorly installed)
$ python
3. Import Requests Library
Soon after the entry to the python command line, the appropriate module can be accessed through ‘import’ keyword. In our example, we import the request module for experimenting the functionality of the request module.
>>> import requests
4. To Send Request
A list of Http methods like GET, POST, PUT, PATCH, DELETE are accessible through the request module.
In the following example, a simple get request is sent and the corresponding response is recorded as follows:
>>> requests.get('https://www.example.com/')
The above request will return <Response [200]>, if successful.
5. To Parse Response
A Http status code for a request can be accessed through request module key status_code like 200, 201, 301, 404, 500, 501 etc.,
>>> response = requests.get('https://www.example.com/')
>>> response.status_code
In the above one, a successful response of 200 returned.
Further, response data of the respective request can be parsed in a variety of formats such as content, text or JSON formats.
>>> response.content
This retrieves the content of the web page requested.
>>> response.text
The above code retrieves the response as string based on header content type, explicitly custom encoding can be passed by response.encoding = ‘utf-8’ or whichever the encoding scheme is required.
>>> response.json()
Here, it returns JSON for a valid response.
Other Frequently Used Http Methods:
Examples of widely used Http methods using request module in Python is as follows:
>>> requests.get('https://httpbin.org/get')
>>> requests.post('https://httpbin.org/post', json={'python': {'library': 'requests'}})
>>> requests.put('https://httpbin.org/put', json={'key':'value'})
>>> requests.patch('https://httpbin.org/patch', json={'key':'value'})
>>> requests.delete('https://httpbin.org/delete')
>>> cmd + d (to exit)
A key json carries the payload/body of Http call.
Here is the sample code for a little more clarity
This code sample covers quite a few use cases of request module.
# Importing Request module, which was installed prior to
import requests
# Http Methods:
response = requests.get('https://httpbin.org/get')
print (response.status_code)
response = requests.post('https://httpbin.org/post', json={'python': {'library': 'requests'}})
print (response.request.body)
response = requests.put('https://httpbin.org/put', json={'python': {'version': '2x', 'library': 'requests'}})
print (response.request.body)
response = requests.patch('https://httpbin.org/patch', json={'python': {'version': '3x', 'library': 'requests'}})
print (response.request.body)
response = requests.delete('https://httpbin.org/delete')
print (response.status_code)
# Status Codes:
for url in ['https://httpbin.org/status/200', 'https://httpbin.org/status/400', 'https://httpbin.org/status/500']:
    try:
        response = requests.get(url)
        response.raise_for_status()  # Raise exception, if applicable
    except:
        print ('Error with status code: ' + response.status_code)
    else:
        print ('Request completed successfully')
Just copy the sample code to “file-name.py”, then open the terminal and navigate to the directory where “file-name.py” resides. Now, run the following command.
$ python file-name.py
Therefore, a successful execution of code would result in use case output.
Hire best Python developers for your web development projects easily with Agira technologies. We provide you with dedicated experts who have mastered the latest technologies. Endure the fullest of outsourcing tech experts for your company. Get in touch with our experts to hire freelance python developers, offshore python developers and python web developers who can cater to your company’s requirement.

Read more blogs related to python web development. Such as Python Vs Node.js: What To Choose & Why – A Detailed Comparison and Developing RESTful APIs with Python and Django.
Ошибка: Контактная форма не найдена.