This will take about 45 minutes.
We will be setting up a Ruby on Rails development environment on Windows 10.
The reason we’re going to be using Bash on Ubuntu on Windows because it allows you to run Linux on your Windows machine. Most Ruby on Rails tutorials and dependencies work best on Linux, so this allows you to get the best of both worlds. A Windows machine for your day to day work, and a Linux subsystem for Ruby on Rails development.
This only works on 64-bit installations of Windows. This is also in beta, so this won’t be nearly as robust as running a Linux virtual machine, but it can definitely do the basics well enough.
Windows 10 allows you to run various Linux operating systems inside of Windows similar to a virtual machine, but natively implemented. We’ll use this to install Ruby and run our Rails apps.
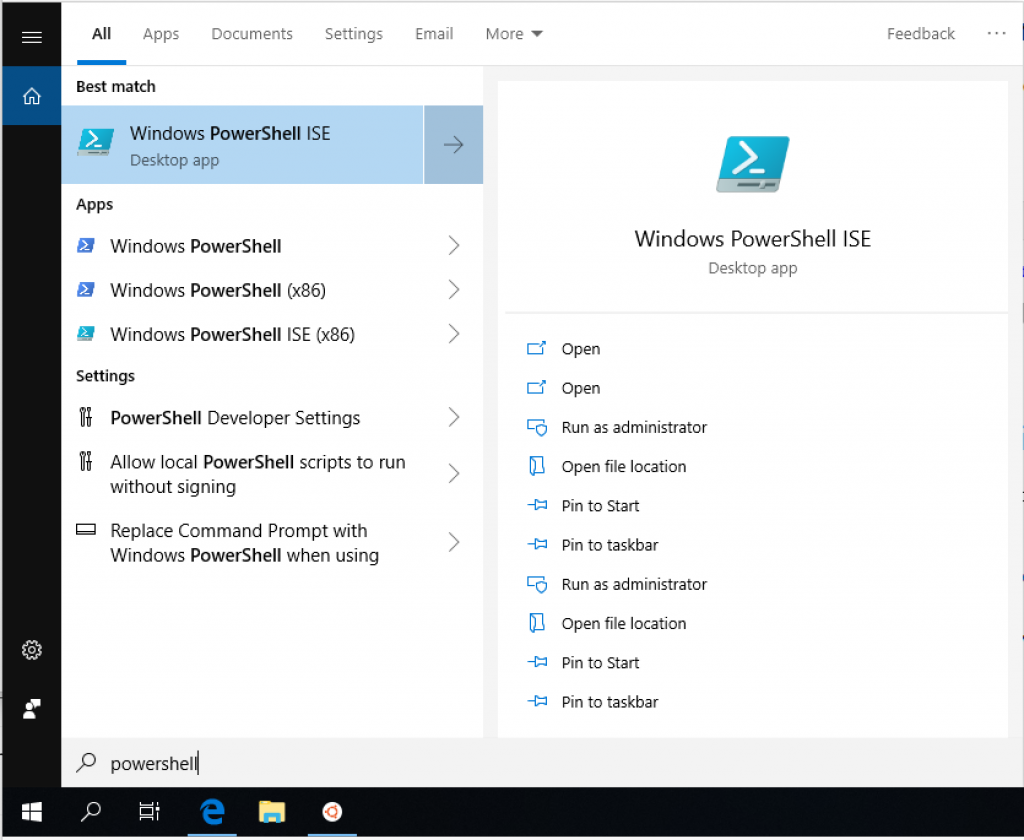
Open Powershell as Administrator and run:
dism.exe /online /enable-feature /featurename:Microsoft-Windows-Subsystem-Linux /all /norestart
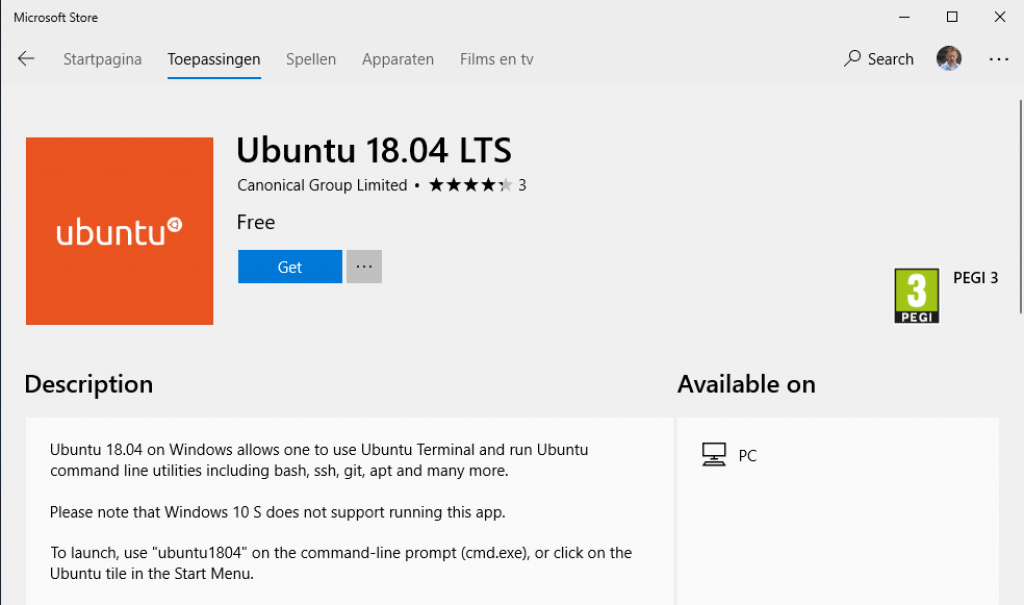
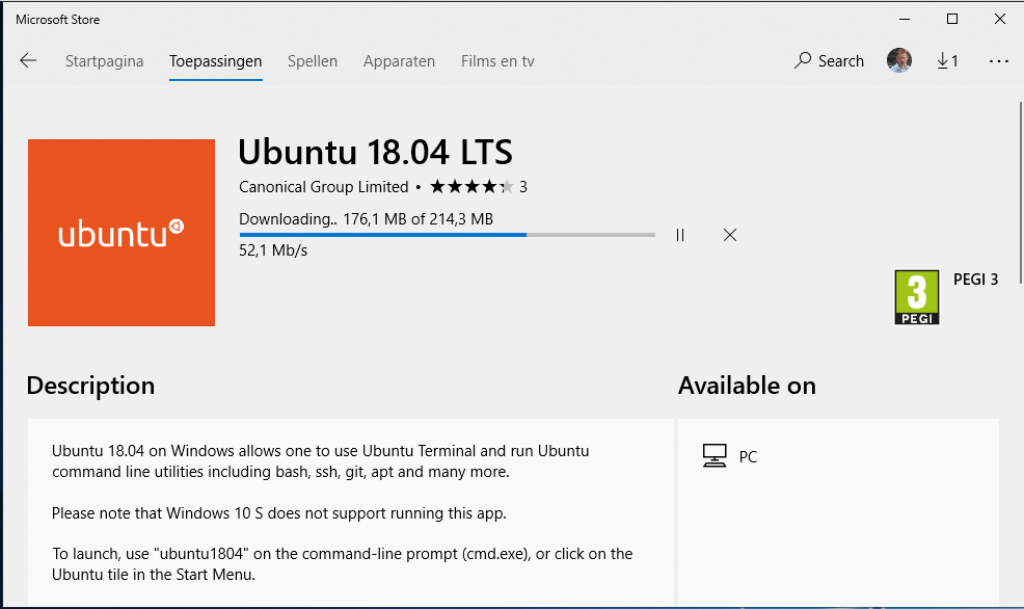
dism.exe /online /enable-feature /featurename:VirtualMachinePlatform /all /norestartNext install Ubuntu from the Microsoft Store.
Now open Ubuntu in the Start menu or by running wsl in PowerShell or the command prompt. You’ll be asked to setup a new user for Ubuntu. Remember this password as it’s what you’ll use later on when installing packages with sudo.
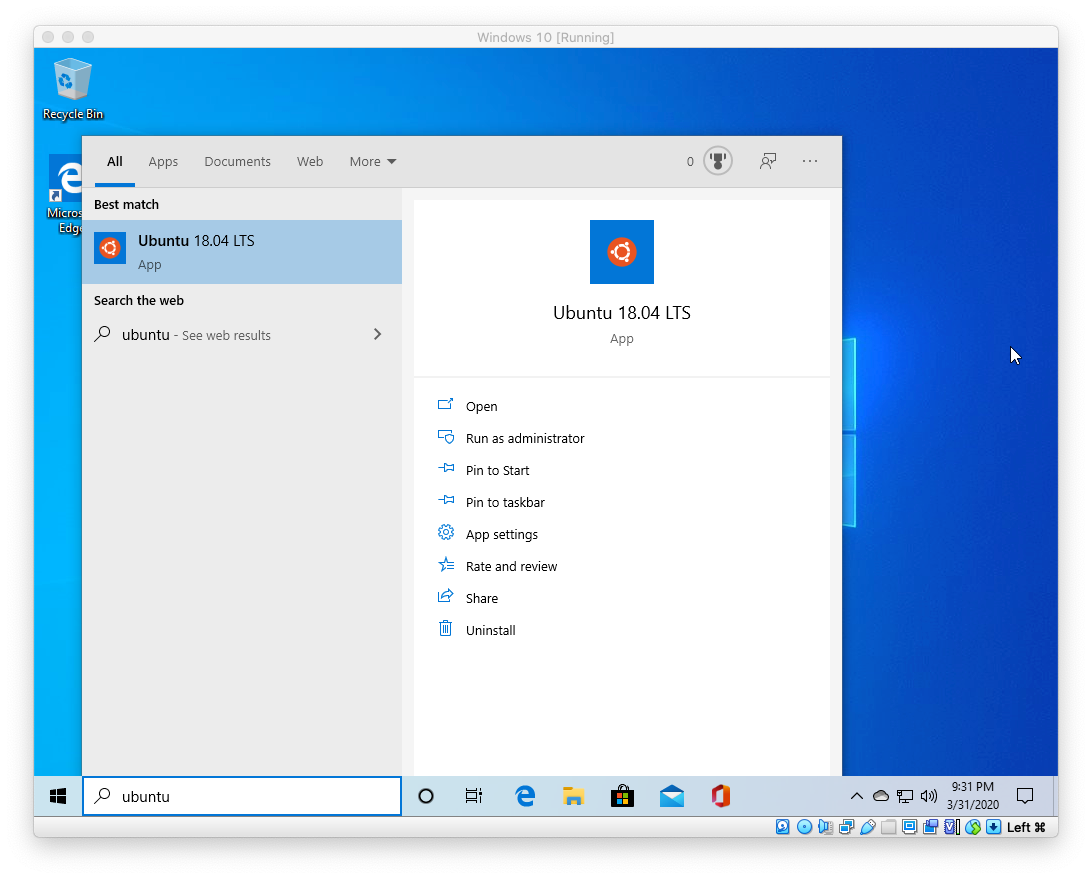
Congrats! You’ve now got a Ubuntu terminal on Windows. You’ll use this to run your Rails server and other processes for development.
Choose the version of Ruby you want to install:
The first step is to install some dependencies for Ruby.
sudo apt-get update
sudo apt-get install git-core curl zlib1g-dev build-essential libssl-dev libreadline-dev libyaml-dev libsqlite3-dev sqlite3 libxml2-dev libxslt1-dev libcurl4-openssl-dev software-properties-common libffi-dev
Next we’re going to be installing Ruby with a version manager called Rbenv.
Installing with rbenv is a simple two step process. First you install rbenv, and then ruby-build:
cd
git clone https://github.com/rbenv/rbenv.git ~/.rbenv
echo 'export PATH="$HOME/.rbenv/bin:$PATH"' >> ~/.bashrc
echo 'eval "$(rbenv init -)"' >> ~/.bashrc
exec $SHELL

git clone https://github.com/rbenv/ruby-build.git ~/.rbenv/plugins/ruby-build
echo 'export PATH="$HOME/.rbenv/plugins/ruby-build/bin:$PATH"' >> ~/.bashrc
exec $SHELL
To install Ruby and set the default version, we’ll run the following commands:
rbenv install 3.2.0
rbenv global 3.2.0
Confirm the default Ruby version matches the version you just installed.
ruby -vThe last step is to install Bundler
gem install bundlerrbenv users need to run rbenv rehash after installing bundler.
We’ll be using Git for our version control system so we’re going to set it up to match our Github account. If you don’t already have a Github account, make sure to register. It will come in handy for the future.
Replace my name and email address in the following steps with the ones you used for your Github account.
git config --global color.ui true
git config --global user.name "YOUR NAME"
git config --global user.email "YOUR@EMAIL.com"
ssh-keygen -t rsa -b 4096 -C "YOUR@EMAIL.com"
The next step is to take the newly generated SSH key and add it to your Github account. You want to copy and paste the output of the following command and paste it here.
cat ~/.ssh/id_rsa.pubOnce you’ve done this, you can check and see if it worked:
ssh -T git@github.comYou should get a message like this:
Hi excid3! You've successfully authenticated, but GitHub does not provide shell access.Choose the version of Rails you want to install:
Since Rails ships with so many dependencies these days, we’re going to need to install a Javascript runtime like NodeJS and a package manager called Yarn.
To install NodeJS and Yarn, we’re going to add it using the official repository:
curl -sL https://deb.nodesource.com/setup_12.x | sudo -E bash -
curl -sS https://dl.yarnpkg.com/debian/pubkey.gpg | sudo apt-key add -
echo "deb https://dl.yarnpkg.com/debian/ stable main" | sudo tee /etc/apt/sources.list.d/yarn.list

sudo apt update
sudo apt-get install -y nodejs yarn
And now, without further adieu:
gem install rails -v 7.0.4If you’re using rbenv, you’ll need to run the following command to make the rails executable available:
rbenv rehashNow that you’ve installed Rails, you can run the rails -v command to make sure you have everything installed correctly:
rails -v
# Rails 7.0.4
If you get a different result for some reason, it means your environment may not be setup properly.
Rails ships with sqlite3 as the default database. Chances are you won’t want to use it because it’s stored as a simple file on disk. You’ll probably want something more robust like MySQL or PostgreSQL.
There is a lot of documentation on both, so you can just pick one that seems like you’ll be more comfortable with.
If you’re new to Ruby on Rails or databases in general, I strongly recommend setting up PostgreSQL.
If you’re coming from PHP, you may already be familiar with MySQL.
You can install MySQL server and client from the packages in the Ubuntu repository. As part of the installation process, you’ll set the password for the root user. This information will go into your Rails app’s database.yml file in the future.
sudo apt-get install mysql-server mysql-client libmysqlclient-devInstalling the libmysqlclient-dev gives you the necessary files to compile the mysql2 gem which is what Rails will use to connect to MySQL when you setup your Rails app.
When you’re finished, you can skip to the Final Steps.
The easiest way to setup PostgreSQL is to install it on Windows using one of the Windows installers. You’ll be able to run it in Windows and connect to it through Linux.
Download PostgreSQL for Windows and install it.
Pay attention to the username and password you setup during installation of Postgres as you will use this to configure your Rails applications later to login to Postgres when your Rails app runs.
You’ll also need to install the development headers on Ubuntu so you can install the pg gem.
sudo apt install libpq-devThe best place to develop Rails apps on the Windows Subsystem for Linux is to navigate to `/mnt/c`. This is actually the C: drive on Windows and it lets you use Sublime, Atom, VS Code, etc on Windows to edit your Rails application.
And now for the moment of truth. Let’s create your first Rails application:
# Navigate to the C: drive on Windows. Do this every time you open the Linux console.
cd /mnt/c

# Create a code directory at C:code for your Rails apps to live (You only need to do this once)
mkdir -p code

#### If you want to use Postgres
# Note that this will expect a postgres user with the same username
# as your app, you may need to edit config/database.yml to match the
# user you created earlier
rails new myapp -d postgresql

#### or if you want to use SQLite (not recommended)
# rails new myapp

#### Or if you want to use MySQL
# rails new myapp -d mysql

# Then, move into the application directory
cd myapp

# If you setup MySQL or Postgres with a username/password, modify the
# config/database.yml file to contain the username/password that you specified

# Create the database
rake db:create

rails server
You can now visit http://localhost:3000 to view your new website!
Now that you’ve got your machine setup, it’s time to start building some Rails applications!
If you received an error that said Access denied for user 'root'@'localhost' (using password: NO) then you need to update your config/database.yml file to match the database username and password.
To edit your code in Windows: open up Sublime, Atom, VS Code, or whatever editor your prefer and point them to your folders in C:code and you’ll be able to safely edit your Rails apps in Windows and run them in Linux!
When you create a new Rails app, you might run into the following error: parent directory is world writable but not sticky.
If you run into this issue, you can run chmod +t -R ~/.bundle and that should fix the permissions errors and let you finish the bundle install for your Rails app.
That’s it! Let us know in the comments below if you run into any issues or have any other protips to share!.
How to Install Ruby on Rails Windows 10/11 (Step by Step Tutorial). With so many programming languages in our IT environment that play a important role Ruby is one of those languages. It is pretty powerful and used for many dynamic tasks but mostly in web application development. Also there are many famous software built using this language. Therefore today we are going to learn how to install Ruby on Windows 11. In this article we will set up Ruby on Rails development environment on Windows 10/11.
What is Ruby on Rails?
")
Ruby on Rails or RoR, is a framework that is built on Ruby, a programming language that was created in the 1990s. There is a simple idea behind making RoR available to developers: to provide an intuitive framework for developing robust, high performance web pages.
Often referred to as “RoR” or just “Rails,” Ruby on Rails is a free and open source for developing web applications in Ruby, an object oriented programming language that is similar to Python and Perl.
In comparison to other frameworks, Ruby on Rails has a great advantage, which is its speed and ease of use that the developers enjoy while working within the environment. A change made to an application is immediately reflected, eliminating the lengthy and time consuming web development process normally associated with it.
Benefits of Ruby on Rails
Cost effective
Ruby on Rails is an open source framework which is 100% free and based on Linux. From a developer’s perspective, it’s also easy to use. Using ruby, developers can save a lot of their time and effort that leads to reducing the overall cost, due to the availability of so many gems (plugins).
Based on the Model View Controller architecture (MVC)
An application developed using this MVC architecture consists of three interconnected layers. These layers contain the code that interacts with the application data. Also, it centralizes both the application’s business logic and the rules for manipulating the data. Among the various formats that the data is presented to the users are HTML, XML, RSS, PDF, and other formats.
Managing changes is easy
Adding new features and editing existing code for a site is easy with Ruby on Rails. You can quickly and easily perform future modifications to your website (for example, changing the data model significantly) after launching your site.
Secure
Ruby framework contains some security features that are enabled by default. Furthermore, using Ruby on Rails means adhering to the secure development lifecycle, which can be a complicated method in terms of security assurance.
There is an active Rails community that works to identify and patch new vulnerabilities, and documentation of the framework is available both officially and unofficially.
Flexibility
Ruby on Rails offers a high level of flexibility and offers many advantages such as easy integration with frameworks and technologies such as AngularJS. Developers can use multiple technologies and separate layers of an application because of its flexibility.
Productivity
When you combine Ruby and third party libraries, you will be able to develop features that are incredibly fast. This makes Ruby an extremely productive programming language. In most cases, these libraries are available as gems, which are packaged libraries and applications that are installed by using a tool referred to as Ruby Gems.
Consistent
In order to stay structured and readable, developers adhere to standardized file management and programming conventions. This also helps save time.
Large Online Community
On GitHub, a social coding site, this language is among the most popular. Among the community’s developers are many who are continually improving code as well as assisting others with their projects.
Whenever you need a particular piece of functionality, there is a high probability that someone else has already created it or is willing to provide assistance to you for fixing any issues. But still, you’ll need a team of skilled programmers to handle the code.
An extensive collection of free plugins
Another RoR advantage is the abundance of free gems or plugins. You can use RoR to create your own website that meets your business needs – for example, you can provide advanced eCommerce services or set up an exclusive social network that guarantees a high level of data security to your users.
Follow this post to show you how to install Ruby on Rails on Windows 10/11.
Install Ruby on Rails on Windows 10/11
Install Git
Before starting, you will need to install the Git software package on your system. You can download it from the Git download page.
Once the Git package is downloaded, follow the below steps to install Git on your system.
Step 1 – Double click on the Git downloaded file. You should see the Git License screen:

Step 2 – Click on the Next. You should see the destination selection screen:

Step 3 – Click on the Next. You should see the component selection screen:

Step 4 – Click on the Next. You should see the Start Menu selection screen:

Step 5 – Click on the Next. You should see the Editor selection screen:

Step 6 – Click on the Next. You should see the adjust Git branch screen:

Step 7 – Click on the Next. You should see the path selection screen:

Step 8 – Click on the Next. You should see the choose SSH executable screen:

Step 9 – Click on the Next. You should see the Choose HTTPS backend screen:

Step 10 – Click on the Next. You should see the Git line ending conversions screen:

Step 11 – Click on the Next. You should see the Terminal emulation configuration screen:

Step 12 – Click on the Next. You should see the Git default behavior screen:

Step 13 – Click on the Next. You should see the Credential helper selection screen:

Step 14 – Click on the Next. You should see the extra option selection screen:

Step 15 – Click on the Next to finish the installation.
Install Ruby on Windows
First, visit the Ruby installer website and download the latest version of Ruby to your system. Once the Ruby installer is downloaded, follow the below steps to install Ruby to your system:
Step 1 – Double click on the Ruby installer to start the installation. You should see the License page:

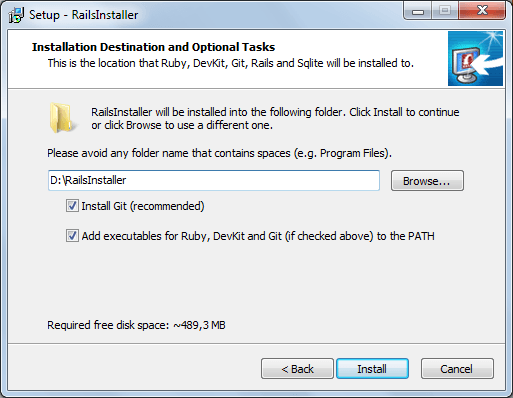
Step 2 – Accept the License agreement and click on the Next button. You should see the installation location selection page:

Step 3 – Select your installation path and click on the Install button. You should see the component selection page:

Step 4 – Select your desired components and click on the Next button. Once the Ruby is installed, you should see the following page:

Step 5 – Click on the Finish button. You should see the Ruby toolchain selection page:

Step 6 – Type 3 to install the Ruby development toolchain and press the Enter key to finish the installation.
Launch the Ruby Shell
After installing Ruby, search for “Ruby” in the Windows Desktop. You should see the following page:

Click on the “start command prompt with Ruby” to launch the Ruby command prompt. Now, verify the Ruby version using the following command:
You should see the Ruby version in the following page:

To verify the Gem installation and list all installed Gems, run the following command:
You should see the following page:

If you want to update the Ruby gems, run the following command:
Install Rails on Windows via Gem command
Rails is one of the Ruby gems and you can install it using the gem command as shown below:
Once the Rails is installed, you should see the following page:

Rails applications cannot operate without a database. Rails support MySQL or the SQLite database. SQLite3 is the default Rails database and it can be installed using the following command:

Create a Rails Application
After installing Ruby and Rails, we will create a simple Rails application to check the Ruby on Rails installation. Let’s create a simple application named app with the following command:
You will get some tzinfo-data related error. To resolve this error, open the Gemfile located inside the app directory using the NotePad editor.
gem 'tzinfo-data', platforms: [:x64_mingw, :mingw, :mswin]
And, replaced it with the following line:
gem 'tzinfo-data', '~> 1.2021', '>= 1.2021.5'
Save and close the file then open the Ruby shell and change the directory to your app directory:
Next, update all gems using the following command:
Now, start the Rails application using the following command:
Once the application is started, you will get the following screen:

Access Rails Application
At this point, Rails is started and listens on port 3000 on localhost. Now, open your web browser and access your Rails application using the URL http://localhost:3000. You should see the Rails application page on the following screen:

Great job about learning how to Install Ruby on Rails Windows 10/11. Let’s summarize.
How to Install Ruby on Rails Windows 10/11 Conclusion
Ruby is a programming language and development environment for web applications, data analysis and general programming. Now your installation is ready and you will be able to create your rails apps and have fun! In this post, we have learned how to install Ruby on Rails on a Windows machine. We also learned how to create a simple Rails application. I hope you have now enough knowledge of Ruby on Rails installation. You can now start developing your own Rails application.
Немного о фреймворке:
Ruby on Rails был написан на языке программирования “Ruby”. Он был создан еще в далеком 2004 году, и получил свою популярность благодаря взаимодействию с компанией “Apple” в 2006 году. Тогда “Apple” объявила, что будет поставлять “Ruby on Rails” вместе с операционной системой Mac OS X 10.5 “Leopard”
Так же нельзя забывать о том, что данный фреймворк повлиял на разработку веб-приложений благодаря инновационным функциям, таким как создание таблиц БД, миграция и создание каркасов представлений для обеспечения быстрой разработки приложений.
Почему именно Ruby on rails ?
В мире программирования существует множество фреймворков для веб-разработки, но больше всего выделяются Django и Ruby on Rails.
Благодаря этому они становятся самыми популярными веб-фреймворками и эта популярность будет расти и дальше.
Масштабируемость
Хотя веб-фреймворк Django унаследовал масштабируемость от Python, он все же немного отстает по сравнению с Rails. Он обладает лучшей масштабируемостью, что является результатом таких его качеств, как свобода и гибкость кода. Оба они являются тяжеловесными фреймворками для веб-разработки, поэтому они оба разработаны с учетом масштабируемости, но в данном случае победа достается Ruby on Rails.
Синтаксис
Известно, что синтаксис Ruby очень гибкий. Однако это не всегда можно отнести к преимуществам Ruby on Rails. Это может вызвать проблемы и усложнить передачу проекта другим членам команды, поскольку одна и та же функция может быть реализована разными способами, создавая путаницу.
В то время как Python выступает за то, что должен быть только один очевидный способ сделать что-то, что делает код более легким для отладки и чтения.
Установка необходимых пакетов:
Для работы Ruby on Rails на операционной системе Windows 10, вам требуется установить следующие программы:
- Nodejs
- Yarn
- sqlite
Переходим к скачиванию и установке Nodejs.
Перейдите по ссылке и скачайте LTS версию.

После выбора LTS версии у вас автоматически начнется скачивание пакета, вам потребуется его установить, открыв исполняемый файл после скачивания.
Требуется выбрать пункт об автоматической установке необходимых инструментов.

После установки, перезапустите ваш персональный компьютер и перейдите в командную строку для проверки установки.
Так как мы выбрали установку необходимых компонентов, то сразу после завершения откроется скрипт для установки.

Проверить установку можно используя команду :
node --version

Установка Yarn:
Перейдите по ссылке, откройте вкладку «Alternatives» и скачайте пакет «classic stable 1.22.19».
Запустите исполняемый файл и следуйте шагам установки.

После установки перезапустите персональный компьютер и проверьте установку программу, запустив командную строку и вписав команду ниже:
yarn --version
Установка Sqlite:
Перейдите по ссылке и скачайте два архива sqlite:
- sqlite-dll-win64-x64-3390300.zip
- sqlite-tools-win32-x86-3390300.zip

После скачивания, разархивируйте оба архива по пути «C:windowssystem32»
Проверить работоспособность и версию sqlite можно используя команду ниже:
sqlite3 --version
Установка Ruby:
Перейдите по ссылке и загрузите последнюю версию Ruby с инструментами разработчика, на данный момент это «Ruby 3.1.2-1»

Установите Ruby открыв исполняемый файл. Так же после завершения установки отметьте пункт «run rdk install» для автоматической установки MSYS2.

Автоматически откроется командная строка с предложением установки MYSYS2, выберите 3 пункт.

Дальше установка происходит автоматически.
Проверить работоспособность и версию Ruby можно используя команду ниже:
ruby --version
Требуется выполнить команды ниже, предварительно открыв командную строку от имени администратора:
gem install tzinfo-data

gem install sqlite3

gem install rails

Создание проекта и запуск Ruby on Rails:
Откройте командную строку от имени администратора. Перейдите в нужный вам каталог и пропишите команду ниже:
rails new *название проекта*

После этого перейдите в папку с вашим проектом и запустите ваш проект командой:
rails server

Можем переходить на наш сервер используя локальный адрес.

Примечание:
Если у вас возникнет проблема при запуске вашего проекта, то перейдите в папку с вашим проектом и откройте конфигурационный файл «Gem» любым удобным для вас текстовым редактором. Исправьте строчку как показано ниже:
Пример ошибки:

Строка перед изменениями:
gem "tzinfo-data", platforms: %i[ mingw mswin x64_mingw jruby ]
Строка после изменений:
![]()
"gem tzinfo-data"
Для проверки работоспособности всех установленных пакетов, воспользуйтесь командами ниже:

Ruby --version

Sqlite3 --version

Node --version

Yarn --version

Gem --version

Rails --version
Вывод:
Благодаря данной публикации вы с легкостью установите Ruby on Rails на Windows 10.
191028
Санкт-Петербург
Литейный пр., д. 26, Лит. А
+7 (812) 403-06-99
![]()
700
300
ООО «ИТГЛОБАЛКОМ ЛАБС»
191028
Санкт-Петербург
Литейный пр., д. 26, Лит. А
+7 (812) 403-06-99
![]()
700
300
ООО «ИТГЛОБАЛКОМ ЛАБС»
If you want to install Ruby on Rails on Windows, look no further! I recommend that you use either Linux or macOS to develop in Rails if you have the option. But sometimes you have no choice. My Macbook has to go back to Apple for repairs so I decided to try developing on Windows. Here is my setup:
Install WSL
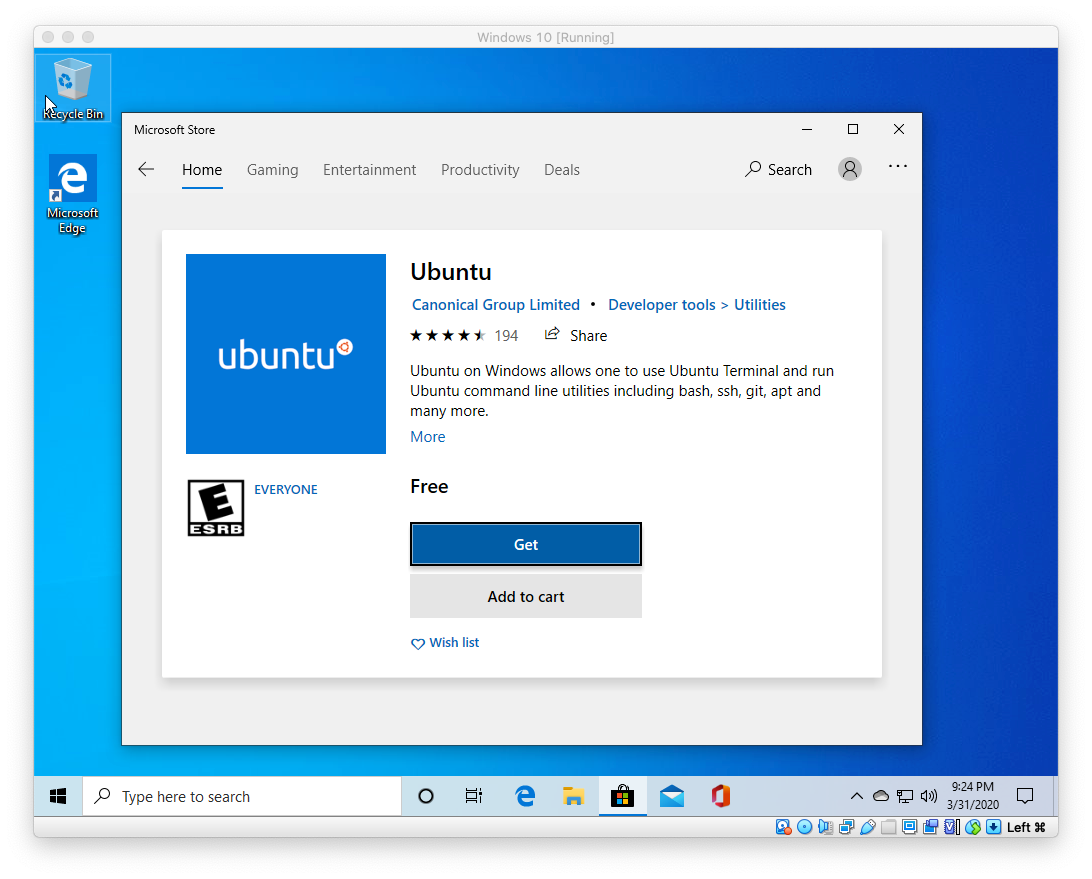
You can use Ruby in Windows with Ruby for Windows but if you want to use Rails I recommend that you use WSL. WSL is short for Windows Subsystem for Linux and it creates a Linux environment in Windows. WSL is fully supported by Microsoft so you can get it for free from the Microsoft Store:
Installing:
 But don’t start it after the install finishes. Open a Windows Powershell with Administrator rights.
And copy and paste this line:
Enable-WindowsOptionalFeature -Online -FeatureName Microsoft-Windows-Subsystem-Linux
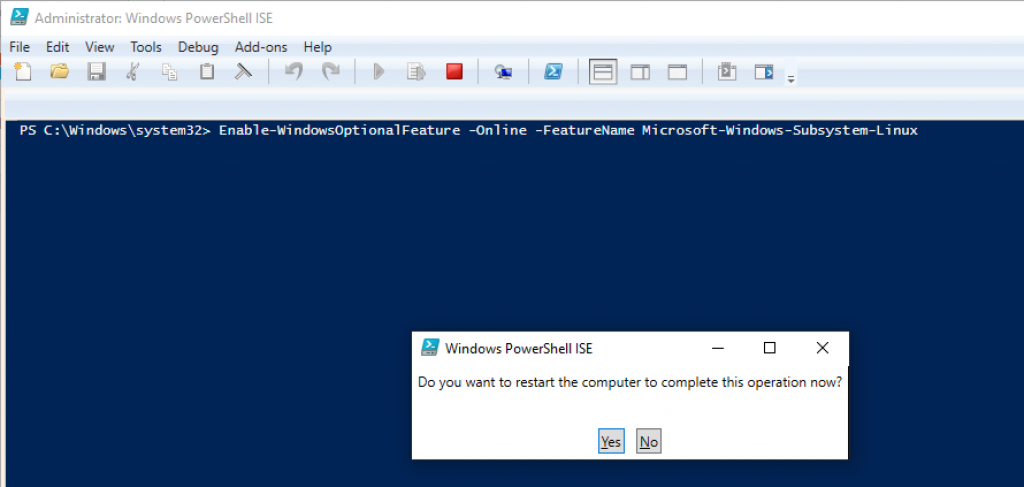
Hit “Enter” and restart your computer.

If you don’t enter the “Enable-WindowsOptionalFeature” line you will get the following error and WSL won’t work:

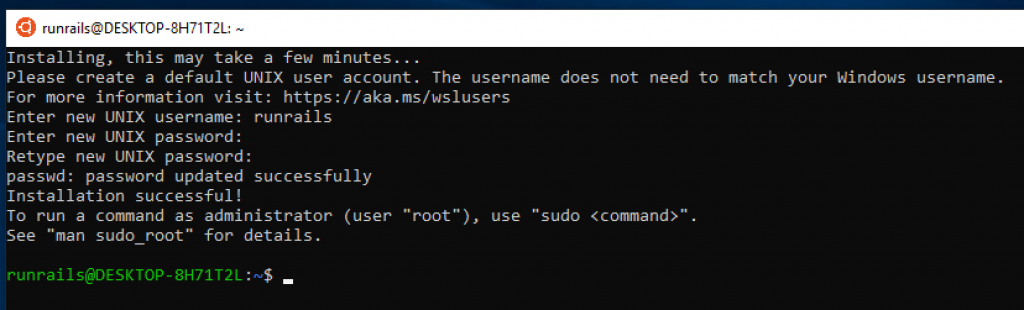
Install updates and dependencies
Now that you have WSL installed it’s time to start it. The first time it starts you are asked to create a user. Go ahead and create one, make sure you remember the password!
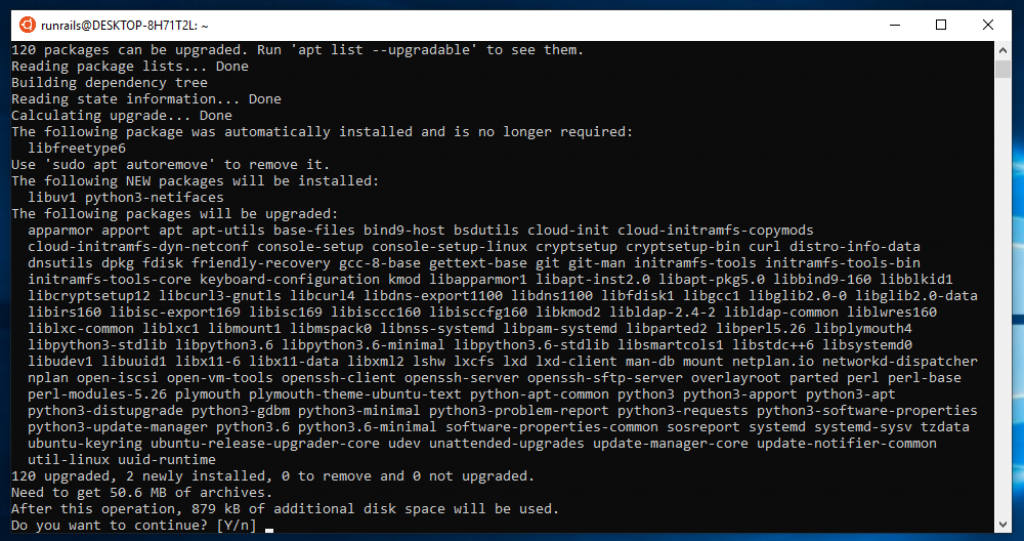
 Before we start installing stuff we have to update the Linux packages. Copy and paste this line to update everything:
sudo apt update && sudo apt dist-upgrade && sudo apt-get autoremove && sudo apt-get clean
Tip: you can right-click to paste something in the WSL terminal.
It’s a good practice to run this line once a month to keep things updated and safe.
Install Ruby and Rails and dependencies
Just a tip: if you hold shift while clicking on the Ubuntu icon you open a second window.
Rails has a lot of dependencies, let’s install them:
sudo apt-get install git-core curl zlib1g-dev build-essential libssl-dev libreadline-dev libyaml-dev libsqlite3-dev sqlite3 libxml2-dev libxslt1-dev libcurl4-openssl-dev software-properties-common libffi-dev libreadline-dev zlib1g-dev
Before we can install Rails we need Ruby first. There are many ways to install Ruby:
- from apt with sudo apt install ruby2.5
- with RVM
- with rbenv
- compile from source (hard mode)
Let’s go with rbenv because that is the most common way:
curl -fsSL https://github.com/rbenv/rbenv-installer/raw/master/bin/rbenv-installer | bash
and add rbenv to the PATH variable, like it asks for after installation:
echo 'export PATH="$HOME/.rbenv/bin:$PATH"' >> ~/.bashrc
echo 'eval "$(rbenv init -)"' >> ~/.bashrc
exec $SHELL
Be careful when copy & pasting, sometimes Windows turns single quotes (‘) into backticks (`) or other curly quotes.
When rbenv is installed you can use it to install Ruby and activate it. No need for sudo this time.
rbenv install 2.5.3
rbenv local 2.5.3
TIP: I’ve noticed that WSL sometimes seems to hang, usually selecting the window and pressing a random key is enough to activate it again. So when the commands above seem to take a very long time press the spacebar every now and then to make sure it’s still working.
Time to install bundler and then Rails:
gem install bundler
gem install rails
You now have an up to date WSL environment with rbenv, ruby 2.5.3 and the latest bundler and rails installed.
Databases
I’ll do a writeup of installing Postgresql in another post. But it basically comes down to two choices:
- install Postgres inside WSL
- install Postgres with the Windows installer
My recommendation is to use the Windows installer because I ran into some weird problems when trying to use Postgres in WSL. Use the interactive installer, not the Graphical installer by BigSQL.
Some tips and tricks
Ping me on Twitter or email if you need more help. Or look at one of the guides other people have written:
GoRails: Rails on Windows 10
DO NOT READ THIS FILE ON GITHUB, GUIDES ARE PUBLISHED ON https://guides.rubyonrails.org.
Getting Started with Rails
This guide covers getting up and running with Ruby on Rails.
After reading this guide, you will know:
- How to install Rails, create a new Rails application, and connect your
application to a database. - The general layout of a Rails application.
- The basic principles of MVC (Model, View, Controller) and RESTful design.
- How to quickly generate the starting pieces of a Rails application.
Guide Assumptions
This guide is designed for beginners who want to get started with creating a Rails
application from scratch. It does not assume that you have any prior experience
with Rails.
Rails is a web application framework running on the Ruby programming language.
If you have no prior experience with Ruby, you will find a very steep learning
curve diving straight into Rails. There are several curated lists of online resources
for learning Ruby:
- Official Ruby Programming Language website
- List of Free Programming Books
Be aware that some resources, while still excellent, cover older versions of
Ruby, and may not include some syntax that you will see in day-to-day
development with Rails.
What is Rails?
Rails is a web application development framework written in the Ruby programming language.
It is designed to make programming web applications easier by making assumptions
about what every developer needs to get started. It allows you to write less
code while accomplishing more than many other languages and frameworks.
Experienced Rails developers also report that it makes web application
development more fun.
Rails is opinionated software. It makes the assumption that there is a «best»
way to do things, and it’s designed to encourage that way — and in some cases to
discourage alternatives. If you learn «The Rails Way» you’ll probably discover a
tremendous increase in productivity. If you persist in bringing old habits from
other languages to your Rails development, and trying to use patterns you
learned elsewhere, you may have a less happy experience.
The Rails philosophy includes two major guiding principles:
- Don’t Repeat Yourself: DRY is a principle of software development which
states that «Every piece of knowledge must have a single, unambiguous, authoritative
representation within a system». By not writing the same information over and over
again, our code is more maintainable, more extensible, and less buggy. - Convention Over Configuration: Rails has opinions about the best way to do many
things in a web application, and defaults to this set of conventions, rather than
require that you specify minutiae through endless configuration files.
Creating a New Rails Project
The best way to read this guide is to follow it step by step. All steps are
essential to run this example application and no additional code or steps are
needed.
By following along with this guide, you’ll create a Rails project called
blog, a (very) simple weblog. Before you can start building the application,
you need to make sure that you have Rails itself installed.
NOTE: The examples below use $ to represent your terminal prompt in a UNIX-like OS,
though it may have been customized to appear differently. If you are using Windows,
your prompt will look something like C:source_code>.
Installing Rails
Before you install Rails, you should check to make sure that your system has the
proper prerequisites installed. These include:
- Ruby
- SQLite3
Installing Ruby
Open up a command line prompt. On macOS open Terminal.app; on Windows choose
«Run» from your Start menu and type cmd.exe. Any commands prefaced with a
dollar sign $ should be run in the command line. Verify that you have a
current version of Ruby installed:
$ ruby --version
ruby 2.7.0
Rails requires Ruby version 2.7.0 or later. It is preferred to use the latest Ruby version.
If the version number returned is less than that number (such as 2.3.7, or 1.8.7),
you’ll need to install a fresh copy of Ruby.
To install Rails on Windows, you’ll first need to install Ruby Installer.
For more installation methods for most Operating Systems take a look at
ruby-lang.org.
Installing SQLite3
You will also need an installation of the SQLite3 database.
Many popular UNIX-like OSes ship with an acceptable version of SQLite3.
Others can find installation instructions at the SQLite3 website.
Verify that it is correctly installed and in your load PATH:
The program should report its version.
Installing Rails
To install Rails, use the gem install command provided by RubyGems:
To verify that you have everything installed correctly, you should be able to
run the following in a new terminal:
If it says something like «Rails 7.0.0», you are ready to continue.
Creating the Blog Application
Rails comes with a number of scripts called generators that are designed to make
your development life easier by creating everything that’s necessary to start
working on a particular task. One of these is the new application generator,
which will provide you with the foundation of a fresh Rails application so that
you don’t have to write it yourself.
To use this generator, open a terminal, navigate to a directory where you have
rights to create files, and run:
This will create a Rails application called Blog in a blog directory and
install the gem dependencies that are already mentioned in Gemfile using
bundle install.
TIP: You can see all of the command line options that the Rails application
generator accepts by running rails new --help.
After you create the blog application, switch to its folder:
The blog directory will have a number of generated files and folders that make
up the structure of a Rails application. Most of the work in this tutorial will
happen in the app folder, but here’s a basic rundown on the function of each
of the files and folders that Rails creates by default:
| File/Folder | Purpose |
|---|---|
| app/ | Contains the controllers, models, views, helpers, mailers, channels, jobs, and assets for your application. You’ll focus on this folder for the remainder of this guide. |
| bin/ | Contains the rails script that starts your app and can contain other scripts you use to set up, update, deploy, or run your application. |
| config/ | Contains configuration for your application’s routes, database, and more. This is covered in more detail in Configuring Rails Applications. |
| config.ru | Rack configuration for Rack-based servers used to start the application. For more information about Rack, see the Rack website. |
| db/ | Contains your current database schema, as well as the database migrations. |
| Gemfile Gemfile.lock |
These files allow you to specify what gem dependencies are needed for your Rails application. These files are used by the Bundler gem. For more information about Bundler, see the Bundler website. |
| lib/ | Extended modules for your application. |
| log/ | Application log files. |
| public/ | Contains static files and compiled assets. When your app is running, this directory will be exposed as-is. |
| Rakefile | This file locates and loads tasks that can be run from the command line. The task definitions are defined throughout the components of Rails. Rather than changing Rakefile, you should add your own tasks by adding files to the lib/tasks directory of your application. |
| README.md | This is a brief instruction manual for your application. You should edit this file to tell others what your application does, how to set it up, and so on. |
| storage/ | Active Storage files for Disk Service. This is covered in Active Storage Overview. |
| test/ | Unit tests, fixtures, and other test apparatus. These are covered in Testing Rails Applications. |
| tmp/ | Temporary files (like cache and pid files). |
| vendor/ | A place for all third-party code. In a typical Rails application this includes vendored gems. |
| .gitattributes | This file defines metadata for specific paths in a git repository. This metadata can be used by git and other tools to enhance their behavior. See the gitattributes documentation for more information. |
| .gitignore | This file tells git which files (or patterns) it should ignore. See GitHub — Ignoring files for more information about ignoring files. |
| .ruby-version | This file contains the default Ruby version. |
Hello, Rails!
To begin with, let’s get some text up on screen quickly. To do this, you need to
get your Rails application server running.
Starting Up the Web Server
You actually have a functional Rails application already. To see it, you need to
start a web server on your development machine. You can do this by running the
following command in the blog directory:
TIP: If you are using Windows, you have to pass the scripts under the bin
folder directly to the Ruby interpreter e.g. ruby binrails server.
TIP: JavaScript asset compression requires you
have a JavaScript runtime available on your system, in the absence
of a runtime you will see an execjs error during asset compression.
Usually macOS and Windows come with a JavaScript runtime installed.
therubyrhino is the recommended runtime for JRuby users and is added by
default to the Gemfile in apps generated under JRuby. You can investigate
all the supported runtimes at ExecJS.
This will start up Puma, a web server distributed with Rails by default. To see
your application in action, open a browser window and navigate to
http://localhost:3000. You should see the Rails default information page:

When you want to stop the web server, hit Ctrl+C in the terminal window where
it’s running. In the development environment, Rails does not generally
require you to restart the server; changes you make in files will be
automatically picked up by the server.
The Rails startup page is the smoke test for a new Rails
application: it makes sure that you have your software configured correctly
enough to serve a page.
Say «Hello», Rails
To get Rails saying «Hello», you need to create at minimum a route, a
controller with an action, and a view. A route maps a request to a
controller action. A controller action performs the necessary work to handle the
request, and prepares any data for the view. A view displays data in a desired
format.
In terms of implementation: Routes are rules written in a Ruby DSL
(Domain-Specific Language).
Controllers are Ruby classes, and their public methods are actions. And views
are templates, usually written in a mixture of HTML and Ruby.
Let’s start by adding a route to our routes file, config/routes.rb, at the
top of the Rails.application.routes.draw block:
Rails.application.routes.draw do
  get "/articles", to: "articles#index"

  # For details on the DSL available within this file, see https://guides.rubyonrails.org/routing.html
end
The route above declares that GET /articles requests are mapped to the index
action of ArticlesController.
To create ArticlesController and its index action, we’ll run the controller
generator (with the --skip-routes option because we already have an
appropriate route):
$ bin/rails generate controller Articles index --skip-routes
Rails will create several files for you:
create  app/controllers/articles_controller.rb
invoke  erb
create    app/views/articles
create    app/views/articles/index.html.erb
invoke  test_unit
create    test/controllers/articles_controller_test.rb
invoke  helper
create    app/helpers/articles_helper.rb
invoke    test_unit
The most important of these is the controller file,
app/controllers/articles_controller.rb. Let’s take a look at it:
class ArticlesController < ApplicationController
  def index
  end
end
The index action is empty. When an action does not explicitly render a view
(or otherwise trigger an HTTP response), Rails will automatically render a view
that matches the name of the controller and action. Convention Over
Configuration! Views are located in the app/views directory. So the index
action will render app/views/articles/index.html.erb by default.
Let’s open app/views/articles/index.html.erb, and replace its contents with:
If you previously stopped the web server to run the controller generator,
restart it with bin/rails server. Now visit http://localhost:3000/articles,
and see our text displayed!
Setting the Application Home Page
At the moment, http://localhost:3000 still displays a page with the Ruby on Rails logo.
Let’s display our «Hello, Rails!» text at http://localhost:3000 as well. To do
so, we will add a route that maps the root path of our application to the
appropriate controller and action.
Let’s open config/routes.rb, and add the following root route to the top of
the Rails.application.routes.draw block:
Rails.application.routes.draw do
  root "articles#index"

  get "/articles", to: "articles#index"
end
Now we can see our «Hello, Rails!» text when we visit http://localhost:3000,
confirming that the root route is also mapped to the index action of
ArticlesController.
TIP: To learn more about routing, see Rails Routing from the Outside In.
Autoloading
Rails applications do not use require to load application code.
You may have noticed that ArticlesController inherits from ApplicationController, but app/controllers/articles_controller.rb does not have anything like
require "application_controller" # DON'T DO THIS.
Application classes and modules are available everywhere, you do not need and should not load anything under app with require. This feature is called autoloading, and you can learn more about it in Autoloading and Reloading Constants.
You only need require calls for two use cases:
- To load files under the
libdirectory. - To load gem dependencies that have
require: falsein theGemfile.
MVC and You
So far, we’ve discussed routes, controllers, actions, and views. All of these
are typical pieces of a web application that follows the MVC (Model-View-Controller) pattern.
MVC is a design pattern that divides the responsibilities of an application to
make it easier to reason about. Rails follows this design pattern by convention.
Since we have a controller and a view to work with, let’s generate the next
piece: a model.
Generating a Model
A model is a Ruby class that is used to represent data. Additionally, models
can interact with the application’s database through a feature of Rails called
Active Record.
To define a model, we will use the model generator:
$ bin/rails generate model Article title:string body:text
NOTE: Model names are singular, because an instantiated model represents a
single data record. To help remember this convention, think of how you would
call the model’s constructor: we want to write Article.new(...), not
Articles.new(...).
This will create several files:
invoke  active_record
create    db/migrate/<timestamp>_create_articles.rb
create    app/models/article.rb
invoke    test_unit
create      test/models/article_test.rb
create      test/fixtures/articles.yml
The two files we’ll focus on are the migration file
(db/migrate/<timestamp>_create_articles.rb) and the model file
(app/models/article.rb).
Database Migrations
Migrations are used to alter the structure of an application’s database. In
Rails applications, migrations are written in Ruby so that they can be
database-agnostic.
Let’s take a look at the contents of our new migration file:
class CreateArticles < ActiveRecord::Migration[7.0]
  def change
    create_table :articles do |t|
      t.string :title
      t.text :body

      t.timestamps
    end
  end
end
The call to create_table specifies how the articles table should be
constructed. By default, the create_table method adds an id column as an
auto-incrementing primary key. So the first record in the table will have an
id of 1, the next record will have an id of 2, and so on.
Inside the block for create_table, two columns are defined: title and
body. These were added by the generator because we included them in our
generate command (bin/rails generate model Article title:string body:text).
On the last line of the block is a call to t.timestamps. This method defines
two additional columns named created_at and updated_at. As we will see,
Rails will manage these for us, setting the values when we create or update a
model object.
Let’s run our migration with the following command:
The command will display output indicating that the table was created:
==  CreateArticles: migrating ===================================
-- create_table(:articles)
   -> 0.0018s
==  CreateArticles: migrated (0.0018s) ==========================
TIP: To learn more about migrations, see Active Record Migrations.
Now we can interact with the table using our model.
Using a Model to Interact with the Database
To play with our model a bit, we’re going to use a feature of Rails called the
console. The console is an interactive coding environment just like irb, but
it also automatically loads Rails and our application code.
Let’s launch the console with this command:
You should see an irb prompt like:
Loading development environment (Rails 7.0.0)
irb(main):001:0>
At this prompt, we can initialize a new Article object:
irb> article = Article.new(title: "Hello Rails", body: "I am on Rails!")
It’s important to note that we have only initialized this object. This object
is not saved to the database at all. It’s only available in the console at the
moment. To save the object to the database, we must call save:
irb> article.save
(0.1ms)  begin transaction
Article Create (0.4ms)  INSERT INTO "articles" ("title", "body", "created_at", "updated_at") VALUES (?, ?, ?, ?)  [["title", "Hello Rails"], ["body", "I am on Rails!"], ["created_at", "2020-01-18 23:47:30.734416"], ["updated_at", "2020-01-18 23:47:30.734416"]]
(0.9ms)  commit transaction
=> true
The above output shows an INSERT INTO "articles" ... database query. This
indicates that the article has been inserted into our table. And if we take a
look at the article object again, we see something interesting has happened:
irb> article
=> #<Article id: 1, title: "Hello Rails", body: "I am on Rails!", created_at: "2020-01-18 23:47:30", updated_at: "2020-01-18 23:47:30">
The id, created_at, and updated_at attributes of the object are now set.
Rails did this for us when we saved the object.
When we want to fetch this article from the database, we can call find
on the model and pass the id as an argument:
irb> Article.find(1)
=> #<Article id: 1, title: "Hello Rails", body: "I am on Rails!", created_at: "2020-01-18 23:47:30", updated_at: "2020-01-18 23:47:30">
And when we want to fetch all articles from the database, we can call all
on the model:
irb> Article.all
=> #<ActiveRecord::Relation [#<Article id: 1, title: "Hello Rails", body: "I am on Rails!", created_at: "2020-01-18 23:47:30", updated_at: "2020-01-18 23:47:30">]>
This method returns an ActiveRecord::Relation object, which
you can think of as a super-powered array.
TIP: To learn more about models, see Active Record Basics and Active Record Query Interface.
Models are the final piece of the MVC puzzle. Next, we will connect all of the
pieces together.
Showing a List of Articles
Let’s go back to our controller in app/controllers/articles_controller.rb, and
change the index action to fetch all articles from the database:
class ArticlesController < ApplicationController
  def index
    @articles = Article.all
  end
end
Controller instance variables can be accessed by the view. That means we can
reference @articles in app/views/articles/index.html.erb. Let’s open that
file, and replace its contents with:
<h1>Articles</h1>

<ul>
  <% @articles.each do |article| %>
    <li>
      <%= article.title %>
    </li>
  <% end %>
</ul>
The above code is a mixture of HTML and ERB. ERB is a templating system that
evaluates Ruby code embedded in a document. Here, we can see two types of ERB
tags: <% %> and <%= %>. The <% %> tag means «evaluate the enclosed Ruby
code.» The <%= %> tag means «evaluate the enclosed Ruby code, and output the
value it returns.» Anything you could write in a regular Ruby program can go
inside these ERB tags, though it’s usually best to keep the contents of ERB tags
short, for readability.
Since we don’t want to output the value returned by @articles.each, we’ve
enclosed that code in <% %>. But, since we do want to output the value
returned by article.title (for each article), we’ve enclosed that code in
<%= %>.
We can see the final result by visiting http://localhost:3000. (Remember that
bin/rails server must be running!) Here’s what happens when we do that:
- The browser makes a request:
GET http://localhost:3000. - Our Rails application receives this request.
- The Rails router maps the root route to the
indexaction ofArticlesController. - The
indexaction uses theArticlemodel to fetch all articles in the database. - Rails automatically renders the
app/views/articles/index.html.erbview. - The ERB code in the view is evaluated to output HTML.
- The server sends a response containing the HTML back to the browser.
We’ve connected all the MVC pieces together, and we have our first controller
action! Next, we’ll move on to the second action.
CRUDit Where CRUDit Is Due
Almost all web applications involve CRUD (Create, Read, Update, and Delete) operations. You
may even find that the majority of the work your application does is CRUD. Rails
acknowledges this, and provides many features to help simplify code doing CRUD.
Let’s begin exploring these features by adding more functionality to our
application.
Showing a Single Article
We currently have a view that lists all articles in our database. Let’s add a
new view that shows the title and body of a single article.
We start by adding a new route that maps to a new controller action (which we
will add next). Open config/routes.rb, and insert the last route shown here:
Rails.application.routes.draw do
  root "articles#index"

  get "/articles", to: "articles#index"
  get "/articles/:id", to: "articles#show"
end
The new route is another get route, but it has something extra in its path:
:id. This designates a route parameter. A route parameter captures a segment
of the request’s path, and puts that value into the params Hash, which is
accessible by the controller action. For example, when handling a request like
GET http://localhost:3000/articles/1, 1 would be captured as the value for
:id, which would then be accessible as params[:id] in the show action of
ArticlesController.
Let’s add that show action now, below the index action in
app/controllers/articles_controller.rb:
class ArticlesController < ApplicationController
  def index
    @articles = Article.all
  end

  def show
    @article = Article.find(params[:id])
  end
end
The show action calls Article.find (mentioned
previously) with the ID captured
by the route parameter. The returned article is stored in the @article
instance variable, so it is accessible by the view. By default, the show
action will render app/views/articles/show.html.erb.
Let’s create app/views/articles/show.html.erb, with the following contents:
<h1><%= @article.title %></h1>

<p><%= @article.body %></p>
Now we can see the article when we visit http://localhost:3000/articles/1!
To finish up, let’s add a convenient way to get to an article’s page. We’ll link
each article’s title in app/views/articles/index.html.erb to its page:
<h1>Articles</h1>

<ul>
  <% @articles.each do |article| %>
    <li>
      <a href="/articles/<%= article.id %>">
        <%= article.title %>
      </a>
    </li>
  <% end %>
</ul>
Resourceful Routing
So far, we’ve covered the «R» (Read) of CRUD. We will eventually cover the «C»
(Create), «U» (Update), and «D» (Delete). As you might have guessed, we will do
so by adding new routes, controller actions, and views. Whenever we have such a
combination of routes, controller actions, and views that work together to
perform CRUD operations on an entity, we call that entity a resource. For
example, in our application, we would say an article is a resource.
Rails provides a routes method named resources
that maps all of the conventional routes for a collection of resources, such as
articles. So before we proceed to the «C», «U», and «D» sections, let’s replace
the two get routes in config/routes.rb with resources:
Rails.application.routes.draw do
  root "articles#index"

  resources :articles
end
We can inspect what routes are mapped by running the bin/rails routes command:
$ bin/rails routes
      Prefix Verb   URI Pattern                  Controller#Action
        root GET    /                            articles#index
    articles GET    /articles(.:format)          articles#index
 new_article GET    /articles/new(.:format)      articles#new
     article GET    /articles/:id(.:format)      articles#show
             POST   /articles(.:format)          articles#create
edit_article GET    /articles/:id/edit(.:format) articles#edit
             PATCH  /articles/:id(.:format)      articles#update
             DELETE /articles/:id(.:format)      articles#destroy
The resources method also sets up URL and path helper methods that we can use
to keep our code from depending on a specific route configuration. The values
in the «Prefix» column above plus a suffix of _url or _path form the names
of these helpers. For example, the article_path helper returns
"/articles/#{article.id}" when given an article. We can use it to tidy up our
links in app/views/articles/index.html.erb:
<h1>Articles</h1>

<ul>
  <% @articles.each do |article| %>
    <li>
      <a href="<%= article_path(article) %>">
        <%= article.title %>
      </a>
    </li>
  <% end %>
</ul>
However, we will take this one step further by using the link_to
helper. The link_to helper renders a link with its first argument as the
link’s text and its second argument as the link’s destination. If we pass a
model object as the second argument, link_to will call the appropriate path
helper to convert the object to a path. For example, if we pass an article,
link_to will call article_path. So app/views/articles/index.html.erb
becomes:
<h1>Articles</h1>

<ul>
  <% @articles.each do |article| %>
    <li>
      <%= link_to article.title, article %>
    </li>
  <% end %>
</ul>
Nice!
TIP: To learn more about routing, see Rails Routing from the Outside In.
Creating a New Article
Now we move on to the «C» (Create) of CRUD. Typically, in web applications,
creating a new resource is a multi-step process. First, the user requests a form
to fill out. Then, the user submits the form. If there are no errors, then the
resource is created and some kind of confirmation is displayed. Else, the form
is redisplayed with error messages, and the process is repeated.
In a Rails application, these steps are conventionally handled by a controller’s
new and create actions. Let’s add a typical implementation of these actions
to app/controllers/articles_controller.rb, below the show action:
class ArticlesController < ApplicationController
  def index
    @articles = Article.all
  end

  def show
    @article = Article.find(params[:id])
  end

  def new
    @article = Article.new
  end

  def create
    @article = Article.new(title: "...", body: "...")

    if @article.save
      redirect_to @article
    else
      render :new, status: :unprocessable_entity
    end
  end
end
The new action instantiates a new article, but does not save it. This article
will be used in the view when building the form. By default, the new action
will render app/views/articles/new.html.erb, which we will create next.
The create action instantiates a new article with values for the title and
body, and attempts to save it. If the article is saved successfully, the action
redirects the browser to the article’s page at "http://localhost:3000/articles/#{@article.id}".
Else, the action redisplays the form by rendering app/views/articles/new.html.erb
with status code 422 Unprocessable Entity.
The title and body here are dummy values. After we create the form, we will come
back and change these.
NOTE: redirect_to
will cause the browser to make a new request,
whereas render
renders the specified view for the current request.
It is important to use redirect_to after mutating the database or application state.
Otherwise, if the user refreshes the page, the browser will make the same request, and the mutation will be repeated.
Using a Form Builder
We will use a feature of Rails called a form builder to create our form. Using
a form builder, we can write a minimal amount of code to output a form that is
fully configured and follows Rails conventions.
Let’s create app/views/articles/new.html.erb with the following contents:
<h1>New Article</h1>

<%= form_with model: @article do |form| %>
  <div>
    <%= form.label :title %><br>
    <%= form.text_field :title %>
  </div>

  <div>
    <%= form.label :body %><br>
    <%= form.text_area :body %>
  </div>

  <div>
    <%= form.submit %>
  </div>
<% end %>
The form_with
helper method instantiates a form builder. In the form_with block we call
methods like label
and text_field
on the form builder to output the appropriate form elements.
The resulting output from our form_with call will look like:
<form action="/articles" accept-charset="UTF-8" method="post">
  <input type="hidden" name="authenticity_token" value="...">

  <div>
    <label for="article_title">Title</label><br>
    <input type="text" name="article[title]" id="article_title">
  </div>

  <div>
    <label for="article_body">Body</label><br>
    <textarea name="article[body]" id="article_body"></textarea>
  </div>

  <div>
    <input type="submit" name="commit" value="Create Article" data-disable-with="Create Article">
  </div>
</form>
TIP: To learn more about form builders, see Action View Form Helpers.
Using Strong Parameters
Submitted form data is put into the params Hash, alongside captured route
parameters. Thus, the create action can access the submitted title via
params[:article][:title] and the submitted body via params[:article][:body].
We could pass these values individually to Article.new, but that would be
verbose and possibly error-prone. And it would become worse as we add more
fields.
Instead, we will pass a single Hash that contains the values. However, we must
still specify what values are allowed in that Hash. Otherwise, a malicious user
could potentially submit extra form fields and overwrite private data. In fact,
if we pass the unfiltered params[:article] Hash directly to Article.new,
Rails will raise a ForbiddenAttributesError to alert us about the problem.
So we will use a feature of Rails called Strong Parameters to filter params.
Think of it as strong typing
for params.
Let’s add a private method to the bottom of app/controllers/articles_controller.rb
named article_params that filters params. And let’s change create to use
it:
class ArticlesController < ApplicationController
  def index
    @articles = Article.all
  end

  def show
    @article = Article.find(params[:id])
  end

  def new
    @article = Article.new
  end

  def create
    @article = Article.new(article_params)

    if @article.save
      redirect_to @article
    else
      render :new, status: :unprocessable_entity
    end
  end

  private
    def article_params
      params.require(:article).permit(:title, :body)
    end
end
TIP: To learn more about Strong Parameters, see Action Controller Overview §
Strong Parameters.
Validations and Displaying Error Messages
As we have seen, creating a resource is a multi-step process. Handling invalid
user input is another step of that process. Rails provides a feature called
validations to help us deal with invalid user input. Validations are rules
that are checked before a model object is saved. If any of the checks fail, the
save will be aborted, and appropriate error messages will be added to the
errors attribute of the model object.
Let’s add some validations to our model in app/models/article.rb:
class Article < ApplicationRecord
  validates :title, presence: true
  validates :body, presence: true, length: { minimum: 10 }
end
The first validation declares that a title value must be present. Because
title is a string, this means that the title value must contain at least one
non-whitespace character.
The second validation declares that a body value must also be present.
Additionally, it declares that the body value must be at least 10 characters
long.
NOTE: You may be wondering where the title and body attributes are defined.
Active Record automatically defines model attributes for every table column, so
you don’t have to declare those attributes in your model file.
With our validations in place, let’s modify app/views/articles/new.html.erb to
display any error messages for title and body:
<h1>New Article</h1>

<%= form_with model: @article do |form| %>
  <div>
    <%= form.label :title %><br>
    <%= form.text_field :title %>
    <% @article.errors.full_messages_for(:title).each do |message| %>
      <div><%= message %></div>
    <% end %>
  </div>

  <div>
    <%= form.label :body %><br>
    <%= form.text_area :body %><br>
    <% @article.errors.full_messages_for(:body).each do |message| %>
      <div><%= message %></div>
    <% end %>
  </div>

  <div>
    <%= form.submit %>
  </div>
<% end %>
The full_messages_for
method returns an array of user-friendly error messages for a specified
attribute. If there are no errors for that attribute, the array will be empty.
To understand how all of this works together, let’s take another look at the
new and create controller actions:
  def new
    @article = Article.new
  end

  def create
    @article = Article.new(article_params)

    if @article.save
      redirect_to @article
    else
      render :new, status: :unprocessable_entity
    end
  end
When we visit http://localhost:3000/articles/new, the GET /articles/new
request is mapped to the new action. The new action does not attempt to save
@article. Therefore, validations are not checked, and there will be no error
messages.
When we submit the form, the POST /articles request is mapped to the create
action. The create action does attempt to save @article. Therefore,
validations are checked. If any validation fails, @article will not be
saved, and app/views/articles/new.html.erb will be rendered with error
messages.
TIP: To learn more about validations, see Active Record Validations. To learn more about validation error messages,
see Active Record Validations § Working with Validation Errors.
Finishing Up
We can now create an article by visiting http://localhost:3000/articles/new.
To finish up, let’s link to that page from the bottom of
app/views/articles/index.html.erb:
<h1>Articles</h1>

<ul>
  <% @articles.each do |article| %>
    <li>
      <%= link_to article.title, article %>
    </li>
  <% end %>
</ul>

<%= link_to "New Article", new_article_path %>
Updating an Article
We’ve covered the «CR» of CRUD. Now let’s move on to the «U» (Update). Updating
a resource is very similar to creating a resource. They are both multi-step
processes. First, the user requests a form to edit the data. Then, the user
submits the form. If there are no errors, then the resource is updated. Else,
the form is redisplayed with error messages, and the process is repeated.
These steps are conventionally handled by a controller’s edit and update
actions. Let’s add a typical implementation of these actions to
app/controllers/articles_controller.rb, below the create action:
class ArticlesController < ApplicationController
  def index
    @articles = Article.all
  end

  def show
    @article = Article.find(params[:id])
  end

  def new
    @article = Article.new
  end

  def create
    @article = Article.new(article_params)

    if @article.save
      redirect_to @article
    else
      render :new, status: :unprocessable_entity
    end
  end

  def edit
    @article = Article.find(params[:id])
  end

  def update
    @article = Article.find(params[:id])

    if @article.update(article_params)
      redirect_to @article
    else
      render :edit, status: :unprocessable_entity
    end
  end

  private
    def article_params
      params.require(:article).permit(:title, :body)
    end
end
Notice how the edit and update actions resemble the new and create
actions.
The edit action fetches the article from the database, and stores it in
@article so that it can be used when building the form. By default, the edit
action will render app/views/articles/edit.html.erb.
The update action (re-)fetches the article from the database, and attempts
to update it with the submitted form data filtered by article_params. If no
validations fail and the update is successful, the action redirects the browser
to the article’s page. Else, the action redisplays the form — with error
messages — by rendering app/views/articles/edit.html.erb.
Using Partials to Share View Code
Our edit form will look the same as our new form. Even the code will be the
same, thanks to the Rails form builder and resourceful routing. The form builder
automatically configures the form to make the appropriate kind of request, based
on whether the model object has been previously saved.
Because the code will be the same, we’re going to factor it out into a shared
view called a partial. Let’s create app/views/articles/_form.html.erb with
the following contents:
<%= form_with model: article do |form| %>
  <div>
    <%= form.label :title %><br>
    <%= form.text_field :title %>
    <% article.errors.full_messages_for(:title).each do |message| %>
      <div><%= message %></div>
    <% end %>
  </div>

  <div>
    <%= form.label :body %><br>
    <%= form.text_area :body %><br>
    <% article.errors.full_messages_for(:body).each do |message| %>
      <div><%= message %></div>
    <% end %>
  </div>

  <div>
    <%= form.submit %>
  </div>
<% end %>
The above code is the same as our form in app/views/articles/new.html.erb,
except that all occurrences of @article have been replaced with article.
Because partials are shared code, it is best practice that they do not depend on
specific instance variables set by a controller action. Instead, we will pass
the article to the partial as a local variable.
Let’s update app/views/articles/new.html.erb to use the partial via render:
<h1>New Article</h1>

<%= render "form", article: @article %>
NOTE: A partial’s filename must be prefixed with an underscore, e.g.
_form.html.erb. But when rendering, it is referenced without the
underscore, e.g. render "form".
And now, let’s create a very similar app/views/articles/edit.html.erb:
<h1>Edit Article</h1>

<%= render "form", article: @article %>
TIP: To learn more about partials, see Layouts and Rendering in Rails § Using
Partials.
Finishing Up
We can now update an article by visiting its edit page, e.g.
http://localhost:3000/articles/1/edit. To finish up, let’s link to the edit
page from the bottom of app/views/articles/show.html.erb:
<h1><%= @article.title %></h1>

<p><%= @article.body %></p>

<ul>
  <li><%= link_to "Edit", edit_article_path(@article) %></li>
</ul>
Deleting an Article
Finally, we arrive at the «D» (Delete) of CRUD. Deleting a resource is a simpler
process than creating or updating. It only requires a route and a controller
action. And our resourceful routing (resources :articles) already provides the
route, which maps DELETE /articles/:id requests to the destroy action of
ArticlesController.
So, let’s add a typical destroy action to app/controllers/articles_controller.rb,
below the update action:
class ArticlesController < ApplicationController
  def index
    @articles = Article.all
  end

  def show
    @article = Article.find(params[:id])
  end

  def new
    @article = Article.new
  end

  def create
    @article = Article.new(article_params)

    if @article.save
      redirect_to @article
    else
      render :new, status: :unprocessable_entity
    end
  end

  def edit
    @article = Article.find(params[:id])
  end

  def update
    @article = Article.find(params[:id])

    if @article.update(article_params)
      redirect_to @article
    else
      render :edit, status: :unprocessable_entity
    end
  end

  def destroy
    @article = Article.find(params[:id])
    @article.destroy

    redirect_to root_path, status: :see_other
  end

  private
    def article_params
      params.require(:article).permit(:title, :body)
    end
end
The destroy action fetches the article from the database, and calls destroy
on it. Then, it redirects the browser to the root path with status code
303 See Other.
We have chosen to redirect to the root path because that is our main access
point for articles. But, in other circumstances, you might choose to redirect to
e.g. articles_path.
Now let’s add a link at the bottom of app/views/articles/show.html.erb so that
we can delete an article from its own page:
<h1><%= @article.title %></h1>

<p><%= @article.body %></p>

<ul>
  <li><%= link_to "Edit", edit_article_path(@article) %></li>
  <li><%= link_to "Destroy", article_path(@article), data: {
                    turbo_method: :delete,
                    turbo_confirm: "Are you sure?"
                  } %></li>
</ul>
In the above code, we use the data option to set the data-turbo-method and
data-turbo-confirm HTML attributes of the «Destroy» link. Both of these
attributes hook into Turbo, which is included by
default in fresh Rails applications. data-turbo-method="delete" will cause the
link to make a DELETE request instead of a GET request.
data-turbo-confirm="Are you sure?" will cause a confirmation dialog to appear
when the link is clicked. If the user cancels the dialog, the request will be
aborted.
And that’s it! We can now list, show, create, update, and delete articles!
InCRUDable!
Adding a Second Model
It’s time to add a second model to the application. The second model will handle
comments on articles.
Generating a Model
We’re going to see the same generator that we used before when creating
the Article model. This time we’ll create a Comment model to hold a
reference to an article. Run this command in your terminal:
$ bin/rails generate model Comment commenter:string body:text article:references
This command will generate four files:
| File | Purpose |
|---|---|
| db/migrate/20140120201010_create_comments.rb | Migration to create the comments table in your database (your name will include a different timestamp) |
| app/models/comment.rb | The Comment model |
| test/models/comment_test.rb | Testing harness for the comment model |
| test/fixtures/comments.yml | Sample comments for use in testing |
First, take a look at app/models/comment.rb:
class Comment < ApplicationRecord
  belongs_to :article
end
This is very similar to the Article model that you saw earlier. The difference
is the line belongs_to :article, which sets up an Active Record association.
You’ll learn a little about associations in the next section of this guide.
The (:references) keyword used in the shell command is a special data type for models.
It creates a new column on your database table with the provided model name appended with an _id
that can hold integer values. To get a better understanding, analyze the
db/schema.rb file after running the migration.
In addition to the model, Rails has also made a migration to create the
corresponding database table:
class CreateComments < ActiveRecord::Migration[7.0]
  def change
    create_table :comments do |t|
      t.string :commenter
      t.text :body
      t.references :article, null: false, foreign_key: true

      t.timestamps
    end
  end
end
The t.references line creates an integer column called article_id, an index
for it, and a foreign key constraint that points to the id column of the articles
table. Go ahead and run the migration:
Rails is smart enough to only execute the migrations that have not already been
run against the current database, so in this case you will just see:
==  CreateComments: migrating =================================================
-- create_table(:comments)
   -> 0.0115s
==  CreateComments: migrated (0.0119s) ========================================
Associating Models
Active Record associations let you easily declare the relationship between two
models. In the case of comments and articles, you could write out the
relationships this way:
- Each comment belongs to one article.
- One article can have many comments.
In fact, this is very close to the syntax that Rails uses to declare this
association. You’ve already seen the line of code inside the Comment model
(app/models/comment.rb) that makes each comment belong to an Article:
class Comment < ApplicationRecord
  belongs_to :article
end
You’ll need to edit app/models/article.rb to add the other side of the
association:
class Article < ApplicationRecord
  has_many :comments

  validates :title, presence: true
  validates :body, presence: true, length: { minimum: 10 }
end
These two declarations enable a good bit of automatic behavior. For example, if
you have an instance variable @article containing an article, you can retrieve
all the comments belonging to that article as an array using
@article.comments.
TIP: For more information on Active Record associations, see the Active Record
Associations guide.
Adding a Route for Comments
As with the articles controller, we will need to add a route so that Rails
knows where we would like to navigate to see comments. Open up the
config/routes.rb file again, and edit it as follows:
Rails.application.routes.draw do
  root "articles#index"

  resources :articles do
    resources :comments
  end
end
This creates comments as a nested resource within articles. This is
another part of capturing the hierarchical relationship that exists between
articles and comments.
TIP: For more information on routing, see the Rails Routing
guide.
Generating a Controller
With the model in hand, you can turn your attention to creating a matching
controller. Again, we’ll use the same generator we used before:
$ bin/rails generate controller Comments
This creates three files and one empty directory:
| File/Directory | Purpose |
|---|---|
| app/controllers/comments_controller.rb | The Comments controller |
| app/views/comments/ | Views of the controller are stored here |
| test/controllers/comments_controller_test.rb | The test for the controller |
| app/helpers/comments_helper.rb | A view helper file |
Like with any blog, our readers will create their comments directly after
reading the article, and once they have added their comment, will be sent back
to the article show page to see their comment now listed. Due to this, our
CommentsController is there to provide a method to create comments and delete
spam comments when they arrive.
So first, we’ll wire up the Article show template
(app/views/articles/show.html.erb) to let us make a new comment:
<h1><%= @article.title %></h1>

<p><%= @article.body %></p>

<ul>
  <li><%= link_to "Edit", edit_article_path(@article) %></li>
  <li><%= link_to "Destroy", article_path(@article), data: {
                    turbo_method: :delete,
                    turbo_confirm: "Are you sure?"
                  } %></li>
</ul>

<h2>Add a comment:</h2>
<%= form_with model: [ @article, @article.comments.build ] do |form| %>
  <p>
    <%= form.label :commenter %><br>
    <%= form.text_field :commenter %>
  </p>
  <p>
    <%= form.label :body %><br>
    <%= form.text_area :body %>
  </p>
  <p>
    <%= form.submit %>
  </p>
<% end %>
This adds a form on the Article show page that creates a new comment by
calling the CommentsController create action. The form_with call here uses
an array, which will build a nested route, such as /articles/1/comments.
Let’s wire up the create in app/controllers/comments_controller.rb:
class CommentsController < ApplicationController
  def create
    @article = Article.find(params[:article_id])
    @comment = @article.comments.create(comment_params)
    redirect_to article_path(@article)
  end

  private
    def comment_params
      params.require(:comment).permit(:commenter, :body)
    end
end
You’ll see a bit more complexity here than you did in the controller for
articles. That’s a side-effect of the nesting that you’ve set up. Each request
for a comment has to keep track of the article to which the comment is attached,
thus the initial call to the find method of the Article model to get the
article in question.
In addition, the code takes advantage of some of the methods available for an
association. We use the create method on @article.comments to create and
save the comment. This will automatically link the comment so that it belongs to
that particular article.
Once we have made the new comment, we send the user back to the original article
using the article_path(@article) helper. As we have already seen, this calls
the show action of the ArticlesController which in turn renders the
show.html.erb template. This is where we want the comment to show, so let’s
add that to the app/views/articles/show.html.erb.
<h1><%= @article.title %></h1>

<p><%= @article.body %></p>

<ul>
  <li><%= link_to "Edit", edit_article_path(@article) %></li>
  <li><%= link_to "Destroy", article_path(@article), data: {
                    turbo_method: :delete,
                    turbo_confirm: "Are you sure?"
                  } %></li>
</ul>

<h2>Comments</h2>
<% @article.comments.each do |comment| %>
  <p>
    <strong>Commenter:</strong>
    <%= comment.commenter %>
  </p>

  <p>
    <strong>Comment:</strong>
    <%= comment.body %>
  </p>
<% end %>

<h2>Add a comment:</h2>
<%= form_with model: [ @article, @article.comments.build ] do |form| %>
  <p>
    <%= form.label :commenter %><br>
    <%= form.text_field :commenter %>
  </p>
  <p>
    <%= form.label :body %><br>
    <%= form.text_area :body %>
  </p>
  <p>
    <%= form.submit %>
  </p>
<% end %>
Now you can add articles and comments to your blog and have them show up in the
right places.

Refactoring
Now that we have articles and comments working, take a look at the
app/views/articles/show.html.erb template. It is getting long and awkward. We
can use partials to clean it up.
Rendering Partial Collections
First, we will make a comment partial to extract showing all the comments for
the article. Create the file app/views/comments/_comment.html.erb and put the
following into it:
<p>
  <strong>Commenter:</strong>
  <%= comment.commenter %>
</p>

<p>
  <strong>Comment:</strong>
  <%= comment.body %>
</p>
Then you can change app/views/articles/show.html.erb to look like the
following:
<h1><%= @article.title %></h1>

<p><%= @article.body %></p>

<ul>
  <li><%= link_to "Edit", edit_article_path(@article) %></li>
  <li><%= link_to "Destroy", article_path(@article), data: {
                    turbo_method: :delete,
                    turbo_confirm: "Are you sure?"
                  } %></li>
</ul>

<h2>Comments</h2>
<%= render @article.comments %>

<h2>Add a comment:</h2>
<%= form_with model: [ @article, @article.comments.build ] do |form| %>
  <p>
    <%= form.label :commenter %><br>
    <%= form.text_field :commenter %>
  </p>
  <p>
    <%= form.label :body %><br>
    <%= form.text_area :body %>
  </p>
  <p>
    <%= form.submit %>
  </p>
<% end %>
This will now render the partial in app/views/comments/_comment.html.erb once
for each comment that is in the @article.comments collection. As the render
method iterates over the @article.comments collection, it assigns each
comment to a local variable named the same as the partial, in this case
comment, which is then available in the partial for us to show.
Rendering a Partial Form
Let us also move that new comment section out to its own partial. Again, you
create a file app/views/comments/_form.html.erb containing:
<%= form_with model: [ @article, @article.comments.build ] do |form| %>
  <p>
    <%= form.label :commenter %><br>
    <%= form.text_field :commenter %>
  </p>
  <p>
    <%= form.label :body %><br>
    <%= form.text_area :body %>
  </p>
  <p>
    <%= form.submit %>
  </p>
<% end %>
Then you make the app/views/articles/show.html.erb look like the following:
<h1><%= @article.title %></h1>

<p><%= @article.body %></p>

<ul>
  <li><%= link_to "Edit", edit_article_path(@article) %></li>
  <li><%= link_to "Destroy", article_path(@article), data: {
                    turbo_method: :delete,
                    turbo_confirm: "Are you sure?"
                  } %></li>
</ul>

<h2>Comments</h2>
<%= render @article.comments %>

<h2>Add a comment:</h2>
<%= render 'comments/form' %>
The second render just defines the partial template we want to render,
comments/form. Rails is smart enough to spot the forward slash in that
string and realize that you want to render the _form.html.erb file in
the app/views/comments directory.
The @article object is available to any partials rendered in the view because
we defined it as an instance variable.
Using Concerns
Concerns are a way to make large controllers or models easier to understand and manage. This also has the advantage of reusability when multiple models (or controllers) share the same concerns. Concerns are implemented using modules that contain methods representing a well-defined slice of the functionality that a model or controller is responsible for. In other languages, modules are often known as mixins.
You can use concerns in your controller or model the same way you would use any module. When you first created your app with rails new blog, two folders were created within app/ along with the rest:
app/controllers/concerns
app/models/concerns
In the example below, we will implement a new feature for our blog that would benefit from using a concern. Then, we will create a concern, and refactor the code to use it, making the code more DRY and maintainable.
A blog article might have various statuses — for instance, it might be visible to everyone (i.e. public), or only visible to the author (i.e. private). It may also be hidden to all but still retrievable (i.e. archived). Comments may similarly be hidden or visible. This could be represented using a status column in each model.
First, let’s run the following migrations to add status to Articles and Comments:
$ bin/rails generate migration AddStatusToArticles status:string
$ bin/rails generate migration AddStatusToComments status:string
And next, let’s update the database with the generated migrations:
To choose the status for the existing articles and comments you can add a default value to the generated migration files by adding the default: "public" option and launch the migrations again. You can also call in a rails console Article.update_all(status: "public") and Comment.update_all(status: "public").
TIP: To learn more about migrations, see Active Record Migrations.
We also have to permit the :status key as part of the strong parameter, in app/controllers/articles_controller.rb:
  private
    def article_params
      params.require(:article).permit(:title, :body, :status)
    end
and in app/controllers/comments_controller.rb:
  private
    def comment_params
      params.require(:comment).permit(:commenter, :body, :status)
    end
Within the article model, after running a migration to add a status column using bin/rails db:migrate command, you would add:
class Article < ApplicationRecord
  has_many :comments

  validates :title, presence: true
  validates :body, presence: true, length: { minimum: 10 }

  VALID_STATUSES = ['public', 'private', 'archived']

  validates :status, inclusion: { in: VALID_STATUSES }

  def archived?
    status == 'archived'
  end
end
and in the Comment model:
class Comment < ApplicationRecord
  belongs_to :article

  VALID_STATUSES = ['public', 'private', 'archived']

  validates :status, inclusion: { in: VALID_STATUSES }

  def archived?
    status == 'archived'
  end
end
Then, in our index action template (app/views/articles/index.html.erb) we would use the archived? method to avoid displaying any article that is archived:
<h1>Articles</h1>

<ul>
  <% @articles.each do |article| %>
    <% unless article.archived? %>
      <li>
        <%= link_to article.title, article %>
      </li>
    <% end %>
  <% end %>
</ul>

<%= link_to "New Article", new_article_path %>
Similarly, in our comment partial view (app/views/comments/_comment.html.erb) we would use the archived? method to avoid displaying any comment that is archived:
<% unless comment.archived? %>
  <p>
    <strong>Commenter:</strong>
    <%= comment.commenter %>
  </p>

  <p>
    <strong>Comment:</strong>
    <%= comment.body %>
  </p>
<% end %>
However, if you look again at our models now, you can see that the logic is duplicated. If in the future we increase the functionality of our blog — to include private messages, for instance — we might find ourselves duplicating the logic yet again. This is where concerns come in handy.
A concern is only responsible for a focused subset of the model’s responsibility; the methods in our concern will all be related to the visibility of a model. Let’s call our new concern (module) Visible. We can create a new file inside app/models/concerns called visible.rb , and store all of the status methods that were duplicated in the models.
app/models/concerns/visible.rb
module Visible
  def archived?
    status == 'archived'
  end
end
We can add our status validation to the concern, but this is slightly more complex as validations are methods called at the class level. The ActiveSupport::Concern (API Guide) gives us a simpler way to include them:
module Visible
  extend ActiveSupport::Concern

  VALID_STATUSES = ['public', 'private', 'archived']

  included do
    validates :status, inclusion: { in: VALID_STATUSES }
  end

  def archived?
    status == 'archived'
  end
end
Now, we can remove the duplicated logic from each model and instead include our new Visible module:
In app/models/article.rb:
class Article < ApplicationRecord
  include Visible

  has_many :comments

  validates :title, presence: true
  validates :body, presence: true, length: { minimum: 10 }
end
and in app/models/comment.rb:
class Comment < ApplicationRecord
  include Visible

  belongs_to :article
end
Class methods can also be added to concerns. If we want to display a count of public articles or comments on our main page, we might add a class method to Visible as follows:
module Visible
  extend ActiveSupport::Concern

  VALID_STATUSES = ['public', 'private', 'archived']

  included do
    validates :status, inclusion: { in: VALID_STATUSES }
  end

  class_methods do
    def public_count
      where(status: 'public').count
    end
  end

  def archived?
    status == 'archived'
  end
end
Then in the view, you can call it like any class method:
<h1>Articles</h1>

Our blog has <%= Article.public_count %> articles and counting!

<ul>
  <% @articles.each do |article| %>
    <% unless article.archived? %>
      <li>
        <%= link_to article.title, article %>
      </li>
    <% end %>
  <% end %>
</ul>

<%= link_to "New Article", new_article_path %>
To finish up, we will add a select box to the forms, and let the user select the status when they create a new article or post a new comment. We can also specify the default status as public. In app/views/articles/_form.html.erb, we can add:
<div>
  <%= form.label :status %><br>
  <%= form.select :status, ['public', 'private', 'archived'], selected: 'public' %>
</div>
and in app/views/comments/_form.html.erb:
<p>
  <%= form.label :status %><br>
  <%= form.select :status, ['public', 'private', 'archived'], selected: 'public' %>
</p>
Deleting Comments
Another important feature of a blog is being able to delete spam comments. To do
this, we need to implement a link of some sort in the view and a destroy
action in the CommentsController.
So first, let’s add the delete link in the
app/views/comments/_comment.html.erb partial:
<% unless comment.archived? %>
  <p>
    <strong>Commenter:</strong>
    <%= comment.commenter %>
  </p>

  <p>
    <strong>Comment:</strong>
    <%= comment.body %>
  </p>

  <p>
    <%= link_to "Destroy Comment", [comment.article, comment], data: {
                  turbo_method: :delete,
                  turbo_confirm: "Are you sure?"
                } %>
  </p>
<% end %>
Clicking this new «Destroy Comment» link will fire off a DELETE /articles/:article_id/comments/:id to our CommentsController, which can then
use this to find the comment we want to delete, so let’s add a destroy action
to our controller (app/controllers/comments_controller.rb):
class CommentsController < ApplicationController
  def create
    @article = Article.find(params[:article_id])
    @comment = @article.comments.create(comment_params)
    redirect_to article_path(@article)
  end

  def destroy
    @article = Article.find(params[:article_id])
    @comment = @article.comments.find(params[:id])
    @comment.destroy
    redirect_to article_path(@article), status: :see_other
  end

  private
    def comment_params
      params.require(:comment).permit(:commenter, :body, :status)
    end
end
The destroy action will find the article we are looking at, locate the comment
within the @article.comments collection, and then remove it from the
database and send us back to the show action for the article.
Deleting Associated Objects
If you delete an article, its associated comments will also need to be
deleted, otherwise they would simply occupy space in the database. Rails allows
you to use the dependent option of an association to achieve this. Modify the
Article model, app/models/article.rb, as follows:
class Article < ApplicationRecord
  include Visible

  has_many :comments, dependent: :destroy

  validates :title, presence: true
  validates :body, presence: true, length: { minimum: 10 }
end
Security
Basic Authentication
If you were to publish your blog online, anyone would be able to add, edit and
delete articles or delete comments.
Rails provides an HTTP authentication system that will work nicely in
this situation.
In the ArticlesController we need to have a way to block access to the
various actions if the person is not authenticated. Here we can use the Rails
http_basic_authenticate_with method, which allows access to the requested
action if that method allows it.
To use the authentication system, we specify it at the top of our
ArticlesController in app/controllers/articles_controller.rb. In our case,
we want the user to be authenticated on every action except index and show,
so we write that:
class ArticlesController < ApplicationController

  http_basic_authenticate_with name: "dhh", password: "secret", except: [:index, :show]

  def index
    @articles = Article.all
  end

  # snippet for brevity
We also want to allow only authenticated users to delete comments, so in the
CommentsController (app/controllers/comments_controller.rb) we write:
class CommentsController < ApplicationController

  http_basic_authenticate_with name: "dhh", password: "secret", only: :destroy

  def create
    @article = Article.find(params[:article_id])
    # ...
  end

  # snippet for brevity
Now if you try to create a new article, you will be greeted with a basic HTTP
Authentication challenge:

After entering the correct username and password, you will remain authenticated
until a different username and password is required or the browser is closed.
Other authentication methods are available for Rails applications. Two popular
authentication add-ons for Rails are the
Devise rails engine and
the Authlogic gem,
along with a number of others.
Other Security Considerations
Security, especially in web applications, is a broad and detailed area. Security
in your Rails application is covered in more depth in
the Ruby on Rails Security Guide.
What’s Next?
Now that you’ve seen your first Rails application, you should feel free to
update it and experiment on your own.
Remember, you don’t have to do everything without help. As you need assistance
getting up and running with Rails, feel free to consult these support
resources:
- The Ruby on Rails Guides
- The Ruby on Rails mailing list
Configuration Gotchas
The easiest way to work with Rails is to store all external data as UTF-8. If
you don’t, Ruby libraries and Rails will often be able to convert your native
data into UTF-8, but this doesn’t always work reliably, so you’re better off
ensuring that all external data is UTF-8.
If you have made a mistake in this area, the most common symptom is a black
diamond with a question mark inside appearing in the browser. Another common
symptom is characters like «Ã¼» appearing instead of «ü». Rails takes a number
of internal steps to mitigate common causes of these problems that can be
automatically detected and corrected. However, if you have external data that is
not stored as UTF-8, it can occasionally result in these kinds of issues that
cannot be automatically detected by Rails and corrected.
Two very common sources of data that are not UTF-8:
- Your text editor: Most text editors (such as TextMate), default to saving
files as UTF-8. If your text editor does not, this can result in special
characters that you enter in your templates (such as é) to appear as a diamond
with a question mark inside in the browser. This also applies to your i18n
translation files. Most editors that do not already default to UTF-8 (such as
some versions of Dreamweaver) offer a way to change the default to UTF-8. Do
so. - Your database: Rails defaults to converting data from your database into UTF-8
at the boundary. However, if your database is not using UTF-8 internally, it
may not be able to store all characters that your users enter. For instance,
if your database is using Latin-1 internally, and your user enters a Russian,
Hebrew, or Japanese character, the data will be lost forever once it enters
the database. If possible, use UTF-8 as the internal storage of your database.

![]()
Today I saw a twitter thread from DHH, which reminded me that even great developers struggle once in a while 👇
Liquid error: internal
No, it’s not that he bought a new Surface Laptop 3. It’s that he was having trouble running Ruby on Rails on Windows 10 👇
I’m many, many hours into the Windows journey so far, but still haven’t been able to get my Rails apps running. At this point I’m starting to get receptive to the idea of just throwing Linux on it directly instead. Anyone running a minimum fuzz distro on Surface Laptop 3?
22:14 PM — 29 Oct 2019


🤔, he is human after all!.
Interestingly enough I saw a lot of people from Microsoft jump in the thread and try to help 👇
@dhh Lemme know if you need any suggestions or help.
02:55 AM — 29 Oct 2019
@dhh If you want to give any direct feedback lemme know. I know the teams behind a lot of this stuff.
00:11 AM — 29 Oct 2019
👏 Props to Rich Turner for providing some very useful tips 👏

@dhh @chadfowler That’s highly unusual. WSL2 is generally pretty quick. Can I ask you to run `wsl -l -v` in PowerShell and share the output? Also, be sure to click the battery icon and make sure you’re on «Best Performance» when plugged-in?
19:29 PM — 29 Oct 2019

@dhh @rathboma @chadfowler @craigaloewen In WSL1, all files were stored in Windows. In WSL2, each distro gets their own VHDX, and perf should be close to native. However, in WSL2 right now, cloning into e.g. /mnt/c/dev/project/ will be slower than cloning into ~/dev/project
21:46 PM — 29 Oct 2019
Scott Hanselman shared a pretty good blog post about running RoR on Windows using WSL2. Which is fabulous!, but I would need to reformat my laptop, get on the windows insider (beta) fast ring, then enable WSL2.
Which as tempting as it may sound, I’m sure a lot of people don’t want to commit their main laptop to a windows beta build.
Can you get this working right now, on your current Win10 install? Absolutely. I’ll guide you through the process 👇
What are we going to use?
- Win 10 | Version 1903 (Build 18362.449)
- WSL 1
- Visual Studio Code + Remote Developer Extensions
Step #1 — 👀 Make sure Win 10 is updated
Go to the search bar and type
winver
Enter fullscreen mode
Exit fullscreen mode
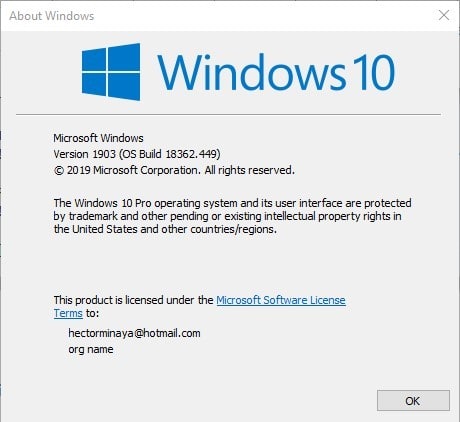
If you are running a version older than Version 1903 (Build 18362.449), go ahead and take the time to update windows, it will save you a lot of headaches 🧠.
Step #2 — 🔨 Install WSL1 + Ruby
Head over to the Microsoft Store and install your favorite version of Linux, In my case I’ll use Ubuntu.
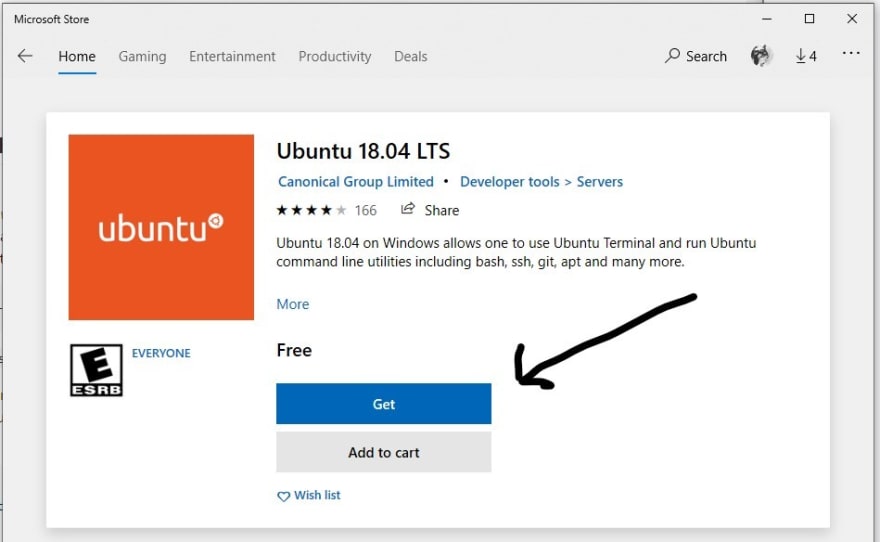
Once installed, just run the terminal and it will ask you to setup a username and pass 👇
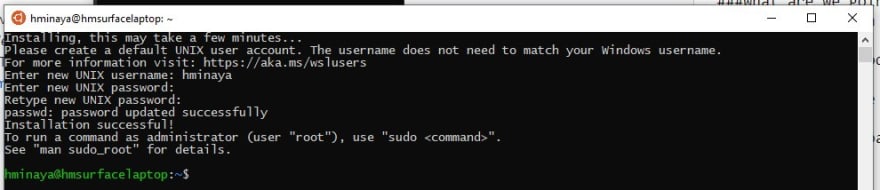
- ⚠ Disclaimer #1: For the sake of brevity I’ll take some shortcuts installing Ruby on Ubuntu, I do recommend installing RVM or rbenv and following proper protocol.*
First I’ll install some prerequisites so I don’t run into issues later on, just run the following commands 👇
sudo apt-get install software-properties-common
sudo apt-get install -y nodejs
sudo apt-get install gcc g++ make
sudo apt-get install libxml2-dev
sudo apt-get install libsqlite3-dev
sudo apt-get install yarn
Enter fullscreen mode
Exit fullscreen mode
Next, I’ll just go ahead and install Ruby, you can use RVM or rbenv, but I’ll keep it simple for this post 👇
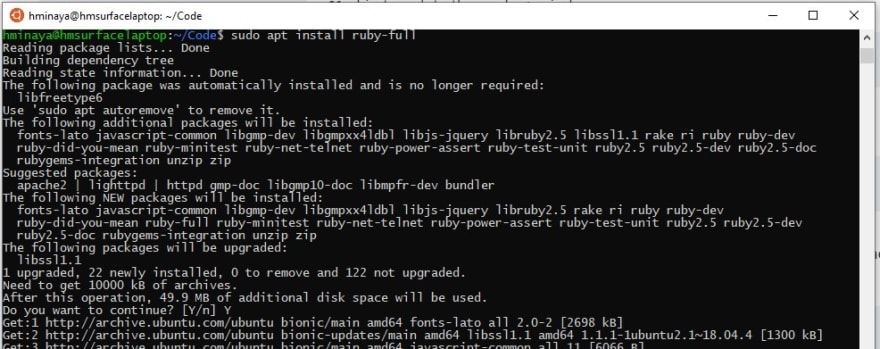
After a few minutes you should have Ruby installed 👏. Now we’ll install Rails to get an app running 👇


🎈🎊👏
Step #3 — 💻 Let’s get VSCode running 🔥
Basically we are going to use VsCode to access the file system in WSL and make changes to our app.
- ⚠ Disclaimer #2: WSL1 and WSL2 are very different beasts. Follow the official Microsoft recommendations on where exactly to place your files. For now, I’m just trying to make the point of working in Windows while accessing the Ubuntu file system in WSL.*
So now, head over to VSCode and install the fabulous Remote Development Pack, this will enable you to open up the WSL filesystem and access the app you just created 👇

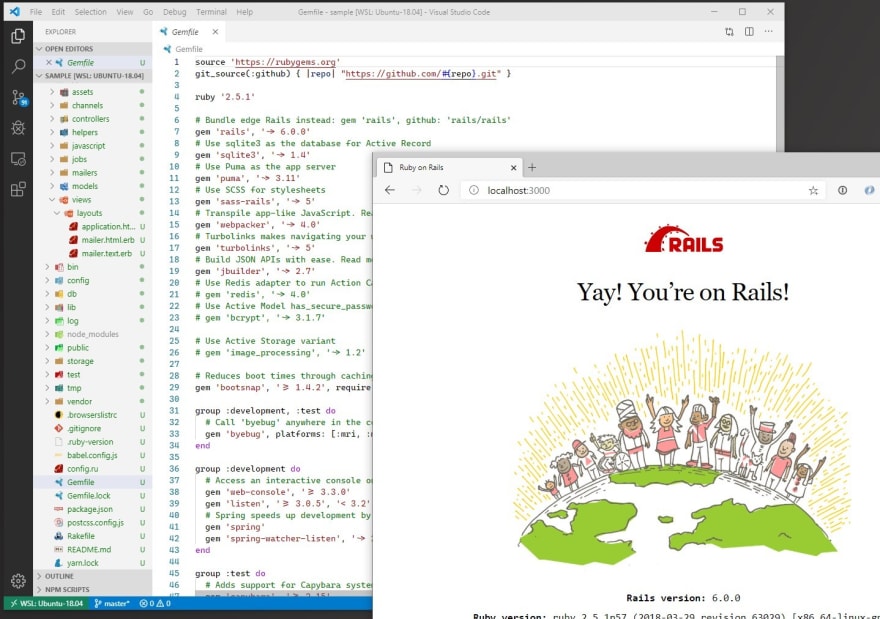
- 1. Установка Ruby on Rails
- 2. Установка с RailsInstaller
Работая с
WordPress
на хостинг-провайдере
TimeWeb
уже почти год, начинаю проявлять всё больший интерес к веб-разработке. В частности это также связано с тем, что данная CMS всё же достаточно прожорлива до ресурсов, а также и с тем, что начинают появляться мысли по поводу новых проектов. Да и в плане расширения кругозора в области программирования хотелось бы попробовать чего-нибудь иного, отличного от
Qt/C++
.
Поэтому выбор пал на
Ruby on Rails
. Здесь я получаю и нечто иное, отличное от
Qt/C++
, а также и возможность поработать в области веб-разработки в своё удовольствие.
Полистав немного документацию и примеры первого запуска веб-сервиса в стиле
«Hello world!»
, я решил поделиться тем, что из этого вышло.
Установка Ruby on Rails
Для первоначальной разработки понадобятся следующие компоненты:
-
Сам
Ruby,
который необходимо скачать по следующей ссылке:http://rubyinstaller.org/downloads/
-
Для сборки модулей
Ruby
понадобится компилятор
MinGW,
но погодите, у меня же Qt установлен, так что с этим всё нормально. -
Так же понадобится
DevelopmentKit
для сборки
Rails.
Распаковать нужно поверх каталога с Ruby. -
SQLite — начинать надо всегда с малого, поэтому не будем замахиваться на MySQL и PostgreSQL. Чтобы сильно не заморачиваться берём
Precompiled Binaries for Windows.
Архив нужно распаковывать в в каталог
Rubybin.
-
Далее в меню
Пуск
находим
Comand Prompt with Ruby,
запускаем (откроется коммандная строка в каталоге с сайтами, по умолчанию C:Sites) и выполняем следующие команды:
gem install sqlite3
— установка SQLite
gem install rails
— установка рельс- Создание тестового приложения:
rails new blog
cd blog
rails server
— будет запущен веб-сервер, страничку которого вы найдёте по следующему адресу: localhost:3000
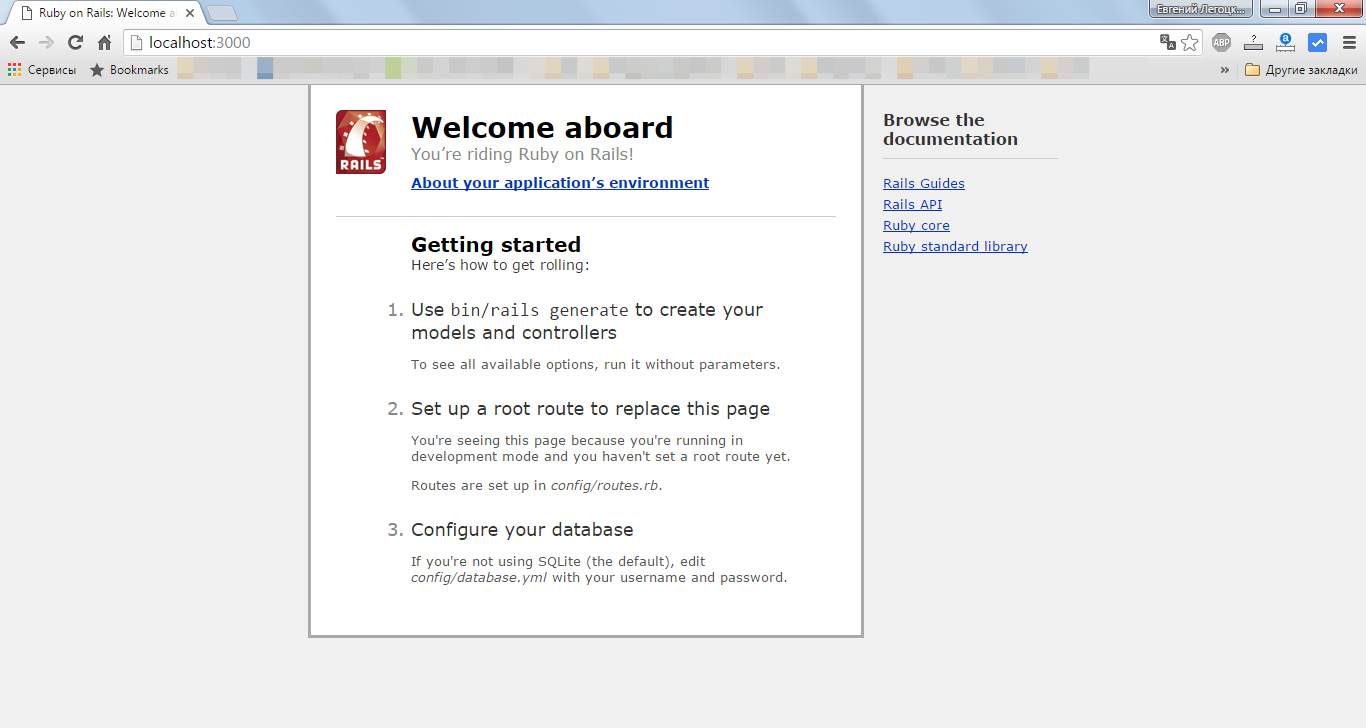
Такой вариант установки и запуска тестового приложения может использоваться в том случае, если не использовать специальные сборки. Но
Ruby
же позиционируется как язык программирования для быстрой разработки. Так почему же не воспользоваться средствами, позволяющими по быстрому установить Ruby on Rails и увидеть результат практически сразу? Этой благой цели служит
RailsInstaller
. Скачиваем последнюю версию и запускаем установку.
Установка с RailsInstaller
В процессе установки необходимо пройти три простых шага, продемонстрированных на ниже следующих изображениях. По завершению установки откроется
Comand Prompt with Ruby and Rails.
После чего повторите шаги 5-6, описанные выше.