Table of Contents
-
Installation and running
- Supported platforms
- Installing binary package
- Installing from source code
-
Basics
-
Creating new database
- Permanent vs transient database
- Using existing database
-
Managing database list
- Editing database details
- Organizing database list
- Deleting database from the list
-
Executing SQL queries
- SQL Editor window
- Buttons on toolbar
- Typing SQL queries
- Code completion
- Query execution history
- Built-in SQL functions
-
Editing the data
- Value editor dialog
- Transparent database attaching
-
Creating and editing tables
-
Column dialog
- Column constraints
- Table constraints
- WITHOUT ROWID tables
- Virtual tables
-
Column dialog
-
Creating and editing indexes
- Partial indexes
-
Creating and editing triggers
- Trigger for a View
- Creating and editing views
- Moving and copying objects between databases
- Exporting schema and data
- Importing data
- Useful keyboard shortcuts
-
Configuration dialog
- Customizing data type editors
- Command line options
- SQLiteStudio configuration file
-
SQLiteStudio updates
- Automatic
- Manual
-
Creating new database
-
Advanced usage
- Custom SQL functions
- Code snippets
- Custom collations
- SQLite extensions
- Populating tables
- DDL history
- Converting SQLite database version
- Command line interface (CLI)
-
Troubleshooting
- SQLiteStudio crashed! What do I do?
- I have saved binary data into SQLite 2 database, but now it’s damaged, empty or truncated!
- I’m using Fcitx input method, but it doesn’t work in SQLiteStudio
- See also
Installation and running
Supported platforms
| Platform | Status | Binaries provided | Notes |
|---|---|---|---|
| Windows (32bit) | Supported | Yes | |
| Windows (64bit) | Supported | Yes | |
| Linux (32bit) | Should work, not tested | No | |
| Linux (64bit) | Supported | Yes | |
| Mac OS X (ARM / M1) | Should work, not tested | No | |
| Mac OS X (ix86 64bit) | Supported | Yes | |
| Mac OS X (ix86 32bit) | Not supported | No | |
| Mac OS X (PowerPC) | Not supported | No | |
| FreeBSD | Should work, not tested | No | |
| Solaris | Should work, not tested | No | |
| Other operating system | Not supported | No |
Installing binary package
Installing from source code
See Compiling application from sources.
Basics
Creating new database
You can create new database in three ways:
- Click on toolbar button:

- Click on main menu entry:
- Right-click on database list and pick entry from context menu:


Then the database dialog will appear:

Click on the browse button:

You will see filesystem browsing dialog (this may look different on various operating systems):

In this dialog go to directory where you want to create your database and type in the file name for your database (on the image above it’s «test.db»). Click «Save». Now the database dialog has file name and database name filled in. You can change the name to whatever you want (in which case you have to disable the checkbox on the right hand side), or just leave it as it is.
The database name is just symbolic name, an alias used by SQLiteStudio to present database in the list. You can pick any name you want, it just has be unique in context of databases already added to SQLiteStudio.
You can press «Test connection» to make sure that your database file can be created in specified localisation (in regards of directory permissions, free space, etc). If everything is okay, than you will see green icon next to it:

If there was any problem, the red icon will appear.
You can now press «Ok» to create the database. You will see it in the databases list on the left:

Double-click to open it:

Permanent vs transient database
You may have noticed the «Permanent» check in the database dialog:

When this option is checked, then the database is added permanently to SQLiteStudio. This means that when you close SQLiteStudio and start it again, the database will remain on the list.
If this option is not checked, then the databases will disappear from the list after SQLiteStudio was restarted.
Using existing database
Adding an existing database to the list is very similar to creating new database.
Repeat steps from above, util you see database dialog:
Then you click (just like before) on browse button:
In the file browsing dialog pick an existing database file:

Then click «Save» and «Ok» in next dialog and your database will be added to the list. You can double-click on it to open it:

Alternatively you can use drag&drop mechanism: drag database file from your file manager and drop it onto the database list, then confirm the database dialog.
Managing database list
Editing database details
You can edit database details at any moment. Just right-click on it and pick «Edit database» from context menu. The standard database dialog will appear.
Changing database’s name is allowed as far, as the new name is unique across all databases being currently on the list.
The database name is just symbolic name, an alias used by SQLiteStudio to present database in the list.
When changing database file path, it will mean that under the same name you will access the new database file. It will not copy nor move the old database file to new location.
When editing database details it’s not possible to change it’s type (SQLite2, SQLite3, or any other), because this is allowed only when creating new datababase. If you want to convert one SQLite version into another, use database conversion dialog.
Organizing database list
You can move databases up and down with mouse «drag & drop». You can create virtual «directories» where you can group databases. It helps maintaining big number of databases on the list.
To create a group, right-click on the databases group and pick «Grouping» → «Create group». Then you can drag & drop databases into that group:


Groups can be nested.
If you right-click on the database and pick «Create group», then the clicked database will be automatically moved into the group after the group was created.
Deleting database from the list
To delete database from the list, select the database and either:
- right-click on it and pick «Remove database»,
- or press «Delete» from the keyboard.
You will be asked for confirmation, before the database is actually removed from the list.
Deleting database from the list does not delete database file! It only removes it from the list of databases in SQLiteStudio. There’s no way to delete actual database file using SQLiteStudio. This is for safety reason — if you really need to delete the database file, do it using your operatins system utils (file manager, command line, …).
Executing SQL queries
SQL Editor window
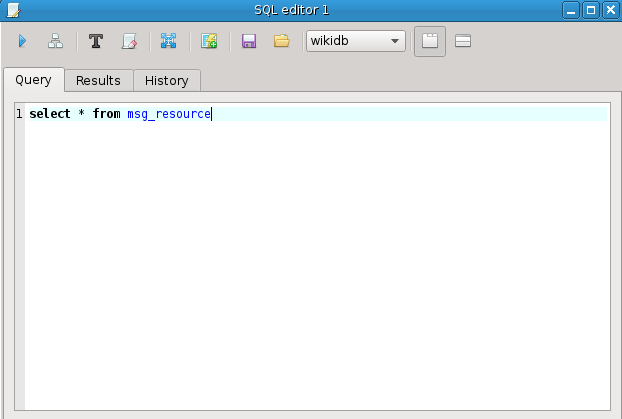
To execute any SQL queries on SQLite database you have to open SQL Editor window:

You can find it also in the «Tools» menu:

It’s also available under keyboard shortcut «Alt+e» (by default, can be changed).
The SQL editor has a upper text edit for entering SQL queries and lower view for displaying results of the query:

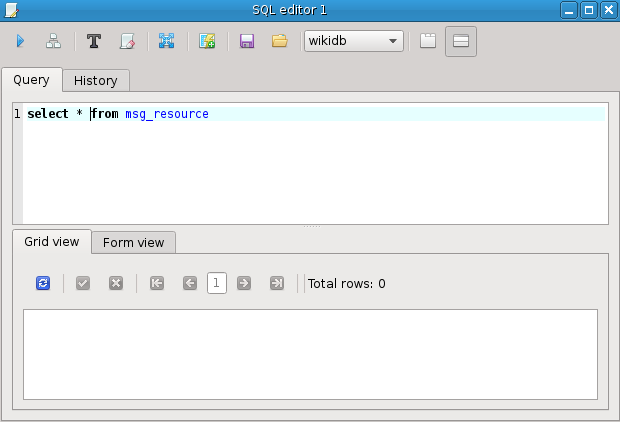
If you prefer to have query edit field on one page and results on another page, you can switch it very quickly from toolbar:

And in the result you get 3 tabs in the editor, instead of 2:

Buttons on toolbar
The list may differ if any plugin adds its own buttons to the toolbar.
Typing SQL queries
When you type SQL query in the editor, it will highlight SQL syntax, but also if you type the correct name of any object (that is existing table, index, trigger, view, database or column name), the name gets highlighted with blue color (by default, it’s configurable):
If you use incorrect SQL syntax, the problematic part will be underlined with wavy line:

To execute the query, use toolbar button  , or keyboard shortcut «F9»
(the shortcut is configurable).
Error handling is done by static syntax analysis, therefore there’s a chance that some errors are detected by mistake. If you think that the marked error is not really the error, you can execute query and SQLiteStudio will not analyze it. Instead it will put query directly to SQLite driver to execute it. If it was indeed correct, then it will return data, but for such cases SQLiteStudio is unable to extract metadata from query and results will not be editable. Only queries that were not marked with error marker will return full metadata and results will be editable. This limitation also affects transparent database attaching.
Even SQLiteStudio claims that the syntax is incorrect, you can still try to execute the query:

In this case, the query was invalid, obviously.
Now, let’s get back to correct query (remove the «qqq» from it) and also switch the results presentation mode, so results are displayed below query, not in separate tab:
Execute the query:

The results appeared in the view below the query and the proper execution status message appeared in the bottom status area.
You can type multiple queries, one after another, just separate them with semicolon. In this case SQLiteStudio will execute all queries types in the editor, but will present only results from the last query:

If you want to execute only one query (even more queries are typed in), select that query and then press «Execute»:

The behaviour of executing all queries typed in is a default, but you can change it, so only query which the input cursor is currently at is executed. To do so, open configuration dialog (button  _on_main_toolbar), go to «General» page and enable this option:

From now on whenever you hit «Execute» in SQL Editor, only one query will be executed, the one under input cursor:

In this mode, after you execute current query, that entire query will be selected, so you can be sure what query exactly was executed:

Code completion
SQLiteStudio provides code assistant, so it can help you with the SQL syntax. When you hit Ctrl+Space (it’s a configurable shortcut), it will show you all possible values for the current cursor position. Let say you typed «SELECT c» and hit Ctrl+Space:

You can see it shows only valid entries that start with the letter «c». Let’s pick «ccc«, then ask the assistant about next suggestions:

First position (with a bullet icon) is a pseudo value, which tells you that you can put an alias name for table or column here. You typed «ccc» before, which is a column name, so here you could type an alias name for it. We won’t do that. Instead we pick «FROM» and add «tab where» and ask the assistant again:

The assistant proposes several columns which you can use in your «where» clause, but notice, that columns from «tab» table are listed at the begining, as you use that table in the query already. This is how the assistant tries to be smart with proposing values — when they are more likely to be used in the context, it will list them at the top.
The assistant is triggered manually by the keyboard shortcut mentioned above, but it also triggers automatically when you type «name.«, where the name is name of existing database or table. In following example I didn’t use keyboard shortcut, this just appeared after I types «wikidb.«:

There’s a small problem with the assistant on Linux with KWin composition enabled, which causes the assistant to show up with a small delay (about half a second). The root cause of this problem is not yet identified. If it bothers you, disabling composition in KWin fixes this issue.
Query execution history
SQL history tab keeps the history of SQL queries you have ever executed. The number of queries kept in history is configurable in Configuration dialog and defaults 1000 entries. When that limit is exceeded, the oldest entry gets deleted.

You can browse and preview queries from the history. Double-click on the entry to automatically copy it into SQL editor, so you can re-execute it.
You can erase entire SQL queries history by clicking on «Erase history» toolbar button and confirming your choice.
Built-in SQL functions
SQLiteStudio defines several SQL functions in databases that it connects to, so you can use them as long as you execute queries from withing SQLiteStudio.
Functions registered by SQLiteStudio are available only from SQLiteStudio. They will not be available in other applications connecting to the database, unless those applications define such functions by themself
| Function | Description |
|---|---|
| regexp(pattern, arg) | Matches arg against pattern, where the pattern is a regular expression. This also makes the REGEXP operator available in SQL queries. Returns 1 on match, or 0 when arg was not matched. |
| sqlfile(file) | Reads given file as text file containing SQL queries and executes all those queries. Returns first column of first row from results of the last query executed from the file. |
| readfile(file) | Reads given file as binary file and returns bytes from it. |
| writefile(file, data) | Writes given data bytes into given file. Returns number of bytes actually written. |
| langs() | Returns list of scripting languages available in SQLiteStudio at the moment (this depends on what scripting language plugins are currently loaded). |
| script(language, code) | Evaluates given code using scripting plugin that supports given language and returns result of the evaluation. Use langs() function to learn supported languages. |
| charsets() | Returns list of charsets supported by SQLiteStudio (to be used for example in arguments for import() function) |
| import_formats() | Returns list of importing formats supported by SQLiteStudio (depends on import plugins being loaded) |
| import_options(format) | Returns list of currently used importing settings for certain format (the format must be one of formats returned from import_formats()). Each setting in a separate line. Each line is a setting_name=setting_value
|
| import(file, format, table, charset, options) | Executes importing process using file for input, format for choosing import plugin (must be one of values returned from import_formats()). The import is done into the table. If table does not exists, it will be created. The charset is optional and must be one of values returned from charsets() (for example 'UTF-8'). It defaults to UTF-8. The options is optional and has to be in the same format as returned from import_options() (which is one option per line, each line is option_name=value), although it’s okay to provide only a subset of options — then the rest of settings will remain. |
| html_escape(string) | Replaces HTML-specific characters in the string with their HTML escape codes and returns modified string. For example ‘<‘ will be replaced with ‘<‘. |
| url_encode(string) | Replaces URL-specific characters with their percent escape codes and returns modified string. For example ‘/’ will be replaced with ‘%2F’. |
| url_decode(string) | Replaces percent escape codes of the URL with their actual characters and returns modified string. For example ‘%2F’ will be replaced with ‘/’. |
| base64_encode(data) | Encodes given bytes with BASE64 encoding and returns BASE64 string. |
| base64_decode(data) | Decodes given bytes from BASE64 encoding and returns decoded bytes. |
| md4_bin(data) | Calculates MD4 hash function for given data and returns calculated value as bytes. |
| md4(data) | Calculates MD4 hash function for given data and returns calculated value as hexadecimal string. |
| md5_bin(data) | Calculates MD5 hash function for given data and returns calculated value as bytes. |
| md5(data) | Calculates MD5 hash function for given data and returns calculated value as hexadecimal string. |
| sha1(data) | Calculates SHA-1 hash function for given data and returns calculated value as bytes. |
| sha224(data) | Calculates SHA-224 hash function for given data and returns calculated value as bytes. |
| sha256(data) | Calculates SHA-256 hash function for given data and returns calculated value as bytes. |
| sha384(data) | Calculates SHA-384 hash function for given data and returns calculated value as bytes. |
| sha512(data) | Calculates SHA-512 hash function for given data and returns calculated value as bytes. |
| sha3_224(data) | Calculates SHA3-224 hash function for given data and returns calculated value as bytes. |
| sha3_256(data) | Calculates SHA3-256 hash function for given data and returns calculated value as bytes. |
| sha3_384(data) | Calculates SHA3-384 hash function for given data and returns calculated value as bytes. |
| sha3_512(data) | Calculates SHA3-512 hash function for given data and returns calculated value as bytes. |
Editing the data
In the Grid view of the data you can start editing values by:
- double-clicking on the cell (old value will remain and will be initially selected),
- selecting the cell and pressing Enter key (old value will remain and will be initially selected),
- selecting the cell and simply start typing the new value (old value will be overwritten immediately),
- right-clicking on the cell and selecting «Edit value in editor» from the context menu (value will be edited in the separate dialog window).
Any changes you make to data are not commited immediately to the database. You have to commit them manually by clicking «Commit» on the toolbar, or hitting «Ctrl+Enter» keyboard shortcut (the shortcut can be changed in Configuration dialog.
If you decide to drop any changes to data you made, click on «Rollback» on the toolbar, or hit «Ctrl+Backspace» keyboard shortcut (it’s also configurable).
You can selectively commit/rollback cells (to commit/rollback only some of current changes). To do so, select cells you want to commit/rollback and right-click on them. You will see «Commit selected cells» and «Rollback selected cells» positions in the context menu.
In the Form view of the data you can edit values of a single row at the time. Each cell from the row is represented here as a tabbed view/editor. By hitting «Commit» or «Rollback» in the Form view you commit/rollback only the current row.
The Form view operates only on rows currently visible in the Grid view, so when you reach the last row from the grid view and you want to edit next rows, you need to switch back to the Grid view, go to next data page and then go to Form view and continue your work.
Note, that before changing pages in Grid view you have to commit/rollback your current changes to the data, otherwise they will be lost.
Value editor dialog
If the column edited is of «BLOB» type, a separate value editor dialog will open. Editor dialog has several tabs where you can view and edit data using different modes (textual, binary, etc). The same dialog will open if you right-click on the cell and select «Edit in value editor».
The same data editors/views are used on the Form view, so if you plan to edit all column using the value editor, you may just as good switch to the Form view.
Value editor can be configured, so it uses certain editor/view modes for the certain column datatype. To do so, use an icon on the right side of the editor view: 
On the left side of the configuration you see the list of datatypes recognized by value editor, where you can select the datatype you want to configure. On top-right area you can see list of all available editor widgets (they are provided by plugins, so the list depends on what plugins you have currently loaded, but many plugins are already built into application). On bottom-right area you have a sample of how your current configuration for selected datatype look like. You can also drag&drop editor tabs to change their order. The left-most editor is a default editor for that datatype (which means that the left tab is always open first for that datatype). 
If there’s a datatype not specified in the configuration list and you step into that type somewhere in your database, SQLiteStudio will pick default editors (Text and Hex).
Transparent database attaching
Transparent attaching feature in SQLiteStudio is an ability of calling ATTACH and DETACH automatically by SQLiteStudio whenever it’s necessary. You can enter your SQL query in SQL editor using tables from several different databases, using database names as presented on databases list: ![]()
Since transparent attaching calls ATTACH and DETACH internally, it’s affected by all limitations that apply to those statements. That is no support for attaching databases of different type. It means that you cannot mix SQLite 2 and SQLite 3 databases in the single query, or any other database type mix ups.
Creating and editing tables
TODO: remember about multi-column sorting TODO: explain difference between column constraints and table constraints
Column dialog
Column constraints
PRIMARY KEY constraints
»’FOREIGN KEY constraints »’
»’ NOT NULL constraints »’
»’ UNIQUE constraints »’
»’ COLLATE constraints »’
»’ CHECK constraints »’
»’ DEFAULT constraints »’
Table constraints
»’ PRIMARY KEY constraints »’
»’ FOREIGN KEY constraints »’
»’ UNIQUE constraints »’
»’ CHECK constraints »’
WITHOUT ROWID tables
Virtual tables
Creating and editing indexes
Partial indexes
Creating and editing triggers
Trigger for a View
Creating and editing views
Moving and copying objects between databases
Exporting schema and data
Importing data
Useful keyboard shortcuts
Configuration dialog
Customizing data type editors
Command line options
Here’s a list of options that can be passed as arguments when running SQLiteStudio. Those options are valid only for the GUI application, for CLI there is separate set of options (click CLI to see details).
| SQLiteStudio options |
|---|
| -h, —help |
| -v, —version |
| -d, —debug |
| —debug-stdout |
| —debug-lemon |
| —debug-sql |
| —debug-sql-db |
| —list-plugins |
| —master-config |
| SQLiteStudio arguments |
|---|
| file |
SQLiteStudio configuration file
Entire SQLiteStudio configuration is stored in a single SQLite3 database file. More details at Configuration directory location page.
SQLiteStudio updates
Automatic
Automatic updates perform:
- updates availability check,
- updates downloading,
- updates installing.
Automatic updates work only for a Portable distribution. If the application was installed from Linux’s package manager, it’s the responsibility of that package manager to update the application.
The updates availability check is always performed at application startup, but it can be disabled by the user (and re-enabled in configuration dialog). It can also be manually triggered by the user from menu Help / Check for updates. User is always asked for confirmation before downloading updates.
Installation of updates might require administrator privileges. If so, SQLiteStudio will ask user for password (on Linux and MacOS X), or for confirmation of privileged operation (on Windows).
HTTP proxy is not supported as for now, so if your HTTP connection requires proxy to be configured, then automatic updates will not work for you. Support for proxy configuration is planned in future versions.
Manual
Manual update is simply about downloading the fresh version from the download page and replacing old version with it.
Advanced usage
Custom SQL functions
SQLiteStudio allows user to create additional SQL functions to be used in SQL queries. You can create for example function «test123()» which will return a random string for you and you will be able to type:
INSERT INTO myTable VALUES (test123());
Custom SQL functions in SQLiteStudio are very useful if your application uses some custom SQL functions for itself and you want to be able to emulate your application’s environment in SQLiteStudio, so you can execute similar queries on the database.
Other use case is when you want to simplify some database maintanance tasks. Creating function which does some more complicated operations using some simple input values can be treated as a procedure by SQLite, because you can execute it with:
SELECT functionName(input_arguments);
To create/edit/delete SQL functions, open Custom SQL Functions editor: 
In the functions editor you need to define few of things:
-
Function name. It needs to be unique.
-
Is your function goind to be Scalar or Aggregate?
- Scalar functions are those applied to every single data row separately. Example of such function is «
length()«. - Aggregate functions are used together with
GROUPBYclause and they are applied to the entire result set. Example of such function is «min()«.
- Scalar functions are those applied to every single data row separately. Example of such function is «
-
Implementation language — a programming language that you will use to define what the function actually do.
-
Input arguments — list of named input arguments. Currently they’re just symbolic names used by a SQL syntax assistant to suggest what are expected input arguments. Nothing more.
-
Databases — for which databases the function should be registered by SQLiteStudio.
-
For Scalar function — a single implementation field is required. It’s the code in chosen programing language that does the actual function’s job. The return value of this code becomes the result of the function call.
-
For Aggregate function there are 3 implementation fields:
- Initialization code — this code is executed once, at the begining of grouped query results. You can use it to initialize some variables to «0» values, or something like that. This field is optional.
- Per step code — this code is executed for each data row from the results. Each iteration uses the same context, which means all variables are shared across all steps.
- Final step code — it’s executed after last «per step» code. You can calculate the final result and releasy any resources you acquired. This code must return the result of the aggregate function.
Arguments passed to function are available in the code as a variables, whose names depend on certain implementation language you chose. For Tcl arguments are available in «$argv«. For QtScript they’re in «arguments» array. To learn how to handle input arguments in certain language, read about the specific plugin that provides support for that language. Offical plugins are described at Scripting languages plugins page).
Custom SQL functions created in SQLiteStudio exist only in context of SQLiteStudio. Functions are not persisted in database, it’s just not how SQLite databases work. If you want to use some function in your own application, you have to register that function in SQLite from your application.
Custom scripts repository
There is a collection of useful scripts maintained here on the wiki: https://github.com/pawelsalawa/sqlitestudio/wiki/Scripts_repository
Code snippets
Code snippets feature was introduced in SQLiteStudio 3.4.0. It allows user to define collection of code snippets that can be then used (inserted) in SQL Editor window.
To define snippets, open the Code Snippets editor either by using toolbar button:

or from menu Tools -> Open Code Snippets editor.
To use (insert) a snippet into current SQL Editor, invoke the code assistant (Ctrl+Space by default — or Cmd+Space on MacOSX) and then, while code assistant is still active, hit the same hotkey again (Ctrl+Space / Cmd+Space). This way you will switch code assistant to another mode — for inserting code snippets. From there you can choose the snippet to insert. If you defined a «code assistant shortcut» for a particular snippet (in snippets editor), then you can hit that shortcut, while code assistant is in «snippets mode». Otherwise you just have to pick the snippet from the list in the assistant.
Custom collations
To add/edit/delete user’s custom collation sequence, open Collations editor: 
Collation sequence is an algorithm definition that is used by SQLite to compare two values and find out if one is less/greater/equal to another. Collations can be used in several contexts by SQLite — for example table’s column can be defined with a specific collation, which will affect how is sorting done for that column, how is grouping by that column done, etc. See SQLite documentation for more details.
Collation implementation is like writting custom SQL function implementation with 2 rules:
- The collation function will always be provided with exactly 2 arguments — values to compare.
- The collation function has to return -1, 0, or 1, when first argument is less then, equal or greater than second argument.
SQLite extensions
SQLite extensions are supported only in SQLite 3. SQLite documentation for details on what are SQLite runtime loadable extensions.
To load SQLite extension into SQLiteStudio database connections, the easiest way is to put it into one of directories, that SQLiteStudio scans for such extensions. You can learn these directories by going into Help -> About -> Environment -> SQLite extensions directories. Usually these are ext and extensions directories, next to plugins directory (in the SQLiteStudio installation directory).
If you put compiled SQLite extension into one of those directories, it will automatically be loaded by SQLiteStudio upon next startup. Note, that such (automatically loaded) extension will not be registered in any database, until you enable it for all or particular databases.
To enable (or just see/add/edit) SQLite extensions currently managed by SQLiteStudio, open Extension Manager: 
You can add more extension directories scanned for automatic loading by defining SQLITESTUDIO_SQLITE_EXTENSIONS environment variable (before application start) pointing to directories (it could be multiple directories, just like you would define PATH environment variable). Another option is to define extra directory during compilation of SQLiteStudio, by passing SQLITE_EXTENSIONS_DIR symbol to compiler with value of desired directory path.
Extension manager window is similar to Collation editor window. On the left side it has list (2) of extensions already registered in the application, which are loaded for defined set (or all) of databases. At the top (1) there is a toolbar, where you can add/remove extensions and commit/rollback any changes made in the manager window. Also in that toolbar there is a help button pointing to this User Manual section.

The main part (3, 4, 5, 6) of the Extension manager window will become enabled/disabled according to your current selection in the list (2) — if there is nothing selected in the list, the main part will stay disabled. When you add/edit certain extension, you need to provide path to the library file, which delivers the extension. This is what you do in the first field (3). You can use file dialog (4) to make it easier.
The initialization function field (5) is optional and should be used if SQLite was unable to initialize an extension, due to missing initialization function. As you may have read in the SQLite documentation, the initialization function name is predicted basing on the library/extension file name, so if the file name does not match initialization function accordingly, you may need to provide the initialization function manually and that’s what you can do in the field (5). Otherwise you can leave it empty.
List of databases in area (6) is just like in Collations editor and Functions editor. You can define there whether certain extension should be loaded for all databases (for SQLite version 3 only) used in the application, or should it be loaded for preselected set of databases.
SQLiteStudio will try to load (probe) the extension that you’re editing (while you type the file path), so you will be notified if the file is invalid/inexisting or there is any other problem (such as initialization function not found). If anything is wrong with the extension file, you will see pulsing red dot at the left-top corner of the file entry. Once you fix file path or initialization extension function name, the red dot will disappear automatically.
Remember to commit your editions. Otherwise they will not be applied.
SQLiteStudio version 3.1.x and older supports extension loading only through load_extension() SQL function executed in SQL editor.
Populating tables
Populating tables feature is a way to insert lots of data into tables, basing on some rules, in order to have some test data to work with. It automates inserting lots of data that have predictible values, like sequence o numbers, random numbers, random text, random numbers, etc, etc.
Populating is done using rules that are defined by Populating plugins. Each plugin has its own input arguments (like minimum/maximum values, etc) and produces set of values basing on input arguments and internal algorithms.
To populate table with data, click on «Populate table» button on Table window’s toolbar. In the Populate dialog you will be able to define how many rows of data you want to produce and select which columns should be populated. Unselected columns will be populated with their default values. When selecting columns to populate, you need to pick a plugin used for populating — this determinates what data will be inserted into that column. Most plugins also have configuration available to specify some details of data production.
DDL history
When managing numerous databases and doing lots of schema changes, it’s useful to have a tool to track and reproduce changed made on the schema. SQLiteStudio shows the DDL preview before executing database object creation/change statements (unless this option was disabled by user). It gets the job done, but it can be clunky to copy the DDL and paste to some it to some other text file to keep the history. It’s also risky, cause one might forget to copy the DDL sometimes.
That’s where the DDL history window comes in. It keeps history of any DDL changes (CREATE statements, DROP statements and any other statements related to changes of database objects), regardless of DDL preview dialog being enabled or not. It keeps information about date and time of execution and database on which the DDL was executed.
Together with SQL history from SQL Editor, DDL history window makes any changes made to any database from SQLiteStudio reproducible.
To open DDL history window, click on «DDL history» button on toolbar: 
Converting SQLite database version
Command line interface (CLI)
If you’re looking for command line options for running main SQLiteStudio application, see Command line options.
CLI is a separate, text-only console application. See Command line interface for more details.
Troubleshooting
SQLiteStudio crashed! What do I do?
Report this on bugs.sqlitestudio.pl, or — if you prefere — you can do it from SQLiteStudio. Go to Help menu and pick «Report a bug».
You can also ask for help on forum.sqlitestudio.pl. Sometime there is a workaround for some bugs, so you can apply them before the bug gets fixed and released in new version.
I have saved binary data into SQLite 2 database, but now it’s damaged, empty or truncated!
The following applies to SQLite 2 only.
Long story short: The old SQLite 2 library is very limited in regards of data types, especially when it comes to binary data. It’s better to use regular text columns and store base64-encoded data.
In more details: To be able to store binary data in SQLite 2 table, you need to define column data type as BLOB, or CLOB, so SQLiteStudio knows that you will be storing binary data in that column. Without that, SQLiteStudio is unable to write and read binary data correctly from that column.
Additionally, the SQLite 2 version has a bug, which makes storing binary data to be truncated to the first occurrence of the null byte (byte with value = 0), just like it is done for regular strings. There’s nothing SQLiteStudio can do about it. Unless you store data with all non-null bytes, the only solution is to use regular TEXT based columns and store base64-encoded data.
I’m using Fcitx input method, but it doesn’t work in SQLiteStudio
Not sure about Windows or MacOS X, but under Linux you can use Fcitx with SQLiteStudio. Here’s how to do that.
- If you are using Linux managed package:
The only thing you may need to do is to change default shortcut for SQLiteStudio code assistant (Ctrl+Space), as it is colliding with Fcitx triggering shortcut.
- If you’re using Portable distribution (binary packages downloaded from SQLiteStudio’s home page):
Copy platforminputcontexts/libfcitxplatforminputcontextplugin.so from your Qt installation into SQLiteStudio/platforminputcontexts/libfcitxplatforminputcontextplugin.so (you will have to create the platforminputcontexts subdirectory), restart SQLiteStudio and that’s it!
In other words, what you have to do is:
sudo apt-get install fcitx-frontend-qt5
ln -s /usr/lib/`arch`-linux-gnu/qt5/plugins/platforminputcontexts/ /path/to/SQLiteStudio3/
Just remember to change the SQLiteStudio’s code assistant shortcut (Ctrl+Space), so it doesn’t collide with Fcitx.
See also
- FAQ
- Forum
-
Главная
-
Инструкции
-
SQLite
-
Краткое руководство по работе с SQLite
SQLite — это внутрипроцессная библиотека, которая реализует автономный, бессерверный, не требующий настройки транзакционный механизм базы данных SQL. Исходный код для SQLite имеется в открытом доступе, позволяет модифицирование и является бесплатным. SQLite выбирают за скорость, минимализм, надёжность. В сервисах timeweb.cloud вы можете установить её на VDS-сервер.
Кстати, в официальном канале Timeweb Cloud мы собрали комьюнити из специалистов, которые говорят про IT-тренды, делятся полезными инструкциями и даже приглашают к себе работать.
Библиотека SQLite уже скомпилирована и доступна к скачиванию и установке с официального сайта. Желающие могут компилировать исходники и самостоятельно.
Для написания и исполнения запросов к базам SQLite можно использовать простую программу-оболочку командной строки — sqlite3. Но также существуют множество бесплатных (например, SQLiteStudio) и коммерческих инструментов с графическим интерфейсом для управления базами SQLite.
Установка и запуск SQLite на Windows
1. Переходим на страницу загрузки SQLite и загружаем файлы, обеспечивающие работу SQLite в Windows, в том числе sqlite3:
2. На своем компьютере создаём новую папку, например, C:sqlite.
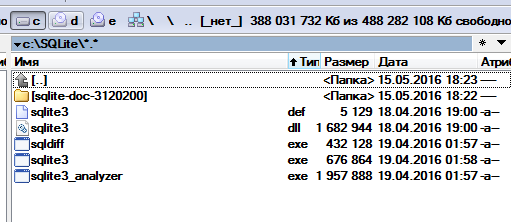
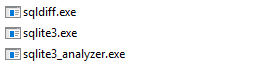
3. Извлекаем содержимое скачанного файла в папку C:sqlite. Там должны появиться три программы:
- Sqlite3.exe
- Sqlite3_analizer.exe
- sqldiff.exe
4. В командной строке переходим в папку с sqlite3.exe и запускаем этот файл. При этом можно указать имя базы данных:
C:>cd C:sqlite
sqlite3 <имя базы данных SQLite>
Если файл с таким именем не существует, то он будет создан автоматически. Если в командной строке не указано имя файла с базой данных, создается временная база данных, которая автоматически удаляется при выходе из sqlite3.
5. Пользователи Windows могут дважды кликнуть значок sqlite3.exe, чтобы открылось всплывающее окно терминала с запущенным sqlite. Однако, так как двойной клик запускает sqlite3 без аргументов, файл базы данных не будет указан, а будет использоваться временная база данных, которая удалится при завершении сеанса.
Установка и запуск SQLite на Linux
Посмотрим как установить на Linux SQLite на примере Ubuntu.
1. Чтобы установить sqlite3 в Ubuntu, сначала обновите список пакетов:
$ sudo apt update2. Затем установите sqlite3:
$ sudo apt install sqlite33. Понять, прошла ли установка, можно, проверив версию:
$ sqlite3 --versionВ случае успеха, вы получите нечто подобное:
3.38.3 2022-04-27 12:03:15 3bfa9cc97da10589251b342961df8f5f68c7399fa117345eeb516bee837balt1Как создать базу данных в SQLite
Существует несколько способов, чтобы сделать создать базу в SQLite:
1. Как отмечалось выше, при запуске sqlite3 можно указать имя базы данных:
$ sqlite3 my_first_db.dbЕсли база my_first_db.db существует, то она откроется, если нет — она будет создана и автоматически удалится при выходе из sqlite3, если к базе не было совершено ни одного запроса. Поэтому, чтобы убедиться, что база записана на диск, можно запустить пустой запрос, введя ; и нажав Enter:
sqlite> ;После работы изменения в базе можно сохранить с помощью специальной команды SQLite «.save» с указанием имени базы:
sqlite> .save my_first_db.dbили полного пути до базы:
sqlite> .save C:/sqlite/my_first_db.dbПри использовании команды «.save» стоит проявлять осторожность, так как эта команда перезапишет все ранее существовавшие файлы с таким же именем не запрашивая подтверждения.
2. В SQLite создать базу данных можно с помощью команды «.open»:
sqlite> .open my_first_db.dbКак и в первом случае, если база с указанным именем существует, то она откроется, если же не существует — то будет создана. При таком способе создания новая база данных SQLite не исчезнет при закрытии sqlite3, но все изменения перед выходом из программы нужно сохранить с помощью команды «.save», как показано выше.
3. Как уже упоминалось, при запуске sqlite3 без аргументов, будет использоваться временная база данных, которая будет удалена при завершении сеанса. Однако эту базу можно сохранить на диск с помощью команды «.save»
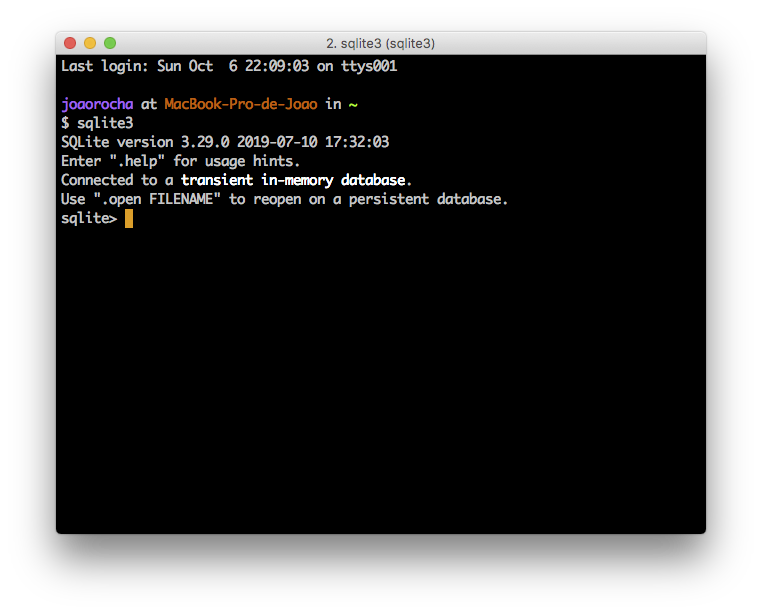
$ sqlite3
SQLite version 3.38.3 2022-04-27 12:03:15
Enter ".help" for usage hints.
Connected to a transient in-memory database.
Use ".open FILENAME" to reopen on a persistent database.
sqlite> ... many SQL commands omitted ...
sqlite> .save db1.db
sqlite>
SQLite. Создание таблицы
Информация в базах SQLite хранится в виде таблиц. Для создания таблиц в SQLite используется запрос CREATE TABLE. Этот запрос должен содержать имя таблицы и имена полей (столбцов), а также может содержать типы данных, описания полей (ключевое поле) и значения по умолчанию. Например, создадим таблицу с описаниями параметров разных пород собак, применяя CREATE TABLE в SQLite:
sqlite> CREATE TABLE dog_params (id integer PRIMARY KEY,
    dog_breed text,
    speed_km_per_h integer,
    weight_kg integer);
В нашей таблице колонка id помечена как PRIMARY KEY. Это значит, что id будет ключевым столбцом (индексом) и целое число для него будет генерироваться автоматически.
Внесение записей в таблицу
Для внесения новой записи в таблицу используется SQL-запрос INSERT INTO, в котором указывается в какую таблицу и в какие поля заносить новые значения. Структура запроса:
sqlite> INSERT INTO таблица (столбец1, столбец2)
VALUES (значение1, значение2);
Если количество значений соответствует количеству колонок в таблице, то названия полей можно исключить из запроса. Столбцы таблицы, которые не отображаются в списке столбцов, заполняются значением столбца по умолчанию (указывается как часть инструкции CREATE TABLE) или значением NULL, если значение по умолчанию не было указано.
Например:
sqlite> INSERT INTO dog_params (dog_breed, speed_km_per_h, weight_kg)
VALUES ("Greyhound", 72, 29);
sqlite> INSERT INTO dog_params VALUES (2, "Jack Russell Terrier", 61, 5);
sqlite> INSERT INTO dog_params VALUES (3, "Dalmation", 59, 24);
В первом случае id сгенерировался сам, так как это поле назначено индексом, а для внесения строчек без указания названий колонок нужно прописывать номера id вручную.
С помощью следующего SQL-запроса можно вставить несколько записей одновременно, id опять сгенерируются автоматически:
sqlite> INSERT INTO dog_params (dog_breed, speed_km_per_h, weight_kg)
VALUES ("Borzoi", 58, 39), ("Standard Poodle", 48, 27);
SQLite. Просмотр таблиц
Чтобы просмотреть всё содержимое таблицы, используется запрос SELECT:
sqlite> SELECT * FROM dog_params;Результат будет выглядеть таким образом:
1|Greyhound|72|29
2|Jack Russell Terrier|61|5
3|Dalmation|59|24
4|Borzoi|58|39
5|Standard Poodle|48|27
С помощью команды WHERE можно просмотреть только те строки, которые удовлетворяют некоторому условию. Например, выведем породы, у которых скорость меньше 60 км/ч:
sqlite> SELECT * FROM dog_params WHERE speed_km_per_h < 60;
3|Dalmation|59|24
4|Borzoi|58|39
5|Standard Poodle|48|27
Изменение записей в таблице
С помощью запроса ALTER TABLE и дополнительных команд можно изменять таблицу следующим образом:
- переименовать таблицу — RENAME TABLE,
- добавить колонку — ADD COLUMN,
- переименовать колонку — RENAME COLUMN,
- удалить колонку — DROP COLUMN.
К примеру, добавим в нашу таблицу колонку с высотой собаки в холке:
sqlite> ALTER TABLE dog_params ADD COLUMN height_cm integer;Чтобы изменить значения в существующих записях таблицы понадобится запрос в SQLite – Update. В этом случае возможно как изменение значений ячейки в группе строк, так и изменение значения ячейки отдельной строки.
В качестве примера, внесем значения высоты собак в холке в нашу таблицу:
sqlite> UPDATE dog_params SET height_cm=71 WHERE id=1;
sqlite> UPDATE dog_params SET height_cm=28 WHERE id=2;
sqlite> UPDATE dog_params SET height_cm=53 WHERE id=3;
sqlite> UPDATE dog_params SET height_cm=69 WHERE id=4;
sqlite> UPDATE dog_params SET height_cm=61 WHERE id=5;
Наша итоговая таблица будет выглядеть так:
sqlite> SELECT * FROM dog_params:
1|Greyhound|72|29|71
2|Jack Russell Terrier|61|5|28
3|Dalmation|59|24|53
4|Borzoi|58|39|69
5|Standard Poodle|48|27|61
Как пользоваться SQLiteStudio
Работать с базами данных SQLite можно не только из командной строки, но и с помощью инструментов с графическим интерфейсом, одним из которых является SQLiteStudio.
Инструмент SQLiteStudio бесплатный, портативный, интуитивно понятный и кроссплатформенный. Он предоставляет много наиболее важных функций для работы с базами данных SQLite, такие как импорт и экспорт данных в различных форматах, включая CSV, XML и JSON.
Вы можете скачать установщик SQLiteStudio или его портативную версию с официального сайта https://sqlitestudio.pl. Затем необходимо извлечь (или установить) загруженный файл в папку, например, C:sqlitegui и запустить его. Подробные инструкции по установке и работе с SQLiteStudio можно найти на сайте.
Привет, посетитель сайта ZametkiNaPolyah.ru! Продолжаем рубрику реляционные базы данных и начинаем новый раздел библиотека SQLite. Давайте установим SQLite3 на наш компьютер. В принципе, установка SQLite — довольно простая и ошибиться здесь трудно. Я буду рассматривать установку SQLite3 на Windows 7. Замечу, что процесс установки SQLite на ОС семейства Windows одинаков.
Помните я уже писал о том, что SQLite3 — это два файла: библиотека и шелл? Вся установка заключается в том, чтобы распаковать архивы с этими двумя файлами.
Где скачать SQLite3
Рассмотрим процесс установки библиотеки SQLite на компьютер под управлением Windows 7. Хочу отметить, что SQLite3 – кросс платформенное приложение и работает одинаково на любой операционной системе.
Первый шаг, который нам нужно сделать – скачать SQLite3. Скачать SQLite3 можно на официальном сайте компании.
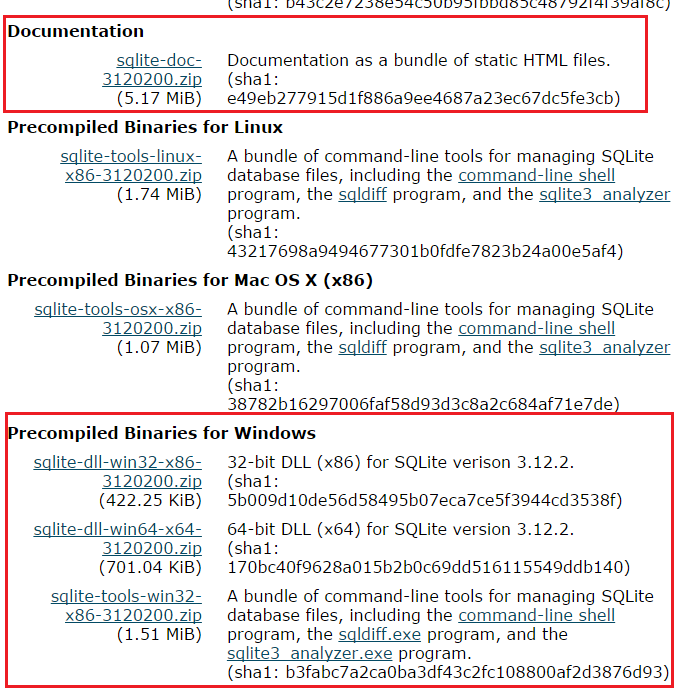
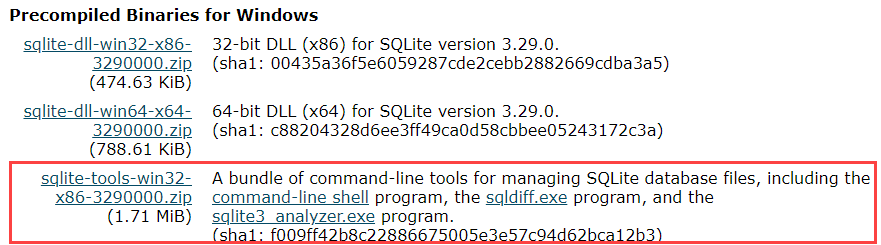
Со страницы Download нам необходимо скачать три архива:
- Архив с документацией sqlite— doc-3120200.zip. Документация очень помогает, когда нет доступа к интернету.
- Sqlite— tools— win32- x86-3120200.zip – это набор утилит для работы и администрирования с базами данных под управлением SQLite
- И на выбор скачиваем sqlite— dll— win64- x64-3120200 или же sqlite— dll— win32- x86-3120200. Выбор зависит от разрядности вашего процессора и операционной системы. Обратите внимание, что х86 можно установить на 64-ех битные системы и всё будет работать, но никак не наоборот.
Установка SQLite на Windows 7
Установим SQLite на компьютер: нам необходимо создать рабочую папку для библиотеки SQLite3.
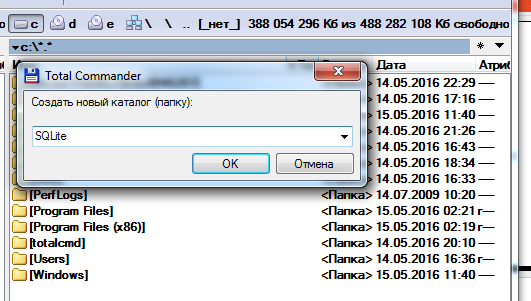
Я буду устанавливать SQLite3 на диск C, поэтому в корне диска С создаю папку с названием SQLite.
В эту папку распаковываю три архива, которые скачал ранее. На самом деле мы уже установили библиотеку SQLite3 на компьютер. Всё, установка SQLite3 завершена.
Запуск библиотеки SQLite3
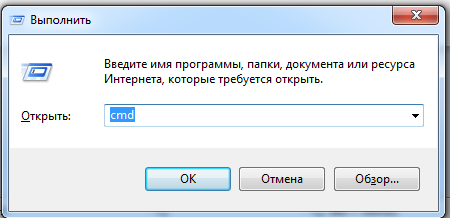
На самом деле, неправильно говорить: запуск SQLite, мы запускаем шелл, через который будем работать с библиотекой. Давайте попробуем ее запустить, для этого нажмем сочетание клавиш:Win+R. Запустится приложение «Выполнить». При помощи приложения «Выполнить» запускаем командную строку командой cmd.
В командной строке набираем sqlite3. Команда sqlite3 служит для запуска оболочки, через которую мы можем работать с базами данных. Но, к сожалению, оболочка не запустилась. А мы получили вот такое предупреждение: «sqlite3» не является внутренней или внешней командой, исполняемой программой или пакетным файлом.
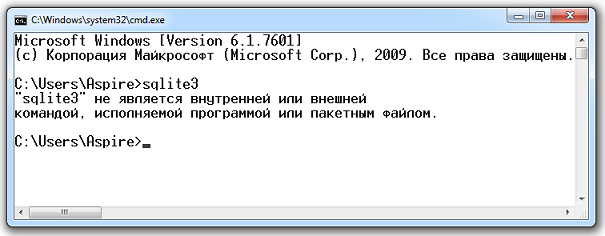
Для решения этой проблемы у нас есть два варианта:
- Мы можем перейти в папку, где находится файл sqlite.exe при помощи команды: cd c:SQLite. После чего шелл библиотеки SQLite3 можно запустить.
- Мы можем добавить путь к файлу sqlite.exe в системную переменную PATH, тогда мы сможем запускать нашу консоль из любой папки на компьютере. Делается это так: нажимаем правой кнопкой мыши на «Компьютер» -> выбираем пункт «Свойства» -> «Дополнительные параметры системы» -> «Переменные среды». В разделе системные переменные находим PATH (если ее еще нет, то создаем) и нажимаем «Изменить». Обратите внимание: переменные разделяются символом точка с запятой. Поэтому ставим точку с запятой после последней переменной и добавляем свою. В моё случае: C:SQLite. Именно в этой папке у меня находится файл sqlite3.exe.
И последнее, что мы сделаем: создадим рабочую среду для библиотеки SQLite3. Всё дело в том, что библиотека SQLite3 создает файл с базой данных именной в той папке, откуда запущен шелл, поэтому я внутри папки C:SQLite, создам еще две: C:SQLiteExample DB и C:SQLiteWorld DB, сюда я положу демонстрационный файл world.db3. База данных World – демонстрационная.
Возможно, эти записи вам покажутся интересными
In this blog post, we will discuss SQLite Studio, a great little management tool, that helps us to easily create and manage SQLite databases. It is a free, cross-platform, portable (no installation required), open-source tool, that can be used without licensing issues even commercially.
The SQLite Studio comes with a list of features like SQL code editor, export and import data to and from various formats (like SQL, XML, JSON, etc) work with multiple databases, encrypted databases, SQL and DDL history, Data population for testing, and many more.
In this post, we will refer to how to install, know about its standard menu, create a sample test database, add table and records, execute a query, export and import database and table records.
Installation – Download, Unzip and Execute
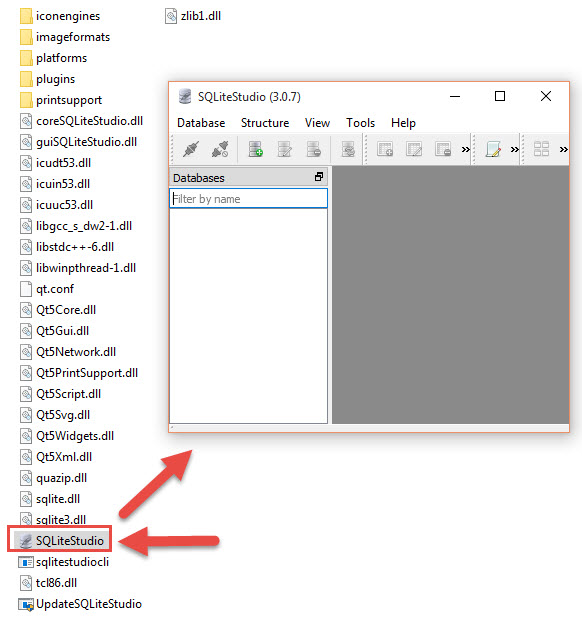
The SQLite Studio is a portable tool that requires no installation. The user can directly download, unzip the downloaded folder and start using the tool. The tool can be download from the https://sqlitestudio.pl/ page.
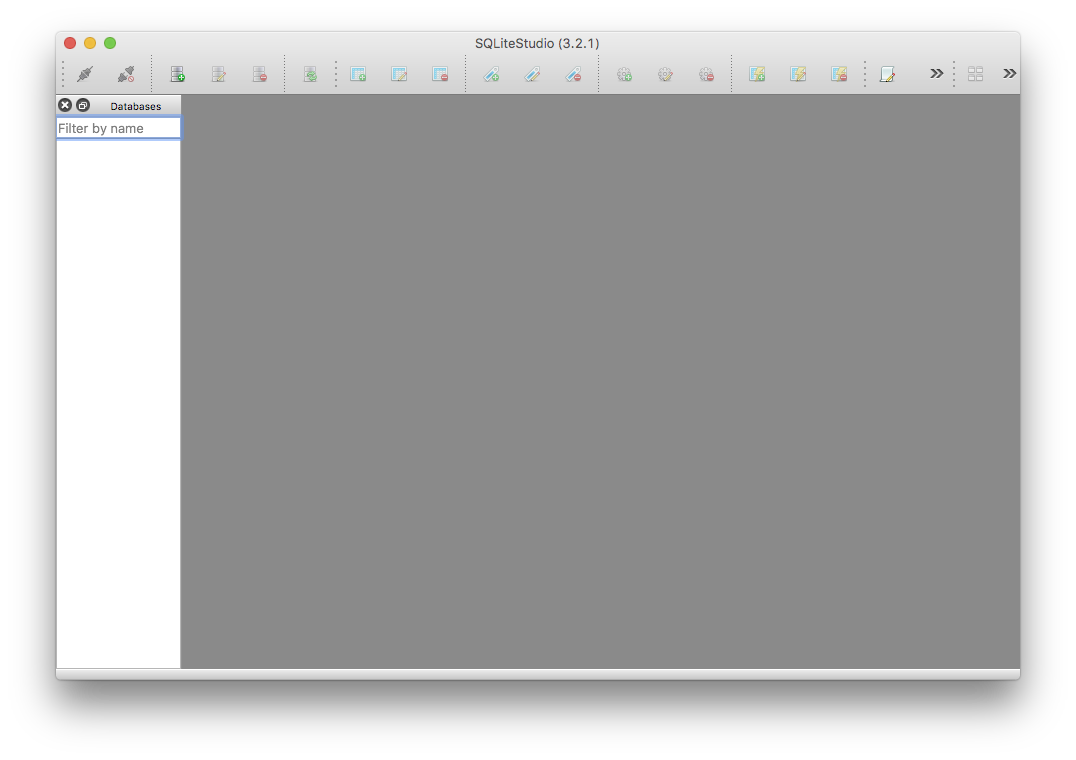
The unzipped folder contains an “SQLiteStudio.exe” executable on a Windows machine. SQLiteStudio on Linux machine. Run the executable to start the studio. I am running version 3.2.1 on a Windows machine.

Standard Menus of SQLite Studio
The SQLite Studio provides a simple user interface with 5 menu options (at the time of writing the current version is: 3.2.1). Let us see what options each of them provide for the user.
The Database menu option provides functionality on the database level and provides the user with an option to perform major operations like adding (creating), editing, removing a database. Connecting to an existing database, export the connected database to SQL, XML, JSON, PDF, HTML formats as well as to convert the database from one format to another like from SQLite3 to SQLCipher, performing integrity test, etc.

The Structure menu option allows the user to perform various database operations like creating, editing, deleting a table, index, trigger, and views.

The View menu provides options related to the Studio layouts, toolbar, and windows management.

The Tools menu provides users with an option to open SQL editor, DDL history, SQL Function editor, Collations editor, Import table data, Export entire database, table, or a query result. As well as options to open Extension Manager and Configuration Editor where the user can configure the look and feel, shortcuts, code formatters details, and data editor values.

The Help menu provides links to the User manual, SQLite documentation, links to Studio’s home page, and forums to request a new feature, report bugs, and an option to check for updates, etc.

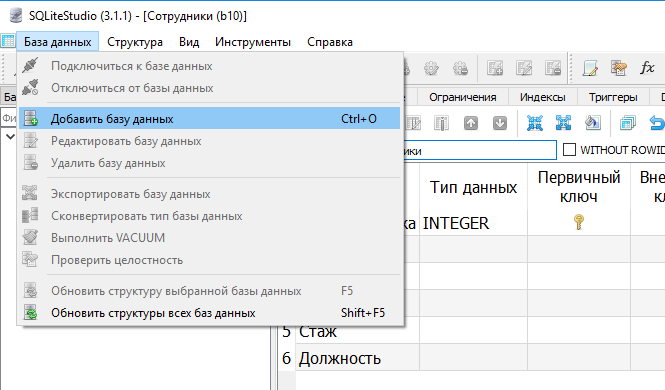
Add (Create) a database
A database can be added (created) in the SQLite Studio in three ways, first is through the Database menu (Database > Add a database), second by using the shortcut key Ctrl + O keys, and third by clicking the “Add a database” icon on the toolbar, on doing so the Database dialog is presented to the user.

Here we have an option to select the Database type; available options in the current versions are SQLite 3, SQLite 2, SQLCipher, System.Data.SQLite and WxSQLite3. For our sample database, we will choose the default Database type i.e. SQLite3

Next is the File section, where we can either provide the name of the database file and click the Ok button to save (this will create a new database file, in the default SQLite Studio location) or we can browse by clicking the “+” button to select a location and save the file. We can also select an existing database. In either case, the database will be added to the Databases list window.
We can choose to provide an alias name for the database by providing a name in the Name (on this list) text box. This name will be used for display purposes in the Databases list window, the actual name of the database file will not be affected. Here we have given “test.db” as the database name.
If we want the database to be always available when the SQLite Studio has opened the check the “Permanent (keep it in configuration)” checkbox.

Here we have created a new database with the following values selected: SQLite3 as the Database Type, “test.db” as the File name, and test as the Name (on the list) as well as checking the Permanent (keep it in configuration) value checked.
After clicking on the OK button, the database file is created and displayed on the Databases list window. Double click the database name to load the artifacts.

Adding a table
Now let us add a new table called Employee into our test database, with the following requirement.
- Id: Integer, Primary Key, and Autoincrement.
- FirstName: varchar(20)
- LastName: varchar(20) and Not Null
A new table can be added in three possible ways, first, from the Structure menu (Structure > Create a table), second by clicking the “Create a table” icon on the toolbar, and third by right-clicking on the Tables in the Databases list window.

On selecting the Create a table option, we will be presented with the table details window, where we have an option to fill in the details using a form or by writing the DDL ourselves. Let us use the Form to fill in the details to create the table.

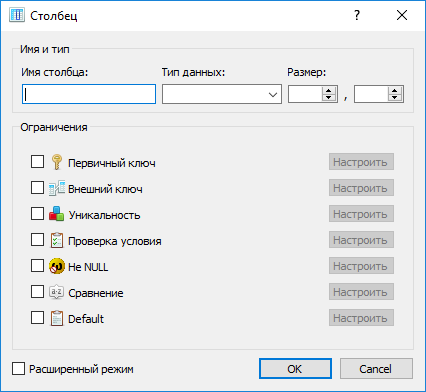
In the form, we will provide the Table name as Employee. Now let us add the first column Id details by clicking the Add-column icon, and fill the column name as Id, Data Type: as INTEGER and check the Primary Key option and then click the Configure button to open the Edit constraint dialog.

Here we will check the Autoincrement checkbox as per the column requirement and click on Apply and then the OK button on the Column dialog.

Next, we will add the second column FirstName again by clicking the Add column icon, with the following values, and click the OK button.

Next, is to add the last column LastName by following the same process.

All the column details will be displayed in the table Structure form. Next, we need to commit it to the database. The changes can be committed by clicking the “Commit structure changes“ icon.

Once we click the “Commit structure changes” icon, we will be displayed the “Queries to be executed” dialog, displaying the DLL statement that will be executed against the database, here we will click the OK button to apply the changes. A status message will also be displayed for our verification purpose in the status window.

Once we apply the changes the table Employee will be added and displayed into the Test>Tables>Employee section in the Databases list window.

Add Records to Employee table
Now let us add a few records and we will do this by double-clicking the Employee table and selecting the Data tab. In this form, we will use the shortcut “Ins” button to insert a new record. (The user can choose to do the same using the “+” icon on the form or by selecting add multiple records at once from the drop-down next to the “+” Insert record icon.)
After inserting the required records, we commit the changes by pressing the “Commit” icon or by using the shortcut (Ctrl + enter)

Executing SQL Queries
In order to execute a SQL query against any database, the SQLite Studio provides a SQL editor. The same can be open from the Tools menu (Tools > Open SQL editor) or by pressing the shortcut key “Alt + E“.
The user can use the same Query Editor window for multiple databases just by changing the active database in the drop-down list.
Let us run a simple query in the editor to check the output. To execute the query we will press the F9 shortcut.

The output of the query is displayed in the Grid view and as a Form view, as well as the status of the query execution, is also displayed in the Status window.
Export database
Let us export the “Test.db” database as an SQL file. In order to export the database, we have three options first, is from the Tools menu (Tools > Export), second is to select “Export the database” from the Database menu and the third option is to right-click on the database name and select “Export the database” from the context menu.

On selecting the menu, we are presented with the Export dialog, select the all the table that needs to be exported. If we want to export the table data as well then have to select the “Export data from tables” option, and click the Next button.

In the next section, we have an option to select the format for the exported file, here we can choose from the various options like HTML, JSON, PDF, SQL, and XML, here we will select the default SQL option.
We can select the output to be a file or just to export the content to the clipboard, here are all the option we have selected, they are all self-explanatory. We have named the file to be DB.sql. Click the Finish button to export the file.

The content to the DB.sql is as follows:
--
-- File generated with SQLiteStudio v3.2.1 on Thu Dec 3 00:09:27 2020
--
-- Text encoding used: System
--
PRAGMA foreign_keys = off;
BEGIN TRANSACTION;

-- Table: Employee
DROP TABLE IF EXISTS Employee;

CREATE TABLE Employee (
    Id        INTEGER      PRIMARY KEY AUTOINCREMENT,
    FirstName VARCHAR (20),
    LastName  VARCHAR (20) NOT NULL
);

INSERT INTO Employee (Id, FirstName, LastName) VALUES (1, 'Lindsay', 'Ferguson');
INSERT INTO Employee (Id, FirstName, LastName) VALUES (2, 'Mathew', 'Hammer');
INSERT INTO Employee (Id, FirstName, LastName) VALUES (3, 'John', 'Doe');

COMMIT TRANSACTION;
PRAGMA foreign_keys = on;
Export Table
We can choose to export a single table as well without exporting the complete database. In order to export a table, right-click on the table name to be exported and select “Export the table” from the context menu.

The Export dialog will appear, we can select to export table data, indexes, and triggers. By default, all these options are checked.

So we will continue by clicking the Next button, and move the next window which is similar to the export database option. Keeping all the options as below, we will click the Finish button.
As the name provided is DB.sql, following is the output of the exported file.
--
-- File generated with SQLiteStudio v3.2.1 on Thu Dec 3 00:24:00 2020
--
-- Text encoding used: System
--
PRAGMA foreign_keys = off;
BEGIN TRANSACTION;

-- Table: Employee
DROP TABLE IF EXISTS Employee;

CREATE TABLE Employee (
    Id        INTEGER      PRIMARY KEY AUTOINCREMENT,
    FirstName VARCHAR (20),
    LastName  VARCHAR (20) NOT NULL
);

INSERT INTO Employee (Id, FirstName, LastName) VALUES (1, 'Lindsay', 'Ferguson');
INSERT INTO Employee (Id, FirstName, LastName) VALUES (2, 'Mathew', 'Hammer');
INSERT INTO Employee (Id, FirstName, LastName) VALUES (3, 'John', 'Doe');

COMMIT TRANSACTION;
PRAGMA foreign_keys = on;
Import Data into a Table
The SQLite Studio also provides an option to import data into an existing table from a CSV file or using a Regular expression. Here will use a CSV file to import data into our Employee table. The content of the CSV file is as follows. Please note my CSV file contain the header information as well.
Id,LastName,FirstName
4,'Edwards', 'George'
5,'Howell', 'Rachel'
6,'Funke', 'Tobias'
In order to import data into a table, right-click on the table name and select the “Import into the table” option or select the Tools menu and Import.

The import dialog is presented with the database and the table name selected. Click the Next button to continue.

Here in the dialog we will select Data source type as CSV, browse and point to our input file, check the “First line represents CSV column names” option as our input file contain the column name and we want to ignore them, and finally select the Field separator as, (comma), and then click the Finish button. This will import all the data into the Employee tables. (Assuming all the data available in the file are correct)

Let us refresh the Employee table data. Here all the data from the CSV file are imported successfully.

Style Configurator
The SQLite Studio provides an option to change its look and feel, as well as to customize its shortcuts, Fonts, colors, Style (theme). The Style configuration dialog can be open from the Tools menu (Tools > Open configuration dialog) or by using the shortcut F2 key.

Conclusion
The SQLite Studio comes with a great number of features like populating a table with random data, function editor, DDL history, Extension manager. Exploring them would be of great help. All in all, it a great tool to manage SQLite databases with ease and is a must-have tool for the team.
The source code and other tools related details can be found on GitHub: https://github.com/pawelsalawa/sqlitestudio
I hope you found this post helpful. Thanks for visiting. Cheers !!!
[Further Readings: Adapter Design Pattern in C# | How to use Blazor EditForm for Model Validation | How to add a new profile in Windows Terminal | How to easily Customize Global Settings in Windows Terminal | How to add Git Bash to Windows Terminal Application | How to customize Windows Terminal Application | How to customize Windows Terminal Key Bindings | How to Install Windows Terminal in Windows 10 | Important Debugging Shortcuts of Visual Studio 2019 | How to publish a Blazor Server Application to IIS | Top 7 Visual Studio 2019 extensions for Web Projects | The difference in Blazor Server and WebAssembly Application ]
Summary: in this tutorial, you will learn step by step on how to download and use the SQLite tools to your computer.
To download SQLite, you open the download page of the SQlite official website.
- First, go to the https://www.sqlite.org website.
- Second, open the download page https://www.sqlite.org/download.html
SQLite provides various tools for working across platforms e.g., Windows, Linux, and Mac. You need to select an appropriate version to download.
For example, to work with SQLite on Windows, you download the command-line shell program as shown in the screenshot below.
The downloaded file is in the ZIP format and its size is quite small.
Run SQLite tools
Installing SQLite is simple and straightforward.
- First, create a new folder e.g.,
C:sqlite. - Second, extract the content of the file that you downloaded in the previous section to the
C:sqlitefolder. You should see three programs in the C:sqlite folder as shown below:
First, open the command line window:
and navigate to the C:sqlite folder.
C:cd c:sqlite
C:sqlite>
Second, type sqlite3 and press enter, you should see the following output:
Code language: CSS (css)
C:sqlite>sqlite3 SQLite version 3.29.0 2019-07-10 17:32:03 Enter ".help" for usage hints. Connected to a transient in-memory database. Use ".open FILENAME" to reopen on a persistent database. sqlite>
Third, you can type the .help command from the sqlite> prompt to see all available commands in sqlite3.
Code language: PHP (php)
sqlite> .help .archive ... Manage SQL archives: ".archive --help" for details .auth ON|OFF Show authorizer callbacks .backup ?DB? FILE Backup DB (default "main") to FILE .bail on|off Stop after hitting an error. Default OFF .binary on|off Turn binary output on or off. Default OFF .cd DIRECTORY Change the working directory to DIRECTORY ...
Fourth, to quit the sqlite>, you use .quit command as follows:
Code language: CSS (css)
sqlite> .quit c:sqlite>
Install SQLite GUI tool
The sqlite3 shell is excellent…
However, sometimes, you may want to work with the SQLite databases using an intuitive GUI tool.
There are many GUI tools for managing SQLite databases available ranging from freeware to commercial licenses.
SQLiteStudio
The SQLiteStudio tool is a free GUI tool for managing SQLite databases. It is free, portable, intuitive, and cross-platform. SQLite tool also provides some of the most important features to work with SQLite databases such as importing, exporting data in various formats including CSV, XML, and JSON.
You can download the SQLiteStudio installer or its portable version by visiting the download page. Then, you can extract (or install) the download file to a folder e.g., C:sqlitegui and launch it.
The following picture illustrates how to launch the SQLiteStudio:
Other SQLite GUI tools
Besides the SQLite Studio, you can use the following free SQLite GUI tools:
- DBeaver is another free multi-platform database tool. It supports all popular major relational database systems MySQL, PostgreSQL, Oracle, DB2, SQL Server, Sybase.. including SQLite.
- DB Browser for SQLite – is an open-source tool to manage database files compatible with SQLite.
In this tutorial, you have learned how to download and install SQLite tools on your computer. Now, you should be ready to work with SQLite. If you have any issues with these above steps, feel free to send us an email to get help.
Was this tutorial helpful ?
Download and Install SQLite, Installing sample database and connecting to a database using SQLite Studio
Summary: This tutorial shows step by step how to download and install SQLite, installing sample database in the SQLite and connecting SQLite database using SQLite Studio
Steps:
- Download SQLite
To download SQLite, open the download page of the SQlite website.
Go to the SQLite website. Then Click on Download button
SQLite provides various versions for various platforms e.g., Windows, Linux, and Mac. Choose an appropriate version to download.
Here to work with SQLite on Windows, download “sqlite-tools-win32-x86-3270100.zip”
Make data easy with Helical Insight.
Helical Insight is world's best open source business intelligence tool.

Click Here to Free Download
It will be downloaded in the zip format.
- Install SQLite
- Open the command line window and navigate to the C:sqlite folder.
- Next type sqlite3 and press enter, we can see the following output:
- Now SQLite database is installed in the machine
- Download sample database
- Go to SQLite installation folder and create folder “db”. Extract the contents of the above downloaded database zip and place it in the db folder
- Using command line program, run below commands to connect database
- Installing GUI tool to connect SQLite database
- To download SQLite studio, go to “https://sqlitestudio.pl/” website and click on download. Select the appropriate version and download.
- Extract the content of the file that we downloaded in the previous step and open the folder
- Run “SQLiteStudio.exe” to open SQLite studio
- Now we can see the “chinook” sample database in the SQLite studio which is installed in the earlier step, we can write SQL queries on the sample database
Create a new folder e.g., C:sqlite.
Extract the content of the file that we downloaded in the previous step to the C:sqlite folder. We can see the sqlite3.exe is in the C:sqlite folder.
c:cd c:sqlite
c:sqlite>
c:sqlite>sqlite3
SQLite version 3.23.0 2018-04-02 11:04:16
Enter ".help" for usage hints.
Connected to a transient in-memory database.
Use ".open FILENAME" to reopen on a persistent database.
sqlite>
Download the sample database using link “http://www.sqlitetutorial.net/wp-content/uploads/2018/03/chinook.zip”
c:sqlite>
Use the following command to connect to the chinook sample database located in the db folder.
c:sqlite>sqlite3 db/chinook.db
We can see the following command:
sqlite>
Now we will try a simple command e.g., .tables to view all the tables available in the sample database
sqlite> .tables
This command will show all the tables present in the database
Make data easy with Helical Insight.
Helical Insight is world's best open source business intelligence tool.

Get your 30 Days Trail Version
To connect SQLite database using GUI tool, download and install SQLite studio. SQLite studio is free, portable, intuitive, and cross-platform. It also provides some of the most important features to work with SQLite databases such as importing, exporting data in various formats including CSV, XML, and JSON.
Here we have downloaded “SQLiteStudio-3.2.1.zip” file/p>
Thank You
Ramu Vudugula
Helical IT Solutions Pvt Ltd

Best Open Source Business Intelligence Software Helical Insight Here
![]()
A Business Intelligence Framework
Best Open Source Business Intelligence Software Helical Insight is Here
![]()
A Business Intelligence Framework
database sqlite sqlite database sqlite studio
Для работы с базой данной (БД) удобно использовать менеджер БД, с помощью которого можно управлять базой в визуальном режиме. Для СУБД SQLite самый удобный менеджер — это SQLiteStudio.
Содержание
- Преимущества SQLiteStudio
- Начало работы
- Создание новой базы данных
- Создание таблиц
- Добавление данных
- Выполнение SQL-запросов
Преимущества SQLiteStudio
Менеджер SQLiteStudio имеет следующие особенности:
- бесплатный;
- портабельный;
- русскоязычный;
- поддерживает UNICODE;
- кросс-платформенный — работает на Windows 9x / 2k / XP / 2003 / Vista / 7, Linux, MacOS X и должен работать на других Unix системах;
- есть возможность экспорта в различные форматы (SQL-операторы, CSV, HTML, XML, PDF, JSON);
- есть возможность импорта данных из различных форматов (CSV, пользовательские текстовые файлы);
- многочисленные небольшие дополнения, такие как форматирование кода, история запросов, выполняемых в окнах редактора, проверка синтаксиса на лету, и многое другое;
- настраиваемые цвета, шрифты и значки;
- открытый исходный код, который опубликован под лицензией GPLv3.
Начало работы
Менеджер SQLiteStudio уже включен в сборку «Си-экспресс«, поэтому, если она у вас установлена, то для запуска нажмите на
c:ProgCodeBlocks2SQLiteStudioSQLiteStudio.exe
Создание новой базы данных
Для создания новой БД SQLite войдите в меню «База данных — Добавить базу данных».
Появится диалог подключения БД.

Введите имя файла и имя базы данных. Имя БД — это просто имя для отображения в списке. Напишите то, какое вам удобно.
Создание таблиц
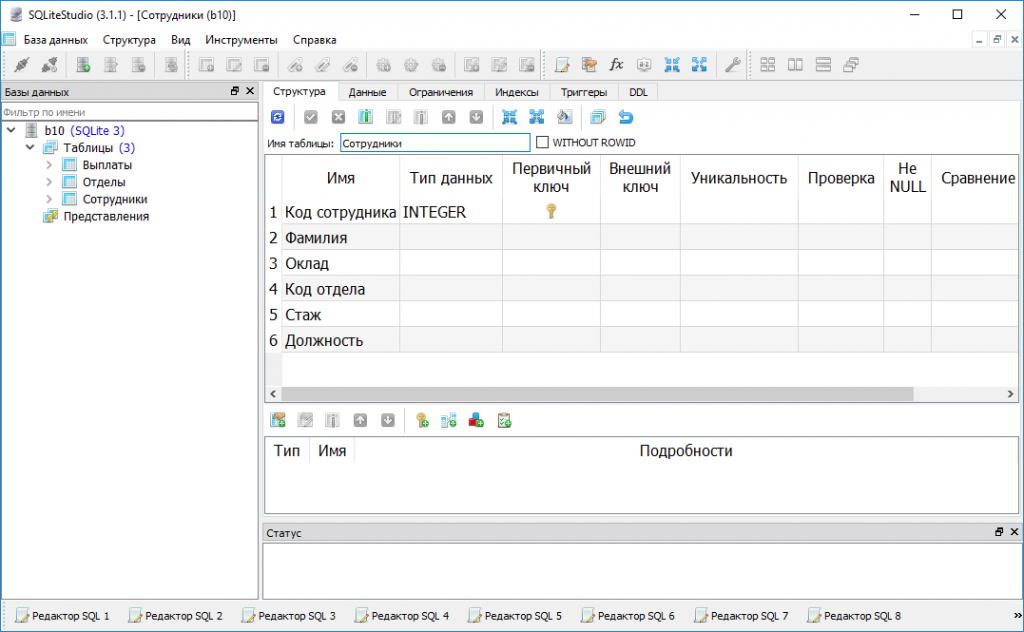
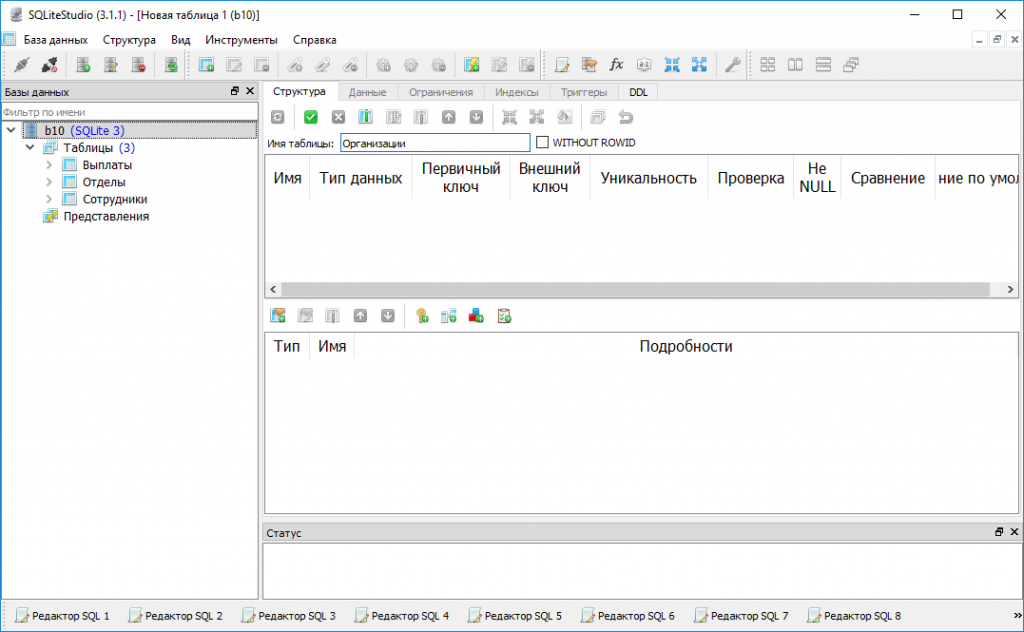
Для создания таблицы войдите в меню «Структура — Создать таблицу». Появится окно структуры.
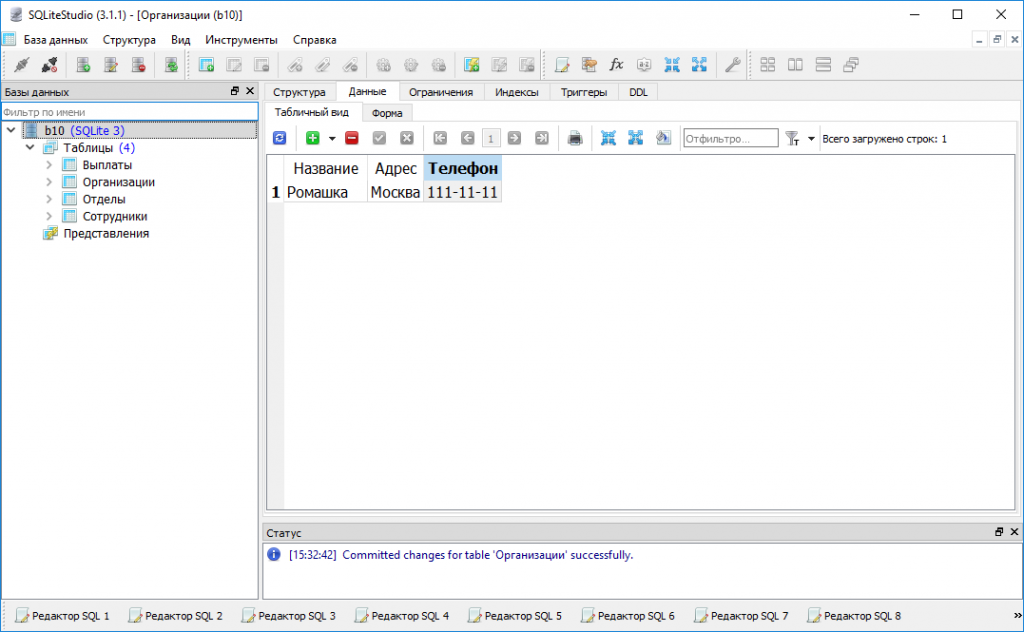
Введите имя таблицы, например, «Организации».
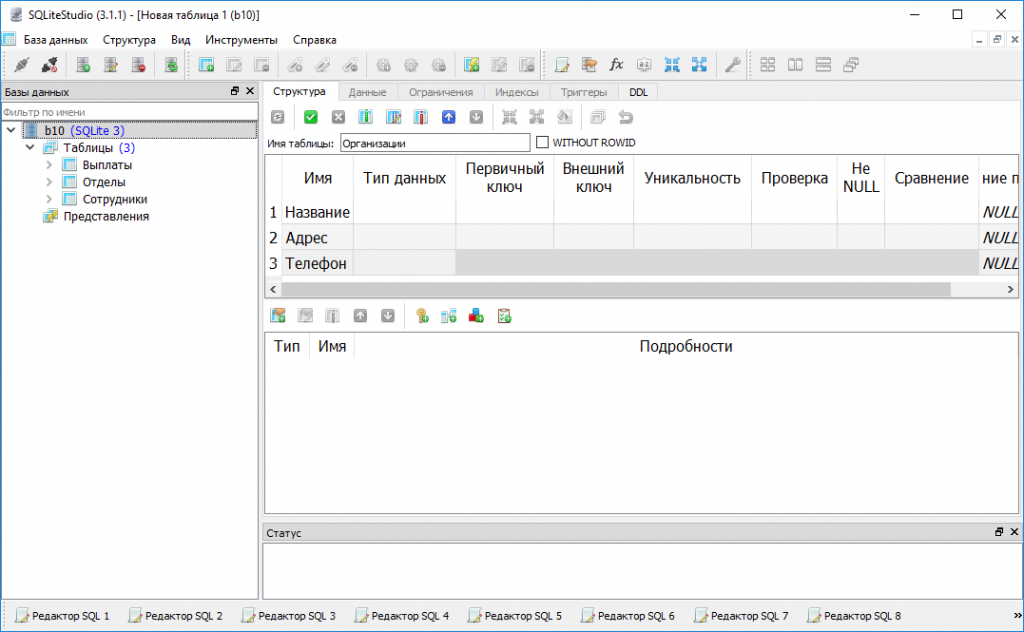
Теперь нужно добавить поля. Нажмите клавишу Insert.
Добавьте три поля: «Название, Адрес, Телефон» и нажмите зеленую галочку. Таблица готова:
Добавление данных
Нажмите на вкладку данные. Опять нажмите клавишу Insert и введите данные.
Выполнение SQL-запросов
Для создания запроса войдите в меню «Инструменты — Открыть редактор SQL».
Напишите запрос «SELECT Название FROM Организации» и нажмите F9. Запрос будет выполнен.
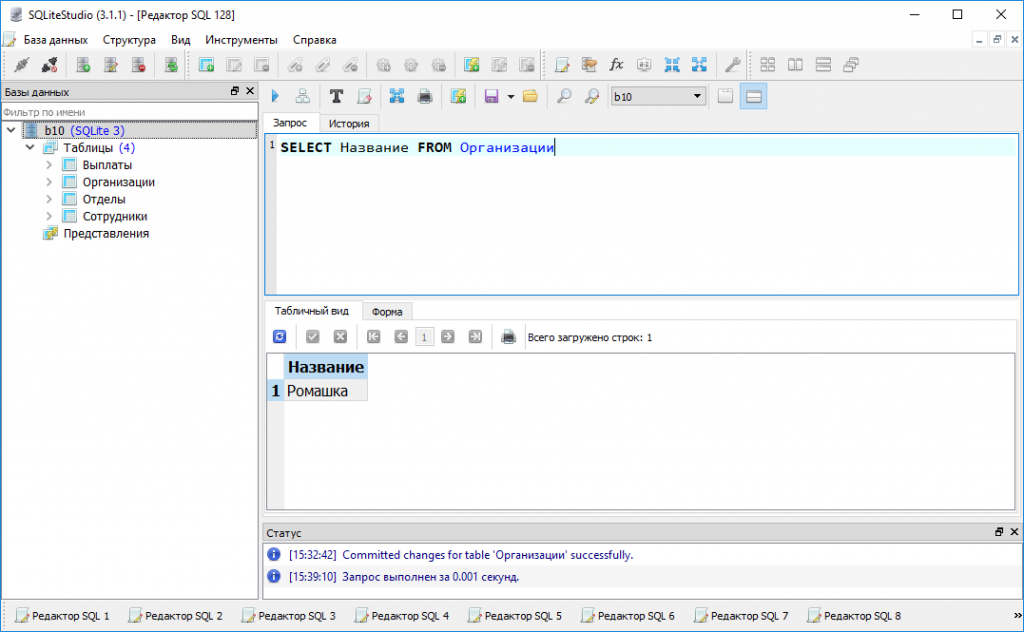
Таким образом с помощью менеджера БД можно быстро создать базу данных, заполнить ее данными и отладить SQL-запросы, которые потом можно вставить в программу.
Официальный сайт SQLiteStudio — sqlitestudio.pl
Похожие записи:
- About
- Installing SQLite3
- Manual Installation (portable)
- Automatic installation
- macOS
- Linux (debian-based distros such as Ubuntu and derivatives)
- Installing the Graphical User Interface
- MacOS
- Linux
- Starting SQLite
- In a FEUP machine
- In your own computer
- Useful commands
- Creating your first database
- Executing SQL statements
- Reading from a file
- Saving to a file
- Keeping the Database state in a file
- Pragma Statements
- Syntax
- PRAGMA foreign_keys
- References and Tutorials
- Miscellaneous scripts
About
SQLite is a lightweight Database Management System (DBMS) which allows its users to implement a relational schema and run SQL queries over it, without the need for a standalone database server. This is convenient because the setup is minimal and the database can be easily bundled with application files.
SQlite is portable, which means that you can install it on any computer, even when you do not have Administration privileges. It is also quite interesting for mobile development in platforms such as Android or iOS.
SQLite implements ACID (Atomic, Consistent, Isolated, and Durable) transactions. This makes it possible to rollback all changes made during transactions in the event of a system crash or power loss.
SQLite does not, however, implement the SQL Standard.
For our classes we will be using SQLite3.
Installing SQLite3
All FEUP computers have sqlite3 already installed, so you should not need to carry out this step in those machines. If you want to install it in your personal laptop for home work or study, read on.
Manual Installation (portable)
- Download the precompiled binaries for
sqlite-toolsfrom the website and unzip them to a folder in your computer. Please choose the appropriate file depending on your operating system (Windows, Linux or macOS).- For Windows, I recommend you unzip the download into
C:sqlite3. For other OS’s you should use your home folder, like~/sqlite3.
- For Windows, I recommend you unzip the download into
- Navigate to the folder where you extracted your download
- You should see 3 files:
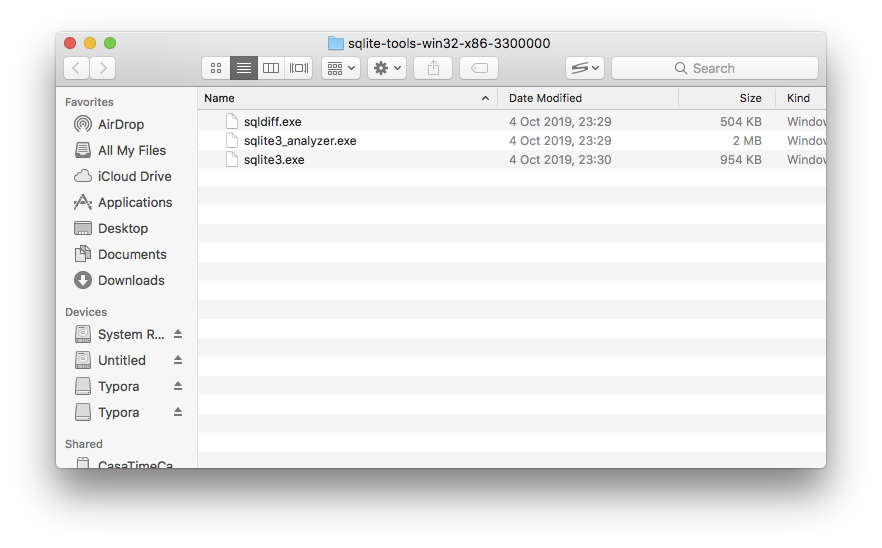
Automatic installation
macOS
- Install HomeBrew
- Open Terminal
- Type
brew install sqlite3and press Enter.
Linux (debian-based distros such as Ubuntu and derivatives)
- Open Terminal emulator
- Type
sudo apt-get update && sudo apt-get install sqlite3and press Enter.
Installing the Graphical User Interface
We will also be using a GUI (Graphical User Interface) to manipulate our SQLite databases. SQLiteStudio is free and runs on every Operating System. Detailed installation instructions for Windows, Mac and Linux are available here.
MacOS
For macOS you can use homebrew. Just run the following command: brew cask install sqlitestudio.
Linux
For Linux, unzip the installer in the downloads page. Open the Terminal, cd to the Downloads folder and make the installer executable by running the command chmod +x ./InstallSQLiteStudio-3.2.1. Then run it: ./InstallSQLiteStudio-3.2.1. The installer should start up.
Starting SQLite
In a FEUP machine
- Press the
Windows Key + R. A small window will pop up. - Type
cmd.exeand press Enter. - A command line window will pop up.
- Type sqlite3 and press Enter.
- You will now be in the SQLite3 command line.
In your own computer
To create a database you must first navigate to the folder where sqlite3 is installed. Assuming that you unzipped the downloaded files to C:sqlite as previously explained, do this:
- Press the
Windows Key + R. A small window will pop up. - Type
cmd.exeand press Enter. - A command line window will pop up.
- Type
C: - Type
cd C:sqlite3 - Type
sqlite3.exeand press Enter. - You will now be in the SQLite3 command line.
Useful commands
| Command | Description |
|---|---|
| .databases | List names and files of attached databases |
| .dump | Dump the database or a specific table in an SQL text format |
| .exit / .quit | Exit the SQLite shell |
| .headers | Turn display of headers on or off, when displaying output of SQL statements |
| .help | Show available commands |
| .import | Import data from a file into a table |
| .mode | Set output mode |
| .open | Open a database from a file |
| .output | Redirect the output to a file |
| .read | Execute SQL statements from a file |
| .save | Write in-memory database into a file |
| .schema | Show the CREATE statements used for the whole database or for a specific table |
| .show | Show current values for various settings |
| .show | List names of tables |
Creating your first database
When you first run sqlite3, any changes will be saved in memory only. This means that if you close the window, all changes will be lost.
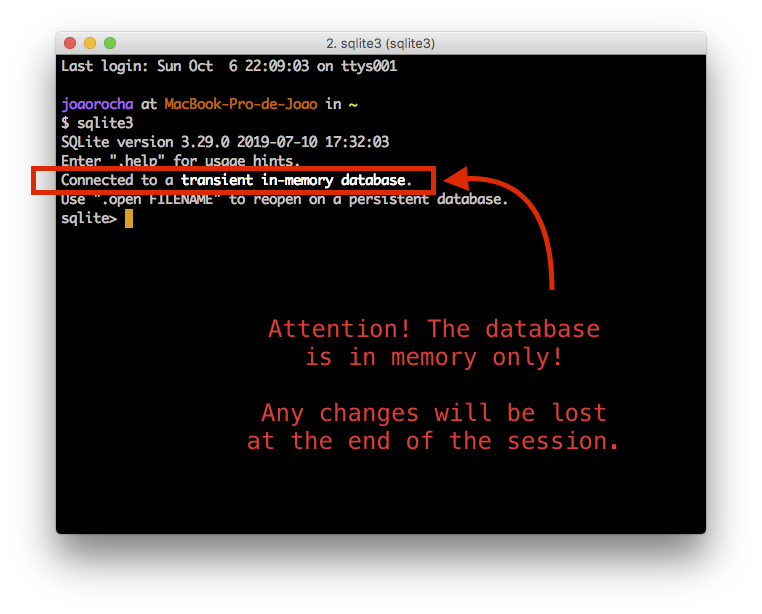
You can see the list of all commands by typing .help:
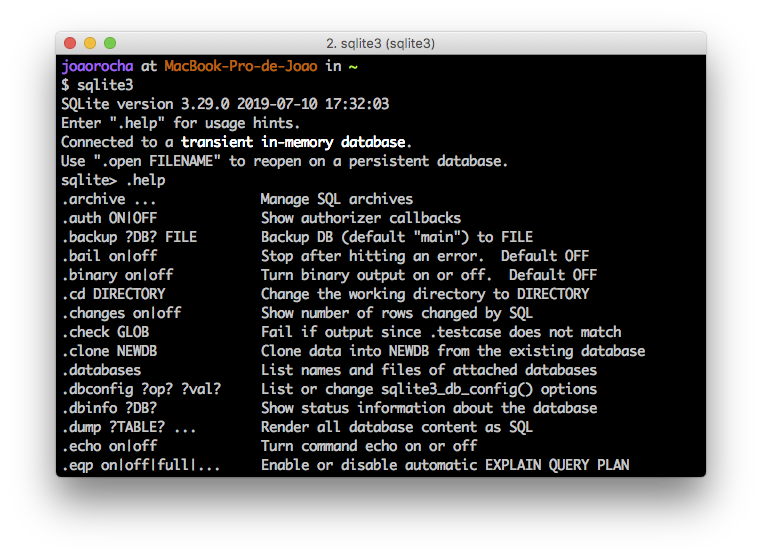
Executing SQL statements
There are two main ways of running SQL in the prompt; the first is to write code directly, the other is to create a .sql file and read it in the prompt.
Here is a piece of code to get you started:
1
2
3
4
5
6
7
8
9
10
11
12


--will present the results in a neat organized table, but will take more horizontal space. Default mode is 'list', which is more compact but harder to read
.mode columns
--shows headers at the top of the columns when running queries
.headers on
-- delete table T if it exists (good for testing purposes)
drop table if exists T;
--create table T
create table T (A text, B text);
-- Insert Hello World into table T
insert into T values ('Hello,', 'world!');
-- Get all rows of table T
select * from T;
You should see this result:
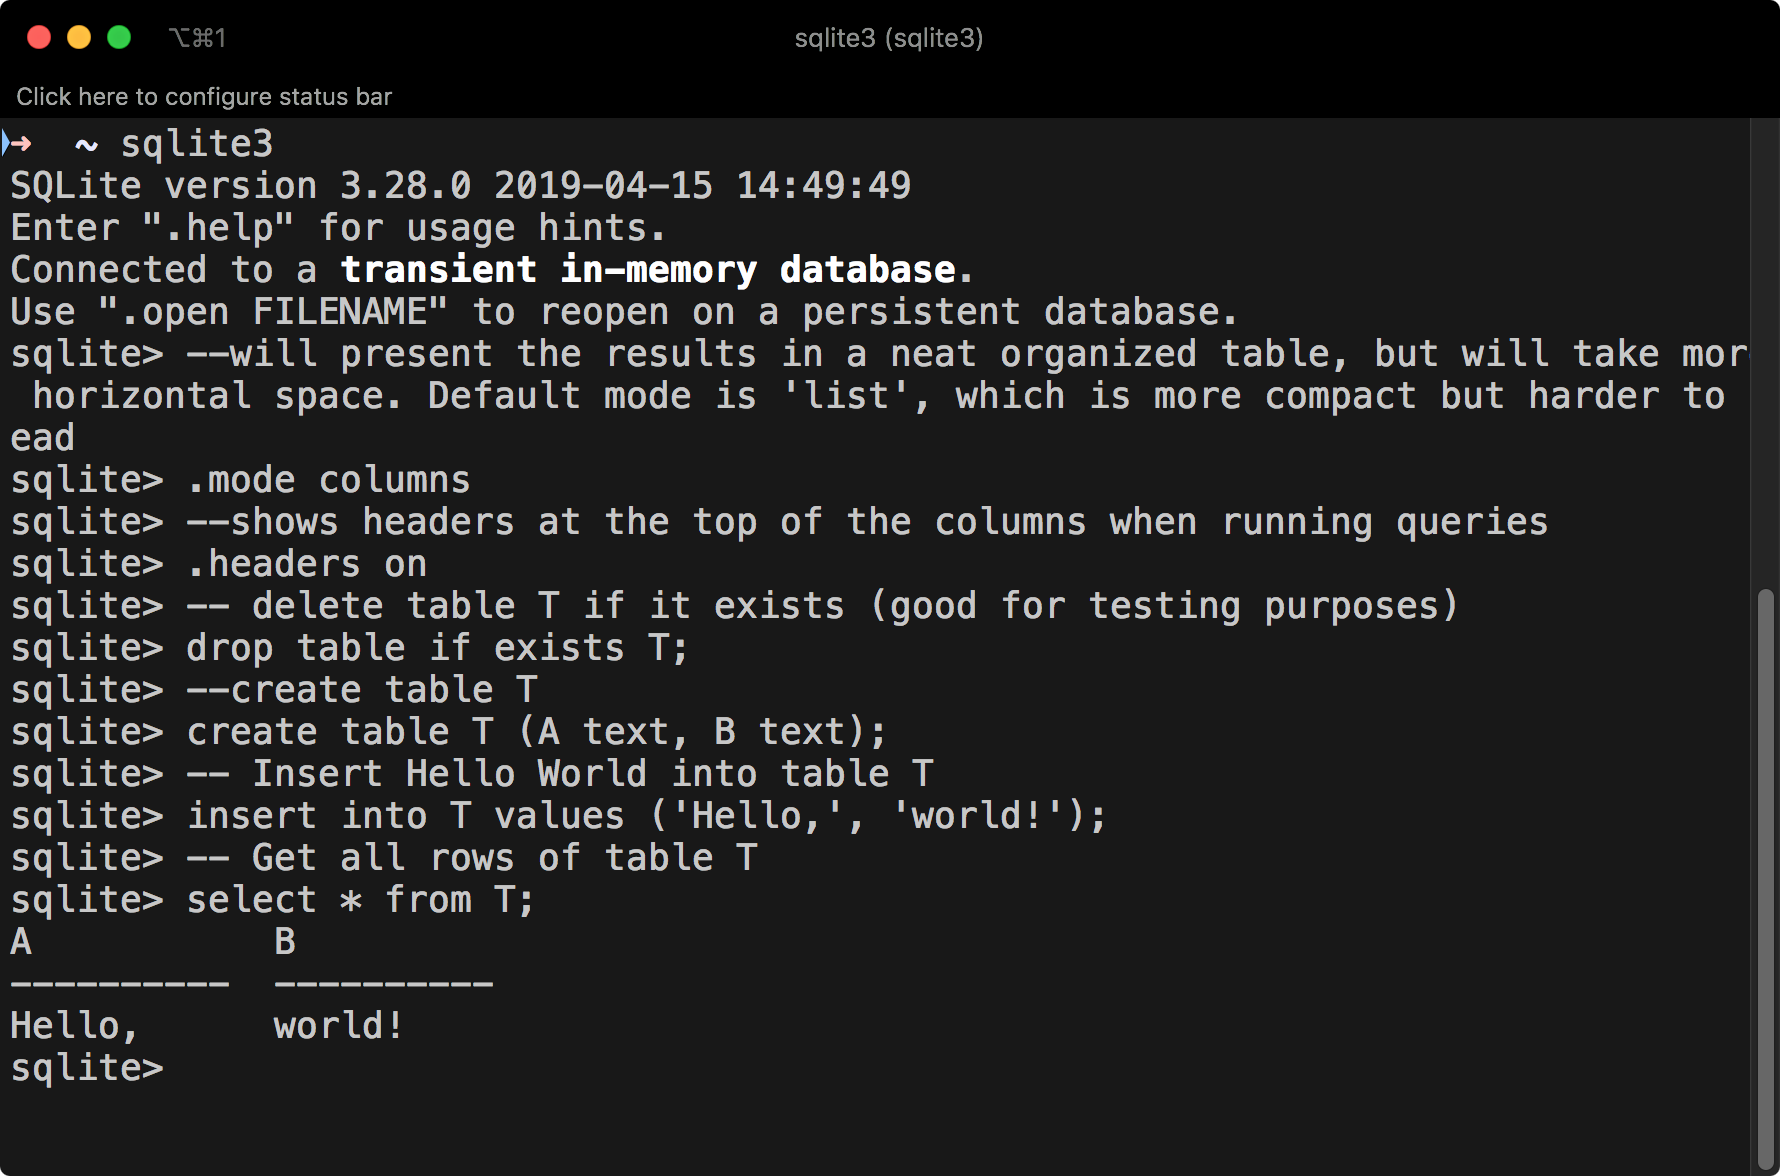
Reading from a file
Another, more powerful way is to save the sequence of commands and statements in a text file (say, “helloworld.sql”), thus creating a script that you can run via .read. This works as long as you have the sql file in the same folder as you are running sqlite3:
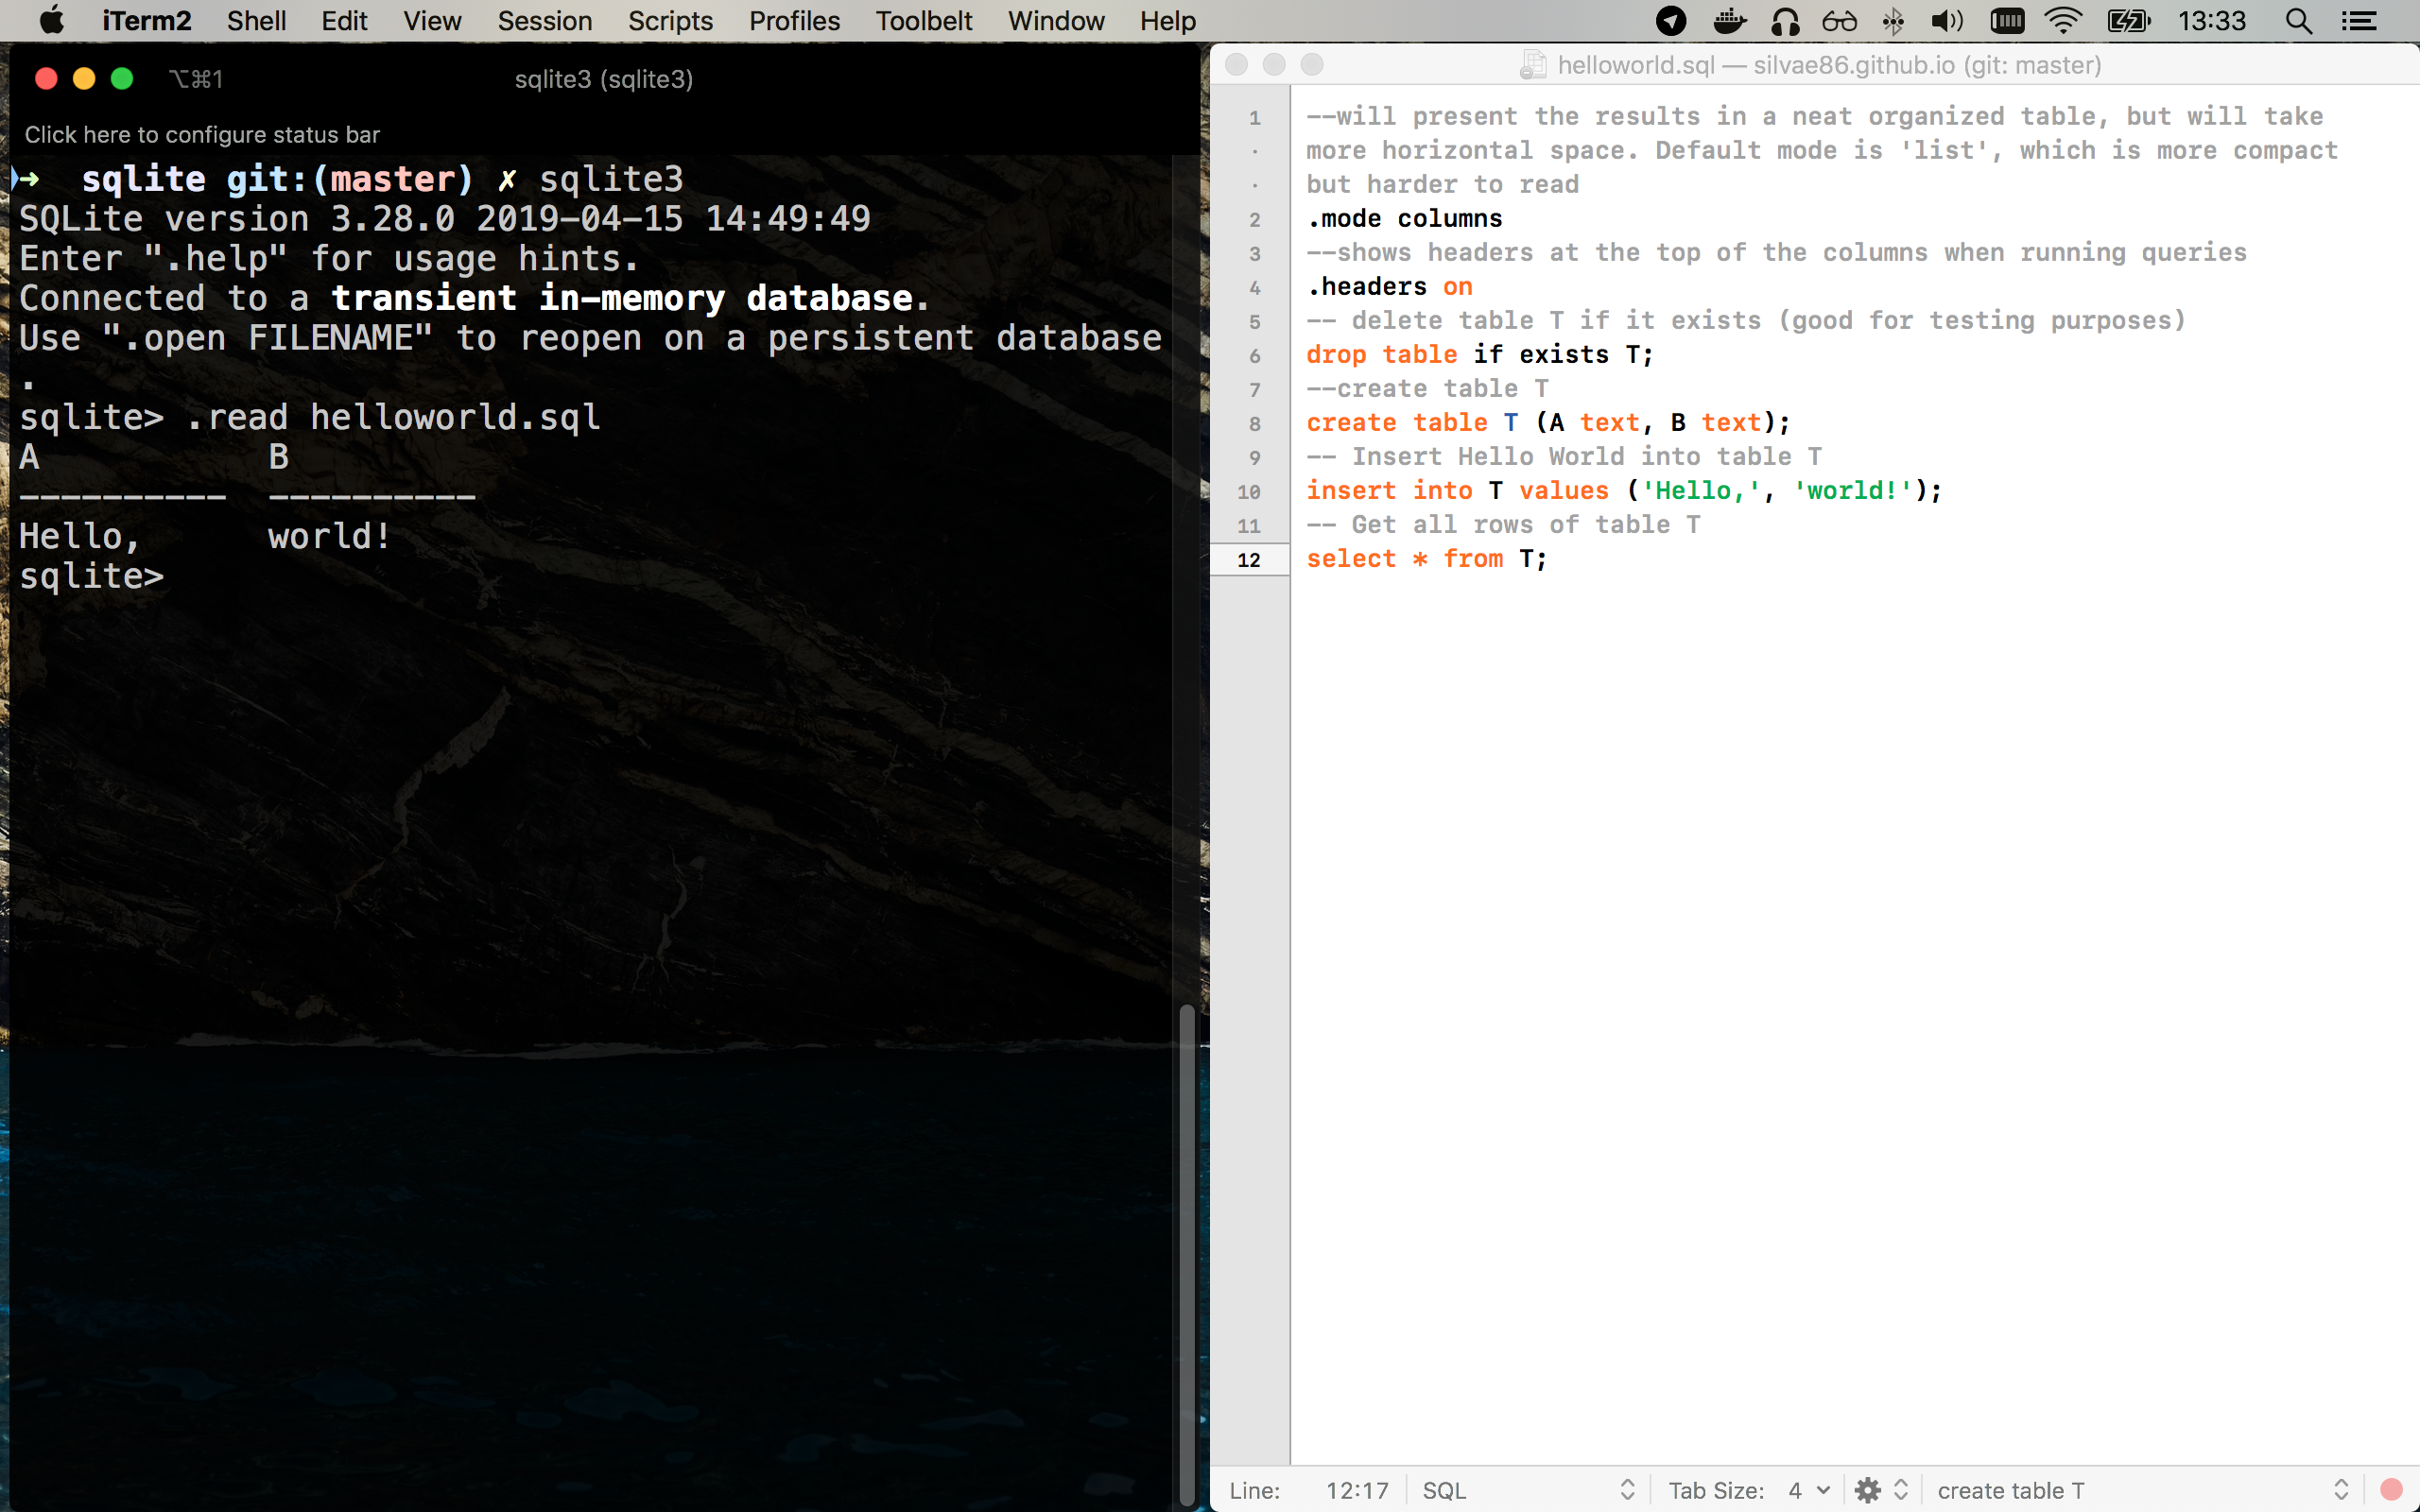
Saving to a file
In any case, you can later save the SQL statements that you’ve used both to create the database (CREATE TABLE statements) and to populate its tables (INSERT INTO statements). For that, you can use the .schema (for the schema creation statements only) or the .dump` (for both creation and insertion statements) commands:
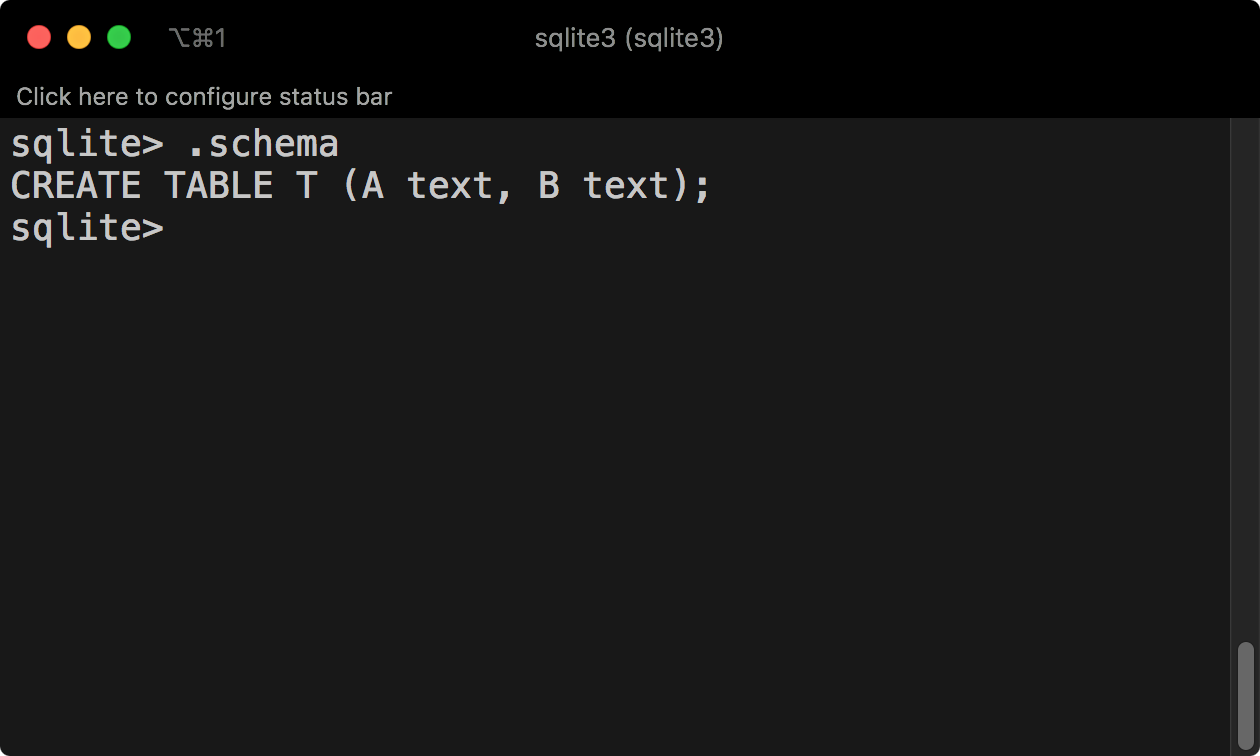
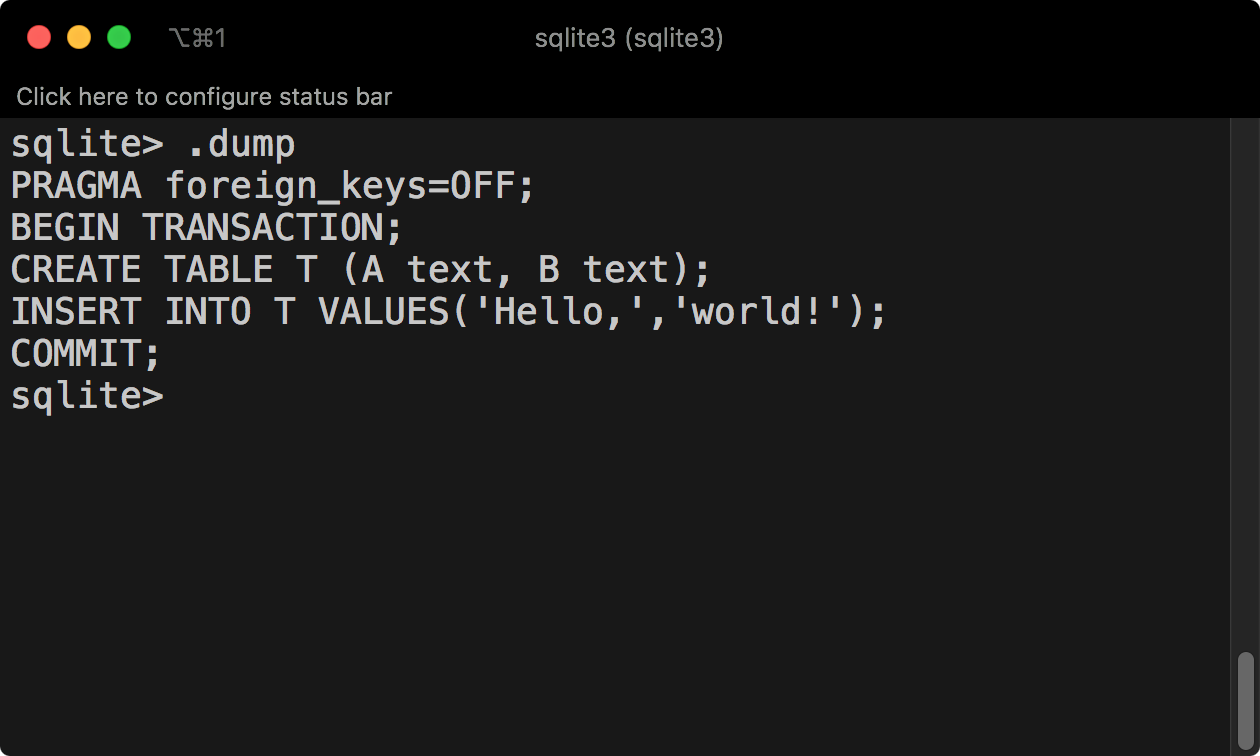
If you want to save these statements into a file you can later read from (using the .read command as shown above), all you need to do is to use the .output command to redirect any output to a file:
1
2


.output helloworld.sql
.dump
The contents of the “helloworld.sql” file should be the statements listed above.
Keeping the Database state in a file
The state of the database can be maintained persistently in a file, avoiding the need to store SQL statements that can be later read (using .read as shown above).
In order to do that, you simply need to add an argument to the sqlite3 application: the name of the database to use.
If the file provided as an argument to sqlite3 does not exist, SQLite will create it automatically. Any changes made in the database are persistently stored in that file, without the need for specific save commands (such as .dump).
The following example illustrates the creation and use of a persistent database:
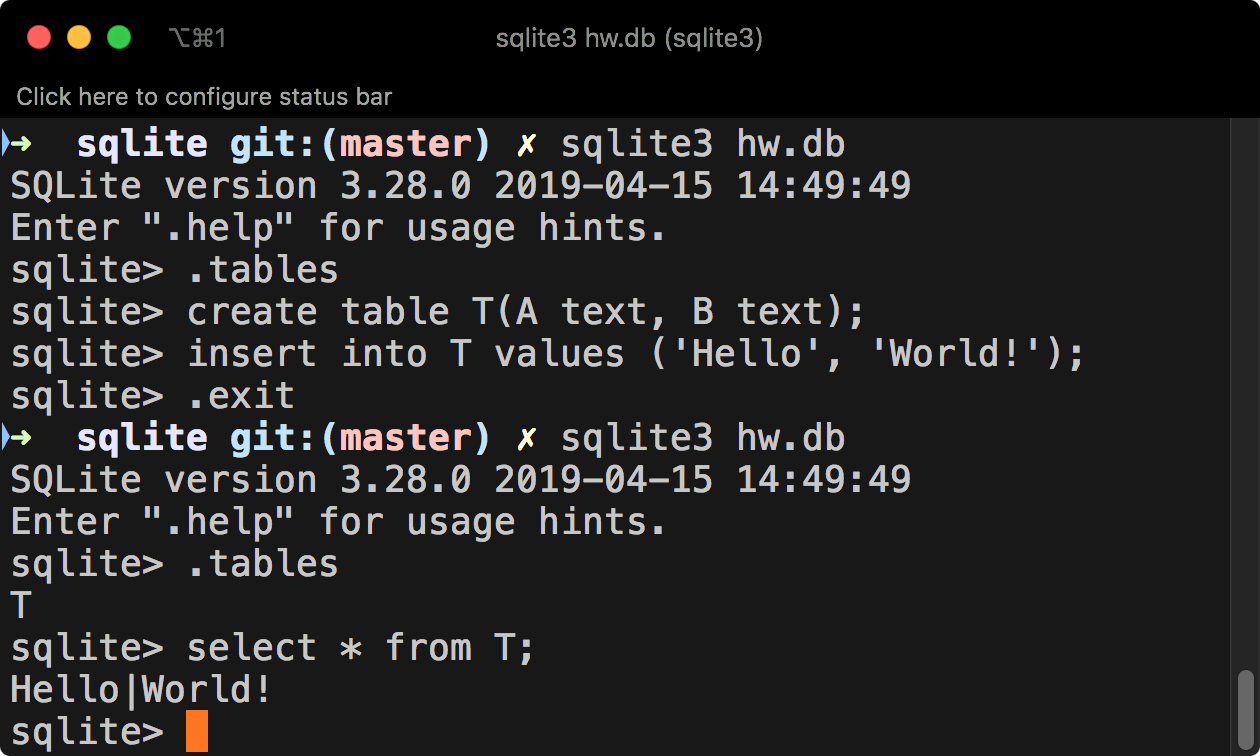
An alternative to using the database file name as an argument to sqlite3 is to use the .open command within SQLite. This still ensures that any changes to the database are automatically stored in the persistent file.
Similarly, if no file was provided as an argument to sqlite3 you can use the .save command to save the database to a file. Notice however that this does not trigger automatic saves of any additional changes that are made in the database.
Pragma Statements
The PRAGMA statement is an SQL extension specific to SQLite and used to modify the operation of the SQLite library or to query the SQLite library for internal (non-table) data.
Syntax
A PRAGMA statement is formed by the keyword PRAGMA followed by the actual “pragma” that is being defined. A pragma has a name and can take one argument. The argument may be in parentheses or separated from the pragma name by an equal sign. The two syntaxes yield identical results. In many pragmas, the argument is a Boolean and can be one of: 1/yes/true/on; 0/no/false/off.
PRAGMA foreign_keys
This is a very important pragma, as it may be used to set the enforcement of foreign key constraints.
Consider the following SQL statements, which violate a foreign key constraint:
1
2
3
4
5
6
7
8
9
10
11
12


create table T1 (
	Id NUMBER PRIMARY KEY,
	Id2 NUMBER REFERENCES T2(Id)
);
create table T2 (
	Id NUMBER PRIMARY KEY
);

insert into T2 values (111);
insert into T2 values (222);
insert into T1 values (1,111);
insert into T1 values (2,333);
Since in the current version of SQLite foreign key constraint enforcement is disabled by default, loading these statements from a file, say fk.sql, does not raise any error:
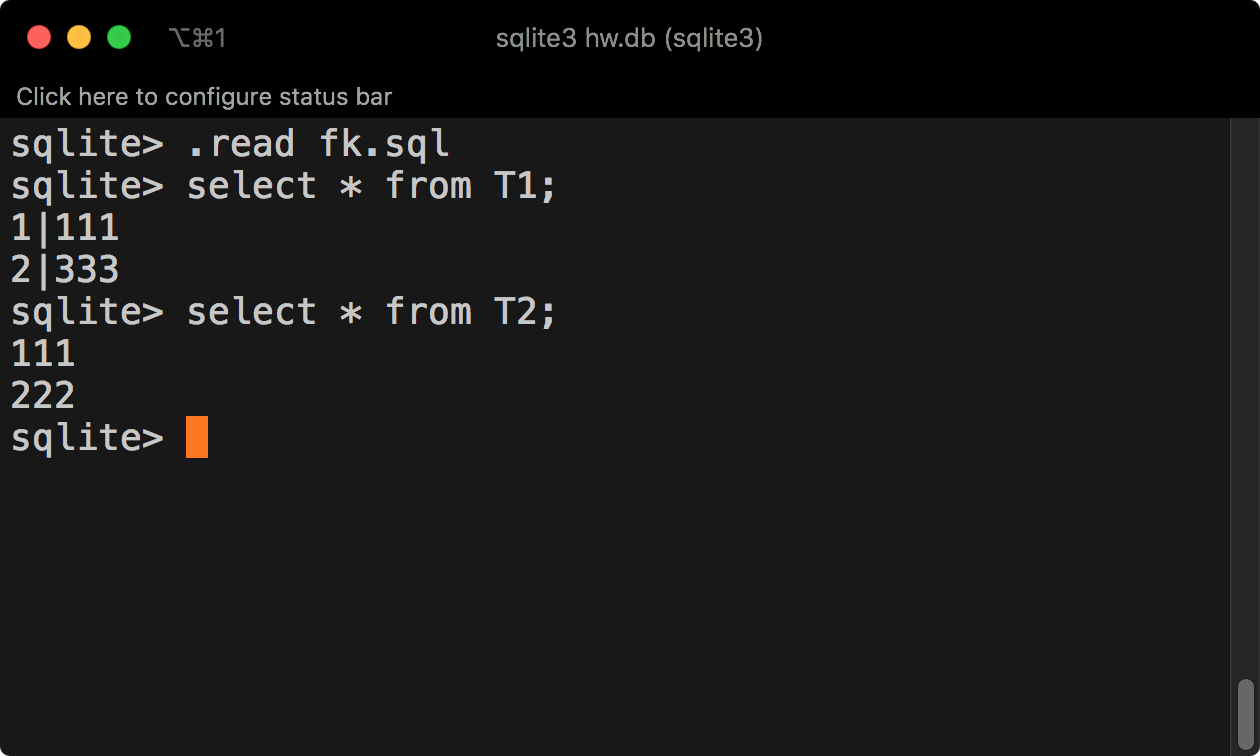
If we turn on foreign key constraint enforcement, we get an error detecting the constraint violation:
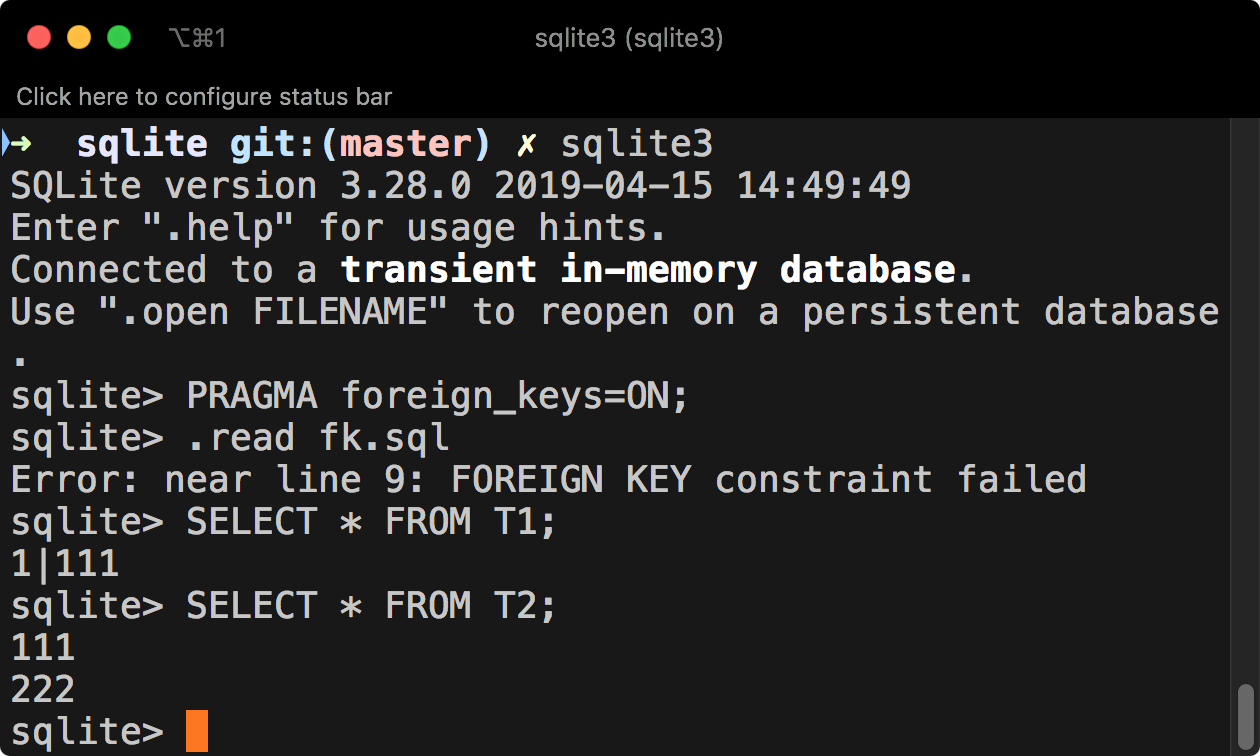
References and Tutorials
- SQLite
- home page.
- documentation.
- SQLite Studio Quickstart page.
- Tutorials
- SQLite Tutorial
- SQLite Tutorial by TutorialsPoint
- SQLite quickstart guide by Carla Lopes.
Miscellaneous scripts
Running all .sql files in the current directory (only Mac or Linux):
1


for i in $(ls *.sql); do echo $i; cat $i | sqlite3; done