In this article, we will examine how to set up Windows 2000 Professional on a new virtual machine using Oracle VM VirtualBox on the Windows 10 64 Bit operating system.
How to Install Windows 2000 on Windows 10 in Oracle VM VirtualBox
Windows 2000, first officially named Windows NT 5.0, was released on February 17, 2000. This operating system from Microsoft is also known as Win2K.
The Windows 200 system, which has improved file encryption, NTFS file system, and file compression features, was more successful in corporate companies. Although it provides many new improvements in terms of system security compared to previous Windows versions, it was not a useful system for home users due to system crashes.
The main support of the Windows 2000 operating system, which works very well in the server computers of the companies, was extended on June 30, 2005, and its extended support was ended on July 13, 2010.
It is a version not released as an update for Windows 2000, Windows 98, or Windows 98 SE and includes four different editions;
- Windows 2000 Professional
- Windows 2000 Server
- Windows 2000 Advanced Server
- Windows 2000 Datacenter
Windows 2000 Professional edition was developed for desktop and notebook computers for personal use. However, there is no point in installing this operating system on your physical computer today because a system without support can always cause you trouble.
So, if you want to use Windows 2000, you can install and use the virtual machine using virtualization programs such as VirtualBox or VMware.
How to Create a New Virtual Machine for Windows 2000
After installing VBox on your host computer, you can install the Windows 2000 system after creating a new VM by opening the virtual machine wizard.
Step 1
After running Oracle VM VirtualBox, open the virtual machine creation wizard by clicking Machine / New from the tool menu or clicking the blue New icon.
Step 2
Type a name for the operating system you will install and select the operating system from the Version sections and click the Next button. Also, configure the location of the virtual system you will install from the Machine Folder section on an external HDD or SSD.
Step 3
In the Memory Size window, configure a 4 GB (4096 MB) RAM size for the Windows 2000 VM and click Next.
Step 4
To create a new virtual disk for a clean Win2K installation, select Create a virtual hard disk now and click the Create button. If you have previously installed a Win2000 VM, you can add the virtual disk from this window.
Step 5
Select VDI (VirtualBox Disk Image) as the virtual hard disk file type and click the Next button.
Step 6
Configuring the virtual disk as Fixed Size increases the virtual machine performance on computers with old hardware. However, since Fixed Size will reduce the capacity of the host disk, you can choose the Dynamically Allocated option to allocate disk space from your host’s disk only as much as the required disk space.
Step 7
The Oracle virtualization program will default to 4 GB of disk capacity for Windows 2000. If you are going to use many applications on your virtual PC, you can increase the disk space in this window.
Step 8
After preparing the VM, click Settings to add the Windows 2000 ISO file and configure other virtual hardware settings.
Step 9
In the General / Advanced tab, configure the file transfer and text copy features as Bidirectional for the drag and drop or copy and paste method between the virtual machine and the host PC.
Step 10
In the System / Motherboard tab, configure Optical first order from the devices in the Boot Order section and disable Floppy.
Also, if you will use more than one virtual processor on the Windows 2000 VM, tick the Enable I/O APIC option in the Extended Features section.
Step 11
Configure the virtual CPU number to 4 in the Processor tab.
Step 12
For better graphics processing in the virtual machine, enable the 3D Acceleration option and configure the Video Memory value to 128 MB.
Step 13
Check that the Host I/O Cache feature is enabled for the IDE controller in the Storage settings.
Step 14
Configure the Windows2000.vdi virtual disk file type as SSD (Solid-State Drive).
Step 15
Finally, after downloading the Windows 2000 ISO file to your computer from this link, select the optical drive and then click the CD/DVD icon and click Choose a disk file.
Step 16
Select the Windows 2000 Professional SP4 ISO file that you downloaded to your computer previously and click the Open button.
Step 17
After adding the Win2K image file to the virtual computer, close the settings window.
Step 18
To install Windows 2000 with VirtualBox, run the guest machine you created by clicking the Start button.
Step 19
Select the Win2K ISO file as the startup disk and click the Start button again.
How to Install Windows 2000
After configuring the virtual machine correctly, from this step, you can install the Win2000 system as if you were installing Windows on a physical computer.
Step 1
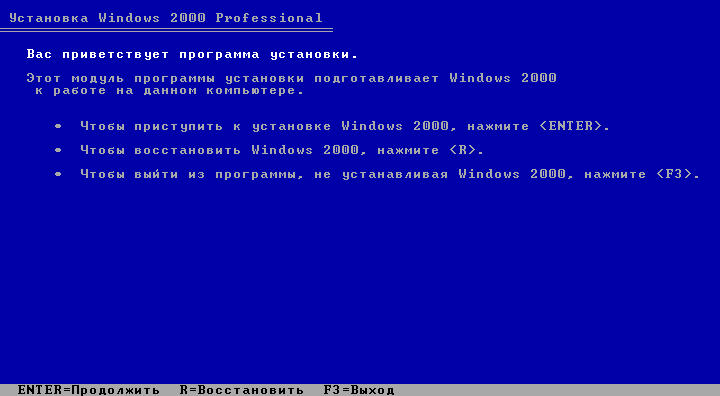
At the Windows 2000 Professional Setup screen, press Enter to start the installation or R to repair your system. You can press F3 to close the setup screen and terminate the installation.
Step 2
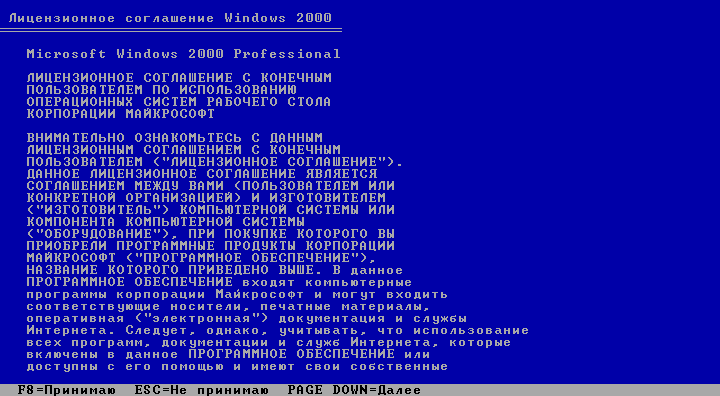
To read the full text of the license agreement for the Windows 2000 operating system, you must press the Page Down key. If you want to directly accept the license agreement, press F8 and continue.
Step 3
Press the C key to edit the unallocated disk space in the disk configuration window.
Step 4
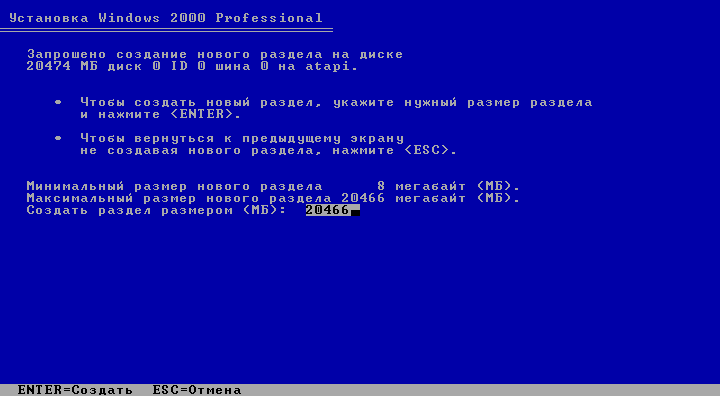
Press Enter to confirm the disk space usage automatically determined by the setup wizard.
Step 5
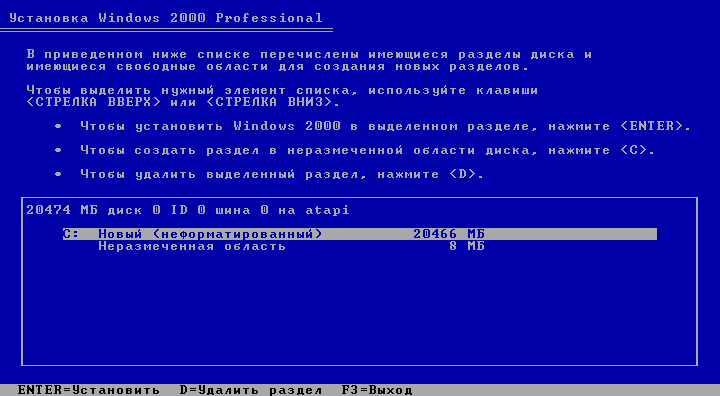
After creating a new Partition on your virtual disk, press Enter to start the installation.
Step 6
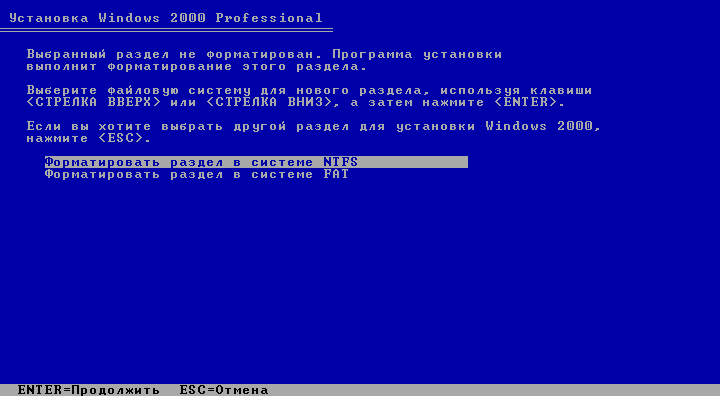
Press Enter again on the related option to format the virtual system’s disk using NTFS file format.
Step 7
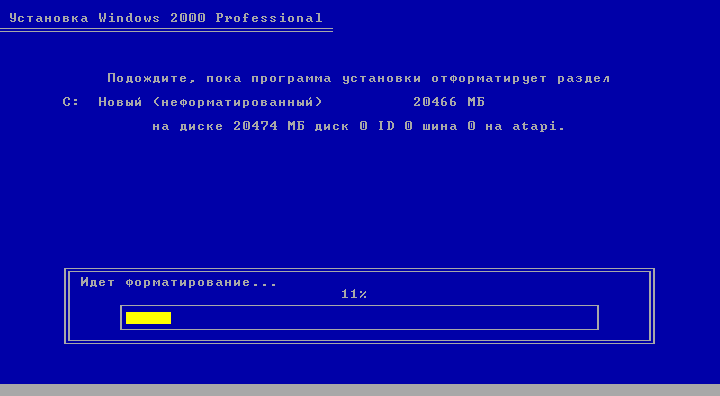
Wait while the setup wizard is formatting the virtual disk.
Step 8
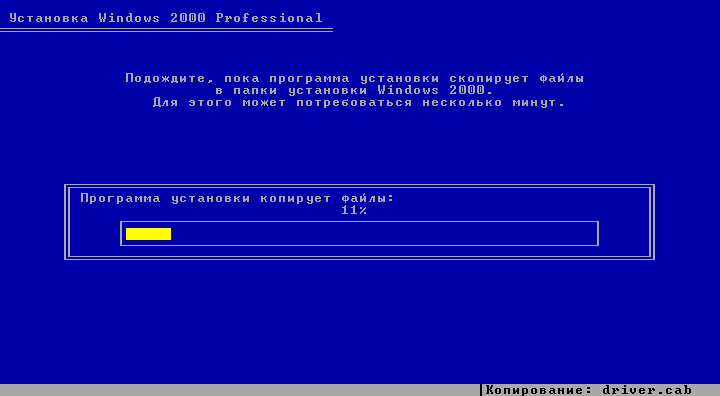
Depending on the performance of your host computer, it may take time to copy Windows 2000 system files. Do not turn off your virtual computer while the system files are being copied.
Step 9
After the system files are copied, your virtual system will automatically restart within 15 seconds.
Step 10
After your virtual PC restarts, wait while Microsoft Windows 2000 Professional is starting.
Step 11
Click Next on the window that informs you that some information will be collected in order for the Windows 2000 system to work properly.
Step 12
The setup wizard will now scan your system’s hardware and install the drivers.
Step 13
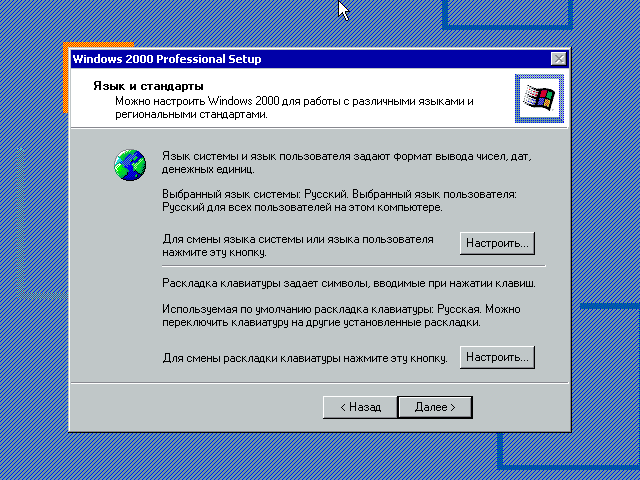
In the region settings window, configure the country you live in by clicking the Customize button. Also, change the keyboard layout of your host computer and click Next.
Step 14
If you are only going to use the Virtual PC, type your username at this step and continue.
Step 15
Type in your Windows 2000 Pro SP4 product key and click Next.
Step 16
Note that if you have more than one computer on the network, the computer name is different from the others. Also, if you want to set a password for the operating system’s administrator account, create a strong password and click Next.
Step 17
Configure your time settings according to the location of the country you live in and click Next after checking the system date is correct.
Step 18
Select the Typical Settings option for your network settings and continue.
Step 19
If there is no server running an Active Directory service in your network environment, configure Workgroup with the No option.
Step 20
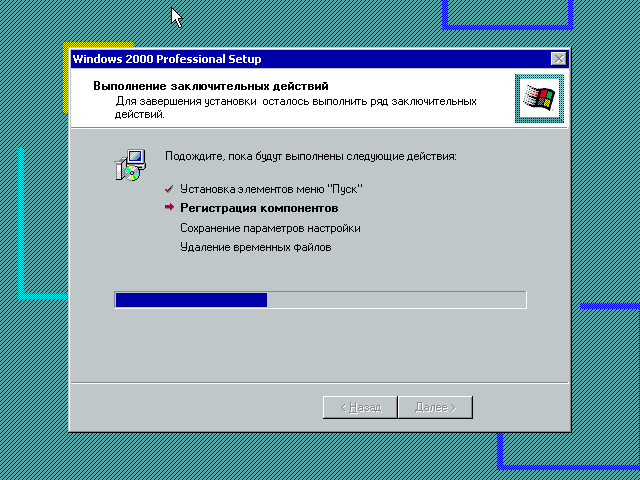
Wait while the setup wizard configures your virtual system’s start menu items and shortcuts, registry components, and settings.
Step 21
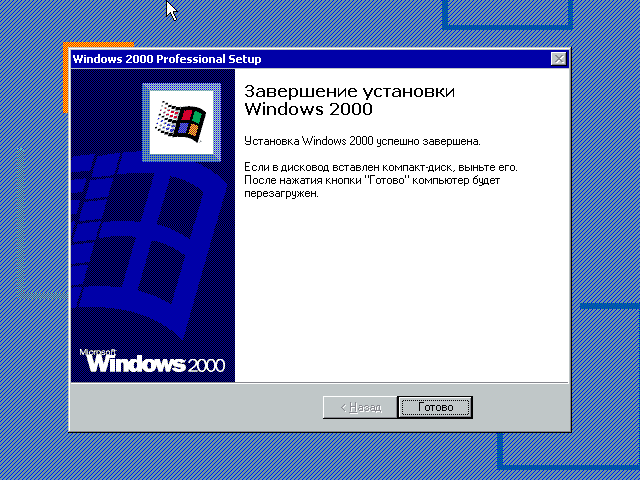
When the Win2K setup wizard is completed, click Finish and restart your virtual PC.
Step 22
After your system is turned on, your network connections will be configured and prepared.
Step 23
To connect your virtual computer to a network, click Next when the Network Identification wizard opens.
Step 24
You can check the option above to allow users who will use the virtual machine to enter a username and password. Otherwise, you can use your default user account for login information if no one other than you will be using a VM.
Step 25
After completing the network diagnostics wizard, click Finish again and continue.
Step 26
Wait while your virtual system is booting up while configuring Windows’ Internet tools and system services.
Step 27
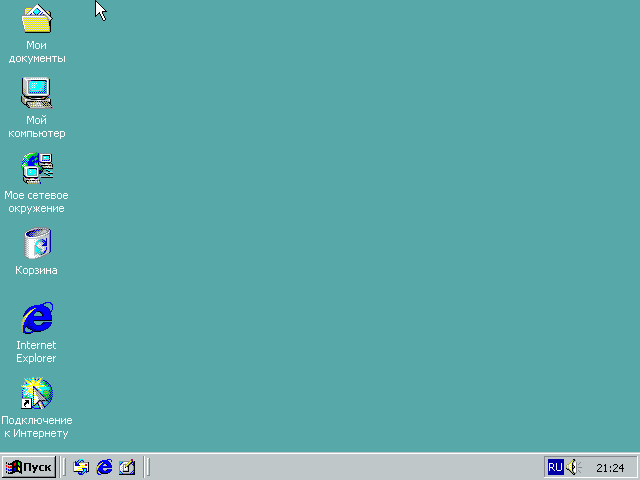
After Windows configures the necessary settings, your desktop environment will be ready as shown in the image below.
Step 28
You can check the operating system version and version after right-clicking on My Computer and then clicking Properties.
How to Install Guest Additions
After installing Windows 2000 on the virtual computer, you need to install the Guest Additions software to use the hardware of your host computer on the virtual PC. This software is only required for Guest machines that you install on the VM.
Step 1
Before proceeding with the installation, you need to check the drivers that are not automatically installed on your guest machine. Open the Computer Management tool after clicking the right button and then Manage on my computer, click Device Manager and check the drives with an exclamation point.
Step 2
From the tool menu of the Win2K guest machine, click on Devices / Insert Guest Additions CD image.
Step 3
If the Guest Additions installation wizard does not open automatically, start the wizard by double-clicking the VBox_GAs image in My Computer.
Step 4
When the Oracle VM VirtualBox Guest Additions wizard opens, click Next to continue the installation process.
Step 5
Installing guest software in the default location may prevent any problems from occurring, so click Next directly in the installation location window.
Step 6
In this window, select the components you want to install and continue. If you want to enable Direct3D support, you must install Guest Additions in safe mode.
Step 7
If you encounter the Digital Signature Not Found window during installation, always click the Yes button.
Step 8
After installing the Guest Additions software on Windows 2000, restart your virtual system.
Step 9
When you view the Device Manager again, you can see that all the drivers have been installed successfully this time.
Step 10
After installing the necessary software for the virtual machine, you can now transfer files between the host and your virtual computer by drag and drop, or you can copy the text or text in any file and paste it into the file in the VM.
Step 11
If the image quality of the virtual machine is lower than the default, VirtualBox will alert you with a notification as in the window below. To increase the color mode of the virtual machine from 8 Bit to 32 Bit, open the Display Properties and change the value in the Colors section to True Color (32 bit).
How to Configure Internet Settings
Internet connection may be required for virtual systems you set up with Oracle VM VirtualBox. Normally, the network settings are configured automatically after installation, but you should still check your connection.
Step 1
After clicking the start menu, find the CMD via the search box and run it. After opening the CMD command prompt, execute the ping 8.8.8.8 command and check your Internet connection by pinging Google servers.
Step 2
After verifying your internet connection, double-click the Internet Explorer shortcut, and the Internet Connection Wizard will open. In this window, check the I want to connect to the Internet via a LAN connection option and click Next.
Step 3
In the next window, check the I connect via LAN option again and click Next.
Step 4
Configure your virtual computer’s proxy server settings as Automatic Discovery and continue.
Step 5
If you do not want to set up an internet mail account, please select the No option.
Step 6
After completing the internet connection wizard, click Finish and close it.
Step 7
As soon as you close the wizard, once the Internet Explorer browser is opened, you can test your connection by visiting the Google search engine.
How to Create and Configure Shared Folder
By creating a Shared Folder in the virtual machine, you can transfer files more easily through your host computer.
Step 1
Click Devices / Shared Folder / Shared Folder Settings on your Windows 2000 guest machine.
Step 2
Click the green + button in the Shared Folder window to open the Add Share window and select a common folder that you created the Folder Path location setting on your host’s desktop or other location.
Configure the shared folder as a network drive by checking the Auto-Mount and Make Permanent options as well.
Step 3
You can see SharedFolder on “VBoxSvr” when you check the public folder on my computer
Step 4
This time click on My Network Places and go to Shared Folder as shown in the image below and check access.
How to Use a USB Flash Drive
You can use your USB flash drives or external storage devices that you attach to your host in your virtual PC.
Step 1
First, insert a flash drive into your host’s USB 2.0 port and click on Devices / USB / Kingston DataTraveler (Your USB Device Name) on your guest machine.
Step 2
The flash drive that you insert into the USB 2.0 port of your host will be automatically recognized in your Windows 2000 virtual computer. When you check My Computer, you can see your Removable Disk device, and in the device manager under Disk Drives, you can see that the USB memory is working fine.
How to Increase Graphics Memory
When you install older operating systems such as Windows 2000 with Oracle software, by default the graphics memory can be 128 MB. You can increase this value by 256 MB by using the PowerShell tool from the location where your virtualization program is installed.
Step 1
Press Windows + R and then run the DirectX Diagnostic Tool by executing the dxdiag command after opening Run.
First, check that the Total Memory value in the Display tab of the DirectX tool is 128 MB.
Step 2
Open the location where Oracle VM VirtualBox is installed and click the right button while holding down the Shift key. Click “Open PowerShell windows here” in the window that opens.
Execute the following command in the PowerShell tool and change the Windows 2000 graphics memory to 256 MB.
VBoxManage modifyvm Windows2000 --vram 256Step 3
After restarting your guest machine, run the dxdiag command and check the total GPU/Graphics memory value of your virtual PC.
Video
Installing Older Versions
VirtualBox Version
YouTube Video
Slide
Related Articles
♦ How to Install Windows Millennium on VirtualBox
♦ How to Install Windows XP on VirtualBox
♦ How to Install Windows 7 on VirtualBox
♦ How to Install Windows Vista on VirtualBox
♦ How to Install Windows 8.1 on VirtualBox
Как-то давным-давно я пробовал установить себе Windows 2000 и посмотреть, что это такое. Сейчас я хочу просто показать, как её установить. Естественно я не буду её ставить на свой ПК или ноутбук, для этого есть классное изобретение – виртуальная машина. Покажу на примере VirtualBox. Ну что, узнаем, как установить Windows 2000?
Сначала нам эту древнюю ОС нужно откуда-то взять. Скачать Windows 2000 можно по этой ссылке. Там есть и ключи для системы и много чего полезного. Когда скачаете, можете записать на флешку, диск или установить на виртуальную машину, как я. Если не знаете, как ставить, например, на VirtualBox, прочтите статью об установке Windows XP на виртуальную машину.
Итак, допустим, вы запустили установку. Перед глазами мы видим синее окно, где нам предлагают:
- Приступить к установке Windows 2000 (нужно нажать Enter);
- Восстановить Windows 2000 (нужно нажать R);
- Выйти из программы установки. Если вы передумали, то нажимаем F3.
Нам нужен первый вариант. Жмём Enter.
Соглашаемся с лицензионным соглашением, нажав кнопку F8.
Появляется раздел, где необходимо разметить диск. При неразмеченной области нажмите клавишу «C».
Выбираем объем для системного диска. Думаю, 10 Гб бы хватило с лихвой. Это же Windows 2000. Но у меня памяти много, я оставлю 20 Гб. Жмём Enter.
В окне работы с дисками появился раздел «С:» неотформатированный. Чтобы его форматировать нажмите Enter.
Выбираем опцию «Форматировать раздел в системе NTFS».
Пошел процесс форматирования.
Сразу же начинается процесс копирования файлов на диск. Это еще не установка.
Компьютер перезагружается.
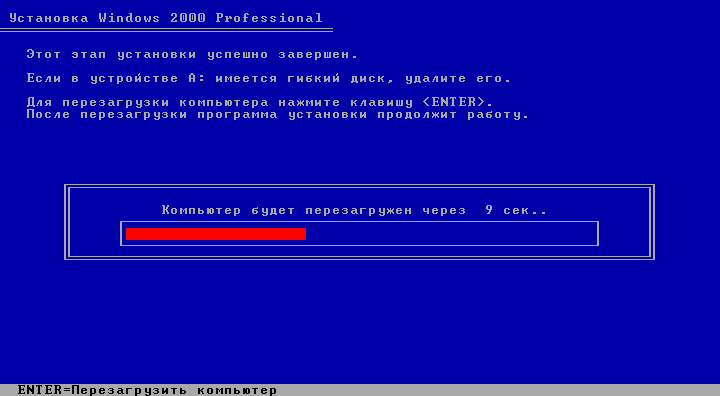
Ход установки Windows 2000
Запуск Windows 2000, а точнее установка этой операционной системы. Немного подождите, когда все инициализируется.
Наконец появилось окошко с выбором языка. Так как интерфейс окна русский, я менять ничего не будут. Просто нажму Далее.
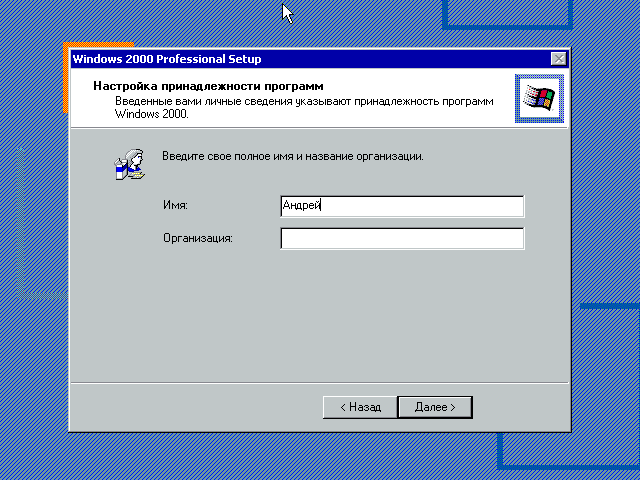
Задаем имя и организацию. Имя обязательно.
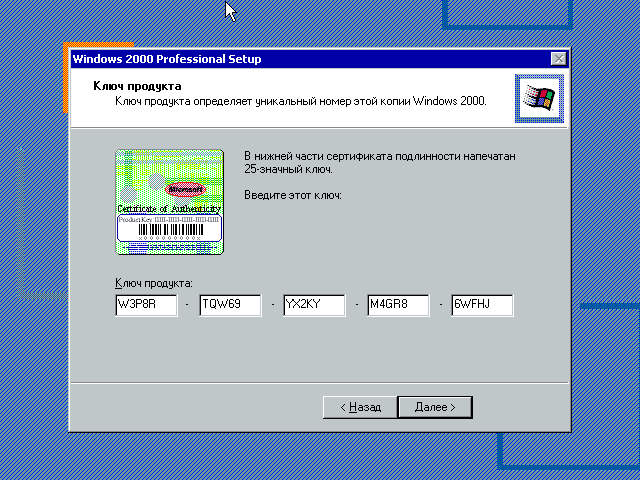
Вводим ключ продукта. У меня он уже был в архиве документом. У вас должен быть там же. Если вы качали оттуда же. Вы можете попробовать переписать ключ со скриншота, как у меня.
Вот ключи:
W3P8R-TQW69-YX2KY-M4GR8-6WFHJ
GTH3Q-2MKP3-DPK7B-X4PB7-GX99J
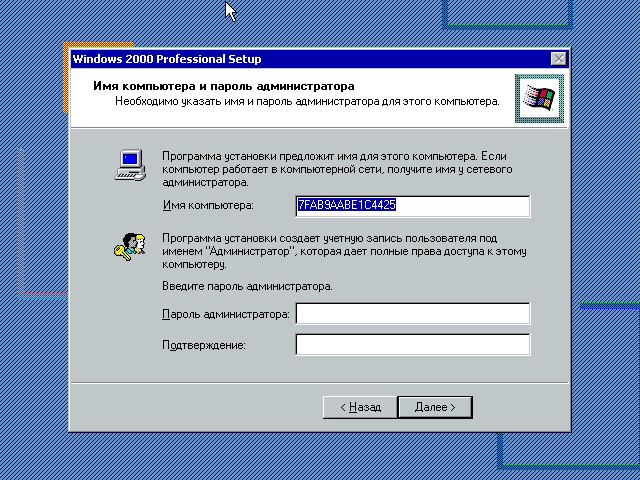
В следующем окне вводим имя компьютера, а если хотите и пароль.
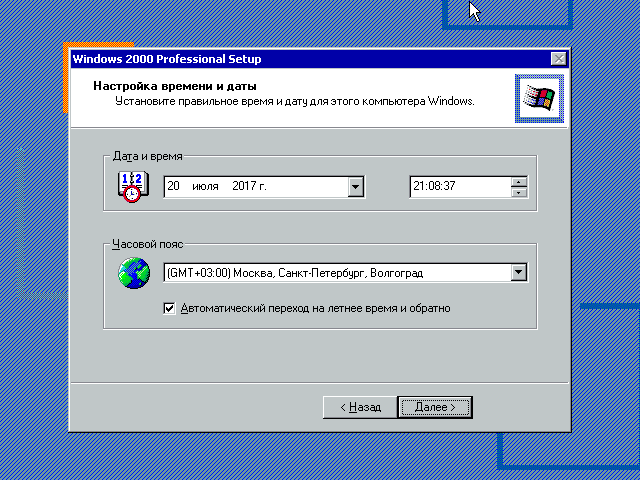
Указываем дату и время, а также часовой пояс. Можно отметить галочку «Автоматический переход на летнее время и обратно».
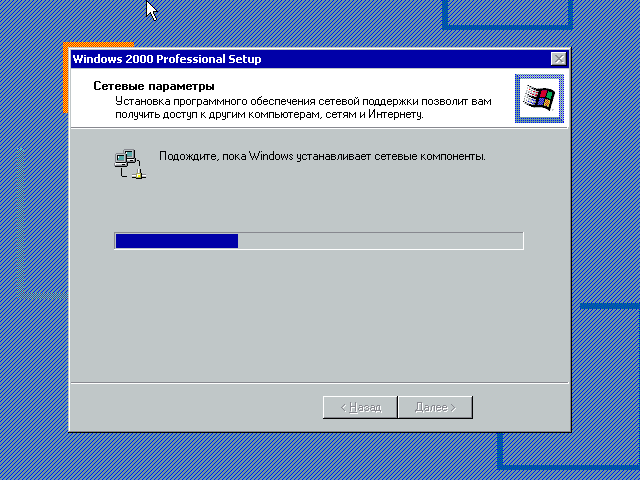
Пошла установка сетевых компонентов.
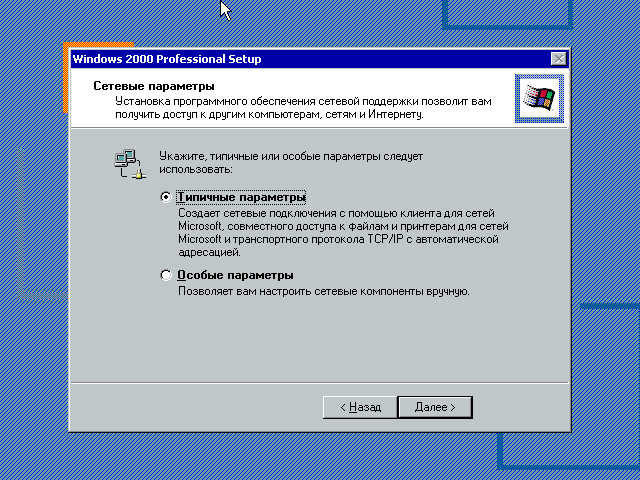
Окно сетевых параметров просит указать типичные параметры или особые. В нашем случае выбираем первый вариант.
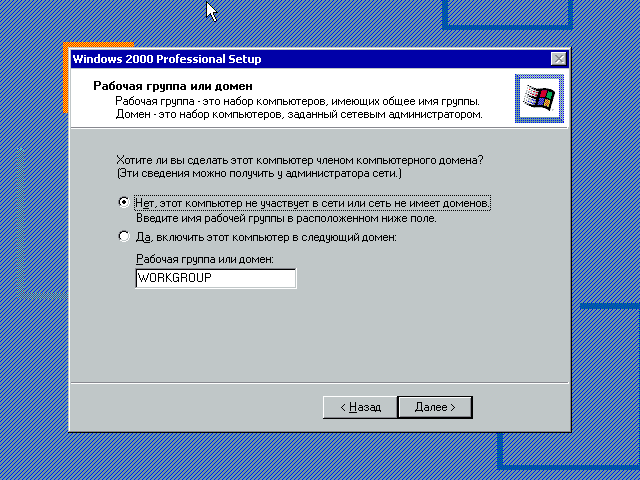
Отмечаем первый пункт «Нет, этот компьютер не участвует в сети или сеть не имеет доменов».
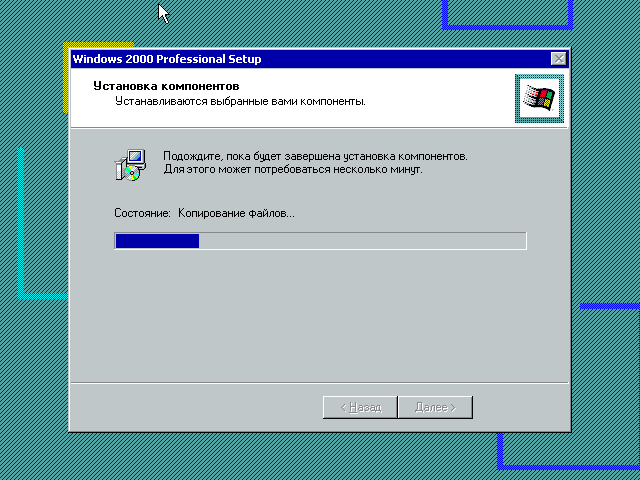
Началась установка компонентов, точнее, полноценная установка Windows 2000.
Конец установки.
Наконец-то после перезагрузки появляется рабочий стол. Короче говоря, всё по стандарту – Корзина, Мои документы, Мой компьютер и Пуск. Что еще нужно для комфортной работы? Ну конечно, не браузер Internet Explorer хрен знает какой версии.
Теперь вы знаете, как установить Windows 2000 на своей ПК. Всем удачи в общем. Если есть какие-то вопросы задавайте. Думаю, Windows 95 мы устанавливать не будем. Эта версия край. Ее все равно никто не использует, но просто посмотреть на ход установки можно.
( 3 оценки, среднее 3.33 из 5 )

Варианты решения:
1. Перенос Win2K на новый комп в качестве второй системы с мультизагрузчиком. Создать новый логический диск, клонировать на него Win2K, установить на Семерке мультизагрузчик (например, бесплатный EasyBCD), решить проблему совместимости с SATA AHCI и прочими драйверами. Несомненный минус этого варианта — необходимость выгружаться из каждой системы для входа в другую, и это при условии, что нашлись драйвера для весьма-таки старой системы под современное оборудование. Да и установка драйверов контроллера SATA через Intel Matrix Storage — те еще танцы с бубном, да и не факт, что получится.
2. Перенос на виртуальную машину. На мой взгляд — оптимальный вариант. Но могут встретиться подводные камни, описанию и преодолению которых и посвящена данная статья.
Я давно использую VMWare Workstation и считаю ее очень удобным инструментом. Преимущества виртуальных машин общеизвестны — наличие нескольких операционных систем (клиентов) на одном физическом компьютере (хосте) с возможностью одновременного их и хоста использования, соединения в сеть между собой и физическими машинами и совместного использования ресурсов, устройств и портов хоста. Пробовал и Virtual PC, и VirtualBox, но остановился на VMWare — показался наиболее удобным. К тому же имеется VMWare Player — бесплатный вариант VMWare Workstation с несколько усеченной функциональностью. Поэтому описывать буду процесс миграции именно на VMWare.
В свое время я успешно переносил Windows XP на VMWare машины используя VMWare Converter. Однако в данном случае несколько разных версий конвертера одинаково не справились и выдали ошибки конвертации. Пришлось действовать ассиметрично.
Описанный ниже процесс подходит для миграции как Win2K, так и WinXP.
Дисклеймер: все выполняется вами на ваш страх и риск. В случае материального или морального ущерба автор статьи умывает руки ;))
Итак: хост — новый комп с Windows 7 64 bit, на нем установлена свеженькая (на время написания статьи) VMWare Workstation 8.0.2. Что иметь перед процессом:
1. Утилиту для создания и восстановления образа и клонирования разделов и дисков (Acronis True Image, Symantec Norton Ghost (платные), Clonezilla (бесплатный) и др.). Я использовал первую, и в дальнейшем для краткости буду называть ее просто «Акронис».
2. Дистрибутив Windows 2000 или XP (CD или ISO-образ) — для запуска консоли восстановления (Recovery Console).
3. Образ дискеты с драйвером SCSI для VMWare (можно скачать здесь или здесь).
4. Обновление KB835732 (на сайте Microsoft: Win2K — английский, русский; WinXP — английский, русский)
5. Внешний USB HDD (если при переносе системы (шаг 3) используется способ 1) или IDE to USB адаптер или коробка (способ 2).
Пошагово:
1. Подготовка Win2K к переносу.
a. Убедиться, что установлен SP4. Не повредит установить все возможные обновления.
b. Скачать соответствующий нашей системе KB835732 и скопировать его в корень (или другой легкодоступный фолдер) системного диска.
2. Создание новой виртуальной машины. Выбираем Windows 2000 Professional на предложение выбрать операционную систему для VM (Select a Guest Operating System). На вопрос о максимальном размере диска я выставил 40 ГБ, поскольку таков размер физического диска с Win2K, и заполнен он более чем на две трети. Остальное можно по умолчанию. Дойдя до экрана Ready to Create Virtual Machine, жмем на кнопку Customize Hardware… и меняем тип New CD/DVD с дефолтного IDE на SCSI. Если оставить IDE, система не подключит CD/DVD после первого успешного запуска, а он нужен для установки VMWare Tools. После установки VMWare Tools и, соответственно, всех виртуальных драйверов можно поменять тип обратно на IDE.
3. Перенос содержимого физического диска на диск VM. Есть несколько способов:
Способ 1:
a. Создаем Акронисом образ физического диска с Win2K и копируем его на внешний USB диск. Подсоединяем диск с образом к хосту.
b. Стартуем виртуальную машину с CD или образа Акронис, и в меню VM > Removable Devices находим наш внешний диск и жмем на подменю Connect (Disconnect from Host). Диск теперь будет распознан Акронисом.
Если Акронис загружается из ISO-образа, то этот образ должен находиться на диске, отличном от подключенного нами внешнего диска, поскольку тот отсоединяется от хоста.
c. Восстанавливаем образ на диск виртуальной машины
Способ 2:
a. Снимаем оригинальный диск со старого компа, подсоединяем его как внешний (через адаптер или коробку) к хосту.
b. Те же действия, что и в п. b способа 1.
c. Клонируем содержимое физического диска (или переносим только нужные разделы) на виртуальный.
Первый способ требует только внешний диск (или даже большую и быструю флешку, что в наше время не редкость). Если нет IDE to USB адаптера или лениво снимать оригинальный диск — он предпочтительнее. Да и лишний бэкап системы не помешает. Минус — если в старом компе USB1.1, процесс создания образа может быть долгим. Ну так поставьте на ночь!
Возможен еще третий путь — работать напрямую с физическим диском из VM. Диск снимается со старой машины, подсоединяется к хосту как внешний или внутренний и монтируется в VM как виртуальный. Этот метод более трудоемкий, поскольку там надо перед монтированием удалять буквы всех партиций для предотвращения одновременного доступа к диску со стороны хоста и VM, а при самом монтировании — опознать диск в списке вида PhysicalDrive0, PhysicalDrive1 и т. д. Если уж снимать диск — лучше второй способ переноса. Третий способ — только для тех, у кого нет места на новом компе (хосте), и кто собирается запускать VM с физическим диском постоянно.
4. Запуск виртуальной машины — система вылетает в BSOD с сообщением:
Inaccessible boot device.
Это происходит из-за того, что диск в VM подключен к виртуальному SCSI контроллеру, и в системе нет соответствующего драйвера. Разрешить данную проблемы можно, заменив файл драйвера IDE atapi.sys на файл с таким же именем, но содержащий драйвер виртуального SCSI контроллера VMWare. Этот трюк обманет систему на момент загрузки, подсунув ей нужный драйвер с именем, соответствующим настройкам в реестре.
a. Вставляем в CD/DVD-ROM диск с дистрибутивом Win2K/WinXP и в настройках VM CD/DVD указываем использовать физический привод, или же монтируем образ дистрибутива (ISO image) в привод виртуальной машины. Во флоппи VM монтируем образ дискеты с драйвером SCSI для VMWare. Отмечаем чекбоксы Connect at power on в разделе Device status для обоих вышеуказанных виртуальных устройств.
b. Запускаем VM с CD/DVD (выставив последовательность загрузки в BIOS виртуальной машины раз и навсегда, либо же нажав Esc после включения VM и выбрав CD-ROM drive). Стартует процесс установки Windows. Заходим в Recovery Console, выбираем нашу систему и попадаем в системный фолдер C:WINDOWS или C:WINNT. В командной строке вводим:
cd SYSTEM32DRIVERS
del atapi.sys
copy a:vmscsi.sys atapi.sys
Вторую строку можно пропустить, тогда соглашаемся перезаписать существующий atapi.sys.
Все вышеописанное относится к случаю, когда старый диск IDE типа. Если же он подключен к SCSI или SATA контроллеру, atapi.sys не может быть использован. Нужно определить, какой файл содержит драйвер контроллера вашего типа диска и заменить его на vmscsi.sys. Команда консоли восстановления LISTSVC, выдающая список сервисов системы, может помочь идентифицировать файл драйвера. Он должен относиться в категории Boot (2й столбец).
c. Перезапускаем VM, введя exit в командную строку. На этот раз система загружается успешно.
Здесь надо отметить, что система при старте заменяет подсунутый ей поддельный IDE драйвер обратно на оригинальный, так что в случае перезагрузки без установки в системе драйвера VM SCSI контроллера синий экран вернется. Поэтому я отверг все предложения системы по ручной установке драйверов и перезагрузке и первым же делом установил драйвер SCSI Controller через Device Manager с той же дискеты. Теперь перезагрузка не чревата синим экраном, и система стартует успешно (а перезагрузиться разок таки пришлось, о чем далее). Если вы случайно перегрузили VM и снова получили BSOD — повторите 4-й шаг.
5. Установка VMware Tools. Запускаю — и получаю сообщение:
Microsoft Runtime DLLs cannot be installed on this operating system. Please see Microsoft KB835732 for details.
Поставил обновление KB835732, перегрузился (теперь можно), и VMware Tools установились без проблем. Ура, мы успешно переехали в виртуальную машину!
Кстати, не факт, что у вас тоже выскочит подобная проблема с установкой VMware Tools. Особенно если, как я упоминал в начале, в оригинальной системе еще до переноса были установлены все обновления. Все же имейте KB835732 под рукой, желательно — прямо на диске для удобства доступа.


