Windows Server 2016 Core Installation
When looking to install Microsoft Hyper-V, you need to install the Hyper-V role on Window Server. One option is to use the GUI to run and manage your server and VMs. However, in certain situations, you can save resources by running Windows Server in command line (without GUI).
To install the Hyper-V role, you need to install the Windows Server 2016 Datacenter Server Core as your operating system (OS) platform. For the purposes of this walkthrough, we are using the Datacenter edition of Windows Server, as it unlocks the most powerful enterprise features for Hyper-V. Most enterprises use Windows Server Datacenter or Windows Server Standard because of the Windows licensing advantages. Note that the steps for other editions will differ.
Hyper-V Server is basically Windows Server Core with the Hyper-V role already installed. Thus, simply installing Hyper-V Server can get you up and running with the hypervisor for free. However, it may be better to install Hyper-V on Windows Server for advanced functionality if you have a license. In this case, you should install the OS first and then enable the Hyper-V role. Let’s cover how to install Windows Server 2016 Core and configuration.
Let’s get started.
- Windows Server 2016 ISO Download
- Windows Server 2016 Datacenter Server Core Installation
- Windows Server 2016 Configuration Setup
Before we start
Both physical servers and virtual machines should be protected against data and configuration loss. Use the NAKIVO solution to protect your Windows Servers and Hyper-V VMs.
Windows Server 2016 ISO Download
To start, you need to download the ISO file. You need MSDN or any other login with Microsoft to download the Windows Server 2016 ISO. However, if you don’t have that, you can download an evaluation copy of Windows Server 2016 from the TechNet Evaluation Center on the Windows Server 2016 download page. The TechNet evaluation copy is a time-limited 180-day version of Windows Server 2016 intended for trial purposes. You are asked to create an account with Microsoft before getting the Windows Server 2016 ISO download link.
Windows Server 2016 Datacenter Server Core Installation
You need to write the ISO image to a DVD disc or USB flash drive. Insert this medium into your computer and boot from this medium to start Windows Server installation.
When installing the Windows Server 2016 OS, you can choose to install the operating system alone, which is a Server Core installation. Server Core is a minimal installation without a graphical interface or management tools. This is the preferred installation method for use in a production environment over the Desktop Experience, which is the regular GUI Windows Server OS.
To demonstrate the installation process for a single standalone Hyper-V host, we use the Server Core installation of Windows Server 2016 Datacenter.
Note: For Windows Server 2016 Datacenter with the graphical user interface (GUI), you can read our blog post on running Hyper-V virtual machines (VMs).
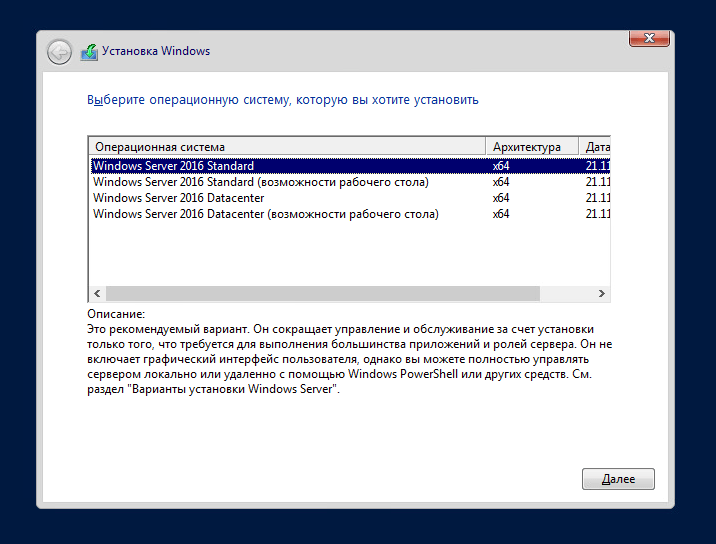
Start by choosing Windows Server 2016 Datacenter in the list with Windows Server editions to install Server Core after you boot from the installation medium. See the screenshot of the Windows Server 2016 installer below with the OS list.

The Windows Server 2016 Core installation is similar to any other Windows Server installation. Go through the steps in the setup wizard:
- Accept the license agreement.
- Choose Custom Install.
- Select the target hard drive on which you want to install Windows.
- Proceed with the installation.
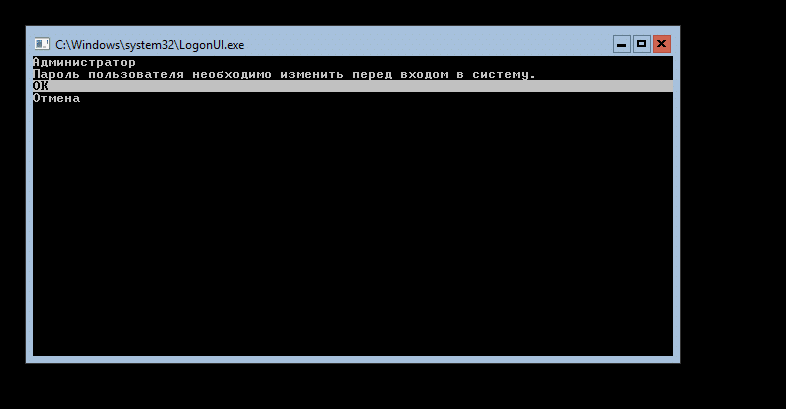
- Once the Windows Server 2016 Datacenter Server Core installation process is complete, you are asked to change the Administrator password. Press Enter.

- Once you set the password, press Enter (OK) to continue.

You have finished the Windows Server installation. Now you need to configure the operating system.
Windows Server 2016 OS Configuration
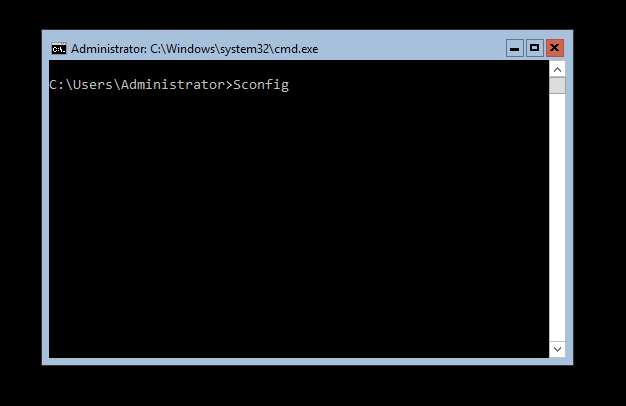
You now reach a CMD command prompt and no visible menu. It is recommended that you configure network settings for your Windows Server 2016 setup.
Configuring network settings
Network settings and most other settings in Windows Server 2016 Core are configured in the console interface:
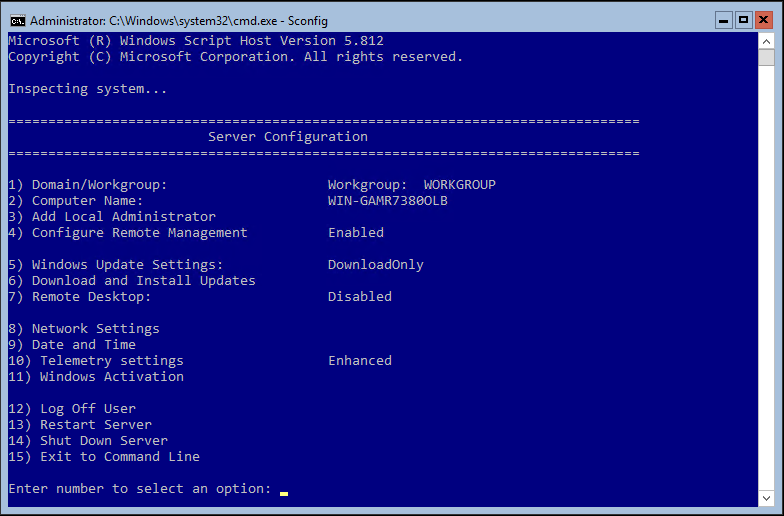
- Type sconfig in the command prompt to launch the Server Core configuration utility.
- You are then presented with the Server Configuration menu.

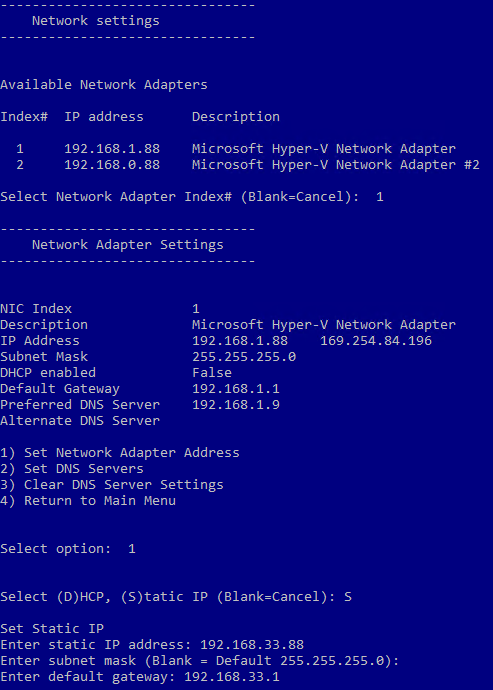
- Type 8 and press Enter to open Network Settings and launch the network configuration menu. It is recommended that you assign a static IP address for Windows Server 2016 setup.
- Choose the network adapter you want to configure. Type the appropriate number and press Enter. You need to always press Enter after entering a value in this configuration menu.
- Now you should see the menu with four entries:
- Set Network Adapter Address
- Set DNS Servers
- Clear DNS Server Settings
- Return to Main Menu
- Type 1 to set the IP address, subnet, and gateway.

- Type S to use the static IP address configuration.
- Enter the appropriate values to meet your network configuration. Once done, you are returned to the previous Network Adapter Settings menu with four entries.

- Type 2 to set DNS servers for the network configuration.
- Enter a new preferred DNS server and alternate DNS server.

Once done, you are returned back to the previous Network Adapter Settings menu.
After configuring the network settings, you should test network connectivity. You can use option 15, Exit to Command Line. This takes you to the cmd prompt, where you can ping your gateway, DNS server, etc.
Changing the computer name
Now let’s run the sconfig command in cmd to open the Server Configuration menu again. You should join a Windows domain and change the computer name. Using an Active Directory domain with a domain controller allows you to manage all Windows machines centrally.
Do the following steps to change the computer name:
- Choose 2 in the Server Configuration menu.
- Enter a new computer name.
- Restart the computer to apply the changes.

Changing Domain/Workgroup options
Open the Server Configuration menu after computer restart (sconfig).
Do the following steps to change the Domain/Workgroup settings:
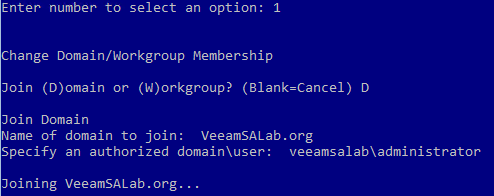
- Choose the 1) Domain/Workgroup option in the Server Configuration menu.
- Type D to join a domain.
- Enter the domain name.
- You are asked to provide the credentials of a user who has permissions for the needed domain.
- Once you have set up the domain configuration, reboot your Windows Server machine.

After the reboot, you have a functioning Windows Server 2016 Datacenter Server Core and are ready to install the Hyper-V server role.
You can also read about the difference between the GUI and Core Windows Server 2016 installation and configuration to run Hyper-V.
Conclusion
Windows Server installation is not a difficult process. Installing the core version of Windows Server 2016 Datacenter allows you to reduce the footprint and related overhead, as well as install the Hyper-V role on the Windows Server to run VMs. As for the core version, Windows Server 2016 setup is performed mostly in the command line interface.
If you use Hyper-V, don’t forget to back up virtual machines. Download NAKIVO Backup & Replication to protect your physical and virtual environments. The NAKIVO solution supports physical Windows Server backup, Active Directory backup, Hyper-V VM backup and more.
In the next several articles we will take you through the steps of deploying a Microsoft Windows Server 2016, configuring it, enabling a Hyper-V role and protecting your data with Veeam Backup & Replication software.
Windows Server 2016 comes in Standard and Datacenter editions and offers several types of installation for both editions: Desktop Experience (full GUI mode), Core (no GUI) and Nano Server. We will go through the installation and configuration of Windows Server 2016 with a Core type deployment, the initial setup and preparing it for the Hyper-V role.
Let’s begin.
Windows Server 2016 Core minimum system requirements
Before you start, check that your hardware meets these minimum system requirements first. This would be the very basis of it since these are just for running the system itself. To run your production workload, you need to size accordingly.
First, download and boot our server from the ISO. Once the boot start and the desired language is chosen you will be welcomed with the screen (Figure 1) to choose the installation type.
Note: Nano Server deployment is not on the list, because you would need to go through a different set of steps to install it. You can find the full guide on how to do this in our dedicated Nano Server Deployment blog series.
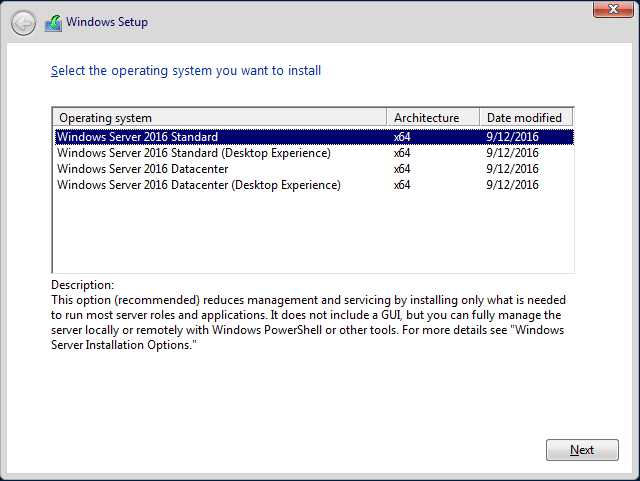
We’ll go with the “Windows Server 2016 Standard” which represents the Core mode of installation and then accept the license terms to start our server disk partitioning. From the minimum system requirement, Windows Server 2016 on Core mode requires a 32 GB disk space as a system drive, so we’ll go ahead and use a 50 GB disk. Note that the system disk will not be used for hosting any Hyper-V configuration files as we will use an ISCSI storage for that as well as for hosting of VMs’ files.
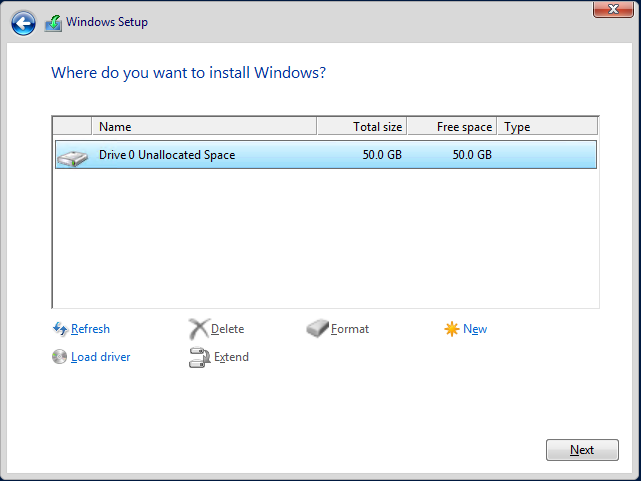
Next is our selection here to partition the full size of the drive and then start the installation of the server.
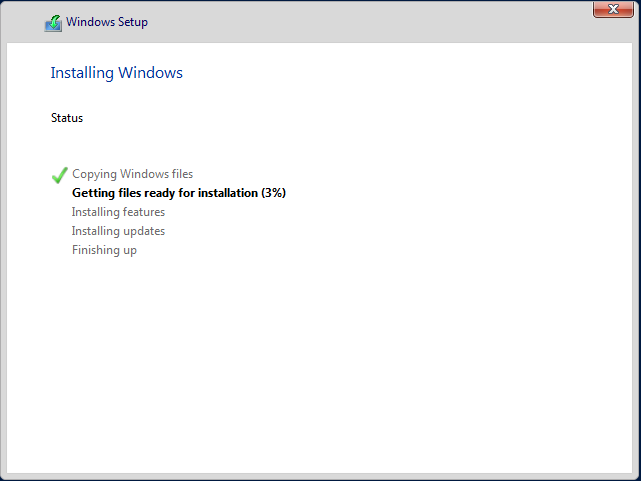
The installation process is fast and the process will automatically reboot the server, to be greeted by changing the server password:


Windows Server 2016 initial configuration
Since we’re doing the Core mode installation, all that you get is a command line window which you use to configure the server via commands and/or scripts including PowerShell. To start our initial server configuration, let’s type “Sconfig” command to start the server configuration (Figure 5).
You are greeted with the default parameters and options that you can change (Figure 6).
To change the Computer name, choose option 2. Once submitted, a restart will be required (Figure 7).

The next step is changing the IP address. We are going to use two IP addresses: One for production and one for the storage (ISCSI). For this, we will choose option 8 and then select each adapter to configure the desired IP address (Figure 8).
Now, we are ready to join the server to our domain by selecting option 1 (Figure 9).
These are the basic steps to get you started, but I recommend to go through the list and configure and modify any configuration suitable for your environment. For example, I will enable remote desktop by selecting option 7 and then check the date and time by pressing option 9 and so on.
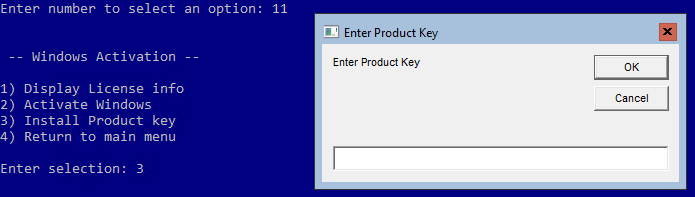
Another important step that we need to go through before we connect our storage and install Hyper-V role is activate our Windows copy. Select option 11 and then option 3 (Figure 10).
iSCSI configuration
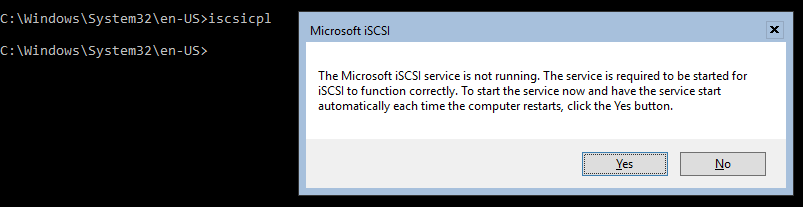
Time to attach our storage to the server. To do so, type the following command into the server’s command line interface:
iscsicpl
You will be greeted with the “Microsoft iSCSI” notification about the iSCSI service not running, so we’ll go ahead and press YES to start it (Figure 11).
Once the service is running, the iSCSI Initiator Properties window opens where you will be able to enter your iSCSI storage IP address and connect to the storage (Figure 12).
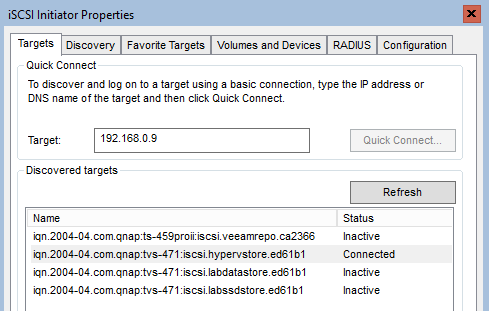
Once the iSCSI storage is connected to the server, time to add the storage to our server and assign a disk before we start the Hyper-V configuration.
Before getting into the disk management steps, I’d like to note that it is best to use Microsoft’s new ReFS format with Windows Server 2016 as it has superb benefits and is the future of file systems. Okay, now to the steps:
- Diskpart to start the object managing tool
- Use “list disk” to select the new iSCSI disk and attach it to the server by “Select disk 1” command (assuming the disk number is 1)
- Use “online disk” command to bring the disk to an online state.
- To make sure the partition is set to writable enter the “attributes disk clear ”
- “List partition” to list all the available partitions of the storage
- “Select partition 1” select the desired partition
- “Assign letter=V” to add the desired letter to the volume.
- Exit
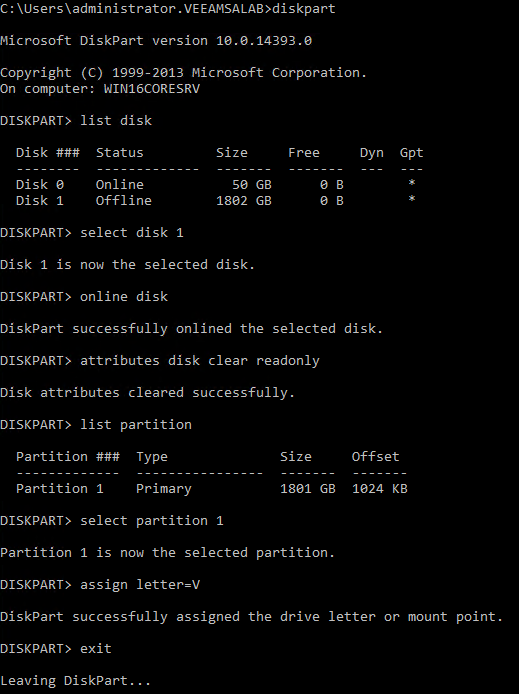
Now our storage is connected to drive V: on our new Windows Server 2016.
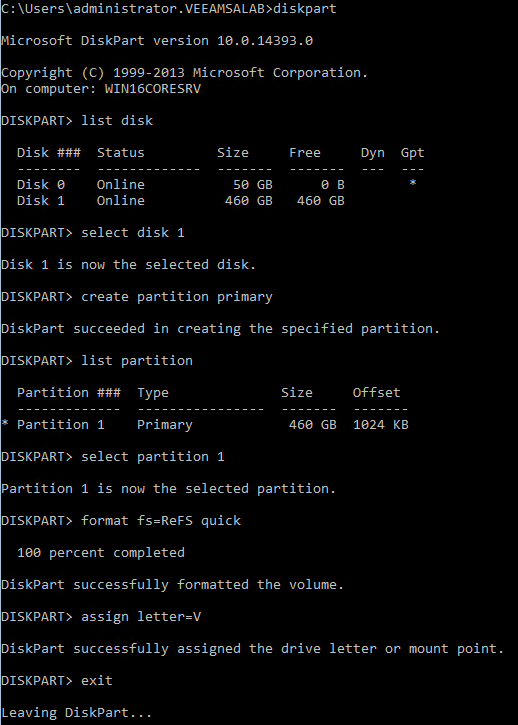
If the storage is brand new, you need to create and format the partition before you assign a letter as shown on Figure 14.
That’s it! We went through the installation and initial configuration of the Windows Server 2016 in Core mode. We connected our server to the storage in preparation for Hyper-V role that will be covered in the next article.
Read more:
- Veeam Agent for Microsoft Windows
- First look at the Project Honolulu
- Completing the Rolling Cluster Upgrade – How to Deploy Windows Server 2016 (Part 3)
- Hyper-V backup & Availability
- Benefits of ReFS file system in Windows Server 2016
![]()
Hal Yaman
Hal Yaman (B.Sc) is a senior IT professional with more than 18 years of IT experience.Hal has a deep background in Backup and data centre infrastructure. As a Veeam solutions architect, he contributes to Veeam’s Australia and New Zealand technical pre-sales business focusing on: Providing strategic Veeam solutions for large, complex and Multi-Faceted environments, Establishing Solution Blueprints, Developing and leveraging of design patterns, reference architectures, Partner enablement and capability delivery for MSPs on BaaS and DRaaS and Delivering technical enablement to ANZs local SE team on Veeam’s emerging feature and function capability in new release solution versions.
More about author
- Windows Server 2016 Core minimum system requirements
- Windows Server 2016 initial configuration
-
iSCSI configuration
-
Read more:
-
Read more:
![]()
Cheers for trusting us with the spot in your mailbox!
Now you’re less likely to miss what’s been brewing in our blog with this weekly digest.
OK

Eliminate Data Loss
Eliminate Ransomware
#1 Backup and Recovery
Server Core 2016, установка и настройка.
В сегодняшней статье рассмотрим установку Windows Server 2016 в режиме Server Core, то есть, без графического интерфейса. Отсутствие графики позволит сэкономить ресурсы на серверах и уменьшит количество уязвимостей, количество обновлений и перезагрузок, к тому же графика там не особо и нужна, ведь управлять сервером можно через оснастки или Диспетчер серверов.
Установка Server Core 2016
Установка Server Core 2016 мало чем отличается от стандартной, графической версии, единственное, при установке выбираем режим без графики.
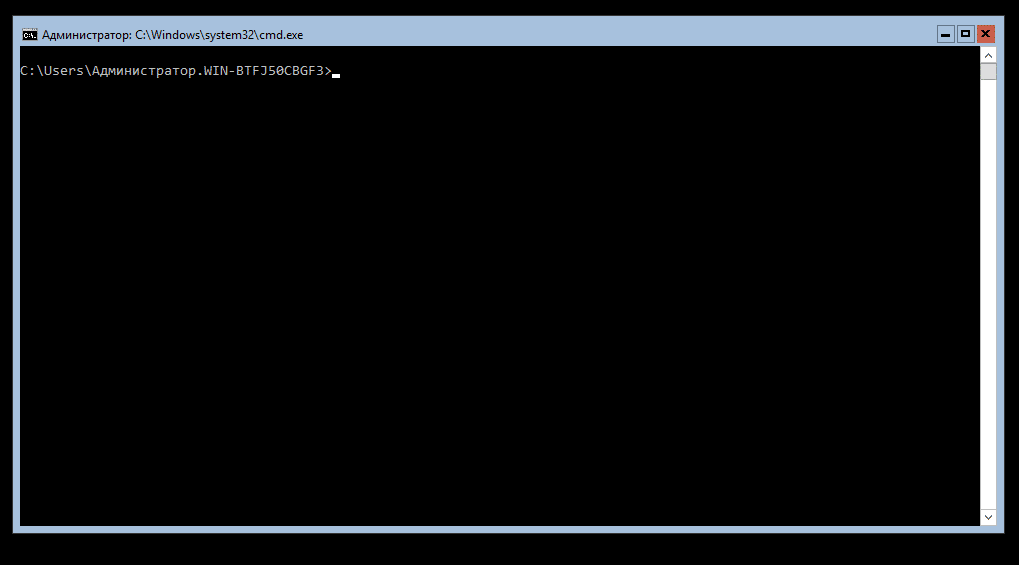
После установки системы вас встретит аскетичный интерфейс командной строки.
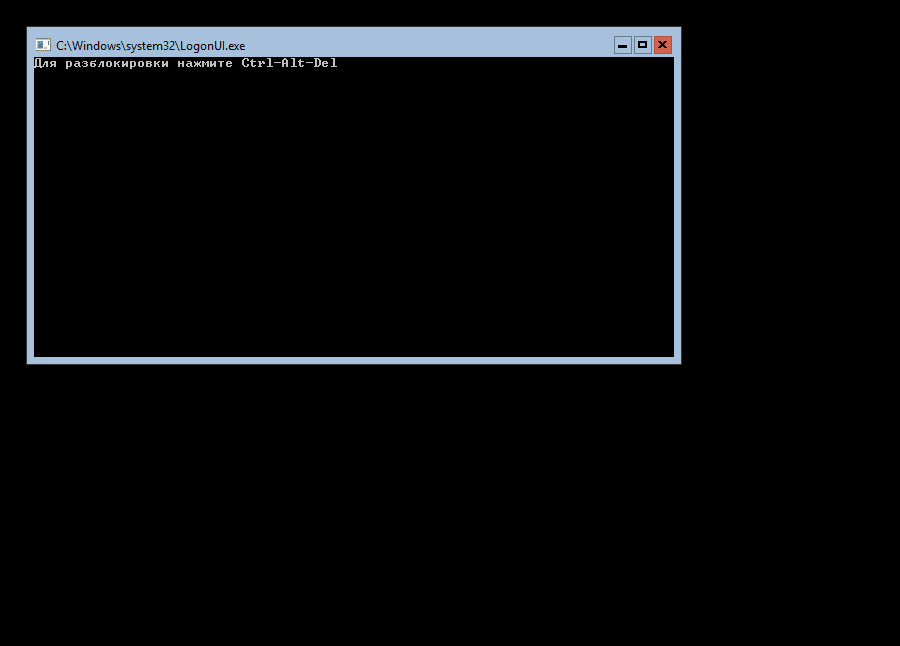
Первым делом установим пароль Администратора:
После ввода и подтверждения пароля
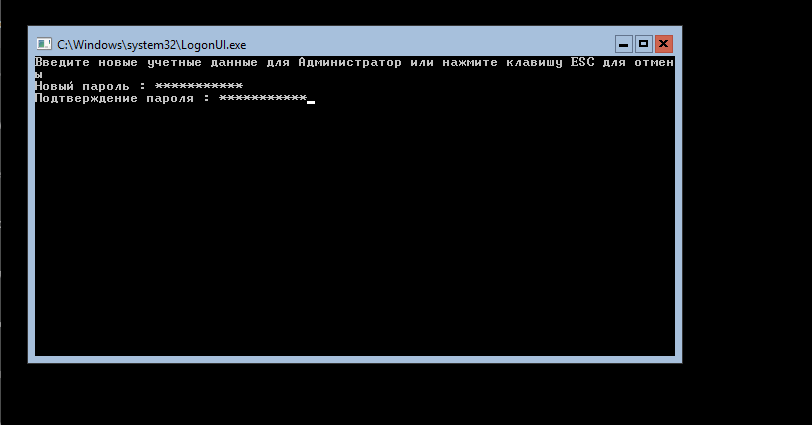
нам напишут об успешной смене пароля
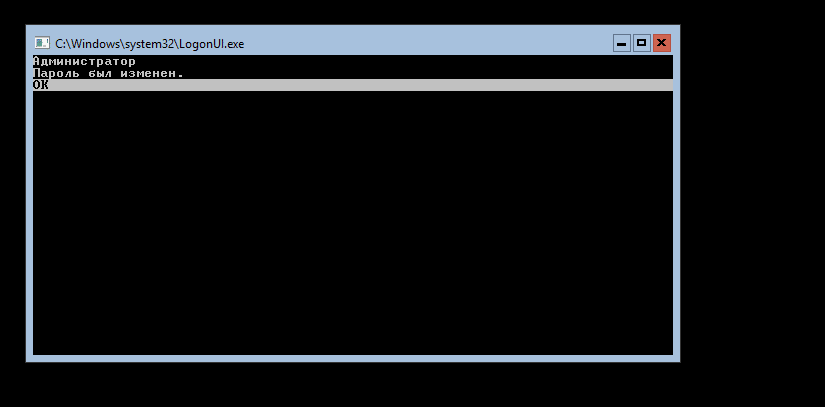
и мы войдем в систему.
Здесь я сделаю «лирическое отступление» и установлю Vmtools, поскольку устанавливаю Server Core на виртуальную машину VMware, и включу буфер обмена для виртуалки.
Установка Vmtools(при установке на vmware):
Подключить к виртуалке диск с Vmtools и выполнить команду <путь>setup64.exe
Дальше всё, как в графическом интерфейсе, стандартная установка Vmtools.
После того, как сервер перезагрузится, можно приступать к настройке.
Настройка Server Core 2016.
Заходим на сервер и вводим в командной строке sconfig.
Откроется окно настройки сервера.
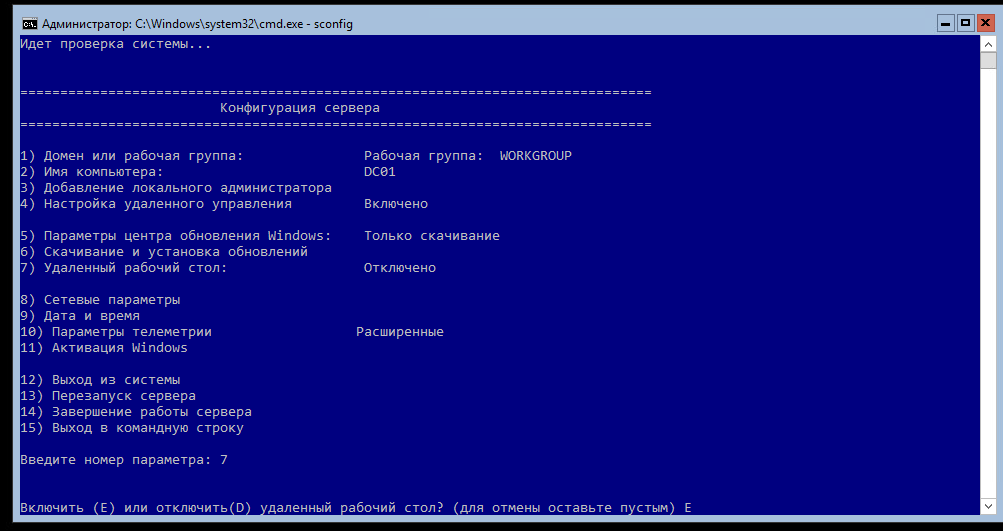
Здесь можно изменить имя сервера, сетевые настройки, включить доступ по РДП и т.д. Подробно описывать не буду — там все интуитивно понятно.
После изменения настроек, если требуется, перезагружаемся и продолжаем.
Замечу, что Powershell уже установлен в системе, и все действия можно выполнять через него, запустив его командой powershell.exe
Для того, чтобы разрешить удаленное управление нашим «ядерным» сервером, нужно выполнить на нем команду

Теперь переходим на компьютер, с которого вы собираетесь управлять сервером Server Core, и на котором установлен Диспетчер серверов.
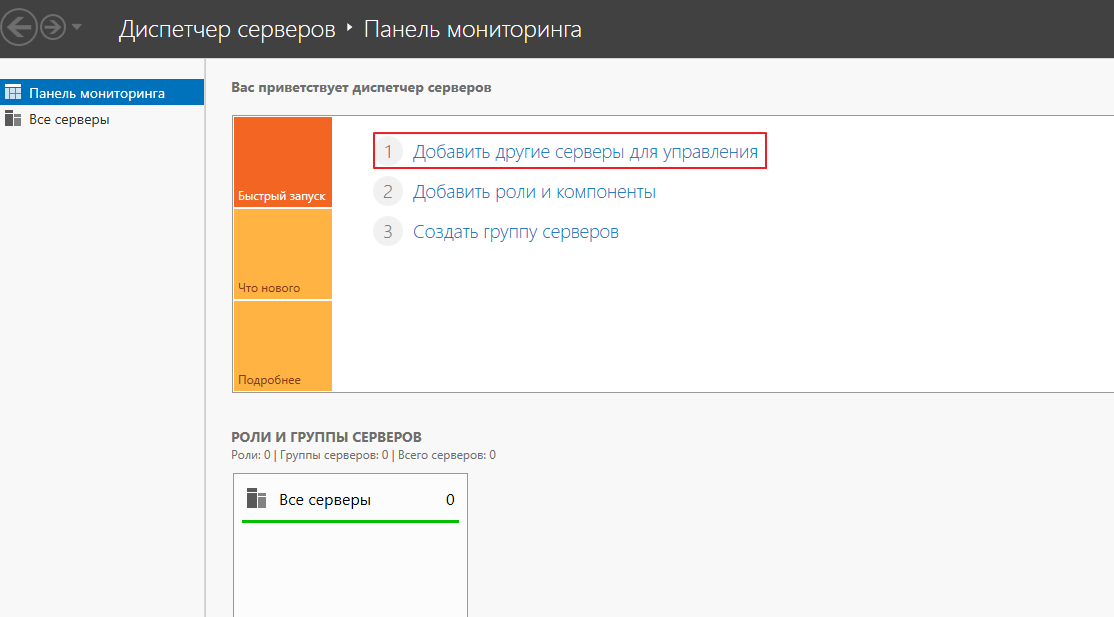
Откройте Диспетчер серверов и выберите «Добавить другие серверы для управления»:
После этого, в открывшемся окне, выберите вкладку DNS и в поисковой строке вбейте имя или адрес вашего сервера Server Core
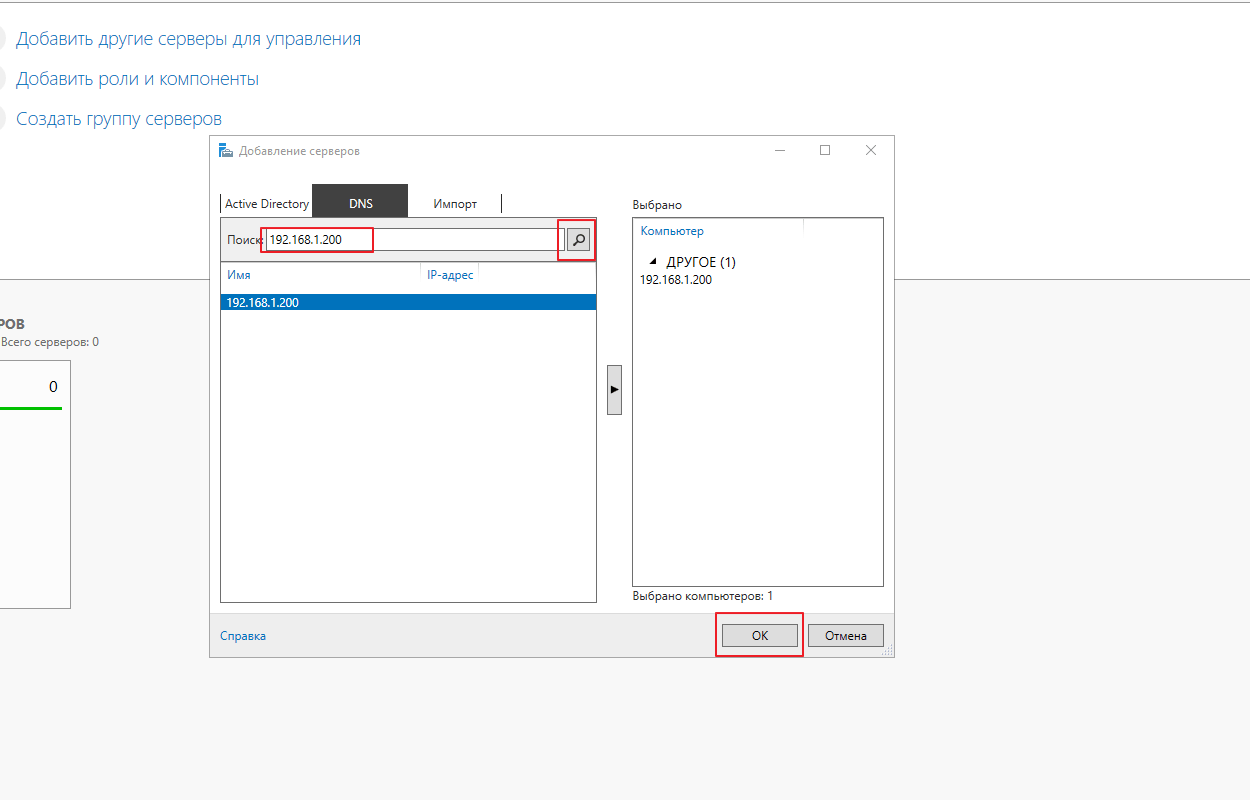
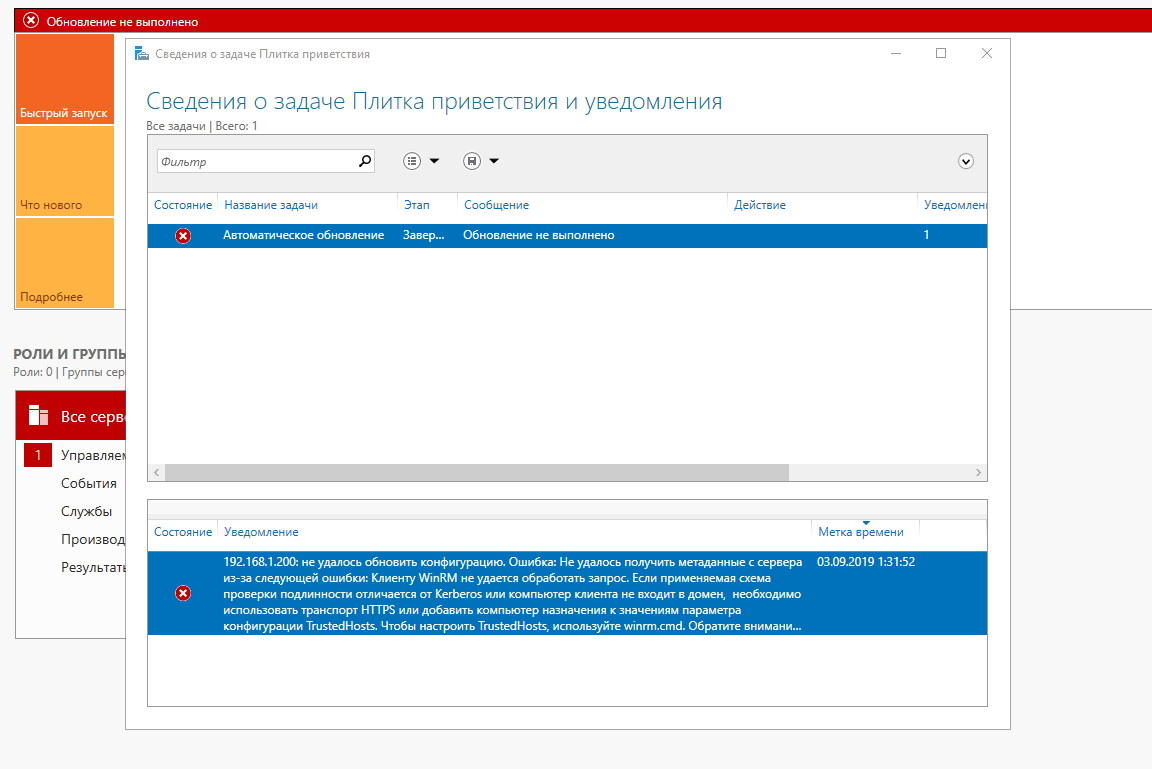
Если сервер у вас, как и у меня, не в домене, то, скорее всего, будут ошибки типа:
Для устранения ошибки, на компьютере, с которого подключаетесь, выполните команду:
|
winrm set winrm/config/client ‘@{TrustedHosts=»DC01″}’ |
— вместо DC01 введите имя или адрес вашего Server Core 2016
Другой вариант настройки Trusted Hosts — с помощью WSMan:
Посмотреть список доверенных хостов:
|
Get-Item WSMan:localhostClientTrustedHosts |
Указать доверенные хосты:
|
Set-Item WSMan:localhostClientTrustedHosts -Value ‘machineA,machineB’ |
Разрешить все хосты:
|
Set-Item WSMan:localhostClientTrustedHosts -Value ‘*’ |
Добавить хост к списку:
|
Set-Item WSMan:localhostClientTrustedHosts -Value ‘machineC’ -Concatenate |
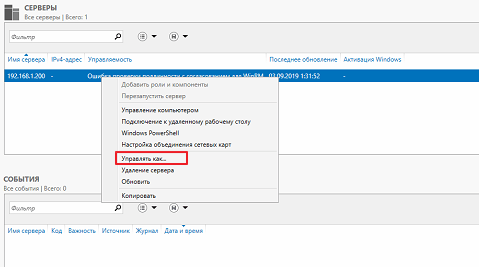
И для того, чтобы управлять сервером вне домена, нужно указать учетную запись с правами администратора на нем. Для этого щелкните правой кнопкой на вашем сервере в диспетчере серверов и выберите пункт «Управлять как…»
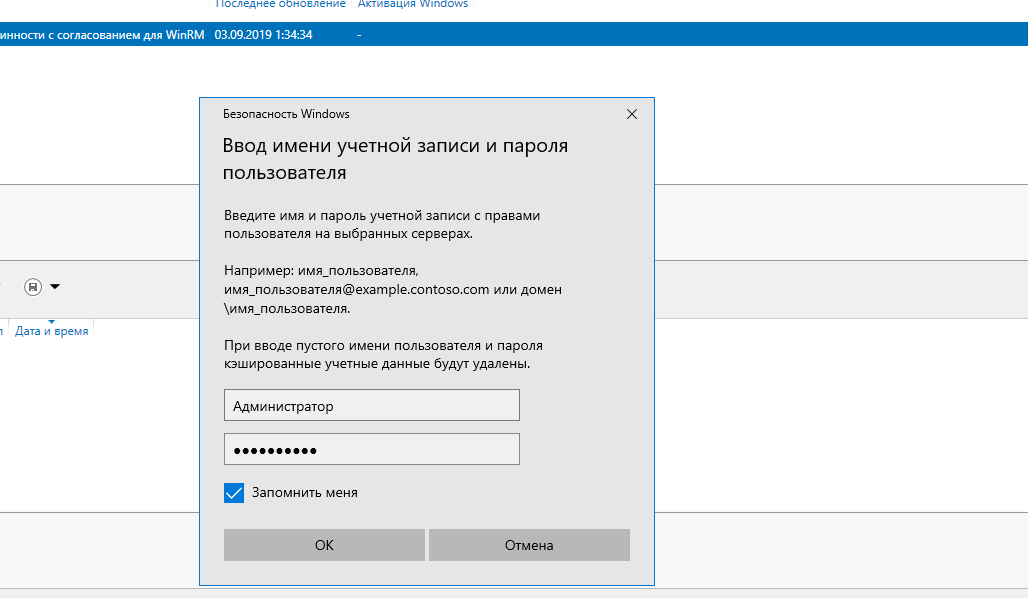
После этого введите учетные данные пользователя с правами администратора.
После всех проделанных манипуляций, ваш сервер в Диспетчере серверов должен выглядеть примерно так:
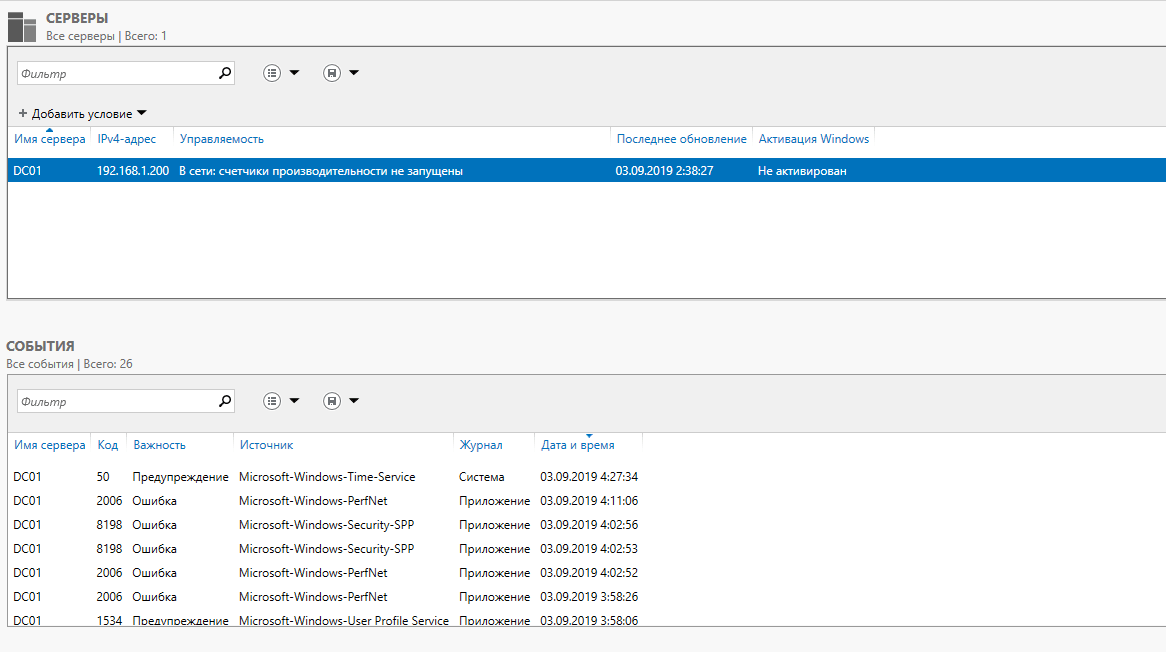
Подробнее о добавлении сервера в Диспетчер серверов: https://docs.microsoft.com/ru-ru/windows-server/administration/server-manager/add-servers-to-server-manager
На этом установку и первичную настройку Windows Server Core можно считать законченной. Теперь можно устанавливать на сервер нужные роли и администрировать его, практически, как обычный сервер.
P.S
С сожалением узнал, что в 2016 Server Core недоступны фишки, как в 2012, которые позволяли устанавливать и удалять графику:
Install-WindowsFeature Server-Gui-Mgmt-Infra,Server-Gui-Shell –Restart –Source c:mountdirwindowswinsxs
Install-WindowsFeature Server-Gui-Mgmt-Infra,Server-Gui-Shell –Restart
Uninstall-WindowsFeature Server-Gui-Mgmt-Infra -Restart
- 06.09.2019
В данной статье мы рассмотрим процесс установки (как установить) Windows Server 2016 с нуля от самого начала до конца, и немного затронем первичную подготовку к непосредственной настройке Windows Server 2016. А саму настройку, уже после установки Windows Server 2016 мы рассмотрим в следующей статье.
1) Первое, что нужно сделать — это скачать сам дистрибутив. Скачать его можете на нашем сайте по этой ссылке. Дистрибутив содержит в себе две редакции Standard и Datacenter на русском и английском языке. При установке у Вас будет выбор что именно нужно Вам установить.
2) Второе, что нужно сделать — это записать дистрибутив на флешку, сделав ее загрузочной. Это нужно для того, что бы Вы смогли загрузиться на флешку из под биоса для инсталляции системы. Подробная инструкция как записать дистрибутив на флешку по следующей ссылке.
3) Соответственно следующий шаг — это нужно загрузиться с загрузочной флешки из под биоса. Если Вы не знаете как это сделать, ознакомиться с инструкцией можете так же в нашем блоге на следующей странице.
4) Итак, мы уже загрузились с флешки и приступаем к непосредственной установке системы Windows Server 2016.

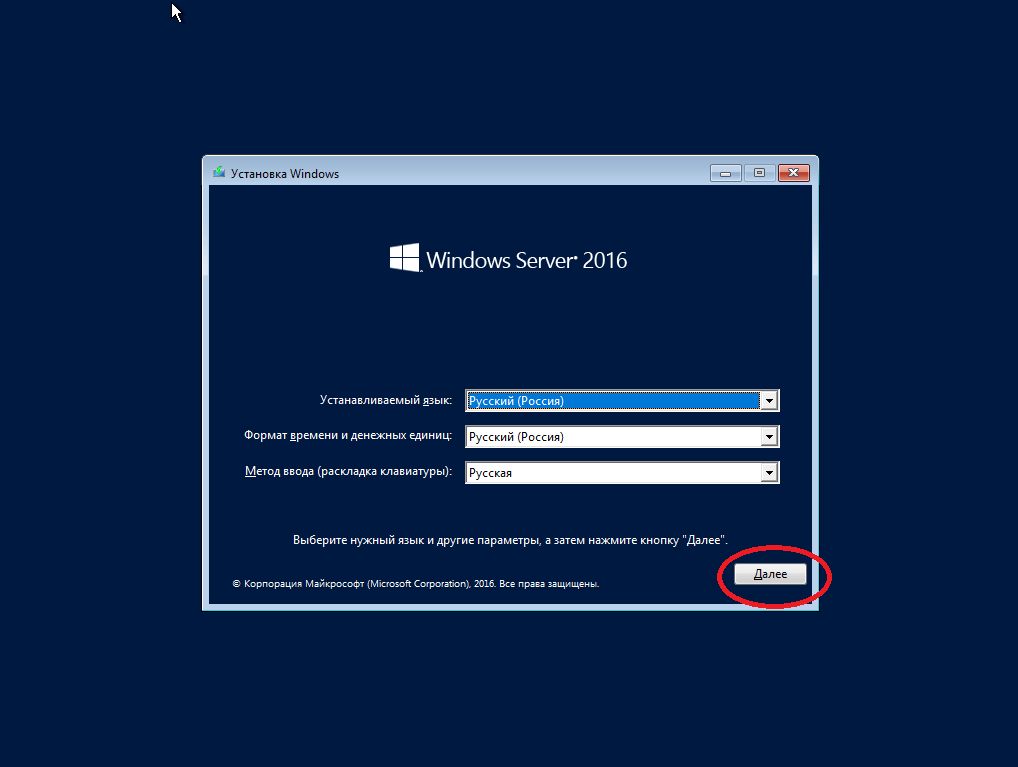
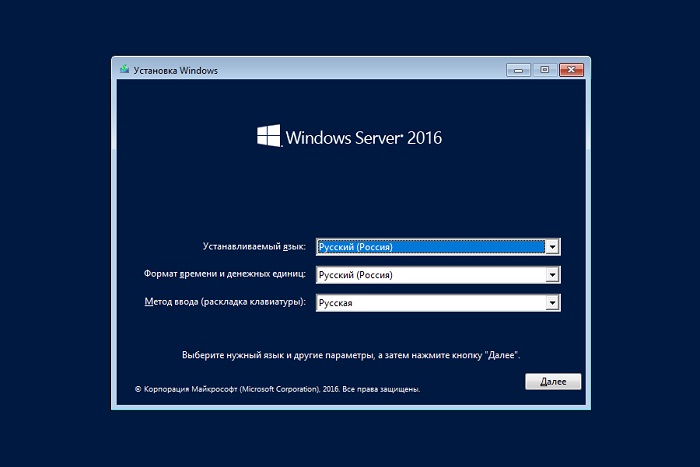
Выбираем нужный язык дистрибутива.

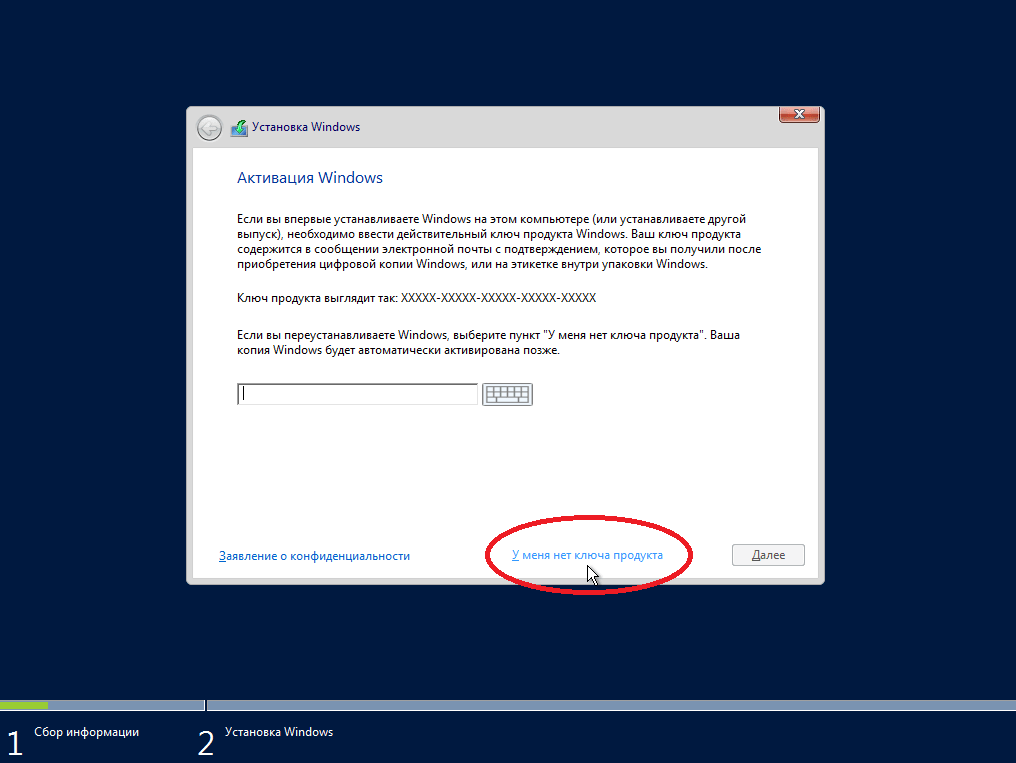
На следующем этапе у Вас запросят ключ активации для Windows Server 2016, мы его введем позже, уже в самой системе. А при установке выбираем «У меня нет ключа продукта».
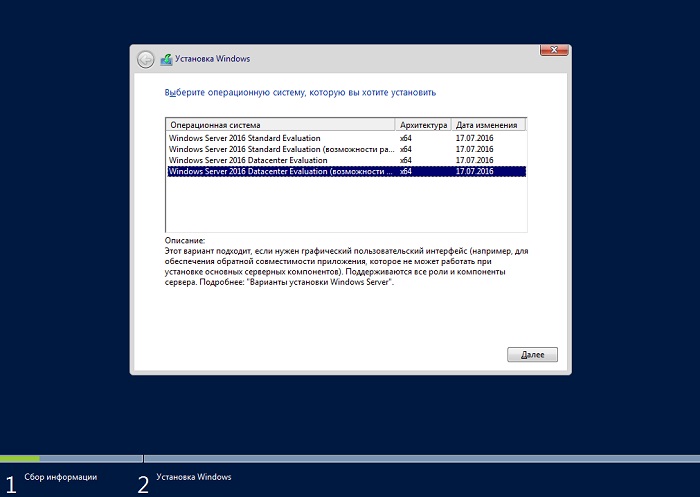
Далее Вас попросят выбрать какой именно версии дистрибутив Вы хотите установить Standard или Datacenter (на примере мы будем устанавливать Standard, но установка Datacenter ничем не отличается), а так же обязательно выбираем «Возможности рабочего стола», иначе система у Вас установится без графической оболочки и управление Windows Server будет доступна только из консоли.

На следующем пункте выбираем «Выборочную установку», т.к мы устанавливаем систему с нуля.
Далее Вам нужно будет выбрать диск, на который Вы хотите установить систему, у Вас их может быть несколько, к примеру SSD для системы, и HDD для хранения файлов, или что-то другое. В нашем случае на примере диск один.
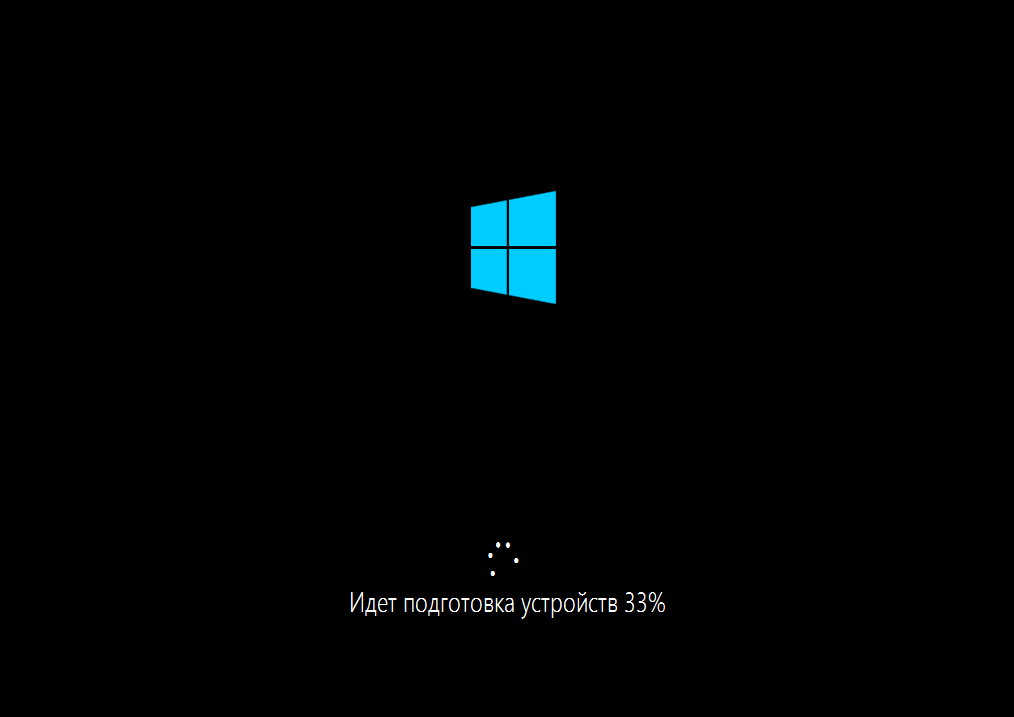
После начинается непосредственно сама установка Winodws Server 2016.
После завершения установки и обновлений компьютер пару раз может перезагрузиться.
Далее Вам нужно придумать пароль администратора, он будет запрашиваться при входе в систему. Используйте латинские символы, пароль так же должен содержать как минимум одну большую букву и цифру.
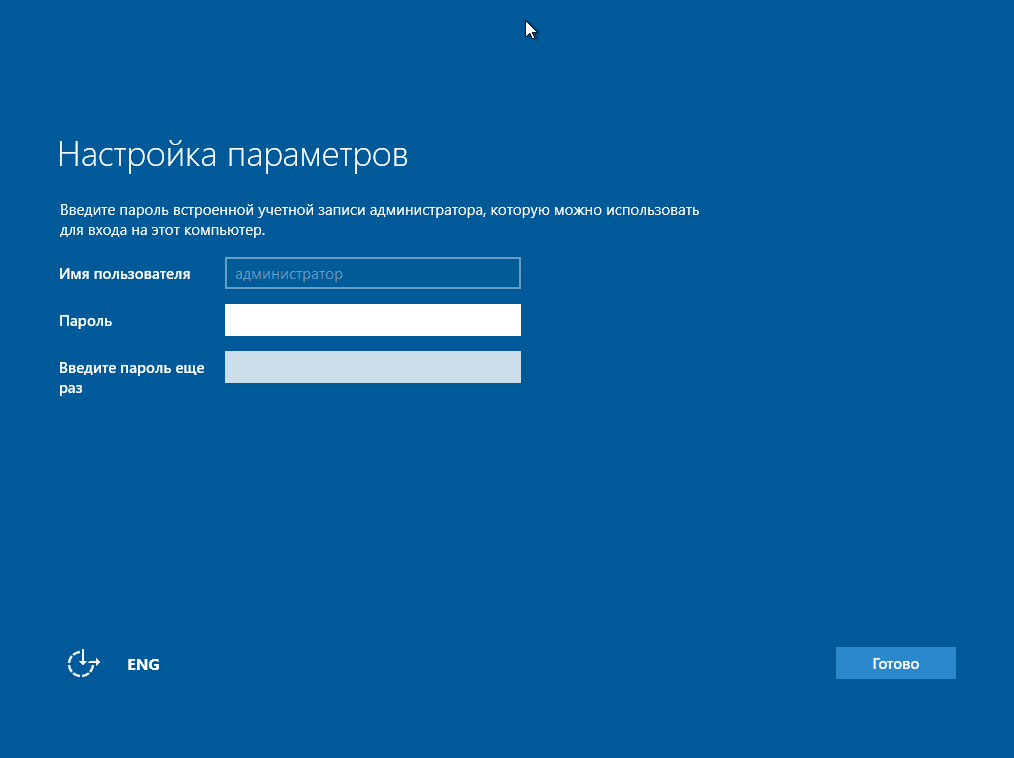
После установки пароля входим в систему.

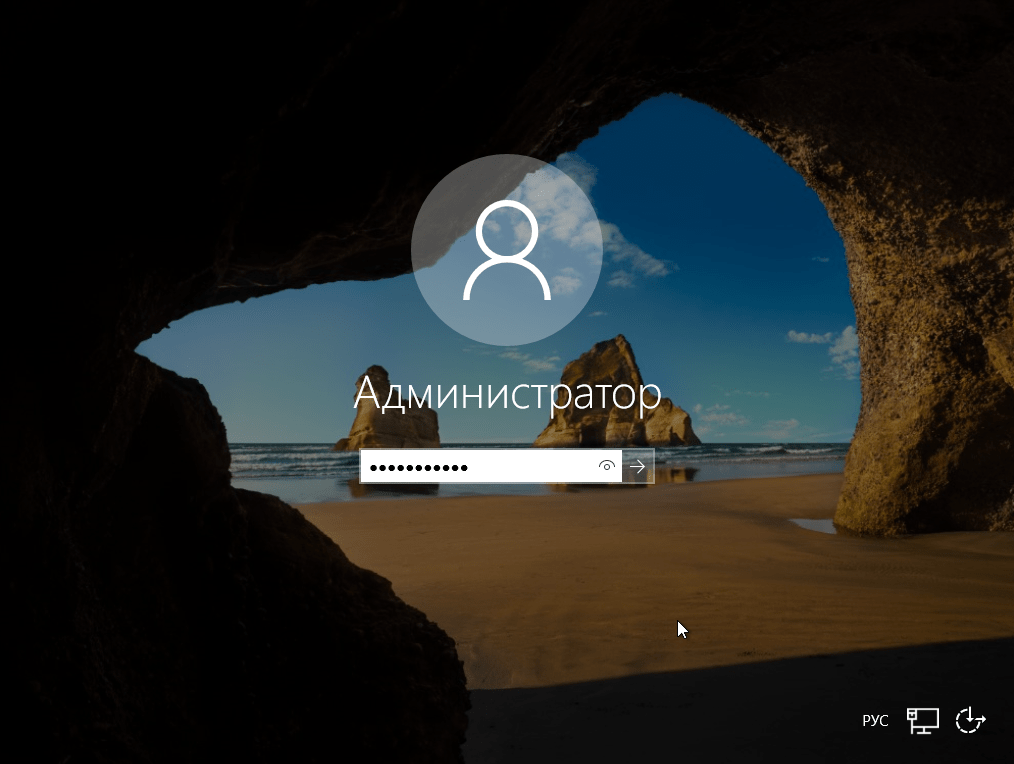
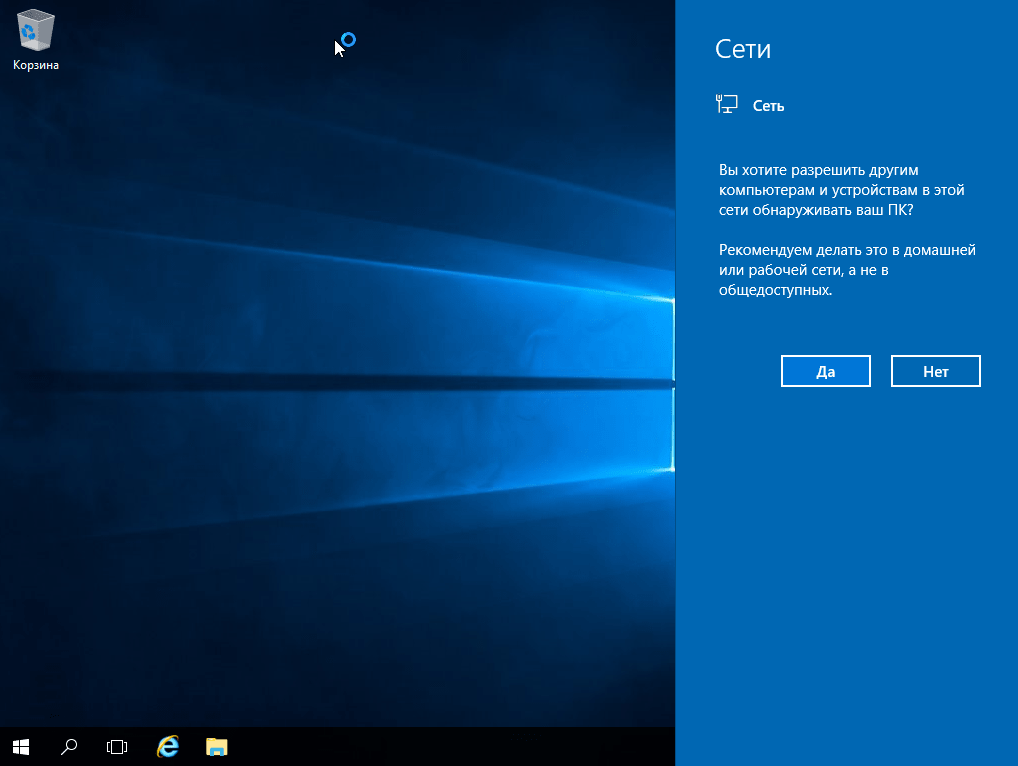
Вот мы и зашли на рабочий стол Windows Server 2016. Нажимаем «Да», если у Вас проводное соединение, для получения доступа в интернет.
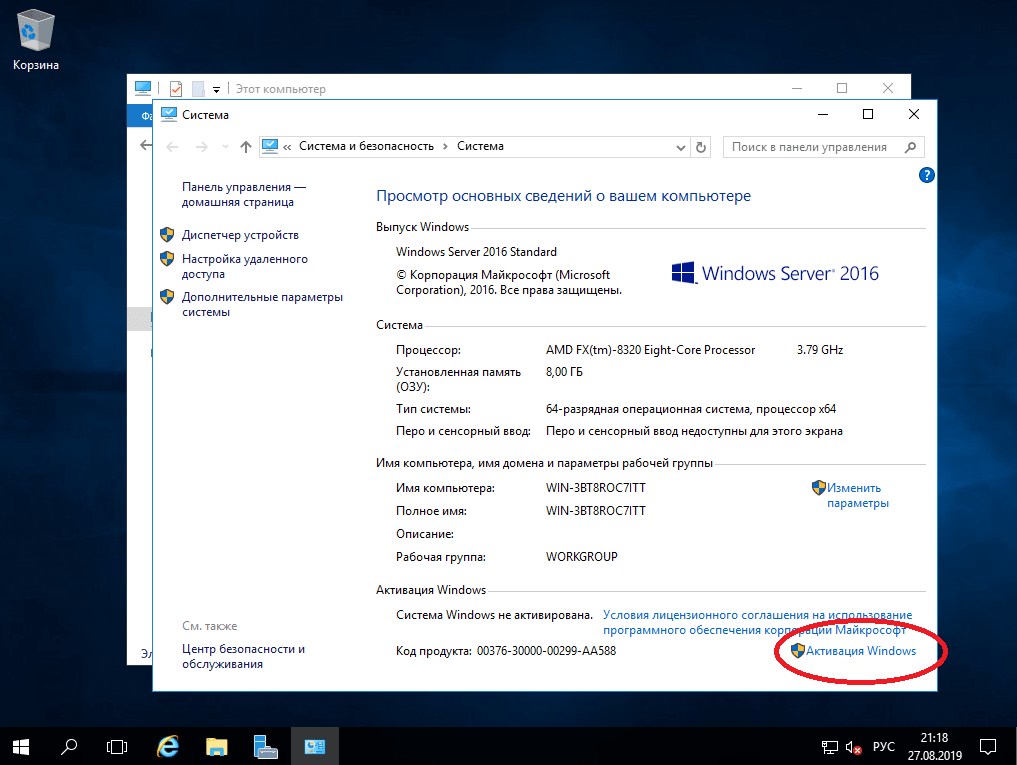
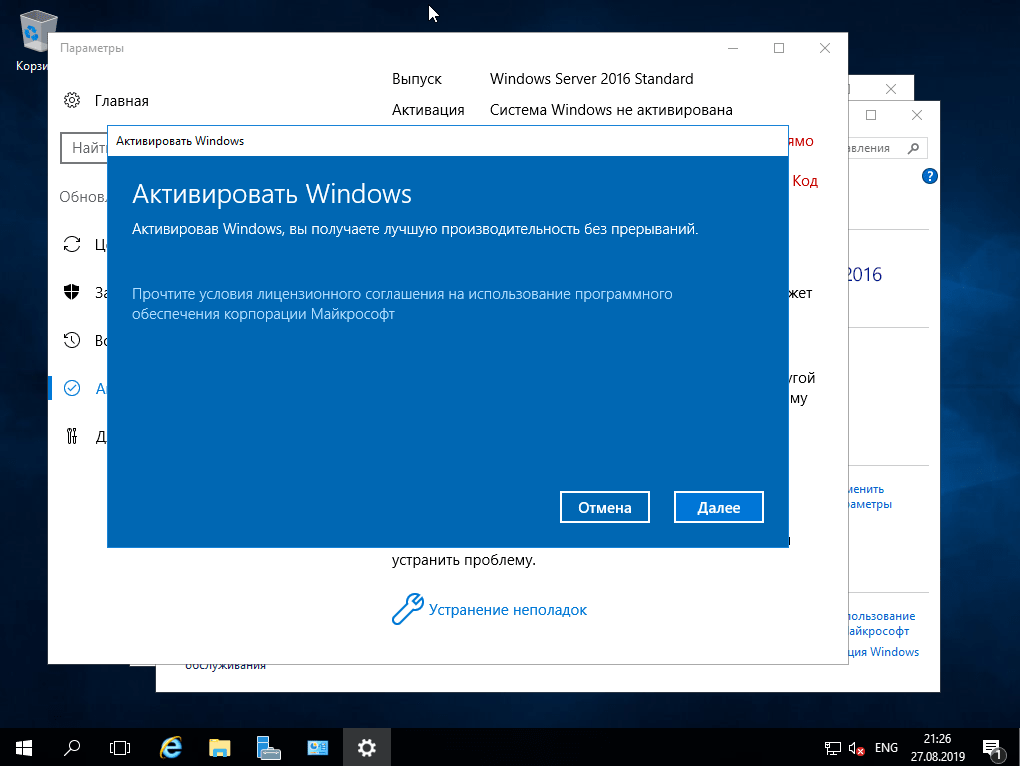
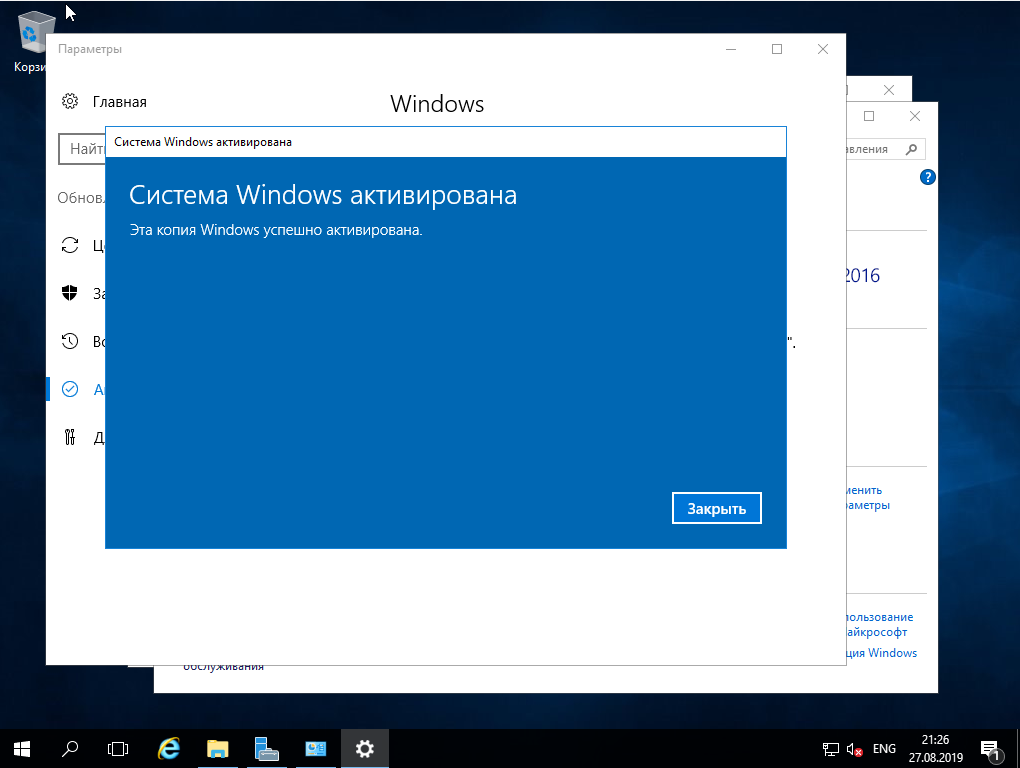
5) Приступим к первичной настройке, не углубляясь в сложности настройки серверной системы. Для начала активируем саму систему. Заходим в свойства компьютера => Активация Windows. Там Вам нужно будет ввести ключ активации.
Приобрести его можете в нашем интернет-магазине по низкой цене. Быстрая доставка ключа на Ваш Email в течении одного часа, так что настройка системы не заставит Вас долго ждать. Приобрести ключ активации на Windows Server 2016 можете в нашем каталоге на следующей странице.
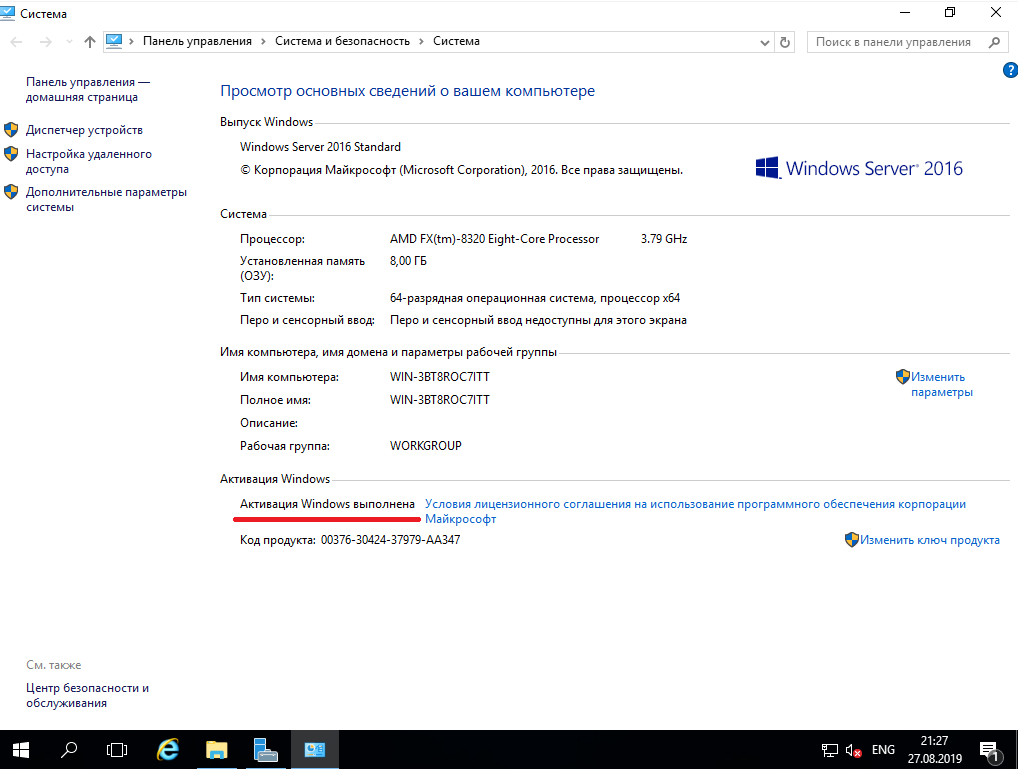
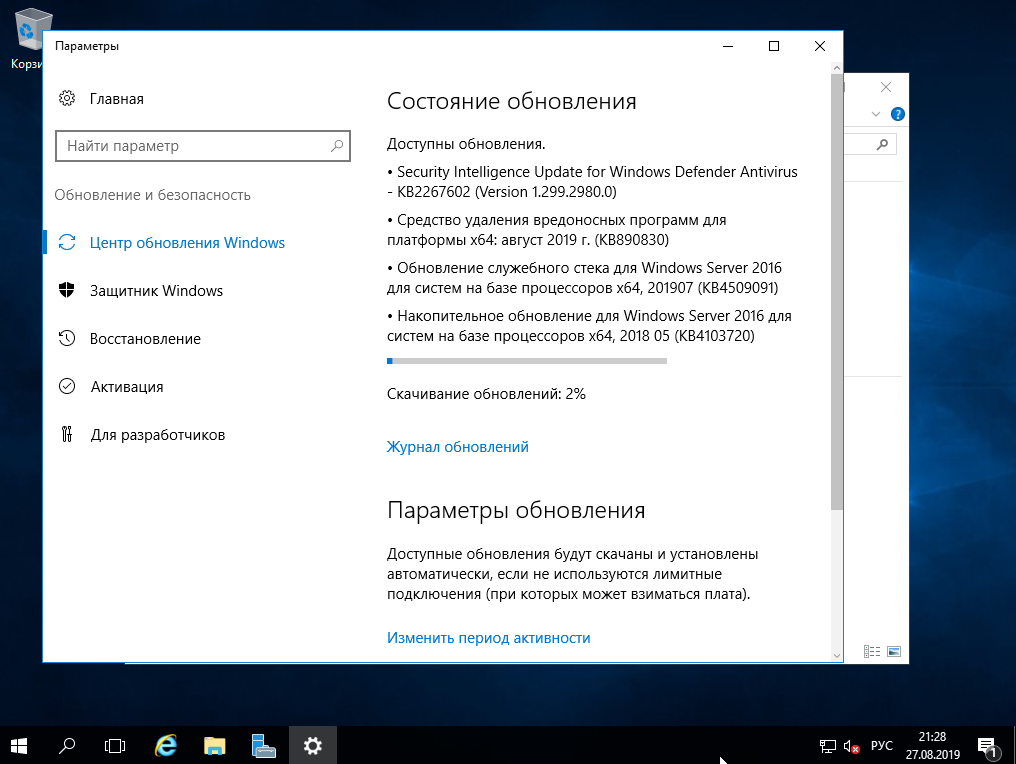
6) Далее приступим к обновлению системы. Чтобы у нас изначально были все актуальные пакеты обновлений и безопасности, для Windows Server — это как никогда очень важно.
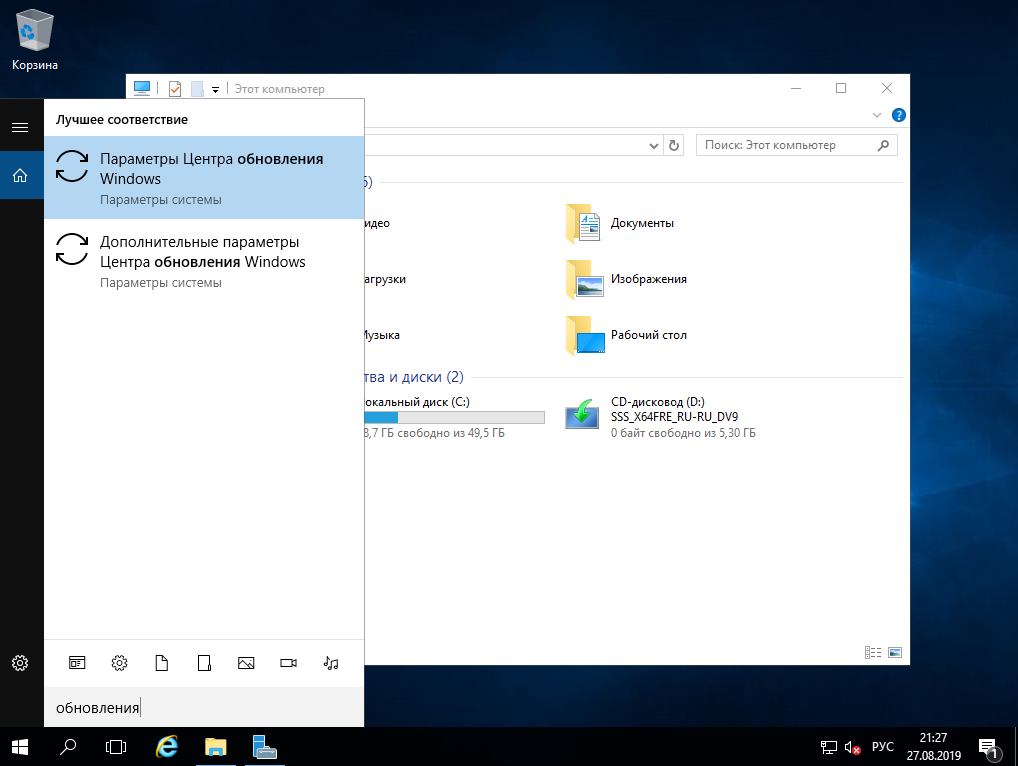
В поиске вводим слово «Обновления» и заходим в «Параметры центра обновлений Windows». Проверяете наличие обновлений, скачиваете и устанавливаете. После установки всех пакетов обновлений перезагрузите систему.
В следующей статье мы расскажем как настроить Windows Server.
Вот и вышла долгожданная серверная операционная система от компании Microsoft Windows Server 2016 и сегодня мы с Вами скачаем пробную версию с официального сайта и установим ее, а также рассмотрим основные нововведения данной версии.
Содержание
- Что нового в Windows Server 2016?
- Nano Server
- Возможность горячей замены сетевых карт и оперативной памяти в Hyper-V
- Shielded Virtual Machines (Экранированные виртуальные машины)
- Linux Secure Boot (безопасная загрузка Linux)
- Cluster OS Rolling Upgrade
- PowerShell Direct
- Discrete Device Assignment (Дискретное назначение устройств)
- Вложенная виртуализация Hyper-V (Nested virtualization Hyper-V)
- Контейнеры Windows Server и Hyper-V
- Улучшения Active Directory Domain Services (AD DS)
- Storage Spaces Direct
- Storage Replica
- Credential Guard
- Remote Desktop Protocol (RDP) Graphics Compression
- MultiPoint Services Role (Роль сервера MultiPoint)
- Системные требования Windows Server 2016
- Где и как скачать Windows Server 2016?
- Описание установки Windows Server 2016
- Шаг 1
- Шаг 2
- Шаг 3
- Шаг 4
- Шаг 5
- Шаг 6
- Скриншоты Windows Server 2016
Nano Server
Компания Microsoft разработала новый вариант установки Windows Server 2016 — Nano Server. Данный вариант установки представляет собой систему без графического интерфейса, без возможности локального входа, без поддержки 32-разрядных приложений и с меньшим количеством компонентов, но Nano Server намного быстрее устанавливается и перезапускается, он значительно легче, даже редакции Server Core, требует гораздо меньше обновлений и перезапусков.
Nano Server главным образом разработан и оптимизирован для вычислительных кластеров с Hyper-V и кластеров хранения с Scale-out File Server, для поддержки облачных приложений, написанных на различных языках (C#, Java, Node.js, Python др.), а также Nano Server идеально подходит для использования его в качестве сервера DNS или в качестве веб-сервера Internet Information Services (IIS).
Получить доступ и управлять Nano Server можно только удаленно, например, с помощью Windows PowerShell, различных консолей MMC (например, Cluster Manager и Hyper-V Manager), диспетчера серверов и других инструментов удаленного управления сервером.
Возможность горячей замены сетевых карт и оперативной памяти в Hyper-V
В Windows Server 2016 Hyper-V появилась возможность замены сетевых адаптеров и регулировки объема памяти у работающей, т.е. активной виртуальной машины. При этом изменять объем оперативной памяти можно даже у виртуальной машины, где используется статическая память. Данная возможность призвана обеспечить работу виртуальных машин без простоев. Напомню ранее, чтобы изменить минимальные и максимальные настройки оперативной памяти работающей виртуальной машины приходилось использовать динамическую память или останавливать машины со статической памятью.
Shielded Virtual Machines (Экранированные виртуальные машины)
Это новый режим защиты виртуальных машин Hyper-V, при котором существует возможность включения шифрования томов внутри гостевой ОС, например, с помощью BitLocker. Это позволяет оставлять содержимое виртуальных машин недоступным как для вредоносного кода, так и для администратора узла Hyper-V.
Linux Secure Boot (безопасная загрузка Linux)
У Hyper-V Windows Server 2016 появилась возможность включения опции Secure Boot, т.е. безопасная загрузка, для гостевых операционных систем Linux (Ubuntu 14.04 и более поздние версии, Red Hat Enterprise Linux 7.0 и выше, и CentOS 7.0 и выше). Данная опция защищает виртуальную машину от атак rootkit и других вредоносных программ, активируемых при загрузке системы. Ранее данная опция была доступна только для Windows 8/8.1 и Windows Server 2012.
Cluster OS Rolling Upgrade
С помощью этой новой функции можно постепенно перевести систему узлов кластера на новую платформу, т.е. с Windows Server 2012 R2 на Windows Server 2016 без остановки Hyper-V или рабочих нагрузок файлового сервера Scale-Out.
PowerShell Direct
Для удаленного управления виртуальной машиной в Hyper-V Windows Server 2016 появилась возможность PowerShell Direct, она позволяет запускать команды Windows PowerShell в виртуальной машине с хоста, при этом доступ к гостевой ОС по сети не требуется, другими словами PowerShell Direct работает между хостом и виртуальной машиной. Данная возможность разработана как альтернатива существующим инструментам управления виртуальной машиной в Hyper-V, таким как VMConnect и Remote PowerShell.
Discrete Device Assignment (Дискретное назначение устройств)
Теперь в Windows Server 2016 Hyper-V можно с помощью функции Discrete Device Assignment пробросить в гостевую ОС виртуальной машины некоторые устройства, подключаемые к хостам через PCI Express. В этом случае виртуальная машина получает прямой доступ к этим устройства, и они находятся под контролем гостевой ОС. Данная функция будет полезна, например, тогда, когда нужно получить максимальную отдачу от графического процессора (GPU).
Вложенная виртуализация Hyper-V (Nested virtualization Hyper-V)
Еще одна полезная функция появилась в Windows Server 2016 Hyper-V — это «Вложенная виртуализация». Она представляет собой возможность создавать виртуальные машины внутри виртуальной машины Hyper-V.
Контейнеры Windows Server и Hyper-V
Одно из основных нововведений Windows Server 2016 является применение технологии контейнеров. Это технология позволяет изолировать приложения от операционной системы тем самым, обеспечивая надежность, а также улучшая их развертывание. В Windows Server 2016 существует два типа контейнеров: Windows Server Containers и Hyper-V Containers. Контейнеры Windows Server обеспечивают изоляцию через пространство имен и изоляцию процессов. Контейнеры Hyper-V отличаются более надежной изоляцией благодаря их запуску в виртуальной машине.
Улучшения Active Directory Domain Services (AD DS)
В Windows Server 2016 есть усовершенствования и в AD DS, например, «Privileged access management» (привилегированное управление доступом) и «Microsoft Passport» (это новая форма аутентификации).
Storage Spaces Direct
Данная возможность Windows Server 2016 позволяет предприятиям использовать стандартные промышленные серверы с локальным хранилищем для создания систем хранения данных с высокой степенью доступности и масштабируемости. Это упрощает развертывание и управление программируемыми параметрами систем хранения, а также добавляет возможность использования новых типов дисковых устройств, таких как SATA SSD и дисковых устройств NVMe.
Storage Replica
В Windows Server 2016 появилась новая технология Storage Replica. Она подразумевает репликацию томов в Windows на уровне блоков с использованием протокола SMB. Технология Storage Replica позволяет использовать синхронную репликацию томов между серверами для аварийного восстановления без какой-либо возможности потери данных.
Credential Guard
Для защиты учетных данных в Windows Server 2016 добавлен новый компонент, который использует средство обеспечения безопасности на основе виртуализации, чтобы только привилегированное системное ПО могло получать доступ к этим данным. Другими словами, вредоносные программы, работающие в операционной системе с правами администратора, получить доступ к учетным данным не смогут. Это достигается за счет того, что Credential Guard работает в защищенной среде, которая изолирована от операционной системы. Напомню, в предыдущих версиях Windows использовалась система безопасности LSA.
Remote Desktop Protocol (RDP) Graphics Compression
Усовершенствования Windows Server 2016 затронули и Remote Desktop Protocol (удаленный рабочий стол) теперь для снижения пропускной способности и работы на более высоких разрешениях возможно сжатие графики.
MultiPoint Services Role (Роль сервера MultiPoint)
В Windows Server 2016 добавлена новая роль сервера MultiPoint Services (MPS). Она предоставляет базовую функциональность удаленных рабочих столов. Первоначально данная возможность разрабатывалась для использования в образовательных учреждениях в учебных классах или в учреждениях, где нет больших требований к нагрузке и масштабируемости. Суть заключается в том, что пользовательское рабочее место может состоять из монитора, клавиатуры и мыши («нулевые» клиенты) с возможностью подключаться к MPS через USB, видеокабели или LAN в итоге мы получаем недорогие пользовательские станции с функциональностью рабочих столов.
На самом деле это далеко не полный перечень всех нововведений, я перечислил только самые заметные и значимые, полный перечень можете посмотреть в официальной документации.
Также хотелось бы отметить, что найти подробную информацию об операционной системе Windows Server 2016, в том числе и о ценах можно найти на странице официального сайта компании Microsoft вот она — Windows Server 2016 | Microsoft.
Системные требования Windows Server 2016
Для того чтобы можно было пользоваться серверной операционной системой Windows Server 2016, Вам минимум потребуется:
- Процессор с тактовой частотой 1,4 ГГц совместимый с набором команд x64 (64-разрядный процессор);
- Оперативной памяти необходимо: 512 МБ для установки на физический сервер, 800 МБ, если Вы будете осуществлять установку на виртуальную машину, 2 ГБ для установки с графическим интерфейсом;
- Для базовой установки требуется 32 гигабайта свободного места на жестком диске (если установку производить на сервер с оперативной памятью более чем 16 ГБ, то потребуется дополнительное пространство на диске для файлов подкачки);
- Сетевой адаптер с гигабитной пропускной способностью, совместимый со спецификацией PCI Express архитектурой и поддержкой Execution Environment (PXE).
Где и как скачать Windows Server 2016?
Для того чтобы попробовать Windows Server 2016 можно совершенно бесплатно скачать ознакомительную версию с официального сайта компании Microsoft. Данная версия идет с предустановленным ключом активации, а ознакомительный период составляет 180 дней. После того как ознакомительный период закончится, операционной системой пользоваться будет практически невозможно, поэтому крайне не рекомендуется использовать ознакомительную версию на «боевых» серверах и развертывать сервисы для промышленной эксплуатации (другими словами, ознакомительная версия только для ознакомления).
Также необходимо отметить, что скачать ознакомительную версию, можно только предварительно зарегистрировавшись на сайте Microsoft (регистрация простая сложного в ней ничего нет).
Итак, для того чтобы скачать ознакомительную версию Windows Server 2016, переходим на страницу загрузки ознакомительных версий — вот она TechNet Evaluation Center.
Затем, если Вы уже зарегистрированы, выбираем вариант загрузки я, например, хочу скачать ISO образ, и жмем «Продолжить».

В итоге загрузится ISO образ размером примерно около 5 гигабайт. Данный образ включает две редакции Windows Server 2016 Standard и Windows Server 2016 Datacenter, которые можно установить как с графическим интерфейсом, так и без него.
Описание установки Windows Server 2016
Установка 2016 версии мало чем отличается от установки Windows Server 2012, поэтому если Вы хоть раз устанавливали 2012 версию или хотя бы Windows 7 или 8, то проблем с установкой Windows Server 2016 возникнуть не должно, но ниже давайте мы все равно подробно рассмотрим данный процесс.

И для начала хотелось бы сказать, что я для примера буду устанавливать редакцию Windows Server 2016 Datacenter с графическим интерфейсом.
Шаг 1
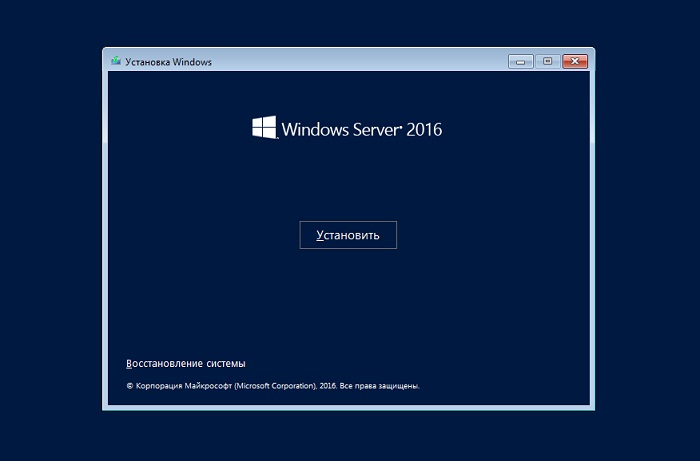
Загружаемся с диска и попадаем в меню, нажимаем «Далее».
Шаг 2
Потом нажимаем «Установить».
Шаг 3
Затем нам необходимо выбрать вариант установки я, как и говорил, выбираю «Windows Server 2016 Datacenter Evaluation возможности рабочего стола» и жмем «Далее».
Шаг 4
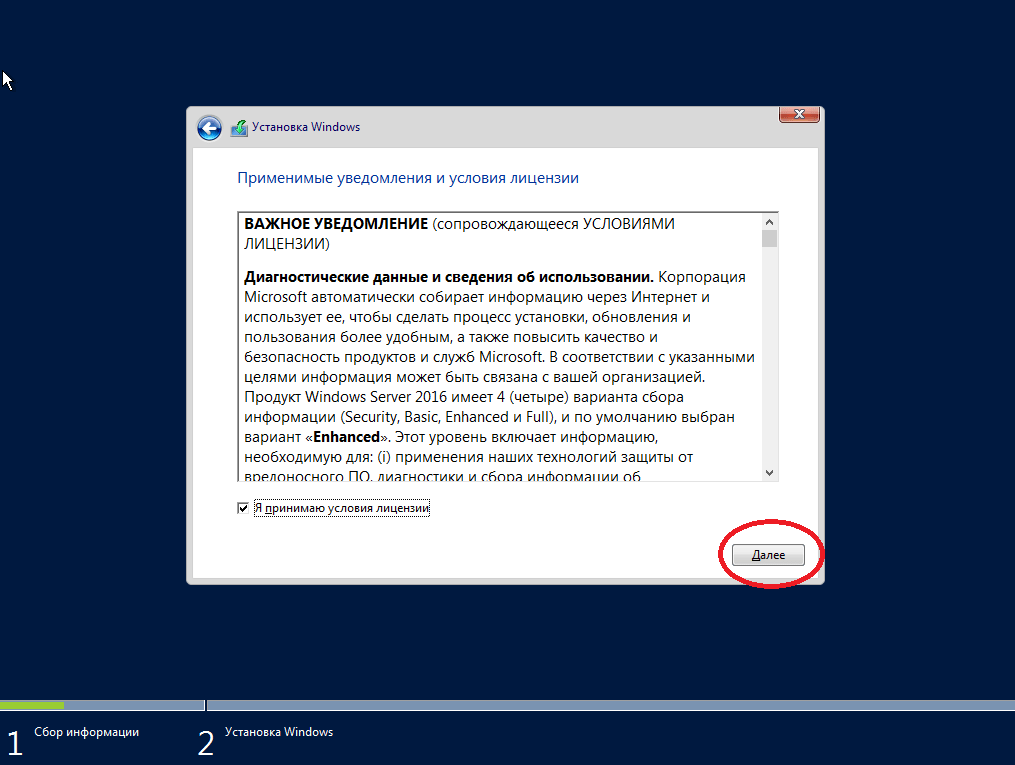
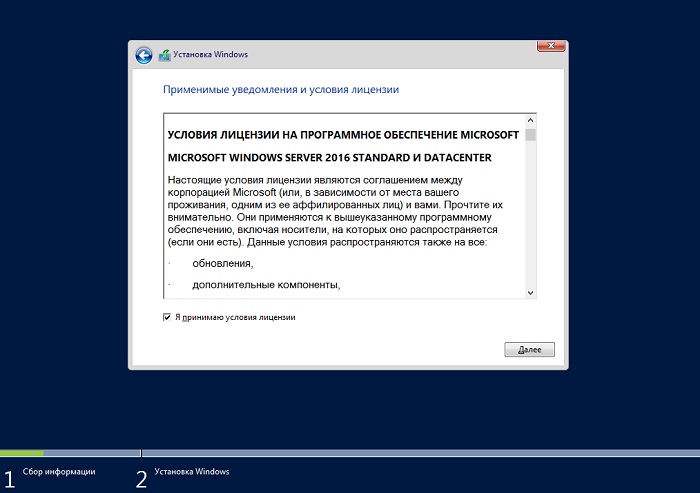
На этом шаге соглашаемся с условиями лицензионного соглашения, ставим галочку и нажимаем «Далее».
Шаг 5
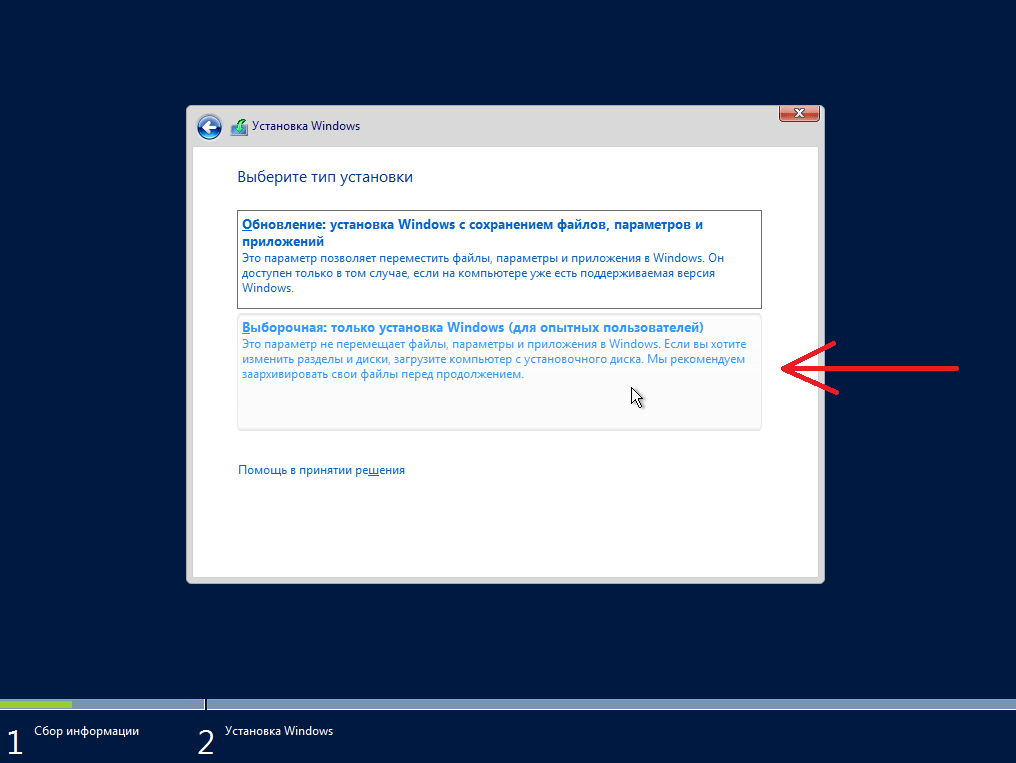
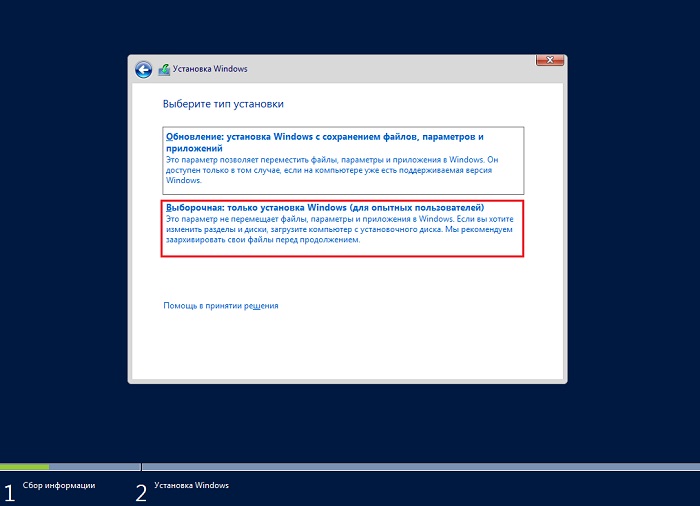
Здесь нам необходимо выбрать тип установки, и так как это у меня новая установка, я выбираю тип «Выборочная: только установка Windows (для опытных пользователей)».
Шаг 6
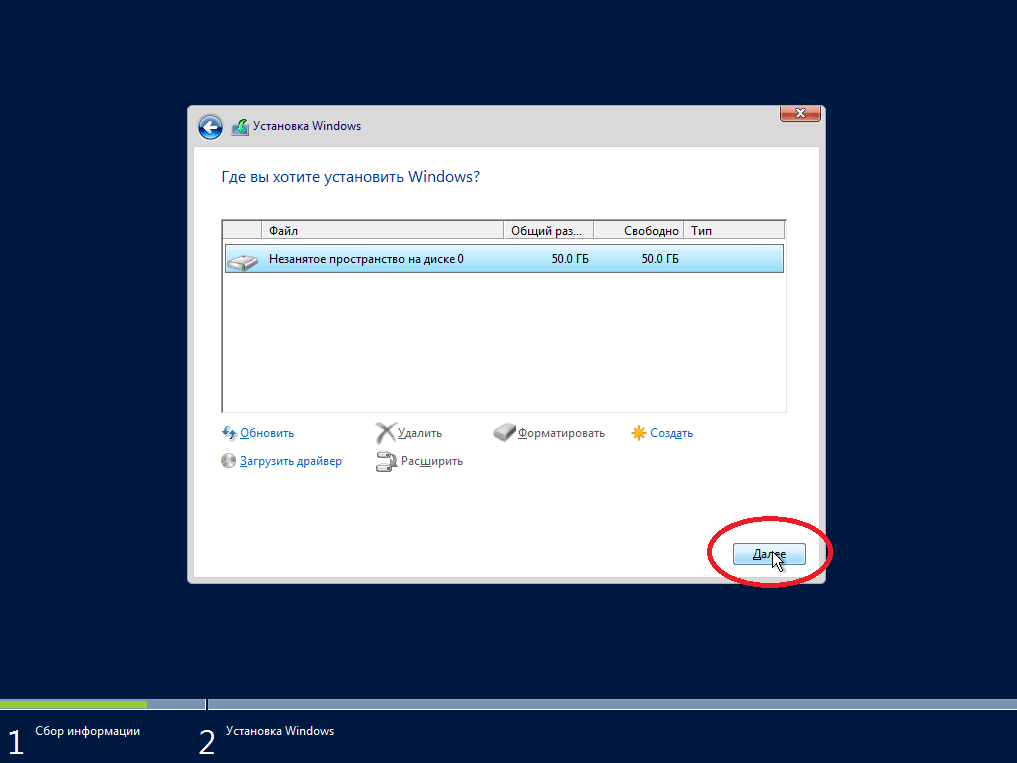
Затем мы можем разметить жесткий диск путем создания разделов, после чего выбираем раздел, в который необходимо установить Windows Server 2016, и нажимаем «Далее».
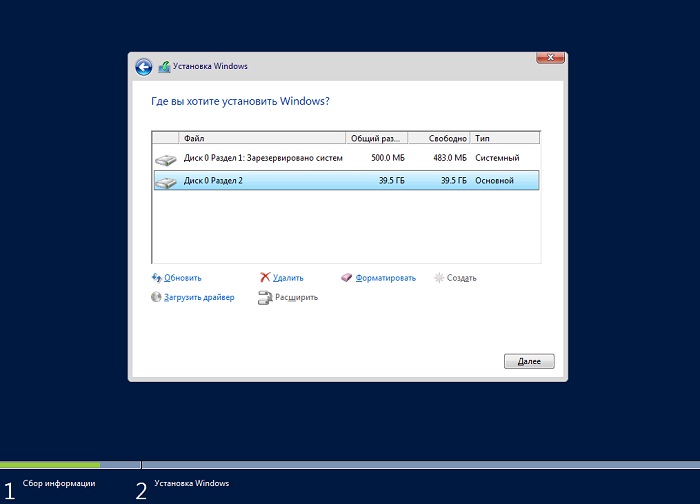
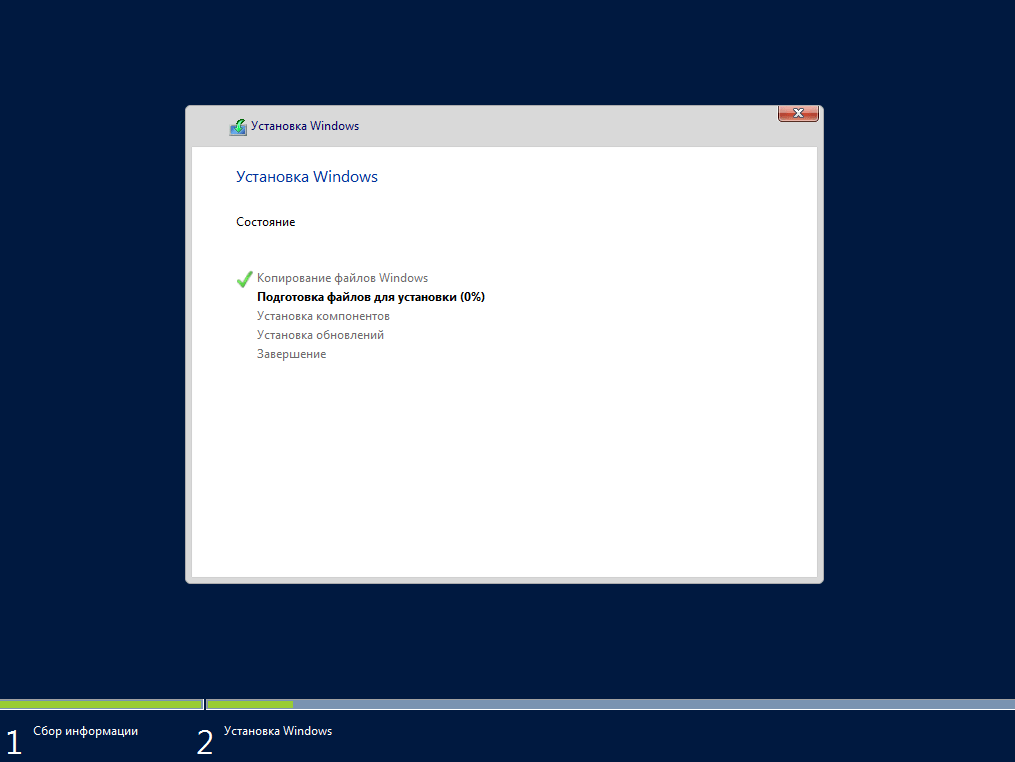
Начнется установка.
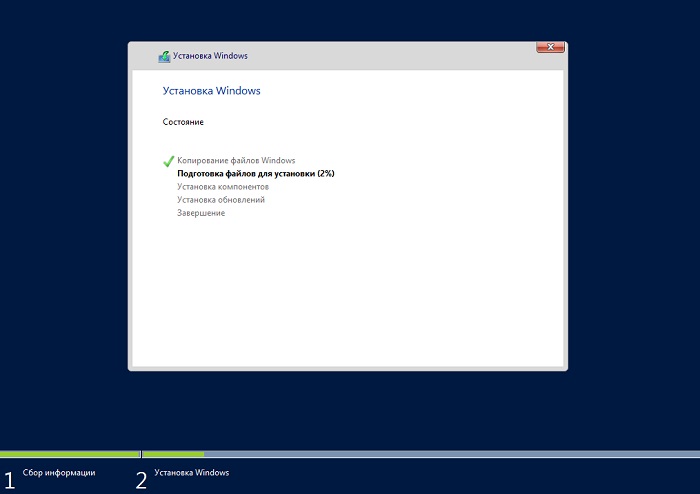
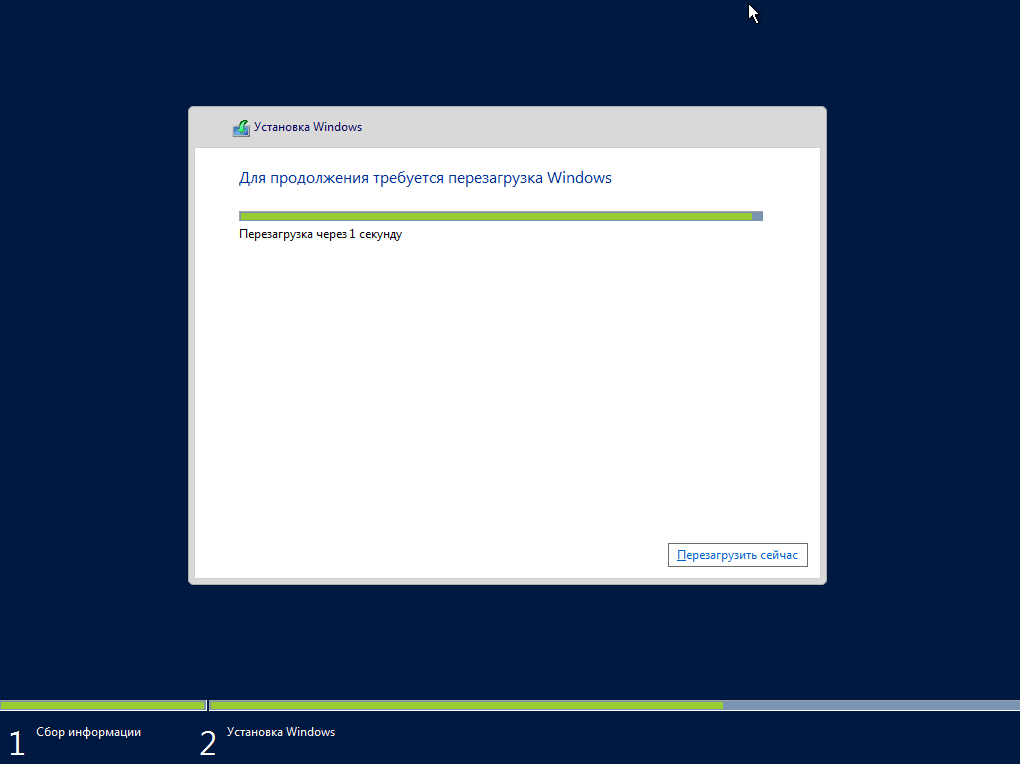
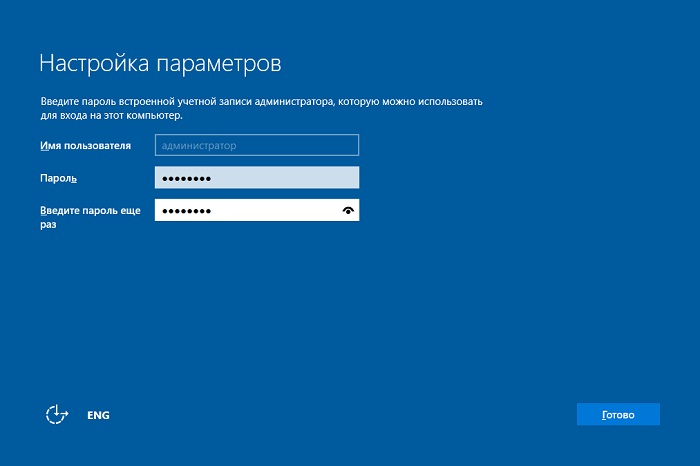
Во время установки компьютер перезагрузится и нам необходимо будет настроить некоторые параметры, а именно придумать и ввести пароль администратора, после того как мы это сделаем, нажимаем «Готово» и установка будет завершена.
Скриншоты Windows Server 2016
Экран входа в систему

Рабочий стол
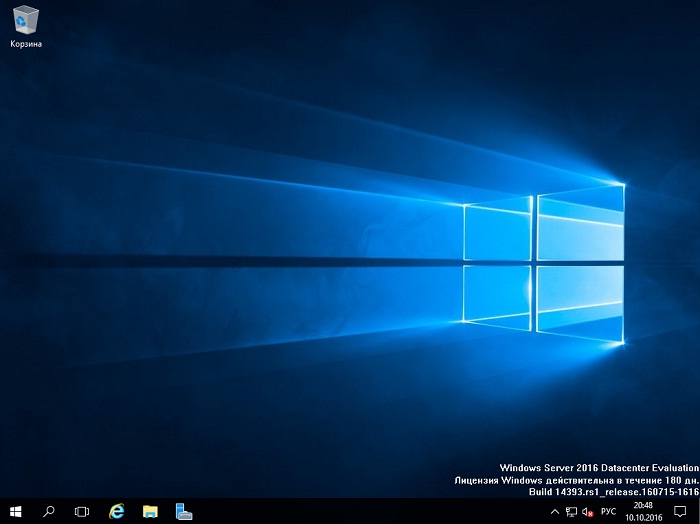

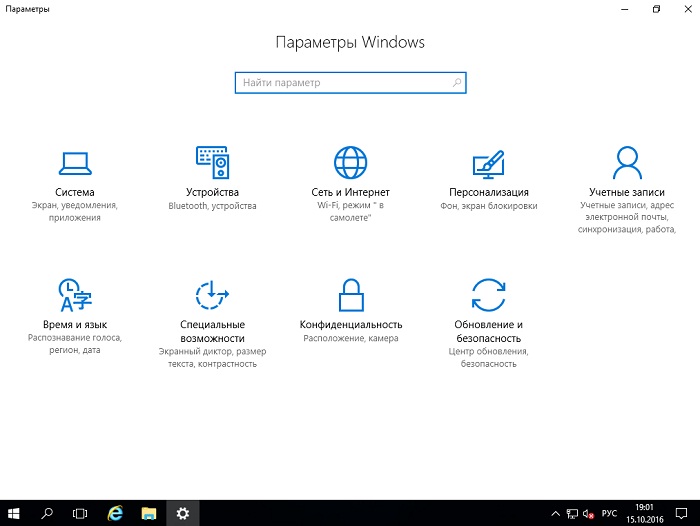
Параметры системы
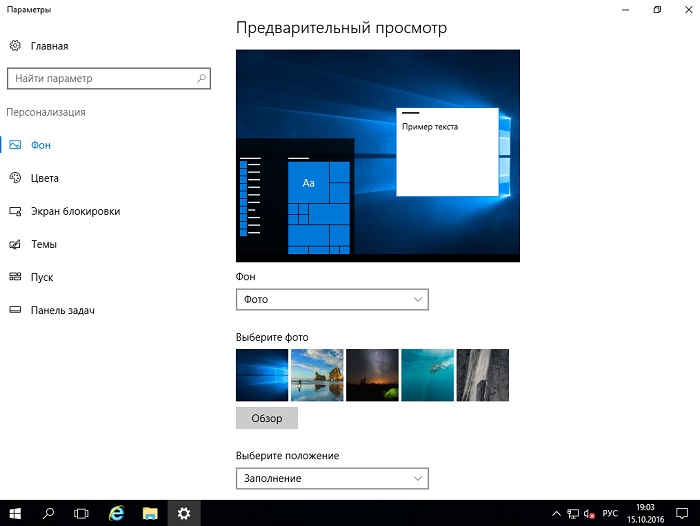
Персонализация
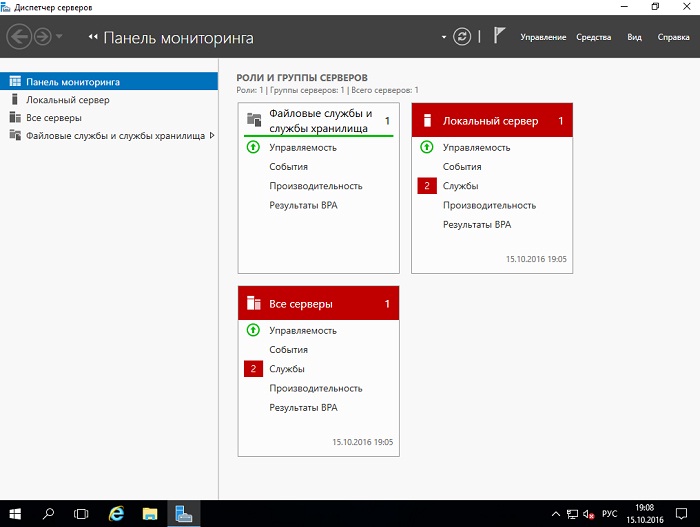
Диспетчер серверов
Панель управления

На этом мой небольшой рассказ о Windows Server 2016 закончен, надеюсь, материал был Вам полезен, пока!
This topic has been deleted. Only users with topic management privileges can see it.

This series of posts is intended to show you the full process of configuring Microsoft Windows Server 2016 Core version – from its installation and the deployment of Hyper-V role to the Failover Cluster setup. In this part, you will find a step-by-step guide on installing and configuring Windows Server Core.
Read the full article by Alex Khorolets, a technical support engineer at StarWind, to learn how to properly install Windows Server 2016 Core.
I know its a technical how-to, but its a shame it doesn’t at least touch on why you might want to deploy Server 2016 and Hyper-V as a role rather than just installing Hyper-V standalone.
@aidan_walsh afaik there is no reason to install it as a role. All it does is create unnecessary licensing dependencies.
@wirestyle22 said in Configuring Windows Server 2016 Core. Part1: Installation:
@aidan_walsh afaik there is no reason to install it as a role. All it does is create unnecessary licensing dependencies.
The main reason some people do it is for auto activation of guest windows machines. That is no reason to ever do it IMO.
If every physical server is a Datacenter license then it is pretty transparent also.
But I still do not feel that Installing in this way makes sense.
@jaredbusch said in Configuring Windows Server 2016 Core. Part1: Installation:
@wirestyle22 said in Configuring Windows Server 2016 Core. Part1: Installation:
@aidan_walsh afaik there is no reason to install it as a role. All it does is create unnecessary licensing dependencies.
The main reason some people do it is for auto activation of guest windows machines. That is no reason to ever do it IMO.
If every physical server is a Datacenter license then it is pretty transparent also.
But I still do not feel that Installing in this way makes sense.
That’s a benefit I wasn’t aware of but agreed that is doesn’t make it worth it.
@jaredbusch said in Configuring Windows Server 2016 Core. Part1: Installation:
@wirestyle22 said in Configuring Windows Server 2016 Core. Part1: Installation:
@aidan_walsh afaik there is no reason to install it as a role. All it does is create unnecessary licensing dependencies.
The main reason some people do it is for auto activation of guest windows machines. That is no reason to ever do it IMO.
If every physical server is a Datacenter license then it is pretty transparent also.
But I still do not feel that Installing in this way makes sense.
Yep, KMS server to the rescue.
@dashrender said in Configuring Windows Server 2016 Core. Part1: Installation:
@jaredbusch said in Configuring Windows Server 2016 Core. Part1: Installation:
@wirestyle22 said in Configuring Windows Server 2016 Core. Part1: Installation:
@aidan_walsh afaik there is no reason to install it as a role. All it does is create unnecessary licensing dependencies.
The main reason some people do it is for auto activation of guest windows machines. That is no reason to ever do it IMO.
If every physical server is a Datacenter license then it is pretty transparent also.
But I still do not feel that Installing in this way makes sense.
Yep, KMS server to the rescue.
Correct. If you are big enough to have Datacenter licensing, spin up another VM and setup KMS.
This topic has been deleted. Only users with topic management privileges can see it.
This series of posts is intended to show you the full process of configuring Microsoft Windows Server 2016 Core version – from its installation and the deployment of Hyper-V role to the Failover Cluster setup. In this part, you will find a step-by-step guide on installing and configuring Windows Server Core.
Read the full article by Alex Khorolets, a technical support engineer at StarWind, to learn how to properly install Windows Server 2016 Core.
I know its a technical how-to, but its a shame it doesn’t at least touch on why you might want to deploy Server 2016 and Hyper-V as a role rather than just installing Hyper-V standalone.
@aidan_walsh afaik there is no reason to install it as a role. All it does is create unnecessary licensing dependencies.
@wirestyle22 said in Configuring Windows Server 2016 Core. Part1: Installation:
@aidan_walsh afaik there is no reason to install it as a role. All it does is create unnecessary licensing dependencies.
The main reason some people do it is for auto activation of guest windows machines. That is no reason to ever do it IMO.
If every physical server is a Datacenter license then it is pretty transparent also.
But I still do not feel that Installing in this way makes sense.
@jaredbusch said in Configuring Windows Server 2016 Core. Part1: Installation:
@wirestyle22 said in Configuring Windows Server 2016 Core. Part1: Installation:
@aidan_walsh afaik there is no reason to install it as a role. All it does is create unnecessary licensing dependencies.
The main reason some people do it is for auto activation of guest windows machines. That is no reason to ever do it IMO.
If every physical server is a Datacenter license then it is pretty transparent also.
But I still do not feel that Installing in this way makes sense.
That’s a benefit I wasn’t aware of but agreed that is doesn’t make it worth it.
@jaredbusch said in Configuring Windows Server 2016 Core. Part1: Installation:
@wirestyle22 said in Configuring Windows Server 2016 Core. Part1: Installation:
@aidan_walsh afaik there is no reason to install it as a role. All it does is create unnecessary licensing dependencies.
The main reason some people do it is for auto activation of guest windows machines. That is no reason to ever do it IMO.
If every physical server is a Datacenter license then it is pretty transparent also.
But I still do not feel that Installing in this way makes sense.
Yep, KMS server to the rescue.
@dashrender said in Configuring Windows Server 2016 Core. Part1: Installation:
@jaredbusch said in Configuring Windows Server 2016 Core. Part1: Installation:
@wirestyle22 said in Configuring Windows Server 2016 Core. Part1: Installation:
@aidan_walsh afaik there is no reason to install it as a role. All it does is create unnecessary licensing dependencies.
The main reason some people do it is for auto activation of guest windows machines. That is no reason to ever do it IMO.
If every physical server is a Datacenter license then it is pretty transparent also.
But I still do not feel that Installing in this way makes sense.
Yep, KMS server to the rescue.
Correct. If you are big enough to have Datacenter licensing, spin up another VM and setup KMS.