- 07.09.2019
В этой статье мы рассмотрим детально как установить Windows Server 2019 и самую первичную настройку, что нужно сделать сразу после установки системы. Как детально настроить Windows Server 2019 читайте в нашей следующей статье.
1) Итак, первое — Вам нужно скачать дистрибутив. Скачать его можете на следующей странице.
2) После скачивания дистрибутива — его нужно записать на флешку, сделав ее загрузочной. Инструкция как записать дистрибутив на флешку.
3) Далее Вам нужно загрузиться с флешки из под биоса для начала самой установки. Краткая инструкция как загрузиться с флешки.
4) Теперь после того, как Вы загрузились с флешки, приступаем к началу установки.
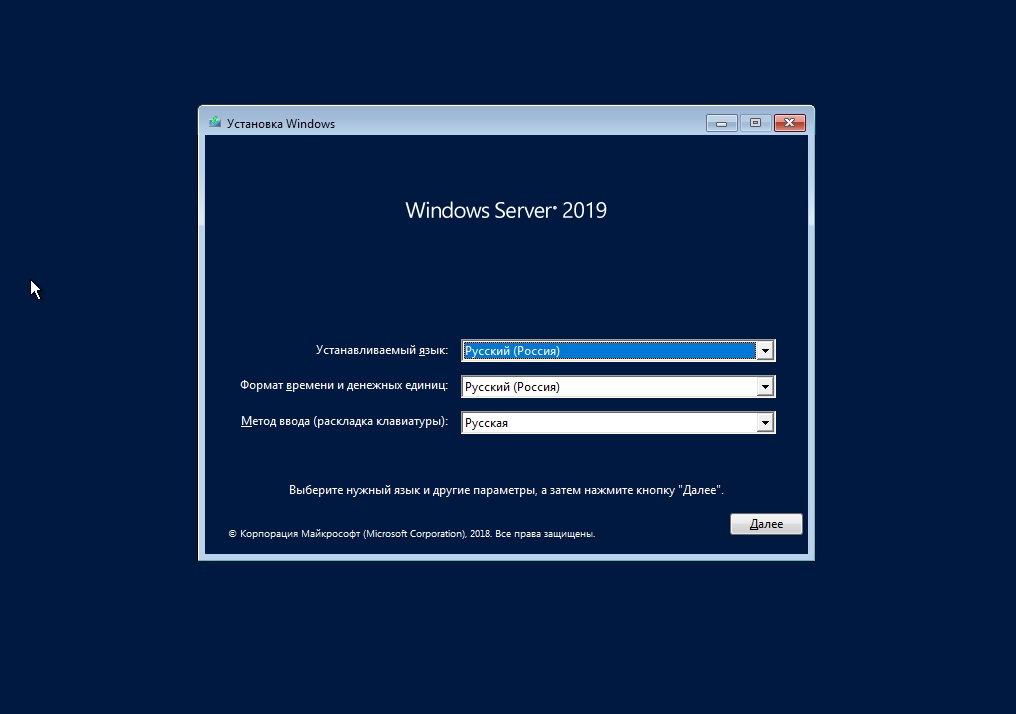
Выбираем язык операционной системы, выберем русский.
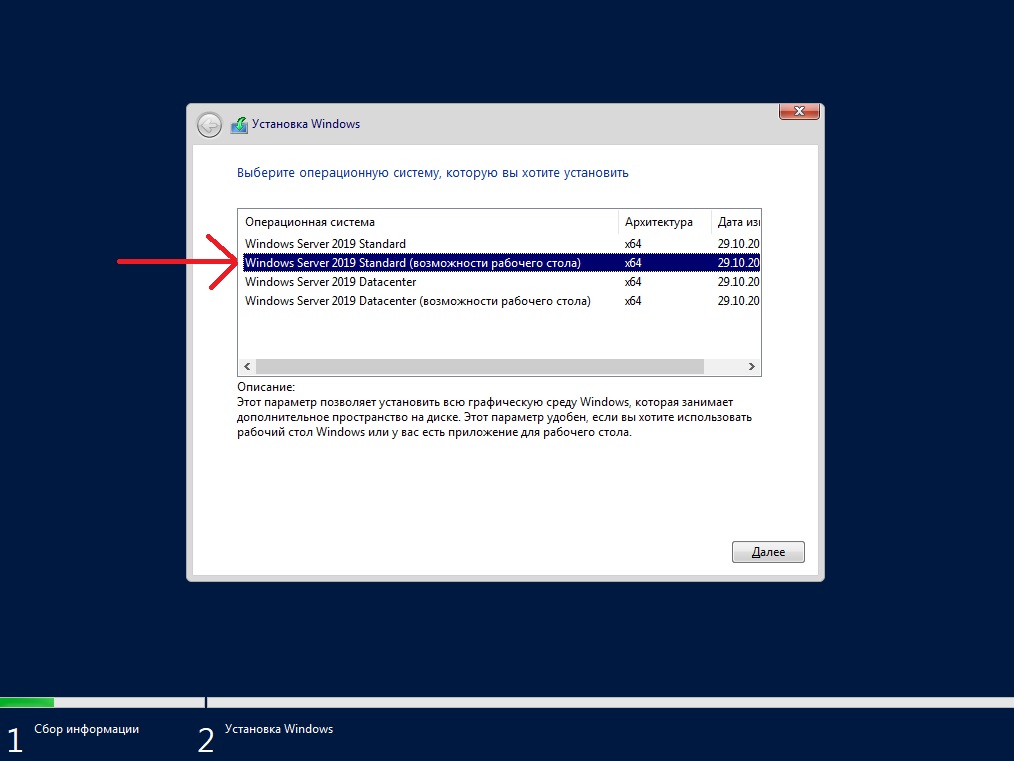
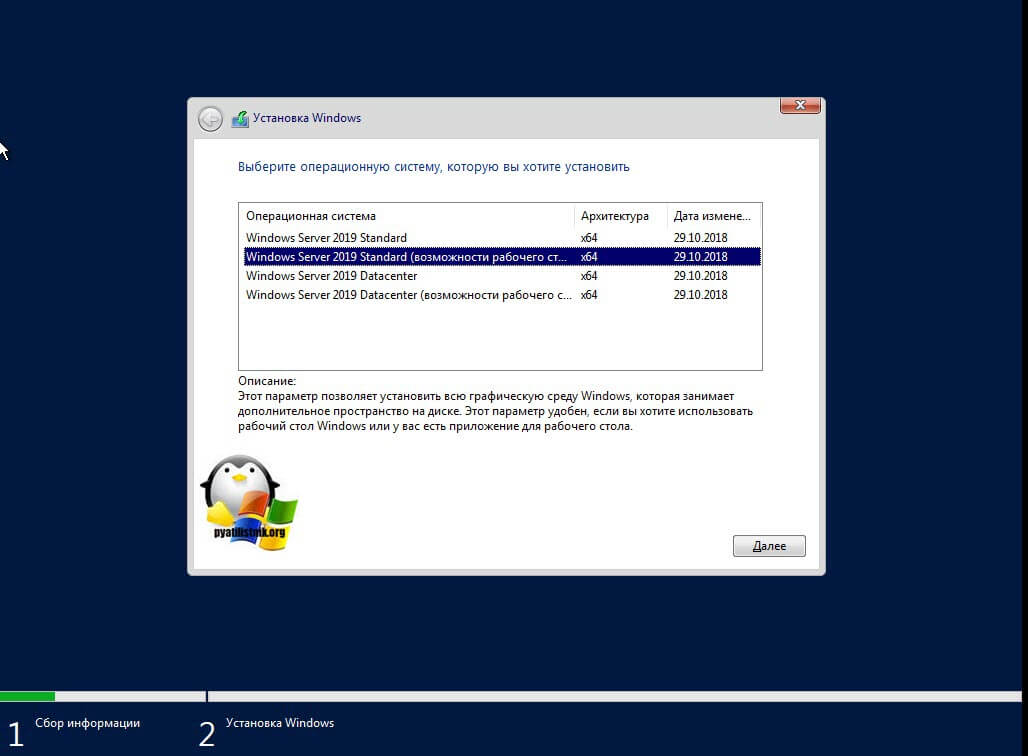
Далее выбираем желаемую редакцию Windows Server 2019 для установки. В данной статье мы установим версию Standard, но Вы можете выбрать другую версию, к примеру Datacenter. Порядок установки в ней аналогичный.
А так же, обязательно выбираете дистрибутив с «Возможности рабоче стола», иначе у Вас система установится без графической оболочки и управление операционной системой будет только из под консоли.
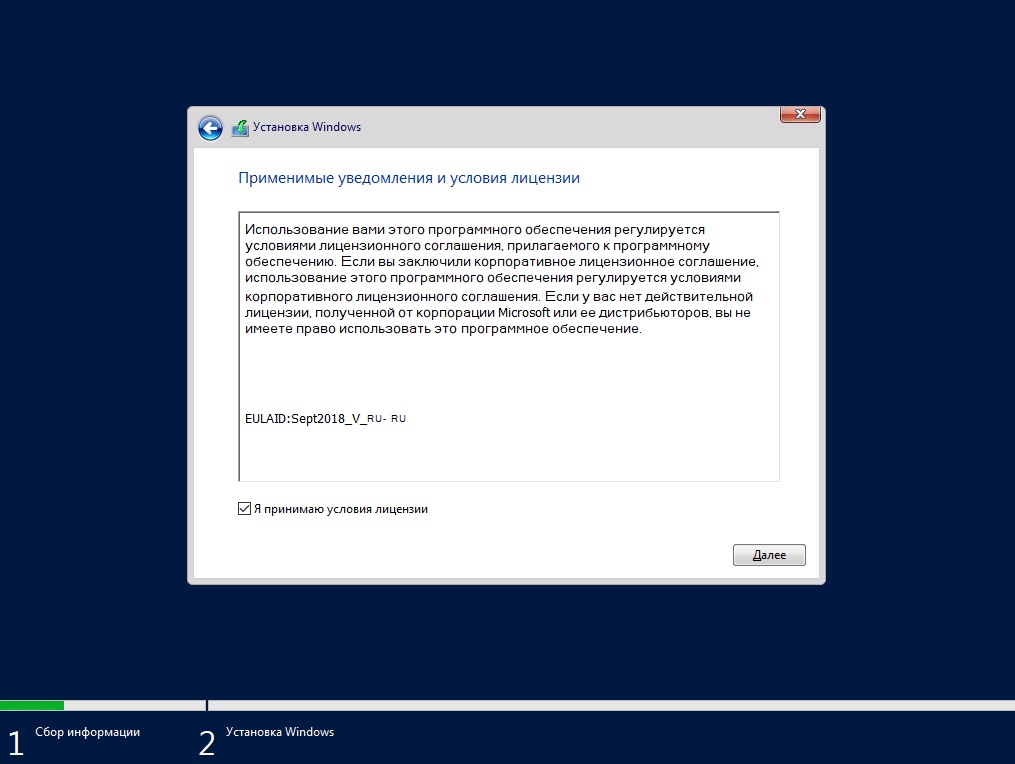
Принимаем условия лицензирования.
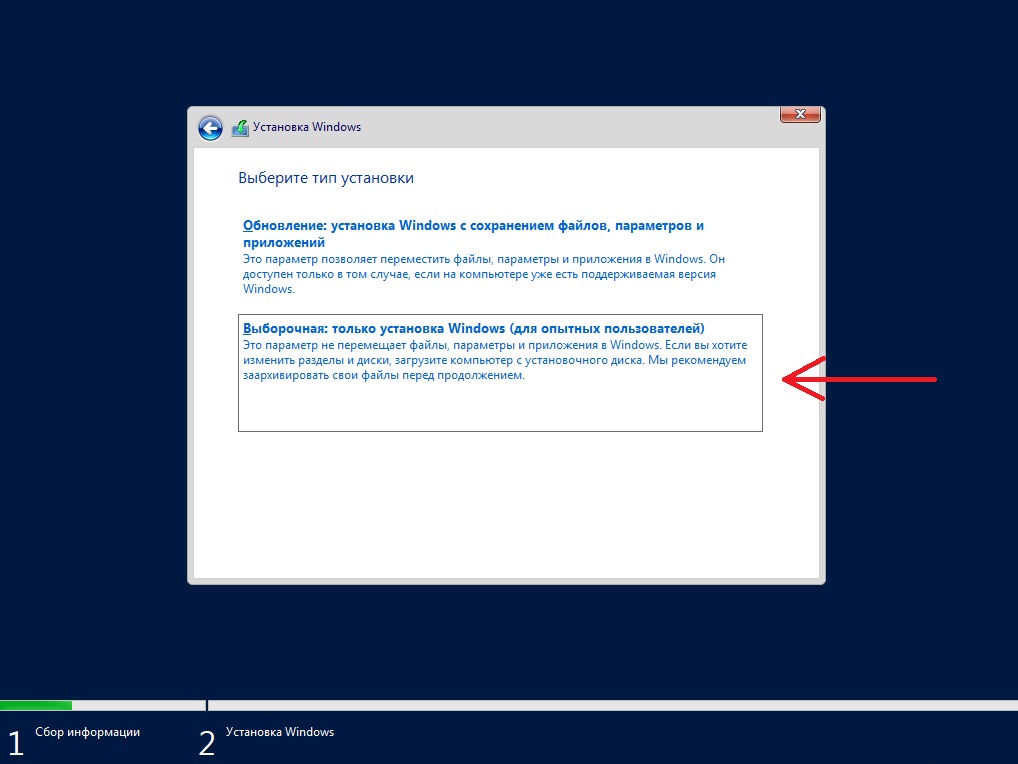
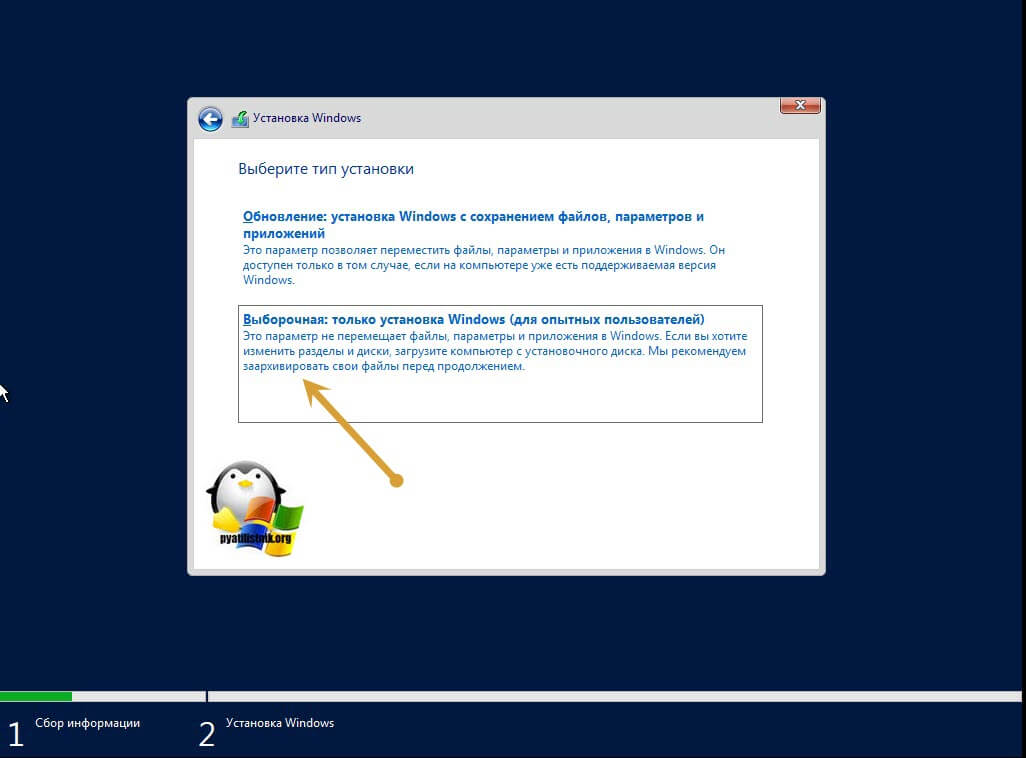
Далее, выбираем выборочную установку, т.к мы устанавливаем систему с нуля.
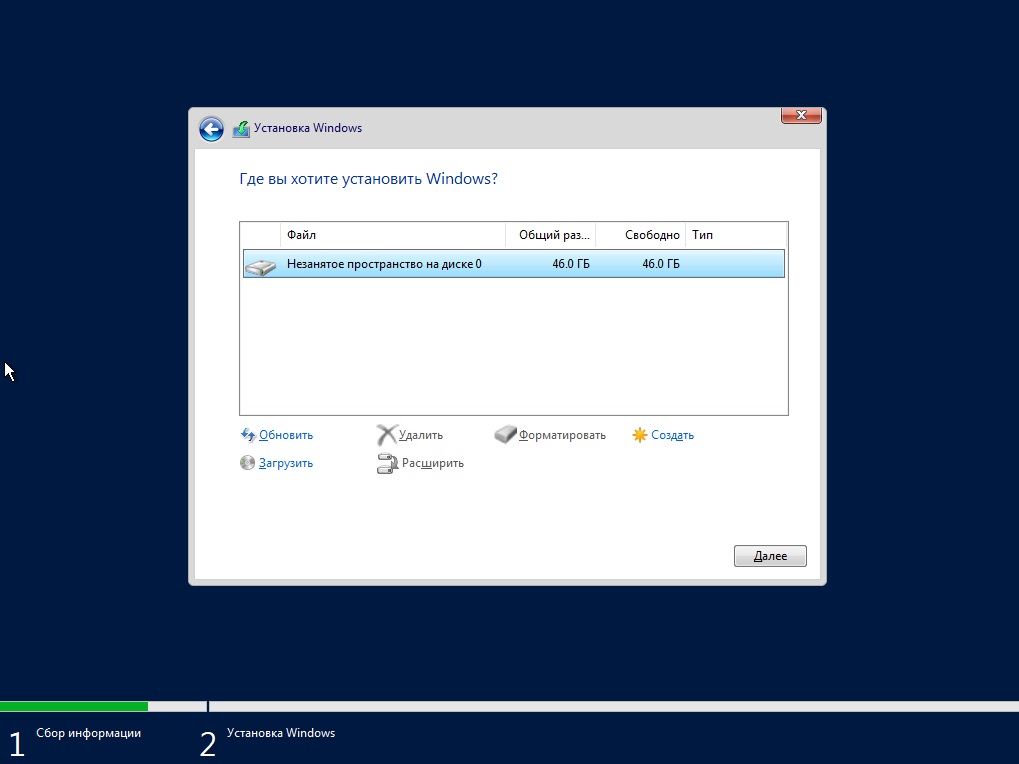
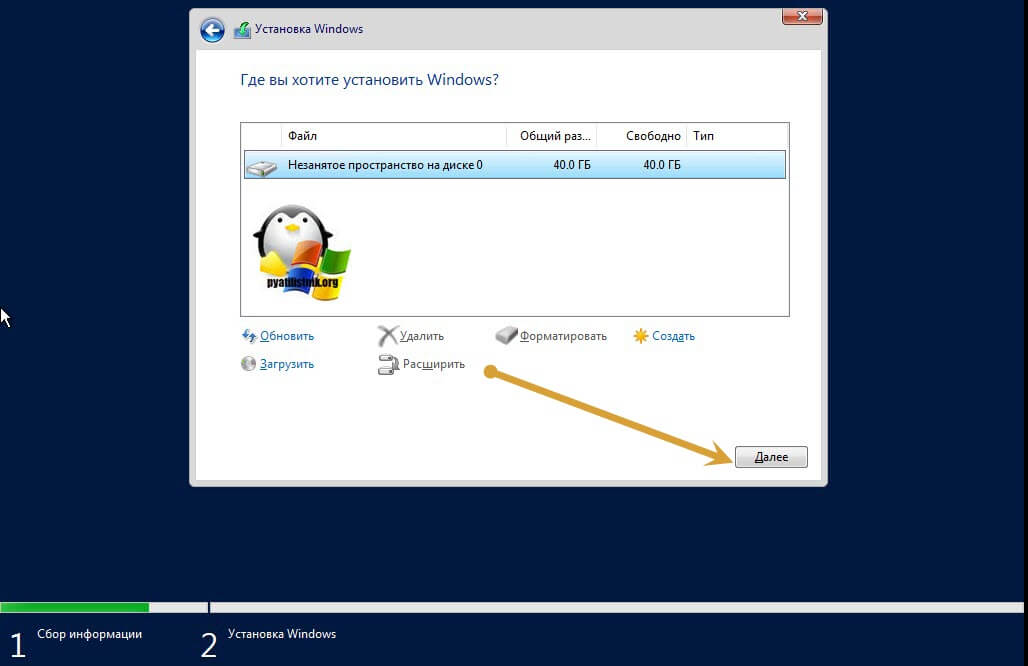
После у Вас будет меню выбора диска куда установить систему. На нашем примере только один диск, у Вас же их может быть больше. Выбираете нужный диск для установки и нажимаем «Далее».
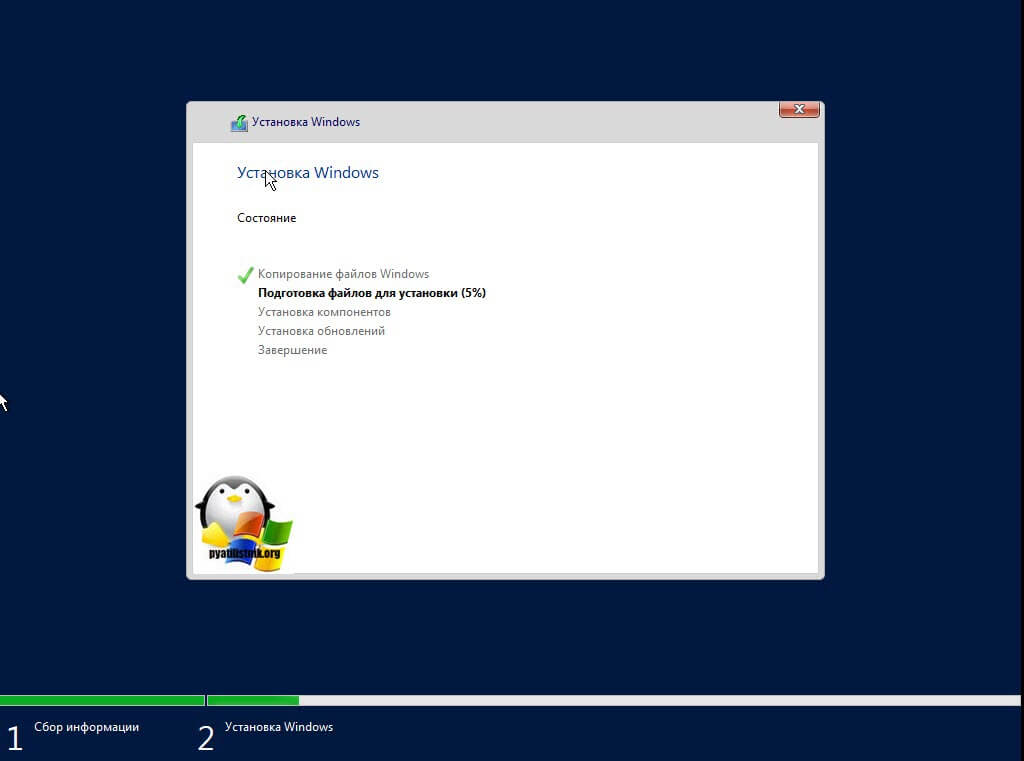
И теперь начинается непосредственно сама установка, ожидайте ее окончание.

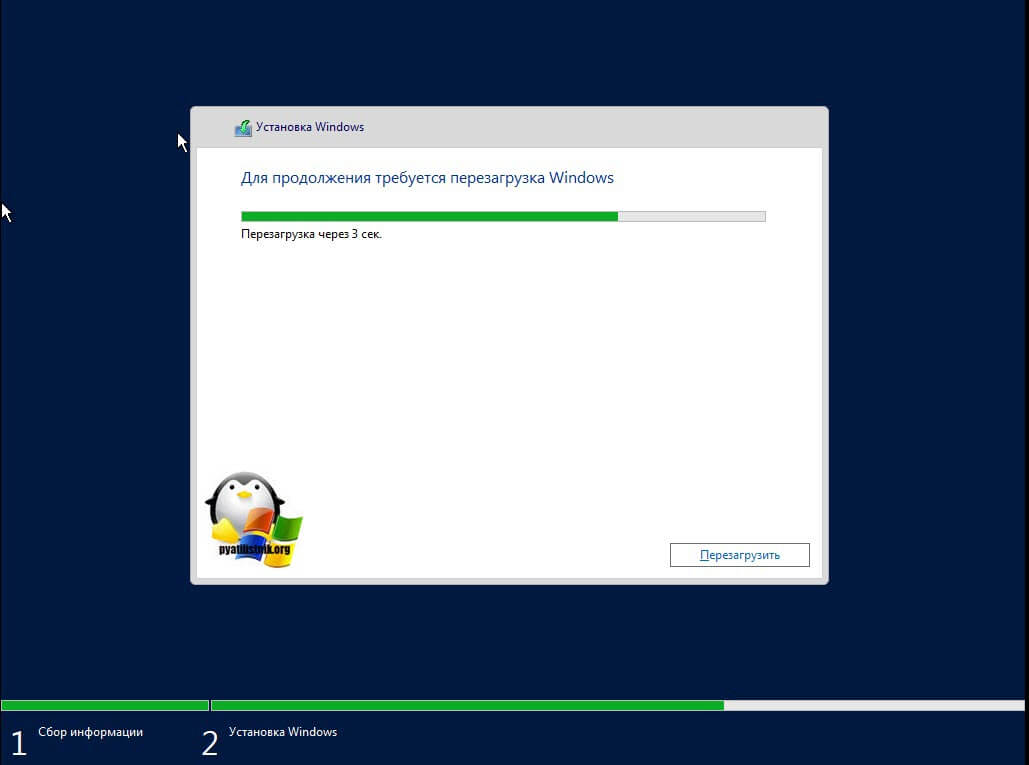
Во время установки система перезагрузится несколько раз.
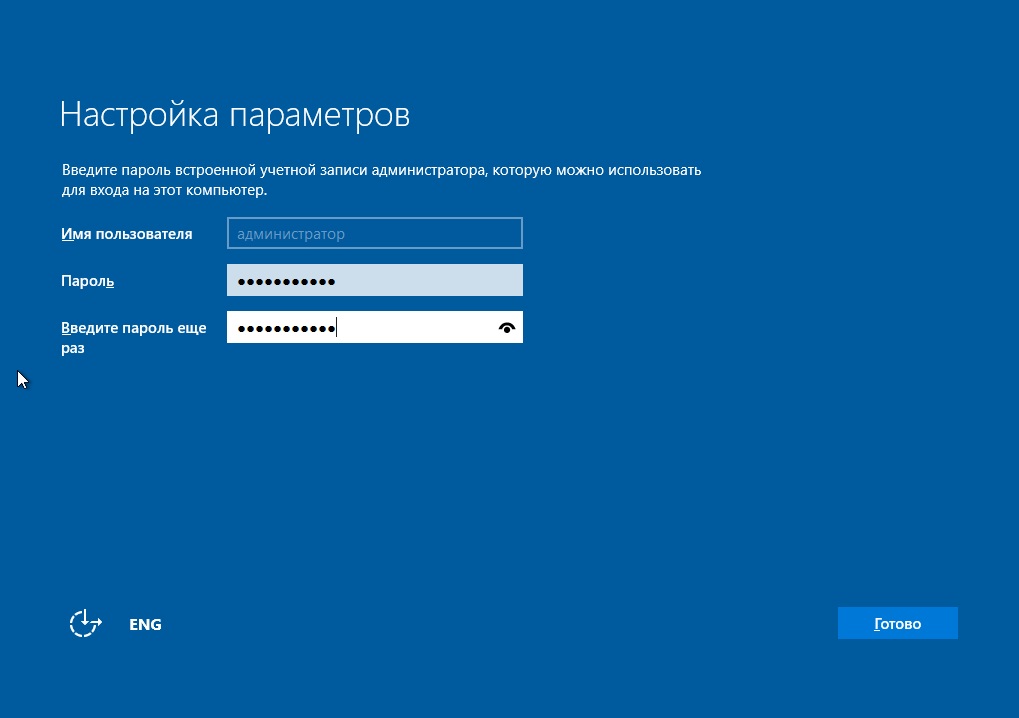
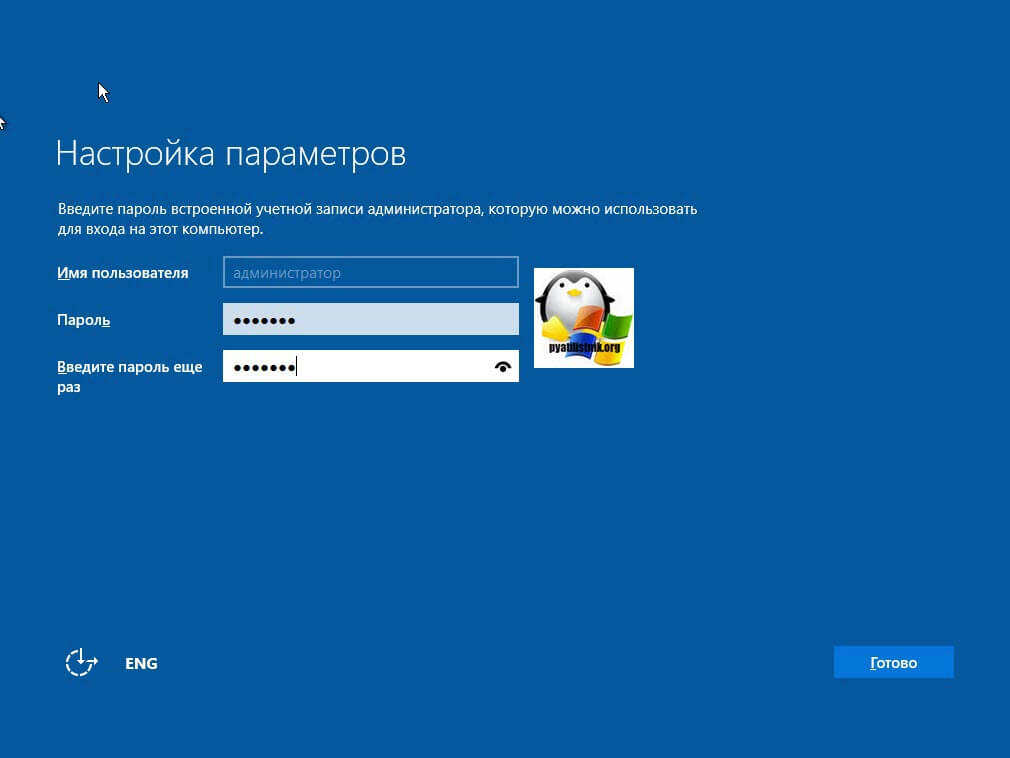
После завершения установки Вам нужно будет задать пароль для учетной записи администратора. Пароль лучше задавать латинскими буквами с цифрами.
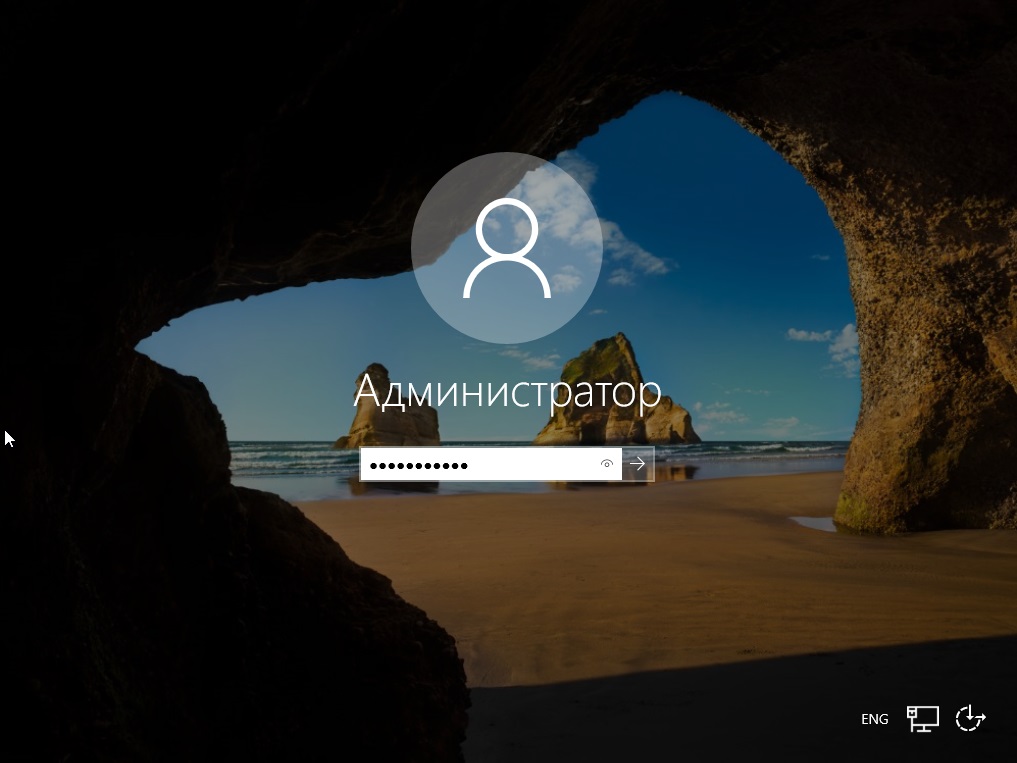
Далее заходим под учетной записью администратора в систему.
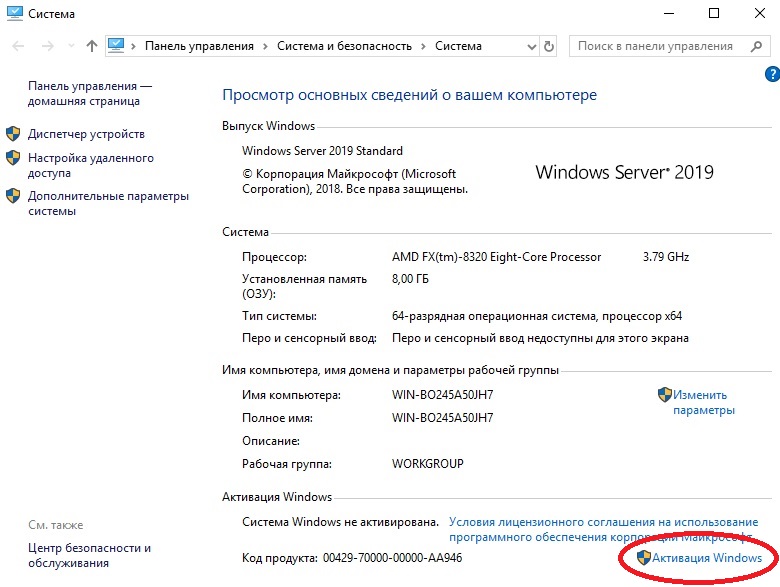
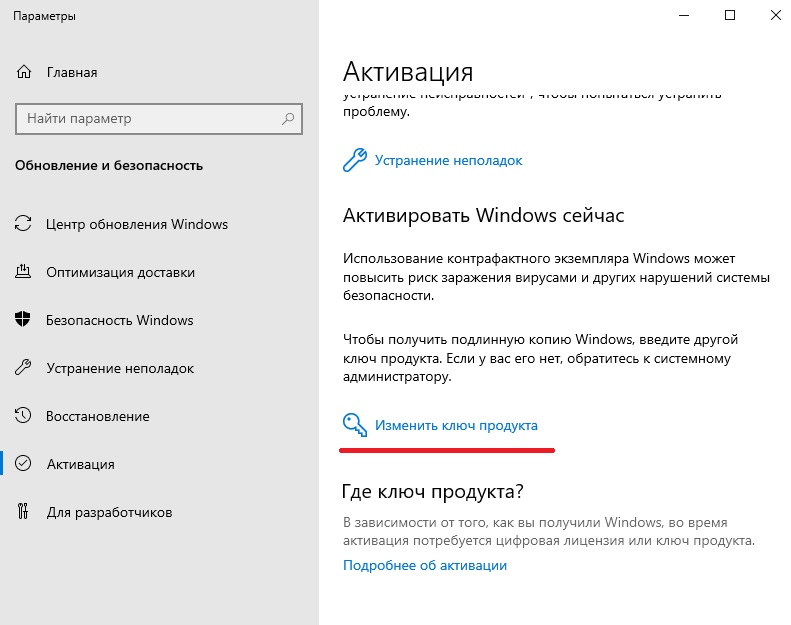
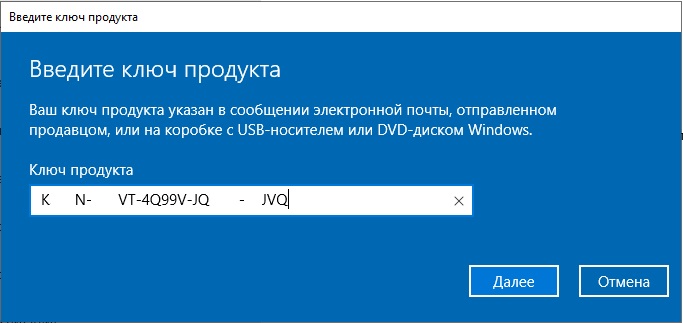
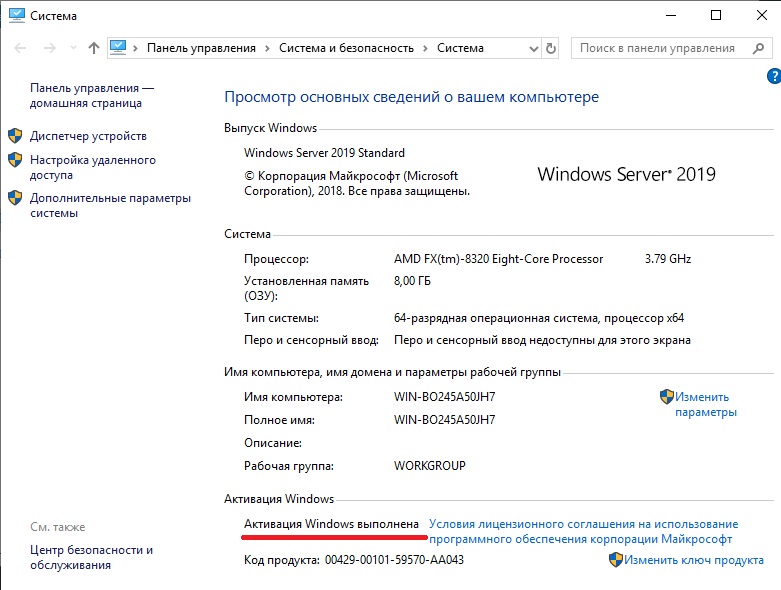
5) После установки переходим к первичной настройке, что нужно сделать сразу после установки — это активировать систему и загрузить все актуальные обновления. Приступим для начала к активации. Заходим меню в «Свойства системы» => Активация Windows => Изменить ключ продукта => и вводите Ваш ключ в поле ввода. Если у Вас нет ключа, то приобрести ключ активации можете в нашем интернет-магазине по самым низким ценам на следующей странице. Моментальная доставка ключа на Вашу электронную почту не заставит Вас должно ожидать активации системы!
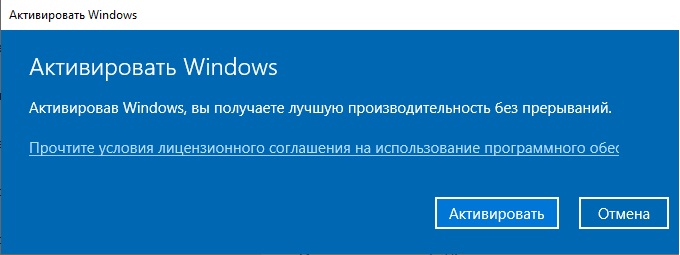
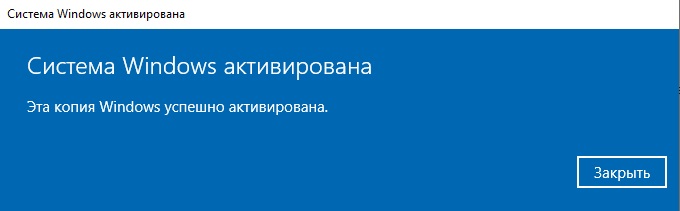
После активации переходим снова в меню «Свойства системы» и проверяем все ли активировалось. Если да, то переходим к загрузке актуальных обновлений.
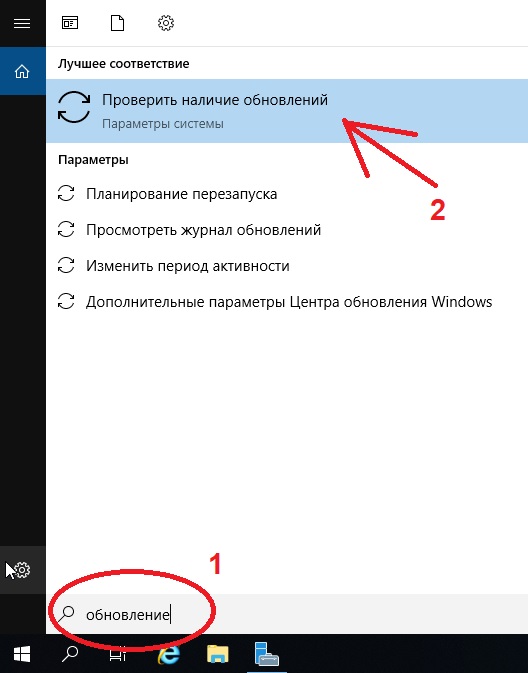
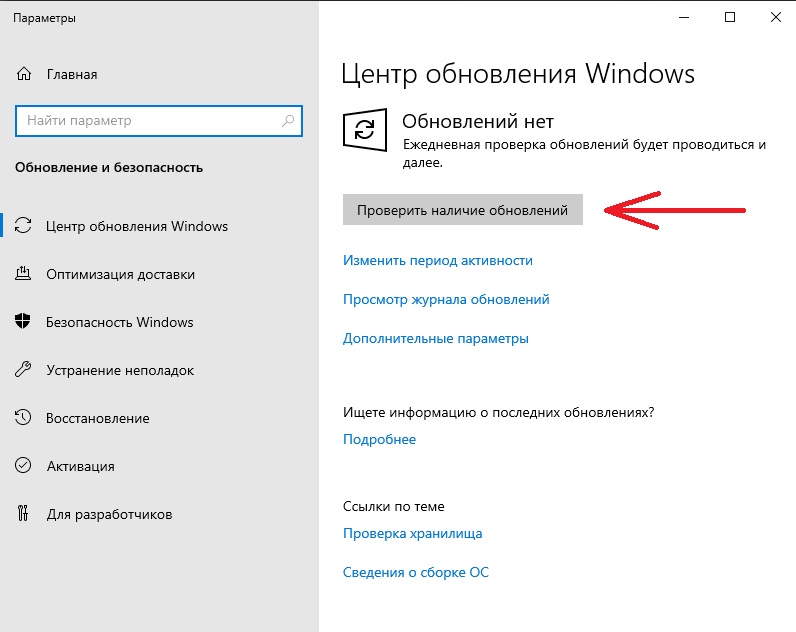
Нажимаем на кнопку «Проверить наличие обновлений».
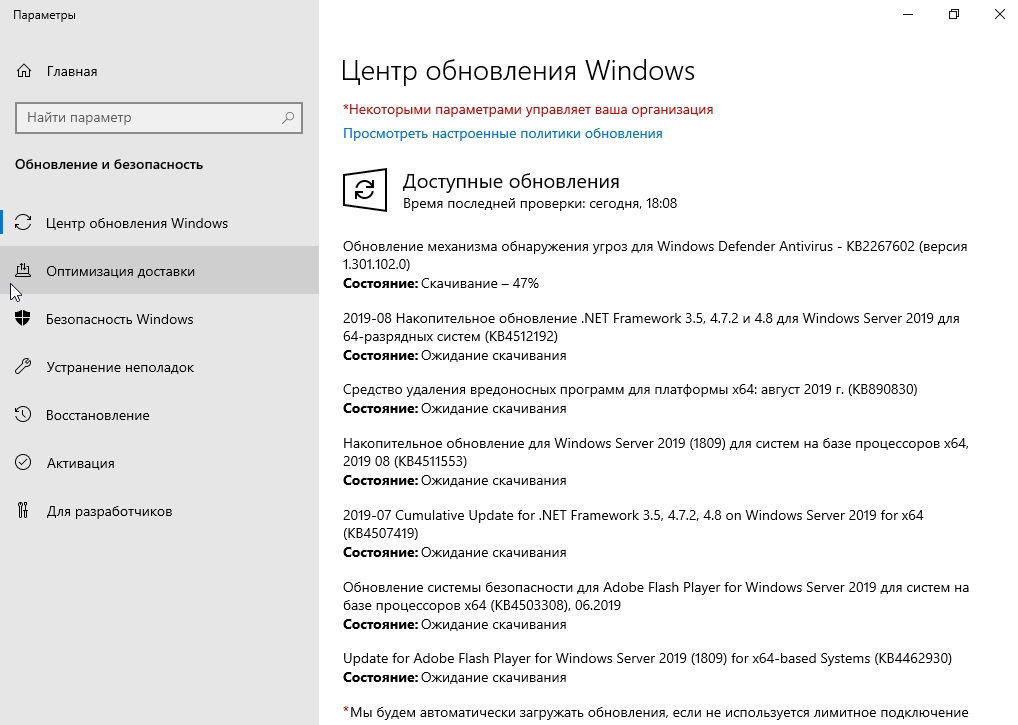
Загружаем обновления, после устанавливаем их. После установки нужно перезагрузить систему.
На этом все. Установка и первичная настройка закончена. Как детально настроить Windows Server 2019 читайте в нашей следующей статье.
Содержание
- ИТ База знаний
- Полезно
- Навигация
- Серверные решения
- Телефония
- Корпоративные сети
- Создание загрузочного USB накопителя для установки Windows Server 2019
- Windows Server
- Зачем создавать загрузочный USB?
- Создание USB загрузочной флешки с Windows Server 2019
- Использование Rufus
- Подготовка инсталляционного USB носителя вручную
- Использование OSDBuilder для кастомизации образа
- Заключение
- Windows Server
- Полезно?
- Почему?
- Create a USB Drive for Windows Server 2019 Installation
- Getting ready to create a USB Drive for a Windows Server 2019 Installation
- Windows Server 2019 USB Thumb Drive for UEFI (GPT) systems
- Important:
- Windows Server 2019 USB Thumb Drive for BIOS (MBR) systems
- About the Author / Thomas Maurer
- Related Posts
- 6 Command Line (PowerShell & CLI) Tips & Tricks for Microsoft Azure you should know about!
- Install and run Kubernetes on Windows Server
- Azure Arc-enabled SQL Managed Instance Landing zone accelerator
- Manage Azure Arc-enabled Azure Stack HCI from Azure
- 68 Replies to “Create a USB Drive for Windows Server 2019 Installation”
ИТ База знаний
Курс по Asterisk
Полезно
— Узнать IP — адрес компьютера в интернете
— Онлайн генератор устойчивых паролей
— Онлайн калькулятор подсетей
— Калькулятор инсталляции IP — АТС Asterisk
— Руководство администратора FreePBX на русском языке
— Руководство администратора Cisco UCM/CME на русском языке
— Руководство администратора по Linux/Unix
Навигация
Серверные решения
Телефония
FreePBX и Asterisk
Настройка программных телефонов
Корпоративные сети
Протоколы и стандарты
Создание загрузочного USB накопителя для установки Windows Server 2019
Загружаемся с флешки
USB-устройства уже полностью вытеснили оптические носители из работы. Сюда же можно отнести и хранение дистрибутивов ОС. USB-устройства во многом превосходят оптические носители по скорости и их легко использовать для установки операционных систем. В наши дни они удобны и крайне недороги. Кроме того, существует множество инструментов для взаимодействия с USB-накопителями и создания на них дистрибутивов ОС. Установить Windows Server 2019 с USB-накопителя очень просто. В этой статье изучим некоторые способы создания USB-накопителя для установки Windows Server 2019.

Windows Server
Все самое главное про внедрение, управление и поддержку инфраструктуры MS Windows Server
Зачем создавать загрузочный USB?
Можно смонтировать ISO образ на виртуальную машину и установить Windows Server. Да, можно, но это справедливо только при использовании виртуальных сред. Также можно ,при наличии, монтировать образ в iDRAC – у Dell это компонент, который находится в сервере и позволяет системным администраторам обновлять, мониторить и контролировать системы, даже когда ОС выключена. У разных производителей разные возможности и цены. Еще один вариант — установка по сети. Этот вариант подразумевает дополнительную установку отдельного PXE сервера и его настройку. Еще более сложный в настройке и дорогой вариант — использовать для установки сервер SCCM. У малого и среднего бизнеса порой нет таких возможностей, и они устанавливают ОС по старинке. Создание загрузочного USB-диска — это самый быстрый способ установить Windows на физическом сервере.
Создание USB загрузочной флешки с Windows Server 2019
Рассмотрим три различных метода создания загрузочного USB
- Используя Rufus или аналогичное ПО, которое может записать ISO образ
- Вручную подготовить USB диск и скопировать файлы с ISO образа
- Использовать OSDBuilder для кастомизации дистрибутива Windows Server 2019
Перед тем как выбрать метод установки, нужно загрузить образ диска. Если в компании не приобретена подписка Visual Studio, можно загрузить ISO образ из Центра загрузки и оценки Microsoft.
Использование Rufus
Раньше приходилось использовать какую-либо утилиту для записи ISO-образа на оптический носитель. Теперь Rufus предоставляет практически те же функции, но позволяет записать ISO-образ на USB-накопитель. Программа обладает простым интерфейсом на русском языке и имеет портативную версию. Загрузить программу можно с сайта Rufus.
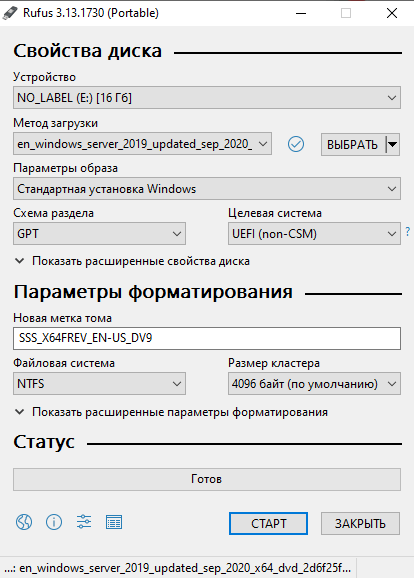
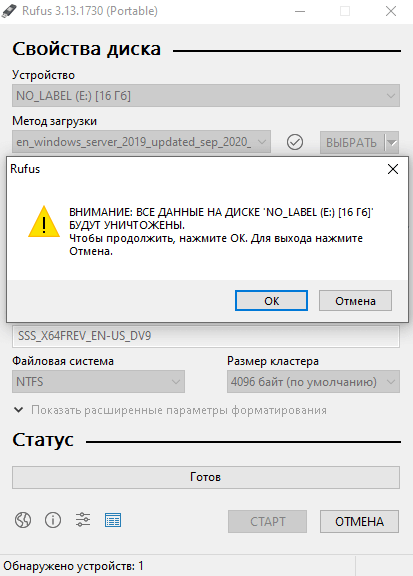
При записи программа предупредит, что все данные на USB устройстве будут удалены!
Подготовка инсталляционного USB носителя вручную
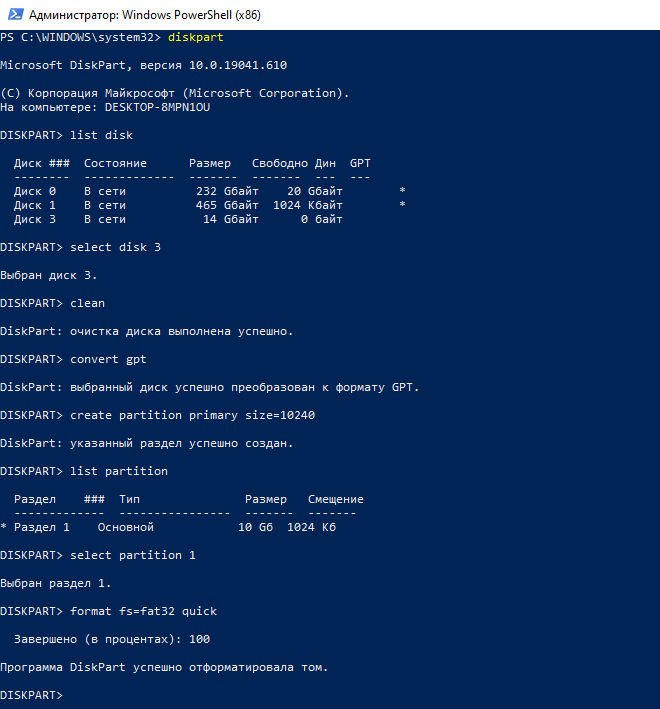
Можно создать инсталляционный дистрибутив системы вручную. Весь процесс состоит из несколько этапов. Подключаем Flash носитель, используем diskpart . Очищаем носитель, создаем новый раздел FAT32. Копируем файлы.
Внимание! Все данные на USB носителе в процессе использования diskpart будут удалены.
Следующим шагом подключим ISO образ в систему. Для этого, щелкнем правой кнопкой мыши по ISO файлу и выберем «Подключить». Затем выделите все файлы в смонтированном образе и скопируйте их на целевой USB-накопитель.
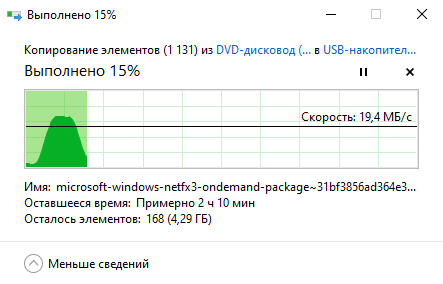
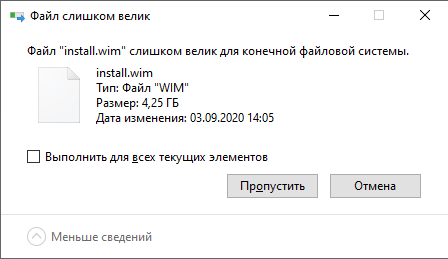
В процессе появится ошибка копирования файла install.wim , т.к. максимально возможный размер файла для тома отформатированного в FAT32 равен 4 ГБ. Сейчас пропустим файл и решим эту проблему ниже.
Чтобы обойти ошибку, связанную с ограничением файловой системы FAT32, разделим файл install.wim на несколько файлов не превышающих размер 4 Гб.
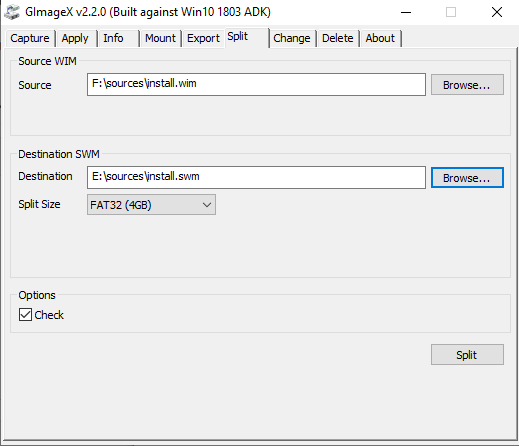
И это действие можно выполнить двумя способами. Первый, используя бесплатную программу GImageX для работы c wim файлами. В ней переходим на вкладку Split, указываем файл install.wim и папку, в которую нужно записать новые файлы.
Второй способ – использовать программу dism .
- sourcesinstall – путь до файла install.wim
- sourcesinstall – путь к целевому USB диску

Если в качестве sourcesinstall был указан путь как в примере, сразу на Flash накопитель, получится готовый USB накопитель для инсталляции Windows Server 2019. Если был указан другой путь, то перенесите полученные файлы *.swm , в папку «sources» на Flash накопитель и у вас будет загрузочный USB-накопитель для установки Windows Server 2019.
С помощью dism можно добавлять и удалять: роли и компоненты, обновления и драйвера. Более подробно написано в этой статье.
Использование OSDBuilder для кастомизации образа
OSDBuilder это модуль PowerShell, с его помощью возможно создать свой, с настроенными предварительно параметрами, ISO образ. Как и Dism, OSDBuilder позволяет выполнять автономное обслуживание операционной системы Windows, включая и Windows Server 2019. Для этого создается файл ответов, называемый задачей, которая позволяет автоматизировать обслуживание автономного образа. С помощью командлета New-MediaUSB создается загрузочный USB носитель.
При установке и импорте модуля OSDBuilder может возникнуть ошибка, т.к. операционной системе по умолчанию запрещено запускать ненадежные сценарии PowerShell.
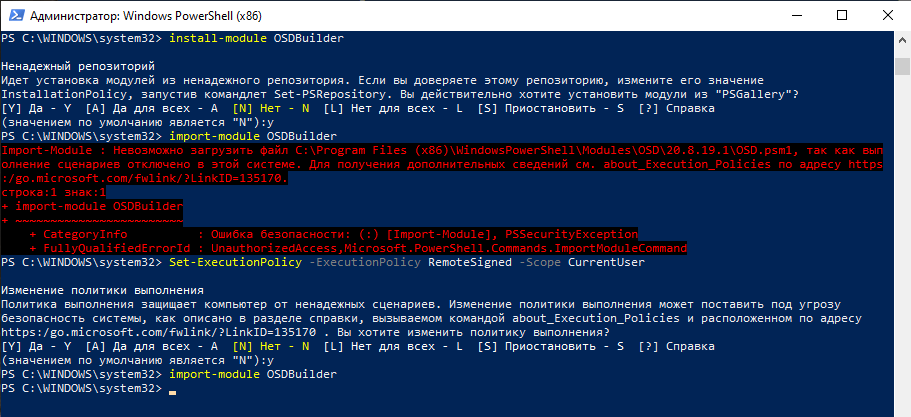
Изменив политику выполнения скриптов, команда импорта модуля завершится без ошибки.
С полным списком команд и последовательностью работы можно ознакомиться на сайте проекта.
Заключение
Существует несколько способов процесса создания USB-накопителя для установки Windows Server 2019. Самый быстрый способ – это использовать Rufus. Более сложные варианты — использовать Dism и OSDBuilder.
Windows Server
Все самое главное про внедрение, управление и поддержку инфраструктуры MS Windows Server
Полезно?
Почему?
😪 Мы тщательно прорабатываем каждый фидбек и отвечаем по итогам анализа. Напишите, пожалуйста, как мы сможем улучшить эту статью.
😍 Полезные IT – статьи от экспертов раз в неделю у вас в почте. Укажите свою дату рождения и мы не забудем поздравить вас.
Источник
Create a USB Drive for Windows Server 2019 Installation
This blog post covers how you can create a bootable USB media drive to install Windows Server 2019 on a physical server. This blog post will not use any third-party tools; it only uses built-in tools that you can find on Windows 10 or Windows Server. Depending on your system you will need it to install it on a BIOS system or a UEFI based system, which is slightly different since UEFI will use GPT disks and BIOS will use an MBR disk. Here is how you create a USB Drive for a Windows Server 2019 installation.
Getting ready to create a USB Drive for a Windows Server 2019 Installation
First, you will need to have all the prerequisites in place.
- Download the Windows Server 2019 ISO File
- A USB Drive with at least 8GB size
Windows Server 2019 USB Thumb Drive for UEFI (GPT) systems

To create the USB drive to install Windows Server 2019 on a UEFI (GPT system, you do the following steps:
- The at least an 8GB USB drive has to be formatted in FAT32
- The USB needs to be GPT and not MBR
- Copy all files from the ISO to the USB drive
This is it, and here is how you do it. First, plug in your USB drive to your computer.
Open a PowerShell using the Run as Administrator option. You will need to change the path of the Windows Server 2019 ISO, and you will need to replace the USB Friendly Name in the script.
REMINDER: The following commands will wipe the USB Drive completely. So backup everything before you run through the PowerShell.
After that, you can safely remove the USB drive and use it to boot your server from.
Important:
If Install.wim is larger than 4GB, you cannot copy the file to the drive, because of the FAT32 based partition limitation. The solution for this is to split the wim file into smaller files.
split wim file using dism (you may have to change the drive letters):
Windows Server 2019 USB Thumb Drive for BIOS (MBR) systems
To create the USB drive to install Windows Server 2019 on BIOS (MBR) systems, you can follow these steps:
- The at least an 8GB USB drive has to be formatted in NTFS
- USB drive needs to us MBR
- The partition needs to be set active
- Copy all files from the ISO to the USB Drive
This is it, and here is how you do it. First, plug in your USB drive to your computer.
Open a PowerShell using the Run as Administrator option. You will need to change the path of the Windows Server 2019 ISO, and you will need to replace the USB Friendly Name in the script.
REMINDER: The following commands will wipe the USB Drive completely. So backup everything before you run through the PowerShell.
After that, you can safely remove the USB drive and use it to boot your server from to install Windows Server 2019.

If you have any questions, please let me know in the comments.


6 Command Line (PowerShell & CLI) Tips & Tricks for Microsoft Azure you should know about!
Install and run Kubernetes on Windows Server

Azure Arc-enabled SQL Managed Instance Landing zone accelerator
Manage Azure Arc-enabled Azure Stack HCI from Azure
Wouldn’t this command
# Copy Files to USB (except install.wim)
Copy-Item -Path ($ISODriveLetter +”:*”) -Destination ($Volume.DriveLetter + “:”) -Recurse
Copy everything including the install.wim file when the comment says except install.wim ?
Sorry forgot to remove it from the PowerShell Comment. Copy Past error 🙂 I used the script for a ISO where the install.wim was larger than 4GB, in that case you need to split it first before you can copy it.
Thanks fixed it 🙂
I thought that Windows Server 2019 was supposed to fit on one single-layer DVD. The original release did, because I actually made such a DVD. The fixed one seems to be just a little too big, which strikes me as being sloppy. Burning a DVD is a lot easier than typing Powershell commands!
Sometimes 🙂 But there are a lot of servers out there, which do not have a DVD drive anymore 🙂
Plus, it an USB drive is way faster 🙂 DVD is so 2003 😉
We could also just use Rufus to burn the iso to a usb to make it bootable. kinda does all of this for you. right?
Absolutely 🙂 If you don’t want to spend time and you can install software on your device, then yes 🙂
After the instalation I want turn back my pen drive to a normal Pen Drive (removable), how I can do this? You can help me?
You can just format the drive again 🙂
I am not able to convert my USB drive to GPT. I searched and found this Microsoft article that states, “You cannot use the GPT partition style on removable media.” (https://docs.microsoft.com/en-us/windows-server/storage/disk-management/change-an-mbr-disk-into-a-gpt-disk)
I checked with the Microsoft Product Group, this was a mistake in the documentation. It is now fixed!
You should be able to use GPT on your USB Drive!
Thank you for the post which worked well. However I cannot get 2019 to boot after the I initial installation and I am starting to suspect every thing. I get a flashing cursor and 4hat is it. Can 2019 run in bios mode? Previously I have just played on a hyperv session with 2019.
Thanks for this – very helpful
One note: I found that Clear-Disk did not remove the MBR partition style from a previously used USB flash drive. As a result, the “Initialize-Disk -PartitionStyle GPT” command failed.
I successfully used “$USBDrive | set-disk -PartitionStyle GPT ” after the Clear-Disk command to set the GPT partition style
Thanks. But, common mistake in second script: comments do not match the code.
Thanks, I fixed it!
Unfortunately, this fails for me on WS2016:
Initialize-Disk : The disk has already been initialized.
Activity ID: <9f3c63c2-0674-43b1-800d-dd4c035fe603>
At K:isocreate_bootable_usbstick_from_iso_image.ps1:16 char:13
+ $USBDrive | Initialize-Disk -PartitionStyle MBR
+
+ CategoryInfo : NotSpecified: (StorageWMI:ROOT/Microsoft/Windows/Storage/MSFT_Disk) [Initialize-Disk], CimException
+ FullyQualifiedErrorId : StorageWMI 41001,Initialize-Disk
What might be wrong?
Did you run the clear command to clean up the USB stick from all existing partitions etc?
You should look up the SerialNumber:
$USBDrive = Get-Disk | Where SerialNumber -eq “AA00000000000489”
as the FriendlyName often is truncated:
Number Friendly Name Serial Number
—— ————- ————-
2 Generic ST… 000000000540
3 Generic ST… 000000000541
4 Generic ST… 000000000542
5 Generic ST… 000000000543
6 Generic ST… 000000000544
7 Verbatim S… AA00000000000489
No. 7 is really Verbatim STORAGE N GO. Not that easy, if you didn’t know.
Hi, Thomas! Thanks for sharing your scripts. I slightly modified each to make them a bit more universal. Take a look: http://www.hyper-v.io/create-bootable-usb-windows-server-2019-installation/
HI, Will this above method work for windows 7
Thanks in advance
Yes, I haven’t tried it, but it should work the same way 🙂
As Graham Goddard has stated, I was getting the “Initialize-Disk : The disk has already been initialized.” error after the Clear-Disk command when my drive had an MBR partition style. Graham’s command helped me but it alone did not do it as the $USBDrive variable was still referencing the old MBR drive instance and not the newly-updated GPT instance. These two commands after the Clear-Disk command got me back on track (the second one needs to be updated for each user just like the very first version of this command needs to be updated for us):
$USBDrive | Set-Disk -PartitionStyle GPT
$USBDrive = Get-Disk | Where FriendlyName -eq “Kingston DT Workspace”
At this point, I also could still not run the Initialize-Disk command but it didn’t seem to be necessary, so I continued without it.
Next, the “$Volume | Get-Partition | Set-Partition -IsActive $true” command failed with the error: “The parameters MbrType and IsActive cannot be used on a GPT disk.”. So again, I skipped this command.
After all of these issues and tweaks, it worked for me with the “Windows Server 2019 (updated March 2019)” ISO from MSDN.
I got a little stuck in this guide as PowerShell refused to Initialize-Disk because the disk had already been initialized. Ended up sorting it with diskpart and the rest went smooth
diskpart> select disk N
diskpart> clean
diskpart> convert gpt
Sorry, this fails immediately on my Windows 7 Professional laptop.
I get this error:
PS C:Usersalamoureux.ATEC> Get-Disk | Where BusType -eq “USB”
The term ‘Get-Disk’ is not recognized as the name of a cmdlet, function, script file, or operable program. Check the sp
elling of the name, or if a path was included, verify that the path is correct and try again.
At line:1 char:9
+ Get-Disk Thomas Maurer says:
Hi Andrew
Sorry, it looks like I misunderstood your question. You can create a Windows 7 USB drive like this. However, if you want to run these commands you need at least Windows 8 or higher, because the PowerShell Storage Module, is only available in Windows 8 or higher.
what a totally unnecessary bunch of steps.
use a linux computer.
fdisk /dev/sda > delete partitions, make one partition, write
dd status=progress if=/pathTOiso of=/dev/sda (dont include the partition number, write to whole disk)
make sure partition is under 32GB
Hi Andrew I get this error when I enter the copy-item command, any idears?
PS C:WINDOWSsystem32> Copy-Item -Path ($ISODriveLetter +”:*”) -Destination ($Volume.DriveLetter + “:”) -Recurse
Copy-Item : The parameter is incorrect.
At line:1 char:1
+ Copy-Item -Path ($ISODriveLetter +”:*”) -Destination ($Volume.DriveL …
+
+ CategoryInfo : WriteError: (install.wim:FileInfo) [Copy-Item], IOException
+ FullyQualifiedErrorId : CopyDirectoryInfoItemIOError,Microsoft.PowerShell.Commands.CopyItemCommand
Sorry not Andrew, meant Thomas 🙂
HI
I get a 0xc0000021a stop error when attempting to boot from a Windows Server 2019 USB I created with rufus
I am about to receive my new server and will give it a try. One question, how is this going to work if install.wim is removed? Are there any additional steps to perform for the installation? Seems as if the meat of the OS is missing from the USB drive.
Oh, I see, there is still a comment that says install.wim will not be copied. This is not the case, install.wim will be copied with that script. Just didn’t, just forgot to update the comment in the script. You should definitely have install.wim copied by this script.
I removed the mention in the comment.
As I suspected, I am getting an error that install.wim does not exist. How is this script supposed to work? I followed the steps, created the bootable drive, the install starts, and I am getting an error that this file is missing.
I get the same error that Darren has:
Copy-Item : The given path’s format is not supported.
At C:tempcreate.ps1:26 char:1
+ Copy-Item -Path ($ISODriveLetter +”:*”) -Destination ($Volume.DriveL …
+
+ CategoryInfo : NotSpecified: (:) [Copy-Item], NotSupportedException
+ FullyQualifiedErrorId : System.NotSupportedException,Microsoft.PowerShell.Commands.CopyItemCommand
Copy-Item : The given path’s format is not supported.
At line:1 char:1
+ Copy-Item -Path ($ISODriveLetter +”:*”) -Destination ($Volume.DriveL …
+
+ CategoryInfo : NotSpecified: (:) [Copy-Item], NotSupportedException
+ FullyQualifiedErrorId : System.NotSupportedException,Microsoft.PowerShell.Commands.CopyItemCommand
But I found the USB disk wasn’t given a drive letter, so it didn’t know where to copy it to. Manually gave it one and edited the destination and it worked.
Not ideal as I make many of these, but it worked.
Also edited the top part to give a gridview out of USB disks, I did nick the idea from somewhere else but can’t for the life of me remember.
$USBDrive = Get-Disk | Where-Object BusType -eq USB | Out-GridView -Title ‘Select USB Drive to Format’ -OutputMode Single | Clear-Disk -RemoveData -Confirm:$false -PassThru | Initialize-Disk -PartitionStyle MBR
That might be half my other problem though.
I also get the following error:
PS C:Windowssystem32> Copy-Item -Path ($ISODriveLetter +”:*”) -Destination ($Volume.DriveLetter + “:”) -Recurse
Copy-Item : The parameter is incorrect.
At line:1 char:1
+ Copy-Item -Path ($ISODriveLetter +”:*”) -Destination ($Volume.DriveL …
+
+ CategoryInfo : WriteError: (install.wim:FileInfo) [Copy-Item], IOException
+ FullyQualifiedErrorId : CopyDirectoryInfoItemIOError,Microsoft.PowerShell.Commands.CopyItemCommand
It seems script is not working. It starts copying the installation files from the ISO image and stops when it is trying to copy the WIM.
In order to be fair, it might not be the script. I also tried with another method using diskpart and I also get an error when trying to copy WIM
E:sourcesinstall.wim -> D:sourcesinstall.wim
File creation error – The parameter is incorrect.
So there must be an error in the ISO file. It is strange because the same mistake happened to other people too. Also I used this ISO to install Windows 2019 server on a Hyper-V host as a virtual machine without any problems
I think the reason for the problem was the following: Install.wim file is 4,2GB. FAT32 is not compatible with files larger than 4GB. When a script or any command tries to copy the file from the ISO to the USB the error shows up.
I tried the second method ntfs and mbr and it created the USB without errors
This is great an all but this assumes everyone knows how to create and run a script in powershell. A short explanation on how to do that would help. I open powershell and don’t know what to do. Am I supposed to copy/past your text into a notepad file and name it a certain way and then run that? Assume we are all novices with powershell.
Hi thank you for the article, I want to make it UEFI compatible but my iso Install.wim file is over 4 gb how can I accomplish it?
I have seen you talk about splitting the the file to copy it. What do I have to add to the script?
You can use the following dism command to split the WIM file. Make sure you change the driveletters:
dism /Split-Image /ImageFile:e:sourcesinstall.wim /SWMFile:k:sourcesinstall.swm /FileSize:4096
I have spent the entire day reading different google searches and still have not succeeded in making a bootable usb WS2019 device.
Is there any persons that could assist me by email?
Same problems here: Your assumptions are sloppy and incomplete! First, you mention to make this FAT32, which does NOT work; so, please, give EXACT details; because later, you mention SPLITTING WIM FILE. What method? How do we do that? Also, you assume everyone is Win 8 or higher – many of us are still using Windows 7 workstations to do this; which will not have the Powershell version needed to run this – so, please mention the requirements at the very beginning of your article! The HUGE issue is: If you tell us to use FAT32, then how do we properly copy the WIM file to the target USB? Also, I am thinking we could use something besides FAT32 that allows larger than 4 GB files to be be copied – . (wouldn’t ExtFat work?)
To split the WIM file you can use the following command (I added it to the blog post):
dism /Split-Image /ImageFile:e:sourcesinstall.wim /SWMFile:k:sourcesinstall.swm /FileSize:4096
If you run Windows 7, you can use my guide for Windows Server 2016, since that one is based on the dism.exe file. https://www.thomasmaurer.ch/2016/10/create-a-usb-stick-for-windows-server-2016-installation/
I hope that helps you 🙂
Bad instructions! You need “$USBDrive | set-disk -PartitionStyle GPT ” before Initialise-Disk
That is not correct, during initialize-disk you set the PartitionStyle, you don’t need to run it before. When you follow the instructions and clean the disk fully before.
Your instructions saved me. I had spent all weekend trying to install Server 2019 on a brand new server that supports it but it just wouldn’t boot. I had formatted my USB as MBR/NTFS because the .wim wouldn’t fit on a GPT/FAT32 key. The MBR/NTFS key booted just fine and performed the install but I couldn’t boot from the hard drive afterwards. I didn’t think that the source key format could affect the result so significantly but using the .wim split and GPT/FAT32 worked perfectly.
Did you see the notice in the blog where it says important? There you find instructions to split the WIM file, so it will fit on the USB drive with FAT32.
dism /Split-Image /ImageFile:e:sourcesinstall.wim /SWMFile:k:sourcesinstall.swm /FileSize:4096
Update: Oh I see you did, sorry 🙂 Happy it worked for you!
Might be useful to just add the dism to the script where if the copy fails due to install.wim file size, run dism from newly mounted iso to the drive letter of the usb being formatted. THEN unmount the iso.
Just think you might get less push back from the confused peanut gallery.
Great script though!
Good idea! will see if I can find some time to add it 🙂
Источник
На чтение 3 мин Просмотров 88 Опубликовано 13.10.2022
Данная инструкция позволяет создать загрузочный USB диск с Windows Server 2019 без использования сторонних программ, только Powershell или cmd.
Нам понадобится: .iso образ Microsoft Windows Server 2019, USB-flash или USB-диск минимум на 8 GB и компьютер под управлением Windows 7, Windows Server 2008 или выше.
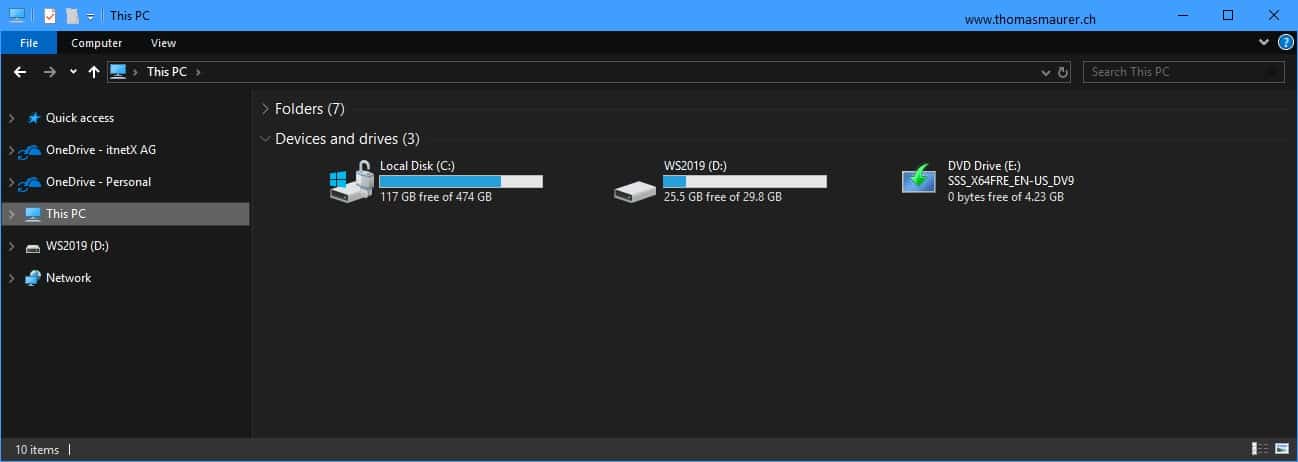
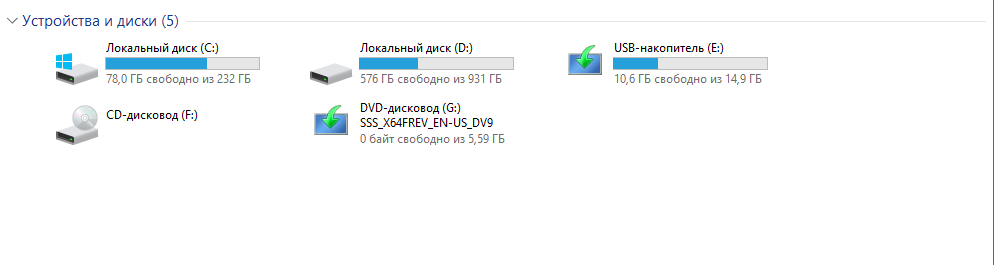
- Монтируем iso-файл (двойной клик по файлу), запоминаем букву примонтированного диска (в моём примере буква G:);
- Втыкаем флешку в USB, запоминаем букву диск (в моём примере буква E:);
- Запускаем Powershell или cmd с правами администратора (Пуск — написать Powershell (или cmd) — пкм — запуск от имени администратора);
Внимание: следующие команды удалят все данные на выбранном диске без запроса подтверждения. Убедитесь что выбран правильный диск.
- Используем программу diskpart для подготовки диска к записи ОС.
diskpart
list disk
select disk 2 (в моём случае нужный диск - 2. Тут нужно внимательно выбрать необходимый диск)
list disk

после повторного выполнения команды list disk выбранный диск будет помечен символом"*"
следующая команда полностью очистит диск

clean
create partition primary
select partition 1
active
format fs=ntfs quick label="WinSRV19"
exit
Всё, USB-диск готов к записи установочного образа, приступаем к записи образа.
- Теперь необходимо записать загрузочный сектор (все операции продолжаем выполнять в Powershell) (заменить G: на свою букву диска)
cd G:boot
bootsect /nt60 e:
Выбранный том был обновлён с помощью загрузочного кода, совместимого с BOOTMGR.
Теперь осталось скопировать файлы на USB-диск. Делать это будем с помощью утилиты xCopy. Замените буквы дисков в соответствии с вашими дисками.
xcopy G:*.* E: /E /H /J /F
Может показаться что копирование зависло, это связано с тем, что файл install.wim очень большой, более 4GB, необходимо просто ждать. Копирование завершится в среднем за 10 минут, в зависимости от скорости USB-диска.
Именно поэтому мы форматировали диск в NTFS.

После того, как копирование завершится, можно использовать полученный диск для установки Windows Server 2019.
UEFI
Внимание: чтобы UEFI загрузчик нормально увидел носитель — его необходимо отформатировать в fat32
Так же используем diskpart
diskpart
list disk
select disk 2 (в моём случае нужный диск - 2. Тут нужно внимательно выбрать необходимый диск)
list disk

после повторного выполнения команды list disk выбранный диск будет помечен символом"*"
следующая команда полностью очистит диск

clean
create partition primary
select partition 1
active
format fs=fat32 quick label="WinSRV19"
exit
Всё, USB-диск готов к записи установочного образа, приступаем к записи образа.
Можно просто скопировать файлы из смонтированного образа.
Файл install.wim не удастся скопировать, т.к. его размер более 4GB.
Придётся резать.
Dism /Split-Image /ImageFile:E:sourcesinstall.wim /SWMFile:C:UsersAdministratorDesktopinstall.swm /FileSize:3000
/ImageFile — путь к файлу install.wim
/SWMFile — путь, куда положить нарезанные swm-файлы
/FileSize — максимальный размер одного swm-файла
Далее полученные файлы необходимо скопировать на флешку в sources
In recent years USB has mostly replaced optical media. It serves a variety of functions, including data transfer, operating system installation, and a boot USB that can be used on any PC. For the most part, a USB is utilized for installation. The task of installing a Windows server from a USB disk is easy.
People nowadays prefer to burn the server 2019 ISO on a USB device to create a bootable drive. The reason for this is you may need to upgrade system server 2019 to a different PC or have a new server at times. You can save server 2019 to a USB to use for installation purposes.
Second, if you have a portable server on a USB, you can transfer it to another computer without restarting over with the installation process.
We will look at how to make a bootable USB in this article. We will also look at a third-party tool that makes the task go faster and easier. Before we get into the details, we recommend you download the Windows Server.iso file from Microsoft official website. Go to the Microsoft website.
Once you click on the link, select ISO and fill in the requirement to download. You can download the trial version with some additional features of App Compatibility FOD. This feature improves the compatibility of the server as well as the troubleshooting and debugging.
Now let’s take a look at the details.
| Workable Solutions | Step-by-step Troubleshooting |
|---|---|
| Fix 1. Create Windows Server 2019 Bootable USB from ISO | Insert the USB drive and run Command Prompt…Full steps |
| Fix 2. Create a USB Bootable for Windows Server Installation by Third-Party Tool (Easier) | Connect USB to PC and start to create bootable…Full steps |
How to Create Windows Server 2019 Bootable USB from ISO
You must complete the prerequisites before beginning the procedure. You must have the following factors ready ahead of time:
- You must be using a USB with an 8GB capacity. While burning, Windows Server 2019 consumes 4GB. Because the ISO image is divided into more than 3GB chunks, it requires extra space.
- The data is completely erased during the disk creation process. Always make a complete backup of your data. You will lose your important info if you don’t create a backup.
We have already created the prerequisites for making a bootable USB for Windows Server 2019. If you obtained the ISO file from the company’s official website, you can use the command line to boot a USB disk. Follow the steps outlined below in detail:
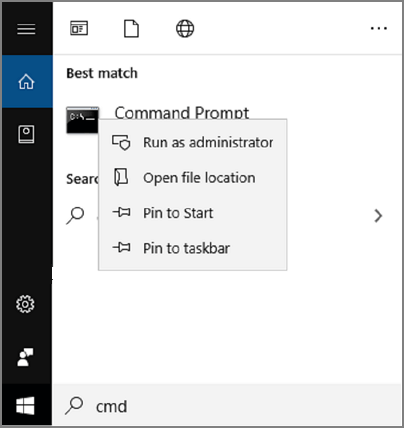
Step 1. Insert the USB drive on your PC. Go to Start and type cmd in the search box. Click on Run as administrator to open a command prompt.
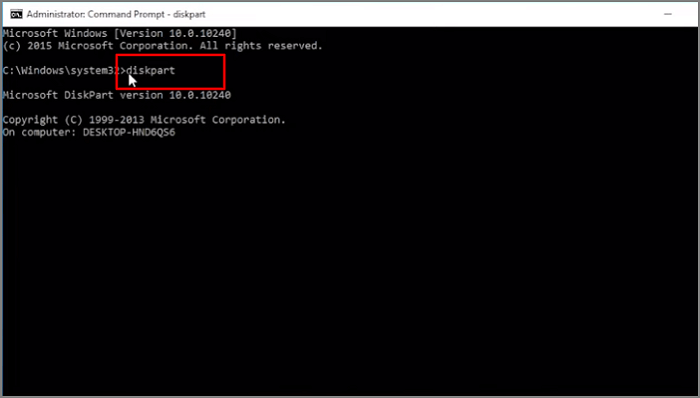
Step 2. Type command diskpart and press enter. The diskpart tool will appear.
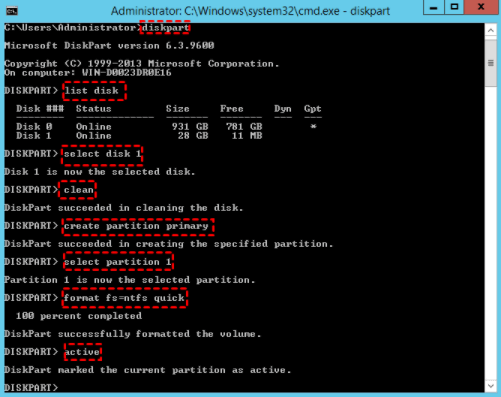
Step 3. Type the following command one by one and press enter:
- list disk and press enter to appear disk list.
- select disk x
Here x denotes the number of your flash drive. You can enter the disk name which you want to make bootable.
Type the following commands one by one:
- clean
- create partition primary
- select partition 1
you will select the partition as per your own requirement
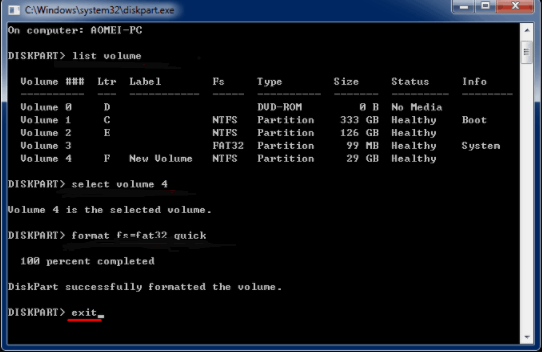
- format fs=ntfs quick (if you want to create UEFI bootable USB, type «format fs=fat32 quick»).
- active
Step 4. Type Exit and press enter. It will close the diskpart command.
You have built a Bootable USB from ISO by following the steps outlined above. In the Windows Operating System, the command-line approach is a built-in feature. It is one of the simplest methods for creating a bootable USB. By typing a few commands you can make your USB bootable. The USB can be used on any other system.
We have now seen how to use the built-in feature. Now we will look at a third-party utility tool that can help make the task easy and quick.
Easier Solution: How to Create a USB Bootable for Windows Server Installation
Note: Before you begin the process make sure you back up your data and your USB has enough space of 8GB at least.
On Windows Server, Microsoft has not included a feature to generate bootable USB drives. We recommend using EaseUS Partition Master, a third-party utility. This software is a disk partition manager that is available for free. It can assist in the allocation of disk space to improve data storage. This software makes disk management convenient.
24/7 Tech Chat
Free Inquiry
The following are the key features of EaseUS Partition Master:
- It supports converting NTFS to FAT32.
- It is capable of supporting split partition.
- It reduced the frequent restart requirement.
- By correctly assigning the disk space it maximizes system performance.
- Change partition label.
- Flexibly adjust partition size by entering the exact partition size.
- Prevent data loss.
- Safe and secure to use.
- Available for a free trial.
- It formats and deletes the partition HDD, SSD, USB, memory card, SD card so, the device must be reusable.
- To ensure security it entirely wipes out the data on the hard disk.
Steps to Create Bootable USB:
Step 1. To create a bootable disk of EaseUS Partition Master, you should prepare a storage media, like a USB drive, flash drive or a CD/DVD disc. Then, correctly connect the drive to your computer.
Step 2. Launch EaseUS Partition Master, and find the «Bootable Media» feature on the left. Click on it.
Step 3. You can choose the USB or CD/DVD when the drive is available. However, if you do not have a storage device at hand, you can also save the ISO file to a local drive, and later burn it to a storage media. Once made the option, click the «Create» button to begin.
- Check the Warning message and click «Yes».
When the process finishes, you have successfully created an EaseUS Partition Master WinPE bootable disk. Now, you can manage your hard disks and partitions through the bootable drive whenever the computer fails to boot normally.
If you have RAID drives, load the RAID driver first by clicking Add Driver from the menu bar, which can help you add the driver of your device under WinPE environment, as some specific device cannot be recognized under WinPE environment without drivers installed, such as RAID or some specific hard disk.
To easily create a USB using a trusted third-party tool. The best solution is EaseUS Partition Master. It formats external devices, manages partitions flexibly, and efficiently allocates space.
EaseUS Partition Master Enterprise
Your trustworthy Windows Server disk manager.
- Extend System drive, combine/split partitions.
- Clone disk, migrate OS to HDD/SSD.
- Convert MBR to GPT, GPT to MBR, no data loss.
- 1-click adjust disk layout, create volumes at one time.
24/7 Tech Chat
Free Inquiry
Conclusion
To summarise what has been said so far, creating a bootable USB for a Windows server is a simple process. However, we recommend using EaseUS Partition Master to make things easy and safer. This tool makes it simple to create a bootable USB drive. The bootable USB Windows Server has yet to be released by Microsoft. So, if you want to create a USB bootable for Windows Server 2019, you will need to use a safe alternative.
To make the USB bootable via the command line, we have included a full step-by-step guide above. You can use that method as well. Therefore, we recommend that you utilize EaseUS Partition Master, which has a free trial and does the task efficiently. Try it out and see if you can solve the USB bootable problem on your own!
In recent years USB has mostly replaced optical media. It serves a variety of functions, including data transfer, operating system installation, and a boot USB that can be used on any PC. For the most part, a USB is utilized for installation. The task of installing a Windows server from a USB disk is easy.
People nowadays prefer to burn the server 2019 ISO on a USB device to create a bootable drive. The reason for this is you may need to upgrade system server 2019 to a different PC or have a new server at times. You can save server 2019 to a USB to use for installation purposes.
Second, if you have a portable server on a USB, you can transfer it to another computer without restarting over with the installation process.
We will look at how to make a bootable USB in this article. We will also look at a third-party tool that makes the task go faster and easier. Before we get into the details, we recommend you download the Windows Server.iso file from Microsoft official website. Go to the Microsoft website.
Once you click on the link, select ISO and fill in the requirement to download. You can download the trial version with some additional features of App Compatibility FOD. This feature improves the compatibility of the server as well as the troubleshooting and debugging.
Now let’s take a look at the details.
| Workable Solutions | Step-by-step Troubleshooting |
|---|---|
| Fix 1. Create Windows Server 2019 Bootable USB from ISO | Insert the USB drive and run Command Prompt…Full steps |
| Fix 2. Create a USB Bootable for Windows Server Installation by Third-Party Tool (Easier) | Connect USB to PC and start to create bootable…Full steps |
How to Create Windows Server 2019 Bootable USB from ISO
You must complete the prerequisites before beginning the procedure. You must have the following factors ready ahead of time:
- You must be using a USB with an 8GB capacity. While burning, Windows Server 2019 consumes 4GB. Because the ISO image is divided into more than 3GB chunks, it requires extra space.
- The data is completely erased during the disk creation process. Always make a complete backup of your data. You will lose your important info if you don’t create a backup.
We have already created the prerequisites for making a bootable USB for Windows Server 2019. If you obtained the ISO file from the company’s official website, you can use the command line to boot a USB disk. Follow the steps outlined below in detail:
Step 1. Insert the USB drive on your PC. Go to Start and type cmd in the search box. Click on Run as administrator to open a command prompt.
Step 2. Type command diskpart and press enter. The diskpart tool will appear.
Step 3. Type the following command one by one and press enter:
- list disk and press enter to appear disk list.
- select disk x
Here x denotes the number of your flash drive. You can enter the disk name which you want to make bootable.
Type the following commands one by one:
- clean
- create partition primary
- select partition 1
you will select the partition as per your own requirement
- format fs=ntfs quick (if you want to create UEFI bootable USB, type «format fs=fat32 quick»).
- active
Step 4. Type Exit and press enter. It will close the diskpart command.
You have built a Bootable USB from ISO by following the steps outlined above. In the Windows Operating System, the command-line approach is a built-in feature. It is one of the simplest methods for creating a bootable USB. By typing a few commands you can make your USB bootable. The USB can be used on any other system.
We have now seen how to use the built-in feature. Now we will look at a third-party utility tool that can help make the task easy and quick.
Easier Solution: How to Create a USB Bootable for Windows Server Installation
Note: Before you begin the process make sure you back up your data and your USB has enough space of 8GB at least.
On Windows Server, Microsoft has not included a feature to generate bootable USB drives. We recommend using EaseUS Partition Master, a third-party utility. This software is a disk partition manager that is available for free. It can assist in the allocation of disk space to improve data storage. This software makes disk management convenient.
24/7 Tech Chat
Free Inquiry
The following are the key features of EaseUS Partition Master:
- It supports converting NTFS to FAT32.
- It is capable of supporting split partition.
- It reduced the frequent restart requirement.
- By correctly assigning the disk space it maximizes system performance.
- Change partition label.
- Flexibly adjust partition size by entering the exact partition size.
- Prevent data loss.
- Safe and secure to use.
- Available for a free trial.
- It formats and deletes the partition HDD, SSD, USB, memory card, SD card so, the device must be reusable.
- To ensure security it entirely wipes out the data on the hard disk.
Steps to Create Bootable USB:
Step 1. To create a bootable disk of EaseUS Partition Master, you should prepare a storage media, like a USB drive, flash drive or a CD/DVD disc. Then, correctly connect the drive to your computer.
Step 2. Launch EaseUS Partition Master, and find the «Bootable Media» feature on the left. Click on it.
Step 3. You can choose the USB or CD/DVD when the drive is available. However, if you do not have a storage device at hand, you can also save the ISO file to a local drive, and later burn it to a storage media. Once made the option, click the «Create» button to begin.
- Check the Warning message and click «Yes».
When the process finishes, you have successfully created an EaseUS Partition Master WinPE bootable disk. Now, you can manage your hard disks and partitions through the bootable drive whenever the computer fails to boot normally.
If you have RAID drives, load the RAID driver first by clicking Add Driver from the menu bar, which can help you add the driver of your device under WinPE environment, as some specific device cannot be recognized under WinPE environment without drivers installed, such as RAID or some specific hard disk.
To easily create a USB using a trusted third-party tool. The best solution is EaseUS Partition Master. It formats external devices, manages partitions flexibly, and efficiently allocates space.
EaseUS Partition Master Enterprise
Your trustworthy Windows Server disk manager.
- Extend System drive, combine/split partitions.
- Clone disk, migrate OS to HDD/SSD.
- Convert MBR to GPT, GPT to MBR, no data loss.
- 1-click adjust disk layout, create volumes at one time.
24/7 Tech Chat
Free Inquiry
Conclusion
To summarise what has been said so far, creating a bootable USB for a Windows server is a simple process. However, we recommend using EaseUS Partition Master to make things easy and safer. This tool makes it simple to create a bootable USB drive. The bootable USB Windows Server has yet to be released by Microsoft. So, if you want to create a USB bootable for Windows Server 2019, you will need to use a safe alternative.
To make the USB bootable via the command line, we have included a full step-by-step guide above. You can use that method as well. Therefore, we recommend that you utilize EaseUS Partition Master, which has a free trial and does the task efficiently. Try it out and see if you can solve the USB bootable problem on your own!
This blog post covers how you can create a bootable USB media drive to install Windows Server 2019 on a physical server. This blog post will not use any third-party tools; it only uses built-in tools that you can find on Windows 10 or Windows Server. Depending on your system you will need it to install it on a BIOS system or a UEFI based system, which is slightly different since UEFI will use GPT disks and BIOS will use an MBR disk. Here is how you create a USB Drive for a Windows Server 2019 installation.
Getting ready to create a USB Drive for a Windows Server 2019 Installation
First, you will need to have all the prerequisites in place.
- Download the Windows Server 2019 ISO File
- A USB Drive with at least 8GB size
Windows Server 2019 USB Thumb Drive for UEFI (GPT) systems
To create the USB drive to install Windows Server 2019 on a UEFI (GPT system, you do the following steps:
- The at least an 8GB USB drive has to be formatted in FAT32
- The USB needs to be GPT and not MBR
- Copy all files from the ISO to the USB drive
This is it, and here is how you do it. First, plug in your USB drive to your computer.
Open a PowerShell using the Run as Administrator option. You will need to change the path of the Windows Server 2019 ISO, and you will need to replace the USB Friendly Name in the script.
REMINDER: The following commands will wipe the USB Drive completely. So backup everything before you run through the PowerShell.
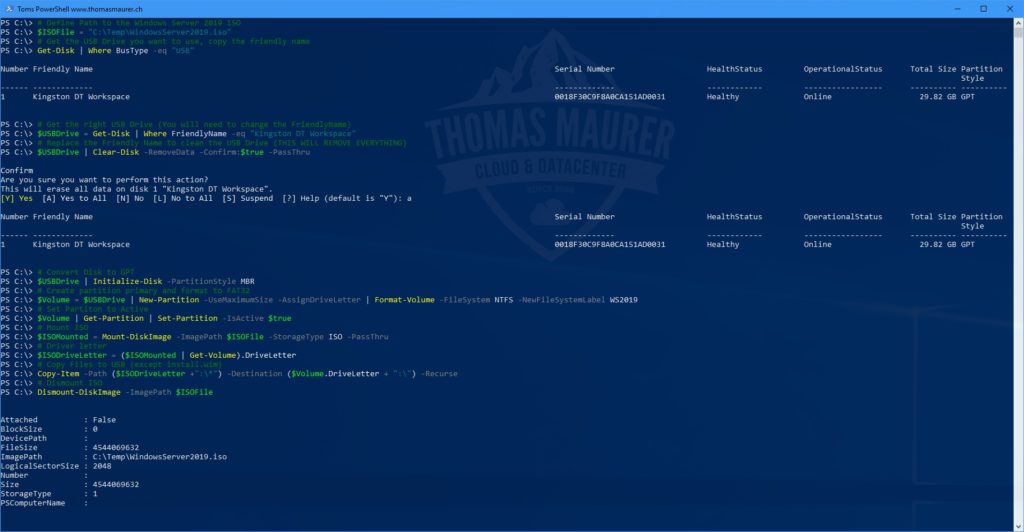
# Define Path to the Windows Server 2019 ISO
$ISOFile = "C:TempWindowsServer2019.iso"

# Get the USB Drive you want to use, copy the friendly name
Get-Disk | Where BusType -eq "USB"

# Get the right USB Drive (You will need to change the FriendlyName)
$USBDrive = Get-Disk | Where FriendlyName -eq "Kingston DT Workspace"

# Replace the Friendly Name to clean the USB Drive (THIS WILL REMOVE EVERYTHING)
$USBDrive | Clear-Disk -RemoveData -Confirm:$true -PassThru

# Convert Disk to GPT
$USBDrive | Set-Disk -PartitionStyle GPT

# Create partition primary and format to FAT32
$Volume = $USBDrive | New-Partition -UseMaximumSize -AssignDriveLetter | Format-Volume -FileSystem FAT32 -NewFileSystemLabel WS2019

# Mount iso
$ISOMounted = Mount-DiskImage -ImagePath $ISOFile -StorageType ISO -PassThru

# Driver letter
$ISODriveLetter = ($ISOMounted | Get-Volume).DriveLetter

# Copy Files to USB
Copy-Item -Path ($ISODriveLetter +":*") -Destination ($Volume.DriveLetter + ":") -Recurse

# Dismount ISO
Dismount-DiskImage -ImagePath $ISOFile
After that, you can safely remove the USB drive and use it to boot your server from.
Important:
If Install.wim is larger than 4GB, you cannot copy the file to the drive, because of the FAT32 based partition limitation. The solution for this is to split the wim file into smaller files.
split wim file using dism (you may have to change the drive letters):
dism /Split-Image /ImageFile:e:sourcesinstall.wim /SWMFile:k:sourcesinstall.swm /FileSize:4096
Windows Server 2019 USB Thumb Drive for BIOS (MBR) systems
To create the USB drive to install Windows Server 2019 on BIOS (MBR) systems, you can follow these steps:
- The at least an 8GB USB drive has to be formatted in NTFS
- USB drive needs to us MBR
- The partition needs to be set active
- Copy all files from the ISO to the USB Drive
This is it, and here is how you do it. First, plug in your USB drive to your computer.
Open a PowerShell using the Run as Administrator option. You will need to change the path of the Windows Server 2019 ISO, and you will need to replace the USB Friendly Name in the script.
REMINDER: The following commands will wipe the USB Drive completely. So backup everything before you run through the PowerShell.
# Define Path to the Windows Server 2019 ISO
$ISOFile = "C:TempWindowsServer2019.iso"

# Get the USB Drive you want to use, copy the friendly name
Get-Disk | Where BusType -eq "USB"

# Get the right USB Drive (You will need to change the FriendlyName)
$USBDrive = Get-Disk | Where FriendlyName -eq "Kingston DT Workspace"

# Replace the Friendly Name to clean the USB Drive (THIS WILL REMOVE EVERYTHING)
$USBDrive | Clear-Disk -RemoveData -Confirm:$true -PassThru

# Convert Disk to MBR
$USBDrive | Set-Disk -PartitionStyle MBR

# Create partition primary and format to NTFS
$Volume = $USBDrive | New-Partition -UseMaximumSize -AssignDriveLetter | Format-Volume -FileSystem NTFS -NewFileSystemLabel WS2019

# Set Partiton to Active
$Volume | Get-Partition | Set-Partition -IsActive $true

# Mount ISO
$ISOMounted = Mount-DiskImage -ImagePath $ISOFile -StorageType ISO -PassThru

# Driver letter
$ISODriveLetter = ($ISOMounted | Get-Volume).DriveLetter

# Copy Files to USB
Copy-Item -Path ($ISODriveLetter +":*") -Destination ($Volume.DriveLetter + ":") -Recurse

# Dismount ISO
Dismount-DiskImage -ImagePath $ISOFile
After that, you can safely remove the USB drive and use it to boot your server from to install Windows Server 2019.
If you have any questions, please let me know in the comments.
Tags: BIOS, Boot from USB, Format Disk, gpt, Install USB Drive, Install Windows Server 2019, installation, iso, MBR, Microsoft, Mount ISO, PowerShell, UEFI, USB, USB Drive, USB media drive, USB Windows Server 2019, Windows Server, Windows Server 2019 Last modified: November 22, 2021
About the Author / Thomas Maurer

Thomas works as a Senior Cloud Advocate at Microsoft. He engages with the community and customers around the world to share his knowledge and collect feedback to improve the Azure cloud platform. Prior joining the Azure engineering team, Thomas was a Lead Architect and Microsoft MVP, to help architect, implement and promote Microsoft cloud technology.
If you want to know more about Thomas, check out his blog: www.thomasmaurer.ch and Twitter: www.twitter.com/thomasmaurer
Обновлено 18.09.2020
![]()
И добрый день! Очень рад вас вновь видеть, уважаемые читатели и гости IT блога Pyatilistnik.org. На дворе уже 2019 год, а это значит, что Microsoft готова нас с вами перевести на новый продукт в серверном сегменте. В прошлый раз я вам рассказывал, как производится установка Windows Server 2016. Данная операционная система заимела очень хорошую оценку, это вам не десятка и Microsoft тут особо не экспериментирует, это же корпоративный сегмент, приносящий основные дивиденды. Сегодня я вам покажу, процесс установки Windows Server 2019 Standard, и мы разберем что нового в данной ОС. Уверен, что вам будет интересно.
Чистая установка windows server 2019
Когда речь идет, о сервере, то ни один уважающий себя администратор, не будет производить обновление одной версии на другую, это вам не клиентские операционные системы, где например, Windows 7 обновляли до Windows 10. Так как это сервер, то и у него ответственность иная, он предоставляет пользователям и клиентам сервисы компании, нужные для бизнес процесса или получения прибыли, поэтому тут все серьезнее.
Правильнее производить чистую установку на виртуальную машину или физический сервер, и уже потом на него переводить (мигрировать) нужные вам сервисы со старого сервера, причем за счет нововведений Windows Server 2019.
Из подготовительных действий вам нужно выполнить три действия:
- Ознакомиться с редакциями Windows Server 2019 и лицензирование, так как это очень важный этап позволяющий провести расчеты по деньгам и по возможности не переплатить
- Скачать установочный ISO с Windows Server 2019, в моем примере, это будет редакция Standard
- Подготовить загрузочную флешку или Zalman виртуальный CD-ROM, либо использовать загрузку по сети с WDS-сервера, через PXE протокол.
Я буду производить инсталляцию на тестовом стенде, поэтому у меня это будет простое монтирование ISO в виртуальную машину, вы же должны выбрать удобный для себя метод. Первым делом, когда вы вставили загрузочное устройство, вам в BIOS нужно выставить загрузку с него, так называемый приоритет загрузки.
Когда все сделано как нужно, то после перезагрузки сервера у вас появится сообщение, о выборе загрузки с диска с дистрибутивом, в виде сообщение «Press any key to boot from CD or DVD» вам нужно успеть нажать «Enter», для того чтобы попасть в мастер установки.

После того, как у вас пробежит белый ползунок загрузки мастера установки, у вас появится приветственное окно «Установка Windows», где вам покажут, что это Windows Server 2019 и предложат выбрать три пункта, которые напоминаю, будут распространятся только на интерфейс мастера инсталляции:
- Устанавливаемый язык — я выставлю Русский, родной
- Формат времени и денежных единиц — Русский (Россия)
- Метод ввода (раскладка клавиатуры) — Русская
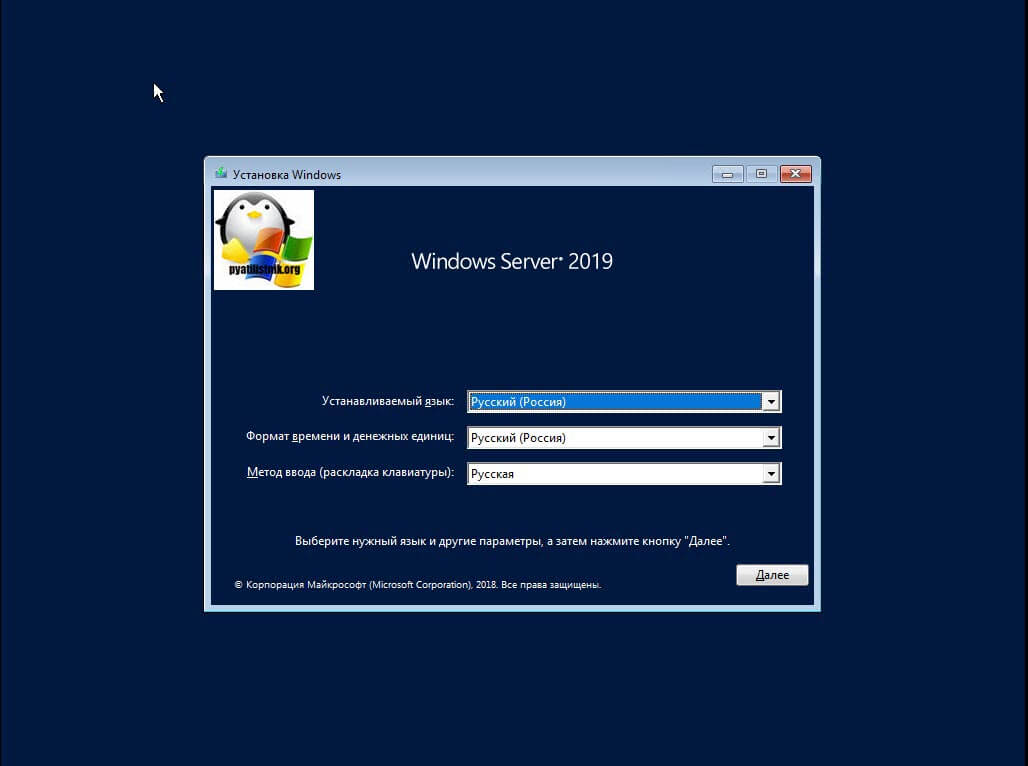
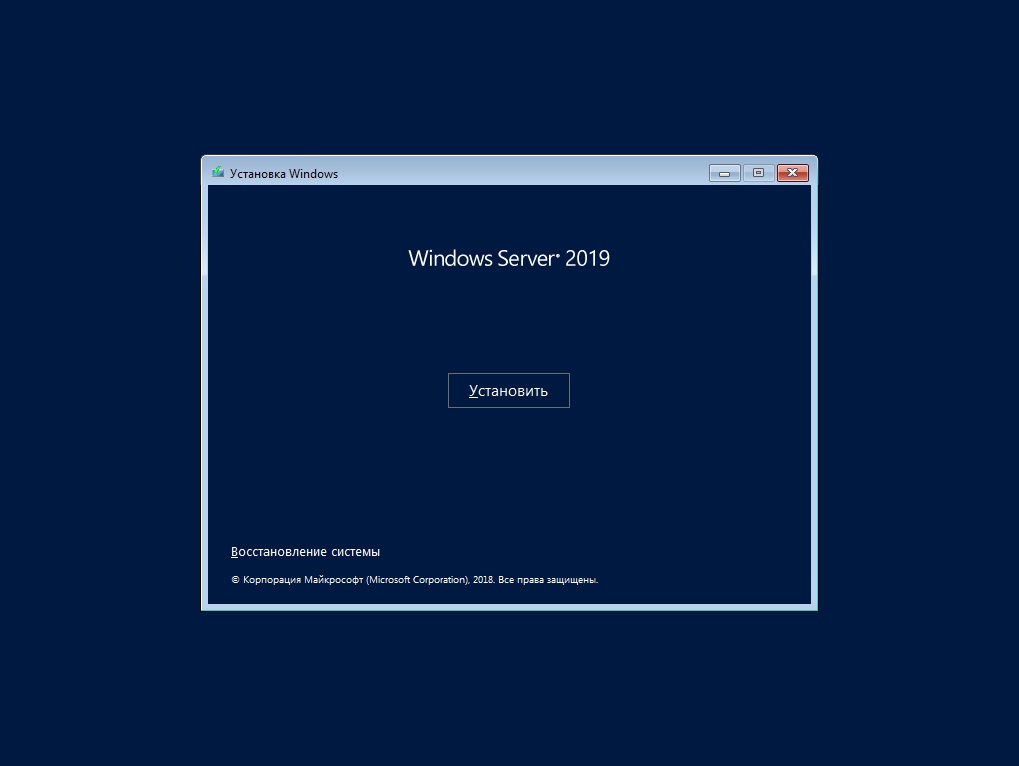
После чего можете смело нажимать «Далее». На следующем окне мастера установки Windows Server 2019 Standard у вас будет две кнопки. Собственно кнопка «Установка» и ссылка на инструменты восстановления системы. Начнется подготовка «Начало установки».

Далее от вас потребуют указать, какую операционную систему систему вы выбираете, на выбор будет четыре варианта, два с графическим интерфейсом, а два в режиме ядра (Core), но разница только в редакции Standard или Datacenter. Выбираем нужную и нажимаем «Далее».
Хочу отметить, что если вы даже установили Server Core, то вы не можете на него установить графический интерфейс
Теперь если вы совсем упоротый, то полностью изучаем и читаем условия лицензии, после чего их принимаем, ставя соответствующую галку «Я принимаю условия лицензии».

Теперь у вас будет самый важный шаг, вы по сути на развилке:
- Обновление: установка Windows с сохранением файлов, параметров и приложений. По сути это установка по верх текущей версии, мало применяемый вариант, только в безвыходной ситуации, когда нужно проверить будет ли работать старое ПО, в основном только в тестовой среде.
- Выборочная: только установка Windows (Для опытных пользователей), это и есть чистая инсталляция Windows Server 2019, то что нам и нужно.
Теперь остался последний подготовительный этап, и заключается он в том, что вам необходимо разметить диск для установки системы. В момем примере, это SSD диск, размеров в 40 гб, в виде незанятого пространства и я просто нажимаю далее. Если у вас уже имеются разделы, то нужно выбрать куда вы будите ставить, обчно делают резервную копию данных, после чего удаляют не нужные разделы.
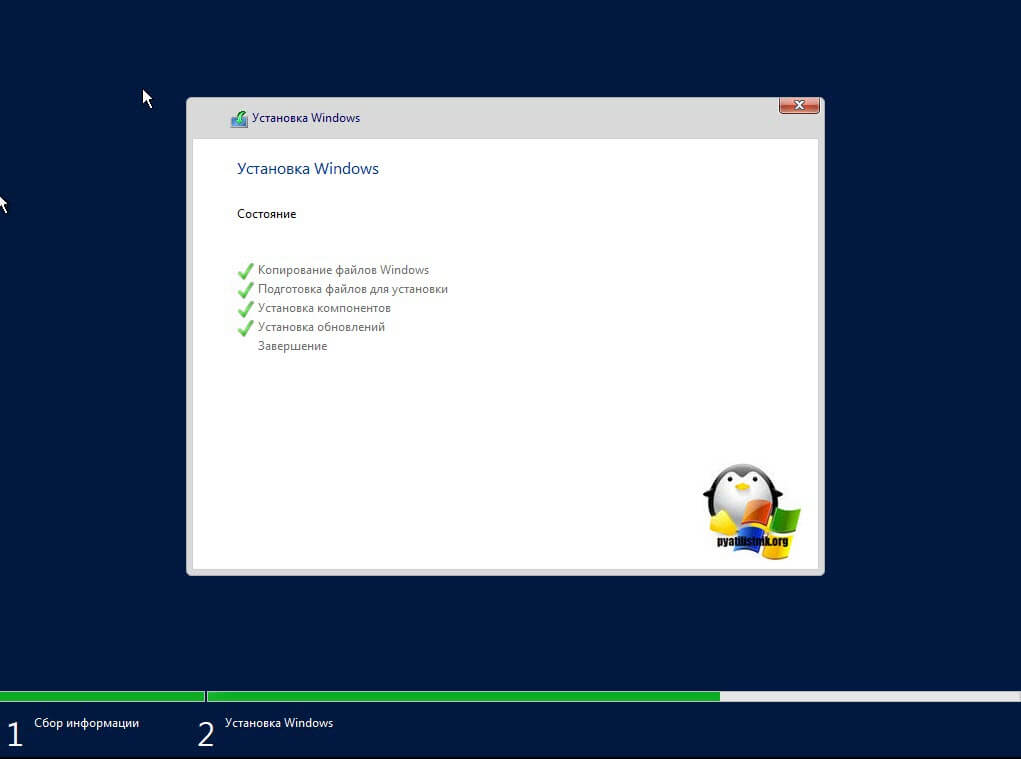
Ну и собственно начинается сам процесс установки виндоус. У вас на первом этапе, мастер инсталляции Windows Server 2019 скопирует с дистрибутива необходимые файлы на локальный диск, после чего начнет их извлечение, а уже потом начнет установку компонентов и обновлений. Как только он это сделает сервер первый раз перезагрузиться, по сути ему больше не нужно будет иметь подключенного загрузочного устройства с дистрибутивом системы.
Вот так вот будет выглядеть завершающий этап
Потребуется еще одна перезагрузка.
Теперь начинается подготовительный этап, где будет определено ваше оборудование и произведены для него настройки
Когда все будет закончено, у вас появится окно «Настройка параметром», где вас попросят указать два раза пароль для учетной записи Администратор, напоминаю, что тут действует правило стойкости пароля.
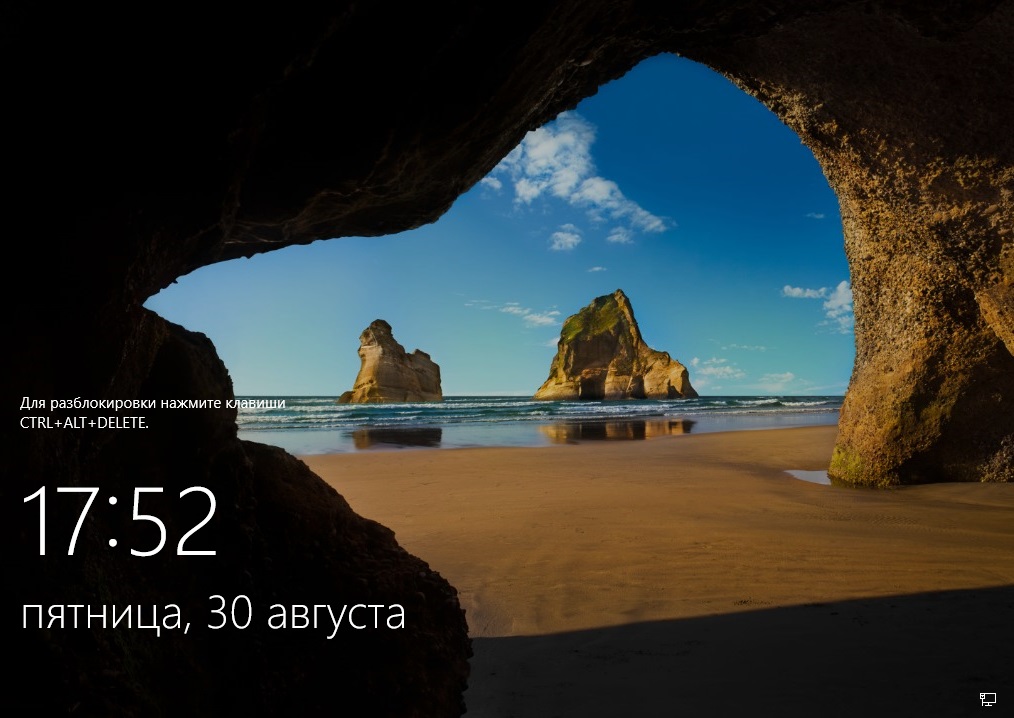
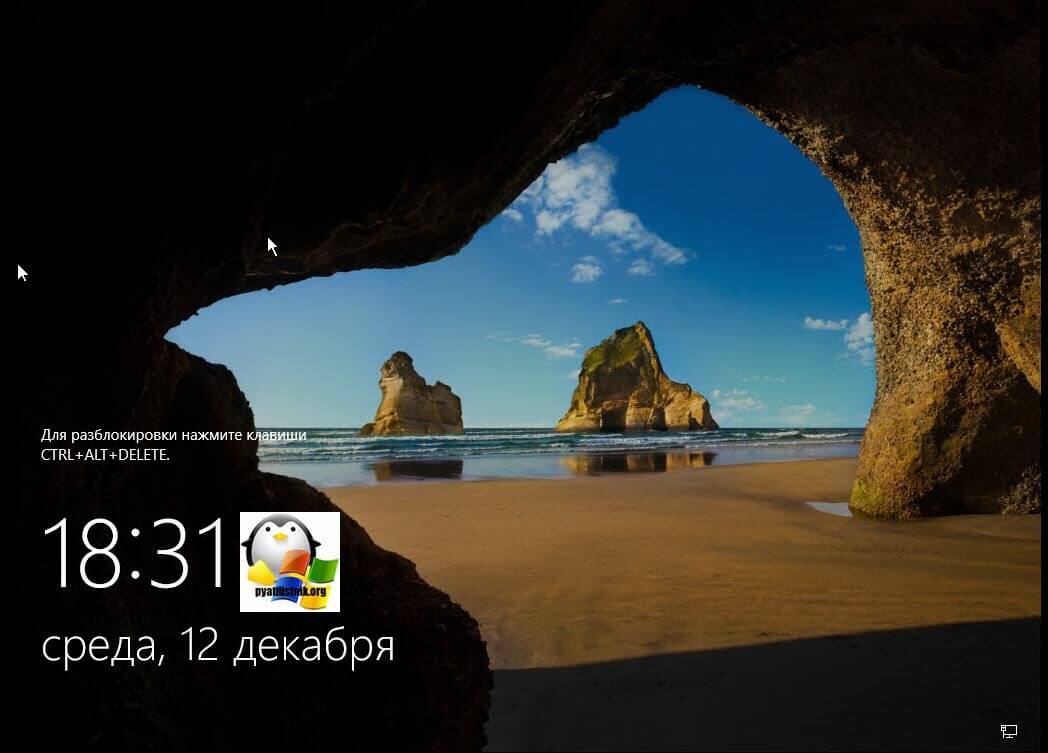
Через мгновение перед вами будет экран аутентификации, нажимаем волшебное сочетание клавиш CTRL+ALT+DELETE
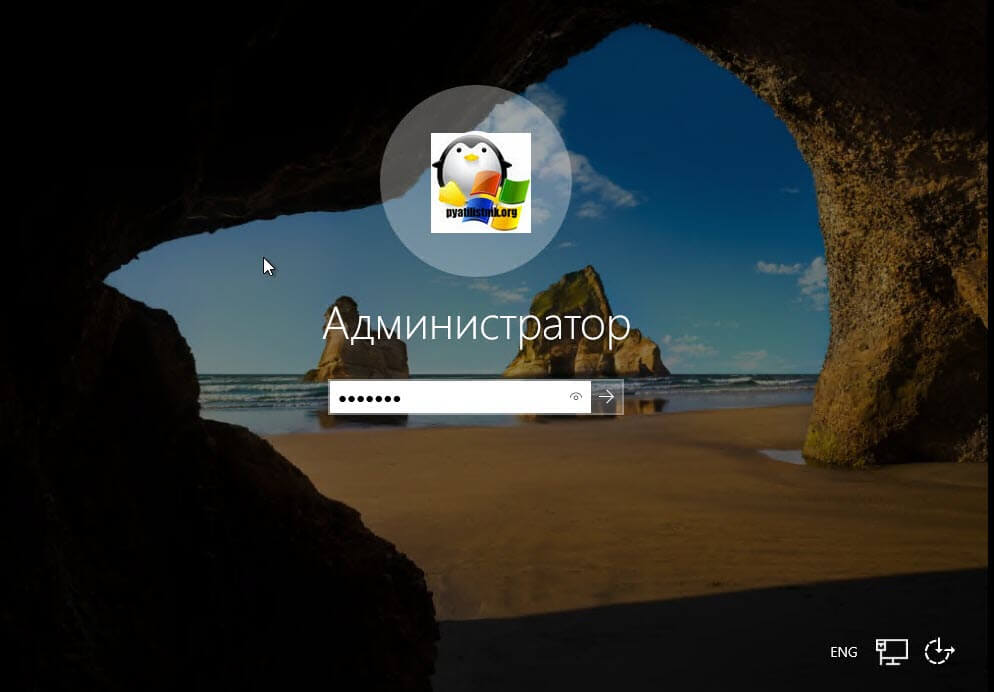
Вводим пароль администратора и логинимся в систему.
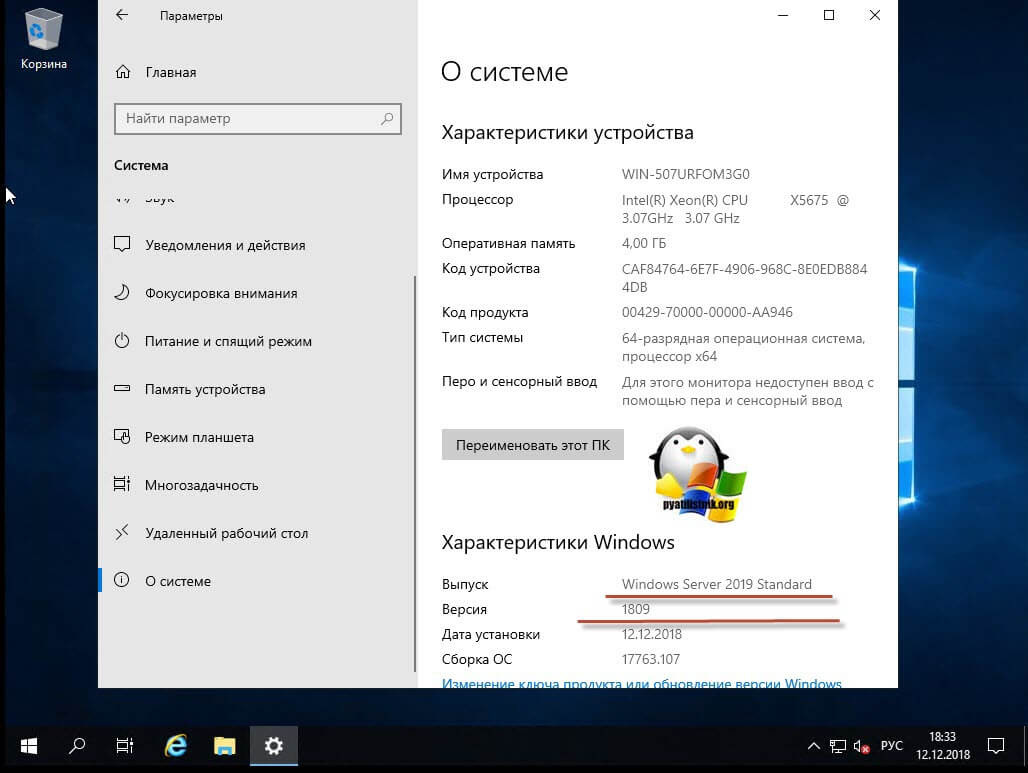
Перед вами будет рабочий стол, для примера я зайду в окно «о системе», где мы видим, что установлена Windows Server 2019 Standard 1809 Сборка 17763.107
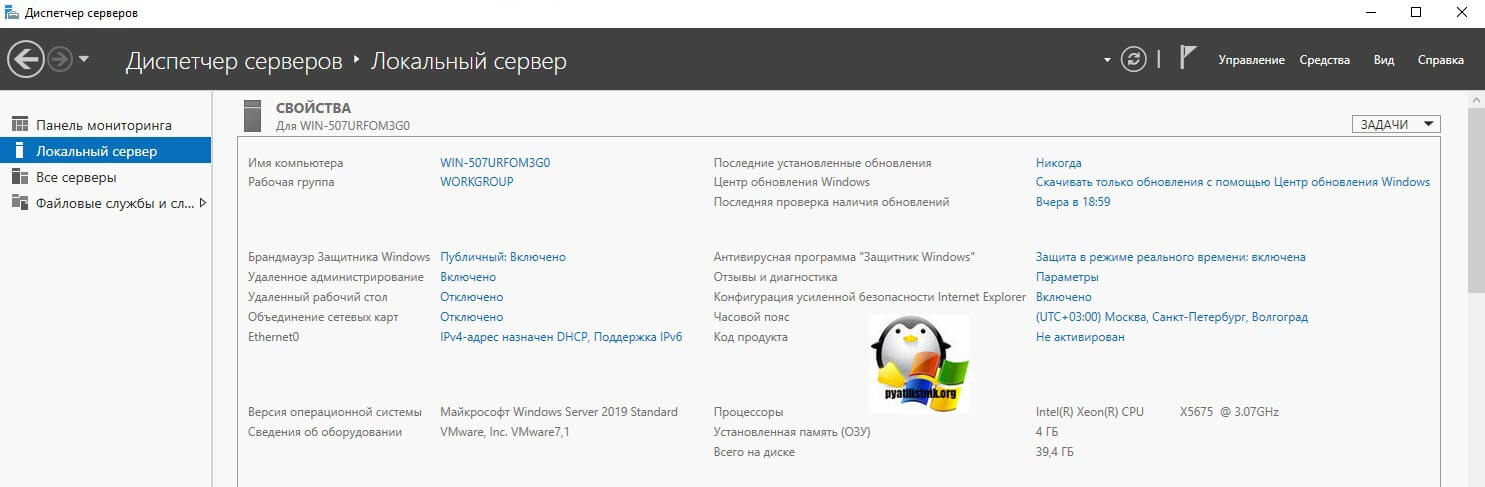
Когда вы попадете на рабочий стол 2019 сервера, то у вас автоматически будет запущено окно диспетчера серверов, как это было и ранее, но тут появился новый нюанс, в виде окна с подсказкой, где компания Microsoft вас уведомит, что появился новый инструмент управления серверами, под названием Windows Admin Center, это кросплатформенный комбайн управления серверами из браузера, думаю он станет через лет пять, основным инструментом для системного администратора, о нем я напишу отдельную статью (Настройка Windows Admin Center)

В диспетчере серверов, у вас все так же будут три вкладки:
- Панель мониторинга
- Локальный сервер
- Все серверы
Вот так вот выглядит окно управления локальным сервером, тут все по старому, здесь вы можете выполнить действия:
- Поменять имя сервера
- Присоединить его к домену предприятия
- Включить брандмауэр
- Включить удаленный доступ RDP
- Объединение сетевых интерфейсов в NIC тиминг
- Настройки безопасности IE
- Скачивание обновлений Windows
- Управление часовым поясом в Windows Server 2019
- Активация Windows Server 2019
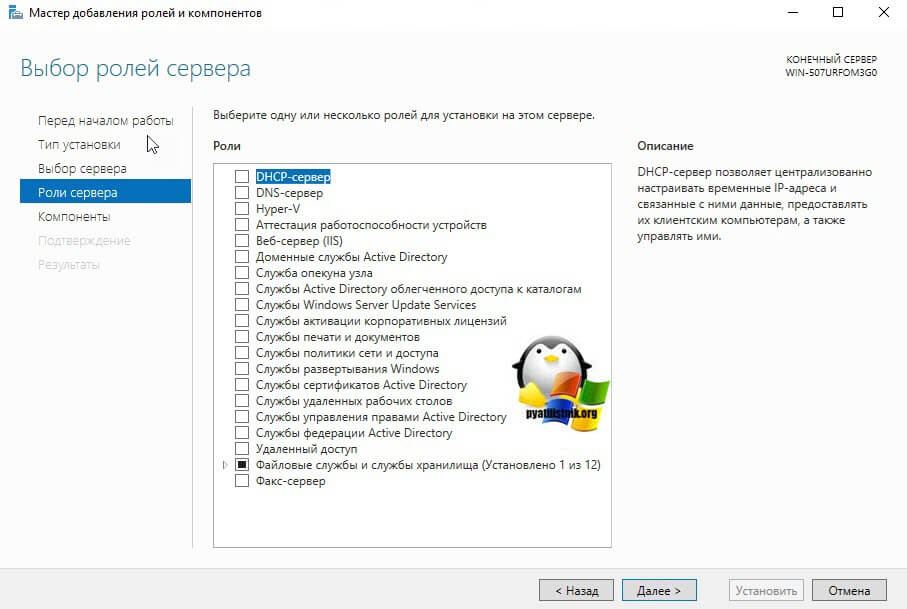
Перед вами список ролей Windows Server 2019, в данной версии операционной системы их 20.
- DHCP-сервер
- DNS-сервер — сервер разрешения имен
- Hyper-V — для виртуализации
- Аттестация работоспособности устройств
- Веб-сервер IIS — организация инфраструктуры веб-приложений
- Доменные службы Active Directory — создание домена на предприятии
- Служба опекуна узла — служба Guardian аттестация и защита ключей, для экранированных виртуальных машин
- Службы Active Directory облегченного доступа к каталогам
- Службы Windows Server Update Services (WSUS)
- Службы активации корпоративных лицензий
- Службы печати и документов
- Службы политики сети и доступа — NPS-сервер
- Службы развертывания Windows — WDS-сервер
- Службы сертификатов Active Directory
- Службы удаленных рабочих столов
- Службы управления правами Active Directory — RMS-сервер
- Службы федерации Active Directory
- Удаленный доступ
- Файловые службы и службы хранилища
- Факс-сервер
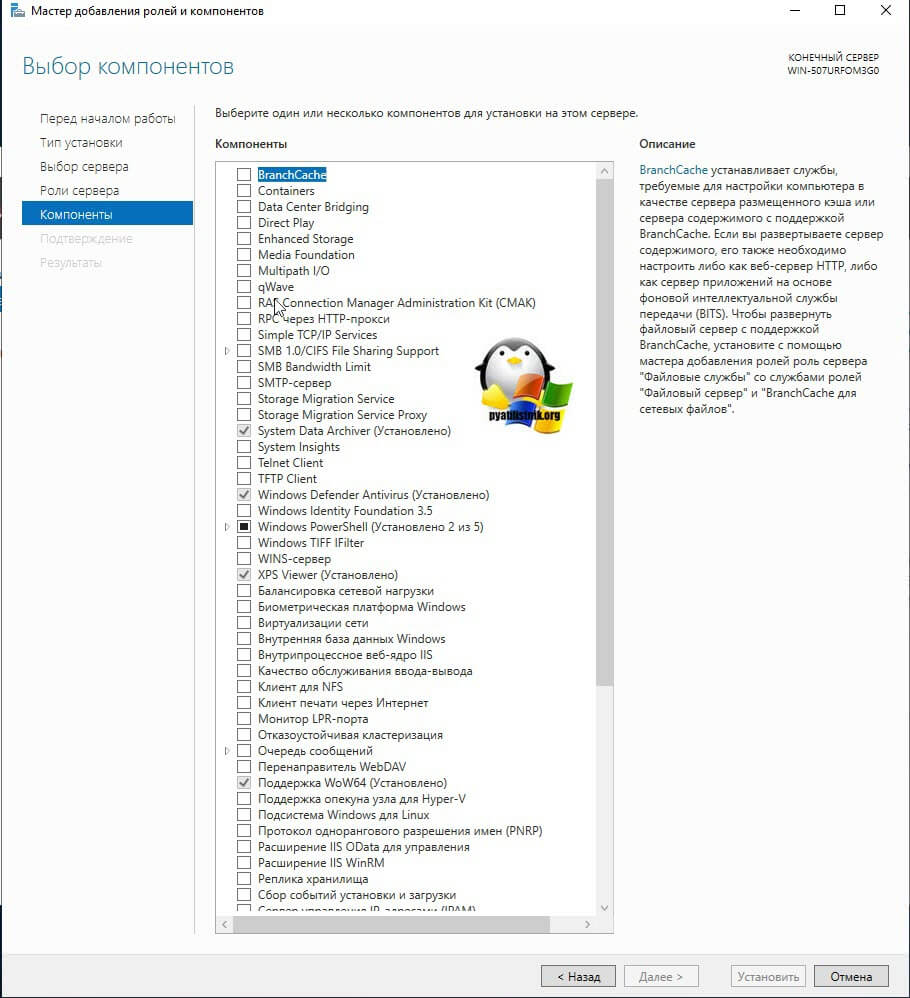
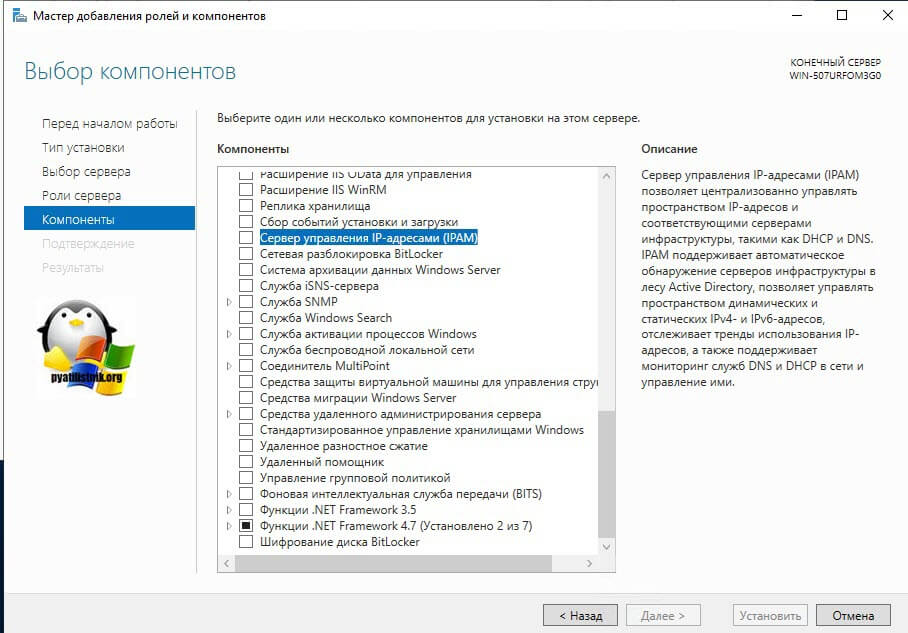
Вот подробный список компонентов в Windows Server 2019
Что улучшили в Windows server 2019
- Как я и писал выше Microsoft начала первую итерации по выводу оснастки «диспетчер серверов (server Manager)» и заменой его на Windows Admin Center, работающий на HTML 5 + WinRM и PowerShell.
- Storage Migrate Service — это решение позволяющее перенести файловые нагрузки на другой сервер, например шары с Windows Server 2008 R2.
- Глобальные изменения в гипервизоре Hyper-V, а именно добавились функции: Host Resource Protection, вложенная виртуализация, Обновление кластера (Rolling Hyper-V Cluster Upgrades), Shielded Virtual Machines, Storage QoS.
- Azure File Sync — данная технология трансформирует традиционные файловые серверы и расширяет объём хранения до практически недостижимых в реальной жизни объёмов.
- Storage Replica — данная технология призвана защитить ваши сервисы от катастроф, по сути это репликация в облако Azure, если у организации, нет своего второго Цода.
- Storage Spaces Direct — в русской локализации, данная технология называется «Локальные дисковые пространства», по сути компонент позволяющий сделать у себя в компании гиперконвергентную инфраструктуру с масштабируемым файловым сервером, упор уже делается на файловую систему ReFS, есть поддержка энергонезависимой памяти, как заверяет Microsoft улучшены алгоритмы дедупликации.
- Cluster sets — теперь в кластерах уже можно собирать более 64 хостов, по заверениям разработчиков, эту цифру они увеличили вдвое
- Теперь можно запускать контейнеры на основе Windows и Linux на одном и том же узле контейнера с помощью одинаковой управляющей программы Docker. Это позволяет работать в разнородной среде узлов контейнеров и предоставить разработчикам гибкость в создании приложений.
- Уменьшение сам дистрибутив платформы, особенно для Server Core и Nano Server, ну и куда же без увеличения производительности
На этом у меня все, если хотите почитать более подробно, что нового в Windows Server 2019, то переходите по ссылке, а с вами был Иван Семин, автор и создатель IT блога Pyatilistnik.org.