
Oracle VM VirtualBox is a free and open-source hosted hypervisor for x86 virtualization, developed by Oracle Corporation. You may want to run multiple VMs on your operating system, with the type 2 virtualization type, this is possible. To achieve this, the following steps below need to be performed. To proceed, ensure you have VirtualBox installed on your device. On how to perform Post OS Installation configuration of Windows Server 2019 Properties, how to install Windows Server 2016 Operating System. Also, you may be interested in my YouTube video on how to setup Windows Server 2019 on a VMware Workstation. On how to install and configure Ubuntu Linux, see the visit link.
Part A: Prepare the Virtualbox environment to hold the windows folders for the new VM. Click on “New” from the Oracle VM VirtualBox Manager. See this guide for how to install Windows Server 2022 on VMware Workstation.

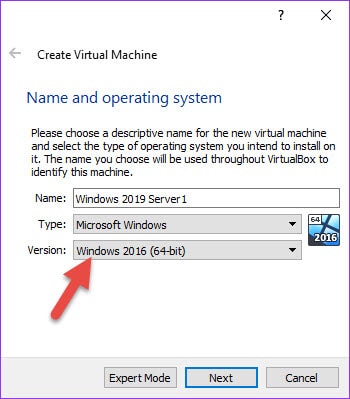
Enter the name, version, desired path to host the VMs and click on continue

Select the memory size as shown below. You can type in the memory size or use the bar to increase it as well.

Click on “create a virtual hard disk now”

This will open the hard disk type window as shown below.
– I will select VDI (Virtual Disk image)

Choose if you wish the hard disk to dynamically increase or use a fixed hard disk file size. I will be using a fixed size which will be entered in the next page

Enter the Hard Disk size of your choice as shown below
– You can also change the file location if you wish from here.

Next, this will create the VM as shown below

Now the VM creation process is complate and VM successfull created.
Part B: To access and attached the Windows Server 2019 ISO file, the following steps should be followed.
Click on the Server and Click or settings or
– Right click on the server and select settings

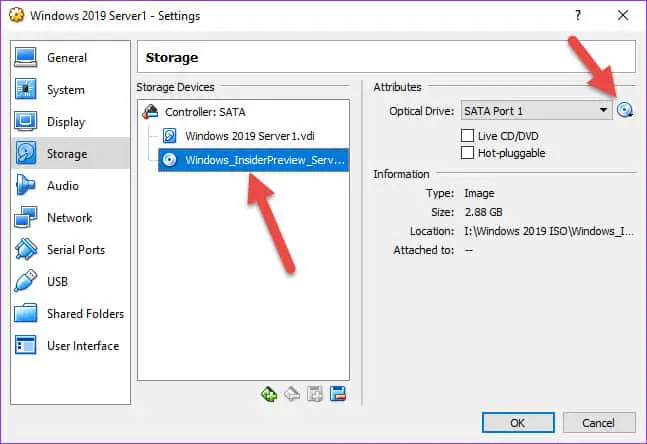
Click on storage
– Click on Empty under the control IDE
– Select the Disk icon and choose the Operating system you wish to install as shown below

As you can see below, the ISO image has been selected. We can now proceed with our installation.

– Click on “ok”. Next, select the VM and click on start to continue the installation of Windows Server 2019.

This will load windows and prompt for the steps in Part C below.
Part C: This step is similar to installing Windows 10, Windows Server 2008, 2012, 2016 on Virtualbox. On the Windows Setup page,
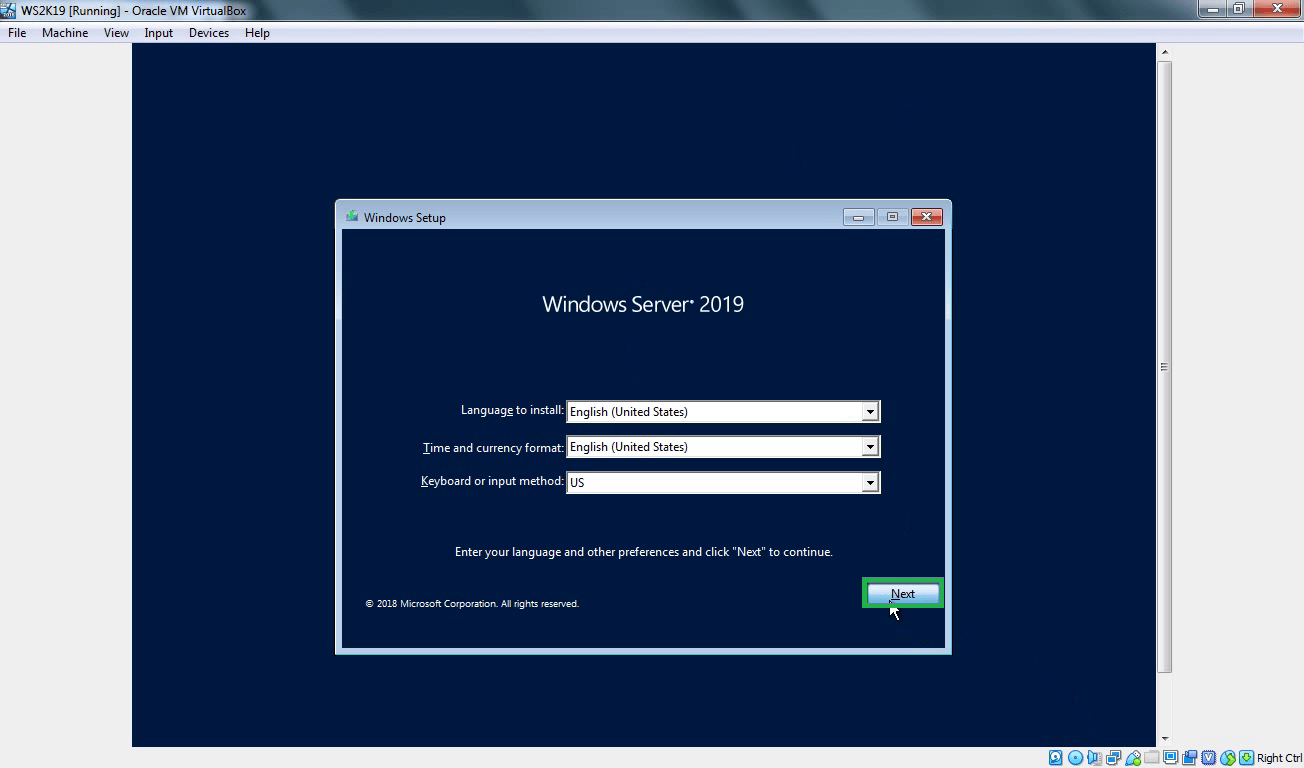
– Select the language to install
– Time and currency format
– Keyboard or input method

Click on Next and Click on “Install now“

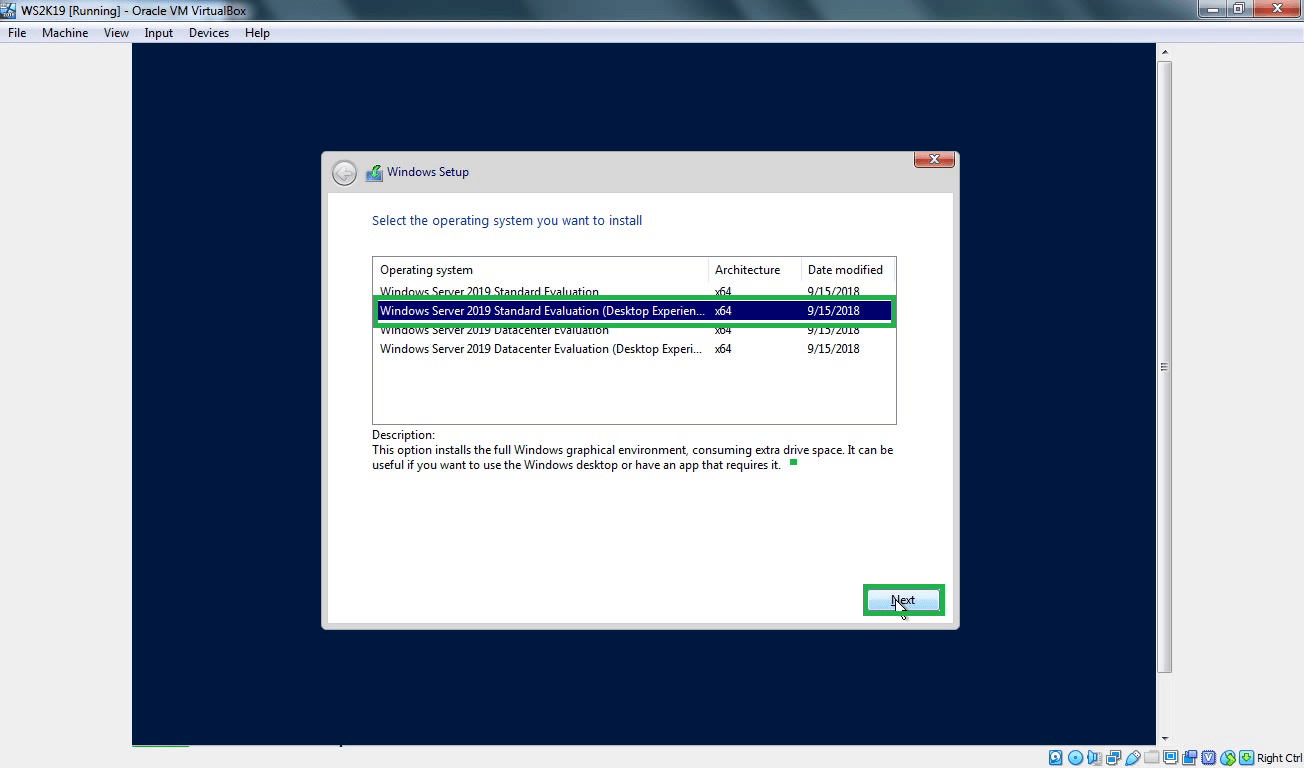
Note: Here you could click on repair your computer if this is the approach you need to take or use “Reset this PC”. See how to repair Windows 10 locally for similar steps. Select the operating system you wish to install and click on Next.

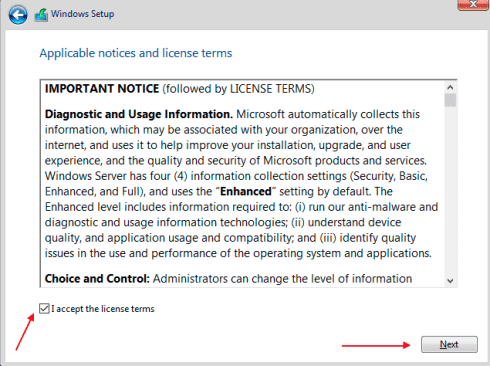
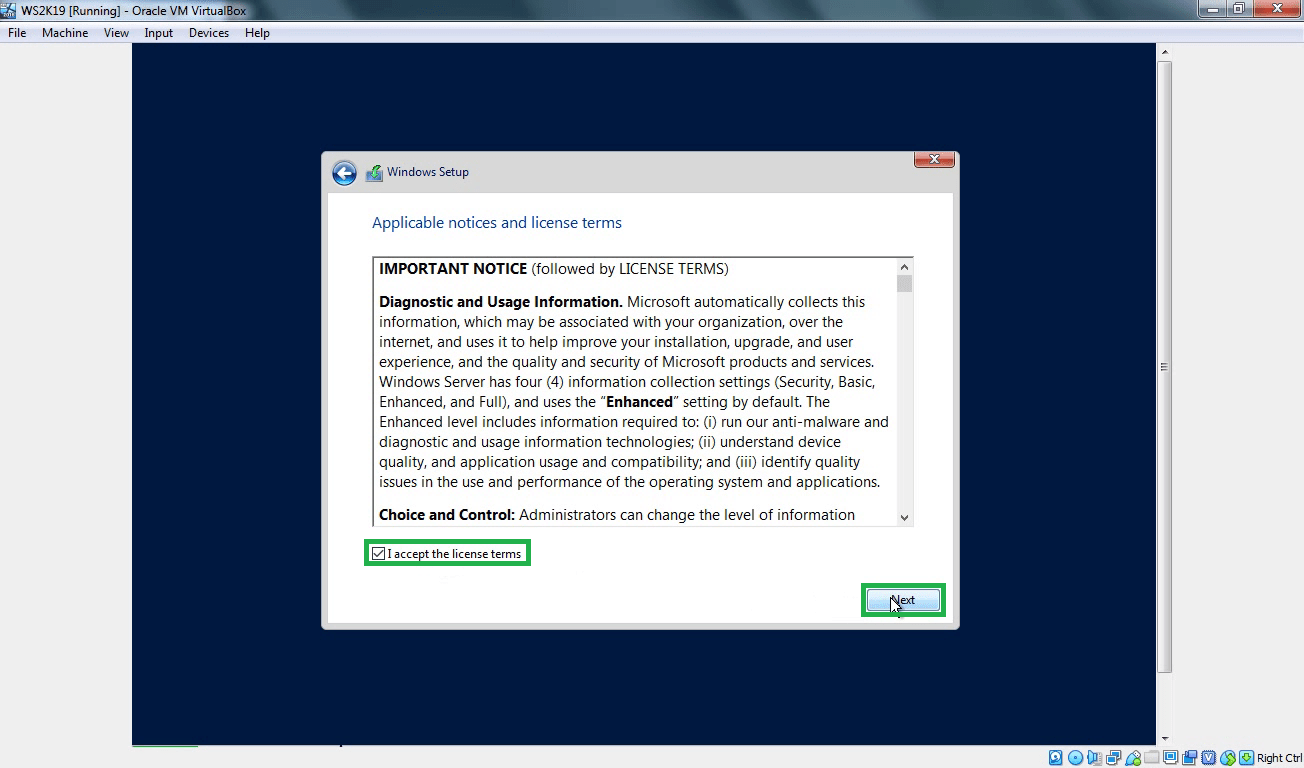
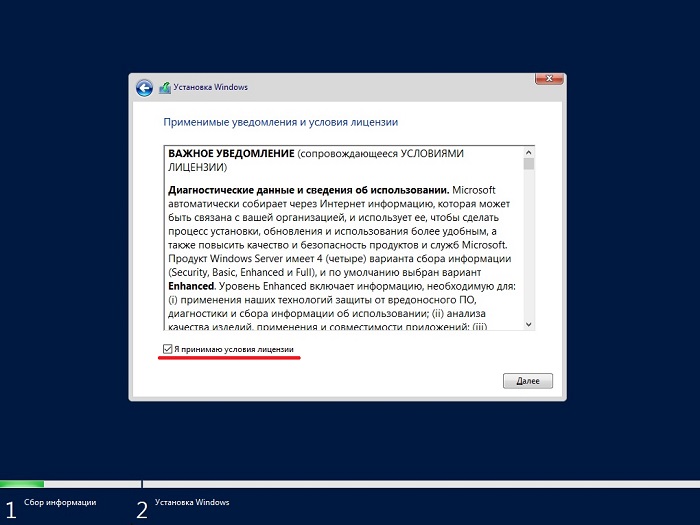
Accept the license agreement as shown below and click on next
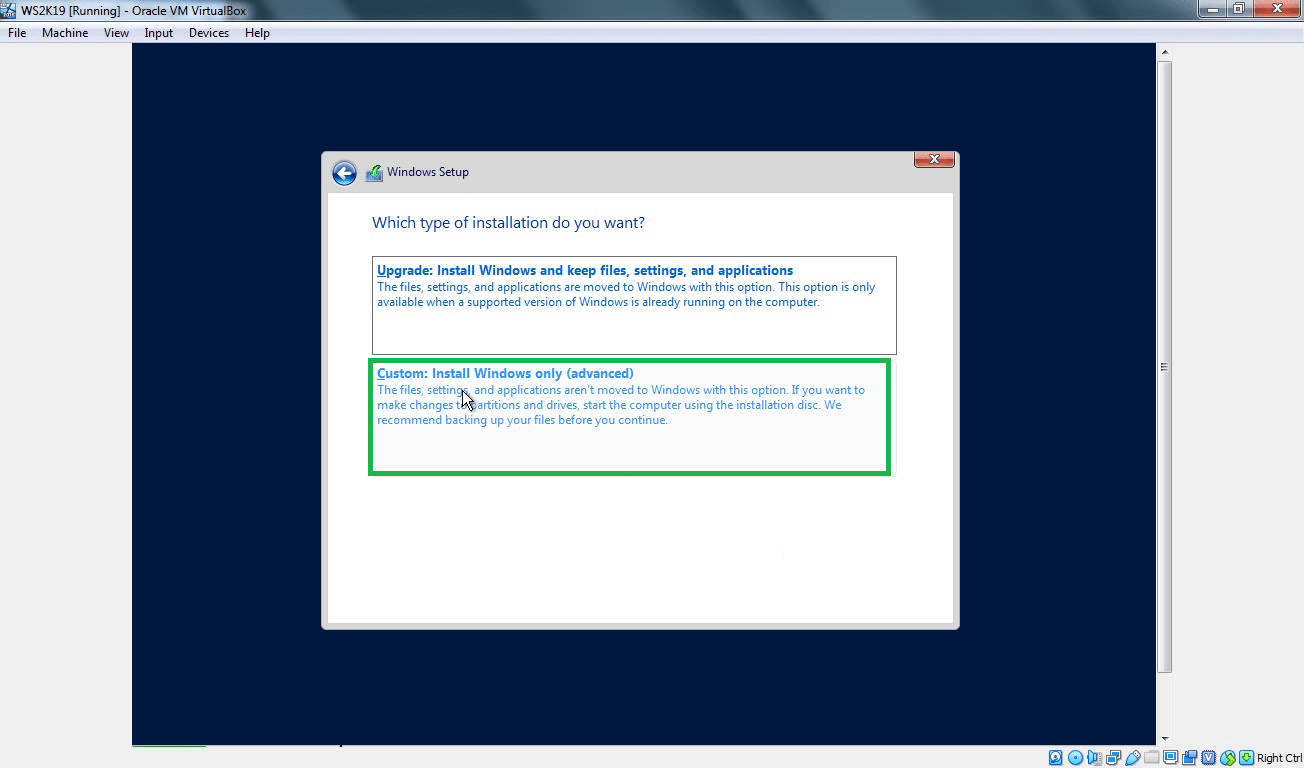
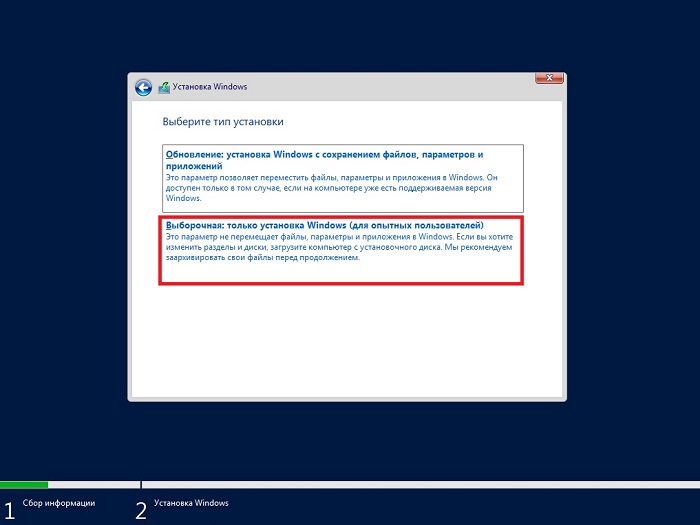
Select custom install as shown below to install Windows
– Select Custom: Install Windows only (advanced)

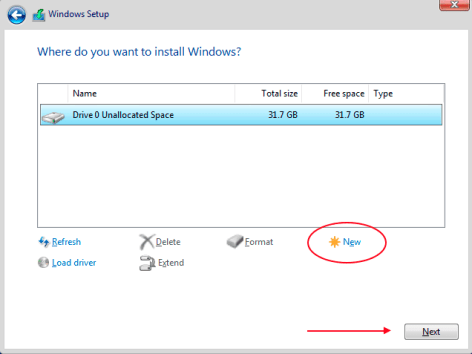
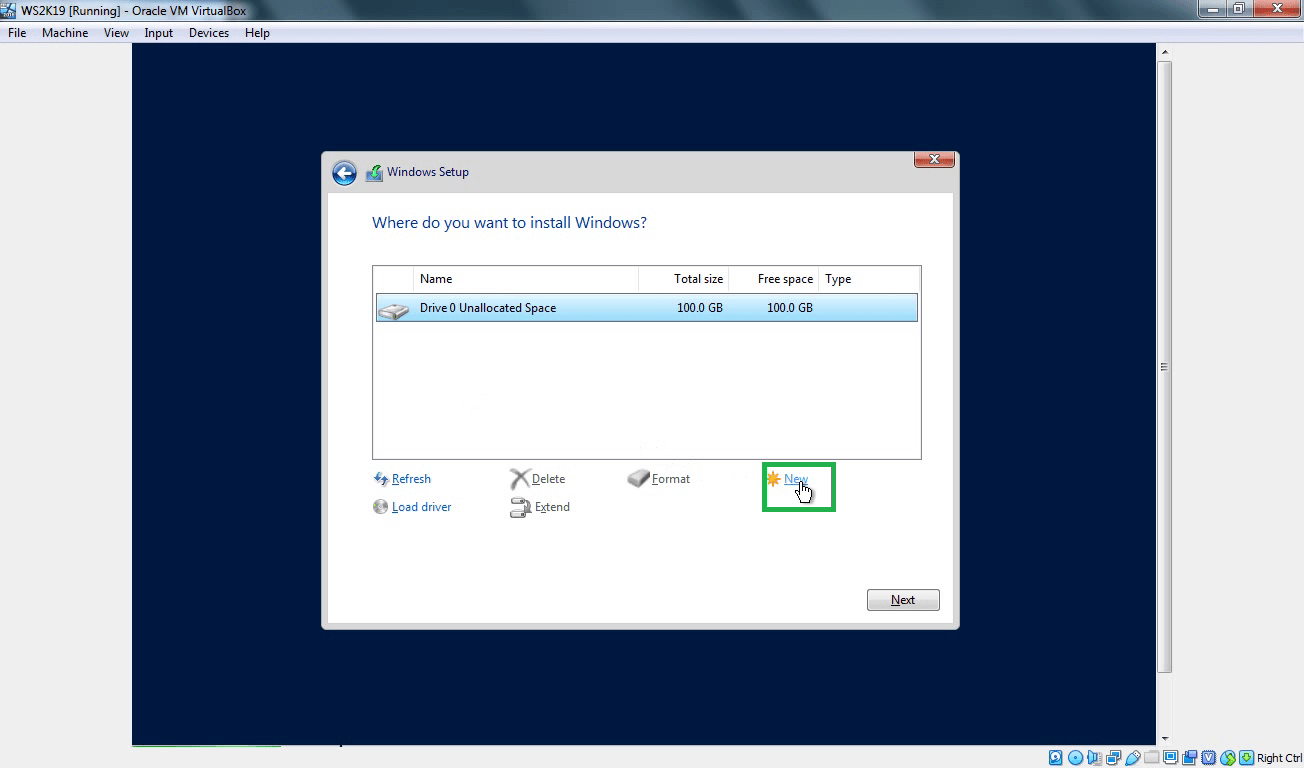
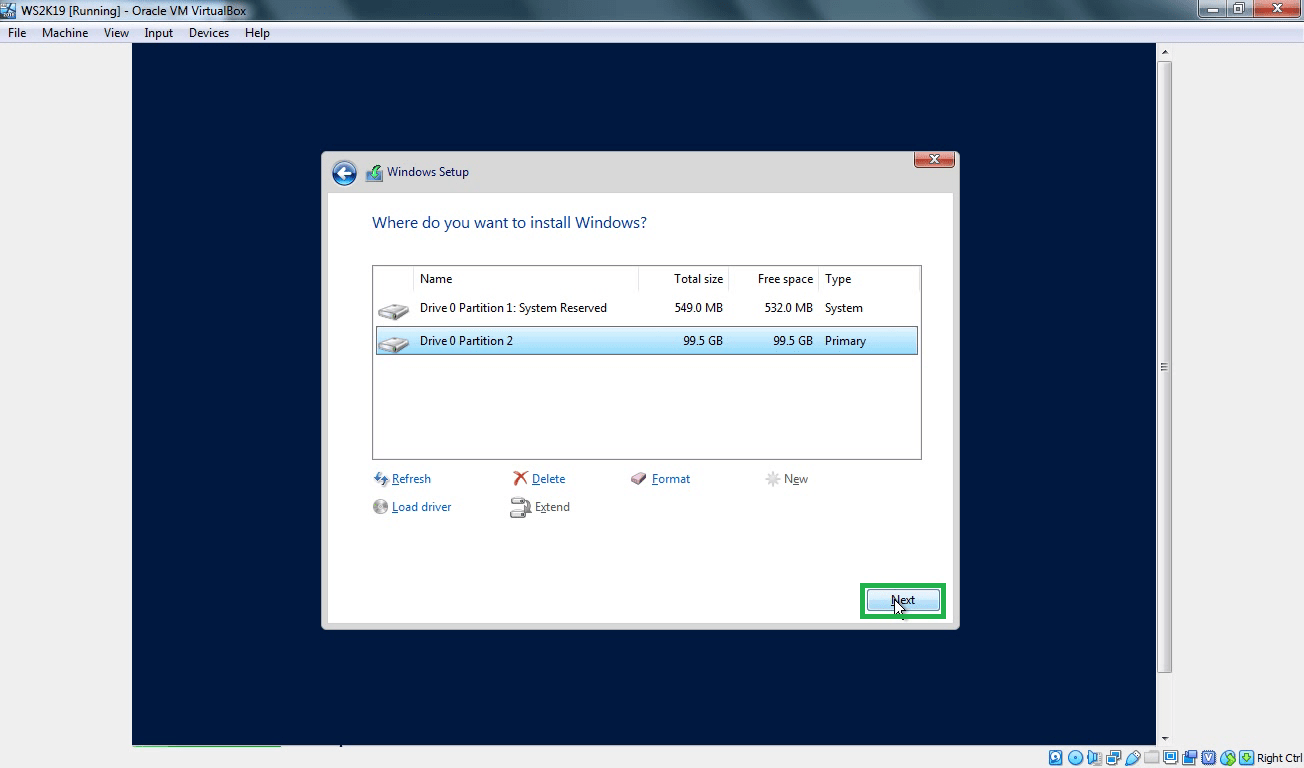
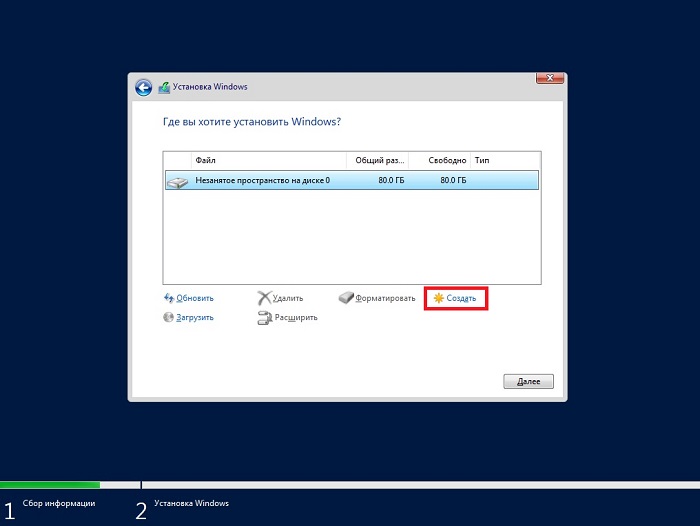
Select the Drive to install Windows and click on Next
Note: You can create an additional drive and install Windows on it. You can also format, delete and extend drives in this window.
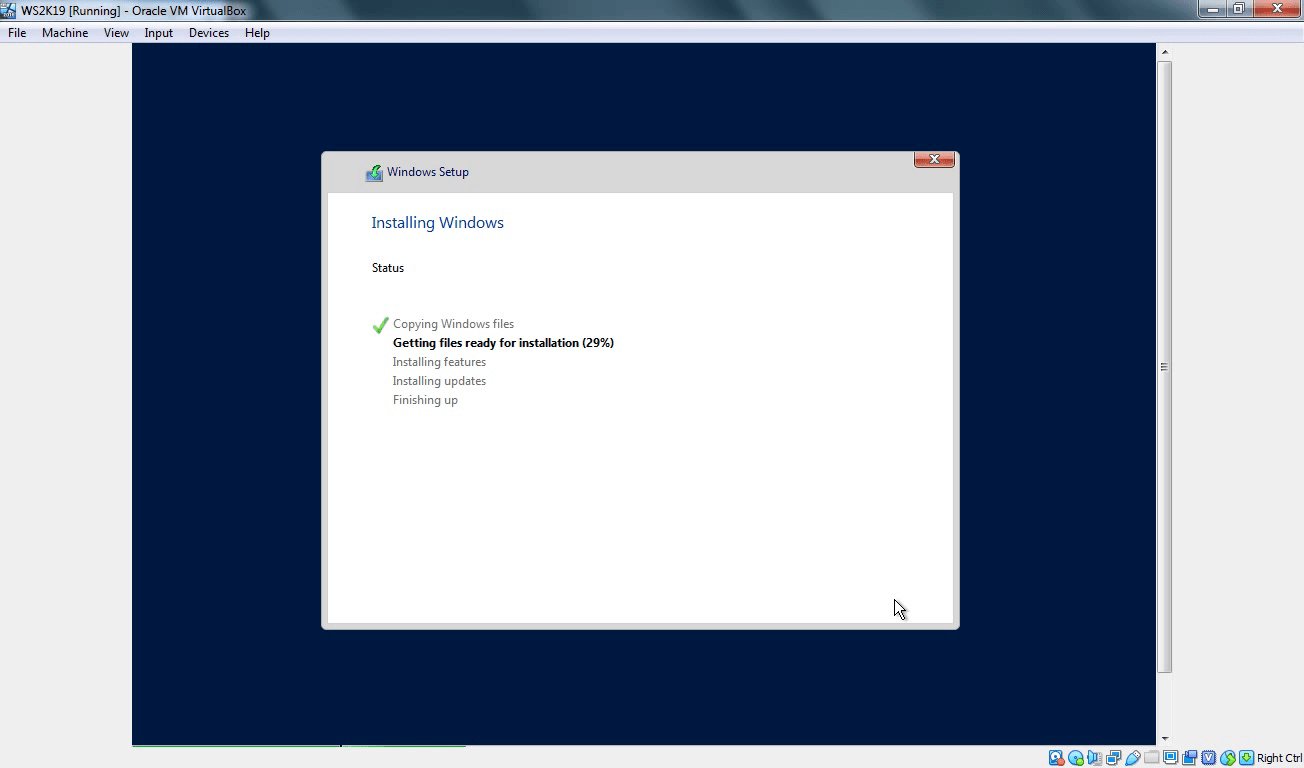
After this step, Windows will be installed unto the system.

When this step complete, the the device will reboot after few seconds
– Note: You can restart immediately

This will prepare and get windows ready as shown below

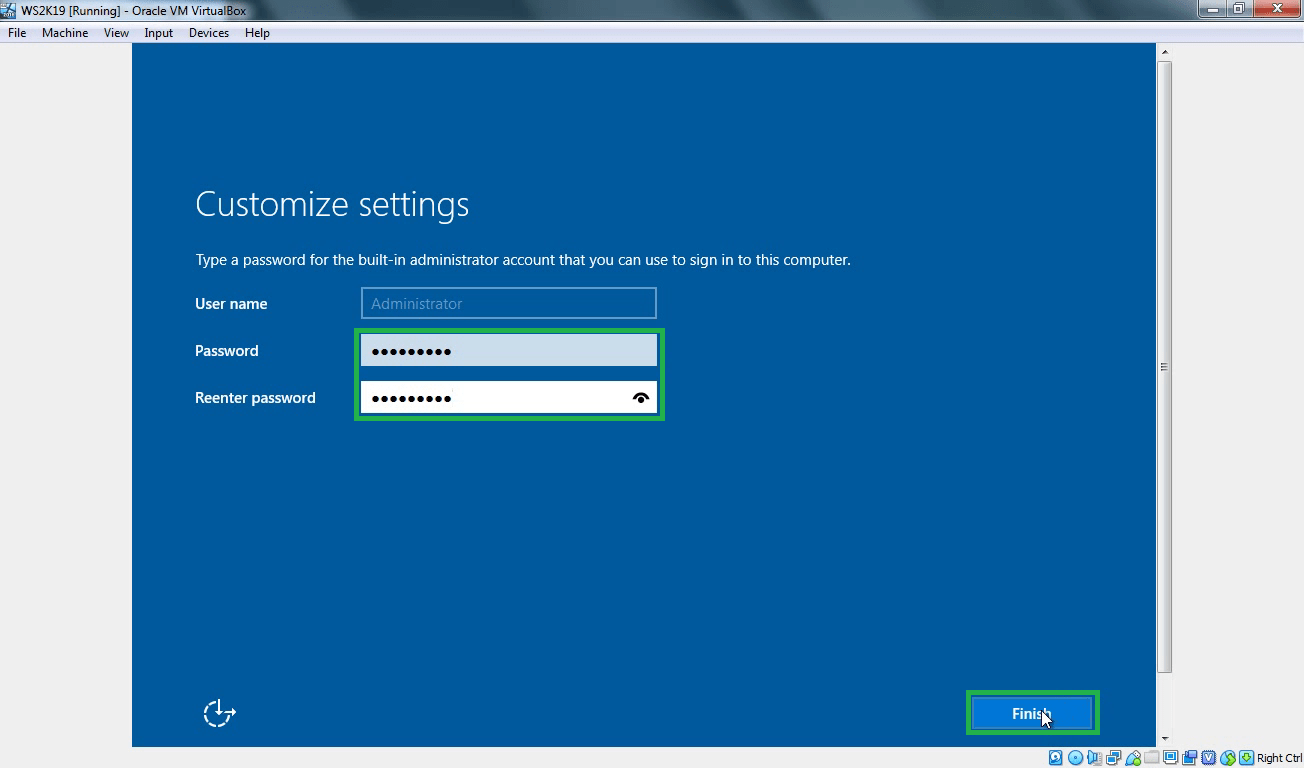
the customise settings window will be displayed. Enter the Password and click on finish to complete Windows Server 2019 Installation.

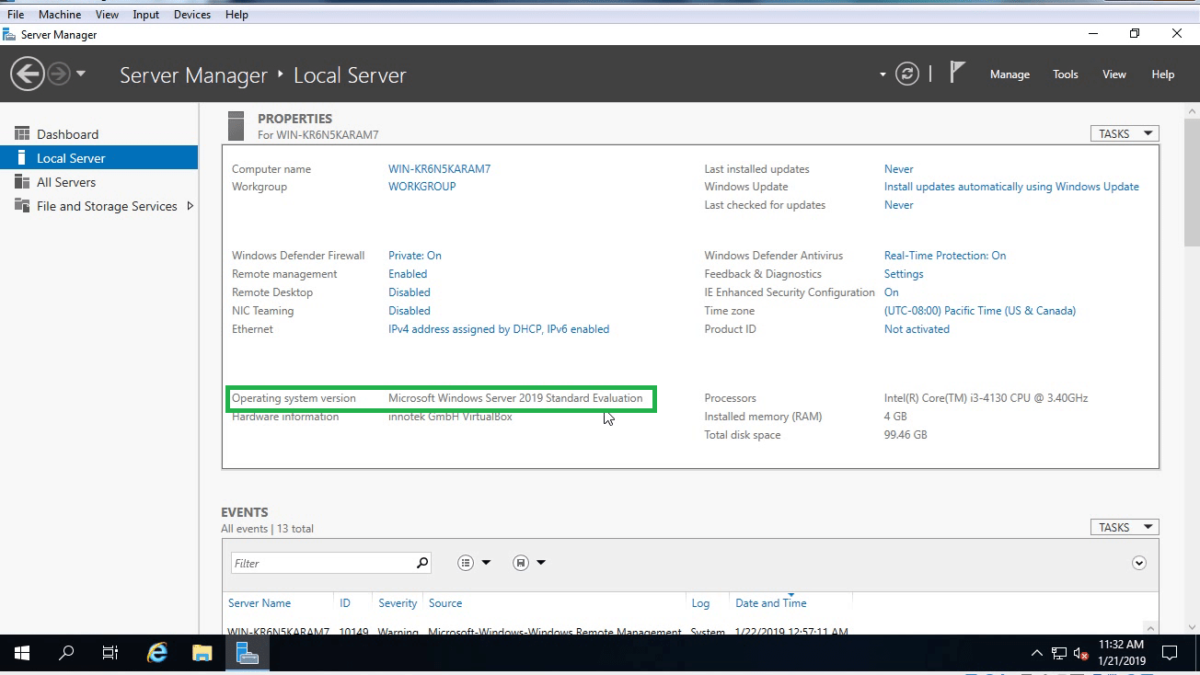
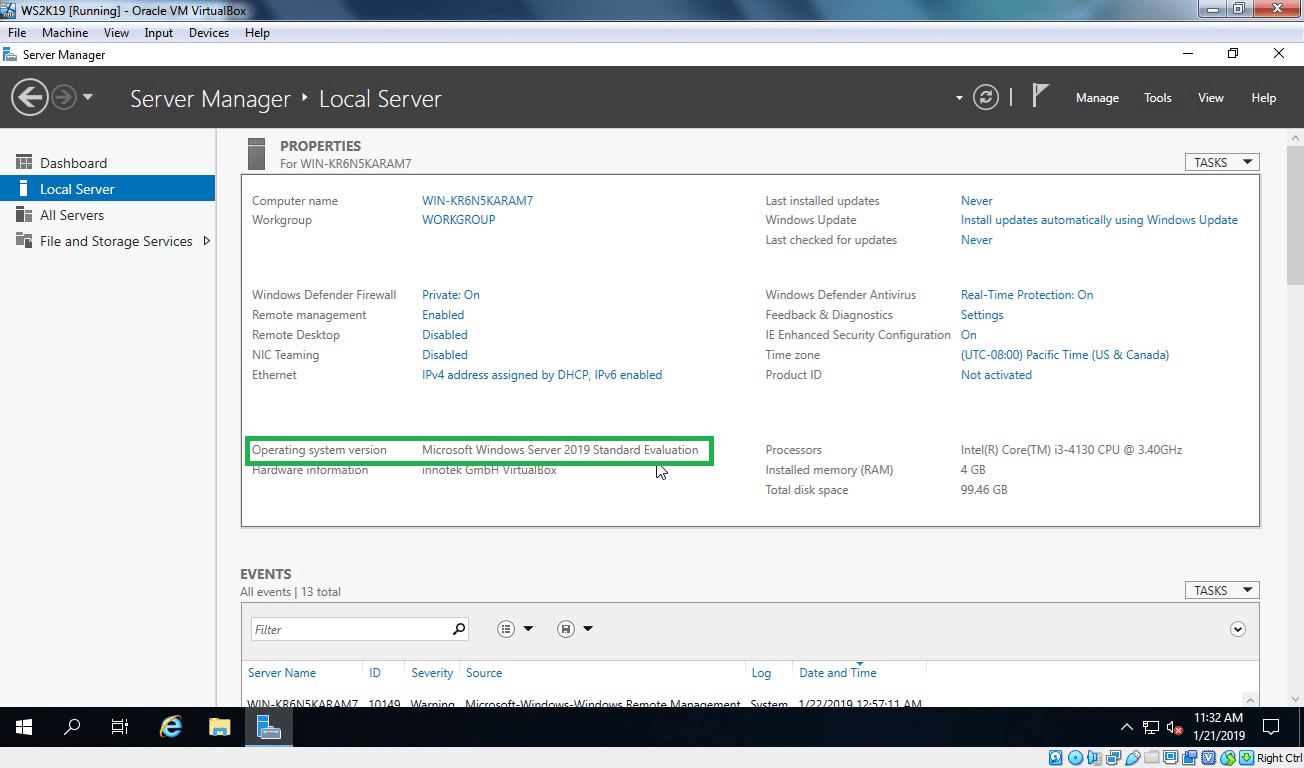
Now Windows Server 2019 setup is now complete as shown below.

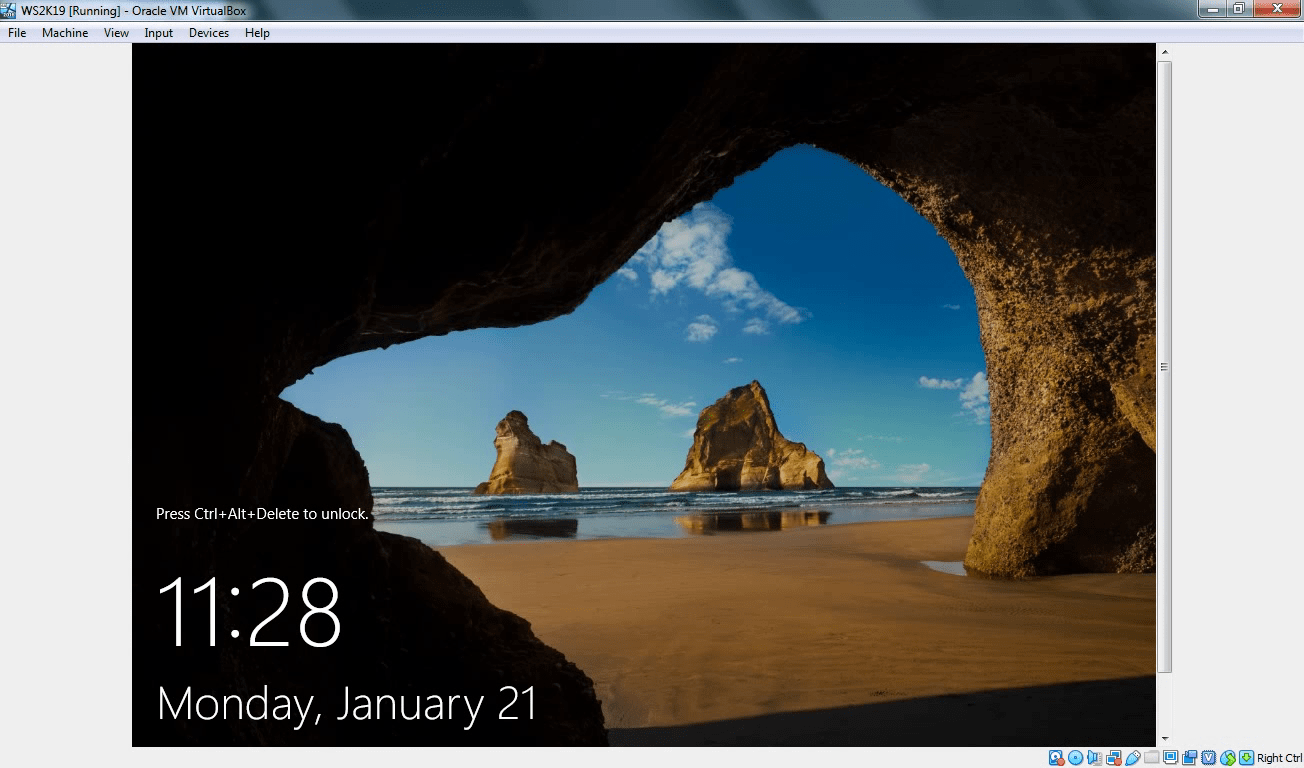
To access the login windows, use the Contl+Alt+Del and enter your password to access Windows. Refer to this guide for the Post OS Installation and configuration of Windows Server 2019 Properties (Configure TCP/IP Parameters).

I hope you found this blog post helpful. If you have any questions, please let me know in the comment session.
In this post, we will see the process to install windows server 2019 in Virtual Box. But before we start installation let’s check minimum system requirement to install windows server 2019.
Minimum system requirement to install windows server 2019.
- Processor: At least 1.4 GHz or faster 64-bit supported processor
- RAM: 512 MB
- Free Space: 32 GB of available free disk space.
How to install Windows Server 2019
First download Windows server 2019 Evaluation edition ISO image from Microsoft TechNet Evaluation Center. https://www.microsoft.com/en-US/evalcenter/evaluate-windows-server-2019
Link to download Oracle VirtualBox: Click Here
Start your VirtualBox and create one VM with below configuration.
- Name: As you wish
- Type:- Microsoft Windows
- Version:- Windows 2016 (64-bit)
- RAM:- 2048 MB
- Create Dynamically Expanding VDI with size 100 GB
After creating VM click on start.
Mount the ISO image which we have downloaded earlier.
Step:1 On Windows Setup console select the installation language, time and currency format and keyboard layout. You can simply use default settings which will be OK.
Step:2 Click on Install now to start the installation process.

Step:3 Select the operating system which you want to install. (First option will install windows server without a graphical user interface.)
If you want GUI to manage server select second option i.e. Windows Server 2019 Standard Evaluation (Desktop Experience).
Step:4 Select Accept the license terms and click on next.
Step:5 For a fresh installation of server 2019 we need to select the second option, Custom: Install Windows Only and then click on next.
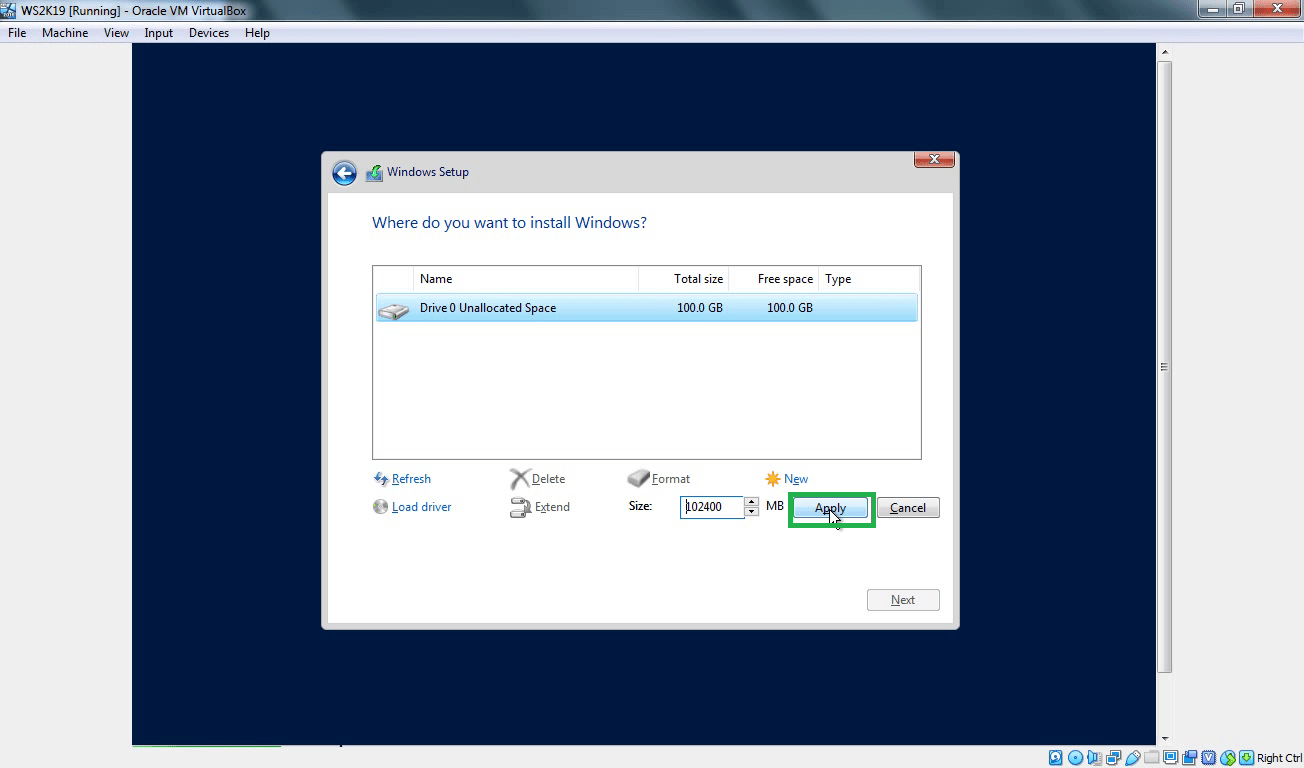
Step:6 Select your virtual hard disk and click on New to create a new partition to install server 2019.
Step:7 For this demo, I am creating only one partition of 100 GB in size.
Step:8 After creating a partition, Click on Next to continue.
The installation process will take some time to complete the process. Once installation completes server will restart automatically.
At next boot, you will see below screen asking to set Administrator account password for windows server 2019.
Step:9 Specify the password of your choice to protect Administrator account of Windows Server 2019.
Congratulations! Now you are ready to log in first time on your newly installed Windows Server 2019.
Now press CTRL + ALT + Delete key combination.
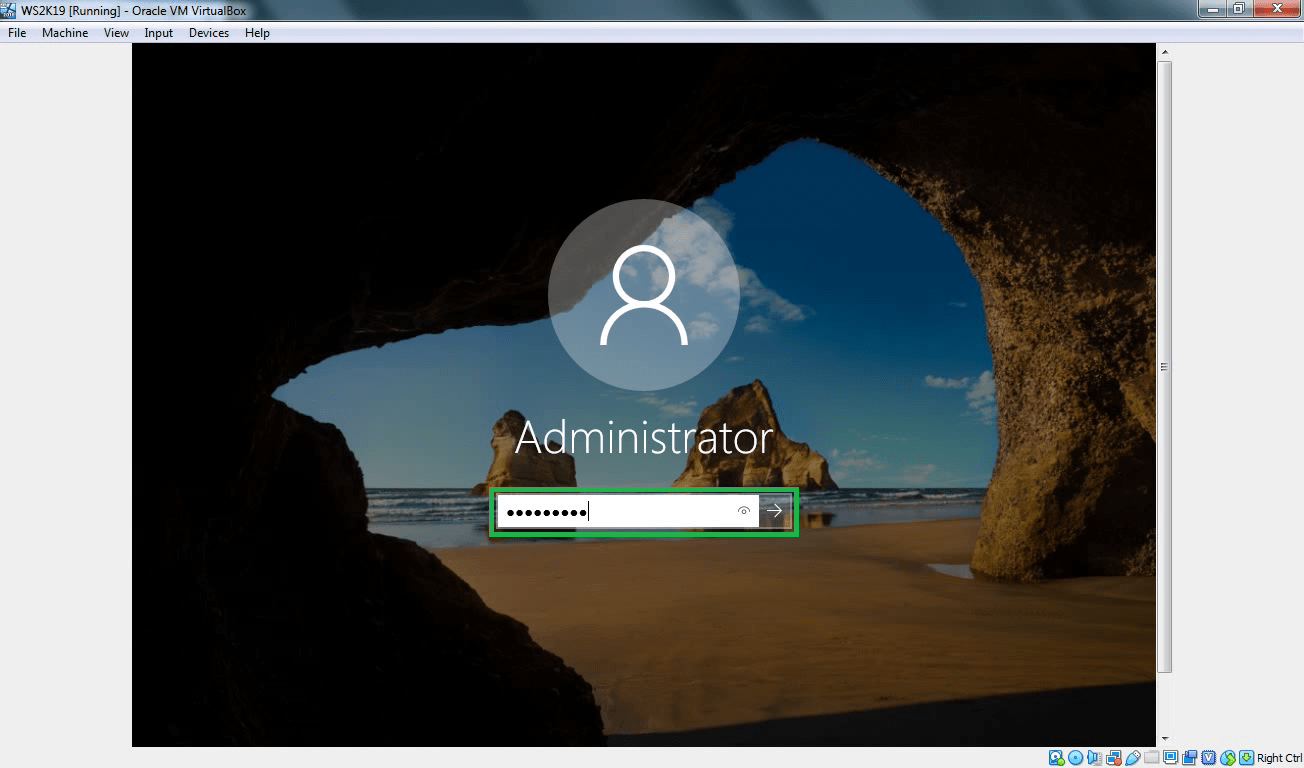
Specify the administrator account password and hit the enter key to login to Windows Server 2019.
Here we go.
We have successfully installed Windows Server 2019 in Oracle Virtualbox.
Post Views: 5,828
It is always advisable to install and test the new Operating Systems in the virtual platform before trying it in a live environment, especially the server version we use in production. In this guide, let me show the steps I followed to install Windows 2019 server LTSC and SAC versions on Oracle VirtualBox. The Windows 2019 server OS was built on the firm foundation of the earlier Windows 2016 server. Windows 2016 was the most popular and fastest adopted Windows server Operating System ever, and Microsoft expects the 2019 version to overtake it.
You can check here to learn more about what is new in Windows 2019. As a Windows server administrator or a learner, you would love the new features it brings up. The project Honolulu is something I’m incredibly interested in and happy to have.
Two Versions of Windows 2019
You must understand the significant difference between both Windows 2019 versions. I have shown how to install Semi-Annual Channel (SAC) and Long-Term Servicing Channel (LTSC) on VirtualBox with my Windows 10 computer. Find below the major differences between both versions.
1) Semi-Annual Channel (SAC)
- It gets feature updates from Microsoft twice a year. Your organization should have Software Assurance to be eligible for the upgrade.
- The Windows 2019 SAC doesn’t have GUI. So, it is like Windows Server Core or Nano installation. It is well secured and optimized, but management is not easy without GUI.
2) Long-Term Servicing Channel (LTSC)
- It is for organizations that prefer the more traditional release of feature updates in two to three years.
- It comes with both Server Core and Desktop Experience (GUI) versions.
Let’s dive into the installation of the Windows 2019 server on VirtualBox.
I already published a guide showing how to install Windows 2012 R2 on VirtualBox with a pre-installed VHD file from Microsoft. At the moment, Microsoft Provides ISO and VHD files of the Windows 2019 server on their official website.
To continue further, you must be able to download the Windows 2019 ISO file from the Microsoft Windows Insider Program website. It will help if you have a Windows live account that is part of the Insider program (Free to join). Here is the URL to download Windows 2019 server version for testing and demo installation purposes.
Unfortunately, I could not use the VHDX file of both Windows 2019 SAC and LTSC versions on the VirtualBox. VirtualBox was unable to read the VHDX file properly. Therefore it can’t be used to boot the virtual machine from it.
It threw the following error while attaching the VHDX, “Failed to open the disk image file..” with the “MediumWrap” “E_FAIL”. It is still doubtful whether VHDX is supported in VirtualBox for reading and writing access. It looks like it supports only read-only as of now. As you know, VHDX files are mainly made for Microsoft Hyper-V hypervisor.

VHDX to VHD
I used “vboxmanage clonemedium” command to convert the VHDX to VHD, and it succeeded and converted the Windows 2019 Server VHDX to VHD. Also, this time I managed to add the converted VHD disk to the new Virtual Machine. But it did not boot. It gave the error saying, “No Bootable medium found.” To reconfirm the readability of the converted VHD file, I attached the disk to another working Windows VM and managed to read the content on the VHD file. I’m yet to find the solution in mounting the preinstalled Windows 2019 Server VHDX on VirtualBox and see how it works.
At the moment, the final solution is to use the ISO file and do the fresh installation.
Read Also: Best Windows Home Server OS
Windows 2019 Semi-Annual Channel (SAC) on VirtualBox
It worked, but I’m not sure why you need to install a Server Core version in VirtualBox without Desktop experience. But for a full-fledged test lab setup, you can install it in multiple VMs to test the Windows 2019 server cluster and server farm feature.
I assume that you have already worked on the Server Core version. The installation is straightforward. Download the ISO file of Windows 2019 SAC from Microsoft and start installing.
1. Select the Operating System as “Windows 2016” or Windows 2019 based on your Oracle VirtualBox version.
 2. Make sure that Processor settings remain the same as below. By default, when you select the Windows 2016 version, it sets automatically.
 3. Set the RAM; I allocated 4GB RAM and 50GB of new hard disk.
4. Attach the downloaded ISO and start the Virtual Machine.
 5. Select the “Standard” or “Data Center” versions to install. I selected the Data Center version and continued the installation.
6. Once installation is completed, you will get the first screen to set up an administrator account. It will be the server core version; you must play with the command prompt and PowerShell. Mouse and keyboard integration works fine.
7. With the ‘sconfig’ command you can configure the Windows 2019 Core on VirtualBox.
 8. Network worked without installing VirtualBox additions inside VM (NAT type, it should work with any type including Bridged or Internal only).

Since it doesn’t have a desktop graphical interface, we do not need to install guest additions on this Server Core.
Windows 2019 Long-Term Servicing Channel (LTSC) on VirtualBox
The LTSC version of Windows 2019 Standard and Datacenter have desktop experience GUI and core installation. Here I selected the Datacenter with the desktop experience.
9. The installation steps are the same as the SAC server mentioned earlier. Select the correct version you want to test with the Desktop experience as mentioned
 10. You can leave the OS key, enabling your evaluation period once the installation is completed. You need to set a new complex password for the Administrator account. You will land on the Windows 2019 server desktop, almost identical to Windows 2016 and 2012 R2 versions.
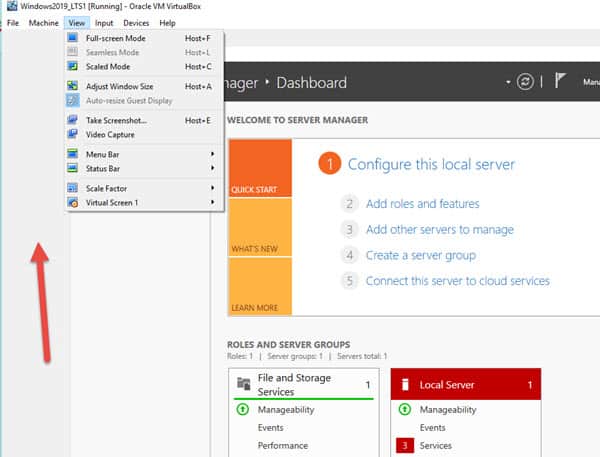
Below is the first screen without VirtualBox guest additions. You can see the space between the console and Windows 2019 virtual machine desktop because no guest additions were installed hence the auto-size of the display is not working.
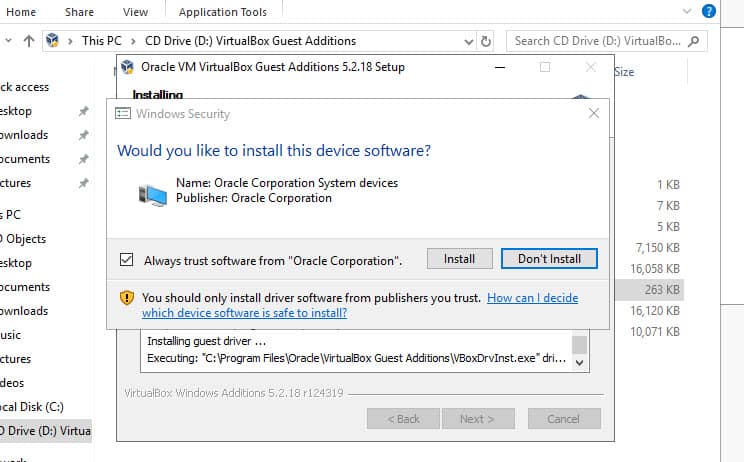
11. Click on Devices and mount the guest additions as shown below.
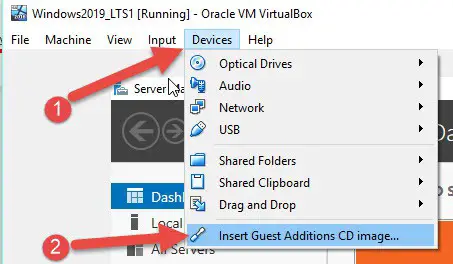 12. It will be the DVD inside the VM. Open it and execute the 64-bit version (even you can execute the normal one which will detect the OS and install the appropriate version).
 13. Click yes to install if the warning comes as not a trusted driver.
 14. Reboot the VM after completion.
15. Once it is rebooted and logged in, you will see a better display, mouse integration and performance enhancement inside the VM. Also, the auto display re-size will work fine.
Take a snapshot before you make any changes from this point.
There you go, you have both versions of the Windows 2019 server (LTSC and SAC) on your Windows 10 desktop or laptop by using Oracle VirtualBox. I hope this guide is useful for the testing or demo lab setup at home/office.
In this article, we will install Windows Server 2019 on Windows 10 with Oracle VM VBox virtualization program step by step.

How to Setup Windows Server 2019 in Windows 10 PC using VirtualBox
Microsoft released the Server 2019 Preview version on March 20, 2018. The Windows Server 2019 full version will be available in the second half of 2018.
Windows Server 2019 is built on the powerful infrastructure of Windows Server 2016, and the most striking feature is Project Honolulu. Project Honolulu is a central console that allows you manage Windows Server 2019, 2016, and 2012 R2 using either the GUI or GUI-less. In the next article, we will examine the Project Honolulu installation and configuration in more detail.
For more information about Microsoft Server 2019, visit https://cloudblogs.microsoft.com/windowsserver/2018/03/20/introducing-windows-server-2019-now-available-in-preview/.
In the previous article, we installed Microsoft Server 2019 with the VMware Workstation program.
- How to Install Windows Server 2019
After briefly discussing MS Server 2019 and Project Honolulu, let’s move on to the steps of setting up Server 2019 with Oracle VM.
How to Install Windows Server 2019 using Virtual Machine
You can install Microsoft Server 2019 on a physical server. Or you can use virtualization programs to install and experience it on your desktop or laptop computer.
Before installing Windows Server 2019 on a physical server, it is a good idea to build and test it in a virtual environment.
First of all, if you are using Windows operating system, install VirtualBox on Windows 10. But if you are using a Linux based Ubuntu/Debian/Linux Mint, install VirtualBox on Ubuntu.
Then, download the Server 2019 ISO file to your computer by clicking here. Finally, follow the steps below to run Microsoft Server 2019.
Step 1
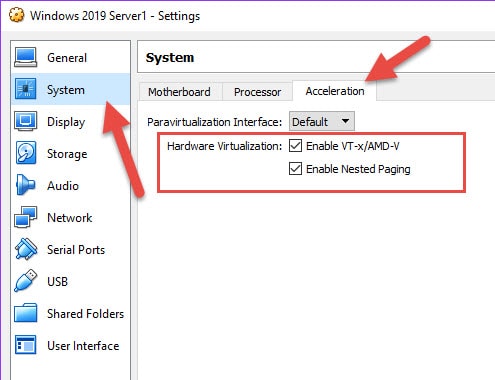
First, create a new virtual computer on VirtualBox. Select Windows Server 2016 (64-bit) in the operating system selection window in the steps for creating a VM. Next, open the Server virtual machine’s settings and click the System / Acceleration tab.
NOTE: Server 2019 is available in the virtual machine operating system selection window in 6.0 version of the Oracle VM program.
In the Hardware Virtualization section, select the Enable VT-x/AMD-V and Enable Nested Paging options, and finally, add the Microsoft Server 2019 ISO file to the virtual pc.

Step 2
After preparing the MS Server 2019 virtual machine, run the virtual machine by clicking the Start button.

Step 3
Configure the language, time settings, and keyboard layout for MS Server 2019 and click Next.

Step 4
Select the Windows Server Standard (Desktop Experience) version and click Next.
")
Step 5
Accept the MS Server 2019 license agreement, and then click Next.

Step 6
To install Windows Server 2019 without updating it, click Custom.

Step 7
Configure the virtual hard disk size for your virtual machine and click Next to select the partition you want to install Server 2019 on.

Step 8
Wait while being installed Windows Server 2019 with VirtualBox…

Step 9
Wait while getting devices ready…

Step 10
You need to set a complex password for your Administrator account. Type in a difficult and complicated password and click on the Finish button.

Step 11
Click on Input / Keyboard / Insert Ctrl-Alt-Del to open the account lock of Server 2019.

Step 12
Type your Administrator password that you created and press Enter.

Step 13
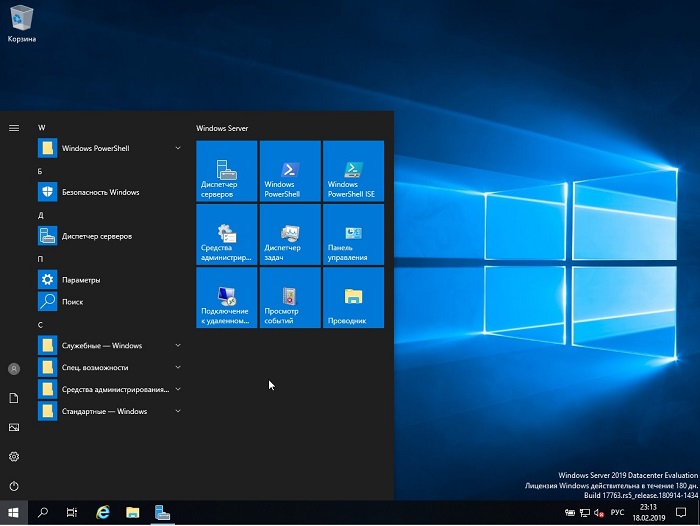
Once you have successfully completed the steps for setting up Server 2019, you can check the Server Manager information as shown in the following image.

How to Install Guest Additions on Windows Server 2019
After you install it with VirtualBox, you should install Guest Additions. To install guest additions for Windows clients, click on the image below to read our related article.

How to Run Server 2019 Step by Step ⇒ Video
You can watch the video below to run it on VirtualBox virtual machine step by step, and also subscribe to our YouTube channel to support us.
Final Word
In this article, we have installed MS Server 2019 Technical Preview step by step, a free and popular virtualization program. You can also install Windows Server 2019 on ESXi. Thanks for following us!
Related Articles
♦ What is VMware ESXi, vSphere, and vCenter?
♦ How to Download Microsoft’s Project Honolulu for Server 2019
♦ How to Install Debian 9 in Oracle on Windows 10
♦ How to Enable Intel Virtualization Technology
♦ How to Install Server 2019 on VMware Software
Google Translate
SEARCH
Calendar
Archives
Archives
Blog Stats
- 1,151,935 hits
Categories
Meta
В этом видео вы научитесь устанавливать операционную систему Windows Server 2019 на VirtualBox.
-
Виктор Черемных -
16 января, 2021 -
No Comments
Добавить комментарий
Ваш адрес email не будет опубликован. Обязательные поля помечены *
Комментарий *
Имя *
Email *
Сайт
Группа в VK
Обнаружили опечатку?
Сообщите нам об этом, выделите текст с ошибкой и нажмите Ctrl+Enter, будем очень признательны!
Свежие статьи

Создание общего Samba ресурса на Astra Linux Special Edition 1.7
30.01.2023

Добавление общей smb папки на Astra Linux Special Edition 1.7
27.01.2023

Создание общей папки для Astra Linux Special Edition 1.7 на VirtualBox
25.01.2023

#10. Настройка оценок и отчетов в системе Moodle
23.01.2023

Программный комплекс ViPNet Client
23.01.2023
Облако меток
PrevМетоды психологического воздействия на человека | СИ
Лента задач в MS PowerPoint — вкладка «Главная»Next
Похожие статьи

Настройка файлового сервера на Windows Server 2019
В этом видео вы научитесь создавать и настраивать файловый сервер на Windows Server 2019.

Создание виртуальных машин в Hyper-V
В этом видео вы научитесь создавать виртуальные машины, коммутаторы и диски в Hyper-V.

Установка Windows Admin Center
В этом видео вы научитесь устанавливать Windows Admin Center для управления Windows Server.

Установка, настройка и обзор Hyper-V на Windows Server 2019
В этом видео вы научитесь устанавливать и настраивать гипервизор Hyper-V на Windows Server 2019.
Приветствую Вас на сайте Info-Comp.ru! В этой статье будет рассмотрен процесс установки бесплатной пробной версии новой серверной операционной системы от компании Microsoft — Windows Server 2019, также Вы узнаете, где скачать такую бесплатную версию, и какие системные требования необходимо выполнить для ее установки.
В одном из прошлых материалов я рассказывал про новые возможности Windows Server 2019 (вот эта статья — Что нового в Windows Server 2019?). Сегодня я расскажу о том, где скачать бесплатную версию Windows Server 2019, и как ее установить на компьютер, например, для того чтобы протестировать эту операционную систему.
Бесплатная версия Windows Server 2019 распространяется в двух редакциях: Standard и Datacenter, они имеют полноценный функционал, иными словами, Вы можете использовать все возможности операционной системы. Однако пробная версия будет действовать в течение 180 дней, т.е. полгода. Этого вполне достаточно, чтобы протестировать эту операционную систему, и принять решение о приобретении лицензии. Для других целей бесплатную пробную версию Windows Server использовать нельзя.
Содержание
- Системные требования Windows Server 2019
- Где скачать бесплатную версию Windows Server 2019?
- Установка Windows Server 2019
- Шаг 1 – Загрузка, выбор языка и запуск установки
- Шаг 2 – Выбор редакции
- Шаг 3 – Принятие условий лицензионного соглашения
- Шаг 4 – Выбор типа установки
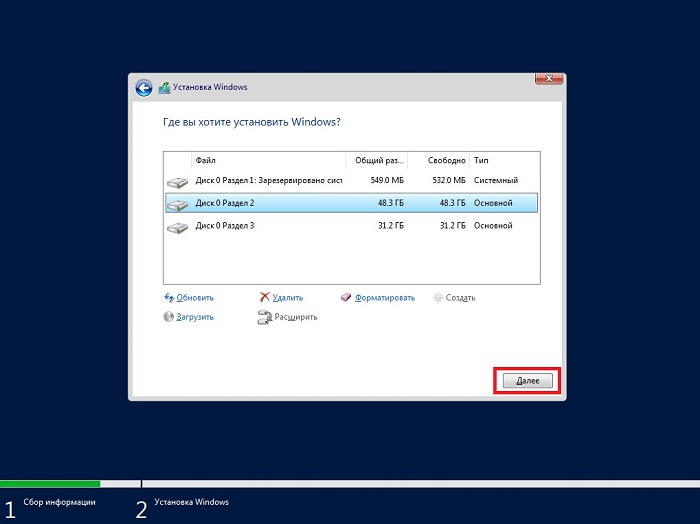
- Шаг 5 – Разметка жесткого диска
- Шаг 6 – Процесс установки
- Шаг 7 – Настройка параметров
- Шаг 8 – Завершение установки и вход в систему
- Видео-инструкция по установке Windows Server 2019
По сравнению с предыдущей версией Windows Server системные требования в 2019 версии практически не изменились. Так, для установки операционной системы Windows Server 2019, Вам минимум потребуется:
- Процессор с тактовой частотой 1,4 ГГц, совместимый с набором инструкций x64 (64-разрядный процессор);
- Оперативной памяти необходимо: 512 МБ для установки на физический сервер, 800 МБ, если Вы будете осуществлять установку на виртуальную машину, 2 ГБ для установки версии с графическим интерфейсом;
- Чтобы установить базовую систему минимум потребуется 32 гигабайта свободного места на жестком диске (если установку производить на сервер с оперативной памятью более чем 16 ГБ, то потребуется дополнительное пространство на диске для файлов подкачки, гибернации и дампов);
- Сетевой адаптер Ethernet с пропускной способностью не менее 1 гигабита.
Где скачать бесплатную версию Windows Server 2019?
Скачать пробную версию Windows Server 2019 можно абсолютно бесплатно и, главное, легально с официального сайта Microsoft, лично я рекомендую Вам всегда скачивать программное обеспечение только с официальных источников.
Чтобы скачать Windows Server 2019, перейдите на страницу загрузки ознакомительной версии, вот она
https://www.microsoft.com/ru-ru/evalcenter/evaluate-windows-server-2019
Выберите тип файла для ознакомления, нам доступны:
- Azure – для того чтобы попробовать в Microsoft Azure;
- ISO – для обычной установки как на физические сервера, так и на виртуальные машины;
- VHD – файл диска для виртуальной машины с установленной операционной системой Windows Server 2019.
Я буду скачивать ISO образ для того, чтобы самостоятельно установить Windows Server 2019 на виртуальную машину. Для этого я выбираю тип ISO, и нажимаю кнопку «Продолжить».
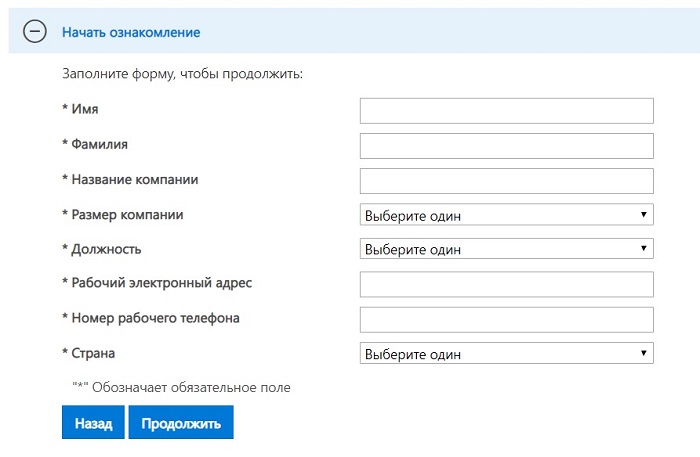
Далее нам нужно заполнить форму для указания своих контактных данных, в принципе Вы можете указать все, что угодно, на текущий процесс загрузки это не окажет какого-то особого влияния, так же, как и указание реальных данных.
После ввода данных нажимайте «Продолжить».
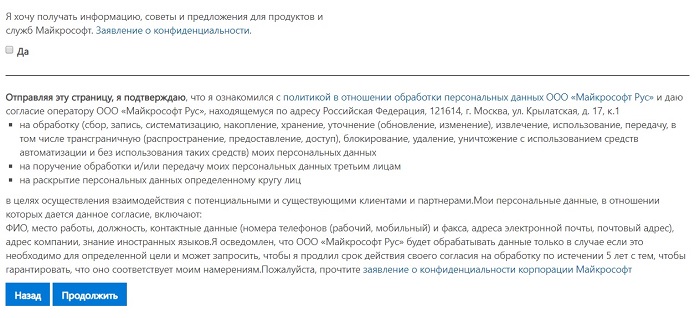
Затем подтверждаем, что мы ознакомились с политикой в отношении обработки персональных данных, и снова нажимаем «Продолжить».
Нам осталось выбрать язык и нажать «Загрузка».
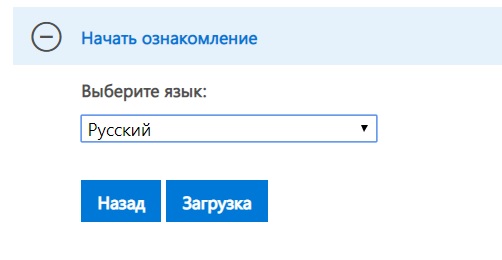
После чего начнется загрузка ISO образа, его размер чуть более 4 гигабайт.
Установка Windows Server 2019
Сразу скажу, что установка очень простая, и она не отличается от установки предыдущих версий Windows Server.
Монтируем ISO образ к виртуальной машине, или записываем его на диск или флешку, если установка будет производиться на физический сервер.
Шаг 1 – Загрузка, выбор языка и запуск установки
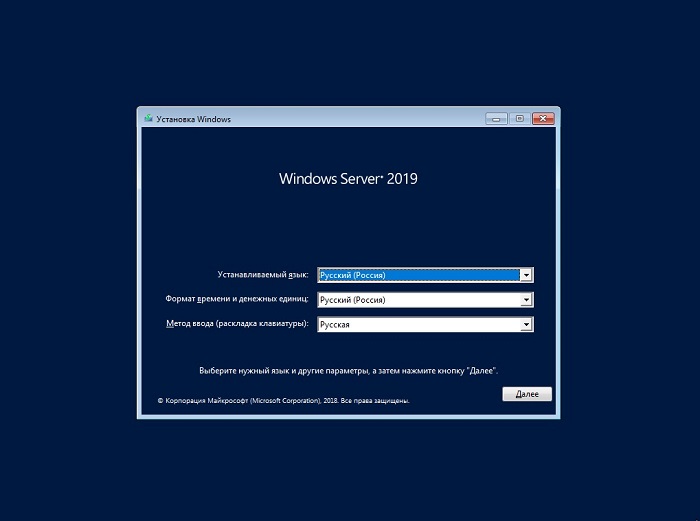
Загружаемся с диска (в случае с виртуальной машиной просто запускаем ее) и попадаем в меню, сначала необходимо выбрать язык, но в нашем случае он уже выбран, поэтому сразу нажимаем «Далее».
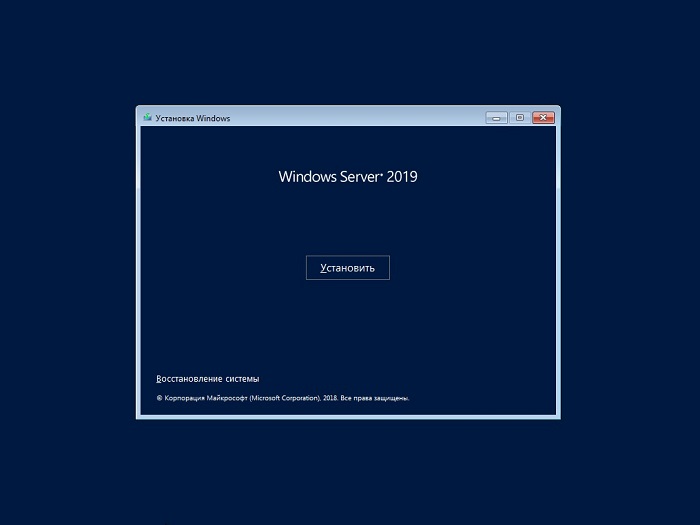
Затем для начала установки нажимаем кнопку «Установить».
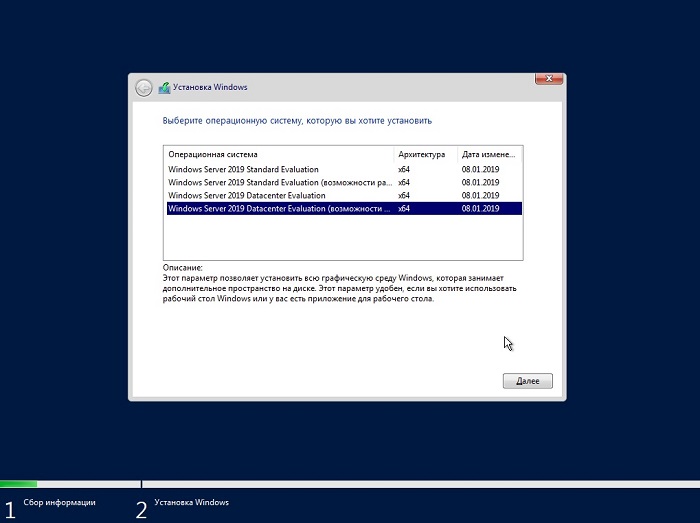
Шаг 2 – Выбор редакции
Сначала нам необходимо выбрать редакцию Windows Server 2019 Standard или Datacenter, при этом нам доступны версии с графическим окружением (т.е. с рабочим столом) и без.
Я выбираю Datacenter с графической средой и нажимаю «Далее».

Шаг 3 – Принятие условий лицензионного соглашения
Потом нам необходимо принять условия лицензионного соглашения, для этого ставим галочку и нажимаем «Далее».
Шаг 4 – Выбор типа установки
Затем выбираем тип установки, для новой установки выбираем «Выборочная: только установка Windows».
Шаг 5 – Разметка жесткого диска
Далее нам необходимо разметить жесткий диск, мой жесткий диск чистый, так как я устанавливаю систему на виртуальную машину.
Для того чтобы создать раздел, нажимаем кнопку «Создать».
Для диска C, на который будет установлена система, я выделю 50 гигабайт.

Затем установщик предупреждает, что будет создан раздел для дополнительных системных файлов, нажимаем «ОК».

Далее, в случае необходимости, можете создать дополнительные разделы точно таким же способом.
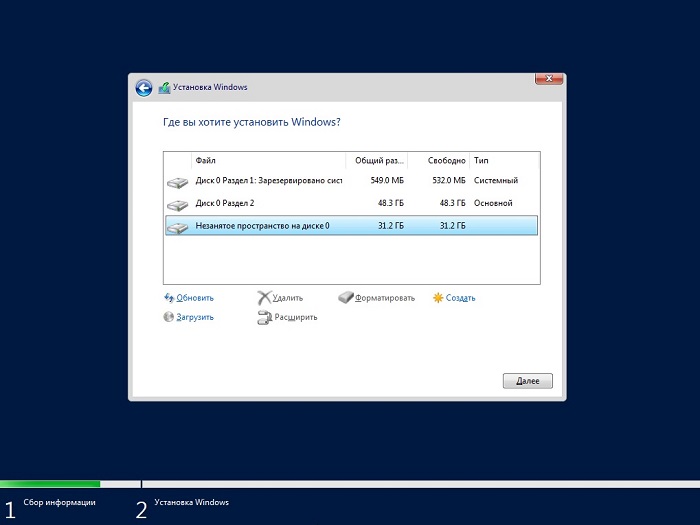
После того как Вы закончите с созданием разделов, выбирайте раздел, на который будет устанавливаться система, и нажимайте «Далее».
Шаг 6 – Процесс установки
В результате начнется процесс установки Windows Server 2019.
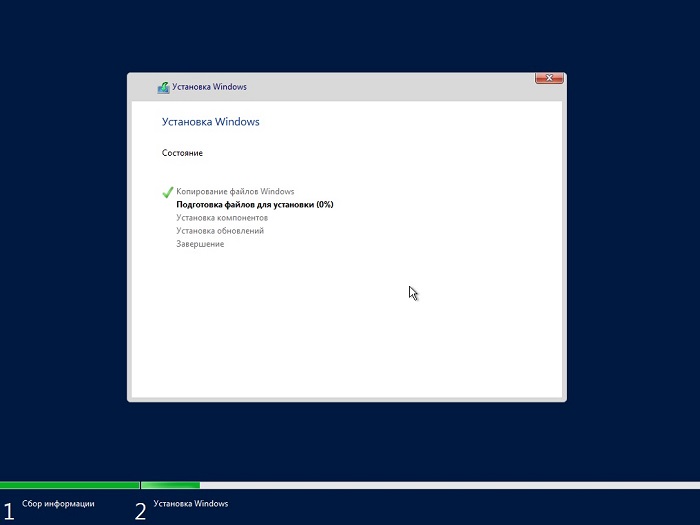
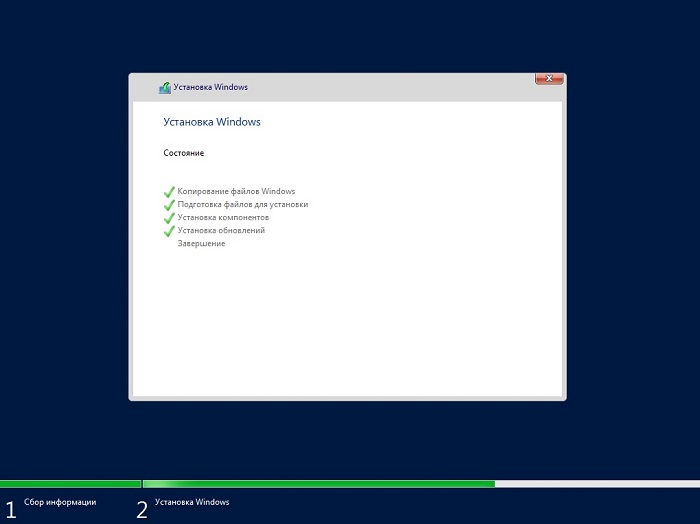
В процессе установки компьютер несколько раз перезагрузится.
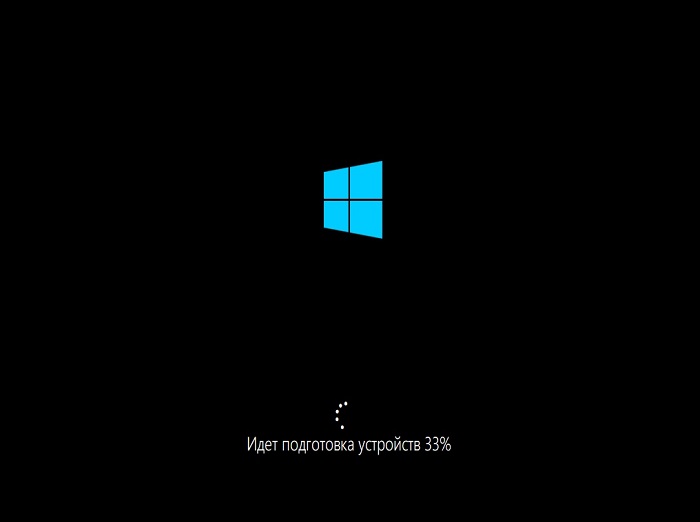
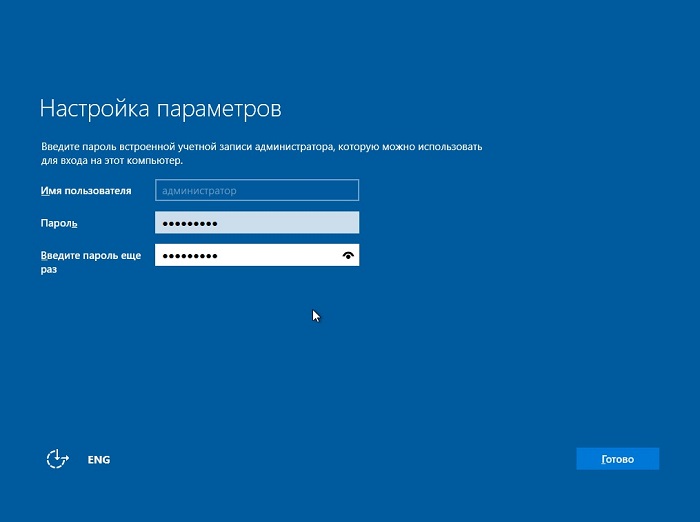
Шаг 7 – Настройка параметров
Из параметров нам нужно настроить только пароль администратора, придумываем его и вводим в соответствующие поля.
Нажимаем «Готово».
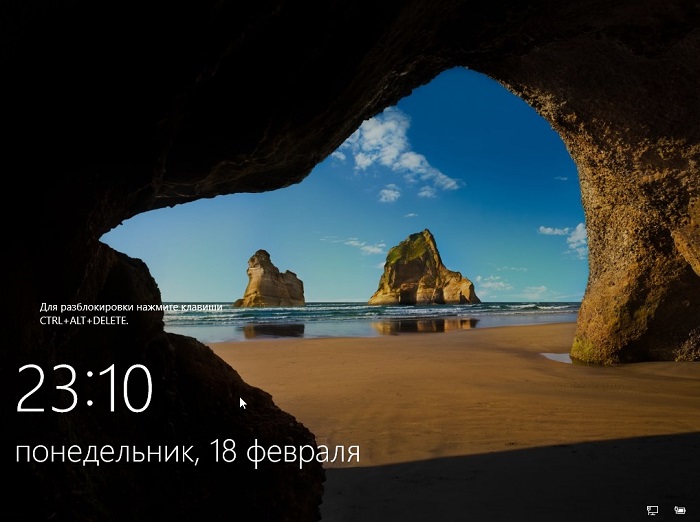
Шаг 8 – Завершение установки и вход в систему
Установка Windows Server 2019 завершена, и мы можем войти в систему.
Видео-инструкция по установке Windows Server 2019
Вот мы с Вами и рассмотрели установку бесплатной пробной версии Windows Server 2019, как я уже отмечал, она будет у Вас действовать 180 дней.
У меня на этом все, пока!
Here we are going to install Windows Server 2022 LTSC preview version on VirtualBox virtual machine to try its latest features…
As per the virtual Ignite 2021 conference announcement done by Microsoft, they are planning to release the final version of Windows server 2022, later this year. Whereas the Trial versions of Windows Server 2022 preview are already available for Windows Insiders.
The upcoming Windows Server’s Long Term Servicing Channel Release (LTSC) will receive security updates for ten years. The current version is Windows Server 2019 LTSC. The innovations of Windows Server 2022 include multi-layer protection against threats, which can be activated via Secured Core Server. Besides, the new version enables HTTPS via TLS 1.3 ex works to support secure connections for business-critical data.
Furthermore, the updated version of Windows Admin Center and the possibility to manage Windows Server in your own data center with Azure Arc. As per the official blog, now it becomes easier to manage virtual machines. Besides, the Storage Migration Service receives a new scenario for migrating file servers from its own data center to Azure. For more information, the user can refer to the official announcement.
Windows Server 2022 installation on VirtualBox Virtual machine
1. Download Windows Server 2022 ISO
To get the preview ISO file of the Server 2022, the user can visit the official Windows Insider page of Microsoft. Or else see our step by step article on this – How to get Server 2022 ISO or VHDX image
2. Install VirtualBox
Although if you are here for this tutorial then you would already have VirtualBox installed on your system, if not, then download it from virtualbox.org. It is available for all popular platforms. Where for Linux see our tutorials such as Redhat and Ubuntu
3. Create a Virtual machine for Windows Server 2022
Run the installed VirtualBox and follow the below steps to create Microsoft Server 2022 virtual machine.
- Click on the New button.
- Give some name to your VM, here we are installing the server version, thus, we name it the same i.e Windows Server 2022.
- Select Microsoft Windows as OS type and Windows 10 64-bit as version.
- If you want to use the Desktop GUI version then at least 2GB RAM should be assigned, however, we recommend 4GB or more depending upon what are you planning to install for better performance.
- Create a Virtual Hard disk. When it asks for file type go for VHD so that later you can use the same virtual disk image in Hyper-V as well.
- Select Dynamic Allocated, this will not allocate all the assigned VHD space at once, instead steadily as our virtual disk starts growing.
- In the next steps, use the slider bar and allocate the amount of space for the VHD file. Here we are stipulating 50 GB but you can more if you are planning to deploy some enterprise features/applications.
- Finally, finish and you will have your Server 2022 Virtual machine on VirtualBox.


4. Start Virtual Machine
Now, select the created VM from the left panel of VirtualBox and click on the Start button given in the Menu… after that the Vbox will ask you to select the startup disk. Here we have to choose the ISO file we have downloaded for Windows Server 2022 at the first step of this article.
⇒ Select the folder icon to open the File Explorer window of your respective OS.

⇒ Click on the Add button to select the downloaded Microsoft Server 2022 ISO image as bootable or Startup disk medium.

⇒ When the ISO image appears in the disk display area select it and then click on the Choose button.

⇒ Finally, hit the Start button to move forward for the installation of Microsoft Server 2022 on Virtualbox VM.

5. Install Microsoft Server 2022
Select “I don’t have license key” when the installation setup asks for it. Moving forward, you will see multiple setups to install, that are:
- Windows Server 2022 Standard
- Windows Server 2022 Standard (Desktop Experience)
- Windows Serbger 2022 Datacenter
- Windows Server 2022 Datacenter (Desktop Experience)
If you have some application that requires Graphical User Interface or you want to experience the Server with GUI, then select the Desktop Experience one. Whereas those who want to manage their server (without GUI) installation using Windows Admin Center can go for the Standard or DataCenter option.

As here we are not upgrading any previous Windows server installation, thus select the Custom Install.

Select the available hard drive, we have created on VirtualBox. If you want to create partitions then select the NEW option otherwise click on the NEXT to let the Server use the whole drive to install the OS.

6. Set Admin Password
Once the installation is complete, the setup will ask you to type a password to secure a built-in Administrator account.
Later press – Ctrl+Alt+Del to login.

