Здравствуй, юный сисадмин. Сегодня мы с тобой установим Windows Server 2019. Устанавливать будем ознакомительную версию, которая работает 180 дней. Установка производится на виртуальную машину VMware, я использую домашний сервер с ESXi на борту.
Дистрибутив Windows Server 2019
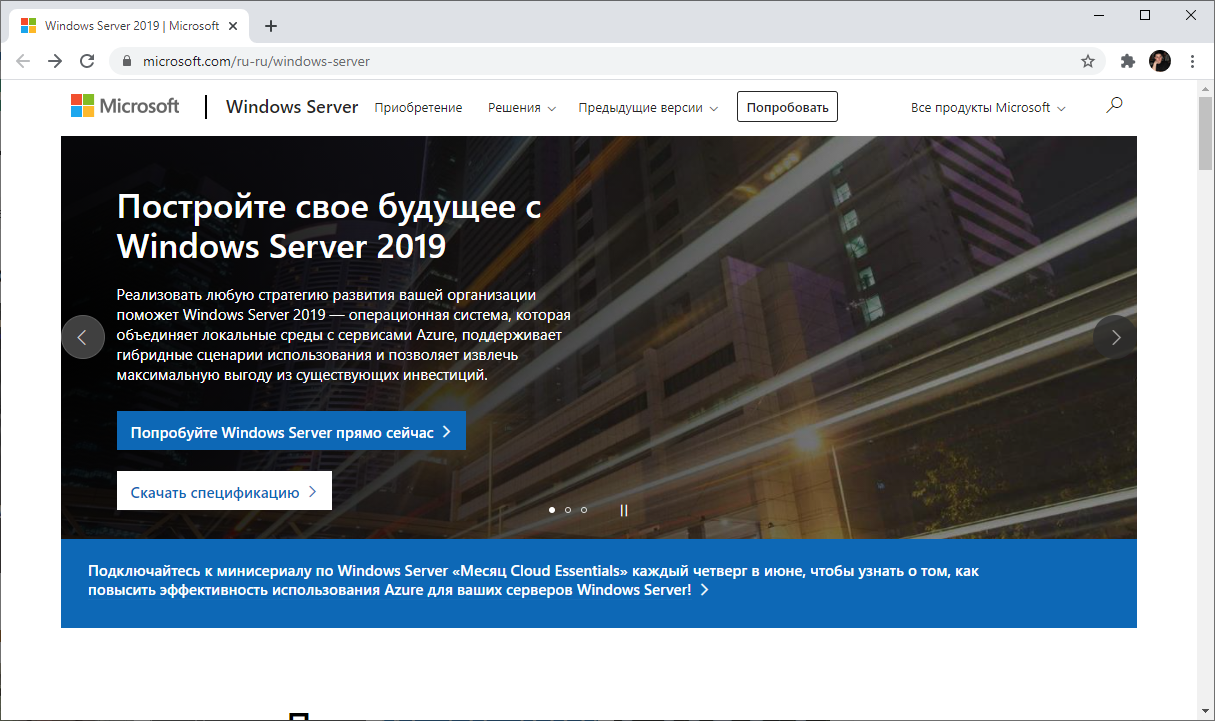
Переходим по ссылке:
https://www.microsoft.com/ru-ru/windows-server
Нажимаем кнопку «Попробуйте Windows Server прямо сейчас».
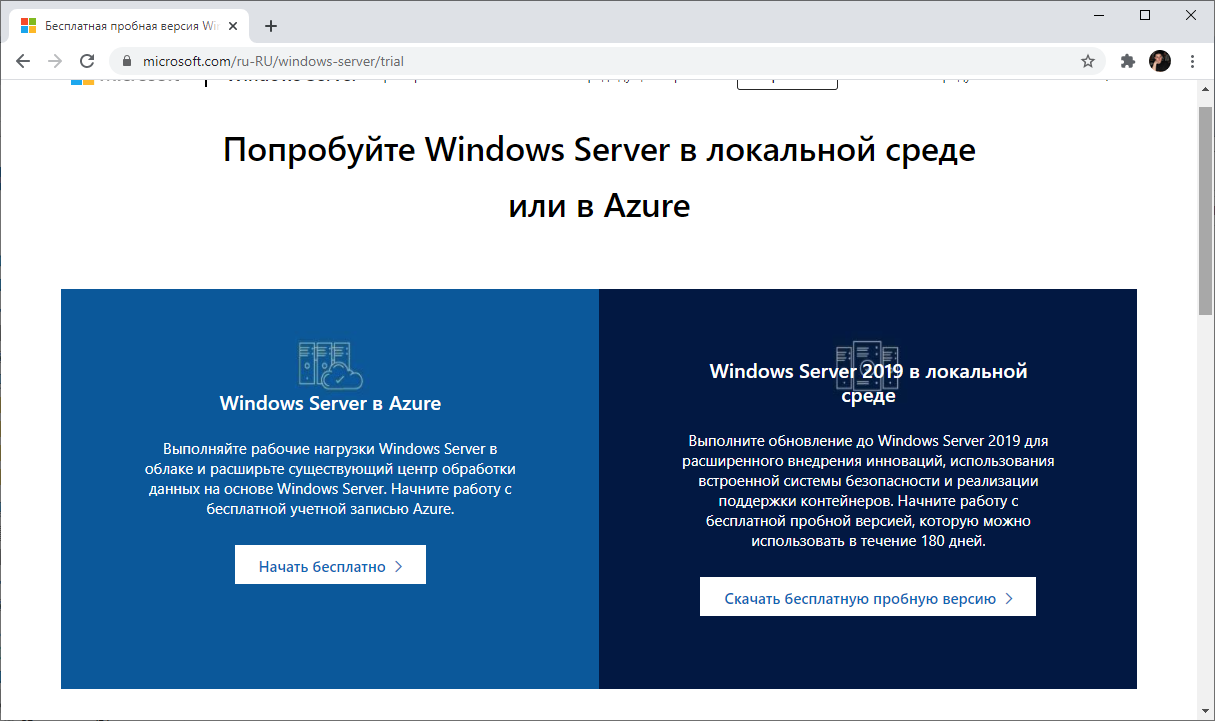
https://www.microsoft.com/ru-RU/windows-server/trial
Нас интересуем Windows Server 2019 в локальной среде. «Скачать бесплатную пробную версию».
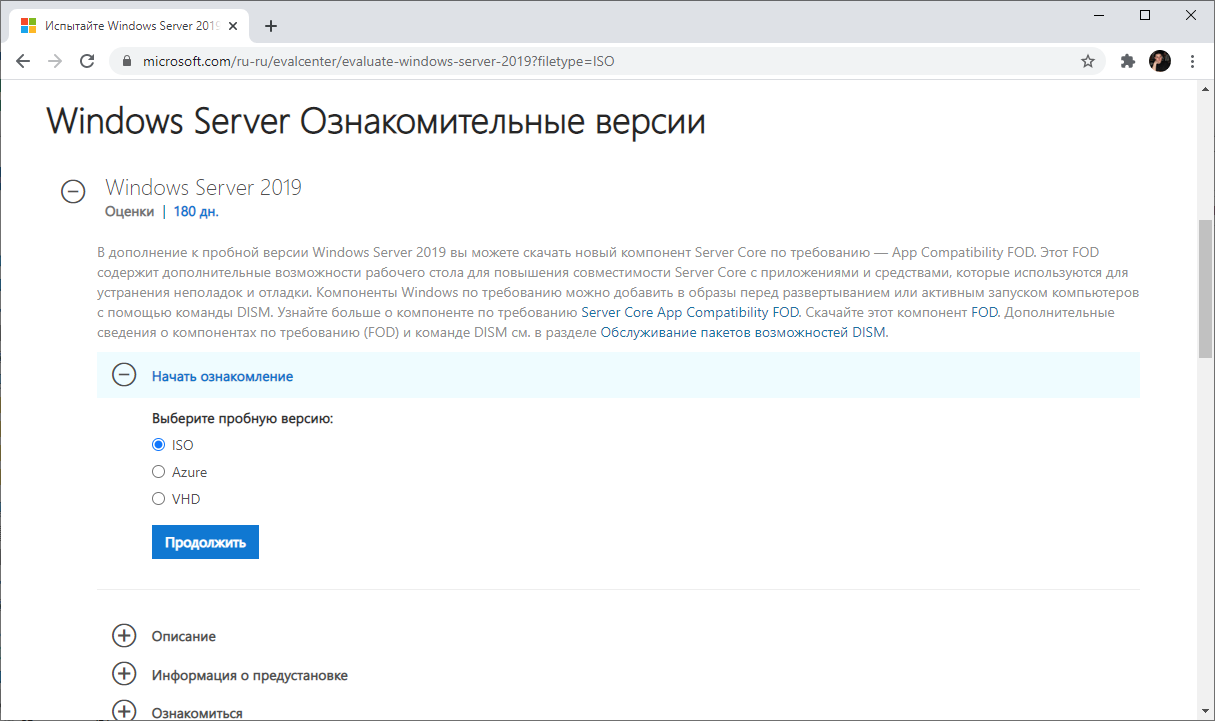
Нам нужен ISO образ, выбираем, «Продолжить».
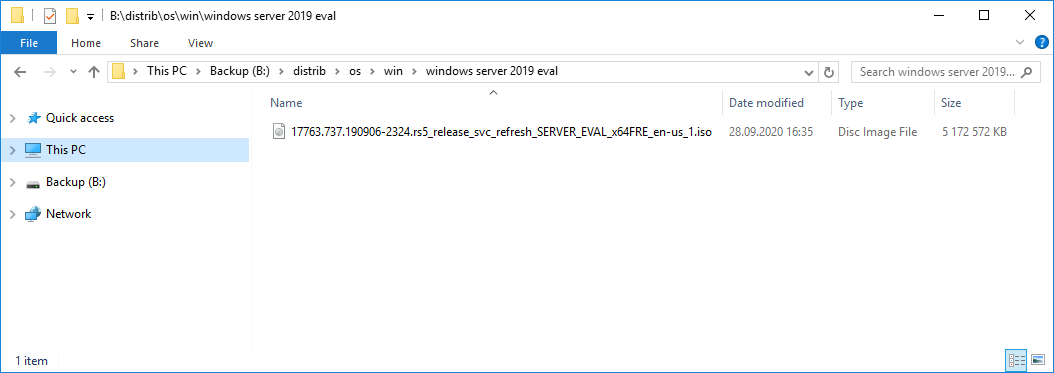
Итак, дистрибутив Windows Server 2019 в виде ISO образа у нас есть.
Системные требования Windows Server 2019
https://docs.microsoft.com/en-us/windows-server/get-started-19/sys-reqs-19
Минимальные системные требования для работы Windows Server 2019:
- Процессор
- 64-разрядный процессор с частотой 1,4 ГГц
- Совместимость с набором инструкций x64
- Поддержка NX и DEP
- Поддержка CMPXCHG16b, LAHF/SAHF и PrefetchW
- Поддержка трансляции адресов второго уровня (EPT или NPT)
- Память
- 512 МБ (2 ГБ для сервера с возможностью установки Desktop Experience)
- ECC (Error Correcting Code) или аналогичная технология для развертывания физического хоста
- Диск
- 32 ГБ для core mode + IIS
- 36 ГБ для GUI mode + IIS
При установке на виртуальную машину минимальных требований (1 процессор и 512 МБ оперативки может быть недостаточно, установка завершится с ошибкой. В этом случае можно сделать следующее:
- Выделите более 800 МБ памяти, после завершения установки можно уменьшить количество памяти до 512 МБ. Если вы используете дополнительный язык, то может потребоваться больше 800 МБ.
- Прервите процесс установки SHIFT+F10. В командной строке используйте diskpart.exe для создания и форматирования раздела для установки. Выполните wpeutil createpagefile /path=C:pf.sys, где C: — это выделенный раздел. Закройте командную строку и продолжите установку.
Подготовка виртуальной машины для Windows Server 2019
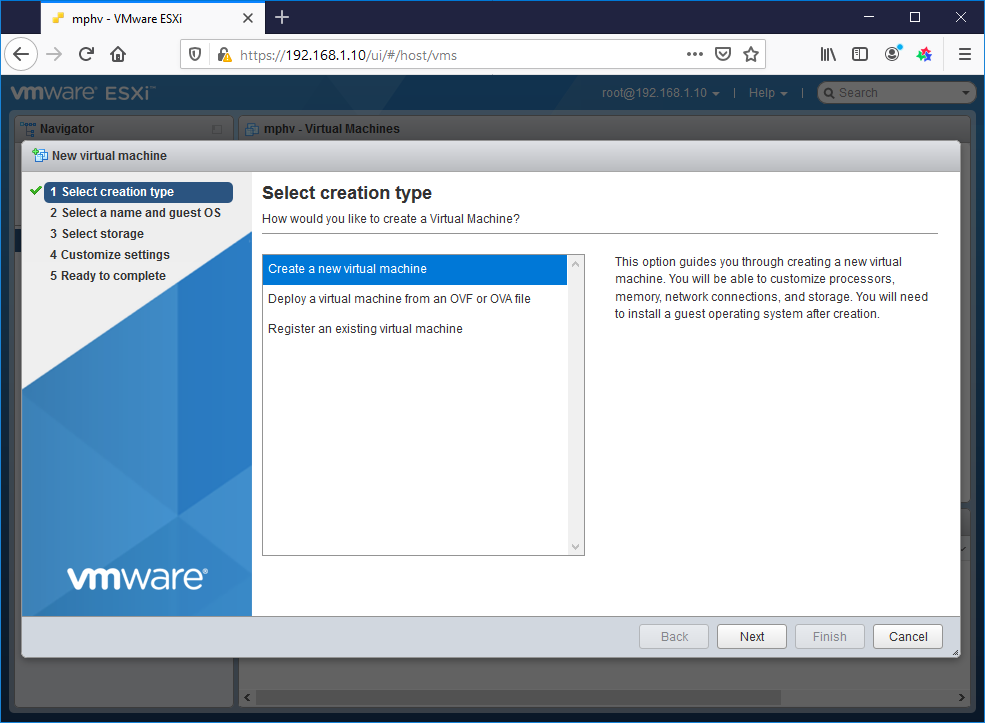
Создаём виртуалку.
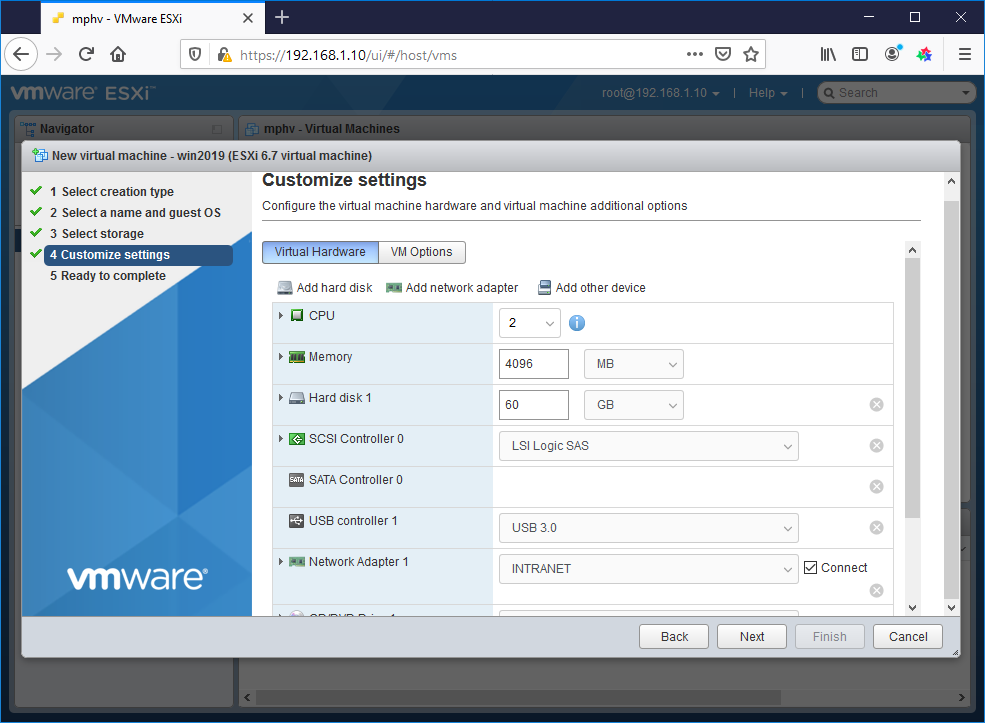
Минимальные требования не будем устанавливать. Я выделил:
- 2 процессора
- 4 ГБ оперативки
- 60 ГБ места на диске
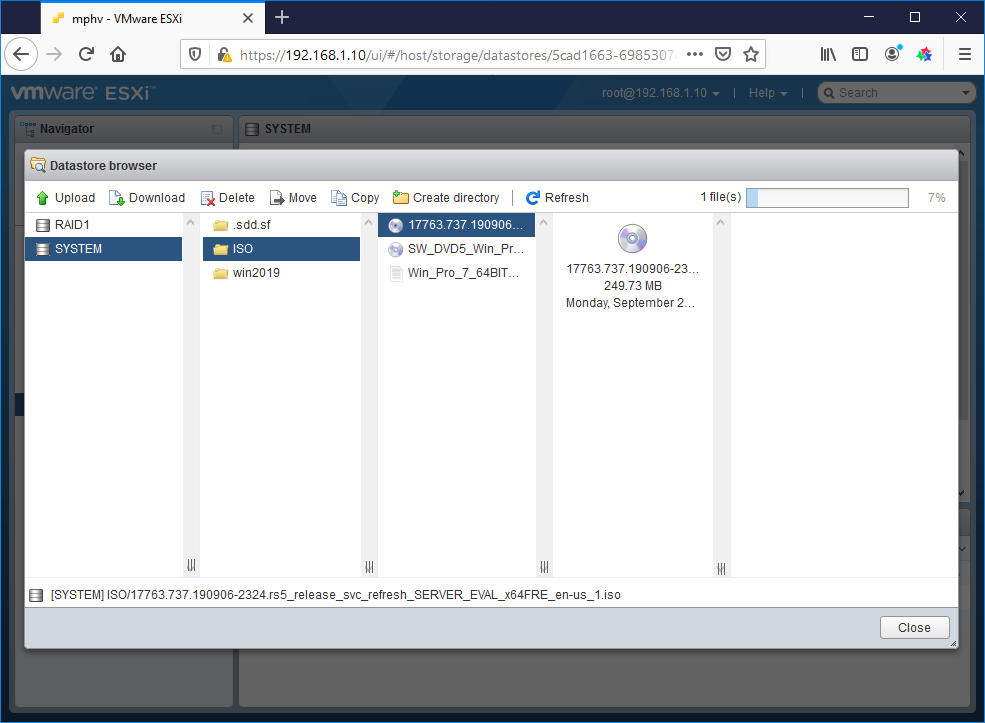
Загружаю в хранилище ISO образ.
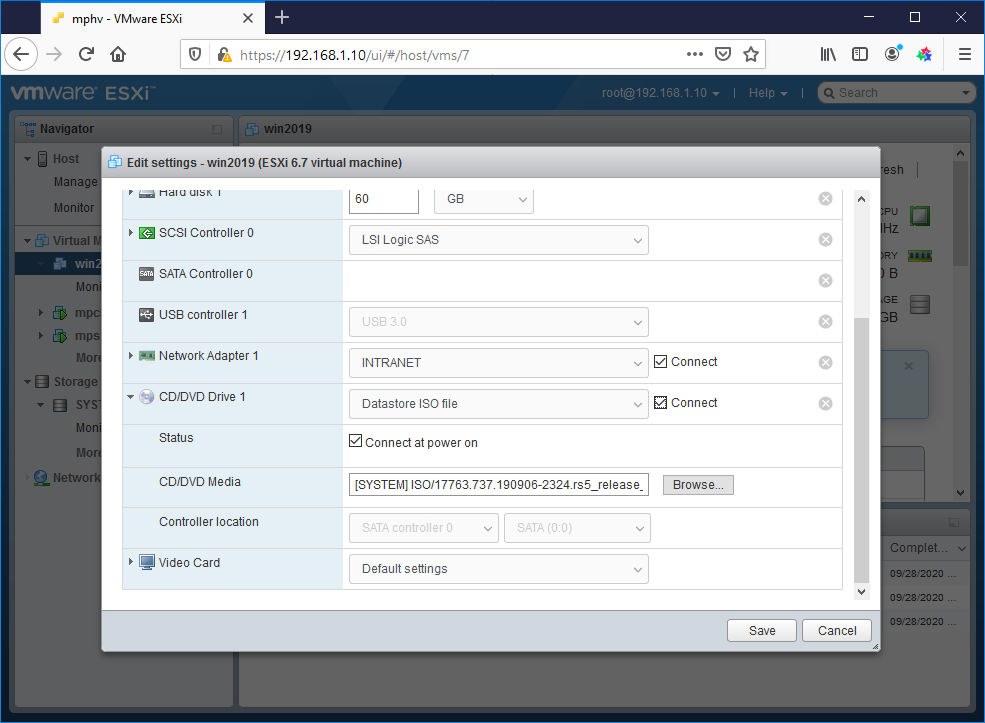
Монтирую ISO образ как CDDVD.
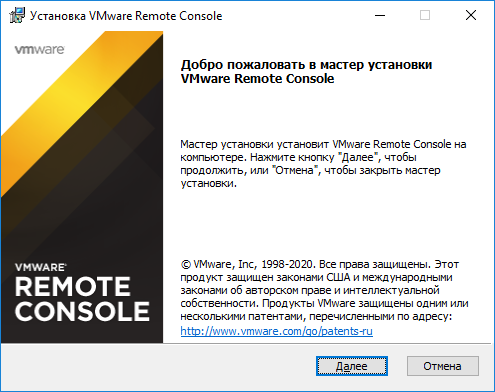
Для удобства устанавливаю VMware Remote Console.
Установка Windows Server 2019
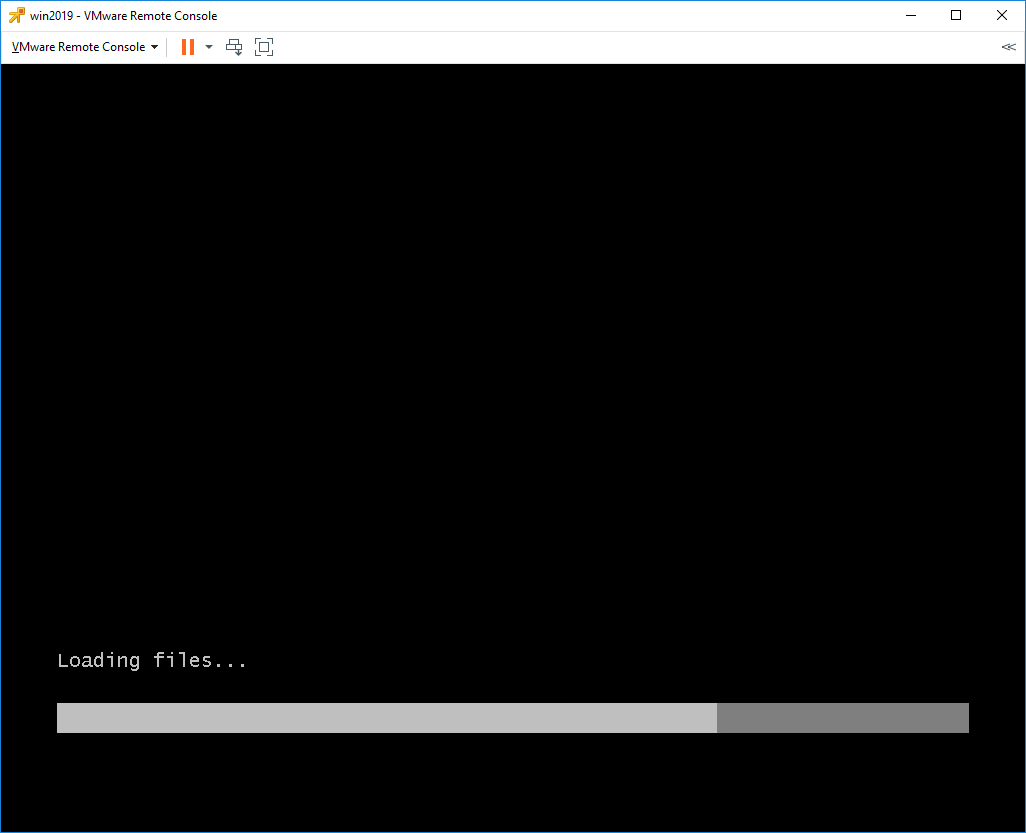
Включаем виртуалку.
Установочный образ подцепился.
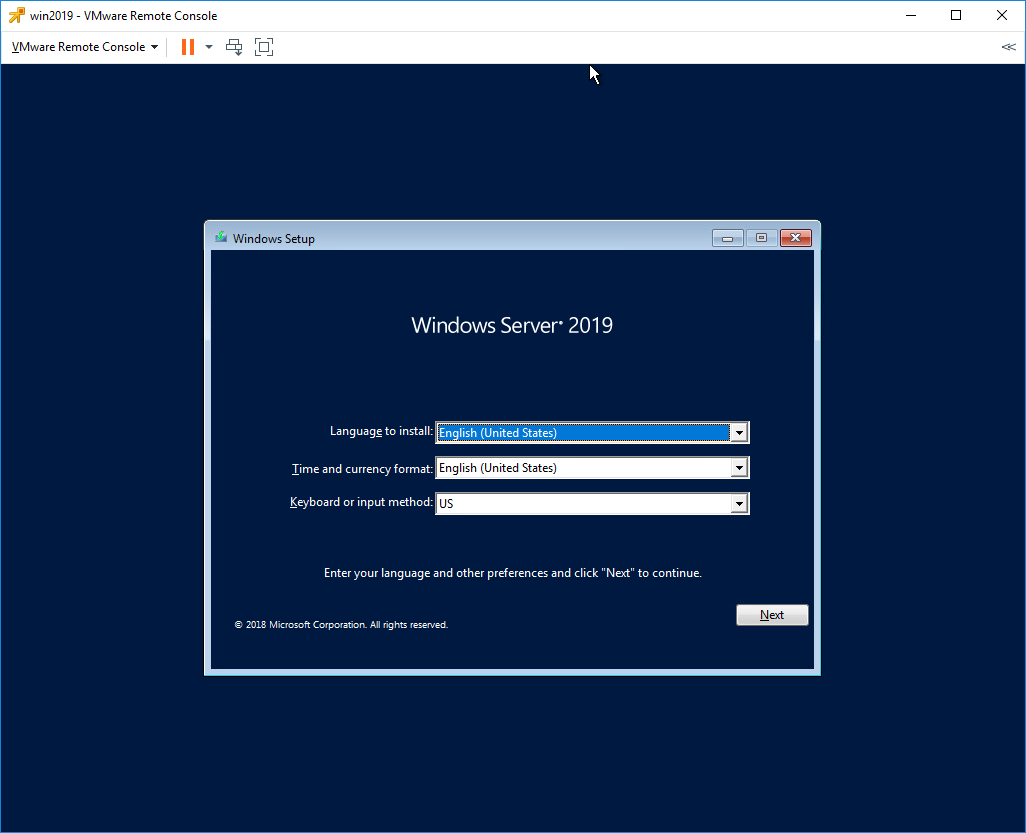
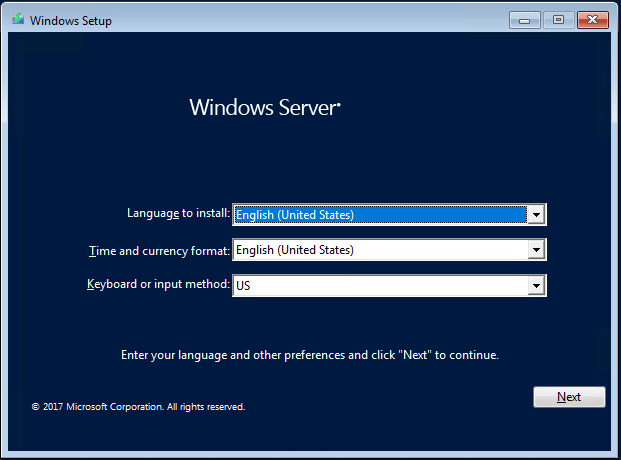
Запускается Windows Setup.
Я предпочитаю устанавливать Windows Server на английском языке, мне так привычнее. Чем меньше лишнего — тем лучше. Единственное исключение делаю для терминальных серверов, так как с ними потом будут работать юзеры.
Выбираем язык установки, Next.
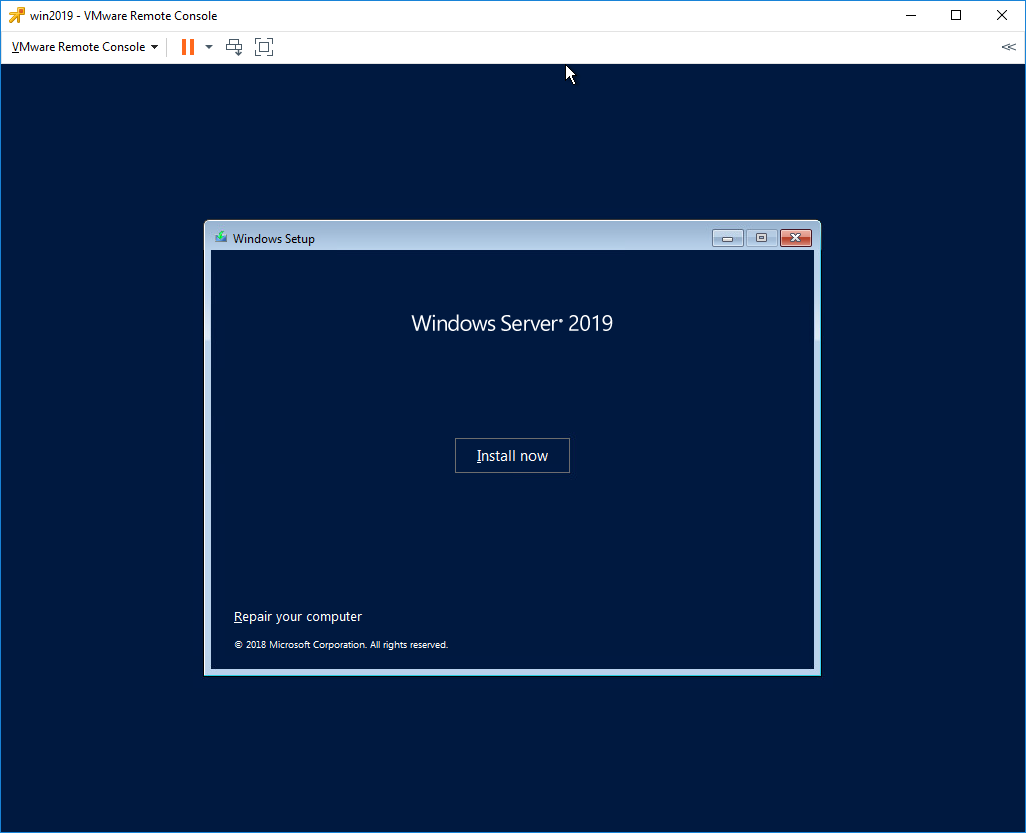
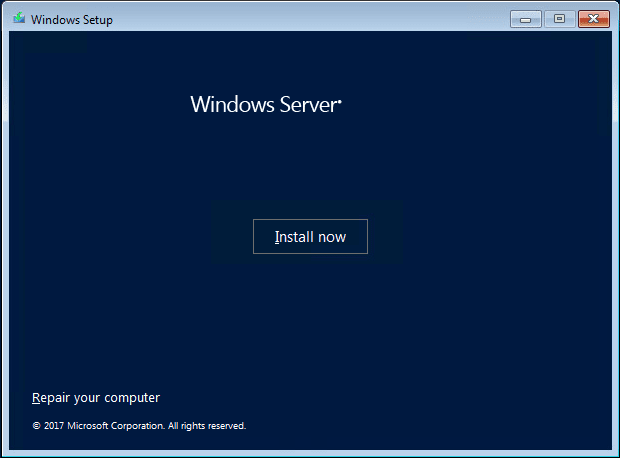
Install now.
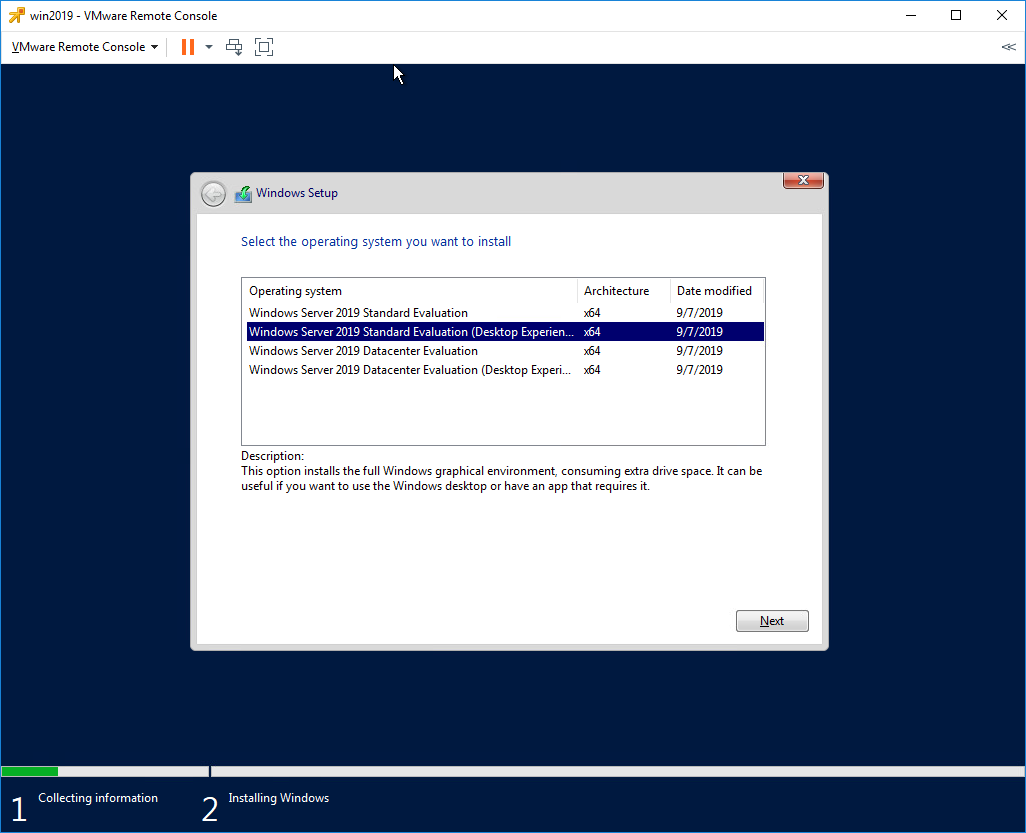
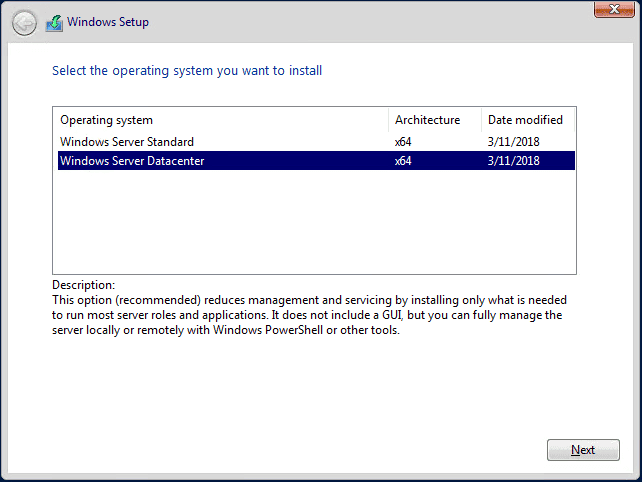
Выбираем Standard версию с GUI. Next.
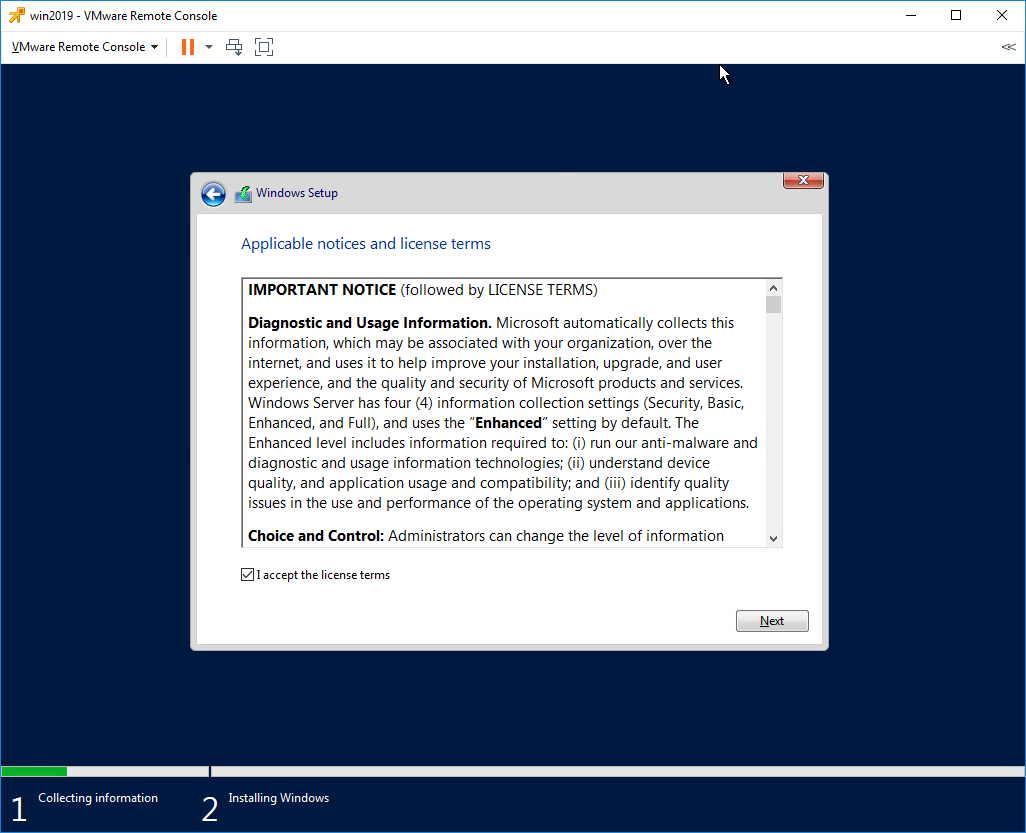
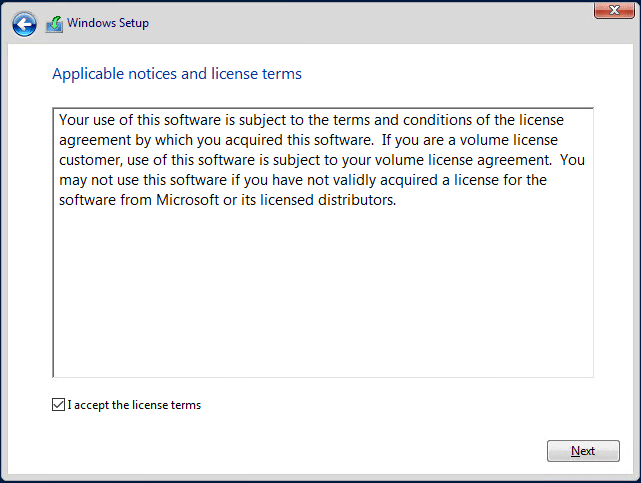
Принимаем лицензионное соглашение. Next.
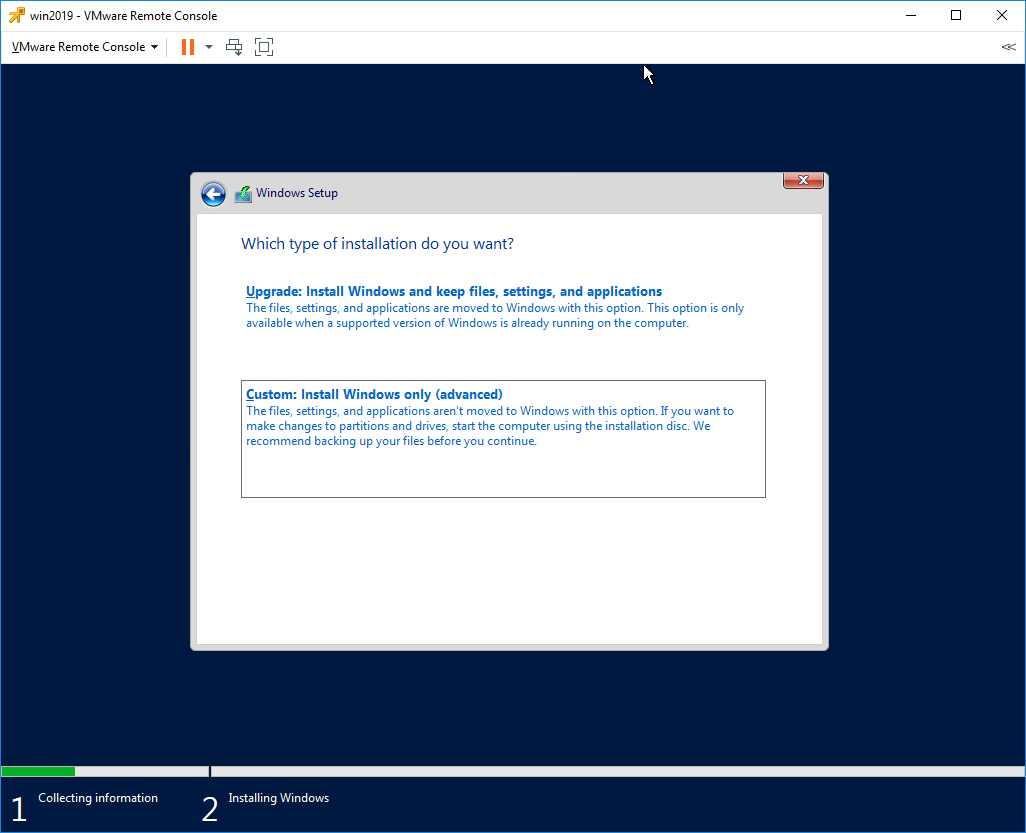
Тип установки — Custom: Install Windows only (advanced). У нас новый сервер.
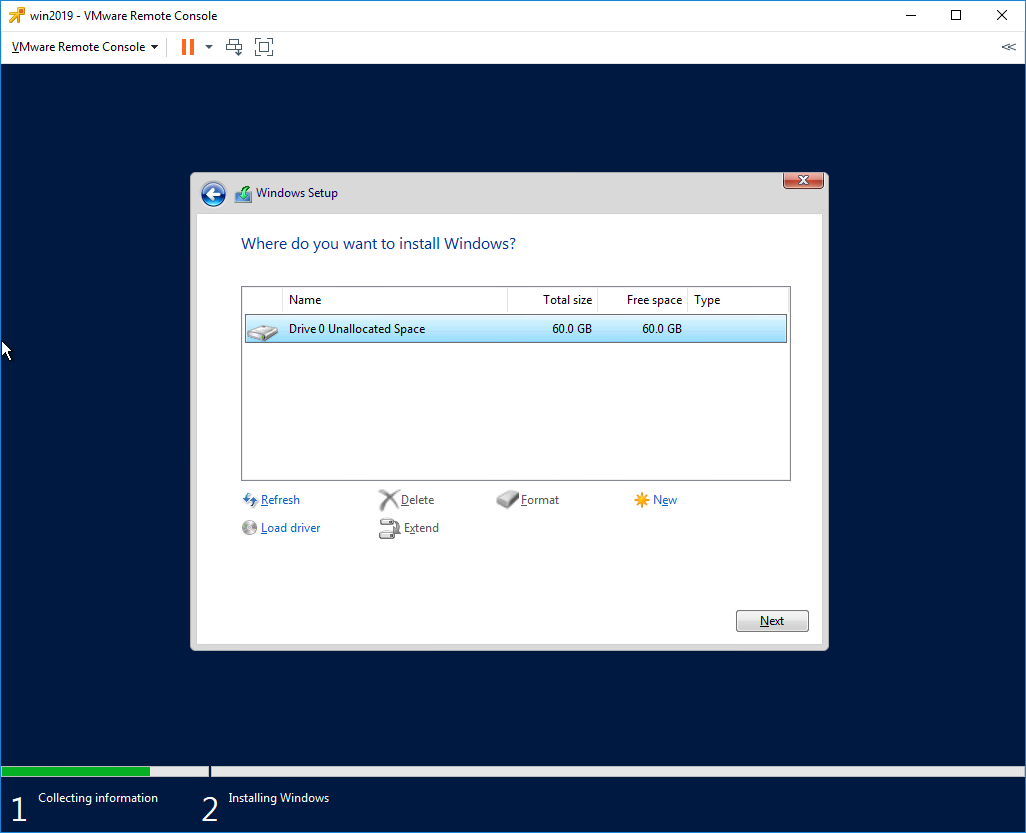
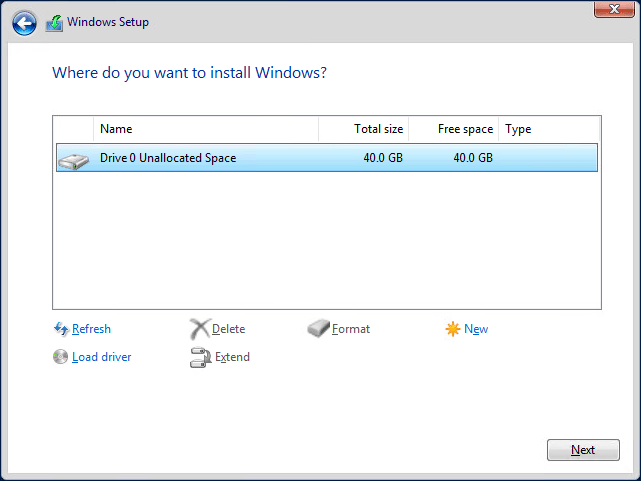
Выбираем диск для установки. На виртуальной машине он у нас выделен один. Next.
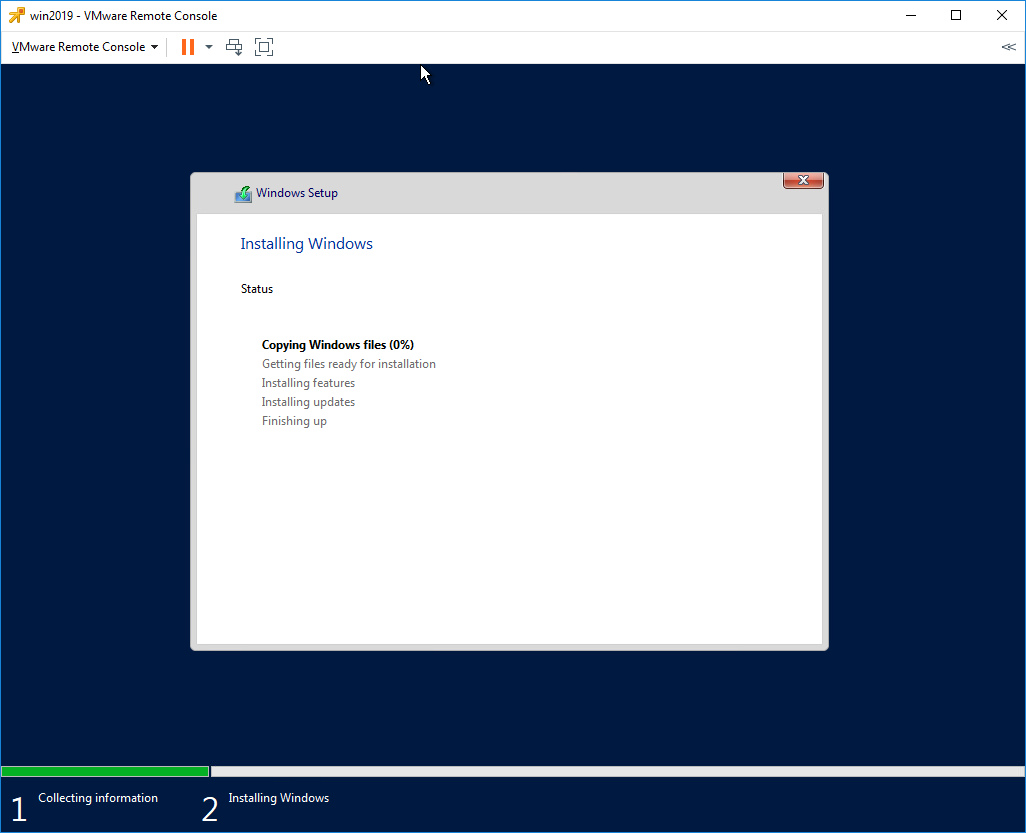
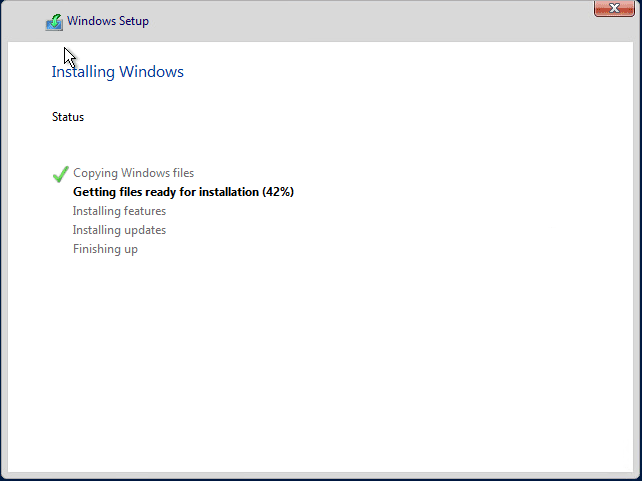
Откиньтесь на спинку кресла, начинают копироваться установочные файлы.
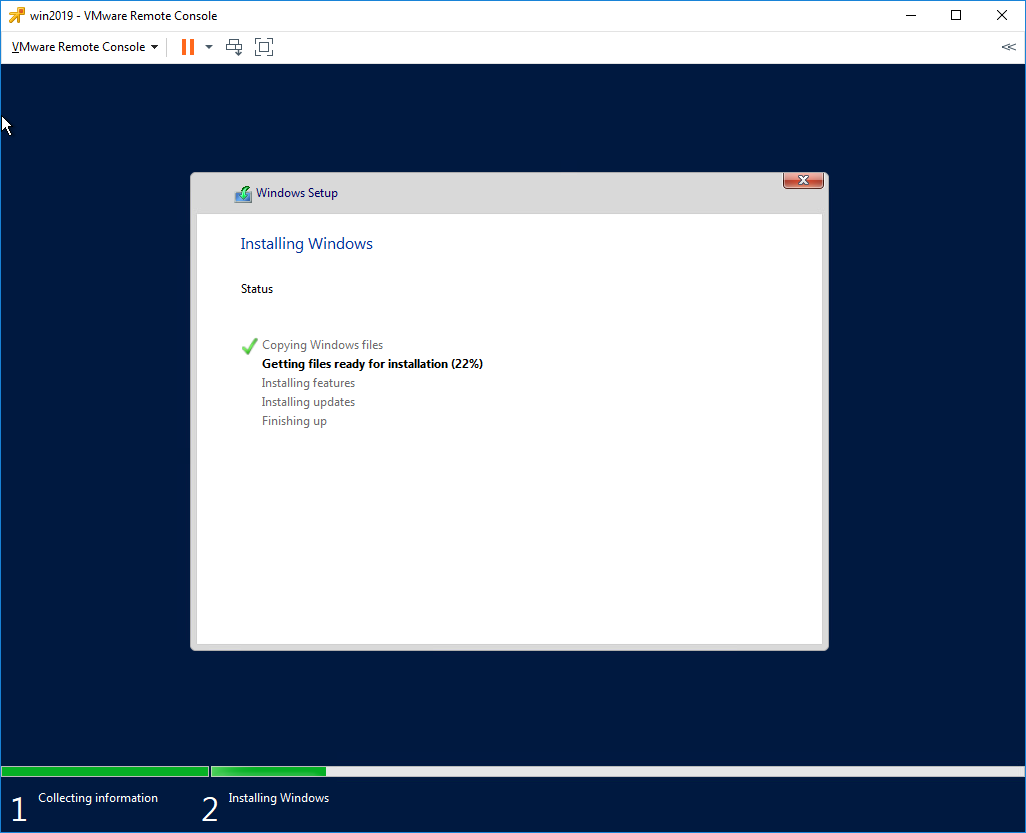
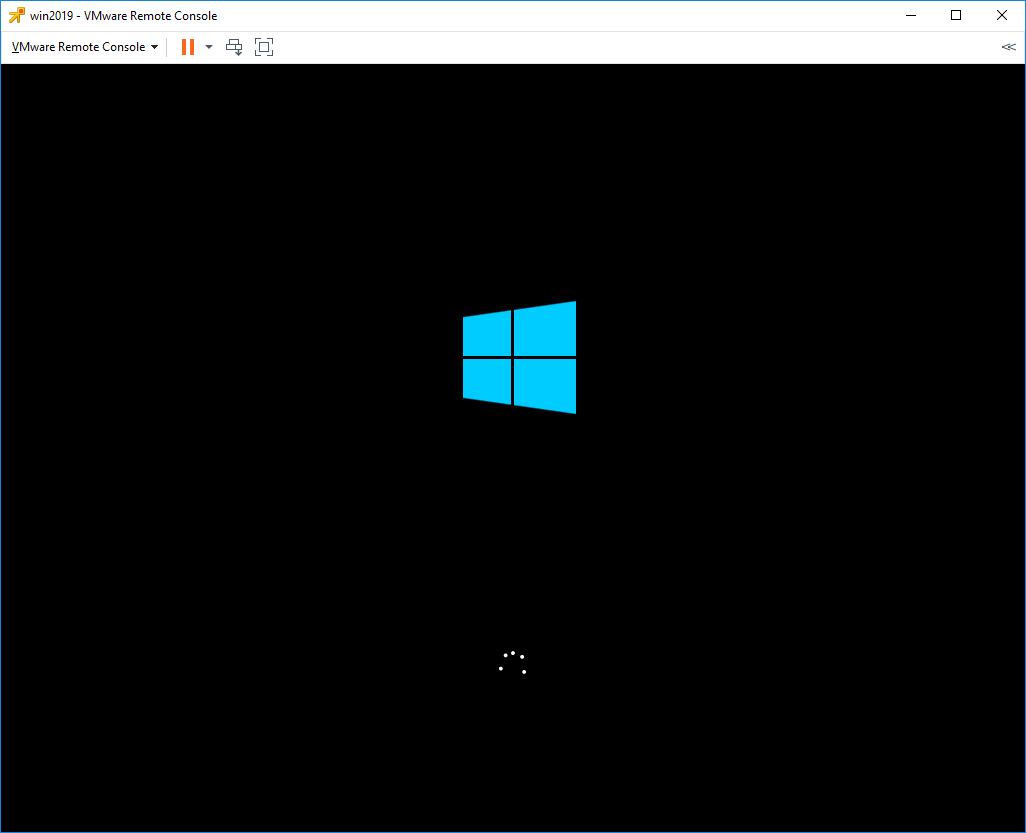
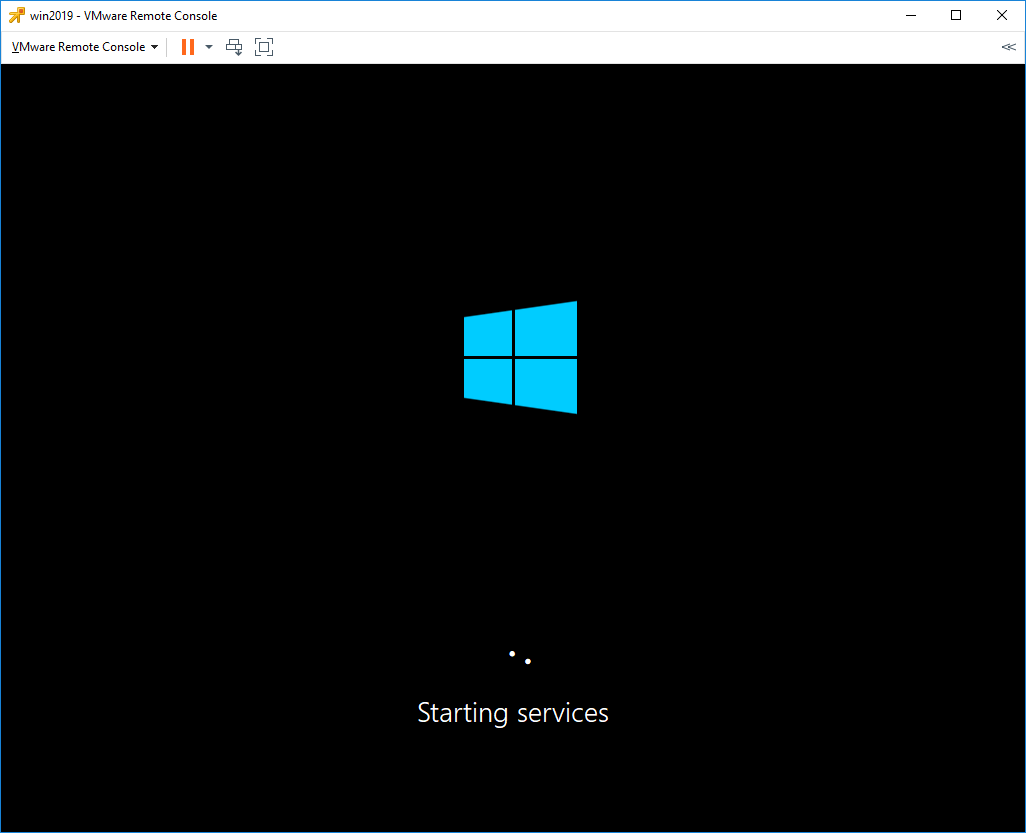
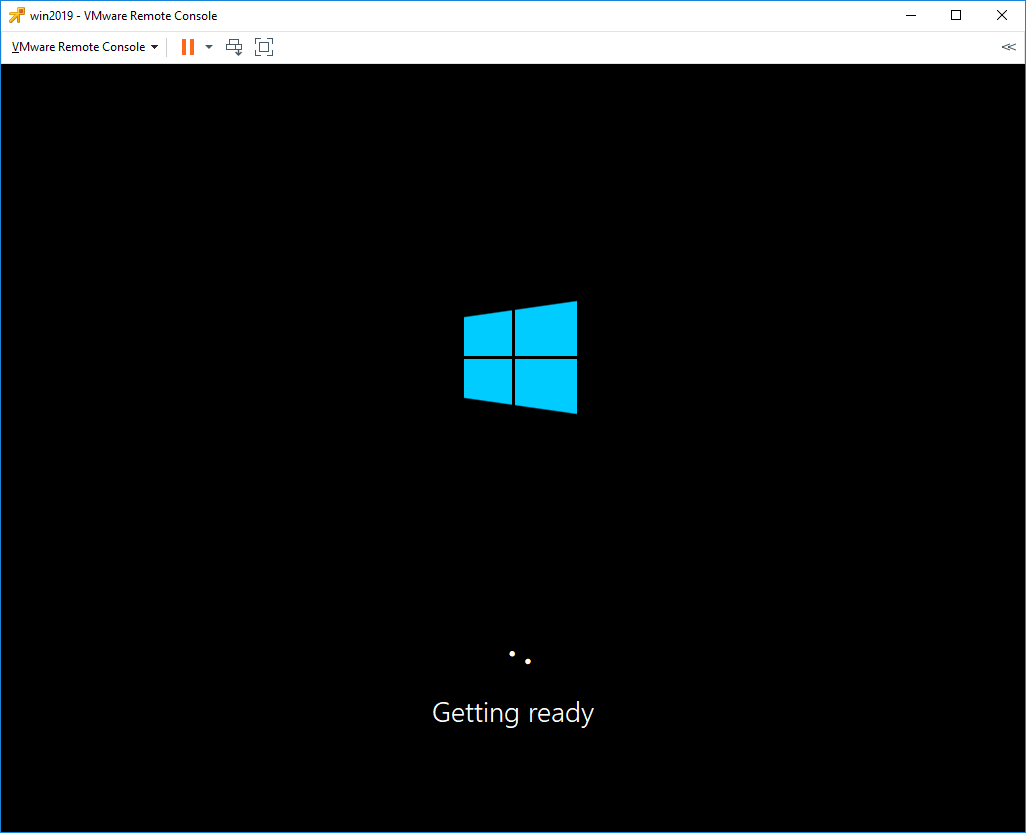
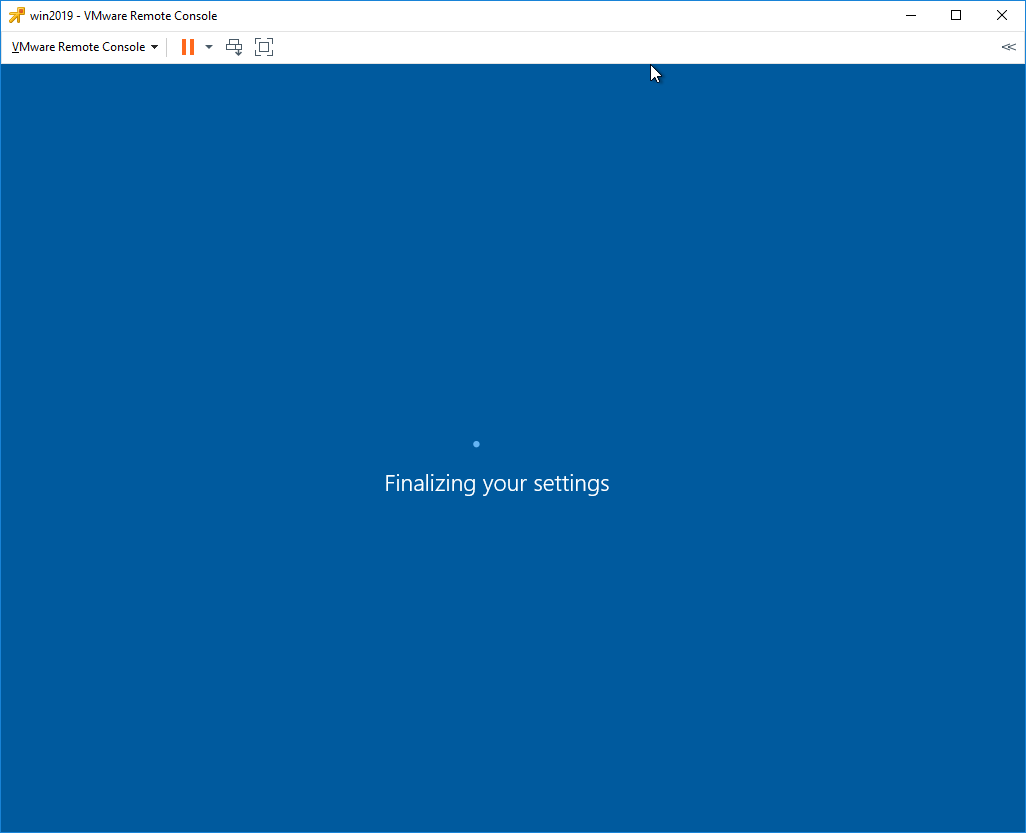
Идёт подготовка для установки Windows Server 2019.
В процессе установки Windows может несколько раз перезагрузиться.
Нужно запастись терпением.
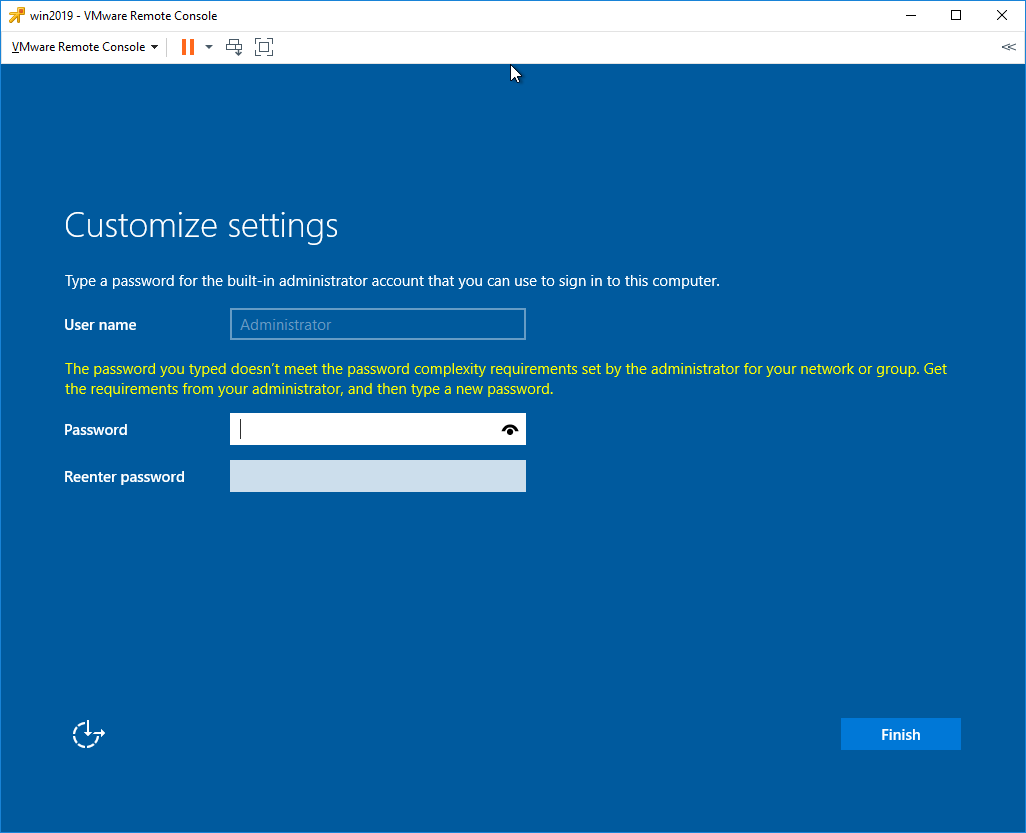
Открывается окно для установки пароля администратора.
Требования к сложности пароля усилились. Два раза вводим пароль для администратора. Finish.
Первоначальная настройка завершена.
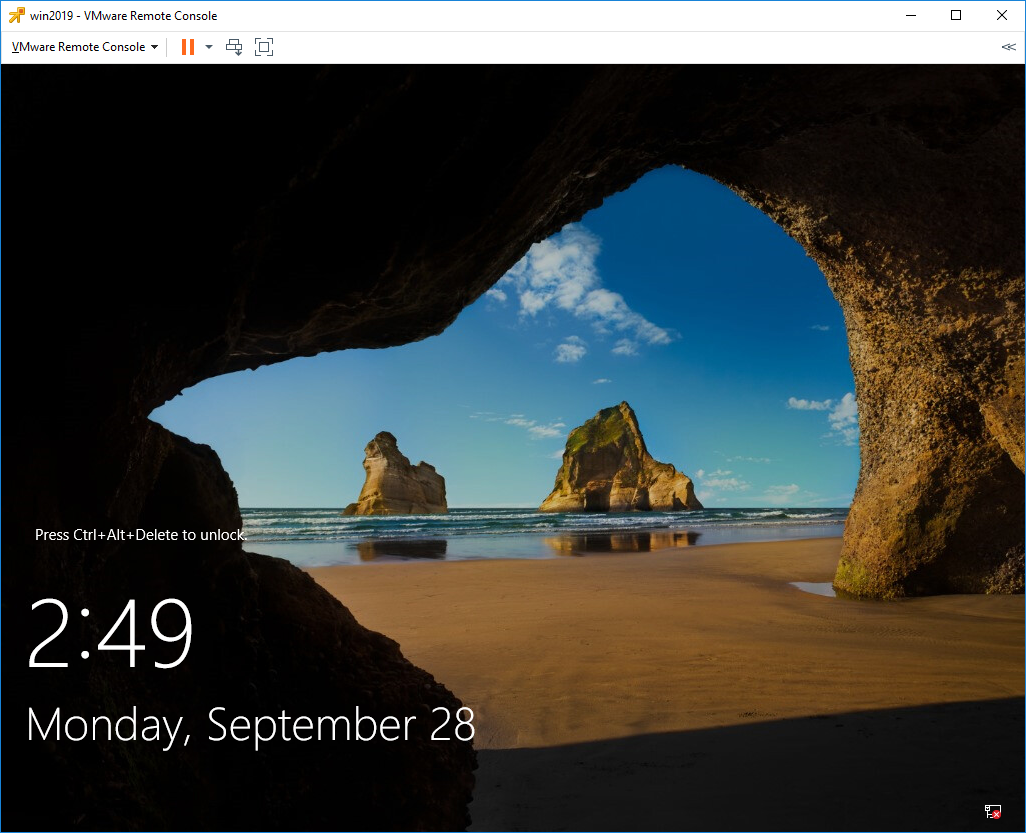
Для входа нужно нажать Ctrl+Alt+Del. Установка Windows Server 2019 завершена.
In this article, we will install Windows Server 2019 on Windows 10 PC using VM Workstation 15/14/12 virtualization program.
How to Setup Windows Server 2019 on VMware Workstation
Microsoft recently released Windows Server 2019 Preview version in the Windows Insider Program.
Although Windows Server 2019 is very similar to version 2016, it has many new features. If you are wondering what’s new in Windows Server 2019, visit https://cloudblogs.microsoft.com/windowsserver/2018/03/20/introducing-windows-server-2019-now-available-in-preview/.
As you know in the world of IT, the high-quality virtualization programs are used. Examples of these virtualization programs are VMware Workstation, Oracle VM VirtualBox, and Hyper-V.
In this article, we will use the Workstation 14 Pro virtualization program developed by VMware to install its Technical Preview.
As you all know, creating a virtual machine with VMware software is simple. If you have not created a virtual machine before, you can browse the How to Create VM in VMware Software. Before proceeding with the installation steps, download the Server 2019 ISO file here.
How to Run Windows Server 2019 in Virtual Machine
Follow the steps below to install it using the VMware virtualization program step by step.
You can download VMware Workstation 14/15 Pro from here.
Step 1
After you have opened VMware Workstation, click Create a New Virtual Machine to create a new virtual machine for installation.
In the virtual machine creation window, select Custom (Advanced) and click on the Next button.
Step 2
In the Virtual Machine Hardware Compatibility window, make sure that Workstation 14.x/15.x is selected and click Next.
Step 3
To add the Server ISO file to the virtual machine later, select I will install the operating system later and click Next.
Step 4
In the operating system selection window, select Microsoft Windows and click Next when you have selected Server 2016 version.
Step 5
Storing the virtual machine you created for installation on an external disk is important for performance. Save the location on a portable HDD and click Next.
Step 6
In the Firmware Type window, UEFI is selected by default. If you want, you can enable Secure Boot. Click Next to continue.
Step 7
In the Processor Configuration window, configure the processor according to the hardware specifications of your computer and click Next.
Step 8
Likewise, you can configure the virtual machine’s memory configuration to 4 GB (4096 MB). You can specify at a higher RAM value as well. Click the Next button to continue the Windows Server 2019 virtual machine configuration.
Step 9
In the VMware network configuration window, you can select the NAT network. Click Next to continue.
Step 10
LSI Logis SAS (Recommended) is selected by default and click Next to continue.
Step 11
Select SCSI for the disk type and click on the Next button.
Step 12
To create a new disk for the virtual machine, select Create a new virtual disk and click Next.
Step 13
It is recommended that you use all the free space of the disk. Configure the VMware virtual machine disk configuration as shown in the following illustration.
Step 14
Continue by clicking the Next button in the disk file specification window.
Step 15
You should activate the virtualization feature before completing the virtual computer. Open the Hardware settings and enable the Virtualize Intel VT-x/EPT or AMD-V/RVI option as shown below and close the window.
Step 16
Click the Finish button at the ready to create virtual machine window.
Step 17
After you click Finish, the virtual disk will start to be created. This may take some time…
Step 18
After you create the virtual machine, attach the ISO file that you downloaded to the virtual machine.
Step 19
Start the virtual machine and start the installation.
How to Install Windows Server 2019 Step by Step
After you run the virtual machine, follow these steps to install the operating system step by step.
Step 1
When you run the virtual machine on VMware 14/15, press any key when you see the “Press any key to boot from CD” message.
After the installation window is opened, make your language, time, and keyboard settings and click Next.
Step 2
Click the Install Now button to start the Server installation.
Step 3
In the Activate Windows window, click I do not have a product key.
Step 4
Select the operating system you want to install and click the Next button.
Step 5
Accept the Server license agreement and click Next.
Step 6
Select the “Custom: Install Windows only” option from the server installation types.
Step 7
Partition the disk of the virtual machine and select the partition you want to install and click Next.
Step 8
Wait while the setup is copying the files…
Step 9
Wait while the devices are being prepared…
Step 10
Set a complex password for Admin user and click Finish button.
Step 11
Once Windows Server 2019 is open, press Ctrl + Insert at the same time to switch to the user interface. Type the password you have specified and press ENTER.
Step 12
After completing the setup, proceed to the next step to install VMware Tools.
How to Install VMware Tools
It is necessary to install the VMware Tools while using the VMware virtualization program. Once you have installed VM Tools, you can use virtual machines more efficiently.
To install the VMware Tools, follow the steps below.
Step 1
On VMware program, click VM and then click Install VMware Tools.
Step 2
After the VMware Tools image file is added to the system, click Run setup64.exe.
Step 3
In the VMware Tools installation wizard window, click Next.
Step 4
Select Complete for the type of installation and click Next.
Step 5
And finally, click the Install button to start the VMware Tools installation.
Step 6
Restart your system for the changes to take effect.
Step 7
Configure the resolution setting of the virtual machine by clicking View / Fix Guest Now. After installing VMware Tools, you can now exchange files between your virtual machine and your physical computer.
How to Run Windows Server in PC ⇒ Video
You can follow the video below to install it step by step and you can also subscribe to our YouTube channel to support us…
How to Install Project Honolulu ⇒ Video
You can also watch the following video to install Microsoft’s Project Honolulu on your virtual server…
Final Word
In this article, we have discussed the steps to run Server 2019 step by step using the virtualization program. Thanks for following us!
Related Articles
♦ How to Download Microsoft Project Honolulu
♦ How to Run Server on Oracle VM VirtualBox
♦ How to Install Windows 7 on VMware ESXi 6.5
♦ How to Upload ISO Files to Datastore in VMware ESXi 6.5
♦ How to Configure Microsoft Project Honolulu
We will show you how to Install Windows Server 2019 on VMWare Workstation. You can use this method to run Windows Server 2019 on your personal computer and practice new features and configurations before implementing them in a production environment. Windows Server 2019 comes with a lot of improvements and new features. And like always, Microsoft has made available different editions of Windows Server 2019 for different users and scenarios. In this article, we will focus on the Datacenter edition which is the most feature-rich edition of Windows Server 2019.
If you want to Install Windows Server 2019 on VMWare Workstation then follow this guide. We will show you step by step process to Install Windows Server 2019 on VMWare Workstation. This guide is also applicable for installing other versions of Windows Servers and Desktops on VMWare Workstation.
Basic Requirments To Install Windows Server 2019 On VMWare Workstation?
Before we start with the installation process, let’s have a look at the system requirements to install Windows Server 2019 on VMWare Workstation.
#1. Host Computer to run VMWare Workstation:
The Minimum computational resources needed to run Windows Server 2019 on VMWare Workstation:
- Processor: Intel Core 2 Duo processor or later. AMD Athlon™ 64 X2 Dual Core Processor 3000+ or higher is recommended.
- Memory: 4GB of RAM or more is recommended. The minimum supported is 2GB of RAM. Note that memory requirements increase as guest operating systems are added.
- Storage: 60GB of available storage is recommended. Additional storage may be necessary when installing guest operating systems.
- Network: A network connection is required for installation and updates.
2. Download Windows Server 2019 ISO File:
The first thing you need is the ISO file of Windows Server 2019. You can download it from the official website of Microsoft. Just go to this link and select the edition you want to download. In our case, we will be downloaded the Datacenter edition because it is the most feature-rich edition.
3. Install VMWare Workstation 15 Pro:
After downloading the ISO file, the next thing you need is virtualization software. In this article, we will be using VMWare Workstation. You can also use other virtualization software like VirtualBox, Hyper-V, etc.
Just go to the official website of VMWare and download the latest version of VMWare Workstation Pro. Install it on your computer and launch it.
Now that we know the system requirements, let’s start with the installation process.
How To Install Windows Server 2019 On VMWare Workstation?
Time needed: 30 minutes.
How to Install Windows Server 2019 on VMWare Workstation?
- Open the new Virtual Machine Wizard
1. Fire up VMWare Workstation
2. Go to File -> New Virtual Machine or Ctrl + N - Select Custom Configuration Wizard
Select Custom Wizard and click Next
- Choose VM Hardware Compatibility
1. Choose the compatible hardware from the drop-down
2. Click Next - Select to install operating system later option
1. Select to install operating system later option
2. Click Next - Select the guest operating system
1. Select Windows 10 since we don’t have the windows server option included yet.
2. Click Next - Virtual Machine Name & Location
1. Give the Virtual Machine Name & Location
2. Click Next - Select Firmware Type
1. You can select either BIOS or UEFI. Note: Only new boards supports UEFI.
2. Click Next - Allocate the number of processors you need
1. Allocate how many processors you need. This depends on your host machine’s hardware.
2. Click Next - Set the Memory for the virtual machine
1. This depends on your host machine’s hardware. You should leave the memory to run the host machine without hazels.
2. Click Next - Select Network Connection settings for the VM
1. Four options are available to select. Please read and select your desired network setting.
2. Click Next - Choose the appropriate storage IO controller
1. Choose the appropriate storage IO controller
2. Click Next - Select the disk type for the VM
1. Select the available disk type on your host machine.
2. Click Next - Select the virtual disk for the VM
1. Select the virtual disk for the VM if not create a new disk
2. Click Next - Assign the disk size for the VM
You can select a single or split virtual disk option. Selecting a single disk will increase the performance. But, if you want to move the disk to a different location you can select the split virtual disk.
Allocate the disk size and click next.
- Give the path where you want to keep the VM disk
1. Give the location where you want to save the disk.
2. Click Next. - Create the VM
1. VM settings are ready to create the VM.
2. Click Finish - Load the ISO image to boot the VM
1. Select use ISO image file
2. Browse the ISO image
3. Click Ok - All set to power on the VM
- First boot screen of Windows Server 2019
- Windows Server 2019 installation wizard
The installation wizard will appear in a couple of seconds after the boot
1. Select the language time and keyboard settings
2. Click Next - Install Windows Server 2019
Click on Install Now
- Select The Operating System You Want To Install
1. Select the version you want to install
2. Click Next - Accept the License Agreement
- Select installation method
Select custom installation if you are doing a fresh installation. Or, select upgrade if you are upgrading your older Windows Server to Windows Server 2019.
- Select the installation disk for installation
Select the disk and click on Next to install Windows Server 2019. If you want to create additional logical partitions then select the disk and click on new assign the partition size. You can create multiple partitions within available storage.
- Installing Windows Server 2019
- Installation is in progress…
- Windows getting ready after the installation completes
- Create Administrator User
- Windows Server is ready to use
- Windows Server 2019 Login screen
- First look at Windows Server 2019
This is how you should Install Windows Server 2019 on VMWare Workstation.
Thanks for reading the post. Please share this post with those who want to know the procedure to Install Windows Server 2019 on VMWare.
With the release of the latest technical preview of Windows Server 2019, we decided to learn how to install and configure Windows Server 2019. The Honolulu project has been officially released as the Windows Admin Center. Microsoft has also released the Honolulu project, which is a new management platform for Windows Server. In this tutorial, we’ll take a look at the Windows Server 2019 installation and configuration and the Henololo project. You can visit the packages available in Eldernode to purchase a Windows VPS server.
Tutorial install and configure Windows Server 2019
In the first step, you have to download the latest version. In the continuation of this article, join us to learn how to install and configure Windows Server 2019.
Install and Configure Windows Server 2019
Windows Server is one of the server-specific operating systems that users install on their server according to their needs when purchasing a VPS Server or Dedicated Server. Among the different versions of Windows Server, the latest and most recent version is Windows Server 2019, which has better performance than previous versions. It should be noted that this version, despite the time since its introduction by Microsoft, is still not recognized as a completely stable version, and new updates for it are constantly released. Follow us in the continuation of this tutorial.
How to install Windows Server 2019 via ISO file in VMware
To install Windows Server 2019 on VMware, we used the following virtual machine:
– Windows Server 2019 x64 bit
– VMware ESXi version 6.5
In the images below, you can see the Windows Server 2019 installation page, the ISO file of which is in the VMware virtual machine:
On the page above, specify the language and keyboard, and then click Next.
Click Install to begin the installation process.
Select the Windows Server version and click Next.
Confirm the agreement (check I accept the license terms).
Select the drive in which you are installing Windows.
As you can see, the installation process is very simple.
How to install Windows Server 2019 on Hyper-V 2016
With Hyper-V, all you have to do is download the VHDX file and copy it to the datastore where you want to run the Hyper-V virtual machine. Details of the Hyper-V environment are as follows:
– Windows Server 2016 Hyper-V
– Windows Server 2016 is installed on VMware ESXi 6.5.
The process of using the downloaded VHDX file is similar to creating other Hyper-V virtual machines. But here we connect the disk to the downloaded Microsoft Insider file.
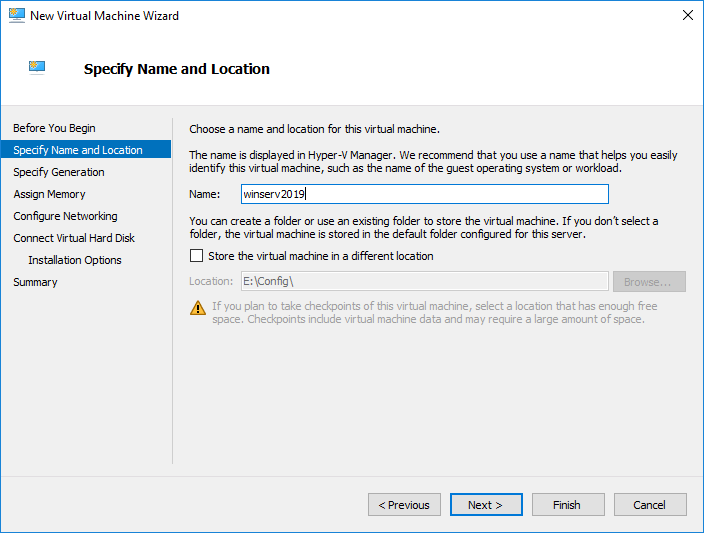
In the image above, we specify the name and path of the virtual machine storage.
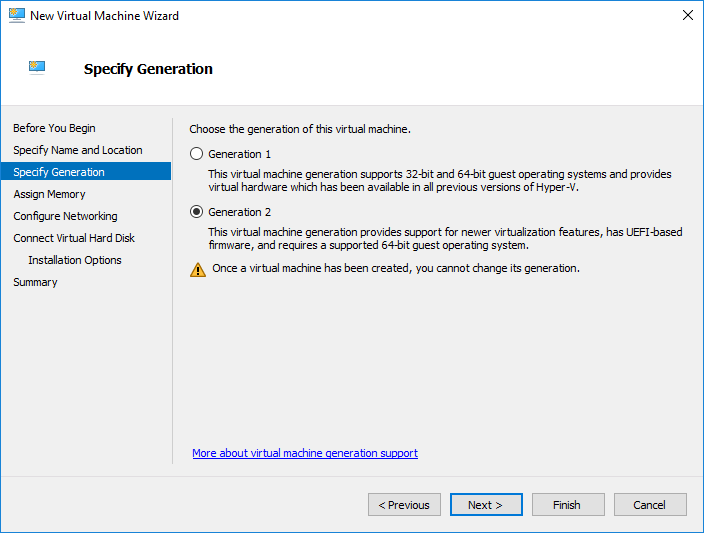
Then select Generation 2 for the Generation version:
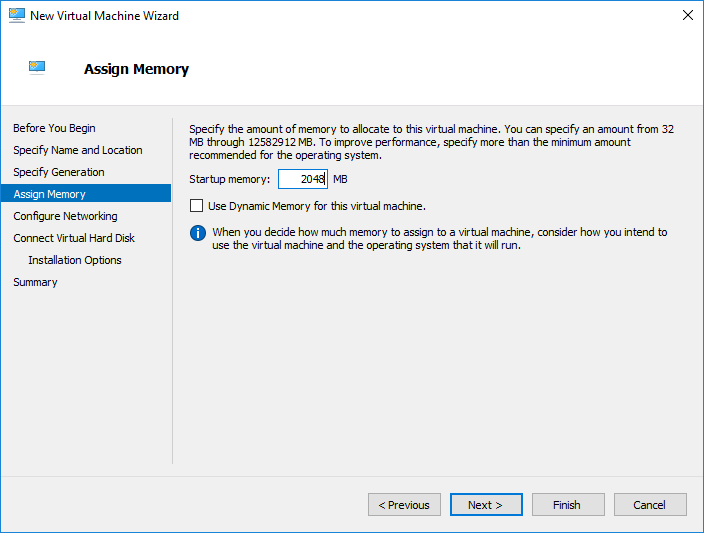
In the image below, we allocate only 2 GB of RAM to this virtual machine.
Note: If you do this in operating environments, be aware that high RAM should be allocated to virtual machines, otherwise you will face many problems when loading high.
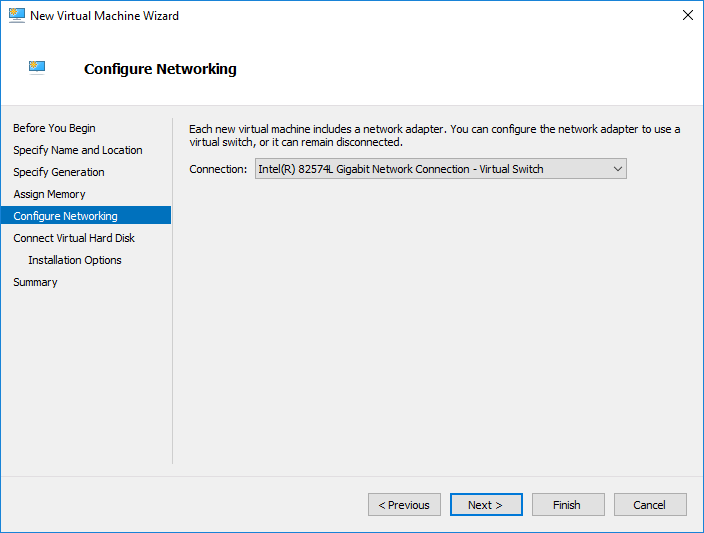
Then select the network card configuration for the Hyper-V virtual machine in Windows Server 2019.
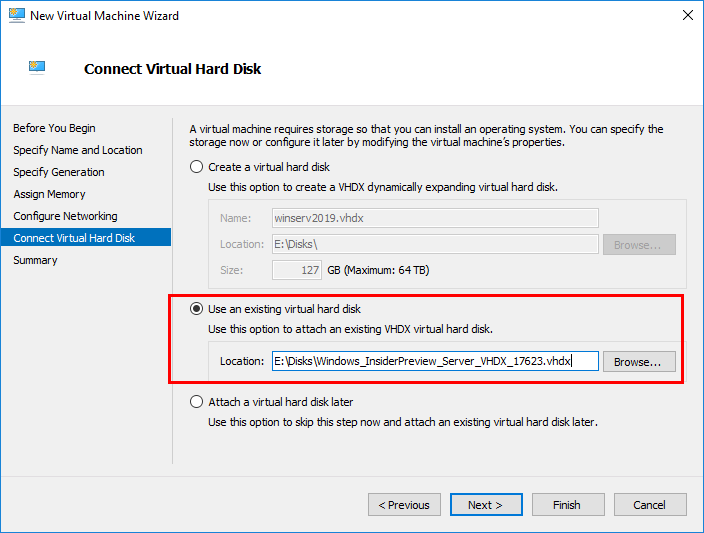
In the Connect Virtual Hard Disk section, select Use an existing virtual hard disk. Below is the path to the downloaded VHDX file that is attached to the virtual machine.
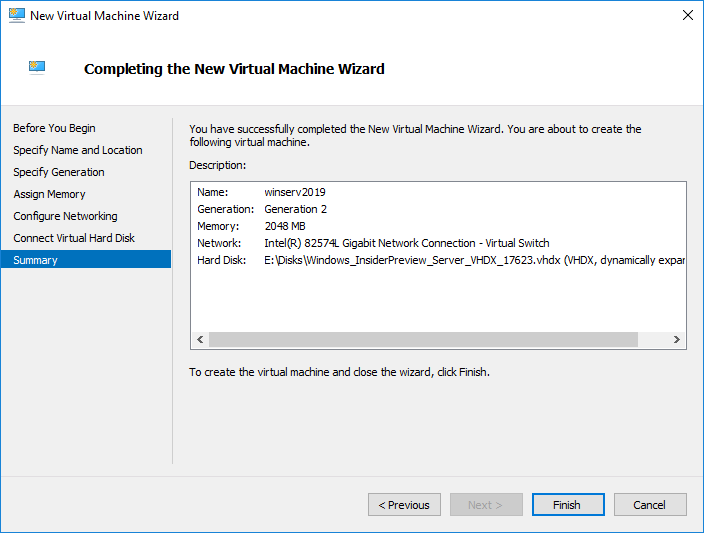
On the last page, you will see a summary of the status of the virtual machine that you configured. Click Finish to create this machine.
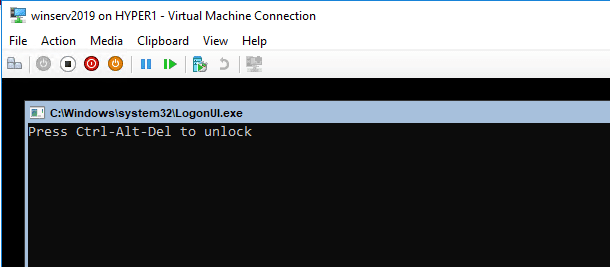
After turning on Hyper-V, you will see that the technical preview is Server Core.
How to install the Honolulu project on Windows Server 2019
Honolulu is a browser-based local tool that allows you to manage Windows Server without the need for Azure or cloud. Honolulu allows IT administrators access to full control of all server structural features. It is generally suitable for management on private networks that are not connected to the Internet.
Honolulu is a modern evolutionary tool for in-box management tools, such as Server Manager or MMC. In fact, the project complements the System Center and Operations Management Suite but has not been created to replace these products and services.
You can install the Honolulu project locally on the Windows Server 2019 Core version. To do this, we need to run and install the MSI package using CMD.
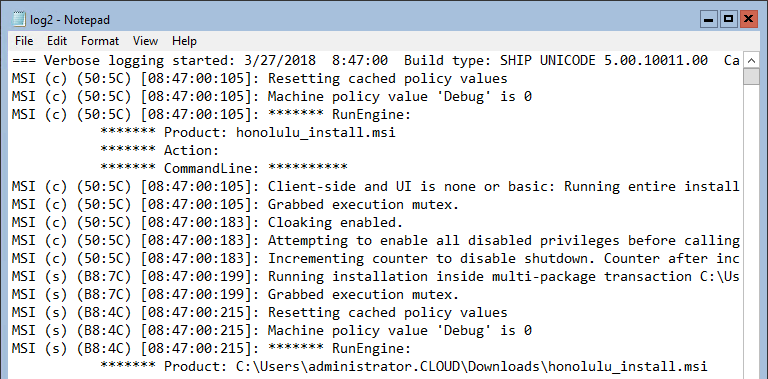
C:Usersadministrator.CLOUDDownloads>msiexec /i honolulu_install.msi /qn /L*v log2.txt SME_port=6513 SSL_CERTIFICATE_OPTION=generateNote: Instructions for installing the Honolulu project on the Windows Server 2019 can be found on the official Microsoft page.
msiexec /i <HonoluluInstallerName>.msi /qn /L*v log.txt SME_PORT=6513 SSL_CERTIFICATE_OPTION=generateAs you can see in the above command, we also specify the log file. Using the log file to see the installation status and troubleshooting problems during installation is appropriate. At first, the installation of Honolulu was faulty, but after resetting the server and reinstalling it, the problem was solved.
The Honolulu project and its implementation on Windows Server 2019
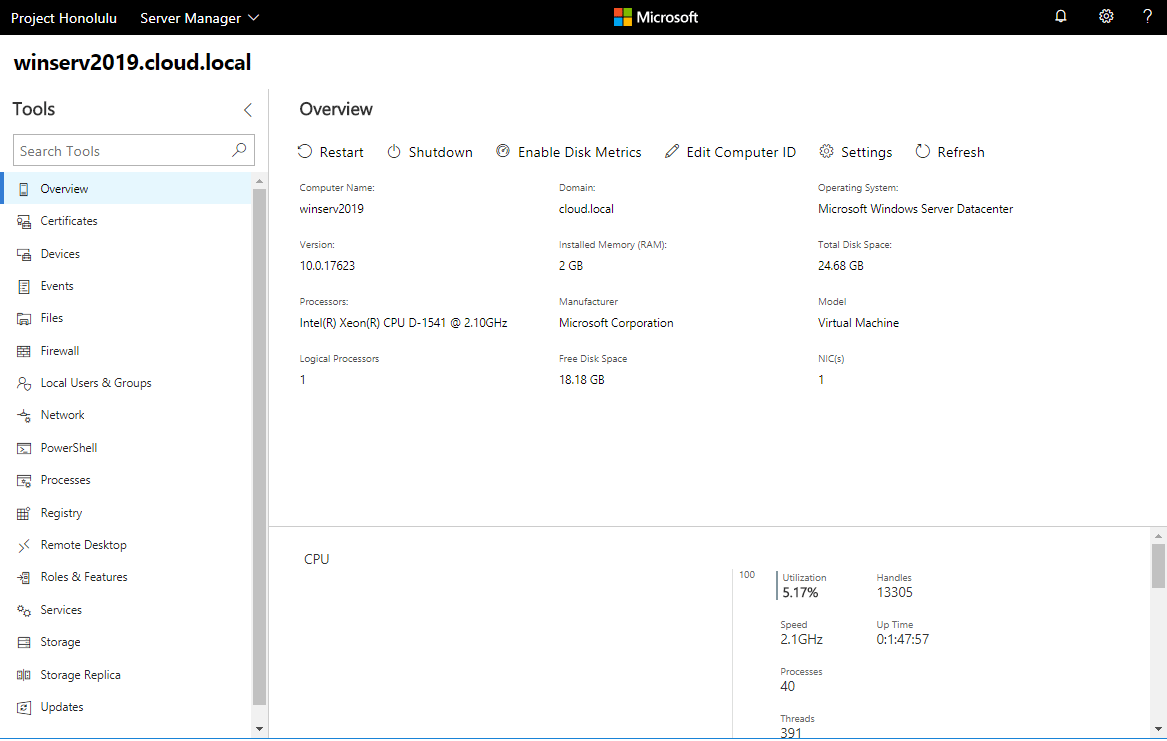
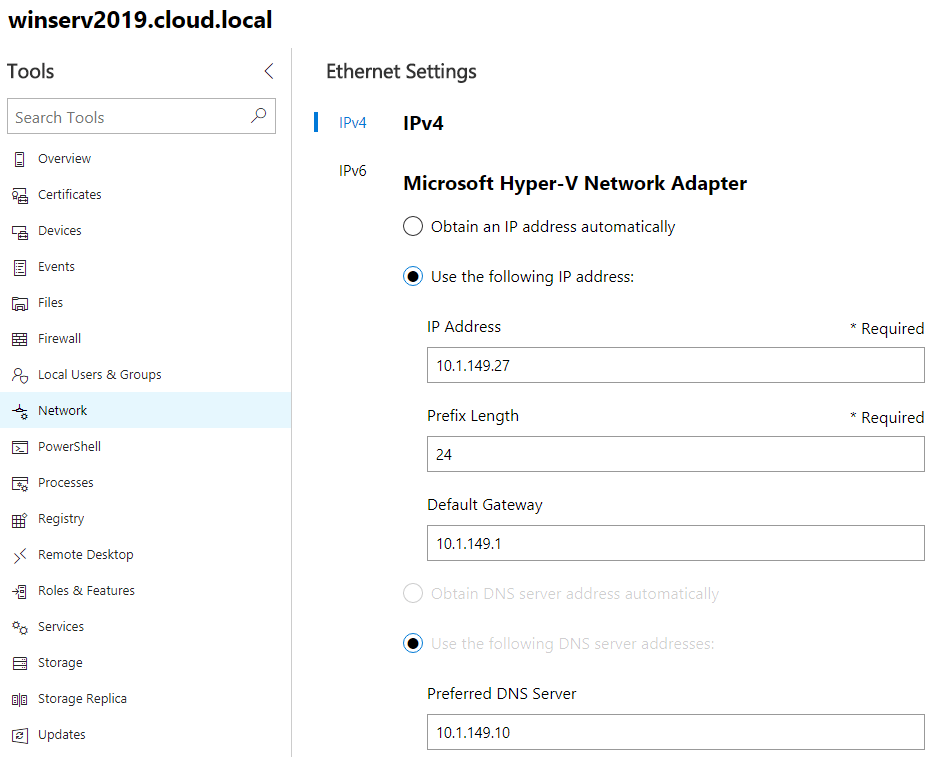
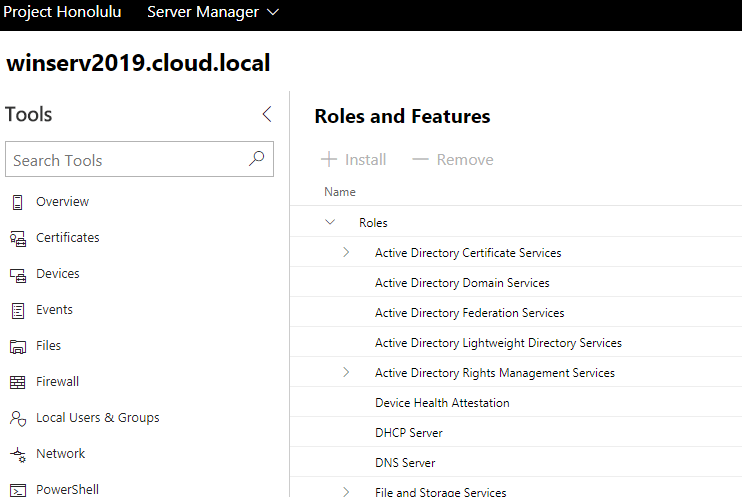
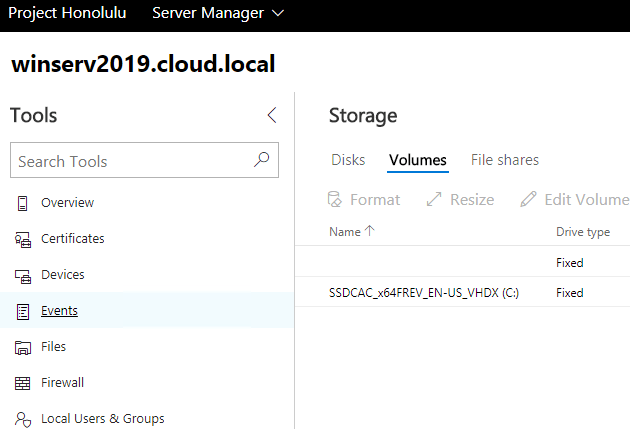
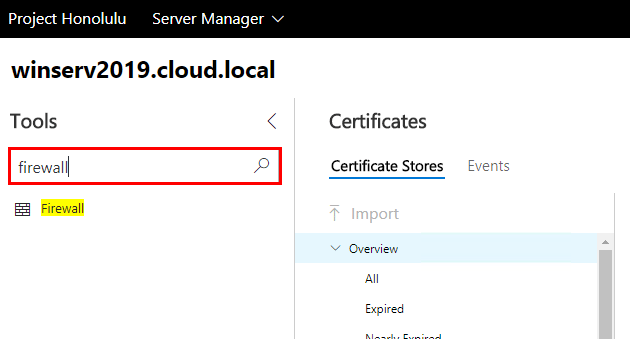
At first glance, the Honolulu project on Windows Server 2019 was very appealing to us. Microsoft has done an interesting job of designing and adding charm to it. In addition, the dashboard has an interesting search feature that allows you to easily find different items. You can type the letters in it so that the Honolulu project quickly displays the item you were looking for. Of course, the Search feature still needs improvements, which I hope will be improved in future versions.
Below you can see pictures of the Honolulu project on Windows Server 2019.
*
**
***
****
Conclusion
This article is one of the most complete Windows Server 2019 installation and configuration training references. In this tutorial, we tried to fully teach you how to install Windows Server 2019 via ISO file in VMware and Hyper-V 2016. You were also taught how to install the Honolulu project on Windows Server 2019.

Update 4.13.2018 – Project Honolulu released officially as Windows Admin Center
With the release of the newest technical preview of Windows Server 2019, you can now go out and pull down the latest code available for the upcoming release of the Windows Server OS. For now, the technical preview is a GUI-less offering (server core) of the new Server OS. Update Thanks to comment from “Vinicius” below – “the preview for 2019 IS available with the Server with desktop experience installation option. On the Insiders page, select the vNext LTSC preview.” This is available through the Microsoft Windows Insiders program. You can read more and sign up for the Insiders program here: https://insider.windows.com/en-us/. After signing up, you can gain access to the latest releases of technical previews and such. With the new release of Windows Server 2019 Technical Preview, Microsoft has also released Project Honolulu which is the new management platform being developed for the Server platform. Let’s take a look at Installing and Configuring Windows Server 2019 and Project Honolulu.
Windows Server 2019 Technical Preview and Project Honolulu Download – https://www.microsoft.com/en-us/software-download/windowsinsiderpreviewserver
From the Windows Insider’s site, there are two options that you can gain access to Windows Server 2019. The official build number that is listed on the site is “Build 17623”. The new build is available via an ISO installer as well as a VHDX hard disk that can be used in Hyper-V. I have installed both, in VMware (used a Windows Server 2016 VM) and installed from ISO, as well as Hyper-V (using the VHDX file). Either work well depending on which platform you prefer. In my home lab, I wanted to go through the motions on both platforms, so used both in deploying a Windows Server 2019 VM.

Installing Windows Server 2019 via the ISO method in VMware
Let’s first take a look at the ISO method of installing Windows Server 2019 in VMware. I used the following for the virtual machine:
- Windows Server 2016 x64 bit VM
- ESX 6.5 hardware compatibility level
Below are the very straightfoward (and familiar) screenshots of the Windows Server 2019 17623 build via an ISO mounted to a VMware VM.
The above was a very straightforward process as you can see. The screens look identical at least at this point and build version to previous Windows Server builds.
Installing Windows Server 2019 in Hyper-V 2016
With Hyper-V all you need to do is download the VHDX file and copy this to the datastore you want to run the Hyper-V virtual machine from. I copied it to a FreeNAS volume that is connected via iSCSI to a couple of Hyper-V hosts. Details of my Hyper-V environment:
- Windows Server 2016 Hyper-V
- Nested inside ESXi 6.5 VMs
- Connected via iSCSI to FreeNAS datastore
The process to use the downloaded VHDX file is the same as creating any Hyper-V virtual machine. However, we will connect the hard disk to the downloaded hard disk file from Microsoft insiders. First, we name the VM.
Next, I selected Generation 2 for the generation version.
Disregard the anemic settings you see below. I am running this VM in a nested instance of Hyper-V running inside my ESXi cluster in the home lab. Here, I am simply running very low memory on the VM as I don’t have a lot of memory assigned to the host itself.
Next, select the networking configuration for the new Windows Server 2019 Hyper-V virtual machine.
The next screen contains the configuration we are most interested in. On the Connect Virtual Hard Disk configuration, select the Use an existing virtual hard disk option. Below, you see the downloaded VHDX file that I am pointing to that was copied over from the download.
Finally, we complete the New Virtual Machine Wizard.
The Hyper-V virtual machine boots. As you can see, the technical preview is running Server Core.
Install Project Honolulu in Windows Server 2019
Update 4.13.2018 – Project Honolulu released officially as Windows Admin Center
What is Project Honolulu? Microsoft’s description of the utility is found here: https://docs.microsoft.com/en-us/windows-server/manage/honolulu/honolulu
Honolulu is a locally deployed, browser-based, management tool set that enables on-premises administration of Windows Servers with no Azure or cloud dependency. Honolulu gives IT Admins full control over all aspects of their Server infrastructure, and is particularly useful for management on private networks that are not connected to the Internet.
Honolulu is the modern evolution of “in-box” management tools, like Server Manager and MMC. It is complementary to System Center and Operations Management Suite, and is not intended to replace these products and services.
The cool thing that we can do is install Project Honolulu locally on our Windows Server 2019 server core installation. To do that we simply need to copy over the Project Honolulu installation MSI package and run the installer via the command line.
The command to install Project Honolulu in Windows Server 2019 as found on Microsoft’s page documenting the process: https://docs.microsoft.com/en-us/windows-server/manage/honolulu/deployment-guide
msiexec /i <HonoluluInstallerName>.msi /qn /L*v log.txt SME_PORT=6513 SSL_CERTIFICATE_OPTION=generate
As you can see in the above command, we specify the log file. This is valuable to see the installation status and troubleshooting any issues with the install. Initially, my installation seemed to fail without progress. However, a reboot of the server and then trying it again seemed to work for me.
Project Honolulu running on Windows Server 2019 Technical Preview
In taking Project Honolulu for a spin with Windows Server 2019, I really liked the “dashboard” feel to the interface. Microsoft has done a good job with the intuitive layout, functions, and feel to the app. Everything in the Preview release 1803 (latest available) was well arranged and responsive. Also, the dashboard has a really nice search feature that allows quickly finding the item you are looking for. It reminds me of the search in WHM in front of cPanel. You can start typing and it immediately starts searching for the item you are looking for. I did find that it wasn’t searching sub-items underneath the main features in the dashboard. However, hopefully this search feature will be improved as the product matures toward GA. Below are screenshots from Project Honolulu loaded in Windows Server 2019.
Thoughts
Microsoft is definitely continuing to evolve the Windows Server platform with more modern approaches in IT infrastructure. The Microsoft Windows Insider’s program is a great service to be a part of as it enables getting your hands on beta products and technical previews and such of Windows Server and other products. I had fun Installing and Configuring Windows Server 2019 and Project Honolulu and it was nice to see the direction things are heading with server administration and methodologies. Look for more posts on Windows Server 2019 and Project Honolulu as the products mature and we have updates on releases, etc.


