Исходные данные:
- организация, использующая в качестве базы данных сотрудников Microsoft Active Directory, базирующуюся на Windows Server 2008 R2 контроллере домена;
- написанная на php информационная система, поддерживающую протокол LDAP для взаимодействия с MS AD (например, Moodle).
Проблема: при соединении с AD по протоколу LDAP (порт 389) не работает функция php для смены пароля пользователю AD. Решением является переход на SSL-версию протокола — LDAPS (порт 636). На поиск способа включить поддержку LDAPS на контроллере домена было потрачено приличное количество времени, сэкономить которое может помочь данная статья.
Шаг 1, установка служб сертификатов на контроллер домена.
Заходим в панель управления сервером (Start — Administrative Tools — Server Manager). Add Roles — Active Directory Certificate Services — Next — Next — отмечаем Certification Authority Web Enrollment (Add Required Role Services) — Next — Enterprise — Next — Root CA — далее Next до конца.
Шаг 2, запрос на сертификат.
Создаём файл request.inf с текстом:
[Version]

Signature= "$Windows NT$"
[NewRequest]
KeySpec = 1
KeyLength = 1024
Exportable = TRUE
MachineKeySet = TRUE
SMIME = FALSE
PrivateKeyArchive = FALSE
UserProtected = FALSE
UseExistingKeySet = FALSE
ProviderName = "Microsoft RSA SChannel Cryptographic Provider"
ProviderType = 12
RequestType = PKCS10
KeyUsage = 0xa0
[EnhancedKeyUsageExtension]
OID=1.3.6.1.5.5.7.3.1
OID=1.3.6.1.5.5.7.3.2
[Extensions]
2.5.29.17=MDiCFURDNC5sb3JlLnVuaS1kdWJuYS5ydaAfBgkrBgEEAYI3GQGgEgQQhePOUDQ+
_continue_=7Uy5GtDgYOzldA==
Critical=2.5.29.17
Затем выполняем
certreq -new request.inf request.req
Шаг 3, получение сертификата у CA.
Вот тут самое интересное. Если попробовать разместить запрос на сертификат штатным способом, т.е. через MMC snap-in «Certification Authority» или командой
certreq -attrib "CertificateTemplate:DomainController" request.req, получаем ошибку «The DNS name is unavailable and cannot be added to the Subject Alternate name. 0x8009480f», которую обойти никаким способом так и не удалось. Зато сработала выдача сертификата через веб.
Заходим на localhost/certsrv/certrqxt.asp и вставляем в первое поле код из файла request.req; в поле Certificate Template выбираем Web Server. Скачиваем получившийся сертификат по ссылке Download certificate.
Шаг 4, импорт сертификата.
Winkey+R — mmc; нажимаем Ctrl+M, Certificates — Add — Computer Account — Next — Local Computer — Finish — OK. Certificates (local computer) — Personal — Certificates (правой кнопкой) — All Tasks — Import. Указываем файл, сделанный на шаге 3.
Шаг 5, проверка.
Winkey+R — ldp; Connection — Connect… Server — это FQDN нашего контроллера домена, например, dc.company.org. Port: 636, галочка SSL. OK. «Cannot open connection» означает, что цель не достигнута. Положительный результат будет выглядеть как много строк в правой половине окошка, включая «Established connection to dc.company.org». Теперь можно указывать ldaps://dc.company.org в качестве url ldap-сервера в информационной системе.
Welcome back to our two-part series on how to enable secure LDAP (LDAPS) communications between client/server applications on Windows Server 2008/2012 domain controllers. In part one, I went over what you should know about LDAPS, your options, and prerequisites. After we understood the concepts of why, where and when we should be looking to use LDAPS, let’s move on to the actual configuration.
Enabling Secure LDAP: Configuring LDAPS
1. Create the right certificate template to issue
First, we need to make sure that your CA is allowed to issue the correct types of certificates. Remember, these must contain the Server Authentication OID 1.3.6.1.5.5.7.3.1.
I’ve described the steps you need to take in order to create such a template in my Creating a Digital Certificate Template for the purpose of Server Authentication in Windows Server 2008/R2/2012 article.
2. Request a certificate for server authentication
To request a certificate from your LDAPS server, do the following on each DC that requires LDAPS connections:
- In Start, type MMC, and then press Enter. If User Account Control prompts it, go ahead and ensure it displays the action you want. After that, select Yes.
- In the MMC console that opens, click File and then click Add/Remove Snap-in.
- Under Available Snap-ins, in Add or Remove Snap-ins, go ahead and select Certificates, and then click Add.

- In the Certificates snap-in, select Computer account and then click Next.

Note: If you plan to have more than one digital certificate for that DC, and if you are using Windows Server 2008/R2/2012, please read this following article BEFORE you proceed: The issue with Active Directory Domain Services (NTDSPersonal) certificate store
If you only plan to have one digital certificate on that DC, please proceed to the next step.
- In Select Computer, select Local. Once you have the correct computer selected, click OK and then click Finish.

- In Add or Remove Snap-ins, select OK.

- In the console tree, expand Certificates (<computer>), right-click Certificates, click All Tasks, and then click Request New Certificate. Note: You cannot do this if you’re connected to a remote DC.

In Certificate Enrollment, click Next.

In the Select Certificate Enrollment Policy, choose Active Directory Enrollment Policy (default) and click Next.

- Select a certificate that allows for server authentication. You may want to use a custom certificate as described in Publishing a Certificate that Supports Server Authentication. Now go ahead and click Enroll.

- The process may take a few seconds to complete. Click Finish in the Certificate Enrollment dialog box. Now you have a digital certificate for the first DC!
- To check your shiny new certificate, in the results pane double-click the certificate that you received to open Certificate properties.

Click the Details tab. In the Field column, go ahead and select Enhanced Key Usage. You’ll want to confirm that the Server Authentication (1.3.6.1.5.5.7.3.1) is listed.
- Repeat this on all the DCs on which you need to enable LDAPS.
Test the LDAP over a TLS Connection
To test if LDAP over TLS works properly, use the ldp.exe tool.
Note: If ldp.exe is not available on your system, you will need to install the Active Directory Directory Services (AD-DS) management tools from the Windows Remote Server Administration Kit (RSAT):
Download Remote Server Administration Tools for Windows 7 with SP1Download Remote Server Administration Tools for Windows 8
- Open a command prompt and type ldp. Click Enter. The LDP application window appears.
- Select Connection, then Connect. The Connect dialog box appears.
- In the Server text box, type the name of your AD server. For this example, type the fully qualified domain name (FQDN) of the DC, just as it appears in the Subject Alternative Name (SAN) of the Digital Certificate.
- In the Port text box, type 636.
- Check the box for SSL.

- Click OK. Now, without the above procedure you will not be able to connect.
After the procedure, note that “Host supports SSL, SSL cipher strength = 128 bits”.

Note: If you try to connect to the right DC but do not use the same FQDN as was listed inside the issued certificate (for example, using the IP address instead), you will not be able to connect using LDAPS.
- Select the Connection menu, click Bind, and then click OK.

The command output should display the user name and domain name that you used for binding, if LDAPS is configured properly. You can start browsing through the AD tree.

If you use the command: netstat -no | find “:636”, you will find the connection to the DC.

Enjoy.
I installed Active Directory by selecting the “Active Directory Domain Services” Role from the Server Manager Dialogue. Step by step instructions can be seen in Deploying a Test Windows Environment in a KVM Infrastucture.
After you installed AD you can confirm that it’s listening on port 389:
C:UsersAdministrator>netstat -abn | findstr :389
TCP    0.0.0.0:389            0.0.0.0:0              LISTENING
TCP    127.0.0.1:389          127.0.0.1:49160        ESTABLISHED
TCP    127.0.0.1:49160        127.0.0.1:389          ESTABLISHED
TCP    192.168.250.47:389     192.168.250.47:49175   ESTABLISHED
TCP    192.168.250.47:49175   192.168.250.47:389     ESTABLISHED
We can see it’s listening on port 389 and there are some local connections to that port for the AD server. Now let’s go ahead and add a test LDAP user for our queries.
Add New User to AD via the “Active Directory Users and Computers” Console
To start the “Active Directory Users and Computers” Console, execute the following command from the run dialogue: dsa.msc. At which point you will see the following window:

Then right click in the white space and go to “New” -> “User”:

Then fill out the User information:

Lastly set the user’s password:

After it’s all said and done you will see the following in the “Active Directory Users and Computers” Console:

So our test user will be elatov.
From the run dialogue run: ldp.exeand you will see the following:

Now let’s bind to the AD server, since we are local to the AD server we can just bind with the same user that we are currently logged in:

and let’s leave the defaults:

After clicking OK, you will see the connection go through and the bind to the AD server succeed:

Now let’s start browsing the AD server, first let’s select the “Tree” view:

After that we need to choose the BaseDN, this is basically where we want to start the search. We will choose dc=elatov,dc=local, which is basically the root of the AD server.

I just want to see all the available branches/children that are part of the AD server:

Expanding the User branch and locating our test user “elatov”, we see the following:

We can see that the DN (Distinguished Name) of the test user is: CN=Karim Elatov,CN=Users,DC=elatov,DC=local. From now on since we know all the users are under CN=Users,DC=elatov,DC=local we will use that as our BaseDN, this way we don’t have to query the whole AD structure.
Use dsquery to find DNs of Users
There is a command line utility called dsquery, which shows a more succinct view. For example to find the DN of our user, we can run the follow command from the command prompt:
C:UsersAdministrator>dsquery user -name "Karim Elatov"
"CN=Karim Elatov,CN=Users,DC=elatov,DC=local"
If you want to find out all the available groups in an AD server, you can run the following:
C:UsersAdministrator>dsquery group DC=elatov,DC=local
"CN=Administrators,CN=Builtin,DC=elatov,DC=local"
"CN=Users,CN=Builtin,DC=elatov,DC=local"
"CN=Guests,CN=Builtin,DC=elatov,DC=local"
"CN=Print Operators,CN=Builtin,DC=elatov,DC=local"
"CN=Backup Operators,CN=Builtin,DC=elatov,DC=local"
"CN=Replicator,CN=Builtin,DC=elatov,DC=local"
"CN=Remote Desktop Users,CN=Builtin,DC=elatov,DC=local"
"CN=Network Configuration Operators,CN=Builtin,DC=elatov,DC=local"
"CN=Performance Monitor Users,CN=Builtin,DC=elatov,DC=local"
"CN=Performance Log Users,CN=Builtin,DC=elatov,DC=local"
"CN=Distributed COM Users,CN=Builtin,DC=elatov,DC=local"
"CN=IIS_IUSRS,CN=Builtin,DC=elatov,DC=local"
"CN=Cryptographic Operators,CN=Builtin,DC=elatov,DC=local"
"CN=Event Log Readers,CN=Builtin,DC=elatov,DC=local"
"CN=Certificate Service DCOM Access,CN=Builtin,DC=elatov,DC=local"
"CN=Domain Computers,CN=Users,DC=elatov,DC=local"
"CN=Domain Controllers,CN=Users,DC=elatov,DC=local"
"CN=Schema Admins,CN=Users,DC=elatov,DC=local"
"CN=Enterprise Admins,CN=Users,DC=elatov,DC=local"
"CN=Cert Publishers,CN=Users,DC=elatov,DC=local"
"CN=Domain Admins,CN=Users,DC=elatov,DC=local"
"CN=Domain Users,CN=Users,DC=elatov,DC=local"
"CN=Domain Guests,CN=Users,DC=elatov,DC=local"
"CN=Group Policy Creator Owners,CN=Users,DC=elatov,DC=local"
"CN=RAS and IAS Servers,CN=Users,DC=elatov,DC=local"
"CN=Server Operators,CN=Builtin,DC=elatov,DC=local"
"CN=Account Operators,CN=Builtin,DC=elatov,DC=local"
"CN=Pre-Windows 2000 Compatible Access,CN=Builtin,DC=elatov,DC=local"
"CN=Incoming Forest Trust Builders,CN=Builtin,DC=elatov,DC=local"
"CN=Windows Authorization Access Group,CN=Builtin,DC=elatov,DC=local"
"CN=Terminal Server License Servers,CN=Builtin,DC=elatov,DC=local"
"CN=Allowed RODC Password Replication Group,CN=Users,DC=elatov,DC=local"
"CN=Denied RODC Password Replication Group,CN=Users,DC=elatov,DC=local"
"CN=Read-only Domain Controllers,CN=Users,DC=elatov,DC=local"
"CN=Enterprise Read-only Domain Controllers,CN=Users,DC=elatov,DC=local"
"CN=DnsAdmins,CN=Users,DC=elatov,DC=local"
"CN=DnsUpdateProxy,CN=Users,DC=elatov,DC=local"
Use openldap Tools to perform an LDAP Query
There are a couple of versions of LDAP clients for Linux:
- Mozilla LDAP Tools.
- OpenLDAP Client Tools
Usually the location of the binary will let you know which one you have. For example here are two binaries on the same system:
$ where ldapsearch
/usr/bin/ldapsearch
/usr/lib/mozldap/ldapsearch
RedHat mostly uses the Mozilla version. From “LDAP Tool Locations”:
For all Red Hat Directory Server guides and documentation, the LDAP tools used in the examples, such as ldapsearch and ldapmodify, are the Mozilla LDAP tools. For most Linux systems, OpenLDAP tools are already installed in the /usr/bin/ directory.
The two different versions have different arguments so make sure you know which one you are using. Let’s perform an LDAP query with openldap tools first:
# ldapsearch -h 192.168.250.47 -b "CN=Users,DC=elatov,DC=local" -s sub -D "administrator@elatov.local" -W "sAMAccountName=elatov"
Enter LDAP Password:
# extended LDIF
#
# LDAPv3
# base cn =Users,DC=elatov,DC=local> with scope subtree
# filter: sAMAccountName=elatov
# requesting: ALL
#

# Karim Elatov, Users, elatov.local
dn: CN=Karim Elatov,CN=Users,DC=elatov,DC=local
objectClass: top
objectClass: person
objectClass: organizationalPerson
objectClass: user
cn: Karim Elatov
sn: Elatov
givenName: Karim
distinguishedName: CN=Karim Elatov,CN=Users,DC=elatov,DC=local
instanceType: 4
whenCreated: 20130511230624.0Z
whenChanged: 20130511230624.0Z
displayName: Karim Elatov
uSNCreated: 94257
uSNChanged: 94262
name: Karim Elatov
objectGUID:: w1P90HpQKU2DUtBdEHJ98w==
userAccountControl: 66048
badPwdCount: 0
codePage: 0
countryCode: 0
badPasswordTime: 0
lastLogoff: 0
lastLogon: 0
pwdLastSet: 130127871842187500
primaryGroupID: 513
objectSid:: AQUAAAAAAAUVAAAA0uO84TKspJERrqPGUgQAAA==
accountExpires: 9223372036854775807
logonCount: 0
sAMAccountName: elatov
sAMAccountType: 805306368
userPrincipalName: elatov@elatov.local
objectCategory: CN=Person,CN=Schema,CN=Configuration,DC=elatov,DC=local
dSCorePropagationData: 16010101000000.0Z

# search result
search: 2
result: 0 Success

# numResponses: 2
# numEntries: 1
We can see that I used “CN=Users,DC=elatov,DC=local” as my baseDN and I used the account “administrator@elatov.local” to bind to the AD server. I could also use the elatov account to bind with, for example:
# ldapsearch -h 192.168.250.48 -b "CN=Users,DC=elatov,DC=local" -s sub -D "elatov@elatov.local" -W "sAMAccountName=elatov" name
Enter LDAP Password:
# extended LDIF
#
# LDAPv3
# base cn =Users,DC=elatov,DC=local> with scope subtree
# filter: sAMAccountName=elatov
# requesting: name
#

# Karim Elatov, Users, elatov.local
dn: CN=Karim Elatov,CN=Users,DC=elatov,DC=local
name: Karim Elatov

# search result
search: 2
result: 0 Success

# numResponses: 2
# numEntries: 1
Notice this time I just grabbed the name field to narrow down the search results.
Use mozldap Tools to perform an LDAP Query
Here is the same query as above using the Mozilla LDAP tools:
# /usr/lib/mozldap/ldapsearch -h 192.168.250.47 -b "CN=Users,DC=elatov,DC=local" -s sub -D "administrator@elatov.local" -w - "sAMAccountName=elatov" name
Enter bind password:
version: 1
dn: CN=Karim Elatov,CN=Users,DC=elatov,DC=local
name: Karim Elatov
For now only the password arguments are different.
After installing the “Active Directory Domain Services” role, it actually starts the AD Server on the Secure port (636):
C:UsersAdministrator>netstat -abnt | findstr :636
TCP    0.0.0.0:636            0.0.0.0:0              LISTENING
But since we have not uploaded an appropriate certificate it won’t work properly.
LDAPS Prerequisites
The list is available at Event ID 1220 — LDAP over SSL, from that page:
-
Certificate must be valid for the purpose of Server Authentication. This means that it must also contains the Server Authentication object identifier (OID): 1.3.6.1.5.5.7.3.1
-
The Subject name or the first name in the Subject Alternative Name (SAN) must match the Fully Qualified Domain Name (FQDN) of the host machine, such as Subject:CN=server1.contoso.com.
-
The host machine account must have access to the private key.
I had recently created my own certificate with my own CA. Check out “certificate_properties.c source file here are the different OIDs defined:
{"1.3.6.1.5.5.7.3.1", "TLS WWW Server"},
{"1.3.6.1.5.5.7.3.2", "TLS WWW Client"},
{"1.3.6.1.5.5.7.3.3", "Code signing"},
{"1.3.6.1.5.5.7.3.4", "Email protection"},
{"1.3.6.1.5.5.7.3.8", "Time stamping"},
{"1.3.6.1.5.5.7.3.9", "OCSP signing"},
{"2.5.29.37.0", "Any purpose"},
{"2.5.29.9", "Subject Directory Attributes"},
{"2.5.29.14", "Subject Key Identifier"},
{"2.5.29.15", "Key Usage"},
{"2.5.29.16", "Private Key Usage Period"},
{"2.5.29.17", "Subject Alternative Name"},
{"2.5.29.19", "Basic Constraints"},
{"2.5.29.30", "Name Constraints"},
{"2.5.29.31", "CRL Distribution Points"},
{"2.5.29.32", "Certificate Policies"},
{"2.5.29.33", "Policy Mappings"},
{"2.5.29.35", "Authority Key Identifier"},
{"2.5.29.36", "Policy Constraints"},
{"2.5.29.37", "Extended Key Usage"},
{"2.5.29.46", "Delta CRL Distribution Point"},
{"2.5.29.54", "Inhibit Any-Policy"},
So let’s fire up gnomint and check to see if I was lucky enough to allow this certificate to be used for a “TLS WWW Server”. To check out if the certificate can be used for that functionality, right click on the certificate and select Properties:

Then click on the “Details” tab, expand the “Extensions”, and lastly expand the “Extended Key Usage” section:

Yay! I was lucky enough to leave that option enabled. I was using a wild certificate so the subject name would match as well. Now let’s follow the instructions from the above Microsoft page to import the certificate.
1. Open Microsoft Management Console (MMC).
From the Run dialogue, enter: mmcand you will see this:

2.Click File, click Add/Remove Snap-in, select Certificates from the available snap-ins, and then click Add:

3. In Add or Remove Snap-ins, click Service account to view the certificates that are stored in the service’s personal store, and then click Next:

4. In Add or Remove Snap-ins, click Local computer, and then click Next.

5. In Add or Remove Snap-ins, click Active Directory Domain Services, click Finish, and then click OK:

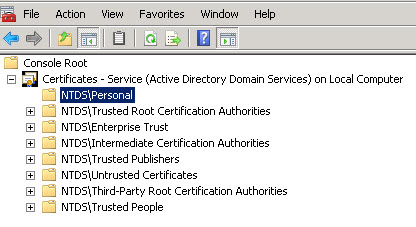
6. In the console tree, expand Certificates — Service (Active Directory Domain Services), expand Personal, and then expand Certificates:

7. To import a certificate, right-click the NTDSPersonal folder, click All Tasks, and then click Import:


After the certificate is imported you will see the following in the Snap-In:

Since this a self-signed certificate make sure you follow the instructions laid out in “Setup Your Own Certificate Authority (CA) on Linux and Use it in a Windows Environment” to import your own CA Certificate under the regular Certificate store. Just launch: certmgr.mscand make sure your CA is in the “Trusted Root Certificate Authorities” folder:

Test LDAPS Connection with ldp.exe
Start ldp.exe, go to “Connection” -> “Connect”, and fill out the necessary information and make sure SSL is chosen:

Then click OK and make sure the connection is successful:

Perform LDAPS Query with OpenLDAP tools
If we try the regular search, we will get this error:
# ldapsearch -x -H ldaps://192.168.250.47:636 -b "CN=Users,DC=elatov,DC=local" -D "administrator@elatov.local" -W - -s sub "(sAMAccountName=elatov)" name
Enter LDAP Password:
ldap_bind: Can't contact LDAP server (-1)
additional info: error:14090086:SSL routines:SSL3_GET_SERVER_CERTIFICATE:certificate verify failed
Since we are using a self-signed certificate, this is expected. From the man page of ldap.conf, we have the following options:
TLS_CACERT filename
Specifies  the  file  that  contains certificates for all of the Certificate Authorities the client will recognize.  This is  thepreferred  method for specifying the list of Certificate Author-
ity certificates.
...
...

TLS_CERT filename
Specifies  the  file that contains the client certificate.  This is a user-only option.
...
...

TLS_REQCERT level
Specifies what checks to perform on server certificates in a TLS session, if any. The level can be specified as one of the fol-lowing keywords:

never  The  client will not request or check any server certifi-cate.

allow  The server certificate is requested. If no certificate is provided,  the  session  proceeds normally. If a bad cer-tificate is provided, it will be ignored and the  session proceeds normally.

try    The server certificate is requested. If no certificate is provided, the session proceeds normally. If  a  bad  cer-tificate  is  provided, the session is immediately termi-nated.

demand | hard
These keywords are equivalent. The server certificate  is requested.  If  no certificate is provided, or a bad cer-tificate is provided, the session is  immediately  termi-nated. This is the default setting.
I had the certificate, but didn’t want to bother with the TLS Verification, so I just ignored it:
# LDAPTLS_REQCERT=never ldapsearch -x -H ldaps://192.168.250.47:636 -b "CN=Users,DC=elatov,DC=local" -D "administrator@elatov.local" -W -s sub "sAMAccountName=elatov" name -LLL
Enter LDAP Password:
dn: CN=Karim Elatov,CN=Users,DC=elatov,DC=local
name: Karim Elatov
The main difference are between SSL and non-SSL openldap’s ldapsearch were:
- -H to specify the URI of the AD server
- -x to use simple authentication instead of SASL
- -LLL to get a more succinct search result
Perform LDAPS Query with MozLDAP tools
Initially the query had the following error:
# /usr/lib/mozldap/ldapsearch -Z -h 192.168.250.47 -p 636 -D "administrator@elatov.local" -w - -s base -b "CN=Users,DC=elatov,DC=local" "sAMAccountName=elatov" name
Enter bind password:
SSL initialization failed: error -8174 (security library: bad database.)
with MozLDAP it actually uses NSS to verify the SSL certificates and unfortunately you can’t ignore the verification (or I didn’t find a way). So let’s go ahead and generate a brand new NSSDB:
# mkdir -p .pki/nssdb
# certutil -N -d .pki/nssdb
Enter a password which will be used to encrypt your keys.
The password should be at least 8 characters long,
and should contain at least one non-alphabetic character.

Enter new password:
Re-enter password:
Now let’s put in our CA into the NSSDB:
# certutil -d .pki/nssdb -A -n 'elatov-local-root-ca' -i root-ca-elatov-local.pem -t TCP,TCP,TCP
Now let’s make sure it’s there:
# certutil -d .pki/nssdb -L
Certificate Nickname                                         Trust Attributes
SSL,S/MIME,JAR/XPI
elatov-local-root-ca                                         CT,C,C
Now let’s do the actual LDAP query with MozLDAP over LDAPS:
# /usr/lib/mozldap/ldapsearch -h 192.168.250.47 -p 636 -Z -P .pki/nssdb/ -b "CN=Users,DC=elatov,DC=local" -s sub -D "administrator@elatov.local" -w - "sAMAccountName=elatov" name
Enter bind password:
version: 1
dn: CN=Karim Elatov,CN=Users,DC=elatov,DC=local
name: Karim Elatov
Now we have confirmed in many different ways that LDAPS on the AD server is working.
Applies to Windows Server 2003, Windows Server 2003 R2, Windows Server 2008, Windows Server 2008 R2, Windows Server 2012, Windows Server 2012 R2
Table of Contents
- Reasons for Enabling LDAPS
- Enabling LDAPS for domain controllers using a single-tier CA hierarchy
- Enabling LDAPS for domain controllers using a multi-tier CA hierarchy
- Publishing a Certificate that Supports Server Authentication
- Requesting a Certificate for Server Authentication
- Enabling LDAPS for Client Authentication
- Active Directory Domain Services Certificate Storage
- Exporting the LDAPS Certificate and Importing for use with AD DS
- Verifying an LDAPS connection
- Troubleshooting LDAP over SSL
- Additional Information
Reasons for Enabling LDAPS
By default, LDAP communications between client and server applications are not encrypted. This means that it would be possible to use a
network monitoring device or software and view the communications traveling between LDAP client and server computers. This is especially problematic when an LDAP simple bind is used because credentials (username and password) is passed over the network
unencrypted. This could quickly lead to the compromise of credentials.
 Note |
|---|
| Only LDAP data transfers are exposed. Other authentication or authorization data using Kerberos, SASL, and even NTLM have their own encryption systems. The Microsoft Management Console (mmc) snap-ins, since Windows 2000 SP4 have used LDAP sign and seal or Simple Authentication and Security Layer (SASL) and replication between domain controllers is encrypted using Kerberos. |
Reasons for enabling Lightweight Directory Access Protocol (LDAP) over Secure Sockets Layer (SSL) / Transport Layer Security (TLS) also known as LDAPS include:
- Some applications authenticate with Active Directory Domain Services (AD DS) through simple BIND. As simple BIND exposes the users’ credentials in clear text, use of Kerberos is preferred. If simple BIND is necessary, using SSL/TLS to encrypt the authentication
session is strongly recommended. - Use of proxy binding or password change over LDAP, which requires LDAPS. (e.g.
Bind to an AD LDS Instance Through a Proxy Object)
- Some applications that integrate with LDAP servers (such as Active Directory or Active Directory Domain Controllers) require encrypted communications. To encrypt LDAP communications in a Windows network, you can enable LDAP over SSL (LDAPS).
 Caution |
|---|
| Before you install a certification authority (CA), you should be aware that you are creating or extending a public key infrastructure (PKI). Be sure to design a PKI that is appropriate for your organization. See PKI Design Brief Overview for additional information. |
Enabling LDAPS for domain controllers using a single-tier CA hierarchy
LDAP over SSL/TLS (LDAPS) is automatically enabled when you install an Enterprise Root CA on a domain controller (although installing a CA on a domain controller is not a recommended practice). You can see examples of this in the
Test Lab Guide Base Configuration for Windows Server 2008 R2,
Building an Enterprise Root Certification Authority in Small and Medium Businesses, and
Install and configure Microsoft Active Directory Certificate Services (AD CS) using Windows Server 2008 R2.
Enabling LDAPS for domain controllers using a multi-tier CA hierarchy
When you have a multi-tier (such as a two-tier or three-tier) CA hierarchy, you will not automatically have the appropriate certificate for LDAPS authentication on the domain controller. In order to enable LDAPS in a multi-tier CA hierarchy, you must request
a certificate that meets the following requirements:
- Certificate must be valid for the purpose of Server Authentication. This means that it must also contains the Server Authentication object identifier (OID):
1.3.6.1.5.5.7.3.1 - The Subject name or the first name in the Subject Alternative Name (SAN) must match the
Fully Qualified Domain Name (FQDN) of the host machine, such as Subject:CN=server1.contoso.com. For more information, see
How to add a Subject Alternative Name to a secure LDAP certificate.
- The host machine account must have access to the private key.
Publishing a Certificate that Supports Server Authentication
- On the issuing Certification Authority computer, open the Certificates console or Certsrv console. To open Certsrv, click
Start. Type certsrv.msc and then click
OK. - Ensure that Certification Authority is expanded as well as the name of the certification authority.
- Right-click Certificate Templates and then click Manage.

- In the Certificate Templates Console, right-click Kerberos Authentication and then select
Duplicate Template. You don’t have to use the Kerberos template. You can create your own or use one of the existing templates that has Server Authentication as a purpose, such as
Domain Controller Authentication, Domain Controller,
Web Server, and Computer. Important: You should be planning on having
only one certificate on each LDAP server (i.e. domain controller or AD LDS computer) with the purpose of
Server Authentication. If you have legitimate reasons for using more than one, you may end up having certificate selection issues, which is discussed further in the
Active Directory Domain Services Certificate Storage.
- On the Duplicate Template dialog box, leave the default selected
Windows Server 2003 Enterprise selected and then click OK. - The Properties of New Template appear. Ensure that settings are as you want them to be for this certificate template. Pay close attention to ensure that the
Template display name is set to an appropriate name along with the following settings:- Validity and Renewal periods are set according to your organization’s security policy
- Key lengths are appropriate
- Select whether you want to place the certificate in Active Directory
- Subject Name tab: DNS name and Service principal name (SPN) are selected
- If you plan to import the certificate into the Active Directory Domain Services certificate store, then should also mark the private key as exportable.
- Click OK.
- Return to the Certificates or Certsrv console and in the details pane of
Certificate Templates, right-click an open area of the console, click
New, and then click Certificate Template to Issue.
- In the Enable Certificate Templates dialog box, select the name of the new template you created and then click
OK.


Requesting a Certificate for Server Authentication
To request a certificate from your LDAPSL server, do the following on each domain controller that requires LDAPS connections:
- Open the Certificates console. Click Start, type
MMC, and then press ENTER. If prompted by User Account Control, ensure it displays the action you want and then click
Yes. - In the MMC console that opens (typically Console1), click File
and then click Add/Remove Snap-in - In Add or Remove Snap-ins under Available Snap-ins, click
Certificates, and then click Add. - In Certificates snap-in select Computer account and then click
Next. - In Select Computer, if you are managing the LDAP server requiring the certificate, select
Local. Otherwise, select Another computer and click
Browse to locate the LDAP server requiring the certificate. - Once you have the correct computer selected, click OK and then click
Finish. - In Add or Remove Snap-ins, click OK.
- In the console tree, expand Certificates (<computer>)
- right click Certificates, click All Tasks, and then click
Request New Certificate.
- In Certificate Enrollment, click Next.
- In the Select Certificate Enrollment Policy, typically you would leave the default of
Active Directory Enrollment Policy. If you have a different policy that you should follow, then select that one and click
Next. - Select a certificate that allows for server authentication, Kerberos works, but you can use a custom certificate as described in Publishing a Certificate that Supports Server Authentication. Click
Enroll.
- On the Certificate Enrollment dialog box, click Finish.
- In the results pane double-click the certificate that you received to open the
Certificate properties dialog box. - Click the Details tab, in the Field column, select Enhanced Key Usage. Confirm that
Server Authentication (1.3.6.1.5.5.7.3.1).


For other step-by-step examples requesting a certificate for server authentication and implementing LDAP over SSL (LDAPS), see the following articles:
- Request a computer certificate for server authentication — Windows
Server 2003, 2003 R2 instructions - How to enable LDAP over SSL with a third-party Certification Authority — Windows Server 2000, 2003, 2003 R2, 2008, 2008 R2 updated instructions
- Appendix A: Configuring LDAP over SSL Requirements for AD LDS — Windows Server 2008 and Windows Server 2008 R2 instructions
Enabling LDAPS for Client Authentication
Enabling LDAPS on the client is not necessary to protect credentials passed from the client to the server when LDAPS is already enabled on the server. This just allows the client to actually authenticate itself to the server — an extra layer of protection to
ensure that the client connecting as COMPUTER_X is actually COMPUTER_X and not some other computer trying to authenticate with COMPUTER_X credentials. The client must be using a certificate from a CA that the LDAP server trusts. Client certificates and AD
DS accounts are mapped using altSecurityIdentities, which can be done through various methods. For more information on those methods, see
HowTo: Map a user to a certificate via all the methods available in the altSecurityIdentities attribute. Certificates are presented to the server during the Transport Layer Security (TLS) key exchange (described in paragraph 7.4 of
RFC 2246). To enable LDAPS authentication for the client, ensure the certificate is placed in the personal store for the user account.
Active Directory Domain Services Certificate Storage
When a certificate is selected from the local machine store (as in
CertEnumCertificatesInStore) the first valid certificate that can be used for Server Authentication (OID: 1.3.6.1.5.5.7.3.1) is returned for use. In cases where customers have multiple certificates valid for Server Authentication in the LDAP server’s (e.g.
AD DS domain controller,
AD LDS, or
ADAM server) local computer certificate store, may see that a different certificate than the one they want is used for LDAPS communications. The best resolution to such an issue is to remove all unnecessary certificates from the local computer certificate
store and have only one certificate that is valid for server authentication.
However, if there is a legitimate reason that two or more certificates and a customer using at least Windows Server 2008 LDAP servers, the Active Directory Domain Services (NTDSPersonal) certificate store can be used for LDAPS communications.
Important There are several significant details to know before you implement the use of the Active Directory Domain Services certificate store.
- Automatic certificate enrollment (auto-enrollment) cannot be utilized with certificates in the NTDSPersonal certificate store.
- Current command line tools do not allow certificate management of the NTDSPersonal certificate store.
- Certificates should be imported into the store, and not moved (using drag and drop) via Certificates console (MMC)
- Each LDAP server will require its own certificate in order to use this option, but it is only necessary to use this option on a server that has multiple certificates with the purpose of Server Authentication in the local certificates store. The best solution
is to have only one certificate in the computer’s personal certificate
Exporting the LDAPS Certificate and Importing for use with AD DS
The following steps will demonstrate how to export an LDAPS enabled certificate from a domain controller computer’s local certificate store to the Active Directory Domain Services service certificate store (NTDSPersonal). You will have to perform this step
for each domain controller that has multiple certificates with the enabled use of Server Authentication. These certificates will have to be manually renewed when they expire and only works starting with Windows Server 2008 domain controllers, as that was the
first Windows Server operating system release in which the NTDS was separated out as its own service.
- Click Start, type mmc and then click
OK. - Click File and then click Add/Remove Snap-in.
- Click Certificates and then click Add.
- In Certificates snap-in select Computer account and then click
Next. - In Select Computer, if you are working at the LDAP server requiring the certificate, select
Local. Otherwise, select Another computer and click
Browse to locate the LDAP server requiring the certificate. - Once you have the correct computer selected, click OK and then click
Finish.In Add or Remove Snap-ins, click OK.
- In the console tree, expand Certificates (<computer>)
- In the certificates console of a computer that contains a certificate that can be used for Server Authentication, right-click the certificate, click
All Tasks, and then click Export. - On the Certificate Export Wizard welcome screen, click
Next. - On the Export Private Key screen, select Yes, export the private key and then click
Next. If you don’t have the option to export the private key, then the certificate template did not allow the exporting of the private key (seePublishing a Certificate that Supports Server Authentication).
- On the Export File Format screen, you should select
Export all extended properties. The other selections are optional.
- On the Password screen, enter a password that you want to be used when the certificate is imported. You will have to type the password twice: once in the
Password box and then again in the Type and confirm password (mandatory) box. Then, click
Next. - On the File to Export screen, enter a path, file name, and .pfx file extension in the
File name box and then click Next.
- Confirm the settings on the completion screen and then click Finish. You should see a pop-up message indicating that the export was successful. Click
OK. - Click File and then click Add/Remove Snap-in.
- Click Certificates and then click Add.
- Select Service account and then click Next.
- In the Select Computer dialog box, ensure that you target the appropriate computer. If you are running the Microsoft Management Console (MMC) and want to target the local computer, you can leave the default selection of
Local computer. Otherwise, select Another computer and then use the
Browse button to select the appropriate computer. Then click
Next. - Select Active Directory Domain Services and then click
Finish. - On the Add or Remove Snap-ins dialog box click OK.
- Expand Certificates — Services (Active Directory Domain Services) and then click
NTDSPersonal. - Right-click NTDSPersonal, click All Tasks, and then click
Import. - On the Certificate Import Wizard welcome screen, click
Next. - On the File to Import screen, click the Browse, and then locate the certificate file that you exported previously.
- On the Open screen, ensure that Personal Information Exchange (*pfx,*.p12) is selected as the file type and then navigate the file system to locate the certificate you exported previously and then click that certificate.
- Click Open and then click Next.
- On the Password screen enter the password you set for the file and then click
Next.
- On the Certificate Store page, ensure that Place all certificates in the following store is selected and reads
Certificate store: NTDSPersonal and then click Next. - On the Certificate Import Wizard completion screen, click
Finish. You should then see a message that the import was successful. Click
OK. - In the Navigation pane, under NTDSPersonal, click Certificates
- In the details pane, right-click the certificate you imported and then click
Open. - Click Details and then click Enhanced Key Usage, you should see that
Server Authentication (1.3.6.1.5.5.7.3.1) is one of the purposes of the certificate and then click
OK.


Verifying an LDAPS connection
After a certificate is installed, follow these steps to verify that LDAPS is enabled:
- Start the Active Directory Administration Tool (Ldp.exe)
- To use LDP.EXE on Windows Server 2003, see
LDAP Overview. - To use LDP.EXE on Windows XP, you must download and install
Windows XP Service Pack 2 Support Tools. - For Windows Vista, Windows 7, or non-domain controller Windows Server 2008, or Windows Server 2008 R2 computers, see
Remote Server Administration Tools (RSAT) for Windows Vista, Windows 7, Windows Server 2008, and Windows Server 2008 R2
- To use LDP.EXE on Windows Server 2003, see
- On the Connection menu, click Connect.
- Type the name of the LDAP server (e.g. domain controller or AD LDS/ADAM server) to which you want to connect.
- Type 636 as the port number.
- Click OK.
Troubleshooting LDAP over SSL
When you have issues with LDAPS, there are several different things that can be wrong. One of the best walkthrough documents regarding troubleshooting LDAPS is on the Ask DS Blog in which a Senior Escalation engineer walks through verification and troubleshooting:
Troubleshooting LDAP over SSL. There is only one Event ID that is directly related to LDAP over SSL, which is Event 1220, expanded upon in the destination of the link in the list below. The rest of the links are related to LDAP signing. LDAP signing does
not encrypt the communications traveling between the LDAP server and client. LDAP signing verifies the identity of the client attempting an LDAP bind and helps to mitigate the chance of replay and man-in-the middle attacks. For more information on LDAP signing,
see LDAP Signing
and
How to enable LDAP Signing in Windows Server 2008.
- Event ID 1220 — LDAP over SSL
- Event ID 2886 — LDAP signing: is logged one each time the domain controller is started, if you do not have signing required
enabled on your domain controller. - Event ID 2887 — If signing required is not enabled, this event keeps a count of how many unsigned binds occurred in the
previous 24 hours. The event is logged every 24 hours. - Event ID 2888 — If signing required is enabled, then this even keeps a count of how many unsigned LDAP binds occurred in the previous
24 hours. Since LDAP signing is required, the binds would be rejected. This is a notice to administrators to investigate the client computers that are trying to bind without signing. - Event ID 2889- Administrators can enable this event to to help identify client computers that are attempting to bind without
signing. This event is logged with the IP address and the bind identity of the client each time an unsigned bind is performed or attempted.
Additional Information
- HowTo: Map a user to a certificate
via ll the methods available in the altSecurityIdentities attribute - WebSphere to Active Directory over SSL
- How to enable LDAP over SSL with a third-party certification authority
- Installing and configuring an Enterprise Root CA on Windows Server 2003
- Implementing and Administering Certificate Templates in Windows Server 2003
- Implementing and Administering Certificate Templates
- Windows 7/2008 Kerberos Default Encryption and Windows
2003/2000 - Install a SSL certificate on your domain controller
- Appendix A: Configuring LDAP over SSL Requirements for AD LDS
- Configuring the JSS to Use LDAP Over SSL When Authenticating with Active Directory
- Windows Server 2003 domain
controller using LDAP over SSL with expired certificate requires restart - How to add a Subject Alternative Name to a secure LDAP certificate
- Troubleshooting PKI Problems on Windows
Last week I faced the easy task to activate LDAPs on Windows Server 2008 R2 domain controllers. One of the applications required an encrypted LDAP connection, because password changes are done via LDAP.
I thought: Hey, that’s easy – just create a server certificate for the DC, import the certificate for the computer account under ‘personal’ via MMC – and done.
Apparently it is not that easy with Windows Server 2008 / 2008 R2 …
To establish LDAP over SSL, I did what I mentioned above.
I created a server certificate for the DC. Then tried to import it to the “personal” settings of the computer account.
Port 636 for LDAPs was activated on the DC with the installed server certificate.
A Telnet connection was also possible.
But, unfortunately a LDAPs connection with the application server could not be achieved
(Yes, the root certificate was installed on the application server).
After researching the problem I found out that a change was introduced with Windows Server 2008 / 2008 R2:
The server certificate has to be imported into the ‘AD DS personal store’.
Import server certificate to AD DS personal store
Here is a step by step manual for the import of the certificate:
- MMC Console / Add or Remove Snap-Ins / Certificates

- Select Computer: Local Computer

- Select Service Account: Active Directory Domain Services

- The certificate is being imported into the Store ‘NTDSPersonal’


Link to the Microsoft Technet article: LDAP over SSL
Article created: 07.04.2014
Microsoft Active Directory поддерживает протокол LDAPv3. С его помощью можно авторизовать пользователей из сторонних приложений. Чтобы обеспечить безопасность при передаче учетной информации серверу необходимо использовать LDAPS (SSL). В этой статье мы рассмотрим настройку контролера доме, для обеспечения поддержки SSL.
Для того, чтобы SSL нормально функционировал нам потребуются сертификат.
Проверяем наличие сертификата
Для начала будет полезно проверить наличие сертификата в вашем домене, для этого запустим на нашем ПК утилиту ldp.exe.
Она не поставляется с Windows 10, чтобы использовать её, вам придется установить компоненты администрирования RSAT.
Нажмите Подключение — подключить, заполните окно аналогично рисунку.

Используйте имя домена, не сервера — тогда сервер для подключения будет выбран автоматически.
Если в ответ вы получили сообщение:
ld = ldap_sslinit("altuninvv.local", 636, 1);
Error 0 = ldap_set_option(hLdap, LDAP_OPT_PROTOCOL_VERSION, 3);
Error 81 = ldap_connect(hLdap, NULL);
Server error: <empty>
Error <0x51>: Fail to connect to altuninvv.local.
Это означает, что либо недоступен ни один контролер домена, либо неправильно настроен DNS, либо ПК не является членом домена, либо не установлен SSL сертификат на контролере домена.
Если сообщение похоже на такое:
Established connection to xxxx.xxxxxxxxx.xxx.
Retrieving base DSA information...
Getting 1 entries:
Dn: (RootDSE)
configurationNamingContext:
...
forestFunctionality: 6 = ( WIN2012R2 );
highestCommittedUSN: 2153249;
isGlobalCatalogReady: FALSE;
isSynchronized: TRUE;
ldapServiceName: XXXXXXXX$@XXXXXXXXXXXXX;
....
supportedCapabilities (6): 1.2.840.113556.1.4.800 = ( ACTIVE_DIRECTORY ); 1.2.840.113556.1.4.1670 = ( ACTIVE_DIRECTORY_V51 ); 1.2.840.113556.1.4.1791 = ( ACTIVE_DIRECTORY_LDAP_INTEG ); 1.2.840.113556.1.4.1935 = ( ACTIVE_DIRECTORY_V61 ); 1.2.840.113556.1.4.2080 = ( ACTIVE_DIRECTORY_V61_R2 ); 1.2.840.113556.1.4.2237 = ( ACTIVE_DIRECTORY_W8 );
supportedControl (37): 1.2.840.113556.1.4.319 = ( PAGED_RESULT ); 1.2.840.113556.1.4.801 = ( SD_FLAGS ); 1.2.840.113556.1.4.473 = ( SORT ); 1.2.840.113556.1.4.528 = ( NOTIFICATION ); 1.2.840.113556.1.4.417 = ( SHOW_DELETED ); 1.2.840.113556.1.4.619 = ( LAZY_COMMIT ); 1.2.840.113556.1.4.841 = ( DIRSYNC ); 1.2.840.113556.1.4.529 = ( EXTENDED_DN ); 1.2.840.113556.1.4.805 = ( TREE_DELETE ); 1.2.840.113556.1.4.521 = ( CROSSDOM_MOVE_TARGET ); 1.2.840.113556.1.4.970 = ( GET_STATS ); 1.2.840.113556.1.4.1338 = ( VERIFY_NAME ); 1.2.840.113556.1.4.474 = ( RESP_SORT ); 1.2.840.113556.1.4.1339 = ( DOMAIN_SCOPE ); 1.2.840.113556.1.4.1340 = ( SEARCH_OPTIONS ); 1.2.840.113556.1.4.1413 = ( PERMISSIVE_MODIFY ); 2.16.840.1.113730.3.4.9 = ( VLVREQUEST ); 2.16.840.1.113730.3.4.10 = ( VLVRESPONSE ); 1.2.840.113556.1.4.1504 = ( ASQ ); 1.2.840.113556.1.4.1852 = ( QUOTA_CONTROL ); 1.2.840.113556.1.4.802 = ( RANGE_OPTION ); 1.2.840.113556.1.4.1907 = ( SHUTDOWN_NOTIFY ); 1.2.840.113556.1.4.1948 = ( RANGE_RETRIEVAL_NOERR ); 1.2.840.113556.1.4.1974 = ( FORCE_UPDATE ); 1.2.840.113556.1.4.1341 = ( RODC_DCPROMO ); 1.2.840.113556.1.4.2026 = ( DN_INPUT ); 1.2.840.113556.1.4.2064 = ( SHOW_RECYCLED ); 1.2.840.113556.1.4.2065 = ( SHOW_DEACTIVATED_LINK ); 1.2.840.113556.1.4.2066 = ( POLICY_HINTS_DEPRECATED ); 1.2.840.113556.1.4.2090 = ( DIRSYNC_EX ); 1.2.840.113556.1.4.2205 = ( UPDATE_STATS ); 1.2.840.113556.1.4.2204 = ( TREE_DELETE_EX ); 1.2.840.113556.1.4.2206 = ( SEARCH_HINTS ); 1.2.840.113556.1.4.2211 = ( EXPECTED_ENTRY_COUNT ); 1.2.840.113556.1.4.2239 = ( POLICY_HINTS ); 1.2.840.113556.1.4.2255 = ( SET_OWNER ); 1.2.840.113556.1.4.2256 = ( BYPASS_QUOTA );
supportedLDAPPolicies (19): MaxPoolThreads; MaxPercentDirSyncRequests; MaxDatagramRecv; MaxReceiveBuffer; InitRecvTimeout; MaxConnections; MaxConnIdleTime; MaxPageSize; MaxBatchReturnMessages; MaxQueryDuration; MaxTempTableSize; MaxResultSetSize; MinResultSets; MaxResultSetsPerConn; MaxNotificationPerConn; MaxValRange; MaxValRangeTransitive; ThreadMemoryLimit; SystemMemoryLimitPercent;
supportedLDAPVersion (2): 3; 2;
supportedSASLMechanisms (4): GSSAPI; GSS-SPNEGO; EXTERNAL; DIGEST-MD5;

-----------
Это значит, что SSL сертификат уже установлен посредством Службы сертификатов Active Directory и дальнейших действий не потребуется.
Установка OpenSSL
В этой статье я буду использовать виртуальный сервер, созданный для цикла статей.
Имя домена — altununvv.local
Имя контролера домена – addc1.altuninvv.local
Виртуальная организация — Altunin Soft
Скачаем свежую версию OpenSSL — вы можете скачать её отсюда — https://slproweb.com/products/Win32OpenSSL.html
Я рекомендую все команды выполнять сразу на сервере, но вы можете так же работать и на вашем ПК, если используете MSYS2.
Те, кто использует, как и я, MSYS2, могут ввести в консоли:
pacman -Sy opensslСоздаем локальный центр сертификации
Создадим папку и назовем её CA.
Создадим в ней файл ca.conf с содержимым:
[ req ]
distinguished_name = req_distinguished_name
req_extensions     = v3_ca

[ req_distinguished_name ]
# Descriptions
countryName=RU
stateOrProvinceName=Magadan region
localityName=Magadan
0.organizationName= Altunin Soft
1.organizationName=IT
commonName=altuninvv.local

#Modify for your details here or answer the prompts from openssl
countryName_default=RU
stateOrProvinceName_default= Magadan region
localityName_default= Magadan
0.organizationName_default= Altunin Soft
1.organizationName_default=IT
commonName_default= altuninvv.local
[ v3_ca ]
keyUsage=critical,keyCertSign
basicConstraints=critical,CA:TRUE,pathlen:1
extendedKeyUsage=serverAuth
subjectAltName = @alt_names
[alt_names]
DNS.1 = *. altuninvv.local
DNS.2 = altuninvv.local
Сгенерируем приватный ключ для CA
openssl genrsa -des3 -out ca.key 4096Укажите пароль для ключа, в нашем случае это будет Pa$$w0rd:
Generating RSA private key, 4096 bit long modulus (2 primes)
......................................................................................................................................
........................................................................................................................................
....++++..........................++++e is 65537 (0x010001)
Enter pass phrase for ca.key:

Verifying - Enter pass phrase for ca.key:
Создадим сертификат для нашего CA:
openssl req -new -x509 -extensions v3_ca -days 3659 -key ca.key -out ca.crt -config ca.confПросто нажимайте Enter все поля будут заполнены автоматически!
Enter pass phrase for ca.key:
 You are about to be asked to enter information that will be incorporated                                                                                                                                           into your certificate request.
 What you are about to enter is what is called a Distinguished Name or a DN.
 There are quite a few fields but you can leave some blank
For some fields there will be a default value,
 If you enter '.', the field will be left blank.
-----
RU [RU]:
Magadan region [Magadan region]:
Magadan [Magadan]:
Altunin Soft [Altunin Soft]:
 IT [IT]:
altuninvv.local [altuninvv.local]:
Теперь нужно импортировать созданный сертификат в хранилище доверенных CA на нашем контролере домена.
Скопируем файл ca.crt на контролер домена. Откроем PowerShell от имени администратора, перейдем в папку с файлом ca.cert и введем команду:
Import-Certificate –Verbose -FilePath ca.crt  -CertStoreLocation 'Cert:LocalMachineRoot'

VERBOSE: Performing the operation "Import certificate" on target "Item: C:caca.crt Destination: Root".


   PSParentPath: Microsoft.PowerShell.SecurityCertificate::LocalMachineRoot

Thumbprint                                Subject
----------                                -------
D5D1306CFFDAF63EDA10710F13F69C0228005350  CN=altuninvv.local, O=IT, O=Altunin Soft, L=Magadan, S=Magadan region, C=RU
Сертификат успешно добавлен.
Теперь пришло время создать запрос на клиентский сертификат, который будет использовать контролер домена.
На контролере домена создадим текстовый файл — req.txt
;----------------- request.inf -----------------
[Version]
Signature="$Windows NT$"

;The Subject will need to be your active directory domain name
[NewRequest]
Subject = "CN=altuninvv.local
KeySpec = 1
KeyLength = 4096
Exportable = TRUE
SMIME = FALSE
MachineKeySet = TRUE
PrivateKeyArchive = FALSE
UseExistingKeySet = FALSE
UserProtected = FALSE
ProviderName = "Microsoft RSA SChannel Cryptographic Provider"
ProviderType = 12
RequestType = PKCS10
KeyUsage = 0xa0

[EnhancedKeyUsageExtension]
OID = 1.3.6.1.5.5.7.3.1 ; Server Authentication
;The following will add a subject alternative name of a wildcard cert on *.example.com
;so any ad controller with a hostname of somththing.example.com can use it.
[Extensions]
2.5.29.17 = "{text}"
_continue_ = "dns=*.altuninvv.local&"
_continue_ = "dns=altuninvv.local&"
Выполним запрос на сертификат:
certreq -new req.txt addc1.csr
CertReq: Request Created
Выполним запрос на сертификат:
certreq -new req.txt addc1.csr
CertReq: Request Created
Скопируем созданный файл на свой ПК в папку нашего CA
В папке CA создадим файл v3ext.txt с содержимым:
# v3ext.txt
keyUsage=digitalSignature,keyEncipherment
extendedKeyUsage=serverAuth
subjectKeyIdentifier=hash
subjectAltName = @alt_names
#Modify for your details. Must include the commonName in the list below also.
#The *.example.com will allow all Domain controllers with
#the hostname somthing.example.com to use the cert.
[alt_names]
DNS.1 = *.altuninvv.local
DNS.2 = altuninvv.local
Сгенерируем сертификат для addc1
openssl x509 -req -days 825 -in addc1.csr -CA ca.crt -CAkey ca.key -extfile v3ext.txt -set_serial 01 -out addc1-server.crt
Signature ok
subject=CN = altuninvv.local
Getting CA Private Key
Enter pass phrase for ca.key:
Введите пароль закрытого ключа: Pa$$w0rd
Скопируем файл с сертификатом addc1-server.crt обратно на контролер домена addc1 и применим сертификат:
certreq -accept addc1-server.crt
Installed Certificate:
  Serial Number: 01
  Subject: CN=altuninvv.local (DNS Name=*.altuninvv.local, DNS Name=altuninvv.local)
  NotBefore: 2/18/2021 5:37 PM
  NotAfter: 5/24/2023 5:37 PM
  Thumbprint: 4721d27e9fe34aaa672d20d68c0ec01fd9f7a82c
Из PowerShell проверим наличие сертификата:
PS C:ca> Get-ChildItem "Cert:LocalMachineMy"

   PSParentPath: Microsoft.PowerShell.SecurityCertificate::LocalMachineMy

Thumbprint                                Subject
----------                                -------
4721D27E9FE34AAA672D20D68C0EC01FD9F7A82C  CN=altuninvv.local
Теперь вы должны перегрузить контролер домена, чтобы все настройки вступили в силу.
Обратите внимание, чтобы подключиться к серверу вы должны указать его полное доменное имя, в нашем случае:
addc1.altuninvv.localЕсли ПК входит в состав домена altuninvv.local, вы можете использовать для подключение его имя:
altuninvv.localТогда контролер домена для подключения будет выбран автоматически из списка доступных, возможно, это будет работать только, при наличии Службы сертификатов на одном из серверов в AD!
Так как мой ПК не входит в домен altuninvv.local и не использует его DNS-сервера, я прописал в файле
C:WindowsSystem32driversetchostsстроку:
192.168.0.10 addc1.altuninvv.localПроверяем подключение
Для проверки подключения мы будет использовать утилиту ldp.exe.
Она не поставляется с Windows 10, чтобы использовать её, вам придется установить компоненты администрирования RSAT.
Запустим ldp.exe, откроется окно:

В этом окне выберите подключение – подключить
Введем:
Сервер: addc1.altuninvv.local
Порт: 636
Установим галочку SSL

Нажмем Ок, будет осуществлено подключение и выведена дополнительная информация:

Теперь мы может сделать bind к серверу
Выберите Подключение – Привязка
Заполните поля:
Пользователь: CN=ldap-bind,CN=Users,DC=altuninvv,DC=local
Пароль: Pas#w0rds#1
Установите: Простая привязка
нажмите Ок

Будет выведено сообщение:
res = ldap_simple_bind_s(ld, 'CN=ldap-bind,CN=Users,DC=altuninvv,DC=local', <unavailable>); // v.3

Authenticated as: 'ALTUNINVVldap-bind'.
Это означает, что подключение прошло успешно.
Далее выберем пункт меню Вид – Дерево
И в окне выберем — DC=altuninvv,DC=local

Нажмем Ок
Откроется дерево с разделами домена,

Таким образом вы можете просматривать каталог AD через LDAP по SSL.
Заключение
Сегодня мы рассмотрели подключение к контролеру домена AD с использованием протокола LDAP по SSL.
Мы создали свой локальный центр сертификации CA с помощью OpenSSL.
Был выпущен сертификат и установлен на контролере домена.
С помощью утилиты ldp.exe было осуществлено подключение к контролеру домена по SSL.
Безопасность трафика LDAP можно обеспечить с помощью протоколов Secure Sockets Layer/Transport Layer Security (SSL/TLS); такую комбинацию называют «LDAP по SSL» (LDAP over SSL) или LDAPS. Метод SSL/TLS исключает возможность прочтения трафика не уполномоченными на то лицами; с этой целью между контроллером домена Windows и клиентом LDAP формируется зашифрованный туннель. В предлагаемой статье я расскажу о том, как установить протокол LDAPS на контроллерах доменов, входящих в инфраструктуру AD Windows Server 2008
В качестве стандартного протокола для считывания данных с контроллеров доменов Active Directory (AD), а также для записи данных на такие контроллеры используется LDAP. LDAP-трафик AD по умолчанию является незащищенным, и именно по этой причине мы можем отслеживать обмен данными по протоколу LDAP между клиентами и контроллерами доменов с помощью программных средств сетевого мониторинга. Не имеют средств защиты и подпротоколы LDAP, такие как LDAP bind, применяемый приложениями, службами, а также пользователями для передачи учетных данных и проверки подлинности на контроллерах доменов Windows.
Используемые в организациях политики в области безопасности, как правило, предполагают шифрование всего трафика между клиентами и серверами. Кроме того, некоторые приложения, интегрированные с AD, предусматривают шифрование данных, передаваемых по протоколу LDAP.
.
Требования к сертификату LDAPS Server
Для использования протокола LDAPS необходимо, чтобы на всех контроллерах доменов Windows были установлены должным образом отформатированные сертификаты X.509. При наличии такого сертификата служба LDAP контроллера домена имеет возможность ожидать передачи данных и автоматически устанавливать соединения SSL как для трафика LDAP, так и для трафика сервера глобального каталога (GC). Сертификат сервера используется для проверки полномочий контроллера домена на клиенте в процессе установки LDAPS и для создания коммуникационного туннеля между клиентом и сервером после завершения установки. При желании протокол LDAPS можно использовать для проверки полномочий клиентов, но в этом случае необходимо предварительно установить сертификат аутентификации клиента на каждом из компьютеров пользователей.
В следующем разделе я подробно остановлюсь на том, как можно получить серверный сертификат LDAPS для контроллеров доменов, но сначала давайте рассмотрим другой вопрос: каким правилам должен соответствовать такой сертификат?
Сертификат LDAPS и ассоциированный с ним закрытый ключ должны размещаться в хранилище сертификатов Personal соответствующего контроллера домена (это хранилище именуется также хранилищем сертификатов MY). Для просмотра содержимого хранилища сертификатов контроллера домена выполните следующие действия.
- На контроллере домена нажмите кнопку Start, введите mmc и нажмите OK.
- Откройте меню File и выберите в нем пункт Add/Remove Snap-in.
- Выберите пункты Certificates, Add.
- В диалоговом окне оснастки Certificates консоли MMC (Microsoft Management Console) выберите пункт Computer account и нажмите кнопку Next.
- В разделе Select Computer выберите компьютер Local и нажмите Finish.
- В разделе Add or Remove Snap-ins нажмите кнопку OK.
- В дереве консоли раскройте контейнер Certificates (Local Computer), потом контейнер Personal и, наконец, контейнер Certificates.
- В правой панели оснастки Certificates вы увидите список всех сертификатов, размещенных в хранилище Personal контроллера домена (см. экран 1).
 |
| Экран 1. Сертификаты в хранилище Personal контроллера домена |
Сертификат LDAPS должен отвечать определенным требованиям к расширениям сертификатов X.509.
- Расширение сертификатов Extended Key Usage должно включать идентификатор Server Authentication Object Identifier (OID): 1.3.6.1.5.5.7.3.1.
- Полное доменное имя Fully Qualified Domain Name (FQDN) соответствующего контроллера домена AD (например, mydomaincontroller.company.net) необходимо указывать либо в части Common Name (CN) поля Subject расширения сертификата, либо в записи DNS расширения сертификата Subject Alternative Name (SAN).
Содержимое расширений X.509 сертификата можно легко проверить в окне Windows Certificate Viewer, которое открывается также из оснастки Certificates. Дважды щелкните на сертификате в правой панели оснастки Certificates, а затем перейдите на вкладку Details, как показано на экране 2.
|
|
| Экран 2. Расширения сертификатов на вкладке Details в окне просмотра Certificate Viewer |
Как и при использовании любого другого сертификата, следует удостовериться в том, что сертификат LDAPS выдан удостоверяющим центром Certification Authority (CA), которому доверяют и контроллер домена, и клиенты LDAPS. Для установления доверительных отношений необходимо настроить клиенты и сервер так, чтобы они доверяли сертификату выдающего удостоверяющего центра (при одноуровневой конфигурации удостоверяющих центров) или сертификату корневого удостоверяющего центра, с которым выдающий удостоверяющий центр связан по цепочке (при многоуровневой конфигурации удостоверяющих центров).
Список всех пользующихся доверием сертификатов удостоверяющих центров размещается в контейнере Trusted Root Certification Authorities хранилища сертификатов соответствующей системы. В данном хранилище содержатся сертификаты удостоверяющих центров, которые администратором домена считаются надежными и которые Windows может использовать в качестве якорей доверия при проверке надежности других сертификатов. Если сертификат выдан удостоверяющим центром, установленным на системе, которая входит в состав инфраструктуры AD, он будет автоматически добавлен в хранилище сертификатов клиентской системы; эта операция осуществляется с помощью механизма обновления объектов групповой политики Group Policy Object (GPO). Если сертификат удостоверяющего центра, выдавшего сертификат LDAPS, не представлен в контейнере Trusted Root CA Certification Authorities, такой сертификат вы можете импортировать вручную, выбрав пункт Import в контекстном меню данного контейнера.
Еще одно важное условие: в хранилище сертификатов контроллера домена должен содержаться не только соответствующий сертификат LDAPS, но и закрытый ключ для него. Удостовериться в том, что хранилище сертификатов содержит закрытый ключ для того или иного сертификата LDAPS, вы можете, перейдя на вкладку General средства просмотра Certificate Viewer, как показано на экране 3. Если такой ключ имеется в данном хранилище, в нижней части диалогового окна будет отображен символ ключа и текст «You have a private key that corresponds to this certificate».
|
|
| Экран 3. Свойства закрытого ключа на вкладке General в окне просмотра Certificate Viewer |
Кроме того, нужно проследить за тем, чтобы не были активированы усиленные средства защиты закрытого ключа; это означает, что система Windows не должна требовать ввода пароля всякий раз при обращении пользователя к ключу. По умолчанию усиленные средства защиты закрытых ключей в системе Windows всегда отключены; сказанное относится и к сертификатам LDAPS.
Если вы хотите, не покидая окна командной строки, удостовериться в том, что сертификат, содержащийся в контроллере домена, является действительным, можете воспользоваться утилитой certutil, которая вызывается с помощью следующей команды:
certutil-verifyStore MY
Более подробные сведения об использовании полученных при выполнении этой команды данных в процессе диагностики сертификатов LDAPS можно найти в статье «Troubleshooting LDAP Over SSL» на Microsoft TechNet, размещенной по адресу blogs.technet.com/b/askds/archive/2008/03/13/troubleshootingldap-over-ssl.aspx.
Получение серверного сертификата LDAPS
При установлении на серверах домена или на контроллерах домена корневого удостоверяющего центра предприятия (то есть удостоверяющего центра, интегрированного в службу AD) контроллеры доменов автоматически получают действительный сертификат LDAPS. Но этот способ обеспечения пользователей сертификатами никак нельзя считать ни самым безопасным, ни самым гибким. Как правило, в организациях, которые стремятся добиться более высокой степени защищенности и универсальности служб сертификатов, формируются многоуровневые иерархии удостоверяющих центров Windows, состоящие из корневого удостоверяющего центра и различных выдающих удостоверяющих центров. Если ваша организация уже создала или собирается создать иерархию удостоверяющих центров Windows, рекомендую вам создавать сертификаты LDAPS для контроллеров доменов в соответствии с указаниями, изложенными в настоящем разделе. Кстати, сертификаты LDAPS могут выдаваться не только удостоверяющими центрами от корпорации Microsoft. Подробные инструкции по работе с удостоверяющим центром от сторонних производителей приведены в статье Microsoft «How to enable LDAP over SSL with a third-party certification authority», опубликованной по адресу support.microsoft.com/kb/321051.
Если вы работаете с иерархией многоуровневой инфраструктуры открытых ключей Windows public key infrastructure (PKI), вам нужно, прежде всего, создать особый шаблон сертификата для сертификатов LDAPS в каталоге AD, затем активировать этот особый шаблон на всех выдающих удостоверяющих центрах и, наконец, вручную настроить все контроллеры доменов для работы с сертификатом LDAPS, построенным на основе данного особого шаблона.
Чтобы создать особый шаблон сертификата для сертификатов LDAPS в каталоге AD, откройте оснастку Certificate Templates консоли MMC в одном из удостоверяющих центров предприятия (интегрированных в AD). Откройте меню Start, введите mmc и нажмите кнопку ОК. Щелкните на меню File и откройте оснастку Add/Remove Snap-in. Выберите пункт Certificate Templates, затем нажмите кнопки Add и OK. В окне оснастки Certificate Templates откройте контейнер Certificate Templates, правой кнопкой мыши щелкните на одном из шаблонов (скажем, на шаблоне Kerberos Authentication) и выделите пункт Duplicate Template. Вы можете также создать дубликат другого шаблона (например, шаблона Controller Authentication); нужно только, чтобы в расширении сертификата Extended Key Usage выбранного вами шаблона содержался идентификатор Server Authentication OID.
В окне Duplicate Template нажмите кнопку ОК, не снимая выделения с выбранного по умолчанию пункта WindowsServer 2003 Enterprise. В результате свойства нового шаблона будут отображены так, как показано на экране 4. Уделите особое внимание следующим свойствам нового шаблона.
|
|
| Экран 4. Свойства шаблона сертификата |
- На вкладке General: введите отображаемое имя шаблона (например, «LDAPS»), установите периоды действия и обновления (они должны соответствовать применяемой в вашей организации политике сертификатов) и укажите, намереваетесь ли вы публиковать сертификат в каталоге AD (переключатель Active Directory установите в положение Publish certificate).
- На вкладке Request Handling: убедитесь, что значение минимального размера ключа установлено в соответствии с применяемой в вашей организации политикой сертификатов, и укажите, следует ли пометить закрытый ключ как exportable (установите флажок Allow private key to be exported). Вы должны пометить закрытый ключ как exportable (экспорт закрытого ключа допускается), если намереваетесь импортировать данный сертификат в хранилище сертификатов AD NTDS, о чем речь пойдет ниже.
- На вкладке Subject Name: проследите за тем, чтобы имя DNS, а также имя SPN (Service Principal Name) были выделены. Наконец, нажмите кнопку ОК; в результате окно свойств шаблона будет закрыто, и настройка нового шаблона на этом закончится.
Теперь требуется активировать выдающие удостоверяющие центры, дабы они могли выдавать сертификаты на основе нового шаблона LDAPS. Добавьте новый шаблон в контейнер удостоверяющего центра Certificate Templates. Делается это так: на одном из удостоверяющих центров предприятия откройте оснастку MMC Certification Authority, затем контейнер удостоверяющего центра, правой кнопкой мыши щелкните на контейнере Certificate Templates и в открывшемся меню выберите пункты New, Certificate Template to Issue. В окне Enable Certificate Templates, показанном на экране 5, вы можете выбрать имя вновь созданного шаблона. Закройте диалоговое окно, нажав кнопку ОК.
|
|
| Экран 5. Диалоговое окно Enable Certificate Templates |
На последнем этапе работы запросите сертификаты LDAPS для каждого контроллера домена, который должен будет устанавливать соединения по протоколу LDAPS. Для этого на всех таких контроллерах домена выполните следующие действия.
- В окне оснастки MMC Certificates откройте контейнер Personal хранилища сертификатов соответствующей системы согласно пояснениям, которые я дал в предыдущем разделе, посвященном требованиям к серверным сертификатам LDAPS.
- Правой кнопкой мыши щелкните на контейнере Certificates и в открывшемся меню выберите пункты All Tasks, Request New Certificate. Откроется окно мастера Certificate Enrollment. Нажмите кнопку Next.
- На странице мастера Select Certificate Enrollment Policy оставьте применяемую по умолчанию настройку Active Directory Enrollment Policy и нажмите кнопку Next.
- Выберите шаблон сертификата LDAPS и щелкните на пункте Enroll.
- Убедитесь в том, что регистрация прошла успешно, и проверьте свойства новых сертификатов LDAPS с помощью кнопки View Certificate в разделе Details.
- Закройте окно мастера нажатием кнопки Finish.
В системе Windows Server 2008 реализована новая возможность, позволяющая пользователю сохранять сертификат LDAPS контроллера домена в хранилище сертификатов Personal каталога AD данного контроллера домена. Эта возможность оказывается весьма кстати в ситуациях, когда в хранилище Local Machines Personal store содержится несколько сертификатов контроллеров домена с идентификатором Server Authentication OID. В таких случаях бывает трудно предсказать, какой сертификат служба AD выберет для LDAPS-аутентификации. Так вот, в соответствии с новой логикой, реализованной в системе Windows Server 2008, служба AD, осуществляя поиск сертификатов для аутентификации серверов, прежде всего обращается к хранилищу сертификатов AD. Таким образом, это новое средство может принудить службу AD использовать именно тот сертификат аутентификации серверов, который вы сгенерировали с помощью особого шаблона LDAPS. Дополнительную информацию о том, как добавлять сертификаты в хранилище сертификатов Personal службы AD можно найти в статье «Event ID 1220-LDAP over SSL», которая опубликована по адресу technet.microsoft.com/en-us/library/dd941846 (WS.10).aspx.
Проверка средств подключения LDAPS
Для проверки правильности настройки протокола LDAPS на контроллерах доменов можно использовать инструмент LDP, который по умолчанию устанавливается на контроллерах доменов Windows Server 2008. Чтобы получить доступ к LDP на рядовых серверах Windows Server 2008, системах Windows 7 или на машинах Windows Vista, необходимо установить на них средства удаленного администрирования сервера Microsoft Remote Server Administration Tools (RSAT).
Чтобы запустить LDP, откройте меню Start и в окне Search введите символы ldp. Выберите пункт меню Ldp Connection и нажмите кнопку Connect. В поле Server введите полное доменное имя контроллера домена, к которому хотите подключиться. Удостоверьтесь в том, что в поле port выбрано значение Port 636 (которое по умолчанию применяется для портов LDAPS), что флажок Connectionless сброшен, а флажок SSL установлен, и нажмите кнопку ОК. Если протокол LDAPS настроен надлежащим образом, после выполнения команды LDP на экране должно появиться извещение Host supports SSL, как показано на экране 6.
|
|
| Экран 6. Проверка подключения LDAPS с помощью программы LDP |
Вновь откройте меню Connection, выберите пункт Bind и нажмите кнопку ОК. Если LDAPS настроен правильно, после выполнения команды LDP на экране появится имя пользователя, а также доменное имя, которое вы использовали для аутентификации программы LDP в службе AD.
Закрываем еще один шлюз AD
Разработчики Microsoft не предусмотрели особого интерфейса для выполнения процедуры настройки, но, несмотря на это, операция защиты направляемого на контроллеры доменов AD LDAP-трафика с использованием технологии SSL/TLS осуществляется относительно просто. В настоящей статье я показал, как, установив на контроллерах доменов должным образом отформатированный сертификат, пользователь может задействовать протокол LDAPS. С помощью этого протокола вы можете заблокировать важный шлюз аутентификации и доступа к каталогу AD. Кроме того, имеется еще два основных протокола аутентификации AD — Kerberos и NTLM. В этих протоколах передача данных осуществляется с помощью удаленных вызовов процедур remote procedure call (RPC), оба они по умолчанию оснащены механизмами защиты и шифрования данных.
Жан де Клерк (jan.declercq@hp.com) — сотрудник Security Office компании HP. Специализируется на управлении идентификационными параметрами и безопасностью в продуктах Microsoft
Enable LDAP over SSL (LDAPS) for Microsoft Active Directory servers.
Microsoft active directory servers will default to offer LDAP connections over unencrypted connections (boo!).
The steps below will create a new self signed certificate appropriate for use with and thus enabling LDAPS for an AD server. Of course the «self-signed» portion of this guide can be swapped out with a real vendor purchased certificate if required.
Steps have been tested successfully with Windows Server 2012R2, but should work with Windows Server 2008 without modification. Requires a working OpenSSL install (ideally Linux/OSX) and (obviously) a Windows Active Directory server.
- Create root certificate
- Import root certificate into trusted store of domain controller
- Create client certificate
- Accept and import certificate
- Reload active directory SSL certificate
- Test LDAPS using
ldp.exeutility - Reference
Create root certificate
Using OpenSSL, create new private key and root certificate. Answer country/state/org questions as suitable:
$ openssl genrsa -aes256 -out ca.key 4096
$ openssl req -new -x509 -days 3650 -key ca.key -out ca.crt
Hold onto the resulting ca.key and ca.crt.
Import root certificate into trusted store of domain controller
- From the active directory server, open
Manage computer certificates. - Add the generated
ca.crtto the certificate pathTrusted Root Certification AuthoritiesCertificates. - Done.
Create client certificate
We will now create a client certificate to be used for LDAPS, signed against our generated root certificate.
From the active directory server:
-
Create a new
request.infdefinition with the following contents — replacingACTIVE_DIRECTORY_FQDNwith the qualified domain name of your active directory server:[Version] Signature="$Windows NT$" [NewRequest] Subject = "CN=ACTIVE_DIRECTORY_FQDN" KeySpec = 1 KeyLength = 2048 Exportable = TRUE MachineKeySet = TRUE SMIME = FALSE PrivateKeyArchive = FALSE UserProtected = FALSE UseExistingKeySet = FALSE ProviderName = "Microsoft RSA SChannel Cryptographic Provider" ProviderType = 12 RequestType = PKCS10 KeyUsage = 0xa0 [EnhancedKeyUsageExtension] OID = 1.3.6.1.5.5.7.3.1 ; Server Authentication -
Run the following to create a client certificate request of
client.csr(note: it’s critical this is run from the active directory server itself to ensure correct private key -> certificate association):C:> certreq -new request.inf client.csr
Back to our OpenSSL system:
-
Create
v3ext.txtcontaining the following:keyUsage=digitalSignature,keyEncipherment extendedKeyUsage=serverAuth subjectKeyIdentifier=hash -
Create a certificate
client.crtfrom certificate requestclient.csrand root certificate (with private key):$ openssl x509 -req -days 3650 -in client.csr -CA ca.crt -CAkey ca.key -extfile v3ext.txt -set_serial 01 -out client.crt
-
Verify generated certificate:
$ openssl x509 -in client.crt -text
-
Ensure the following
X509v3 extensionsare all present:X509v3 Key Usage: Digital Signature, Key EnciphermentX509v3 Extended Key Usage: TLS Web Server AuthenticationX509v3 Subject Key Identifier
Accept and import certificate
-
From the active directory server with
client.crtpresent, run the following:C:> certreq -accept client.crt
-
Open
Manage computer certificates, the new certificate should now be present underPersonalCertificates. Ensure that:- Certificate has a private key association.
- The «Intended Purposes» is defined as «Server Authentication».
- Certificate name is the FQDN of the active directory server.
Reload active directory SSL certificate
Alternatively you can just reboot the server, but this method will instruct the active directory server to simply reload a suitable SSL certificate and if found, enable LDAPS:
-
Create
ldap-renewservercert.txtcontaining the following:dn: changetype: modify add: renewServerCertificate renewServerCertificate: 1 - -
Run the following command:
C:> ldifde -i -f ldap-renewservercert.txt
Test LDAPS using ldp.exe utility
-
From another domain controller, firstly install our generated root certificate
ca.crtto the certificate pathTrusted Root Certification AuthoritiesCertificates. -
Open utility:
-
From
Connection, selectConnect. -
Enter name of target domain controller.
-
Enter
636as port number (this is the LDAPS port). -
Click
OKto confirm the connection works. -
You’re all done!
Reference
- Enable LDAP over SSL with a third-party certification authority: https://support.microsoft.com/en-us/kb/321051
- LDAP renewServerCertificate: https://msdn.microsoft.com/en-us/library/cc223311.aspx
- How to Enable LDAPS in Active Directory (similar outcome to above): http://www.javaxt.com/tutorials/windows/how_to_enable_ldaps_in_active_directory
- DigiCert LDAPS certificate install guide: https://www.digicert.com/ssl-certificate-installation-microsoft-active-directory-ldap-2012.htm
First published on MSDN on Apr 10, 2017
Step-by-step guide for setting up
LDAPS
(LDAP over SSL)
The guide is split into 3 sections :
- Create a Windows Server VM in Azure
- Setup LDAP using AD LDS (Active Directory Lightweight Directory Services)
- Setup LDAPS (LDAP over SSL)
NOTE : The following steps are similar for Windows Server 2008, 2012, 2012 R2 , 2016. In this article, we will use Windows Server 2012 R2.
Create a Windows Server VM in Azure
Create a VM named “ldapstest” Windows Server 2012 R2 Datacenter Standard DS12 using the instructions here:
Create a Windows virtual machine with the Azure portal
Connect to the VM ldapstest using Remote Desktop Connection.
Setup LDAP using AD LDS
Now let us add AD LDS in our VM ldapstest
Click on Start —> Server Manager —> Add Roles and Features. Click Next.
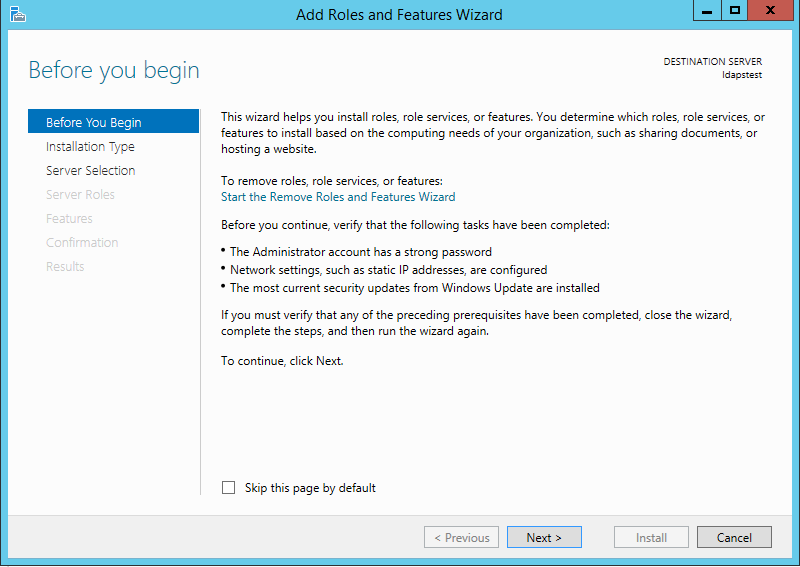
Choose Role-based or feature-based installation. Click Next.
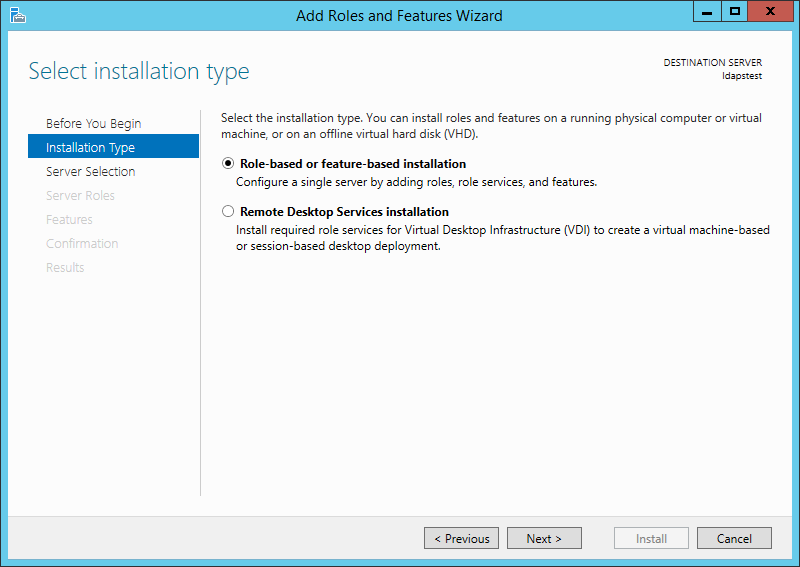
Select ldapstest server from the server pool. Click Next.
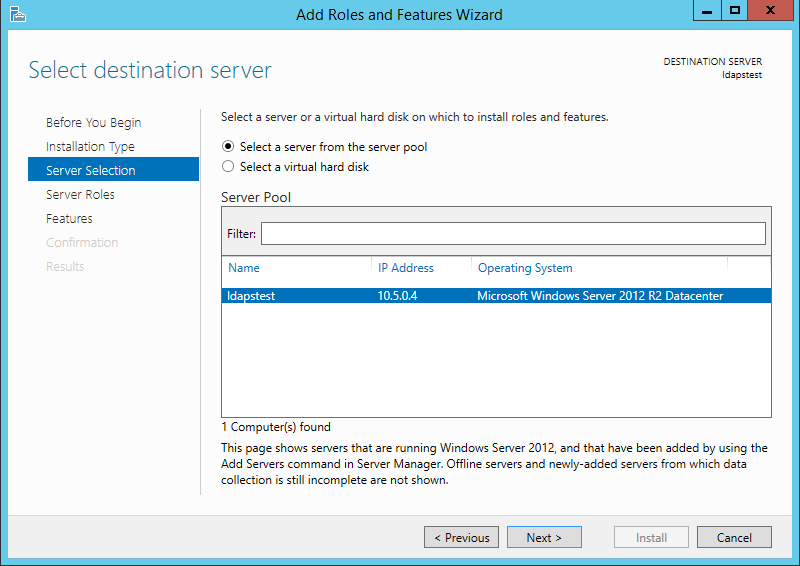
Mark Active Directory Lightweight Directory Services from the list of roles and click Next.
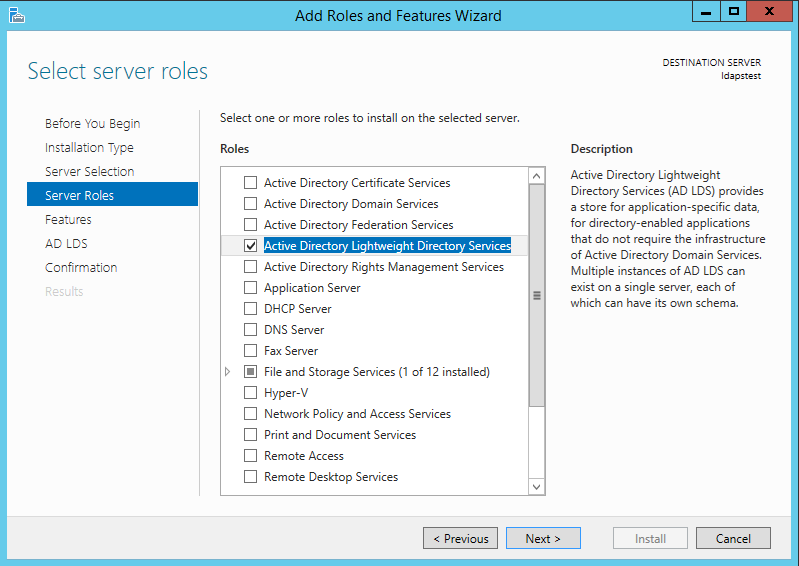
From the list of features, choose nothing – just click Next.
Click Next.

Click Install to start installation.

Once installation is complete, click Close.

Now we have successfully set up AD LDS Role. Let us create a new AD LDS Instance “CONTOSO” using the wizard. Click the “Run the Active Directory Lightweight Directory Services Setup Wizard” in the above screen. And then Click Close.

Choose Unique Instance since we are setting it up for the first time.

Type “CONTOSO” in Instance Name and click Next.
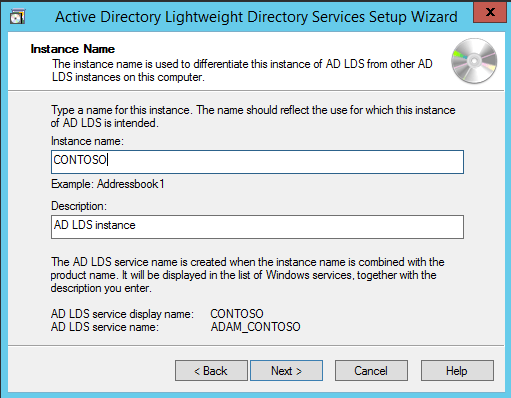
By Default, LDAP Port is 389 and LDAPS port is 636, let us choose the default values — click Next.
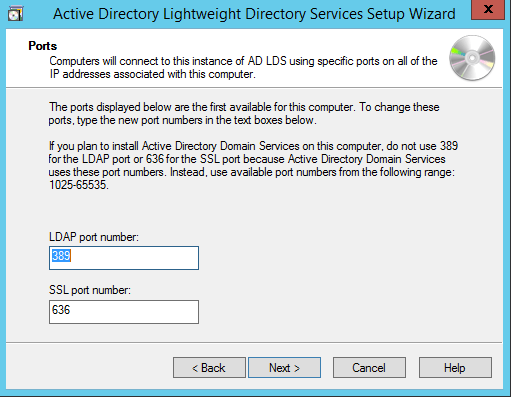
Create a new Application Directory Partition named “CN=MRS,DC=CONTOSO,DC=COM”. Click Next.

Using the default values for storage location of ADLDS files- Click Next.

Choosing Network Service Account for running the AD LDS Service.
You will receive a prompt warning about data replication. Since we are using a single LDAP Server, we can click Yes.

Choosing the currently logged on user as an administrator for the AD LDS Instance. Click Next.

Mark all the required LDIF files to import (Here we are marking all files). Click Next.

Verify that all the selections are right and then Click Next to confirm Installation.
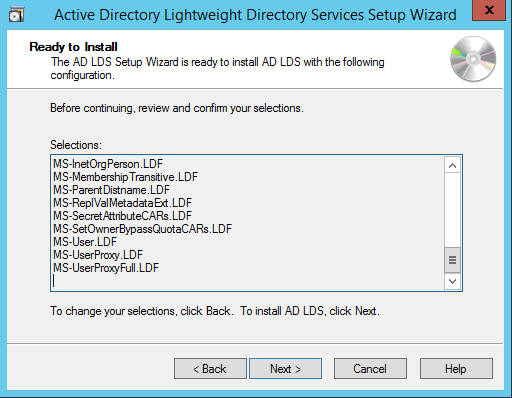
Once the instance is setup successfully, click Finish.

Now let us try to connect to the AD LDS Instance CONTOSO using ADSI Edit.
Click on Start —> Search “ADSI Edit” and open it.
Right Click on ADSI Edit Folder (on the left pane) and choose Connect To.. . Fill the following values and Click OK.
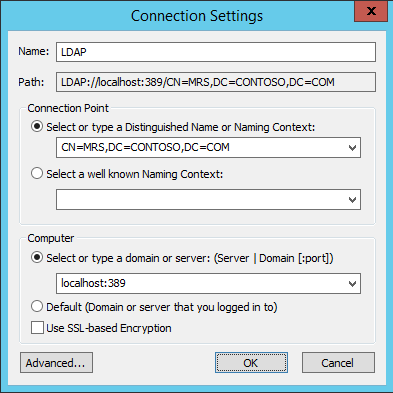
If the connection is successful, we will be able to browse the Directory CN=MRS,DC=CONTOSO,DC=COM :
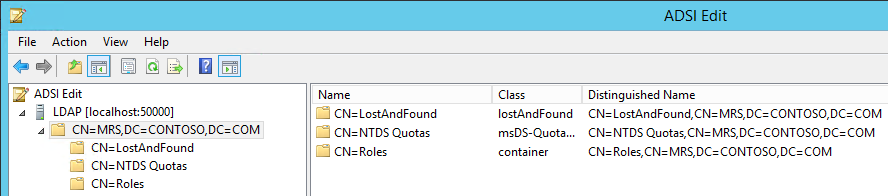
Setup LDAPS (LDAP over SSL)
The Certificate to be used for LDAPS must satisfy the following 3 requirements:
• Certificate must be valid for the purpose of Server Authentication. This means that it must also contains the Server Authentication object identifier (OID): 1.3.6.1.5.5.7.3.1
• The Subject name or the first name in the Subject Alternative Name (SAN) must match the Fully Qualified Domain Name (FQDN) of the host machine, such as Subject:CN=contosoldaps. For more information, see How to add a Subject Alternative Name to a secure LDAP certificate .
• The host machine account must have access to the private key.
Now, let’s use Active Directory Certificate Services to create a certificate to be used for LDAPS. If you already have a certificate satisfying the above requirements, you can skip this step.
Click on Start —> Server Manager —> Add Roles and Features. Click Next.
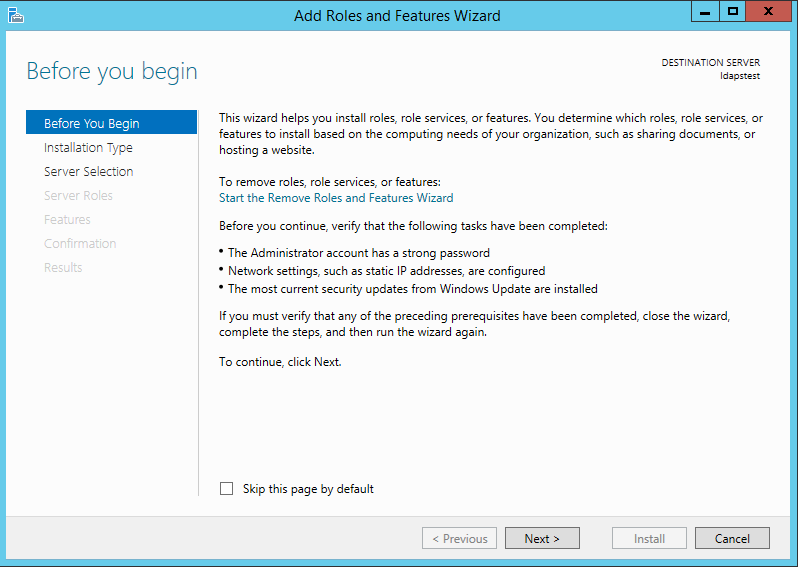
Choose Role-based or feature-based installation. Click Next.

Select ldapstest server from the server pool. Click Next.

Choose Active Directory Certificate Services from the list of roles and click Next.

Choose nothing from the list of features and click Next.
Click Next.

Mark “Certificate Authority” from the list of roles and click Next.
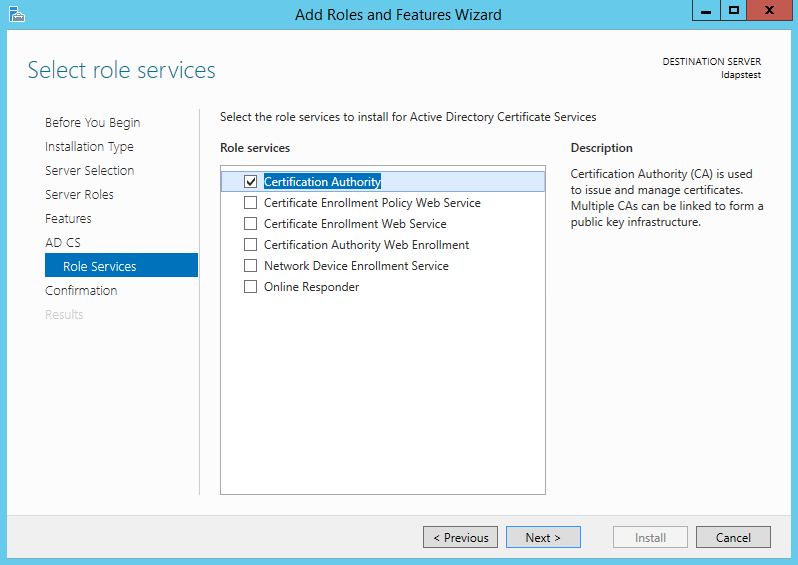
Click Install to confirm installation.

Once installation is complete, Click Close.

Now let’s create a certificate using AD CS Configuration Wizard. To open the wizard, click on “Configure Active Directory Certificate Services on the destination server” in the above screen. And then click Close. We can use the currently logged on user azureuser to configure role services since it belongs to the local Administrators group. Click Next.
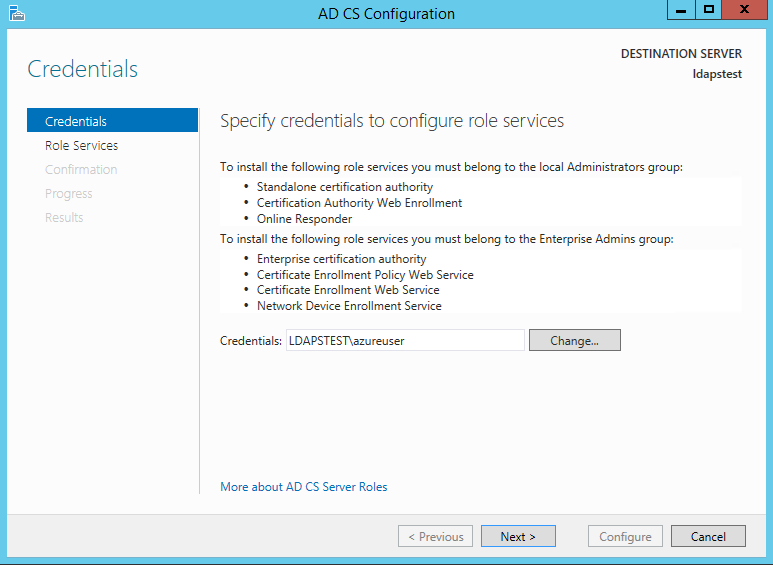
Choose Certification Authority from the list of roles. Click Next.

Since this is a local box setup without a domain, we are going to choose a Standalone CA. Click Next.

Choosing Root CA as the type of CA, click Next.
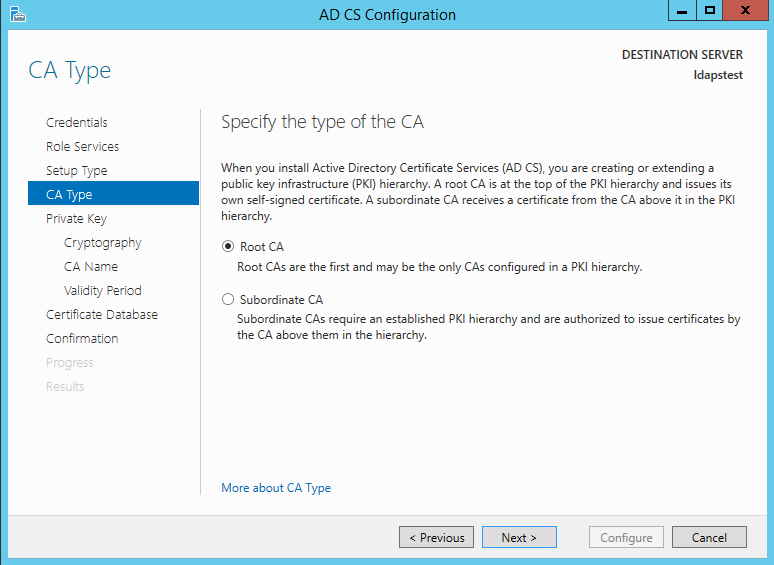
Since we do not possess a private key – let’s create a new one. Click Next.

Choosing SHA1 as the Hash algorithm. Click Next.
UPDATE : Recommended to select the most recent hashing algorithm since
SHA-1 deprecation countdown
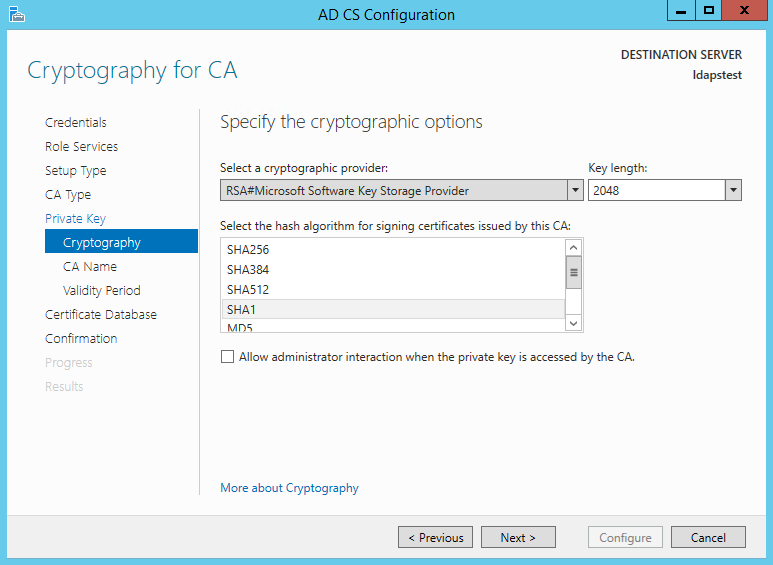
The name of the CA must match the Hostname (requirement number 2). Enter “LDAPSTEST” and Click Next.

Specifying validity period of the certificate. Choosing Default 5 years. Click Next.

Choosing default database locations, click Next.

Click Configure to confirm.
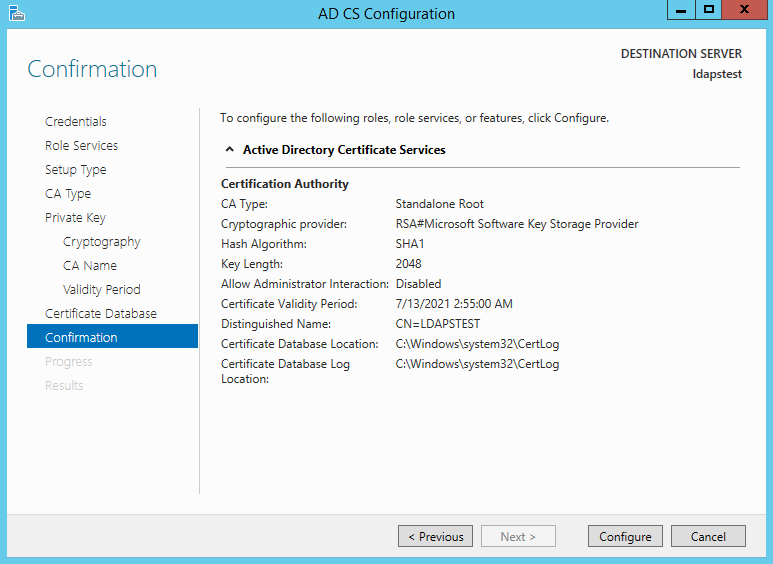
Once the configuration is successful/complete. Click Close.

Now let us view the generated certificate.
Click on Start à Search “Manage Computer Certificates” and open it.
Click on Personal Certificates and verify that the certificate “LDAPSTEST” is present:

Now to fulfill the third requirement, let us ensure host machine account has access to the private key. Using the Certutil utility, find the Unique Container Name. Open Command Prompt in Administrator mode and run the following command: certutil -verifystore MY

The private key will be present in the following location C:ProgramDataMicrosoftCryptoKeys<UniqueContainerName>
Right Click C:ProgramDataMicrosoftCryptoKeys874cb49a696726e9f435c1888b69f317_d3e61130-4cd8-4288-a344-7784647ff8c4 and click properties —> Security and add read permissions for NETWORK SERVICE.

We need to import this certificate into JRE key store since our certificate “CN=LDAPSTEST” is not signed by any by any trusted Certification Authority(CA) which is configured in you JRE keystore e.g Verisign, Thwate, goDaddy or entrust etc. In order to import this certificate using the keytool utility, let us first export this cert as a .CER from the machine certificate store:
Click Start —> Search “Manage Computer Certificates” and open it. Open personal, right click LDAPSTEST cert and click “Export”.

This opens the Certificate Export Wizard. Click Next.

Do not export the private key. Click Next.

Choose Base-64 encoded X .509 file format. Click Next.

Exporting the .CER to Desktop. Click Next.

Click Finish to complete the certificate export.

Certificate is now successfully exported to “C:UsersazureuserDesktopldapstest.cer”.
Now we shall import it to JRE Keystore using the keytool command present in this location:
C:Program FilesJavajre1.8.0_92binkeytool.exe.
Open Command Prompt in administrator mode. Navigate to “C:Program FilesJavajre1.8.0_92bin” and run the following command:
keytool -importcert -alias «ldapstest» -keystore «C:Program FilesJavajre1.8.0_92libsecuritycacerts» -storepass changeit -file «C:UsersazureuserDesktopldapstest.cer»

Type “yes” in the Trust this certificate prompt.
Once certificate is successfully added to the JRE keystore, we can connect to the LDAP server over SSL.
Now let us try to connect to LDAP Server (with and without SSL) using the ldp.exe tool.
Connection strings for
LDAP:\ldapstest:389
LDAPS:\ldapstest:636
Click on Start —> Search ldp.exe —> Connection and fill in the following parameters and click OK to connect:
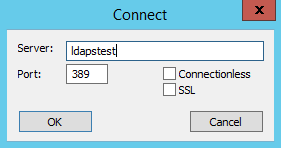
If Connection is successful, you will see the following message in the ldp.exe tool:

To Connect to LDAPS (LDAP over SSL), use port 636 and mark SSL. Click OK to connect.

If connection is successful, you will see the following message in the ldp.exe tool:

REFERENCES
https://technet.microsoft.com/en-us/library/cc770639(v=ws.10)
https://technet.microsoft.com/en-us/library/cc725767(v=ws.10).aspx
http://social.technet.microsoft.com/wiki/contents/articles/2980.ldap-over-ssl-ldaps-certificate….
https://blogs.technet.microsoft.com/askds/2008/03/13/troubleshooting-ldap-over-ssl/
http://javarevisited.blogspot.com/2011/11/ldap-authentication-active-directory.html
The following takes you through setting up LDAP over SSL
from the server side of a Windows 2008 R2 SP1 Domain Controller.
Note: It just
happens to be the minimum required to force a NetApp CDOT 8.2.1 SVM to have to
have LDAP over SSL properly configured before it can join the Active Directory
Domain.
My Lab Setup
My lab setup is simply a single Windows Server 2008 R2
SP1 Domain Controller — called MSDMC01 — in the domain LAB.PRIV. And we start
with a pretty much out of the box Domain Controller setup.
Step 1 of 3:
Enablement in the Default Domain Controllers Policy
Start >
Administrative Tools > Group Policy Management
Find the ‘Default
Domain Controllers Policy’, right-click and click Edit…
Image 1: Group
Policy Management
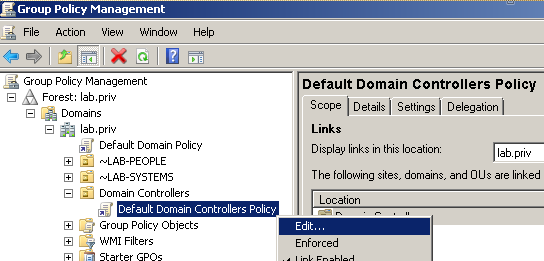
In the ‘Group Policy Management Editor: Default Domain
Controllers Policy’
Computer
Configuration > Policies > Windows Settings > Security Settings >
Local Policies > Security Options
Find the policy ‘Domain
controller: LDAP server signing requirements’, right-click and click Properties
Image 2: Group
Policy Management Editor
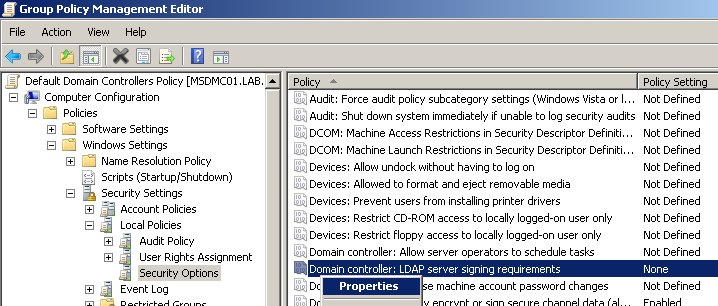
Domain controller: LDAP server signing requirements
Ensure that the ‘Define
this policy setting’ box is ticked
Change the drop-down menu to ‘Require signing’
Click Yes to
the ‘Confirm Settings Change’ box
Image 3: Domain
controller — LDAP server signing requirements Properties
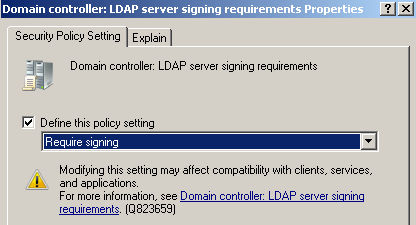
Close the ‘Group
Policy Management Editor’ window.
Close the ‘Group
Policy Management’ window.
Then, from the Domain Controller, open a DOS Command
Prompt and type the following command to update the policy on the Domain
Controller.
gpupdate
Note: The GPO
setting isn’t applied until the registry setting — HKLMSYSTEMCurrentControlSetservicesNTDSParameters and DWORD ‘ldapserverintegrity’ has changed from
the default 1 to the new setting of 2. If you manually change in the registry
without updating the Default Domain Controllers GPO, it will go back to 1 after
every gpupdate.
Image 4: Registry
Editor

Step 2 of 3: Setting
up an Enterprise Root CA
Server Manager
> Roles > Add Roles
Add Roles Wizard: Select Server Roles
Tick the ‘Active
Directory Certificate Services’ box and click Next >
Image 5: Add Roles
Wizard
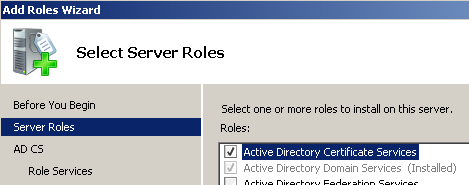
Add Roles Wizard: Introduction to Active
Directory Certificate Services
Add Roles Wizard: Select Role Services
Tick the ‘Certification
Authority’ box only
Image 6: AD CS —
Select Role Services

Note: Later on —
but not required for what we want to achieve here — I will install ‘Certification
Authority Web Enrollment’ so I can request certificates from the domain
certification authority.
Add Roles Wizard: Specify Setup Type
Choose ‘Enterprise’
to set up an Enterprise CA
Image 7: AD CS —
Specify Setup Type

Add Roles Wizard: Specify CA Type
Image 8: AD CS —
Specify CA Type
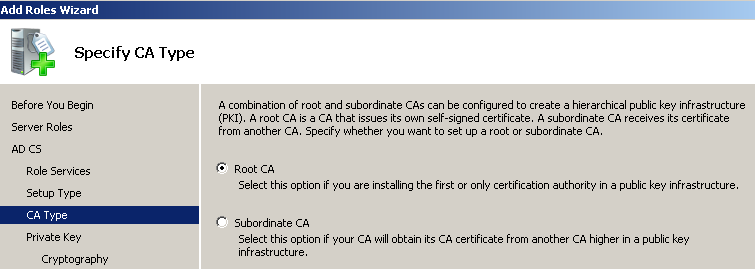
Add Roles Wizard: Set Up Private Key
Choose ‘Create a
new private key’ (since this is a new CA)
Image 9: AD CS —
Set Up Private Key
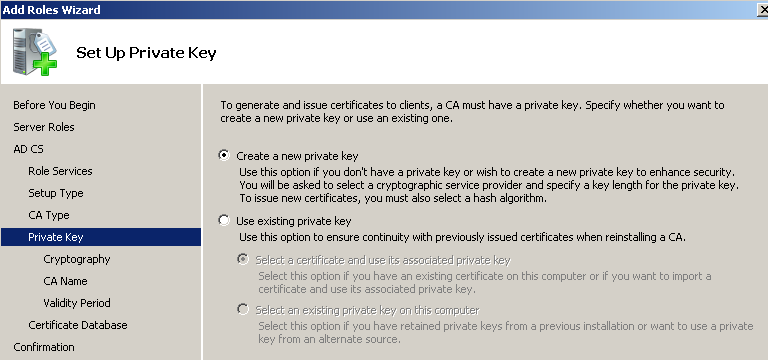
Add Roles Wizard: Configure Cryptography for
CA
Leave as the default settings which are sufficient for
our requirements:
Cryptographic
service provide (CSP) = RSA#Microsoft
Software Key Storage Provider
Key character
length = 2048
Hash algorithm for
signing certificates issued by this CA = SHA1
‘Allow
administrator interaction when the private key is accessed by the CA’ = unticked
Image 10: AD CS —
Configure Cryptography for CA
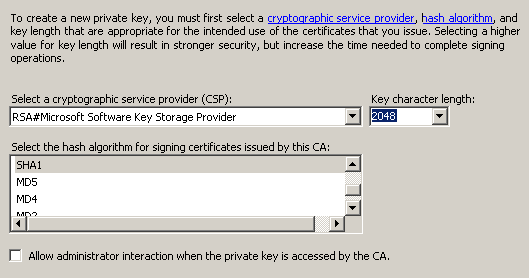
Add Roles Wizard: Configure CA Name
Leave as the default populated settings which are
sufficient for our requirements:
Common name for
this CA = lab-MSDMC01-CA
Distinguished name
suffix = DC=lab,DC=priv
Preview of
distinguished name = CN=lab-MSDMC01-CA,DC=lab,DC=priv
Image 11: AD CS —
Configure CA Name
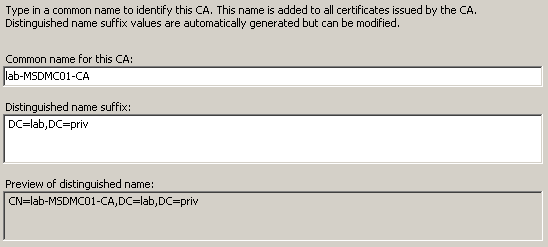
Add Roles Wizard: Set Validity Period
Leave as the default settings which are sufficient for
our requirements:
Validity period for
certificate generated for this CA = 5
years
Image 12: AD CS —
Set Validity Period

Add Roles Wizard: Configure Certificate
Database
Leave as the default settings which are sufficient for
our requirements:
Certificate
database location = C:Windowssystem32CertLog
Certificate
database log location = C:Windowssystem32CertLog
Image 13: AD CS —
Configure Certificate Database
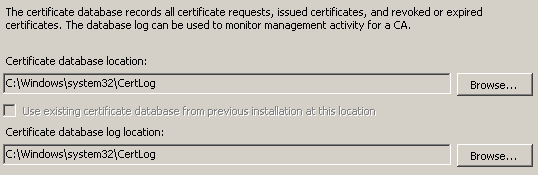
Add Roles Wizard: Confirm Installation
Selections
Image 14: AD CS —
Confirm Installation Selections
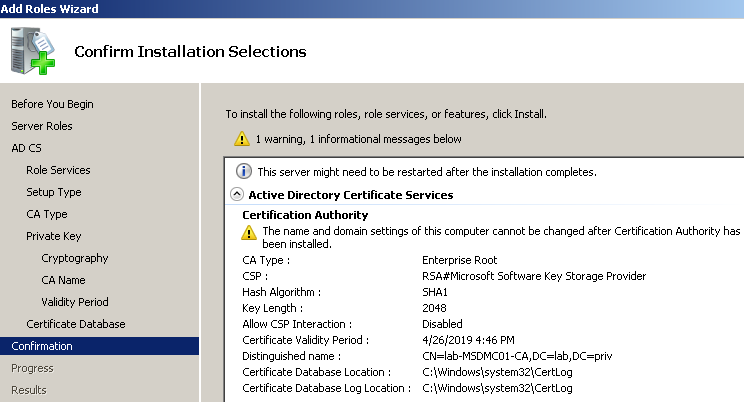
Add Roles Wizard: Installation Results
Step 3 of 3: Obtaining
the Root CA Certificate
On our Enterprise Root CA Domain Controller, run the
following commands from the DOS prompt (>) to obtain the self-signed root CA
certificate, and copy all the output between and including the BEGIN
CERTIFICATE and END CERTIFICATE lines into a simple text document. This will
need to be provided to the clients wanting to establish LDAP over SSL
connections, so they can install the root CA certificate first.
certutil
certutil -ca.cert CA_root_cert
Example of the
output using certutil and certutil -ca.cert:
C:UsersAdministrator>certutil
Entry 0:
(Local)
Name: `lab-MSDMC01-CA’
Organizational Unit: `’
Organization: `’
Locality: `’
State: `’
Country/region: `’
Config:
`MSDMC01.lab.privlab-MSDMC01-CA’
Exchange Certificate: `’
Signature Certificate: `MSDMC01.lab.priv_lab-MSDMC01-CA.crt’
Description: `’
Server: `MSDMC01.lab.priv’
Authority: `lab-MSDMC01-CA’
Sanitized Name: `lab-MSDMC01-CA’
Short Name: `lab-MSDMC01-CA’
Sanitized Short Name: `lab-MSDMC01-CA’
Flags: `13′
Web Enrollment Servers: `’
CertUtil:
-dump command completed successfully.
C:UsersAdministrator>certutil -ca.cert CA_root_cert
CA
cert[0]: 3 — Valid
CA
cert[0]:
——BEGIN
CERTIFICATE——
MIIDYzCCAkugAwIBAgIQbkWjIrQBqr9MYH6LuvOa7jANBgkqhkiG9w0BAQUFADBE
MRQwEgYKCZImiZPyLGQBGRYEcHJpdjETMBEGCgmSJomT8ixkARkWA2xhYjEXMBUG
A1UEAxMObGFiLU1TRE1DMDEtQ0EwHhcNMTQwNDI2MTYwNjE3WhcNMTkwNDI2MTYx
NjE2WjBEMRQwEgYKCZImiZPyLGQBGRYEcHJpdjETMBEGCgmSJomT8ixkARkWA2xh
YjEXMBUGA1UEAxMObGFiLU1TRE1DMDEtQ0EwggEiMA0GCSqGSIb3DQEBAQUAA4IB
DwAwggEKAoIBAQDVR1jxp1Sazi88OXWECAPZAdcUdaaXOIlquSV/2vZGz548zeVX
GxJmV2MIte0IPe+q7RMcjgCW9espkGG1LjkZdKtxA9zAvZJY3zhpZzCbAinP9aIO
CnopICoQ5OPK5wWpJvn18yWfOJiJOeIG/TK71YPzE2yxRNZv0ouSlflq2522Gutr
EAW+KrSsXs03G2KVY6iVZ9A+k/cfZN/G1v4DRElwqmXuCMxRcdQWkd8FNHJ4dYx6
Nvq1DmroWxn/zicBkUHz0aKbuQSM0P1M/LFTA7lGCosbjT+q8Bc37oGlci2vVTOS
JXv+Qxx/y/epOmkBJilf112uch+npWViMnPPAgMBAAGjUTBPMAsGA1UdDwQEAwIB
hjAPBgNVHRMBAf8EBTADAQH/MB0GA1UdDgQWBBSVo87stQ2puh0s37snZtHOC0SN
BTAQBgkrBgEEAYI3FQEEAwIBADANBgkqhkiG9w0BAQUFAAOCAQEACVC9UENQQuy+
OuC7M/pHns+d233j7PofbkFZ/a87WdePGUWEAfnYJYhXAWcV4HoM1WHZhqG408tV
CsfYS5NXCXrqIM5hNF+I+qnqA5aS0aPICIfBspOFDJqvcgj0bBPwKXRbRmBdizHe
pdNgzxR7RZgoDdorjNeAfmdkXEPoHKN4B9nQjtKSZGyXJxg0RUFUmGBadoNRSiGp
KNzmNQLsTLWszKarzqAjkfO5gN9oIOrVt1GFhkgxEfd6pUkTznm48CfrKSV62SMw
/b6Lqx0o/3mkuUUgMgJLUB21Os6z8XBtLFwA847vJNoi3SoLpjZE9+b+rf1r163C
qO2+O6CqYw==
——END
CERTIFICATE——
CertUtil:
-ca.cert command completed successfully.