По-умолчанию в Windows Server 2016/2019 и Windows 10 (начиная с билда 1709) отключена поддержка сетевого протокола для общего доступа к файлам в сетевых папках Server Message Block 1.0 (SMBv1). Этот протокол в большинстве случаев нужно только для обеспечения работы устаревших систем, например снятых с поддержки Windows XP, Windows Server 2003 и т.д. В этой статье мы рассмотрим, как включить или корректно отключить поддержку клиента и сервера SMBv1 в Windows 10 и Windows Server 2016/2019.
Если вашей сети не осталось устройств, которые поддерживают только протокол SMB 1.1, нужно полностью отключить протокол SMBv1 на всех Windows компьютерах в целях безопасности. Отключив SMB 1, вы защитите компьютеры Windows от большого количества уязвимостей, которые есть в этом устаревшем протоколе (самый известный публичный эксплоит для SMBv1 — EternalBlue). В результате клиенты при доступе к общим сетевым SMB шарам будут использовать новые более производительные, безопасные и
функциональные
версии протокола SMB.
В одной из предыдущих статей мы приводили таблицу совместимости версий протокола SMB на стороне клиента и сервера. Согласно этой таблице, старые версии клиентов (XP, Server 2003 и некоторые устаревшие *nix клиенты) могут использовать для доступа к файловым ресурсам только протокол SMB 1.0. Если таких клиентов в сети не осталось, можно полностью отключить SMB 1.0 на стороне файловых серверов (в том числе контролерах домена AD) и клиентских станциях.
В Windows 10 и Windows Server 2016 протокол SMBv1 разделен на два отдельных компонента – SMB клиент и SMB сервер, которые можно включать/отключать отдельно.
Содержание:
- Аудит доступа к файловому серверу по SMB v1.0
- Включение/отключение SMB 1.0 в Windows Server 2016/2019
- Включить/отключить SMB 1.0 в Windows 10
- Отключение SMBv1 с помощью групповых политик
Аудит доступа к файловому серверу по SMB v1.0
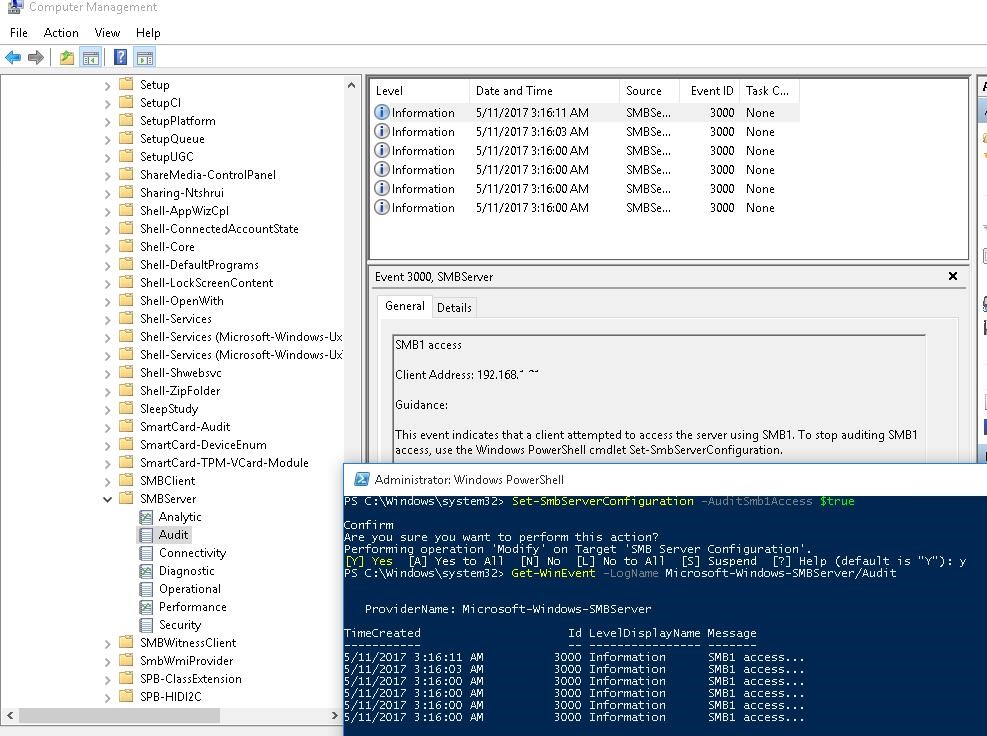
Перед отключением и полным удалением драйвера SMB 1.0 на стороне файлового SMB сервера желательно убедится, что в сети не осталось устаревших клиентов, которые используют для подключения протокол SMB v1.0. Для этого, нужно включить аудит доступа к файловому серверу по SMB1 протоколу с помощью команды PowerShell:
Set-SmbServerConfiguration –AuditSmb1Access $true
Через пару дней откройте на сервере журнал событий Applications and Services -> Microsoft -> Windows -> SMBServer -> Audit и проверьте, были ли зафиксированы попытки доступа к ресурсам сервера по протоколу SMB1.
В нашем примере в журнале обнаружено событие с EventID 3000 от источника SMBServer, в котором указано что клиент 192.168.1.10 пытается обратиться к сервереу по протоколу SMB1.
SMB1 access Client Address: 192.168.1.10

Guidance: This event indicates that a client attempted to access the server using SMB1. To stop auditing SMB1 access, use the Windows PowerShell cmdlet Set-SmbServerConfiguration.

Вам нужно найти в сети этот компьютер или устройство, при необходимости обновить ОС или прошивку, до версии поддерживающий, более новые протоколы SMB: SMBv2 или SMBv3.
В данном случае, мы проигнорируем эту информацию, но нужно учитывать тот факт, что в дальнейшем данный клиент не сможет получить SMB доступ к общим папкам на этом сервере.
Включение/отключение SMB 1.0 в Windows Server 2016/2019
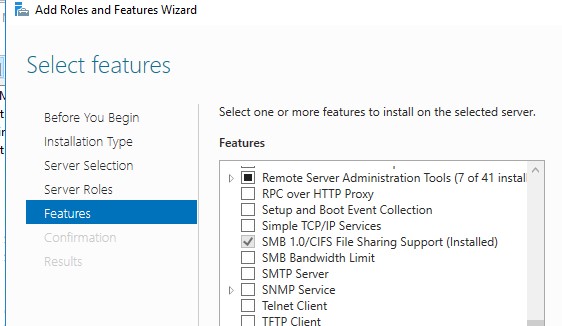
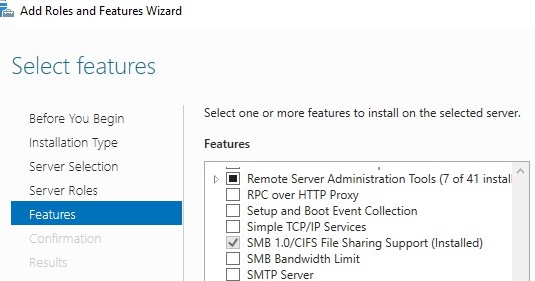
В Windows Server 2016, начиная с билда 1709, и Windows Server 2019 по умолчанию отключен протокол SMBv1. Чтобы включить поддержку клиентского протокола SMBv1в новых версиях Windows Server, нужно установить отдельный компонент SMB 1.0/CIFS File Sharing Support.
Вы можете установить компонент поддержки клиента SMBv1 с помощью Server Manager, или через PowerShell.
Проверить, что SMBv1 включен можно командой PowerShell:
Get-WindowsFeature | Where-Object {$_.name -eq "FS-SMB1"} | ft Name,Installstate

Чтобы установить компонент FS-SMB1, выполните:
Install-WindowsFeature FS-SMB1
Для удаления SMBv1 клиента (понадобится перезагрузка), выполните:
Uninstall-WindowsFeature –Name FS-SMB1 –Remove
Еще одна PowerShell команда, которая также позволяет удалить протокол SMB1Protocol:
Disable-WindowsOptionalFeature -Online -FeatureName SMB1Protocol -Remove
Чтобы ваш сервер мог обрабатывать доступ клиентов по протоколу SMBv1, кроме компонента FS-SMB1 нужно, чтобы поддержка протокола SMBv1 была включена на уровне файлового сервера SMB. Чтобы проверить, что на вашем сервере включен доступ по SMBv1 к сетевым папкам, выполните:
Get-SmbServerConfiguration
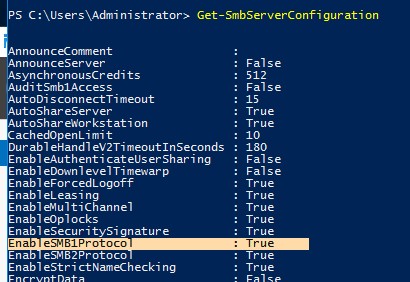
Строка “
EnableSMB1Protocol: True
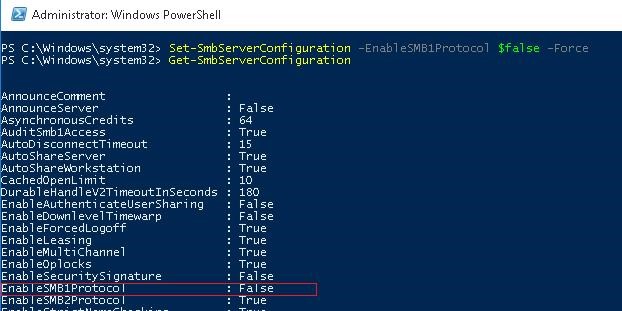
” говорит о том, что у вас разрешен доступ по протоколу SMBv1 к сетевым папкам на сервере. Чтобы отключить поддержку сервера SMBv1 в Windows Server, выполните команду:
Set-SmbServerConfiguration -EnableSMB1Protocol $false -Force
Теперь с помощью командлета
Get-SmbServerConfiguration
убедитесь, что протокол SMB1 отключен.

Чтобы включить поддержку протокола SMBv1 на сервере, выполните команду:
Set-SmbServerConfiguration -EnableSMB1Protocol $True -Force
В Windows 7/8 и Windows Server 2008 R2/ 2012 для отключения клиента SMB нужно отключать службу и драйвер доступа по SMBv1 командами:
sc.exe config lanmanworkstation depend= bowser/mrxsmb20/nsi
sc.exe config mrxsmb10 start= disabled

Включить/отключить SMB 1.0 в Windows 10
Как мы уже говорили, начиная с Windows 10 1709, во всех новых билдах поддержка протокола SMB1 отключена (также отключен гостевой доступ по протоколу SMBv2).
В Windows 10 вы можете проверить статус компонентов SMBv1 протокола командой DISM:
Dism /online /Get-Features /format:table | find "SMB1Protocol"
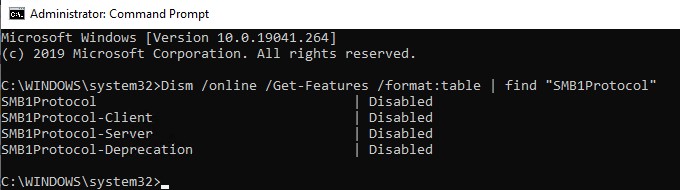
В нашем примере видно, что все компоненты SMBv1 отключены:
SMB1Protocol                                | Disabled
SMB1Protocol-Client                         | Disabled
 SMB1Protocol-Server                         | Disabled
SMB1Protocol-Deprecation                    | Disabled
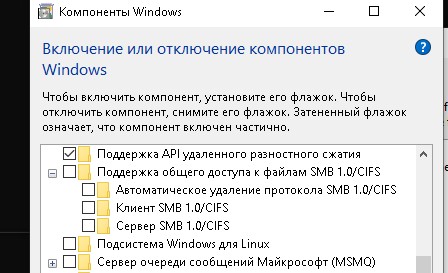
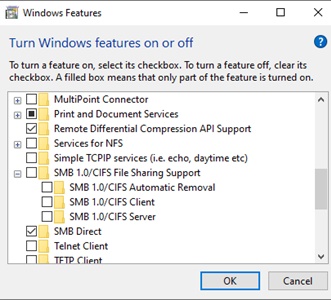
В Windows 10 также можно управлять компонентами SMB 1 из панели управления компонентами (
optionalfeatures.exe
). Разверните ветку Поддержка общего доступа к файлам SMB 1.0 /CIFS. Как вы видите здесь также доступны 3 компонента:
- Клиент SMB0/CIFS
- Сервер SMB0/CIFS
- Автоматическое удаление протокола SMB0/CIFS
Вы можете включить клиент и сервер SMBv1 в Windows 10 из окна управления компонентами или командой:
Dism /online /Enable-Feature /FeatureName:"SMB1Protocol"
Dism /online /Enable-Feature /FeatureName:"SMB1Protocol-Client"
Dism /online /Enable-Feature /FeatureName:"SMB1Protocol-Server"
Также можно включить сервер и клиент SMBv1 с помощью PowerShell:
Enable-WindowsOptionalFeature -Online -FeatureName SMB1Protocol-Server
Enable-WindowsOptionalFeature -Online -FeatureName SMB1Protocol-Client
Если после включения SMBv1 клиента, он не используется более 15 дней, он автоматически отключается.
Автоматическое отключение клиента SMBv1 это разовая операция. Если администратор включит SMBv1 вручную еще раз, он не будет отключаться автоматически.
Чтобы отключить поддержку клиента и сервера SMB1 в Windows 10, выполните следующие команды DISM:
Dism /online /Disable-Feature /FeatureName:"SMB1Protocol"
Dism /online /Disable-Feature /FeatureName:"SMB1Protocol-Client"
Dism /online /Disable-Feature /FeatureName:"SMB1Protocol-Server"
Если вы отключили поддержку SMBv1 клиента в Windows 10, то при доступе к сетевой папке на файловом сервере, который поддерживает только SMBv1 (протоколы SMBv2 и v3 отключены или не поддерживаются), появятся ошибки вида:
- 0x80070035 — не найден сетевой путь;
-
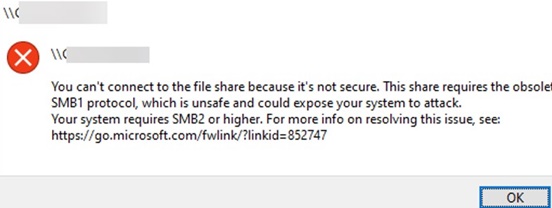
Вы не можете подключиться к общей папке, так как она небезопасна. Эта общая папка работает по устаревшему протоколу SMB1, который небезопасен и может подвергнуть вашу систему риску атаки. Вашей системе необходимо использовать SMB2 или более позднюю версию.
Unable to connect to file shares because it is not secure. This share requires the obsolete SMB1 protocol, which is not secure and could expose your system to attacks
;

-
Вы не можете подключиться к общей папке, так как она небезопасна. Эта общая папка работает по устаревшему протоколуSMB1, который небезопасен и может подвергнуть вашу систему риску атаки. Вашей системе необходимо использовать SMB2 или более позднюю версию.
You can’t connect to the file share because it’s not secure. This share requires the obsolete SMB1 protocol, which is unsafe and could expose your system to attack. Your system requires SMB2 or higher).
Также при отключении клиента SMBv1 на компьютере перестает работать служба Computer Browser (Обозреватель компьютеров), которая используется устаревшим протоколом NetBIOS для обнаружения устройств в сети. Для корректгого отобрражения соседних компьютеров в сети Windows 10 нужно настроить службу Function Discovery Provider Host (см. статью).
Отключение SMBv1 с помощью групповых политик
В доменной среде Active Directory вы можете отключить протокол SMBv1 на всех серверах и компьютеров с помощью групповой политики. Т.к. в стандартных политиках Windows нет политики настройки компонентов SMB, придется отключать его через политику реестра.
- Откройте консоль управления Group Policy Management (gpmc.msc), создайте новый объект GPO (disableSMBv1) и назначьте его на OU с компьютерами, на которых нужно отключить SMB1;
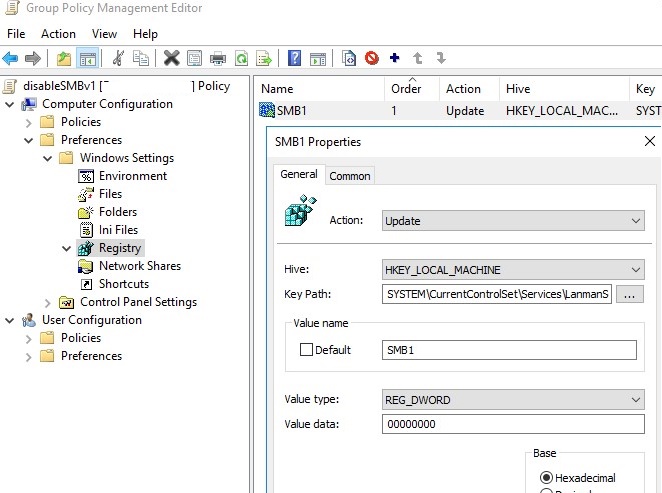
- Перейдите в режим редактирования политики. Выберите Computer Configuration -> Preferences -> Windows Settings -> Registry;
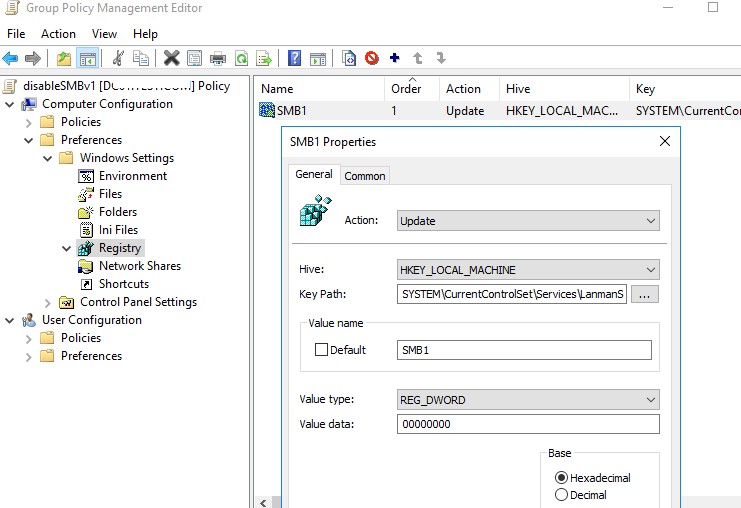
- Создайте новый параметр реестра (Registry Item) со следующими настройками:
Action:
Update
Hive:
HKEY_LOCAL_MACHINE
Key Path:
SYSTEMCurrentControlSetServicesLanmanServerParameters
Value name:
SMB1
Value type:
REG_DWORD
Value data:
0

Данная политика отключит через реестр поддержку компонента сервер SMBv1 на всех компьютерах.Если в вашем домене остались компьютеры с Windows XP/Server 2003, можно использовать отдельный WMI фильтр политики, чтобы исключить эти версии Windows из-под действия политики.
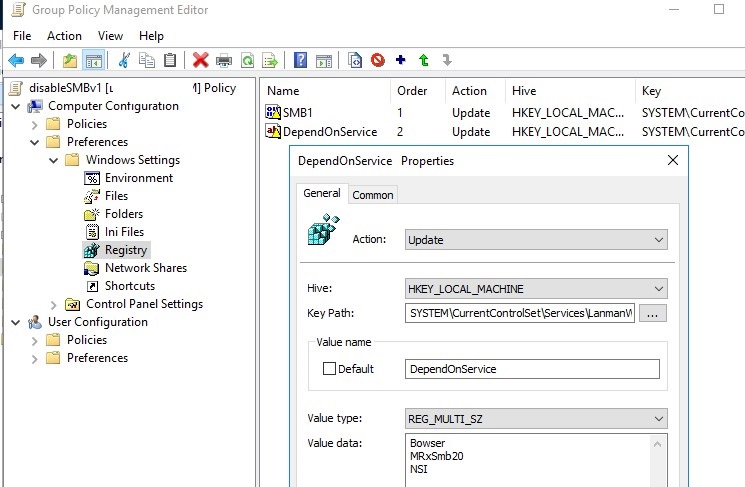
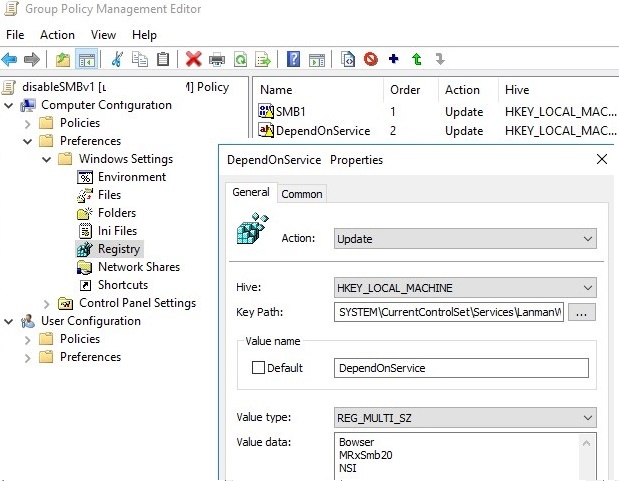
Если вы хотите через GPO отключить на компьютерах SMB клиент, создайте дополнительно два параметра реестра:
- Параметр Start (типа REG_DWORD) со значением 4 в ветке реестра HKLMSYSTEMCurrentControlSetservicesmrxsmb10;
- Параметр DependOnService (типа REG_MULTI_SZ) со значением Bowser, MRxSmb20, NSI (каждое значение с новой строки) в ветке реестра HKLMSYSTEMCurrentControlSetServicesLanmanWorkstation.
Осталось обновить настройки групповых политик на клиентах и после перезагрузки проверить, что компоненты SMBv1 полностью отключены.
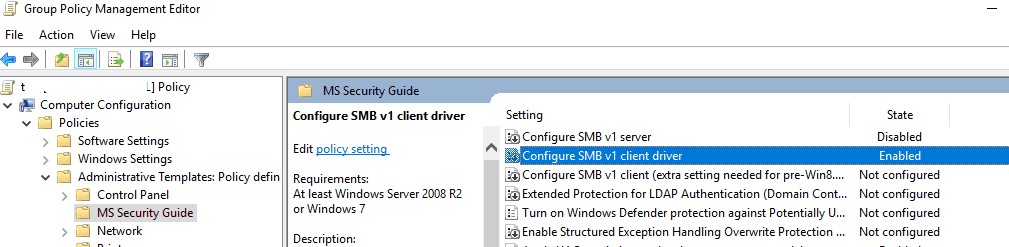
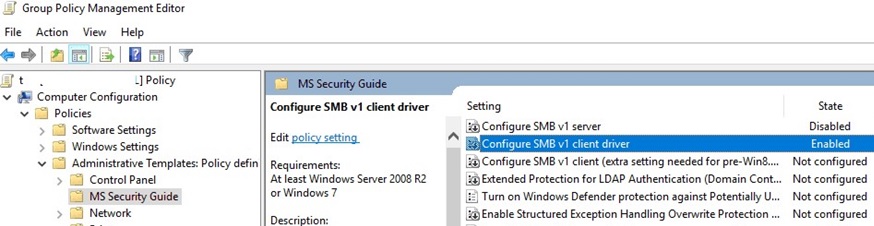
В групповых политиках Security Baseline из Microsoft Security Compliance Toolkit есть отдельный административный шаблон (файлы SecGuide.adml и SecGuide.ADMX), в которых есть отдельные параметры для отключения сервера и клиента SMB:
- Configure SMB v1 server;
- Configure SMB v1 client driver.

I realize this is not a very exciting post, especially compared to my other wonderful musing on this site, but I felt I really had to write it to share the pain!
A colleague I work with needed to enable this feature on an Azure Windows Server 2019 machine to communicate with some old system that only supports Server Message Block version 1 (SMB1). Easy enough to add that right?
Trying the installation
Let’s first get some information about the feature:
Get-WindowsOptionalFeature -Online -FeatureName SMB1Protocol
The output:

Notice the State property? The feature is disabled and the payload (installation files) are not on the Azure virtual machine.
When you try to install the feature, you get:
I guess I need the Windows Server 2019 sources!
Downloading Windows Server 2019
I downloaded Windows Server 2019 (November 2019 version) from https://my.visualstudio.com/Downloads?q=SQL%20Server%202019. I am not sure if you can use the evaluation version of Windows Server 2019 because I did not try that. I downloaded the ISO to the Azure virtual machine.
Mount ISO and copy install.wim
On recent versions of Windows, you can right click an ISO and mount it. In the mounted ISO, search for install.wim and copy that file to a folder on your C: disk like c:wim. Under c:wim, create a folder called mount and run the following command:
dism /mount-wim /wimfile:c:wiminstall.wim /index:4 /mountdir:c:wimmount /readonly
The contents of install.wim is now available in c:wimmount. Now don’t try to enable the feature by pointing to the sources with the -source parameter of Enable-WindowsOptionalFeature. It will not work yet!
Patch the mounted files
The Azure Windows Server 2019 image (at time of writing, June 2020) has a cumulative update installed: https://support.microsoft.com/en-us/help/4551853/windows-10-update-kb4551853. For this installatin to work, I needed to download the update from https://www.catalog.update.microsoft.com/home.aspx and put it somewhere like c:patches.
Now we can update the mounted files offline with the following command:
Dism /Add-Package /Image:"C:wimmount" /PackagePath="c:patcheswindows10.0-kb4551853-x64_ce1ea7def481ee2eb8bba6db49ddb42e45cba54f.msu"
It will take a while to update! You need to do this because the files mounted from the downloaded ISO do not match the version of the Windows Server 2019 image. Without this update, the installation of the SMB1 feature will not succeed.
Enable the SMB1 feature
Now we can enable the feature with the following command:
dism /online /Enable-Feature /FeatureName:SMB1Protocol /All /source:c:wimmountwindowswinsxs /limitaccess
You will need to reboot. After rebooting, from a PowerShell prompt run the command below to check the installation:
Get-WindowsOptionalFeature -Online -FeatureName SMB1Protocol
The State property should say: Enabled
Conclusion
Something this trivial took me way too long. Is there a simpler way? Let me know! 👍
And by the way, don’t enable SMB1. It’s not secure at all. But in some cases, there’s just no way around it.
| title | description | author | manager | ms.topic | ms.author | ms.date | ms.custom |
|---|---|---|---|---|---|---|---|
|
How to detect, enable and disable SMBv1, SMBv2, and SMBv3 in Windows |
Describes how to enable and disable the Server Message Block protocol (SMBv1, SMBv2, and SMBv3) in Windows client and server environments. |
Deland-Han |
dcscontentpm |
how-to |
delhan |
12/12/2022 |
contperf-fy21q2 |
How to detect, enable and disable SMBv1, SMBv2, and SMBv3 in Windows
Applies to: Windows Server 2022, Windows Server 2019, Windows Server 2016, Windows Server 2012 R2, Windows Server 2012, Windows 11, Windows 10, Windows 8.1, Windows 8
This article describes how to enable and disable Server Message Block (SMB) version 1 (SMBv1), SMB version 2 (SMBv2), and SMB version 3 (SMBv3) on the SMB client and server components.
While disabling or removing SMBv1 might cause some compatibility issues with old computers or software, SMBv1 has significant security vulnerabilities, and we strongly encourage you not to use it.
Disabling SMBv2 or SMBv3 for troubleshooting
We recommend keeping SMBv2 and SMBv3 enabled, but you might find it useful to disable one temporarily for troubleshooting. For more information, see How to detect status, enable, and disable SMB protocols on the SMB Server.
In Windows 10, Windows 8.1, Windows Server 2019, Windows Server 2016, Windows Server 2012 R2, and Windows Server 2012, disabling SMBv3 deactivates the following functionality:
- Transparent Failover — clients reconnect without interruption to cluster nodes during maintenance or failover
- Scale Out — concurrent access to shared data on all file cluster nodes
- Multichannel — aggregation of network bandwidth and fault tolerance if multiple paths are available between client and server
- SMB Direct — adds RDMA networking support for high performance, with low latency and low CPU use
- Encryption — Provides end-to-end encryption and protects from eavesdropping on untrustworthy networks
- Directory Leasing — Improves application response times in branch offices through caching
- Performance Optimizations — optimizations for small random read/write I/O
In Windows 7 and Windows Server 2008 R2, disabling SMBv2 deactivates the following functionality:
- Request compounding — allows for sending multiple SMBv2 requests as a single network request
- Larger reads and writes — better use of faster networks
- Caching of folder and file properties — clients keep local copies of folders and files
- Durable handles — allow for connection to transparently reconnect to the server if there’s a temporary disconnection
- Improved message signing — HMAC SHA-256 replaces MD5 as hashing algorithm
- Improved scalability for file sharing — number of users, shares, and open files per server greatly increased
- Support for symbolic links
- Client oplock leasing model — limits the data transferred between the client and server, improving performance on high-latency networks and increasing SMB server scalability
- Large MTU support — for full use of 10 Gigabit Ethernet (GbE)
- Improved energy efficiency — clients that have open files to a server can sleep
The SMBv2 protocol was introduced in Windows Vista and Windows Server 2008, while the SMBv3 protocol was introduced in Windows 8 and Windows Server 2012. For more information about SMBv2 and SMBv3 capabilities, see the following articles:
- Server Message Block overview
- What’s New in SMB
How to remove SMBv1 via PowerShell
Here are the steps to detect, disable and enable SMBv1 client and server by using PowerShell commands with elevation.
[!NOTE]
The computer will restart after you run the PowerShell commands to disable or enable SMBv1.
-
Detect:
Get-WindowsOptionalFeature -Online -FeatureName SMB1Protocol
-
Disable:
Disable-WindowsOptionalFeature -Online -FeatureName SMB1Protocol
-
Enable:
Enable-WindowsOptionalFeature -Online -FeatureName SMB1Protocol
[!TIP]
You can detect SMBv1 status, without elevation, by running:Get-SmbServerConfiguration | Format-List EnableSMB1Protocol.
Windows Server 2012 Windows Server 2012 R2, Windows Server 2016, Windows Server 2019: Server Manager method

To remove SMBv1 from Windows Server:
- On the Server Manager Dashboard of the server where you want to remove SMBv1, under Configure this local server, select Add roles and features.
- On the Before you begin page, select Start the Remove Roles and Features Wizard, and then on the following page, select Next.
- On the Select destination server page under Server Pool, ensure that the server you want to remove the feature from is selected, and then select Next.
- On the Remove server roles page, select Next.
- On the Remove features page, clear the check box for SMB 1.0/CIFS File Sharing Support and select Next.
- On the Confirm removal selections page, confirm that the feature is listed, and then select Remove.
Windows 8.1, Windows 10, and Windows 11: Add or Remove Programs method

To disable SMBv1 for the mentioned operating systems:
- In Control Panel, select Programs and Features.
- Under Control Panel Home, select Turn Windows features on or off to open the Windows Features box.
- In the Windows Features box, scroll down the list, clear the check box for SMB 1.0/CIFS File Sharing Support and select OK.
- After Windows applies the change, on the confirmation page, select Restart now.
How to detect status, enable, and disable SMB protocols
[!NOTE]
When you enable or disable SMBv2 in Windows 8 or Windows Server 2012, SMBv3 is also enabled or disabled. This behavior occurs because these protocols share the same stack.
Server
Windows 8 and Windows Server 2012 introduced the new Set-SMBServerConfiguration Windows PowerShell cmdlet. The cmdlet enables you to enable or disable the SMBv1, SMBv2, and SMBv3 protocols on the server component.
You don’t have to restart the computer after you run the Set-SMBServerConfiguration cmdlet.
SMBv1
-
Detect:
Get-SmbServerConfiguration | Select EnableSMB1Protocol
-
Disable:
Set-SmbServerConfiguration -EnableSMB1Protocol $false
-
Enable:
Set-SmbServerConfiguration -EnableSMB1Protocol $true
For more information, see Server storage at Microsoft.
SMB v2/v3
-
Detect:
Get-SmbServerConfiguration | Select EnableSMB2Protocol
-
Disable:
Set-SmbServerConfiguration -EnableSMB2Protocol $false
-
Enable:
Set-SmbServerConfiguration -EnableSMB2Protocol $true
For Windows 7, Windows Server 2008 R2, Windows Vista, and Windows Server 2008
To enable or disable SMB protocols on an SMB Server that is running Windows 7, Windows Server 2008 R2, Windows Vista, or Windows Server 2008, use Windows PowerShell or Registry Editor.
Additional PowerShell methods
[!NOTE]
This method requires PowerShell 2.0 or later.
SMBv1 on SMB Server
Detect:
Get-Item HKLM:SYSTEMCurrentControlSetServicesLanmanServerParameters | ForEach-Object {Get-ItemProperty $_.pspath}
Default configuration = Enabled (No registry named value is created), so no SMB1 value will be returned
Disable:
Set-ItemProperty -Path "HKLM:SYSTEMCurrentControlSetServicesLanmanServerParameters" SMB1 -Type DWORD -Value 0 -Force
Enable:
Set-ItemProperty -Path "HKLM:SYSTEMCurrentControlSetServicesLanmanServerParameters" SMB1 -Type DWORD -Value 1 -Force
Note You must restart the computer after you make these changes.
For more information, see Server storage at Microsoft.
SMBv2/v3 on SMB Server
Detect:
Get-ItemProperty HKLM:SYSTEMCurrentControlSetServicesLanmanServerParameters | ForEach-Object {Get-ItemProperty $_.pspath}
Disable:
Set-ItemProperty -Path "HKLM:SYSTEMCurrentControlSetServicesLanmanServerParameters" SMB2 -Type DWORD -Value 0 -Force
Enable:
Set-ItemProperty -Path "HKLM:SYSTEMCurrentControlSetServicesLanmanServerParameters" SMB2 -Type DWORD -Value 1 -Force
[!NOTE]
You must restart the computer after you make these changes.
Registry Editor
[!IMPORTANT]
Follow the steps in this section carefully. Serious problems might occur if you modify the registry incorrectly. Before you modify it, back up the registry for restoration in case problems occur.
To enable or disable SMBv1 on the SMB server, configure the following registry key:
HKEY_LOCAL_MACHINESYSTEMCurrentControlSetServicesLanmanServerParameters
Registry entry: SMB1
REG_DWORD: 0 = Disabled
REG_DWORD: 1 = Enabled
Default: 1 = Enabled (No registry key is created)
To enable or disable SMBv2 on the SMB server, configure the following registry key:
HKEY_LOCAL_MACHINESYSTEMCurrentControlSetServicesLanmanServerParameters
Registry entry: SMB2
REG_DWORD: 0 = Disabled
REG_DWORD: 1 = Enabled
Default: 1 = Enabled (No registry key is created)
[!NOTE]
You must restart the computer after you make these changes.
Client
Here is how to detect status, enable, and disable SMB protocols on the SMB Client that is running Windows 10, Windows Server 2019, Windows 8.1, Windows Server 2016, Windows Server 2012 R2, and Windows Server 2012.
SMBv1 on SMB Client
-
Detect
sc.exe qc lanmanworkstation
-
Disable:
sc.exe config lanmanworkstation depend= bowser/mrxsmb20/nsi
sc.exe config mrxsmb10 start= disabled
-
Enable:
sc.exe config lanmanworkstation depend= bowser/mrxsmb10/mrxsmb20/nsi
sc.exe config mrxsmb10 start= auto
For more information, see Server storage at Microsoft
SMB v2/v3 on SMB Client
-
Detect:
sc.exe qc lanmanworkstation
-
Disable:
sc.exe config lanmanworkstation depend= bowser/mrxsmb10/nsi
sc.exe config mrxsmb20 start= disabled
-
Enable:
sc.exe config lanmanworkstation depend= bowser/mrxsmb10/mrxsmb20/nsi
sc.exe config mrxsmb20 start= auto
[!NOTE]
- You must run these commands at an elevated command prompt.
- You must restart the computer after you make these changes.
Disable SMBv1 by using Group Policy
This section introduces how to use Group Policy to disable SMBv1. You can use this method on different versions of Windows.
Server
SMBv1
This procedure configures the following new item in the registry:
HKEY_LOCAL_MACHINESYSTEMCurrentControlSetServicesLanmanServerParameters
- Registry entry: SMB1
- REG_DWORD: 0 = Disabled
To use Group Policy to configure this, follow these steps:
-
Open the Group Policy Management Console. Right-click the Group Policy object (GPO) that should contain the new preference item, and then click Edit.
-
In the console tree under Computer Configuration, expand the Preferences folder, and then expand the Windows Settings folder.
-
Right-click the Registry node, point to New, and select Registry Item.


In the New Registry Properties dialog box, select the following:
- Action: Create
- Hive: HKEY_LOCAL_MACHINE
- Key Path: SYSTEMCurrentControlSetServicesLanmanServerParameters
- Value name: SMB1
- Value type: REG_DWORD
- Value data: 0

This procedure disables the SMBv1 Server components. This Group Policy must be applied to all necessary workstations, servers, and domain controllers in the domain.
[!NOTE]
WMI filters can also be set to exclude unsupported operating systems or selected exclusions, such as Windows XP.
[!IMPORTANT]
Be careful when you make these changes on domain controllers on which legacy Windows XP or older Linux and third-party systems (that don’t support SMBv2 or SMBv3) require access to SYSVOL or other file shares where SMB v1 is being disabled.
Client
SMB v1
To disable the SMBv1 client, the services registry key needs to be updated to disable the start of MRxSMB10, and then the dependency on MRxSMB10 needs to be removed from the entry for LanmanWorkstation so that it can start normally without requiring MRxSMB10 to first start.
This guidance updates and replaces the default values in the following two items in the registry:
HKEY_LOCAL_MACHINESYSTEMCurrentControlSetservicesmrxsmb10
Registry entry: Start REG_DWORD: 4= Disabled
HKEY_LOCAL_MACHINESYSTEMCurrentControlSetServicesLanmanWorkstation
Registry entry: DependOnService REG_MULTI_SZ: «Bowser»,»MRxSmb20″,»NSI»
[!NOTE]
The default included MRxSMB10 which is now removed as dependency.
To configure this by using Group Policy, follow these steps:
-
Open the Group Policy Management Console. Right-click the GPO that should contain the new preference item, and then click Edit.
-
In the console tree under Computer Configuration, expand the Preferences folder, and then expand the Windows Settings folder.
-
Right-click the Registry node, point to New, and select Registry Item.
-
In the New Registry Properties dialog box, select the following:
- Action: Update
- Hive: HKEY_LOCAL_MACHINE
- Key Path: SYSTEMCurrentControlSetservicesmrxsmb10
- Value name: Start
- Value type: REG_DWORD
- Value data: 4
-
Then remove the dependency on the MRxSMB10 that was disabled.
In the New Registry Properties dialog box, select the following:
- Action: Replace
- Hive: HKEY_LOCAL_MACHINE
- Key Path: SYSTEMCurrentControlSetServicesLanmanWorkstation
- Value name: DependOnService
- Value type: REG_MULTI_SZ
- Value data:
- Bowser
- MRxSmb20
- NSI
[!NOTE]
These three strings will not have bullets (see the following screen shot).The default value includes MRxSMB10 in many versions of Windows, so by replacing them with this multi-value string, it is in effect removing MRxSMB10 as a dependency for LanmanWorkstation and going from four default values down to just these three values above.
[!NOTE]
When you use Group Policy Management Console, you don’t have to use quotation marks or commas. Just type each entry on individual lines. -
Restart the targeted systems to finish disabling SMB v1.


Auditing SMBv1 usage
To determine which clients are attempting to connect to an SMB server with SMBv1, you can enable auditing on Windows Server 2016, Windows 10, and Windows Server 2019. You can also audit on Windows 7 and Windows Server 2008 R2 if the May 2018 monthly update is installed, and on Windows 8.1 and Windows Server 2012 R2 if the July 2017 monthly update is installed.
-
Enable:
Set-SmbServerConfiguration -AuditSmb1Access $true
-
Disable:
Set-SmbServerConfiguration -AuditSmb1Access $false
-
Detect:
Get-SmbServerConfiguration | Select AuditSmb1Access
When SMBv1 auditing is enabled, event 3000 appears in the «Microsoft-Windows-SMBServerAudit» event log, identifying each client that attempts to connect with SMBv1.
Summary
If all the settings are in the same GPO, Group Policy Management displays the following settings.

Testing and validation
After completing the configuration steps in this article, allow the policy to replicate and update. As necessary for testing, run gpupdate /force at a command prompt, and then review the target computers to make sure that the registry settings are applied correctly. Make sure SMBv2 and SMBv3 are functioning for all other systems in the environment.
[!NOTE]
Don’t forget to restart the target systems.
In Windows Server 2016/2019 and Windows 10 (starting with build 1709), the Server Message Block 1.0 (SMBv1) network protocol used to access shared folders is disabled by default. In most cases, this protocol is required to access shared folders hosted on legacy systems, such as no longer supported Windows XP, Windows Server 2003 and older OSs. In this article, we’ll look on how to enable or disable SMBv1 client and server support on Windows 10 and Windows Server 2016/2019.
If there are no SMB 1.x clients left on your network, you must completely disable SMBv1 on all Windows devices. By disabling SMB 1.0, you can protect Windows computers from a wide range of vulnerabilities in this legacy protocol (the most famous public exploit for SMBv1 is EternalBlue). As a result, your devices will use new, more efficient, secure and functional versions of the SMB protocol when accessing network shares.
In one of the previous articles, we showed the table of client- and server-side SMB version compatibility. According to the table, old client versions (XP, Server 2003 and some *nix clients) can access network shared folders only using SMB v1.0 protocol. If there are no such clients in the network, you can completely disable SMB 1.0 on the side of file servers (including AD domain controllers) and client desktops.
In Windows 10 and Windows Server 2016, the SMBv1 protocol is split into two separate components – SMB client and SMB server, which can be enabled/disabled independently.
Contents:
- Auditing Shared Folder Access via SMB v1.0
- Enable/Disable SMB 1.0 on Windows Server 2016/2019
- How to Enable/Disable SMBv1 on Windows 10?
- Disabling SMBv1 Client and Server via Group Policy
Auditing Shared Folder Access via SMB v1.0
Before disabling or completely removing SMB 1.0 driver on the side of the SMB file server, it’s worth making sure that there are no legacy clients that use it in your network. To do this, enable the audit of file server access over SMB v1.0 using the following PowerShell command:
Set-SmbServerConfiguration –AuditSmb1Access $true
After a couple of days, open the Event Viewer on the server, check the log Applications and Services -> Microsoft -> Windows -> SMBServer -> Audit and see if any clients accessed the file server over SMB1.
Tip. You can display the list of events from this event log using the following PowerShell command:
Get-WinEvent -LogName Microsoft-Windows-SMBServer/Audit
In our example, an event with EventID 3000 from the SMBServer source was found in the log. The event indicates that the client 192.168.1.10 is trying to access the server using the SMB1 protocol.
SMB1 access
Client Address: 192.168.1.10
Guidance:
This event indicates that a client attempted to access the server using SMB1. To stop auditing SMB1 access, use the Windows PowerShell cmdlet Set-SmbServerConfiguration.
You need to find this computer or device on the network and update the OS or firmware to a version that supports newer SMB protocol versions: SMBv2 or SMBv3.
In our case we’ll ignore this information, but you should bear in mind that later this client won’t be able to access shared folders on this SMB server.
Enable/Disable SMB 1.0 on Windows Server 2016/2019
In Windows Server 2016 starting with build 1709 and Windows Server 2019, SMBv1 is disabled by default. To enable support for the SMBv1 client protocol in newer versions of Windows Server, you need to install the separate SMB 1.0/CIFS File Sharing Support feature.
You can install the SMBv1 feature using Server Manager, or through PowerShell.
You can check that SMBv1 is enabled with the PowerShell command:
Get-WindowsFeature | Where-Object {$_.name -eq "FS-SMB1"} | ft Name,Installstate
To install the FS-SMB1 feature, run:
Install-WindowsFeature FS-SMB1
To uninstall the SMBv1 client feature (requires a reboot), run the command:
Uninstall-WindowsFeature –Name FS-SMB1 –Remove
Another PowerShell command that also removes the SMB1Protocol feature:
Disable-WindowsOptionalFeature -Online -FeatureName SMB1Protocol -Remove
In order for your server to handle SMBv1.0 client access, you need to enable SMBv1 support at the SMB file server level in addition to the FS-SMB1 component. To check if SMBv1 access is enabled for network shares on your server, run:
Get-SmbServerConfiguration
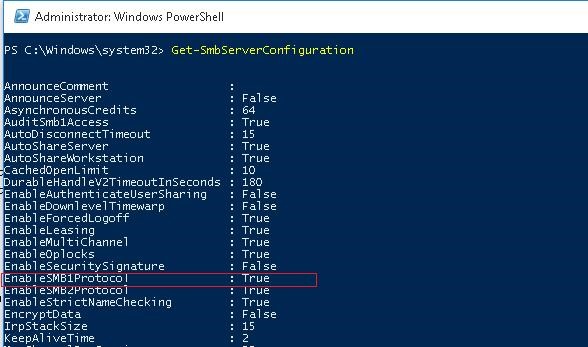
The line “EnableSMB1Protocol: True” means that you are allowed to access shared folders on this server using the SMBv1 protocol. To disable SMBv1 server support in Windows Server, run the PowerShell command:
Set-SmbServerConfiguration -EnableSMB1Protocol $false -Force
Now use the Get-SmbServerConfiguration cmdlet to make sure SMB1 server is disabled.
To enable SMBv1 support on the server, run the command:
Set-SmbServerConfiguration -EnableSMB1Protocol $True -Force
On Windows 7/8 and Windows Server 2008 R2/2012, in order to disable the SMB 1.0 client, you need to disable the service and the SMBv1 access driver with the commands:
sc.exe config lanmanworkstation depend= bowser/mrxsmb20/nsi

sc.exe config mrxsmb10 start= disabled
![]()
How to Enable/Disable SMBv1 on Windows 10?
As we already said, in all new builds of Windows10 (starting from 1709) support for the SMB1 protocol is disabled (guest access via the SMBv2 protocol is also disabled).
In Windows 10, you can check the status of the SMBv1 protocol components with the DISM command:
Dism /online /Get-Features /format:table | find "SMB1Protocol"

In our example, you can see that all SMBv1 features are disabled:
SMB1Protocol                                | Disabled
SMB1Protocol-Client                         | Disabled
SMB1Protocol-Server                         | Disabled
SMB1Protocol-Deprecation                    | Disabled
In Windows 10, you can also manage SMB 1 features from the Control Panel (optionalfeatures.exe). Expand the SMB 1.0 /CIFS File Sharing Support option. As you can see, 3 SMBv1 components are also available here:
- SMB 1.0/CIFS Automatic Removal
- SMB 1.0/CIFS Client
- SMB 1.0/CIFS Server
You can enable SMBv1 client and server on Windows 10 from the feature management window or using the commands:
Dism /online /Enable-Feature /FeatureName:"SMB1Protocol"

Dism /online /Enable-Feature /FeatureName:"SMB1Protocol-Client"

Dism /online /Enable-Feature /FeatureName:"SMB1Protocol-Server"
You can also enable SMBv1 server and client in Windows 10 using PowerShell:
Enable-WindowsOptionalFeature -Online -FeatureName SMB1Protocol-Server

Enable-WindowsOptionalFeature -Online -FeatureName SMB1Protocol-Client
If after enabling SMBv1 client, it is not used for more than 15 days, it is automatically disabled.
Automatic removal of SMBv1 client is a one-time operation. If the administrator manually enables SMBv1 again, it won’t be disabled automatically.
To disable SMB1 client and server support in Windows 10, run the following DISM commands:
Dism /online /Disable-Feature /FeatureName:"SMB1Protocol"

Dism /online /Disable-Feature /FeatureName:"SMB1Protocol-Client"

Dism /online /Disable-Feature /FeatureName:"SMB1Protocol-Server"
If you disabled the SMBv1 client in Windows 10, then when you access a snared folder on a file server that only supports SMBv1 (the SMBv2 and v3 protocols are disabled or not supported), you may receive the following errors:
-
0x80070035 The network path was not found;
-
Unable to connect to file shares because it is not secure. This share requires the obsolete SMB1 protocol, which is not secure and could expose your system to attacks;
-
You can’t connect to the file share because it’s not secure. This share requires the obsolete SMB1 protocol, which is unsafe and could expose your system to attack. Your system requires SMB2 or higher.

Additionally, if you disable the SMBv1 client, the Computer Browser service, which is used by the legacy NetBIOS protocol to discover devices on the network, stops working on the computer. To correctly display neighboring computers on the Windows 10 network, you must configure the Feature Discovery Provider Host service (check this article).
Disabling SMBv1 Client and Server via Group Policy
In an Active Directory domain environment, you can disable SMBv1 on all servers and computers using Group Policies (GPOs). Since there is no separate SMB configuration policy in the standard Windows Group Policies, you will have to disable it through the registry policy.
- Open the Group Policy Management console (
gpmc.msc), create a new GPO (disableSMBv1) and link it to the OU containing the computers on which you want to disable SMB1; - Switch to the policy editing mode. Expand the GPO section Computer Configuration -> Preferences -> Windows Settings -> Registry;
- Create a new Registry Item with the following setting:
Action:Update
Hive:HKEY_LOCAL_MACHINE
Key Path:SYSTEMCurrentControlSetServicesLanmanServerParameters
Value name:SMB1
Value type:REG_DWORD
Value data:0

This policy will disable support for the SMBv1 server component through the registry on all computers.You can exclude some version of Windows from this policy using the WMI filter.
If you want to disable the SMB client on domain computers via GPO, create two additional registry parameters:
- The Start parameter (REG_DWORD type) with value 4 in the registry key HKLMSYSTEMCurrentControlSetservicesmrxsmb10;
- The DependOnService parameter (REG_MULTI_SZ type) with the value Bowser, MRxSmb20, NSI (each value on a new line) in the reg key HKLMSYSTEMCurrentControlSetServicesLanmanWorkstation.
It remains to update the Group Policy settings on the clients (gpupdate /force) after the reboot make sure that the SMBv1 components are completely disabled.
The Security Baseline GPOs from the Microsoft Security Compliance Toolkit have a separate administrative template MS Security Guide (SecGuide.adml and SecGuide.admx files) that have separate options for disabling the SMB server and client:
- Configure SMB v1 server;
- Configure SMB v1 client driver.
Содержание
- Как обнаруживать, включать и отключать SMBv1, SMBv2 и SMBv3 в Windows
- Отключение SMB или SMBv3 для устранения неполадок
- Удаление SMBv1
- Adding SMB1 protocol support to Windows Server 2019
- Trying the installation
- Downloading Windows Server 2019
- Mount ISO and copy install.wim
- Patch the mounted files
- Enable the SMB1 feature
- Conclusion
- Как отключить или включить протокол SMBv1 в Windows 10/Server 2016?
- Аудит доступа к файловому серверу по SMB v1.0
- Включение/отключение SMB 1.0 в Windows Server 2016/2019
- Включить/отключить SMB 1.0 в Windows 10
- Отключение SMBv1 с помощью групповых политик
- HackWare.ru
- Этичный хакинг и тестирование на проникновение, информационная безопасность
- SMB: настройка общей сетевой папки в Windows
- Книга по SMB и Samba на русском языке. Оглавление
- Что такое и для чего нужен SMB
- Как соотносятся SMB и Samba
- Проще говоря
- Как настроить общую сетевую папку на Windows (SMB) без пароля
- 1. Компьютеры должны быть в одной локальной сети
- 2. Статичный IP
- 3. У компьютеров должна быть одинаковая рабочая группа
- 4. Настройки сетевых папок в Windows
- 5. Как создать сетевую папку SMB
- Как настроить совместную папку на Windows с паролем
- Как подключиться к сетевой папке в Windows по SMB
- Как подключиться с общей папке на Windows, для которой требуется ввод учётных данных
Как обнаруживать, включать и отключать SMBv1, SMBv2 и SMBv3 в Windows
применимо к: Windows Server 2022, Windows 10, Windows 8.1, Windows 8, Windows Server 2019, Windows Server 2016, Windows Server 2012 R2, Windows Server 2012
В этой статье описывается, как включить и отключить протокол SMB версии 1 (SMBv1), SMB версии 2 (SMB) и SMB версии 3 (SMBv3) на клиентских и серверных компонентах SMB.
Хотя отключение или удаление SMBv1 может вызвать некоторые проблемы совместимости со старыми компьютерами или программами, SMBv1 имеет существенные уязвимости, и мы настоятельно рекомендуем не использовать ее.
Отключение SMB или SMBv3 для устранения неполадок
Мы рекомендуем включить протоколы SMB 2.0 и SMBv3, но может оказаться полезным временно отключить их для устранения неполадок. Дополнительные сведения см. в статье как определить состояние, включить и отключить протоколы SMB на сервере SMB.
в Windows 10, Windows 8.1 и Windows 8 Windows Server 2019, Windows Server 2016, Windows Server 2012 R2 и Windows Server 2012, отключение SMBv3 деактивирует следующие функциональные возможности:
в Windows 7 и Windows Server 2008 R2 отключение 2.0 отключает следующие функции:
протокол smb был впервые появился в Windows Vista и Windows Server 2008, а протокол SMBv3 появился в Windows 8 и Windows Server 2012. Дополнительные сведения о функциях SMB и SMBv3 см. в следующих статьях:
Удаление SMBv1
вот как можно удалить SMBv1 в Windows 10, Windows 8.1, Windows Server 2019, Windows Server 2016 и Windows 2012 R2.
Источник
Adding SMB1 protocol support to Windows Server 2019

I realize this is not a very exciting post, especially compared to my other wonderful musing on this site, but I felt I really had to write it to share the pain!
A colleague I work with needed to enable this feature on an Azure Windows Server 2019 machine to communicate with some old system that only supports Server Message Block version 1 (SMB1). Easy enough to add that right?
Trying the installation
Let’s first get some information about the feature:

Notice the State property? The feature is disabled and the payload (installation files) are not on the Azure virtual machine.
When you try to install the feature, you get:
I guess I need the Windows Server 2019 sources!
Downloading Windows Server 2019
I downloaded Windows Server 2019 (November 2019 version) from https://my.visualstudio.com/Downloads?q=SQL%20Server%202019. I am not sure if you can use the evaluation version of Windows Server 2019 because I did not try that. I downloaded the ISO to the Azure virtual machine.
Mount ISO and copy install.wim
On recent versions of Windows, you can right click an ISO and mount it. In the mounted ISO, search for install.wim and copy that file to a folder on your C: disk like c:wim. Under c:wim, create a folder called mount and run the following command:
Patch the mounted files
The Azure Windows Server 2019 image (at time of writing, June 2020) has a cumulative update installed: https://support.microsoft.com/en-us/help/4551853/windows-10-update-kb4551853. For this installatin to work, I needed to download the update from https://www.catalog.update.microsoft.com/home.aspx and put it somewhere like c:patches.
Now we can update the mounted files offline with the following command:
It will take a while to update! You need to do this because the files mounted from the downloaded ISO do not match the version of the Windows Server 2019 image. Without this update, the installation of the SMB1 feature will not succeed.
Enable the SMB1 feature
Now we can enable the feature with the following command:
You will need to reboot. After rebooting, from a PowerShell prompt run the command below to check the installation:
The State property should say: Enabled
Conclusion
Something this trivial took me way too long. Is there a simpler way? Let me know! 👍
And by the way, don’t enable SMB1. It’s not secure at all. But in some cases, there’s just no way around it.
Источник
Как отключить или включить протокол SMBv1 в Windows 10/Server 2016?
По-умолчанию в Windows Server 2016/2019 и Windows 10 (начиная с билда 1709) отключена поддержка сетевого протокола для общего доступа к файлам в сетевых папках Server Message Block 1.0 (SMBv1). Этот протокол в большинстве случаев нужно только для обеспечения работы устаревших систем, например снятых с поддержки Windows XP, Windows Server 2003 и т.д. В этой статье мы рассмотрим, как включить или корректно отключить поддержку клиента и сервера SMBv1 в Windows 10 и Windows Server 2016/2019.
В одной из предыдущих статей мы приводили таблицу совместимости версий протокола SMB на стороне клиента и сервера. Согласно этой таблице, старые версии клиентов (XP, Server 2003 и некоторые устаревшие *nix клиенты) могут использовать для доступа к файловым ресурсам только протокол SMB 1.0. Если таких клиентов в сети не осталось, можно полностью отключить SMB 1.0 на стороне файловых серверов (в том числе контролерах домена AD) и клиентских станциях.
В Windows 10 и Windows Server 2016 протокол SMBv1 разделен на два отдельных компонента – SMB клиент и SMB сервер, которые можно включать/отключать отдельно.
Аудит доступа к файловому серверу по SMB v1.0
Перед отключением и полным удалением драйвера SMB 1.0 на стороне файлового SMB сервера желательно убедится, что в сети не осталось устаревших клиентов, которые используют для подключения протокол SMB v1.0. Для этого, нужно включить аудит доступа к файловому серверу по SMB1 протоколу с помощью команды PowerShell:
Через пару дней откройте на сервере журнал событий Applications and Services -> Microsoft -> Windows -> SMBServer -> Audit и проверьте, были ли зафиксированы попытки доступа к ресурсам сервера по протоколу SMB1.
В нашем примере в журнале обнаружено событие с EventID 3000 от источника SMBServer, в котором указано что клиент 192.168.1.10 пытается обратиться к сервереу по протоколу SMB1.
Вам нужно найти в сети этот компьютер или устройство, при необходимости обновить ОС или прошивку, до версии поддерживающий, более новые протоколы SMB: SMBv2 или SMBv3.
В данном случае, мы проигнорируем эту информацию, но нужно учитывать тот факт, что в дальнейшем данный клиент не сможет получить SMB доступ к общим папкам на этом сервере.
Включение/отключение SMB 1.0 в Windows Server 2016/2019
В Windows Server 2016, начиная с билда 1709, и Windows Server 2019 по умолчанию отключен протокол SMBv1. Чтобы включить поддержку клиентского протокола SMBv1в новых версиях Windows Server, нужно установить отдельный компонент SMB 1.0/CIFS File Sharing Support.
Вы можете установить компонент поддержки клиента SMBv1 с помощью Server Manager, или через PowerShell.
Проверить, что SMBv1 включен можно командой PowerShell:
Чтобы установить компонент FS-SMB1, выполните:
Для удаления SMBv1 клиента (понадобится перезагрузка), выполните:
Uninstall-WindowsFeature –Name FS-SMB1 –Remove
Чтобы ваш сервер мог обрабатывать доступ клиентов по протоколу SMBv1, кроме компонента FS-SMB1 нужно, чтобы поддержка протокола SMBv1 была включена на уровне файлового сервера SMB. Чтобы проверить, что на вашем сервере включен доступ по SMBv1 к сетевым папкам, выполните:
Строка “ EnableSMB1Protocol: True ” говорит о том, что у вас разрешен доступ по протоколу SMBv1 к сетевым папкам на сервере. Чтобы отключить поддержку сервера SMBv1 в Windows Server, выполните команду:
Теперь с помощью командлета Get-SmbServerConfiguration убедитесь, что протокол SMB1 отключен.
Чтобы включить поддержку протокола SMBv1 на сервере, выполните команду:
sc.exe config lanmanworkstation depend= bowser/mrxsmb20/nsi
sc.exe config mrxsmb10 start= disabled
Включить/отключить SMB 1.0 в Windows 10
Как мы уже говорили, начиная с Windows 10 1709, во всех новых билдах поддержка протокола SMB1 отключена (также отключен гостевой доступ по протоколу SMBv2).
В Windows 10 вы можете проверить статус компонентов SMBv1 протокола командой DISM:
Dism /online /Get-Features /format:table | find «SMB1Protocol»
В нашем примере видно, что все компоненты SMBv1 отключены:
В Windows 10 также можно управлять компонентами SMB 1 из панели управления компонентами ( optionalfeatures.exe ). Разверните ветку Поддержка общего доступа к файлам SMB 1.0 /CIFS. Как вы видите здесь также доступны 3 компонента:
Вы можете включить клиент и сервер SMBv1 в Windows 10 из окна управления компонентами или командой:
Dism /online /Enable-Feature /FeatureName:»SMB1Protocol»
Dism /online /Enable-Feature /FeatureName:»SMB1Protocol-Client»
Dism /online /Enable-Feature /FeatureName:»SMB1Protocol-Server»
Если после включения SMBv1 клиента, он не используется более 15 дней, он автоматически отключается.
Чтобы отключить поддержку клиента и сервера SMB1 в Windows 10, выполните следующие команды DISM:
Dism /online /Disable-Feature /FeatureName:»SMB1Protocol»
Dism /online /Disable-Feature /FeatureName:»SMB1Protocol-Client»
Dism /online /Disable-Feature /FeatureName:»SMB1Protocol-Server»
Если вы отключили поддержку SMBv1 клиента в Windows 10, то при доступе к сетевой папке на файловом сервере, который поддерживает только SMBv1 (протоколы SMBv2 и v3 отключены или не поддерживаются), появятся ошибки вида:
;
Также при отключении клиента SMBv1 на компьютере перестает работать служба Computer Browser (Обозреватель компьютеров), которая используется устаревшим протоколом NetBIOS для обнаружения устройств в сети. Для корректгого отобрражения соседних компьютеров в сети Windows 10 нужно настроить службу Function Discovery Provider Host (см. статью).
Отключение SMBv1 с помощью групповых политик
В доменной среде Active Directory вы можете отключить протокол SMBv1 на всех серверах и компьютеров с помощью групповой политики. Т.к. в стандартных политиках Windows нет политики настройки компонентов SMB, придется отключать его через политику реестра.
Если вы хотите через GPO отключить на компьютерах SMB клиент, создайте дополнительно два параметра реестра:
Осталось обновить настройки групповых политик на клиентах и после перезагрузки проверить, что компоненты SMBv1 полностью отключены.
Источник
HackWare.ru
Этичный хакинг и тестирование на проникновение, информационная безопасность
SMB: настройка общей сетевой папки в Windows
Книга по SMB и Samba на русском языке. Оглавление
Эта статья расскажет о том, как настроить на своих компьютерах сетевые общие папки SMB и Samba, как подключиться к сетевым папкам из различных операционных систем (Windows и Linux), о всех тонкостях и подводных камнях, с которыми вы можете столкнуться. В последней части будут рассмотрены программы для аудита безопасности (взлома) SMB и Samba, поэтому первую часть вы можете использовать как настройку лабораторного окружения для тестирования программ, либо в обычных целях — для создания общей сетевой папки, с помощью которой можно обмениваться файлами (кино, музыка, фотографии, документы) и получать доступ к принтерам между компьютерами в домашней сети. А информацию из второй части вы можете использовать для моделирования атак или взломов общих сетевых папок на SMB, для проверки своей собственной сети.
Из-за разных версий SMB, из-за разных операционных систем, неочевидных настроек Windows и, возможно, других причин при настройке сетевых папок у меня на разных компьютерах их поведение различается. Если вы заметили неточности или вам есть что дополнить по SMB и Samba, то пишите в комментариях!
Что такое и для чего нужен SMB
SMB (сокр. от англ. Server Message Block) — сетевой протокол прикладного уровня для удалённого доступа к файлам, принтерам и другим сетевым ресурсам, а также для межпроцессного взаимодействия. Первая версия протокола, также известная как Common Internet File System (CIFS) (Единая файловая система Интернета), была разработана компаниями IBM, Microsoft, Intel и 3Com в 1980-х годах; вторая (SMB 2.0) была создана Microsoft и появилась в Windows Vista. В настоящее время SMB связан главным образом с операционными системами Microsoft Windows, где используется для реализации «Сети Microsoft Windows» (англ. Microsoft Windows Network) и «Совместного использования файлов и принтеров» (англ. File and Printer Sharing).
SMB — это протокол, основанный на технологии клиент-сервер, который предоставляет клиентским приложениям простой способ для чтения и записи файлов, а также запроса служб у серверных программ в различных типах сетевого окружения. Серверы предоставляют файловые системы и другие ресурсы (принтеры, почтовые сегменты, именованные каналы и т. д.) для общего доступа в сети. Клиентские компьютеры могут иметь у себя свои носители информации, но также имеют доступ к ресурсам, предоставленным сервером для общего пользования.
Клиенты соединяются с сервером, используя протоколы TCP/IP (а, точнее, NetBIOS через TCP/IP), NetBEUI или IPX/SPX. После того, как соединение установлено, клиенты могут посылать команды серверу (эти команды называются SMB-команды или SMBs), который даёт им доступ к ресурсам, позволяет открывать, читать файлы, писать в файлы и вообще выполнять весь перечень действий, которые можно выполнять с файловой системой. Однако в случае использования SMB эти действия совершаются через сеть.
SMB работает, используя различные протоколы. В сетевой модели OSI протокол SMB используется как протокол Application/Presentation уровня и зависит от низкоуровневых транспортных протоколов. SMB может использоваться через TCP/IP, NetBEUI и IPX/SPX. Если TCP/IP или NetBEUI будут заняты, то будет использоваться NetBIOS API. SMB также может посылаться через протокол DECnet. Digital (ныне Compaq) сделала это специально для своего продукта PATHWORKS. NetBIOS в случае использования через TCP/IP имеет различные названия. Microsoft называет его в некоторых случаях NBT, а в некоторых NetBT. Также встречается название RFCNB (из Википедии).
Как соотносятся SMB и Samba
Samba — пакет программ, которые позволяют обращаться к сетевым дискам и принтерам на различных операционных системах по протоколу SMB/CIFS. Имеет клиентскую и серверную части. Является свободным программным обеспечением, выпущена под лицензией GPL.
Начиная с четвёртой версии, разработка которой велась почти 10 лет, Samba может выступать в роли контроллера домена и сервиса Active Directory, совместимого с реализацией Windows 2000, и способна обслуживать все поддерживаемые Microsoft версии Windows-клиентов, в том числе Windows 10.
Samba работает на большинстве Unix-подобных систем, таких как Linux, POSIX-совместимых Solaris и Mac OS X Server, на различных вариантах BSD; в OS/2 портирован Samba-клиент, являющийся плагином к виртуальной файловой системе NetDrive. Samba включена практически во все дистрибутивы Linux (из Википедии).
Проще говоря
С помощью SMB можно делать общие сетевые папки, чтобы другой компьютер или несколько компьютеров в локальной сети могли обмениваться между собой файлами. SMB работает на Windows. А Samba это альтернатива SMB для Linux, которая позволяет делать это же самое: создавать или подключаться к сетевым папкам по протоколу SMB.
Для SMB не нужен Windows Server, то есть без настройки сервера на любом компьютере можно создать общую сетевую папку. Не требуется настройка Active Directory или чего-то другого.
Физически сетевая папка находится на одном из компьютеров и для этого компьютера представляет собой обычную локальную папку.
Настройка в Windows происходит в графическом интерфейсе и в целом довольно простая, если не упустить несколько важных моментов.
Как настроить общую сетевую папку на Windows (SMB) без пароля
1. Компьютеры должны быть в одной локальной сети
То есть если ваши устройства подключены к одному роутеру, то у них всех будет доступ к общей папке.
Если вы делаете настройку в виртуальных машинах, то во вкладке «Сеть» в качестве «Тип подключения» выберите «Сетевой мост»:

2. Статичный IP
Для настройки общей папки SMB статичный IP адрес компьютера, где будет располагаться папка, не является обязательным. К общей сетевой папке (шаре) можно обращаться по имени компьютера. Тем не менее если вам привычнее использовать IP, то нужно настроить статичный IP адрес для компьютера, который будет выполнять роль файлового сервера.
3. У компьютеров должна быть одинаковая рабочая группа
Компьютер с общей папкой, а также все другие компьютеры, которые будут иметь доступ к совместной папке по SMB, должны находится в одной рабочей группе.
По умолчанию в операционной системе Windows у всех компьютеров одинаковая рабочая группа с именем WORKGROUP.
Чтобы проверить текущую группу у вашего компьютера, откройте проводник, в нём найдите вкладку «Этот компьютер», вверху нажмите кнопку «Компьютер» и в открывшемся меню нажмите кнопку «Свойства»:

В новом открывшемся окне вы увидите «Имя компьютера» и «Рабочую группу»:

Если вы хотите изменить эти значения, то нажмите «Изменить параметры».
Нажмите кнопку «Изменить» чтобы назначить компьютеру новое имя:

4. Настройки сетевых папок в Windows
Протокол SMB в Windows обеспечивает работу не только сетевых папок, но и совместное использование принтеров и других ресурсов. Поэтому настройки совместно используемых папок (сетевых шар) называются «общим доступом».
В Windows при подключении к новой сети у вас может появится такой запрос:

Вы хотите разрешить другим компьютерам и устройствам в этой сети обнаруживать ваш ПК? Рекомендуется делать это в домашней или рабочей сети, а не в общедоступных.

Если вы ответите «Да», то при создании папки с сетевым доступом на этом компьютере, она будет видна на других устройствах в локальной сети.
Если вы уже давно ответили на этот вопрос и не помните как именно, то это не проблема — можно найти эти настройки в другом месте.
Следующий вариант для тех, у кого проводное соединение: рядом с часами нажмите на значок сетевых подключений и нажмите на имя сети:

В открывшемся окне нажмите на «Изменение расширенных параметров общего доступа»:

Универсальный вариант, подходит для тех, у кого проводное соединение или Wi-Fi: нажмите правой кнопкой мыши на значок сетевого соединения и нажмите «Открыть параметры сети и Интернет»:

В открывшемся окне нажмите на «Параметры общего доступа»:

Если вы хотите перейти к этим настройкам через «Панель управления», то путь такой: Панель управленияСеть и ИнтернетЦентр управления сетями и общим доступомДополнительные параметры общего доступа
В новом окне настройки разбиты на три раздела:

Пометка «(текущий профиль)» означает, что в данный момент используется именно этот профиль.
Нам нужно изменить настройки для той сети, которая отмечена как «(текущий профиль)», а также в разделе «Все сети».
Переходим в Частная (текущий профиль):

Первая настройка: Сетевой обнаружение (Если включено сетевое обнаружение, этот компьютер может видеть другие компьютеры и устройства в сети и виден другим компьютерам). В ней выберите «Включить сетевое обнаружение» и поставьте галочку «Включить автоматическую настройку на сетевых устройствах».
Вторая настройка: Общий доступ к файлам и принтерам (Если общий доступ к файлам и принтерам включён, то файлы и принтеры, к которым разрешён общий доступ на этом компьютере, будут доступны другим пользователям в сети). Здесь выберите «Включить общий доступ к файлам и принтерам».
Далее в разделе «Все сети» нас интересуют одна последняя настройка:

В описании сказано: Если включена парольная защита общего доступа, только пользователи с учётной записью и паролем на этом компьютере могут получить доступ к общим файлам, принтерам, подключённым к этому компьютеру, и общим папкам. Чтобы открыть доступ другим пользователям, нужно отключить парольную защиту общего доступа.
Суть её в том, что для подключения к сетевой папке нужно ввести логин и пароль пользователя, существующего на компьютере с этой папкой. Если у вашего пользователя не установлен пароль, то не получится подключиться если эта опция включена. Нужно либо:
В этом разделе мы рассматриваем как сделать сетевую папку без пароля, поэтому выберите вариант «Отключить общий доступ с парольной защитой»:

Опционально: имеется несколько версий протокола SMB и по умолчанию первая версия отключена в современных системах Windows. Samba для некоторых функций использует первую версию, поэтому если у вас смешенная сеть с Linux, либо имеется устаревшее оборудование, которое поддерживает только SMB 1, то вы можете включить поддержку этой версии протокола. Для этого запустите cmd с правами администратора. Проверьте:
Для включения SMB 1 выполните:
Если вы захотите отключить их, то выполните:
Если вы предпочитаете графический интерфейс, то в поиске наберите «Включение или отключение компонентов Windows»:

5. Как создать сетевую папку SMB
Создайте новую папку или используйте уже существующую. К примеру, я создал в корне диска C папку с именем Share.
Открываем контекстное меню:

Во вкладке «Доступ» нажимаем кнопку «Общий доступ». В выпадающем меню выбираем «Все», нажимаем кнопку «Добавить», переключите «Чтение» на «Чтение и запись» и нажимаем кнопку «Поделиться»:

Будет открыто окно, в котором можно скопировать ссылку на сетевую папку, скопируется ссылка вида Share (file://HACKWARE-MIAL/Share). Эта ссылка является НЕПРАВИЛЬНОЙ, правильная ссылка имеет вид file://ИМЯ-КОМПЬЮТЕРА/Папка или \ИМЯ-КОМПЬЮТЕРАПапка, например, file://HACKWARE-MIAL/Share или \HACKWARE-MIALShare.

Возможные проблемы и их решения:
«Нет доступа к \XXX. Возможно у Вас нет прав на использование этого сетевого ресурса. Обратитесь к администратору этого сервера для получения соответствующих прав доступа.
Вход в систему не произведён: выбранный режим входа для данного пользователя на этом компьютере не предусмотрен
Панель управленияВсе элементы панели управленияАдминистрирование — Локальная политика безопасности.
В открывшемся окне: Локальные политики — Назначение прав пользователя — Отказать в доступе к этому компьютеру из сети — Удаляем из списка учётную запись «Гость».
После выполнения данной манипуляции, всё должно работать.
Эта ошибка может возникнуть после активации учётной записи гостя.
Если кому-то не помогло — проверьте, чтобы текущая учётная запись, с которой вы пытаетесь получить доступ, называлась не «Администратор». Это служебная, создаваемая автоматически учётная запись, которая предназначена не для обычного использования, а обслуживания. Лечение — создание учётной записи «Пользователь/User» с правами администратора
Как настроить совместную папку на Windows с паролем
В домашних сетях удобно использовать совместные папки с доступом без пароля. Но в корпоративных сетях, либо в других случаях, когда не все пользователи должны иметь доступ к общей папке, можно настроить вход на совместную шару по паролю.
Настройка сетевой папки по паролю почти полностью повторяет процесс описанный в предыдущем разделе. Отличия следующие:
Итак, для создания нового пользователя в Windows 10 нажмите Win+i, чтобы открыть приложение «Настройки», а затем нажмите «Учетные записи».

На странице «Учетные записи» перейдите на вкладку «Семья и другие пользователи», а затем нажмите кнопку «Добавить пользователя для этого компьютера»:

В открывшемся окне Учетная запись Microsoft вы будете направлены на создание сетевой учетной записи Microsoft. Не обращайте внимания на запрос предоставить адрес электронной почты или номер телефона. Вместо этого нажмите внизу ссылку «У меня нет данных для входа этого человека».

На следующей странице Windows предложит вам создать учётную запись в Интернете. Опять же, проигнорируйте все это и нажмите внизу ссылку «Добавить пользователя без учётной записи Microsoft».

Если вы создали новые учётные записи в Windows 7 и предыдущих версиях, следующий экран будет вам знаком. Введите имя пользователя, пароль и подсказку к паролю, а затем нажмите «Далее».

После нажатия «Далее» вы вернётесь к экрану «Учетные записи», который вы видели ранее, но теперь должна быть указана ваша новая учётная запись. При первом входе в систему с использованием учётной записи Windows создаст пользовательские папки и завершит настройку.

Теперь нужно создать папку, владельцем которой будет только что созданный пользователь (ShareOverlord). Можно перезагрузить компьютер, выполнить вход под этим пользователем и создать папку, но я предполагаю, что возникнет несколько проблем:
В общем, я создам папку под текущим аккаунтом администратора. Чтобы у пользователя, под которым будет выполняться вход для доступа к этой папке, были права на эту папку, можно поступить двумя способами:
Поскольку в Windows администраторы по умолчанию всё равно имеют полный доступ к папке любого пользователя, то эти способы весьма схожи по результатам.
Допустим, я решил поменять владельца папки (источник: «Как поменять владельца папки в Windows 10»), для этого кликните правой кнопкой мыши по директории, владельца которой вы хотите поменять. Там выберите «Свойства»:

Теперь перейдите во вкладку «Безопасность» и там нажмите кнопку «Дополнительно»:

В открывшемся окне нажмите «Изменить»:

Впишите нового владельца — в моём случае это существующий локальный пользователь ShareOverlord и и нажмите кнопку «Проверить имена»:

Теперь во всех открытых окнах настроек и свойств нажмите «ОК» для их закрытия.
Теперь вновь кликаем правой кнопкой мыши по папке, выбираем вкладку «Доступ» → «Общий доступ». При желании вы можете удалить права доступа текущего администратора. Нажмите кнопку «Поделиться».

Обратите внимание, что общий доступ убран для текущего администратора только когда он будет пытаться просмотреть папку по сети. При локальном доступе, администратор всё равно может просматривать и менять содержимое этой папки — это можно поменять во вкладке «Безопасность» в свойствах папки.
Имеется нюанс если мы вместо смены владельца добавляем права доступа для определённого пользователя, поэтому рассмотрим второй вариант. Я удалил и заново создал папку C:ShareRestricted, поэтому текущий администратор вновь является её владельцем. Вновь кликаем правой кнопкой мыши по папке, выбираем вкладку «Доступ» → «Общий доступ» и добавляем права чтения и записи для пользователя ShareOverlord:

Нажимаем кнопку «Поделиться».
Теперь нажимаем «Расширенная настройка»:

Там нажимаем кнопку «Разрешения»:

В открывшемся окне нажимаем «Добавить»:

Вводим имя пользователя под которым должен выполнятся вход для доступа к папке (у меня это пользователь ShareOverlord) и нажимаем кнопку «Проверить имена»:

Теперь нажимаем «ОК» и возвращаемся в предыдущее окно:

Если вы хотите, чтобы у этого пользователя было не только право просматривать содержимое папки, но и её менять, то поставьте соответствующие галочки:

Теперь во всех открытых окнах настроек и свойств нажмите «ОК» для их закрытия.
Как подключиться к сетевой папке в Windows по SMB
На компьютерах, которые должны подключаться к общей сетевой папке, перейдите в «Изменение расширенных параметров общего доступа» и выберите опцию «Включить сетевое обнаружение»:

С недавнего времени, после очередного обновления Windows 10 в некоторых случаях перестали открываться сетевые папки. Дело в том, что теперь вход без ввода пароля нужно настраивать не только на компьютерах, где находится сетевая папка, но и на компьютерах, с которых выполняется подключение. Это довольно странное решение объясняется тем, чтобы вы случайно не подключились к папке злоумышленника и не скачали с неё вредоносное ПО. Вам НЕ НУЖНО делать настройку в gpedit.msc если вы подключаетесь к сетевой шаре по паролю. Если же вы настроили вход в общую папку без пароля, то для исправления ситуации нажмите Win+r (Пуск->Выполнить) и запустите
Далее необходимо перейти по следующему пути «Конфигурация компьютера» → «Административные шаблоны» → «Сеть» → «Рабочая станция Lanmann»:

Теперь выставите параметр «Включить небезопасные гостевые входы» в положение «Включено»:

Описание в документации:
Этот параметр политики определяет, разрешит ли клиент SMB небезопасные гостевые входы на сервер SMB.
Если этот параметр политики включён или не настроен, клиент SMB разрешит небезопасные гостевые входы.
Если этот параметр политики отключён, клиент SMB будет отклонять небезопасные гостевые входы.
Небезопасные гостевые входы используются файловыми серверами для разрешения доступа без проверки подлинности к общим папкам. Небезопасные гостевые входы обычно не используются в среде предприятия, однако часто используются потребительскими запоминающими устройствами, подключёнными к сети (NAS), которые выступают в качестве файловых серверов. Для файловых серверов Windows требуется проверка подлинности, и на них по умолчанию не используются небезопасные гостевые входы. Поскольку небезопасные гостевые входы не проходят проверку подлинности, важные функции безопасности, такие как подписывание и шифрование SMB-пакетов отключены. В результате этого клиенты, которые разрешают небезопасные гостевые входы, являются уязвимыми к различным атакам с перехватом, которые могут привести к потере данных, повреждению данных и уязвимости к вредоносным программам. Кроме того, какие-либо данные, записанные на файловый сервер с использованием небезопасного гостевого входа, являются потенциально доступными для любого пользователя в сети. Майкрософт рекомендует отключить небезопасные гостевые входы и настроить файловые серверы на требование доступа с проверкой подлинности.»
Наконец-то, можно подключиться к общей папке (share) в локальной сети. Для этого откройте проводник и перейдите в раздел «Сеть»:

Обратите внимание на глючность этой службы — в левой части проводника мы видим 4 компьютера, а в главном разделе окна — только два.
Если вы не видите нужный компьютер, то попробуйте открыть его по прямой ссылке, например, у меня имя компьютера с сетевой папкой HACKWARE-MIAL, тогда я открываю его по ссылке \HACKWARE-MIAL.
Примечание для Windows Server: в серверных версиях Windows даже когда разрешено подключаться без пароля, всё равно появляется окно запроса:

Достаточно ввести произвольные данные и, моём случае, сетевая папка успешно открывалась. При подключении к этой же папке с обычного Windows 10, запрос на ввод пароля не появлялся. Видимо, для сервера настроены какие-то более строгие политики.
При клике на имя компьютера вы увидите доступные сетевые папки. При переходе в папку вы увидите её содержимое:

Вы можете открывать файлы по сети, то есть не нужно предварительно копировать их на свой компьютер. Можете копировать файлы из общей папки, добавлять туда новые или удалять существующие — с сетевой папкой можно работать как с обычной локальной папкой.
В Windows сетевые папки можно сделать доступными в качестве дисков с буквой. Для этого правой кнопкой мыши кликните по слову «Сеть» и выберите пункт «Подключить сетевой диск»:

Выберите букву для диска, введите путь до папки, поставьте галочку «Восстанавливать подключение при входе в систему»:

Теперь вы будете видеть сетевую папку как диск в любом файловом менеджере:

Как подключиться с общей папке на Windows, для которой требуется ввод учётных данных
В целом процесс очень схож с подключением к незащищённой папке, но при попытке подключения появится такое окно:

Чуть выше я создал папку, для доступа к которой нужно ввести учётные данные пользователя ShareOverlord, ссылка на эту папку: \HACKWARE-MIALShareRestricted
В это окно авторизации нужно вводить имя пользователя и пароль того пользователя, который имеет права на доступ к этой папке на УДАЛЁННОМ компьютере, то есть на том компьютере, где находится эта папка с совместным доступом.
Источник
- Remove From My Forums
-
Question
-
Hello,
please let me know if anyone can help me with this.
i srote this to the german forum already but i got no reply after 2 Weeks so i hope its okay that i ask the same question here.
Ive installed a Windows Server 2019 with the Feature «SMB1.0/CIFs File Sharing Support» plus the Services SSDP Discovery and the UPnP Device Host.
On an other Server i installed a Storage-Software and created a WORM Storage with and SMB Share.
My problem is i cant get on to this share with Windows Server 2019 but with all other OS (Windows Server 2016/2012R2 Windows 7/10) the connection works fine.
Is there anything i can do?
Windows Server 2019 is up to Date.Best regards.
Answers
-
Hi,
Thanks for your update.
Guest access in SMB2 will be disabled by default in Windows Server 2019.
Resolution:
If you want to enable insecure guest access, you can configure the following
Group Policy settings:Computerconfigurationadministrative templatesnetworkLanman Workstation
«Enable insecure guest logons»Note: By enabling insecure guest logons, this setting reduces the security of Windows clients.
Please try to do this and check whether the issue still exist.
You can refer to:
https://support.microsoft.com/en-us/help/4046019/guest-access-in-smb2-disabled-by-default-in-windows-10-and-windows-ser
Best Regards,
Eric
Please remember to mark the replies as answers if they help and
unmark them if they provide no help.
If you have feedback for TechNet Subscriber Support, contact
tnmff@microsoft.com.-
Edited by
Wednesday, December 19, 2018 2:43 AM
-
Marked as answer by
PvBM
Wednesday, December 19, 2018 7:44 AM
-
Edited by
При проработке различных настроек на Windows Server 2019 Standard (Version 10.0.17763.2114) на тестовом полигоне Debian 10 + Proxmox 6 в своей локальной сети столкнулся, что не вижу свой ресурс на базе Samba 2.4.3 on Ubuntu 14.04.5 (моя локальная сетевая папка, где у меня лежат образа, софт, книги, видеоуроки). А данная система успешно работает, как виртуальная машина на HP MicroServer Gen8. При попытке обращения к нему по DNS имени (\srv-nas.polygon.lan) или же по IP адресу (\172.35.35.4) получаю сетевую ошибку вида:
Windows cannot access \srv-nas.polygon.lan
Check the spelling of the name. Otherwise, there might be a problem with your network. To try to identify and resolve network problem
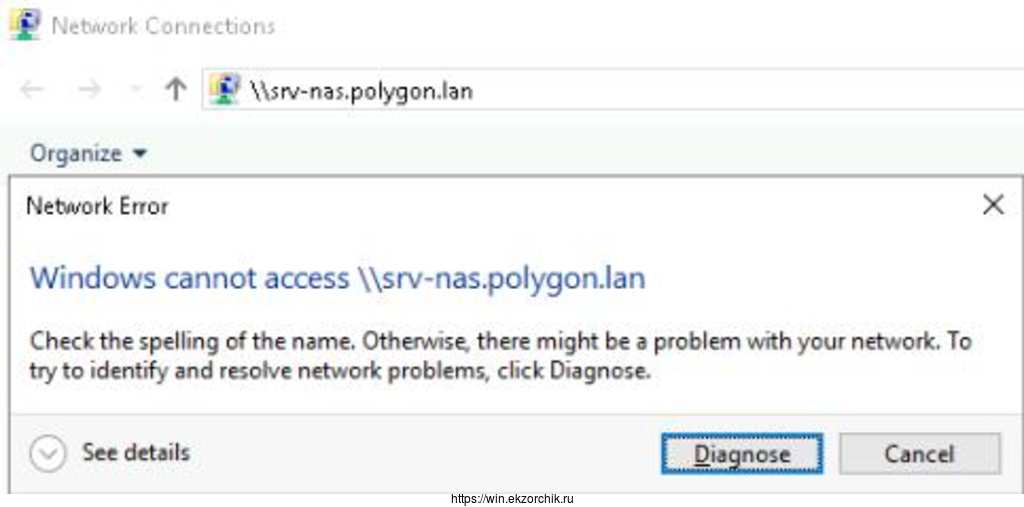
На заметку: Если посмотреть See details то может быть код ошибки
Код ошибки 0x80070035 (Не найден сетевой путь)
Код ошибки 0x80004005 (Неопознанная ошибка)
Вот только данный ресурс работает и к нему я успешно обращаюсь, с Windows 7,10, Server 2012 R2, Ubuntu систем, а почему же для Windows Server 2019 нужно что-то еще?
Для начала проверяю конфигурационный файл smb.conf дабы убедиться, что я в нем ничего не запретил, ну мало ли:
|
1 2 3 4 5 6 7 8 9 10 11 12 13 14 15 16 17 18 19 20 21 22 23 24 25 26 27 |
ekzorchik@srv—nas:~$ cat /etc/samba/smb.conf | grep —v «^$» | grep —v «#» | grep —v «;» [global] workgroup = WORKGROUP server string = %h server (Samba, Ubuntu) dns proxy = no log file = /var/log/samba/log.%m max log size = 1000 syslog = 0 panic action = /usr/share/samba/panic—action %d server role = standalone server passdb backend = tdbsam obey pam restrictions = yes unix password sync = yes passwd program = /usr/bin/passwd %u passwd chat = *Entersnews*spassword:* %nn *Retypesnews*spassword:* %nn *passwordsupdatedssuccessfully* . pam password change = yes map to guest = bad password usershare allow guests = yes [nas] path = /nas guest ok = yes read only = no create mask = 0777 directory mask = 0777 hide files = /$RECYCLE.BIN/desktop.ini/lost+found/Thumbs.db/ acl allow execute always = true ekzorchik@srv—nas:~$ |
и вывода вижу, что доступ возможен как авторизацией так и гостем.
Чтобы включить авторизацию гостем с Windows Server 2019 нужно
Win + R -> gpedit.msc - Local Computer Policy - Computer Configuration - Administrative Templates - Network - Lanman Workstation
Enable insecure guest logons: Enable
На заметку: Все выше указанное можно сделать через правку реестра:
HKLMSYSTEMCurrentControlSetServicesLanmanWorkstationParameters
изменяем значение параметра AllowInsecureGuestAuth на 1
и нужно после перезагрузить сервер, либо
|
cmd.exe — Run as Administrator echo y | net stop LanmanWorkstation && echo y | net start LanmanWorkstation |
теперь мой сетевой диск успешно открывается

Итого в моем случаем дома авторизация на сетевой папке ни к чему и можно оставить так. Главное что я разобрал как получить доступ к нужной информации в локальной сети.
На этом я прощаюсь, с уважением автор блога Олло Александр aka ekzorchik.
Hello- How do you enable SMB1 Protocol on Windows Server 2019? When adding the role we get an error, «The source files could not be found.» We have run several PowerShell commands but still no joy. Powershell output below. What are we missing?
Systems Manager Screenshot
PS C:Userslocaladmin> Set-SmbServerConfiguration -EnableSMB1Protocol $true
Confirm
Are you sure you want to perform this action?
Performing operation ‘Modify’ on Target ‘SMB Server Configuration’.
[Y] Yes [A] Yes to All [N] No [L] No to All [S] Suspend [?] Help (default is «Y»): A
Set-SmbServerConfiguration : The specified service does not exist.
At line:1 char:1
+ Set-SmbServerConfiguration -EnableSMB1Protocol $true
+ ~~~~~~~~~~~~~~~~~~~~~~~~~~~~~~~~~~~~~~~~~~~~~~~~~~~~
+ CategoryInfo : NotSpecified: (MSFT_SmbServerConfiguration:ROOT/Microsoft/…erConfiguration) [Set-SmbSe
rverConfiguration], CimException
+ FullyQualifiedErrorId : Windows System Error 1243,Set-SmbServerConfiguration
PS C:Userslocaladmin> Enable-WindowsOptionalFeature -Online -FeatureName smb1protocol
Enable-WindowsOptionalFeature : The source files could not be found.
Use the «Source» option to specify the location of the files that are required to restore the feature. For more
information on specifying a source location, see http://go.microsoft.com/fwlink/?LinkId=243077.
At line:1 char:1
+ Enable-WindowsOptionalFeature -Online -FeatureName smb1protocol
+ ~~~~~~~~~~~~~~~~~~~~~~~~~~~~~~~~~~~~~~~~~~~~~~~~~~~~~~~~~~~~~~~
+ CategoryInfo : NotSpecified: (:) [Enable-WindowsOptionalFeature], COMException
+ FullyQualifiedErrorId : Microsoft.Dism.Commands.EnableWindowsOptionalFeatureCommand
PS C:Userslocaladmin> Set-SmbServerConfiguration -EnableSMB1Protocol $true
Confirm
Are you sure you want to perform this action?
Performing operation ‘Modify’ on Target ‘SMB Server Configuration’.
[Y] Yes [A] Yes to All [N] No [L] No to All [S] Suspend [?] Help (default is «Y»): y
Set-SmbServerConfiguration : The specified service does not exist.
At line:1 char:1
+ Set-SmbServerConfiguration -EnableSMB1Protocol $true
+ ~~~~~~~~~~~~~~~~~~~~~~~~~~~~~~~~~~~~~~~~~~~~~~~~~~~~
+ CategoryInfo : NotSpecified: (MSFT_SmbServerConfiguration:ROOT/Microsoft/…erConfiguration) [Set-SmbSe
rverConfiguration], CimException
+ FullyQualifiedErrorId : Windows System Error 1243,Set-SmbServerConfiguration
PS C:Userslocaladmin> Get-WindowsOptionalFeature -Online -FeatureName «SMB1Protocol»
FeatureName : SMB1Protocol
DisplayName : SMB 1.0/CIFS File Sharing Support
Description : Support for the SMB 1.0/CIFS file sharing protocol, and the Computer Browser protocol.
RestartRequired : Possible
State : DisabledWithPayloadRemoved
CustomProperties :
ServerComponentDescription : Support for the SMB 1.0/CIFS file sharing protocol, and the Computer
Browser protocol.
ServerComponentDisplayName : SMB 1.0/CIFS File Sharing Support
ServerComponentId : 487
ServerComponentType : Feature
ServerComponentUniqueName : FS-SMB1
ServerComponentDeploysUpdateName : SMB1Protocol
PS C:Userslocaladmin> Enable-WindowsOptionalFeature -Online -FeatureName «SMB1Protocol» -All
Enable-WindowsOptionalFeature : The source files could not be found.
Use the «Source» option to specify the location of the files that are required to restore the feature. For more
information on specifying a source location, see http://go.microsoft.com/fwlink/?LinkId=243077.
At line:1 char:1
+ Enable-WindowsOptionalFeature -Online -FeatureName «SMB1Protocol» -Al …
+ ~~~~~~~~~~~~~~~~~~~~~~~~~~~~~~~~~~~~~~~~~~~~~~~~~~~~~~~~~~~~~~~~~~~~~
+ CategoryInfo : NotSpecified: (:) [Enable-WindowsOptionalFeature], COMException
+ FullyQualifiedErrorId : Microsoft.Dism.Commands.EnableWindowsOptionalFeatureCommand
PS C:Userslocaladmin> Enable-WindowsOptionalFeature -Online -FeatureName smb1protocol
Enable-WindowsOptionalFeature : The source files could not be found.
Use the «Source» option to specify the location of the files that are required to restore the feature. For more
information on specifying a source location, see http://go.microsoft.com/fwlink/?LinkId=243077.
At line:1 char:1
+ Enable-WindowsOptionalFeature -Online -FeatureName smb1protocol
+ ~~~~~~~~~~~~~~~~~~~~~~~~~~~~~~~~~~~~~~~~~~~~~~~~~~~~~~~~~~~~~~~
+ CategoryInfo : NotSpecified: (:) [Enable-WindowsOptionalFeature], COMException
+ FullyQualifiedErrorId : Microsoft.Dism.Commands.EnableWindowsOptionalFeatureCommand
PS C:Userslocaladmin>
PS C:Userslocaladmin> Get-WindowsFeature FS-SMB1
Display Name Name Install State
———— —- ————-
[ ] SMB 1.0/CIFS File Sharing Support FS-SMB1 Removed
PS C:Userslocaladmin> Enable-WindowsOptionalFeature -Online -FeatureName smb1protocol
Enable-WindowsOptionalFeature : The source files could not be found.
Use the «Source» option to specify the location of the files that are required to restore the feature. For more
information on specifying a source location, see http://go.microsoft.com/fwlink/?LinkId=243077.
At line:1 char:1
+ Enable-WindowsOptionalFeature -Online -FeatureName smb1protocol
+ ~~~~~~~~~~~~~~~~~~~~~~~~~~~~~~~~~~~~~~~~~~~~~~~~~~~~~~~~~~~~~~~
+ CategoryInfo : NotSpecified: (:) [Enable-WindowsOptionalFeature], COMException
+ FullyQualifiedErrorId : Microsoft.Dism.Commands.EnableWindowsOptionalFeatureCommand
PS C:Userslocaladmin> Get-SmbServerConfiguration | Select EnableSMB1Protocol
EnableSMB1Protocol
——————
False
PS C:Userslocaladmin> Set-SmbServerConfiguration -EnableSMB1Protocol $true
Confirm
Are you sure you want to perform this action?
Performing operation ‘Modify’ on Target ‘SMB Server Configuration’.
[Y] Yes [A] Yes to All [N] No [L] No to All [S] Suspend [?] Help (default is «Y»): A
Set-SmbServerConfiguration : The specified service does not exist.
At line:1 char:1
+ Set-SmbServerConfiguration -EnableSMB1Protocol $true
+ ~~~~~~~~~~~~~~~~~~~~~~~~~~~~~~~~~~~~~~~~~~~~~~~~~~~~
+ CategoryInfo : NotSpecified: (MSFT_SmbServerConfiguration:ROOT/Microsoft/…erConfiguration) [Set-SmbSe
rverConfiguration], CimException
+ FullyQualifiedErrorId : Windows System Error 1243,Set-SmbServerConfiguration
PS C:Userslocaladmin> Set-SMBServerConfiguration
Confirm
Are you sure you want to perform this action?
Performing operation ‘Modify’ on Target ‘SMB Server Configuration’.
[Y] Yes [A] Yes to All [N] No [L] No to All [S] Suspend [?] Help (default is «Y»): A
PS C:Userslocaladmin> Set-SmbServerConfiguration -EnableSMB1Protocol $true
Confirm
Are you sure you want to perform this action?
Performing operation ‘Modify’ on Target ‘SMB Server Configuration’.
[Y] Yes [A] Yes to All [N] No [L] No to All [S] Suspend [?] Help (default is «Y»): A
Set-SmbServerConfiguration : The specified service does not exist.
At line:1 char:1
+ Set-SmbServerConfiguration -EnableSMB1Protocol $true
+ ~~~~~~~~~~~~~~~~~~~~~~~~~~~~~~~~~~~~~~~~~~~~~~~~~~~~
+ CategoryInfo : NotSpecified: (MSFT_SmbServerConfiguration:ROOT/Microsoft/…erConfiguration) [Set-SmbSe
rverConfiguration], CimException
+ FullyQualifiedErrorId : Windows System Error 1243,Set-SmbServerConfiguration
There are several protocols to perform specific tasks in Windows Server and one of them is the SMB protocol (Server Message Block — Server Message Block Protocol) which is focused on one of the most popular tasks such as file transfer. The protocol dates back more than 20 years since the SMB1 version was developed, and today we have the SMB3 version, which significantly improves the security and reliability of the information..
The SMB protocol is a file sharing protocol called in other terms Microsoft’s SMB protocol, it is made up of a group of message packets which defines the version of the protocol or the protocol of the common Internet file system (CIFS).
SMB Features
Some of the main functions of SMB are:
- File and record lock
- Managing Microsoft SMB protocol servers on the network or local network browsing
- Extended handling of file attributes
- Dialect negotiation
- Allows you to perform printing tasks on the local network
- File and directory change notification for added control
- Unicode support
SMB packages
The SMB protocol handles various types of packets such as:
- Session control packets: your task is to grant a connection to the server shares
- File access packages: its role is to access and work on the files and directories on the remote server
- General message packages: its action is to send data to print queues, mailing lists and generate data on the status of print queues.
SMB functions
SMB1 has been classified as a security threat for Windows systems in general and that is why SMB2 offers us:
- Support for symbolic links
- Oplock customer lease model
- Support for older versions of SMB
- More extensive reads and writes for task optimization
- Better utilization of the network
- Improved scalability for file sharing
With this in mind we are going to see how to activate both SMB1 and SMB2 in Windows Server 2022..
To stay up to date, remember to subscribe to our YouTube channel! SUBSCRIBE
1. Activate SMB1 in Windows Server 2022 from Control Panel
Step 1
We are going to:
- Control Panel
- Programs
- Programs and characteristics
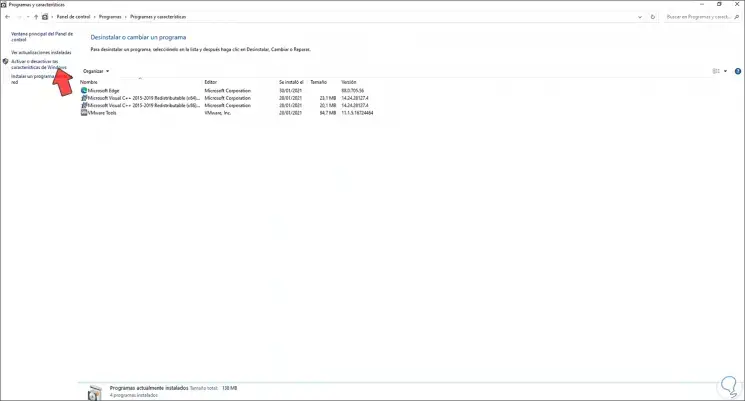
Step 2
We click on «Enable or disable Windows features» and this redirects us to the Server Manager, there we will see the following:
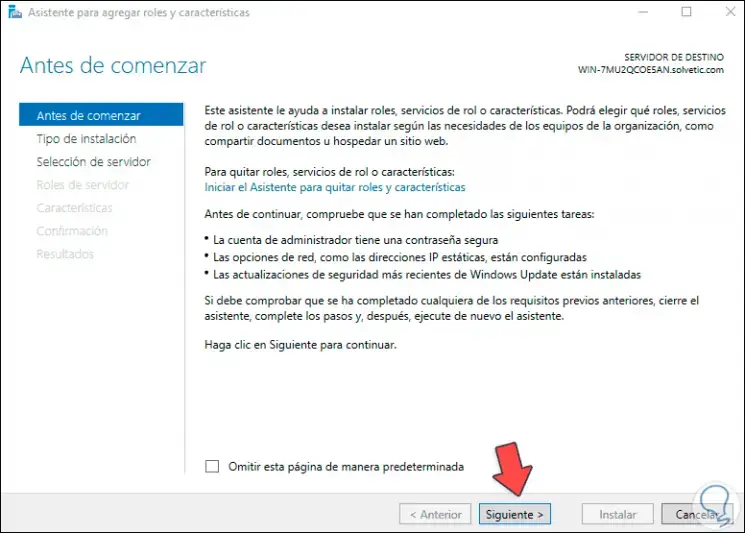
Step 3
Click Next and activate the «Role-based or feature-based installation» box:
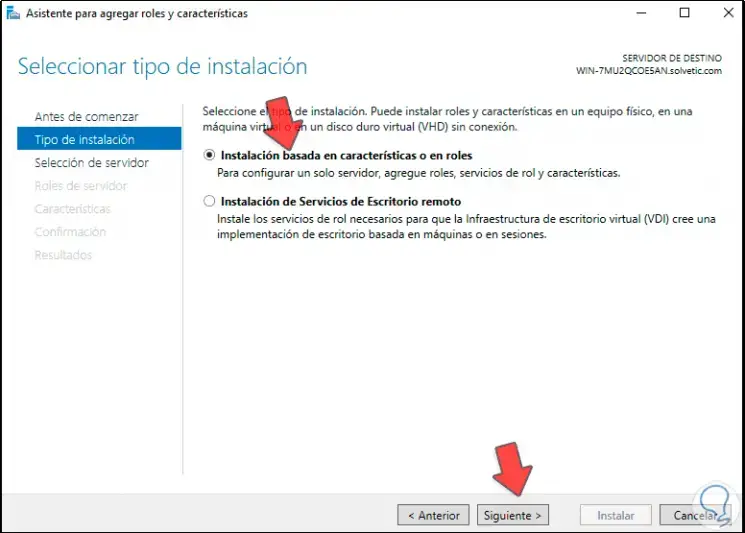
Step 4
In the next window we select the server:
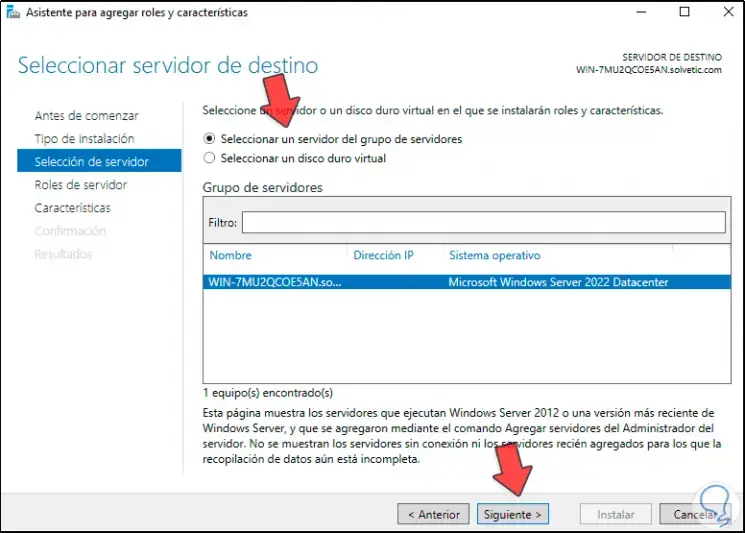
Step 5
In the next window we will see the role options for Windows Server 2022:
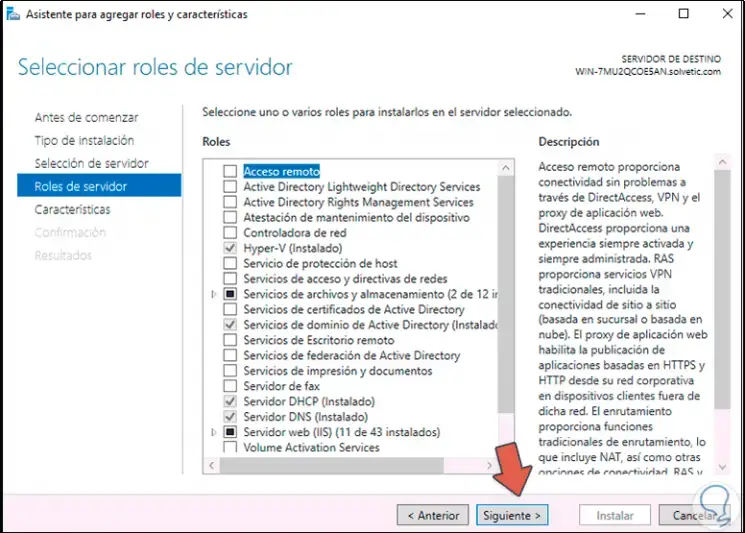
Step 6
In this case we do not add any role, we go to the «Features» section and activate the box «Compatibility with the protocol for sharing SMB 1.0 / CIFS files», we display its options and activate the desired boxes «SMB Client 1.0 / CIFS / SMB Server 1.0 / CIFS «:
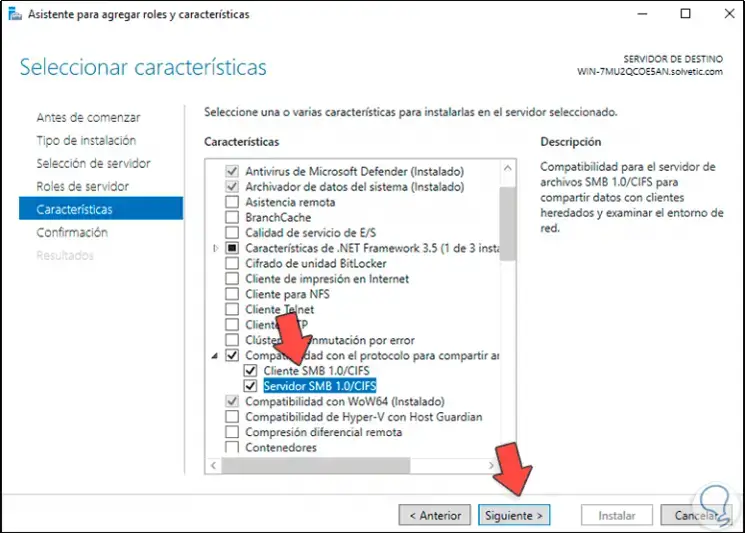
Step 7
Click Next to see a summary of the feature to install:
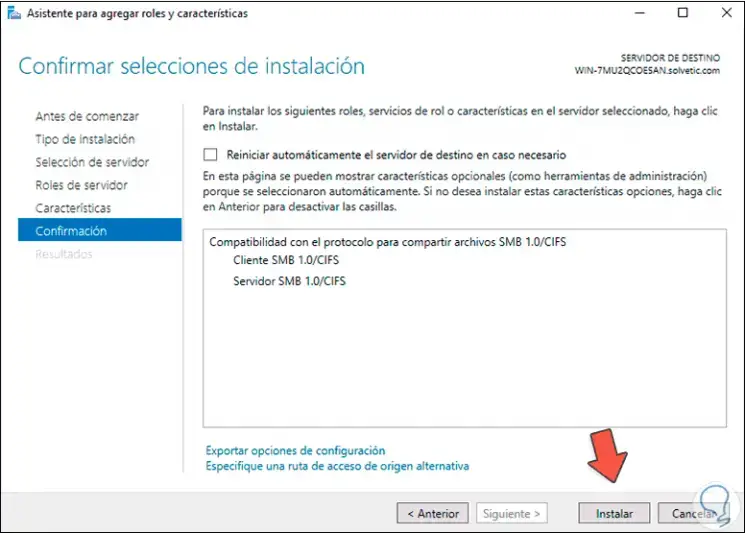
Step 8
Click Install to start the process:
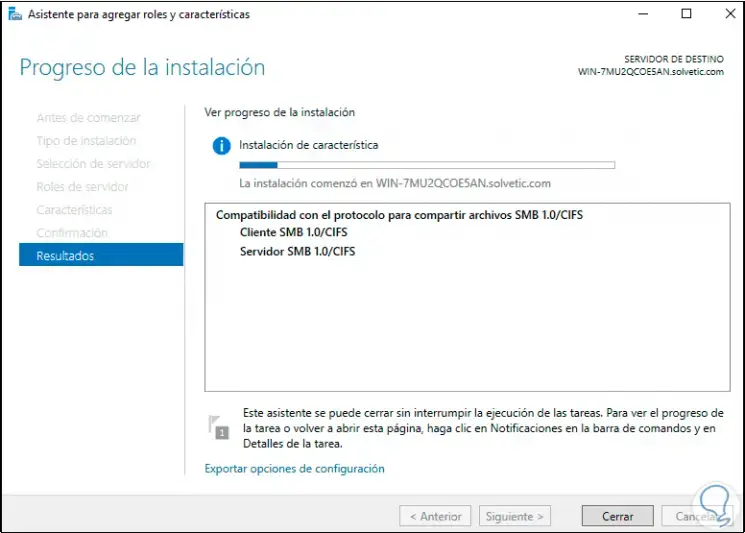
Step 9
At the end of this task we will see the following:
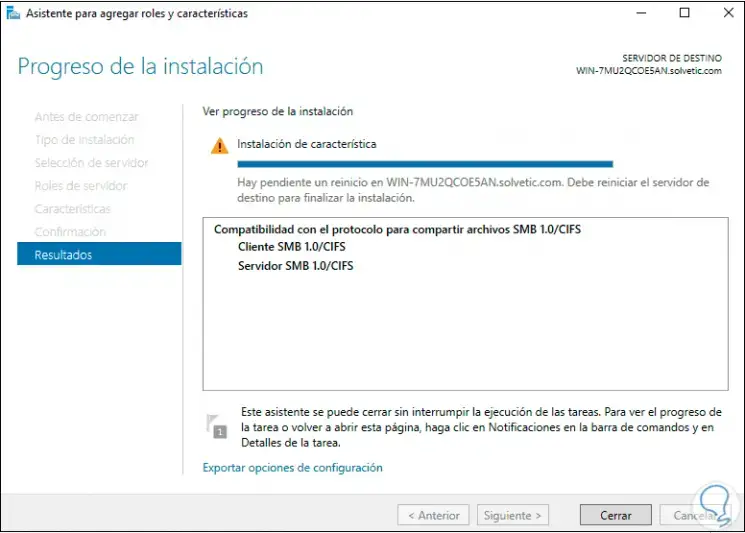
Step 10
Restart Windows Server 2022 to complete the process as it is necessary:
2 . Activate SMB1 in Windows Server 2022 from PowerShell
Step 1
We open PowerShell as administrator:
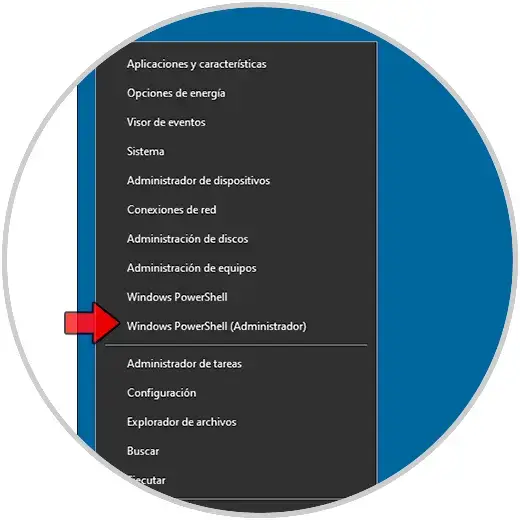
Step 2
First, we are going to detect the SMB1 protocol with the command:
Get-WindowsOptionalFeature -Online -FeatureName SMB1Protocol
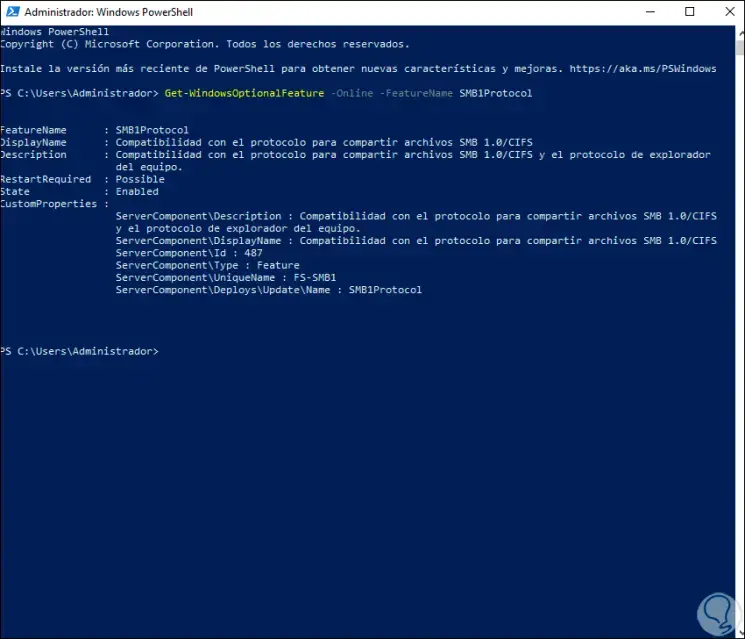
Step 3
There we see specific details of the protocol, we enable SMB1 in Windows Server 2022 with the command:
Enable-WindowsOptionalFeature -Online -FeatureName SMB1Protocol
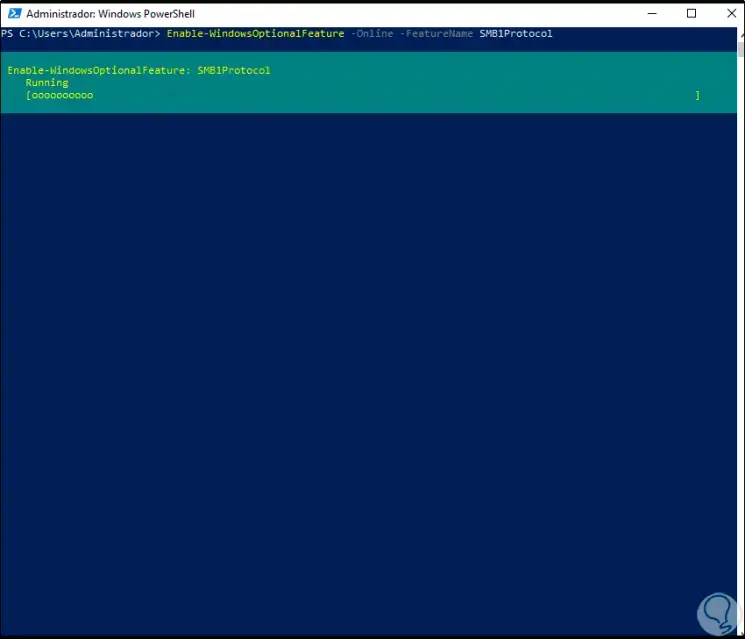
Step 4
This will load all the necessary plugins and at the end we will see the following:
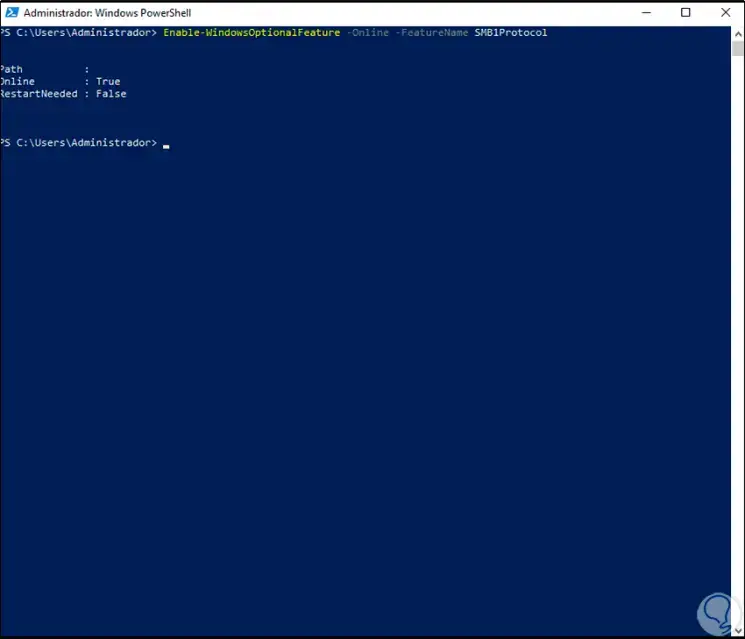
3 . Activate SMB2 on Windows Server 2022 from PowerShell
Step 1
To activate this protocol in Windows Server 2022 we are going to open PowerShell as administrator:
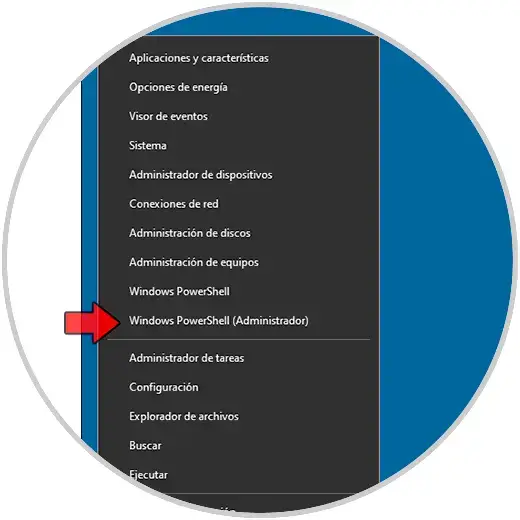
Step 2
We are going to detect the SMB2 protocol with the command:
Get-SmbServerConfiguration | select EnableSMB2Protocol
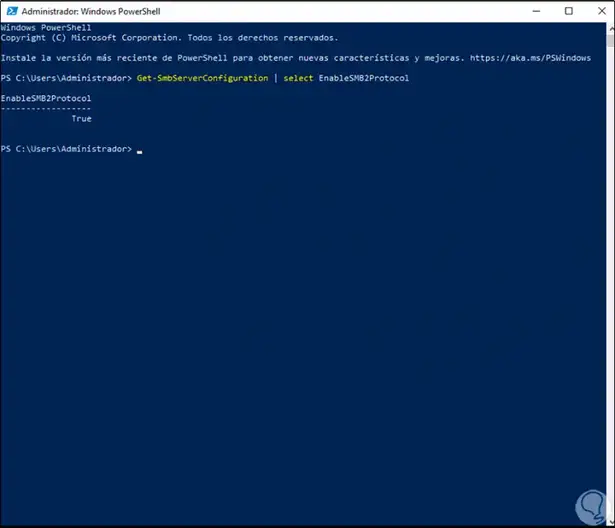
Step 3
Now enabled by SMB2. We enter the letter S to confirm the process.
Set-SmbServerConfiguration –EnableSMB2Protocol $ true
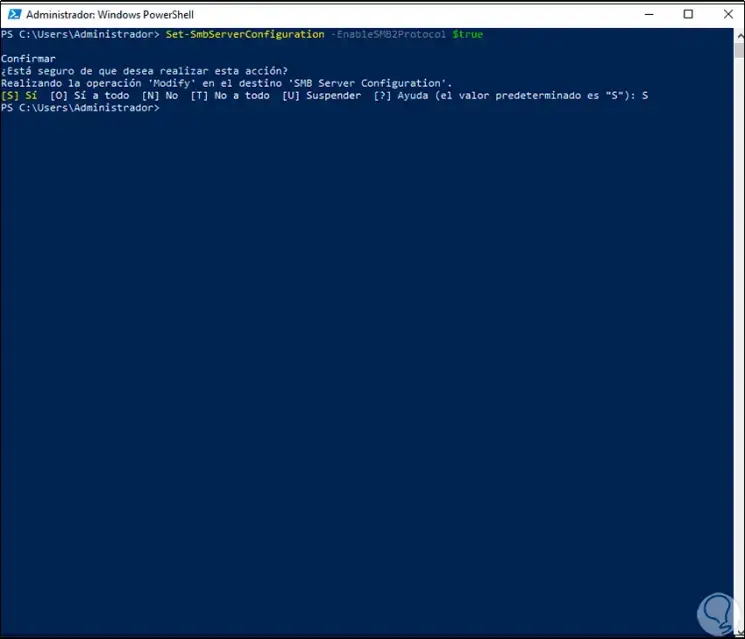
Step 4
In this same PowerShell console we are going to detect the SMB1 server:
Get-Item HKLM: SYSTEM CurrentControlSet Services LanmanServer Parameters | ForEach-Object {Get-ItemProperty $ _. Pspath}
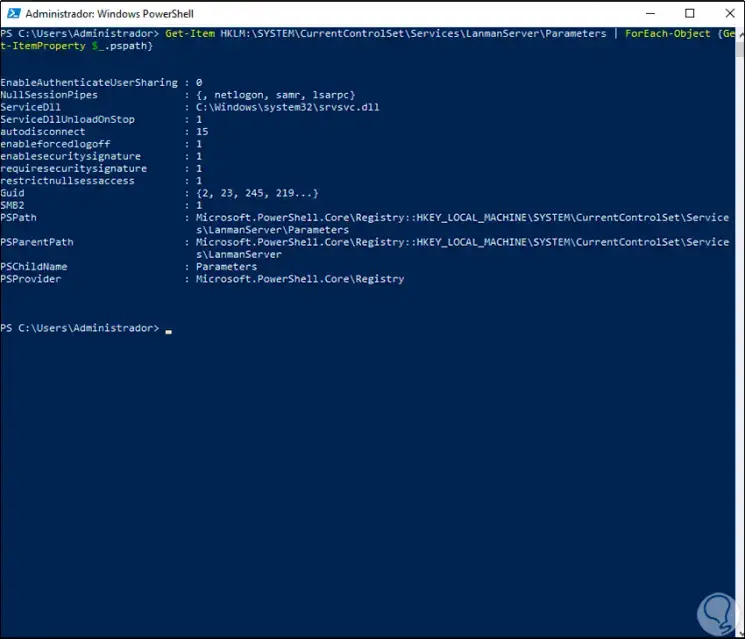
Step 5
This command gives us complete details about the SMB1 server, to enable it from here, the SMB1 server, we execute:
Set-ItemProperty -Path "HKLM: SYSTEM CurrentControlSet Services LanmanServer Parameters" SMB1 -Type DWORD -Value 1
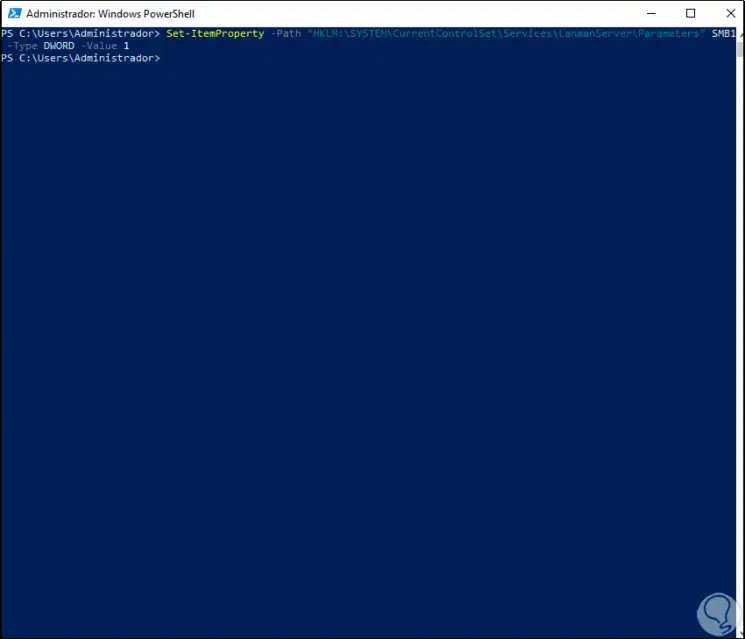
Step 6
In the same way we are going to detect the SMB2 server:
Get-ItemProperty HKLM: SYSTEM CurrentControlSet Services LanmanServer Parameters | ForEach-Object {Get-ItemProperty $ _. Pspath}
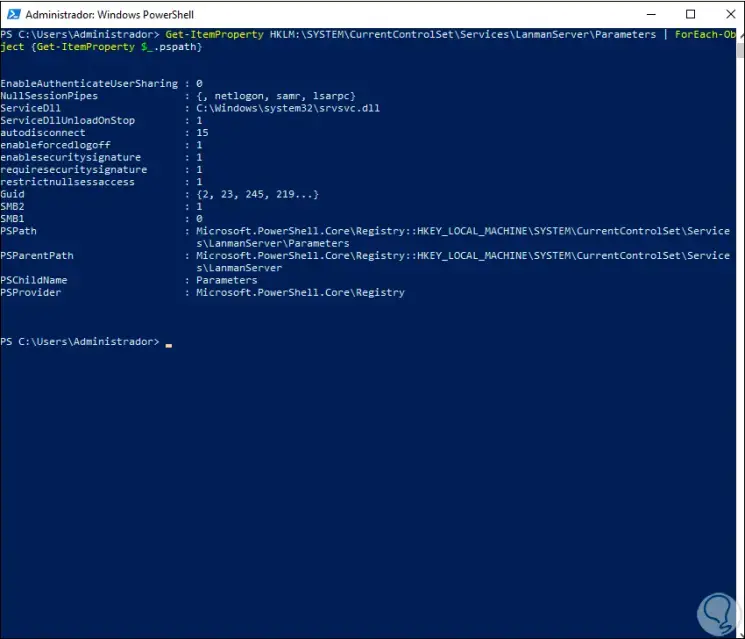
Step 7
To enable the SMB2 server we execute:
Set-ItemProperty -Path "HKLM: SYSTEM CurrentControlSet Services LanmanServer Parameters" SMB2 -Type DWORD -Value 1
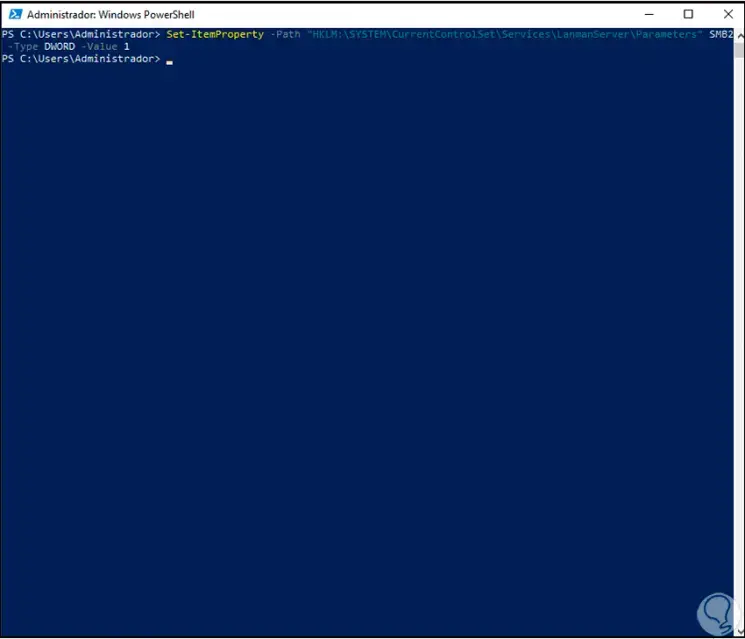
4. Enable SMB1 and SMB2 in Windows Server 2022 from Registry Editor
Step 1
Before executing this process it is advisable to create a restore point or backup, after this we access the registry editor:
Step 2
Now we go to the path «HKEY_LOCAL_MACHINE — SYSTEM — CurrentControlSet — Services — LanmanServer — Parameters»:
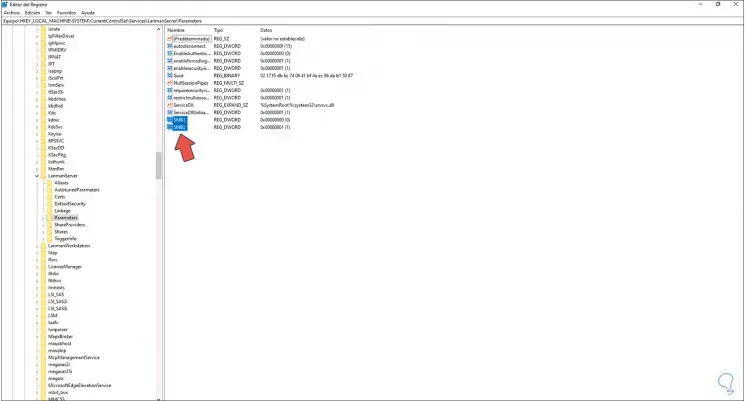
Step 3
There we find the SMB1 and SMB2 values, to enable them, we double click on each one and enter 1 in the Value information field so that its status becomes enabled. Apply the changes.
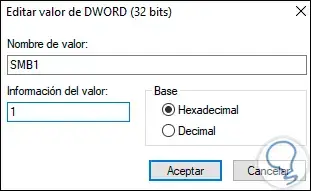
5. Activate SMB1 and SMB2 in Windows Server 2022 from CMD
Step 1
Another of the available methods is the command prompt console, we access CMD:
Step 2
, To detect SMB1 we execute:
sc.exe query lanmanworkstation
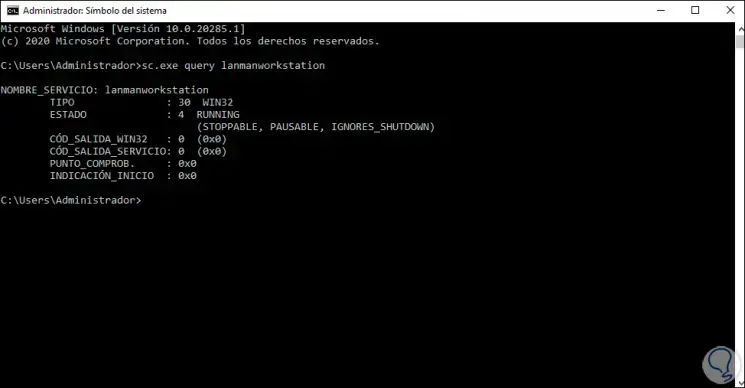
Step 3
We enable SMB1 with the following command:
sc.exe config lanmanworkstation depend = bowser / mrxsmb10 / mrxsmb20 / nsi
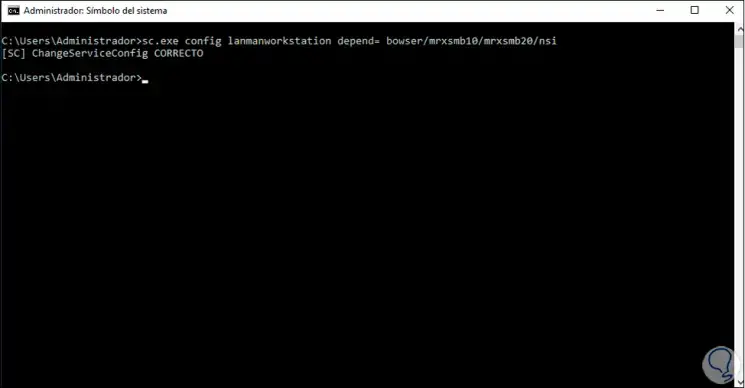
Step 4
To detect SMB2 we execute:
sc.exe query lanmanworkstation
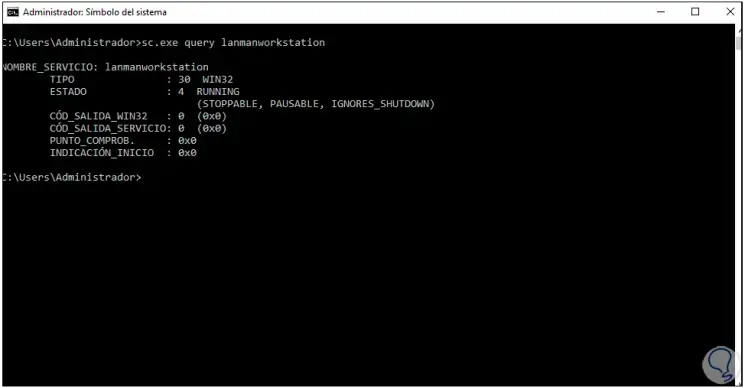
Step 5
To enable SMB2 we use the command:
sc.exe config lanmanworkstation depend = bowser / mrxsmb10 / mrxsmb20 / nsi
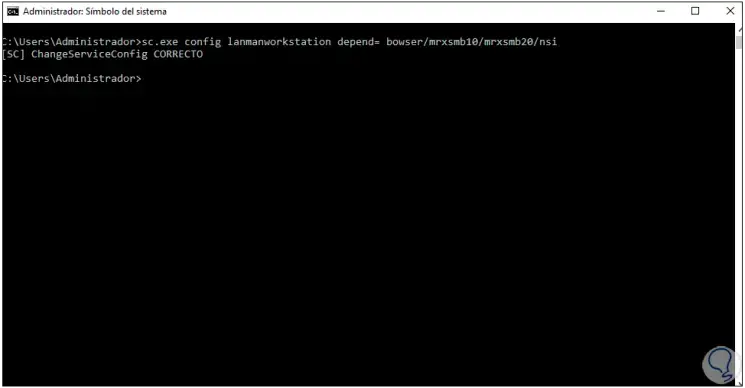
6 . Activate SMB1 and SMB2 in Windows Server 2022 from PowerShell
Step 1
Finally we can resort again to PowerShell, we open PowerShell as administrators and to activate SMB1 we execute:
Enable-WindowsOptionalFeature -Online -FeatureName SMB1Protocol
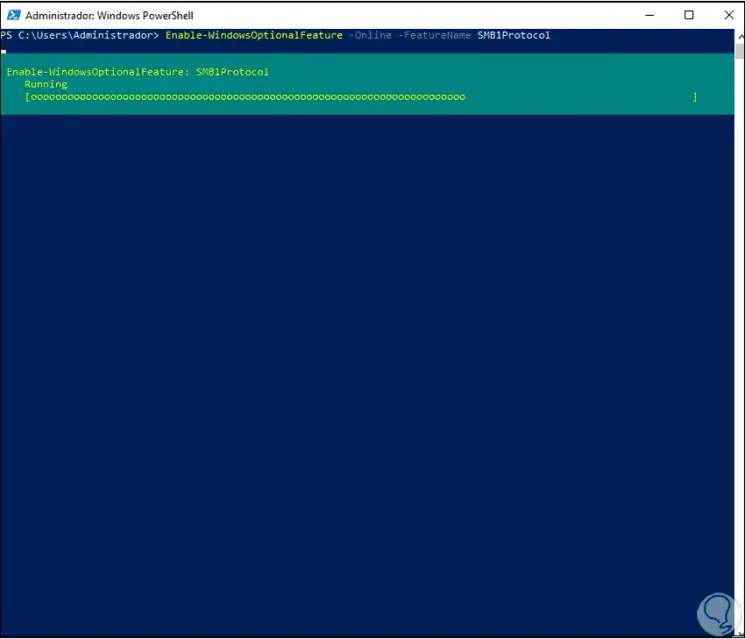
Step 2
At the end we will see the following. There we enter the letter Y to restart the computer or N to do it later.
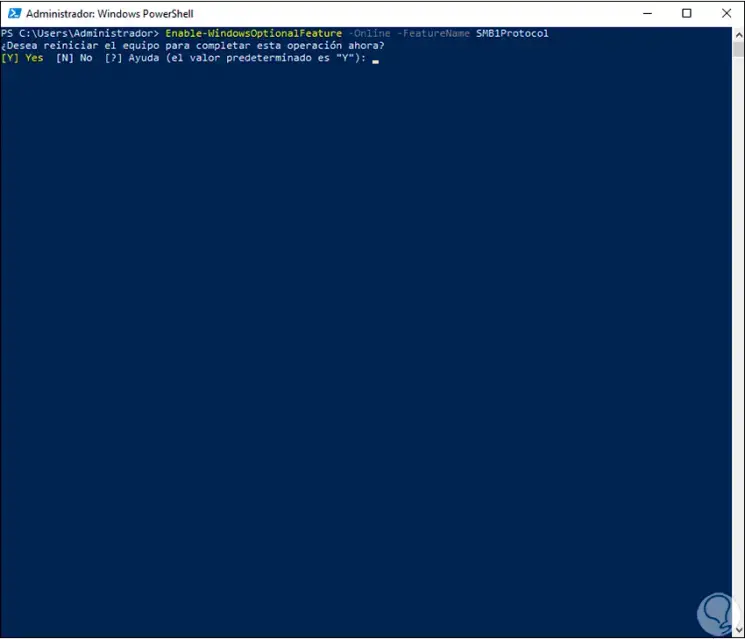
Step 3
Now we activate SMB2 with the command. With the letter S we confirm the process.
Set-SmbServerConfiguration -EnableSMB2Protocol $ true
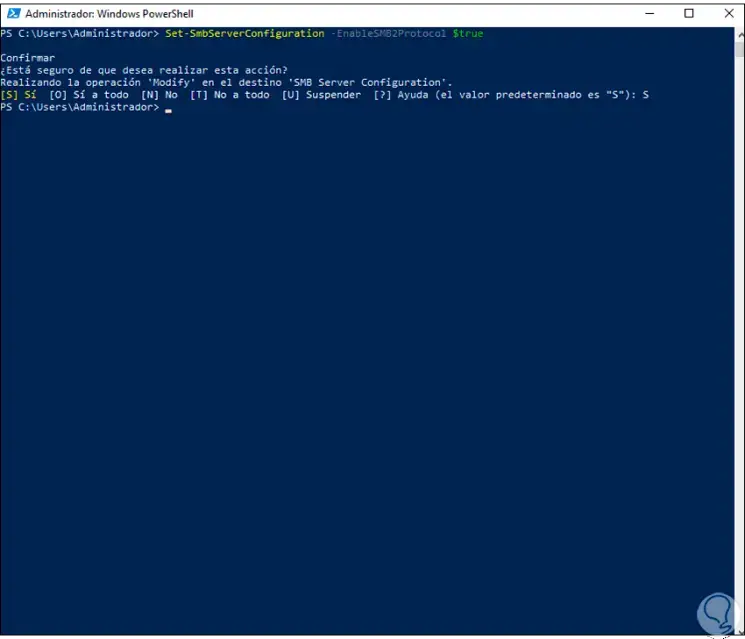
These are the methods that TechnoWikis gives you to activate SMB1 and SMB2 in Windows Server 2022.