Последнее обновление: 31.10.2015
Как правило, для вывода сообщений применяется элемент MessageBox. Однако кроме сообственно вывода строки сообщения данный элемент может устанавливать
ряд настроек, которые определяют его поведение.
Для вывода сообщения в классе MessageBox предусмотрен метод Show, который имеет различные версии и может принимать ряд параметров.
Рассмотрим одну из наиболее используемых версий:
public static DialogResult Show(
	string text,
	string caption,
	MessageBoxButtons buttons,
	MessageBoxIcon icon,
	MessageBoxDefaultButton defaultButton,
	MessageBoxOptions options
)
Здесь применяются следующие параметры:
text: текст сообщения
caption: текст заголовка окна сообщения
buttons: кнопки, используемые в окне сообщения.
Принимает одно из значений перечисления MessageBoxButtons:
-
AbortRetryIgnore: три кнопки Abort (Отмена), Retry (Повтор), Ignore (Пропустить) -
OK: одна кнопка OK -
OKCancel: две кнопки OK и Cancel (Отмена) -
RetryCancel: две кнопки Retry (Повтор) и Cancel (Отмена) -
YesNo: две кнопки Yes и No -
YesNoCancel: три кнопки Yes, No и Cancel (Отмена)
Таким образом, в зависимости от выбора окно сообщения может иметь от одной до трех кнопок.
icon: значок окна сообщения. Может принимать одно из следующих значений перечисления MessageBoxIcon:
-
Asterisk, Information: значок, состоящий из буквы i в нижнем регистре, помещенной в кружок -
Error, Hand, Stop: значок, состоящий из белого знака «X» на круге красного цвета. -
Exclamation, Warning: значок, состоящий из восклицательного знака в желтом треугольнике -
Question: значок, состоящий из вопросительного знака на периметре круга -
None: значок у сообщения отсутствует
defaultButton: кнопка, на которую по умолчанию устанавливается фокус. Принимает одно из значений перечисления MessageBoxDefaultButton:
-
Button1: первая кнопка из тех, которые задаются перечислением MessageBoxButtons -
Button2: вторая кнопка -
Button3: третья кнопка
options: параметры окна сообщения. Принимает одно из значений перечисления MessageBoxOptions:
-
DefaultDesktopOnly: окно сообщения отображается на активном рабочем столе. -
RightAlign: текст окна сообщения выравнивается по правому краю -
RtlReading: все элементы окна располагаются в обратном порядке справа налево -
ServiceNotification: окно сообщения отображается на активном рабочем столе, даже если в системе не зарегистрирован ни один пользователь
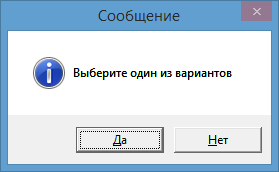
Нередко используется один параметр — текст сообщения. Но посмотрим, как использовать остальные параметры. Пусть у нас есть кнопка, в обработчике
нажатия которой открывается следующее окно сообщения:
private void button1_Click(object sender, EventArgs e)
{
    MessageBox.Show(
        "Выберите один из вариантов",
        "Сообщение",
        MessageBoxButtons.YesNo,
        MessageBoxIcon.Information,
        MessageBoxDefaultButton.Button1,
        MessageBoxOptions.DefaultDesktopOnly);
}
Однако нам не просто дается возможность установки кнопок в окне сообщения. Метод MessageBox.Show возвращает объект
DialogResult, с помощью которого мы можем узнать, какую кнопку в окне сообщения нажал пользователь. DialogResult представляет
перечисление, в котором определены следующие значения:
-
Abort: нажата кнопка Abort -
Retry: нажата кнопка Retry -
Ignore: нажата кнопка Ignore -
OK: нажата кнопка OK -
Cancel: нажата кнопка Cancel -
None: отсутствие результата -
Yes: нажата кнопка Yes и No -
No: нажата кнопка No
Используем обработку выбора пользователя, изменив обработчик нажатия кнопки следующим образом:
private void button1_Click(object sender, EventArgs e)
{
    DialogResult result = MessageBox.Show(
        "Окрасить кнопку в красный цвет?",
        "Сообщение",
        MessageBoxButtons.YesNo,
        MessageBoxIcon.Information,
        MessageBoxDefaultButton.Button1,
        MessageBoxOptions.DefaultDesktopOnly);

	if (result == DialogResult.Yes)
        button1.BackColor=Color.Red;

	this.TopMost = true;
}
И теперь, если в окне сообщения мы выберем выриант Yes, то кнопка окрасится в красный цвет.
Приветствую всех, сегодня я покажу как вывести диалоговое окно с сообщением пользователю, я частенько использую в своих программах. Да и порой под забываю какое именно мне нужно, и подсматриваю здесь.
Для начало создадим обычное приложение WinForm и разместим на нем кнопку при нажатии на которое будем выводить сообщения.
|
1 2 3 4 5 6 7 8 9 10 11 12 13 14 15 16 17 18 |
using System; using System.Windows.Forms; namespace Сообщения { public partial class Form1 : Form { public Form1() { InitializeComponent(); } private void button1_Click(object sender, EventArgs e) { } } } |
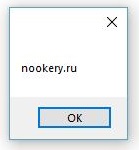
Для того что бы вывести обычно сообщения достаточно вписать в метод нажатия кнопки строку:
|
private void button1_Click(object sender, EventArgs e) { MessageBox.Show(«nookery.ru»); } |
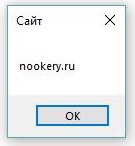
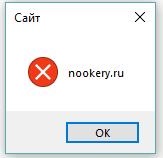
MessageBox.Show имеет перегруженные варианты метода, следующий пример нам покажет как отобразить окно сообщения с заданным текстом и заголовком.
|
private void button1_Click(object sender, EventArgs e) { MessageBox.Show(«nookery.ru», «Сайт»); } |
В следующем примере нам придется использовать MessageBoxButtons в качестве передаваемого аргумента. Однако он имеет несколько параметров:
- MessageBoxButtons.AbortRetryIgnore – Прервать | Повтор | Пропустить
- MessageBoxButtons.OK — ОК
- MessageBoxButtons.OKCancel — ОК | Отмена
- MessageBoxButtons.RetryCancel — Повтор | Отмена
- MessageBoxButtons.YesNo — Да | Нет
- MessageBoxButtons.YesNoCancel — Да | Нет | Отмена
Это нам позволит разместить в диалоговом окне сообщение кнопку или кнопки, в зависимости от параметров.
Рассмотрим все примеры с использованием кнопок:
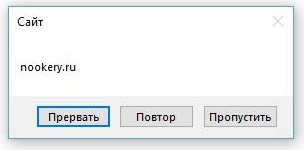
Вариант AbortRetryIgnore
|
private void button1_Click(object sender, EventArgs e) { MessageBox.Show(«nookery.ru», «Сайт», MessageBoxButtons.AbortRetryIgnore); } |
Вариант OK
В этом варианте у нас ничего не измениться так как он используется по умолчанию, выводит кнопку Ok.
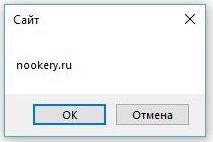
Вариант OKCancel
|
private void button1_Click(object sender, EventArgs e) { MessageBox.Show(«nookery.ru», «Сайт», MessageBoxButtons.OKCancel); } |
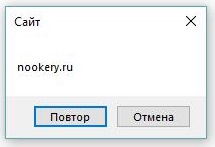
Вариант RetryCancel Диалоговое окно подходит для вывода сообщения пользователю с возможностью повторения какого либо действия, имея в функционале диалогового окна две кнопки Повтор, Отмена.
|
private void button1_Click(object sender, EventArgs e) { MessageBox.Show(«nookery.ru», «Сайт», MessageBoxButtons.RetryCancel); } |
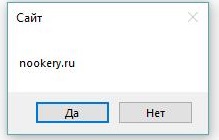
Вариант YesNo Диалоговое окно подходит для вывода сообщения пользователю с возможностью выбора, подтвердить или отказаться имя в функционале диалогового окна две кнопки Да, Нет.
|
private void button1_Click(object sender, EventArgs e) { MessageBox.Show(«nookery.ru», «Сайт», MessageBoxButtons.YesNo); } |
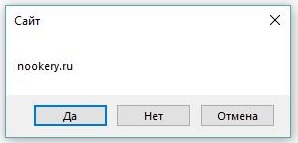
Вариант YesNoCancel Диалоговое окно подходит для вывода сообщения пользователю с возможностью выбора, подтвердить или отказаться имя в функционале диалогового окна три кнопки Да, Нет, Отмена.
|
private void button1_Click(object sender, EventArgs e) { MessageBox.Show(«nookery.ru», «Сайт», MessageBoxButtons.YesNoCancel); } |
Метод Show может принимать в качестве параметра изображения MessageBoxIcon которые позволяют устанавливать тип сообщения, и могут принимать следующие значения:
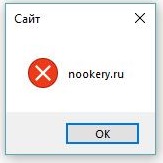
MessageBoxIcon.Error Диалоговое окно подходит для вывода сообщения пользователю об ошибке.
|
private void button1_Click(object sender, EventArgs e) { MessageBox.Show(«nookery.ru», «Сайт», MessageBoxButtons.OK, MessageBoxIcon.Error); } |
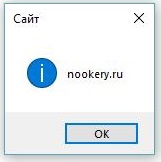
MessageBoxIcon.Information Диалоговое окно подходит для вывода сообщения пользователю о какой то информации.
|
private void button1_Click(object sender, EventArgs e) { MessageBox.Show(«nookery.ru», «Сайт», MessageBoxButtons.OK, MessageBoxIcon.Information); } |
MessageBoxIcon.None
Данные вариант стоит по умолчанию и не выводит никого изображения.
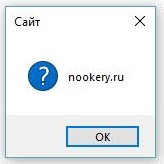
MessageBoxIcon.Question Диалоговое окно подходит для вывода сообщения пользователю о помощи.
|
private void button1_Click(object sender, EventArgs e) { MessageBox.Show(«nookery.ru», «Сайт», MessageBoxButtons.OK, MessageBoxIcon.Question); } |
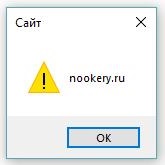
MessageBoxIcon.Warning Диалоговое окно подходит для вывода сообщения пользователю об ошибке или опасности.
|
private void button1_Click(object sender, EventArgs e) { MessageBox.Show(«nookery.ru», «Сайт», MessageBoxButtons.OK, MessageBoxIcon.Warning); } |
MessageBoxIcon.Exclamation
|
private void button1_Click(object sender, EventArgs e) { MessageBox.Show(«nookery.ru», «Сайт», MessageBoxButtons.OK, MessageBoxIcon.Exclamation); } |
MessageBoxIcon.Stop
|
private void button1_Click(object sender, EventArgs e) { MessageBox.Show(«nookery.ru», «Сайт», MessageBoxButtons.OK, MessageBoxIcon.Stop); } |
MessageBoxIcon.Asterisk
|
private void button1_Click(object sender, EventArgs e) { MessageBox.Show(«nookery.ru», «Сайт», MessageBoxButtons.OK, MessageBoxIcon.Asterisk); } |
MessageBoxIcon.Hand
|
private void button1_Click(object sender, EventArgs e) { MessageBox.Show(«nookery.ru», «Сайт», MessageBoxButtons.OK, MessageBoxIcon.Hand); } |
Для того что бы сохранить полученный результат после нажатия кнопки, нам достаточно создать переменную класса DialogResult
DialogResult может принимать следующие значения:
- DialogResult.Abort — Прервать
- DialogResult.Cancel — Отмена
- DialogResult.Ignore — Пропустить
- DialogResult.No — Нет
- DialogResult.Yes — Да
- DialogResult.OK — ОК
- DialogResult.Retry — Повтор
|
DialogResult resualt= MessageBox.Show(«nookery.ru», «Сайт», MessageBoxButtons.YesNo); |
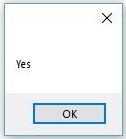
А что бы посмотреть что хранить переменная resualt мы можем вывести ее в сообщении :
|
MessageBox.Show(resualt.ToString()); |
В моем примере я нажал на кнопку Да и вывелось сообщения
В этих примерах мы рассмотрели возможность вывода сообщений пользователю, на основе диалоговых окно в WinForm.
I have just installed C# for the first time, and at first glance it appears to be very similar to VB6. I decided to start off by trying to make a ‘Hello, World!’ UI Edition.
I started in the Form Designer and made a button named «Click Me!» proceeded to double-click it and typed in
MessageBox("Hello, World!");
I received the following error:
MessageBox is a ‘type’ but used as a ‘variable’
Fair enough, it seems in C# MessageBox is an Object. I tried the following
MessageBox a = new MessageBox("Hello, World!");
I received the following error:
MessageBox does not contain a constructor that takes ‘1’ arguments
Now I am stumped. Please help.
asked Sep 8, 2008 at 4:00
![]()
Nick StinematesNick Stinemates
40.4k21 gold badges59 silver badges60 bronze badges
1
MessageBox.Show also returns a DialogResult, which if you put some buttons on there, means you can have it returned what the user clicked. Most of the time I write something like
if (MessageBox.Show("Do you want to continue?", "Question", MessageBoxButtons.YesNo) == MessageBoxResult.Yes) {
     //some interesting behaviour here
}
which I guess is a bit unwieldy but it gets the job done.
See https://learn.microsoft.com/en-us/dotnet/api/system.windows.forms.dialogresult for additional enum options you can use here.
![]()
StayOnTarget
11k10 gold badges49 silver badges75 bronze badges
answered Sep 8, 2008 at 4:08
![]()
MerusMerus
8,7365 gold badges28 silver badges41 bronze badges
0
Code summary:
using System.Windows.Forms;

...

MessageBox.Show( "hello world" );
Also (as per this other stack post): In Visual Studio expand the project in Solution Tree, right click on References, Add Reference, Select System.Windows.Forms on Framework tab. This will get the MessageBox working in conjunction with the using System.Windows.Forms reference from above.
![]()
StayOnTarget
11k10 gold badges49 silver badges75 bronze badges
answered Sep 8, 2008 at 4:02
![]()
moobaamoobaa
4,4721 gold badge28 silver badges31 bronze badges
0
It is a static function on the MessageBox class, the simple way to do this is using
MessageBox.Show("my message");
in the System.Windows.Forms class. You can find more on the msdn page for this here . Among other things you can control the message box text, title, default button, and icons. Since you didn’t specify, if you are trying to do this in a webpage you should look at triggering the javascript alert(«my message»); or confirm(«my question»); functions.
answered Sep 8, 2008 at 4:08
![]()
George MauerGeorge Mauer
115k129 gold badges372 silver badges603 bronze badges
Try below code:
MessageBox.Show("Test Information Message", "Caption", MessageBoxButtons.OK, MessageBoxIcon.Information);
![]()
AminM
1,6504 gold badges32 silver badges47 bronze badges
answered Feb 21, 2014 at 12:59
![]()
4
Also you can use a MessageBox with OKCancel options, but it requires many codes.
The if block is for OK, the else block is for Cancel. Here is the code:
if (MessageBox.Show("Are you sure you want to do this?", "Question", MessageBoxButtons.OKCancel, MessageBoxIcon.Question) == DialogResult.OK)
{
    MessageBox.Show("You pressed OK!");
}
else
{
    MessageBox.Show("You pressed Cancel!");
}
You can also use a MessageBox with YesNo options:
if (MessageBox.Show("Are you sure want to doing this?", "Question", MessageBoxButtons.YesNo, MessageBoxIcon.Question) == DialogResult.Yes)
{
    MessageBox.Show("You are pressed Yes!");
}
else
{
    MessageBox.Show("You are pressed No!");
}
![]()
rob006
20.9k5 gold badges51 silver badges71 bronze badges
answered Apr 28, 2018 at 14:37
![]()
In the System.Windows.Forms class, you can find more on the MSDN page for this here. Among other things you can control the message box text, title, default button, and icons. Since you didn’t specify, if you are trying to do this in a webpage you should look at triggering the javascript alert("my message"); or confirm("my question"); functions.
![]()
answered May 31, 2012 at 8:22
![]()
This is some of the things you can put into a message box. Enjoy
MessageBox.Show("Enter the text for the message box",

                      "Enter the name of the message box",

                      (Enter the button names e.g. MessageBoxButtons.YesNo),

                      (Enter the icon e.g. MessageBoxIcon.Question),

                  (Enter the default button e.g. MessageBoxDefaultButton.Button1)
More information can be found here
answered Sep 23, 2013 at 3:36
![]()
I got the same error ‘System.Windows.Forms.MessageBox’ is a ‘type’ but is used like a ‘variable’, even if using:
MessageBox.Show("Hello, World!");
I guess my initial attempts with invalid syntax caused some kind of bug and I ended up fixing it by adding a space between «MessageBox.Show» and the brackets ():
MessageBox.Show ("Hello, World!");
Now using the original syntax without the extra space works again:
MessageBox.Show("Hello, World!");
answered Mar 9, 2015 at 0:42
![]()
KeithJKeithJ
1593 silver badges12 bronze badges
2
C# MessageBox in Windows Forms displays a message with the given text and action buttons. You can also use MessageBox control to add additional options such as a caption, an icon, or help buttons. In this article, you’ll learn how to display and use a MessageBox in C# WinForms app. You will also learn how to use C# MessageBox class dynamically in code samples.
C# MessageBox
MessageBox class has an overloaded static Show method that displays a message box with a message and action buttons. The action buttons can be OK and Cancel, Yes and No etc. Here are some of the options that can be used in C# message box.
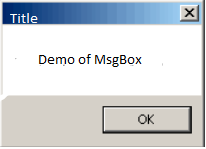
Simple MessageBox
The simplest form of a MessageBox is a dialog with a text and OK button. When you click OK button, the box disappears.
The following code snippet creates a simple Message Box.
- string message = «Simple MessageBox»;
- MessageBox.Show(message);
MessageBox with Title
The following code snippet creates a simple MessageBox with a title.
- string message = «Simple MessageBox»;
- string title = «Title»;
- MessageBox.Show(message, title);

MessageBox with Buttons
A MessageBox can have different button combinations such as YesNo and OKCancel. The MessageBoxButtons enumeration represents the buttons to be displayed on a MessageBox and has following values.
- OK
- OKCancel
- AbortRetryIgnore
- YesNoCancel
- YesNo
- RetryCancel
The following code snippet creates a MessageBox with a title and Yes and No buttons. This is a typical MessageBox you may call when you want to close an application. If the Yes button is clicked, the application will be closed. The Show method returns a DialogResult enumeration.
- string message = «Do you want to close this window?»;
- string title = «Close Window»;
- MessageBoxButtons buttons = MessageBoxButtons.YesNo;
- DialogResult result = MessageBox.Show(message, title, buttons);
- if (result == DialogResult.Yes) {
- this.Close();
- } else {
- }

MessageBox with Icon
A MessageBox can display an icon on the dialog. A MessageBoxIcons enumeration represents an icon to be displayed on a MessageBox and has the following values.
- None
- Hand
- Question
- Exclamation
- Asterisk
- Stop
- Error
- Warning
- Information
The following code snippet creates a MessageBox with a title, buttons, and an icon.
- string message = «Do you want to abort this operation?»;
- string title = «Close Window»;
- MessageBoxButtons buttons = MessageBoxButtons.AbortRetryIgnore;
- DialogResult result = MessageBox.Show(message, title, buttons, MessageBoxIcon.Warning);
- if (result == DialogResult.Abort) {
- this.Close();
- }
- elseif(result == DialogResult.Retry) {
- }
- else {
- }

MessageBox with Default Button
We can also set the default button on a MessageBox. By default, the first button is the default button. The MessageBoxDefaultButton enumeration is used for this purpose and it has the following three values.
- Button1
- Button2
- Button3
The following code snippet creates a MessageBox with a title, buttons, and an icon and sets the second button as a default button.
- string message = «Do you want to abort this operation?»;
- string title = «Close Window»;
- MessageBoxButtons buttons = MessageBoxButtons.AbortRetryIgnore;
- DialogResult result = MessageBox.Show(message, title, buttons, MessageBoxIcon.Warning, MessageBoxDefaultButton.Button2);
- if (result == DialogResult.Abort) {
- this.Close();
- }
- elseif(result == DialogResult.Retry) {
- }
- else {
- }

MessageBox with Message Options
MessageBoxOptions enumeration represents various options and has the following values.
- ServiceNotification
- DefaultDesktopOnly
- RightAlign
- RtlReading
The following code snippet creates a MessageBox with various options.
- DialogResult result = MessageBox.Show(message, title, buttons,
- MessageBoxIcon.Warning, MessageBoxDefaultButton.Button2,
- MessageBoxOptions.RightAlign|MessageBoxOptions.RtlReading);

MessageBox with Help Button
A MessageBox can have an extra button called Help button. This is useful when we need to display a help file. The following code snippet creates a MessageBox with a Help button.
- DialogResult result = MessageBox.Show(message, title, buttons,
- MessageBoxIcon.Warning, MessageBoxDefaultButton.Button2,
- MessageBoxOptions.RightAlign, true );

We can also specify a help file when the Help button is clicked. The following code snippet references a help file.
- DialogResult result = MessageBox.Show(message, title,
- buttons, MessageBoxIcon.Question, MessageBoxDefaultButton.Button1, 0, «helpfile.chm»);
Summary
In this article, we discussed how to create and use a MessageBox in a Windows Forms application.
Introduction to C# MessageBox
In today’s applications, it is always required that a message is displayed to the user as a token of information or confirmation so that the user is aware of the status of the operation he performed. The message can be anything ranging from “The payment is successful” or a warning type like “Do you want to continue” etc. This is achieved in C# with the help of Message Box. A message box can be considered as an interface between the user and the application. It is nothing but a window that has text, images, or symbols to guide or convey something to the user. Until appropriate action is performed, and the message box is closed, it will not allow other actions to be performed.
Syntax:
Message Box is a class in the “Systems.Windows.Forms” Namespace and the assembly it is available is “System.Windows.Forms.dll”.The show method available in the class is used to display the message along with action buttons. The action buttons can be anything ranging from Yes to No, Ok to Cancel.
Example:
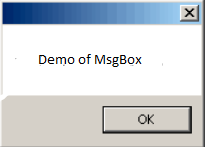
The following code will create a simple Message Box only with the OK button.
string msg = "Test";
MessageBox.Show(msg);
Types of Show Methods
Following are the types of show method:
| Syntax | Use |
| MessageBox.Show(String) | It will display only the message box with the string that is passed. An ok button is also present to close the dialog. Example: |
| MessageBox.Show( String, String) | It will display only the message box with the string that is passed as first parameter. The second parameter is the title of the Message Box. An ok button is also present to close the dialog. Example: |
| MessageBox.Show( String,String, MessageBoxButtons) | It will display the message box with the supplied text, title and the corresponding buttons to be displayed on the Message Box. For eg the below will display Yes and No buttons. |
| Show(String, String, MessageBoxButtons, MessageBoxIcon) | It will display the message box with the supplied text, title and the corresponding buttons to be displayed on the Message Box. It will also display the icon that is specified before the text. For eg the below will display Yes and No buttons with a question mark in front of message. |
| Show(String, String, MessageBoxButtons, MessageBoxIcon, MessageBoxDefaulButton) | It will display the message box with the supplied text, title and the corresponding buttons to be displayed on the Message Box. It will also display the icon that is specified before the text. The last parameter denotes which button must be selected by default on load. For eg the below will display Yes and No buttons with a question mark in front of message. |
| Show(String, String, MessageBoxButtons, MessageBoxIcon, MessageBoxDefaulButton, MessageBoxOptions) | It will display the message box with the supplied text, title, and the corresponding buttons to be displayed on the Message Box. It will also display the icon that is specified before the text. The last parameter denotes which button must be selected by default on load and the contents of the messagebox will be right-aligned. For eg the below will display Yes and No buttons with a question mark in front of message. |
Types of MessageBox Buttons
The following are the types of Buttons that are available in the MessageBox.Show() method. They are
- OK: It is defined as MessageBoxButtons.OK
- OK and Cancel: It is defined as MessageBoxButtons.OkCancel.
- Abort Retry and Ignore: It is defined as MessageBoxButtons.AbortRetryIgnore.
- Yes No and Cancel: It is defined as MessageBoxButtons.YesNoCancel.
- Yes and No: It is defined as MessageBoxButtons.YesNo.
- Retry and Cancel: It is defined as MessageBoxButtons.RetryCancel.
Types of MessageBox Icons
The following are the types of MessageBox icons method are:
- None: No icons are displayed in the Message box.
- Hand: A hand icon is displayed. It is defined as MessageBoxIcon.Hand.
- Question: A question mark is displayed. It is defined as MessageBoxIcon.Question.
- Exclamation: An exclamation mark is displayed. It is defined as MessageBoxIcon.Exclamation.
- Asterisk: An asterisk symbol is displayed. It is defined as MessageBoxIcon.Asterisk.
- Stop: A stop icon is displayed. It is defined as MessageBoxIcon.Stop.
- Error: An error icon is displayed. It is defined as MessageBoxIcon.Error.
- Warning: A warning icon is displayed. It is defined as MessageBoxIcon.Warning.
- Information: An info symbol is displayed. It is defined as MessageBoxIcon.Information.
Types of MessageBox Options
The following are the various Message Box options that are available.
- ServiceNotification: It is defined as MessageBoxOptions.ServiceNotification. This is used to display the message box on the current desktop which is active. The message box is displayed even when no user is logged on to the desktop.
- DefaultDesktopOnly: It is defined as MessageBoxOptions.DefaultDesktopOnly. This also displays on the currently active desktop. The difference between this and service notification is that here the message is displayed on the interactive window.
- RightAlign: It is defined as MessageBoxOptions.RightAlign. This is used to format the message in right alignment.
- RtlReading: It is defined as MessageBoxOptions.RtlReading. This denotes that message is displayed from right to left order.
Example of C# MessageBox
Following are the examples of c# message box are:
Input:
using System;
using System.Collections.Generic;
using System.ComponentModel;
using System.Data;
using System.Drawing;
using System.Linq;
using System.Text;
using System.Windows.Forms;
namespace test
{
public partial class testform : Form
{
public testform()
{
InitializeComponent();
}
private void testform_Load(object sender, EventArgs e)
{
MessageBox.Show("Demo of MsgBox");
MessageBox.Show("Demo of MsgBox", "Title");
MessageBox.Show("Demo of Msgbox","Title",MessageBoxButtons.YesNo);
MessageBox.Show("Demo of Msgbox","Title",MessageBoxButtons.YesNoCancel);
MessageBox.Show("Demo of Msgbox","Title",MessageBoxButtons.OkCancel);
MessageBox.Show("Demo of Msgbox","Title",MessageBoxButtons.RetryCancel);
MessageBox.Show("Demo of Msgbox","Title",MessageBoxButtons.OK);
MessageBox.Show("Demo of Msgbox","Title",MessageBoxButtons.AbortRetryIgnore);
MessageBox.Show("Demo of Msgbox","Title",MessageBoxButtons.YesNoCancel,MessageBoxIcon.Question);
MessageBox.Show("Demo of Msgbox","Title",MessageBoxButtons.YesNoCancel,MessageBoxIcon.Hand);
MessageBox.Show("Demo of Msgbox","Title",MessageBoxButtons.YesNoCancel,MessageBoxIcon.Exclamation);
MessageBox.Show("Demo of Msgbox","Title",MessageBoxButtons.YesNoCancel,MessageBoxIcon.Asterisk);
MessageBox.Show("Demo of Msgbox","Title",MessageBoxButtons.YesNoCancel,MessageBoxIcon.Stop);
MessageBox.Show("Demo of Msgbox","Title",MessageBoxButtons.YesNoCancel,MessageBoxIcon.Error);
MessageBox.Show("Demo of Msgbox","Title",MessageBoxButtons.YesNoCancel,MessageBoxIcon.Warning);MessageBox.Show("Demo of Msgbox","Title",MessageBoxButtons.YesNoCancel,MessageBoxIcon.Information);MessageBox.Show("Demo of Msgbox","Title",MessageBoxButtons.YesNoCancel,MessageBoxIcon.Question,MessageBoxDefaultButton.Button2);
MessageBox.Show("Demo of Msgbox","Title",MessageBoxButtons.OK,MessageBoxIcon.Exclamation,MessageBoxDefaultButton.Button1);
}
}
}
Output:
Conclusion – C# MessageBox
Thus, the article covered in detail about the Message box class in c# in detail. It explained about various message box show methods that are available, the various parameters of each method, and demonstrated that with an example. The article also covered in detail about various message box options, message box buttons, and message box icons in detail along with their use. To learn more in detail it is advisable to write sample programs and practice them.
Recommended Articles
This is a guide to C# MessageBox. Here we also discuss the introduction and types of show method along with an example and its code implementation. You may also have a look at the following articles to learn more –
- Assert in C#
- C# List vs Array
- ASP.NET CheckBox
- C# BinaryReader
A message box or dialog box is used to interact with the users of your application. The purpose of using a message box may include notifying about a particular action e.g. success message after entering a record. Similarly, an error message if an operation was unsuccessful. In both cases, you may display the “OK” button in the message box with the message.
In other cases, you may display a message box for the user confirmation before performing a critical action e.g. deleting a record permanently. In that case, a Yes/No button in the dialog box makes sense.
In this tutorials, I will show you how to create various types of C# message box with code.
How to make message box work in Visual Studio?
If you are working in Visual Studio then you have to include the System.Windows.Forms by following this:
- In your project name under “Solution Explorer” right click and select “Add Reference”.
- There you can see a few tabs. Select “.Net” tab.
- Now locate the System.Windows.Forms and press OK
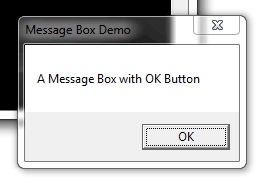
The example of creating a simple message box
After taking the above steps, you need including the System.Windows.Forms namespace as used in the code below.
You may provide a message to be displayed and the title of the dialog box by using the MessageBox class’s show method. The following example simply displays a box with the OK button:
|
1 2 3 4 5 6 7 8 9 10 11 12 13 14 15 16 17 18 19 20 21 22 23 24 25 26 27 |
using System; using System.Windows.Forms; class msgbox_example { static void Main() { string box_msg = «A Message Box with OK Button»; string box_title = «Message Box Demo»; MessageBox.Show(box_msg, box_title); } } |
The result:
An example of Yes/No message box
The Yes/No dialog box can be useful for asking users to choose an option between the two. For example, “Are you sure you want to delete this record?” Similarly, “Do you want to really quit?” and so on.
The example below shows a Yes/No message box:
|
1 2 3 4 5 6 7 8 9 10 11 12 13 14 15 16 17 18 19 20 21 22 23 24 25 26 27 |
using System; using System.Windows.Forms; class msgbox_example { static void Main() { string box_msg = «Message Box with Yes / No Options»; string box_title = «Yes No Dialog»; MessageBox.Show(box_msg, box_title, MessageBoxButtons.YesNo); } } |
The result:

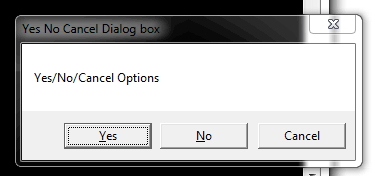
Adding Cancel button in above dialog
You may use the YesNoCancel Enum value for creating a dialog with the third button i.e. Cancel in addition to the above two buttons. The code below shows how with the output:
|
1 2 3 4 5 6 7 8 9 10 11 12 13 14 15 16 17 18 19 20 21 22 23 24 25 26 27 |
using System; using System.Windows.Forms; class msgbox_example { static void Main() { string box_msg_y_n_c = «Yes/No/Cancel Options»; string box_title_y_n_c = «Yes No Cancel Dialog box»; MessageBox.Show(box_msg_y_n_c, box_title_y_n_c, MessageBoxButtons.YesNoCancel); } } |
Adding an icon example
By using the MessageBoxIcon Enum, you may specify an icon to be displayed with the message in the dialog box. A number of values for various types of icons can be used. For example:
- Exclamation
- Information
- Question
- Warning
- Asterisk
- Error
- Hand
- Stop
- None
The following example shows a few message boxes with different icons:
|
1 2 3 4 5 6 7 8 9 10 11 12 13 14 15 16 17 18 19 20 21 22 23 24 25 26 27 28 29 |
using System; using System.Windows.Forms; class msgbox_example { static void Main() { MessageBox.Show(«Exclamation Icon message box», «Dialog with Icon», MessageBoxButtons.YesNo, MessageBoxIcon.Exclamation); MessageBox.Show(«Warning Icon message box», «Dialog with Icon», MessageBoxButtons.OKCancel, MessageBoxIcon.Warning); MessageBox.Show(«There was an error processing your request!», «Dialog with Icon», MessageBoxButtons.OK, MessageBoxIcon.Error); MessageBox.Show(«Operation cannot be successful, Do you want to retry?», «Dialog with Icon», MessageBoxButtons.RetryCancel, MessageBoxIcon.Stop); } } |
As you execute this code, four dialog boxes should display with respective icons and messages.
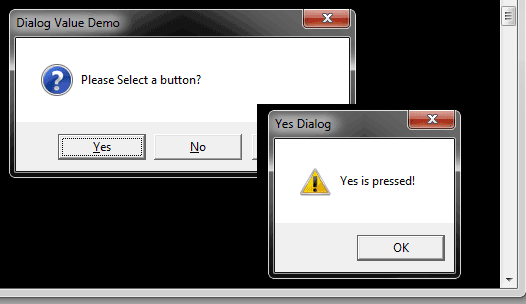
Performing actions on different buttons
The message box with OK button only may be used for information purpose to the user, without performing any action. However, in the case of boxes with OK, Cancel, Yes and No, Retry buttons, you may require performing some action based on the user’s selection.
So, how to catch which button is pressed by the user?
For that, you may use a variable that catches the returned value. Then it can be used in an if statement and you may perform the desired action.
To demonstrate that, the following program displays a message box with Yes/No/Cancel buttons. As you click any button, another message box with “OK” button is displayed with its own message for each button:
|
1 2 3 4 5 6 7 8 9 10 11 12 13 14 15 16 17 18 19 20 21 22 23 24 25 26 27 28 29 30 31 32 33 34 35 36 37 38 39 40 41 42 43 44 45 46 47 48 49 |
using System; using System.Windows.Forms; class msgbox_example_value { static void Main() { var selectedOption = MessageBox.Show(«Please Select a button?», «Dialog Value Demo», MessageBoxButtons.YesNoCancel, MessageBoxIcon.Question); // If the no button was pressed … if (selectedOption == DialogResult.Yes) { MessageBox.Show(«Yes is pressed!», «Yes Dialog», MessageBoxButtons.OK, MessageBoxIcon.Warning); } else if (selectedOption == DialogResult.No) { MessageBox.Show(«No is pressed!», «No Dialog», MessageBoxButtons.OK, MessageBoxIcon.Exclamation); } else { MessageBox.Show(«Cancel is pressed», «Cancel Dialog», MessageBoxButtons.OK, MessageBoxIcon.Error); } } } |
This div height required for enabling the sticky sidebar
The whole concept behind a message box is to display text to the user or to ask a question of some sort. So in practice we can use message boxes to display an error to the user, or maybe to ask the user to confirm something before continuing. A C# MessageBox is a read-only dialog box which means that the text displayed in the MessageBox cannot be edited by the end user.
With C#.NET it is very easy to display a message box. The following line of code will display the simplest form of message box available.
MessageBox.Show("Hello from daveoncsharp.com!");
MessageBox is the C# message box class which is part of the System.Windows.Forms namespace and Show() is the static method we must call in order to display the message box on screen. When we execute the code we would be shown a dialog which looks like the following when running under Microsoft Windows Vista:

Adding a Caption
A message box caption is the text which is displayed in the title bar of the message box. To add a caption to our message box we have to pass the text we want to display as another parameter in the Show() method. In this example we are going to write “Welcome” in the caption.
MessageBox.Show("Hello from daveoncsharp.com!", "Welcome");
Customizing Buttons
The C# MessageBox class allows you to customize your message box’s functionality and style by assigning different buttons. There are six different button styles which can be used and they are shown below:
| MessageBoxButtons | Buttons Displayed |
| OK | |
| OKCancel | |
| RetryCancel | |
| YesNo | |
| YesNoCancel | |
| AbortRetryIgnore |
Now let’s change our simple message box to display the YesNo buttons instead of the default OK button. To do this we have to add a third parameter to the Show() method of the MessageBox class as shown below (Note I have split the MessageBox.Show() method over three lines. This does not affect the compiler because C# still regards it as a whole line.):
MessageBox.Show("Hello from daveoncsharp.com!",
                "Welcome",
                MessageBoxButtons.YesNo);
Setting the Icon
With C# you can choose to display a number of predefined icons on your message box or you may choose to not display an icon at all. Below is a list of the available icons.
| MessageBoxIcon | Icon |
| Asterisk | |
| Error | |
| Exclamation | |
| Hand | |
| Information | |
| None | |
| Question | |
| Stop | |
| Warning |
You can select which icon to display, if any, by using the MessageBoxIcon enumeration and adding it as the next parameter to the Show() method of the MessageBox. This is shown below where we are displaying the Question icon.
MessageBox.Show("Do you want to continue?",
                "A Question",
                MessageBoxButtons.YesNo,
                MessageBoxIcon.Question);
Setting the Default Button
The default button is the currently selected or highlighted button, and if not manually set, the default button is decided by the operating system.The C# MessageBox accepts a parameter of type MessageBoxDefaultButton which is another enumeration and contains three values – Button1, Button2, and Button3. One of these values can be added as a parameter to the Show() method of the MessageBox class as seen below:
MessageBox.Show("Do you want to continue?",
                "A Question",
                MessageBoxButtons.YesNo,
                MessageBoxIcon.Question,
                MessageBoxDefaultButton.Button2);
Since our example message box is using MessageBoxButtons.YesNo, and therefore only has two buttons, we cannot make use of MessageBoxDefaultButton.Button3 as a third button does not exist. If we try and use Button3 in this situation, the value will be ignored and the default button will be set by the operating system.
So far our message box looks like this:

Capturing Button Return Values
Obviously, after you customize a message box’s buttons you will want to know which button the user clicked. This is very simple to do as the Show() method of the MessageBox class returns a value of type DialogResult which is another enumeration with the value of the selected button.
The below example is showing how different code can be executed according to which button the user selects.
if (MessageBox.Show("Do you want to continue?",
                    "A Question",
                    MessageBoxButtons.YesNo,
                    MessageBoxIcon.Question,
                    MessageBoxDefaultButton.Button2) == DialogResult.No)
{
    // The user clicked the 'No' button
}
else
{
    // The user clicked the 'Yes' button
}
Conclusion
This concludes my explanation of the simple properties of a C# MessageBox. There are a few other parameters which can be passed to the Show() method such as text alignment options for different cultures, and options to show a help button which links to a help file, but these are more advanced topics which I will be covering in the future.
Thanks for reading this article – I hope it was of some help. Please feel free to leave any comments below.
Stay tuned to this blog for more articles in the near future.
Dave