Note: This release of Docker deprecates the Boot2Docker command line in
favor of Docker Machine. Use the Docker Toolbox to install Docker Machine as
well as the other Docker tools.
You install Docker using Docker Toolbox. Docker Toolbox includes the following Docker tools:
- Docker Machine for running the
docker-machinebinary - Docker Engine for running the
dockerbinary - Kitematic, the Docker GUI
- a shell preconfigured for a Docker command-line environment
- Oracle VM VirtualBox
Because the Docker daemon uses Linux-specific kernel features, you can’t run
Docker natively in Windows. Instead, you must use docker-machine to create and attach to a Docker VM on your machine. This VM hosts Docker for you on your Windows system.
The virtual machine runs a lightweight Linux distribution made specifically to
run the Docker daemon. The VirtualBox VM runs completely from RAM, is a small
~24MB download, and boots in approximately 5s.
Requirements
To run Docker, your machine must have a 64-bit operating system running Windows 7 or higher. Additionally, you must make sure that virtualization is enabled on your machine.
To verify your machine meets these requirements, do the following:
-
Right click the Windows Start Menu and choose System.

If you are using an unsupported version of Windows, you should consider
upgrading your operating system in order to try out Docker. -
Make sure your CPU supports virtualization technology
and virtualization support is enabled in BIOS and recognized by Windows.For Windows 8, 8.1 or 10
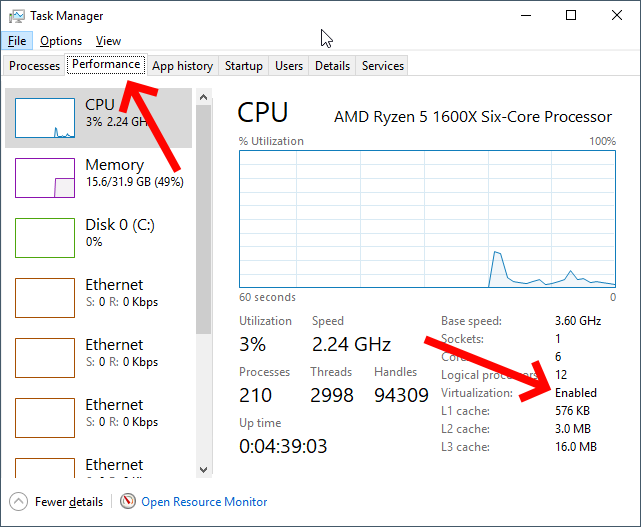
Choose Start > Task Manager. On Windows 10, click more details. Navigate to the Performance tab.
Under CPU you should see the following:If virtualization is not enabled on your system, follow the manufacturer’s instructions for enabling it.
For Windows 7
Run the Microsoft® Hardware-Assisted Virtualization Detection
Tool and follow the on-screen instructions. -
Verify your Windows OS is 64-bit (x64)
How you do this verification depends on your Windows version. For details, see the Windows
article How to determine whether a computer is running a 32-bit version or 64-bit version
of the Windows operating system.


Note: If you have Docker hosts running and you don’t wish to do a Docker Toolbox
installation, you can install thedocker.exeusing the unofficial Windows package
manager Chocolatey. For information on how to do this, see Docker package on
Chocolatey.
Learn the key concepts before installing
In a Docker installation on Linux, your machine is both the localhost and the
Docker host. In networking, localhost means your computer. The Docker host is
the machine on which the containers run.
On a typical Linux installation, the Docker client, the Docker daemon, and any
containers run directly on your localhost. This means you can address ports on a
Docker container using standard localhost addressing such as localhost:8000 or
0.0.0.0:8376.

In an Windows installation, the docker daemon is running inside a Linux virtual
machine. You use the Windows Docker client to talk to the Docker host VM. Your
Docker containers run inside this host.

In Windows, the Docker host address is the address of the Linux VM. When you
start the VM with docker-machine it is assigned an IP address. When you start
a container, the ports on a container map to ports on the VM. To see this in
practice, work through the exercises on this page.
Installation
If you have VirtualBox running, you must shut it down before running the
installer.
-
Go to the Docker Toolbox page.
-
Click the installer link to download.
-
Install Docker Toolbox by double-clicking the installer.
The installer launches the «Setup — Docker Toolbox» dialog.
-
Press «Next» to install the toolbox.
The installer presents you with options to customize the standard
installation. By default, the standard Docker Toolbox installation:- installs executables for the Docker tools in
C:Program FilesDocker Toolbox - install VirtualBox; or updates any existing installation
- adds a Docker Inc. folder to your program shortcuts
- updates your
PATHenvironment variable - adds desktop icons for the Docker Quickstart Terminal and Kitematic
This installation assumes the defaults are acceptable.
- installs executables for the Docker tools in
-
Press «Next» until you reach the «Ready to Install» page.
The system prompts you for your password.
-
Press «Install» to continue with the installation.
When it completes, the installer provides you with some information you can
use to complete some common tasks. -
Press «Finish» to exit.


Running a Docker Container
To run a Docker container, you:
- Create a new (or start an existing) Docker virtual machine
- Switch your environment to your new VM
- Use the
dockerclient to create, load, and manage containers
Once you create a machine, you can reuse it as often as you like. Like any
VirtualBox VM, it maintains its configuration between uses.
There are several ways to use the installed tools, from the Docker Quickstart Terminal or
from your shell.
Using the Docker Quickstart Terminal
-
Find the Docker Quickstart Terminal icon on your Desktop and double-click to launch it.
The application:
- Opens a terminal window
- Creates a
defaultVM if it doesn’t exist, and starts the VM after - Points the terminal environment to this VM
Once the launch completes, you can run
dockercommands. -
Verify your setup succeeded by running the
hello-worldcontainer.$ docker run hello-world Unable to find image 'hello-world:latest' locally 511136ea3c5a: Pull complete 31cbccb51277: Pull complete e45a5af57b00: Pull complete hello-world:latest: The image you are pulling has been verified. Important: image verification is a tech preview feature and should not be relied on to provide security. Status: Downloaded newer image for hello-world:latest Hello from Docker. This message shows that your installation appears to be working correctly. To generate this message, Docker took the following steps: 1. The Docker client contacted the Docker daemon. 2. The Docker daemon pulled the "hello-world" image from the Docker Hub. (Assuming it was not already locally available.) 3. The Docker daemon created a new container from that image which runs the executable that produces the output you are currently reading. 4. The Docker daemon streamed that output to the Docker client, which sent it to your terminal. To try something more ambitious, you can run an Ubuntu container with: $ docker run -it ubuntu bash For more examples and ideas, visit: http://docs.docker.com/userguide/
Using Docker from Windows Command Prompt (cmd.exe)
-
Launch a Windows Command Prompt (cmd.exe).
The
docker-machinecommand requiresssh.exein yourPATHenvironment
variable. This.exeis in the MsysGitbinfolder. -
Add this to the
%PATH%environment variable by running:set PATH=%PATH%;"c:Program Files (x86)Gitbin" -
Create a new Docker VM.
 docker-machine create --driver virtualbox my-default
 Creating VirtualBox VM...
 Creating SSH key...
 Starting VirtualBox VM...
 Starting VM...
 To see how to connect Docker to this machine, run: docker-machine env my-default
The command also creates a machine configuration in the
C:USERSUSERNAME.dockermachinemachinesdirectory. You only need to run thecreate
command once. Then, you can usedocker-machineto start, stop, query, and
otherwise manage the VM from the command line. -
List your available machines.
 C:Usersmary> docker-machine ls
 NAME                ACTIVE   DRIVER       STATE     URL                         SWARM
 my-default        *        virtualbox   Running   tcp://192.168.99.101:2376
If you have previously installed the deprecated Boot2Docker application or
run the Docker Quickstart Terminal, you may have adevVM as well. -
Get the environment commands for your new VM.
C:Usersmary> docker-machine env --shell cmd my-default -
Connect your shell to the
my-defaultmachine.C:Usersmary> eval "$(docker-machine env my-default)" -
Run the
hello-worldcontainer to verify your setup.C:Usersmary> docker run hello-world
Using Docker from PowerShell
-
Launch a Windows PowerShell window.
-
Add
ssh.exeto your PATH:PS C:Usersmary> $Env:Path = "${Env:Path};c:Program Files (x86)Gitbin" -
Create a new Docker VM.
PS C:Usersmary> docker-machine create --driver virtualbox my-default -
List your available machines.
C:Usersmary> docker-machine ls NAME ACTIVE DRIVER STATE URL SWARM my-default * virtualbox Running tcp://192.168.99.101:2376 -
Get the environment commands for your new VM.
C:Usersmary> docker-machine env --shell powershell my-default -
Connect your shell to the
my-defaultmachine.C:Usersmary> eval "$(docker-machine env my-default)" -
Run the
hello-worldcontainer to verify your setup.C:Usersmary> docker run hello-world
Learn about your Toolbox installation
Toolbox installs the Docker Engine binary in the C:Program FilesDocker Toolbox directory. When you use the Docker Quickstart Terminal or create a
default VM manually, Docker Machine updates the
C:USERSUSERNAME.dockermachinemachinesdefault folder to your
system. This folder contains the configuration for the VM.
You can create multiple VMs on your system with Docker Machine. Therefore, you
may end up with multiple VM folders if you have created more than one VM. To
remove a VM, use the docker-machine rm <machine-name> command.
Migrate from Boot2Docker
If you were using Boot2Docker previously, you have a pre-existing Docker
boot2docker-vm VM on your local system. To allow Docker Machine to manage
this older VM, you can migrate it.
-
Open a terminal or the Docker CLI on your system.
-
Type the following command.
$ docker-machine create -d virtualbox --virtualbox-import-boot2docker-vm boot2docker-vm docker-vm -
Use the
docker-machinecommand to interact with the migrated VM.
The docker-machine subcommands are slightly different than the boot2docker
subcommands. The table below lists the equivalent docker-machine subcommand
and what it does:
boot2docker |
docker-machine |
docker-machine description |
|---|---|---|
| init | create | Creates a new docker host. |
| up | start | Starts a stopped machine. |
| ssh | ssh | Runs a command or interactive ssh session on the machine. |
| save | — | Not applicable. |
| down | stop | Stops a running machine. |
| poweroff | stop | Stops a running machine. |
| reset | restart | Restarts a running machine. |
| config | inspect | Prints machine configuration details. |
| status | ls | Lists all machines and their status. |
| info | inspect | Displays a machine’s details. |
| ip | ip | Displays the machine’s ip address. |
| shellinit | env | Displays shell commands needed to configure your shell to interact with a machine |
| delete | rm | Removes a machine. |
| download | — | Not applicable. |
| upgrade | upgrade | Upgrades a machine’s Docker client to the latest stable release. |
Upgrade Docker Toolbox
To upgrade Docker Toolbox, download and re-run the Docker Toolbox
installer.
Container port redirection
If you are curious, the username for the Docker default VM is docker and the
password is tcuser. The latest version of docker-machine sets up a host only
network adaptor which provides access to the container’s ports.
If you run a container with a published port:
$ docker run --rm -i -t -p 80:80 nginx
Then you should be able to access that nginx server using the IP address
reported to you using:
Typically, the IP is 192.168.59.103, but it could get changed by VirtualBox’s
DHCP implementation.
Note: There is a known
issue that
may cause files shared with your nginx container to not update correctly as you
modify them on your host.
Login with PUTTY instead of using the CMD
Docker Machine generates and uses the public/private key pair in your
%USERPROFILE%.dockermachinemachines<name_of_your_machine> directory. To
log in you need to use the private key from this same directory. The private key
needs to be converted into the format PuTTY uses. You can do this with
puttygen:
-
Open
puttygen.exeand load («File»->»Load» menu) the private key from (you may need to change to theAll Files (*.*)filter)%USERPROFILE%.dockermachinemachines<name_of_your_machine>id_rsa -
Click «Save Private Key».
-
Use the saved file to login with PuTTY using
docker@127.0.0.1:2022.
Uninstallation
You can uninstall Docker Toolbox using Window’s standard process for removing
programs. This process does not remove the docker-install.exe file. You must
delete that file yourself.
Learn more
You can continue with the Docker Engine User Guide. If you are
interested in using the Kitematic GUI, see the Kitematic user
guide.
Docker containers become unavoidable for infrastructure development as it provides, Isolation, Simplicity, Rapid Continuous Deployment, and Faster Configuration with Security. Earlier, Docker has only used for Linux based applications as it is using the Linux kernel baseline for creating Containers. But Windows applications are widely used in Software development and Hence, windows developers need Docker Containers for Windows. In this article, we will discuss How to Create Docker Windows Containers from Docker Desktop.
Docker Desktop Installation
Requirement
- Minimum Windows 10 (Home and All other Editions)
- Hyper-V (In-Built and can be Enabled)
- Only 64bit Processor Architecture
- Virtualization Enablement from Bios Level
Installation
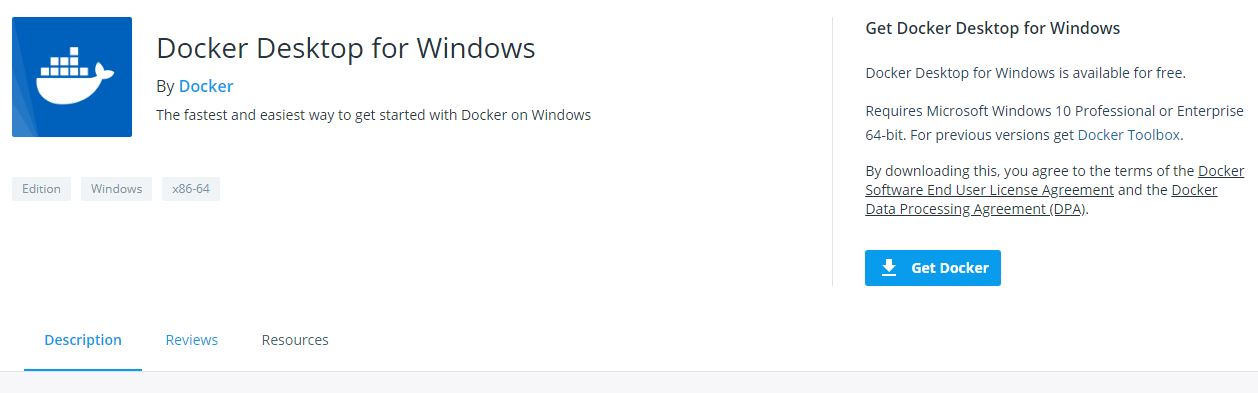
- Step-1: Download the “Docker Desktop for Windows” exe file from here (https://hub.docker.com/editions/community/docker-ce-desktop-windows/) and run it to install.
- Step-2: Enable Docker Running Environment 1. For Windows Home – Enable Windows Subsystem for Linux (Instructions Here: https://docs.microsoft.com/en-us/windows/wsl/install-win10). 2. For Windows Other Editions – Enable Hyper-V (Instructions Here: https://docs.microsoft.com/en-us/virtualization/hyper-v-on-windows/quick-start/enable-hyper-v)
- Step-3: Follow the instructions on the Installation process
- Step-4: If you are the Only user with Admin access, you can proceed. Else add the current user into a docker-users group (Instructions Here: https://www.tenforums.com/tutorials/88049-add-remove-users-groups-windows-10-a.html)
NOTE:
Docker Desktop Installed in the Windows Machine can run Linux Based Docker Containers and Windows-based Docker Container. But You cannot run Windows Based Docker Containers on Docker Engine installed in Linux. Refer the below image.

About Docker on Windows Machine
As we all know, the Docker Engine will run as a daemon that uses the Linux specific kernel features. So, running the Docker Engine on Windows directly is not possible. Hence, we must create a Linux based environment in Windows to run docker. In order to enable Linux environment on the windows, we have two options,
- Windows Subsystem for Linux (WSL) – is the compatibility layer to run Linux applications
- Hyper-V – Microsoft solution for virtualization.

Both these features are available from Windows 10. Running docker on windows will be ultimately using the Linux environment. But it is using some of the Host’s features. So, Docker Engine will sit on top of the Linux Kernel created by the Hyper-V/WSL. On top of the Docker Engine, Docker Containers can be created. All this is managed by the Docker Desktop. So, Application Program which will be written by the developers will sit on top of the Containers.
Simple Windows Container with Example
Let’s learn how to create the Docker Windows container using Docker Desktop. For that, first, we are going to create Dockerfile which is the simple text file with the instructions of the application and configurations.
Creating Dockerfile
Let’s run a simple application which will return the “hello world” print output from the Windows Docker Container. For the same, create a file called “Dockerfile” and put the bellow content.
# Base Image
FROM microsoft/nanoserver

# Copy powershell init-script from the host machine (windows) to the docker container.
COPY init-setup.ps1 c:\workspaceapplicationinit-setup.ps1

# Run the Powershell script in the Docker Container
CMD ["powershell.exe", "c:\workspaceapplicationinit-setup.ps1"]
- In this, Line number #2 is setting the container from the base image. Here it is “
microsoft/nanoserver”. - Inline Number #5 is giving
init-script.ps1from the host to the docker container. - Line Number #8 is to run the script in PowerShell executable.
And Create a script file called “init-setup.ps1” and put the below content inside the file
Building Docker Image
Once you have this file in your folder you can start building the Dockerfile as Docker image using the command.
$ docker build -t digitalvarys/print-hello-world .
where digitalvarys/print-hello-world is the tag name of the docker image.
Once the Docker image is been built, you can check the Image by passing the following commad
This will display the created image.
Running the Docker Container
Now, it is time to run the Docker image which we have created. Hence, run the following command
$ docker run digitalvarys/print-hello-world
This will print the string “hello world” as we provided.
If you run it with -it parameter, you can explore the Created Docker Container with Windows CMD.
ASP.net example of the Windows Docker Container.
The above sample application will tell you about the basic container feature. This one will tell you the real-time advantage of the Windows Docker Container.
Sample application
For this tutorial, we are going to use, cloud foundry’s sample Dotnet core hello world application (https://github.com/cloudfoundry-samples/dotnet-core-hello-world). Just clone it and keep it in your working directory
Dockerfile creation.
Now, we are going to create Dockerfile to create the image of the above application.
# Base Image
FROM microsoft/dotnet:nanoserver-core

# Copy entire application code folder dotnet-application to the working directory in Container.
COPY c:\workspacedotnet-application .

# Relax the firewall rule to expose port 5000
EXPOSE 5000

# Run the dotnet application
CMD ["dotnet", "run", "--server.urls", "http://0.0.0.0:5000"]
Just like the PowerShell example, we are going to take the base image and copy the application from the host to the container. Then, we are going to expose the port 5000 to run the dotnet application in this port. Then, we are going to run the application using the dotnet executable.
Building the Docker Image.
Once the Dockerfile is ready, we have to build the Docker container.
$ docker build -t digitalvarys/simple-dotnet-application .
Here, I am giving the image name as “digitalvarys/simple-dotnet-application”.
Running the Docker Container
Now, we have to run the application in background (detached mode),
$ docker run -d -p 5000:5000 digitalvarys/simple-dotnet-application
This will run the container and expose the container port to the host port 5000.
Getting the IP address of the Created Docker Container.
Now, Just inspect the Docker container and see the assigned IP address of the running container,
$ docker inspect [container-id]
This will show you the JSON response. In that, check for “networks” -> “nat” -> “IPAddress”. This will be your container IP address.
Now, Just enter the URL in the browser as https://[container-ip-address]:5000, then you will see the Hello world message in the browser. This means your application is running in a container.
Conclusion
As we already discussed, Docker is unavoidable for the application development or at least in the process of application development. But the Containerization of the Windows application like dotnet application needs extra lookup. Hope this article covers enough concepts and procedures for the Windows Docker Containers running on windows application. In our upcoming article, we will discuss more running a cluster of Microsoft Windows-based applications in Docker Swarm and Kubernetes. Stay tuned and subscribe DigitalVarys for more articles and study materials on DevOps, Agile, DevSecOps and App Development.

Experienced DevSecOps Practitioner, Tech Blogger, Expertise in Designing Solutions in Public and Private Cloud. Opensource Community Contributor.
 Данная публикация является разбором особенностей контейнерной виртуализации Docker под системой Windows.
Она не претендует на роль исчерпывающей и по мере необходимости будет обновляться и дополняться.
За практическим руководством с нуля советую обратиться к этой публикации.
Содержание
- Предварительные настройки
- Выбор между Docker Toolbox on Windows или Docker for Windows
- Windows контейнеры и Linux контейнеры
- Особенности монтирования папок
- Монтирование с хост-машины или volume
- Особенности разметки диска GPT и MBR
- Docker Toobox to Windows
- Docker Swarm
- Проблемы с кодировкой
- Полезные ссылки
- Заключение
Предварительные настройки
Контейнерная виртуализация или виртуализация на уровне операционной системы Docker нативно работает только на дистрибутивах Linux и FreeBSD (экспериментально).
На Windows вам понадобится гостевая Linux система либо специальная минималистичная виртуальная машина с ядром Linux от разработчиков Docker, которая и ставится из коробки.
Само собой разумеется, что вы включили виртуализацию у себя в BIOS/UEFI
Пункт настройки может называться по-разному: VT-x, VT-d, Intel VT, AMD-V, Virtualization Technology.
Еще одним минимальным системным требованием будет разрядность системы x64 и версия не ниже Windows 7 Pro.
Выбор между Docker Toolbox on Windows или Docker for Windows
Появление Docker Toolbox on Windows и Docker Toolbox on Mac было большим событием.
Сборка включается в себя сам docker, утилиту docker-compose, утилиту для работы с виртуальной машиной docker-machine и клиент Kitematic.
Используется виртуальная машина (по умолчанию на VirtualBox) с минималистичным Linux окружением.
Позже для новых операционных систем выпустили Docker for Windows и Docker for Mac, которая на текущий момент является актуальной версией и продолжает развиваться.
Выбор между версиями не сложный:
— Если у вас Windows 10 x64 Pro, Enterprise или Education то включаем службу Hyper-V и ставим Docker for Windows.
Заметьте, что после включения службы Hyper-V пропадет возможность запускать и создавать x64 виртуальные машины на VirtualBox.
— Если же у вас другая версия Windows(7 Pro, 8, 8.1, 10 Home) то ставим VirtualBox и Docker Toolbox on Windows.
Несмотря на то, что Docker Toolbox разработчиками признан устаревшим работа с ним слабо отличается от Docker for Windows.
Вместе с установкой Docker Toolbox будет создана виртуальная машина.
В самом VirtualBox можно будет добавить оперативной памяти и ядер процессора на ваше усмотрение.
Windows контейнеры и Linux контейнеры
Docker for Windows предоставляет возможность переключать контейнеризацию между Linux и Windows версией.
В режиме Windows контейнеризации вы можете запускать только Windows приложения.
Замечу, что на май 2018 года в официальном Docker Hub существует всего 13 образов для Windows.
После включения Windows контейнеризации не забудьте добавить внешнюю сеть.
В конфигурационном файле docker-compose.yml это выглядит так:
networks:
  default:
    external:
      name: nat
Особенности монтирования папок
На примонтированных volume-ах не кидаются события файловой системы, поэтому inotify-tools не работает.
Спасибо пользователю eee
Если вы разрабатываете свой проект и пользуетесь docker-compose вне домашней папки то вам нужно будет проделать некоторые манипуляции.
Используя Docker for Windows для монтирования нового диска у вашего локального пользователя обязательно должен стоять пароль, который будет использоваться для доступа к shared папки.
Особенность заключается в том, что монтируемые внутрь контейнера диск будет монтироваться как от удаленной машины //10.0.75.1/DISK_DRIVE по протоколу SMB.
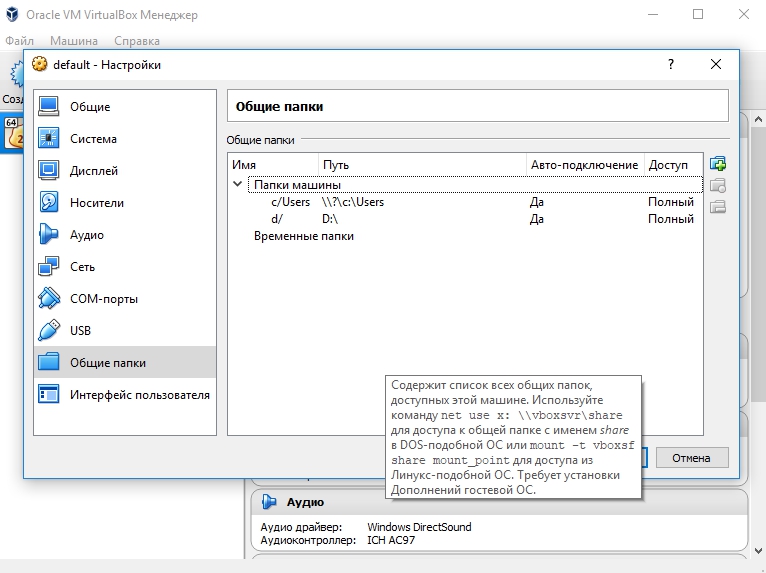
Для Docker Toolbox диски монтируются в самом VirtualBox на вкладке «Общие папки»
Пример для диска «D»:
Права доступа к монтируемым файлам и папкам
Как бы вам не хотелось, но для всех примонтированных из хост-машины файлов и папок будут стоять права 755 (rwx r-x r-x) и поменять их вы не сможете.
Остро встает вопрос при монтировании внутрь файла закрытого SSH ключа, права на который должны быть только у владельца(например 600).
В данном случае либо генерируют ключ при создании образа, либо прокидывают сокет ssh-agent с хост-машины.
Монтирование с хост-машины или volume
Монтирование внутрь контейнера происходит с использованием сети и протокола SMB, следовательно, внутри контейнера диск «D:» будет примонтирован из источника //10.0.75.1/D
Использование volume внутри контейнера отображается как монтирование локального диска /dev/sda1, что влияет на скорость работы.
Простым тестом копирование файла на обычном HDD скорость работы получилась следующая:
Такая разница в скорости скорее всего связана с тем, что в volume данные сбрасываются на диск постепенно, задействуя кеш в ОЗУ.
Особенности разметки диска GPT и MBR
Данный пункт не является истинной так как опровергающей или подтверждающей информации в интернете найти не смог.
Если на хост-машине таблица разделов MBR, то контейнер с MySQL/MariaDB может упасть с ошибкой:
InnoDB: File ./ib_logfile101: ‘aio write’ returned OS error 122. Cannot continue operation
По умолчанию в базе данных включеён параметр innodb_use_native_aio, отвечающий за асинхронный ввод/вывод и его надо будет выключить.
Данная проблема также встречается на некоторых версиях MacOS.
Docker Toobox to Windows
Главное правило: начинать работу с запуска ярлыка на рабочем столе «Docker Quickstart Terminal», это решает 80% проблем.
— Бывает возникают проблемы с отсутствия переменных окружения, решается командой:
eval $(docker-machine env default)
— Если все же возникают проблемы из разряда «docker: error during connect», необходимо выполнить:
docker-machine env --shell cmd default
@FOR /f "tokens=*" %i IN ('docker-machine env --shell cmd default') DO @%i
Название Docker Machine по умолчанию default.
Docker Swarm
Ни в Docker for Mac, ни в Docker for Windows — нет возможности использовать запущенные демоны в качестве клиентов кластера (swarm members).
Спасибо пользователю stychos
Проблемы с кодировкой
Используя Docker Toolbox(на Docker for Windows не удалось воспроизвести) нашлась проблема с тем, что русские комментарии в docker-compose.yml файле приводили к ошибке:
Traceback (most recent call last):
  File "docker-compose", line 6, in <module>
  File "composeclimain.py", line 71, in main
  File "composeclimain.py", line 124, in perform_command
  File "composeclicommand.py", line 41, in project_from_options
  File "composeclicommand.py", line 109, in get_project
  File "composeconfigconfig.py", line 283, in find
  File "composeconfigconfig.py", line 283, in <listcomp>
  File "composeconfigconfig.py", line 183, in from_filename
  File "composeconfigconfig.py", line 1434, in load_yaml
  File "site-packagesyaml__init__.py", line 94, in safe_load
  File "site-packagesyaml__init__.py", line 70, in load
  File "site-packagesyamlloader.py", line 24, in __init__
  File "site-packagesyamlreader.py", line 85, in __init__
  File "site-packagesyamlreader.py", line 124, in determine_encoding
  File "site-packagesyamlreader.py", line 178, in update_raw
  File "c:projectscomposevenvlibencodingscp1251.py", line 23, in decode
UnicodeDecodeError: 'charmap' codec can't decode byte 0x98 in position 1702: character maps to <undefined>
[4176] Failed to execute script docker-compose
Полезные ссылки
Docker Toolbox on Windows
Docker for Windows
Практическое руководство по Docker
Заключение
Особенности работы с Docker контейнеризацией на системе Windows не отличается от работы на Linux за исключение разобранных выше.
В статье я умышленно не упомянул заметно низкую скорость работы контейнеров и overhead используя систему Windows как само собой разумеющееся.
Буду рад услышать ваши отзывы. Не стесняйтесь предлагать улучшения или указывать на мои ошибки.
Только зарегистрированные пользователи могут участвовать в опросе. Войдите, пожалуйста.
Какой версией Docker вы пользуетесь?
33.08%
Docker Toolbox on Windows
88
66.92%
Docker for Windows
178
Проголосовали 266 пользователей.
Воздержались 189 пользователей.
Эта статья даст вам полное представление о Docker Desktop для пользователей Windows и MAC. Мы изучим установку Docker Desktop на компьютерах с Windows и Mac. После установки мы также попытаемся выполнить некоторые операции Docker.
Docker Desktop — это собственное настольное приложение, разработанное Docker для пользователей Windows и MAC. Это самый простой способ запуска, сборки, отладки и тестирования приложений Dockerized.
Docker Desktop предлагает важные и наиболее полезные функции, такие как быстрые циклы редактирования, уведомления об изменениях файлов, встроенная поддержка корпоративной сети и гибкость для работы с собственным выбором прокси и VPN.
Docker Desktop состоит из инструментов для разработчика, приложения Docker, Kubernetes и синхронизации версий. Он позволяет вам создавать сертифицированные образы и шаблоны языков и инструментов.
Скорость, безопасность и выбор — все, что вам нужно для разработки и доставки контейнерных приложений, доступных на вашем рабочем столе, будет представлено вам.
Прежде чем перейти к процессу установки, давайте разберемся с его версиями.
Версии Docker
Docker в основном поставляется в двух версиях, в Community и ENterprise.
Community версия поставляется с бесплатным набором продуктов Docker. ENterprise корпоративная версия представляет собой сертифицированную контейнерную платформу, которая предоставляет коммерческим пользователям дополнительные функции, такие как безопасность образов, управление образами, оркестровка и управление средой выполнения контейнеров, но по разумной цене.
Мы начнем наше обучение с Community Edition. Контейнеры Docker, работающие в конкретной операционной системе, совместно используют ядро ОС. Это означает, что мы не можем использовать ядро Windows (хост) для запуска контейнеров Linux или наоборот. Чтобы проделать это, у нас есть Docker Desktop для Windows и MAC.
Выпуски Docker Desktop
Docker Desktop выпускается в двух вариантах.
- Stable: как видно из названия, стабильный выпуск тщательно протестирован и может быть использован при разработке более надежных приложений. Его версии полностью синхронизированы с версиями Docker Engine.
- Edge: эти версии состоят из всех новых и экспериментальных функций Docker Engine. Есть больше шансов ошибок, сбоев и проблем, которые могут возникнуть. Тем не менее, пользователи получат возможность ознакомиться с предстоящими функциями.
Docker на Windows
Есть два варианта Docker на Windows.
1. Использование Docker Toolbox
Docker Toolbox предоставляет набор легких инструментов.
- Oracle virtual box
- Docker Engine
- Docker Machine
- Docker compose
- Kitematic GUI
Вышеуказанные инструменты устраняют необходимость развертывания отдельной виртуальной машины для запуска Docker. Просто установите исполняемый файл панели инструментов Docker непосредственно в Windows и начните разработку приложений. Требуется 64-битная ОС и Windows 7 или выше с включенным режимом виртуализации.
Но опять же, панель инструментов Docker — это оригинальная поддержка, предоставляемая в Windows для запуска Docker и его устаревшего решения для всех ОС Windows, которые не соответствуют требуемой конфигурации.
2. Использование Docker Desktop
Docker Desktop — это новейшая технология, используемая для Docker в Windows. Он заменяет виртуальную машину Oracle собственной технологией виртуализации, доступной в Windows, то есть Microsoft Hyper-V.
Он по-прежнему будет запускать Docker на Linux-машине, созданной под ним. Но на этот раз вместо виртуальной машины Oracle мы использовали нативный Microsoft Hyper-V.
Установка Docker на Windows
Вы можете скачать репозиторий Docker Desktop из Docker Hub.
истемные требования:
- Windows 10 или Windows Server 2016 Professional или Enterprise Edition
- Поддержка Hyper-V.
Чтобы запустить Hyper-V, оборудование должно соответствовать следующим требованиям:
- 64-битный процессор
- > = 4 ГБ ОЗУ
- Поддержка виртуализации оборудования на уровне BIOS
Следовательно, программная и аппаратная зависимость заключается в запуске Docker Desktop на Windows.
Установка Docker на macOS
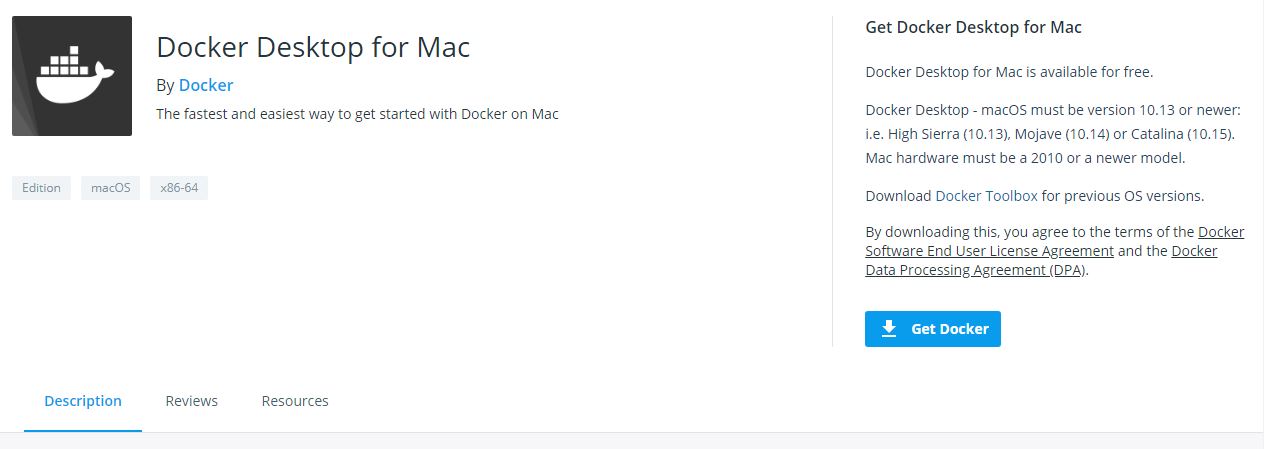
Вы можете скачать репозиторий Docker Desktop из Docker Hub.
Системные требования:
- MAC Hardware 2010 или новее с аппаратной поддержкой управления памятью и неограниченным режимом. Выполните команду kern.hv_support, чтобы проверить, поддерживает ли оборудование MAC инфраструктуру гипервизора.
- MAC OS версии 10.13 или новее.
- > = 4 ГБ ОЗУ
- Virtual-Box до версии 4.3.30
Работа с образами
После установки проверьте версию установленного Docker Engine.
docker --versionDocker работает с доставкой и запуском контейнерных приложений. Вам либо нужно создать свое собственное контейнерное приложение, либо Docker поддерживает контейнерные образы в Docker Hub, и его можно легко загрузить с помощью простой команды docker run.
Здесь мы будем тянуть образ Redis.
docker pull redis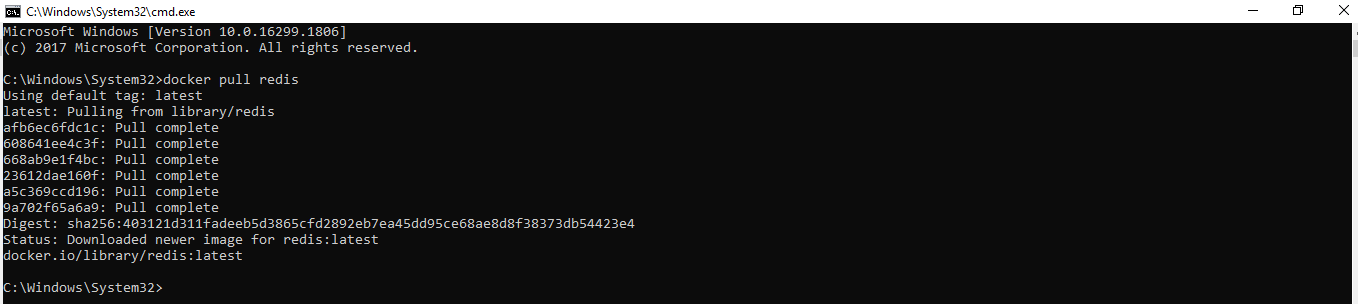
С помощью простой команды run образы можно скачивать и загружать на GitHub или Docker Hub, и любой пользователь во всем мире может получить к нему доступ и начать работать с ним.
Docker Container запускает образ Docker. Следующим шагом является запуск контейнера.
docker run -p 6379 Redis
Будет создан зашифрованный идентификатор контейнера. Вы можете быстро проверить состояние работающего экземпляра в Docker, нажав на Dashboard option.

Обязательно остановите контейнер, прежде чем удалять его из Docker Engine.

Возможности Docker Desktop
Существует множество преимуществ:
- Поддерживает широкий спектр инструментов разработки.
- Обеспечьте быстрый и оптимизированный способ создания и публикации контейнерного образа на любой облачной платформе.
- Простота установки и настройки полной среды Docker
- Повышение производительности благодаря встроенной виртуализации Hyper-V для Windows и HyperKit для MAC.
- Возможность работать в Linux через WSL 2 на компьютерах с Windows.
- Легкий доступ к работающим контейнерам в локальной сети.
- Возможность поделиться любым приложением на облачной платформе, на разных языках и в разных средах.
- Для обеспечения безопасности и актуальности выполняются автоматические обновления.
- Включены последние версии Kubernetes.
- Возможность переключения между Linux и Windows сервером на Windows.
Docker Desktop — это нативное приложение, разработанное на Windows и MAC OS для запуска, сборки и доставки контейнерных приложений или сервисов.
Однако
Docker Desktop предназначен не для производственной среды, а для рабочего стола и среды разработки.
Также рекомендуем прочитать:
- Docker для начинающих — технология контейнеров
- В чем разница между Docker и Kubernetes?
- Введение в Docker Hub и все, что вы должны знать о нем
- Как установить Docker на Ubuntu, Windows, Debian и CentOS?
- Kubernetes — Введение для начинающих
- Docker посмотреть запущенные контейнеры, запустить или остановить контейнеры
If you’re new to containers and Docker and work primarily on Windows, you’re in for a treat. In this article, you’re going to learn how to set up Docker on Windows 10 using Docker Desktop for Windows or simply referred to as Docker Desktop in this article.
Not a reader? Watch this related video tutorial!
Not seeing the video? Make sure your ad blocker is disabled.
Docker Desktop is the Docker Engine and a management client packaged together for easy use in Windows 10. In this article, you will install Docker Desktop, deploy your first container, and share data between your host and your containers.
Prerequisites for Docker on Windows
This is a walkthrough article demonstrating various steps in Docker Desktop for Docker on Windows. To follow along, be sure you have a few specific requirements in place first.
- An Internet connection to download 800MB+ of data
- Windows 10 64-bit running Pro, Enterprise, or Education edition with release 1703 or newer. This is necessary to run Hyper-V on Windows 10.
- A CPU with SLAT (nested paging) compatibility. All AMD/Intel processors since approximately 2008 are SLAT compatible
- At least 4GB of RAM
- BIOS hardware virtualization sometimes labeled as Virtualization Technology or VTx. This must be enabled and show as Enabled in the performance tab of Task Manager as shown below.
Downloading and Installing Docker Desktop
Up first, you need to download and install Docker Desktop to get Docker on Windows going. Docker Desktop comes available in two releases; a stable release and a testing release.
The stable release is released quarterly and ensures a fully-tested application. In this article, you will be using the stable release.
Warning: Upon installation, Docker Desktop will prompt you to install the Hyper-V hypervisor if not already installed. By doing so, the Hyper-V hypervisor prevents any user-mode hypervisors such as VirtualBox, VMWare, etc. from running guest VMs. Hyper-V support for VirtualBox and VMWare is limited but coming.
You also have the option of a download source through manually downloading Docker Desktop directly from Docker.com or via the Windows package manager, Chocolatey. Let’s briefly cover each method.
From Docker.com
To download Docker Desktop directly from docker.com, you can go to the product page, register for an account and download it from there. This is preferred if you intend to use Docker in production by registering an account.
However, if you’re just testing Docker out for the first time, you can also download it directly which is much easier.
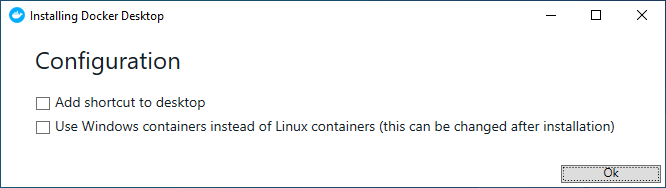
Once the EXE is downloaded, run the executable and click through the prompts accepting all of the defaults.
When asked whether you plan to Use Windows containers instead of Linux containers, as shown below, do not enable the checkbox. You will be using Linux containers in this article.
Once installation is complete, reboot your computer.
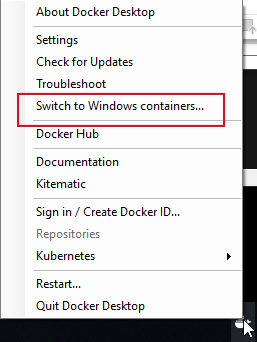
Selecting the option to use Windows containers or Linux containers tells Docker to attach images to a Windows kernel or Linux kernel. You can change this setting at any time after installation by right-clicking the Docker icon in the System Tray and selecting Switch to Windows containers as shown below.
Using Chocolatey
The other option to get Docker Desktop downloaded and installed is with Chocolatey. Chocolatey automates many of the download/install tasks for you. To do so, open up a command-line console (either cmd or PowerShell) as an administrator to download and install the program in one shot by running the command below.
choco install docker-desktopOnce complete, reboot Windows 10.
If you’d like to try out the testing release at some point, you can download and install this by running
choco install docker-desktop --pre.
Validating the Docker Desktop Installation
Once installed, Docker Desktop automatically runs as a service providing Docker on Windows. It’s shown in the system tray when you log in to Windows after you reboot. But how do you actually know it’s working?
To validate Docker Desktop is working correctly, open a command-line console and run the docker command. If the installation went well, you will see a Docker command reference.
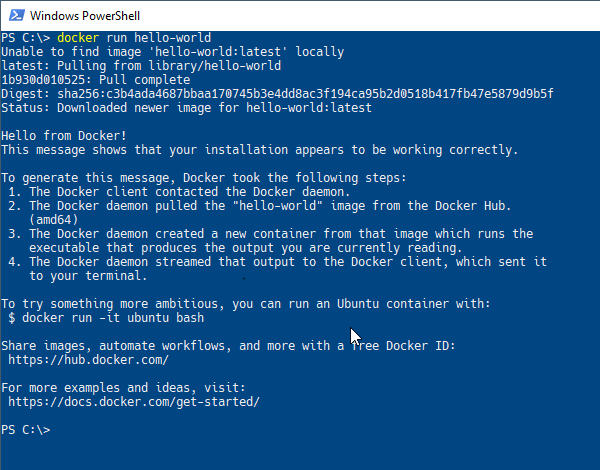
Finally, have Docker download and run an example container image called hello-world by running the command docker run hello-world. If all is well, you will see output like below.
Running Commands in Docker Containers
Docker Desktop is installed and you’ve verified all is well? Now what? To get started with Docker on Windows, one common task to perform in a Docker container is running commands. Through the docker run command, you can send commands through the host (your Windows 10 PC) directly into a running container.
To run commands in a container with docker run, you’ll first specify an image name followed by the command. To get started, tell Docker to run the command hostname inside of a container called alpine as seen below.
> docker run alpine hostname
b74ff46601af
Since you don’t have the alpine Docker image on your computer now, Docker on Windows will download the tiny image from the Docker Hub, bring up a container from that image, and send the command directly into the container and shut it down all in one swoop.
If you’d like to keep the container running, you can also use the -it parameter. This parameter tells Docker to keep the container in “interactive mode” leaving it running in the foreground after executing the command. You’ll see that you are then presented with a terminal prompt ready to go.
> docker run -it alpine sh
/ #
When you’re done in the terminal, type exit to return to Windows 10.
Accessing Files from the Docker Host in Containers
Another common task is accessing host files from containers. To access host files in containers, Docker on Windows allows you to link a folder path from your desktop to share that folder to your container. This process is called binding.
To create a binding, make a folder on a local drive. For this example, I’ll use E: and call it input. It’ll then create a new text document named file.txt in the folder. Feel free to use whatever path and file you wish.
Once you have the folder you’d like to share between the host and container, Docker needs to mount the folder using the --mount parameter. The --mount parameter requires three arguments; a mount type, a source host directory path and a target directory path. The target path will be a symbolic link within the container.
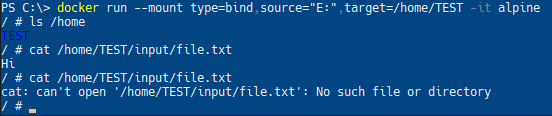
Below you will see an example of mounting the entire E: within the Windows 10 host to show up as the /home/TEST directory inside of the Linux container.
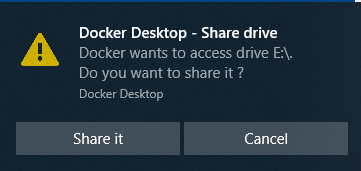
> docker run --mount type=bind,source="E:/",target=/home/TEST -it alpineWhen you attempt to mount a host folder, Docker Desktop will ask for your permission to share this drive with the Docker containers as seen below.
If you created the file.txt file in the Windows 10 folder as described earlier, run cat /home/TEST/input/file.txt. You will see that contents are displayed.
Now, delete the input folder that you just created and run the cat ... command again. Observe that the shell now reports that the file does not exist anymore.
Mapping Network Ports
Another important concept to know is how Docker on Windows handles networking. For a brief introduction, let’s see what it takes to access a web service running in a container from the local host.
First, spin up a demo image that will run an example webpage. Download and run the Docker image called dockersamples/static-site. You’ll use docker container run to do so.
The following command does four actions at once:
- Downloads a Docker image from Docker Hub called static-site in the docker-samples “directory”
- Starts a container instance up from the static-site image
- Immediately detaches the container from the terminal foreground (
—detach) - Makes the running container’s network ports accessible to the Windows 10 host (
—publish-all)
docker container run --detach --publish-all dockersamples/static-site
## Alternate/shorthand syntax that does the same thing:
## docker container run -d -P dockersamples/static-site
## docker run -d -P dockersamples/static-site
Once run, Docker will return the container ID that was brought up as shown below.
Publishing Network Ports
Since using the --publish-all parameter, local host ports are now mapped to the container’s network stack. You can use the docker ps subcommand to list all running containers including what ports are assigned to all of the running containers. In the instance below, one container is running mapping host port 32777 to container port 80 and host port 32776 to container port 443.
Docker on Windows assigns containers random ports when using the --publish-all parameter unless explicitly define them.
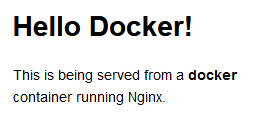
Now open up a web browser and navigate to http://localhost:32777 or the port that Docker assigned to map to port 80 as output by docker ps. If all goes well, you should see the below webpage show up.
Changing the Published Ports
You now have a Docker container running in Docker on Windows serving up a simple web page. Congratulations! But now you need to specify a specific port binding not relying on the random port selection with --publish-all. No problem. Use the -p parameter.
First, stop the running container by specifying a unique string of it’s container ID. You can find this container ID by running docker ps. Once you know the container ID, stop the container and start a new one while designating Docker to assign a specific port to publish.
The syntax for specifying a port is <external port>:<container port>. For each port that you want to publish, use the --publish or -p switch with the external and container port numbers as shown below.
> docker stop f766
> docker run --detach -p 1337:80 dockersamples/static-site
When you are specifying a container ID, you only have to type enough of the ID to be unique. If you are only running a single container and its ID is
f766f4ac8d66bf7, you can identify the container using any number of characters including justf. The requirement is that whatever you type allows it to uniquely identify a single container.
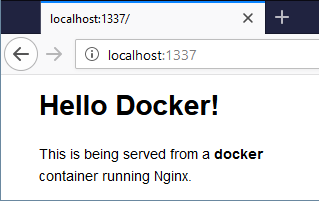
Now go to your web browser and navigate to localhost:1337. Remember, you are not changing the image and it always listens on port 80; you are changing the port translation rule in the Docker configuration that lets you connect to the container.
Stopping all Containers
Using docker stop, you can stop a container but how do you stop multiple containers at once? One way to do so is by providing multiple, space-delimited container IDs. You can see below an example of how to stop three containers with IDs of fd50b0a446e7, 36ee57c3b7da, and 7c45664906ff.
> docker stop fd50 36ee 7c45If you’re managing Docker containers in PowerShell, you can also use a shortcut to stop all containers. Feed a list of container IDs via
docker ps -qto the stop parameter through PowerShell’s command expansiondocker stop (docker ps -q).
Confirm all containers are stopped by seeing no containers listed when you type docker ps.
Cleaning Up
You’ve downloaded a few container images and run some containers that are now stopped. Even though they’re stopped, their allocated storage isn’t gone off of the local host disk. You must delete the containers free up that space and avoid cluttering up your workspace.
To delete a single container, use the container remove rm parameter like below.
> docker container rm <container ID>Or, to delete all stopped containers, use the prune parameter as below.