В одной из своих предыдущих заметок я описал процесс конфигурации сервера приложений GlassFish в качестве службы в ОС Windows Server 2012. В продолжение начатой темы, в этой заметке приведён краткий howto по аналогичной операции с сервером приложений Apache Tomcat (на примере версии 7.0).
Как и в случае GlassFish, в состав бандла Tomcat для Windows входит набор утилит для конфигурации служб в ОС. Если вы скачали Tomcat в виде обычного (кросс-платформенного) zip-архива, то нужных нам утилит в этом архиве не будет, но это не проблема — можно скачать Windows-бандл и «подложить» утилиты оттуда к уже установленному серверу приложений (главное, чтобы версии совпадали).
Инструментарий
Собственно, сам набор состоит из трёх утилит — консольной tomcat7.exe, графической tomcat7w.exe и исполняемого сценария service.bat. Наиболее важная из них — первая утилита, она позволяет создавать, модифицировать и удалять службы ОС. Остальные две утилиты, по сути, просто реализуют упрощённые интерфейсы к tomcat7.exe, позволяя сделать некоторые типовые действия более быстро и удобно. Поэтому сначала поговорим про интерфейс tomcat7.exe.
Утилита tomcat7.exe
Основная утилита Apache Tomcat для конфигурации служб Windows. Синтаксис команды, в общем случае, выглядит примерно так:
C:\tomcat7bintomcat7.exe \CMD\ServiceName [arguments]
Здесь CMD — имя команды (например, «IS»), ServiceName — имя службы (например, «MyWebapp» — мы сами задаём его при создании службы), а arguments — опциональные аргументы. Три наиболее важные команды — IS (Install Service — создать службу), US (Update Service parameters — изменить параметры службы) и DS (Delete Service — удалить службу); полный список команд можно посмотреть в официальном руководстве.
Сценарий service.bat
Типичная команда создания службы с помощью tomcat7.exe обычно выглядит как-то так (пример взят с оф. мануала):
C:> tomcat7 //IS//Tomcat7 --DisplayName="Apache Tomcat 7"
C:> --Install="C:Program FilesTomcatbintomcat7.exe" --Jvm=auto
C:> --StartMode=jvm --StopMode=jvm
C:> --StartClass=org.apache.catalina.startup.Bootstrap --StartParams=start
C:> --StopClass=org.apache.catalina.startup.Bootstrap --StopParams=stop
Видим, что 99% этого конфига будет совпадать для всех возможных конфигураций служб. Собственно, чтобы не вбивать этот конфиг каждый раз вручную, разработчики Tomcat любезно предоставляют в наше распоряжение сценарий service.bat, в котором все эти аргументы уже прописаны. К примеру, для создания приведённого выше сервиса с теми же аргументами достаточно просто вызвать service.bat с аргументом install:
C:> service.bat install
Все остальные аргументы уже прописаны в самом сценарии. Единственный недостаток service.bat — если нам нужно задать какие-либо недефолтные параметры службы (например, лимиты памяти для JVM), сделать это через него не получится — придётся после создания службы вызывать «tomcat7.exe //US//», либо доконфигурировать службу с помощью tomcat7w.exe.
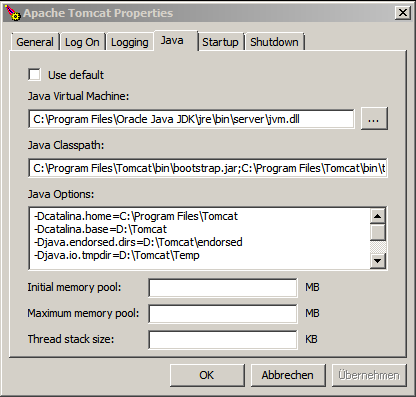
Утилита tomcat7w.exe
Удобная графическая утилита для мониторинга службы и задания параметров её конфигурации. Интерфейс выглядит примерно так:
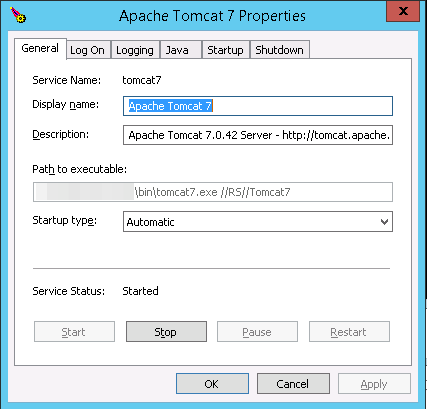
Можно задать все основные параметры конфигурации, если не хочется связываться с консолью и запускать / останавливать службу, если не хочется связываться со стандартной админкой Windows.
Пример конфигурации службы
Для примера рассмотрим практический пример конфигурации службы на реальной системе. Предположим, что нам нужно создать службу Windows для Tomcat 7, установленного в каталог C:\MyWebapp, причём работающее под управлением Tomcat приложение достаточно «тяжёлое» — требует 1 Гб хипа и 256 Мб PermGen.
Для начала, запускаем service.bat:
c:MyWebapptomcatbin>service.bat install MyWebapp
Installing the service 'MyWebapp' ...
Using CATALINA_HOME:    "c:MyWebapptomcat"
Using CATALINA_BASE:    "c:MyWebapptomcat"
Using JAVA_HOME:        "C:Program FilesJavajdk1.7.0_45"
Using JRE_HOME:         "C:Program FilesJavajdk1.7.0_45jre"
Using JVM:              "C:Program FilesJavajdk1.7.0_45jrebinserverjvm.dl
l"
The service 'MyWebapp' has been installed.
Помним о том, что служба создалась с дефолтными параметрами JVM. Для того, чтобы изменить их на нужные нам, вызываем команду //US утилиты tomcat7.exe:
c:MyWebapptomcatbin>tomcat7.exe //US//MyWebapp ++JvmOptions=-Xmx1024m;-XX:MaxPermSize=256m
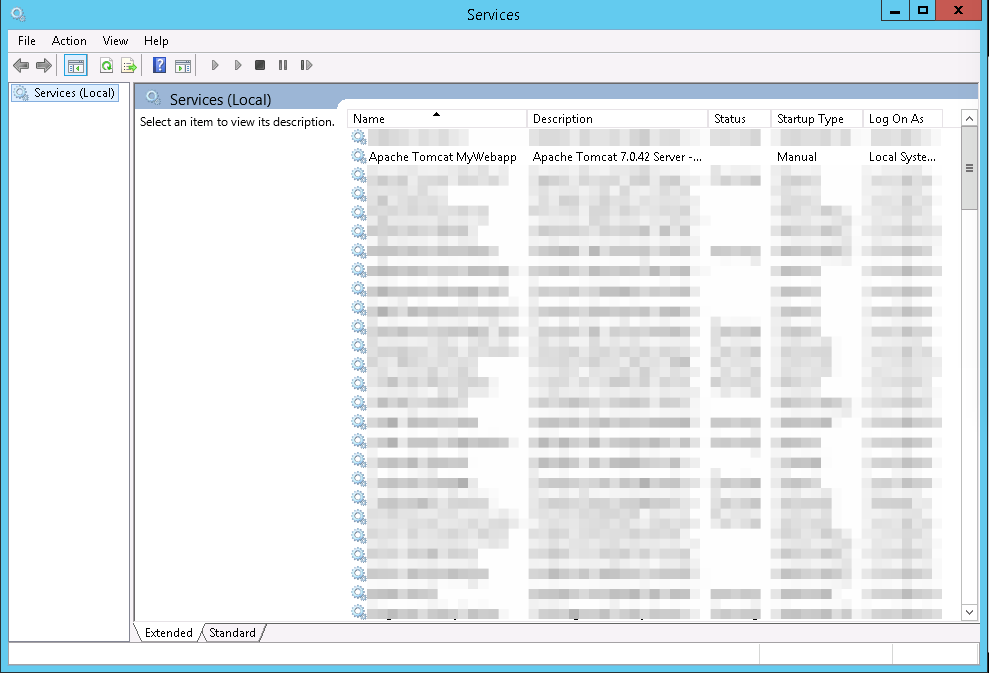
Проверяем, появилаясь ли служба в панели управления:
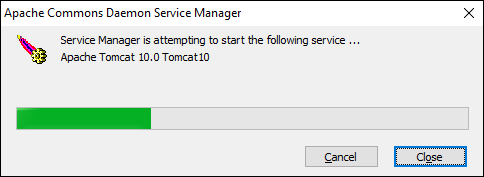
Пытаемся запустить:
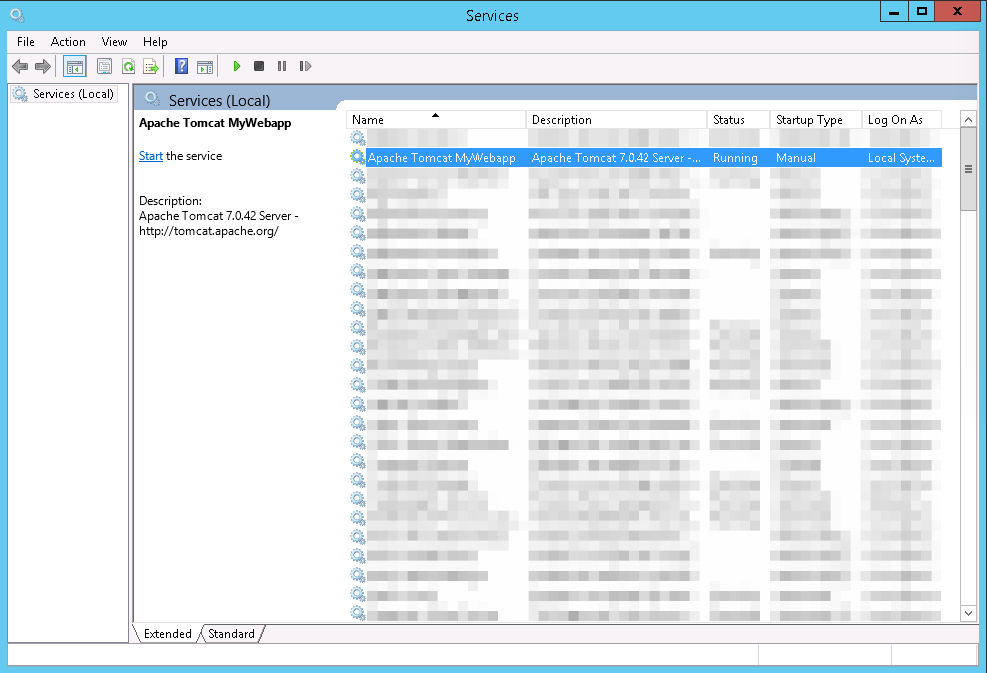
Работает!
Introduction
Apache Tomcat is an open-source web server and servlet container for Java code. Tomcat executes programs written in the Java programming language, and it implements many Java EE specifications, including Jakarta Servlet, Jakarta Server Pages, and others.
In this tutorial, you will learn to install the Apache Tomcat server on Windows.
Prerequisites:
- Java JRE installed and configured
- Administrator privileges
In this section, we will cover two ways of installing the Tomcat web server:
- Via Windows Service Installer.
- From a zip archive.
Follow the steps below to download and install Tomcat.
Step 1: Download Tomcat for Windows
To download the Tomcat installation file, follow the steps below:
1. Browse to the official Apache Tomcat website. Locate the Download section and click the latest Tomcat version available. At the time of writing this article, the latest Tomcat version was version 10.
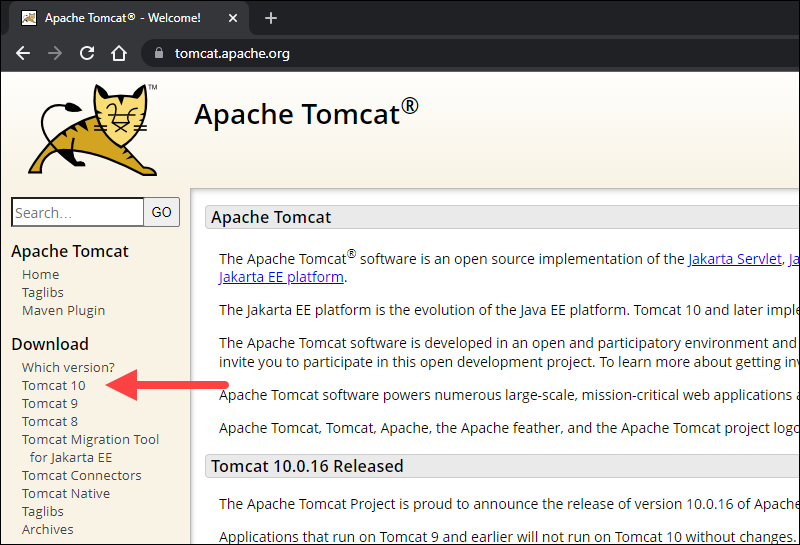
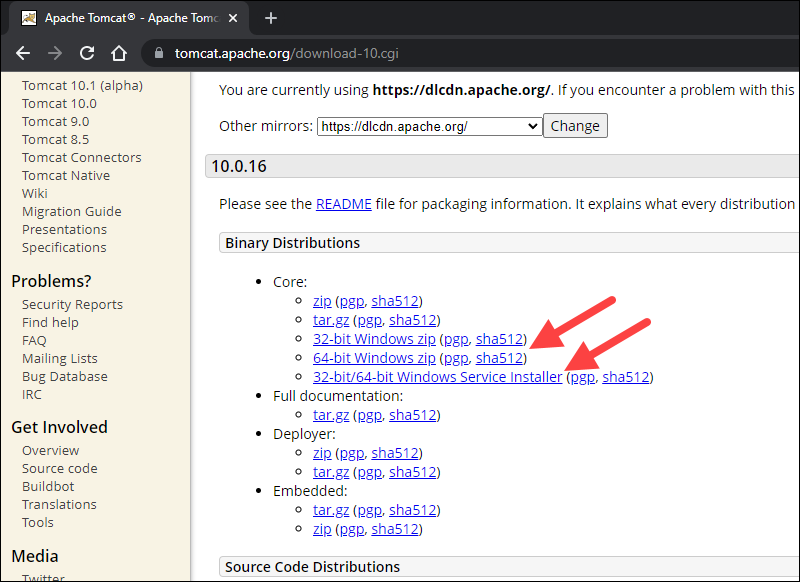
2. On the Download page, scroll down and locate the Binary Distributions area.
In the Core list, depending on the installation type you prefer, click the download link for the Windows Service Installer or the 32bit/64bit Windows zip file.
Step 2: Install Tomcat
Install Tomcat via the Windows Service Installer for an automated and wizard-guided experience. The service installer installs the Tomcat service and runs it automatically when the system boots.
For a portable experience, install Tomcat using the zip file and avoid installing the service. Easily uninstall Tomcat when it is no longer needed by deleting the Tomcat directory, or move it around when necessary.
Note: Take a look at our list of 13 best Java IDEs, which help write, debug, and test Java code.
Method 1: Install Tomcat Using the Windows Service Installer
Follow the steps below to install Tomcat using the Windows Service Installer.
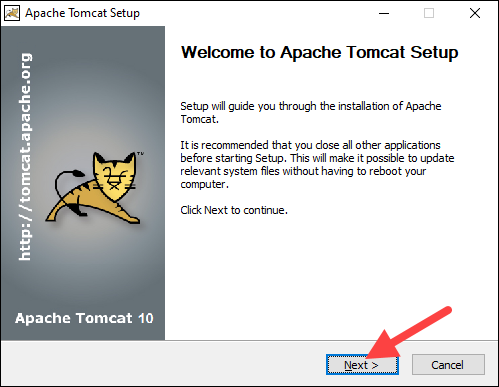
1. Open the downloaded Windows Service Installer file to start the installation process.
2. In the Tomcat Setup welcome screen, click Next to proceed.
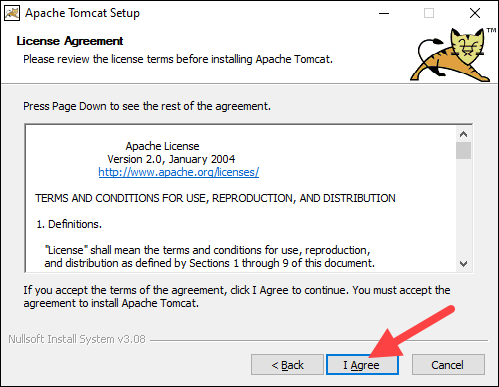
3. Read the License Agreement and if you agree to the terms, click I Agree to proceed to the next step.
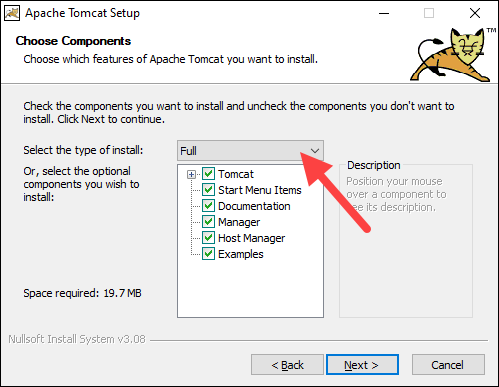
4. In the Tomcat component selection screen, choose Full in the dropdown menu to ensure the wizard installs the Tomcat Host Manager and Servlet and JSP examples web applications. Alternatively, keep the default Normal installation type and click Next.
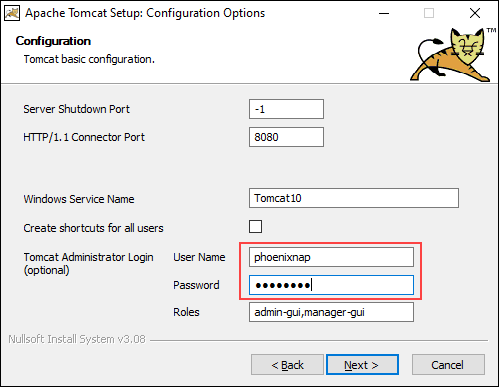
5. The next step configures the Tomcat server. For instance, enter the Administrator login credentials or choose a different connection port. When finished, click Next to proceed to the next step.
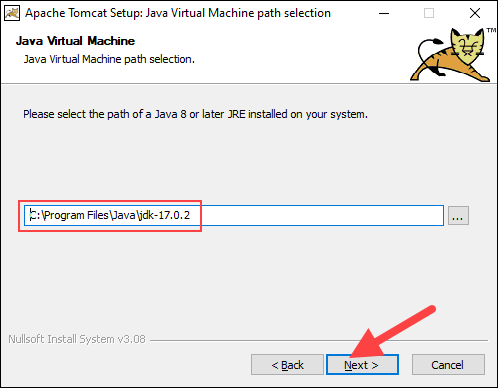
6. The next step requires you to enter the full path to the JRE directory on your system. The wizard auto-completes this if you have previously set up the Java environment variables. Click Next to proceed to the next step.
7. Choose the Tomcat server install location or keep the default one and click Install.

8. Check the Run Apache Tomcat box to start the service after the installation finishes. Optionally, check the Show Readme box to see the Readme file. To complete the installation, click Finish.
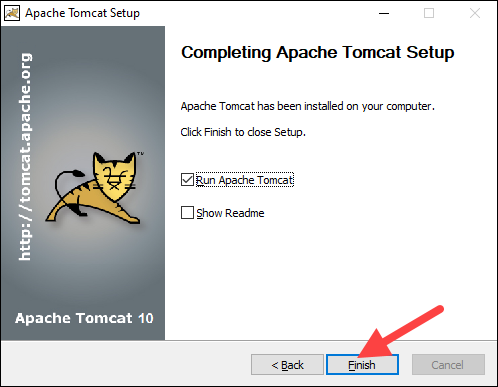
9. A popup window appears that starts the Tomcat service. After the process completes, the window closes automatically. The Apache Tomcat web server is now successfully installed .
Method 2: Install Tomcat Using the zip Archive
Follow the steps below to set up the Tomcat server using the zip archive.
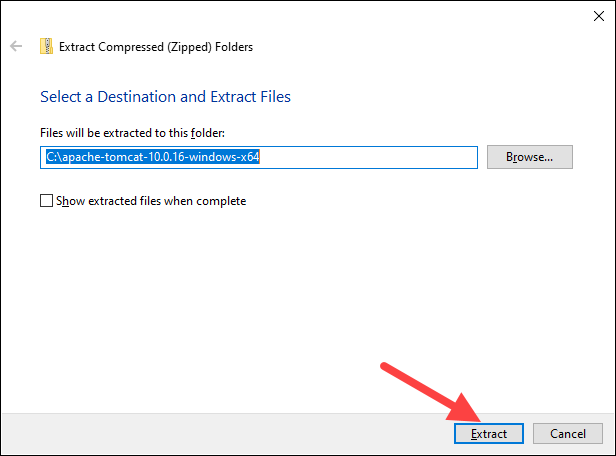
1. After downloading the 32bit/64bit Windows zip file, depending on your Windows version, unzip the downloaded file. Right-click the file and select Extract all…
2. Choose where to extract the archive contents. For easier navigation, we recommend extracting it to the hard drive’s root. Optionally, give the directory a shorter name to facilitate server configuration later. Click Extract to start the process.
3. Navigate to the conf sub-directory within the extracted directory and locate the server.xml file.
Important: Back up the .xml files before making any changes.
4. The default connection port is 8080. To choose a different port, edit the server.xml file with a text editor, such as Notepad++, and locate the following lines:
<Connector port="8080" protocol="HTTP/1.1"
           connectionTimeout="20000"
           redirectPort="8443" />
Change the connector port number to any number between 1024 and 65535.
5. To enable directory browsing, locate the web.xml file in the conf directory and edit the file with a text editor. Directory browsing helps when testing the system, and sometimes it may be the solution for a 403 forbidden error.
Locate the following lines and change the listings value from false to true:
<servlet>
  <servlet-name>default</servlet-name>
  <servlet-class>org.apache.catalina.servlets.DefaultServlet</servlet-class>
  <init-param>
    <param-name>debug</param-name>
    <param-value>0</param-value>
  </init-param>
  <init-param>
    <param-name>listings</param-name>
    <param-value>false</param-value>
  </init-param>
  <load-on-startup>1</load-on-startup>
</servlet>
6. Implement an auto-reload feature by editing the context.xml file. Above all, auto-reload is useful in development to prevent restarting the server manually each time a change is made.
Using a text editor, open the context.xml file. Locate the following line and change the value from false to true in each instance:
<Context reloadable="false" crossContext="false" parallelAnnotationScanning="false">
   ......
   ......
</Context>
7. After making the changes, start the server. Press the Windows key and type cmd. Press Enter to open a Command Prompt window.
8. Move to the bin directory of your Tomcat server and run:
startup
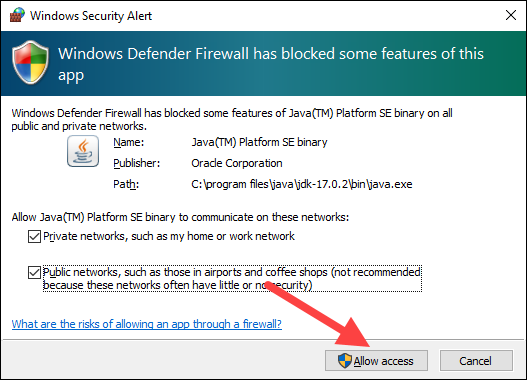
8. Add an exception for Tomcat in the firewall:
9. A new Tomcat console window appears. This console receives error messages and system.out.println() messages issued by the Java servlets.
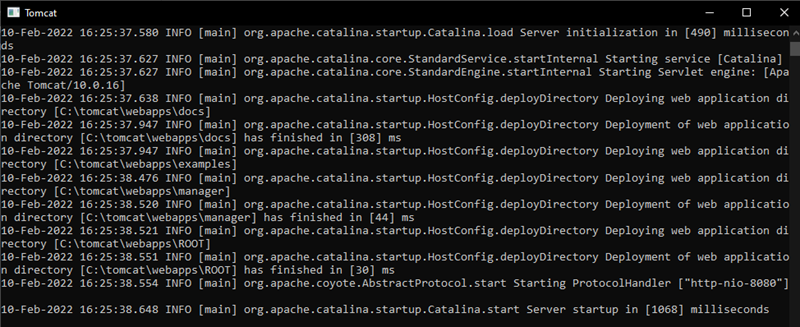
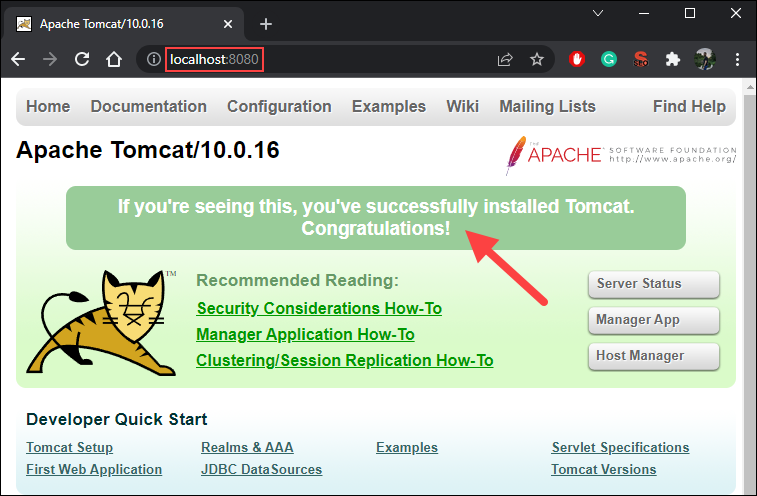
10. Access the server using a browser as an HTTP client. Browse to http://localhost:8080 and access the Tomcat welcome page to ensure the server works.
In addition, use the Developer Quick Start links to see more information about the server and start using and configuring the server.
11. Shut down the Tomcat server by pressing Ctrl+C on the Tomcat console.
Step 3: Check if Apache Tomcat Service Is Running
Installing Tomcat using the Windows Service Installer installs Tomcat as a Windows service that automatically runs on boot. Follow the steps below to ensure that Tomcat is started as a Windows service.
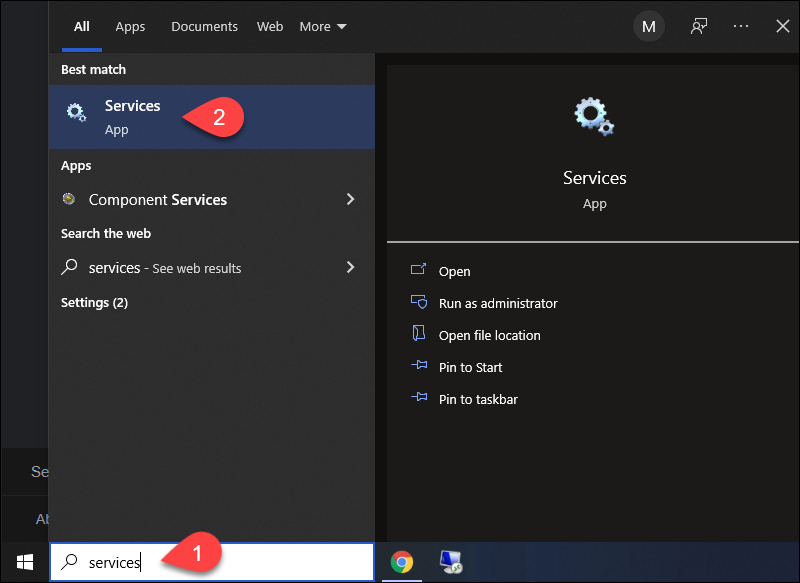
1. Open the Start menu and search for Services.
2. Select the Services result.
3. In the Services window, locate the Apache Tomcat service. The Status column indicates whether the service is running or not. Start or Stop the service using the buttons in the toolbar or by pressing Stop or Restart on the left side of the service list.
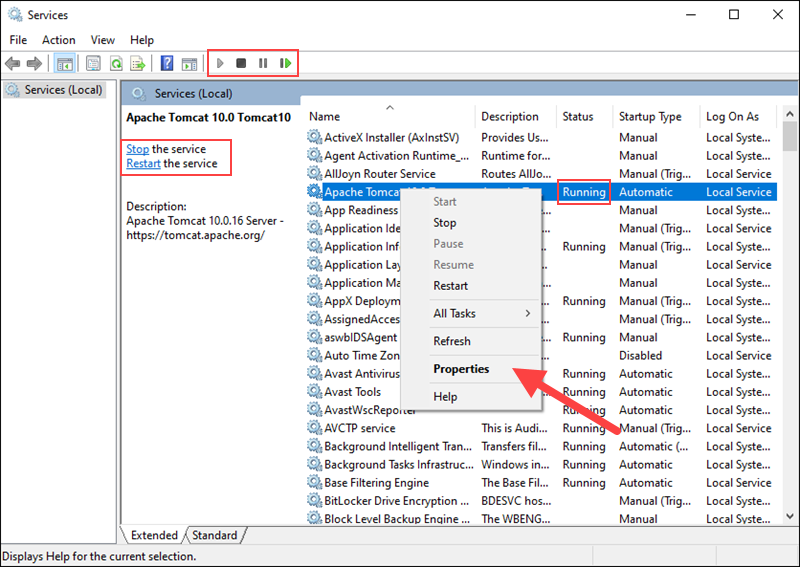
Configure the service startup by right-clicking the Tomcat service and selecting Properties.
4. In the Properties window, under the Startup type dropdown menu, select how to run the Tomcat service:
- Automatic (Delayed Start). Starts the service shortly after boot. A delayed start improves server boot performance and has security benefits.
- Automatic. Automatically starts the service on boot.
- Manual. The service starts only when Windows or another service needs it or if invoked.
- Disabled. Disables the service startup, even if you try to start it.
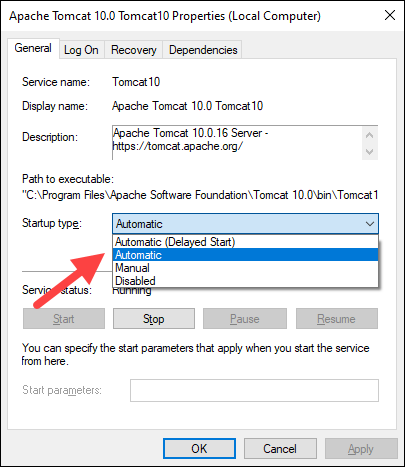
Click OK to confirm the changes.
Note: If you are looking for a different operating system, our Knowledge Base also has a tutorial on how to install Tomcat on Ubuntu.
Conclusion
This guide showed how to install the Apache Tomcat web server on Windows. While Tomcat doesn’t provide all the features of Java EE, many applications require only the features that Tomcat provides. Therefore, heavier tools aren’t always necessary.
Learn more about servers in our tutorial on big data servers, or learn what a database server is.
![]()
Download Article
![]()
Download Article
This wikiHow teaches you how to install the Apache Tomcat web server environment on your computer, using a Windows PC. Tomcat allows you to run Java code with several specifications in an HTTP web server environment. You will first have to install and configure Java Development Kit (JDK) on your computer to install Tomcat.
-

1
Open the Oracle website. Type or paste https://www.oracle.com into the address bar, and press ↵ Enter or ⏎ Return on your keyboard.
- You will have to download, install, and configure JDK (Java Development Kit) in order to install and run Tomcat.
-
2
Click the Downloads button next to «Top Actions.« This button looks like a white, downward arrow in a blue circle on a quick menu bar. You can find it below the main showcase box on the welcome page.
Advertisement
-
3
Scroll down and click Java SE in the Java section. You can find all the Java Standard Edition downloads here, including JDK, JRE, and Server JRE versions.
-
4
Click the DOWNLOAD button below «JDK» or «Oracle JDK.« This is a blue button on the right-hand side. It will open the available download versions.
- The newest release version will show up at the top of the «Java SE Downloads» page.
-
5
Select Accept License Agreement at the top of the download links. All the download versions are listed at the bottom of the page. You can find the license agreement option at the top of this list.
- You’ll have to accept the license agreement here in order to download a file.
-
6
Click the blue download link next to your Windows version. This will download the installer file to your default Downloads folder.
- Some of the latest Oracle JDK versions only have 64-bit (x64) support for Windows.
- If you’re using Windows in 32-bit version (x86), you may have to check several JDK/Oracle JDK versions on the Java SE page, and find one that’s compatible with your system.
-
7
Launch the JDK installer file on your computer. Find the installer file you just downloaded in your Downloads folder, and double-click on it to run the installer.
-
8
Click Next in the installer window. This will take you to the installation preferences on the next step.
- Make sure to note down the folder directory of the installation location here. You can find it near the bottom-left corner.
- The installation location is usually «C:Program FilesJavajdk1.8.*» with the latest version and release number.
-
9
Click Next. This will start your installation, and install Java Development Kit (JDK) on your computer.
- If you’re prompted during the install, click Next to confirm the installation location.
-
10
Click the Close button. At the end of your installation, click this button to close the installer window.
-
11
Open the Java installation location on your computer. Double-click This PC on your desktop or Start menu, and find the Java folder in your Program Files.
- If you install JDK to a different location, make sure to open the same location as your install location from the installation wizard.
-
12
Open the jdk folder in your files. You will usually have two folders named jdk and jre in your Java folder. Double-click the JDK folder to open it.
-
13
Copy the folder directory for the JDK folder. Select the directory from the address bar at the top of the File Explorer window, right-click on it, and select Copy on the menu.
-
14
Right-click This PC on your desktop. The «This PC» icon looks like a desktop computer. This will open your right-click options on a drop-down menu.
-
15
Click Properties on the right-click menu. This will open your system information in a new window.
-
16
Click Advanced system settings on the left-menu. This is a blue link on the left-hand side of the System window. It will open a new dialogue box titled «System Properties.»
-
17
Click the Advanced tab. You can change your performance, user profile, and other advanced settings here.
-
18
Click the Environment Variables button. This button is near the bottom-right corner of the dialogue box. It will open a new window.
-
19
Click the New button under the «System variables» section. This section is the second box at the bottom of the Environment Variables window. You can create a new system variable here.
-
20
Type JAVA_HOME into the «Variable name» field. This will be the name of your new system variable.
-
21
Paste the copied folder directory into the «Variable value» field. Right-click the bottom field, and select paste to paste the copied folder directory.
-
22
Click OK. This will add your new system variable.
-
23
Select Path in the «System variables» section. Scroll down the variable list in the bottom box, and click Path to select it.
-
24
Click the Edit button. This will allow you to edit the contents of the Path variable in a new dialogue box.
-
25
Click New in the new dialogue box. It’s in the upper-right corner of the window. This will add a new entry at the bottom of the list.
-
26
Type %JAVA_HOME%bin into the new entry field. This will be added to the Path variable in your system.
-
27
Click OK. This will save the new contents of the Path variable.
-
28
Click OK in the Environment Variables window. This will save your new environment variables.
-
29
Click OK in the System Properties window. This will save and apply all your new settings.
- You are now ready to download and install the Tomcat files on your computer.


Advertisement
-
1
Open the Tomcat website in your internet browser. Type or paste http://tomcat.apache.org into your browser’s address bar, and press ↵ Enter or ⏎ Return on your keyboard.
-
2
Click Tomcat 9 on the left sidebar. You can find this option under the «Downloads» heading on a navigation menu on the left-hand side.
-
3
Download 32-bit/64-bit Windows Service Installer under «Core.« You can find this option in the «Binary Distributions» section at the bottom.
- If you’re prompted, select a saving location for the installer file.
-
4
Launch the installer file on your computer. Find the installer in your Downloads folder, and double-click on it to start the installation wizard.
-
5
Click Next on the welcome page. This will open the License Agreement on a new page.
-
6
Click the I Agree button. It’s on the bottom-right corner of the installer window. This will let you choose the components you want to install on the next page.
-
7
Select Full as your install type. Click the drop-down next to «Select the type of install,» and select Full here to install all the Tomcat components, including documentation and app shortcuts.
- Optionally, you can click and uncheck the components you don’t want to install on the list here.
-
8
Click Next. This will confirm your selection, and take you to the configuration page.
-
9
Click Next on the configuration page. Unless you’re customizing your ports, click Next here to proceed.
- Optionally, you can set an admin user name and password for your Tomcat service at the bottom here.
- You will have to specify the Java SE location on your computer on the next page.
-
10
Click the three-dot button next to the text field. When you’re prompted to specify the location of your JRE (Java Runtime Environment), click this button to select your file location.
-
11
Select the jre folder in your Java folder. You can usually find your Java folder in Program Files under This PC.
-
12
Click OK. This will confirm your selection, and copy the folder directory to the text field in the installer.
-
13
Click Next in the installer. You can select the install location on the final page in the next step.
-
14
Click the Install button. This will start your installation. You can track the install on a green progress bar here.
- Optionally, you can click Browse before beginning installation, and set a custom location for your Tomcat install.
-
15
Click Finish on the last page. When your Tomcat setup is finished, click this button to close the installer.
-
16
Press the ⊞ Win+R Windows and «R» keys on your keyboard. Make sure to press both buttons at the same time. This will open the «Run» window.
-
17
Type services.msc in the Run window. You can check all your running and paused system services here.
-
18
Right-click Apache Tomcat on the list. This will open your right-click options on a drop-down.
-
19
Select Properties on the right-click menu. This will open a new dialogue box.
-
20
Click the Start button under «Service status.« This will take a few seconds, and start the Tomcat service on your computer.


Advertisement
Ask a Question
200 characters left
Include your email address to get a message when this question is answered.
Submit
Advertisement
Thanks for submitting a tip for review!
About This Article
Article SummaryX
1. Install and configure Java JDK.
2. Download the Tomcat 9 installer from https://tomcat.apache.org/download-90.cgi.
3. Launch the installer.
4. Click Next, and then I Agree.
5. Select the Full install, and click Next twice.
6. Click the three-dot button to specify JRE location.
7. Select your jre folder, and click OK.
8. Click Next, and then Install.
9. Click Finish.
Did this summary help you?
Thanks to all authors for creating a page that has been read 30,711 times.
Is this article up to date?
![]()
Download Article
![]()
Download Article
This wikiHow teaches you how to install the Apache Tomcat web server environment on your computer, using a Windows PC. Tomcat allows you to run Java code with several specifications in an HTTP web server environment. You will first have to install and configure Java Development Kit (JDK) on your computer to install Tomcat.
-
1
Open the Oracle website. Type or paste https://www.oracle.com into the address bar, and press ↵ Enter or ⏎ Return on your keyboard.
- You will have to download, install, and configure JDK (Java Development Kit) in order to install and run Tomcat.
-
2
Click the Downloads button next to «Top Actions.« This button looks like a white, downward arrow in a blue circle on a quick menu bar. You can find it below the main showcase box on the welcome page.
Advertisement
-
3
Scroll down and click Java SE in the Java section. You can find all the Java Standard Edition downloads here, including JDK, JRE, and Server JRE versions.
-
4
Click the DOWNLOAD button below «JDK» or «Oracle JDK.« This is a blue button on the right-hand side. It will open the available download versions.
- The newest release version will show up at the top of the «Java SE Downloads» page.
-
5
Select Accept License Agreement at the top of the download links. All the download versions are listed at the bottom of the page. You can find the license agreement option at the top of this list.
- You’ll have to accept the license agreement here in order to download a file.
-
6
Click the blue download link next to your Windows version. This will download the installer file to your default Downloads folder.
- Some of the latest Oracle JDK versions only have 64-bit (x64) support for Windows.
- If you’re using Windows in 32-bit version (x86), you may have to check several JDK/Oracle JDK versions on the Java SE page, and find one that’s compatible with your system.
-
7
Launch the JDK installer file on your computer. Find the installer file you just downloaded in your Downloads folder, and double-click on it to run the installer.
-
8
Click Next in the installer window. This will take you to the installation preferences on the next step.
- Make sure to note down the folder directory of the installation location here. You can find it near the bottom-left corner.
- The installation location is usually «C:Program FilesJavajdk1.8.*» with the latest version and release number.
-
9
Click Next. This will start your installation, and install Java Development Kit (JDK) on your computer.
- If you’re prompted during the install, click Next to confirm the installation location.
-
10
Click the Close button. At the end of your installation, click this button to close the installer window.
-
11
Open the Java installation location on your computer. Double-click This PC on your desktop or Start menu, and find the Java folder in your Program Files.
- If you install JDK to a different location, make sure to open the same location as your install location from the installation wizard.
-
12
Open the jdk folder in your files. You will usually have two folders named jdk and jre in your Java folder. Double-click the JDK folder to open it.
-
13
Copy the folder directory for the JDK folder. Select the directory from the address bar at the top of the File Explorer window, right-click on it, and select Copy on the menu.
-
14
Right-click This PC on your desktop. The «This PC» icon looks like a desktop computer. This will open your right-click options on a drop-down menu.
-
15
Click Properties on the right-click menu. This will open your system information in a new window.
-
16
Click Advanced system settings on the left-menu. This is a blue link on the left-hand side of the System window. It will open a new dialogue box titled «System Properties.»
-
17
Click the Advanced tab. You can change your performance, user profile, and other advanced settings here.
-
18
Click the Environment Variables button. This button is near the bottom-right corner of the dialogue box. It will open a new window.
-
19
Click the New button under the «System variables» section. This section is the second box at the bottom of the Environment Variables window. You can create a new system variable here.
-
20
Type JAVA_HOME into the «Variable name» field. This will be the name of your new system variable.
-
21
Paste the copied folder directory into the «Variable value» field. Right-click the bottom field, and select paste to paste the copied folder directory.
-
22
Click OK. This will add your new system variable.
-
23
Select Path in the «System variables» section. Scroll down the variable list in the bottom box, and click Path to select it.
-
24
Click the Edit button. This will allow you to edit the contents of the Path variable in a new dialogue box.
-
25
Click New in the new dialogue box. It’s in the upper-right corner of the window. This will add a new entry at the bottom of the list.
-
26
Type %JAVA_HOME%bin into the new entry field. This will be added to the Path variable in your system.
-
27
Click OK. This will save the new contents of the Path variable.
-
28
Click OK in the Environment Variables window. This will save your new environment variables.
-
29
Click OK in the System Properties window. This will save and apply all your new settings.
- You are now ready to download and install the Tomcat files on your computer.
Advertisement
-
1
Open the Tomcat website in your internet browser. Type or paste http://tomcat.apache.org into your browser’s address bar, and press ↵ Enter or ⏎ Return on your keyboard.
-
2
Click Tomcat 9 on the left sidebar. You can find this option under the «Downloads» heading on a navigation menu on the left-hand side.
-
3
Download 32-bit/64-bit Windows Service Installer under «Core.« You can find this option in the «Binary Distributions» section at the bottom.
- If you’re prompted, select a saving location for the installer file.
-
4
Launch the installer file on your computer. Find the installer in your Downloads folder, and double-click on it to start the installation wizard.
-
5
Click Next on the welcome page. This will open the License Agreement on a new page.
-
6
Click the I Agree button. It’s on the bottom-right corner of the installer window. This will let you choose the components you want to install on the next page.
-
7
Select Full as your install type. Click the drop-down next to «Select the type of install,» and select Full here to install all the Tomcat components, including documentation and app shortcuts.
- Optionally, you can click and uncheck the components you don’t want to install on the list here.
-
8
Click Next. This will confirm your selection, and take you to the configuration page.
-
9
Click Next on the configuration page. Unless you’re customizing your ports, click Next here to proceed.
- Optionally, you can set an admin user name and password for your Tomcat service at the bottom here.
- You will have to specify the Java SE location on your computer on the next page.
-
10
Click the three-dot button next to the text field. When you’re prompted to specify the location of your JRE (Java Runtime Environment), click this button to select your file location.
-
11
Select the jre folder in your Java folder. You can usually find your Java folder in Program Files under This PC.
-
12
Click OK. This will confirm your selection, and copy the folder directory to the text field in the installer.
-
13
Click Next in the installer. You can select the install location on the final page in the next step.
-
14
Click the Install button. This will start your installation. You can track the install on a green progress bar here.
- Optionally, you can click Browse before beginning installation, and set a custom location for your Tomcat install.
-
15
Click Finish on the last page. When your Tomcat setup is finished, click this button to close the installer.
-
16
Press the ⊞ Win+R Windows and «R» keys on your keyboard. Make sure to press both buttons at the same time. This will open the «Run» window.
-
17
Type services.msc in the Run window. You can check all your running and paused system services here.
-
18
Right-click Apache Tomcat on the list. This will open your right-click options on a drop-down.
-
19
Select Properties on the right-click menu. This will open a new dialogue box.
-
20
Click the Start button under «Service status.« This will take a few seconds, and start the Tomcat service on your computer.
Advertisement
Ask a Question
200 characters left
Include your email address to get a message when this question is answered.
Submit
Advertisement
Thanks for submitting a tip for review!
About This Article
Article SummaryX
1. Install and configure Java JDK.
2. Download the Tomcat 9 installer from https://tomcat.apache.org/download-90.cgi.
3. Launch the installer.
4. Click Next, and then I Agree.
5. Select the Full install, and click Next twice.
6. Click the three-dot button to specify JRE location.
7. Select your jre folder, and click OK.
8. Click Next, and then Install.
9. Click Finish.
Did this summary help you?
Thanks to all authors for creating a page that has been read 30,711 times.
Is this article up to date?

Creating the Windows service is only possible on the command line. The basic syntax is:
"C:Program FilesTomcatbintomcat8.exe" //IS//Tomcat8 --DisplayName="Apache Tomcat Application Server"
This line would install the service. The argument //IS// installs the service without starting it. Probably the service wouldn’t start anyway: A lot of configuration data needs to be stored into the registry first. Actually Tomcat is blind like a mole.
The basic installation from above can be extended with configuration data. The installation can be run multiple times in an update mode by using the argument //US//. Using multiple runs makes our life easier and we can break down the configuration into logical blocks without losing the global picture.
Let’s use this line as the first action to create the service on your server:
"C:Program FilesTomcatbintomcat8.exe" //IS//Tomcat8 --DisplayName="Apache Tomcat Application Server" --Description="Apache Tomcat Application Server" --Startup="auto"
Now we append the path to the jvm.dll and the class path:
"C:Program FilesTomcatbintomcat8.exe" //US//Tomcat8 --Classpath="C:Program FilesTomcatbinbootstrap.jar;C:Program FilesTomcatbintomcat-juli.jar"
"C:Program FilesTomcatbintomcat8.exe" //US//Tomcat8 --Jvm="C:Program FilesOracle Java Serverjrebinserverjvm.dll"
Important: The path to the jvm.dll depends, which Java kit you installed previously on your server.
C:Program FilesOracle Java Serverjrebinserverjvm.dll
C:Program FilesOracle Java JDKjrebinserverjvm.dll
Now let’s add the remaining Java Options:
"C:Program FilesTomcatbintomcat8.exe" //US//Tomcat8 ++JvmOptions="-Dcatalina.home=C:Program FilesTomcat;-Dcatalina.base=D:Tomcat;-Djava.endorsed.dirs=D:Tomcatendorsed;-Djava.io.tmpdir=D:TomcatTemp;-Djava.util.logging.manager=org.apache.juli.ClassLoaderLogManager;-Djava.util.logging.config.file=D:Tomcatconflogging.properties"
Let’s continue by adding the logging properties:
"C:Program FilesTomcatbintomcat8.exe" //US//Tomcat8 --LogLevel="Info" --LogPrefix="tomcat_service_" --LogPath="D:TomcatLogs" --StdOutput="auto" --StdError="auto" --PidFile="tomcat8.pid"
And finally we add the Startup and Shutdown properties:
"C:Program FilesTomcatbintomcat8.exe" //US//Tomcat8 --StartClass="org.apache.catalina.startup.Bootstrap" --StartMode="jvm" ++StartParams="start"
"C:Program FilesTomcatbintomcat8.exe" //US//Tomcat8 --StopClass="org.apache.catalina.startup.Bootstrap" --StopMode="jvm" ++StopParams="stop" --StopTimeout="0"
Please check the configuration by starting the Tomcat applet:
«C:Program FilesTomcatbintomcat8w.exe» //ES//Tomcat8
Note: Anything we created is stored the windows registry:
HKMLSOFTWAREWow6432NodeApache Software FoundationProcrun 2.0Tomcat8
-
- — Reference: Apache Tomcat — Windows Service
Tomcat runtime configuration
One very important thing is left: Tomcat needs to know about his memory configuration and how he should behave in general.
Disclaimer: The following values are working well on the authors servers. You can take these settings as a starting point. These settings are NOT an official recommendation of the Lucee Association Switzerland.
So, stop this shouting and let’s get back to business. For this guide, we will use the following values:
-Xms4096m -Xmx4096m -Xss512k -XX:NewSize=1024M -XX:MaxNewSize=1024M -XX:GCTimeRatio=5 -XX:ThreadPriorityPolicy=42 -XX:ParallelGCThreads=4 -XX:MaxGCPauseMillis=50 -XX:+DisableExplicitGC -XX:MaxHeapFreeRatio=70 -XX:MinHeapFreeRatio=40 -XX:+OptimizeStringConcat -XX:+UseTLAB -XX:+ScavengeBeforeFullGC -XX:CompileThreshold=1500 -XX:+TieredCompilation -XX:+UseBiasedLocking -Xverify:none -XX:+UseThreadPriorities -XX:+UseFastAccessorMethods -XX:+UseCompressedOops -XX:ReservedCodeCacheSize=256m
Let’s apply these settings on the server:
"C:Program FilesTomcatbintomcat8.exe" //US//Tomcat8 ++JvmOptions="-Xms4096m;-Xmx4096m;-Xss512k;-XX:NewSize=1024M;-XX:MaxNewSize=1024M;-XX:GCTimeRatio=5;-XX:ThreadPriorityPolicy=42;-XX:ParallelGCThreads=4;-XX:MaxGCPauseMillis=50;-XX:+DisableExplicitGC;-XX:MaxHeapFreeRatio=70;-XX:MinHeapFreeRatio=40;-XX:+OptimizeStringConcat;-XX:+UseTLAB;-XX:+ScavengeBeforeFullGC;-XX:CompileThreshold=1500;-XX:+TieredCompilation;-XX:+UseBiasedLocking;-Xverify:none;-XX:+UseThreadPriorities;-XX:+UseFastAccessorMethods;-XX:+UseCompressedOops;-XX:ReservedCodeCacheSize=256m"
For you convenience, these command line snippets are available here as a script.
set jvm.serverDLL="C:Program FilesJavajre8u92binserverjvm.dll"
set catalina.base=D:Tomcat
set catalina.home=C:Program FilesTomcat
set catalina.binary="%catalina.home%bintomcat8.exe"
set catalina.instanceName=Tomcat8
set catalina.displayName="Apache Tomcat Application Server"
%catalina.binary% //IS//%catalina.instanceName% --DisplayName=%catalina.displayName% --Description=%catalina.displayName% --Startup="auto"
%catalina.binary% //US//%catalina.instanceName% --Classpath="%catalina.home%binbootstrap.jar;%catalina.home%bintomcat-juli.jar"
%catalina.binary% //US//%catalina.instanceName% --Jvm=%jvm.serverDLL%
%catalina.binary% //US//%catalina.instanceName% ++JvmOptions="-Dcatalina.home=%catalina.home%;-Dcatalina.base=%catalina.base%;-Djava.endorsed.dirs=%catalina.base%endorsed;-Djava.io.tmpdir=%catalina.base%Temp;-Djava.util.logging.manager=org.apache.juli.ClassLoaderLogManager;-Djava.util.logging.config.file=%catalina.base%conflogging.properties"
%catalina.binary% //US//%catalina.instanceName% --LogLevel="Info" --LogPrefix="tomcat_service_" --LogPath="%catalina.base%Logs" --StdOutput="auto" --StdError="auto" --PidFile="tomcat8.pid"
%catalina.binary% //US//%catalina.instanceName% --StartClass="org.apache.catalina.startup.Bootstrap" --StartMode="jvm" ++StartParams="start"
%catalina.binary% //US//%catalina.instanceName% --StopClass="org.apache.catalina.startup.Bootstrap" --StopMode="jvm" ++StopParams="stop" --StopTimeout="0"
%catalina.binary% //US//%catalina.instanceName% ++JvmOptions="-Xms4096m;-Xmx4096m;-Xss512k;-XX:NewSize=1024M;-XX:MaxNewSize=1024M;-XX:GCTimeRatio=5;-XX:ThreadPriorityPolicy=42;-XX:ParallelGCThreads=4;-XX:MaxGCPauseMillis=50;-XX:+DisableExplicitGC;-XX:MaxHeapFreeRatio=70;-XX:MinHeapFreeRatio=40;-XX:+OptimizeStringConcat;-XX:+UseTLAB;-XX:+ScavengeBeforeFullGC;-XX:CompileThreshold=1500;-XX:+TieredCompilation;-XX:+UseBiasedLocking;-Xverify:none;-XX:+UseThreadPriorities;-XX:+UseFastAccessorMethods;-XX:+UseCompressedOops;-XX:ReservedCodeCacheSize=256m"
Now we are ready to start the Tomcat service for the very first time.
I am using Tomcat6 on Windows 8. I am able to start Tomcat via startup.bat without error. I’ve copied Tomcat6.exe, Tomcat6w.exe and service.bat under tomcat/bin directory and set the .exe files to run as administrator.
I open command line with administrator rights and execute «service.bat install» which ran without error. In Windows Services, I can see Apache Tomcat 6 which I want to run automatically.
But both running from Windows Services using «Start» button and on start up of Windows I got the same error.
«Windows could not start the Apache Tomcat 6 on Local Computer. For more information, review the System Event Log. If this is a non-Microsoft service, contact the service vendor, and refer to service-specific error code 0.
When I check Windows Event Log, I see the following bizarre error.
«Apache Tomcat 6 service terminated with the following service-specific error:
The operation completed successfully.»
I tried copying msvcr71.dll under tomcat/bin directory, but nothing changed. What else can I do?
Update:
I am using a different port than 8080. And I saw the error below in the log file /logs/jakarta_service.log:
%1 is not a valid Win32 application.
Чтобы проверить, что Tomcat запущен как служба Widows:
- На рабочем столе нажмите кнопку «Пуск» Windows, чтобы открыть меню «Пуск» Windows.
- В поле «Поиск программ и файлов» найдите программу «Выполнить». …
- Откройте программу «Выполнить». …
- В поле Открыть введите: услуги. …
- Выберите ОК. …
- Если служба не запущена, выберите Пуск.
Как установить Tomcat 8 в качестве службы?
Установка и настройка как служба Windows
- Перейдите в папку bin в папке установки Tomcat (в примере это C: tomcatapache-tomcat-8.5.11bin)
- Установите Tomcat как службу с именем tomcat8, вызвав service.bat install
Где имя службы Tomcat в Windows?
Служба Tomcat для Windows
- Откройте командную строку с правами администратора и перейдите в каталог> (TOMCAT_HOMEbin).
- Запустить командную службу. …
- Перейдите в диспетчер задач, щелкните службы, проверьте службу с отображаемым именем «Apache Tomcat 9».
Как запустить диспетчер служб Tomcat?
Вручную запустить службу Tomcat из командной строки. / TS / — Терминальная служба. Запускает службу как консольное приложение. Tomcat6 запускает эту команду по умолчанию, если не указан другой параметр.
Как установить Tomcat 8.5 в качестве службы в Windows?
Как установить Tomcat 8.5 в Windows
- Перейдите на https://tomcat.apache.org/tomcat-8.5-doc/index.html и загрузите 8.5-битную zip-версию для Windows 64.
- Разархивируйте папку на диск c.
- Откройте командную строку от имени администратора и перейдите в папку bin tomcat.
- Выполните команду:…
- Перейдите в службы Windows и запустите Tomcat.
Как узнать, работает ли Tomcat в Windows?
С помощью браузера проверьте, работает ли Tomcat по URL-адресу http: // localhost: 8080, где 8080 — порт Tomcat, указанный в conf / server. xml. Если Tomcat работает правильно и вы указали правильный порт, браузер отображает домашнюю страницу Tomcat.
Как мне загрузить и установить Tomcat 8?
Откройте домашнюю страницу Apache Tomcat по адресу http://tomcat.apache.org/index.html.
- В меню загрузки слева выберите последнюю доступную версию Tomcat.
- Найдите область «Бинарные дистрибутивы» и в списке «Основные» щелкните ZIP-файл, соответствующий требуемой версии Windows.
- Сохраните ZIP-файл во временном каталоге.
Где установлен Tomcat?
Для Tomcat есть три важных каталога:
- / etc / tomcat {X} для настройки.
- / usr / share / tomcat {X} для среды выполнения, называемой CATALINA_HOME.
- / usr / share / tomcat {X} -root для веб-приложений.
Tomcat установлен в Windows?
Tomcat 9 — это последняя версия службы Tomcat Apache и легко устанавливается в Windows служить удобным способом запуска Java. Tomcat 9 может предложить множество функций и инструментов, которые могут сделать развертывание веб-страниц более управляемым, включая использование JavaServer Pages.
Как узнать, работает ли Tomcat в Linux?
Простой способ узнать, запущен ли Tomcat, — это проверить, работает ли есть служба, прослушивающая TCP-порт 8080 с помощью команды netstat. Это, конечно, будет работать только в том случае, если вы запускаете Tomcat на указанном вами порту (например, его порт по умолчанию 8080) и не запускаете какие-либо другие службы на этом порту.
Как узнать, работает ли Apache в Windows?
4 ответы
- Вызовите диспетчер задач, нажав Ctrl + Shift + Esc.
- Перейдите на вкладку «Процессы» и выполните сортировку по имени изображения. В Server 2012 перейдите на вкладку «Подробности» и выполните сортировку по имени.
- Найдите apache.exe (или httpd.exe) и проверьте столбец «Имя пользователя».