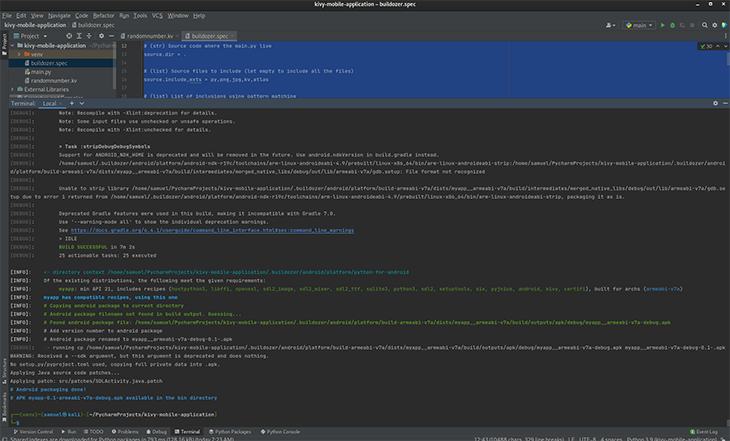
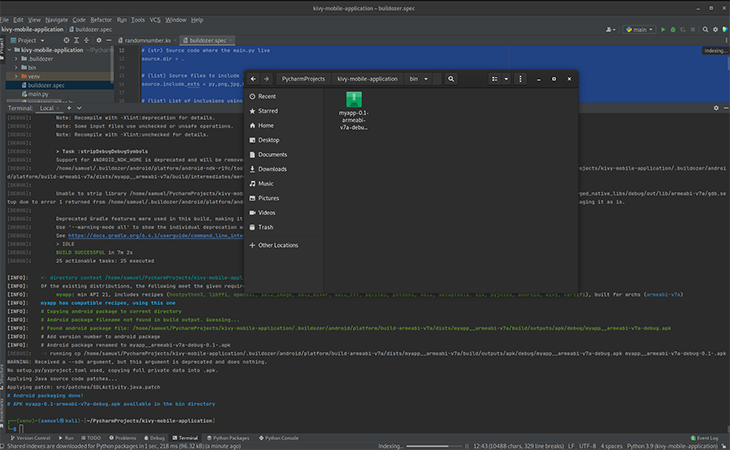
You can create a package for android using the python-for-android project. This page explains how
to download and use it directly on your own machine (see
Packaging your application into APK or AAB) or
use the Buildozer tool to automate the entire process. You can also see
Packaging your application for the Kivy Launcher to run kivy
programs without compiling them.
For new users, we recommend using Buildozer as the easiest way
to make a full APK or AAB. You can also run your Kivy app without a
compilation step with the Kivy Launcher app.
Kivy applications can be released on an Android market such as the Play store, with a few extra
steps to create a fully signed AAB (Android App Bundle).
The Kivy project includes tools for accessing Android APIs to
accomplish vibration, sensor access, texting etc. These, along with
information on debugging on the device, are documented at the
main Android page.
Buildozer
Buildozer is a tool that automates the entire build process. It
downloads and sets up all the prerequisites for python-for-android,
including the android SDK and NDK, then builds an apk that can be
automatically pushed to the device.
Buildozer currently works only in Linux and macOS (You can still use
it on Windows via WSL), and can significantly simplify the apk build.
You can get buildozer at https://github.com/kivy/buildozer:
git clone https://github.com/kivy/buildozer.git
cd buildozer
sudo python setup.py install
This will install buildozer in your system. Afterwards, navigate to
your project directory and run:
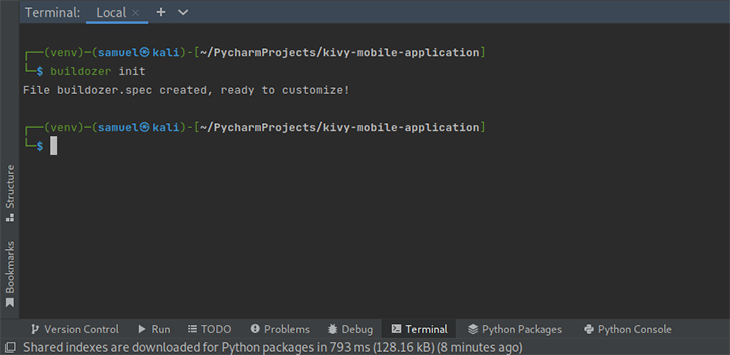
This creates a buildozer.spec file controlling your build
configuration. You should edit it appropriately with your app name
etc. You can set variables to control most or all of the parameters
passed to python-for-android.
Install buildozer’s dependencies.
Finally, plug in your android device and run:
buildozer android debug deploy run
to build, push and automatically run the apk on your device.
Buildozer has many available options and tools to help you, the steps
above are just the simplest way to build and run your
APK. The full documentation is available here. You can also check
the Buildozer README at https://github.com/kivy/buildozer.
Packaging with python-for-android
You can also package directly with python-for-android, which can give
you more control but requires you to manually download parts of the
Android toolchain.
See the python-for-android documentation
for full details.
Packaging your application for the Kivy Launcher
The Kivy launcher is an Android application that runs any Kivy examples
stored on your SD Card.
To install the Kivy launcher, you must:
-
Go on Google Play Store and search for Kivy Launcher from kivy org
-
Click on Install
-
Select your phone… And you’re done!
If you don’t have access to the Google Play Store on your phone/tablet,
you can download and install the APK manually from
https://github.com/kivy/kivy-launcher/releases
Once the Kivy launcher is installed, you can put your Kivy
applications in the Kivy directory in your external storage directory
(often available at /sdcard even in devices where this memory
is internal), e.g.
/sdcard/kivy/<yourapplication>
<yourapplication> should be a directory containing:
# Your main application file:
main.py
# Some info Kivy requires about your app on android:
android.txt
The file android.txt must contain:
title=<Application Title>
author=<Your Name>
orientation=<portrait|landscape>
These options are just a very basic configuration. If you create your
own APK using the tools above, you can choose many other settings.
Installation of Examples
Kivy comes with many examples, and these can be a great place to start
trying the Kivy launcher. You can run them as below:
#. Download the `Kivy demos for Android <https://storage.googleapis.com/google-code-archive-downloads/v2/code.google.com/kivy/kivydemo-for-android.zip>`_
#. Unzip the contents and go to the folder `kivydemo-for-android`
#. Copy all the the subfolders here to
/sdcard/kivy
-
Run the launcher and select one of the Pictures, Showcase, Touchtracer, Cymunk or other demos…
Release on the market
If you have built your own APK with Buildozer or with
python-for-android, you can create a release version that may be
released on the Play store or other Android markets.
To do this, you must run Buildozer with the release parameter
(e.g. buildozer android release), or if using
python-for-android use the --release option to build.py. This
creates a release AAB in the bin directory, which you must
properly sign and zipalign.
The procedure for doing this is described in the Android documentation
at https://developer.android.com/studio/publish/app-signing.html#signing-manually —
all the necessary tools come with the Android SDK.
Targeting Android
Kivy is designed to operate identically across platforms and as a result, makes
some clear design decisions. It includes its own set of widgets and by default,
builds an APK or AAB with all the required core dependencies and libraries.
It is possible to target specific Android features, both directly and
in a (somewhat) cross-platform way. See the Using Android APIs section
of the Kivy on Android documentation for more details.
Во вчерашней статье Python в Mobile development, в которой речь шла о библиотеке KivyMD (коллекции виджетов в стиле Material Design для использования их в кроссплатформенном фреймворке Kivy), в комментариях меня попросили рассказать о процессе сборки пакета для платформы Android. Для многих этот процесс, к сожалению, был и остается чем-то из ряда магического шаманства и не подъёмным для новичков делом. Что ж, давайте разбираться, так ли на самом деле все сложно и действительно ли я маг и волшебник…
Конечно, мог бы! Итак, вы написали свой код на Python и Kivy. Что нужно для того, чтобы это можно было запустить на Android устройствах? Перейдите в репозиторий KivyMD и вы увидите, что в этой инструкции уже давно прописаны шаги, которые позволят вам собрать APK пакет:
- Загрузите XUbuntu 18.04
Установите Virtual Box на свой компьютер.
Создайте новую виртуальную машину на основе загруженного образа XUbuntu
Запустите виртуальную машину XUbuntu, откройте терминал и выполните нижеследующую команду:
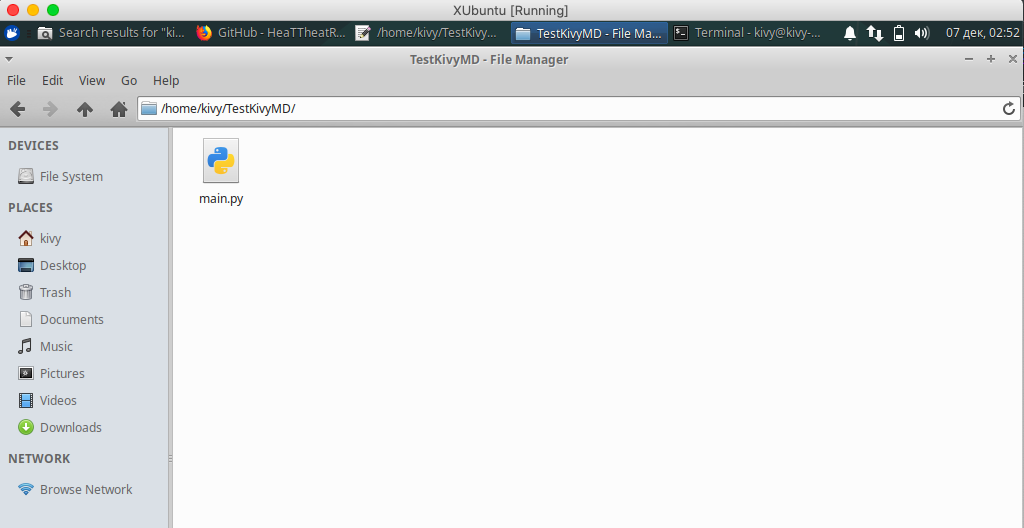
wget https://github.com/HeaTTheatR/KivyMD-data/raw/master/install-kivy-buildozer-dependencies.shchmod +x install-kivy-buildozer-dependencies.sh./install-kivy-buildozer-dependencies.shВсе! Теперь у вас есть виртуальная машина для сборки APK пакетов для приложений Kivy! Что дальше? Давайте, собственно, займемся сборкой тестового приложения. Создайте в домашнем каталоге вашей виртуальной машины директорию TestKivyMD с пустым файлом main.py:
Далее откройте файл main.py и напишите код нашего тестового приложения, которое будет использовать библиотеку KivyMD:
from kivy.lang import Builder

from kivymd.app import MDApp


KV = """
Screen:

    MDToolbar:
        title: "My firt app"
        elevation: 10
        md_bg_color: app.theme_cls.primary_color
        left_action_items: [["menu", lambda x: x]]
        pos_hint: {"top": 1}

    MDRaisedButton:
        text: "Hello World"
        pos_hint: {"center_x": .5, "center_y": .5}
"""


class HelloWorld(MDApp):
    def build(self):
        return Builder.load_string(KV)


HelloWorld().run()
Сохраните, откройте терминал в директории с файлом main.py и установите библиотеку KivyMD:
sudo pip3 install kivymd
После установки можно протестировать наш код:
python3 main.py
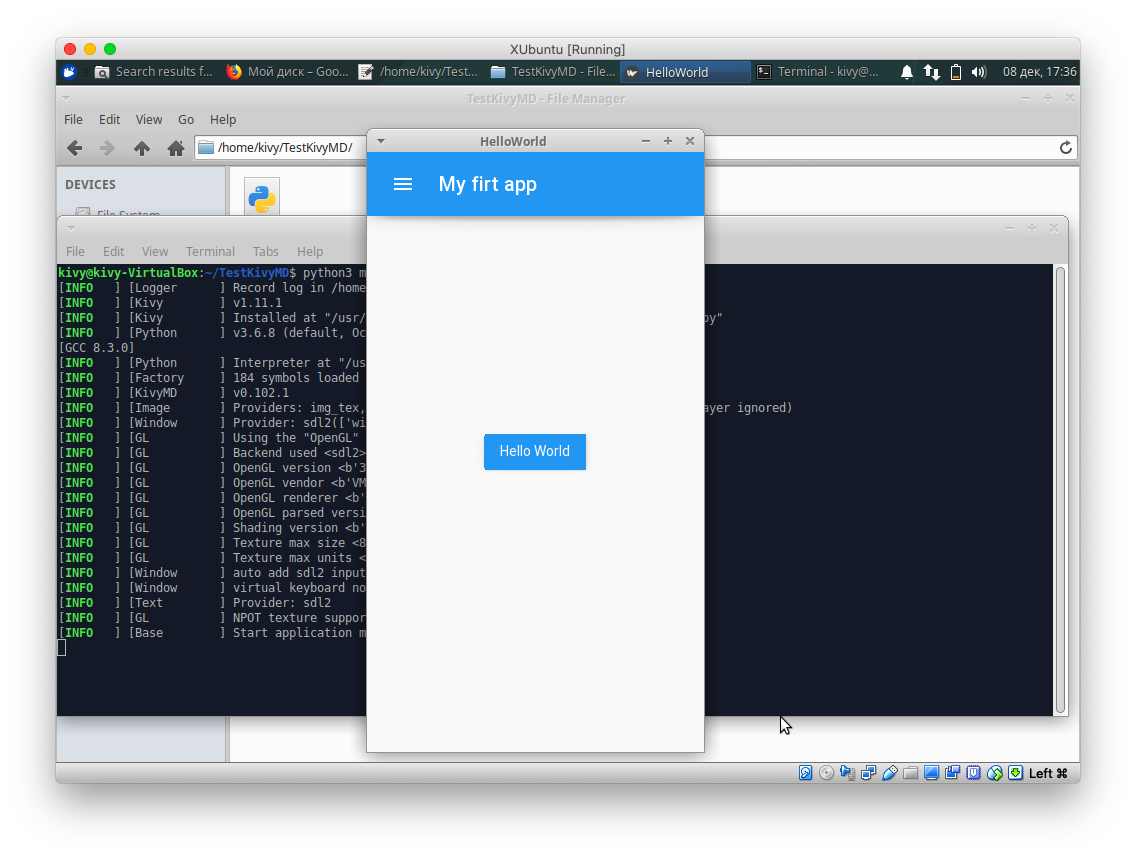
Результатом работы скрипта будет экран с Toolbar и одной кнопкой «Hello World»:
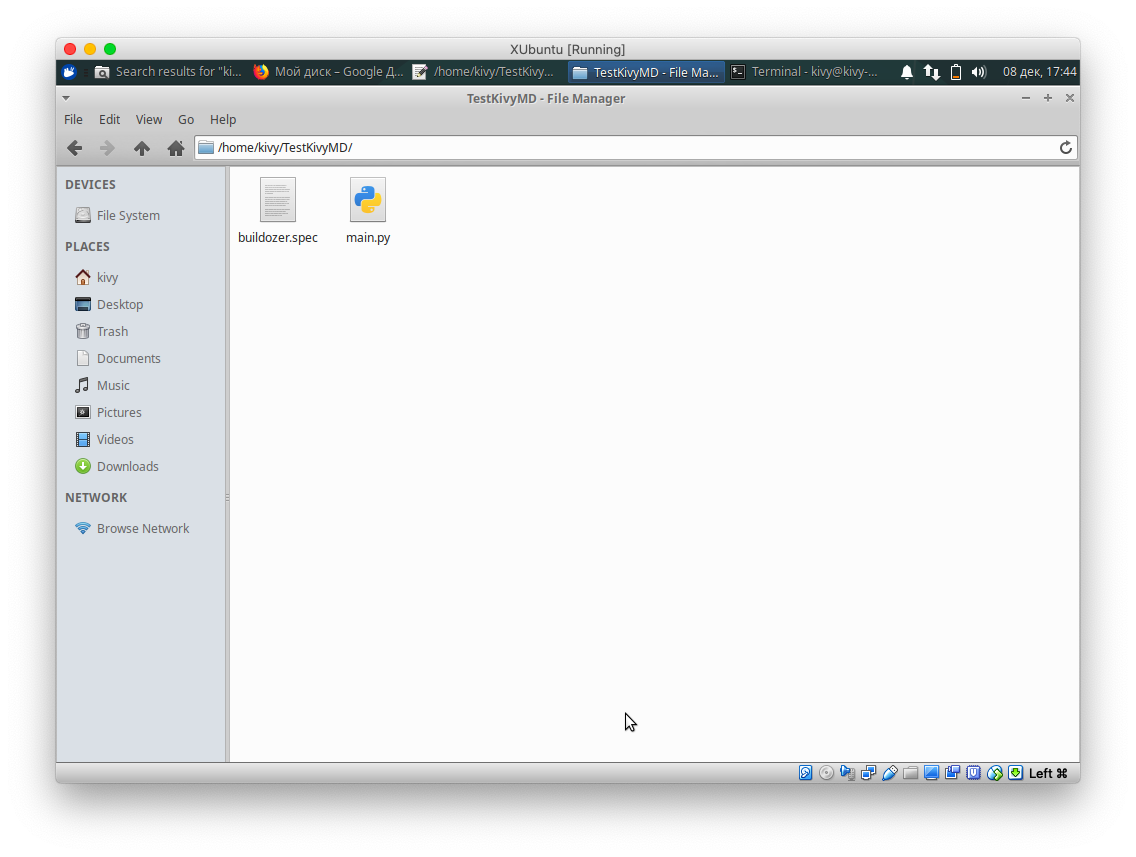
Дальше нам нужно создать файл спецификации buildozer.spec, который должен располагаться в той же директории, что и файл main.py:
Если вы не закрывали терминал (если терминал был закрыт, откройте его в директории TestKivyMD), введите команду:
buildozer init
Эта команда создаст дефолтный файл спецификации. Откройте его и отредактируйте:
[app]

# (str) Title of your application
title = KivyMDTest

# (str) Package name
package.name = kivymd_test

# (str) Package domain (needed for android/ios packaging)
package.domain = com.heattheatr

# (str) Source code where the main.py live
source.dir = .

# (list) Source files to include (let empty to include all the files)
source.include_exts = py,png,jpg,jpeg,ttf

# (list) Application version
version = 0.0.1

# (list) Application requirements
# comma separated e.g. requirements = sqlite3,kivy
requirements = python3,kivy==1.11.1,kivymd

# (str) Supported orientation (one of landscape, sensorLandscape, portrait or all)
orientation = portrait

# (bool) Indicate if the application should be fullscreen or not
fullscreen = 1

# (list) Permissions
android.permissions = INTERNET,WRITE_EXTERNAL_STORAGE

# (int) Target Android API, should be as high as possible.
android.api = 28

# (int) Minimum API your APK will support.
android.minapi = 21

# (str) Android NDK version to use
android.ndk = 17c

# (bool) If True, then skip trying to update the Android sdk
# This can be useful to avoid excess Internet downloads or save time
# when an update is due and you just want to test/build your package
android.skip_update = False

# (bool) If True, then automatically accept SDK license
# agreements. This is intended for automation only. If set to False,
# the default, you will be shown the license when first running
# buildozer.
android.accept_sdk_license = True

# (str) The Android arch to build for, choices: armeabi-v7a, arm64-v8a, x86, x86_64
android.arch = armeabi-v7a

[buildozer]

# (int) Log level (0 = error only, 1 = info, 2 = debug (with command output))
log_level = 2

# (int) Display warning if buildozer is run as root (0 = False, 1 = True)
warn_on_root = 0

# (str) Path to build artifact storage, absolute or relative to spec file
build_dir = ./.buildozer

# (str) Path to build output (i.e. .apk, .ipa) storage
bin_dir = ./bin
Здесь все понятно поэтому дополнительные комментарии излишни. Почитайте внимательно дефолтную спецификацию, в ней можно указать путь к иконке, пресплеш при загрузке приложения и многое другое. Я оставил лишь то, что нам сейчас нужно для сборки нашего тестового пакета. И, собственно, запускаем процесс сборки командой в терминале:
buildozer android debug
Можете смело идти на кухню и заваривать кофе, потому что в первый раз процесс загрузки и компиляции библиотек займет очень много времени. Все последующие сборки проходят за 10-20 секунд.
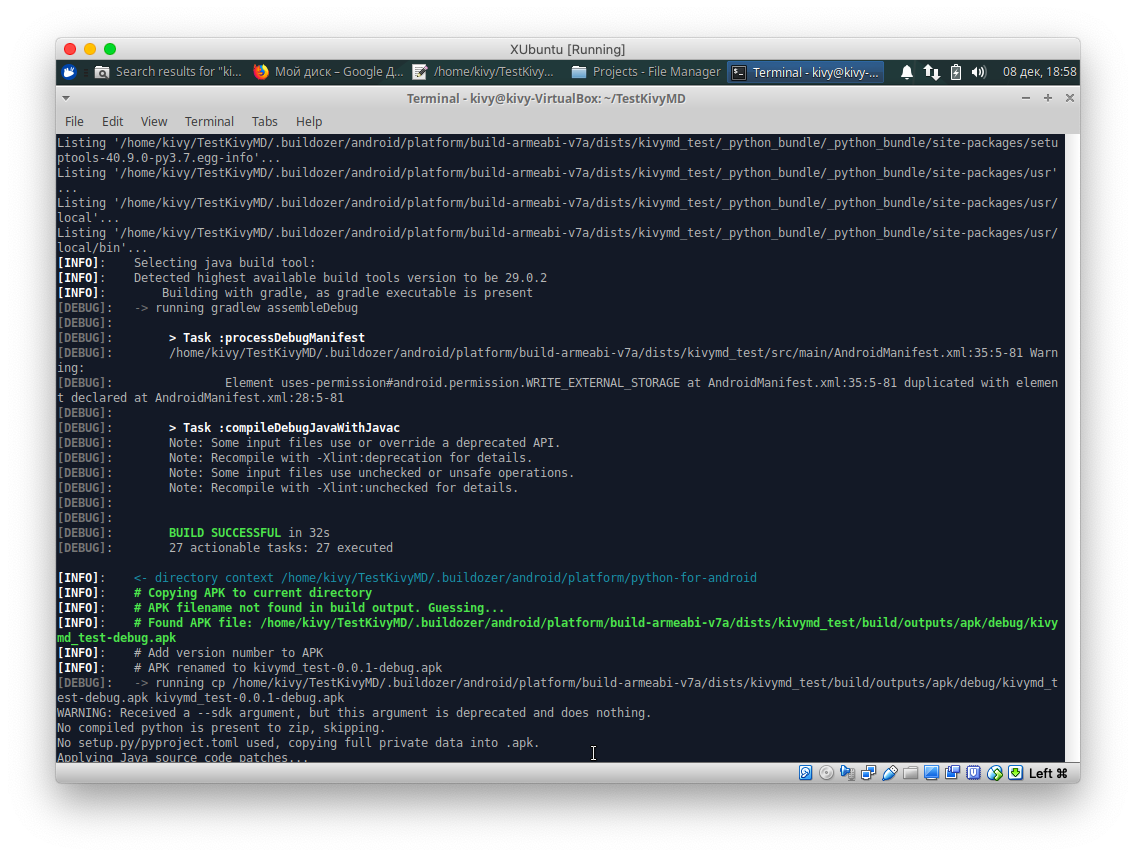
Кофе выпит и самое время заглянуть в терминал:
Вуаля! Наше приложение построено! Самое время закинуть его на смартфон и запустить:
Все работает! И оказывается не все так сложно, как казалось.
Также меня спрашивали:
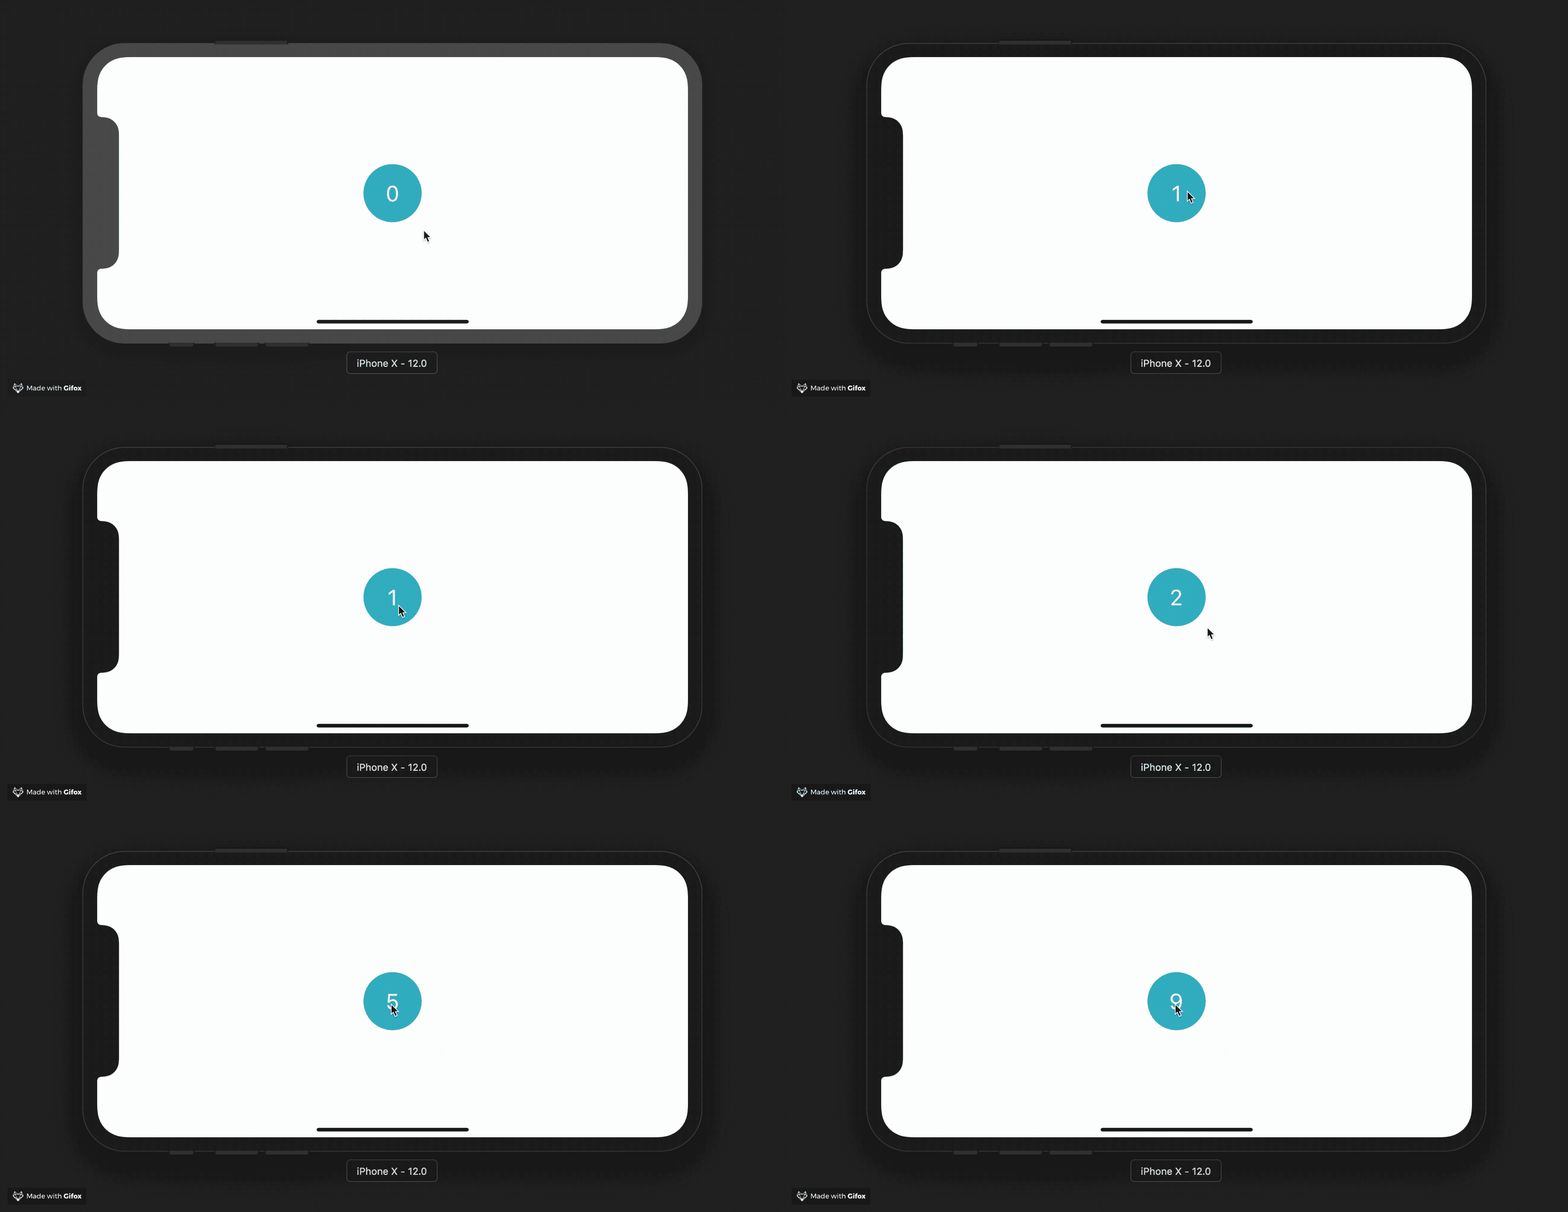
Ни у Flutter ни у React Native нет преимуществ перед языком разметки Kivy Language, которая позволяет создавать и позиционировать лайоуты и виджеты. Как по мне, то, как строится UI во Flutter — это самое настоящее извращение. Придумать это мог только больной на голову человек. Чтобы не быть голословным, давайте посмотрим на код Flutter и код Kivy одного и того же простейшего приложения… Выглядеть оно будет следующим образом:
Ниже я привожу код из статьи Про Flutter, кратко: Основы:
import 'package:flutter/widgets.dart';

main() => runApp(
  Directionality(
    textDirection: TextDirection.ltr,
    child: Container(
      color: Color(0xFFFFFFFF),
      child: App(),
    ),
  ),
);

class App extends StatelessWidget {
  @override
  Widget build(BuildContext context) {
    return Center(
      child: GestureDetector( // используется как обычный виджет
        onTap: () { // одно из свойств GestureDetector
          // Этот метод будет вызван, когда дочерний элемент будет нажат
          print('You pressed me');
        },
        child: Container( // нашей кнопкой будет контейнер
          decoration: BoxDecoration( // стилизуем контейнер
            shape: BoxShape.circle, // зададим ему круглую форму
            color: Color(0xFF17A2B8), // и покрасим его в синий
          ),
          width: 80.0,
          height: 80.0,
        ),
      ),
    );
  }
}

class Counter extends StatefulWidget {
  // Изменяемое состояние хранится не в виджете, а внутри объекта особого класса,
  // создаваемого методом createState()
  @override
  State<Counter> createState() => _CounterState();
  // Результатом функции является не просто объект класса State,
  // а обязательно State<ИмяНашегоВиджета>
}

class _CounterState extends State<Counter> {
  // Внутри него мы наконец-то можем объявить динамические переменные,
  // в которых мы будем хранить состояние.

  // В данном случае, это счетчик количества нажатий
  int counter = 0;

  // А дальше все очень просто, мы имплементируем точно такой же метод
  // для отрисовки виджетов, который мы использовали в классе Stateless виджета.
  @override
  Widget build(BuildContext context) {
    // И тут практически ничего не изменилось с нашего последнего примера,
    // а то что изменилось — я прокомментировал:
    return Center(
      child: GestureDetector(
        onTap: () {
          // В момент, когда кнопка нажата, мы увеличиваем значение
          // перменной counter.
          setState(() {
            // setState() необходим для того, чтобы вызвать методы
            // жизненного цикла виджета и сказать ему, что пора обновится
            ++counter;
          });
        },
        child: Container(
          decoration: BoxDecoration(
            shape: BoxShape.circle,
            color: Color(0xFF17A2B8),
          ),
          width: 80.0,
          child: Center(
            child: Text( // выводим значение свойства counter
              '$counter', // чтобы следить за его изменением
              style: TextStyle(fontSize: 30.0),
            ),
          ),
        ),
      ),
    );
  }
}
А вот абсолютно тоже самое, но с использованием Kivy и KivyMD:
from kivy.lang import Builder
from kivymd.app import MDApp

KV = """
#:import get_color_from_hex kivy.utils.get_color_from_hex

Screen:
    MDCard:

    MDLabel:
        value: 0
        text: str(self.value)
        halign: "center"
        on_touch_down: self.value += 1

        canvas.before:
            Color:
                rgba: get_color_from_hex("#4eaabe")
            Ellipse:
                pos: self.center[0] - dp(25), self.center[1] - dp(25)
                size: dp(50), dp(50)
"""

class HelloWorld(MDApp):
    def build(self):
        return Builder.load_string(KV)

HelloWorld().run()
По-моему, вывод очевиден и не нуждается в моем комментировании…
Надеюсь, был вам полезен. Оставляю опрос на тему «Удалось ли вам построить приложение для Андроид».
Только зарегистрированные пользователи могут участвовать в опросе. Войдите, пожалуйста.
Удалось ли вам построить приложение для Андроид по этой инструкции?
Проголосовали 48 пользователей.
Воздержались 57 пользователей.
Buildozer
Buildozer is a tool for creating application packages easily.
The goal is to have one «buildozer.spec» file in your app directory, describing
your application requirements and settings such as title, icon, included modules
etc. Buildozer will use that spec to create a package for Android, iOS, Windows,
OSX and/or Linux.
Buildozer currently supports packaging for Android via the python-for-android
project, and for iOS via the kivy-ios project. iOS and OSX are still under work.
For Android, buildozer will automatically download and prepare the
build dependencies. For more information, see
Android-SDK-NDK-Information.
Note that only Python 3 is supported.
Note that this tool has nothing to do with the eponymous online build service
buildozer.io.
Installing Buildozer with target Python 3 (default):
-
Install buildozer:
# via pip (latest stable, recommended) # if you use a virtualenv, don't use the `--user` option pip install --user buildozer # latest dev version # if you use a virtualenv, don't use the `--user` option pip install --user https://github.com/kivy/buildozer/archive/master.zip # git clone, for working on buildozer git clone https://github.com/kivy/buildozer cd buildozer python setup.py build pip install -e . -
Check buildozer is in your path
`which buildozer` # if there is no result, and you installed with --user, add this line at the end of your `~/.bashrc` file. export PATH=~/.local/bin/:$PATH # and then run . ~/.bashrc -
Go into your application directory and run:
buildozer init
# edit the buildozer.spec, then
buildozer android debug deploy run
Buildozer Docker image
A Dockerfile is available to use buildozer through a Docker environment.
-
Build with:
docker build --tag=buildozer . -
Run with:
docker run --volume "$(pwd)":/home/user/hostcwd buildozer --version
Buildozer GitHub action
Use ArtemSBulgakov/buildozer-action@v1
to build your packages automatically on push or pull request.
See full workflow example.
Examples of Buildozer commands
# buildozer target command
buildozer android clean
buildozer android update
buildozer android deploy
buildozer android debug
buildozer android release

# or all in one (compile in debug, deploy on device)
buildozer android debug deploy

# set the default command if nothing set
buildozer setdefault android debug deploy run
Usage
Usage:
    buildozer [--profile <name>] [--verbose] [target] <command>...
    buildozer --version

Available targets:
    android        Android target, based on python-for-android project
    ios            iOS target, based on kivy-ios project

Global commands (without target):
    distclean          Clean the whole Buildozer environment
    help               Show the Buildozer help
    init               Create an initial buildozer.spec in the current directory
    serve              Serve the bin directory via SimpleHTTPServer
    setdefault         Set the default command to run when no arguments are given
    version            Show the Buildozer version

Target commands:
    clean      Clean the target environment
    update     Update the target dependencies
    debug      Build the application in debug mode
    release    Build the application in release mode
    deploy     Deploy the application on the device
    run        Run the application on the device
    serve      Serve the bin directory via SimpleHTTPServer

Target "ios" commands:
    list_identities    List the available identities to use for signing.
    xcode              Open the xcode project.

Target "android" commands:
    adb                Run adb from the Android SDK. Args must come after --, or
                        use --alias to make an alias
    logcat             Show the log from the device
    p4a                Run p4a commands. Args must come after --, or use --alias
                        to make an alias
buildozer.spec
See buildozer/default.spec for an up-to-date spec file.
Default config
You can override the value of any buildozer.spec config token by
setting an appropriate environment variable. These are all of the
form $SECTION_TOKEN, where SECTION is the config file section and
TOKEN is the config token to override. Dots are replaced by
underscores.
For example, here are some config tokens from the [app] section of the
config, along with the environment variables that would override them.
title->$APP_TITLEpackage.name->$APP_PACKAGE_NAMEp4a.source_dir->$APP_P4A_SOURCE_DIR
Support
If you need assistance, you can ask for help on our mailing list:
- User Group : https://groups.google.com/group/kivy-users
- Email : kivy-users@googlegroups.com
Discord channel:
Server : https://chat.kivy.org
Channel : #support
For debugging on Android, don’t hesitate to use ADB to get logs of your application.
Contributing
We love pull requests and discussing novel ideas. Check out our
contribution guide and
feel free to improve buildozer.
The following mailing list and IRC channel are used exclusively for
discussions about developing the Kivy framework and its sister projects:
- Dev Group : https://groups.google.com/group/kivy-dev
- Email : kivy-dev@googlegroups.com
We also have a Discord channel:
- Server : https://chat.kivy.org
- Channel : #support
License
Buildozer is released under the terms of the MIT License. Please refer to the
LICENSE file.
Backers
Thank you to all our backers! 🙏 [Become a backer]
Sponsors
Support this project by becoming a sponsor. Your logo will show up here with a link to your website. [Become a sponsor]

Mehmet
Posted on Sep 1, 2021
• Updated on Sep 6, 2021
In this article, I will explain how we can convert a cross-platform application made using kivy/kivymd in python on Windows to an APK file without the need for a Linux machine. For this, I will use the online platform called Google Colab.
After logging into google colab, let’s prepare the environment for the conversion process. Do not forget to upload the project you are working on. Follow these commands step by step:
!sudo apt update
Enter fullscreen mode
Exit fullscreen mode
!sudo apt install -y git zip unzip openjdk-8-jdk python3-pip autoconf libtool pkg-config zlib1g-dev libncurses5-dev libncursesw5-dev libtinfo5 cmake libffi-dev libssl-dev
Enter fullscreen mode
Exit fullscreen mode
!pip3 install --upgrade Cython==0.29.19 virtualenv
Enter fullscreen mode
Exit fullscreen mode
!export PATH=$PATH:~/.local/bin/
Enter fullscreen mode
Exit fullscreen mode
!pip install buildozer
Enter fullscreen mode
Exit fullscreen mode
!sudo apt-get install -y
    python3-pip
    build-essential
    git
    python3
    python3-dev
    ffmpeg
    libsdl2-dev
    libsdl2-image-dev
    libsdl2-mixer-dev
    libsdl2-ttf-dev
    libportmidi-dev
    libswscale-dev
    libavformat-dev
    libavcodec-dev
    zlib1g-dev
Enter fullscreen mode
Exit fullscreen mode
!sudo apt-get install -y
    python3-pip
    build-essential
    git
    python3
    python3-dev
    ffmpeg
    libsdl2-dev
    libsdl2-image-dev
    libsdl2-mixer-dev
    libsdl2-ttf-dev
    libportmidi-dev
    libswscale-dev
    libavformat-dev
    libavcodec-dev
    zlib1g-dev
Enter fullscreen mode
Exit fullscreen mode
!sudo apt-get install build-essential libsqlite3-dev sqlite3 bzip2 libbz2-dev zlib1g-dev libssl-dev openssl libgdbm-dev libgdbm-compat-dev liblzma-dev libreadline-dev libncursesw5-dev libffi-dev uuid-dev libffi6
Enter fullscreen mode
Exit fullscreen mode
!sudo apt-get install libffi-dev
Enter fullscreen mode
Exit fullscreen mode
Now our environment is ready. We can start the conversion process. We will use buildozer for this. Run this command to start Buildozer:
!buildozer init
Enter fullscreen mode
Exit fullscreen mode
This command will create a configuration file named buildozer.spec for us. Now it’s time to edit this file. At least you should change the;
title, package.name, package.domain.
After changing these, my suggestion is to make some more changes to avoid some problems. Let’s look at source.dir first, if your main.py file is in the same directory, there is no need to change it, but if not, you should write the path here.
Afterwards, if you have used separate files such as png, txt, csv in the program, you should add the extension to source.include_exts.
Now let’s change the most important, requirements. If you only used kivy, python3,kivy==2.0.0rc4 will be enough to do it this way.If you also used kivymd then you should add this https://github.com/kivymd/KivyMD/archive/master.zip. If you have used other libraries, run the pip install <library-name> command, and it will show the downloaded packages. You can add them without specifying the version.
If you want to use icon you can uncomment icon.filename and you can edit the path.
If you want your app to be fullscreen, you can make fullscreen 1.
We will need to clone python-for-android to avoid problems such as not showing some symbols.
!git clone <git-link-of-forked-repo>
Enter fullscreen mode
Exit fullscreen mode
Then we need to edit it in spec file.p4a.source_dir = /path/to/your/python-for-android and p4a.branch = develop.
Finally, if you need permissions on android you have to write them.We are done with spec file for now.
Now we can start the conversion process by this command:
!buildozer -v android debug
Enter fullscreen mode
Exit fullscreen mode
When you first run this process, it may take up to 15-20 minutes depending on your internet speed. When the process is finished, your bin/*.apk file is ready and you can download it to the phone.
If the application does not work, you can create a log file from the phone. For this, try to run the application after clicking on the settings / developer option / bug report. After waiting for a while, it will also show the process in the notification bar. You can now see the errors by sharing it to your computer.
You can also check out my project that I made using kivymd.
Mehmet Karagoz.
Resources
Buildozer Installation
Spec file
Running
p4a
in addition
В наши дни каждый разработчик может столкнуться с необходимостью работы над мобильным или веб-приложением на Python. В Python нет встроенных инструментов для мобильных устройств, тем не менее существуют пакеты, которые можно использовать для создания мобильных приложений. Это Kivy, PyQt и даже библиотека Toga от Beeware.
Содержание
- Принципы работы фреймворка Kivy Python
- Установка Kivy
- Работа с виджетами в Kivy
- Запуск программы «Hello, Kivy!»
- Отображение виджета Image в Kivy Python
- Разметка (Layout) в UI Kivy
- Добавление событий в Kivy
- Использование языка дизайна KV
- Создание приложения Kivy Python
- Создаем apk приложения для Android на Python
- Создание приложений для iPhone (iOS) на Python
- Создание exe приложений для Windows на Python используя Kivy
- Создание приложений для macOS на Python используя Kivy
Библиотеки являются основными элементами мобильного мира Python. Однако, говоря о Kivy, нельзя игнорировать преимущества данного фреймворка при работе с мобильными приложениями. Внешний вид приложения автоматически подстраивается под все платформы, разработчику при этом не нужно компилировать код после каждой поправки. Кроме того, здесь для создания приложений можно использовать чистый синтаксис Python.
В руководстве будут разобраны следующие темы:
- Работа с виджетами Kivy;
- Планировка UI и лейауты;
- Добавление событий;
- Использование языка KV;
- Создание приложения-калькулятора;
- Упаковка приложения для iOS, Android, Windows и macOS.
Разбор данного руководства предполагает, что читатель знаком с объектно-ориентированным программированием. Для введения в курс дела можете просмотреть статью об Объектно-ориентированном программировании (ООП) в Python 3.
Приступим!
Принципы работы фреймворка Kivy Python
Kivy был создан в 2011 году. Данный кросс-платформенный фреймворк Python работает на Windows, Mac, Linux и Raspberry Pi. В дополнение к стандартному вводу через клавиатуру и мышь он поддерживает мультитач. Kivy даже поддерживает ускорение GPU своей графики, что во многом является следствием использования OpenGL ES2. У проекта есть лицензия MIT, поэтому библиотеку можно использовать бесплатно и вкупе с коммерческим программным обеспечением.
Во время разработки приложения через Kivy создается интуитивно понятный интерфейс (Natural user Interface), или NUI. Его главная идея в том, чтобы пользователь мог легко и быстро приспособиться к программному обеспечению без чтения инструкций.
Kivy не задействует нативные элементы управления, или виджеты. Все его виджеты настраиваются. Это значит, что приложения Kivy будут выглядеть одинаково на всех платформах. Тем не менее, это также предполагает, что внешний вид вашего приложения будет отличаться от нативных приложений пользователя. Это может стать как преимуществом, так и недостатком, все зависит от аудитории.
Установка Kivy
У Kivy есть множество зависимостей, поэтому лучше устанавливать его в виртуальную среду Python. Можно использовать встроенную библиотеку Python venv или же пакет virtualenv.
Виртуальная среда Python создается следующим образом:
|
$ python3 —m venv my_kivy_project |
По ходу данного действия исполняемый файл Python 3 будет скопирован в папку под названием my_kivy_project, куда также будут добавлено несколько других папок.
Есть вопросы по Python?
На нашем форуме вы можете задать любой вопрос и получить ответ от всего нашего сообщества!
Telegram Чат & Канал
Вступите в наш дружный чат по Python и начните общение с единомышленниками! Станьте частью большого сообщества!
Паблик VK
Одно из самых больших сообществ по Python в социальной сети ВК. Видео уроки и книги для вас!
Для использования виртуальной среды ее нужно активировать. На Mac или Linux это можно сделать, выполнив следующую команду, будучи внутри папки my_kivy_project:
Команда для Windows точно такая же, но активировать скрипт нужно в другом месте — через папку Scripts, а не bin.
После активации виртуальной среды Python можно запустить pip для установки Kivy. На Linux и Mac нужно выполнить следующую команду:
|
$ python —m pip install kivy |
Инсталляция на Windows несколько сложнее. В официальной документации фреймворка изучите пункт, касающийся установки Kivy на Windows. Пользователи Mac также могут скачать файл dmg и установить Kivy данным образом.
В случае возникновения проблем во время установки Kivy на вашу платформу изучите дополнительные инструкции, с которыми можно ознакомиться через страницу загрузки.
Работа с виджетами в Kivy
Виджеты — это отображаемые на экране элементы управления, которыми пользователь может оперировать. Любой инструментарий графического интерфейса пользователя поставляется с набором виджетов. Типичными представителями виджетов, что вы не раз использовали, являются кнопки, выпадающие списки и вкладки. Внутри фреймворка Kivy встроено много виджетов.
Запуск программы «Hello, Kivy!»
Принцип работы Kivy можно уловить, взглянув на следующее приложение «Hello, World!»:
|
from kivy.app import App from kivy.uix.label import Label class MainApp(App): def build(self): label = Label(text=‘Hello from Kivy’, size_hint=(.5, .5), pos_hint={‘center_x’: .5, ‘center_y’: .5}) return label if __name__ == ‘__main__’: app = MainApp() app.run() |
Каждому приложению Kivy требуется создать подкласс App и переопределить метод build(). Сюда вы помещаете код UI или вызываете другие функции, которые определяют код UI. В данном случае создается виджет Label и передается text, size_hint и pos_hint. Последние два аргумента не обязательны.
size_hint говорит Kivy о размерах что нужно использовать при создании виджета. Используются два числа:
- Первое число
xуказывает на размер ширины элемента управления. - Второе число
yуказывает на размер высоты элемента управления.
Значение обоих чисел должно быть в промежутке между 0 и 1. Значение по обоих показателей по умолчанию равно 1. Также можно задействовать pos_hint, что используется для позиционирования виджета. В коде, размещенном выше, указывается, что виджет должен быть размещен в центре осей x и y.
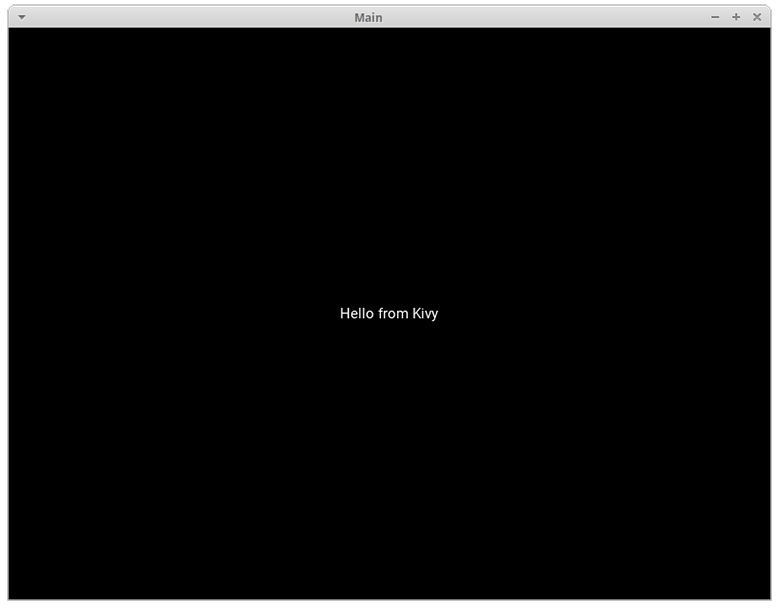
Для запуска приложения нужно инициализировать класс MainApp и вызвать метод run(). После этих действий на экране появится следующее:
Kivy также выводит в stdout довольно много текста:
|
1 2 3 4 5 6 7 8 9 10 11 12 13 14 15 16 17 18 19 20 21 22 23 |
[INFO ] [Logger ] Record log in /home/mdriscoll/.kivy/logs/kivy_19—06—07_2.txt [INFO ] [Kivy ] v1.11.0 [INFO ] [Kivy ] Installed at «/home/mdriscoll/code/test/lib/python3.6/site-packages/kivy/__init__.py» [INFO ] [Python ] v3.6.7 (default, Oct 22 2018, 11:32:17) [GCC 8.2.0] [INFO ] [Python ] Interpreter at «/home/mdriscoll/code/test/bin/python» [INFO ] [Factory ] 184 symbols loaded [INFO ] [Image ] Providers: img_tex, img_dds, img_sdl2, img_gif (img_pil, img_ffpyplayer ignored) [INFO ] [Text ] Provider: sdl2([‘text_pango’] ignored) [INFO ] [Window ] Provider: sdl2([‘window_egl_rpi’] ignored) [INFO ] [GL ] Using the «OpenGL» graphics system [INFO ] [GL ] Backend used <sdl2> [INFO ] [GL ] OpenGL version <b‘4.6.0 NVIDIA 390.116’> [INFO ] [GL ] OpenGL vendor <b‘NVIDIA Corporation’> [INFO ] [GL ] OpenGL renderer <b‘NVS 310/PCIe/SSE2’> [INFO ] [GL ] OpenGL parsed version: 4, 6 [INFO ] [GL ] Shading version <b‘4.60 NVIDIA’> [INFO ] [GL ] Texture max size <16384> [INFO ] [GL ] Texture max units <32> [INFO ] [Window ] auto add sdl2 input provider [INFO ] [Window ] virtual keyboard not allowed, single mode, not docked [INFO ] [Base ] Start application main loop [INFO ] [GL ] NPOT texture support is available |
Это может быть полезно для отладки приложения.
Далее добавим виджет Image и посмотрим, чем он отличается от Label.
Отображение виджета Image в Kivy Python
В Kivy есть несколько видов виджетов, связанных с изображениями. Для загрузки картинок с жесткого диска можно задействовать Image, а при использовании адреса URL подойдет AsyncImage. К следующем примере берется стандартный класс Image:
|
from kivy.app import App from kivy.uix.image import Image class MainApp(App): def build(self): img = Image(source=‘/path/to/real_python.png’, size_hint=(1, .5), pos_hint={‘center_x’:.5, ‘center_y’:.5}) return img if __name__ == ‘__main__’: app = MainApp() app.run() |
В данном коде импортируется Image из подпакета kivy.uix.image. Класс Image принимает много разных параметров, однако единственным для нас нужным является source, что указывает Kivy, какое изображение должно быть загружено. Здесь передается полный путь к выбранному изображению. Оставшаяся часть кода такая же, как и в прошлом примере.
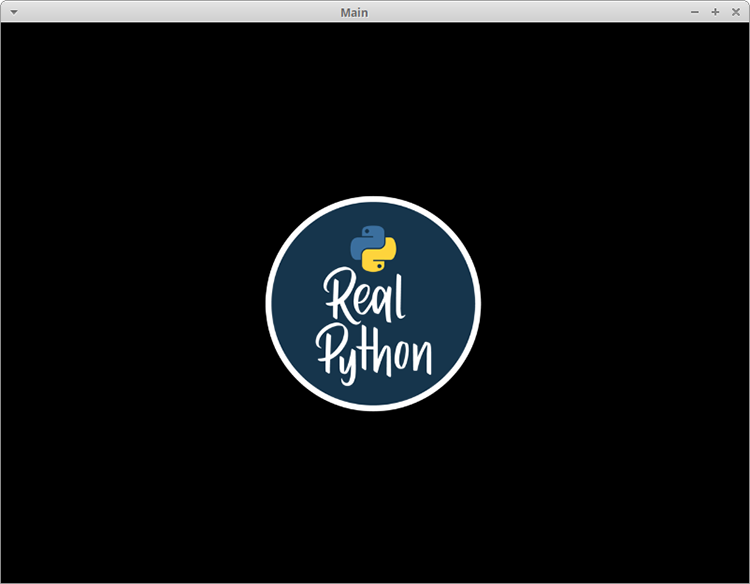
После запуска кода должно выводиться нечто подобное:
Текст из предыдущего примера был заменен картинкой.
Теперь рассмотрим, как добавить и оптимально расположить несколько виджетов в приложении.
Разметка (Layout) в UI Kivy
У каждого фреймворка есть свой собственный метод для размещения виджетов. К примеру, в wxPython используются классификаторы, а в Tkinter будет задействован лейаут, или менеджер геометрии. В Kivy за это отвечают Лейауты (Layouts). Доступно несколько различных типов Лейаутов. Чаще всего используются следующие виды:
- BoxLayout;
- FloatLayout;
- GridLayout.
Найти полный список доступных Лейаутов можно в документации Kivy. Рабочий исходный код можно найти в kivy.uix.
Рассмотрим BoxLayout на примере следующего кода:
|
1 2 3 4 5 6 7 8 9 10 11 12 13 14 15 16 17 18 19 20 21 22 23 24 25 26 27 28 |
import kivy import random from kivy.app import App from kivy.uix.button import Button from kivy.uix.boxlayout import BoxLayout red = [1,0,0,1] green = [0,1,0,1] blue = [0,0,1,1] purple = [1,0,1,1] class HBoxLayoutExample(App): def build(self): layout = BoxLayout(padding=10) colors = [red, green, blue, purple] for i in range(5): btn = Button(text=«Button #%s» % (i+1), background_color=random.choice(colors) ) layout.add_widget(btn) return layout if __name__ == «__main__»: app = HBoxLayoutExample() app.run() |
Здесь из kivy.uix.boxlayout импортируется модуль BoxLayout и затем устанавливается. После этого создается список цветов, которые представляют собой цвета RGB (Red-Blue-Green).
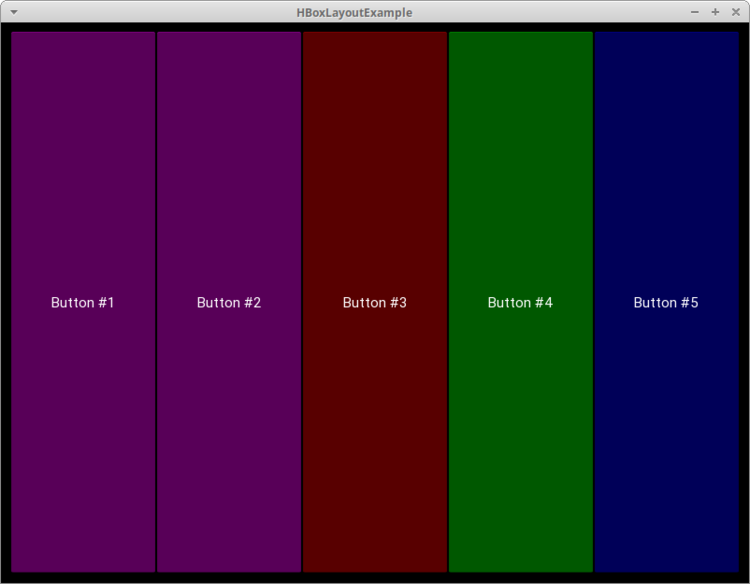
В конечном итоге формируется цикл для range из 5, результатом чего является кнопка btn для каждой итерации. Сделаем вещи немного интереснее и поставим в качестве фона кнопки background_color случайный цвет. Теперь можно добавить кнопку в лейаут при помощи layout.add_widget(btn).
После запуска кода выведется нечто подобное:
Здесь представлены 5 кнопок, окрашенных случайным образом, по одной для каждой итерации цикла for.
Во время создания лейаута следует учитывать следующие аргументы:
- padding: Отступ
paddingмежду лейаутом и его дочерними элементами уточняется в пикселях. Для этого можно выбрать один из трех способов:- Список из четырех аргументов:
[padding_left, padding_top, padding_right, padding_bottom] - Список из двух аргументов:
[padding_horizontal, padding_vertical] - Один аргумент:
padding=10
- Список из четырех аргументов:
- spacing: При помощи данного аргумента добавляется расстояние между дочерними виджетами.
- orientation: Позволяет изменить значение
orientationдляBoxLayoutпо умолчанию — с горизонтального на вертикальное.
Добавление событий в Kivy
Как и многие другие инструментарии GUI, по большей части Kivy полагается на события. Фреймворк отзывается на нажатие клавиш, кнопки мышки или прикосновение к сенсорному экрану. В Kivy задействован концепт Часов (Clock), что дает возможность создать своего рода график для вызова определенных функций в будущем.
В Kivy также используется концепт Свойств (Properties), что работает с EventDispatcher. Свойства помогают осуществить проверку достоверности. Они также запускают события, когда виджет меняет размер или позицию.
Добавим событие для кнопки из предыдущего кода:
|
1 2 3 4 5 6 7 8 9 10 11 12 13 14 15 16 17 18 |
from kivy.app import App from kivy.uix.button import Button class MainApp(App): def build(self): button = Button(text=‘Hello from Kivy’, size_hint=(.5, .5), pos_hint={‘center_x’: .5, ‘center_y’: .5}) button.bind(on_press=self.on_press_button) return button def on_press_button(self, instance): print(‘Вы нажали на кнопку!’) if __name__ == ‘__main__’: app = MainApp() app.run() |
В данном коде вызывается button.bind(), а событие on_press ссылается на MainApp.on_press_button().
Этот метод неявно принимает экземпляр виджета, который является самим объектом кнопки. Сообщение будет выводиться на stdout всякий раз при нажатии пользователем на кнопку.
Использование языка дизайна KV
Kivy предоставляет язык дизайна KV, что можно использовать в приложениях Kivy. Язык KV позволяет отделить дизайн интерфейса от логики приложения. Он придерживается принципа разделения ответственности и является частью архитектурного паттерна Модель-Представление-Контроллер (Model-View-Controller). Предыдущий пример можно обновить, используя язык KV:
|
from kivy.app import App from kivy.uix.button import Button class ButtonApp(App): def build(self): return Button() def on_press_button(self): print(‘Вы нажали на кнопку!’) if __name__ == ‘__main__’: app = ButtonApp() app.run() |
С первого взгляда данный код может показаться несколько странным, так как кнопка Button создается без указания атрибутов или привязывания к ним событий. Здесь Kivy автоматически ищет файл с таким же названием, что и у класса, только строчными буквами и без части App в названии класса.
В данном случае названием класса является ButtonApp, поэтому Kivy будет искать файл button.kv. Если такой файл существует, и он также форматирован должным образом, тогда Kivy использует его при загрузке UI. Попробуйте создать такой файл и добавить следующий код:
|
<Button>: text: ‘Press me’ size_hint: (.5, .5) pos_hint: {‘center_x’: .5, ‘center_y’: .5} on_press: app.on_press_button() |
Действия каждой строки:
- Строка 1 соответствует вызову
Buttonв коде Python. Kivy должен осмотреть инициализированный объект для определения кнопки; - Строка 2 устанавливает
textкнопки; - Строка 3 устанавливает ширину и высоту при помощи
size_hint; - Строка 4 устанавливает позицию кнопки через
pos_hint; - Строка 5 устанавливает обработчик событий
on_press. Для указания Kivy места обработчика событий используетсяapp.on_press_button(). Здесь Kivy будет искать метод.on_press_button()в классеApplication.
Вы можете установить все ваши виджеты и лейауты внутри одного или нескольких файлов языка KV. Язык KV также поддерживает импорт модулей Python в KV, создавая динамичные классы, и это далеко не предел. Ознакомиться с полным перечнем его возможностей можно в гиде Kivy по языку KV.
Теперь мы можем приступить к созданию настоящего рабочего приложения.
Создание приложения Kivy Python
Создание чего-то полезное несомненно является отличным способом выучить новый навык. Учитывая данное утверждение, давайте используем Kivy при создании калькулятора, который будет поддерживать следующие операции:
- Сложение;
- Вычитание;
- Умножение;
- Деление.
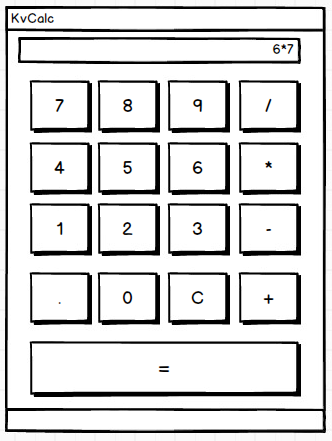
В данном приложении будет использован набор кнопок в своего рода лейауте. В верхней части также будет специальный блок для вывода операций и их результатов. В итоге калькулятор будет выглядеть следующим образом:
Теперь, когда у нас есть в наличии целевой UI, может составить код:
|
1 2 3 4 5 6 7 8 9 10 11 12 13 14 15 16 17 18 19 20 21 22 23 24 25 26 27 28 29 30 31 32 33 34 35 36 37 38 39 |
from kivy.app import App from kivy.uix.boxlayout import BoxLayout from kivy.uix.button import Button from kivy.uix.textinput import TextInput class MainApp(App): def build(self): self.operators = [«/», «*», «+», «-«] self.last_was_operator = None self.last_button = None main_layout = BoxLayout(orientation=«vertical») self.solution = TextInput( multiline=False, readonly=True, halign=«right», font_size=55 ) main_layout.add_widget(self.solution) buttons = [ [«7», «8», «9», «/»], [«4», «5», «6», «*»], [«1», «2», «3», «-«], [«.», «0», «C», «+»], ] for row in buttons: h_layout = BoxLayout() for label in row: button = Button( text=label, pos_hint={«center_x»: 0.5, «center_y»: 0.5}, ) button.bind(on_press=self.on_button_press) h_layout.add_widget(button) main_layout.add_widget(h_layout) equals_button = Button( text=«=», pos_hint={«center_x»: 0.5, «center_y»: 0.5} ) equals_button.bind(on_press=self.on_solution) main_layout.add_widget(equals_button) return main_layout |
Калькулятор работает следующим образом:
- В строках с 8 по 10 создается список
operatorsи несколько полезных значений,last_was_operatorиlast_button, которые будут использованы чуть позже. - В строках с 11 по 15 создается лейаут верхнего уровня
main_layout, к нему также добавляется виджет только для чтенияTextInput. - В строках с 16 по 21 создается вложенный список из списков, где есть большая часть кнопок для калькулятора.
- В строке 22 начинается цикл for для кнопок. Для каждого вложенного списка делается следующее:
- В строке 23 создается
BoxLayoutс горизонтальной ориентацией. - В строке 24 начинается еще один цикл
forдля элементов вложенного списка. - В строках с 25 по 39 создаются кнопки для ряда и связываются обработчиком событий, после чего кнопки добавляются к горизонтальному
BoxLayoutиз строки 23. - В строке 31 этот лейаут добавляется к
main_layout.
- В строке 23 создается
- В строках с 33 по 37 создается кнопка равно (=) и привязывается к обработчику событий, после чего она добавляется к
main_layout.
Далее создается обработчик событий .on_button_press(). Код будет выглядеть следующим образом:
|
1 2 3 4 5 6 7 8 9 10 11 12 13 14 15 16 17 18 19 20 |
def on_button_press(self, instance): current = self.solution.text button_text = instance.text if button_text == «C»: # Очистка виджета с решением self.solution.text = «» else: if current and ( self.last_was_operator and button_text in self.operators): # Не добавляйте два оператора подряд, рядом друг с другом return elif current == «» and button_text in self.operators: # Первый символ не может быть оператором return else: new_text = current + button_text self.solution.text = new_text self.last_button = button_text self.last_was_operator = self.last_button in self.operators |
Почти все виджеты приложения вызывают .on_button_press(). Это работает следующим образом:
- Строка 41 принимает аргумент
instance, в результате чего можно узнать, какой виджет вызвал функцию. - Строки между 42 и 43 извлекают и хранят значения
solutionиtextкнопки. - Строки c 45 по 47 проверяют, на какую кнопку нажали. Если пользователь нажимает с, тогда очищается
solution. В противном случае используется утверждениеelse. - Строка 49 проверяет, было ли у решения предыдущее значение.
- Строки с 50 по 52 проверяют, была ли последняя нажатая кнопка оператором. Если да, тогда
solutionобновляться не будет. Это необходимо для предотвращения создания двух операций в одном ряду. К примеру,1 * /будет недействительным утверждением. - Строки с 53 по 55 проверяют, является ли первый символ оператором. Если да, тогда solution обновляться не будет, так как первое значение не может быть значением оператора.
- Строки с 56 по 58 переходят к условию
else. Если никакое из предыдущих значений не найдено, тогда обновляетсяsolution. - Строка 59 устанавливает
last_buttonк метке последней нажатой кнопки. - Строка 60 устанавливает
last_was_operatorк значениюTrueилиFalseв зависимости от того, был символ оператором или нет.
Последней частью кода будет .on_solution():
|
def on_solution(self, instance): text = self.solution.text if text: solution = str(eval(self.solution.text)) self.solution.text = solution |
Здесь берется текущий текст из solution и используется встроенный в Python eval() для исполнения. Если пользователь создал формулу вроде 1+2, тогда eval() запустит код и вернет результат. В конце результат устанавливается как новое значение виджета solution.
На заметку: порой
eval()бывает опасным, так как он может запустить произвольный код. Многие разработчики избегают его использование именно по этой причине. Тем не менее, ввиду задействования только целых чисел, операторов и точки в качестве вводных данных дляeval(), в данном контексте его можно использовать безопасно.
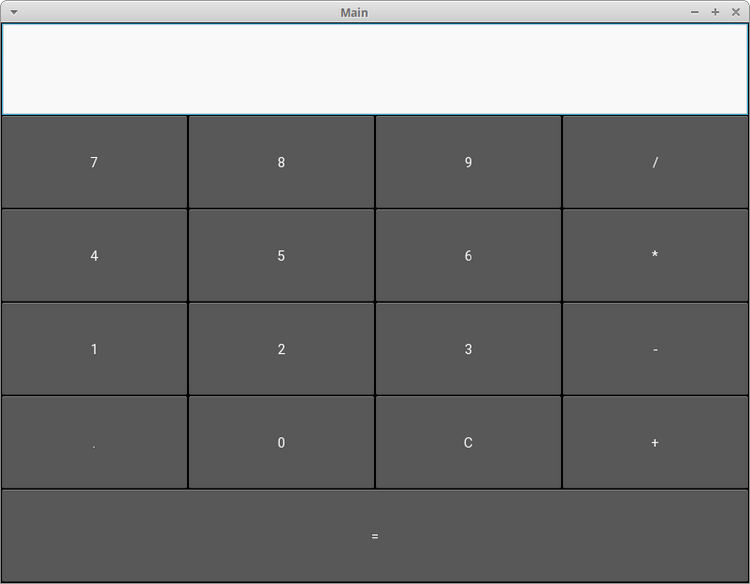
При запуске данного кода на рабочем столе компьютера приложение будет выглядеть следующим образом:
Полный текст кода примера калькулятора представлен ниже:
|
1 2 3 4 5 6 7 8 9 10 11 12 13 14 15 16 17 18 19 20 21 22 23 24 25 26 27 28 29 30 31 32 33 34 35 36 37 38 39 40 41 42 43 44 45 46 47 48 49 50 51 52 53 54 55 56 57 58 59 60 61 62 63 64 65 66 67 68 69 70 71 |
from kivy.app import App from kivy.uix.boxlayout import BoxLayout from kivy.uix.button import Button from kivy.uix.textinput import TextInput class MainApp(App): def build(self): self.operators = [«/», «*», «+», «-«] self.last_was_operator = None self.last_button = None main_layout = BoxLayout(orientation=«vertical») self.solution = TextInput( multiline=False, readonly=True, halign=«right», font_size=55 ) main_layout.add_widget(self.solution) buttons = [ [«7», «8», «9», «/»], [«4», «5», «6», «*»], [«1», «2», «3», «-«], [«.», «0», «C», «+»], ] for row in buttons: h_layout = BoxLayout() for label in row: button = Button( text=label, pos_hint={«center_x»: 0.5, «center_y»: 0.5}, ) button.bind(on_press=self.on_button_press) h_layout.add_widget(button) main_layout.add_widget(h_layout) equals_button = Button( text=«=», pos_hint={«center_x»: 0.5, «center_y»: 0.5} ) equals_button.bind(on_press=self.on_solution) main_layout.add_widget(equals_button) return main_layout def on_button_press(self, instance): current = self.solution.text button_text = instance.text if button_text == «C»: # Очистка виджета с решением self.solution.text = «» else: if current and ( self.last_was_operator and button_text in self.operators): # Не добавляйте два оператора подряд, рядом друг с другом return elif current == «» and button_text in self.operators: # Первый символ не может быть оператором return else: new_text = current + button_text self.solution.text = new_text self.last_button = button_text self.last_was_operator = self.last_button in self.operators def on_solution(self, instance): text = self.solution.text if text: solution = str(eval(self.solution.text)) self.solution.text = solution if __name__ == «__main__»: app = MainApp() app.run() |
Пришло время разместить приложение в Google Play или в AppStore!
По завершении составления кода вы можете поделиться своим приложением с другими. Хорошим способом сделать это может стать превращение вашего кода в приложения для смартфона на Android. Для этого вначале нужно установить пакет buildozer через pip:
Затем создается новая папка, после чего нужно перейти в нее через терминал. Затем выполняется следующая команда:
После этого создается файл buildozer.spec, который будет использован для конфигурации сборки. К примеру, первые две строчки файла спецификации можно редактировать следующим образом:
|
[app] # (str) Название вашего приложения title = KvCalc # (str) Название упаковки package.name = kvcalc # (str) Домен упаковки (нужен для упаковки android/ios) package.domain = org.kvcalc |
Не бойтесь посмотреть оставшуюся часть файла для выяснения того, что еще можно поменять.
На данный момент приложение почти готово к сборке, однако для начала нужно установить зависимости для buildozer. После их установки скопируйте ваше приложение калькулятора в новую папку и переименуйте его в main.py. Этого требует buildozer. Если файл будет назван неверно, тогда процесс сборки завершится неудачей.
Теперь можно запустить следующую команду:
|
$ buildozer —v android debug |
Этап сборки займет время! На моем компьютере на это ушло около 15-20 минут. Здесь все зависит от вашего железа, так что времени может потребоваться еще больше. Расслабьтесь, налейте чашечку кофе или прогуляйтесь. Buildozer скачает те элементы Android SDK, которые нужны для процесса сборки. Если все идет по плану, тогда в папке bin появится файл под названием, напоминающим что-то вроде kvcalc-0.1-debug.apk.
Далее требуется связать телефон Android с компьютером и перенести туда файл apk. Затем откройте менеджер файлов телефона и кликните на файл apk. Android должен спросить, хотите ли вы установить приложение. Есть вероятность появления предупреждения, ведь приложение было скачано не из Google Play. Тем не менее, вы по-прежнему сможете установить его.
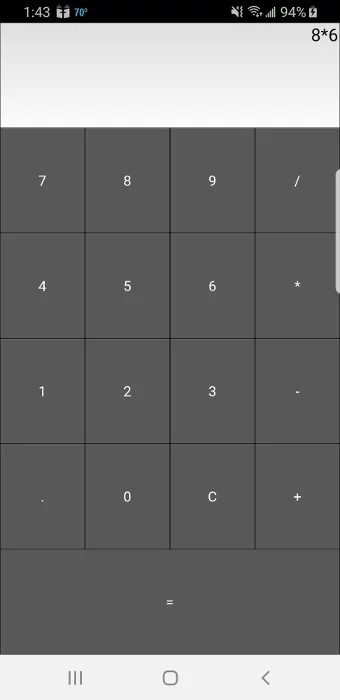
Вот как выглядит калькулятор, запущенный на Samsung S9:
У buildozer также есть несколько других команд, которые вы можете использовать. Изучите документацию, чтобы подробнее узнать об этом.
При необходимости добиться более детального управления упаковку можно осуществить через python-for-android. Здесь это обсуждаться не будет, но если интересно, ознакомьтесь, как еще можно быстро начать проект.
Создание приложений для iPhone (iOS) на Python
Инструкция для сборки приложения для iOS будет немного сложнее, нежели для Android. Для получения последней информации всегда проверяйте обновления официальной документации Kivy.
Вам нужен будет компьютер с операционной системой OS X: MacBook или iMac. На Linux или Windows вы не сможете создать приложения для Apple.
Перед упаковкой приложения для iOS на Mac необходимо выполнить следующие команды:
|
$ brew install autoconf automake libtool pkg—config $ brew link libtool $ sudo easy_install pip $ sudo pip install Cython==0.29.10 |
После успешной установки нужно скомпилировать при использования следующих команд:
|
$ git clone git://github.com/kivy/kivy—ios $ cd kivy—ios $ ./toolchain.py build python3 kivy |
Если вы получаете ошибку, где говорится, что iphonesimulator не найден, тогда поищите способ решение проблемы на StackOverflow, после чего попробуйте запустить команды вновь.
Если вы получаете ошибки SSL, тогда скорее всего у вас не установлен OpenSSL от Python. Следующая команда должна это исправить:
|
$ cd /Applications/Python 3.7/ $ ./Install Certificates.command |
Теперь вернитесь назад и запустите команду toolchain опять.
После успешного выполнения всех указанных выше команд можете создать проект Xcode при помощи использования скрипта toolchain. Перед созданием проекта Xcode переименуйте ваше главное приложение в main.py, это важно. Выполните следующую команду.
|
./toolchain.py create <title> <app_directory> |
Здесь должна быть папка под названием title, внутри которой будет проект Xcode. Теперь можно открыть проект Xcode и работать над ним отсюда. Обратите внимание, что если вы хотите разместить свое приложение на AppStore, вам понадобится создать аккаунт разработчика на developer.apple.com и заплатить годовой взнос.
Создание exe приложений для Windows на Python используя Kivy
Упаковать приложение Kivy для Windows можно при помощи PyInstaller. Если ранее вы никогда не работали с ним, тогда изучите тему использования PyInstaller для упаковки кода Python в исполняемый файл.
Для установки PyInstaller можно использовать pip:
|
$ pip install pyinstaller |
Следующая команда упакует ваше приложение:
Команда создаст исполняемый файл Windows, а вместе с ним еще несколько других файлов. Аргумент -w говорит PyInstaller, что приложение открывается в оконном режиме и не является приложение для командной строки. Если вы хотите, чтобы PyInstaller создал только один исполняемый файл, тогда можете передать в дополнение к -w аргумент --onefile.
Создание приложений для macOS на Python используя Kivy
Как и в случае с Windows, для создания исполняемого файла Mac можно также использовать PyInstaller. Единственным условием является запуск следующей команды на Mac:
|
$ pyinstaller main.py —w —onefile |
Результатом станет один исполняемый файл в папке dist. Название исполняемого файла будет таким же, как и название файла Python, что был передан PyInstaller.
Если вы хотите уменьшить размер исполняемого файла или использовать в приложении GStreamer, тогда для получения дополнительной информации изучите тему упаковки для macOS.
Заключение
Kivy является действительно интересным фреймворком GUI, что можно использовать для создания пользовательских интерфейсов и мобильных приложений для Android и iOS. Внешне приложения Kivy будут отличаться от нативных приложений выбранной платформы. В том случае, если вы хотите выделяться на фоне конкурентов, это может быть выгодным преимуществом.
В данном руководстве были рассмотрены основы Kivy, среди которых стоит выделить добавление виджетов, привязку событий, планировку виджетов и лейауты, а также использование языка KV. В результате мы получили рабочее приложение Kivy и рассмотрели способы его переноса на другие платформы, в том числе мобильные.
В Kivy есть множество виджетов и концептов, которые не были рассмотрены в статьи. Для дальнейшего изучения темы можете изучить официальный сайт Kivy, где размещены разнообразные руководства, примеры приложений и многое другое.
Рекомендации
Для дальнейшего изучения Kivy ознакомьтесь со следующими ресурсами:
- Гид программирования на Kivy
- Документация по упаковке приложений Kivy
- Сборка приложений GUI через Python
Чтобы посмотреть, как создать приложение с графическим интерфейсом при использовании другого GUI фреймфорка Python, можете ознакомиться со статьями о wxPython.
Являюсь администратором нескольких порталов по обучению языков программирования Python, Golang и Kotlin. В составе небольшой команды единомышленников, мы занимаемся популяризацией языков программирования на русскоязычную аудиторию. Большая часть статей была адаптирована нами на русский язык и распространяется бесплатно.
E-mail: vasile.buldumac@ati.utm.md
Образование
Universitatea Tehnică a Moldovei (utm.md)
- 2014 — 2018 Технический Университет Молдовы, ИТ-Инженер. Тема дипломной работы «Автоматизация покупки и продажи криптовалюты используя технический анализ»
- 2018 — 2020 Технический Университет Молдовы, Магистр, Магистерская диссертация «Идентификация человека в киберпространстве по фотографии лица»
I’m using windows right now and I want to ask is there any good tools to package a kivy app for android in windows or I have t use Linux distributions?
Unfortunately the build tools don’t work on windows right now. I think there are technical barriers to do with cross compilation.
Have you seen the kivy virtual machine, available at http://kivy.org/#download ? This is an Ubuntu linux image that already has the tools installed and set up. You should be able to run it in virtualbox on any recentish machine.
There’s also an online interface to the android component of the buildozer tool (which can manage the entire android or ios build process, but I think doesn’t work on windows at the moment), available at http://android.kivy.org/ . You can upload your project there to have the apk built. I haven’t tried this service, but it should work.
And also is there anyway to use kivy for python 3.3.2?
The next release of kivy will support python 3, and the github master branch at https://github.com/kivy/kivy should be mostly (if not all) working.
Разработка мобильных приложений, Разработка под Android, Python
Рекомендация: подборка платных и бесплатных курсов Java — https://katalog-kursov.ru/
Фух! Только что выбрался из под траков этого чудовища. А кое-кому повезло меньше. Как и было обещано в предыдущей статье, сегодня мы расскажем, как собираются apk пакеты для программ, написанных с использованием фреймворка Kivy при помощи утилиты Buildozer.
Что для этого понадобится? Помимо уже известных инструментов — кофе-сигареты, полкило нервов — нам потребуются ключи от новенького Бульдозера, который стоит в ангаре на github и сопутствующие зависимости, без которых он, к сожалению, не заведется, а если заведется, то никого задавить не удастся и apk пакет для Android не собрать.
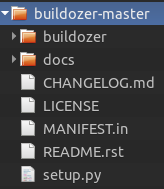
Кстати, пользователи Microsoft, на своих Windows машинах за Бульдозером с нами не едут, потому что для сборки apk пакета требуется Linux система, либо ее образ на виртуалке. Ну, что ж. А мы отправляемся на github, отбуксируем Бульдозер и распакуем архив в какую-нибудь директорию. Блин. Да это просто монстр!
Спокойно. Не заводим. За рычаги не хватаемся. Во-первых, нам нужно скачать пакет pip — инструмент для установки и управления пакетами Python.
sudo apt-get install python-pipЗаходим в ангар, в смысле в папку с Бульдозером…
… и выполняем команду —
sudo python setup.py installОб успешной установке мы будем извещены сообщением Successfully installed buildozer. Бульдозер работает как на Python 2.7 так и на Python >= 3.3. Я использую Python 2.7. Просто потому, что я пока не пытался собирать apk пакеты для программ, написанных с использованием Python 3, хотя по заявлениям разработчиков Kivy, третий Python полностью поддерживается. Ну, и теперь, собственно, давайте скачаем python-for-android. У меня работает именно эта ветка, поэтому других я не предлагаю. Распакуйте python-for-android.zip и пока забудем о нем.
Зависимости
Их довольно много и от правильной их установки будет зависеть, сможете ли вы собрать заветную apk-шечку или придется выпить валидолу и начать все сначала. Считается, что все вышеперечисленные пакеты у вас отсутствуют и предполагается, что фреймворк Kivy установлен и успешно вами используется.
sudo pip install --upgrade cython
sudo pip install virtualenv
sudo pip install Jinja2
Для сборки пакета под Android нам понадобится Android SDK. Некоторые его двоичные файлы все еще находятся в 32 битных библиотеках, так что нужно сделать их доступными:
dpkg --add-architecture i386После этого можем установить следующие пакеты:
sudo apt-get update
sudo apt-get install -y build-essential ccache git zlib1g-dev python2.7 python2.7-dev libncurses5:i386 libstdc++6:i386 zlib1g:i386 openjdk-7-jdk unzip
Ну, и теперь, наконец, мы готовы сесть в удобное кресло Бульдозера и схватится за рычаги управления. Заходим в папку проекта и выполняем в терминале команду —
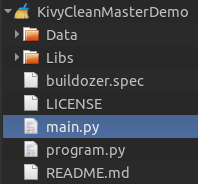
buildozer init… которая создаст в проекте файл спецификации buildozer.spec, где мы будем указывать Бульдозеру с какими параметрами собирать наше приложение.
Откроем данный файл и посмотрим его содержимое:
buildozer.spec
[app]

# (str) Title of your application
title = DemoCleanMaster

# (str) Package name
package.name = democleanmaster

# (str) Package domain (needed for android/ios packaging)
package.domain = org.heattheatr

# (str) Source code where the main.py live
source.dir = .

# (list) Source files to include (let empty to include all the files)
source.include_exts = py,png,kv,jpg

# (list) Source files to exclude (let empty to not exclude anything)
#source.exclude_exts = []

# (list) List of directory to exclude (let empty to not exclude anything)
#source.exclude_dirs = []

# (list) List of exclusions using pattern matching
#source.exclude_patterns = license,images/*/*.jpg

# (str) Application versioning (method 1)
version.regex = __version__ = ['"](.*)['"]
version.filename = %(source.dir)s/main.py

# (str) Application versioning (method 2)
# version = 1.2.0

# (list) Application requirements
# comma seperated e.g. requirements = sqlite3,kivy
requirements = kivy
# (str) Custom source folders for requirements
# Sets custom source for any requirements with recipes
# requirements.source.kivy = ../../kivy

# (list) Garden requirements
#garden_requirements =

# (str) Presplash of the application
presplash.filename = %(source.dir)s/Data/Images/presplash.jpg

# (str) Icon of the application
icon.filename = %(source.dir)s/Data/Images/logo.png

# (str) Supported orientation (one of landscape, portrait or all)
orientation = portrait

# (bool) Indicate if the application should be fullscreen or not
fullscreen = 1

#
# Android specific
#

# (list) Permissions
android.permissions = INTERNET

# (int) Android API to use
android.api = 18

# (int) Minimum API required (8 = Android 2.2 devices)
android.minapi = 8

# (int) Android SDK version to use
android.sdk = 21

# (str) Android NDK version to use
android.ndk = 9

# (bool) Use --private data storage (True) or --dir public storage (False)
android.private_storage = False

# (str) Android NDK directory (if empty, it will be automatically downloaded.)
android.ndk_path = /home/zavulon/Opt/android-ndk-r9

# (str) Android SDK directory (if empty, it will be automatically downloaded.)
android.sdk_path = /home/zavulon/Opt/android-sdk

# (str) python-for-android git clone directory (if empty, it will be automatically cloned from github)
android.p4a_dir = /home/zavulon/Opt/Python/python-for-android

# (list) python-for-android whitelist
#android.p4a_whitelist =

# (str) Android entry point, default is ok for Kivy-based app
#android.entrypoint = org.renpy.android.PythonActivity

# (list) List of Java .jar files to add to the libs so that pyjnius can access
# their classes. Don't add jars that you do not need, since extra jars can slow
# down the build process. Allows wildcards matching, for example:
# OUYA-ODK/libs/*.jar
#android.add_jars = foo.jar,bar.jar,path/to/more/*.jar

# (list) List of Java files to add to the android project (can be java or a
# directory containing the files)
#android.add_src =

# (str) python-for-android branch to use, if not master, useful to try
# not yet merged features.
#android.branch = master

# (str) OUYA Console category. Should be one of GAME or APP
# If you leave this blank, OUYA support will not be enabled
#android.ouya.category = GAME

# (str) Filename of OUYA Console icon. It must be a 732x412 png image.
#android.ouya.icon.filename = %(source.dir)s/data/ouya_icon.png

# (str) XML file to include as an intent filters in <activity> tag
#android.manifest.intent_filters =

# (list) Android additionnal libraries to copy into libs/armeabi
#android.add_libs_armeabi = libs/android/*.so
#android.add_libs_armeabi_v7a = libs/android-v7/*.so
#android.add_libs_x86 = libs/android-x86/*.so
#android.add_libs_mips = libs/android-mips/*.so

# (bool) Indicate whether the screen should stay on
# Don't forget to add the WAKE_LOCK permission if you set this to True
#android.wakelock = False

# (list) Android application meta-data to set (key=value format)
#android.meta_data =

# (list) Android library project to add (will be added in the
# project.properties automatically.)
#android.library_references =

#
# iOS specific
#

# (str) Name of the certificate to use for signing the debug version
# Get a list of available identities: buildozer ios list_identities
#ios.codesign.debug = "iPhone Developer: <lastname> <firstname> (<hexstring>)"

# (str) Name of the certificate to use for signing the release version
#ios.codesign.release = %(ios.codesign.debug)s

[buildozer]

# (int) Log level (0 = error only, 1 = info, 2 = debug (with command output))
log_level = 2

# (int) Display warning if buildozer is run as root (0 = False, 1 = True)
warn_on_root = 0

#    -----------------------------------------------------------------------------
#    List as sections
#
#    You can define all the "list" as [section:key].
#    Each line will be considered as a option to the list.
#    Let's take [app] / source.exclude_patterns.
#    Instead of doing:
#
#[app]
#source.exclude_patterns = license,data/audio/*.wav,data/images/original/*
#
#    This can be translated into:
#
#[app:source.exclude_patterns]
#license
#data/audio/*.wav
#data/images/original/*
#
#    -----------------------------------------------------------------------------
#    Profiles
#
#    You can extend section / key with a profile
#    For example, you want to deploy a demo version of your application without
#    HD content. You could first change the title to add "(demo)" in the name
#    and extend the excluded directories to remove the HD content.
#
#[app@demo]
#title = My Application (demo)
#
#[app:source.exclude_patterns@demo]
#images/hd/*
#
#    Then, invoke the command line with the "demo" profile:
#
#buildozer --profile demo android debug
Теперь рассмотрим подробнее…
title = DemoCleanMasterЭто имя приложение, которое будет отображаться на Android девайсе и которое будет носить установочный apk пакет.
package.name = democleanmaster
package.domain = org.heattheatr
Уникальный домен приложения.
source.dir = .Директория, в которой находится точка входа в приложение — файл main.py. По умолчанию это корневая директория проекта.
source.include_exts = py,kv,jpg,pngРасширение файлов, которые будут включены в сборку apk пакета из вашего проекта. Структура дерева директорий, откуда указанные файлы будут браться, сохраняется.
version.regex = __version__ = ['"](.*)['"]
version.filename = %(source.dir)s/main.py
Версия программы и в каком файле ее (версию) искать. Данный метод говорит, что в файле main.py корневой директории проекта должна быть переменная со значением версии вашего приложения.
# main.py

__version__ = '0.0.1'

# ...ваш код
requirements = kivyСторонние библиотеки, которые будут включены в сборку. Через запятую вы можете указать пакеты библиотек, с которыми работает ваше приложение, например: kivy, opencv, pil, sqlite3.
Полный список доступных библиотек вы можете посмотреть в редакторе спецификации в инструменте для построения UI — Kivy Designer. Очень рекомендую!
presplash.filename = %(source.dir)s/Data/Images/presplash.jpgИзображение, которое будет показано на экране девайса пока запускается ваше приложение, где %(source.dir)s — путь к корневой директории проекта.
icon.filename = %(source.dir)s/Data/Images/logo.pngИконка приложения, которая будет отображаться на девайсе.
orientation = portrait
fullscreen = 1
Ориентация вашего приложения на девайсе. Помимо ‘portrait’, может принимать значение ‘landscape’. ‘fullscreen’ указывает разворачивать Activity на весь экран. Также принимает значение ‘0’.
android.permissions = INTERNETПрава приложения.
android.api = 18Используемая приложением версия Android API (должна быть в Android SDK). Здесь могут возникнуть проблемы, если, например, вы указали версию Android API 10, которая отсутствует в Android NDK.
android.minapi = 8Минимальная версия Android API, поддерживаемая приложением.
android.sdk = 21Версия Android SDK.
android.ndk = 9Версия Android NDK.
android.private_storage = FalseУказывает создавать папку с файлами проекта на девайсе на SD карте. Рекомендую. Потому что в данном случае вы можете заменить байткомпилированое представление *.pyo файлов проекта на исходные тексты, и если будет необходимость внести в проект небольшое изменение, вы можете сделать это прямо на девайсе, отредактировав исходники или перезалив их с компьютера.
android.ndk_path = /home/zavulon/Opt/android-ndk-r9
android.sdk_path = /home/zavulon/Opt/android-sdk

android.p4a_dir = /home/zavulon/Opt/Python/python-for-android
Здесь все понятно. Можете сделать следующим образом:
android.ndk_path =
android.sdk_path =
android.p4a_dir =
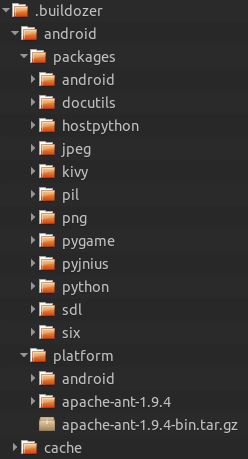
В таком случае Бульдозер скачает и Android SDK с указанными в спецификации версиями ANDROID API, и Android NDK, и python-for-android, будет скачан Apache-ant, если Бульдозер его не найдет. Также будут скачаны следующие библиотеки и исходники самого Python и модулей:
Да. Все это несколько хлопотно, но делается это один раз. Потом, для сборки проекта, достаточно просто отредактировать файл спецификации buildozer.spec и закинуть его в проект, который мы хотим собрать. Остальные параметры спецификации я не рассматриваю, поскольку пока я их еще сам не использоавл. И, да, параметры для сборки под iOS тоже остаются за траками, потому что я не имею девайса с данной платформой.
Собственно, эй, вы там — закройте двери Бульдозера с той стороны и прочь со взлетной полосы — мы заходим в папку проекта и выполняем в терминале команду начала компиляции:
buildozer android debugПройдет о-о-очень много времени (пригодились сигареты и кофе), прежде чем вы увидите заветное сообщение:
Обратите внимание, что apk-шечка получается дебажная. На Хабре есть статья, в которой описывается процесс создания подписанного пакета. К тому же размер сборки довольно внушительный — 7.6 Мб. Это потому, что Бульдозер включает в сборку весь Python целиком со всеми тестами и не нужными библиотеками. Также сам Kivy включается со всеми API даже если ваше приложение их не использует.
После установки собранного apk на девайсе и его старта, приложение будет довольно долго запускаться. Kivy потребуется время, чтобы извлечь и развернуть все библиотеки. К счачтью, все последующие загрузки программы длятся не более пяти секунд.
В следующей статье я расскажу, за какие рычаги дергать Бульдозер, чтобы увидеть собранный проект, но уже гораздо меньшего размера…
Удачных сборок! Смотрите под траки!
Во вчерашней статье Python в Mobile development, в которой речь шла о библиотеке KivyMD (коллекции виджетов в стиле Material Design для использования их в кроссплатформенном фреймворке Kivy), в комментариях меня попросили рассказать о процессе сборки пакета для платформы Android. Для многих этот процесс, к сожалению, был и остается чем-то из ряда магического шаманства и не подъёмным для новичков делом. Что ж, давайте разбираться, так ли на самом деле все сложно и действительно ли я маг и волшебник…
Конечно, мог бы! Итак, вы написали свой код на Python и Kivy. Что нужно для того, чтобы это можно было запустить на Android устройствах? Перейдите в репозиторий KivyMD и вы увидите, что в этой инструкции уже давно прописаны шаги, которые позволят вам собрать APK пакет:
- Загрузите XUbuntu 18.04
Установите Virtual Box на свой компьютер.
Создайте новую виртуальную машину на основе загруженного образа XUbuntu
Запустите виртуальную машину XUbuntu, откройте терминал и выполните нижеследующую команду:
wget https://github.com/HeaTTheatR/KivyMD-data/raw/master/install-kivy-buildozer-dependencies.shchmod + x install-kivy-buildozer-dependencies.sh./install-kivy-buildozer-dependencies.shВсе! Теперь у вас есть виртуальная машина для сборки APK пакетов для приложений Kivy! Что дальше? Давайте, собственно, займемся сборкой тестового приложения. Создайте в домашнем каталоге вашей виртуальной машины директорию TestKivyMD с пустым файлом main.py:
Далее откройте файл main.py и напишите код нашего тестового приложения, которое будет использовать библиотеку KivyMD:
from kivy.lang import Builder

from kivymd.app import MDApp


KV = """
Screen:

    MDToolbar:
        title: "My firt app"
        elevation: 10
        md_bg_color: app.theme_cls.primary_color
        left_action_items: [["menu", lambda x: x]]
        pos_hint: {"top": 1}

    MDRaisedButton:
        text: "Hello World"
        pos_hint: {"center_x": .5, "center_y": .5}
"""


class HelloWorld(MDApp):
    def build(self):
        return Builder.load_string(KV)


HelloWorld().run()
Сохраните, откройте терминал в директории с файлом main.py и установите библиотеку KivyMD:
sudo pip3 install kivymd
После установки можно протестировать наш код:
python3 main.py
Результатом работы скрипта будет экран с Toolbar и одной кнопкой «Hello World»:
Дальше нам нужно создать файл спецификации buildozer.spec, который должен располагаться в той жу директории, что и файл main.py:
Если вы не закрывали терминал (если терминал был закрыт, откройте его в директории TestKivyMD), введите команду:
buikdozer init
Эта команда создаст дефолтный файл спецификации. Откройте его и отредактируйте:
[app]

# (str) Title of your application
title = KivyMDTest

# (str) Package name
package.name = kivymd_test

# (str) Package domain (needed for android/ios packaging)
package.domain = com.heattheatr

# (str) Source code where the main.py live
source.dir = .

# (list) Source files to include (let empty to include all the files)
source.include_exts = py,png,jpg,jpeg,ttf

# (list) Application version
version = 0.0.1

# (list) Application requirements
# comma separated e.g. requirements = sqlite3,kivy
requirements = python3,kivy==1.11.1,kivymd

# (str) Supported orientation (one of landscape, sensorLandscape, portrait or all)
orientation = portrait

# (bool) Indicate if the application should be fullscreen or not
fullscreen = 1

# (list) Permissions
android.permissions = INTERNET,WRITE_EXTERNAL_STORAGE

# (int) Target Android API, should be as high as possible.
android.api = 28

# (int) Minimum API your APK will support.
android.minapi = 21

# (str) Android NDK version to use
android.ndk = 17c

# (bool) If True, then skip trying to update the Android sdk
# This can be useful to avoid excess Internet downloads or save time
# when an update is due and you just want to test/build your package
android.skip_update = False

# (bool) If True, then automatically accept SDK license
# agreements. This is intended for automation only. If set to False,
# the default, you will be shown the license when first running
# buildozer.
android.accept_sdk_license = True

# (str) The Android arch to build for, choices: armeabi-v7a, arm64-v8a, x86, x86_64
android.arch = armeabi-v7a

[buildozer]

# (int) Log level (0 = error only, 1 = info, 2 = debug (with command output))
log_level = 2

# (int) Display warning if buildozer is run as root (0 = False, 1 = True)
warn_on_root = 0

# (str) Path to build artifact storage, absolute or relative to spec file
build_dir = ./.buildozer

# (str) Path to build output (i.e. .apk, .ipa) storage
bin_dir = ./bin
Здесь все понятно поэтому дополнительные комментарии излишне. Почитайте внимательно дефолтную спецификацию, в ней можно указать путь к иконке, пресплеш при загрузке приложения и многое другое. Я оставил лишь то, что нам сейчас нужно для сборки нашего тестового пакета. И, собственно, запускаем процесс сборки командой в терминале:
buildozer android debug
Можете смело идти на кухню и заваривать кофе, потому что в первый раз процесс загрузки и компиляции библиотек займет очень много времени. Все последующие сборки проходят за 10-20 секунд.
Кофе выпит и самое время заглянуть в терминал:
Вуаля! Наше приложение построено! Самое время закинуть его на смартфон и запустить:
Все работает! И оказывается не все так сложно, как казалось.
Также меня спрашивали:
Ни у Flutter ни у React Native нет преимуществ перед языком разметки Kivy Language, которая позволяет создавать и позиционировать лайоуты и виджеты. Как по мне, то, как строится UI во Flutter — это самое настоящее извращение. Придумать это мог только больной на голову человек. Чтобы не быть голословным, давайте посмотрим на код Flutter и код Kivy одного и того же простейшего приложения… Выглядеть оно будет следующим образом:
Ниже я привожу код из статьи Про Flutter, кратко: Основы:
import 'package:flutter/widgets.dart';

main() => runApp(
  Directionality(
    textDirection: TextDirection.ltr,
    child: Container(
      color: Color(0xFFFFFFFF),
      child: App(),
    ),
  ),
);

class App extends StatelessWidget {
  @override
  Widget build(BuildContext context) {
    return Center(
      child: GestureDetector( // используется как обычный виджет
        onTap: () { // одно из свойств GestureDetector
          // Этот метод будет вызван, когда дочерний элемент будет нажат
          print('You pressed me');
        },
        child: Container( // нашей кнопкой будет контейнер
          decoration: BoxDecoration( // стилизуем контейнер
            shape: BoxShape.circle, // зададим ему круглую форму
            color: Color(0xFF17A2B8), // и покрасим его в синий
          ),
          width: 80.0,
          height: 80.0,
        ),
      ),
    );
  }
}

class Counter extends StatefulWidget {
  // Изменяемое состояние хранится не в виджете, а внутри объекта особого класса,
  // создаваемого методом createState()
  @override
  State<Counter> createState() => _CounterState();
  // Результатом функции является не просто объект класса State,
  // а обязательно State<ИмяНашегоВиджета>
}

class _CounterState extends State<Counter> {
  // Внутри него мы наконец-то можем объявить динамические переменные,
  // в которых мы будем хранить состояние.

  // В данном случае, это счетчик количества нажатий
  int counter = 0;

  // А дальше все очень просто, мы имплементируем точно такой же метод
  // для отрисовки виджетов, который мы использовали в классе Stateless виджета.
  @override
  Widget build(BuildContext context) {
    // И тут практически ничего не изменилось с нашего последнего примера,
    // а то что изменилось — я прокомментировал:
    return Center(
      child: GestureDetector(
        onTap: () {
          // В момент, когда кнопка нажата, мы увеличиваем значение
          // перменной counter.
          setState(() {
            // setState() необходим для того, чтобы вызвать методы
            // жизненного цикла виджета и сказать ему, что пора обновится
            ++counter;
          });
        },
        child: Container(
          decoration: BoxDecoration(
            shape: BoxShape.circle,
            color: Color(0xFF17A2B8),
          ),
          width: 80.0,
          child: Center(
            child: Text( // выводим значение свойства counter
              '$counter', // чтобы следить за его изменением
              style: TextStyle(fontSize: 30.0),
            ),
          ),
        ),
      ),
    );
  }
}
А вот абсолютно тоже самое, но с использованием Kivy и KivyMD:
from kivy.lang import Builder
from kivymd.app import MDApp

KV = """
#:import get_color_from_hex kivy.utils.get_color_from_hex

Screen:
    MDCard:

    MDLabel:
        value: 0
        text: str(self.value)
        halign: "center"
        on_touch_down: self.value += 1

        canvas.before:
            Color:
                rgba: get_color_from_hex("#4eaabe")
            Ellipse:
                pos: self.center[0] - dp(25), self.center[1] - dp(25)
                size: dp(50), dp(50)
"""

class HelloWorld(MDApp):
    def build(self):
        return Builder.load_string(KV)

HelloWorld().run()
По-моему, вывод очевиден и не нуждается в моем комментировании…
Надеюсь, был вам полезен. Оставляю опрос на тему «Удалось ли вам построить приложение для Андроид».
If you’re a Python developer thinking about getting started with mobile development, then the Kivy framework is your best bet. With Kivy, you can develop platform-independent applications that compile for iOS, Android, Windows, MacOS, and Linux. In this article, we’ll cover:
- Getting started with Kivy
- Creating the
RandomNumberclass - Outsourcing the interface
- A note on file naming
- Applying the box layout
- Kivy color values
- Building the rest of the UI
- Generating the random number function
- Manually testing the app
- Compiling our app for Android, Windows, and iOS
To follow along with this article, you should be familiar with Python. Let’s get started!
Getting started with Kivy
First, you’ll need a new directory for your app. Make sure you have Python installed on your machine and open a new Python file. You’ll need to install the Kivy module from your terminal using either of the commands below. To avoid any package conflicts, be sure you’re installing Kivy in a virtual environment:
pip install kivy
//
pip3 install kivy
Once you have installed Kivy, you should see a success message from your terminal that looks like the screenshots below:
Next, navigate into your project folder. In the main.py file, we’ll need to import the Kivy module and specify which version we want. You can use Kivy v2.0.0, but if you have a smartphone that is older than Android v8, I recommend v1.9.0. You can mess around with the different versions during the build to see the differences in features and performance.
To specify the version, add the version number right after the import kivy line as follows:
kivy.require('1.9.0')
Creating the RandomNumber class
Now, we’ll create a class that will define our app; I’ll name mine RandomNumber. This class will inherit the app class from Kivy. Therefore, you need to import the app by adding from kivy.app import App:
class RandomNumber(App):
In the RandomNumber class, you’ll need to add a function called build, which takes a self parameter. To actually return the UI, we’ll use the build function. For now, I have it returned as a simple label. To do this, you’ll need to import Label using the line from kivy.uix.label import Label:
import kivy
from kivy.app import App
from kivy.uix.label import Label

class RandomNumber(App):
  def build(self):
    return Label(text="Random Number Generator")
Now, our app skeleton is complete! Before moving forward, you should create an instance of the RandomNumber class and run it in your terminal or IDE to see the interface:
import kivy
from kivy.app import App
from kivy.uix.label import Label

class RandomNumber(App):
  def build(self):
    return Label(text="Random Number Generator")

randomApp = RandomNumber()
randomApp.run()
When you run the class instance with the text Random Number Generator, you should see a simple interface or window that looks like the screenshot below:
You won’t be able to run the text on Android until you’ve finished building the whole thing.
Outsourcing the interface
Next, we’ll need a way to outsource the interface. First, we’ll create a Kivy file in our directory that will house most of our design work.
A note on file naming
You’ll want to name this file the same name as your class using lowercase letters and a .kv extension. Kivy will automatically associate the class name and the filename, but it may not work on Android if they are exactly the same. (This might have been a glitch on my end, but you can mess around with it on your side. From what I tested, you have to write your Kivy file name in lowercase letters.)
Inside that .kv file, you need to specify the layout of your app, including elements like the label, buttons, forms, etc. Layouts in Kivy are of different types, but have the same function — they are all containers used to arrange widgets in ways that are specific to the chosen layout; you can read more information about different Kivy layouts in their getting started guide.
Applying the box layout
To keep this application simple, I will use the box layout. In a nutshell, the box layout arranges widgets and other elements in one of two orientations: vertical or horizontal. I’ll add three labels:
- One for the title
RandomNumber - One to serve as a placeholder for the random number that is generated
_ - A
Generatebutton that calls thegeneratefunction
Keep in mind that these labels will be stacked on top of each other.
My .kv file looks like the code below, but you can mess around with the different values to fit your requirements:
<boxLayout>:
    orientation: "vertical"
    Label:
        text: "Random Number"
        font_size: 30
        color: 0, 0.62, 0.96

    Label:
        text: "_"
        font_size: 30

    Button:
        text: "Generate"
        font_size: 15
In the above code snippet, line 2 specifies the type of layout I am using for my app, and line 3 specifies the orientation I just mentioned. The rest of the lines are customizable, so you can specify how you want your UI elements to appear.
Kivy color values
The color values in Kivy are not your typical RGB values — they are normalized. To understand color normalization, you need to be aware that the distribution of color values is normally dependent on illumination. This varies depending on factors like lighting conditions, lens effects, and other factors.
To avoid this, Kivy accepts the (1, 1, 1) convention. This is Kivy’s representation of RGB’s (255, 255, 255). To convert your normal RGB values to Kivy’s convention, you need to divide all of your values by 255. That way, you get values from 0–1.
Building the rest of the UI
In the main.py file, you no longer need the Label import statement because the Kivy file takes care of your UI. However, you do need to import the boxlayout, which you will use in the Kivy file.
In your main file, add the import statement and edit your main.py file to read return BoxLayout() in the build method:
from kivy.uix.boxlayout import BoxLayout
If you run the command above, you should see a simple interface that has the random number title, the _ placeholder, and the clickable generate button:
Notice that you didn’t have to import anything additional for the Kivy file to work. Basically, when you run the app, it returns boxlayout by looking for a file inside the Kivy file that has the same name as your class. Keep in mind, this is a simple interface, so you can make your app as robust as you want. Be sure to check out the Kv language documentation for ideas.
Generating the random number function
Now that our app is almost done, we’ll need a simple function to generate random numbers when a user clicks the generate button. Then, it will render that random number into the app interface. To do this, we’ll need to change a few things in our files.
First, import the random module that you’ll use to generate a random number and create a function or method that calls the generated number. To import the random module, use the statement import random.
For this demonstration, I’ll use a range between 0 and 2000. Generating the random number is simple with the random.randint(0, 2000) one-liner. We’ll add this into our code in a moment.
Next, we’ll create another class that will be our own version of the box layout. Our class will inherit the box layout class, which houses the method to generate random numbers and render them on the interface:
class MyRoot(BoxLayout):
    def __init__(self):
        super(MyRoot, self).__init__()
After that, you need to create the generate method within that class, which will not only generate random numbers, but also manipulate the label that controls what is displayed as the random number in the Kivy file.
In order to accommodate this method, we’ll first need to make changes to the .kv file. Since the MyRoot class has inherited the box layout, you can make MyRoot the top level element in your .kv file:
<MyRoot>:
    BoxLayout:
        orientation: "vertical"
        Label:
            text: "Random Number"
            font_size: 30
            color: 0, 0.62, 0.96

        Label:
            text: "_"
            font_size: 30

        Button:
            text: "Generate"
            font_size: 15
Notice that you are still keeping all your UI specifications indented in the Box Layout. After this, you need to add an ID to the label to hold the generated numbers, making it easy to manipulate when the generate function is called. You need to specify the relationship between the id in this file and another in the main code at the top, just before the BoxLayout line:
<MyRoot>:
    random_label: random_label
    BoxLayout:
        orientation: "vertical"
        Label:
            text: "Random Number"
            font_size: 30
            color: 0, 0.62, 0.96

        Label:
            id: random_label
            text: "_"
            font_size: 30

        Button:
            text: "Generate"
            font_size: 15
This random_label: random_label line basically means that the label with the ID random_label will be mapped to random_label in the main.py file, so that any action that manipulates random_label will be mapped on the label with the specified name.
You can now create the method to generate the random number in the main.py file:
def generate_number(self):
    self.random_label.text = str(random.randint(0, 2000))
Notice how the class method manipulates the text attribute of the random_label by assigning it a new random number generated by the 'random.randint(0, 2000)' function. Since the random number generated is an integer, typecasting is required to make it a string — otherwise, you will get a type error in your terminal when you run it.
The MyRoot class should now look like the code below:
class MyRoot(BoxLayout):
    def __init__(self):
        super(MyRoot, self).__init__()

    def generate_number(self):
        self.random_label.text = str(random.randint(0, 2000))
Congratulations! You’re now done with the main file of the app.
Manually testing the app
The only thing left to do is making sure that you call this function when the generate button is clicked. You need only add the line on_press: root.generate_number() to the button selection part of your .kv file:
<MyRoot>:
    random_label: random_label
    BoxLayout:
        orientation: "vertical"
        Label:
            text: "Random Number"
            font_size: 30
            color: 0, 0.62, 0.96

        Label:
            id: random_label
            text: "_"
            font_size: 30

        Button:
            text: "Generate"
            font_size: 15
            on_press: root.generate_number()
Now, you can run this app:
Compiling our app for Android, Windows, and iOS
Before compiling our app for Android, I have some bad news for Windows users. You’ll need Linux or macOS to compile your Android application. However, you don’t need to have a separate Linux distribution — instead, you can use a virtual machine.
To compile and generate a full Android .apk application, we’ll use a tool called Buildozer. Install Buildozer through our terminal using one of the commands below:
pip3 install buildozer
//
pip install buildozer
Now, we’ll install some of Buildozer’s required dependencies. I am using Linux Ergo, so I’ll use Linux-specific commands. You should execute these commands one by one:
sudo apt update
sudo apt install -y git zip unzip openjdk-13-jdk python3-pip autoconf libtool pkg-config zlib1g-dev libncurses5-dev libncursesw5-dev libtinfo5 cmake libffi-dev libssl-dev

pip3 install --upgrade Cython==0.29.19 virtualenv

# add the following line at the end of your ~/.bashrc file
export PATH=$PATH:~/.local/bin/
After executing the specific commands, run buildozer init. You should see an output similar to the screenshot below:
The command above creates a buildozer .spec file, which you can use to make specifications to your app, including the name of the app, the icon, etc. The .spec file should look like the code block below:
[app]

# (str) Title of your application
title = My Application

# (str) Package name
package.name = myapp

# (str) Package domain (needed for android/ios packaging)
package.domain = org.test

# (str) Source code where the main.py live
source.dir = .

# (list) Source files to include (let empty to include all the files)
source.include_exts = py,png,jpg,kv,atlas

# (list) List of inclusions using pattern matching
#source.include_patterns = assets/*,images/*.png

# (list) Source files to exclude (let empty to not exclude anything)
#source.exclude_exts = spec

# (list) List of directory to exclude (let empty to not exclude anything)
#source.exclude_dirs = tests, bin

# (list) List of exclusions using pattern matching
#source.exclude_patterns = license,images/*/*.jpg

# (str) Application versioning (method 1)
version = 0.1

# (str) Application versioning (method 2)
# version.regex = __version__ = ['"](.*)['"]
# version.filename = %(source.dir)s/main.py

# (list) Application requirements
# comma separated e.g. requirements = sqlite3,kivy
requirements = python3,kivy

# (str) Custom source folders for requirements
# Sets custom source for any requirements with recipes
# requirements.source.kivy = ../../kivy

# (list) Garden requirements
#garden_requirements =

# (str) Presplash of the application
#presplash.filename = %(source.dir)s/data/presplash.png

# (str) Icon of the application
#icon.filename = %(source.dir)s/data/icon.png

# (str) Supported orientation (one of landscape, sensorLandscape, portrait or all)
orientation = portrait

# (list) List of service to declare
#services = NAME:ENTRYPOINT_TO_PY,NAME2:ENTRYPOINT2_TO_PY

#
# OSX Specific
#

#
# author = © Copyright Info

# change the major version of python used by the app
osx.python_version = 3

# Kivy version to use
osx.kivy_version = 1.9.1

#
# Android specific
#

# (bool) Indicate if the application should be fullscreen or not
fullscreen = 0

# (string) Presplash background color (for new android toolchain)
# Supported formats are: #RRGGBB #AARRGGBB or one of the following names:
# red, blue, green, black, white, gray, cyan, magenta, yellow, lightgray,
# darkgray, grey, lightgrey, darkgrey, aqua, fuchsia, lime, maroon, navy,
# olive, purple, silver, teal.
#android.presplash_color = #FFFFFF

# (list) Permissions
#android.permissions = INTERNET

# (int) Target Android API, should be as high as possible.
#android.api = 27

# (int) Minimum API your APK will support.
#android.minapi = 21

# (int) Android SDK version to use
#android.sdk = 20

# (str) Android NDK version to use
#android.ndk = 19b

# (int) Android NDK API to use. This is the minimum API your app will support, it should usually match android.minapi.
#android.ndk_api = 21

# (bool) Use --private data storage (True) or --dir public storage (False)
#android.private_storage = True

# (str) Android NDK directory (if empty, it will be automatically downloaded.)
#android.ndk_path =

# (str) Android SDK directory (if empty, it will be automatically downloaded.)
#android.sdk_path =

# (str) ANT directory (if empty, it will be automatically downloaded.)
#android.ant_path =

# (bool) If True, then skip trying to update the Android sdk
# This can be useful to avoid excess Internet downloads or save time
# when an update is due and you just want to test/build your package
# android.skip_update = False

# (bool) If True, then automatically accept SDK license
# agreements. This is intended for automation only. If set to False,
# the default, you will be shown the license when first running
# buildozer.
# android.accept_sdk_license = False

# (str) Android entry point, default is ok for Kivy-based app
#android.entrypoint = org.renpy.android.PythonActivity

# (str) Android app theme, default is ok for Kivy-based app
# android.apptheme = "@android:style/Theme.NoTitleBar"

# (list) Pattern to whitelist for the whole project
#android.whitelist =

# (str) Path to a custom whitelist file
#android.whitelist_src =

# (str) Path to a custom blacklist file
#android.blacklist_src =

# (list) List of Java .jar files to add to the libs so that pyjnius can access
# their classes. Don't add jars that you do not need, since extra jars can slow
# down the build process. Allows wildcards matching, for example:
# OUYA-ODK/libs/*.jar
#android.add_jars = foo.jar,bar.jar,path/to/more/*.jar

# (list) List of Java files to add to the android project (can be java or a
# directory containing the files)
#android.add_src =

# (list) Android AAR archives to add (currently works only with sdl2_gradle
# bootstrap)
#android.add_aars =

# (list) Gradle dependencies to add (currently works only with sdl2_gradle
# bootstrap)
#android.gradle_dependencies =

# (list) add java compile options
# this can for example be necessary when importing certain java libraries using the 'android.gradle_dependencies' option
# see https://developer.android.com/studio/write/java8-support for further information
# android.add_compile_options = "sourceCompatibility = 1.8", "targetCompatibility = 1.8"

# (list) Gradle repositories to add {can be necessary for some android.gradle_dependencies}
# please enclose in double quotes
# e.g. android.gradle_repositories = "maven { url 'https://kotlin.bintray.com/ktor' }"
#android.add_gradle_repositories =

# (list) packaging options to add
# see https://google.github.io/android-gradle-dsl/current/com.android.build.gradle.internal.dsl.PackagingOptions.html
# can be necessary to solve conflicts in gradle_dependencies
# please enclose in double quotes
# e.g. android.add_packaging_options = "exclude 'META-INF/common.kotlin_module'", "exclude 'META-INF/*.kotlin_module'"
#android.add_gradle_repositories =

# (list) Java classes to add as activities to the manifest.
#android.add_activities = com.example.ExampleActivity

# (str) OUYA Console category. Should be one of GAME or APP
# If you leave this blank, OUYA support will not be enabled
#android.ouya.category = GAME

# (str) Filename of OUYA Console icon. It must be a 732x412 png image.
#android.ouya.icon.filename = %(source.dir)s/data/ouya_icon.png

# (str) XML file to include as an intent filters in <activity> tag
#android.manifest.intent_filters =

# (str) launchMode to set for the main activity
#android.manifest.launch_mode = standard

# (list) Android additional libraries to copy into libs/armeabi
#android.add_libs_armeabi = libs/android/*.so
#android.add_libs_armeabi_v7a = libs/android-v7/*.so
#android.add_libs_arm64_v8a = libs/android-v8/*.so
#android.add_libs_x86 = libs/android-x86/*.so
#android.add_libs_mips = libs/android-mips/*.so

# (bool) Indicate whether the screen should stay on
# Don't forget to add the WAKE_LOCK permission if you set this to True
#android.wakelock = False

# (list) Android application meta-data to set (key=value format)
#android.meta_data =

# (list) Android library project to add (will be added in the
# project.properties automatically.)
#android.library_references =

# (list) Android shared libraries which will be added to AndroidManifest.xml using <uses-library> tag
#android.uses_library =

# (str) Android logcat filters to use
#android.logcat_filters = *:S python:D

# (bool) Copy library instead of making a libpymodules.so
#android.copy_libs = 1

# (str) The Android arch to build for, choices: armeabi-v7a, arm64-v8a, x86, x86_64
android.arch = armeabi-v7a

# (int) overrides automatic versionCode computation (used in build.gradle)
# this is not the same as app version and should only be edited if you know what you're doing
# android.numeric_version = 1

#
# Python for android (p4a) specific
#

# (str) python-for-android fork to use, defaults to upstream (kivy)
#p4a.fork = kivy

# (str) python-for-android branch to use, defaults to master
#p4a.branch = master

# (str) python-for-android git clone directory (if empty, it will be automatically cloned from github)
#p4a.source_dir =

# (str) The directory in which python-for-android should look for your own build recipes (if any)
#p4a.local_recipes =

# (str) Filename to the hook for p4a
#p4a.hook =

# (str) Bootstrap to use for android builds
# p4a.bootstrap = sdl2

# (int) port number to specify an explicit --port= p4a argument (eg for bootstrap flask)
#p4a.port =


#
# iOS specific
#

# (str) Path to a custom kivy-ios folder
#ios.kivy_ios_dir = ../kivy-ios
# Alternately, specify the URL and branch of a git checkout:
ios.kivy_ios_url = https://github.com/kivy/kivy-ios
ios.kivy_ios_branch = master

# Another platform dependency: ios-deploy
# Uncomment to use a custom checkout
#ios.ios_deploy_dir = ../ios_deploy
# Or specify URL and branch
ios.ios_deploy_url = https://github.com/phonegap/ios-deploy
ios.ios_deploy_branch = 1.7.0

# (str) Name of the certificate to use for signing the debug version
# Get a list of available identities: buildozer ios list_identities
#ios.codesign.debug = "iPhone Developer: <lastname> <firstname> (<hexstring>)"

# (str) Name of the certificate to use for signing the release version
#ios.codesign.release = %(ios.codesign.debug)s


[buildozer]

# (int) Log level (0 = error only, 1 = info, 2 = debug (with command output))
log_level = 2

# (int) Display warning if buildozer is run as root (0 = False, 1 = True)
warn_on_root = 1

# (str) Path to build artifact storage, absolute or relative to spec file
# build_dir = ./.buildozer

# (str) Path to build output (i.e. .apk, .ipa) storage
# bin_dir = ./bin

#    -----------------------------------------------------------------------------
#    List as sections
#
#    You can define all the "list" as [section:key].
#    Each line will be considered as a option to the list.
#    Let's take [app] / source.exclude_patterns.
#    Instead of doing:
#
#[app]
#source.exclude_patterns = license,data/audio/*.wav,data/images/original/*
#
#    This can be translated into:
#
#[app:source.exclude_patterns]
#license
#data/audio/*.wav
#data/images/original/*
#


#    -----------------------------------------------------------------------------
#    Profiles
#
#    You can extend section / key with a profile
#    For example, you want to deploy a demo version of your application without
#    HD content. You could first change the title to add "(demo)" in the name
#    and extend the excluded directories to remove the HD content.
#
#[[email protected]]
#title = My Application (demo)
#
#[app:[email protected]]
#images/hd/*
#
#    Then, invoke the command line with the "demo" profile:
#
#buildozer --profile demo android debug
If you want to specify things like the icon, requirements, or loading screen, you should edit this file.
After making all the desired edits to your application, run buildozer -v android debug from your app directory to build and compile your application. This may take a while, especially if you have a slow machine.
After the process is done, your terminal should have some logs, one confirming that the build was successful:
You should also have an APK version of your app in your bin directory. This is the application executable that you will install and run on your phone:
Congratulations! If you have followed this tutorial step by step, you should have a simple random number generator app on your phone. Play around with it and tweak some values, then rebuild. Running the rebuild will not take as much time as the first build.
Conclusion
As you can see, building a mobile application with Python is fairly straightforward, as long as you are familiar with the framework or module you are working with. Regardless, the logic is executed the same way: if you want to package the application for other platforms, you can check out the steps here. Keep in mind that for the Apple ecosystem, you’ll need to be on a Mac.
That being said, get familiar with the Kivy module and its widgets. You can never know everything all at once. You need only find a project and get your feet wet as early as possible. Happy coding!
LogRocket: Full visibility into your web and mobile apps
LogRocket is a frontend application monitoring solution that lets you replay problems as if they happened in your own browser. Instead of guessing why errors happen, or asking users for screenshots and log dumps, LogRocket lets you replay the session to quickly understand what went wrong. It works perfectly with any app, regardless of framework, and has plugins to log additional context from Redux, Vuex, and @ngrx/store.
In addition to logging Redux actions and state, LogRocket records console logs, JavaScript errors, stacktraces, network requests/responses with headers + bodies, browser metadata, and custom logs. It also instruments the DOM to record the HTML and CSS on the page, recreating pixel-perfect videos of even the most complex single-page and mobile apps.
Try it for free.

