| title | description | ms.topic | ms.assetid | ms.author | author | manager | ms.date |
|---|---|---|---|---|---|---|---|
|
Server Manager |
Learn about the management console in Windows Server that helps IT professionals provision and manage both local and remote Windows-based servers from their desktops, without requiring either physical access to servers, or the need to enable Remote Desktop protocol (rdP) connections to each server. |
conceptual |
d996ef40-8bcc-42b0-b6ae-806b828223f6 |
jgerend |
JasonGerend |
mtillman |
10/16/2017 |
Server Manager
Applies to: Windows Server 2022, Windows Server 2019, Windows Server 2016, Windows Server 2012 R2, Windows Server 2012
Server Manager is a management console in Windows Server that helps IT professionals provision and manage both local and remote Windows-based servers from their desktops, without requiring either physical access to servers, or the need to enable Remote Desktop protocol (rdP) connections to each server. Although Server Manager is available in Windows Server 2008 R2 and Windows Server 2008, Server Manager was updated in Windows Server 2012 to support remote, multi-server management, and help increase the number of servers an administrator can manage.
In our tests, Server Manager in Windows Server 2016, Windows Server 2012 R2, and Windows Server 2012 can be used to manage up to 100 servers, depending on the workloads that the servers are running. The number of servers that you can manage by using a single Server Manager console can vary depending on the amount of data that you request from managed servers, and hardware and network resources available to the computer running Server Manager. As the amount of data you want to display approaches that computer’s resource capacity, you can experience slow responses from Server Manager, and delays in the completion of refreshes. To help increase the number of servers that you can manage by using Server Manager, we recommend limiting the event data that Server Manager gets from your managed servers, by using settings in the Configure Event Data dialog box. Configure Event Data can be opened from the Tasks menu in the Events tile. If you need to manage an enterprise-level number of servers in your organization, we recommend evaluating products in the Microsoft System Center suite.
This topic and its subtopics provide information about how to use features in the Server Manager console. This topic contains the following sections.
-
Review initial considerations and system requirements
-
Tasks that you can perform in Server Manager
-
Start Server Manager
-
Restart remote servers
-
Export Server Manager settings to other computers
Review initial considerations and system requirements
The following sections list some initial considerations that you need to review, as well as hardware and software requirements for Server Manager.
Hardware requirements
Server Manager is installed by default with all editions of Windows Server 2016. No additional hardware requirements exist for Server Manager.
Software and configuration requirements
Server Manager is installed by default with all editions of Windows Server 2016. You can use Server Manager in Windows Server 2016 to manage Server Core installation options of Windows Server 2016, Windows Server 2012 , and Windows Server 2008 R2 that are running on remote computers. Server Manager does run on the Server Core installation option of Windows Server 2016.
Server Manager runs in the Minimal Server Graphical Interface; that is, when the Server Graphical Shell feature is not installed. The Server Graphical Shell feature is not installed by default on Windows Server 2016. If you are not running Server Graphical Shell, the Server Manager console runs, but some applications or tools available from the console are not available. Internet browsers cannot run without Server Graphical Shell, so webpages and applications such as HTML help (The mmc F1 help, for example) cannot be opened. You cannot open dialog boxes for configuring Windows automatic updating and feedback when Server Graphical Shell is not installed; commands that open these dialog boxes in the Server Manager console are redirected to run sconfig.cmd.
To manage servers that are running Windows Server releases older than Windows Server 2016, install the following software and updates to make the older releases of Windows Server manageable by using Server Manager in Windows Server 2016.
| Operating System | Required Software |
|---|---|
| Windows Server 2012 R2 or Windows Server 2012 | — .NET Framework 4.6 — Windows Management Framework 5.0. The Windows Management Framework 5.0 download package updates Windows Management Instrumentation (WMI) providers on Windows Server 2012 R2 and Windows Server 2012 . The updated WMI providers let Server Manager collect information about roles and features that are installed on the managed servers. Until the update is applied, servers that are running Windows Server 2012 R2 or Windows Server 2012 have a manageability status of Not accessible. — The performance update associated with Knowledge Base article 2682011 is no longer necessary on servers that are running Windows Server 2012 R2 or Windows Server 2012 . |
| Windows Server 2008 R2 | — .NET Framework 4.5 — Windows Management Framework 4.0. The Windows Management Framework 4.0 download package updates Windows Management Instrumentation (WMI) providers on Windows Server 2008 R2 . The updated WMI providers let Server Manager collect information about roles and features that are installed on the managed servers. Until the update is applied, servers that are running Windows Server 2008 R2 have a manageability status of Not accessible. — The performance update associated with Knowledge Base article 2682011 lets Server Manager collect performance data from Windows Server 2008 R2 . |
| Windows Server 2008 | — .NET Framework 4 — Windows Management Framework 3.0 The Windows Management Framework 3.0 download package updates Windows Management Instrumentation (WMI) providers on Windows Server 2008 . The updated WMI providers let Server Manager collect information about roles and features that are installed on the managed servers. Until the update is applied, servers that are running Windows Server 2008 have a manageability status of Not accessible — verify earlier versions run Windows Management Framework 3.0. — The performance update associated with Knowledge Base article 2682011 lets Server Manager collect performance data from Windows Server 2008 . |
Manage remote computers from a client computer
The Server Manager console is included with Remote Server Administration Tools for Windows 10. Note that when Remote Server Administration Tools is installed on a client computer, you cannot manage the local computer by using Server Manager; Server Manager cannot be used to manage computers or devices that are running a Windows client operating system. You can only use Server Manager to manage Windows-based servers.
| Server Manager Source Operating System | Targeted at Windows Server 2016 | Targeted at Windows Server 2012 R2 | Targeted at Windows Server 2012 | Targeted at Windows Server 2008 R2 or Windows Server 2008 | Targeted at Windows Server 2003 | Targeted at Windows 10 Enterprise multi-session on Azure Virtual Desktop |
|---|---|---|---|---|---|---|
| Windows 10 or Windows Server 2016 | Full support | Full support | Full support | After Software and configuration requirements are satisfied, can perform most management tasks, but no role or feature installation or uninstallation | Not supported | Not supported |
| Windows 8.1 or Windows Server 2012 R2 | Not supported | Full support | Full support | After Software and configuration requirements are satisfied, can perform most management tasks, but no role or feature installation or uninstallation | Limited support; online and offline status only | Not supported |
| Windows 8 or Windows Server 2012 | Not supported | Not supported | Full support | After Software and configuration requirements are satisfied, can perform most management tasks, but no role or feature installation or uninstallation | Limited support; online and offline status only | Not supported |
To start Server Manager on a client computer
-
Follow instructions in Remote Server Administration Tools to install Remote Server Administration Tools for Windows 10.
-
On the start screen, click Server Manager. The Server Manager tile is available after you install Remote Server Administration Tools.
-
if neither the Administrative Tools nor the Server Manager tiles are displayed on the start screen after installing Remote Server Administration Tools, and searching for Server Manager on the start screen does not display results, verify that the Show administrative tools setting is turned on. To view this setting, hover the mouse cursor over the upper right corner of the start screen, and then click Settings. If Show administrative tools is turned off, turn the setting on to display tools that you have installed as part of Remote Server Administration Tools.
for more information about running Remote Server Administration Tools for Windows 10 to manage remote servers, see Remote Server Administration Tools on the TechNet Wiki.
Configure remote management on servers that you want to manage
[!IMPORTANT]
By default, Server Manager and Windows PowerShell remote management is enabled in Windows Server 2016.
To perform management tasks on remote servers by using Server Manager, remote servers that you want to manage must be configured to allow remote management by using Server Manager and Windows PowerShell. If remote management has been disabled on Windows Server 2012 R2 or Windows Server 2012 , and you want to enable it again, perform the following steps.
To configure Server Manager remote management on Windows Server 2012 R2 or Windows Server 2012 by using the Windows interface
-
[!NOTE]
The settings that are controlled by the Configure remote Management dialog box do not affect parts of Server Manager that use DCOM for remote communications.Do one of the following to open Server Manager if it is not already open.
-
On the Windows taskbar, click the Server Manager button.
-
On the start screen, click Server Manager.
-
-
In the Properties area of the Local Servers page, click the hyperlinked value for the remote management property.
-
Do one of the following, and then click OK.
-
To prevent this computer from being managed remotely by using Server Manager (or Windows PowerShell if it is installed), clear the Enable remote management of this server from other computers check box.
-
To let this computer be managed remotely by using Server Manager or Windows PowerShell, select Enable remote management of this server from other computers.
-
To enable Server Manager remote management on Windows Server 2012 R2 or Windows Server 2012 by using Windows PowerShell
-
Do one of the following.
-
To run Windows PowerShell as an administrator from the start screen, right-click the Windows PowerShell tile, and then click Run as Administrator.
-
To run Windows PowerShell as an administrator from the desktop, right-click the Windows PowerShell shortcut in the taskbar, and then click Run as Administrator.
-
-
type the following, and then press Enter to enable all required firewall rule exceptions.
Configure-SMremoting.exe -Enable
[!NOTE]
This command also works in a command prompt that has been opened with elevated user rights (Run as Administrator).if enabling remote management fails, see about_remote_Troubleshooting on Microsoft TechNet for troubleshooting tips and best practices.
To enable Server Manager and Windows PowerShell remote management on older operating systems
-
Do one of the following.
-
To enable remote management on servers that are running Windows Server 2008 R2 , see remote Management with Server Manager in the Windows Server 2008 R2 help.
-
To enable remote management on servers that are running Windows Server 2008 , see Enable and Use remote Commands in Windows PowerShell.
-
Tasks that you can perform in Server Manager
Server Manager makes server administration more efficient by allowing administrators to do tasks in the following table by using a single tool. In Windows Server 2012 R2 and Windows Server 2012 , both standard users of a server and members of the Administrators group can perform management tasks in Server Manager, but by default, standard users are prevented from performing some tasks, as shown in the following table.
Administrators can use two Windows PowerShell cmdlets in the Server Manager cmdlet module, Enable-ServerManagerStandardUserremoting and Disable-ServerManagerStandardUserremoting, to further control standard user access to some additional data. The Enable-ServerManagerStandardUserremoting cmdlet can provide one or more standard, non-Administrator users access to event, service, performance counter, and role and feature inventory data.
[!IMPORTANT]
Server Manager cannot be used to manage a newer release of the Windows Server operating system. Server Manager running on Windows Server 2012 or Windows 8 cannot be used to manage servers that are running Windows Server 2012 R2 .
| Task Description | Administrators (including the built-in Administrator account) | Standard Server Users |
|---|---|---|
| add remote servers to a pool of servers that Server Manager can be used to manage. | Yes | No |
| create and edit custom groups of servers, such as servers that are in a specific geographic location or serve a specific purpose. | Yes | Yes |
| Install or uninstall roles, role services, and features on the local or on remote servers that are running Windows Server 2012 R2 or Windows Server 2012 . For definitions of roles, role services, and features, see Roles, Role Services, and Features. | Yes | No |
| View and make changes to server roles and features that are installed on either local or remote servers. Note: In Server Manager, role and feature data is displayed in the base language of the system, also called the system default GUI language, or the language selected during installation of the operating system. | Yes | Standard users can view and manage roles and features, and perform tasks such as viewing role events, but cannot add or remove role services. |
| start management tools such as Windows PowerShell or mmc snap-ins. You can start a Windows PowerShell session targeted at a remote server by right-clicking the server in the Servers tile, and then clicking Windows PowerShell. You can start mmc snap-ins from the Tools menu of the Server Manager console, and then point the mmc toward a remote computer after the snap-in is open. | Yes | Yes |
| Manage remote servers with different credentials by right-clicking a server in the Servers tile, and then clicking Manage As. You can use Manage As for general server and File and Storage Services management tasks. | Yes | No |
| Perform management tasks associated with the operational lifecycle of servers, such as starting or stopping services; and start other tools that allow you to configure a server’s network settings, users and groups, and Remote Desktop connections. | Yes | Standard users cannot start or stop services. They can change the local server’s name, workgroup, or domain membership and Remote Desktop settings, but are prompted by User Account Control to provide Administrator credentials before they can complete these tasks. They cannot change remote management settings. |
| Perform management tasks associated with the operational lifecycle of roles that are installed on servers, including scanning roles for compliance with best practices. | Yes | Standard users cannot run Best Practices Analyzer scans. |
| Determine server status, identify critical events, and analyze and troubleshoot configuration issues or failures. | Yes | Yes |
| Customize the events, performance data, services, and Best Practices Analyzer results about which you want to be alerted on the Server Manager dashboard. | Yes | Yes |
| Restart servers. | Yes | No |
| Refresh data that is displayed in the Server Manager console about managed servers. | Yes | No |
[!NOTE]
Server Manager cannot be used to add roles and features to servers that are running Windows Server 2008 R2 or Windows Server 2008 .
Start Server Manager
Server Manager starts automatically by default on servers that are running Windows Server 2016 when a member of the Administrators group logs on to a server. If you close Server Manager, restart it in one of the following ways. This section also contains steps for changing the default behavior, and preventing Server Manager from starting automatically.
To start Server Manager from the start screen
- On the Windows start screen, click the Server Manager tile.
To start Server Manager from the Windows desktop
- On the Windows taskbar, click Server Manager.
To prevent Server Manager from starting automatically
-
In the Server Manager console, on the Manage menu, click Server Manager Properties.
-
In the Server Manager Properties dialog box, fill the check box for Do not start Server Manager automatically at logon. Click OK.
-
Alternatively, you can prevent Server Manager from starting automatically by enabling the Group Policy setting, Do not start Server Manager automatically at logon. The path to this policy setting, in the Local Group Policy editor console, is computer ConfigurationAdministrative TemplatesSystemServer Manager.
Restart remote servers
You can restart a remote server from the Servers tile of a role or group page in Server Manager.
[!IMPORTANT]
Restarting a remote server forces the server to restart, even if users are still logged on to the remote server, and even if programs with unsaved data are still open. This behavior is different from shutting down or restarting the local computer, on which you would be prompted to save unsaved program data, and verify that you wanted to force logged-on users to log off. Be sure that you can force other users to log off of remote servers, and that you can discard unsaved data in programs that are running on the remote servers.if an automatic refresh occurs in Server Manager while a managed server is shutting down and restarting, refresh and manageability status errors can occur for the managed server, because Server Manager cannot connect to the remote server until it is finished restarting.
To restart remote servers in Server Manager
-
Open a role or server group home page in Server Manager.
-
select one or more remote servers that you have added to Server Manager. Press and hold Ctrl as you click to select multiple servers at one time. For more information about how to add servers to the Server Manager server pool, see add Servers to Server Manager.
-
Right-click selected servers, and then click Restart Server.
Export Server Manager settings to other computers
In Server Manager, your list of managed servers, changes to Server Manager console settings, and custom groups that you have created are stored in the following two files. You can reuse these settings on other computers that are running the same release of Server Manager (or Windows 10 with Remote Server Administration Tools installed). Remote Server Administration Tools must be running on Windows client-based computers to export Server Manager settings to those computers.
-
%appdata%MicrosoftWindowsServerManagerServerlist.xml
-
%appdata%LocalMicrosoft_CorporationServerManager.exe_StrongName_GUID6.2.0.0user.config
[!NOTE]
- Manage As (or alternate) credentials for servers in your server pool are not stored in the roaming profile. Server Manager users must add them on each computer from which they want to manage.
- The network share roaming profile is not created until a user logs on to the network, and then logs off for the first time. The Serverlist.xml file is created at this time.
You can export Server Manager settings, make Server Manager settings portable, or use them on other computers in one of the following two ways.
-
To export settings to another domain-joined computer, configure the Server Manager user to have a roaming profile in active directory Users and computers. You must be a Domain Administrator to change user properties in active directory Users and computers.
-
To export settings to another computer in a workgroup, copy the preceding two files to the same location on the computer from which you want to manage by using Server Manager.
To export Server Manager settings to other domain-joined computers
-
In active directory Users and computers, open the Properties dialog box for a Server Manager user.
-
On the Profile tab, add a path to a network share to store the user’s profile.
-
Do one of the following.
-
On U.S. English (en-us) builds, changes to the Serverlist.xml file are automatically saved to the profile. Go on to the next step.
-
On other builds, copy the following two files from the computer that is running Server Manager to the network share that is part of the user’s roaming profile.
-
%appdata%MicrosoftWindowsServerManagerServerlist.xml
-
%localappdata%Microsoft_CorporationServerManager.exe_StrongName_GUID6.2.0.0user.config
-
-
-
Click OK to save your changes and close the Properties dialog box.
To export Server Manager settings to computers in workgroups
-
On a computer from which you want to manage remote servers, overwrite the following two files with the same files from another computer that is running Server Manager, and that has the settings you want.
-
%appdata%MicrosoftWindowsServerManagerServerlist.xml
-
%localappdata%Microsoft_CorporationServerManager.exe_StrongName_GUID6.2.0.0user.config
-
| title | description | ms.topic | ms.assetid | ms.author | author | manager | ms.date |
|---|---|---|---|---|---|---|---|
|
Manage the Local Server and the Server Manager Console |
Learn how to manage both the local server and remote servers that are running Windows Server 2008 and newer releases of the Windows Server operating system. |
article |
eeb32f65-d588-4ed5-82ba-1ca37f517139 |
jgerend |
JasonGerend |
mtillman |
10/16/2017 |
Manage the Local Server and the Server Manager Console
Applies to: Windows Server 2022, Windows Server 2019, Windows Server 2016, Windows Server 2012 R2, Windows Server 2012
In Windows Server, Server Manager lets you manage both the local server (if you are running Server Manager on Windows Server, and not on a Windows-based client operating system) and remote servers that are running Windows Server 2008 and newer releases of the Windows Server operating system.
The Local Server page in Server Manager displays server properties, events, service and performance counter data, and Best Practices Analyzer (BPA) results for the local server. Event, service, BPA, and performance tiles function as they do on role and server group pages. For more information about configuring the data that is displayed in these tiles, see View and Configure Performance, Event, and Service Data and Run Best Practices Analyzer Scans and Manage Scan Results.
Menu commands and settings in the Server Manager console heading bars apply globally to all servers in your server pool, and let you use Server Manager to manage the entire server pool.
This topic contains the following sections.
-
Shut down the local server
-
Configure Server Manager properties
-
Manage the Server Manager console
-
Customize tools that are displayed in the Tools menu
-
Manage roles on role home pages
Shut down the local server
The Tasks menu in the local server Properties tile lets you start a Windows PowerShell session on the local server, open the computer Management mmc snap-in, or open mmc snap-ins for roles or features that are installed on the local server. You can also shut down the local server by using the Shut Down Local Server command in this Tasks menu. The Shut Down Local Server command is also available for the local server in the Servers tile on the All Servers page, or on any role or group page in which the local server is represented.
Shutting down the local server by using this method, unlike shutting down Windows Server 2016 from the start screen, opens the Shut Down Windows dialog box, which lets you specify reasons for shutdown in the shutdown Event Tracker area.
[!NOTE]
Only members of the Administrators group can shut down or restart a server. Standard users cannot shut down or restart a server. Clicking the Shut Down Local Server command logs standard users off server sessions. This matches the experience of a standard user running the Alt+F4 shutdown command from the server desktop.
Configure Server Manager properties
You can view or change the following settings in the Properties tile on the Local Server page. To change a setting’s value, click the hypertext value of the setting.
[!NOTE]
Typically, the properties displayed in the Local Server Properties tile can only be changed on the local server. You cannot change the local server properties from a remote computer by using Server Manager because the Properties tile can only get information about the local computer, not remote computers.Because many properties displayed in the Properties tile are controlled by tools that are not part of Server Manager (Control Panel, for example), changes to Properties settings are not always displayed in the Properties tile immediately. By default, data in the Properties tile is refreshed every two minutes. To refresh Properties tile data immediately, click Refresh in the Server Manager address bar.
| Setting | Description |
|---|---|
| computer name | Displays the computer friendly name, and opens the System Properties dialog box, which lets you change the server’s name, domain membership, and other system settings such as user profiles. |
| Domain (or Workgroup, if the server is not joined to a domain) | Displays the domain or workgroup of which the server is a member. Opens the System Properties dialog box, which lets you change the server’s name, domain membership, and other system settings such as user profiles. |
| Windows Firewall | Displays Windows Firewall status for the local server. Opens Control PanelSystem and SecurityWindows Firewall. For more information about configuring Windows Firewall, see Windows Firewall with Advanced Security and IPsec. |
| remote management | Displays Server Manager and Windows PowerShell remote management status. Opens the Configure remote Management dialog box. For more information about remote management, see Configure remote Management in Server Manager. |
| Remote Desktop | Shows whether users can connect to the server remotely by using Remote Desktop sessions. Opens the remote tab of the System Properties dialog box. |
| NIC Teaming | Shows whether the local server is participating in NIC teaming. Opens the NIC Teaming dialog box, and lets you join the local server to a NIC team if desired. For more information about NIC Teaming, see the NIC Teaming white paper. |
| Ethernet | Displays the networking status of the server. Opens Control PanelNetwork and InternetNetwork Connections. |
| Operating system version | This read-only field displays the version number of the Windows operating system that the local server is running. |
| Hardware information | This read-only field displays the manufacturer and model name and number of the server hardware. |
| Last installed updates | Displays the day and time that Windows updates were last installed. Opens Control PanelSystem and SecurityWindows Update. |
| Windows Update | Displays Windows Update settings for the local server. Opens Control PanelSystem and SecurityWindows Update. |
| Last checked for updates | Displays the day and time that the server last checked for available Windows updates. Opens Control PanelSystem and SecurityWindows Update. |
| Windows Error Reporting | Displays Windows Error Reporting opt-in status. Opens the Windows Error Reporting Configuration dialog box. For more information about Windows Error Reporting, its benefits, privacy statements, and opt-in settings, see Windows Error Reporting. |
| Customer Experience Improvement Program | Displays Windows Customer Experience Improvement Program opt-in status. Opens the Customer Experience Improvement Program Configuration dialog box. For more information about Windows Customer Experience Improvement Program, its benefits, and opt-in settings, see Windows Customer Experience Improvement Program. |
| Internet Explorer (IE) Enhanced Security Configuration | Shows whether IE Enhanced Security Configuration (also known as IE hardening or IE ESC) is turned on or off. Opens the Internet Explorer Enhanced Security Configuration dialog box. IE Enhanced Security Configuration is a security measure for servers that prevents web pages from opening in Internet Explorer. For more information about IE Enhanced Security Configuration, its benefits, and settings, see Internet Explorer: Enhanced Security Configuration. |
| time zone | Displays the local server’s time zone. Opens the date and time dialog box. |
| Product ID | Displays the Windows activation status and product ID number (if Windows has been activated) of the Windows Server 2016 operating system. This is not the same number as the Windows product key. Opens the Windows Activation dialog box. |
| Processors | This read-only field displays manufacturer, model name, and speed information about the local server’s processors. |
| Installed memory (RAM) | This read-only field displays the amount of available RAM, in gigabytes. |
| Total disk space | This read-only field displays the amount of available disk space, in gigabytes. |
Manage the Server Manager console
Global settings that apply to the entire Server Manager console, and to all remote servers that have been added to the Server Manager server pool, are found in the heading bars at the top of the Server Manager console window.
add servers to Server Manager
The command that opens the add Servers dialog box, and lets you add remote physical or virtual servers to the Server Manager server pool, is in the Manage menu of the Server Manager console. For detailed information about how to add servers, see add Servers to Server Manager.
Refresh data that is displayed in Server Manager
You can configure the refresh interval for data that is displayed in Server Manager on the Server Manager Properties dialog box, which you open from the Manage menu.
To configure the refresh interval in Server Manager
-
On the Manage menu in the Server Manager console, click Server Manager Properties.
-
In the Server Manager Properties dialog box, specify a time period, in minutes, for the amount of elapsed time you want between refreshes of the data that is displayed in Server Manager. The default is 10 minutes. Click OK when you are finished.
Refresh limitations
Refresh applies globally to data from all servers that you have added to the Server Manager server pool. You cannot refresh data or configure different refresh intervals for individual servers, roles, or groups.
When servers that are in a cluster are added to Server Manager, whether they are physical computers or virtual machines, the first refresh of data can fail, or display data only for the host server for clustered objects. Subsequent refreshes show accurate data for physical or virtual servers in a server cluster.
Data that is displayed in role home pages in Server Manager for Remote Desktop Services, IP address Management, and File and Storage Services does not refresh automatically. Refresh data that is displayed in these pages manually, by pressing F5 or clicking Refresh in the Server Manager console heading while you are on those pages.
add or remove roles or features
The commands that open the add Roles and Features Wizard and remove Roles and Features Wizard, and let you add or remove roles, role services, and features to servers in your server pool, are in the Manage menu of the Server Manager console, and the Tasks menu of the Roles and Features tile on role or group pages. For detailed information about how to add or remove roles or features, see Install or Uninstall Roles, Role Services, or Features.
In Server Manager, role and feature data is displayed in the base language of the system, also called the system default GUI language, or the language selected during installation of the operating system.
create server groups
The command that opens the create Server Group dialog box, and lets you create custom groups of servers, is in the Manage menu of the Server Manager console. For detailed information about how to create server groups, see create and Manage Server Groups.
Prevent Server Manager from opening automatically at logon
The Do not start Server Manager automatically at logon check box in the Server Manager Properties dialog box controls whether Server Manager opens automatically at logon for members of the Administrators group on a local server. This setting does not affect Server Manager behavior when it is running on Windows 10 as part of Remote Server Administration Tools. For more information about configuring this setting, see Server Manager.
Zoom in or out
To zoom in or out on your view of the Server Manager console, you can either use the Zoom commands on the View menu, or press Ctrl+Plus (+) to zoom in and Ctrl+Minus (-) to zoom out.
Customize tools that are displayed in the Tools menu
The Tools menu in Server Manager includes soft links to shortcuts in the Administrative Tools folder in Control Panel/System and Security. The Administrative Tools folder contains a list of shortcuts or LNK files to available management tools, such as mmc snap-ins. Server Manager populates the Tools menu with links to those shortcuts, and copies the folder structure of the Administrative Tools folder to the Tools menu. By default, tools in the Administrative Tools folder are arranged in a flat list, sorted by type and by name. In the Server ManagerTools menu, items are sorted only by name, not by type.
To customize the Tools menu, copy tool or script shortcuts that you want to use to the Administrative Tools folder. You can also organize your shortcuts in folders, which create cascading menus in the Tools menu. additionally, if you want to restrict access to the custom tools on the Tools menu, you can set user access rights on both your custom tool folders in Administrative Tools, or directly on the original tool or script files.
We recommend against reorganizing system and administrative tools, and any management tools associated with roles and features that are installed on the local server. Moving role and feature management tools can prevent successful uninstallation of those management tools, when necessary. After uninstallation of a role or feature, a nonfunctional link to a tool whose shortcut has been moved might remain in the Tools menu. If you reinstall the role, a duplicate link to the same tool is created in the Tools menu, but one of the links will not work.
Role and feature tools that are installed as part of Remote Server Administration Tools on a Windows client-based computer can be organized into custom folders, however. Uninstalling the parent role or feature has no effect on the tool shortcuts that are available on a remote computer that is running Windows 10.
The following procedure describes how to create an example folder called MyTools, and move shortcuts for two Windows PowerShell scripts into the folder that are then accessible from the Server Manager Tools menu.
To customize the Tools menu by adding shortcuts in Administrative Tools
-
create a new folder called MyTools in a convenient location.
[!NOTE]
Because of restrictive access rights on the Administrative Tools folder, you are not allowed to create a new folder directly in the Administrative Tools folder; you must create a new folder elsewhere (such as on the Desktop), and then copy the new folder to the Administrative Tools folder. -
move or copy MyTools to Control Panel/System and Security/Administrative Tools. By default, you must be a member of the Administrators group on the computer to make changes to the Administrative Tools folder.
-
if you do not need to restrict user access rights to your custom tool shortcuts, go on to step 6. Otherwise, right-click either the tool file (or the MyTools folder), and then click Properties.
-
On the Security tab of the file’s Properties dialog box, click edit.
-
for users for whom you want to restrict tool access, clear check boxes for Read & execute, Read, and Write permissions. These permissions are inherited by the tool shortcut n the Administrative Tools folder.
if you edit access rights for a user while the user is using Server Manager (or while Server Manager is open), then your changes are not shown in the Tools menu until the user restarts Server Manager.
[!NOTE]
if you restrict access to an entire folder that you have copied to Administrative Tools, restricted users can see neither the folder nor its contents in the Server ManagerTools menu.edit permissions for the folder in the Administrative Tools folder. Because hidden files and folders in Administrative Tools are always displayed in the Server ManagerTools menu, do not use the Hidden setting on a file or folder’s Properties dialog box to restrict user access to your custom tool shortcuts.
Deny permissions always overwrite Allow permissions.
-
Right-click the original tool, script, or executable file for which you want to add entries on the Tools menu, and then click create shortcut.
-
move the shortcut to the MyTools folder in Administrative Tools.
-
Refresh or restart Server Manager, if necessary, to see your custom tool shortcut in the Tools menu.
Manage roles on role home pages
After you add servers to the Server Manager server pool, and Server Manager collects inventory data about servers in your pool, Server Manager adds pages to the navigation pane for roles that are discovered on managed servers. The Servers tile on role pages lists managed servers that are running the role. By default, Events, Best Practices Analyzer, Services, and Performance tiles display data for all servers that are running the role; selecting specific servers in the Servers tile limits the scope of events, services, performance counters, and BPA results to selected servers only. Management tools are typically available in the Server Manager console Tools menu, after a role or feature has been installed or discovered on a managed server. You can also right-click server entries in the Servers tile for a role or group, and then start the management tool that you want to use.
In Windows Server 2016, the following roles and feature have management tools that are integrated into Server Manager console as pages.
-
File and Storage Services. File and Storage Services pages include custom tiles and commands for managing volumes, shares, iSCSI virtual disks, and storage pools. When you open the File and Storage Services role home page in Server Manager, a retracting pane opens that displays custom management pages for File and Storage Services. For more information about deploying and managing File and Storage Services, see File and Storage Services.
-
Remote Desktop Services. Remote Desktop Services pages include custom tiles and commands for managing sessions, licenses, gateways, and virtual desktops. For more information about deploying and managing Remote Desktop Services, see Remote Desktop Services (rdS).
-
IP address Management (IPAM). The IPAM role page includes a custom Welcome tile containing links to common IPAM configuration and management tasks, including a wizard for provisioning an IPAM server. The IPAM home page also includes tiles for viewing the managed network, configuration summary, and scheduled tasks.
There are some limitations to IPAM management in Server Manager. Unlike typical role and group pages, IPAM has no Servers, Events, Performance, Best Practices Analyzer, or Services tiles. There is no Best Practices Analyzer model available for IPAM; Best Practices Analyzer scans on IPAM are not supported. To access servers in your server pool that are running IPAM, create a custom group of those servers that are running IPAM, and access the server list from the Servers tile on the custom group page. Alternatively, access IPAM servers from the Servers tile on the All Servers group page.
Dashboard thumbnails also display limited rows for IPAM, compared to thumbnails for other roles and groups. By clicking the IPAM thumbnail rows, you can view events, performance data, and manageability status alerts for servers that are running IPAM. IPAM-related services can be managed from pages for server groups that contain IPAM servers, such as the page for the All Servers group.
for more information about deploying and managing IPAM, see IP address Management (IPAM).
See Also
Server Manager
add Servers to Server Manager
create and Manage Server Groups
View and Configure Performance, Event, and Service Data
File and Storage Services
Remote Desktop Services (rdS)
IP address Management (IPAM)
Applies to: Windows Server (Semi-Annual Channel) and Windows Server 2016
Because Server Core doesn’t have a UI, you need to use Windows PowerShell cmdlets, command line tools, or remote tools to perform basic administration tasks. The following sections outline the PowerShell cmdlets and commands used for basic tasks. You can also use Windows Admin Center, a unified management portal currently in public preview, to administer your installation.
First from the cmd prompt start PowerShell
C:UsersAdministrator> powershell

PS C:UsersAdministrator>
Administrative tasks using PowerShell cmdlets
Use the following information to perform basic administrative tasks with Windows PowerShell cmdlets.
Set a static IP address
When you install a Server Core server, by default it has A DHCP address. If you need a static IP address, you can set it using the following steps.
To view your current network configuration, use Get-NetIPConfiguration.
To view the IP addresses you’re already using, use Get-NetIPAddress.
To set a static IP address, do the following:
-
Run Get-NetIPInterface.
-
Note the number in the IfIndex column for your IP interface or the InterfaceDescription string. If you have more than one network adapter, note the number or string corresponding to the interface you want to set the static IP address for.
-
Run the following cmdlet to set the static IP address:
PowerShell
New-NetIPaddress -InterfaceIndex 12 -IPAddress 192.0.2.2 -PrefixLength 24 -DefaultGateway 192.0.2.1where:
- InterfaceIndex is the value of IfIndex from step 2. (In our example, 12)
- IPAddress is the static IP address you want to set. (In our example, 191.0.2.2)
- PrefixLength is the prefix length (another form of subnet mask) for the IP address you’re setting. (For our example, 24)
- DefaultGateway is the IP address to the default gateway. (For our example, 192.0.2.1)
-
Run the following cmdlet to set the DNS client server address:
PowerShell
Set-DNSClientServerAddress –InterfaceIndex 12 -ServerAddresses 192.0.2.4where:
- InterfaceIndex is the value of IfIndex from step 2.
- ServerAddresses is the IP address of your DNS server.
-
To add multiple DNS servers, run the following cmdlet:
PowerShell
Set-DNSClientServerAddress –InterfaceIndex 12 -ServerAddresses 192.0.2.4,192.0.2.5where, in this example, 192.0.2.4 and 192.0.2.5 are both IP addresses of DNS servers.
If you need to switch to using DHCP, run Set-DnsClientServerAddress –InterfaceIndex 12 –ResetServerAddresses.
Join a domain
Use the following cmdlets to join a computer to a domain.
-
Run Add-Computer. You’ll be prompted for both credentials to join the domain and the domain name.
-
If you need to add a domain user account to the local Administrators group, run the following command at a command prompt (not in the PowerShell window):
net localgroup administrators /add <DomainName><UserName> -
Restart the computer. You can do this by running Restart-Computer.
Rename the server
Use the following steps to rename the server.
- Determine the current name of the server with the hostname or ipconfig command.
- Run Rename-Computer -ComputerName <new_name>.
- Restart the computer.
Activate the server
Run slmgr.vbs –ipk<productkey>. Then run slmgr.vbs –ato. If activation succeeds, you won’t get a message.
Note
You can also activate the server by phone, using a Key Management Service (KMS) server, or remotely. To activate remotely, run the following cmdlet from a remote computer:
PowerShell
**cscript windowssystem32slmgr.vbs <ServerName> <UserName> <password>:-ato**
Configure Windows Firewall
You can configure Windows Firewall locally on the Server Core computer using Windows PowerShell cmdlets and scripts. See NetSecurity for the cmdlets you can use to configure Windows Firewall.
Enable Windows PowerShell remoting
You can enable Windows PowerShell Remoting, in which commands typed in Windows PowerShell on one computer run on another computer. Enable Windows PowerShell Remoting with Enable-PSRemoting.
For more information, see About Remote FAQ.
Administrative tasks from the command line
Use the following reference information to perform administrative tasks from the command line.
Configuration and installation
| Task | Command |
|---|---|
| Set the local administrative password | net user administrator * |
| Join a computer to a domain | netdom join %computername% /domain:<domain> /userd:<domainusername> /passwordd:* Restart the computer. |
| Confirm that the domain has changed | set |
| Remove a computer from a domain | netdom remove <computername> |
| Add a user to the local Administrators group | net localgroup Administrators /add <domainusername> |
| Remove a user from the local Administrators group | net localgroup Administrators /delete <domainusername> |
| Add a user to the local computer | net user <domainusername> * /add |
| Add a group to the local computer | net localgroup <group name> /add |
| Change the name of a domain-joined computer | netdom renamecomputer %computername% /NewName:<new computer name> /userd:<domainusername> /passwordd: * |
| Confirm the new computer name | set |
| Change the name of a computer in a work group | netdom renamecomputer <currentcomputername> /NewName:<newcomputername> Restart the computer. |
| Disable paging file management | wmic computersystem where name=»<computername>» set AutomaticManagedPagefile=False |
| Configure the paging file | wmic pagefileset where name=”<path/filename>” set InitialSize=<initialsize>,MaximumSize=<maxsize> Where path/filename is the path to and name of the paging file, initialsize is the starting size of the paging file, in bytes, and maxsize is the maximum size of the page file, in bytes. |
| Change to a static IP address | ipconfig /all Record the relevant information or redirect it to a text file (ipconfig /all >ipconfig.txt). netsh interface ipv4 show interfaces Verify that there is an interface list. netsh interface ipv4 set address name <ID from interface list> source=static address=<preferred IP address> gateway=<gateway address> Run ipconfig /all to verify that DHCP enabled is set to No. |
| Set a static DNS address. | netsh interface ipv4 add dnsserver name=<name or ID of the network interface card> address=<IP address of the primary DNS server> index=1 netsh interface ipv4 add dnsserver name=<name of secondary DNS server> address=<IP address of the secondary DNS server> index=2** Repeat as appropriate to add additional servers. Run ipconfig /all to verify that the addresses are correct. |
| Change to a DHCP-provided IP address from a static IP address | netsh interface ipv4 set address name=<IP address of local system> source=DHCP Run ipconfig /all to verify that DCHP enabled is set to Yes. |
| Enter a product key | slmgr.vbs –ipk <product key> |
| Activate the server locally | slmgr.vbs -ato |
| Activate the server remotely | cscript slmgr.vbs –ipk <product key><server name><username><password> cscript slmgr.vbs -ato <servername> <username> <password> Get the GUID of the computer by running cscript slmgr.vbs -did Run cscript slmgr.vbs -dli <GUID> Verify that License status is set to Licensed (activated). |
Networking and firewall
| Task | Command |
|---|---|
| Configure your server to use a proxy server | netsh Winhttp set proxy <servername>:<port number> Note: Server Core installations can’t access the Internet through a proxy that requires a password to allow connections. |
| Configure your server to bypass the proxy for Internet addresses | netsh winttp set proxy <servername>:<port number> bypass-list=»<local>» |
| Display or modify IPSEC configuration | netsh ipsec |
| Display or modify NAP configuration | netsh nap |
| Display or modify IP to physical address translation | arp |
| Display or configure the local routing table | route |
| View or configure DNS server settings | nslookup |
| Display protocol statistics and current TCP/IP network connections | netstat |
| Display protocol statistics and current TCP/IP connections using NetBIOS over TCP/IP (NBT) | nbtstat |
| Display hops for network connections | pathping |
| Trace hops for network connections | tracert |
| Display the configuration of the multicast router | mrinfo |
| Enable remote administration of the firewall | netsh advfirewall firewall set rule group=”Windows Firewall Remote Management” new enable=yes |
Updates, error reporting, and feedback
| Task | Command |
|---|---|
| Install an update | wusa <update>.msu /quiet |
| List installed updates | systeminfo |
| Remove an update | expand /f:* <update>.msu c:test Navigate to c:test and open <update>.xml in a text editor. Replace Install with Remove and save the file. pkgmgr /n:<update>.xml |
| Configure automatic updates | To verify the current setting: cscript %systemroot%system32scregedit.wsf /AU /v ** To enable automatic updates: **cscript scregedit.wsf /AU 4 To disable automatic updates: cscript %systemroot%system32scregedit.wsf /AU 1 |
| Enable error reporting | To verify the current setting: serverWerOptin /query To automatically send detailed reports: serverWerOptin /detailed To automatically send summary reports: serverWerOptin /summary To disable error reporting: serverWerOptin /disable |
| Participate in the Customer Experience Improvement Program (CEIP) | To verify the current setting: serverCEIPOptin /query To enable CEIP: serverCEIPOptin /enable To disable CEIP: serverCEIPOptin /disable |
Services, processes, and performance
| Task | Command |
|---|---|
| List the running services | sc query or net start |
| Start a service | sc start <service name> or net start <service name> |
| Stop a service | sc stop <service name> or net stop <service name> |
| Retrieve a list of running applications and associated processes | tasklist |
| Start Task Manager | taskmgr |
| Create and manage event trace session and performance logs | To create a counter, trace, configuration data collection or API: logman ceate To query data collector properties: logman query To start or stop data collection: logman start|stop To delete a collector: logman delete To update the properties of a collector: logman update To import a data collector set from an XML file or export it to an XML file: logman import|export |
Event logs
| Task | Command |
|---|---|
| List event logs | wevtutil el |
| Query events in a specified log | wevtutil qe /f:text <log name> |
| Export an event log | wevtutil epl <log name> |
| Clear an event log | wevtutil cl <log name> |
Disk and file system
| Task | Command |
|---|---|
| Manage disk partitions | For a complete list of commands, run diskpart /? |
| Manage software RAID | For a complete list of commands, run diskraid /? |
| Manage volume mount points | For a complete list of commands, run mountvol /? |
| Defragment a volume | For a complete list of commands, run defrag /? |
| Convert a volume to the NTFS file system | convert <volume letter> /FS:NTFS |
| Compact a file | For a complete list of commands, run compact /? |
| Administer open files | For a complete list of commands, run openfiles /? |
| Administer VSS folders | For a complete list of commands, run vssadmin /? |
| Administer the file system | For a complete list of commands, run fsutil /? |
| Take ownership of a file or folder | For a complete list of commands, run icacls /? |
Hardware
| Task | Command |
|---|---|
| Add a driver for a new hardware device | Copy the driver to a folder at %homedrive%<driver folder>. Run pnputil -i -a %homedrive%<driver folder><driver>.inf |
| Remove a driver for a hardware device | For a list of loaded drivers, run sc query type= driver. Then run sc delete <service_name> |
You can manage a Server Core server in the following ways:
You can also add hardware and manage drivers locally, as long as you do that from the command line.
There are some important limitations and tips to keep in mind when you work with Server Core:
Managing Server Core with Windows Admin Center
Windows Admin Center is a browser-based management app that enables on-premises administration of Windows Servers with no Azure or cloud dependency. Windows Admin Center gives you full control over all aspects of your server infrastructure and is particularly useful for management on private networks that are not connected to the Internet. You can install Windows Admin Center on Windows 10, on a gateway server, or on an installation of Windows Server with Desktop Experience, and then connect to the Server Core system that you want to manage.
Managing Server Core remotely with Server Manager
Server Manager is a management console in Windows Server that helps you provision and manage both local and remote Windows-based servers from your desktops, without requiring either physical access to servers, or the need to enable Remote Desktop protocol (RDP) connections to each server. Server Manager supports remote, multi-server management.
To enable your local server to be managed by Server Manager running on a remote server, run the Windows PowerShell cmdlet Configure-SMRemoting.exe –Enable.
Managing with Microsoft Management Console
You can use many snap-ins for Microsoft Management Console (MMC) remotely to manage your Server Core server.
To use an MMC snap-in to manage a Server Core server that is a domain member:
To use an MMC snap-in to manage a Server Core server that is not a domain member:
To configure Windows Firewall to allow MMC snap-in(s) to connect
To allow all MMC snap-ins to connect, run the following command:
Enable-NetFirewallRule -DisplayGroup "Remote Administration"
To allow only specific MMC snap-ins to connect, run the following:
Enable-NetFirewallRule -DisplayGroup "<rulegroup>"
Where rulegroup is one of the following, depending on which snap-in you want to connect:
| MMC snap-in | Rule group |
|---|---|
| Event Viewer | Remote Event Log Management |
| Services | Remote Service Management |
| Shared Folders | File and Printer Sharing |
| Task Scheduler | Performance Logs and Alerts, File and Printer Sharing |
| Disk Management | Remote Volume Management |
| Windows Firewall and Advanced Security | Windows Firewall Remote Management |
Note
Some MMC snap-ins don’t have a corresponding rule group that allows them to connect through the firewall. However, enabling the rule groups for Event Viewer, Services, or Shared Folders will allow most other snap-ins to connect.
Additionally, certain snap-ins require further configuration before they can connect through Windows Firewall:
Managing with Remote Desktop Services
You can use Remote Desktop to manage a Server Core server from remote computers.
Before you can access Server Core, you’ll need to run the following command:
cscript C:WindowsSystem32Scregedit.wsf /ar 0
This enables the Remote Desktop for Administration mode to accept connections.
Add hardware and manage drivers locally
To add hardware to a Server Core server, follow the instructions provided by the hardware vendor for installing new hardware.
If the hardware is not plug and play, you’ll need to manually install the driver. To do that, copy the driver files to a temporary location on the server, and then run the following command:
pnputil –i –a <driverinf>
Where driverinf is the file name of the .inf file for the driver.
If prompted, restart the computer.
To see what drivers are installed, run the following command:
sc query type= driver
Note
You must include the space after the equal sign for the command to complete successfully.
To disable a device driver, run the following:
sc delete <service_name>
Where service_name is the name of the service that you got when you ran sc query type= driver.
- Using Windows Admin Center
- Using Remote Server Administration Tools running on Windows 10
- Locally and remotely using Windows PowerShell
- Remotely using Server Manager
- Remotely using an MMC snap-in
- Remotely with Remote Desktop Services
- If you close all command prompt windows and want to open a new Command Prompt window, you can do that from the Task Manager. Press CTRL+ALT+DELETE, click Start Task Manager, click More Details > File > Run, and then type cmd.exe. (Type Powershell.exe to open a PowerShell command windows.) Alternatively, you can sign out and then sign back in.
- Any command or tool that attempts to start Windows Explorer will not work. For example, running start . from a command prompt won’t work.
- There is no support for HTML rendering or HTML help in Server Core.
- Server Core supports Windows Installer in quiet mode so that you can install tools and utilities from Windows Installer files. When installing Windows Installer packages on Server Core, use the /qb option to display the basic user interface.
- To change the time zone, run Set-Date.
- To change international settings, run control intl.cpl.
- Control.exe won’t run on its own. You must run it with either Timedate.cpl or Intl.cpl.
- Winver.exe isn’t available in Server Core. To obtain version information use Systeminfo.exe.
- Start an MMC snap-in, such as Computer Management.
- Right-click the snap-in, and then click Connect to another computer.
- Type the computer name of the Server Core server, and then click OK. You can now use the MMC snap-in to manage the Server Core server as you would any other PC or server.
-
Establish alternate credentials to use to connect to the Server Core computer by typing the following command at a command prompt on the remote computer:
-
cmdkey /add:<ServerName> /user:<UserName> /pass:<password>If you want to be prompted for a password, omit the /pass option.
-
When prompted, type the password for the user name you specified. If the firewall on the Server Core server is not already configured to allow MMC snap-ins to connect, follow the steps below to configure Windows Firewall to allow MMC snap-in. Then continue with step 3.
-
On a different computer, start an MMC snap-in, such as Computer Management.
-
In the left pane, right-click the snap-in, and then click Connect to another computer. (For example, in the Computer Management example, you would right-click Computer Management (Local).)
-
In Another computer, type the computer name of the Server Core server, and then click OK. You can now use the MMC snap-in to manage the Server Core server as you would any other computer running a Windows Server operating system.
- Disk Management. You must first start the Virtual Disk Service (VDS) on the Server Core computer. You must also configure the Disk Management rules appropriately on the computer that is running the MMC snap-in.
- IP Security Monitor. You must first enable remote management of this snap-in. To do this, at a command prompt, type Cscript windowssystem32scregedit.wsf /im 1
- Reliability and Performance. The snap-in does not require any further configuration, but when you use it to monitor a Server Core computer, you can only monitor performance data. Reliability data is not available.
Patch a Server Core installation
You can patch a server running Server Core installation in the following ways:
View the updates installed on your Server Core server
Before you add a new update to Server Core, it’s a good idea to see what updates have already been installed.
To view updates by using Windows PowerShell, run Get-Hotfix.
To view updates by running a command, run systeminfo.exe. There might be a short delay while the tool inspects your system.
You can also run wmic qfe list from the command line.
Patch Server Core automatically with Windows Update
Use the following steps to patch the server automatically with Windows Update:
If the server is a member of a domain, you can also configure Windows Update using Group Policy. For more information, see https://go.microsoft.com/fwlink/?LinkId=192470. However, when you use this method, only option 4 («Auto download and schedule the install») is relevant to Server Core installations because of the lack of a graphical interface. For more control over which updates are installed and when, you can use a script which provides a command-line equivalent of most of the Windows Update graphical interface. For information about the script, see https://go.microsoft.com/fwlink/?LinkId=192471.
To force Windows Update to immediately detect and install any available updates, run the following command:
Wuauclt /detectnow
Depending on the updates that are installed, you may need to restart the computer, although the system will not notify you of this. To determine if the installation process has completed, use Task Manager to verify that the Wuauclt or Trusted Installerprocesses are not actively running. You can also use the methods in View the updates installed on your Server Core server to check the list of installed updates.
Patch the server with WSUS
If the Server Core server is a member of a domain, you can configure it to use a WSUS server with Group Policy. For more information, download the Group Policy reference information. You can also review Configure Group Policy Settings for Automatic Updates
Patch the server manually
Download the update and make it available to the Server Core installation. At a command prompt, run the following command:
Wusa <update>.msu /quiet
Depending on the updates that are installed, you may need to restart the computer, although the system will not notify you of this.
To uninstall an update manually, run the following command:
Wusa /uninstall <update>.msu /quiet -
Using Windows Update automatically or with Windows Server Update Services (WSUS). By using Windows Update, either automatically or with command-line tools, or Windows Server Update Services (WSUS), you can service servers running a Server Core installation.
-
Manually. Even in organizations that do not use Windows update or WSUS, you can apply updates manually.
-
Verify the current Windows Update setting:
%systemroot%system32Cscript scregedit.wsf /AU /v -
To enable automatic updates:
Net stop wuauserv %systemroot%system32Cscript scregedit.wsf /AU 4 Net start wuauserv -
To disable automatic updates, run:
Net stop wuauserv
%systemroot%system32Cscript scregedit.wsf /AU 1
Net start wuauserv
Server Manager
Server Manager is a management console in Windows Server that helps IT professionals provision and manage both local and remote Windows-based servers from their desktops, without requiring either physical access to servers, or the need to enable Remote Desktop protocol (rdP) connections to each server. Although Server Manager is available in Windows Server 2008 R2 and Windows Server 2008, Server Manager was updated in Windows Server 2012 to support remote, multi-server management, and help increase the number of servers an administrator can manage.
In our tests, Server Manager in Windows Server 2016, Windows Server 2012 R2, and Windows Server 2012 can be used to manage up to 100 servers, depending on the workloads that the servers are running. The number of servers that you can manage by using a single Server Manager console can vary depending on the amount of data that you request from managed servers, and hardware and network resources available to the computer running Server Manager. As the amount of data you want to display approaches that computer’s resource capacity, you can experience slow responses from Server Manager, and delays in the completion of refreshes. To help increase the number of servers that you can manage by using Server Manager, we recommend limiting the event data that Server Manager gets from your managed servers, by using settings in the Configure Event Data dialog box. Configure Event Data can be opened from the Tasks menu in the Events tile. If you need to manage an enterprise-level number of servers in your organization, we recommend evaluating products in the Microsoft System Center suite.
This topic and its subtopics provide information about how to use features in the Server Manager console. This topic contains the following sections.
Review initial considerations and system requirements
The following sections list some initial considerations that you need to review, as well as hardware and software requirements for Server Manager.
Hardware requirements
Server Manager is installed by default with all editions of Windows Server 2016. No additional hardware requirements exist for Server Manager.
Software and configuration requirements
Server Manager is installed by default with all editions of Windows Server 2016. You can use Server Manager in Windows Server 2016 to manage Server Core installation options of Windows Server 2016, Windows Server 2012 , and Windows Server 2008 R2 that are running on remote computers. Server Manager does run on the Server Core installation option of Windows Server 2016.
Server Manager runs in the Minimal Server Graphical Interface; that is, when the Server Graphical Shell feature is not installed. The Server Graphical Shell feature is not installed by default on Windows Server 2016. If you are not running Server Graphical Shell, the Server Manager console runs, but some applications or tools available from the console are not available. Internet browsers cannot run without Server Graphical Shell, so webpages and applications such as HTML help (The mmc F1 help, for example) cannot be opened. You cannot open dialog boxes for configuring Windows automatic updating and feedback when Server Graphical Shell is not installed; commands that open these dialog boxes in the Server Manager console are redirected to run sconfig.cmd.
To manage servers that are running Windows Server releases older than Windows Server 2016, install the following software and updates to make the older releases of Windows Server manageable by using Server Manager in Windows Server 2016.
| Operating System | Required Software |
|---|---|
| Windows Server 2012 R2 or Windows Server 2012 | — .NET Framework 4.6 — Windows Management Framework 5.0. The Windows Management Framework 5.0 download package updates Windows Management Instrumentation (WMI) providers on Windows Server 2012 R2 and Windows Server 2012 . The updated WMI providers let Server Manager collect information about roles and features that are installed on the managed servers. Until the update is applied, servers that are running Windows Server 2012 R2 or Windows Server 2012 have a manageability status of Not accessible. — The performance update associated with Knowledge Base article 2682011 is no longer necessary on servers that are running Windows Server 2012 R2 or Windows Server 2012 . |
| Windows Server 2008 R2 | — .NET Framework 4.5 — Windows Management Framework 4.0. The Windows Management Framework 4.0 download package updates Windows Management Instrumentation (WMI) providers on Windows Server 2008 R2 . The updated WMI providers let Server Manager collect information about roles and features that are installed on the managed servers. Until the update is applied, servers that are running Windows Server 2008 R2 have a manageability status of Not accessible. — The performance update associated with Knowledge Base article 2682011 lets Server Manager collect performance data from Windows Server 2008 R2 . |
| Windows Server 2008 | — .NET Framework 4 — Windows Management Framework 3.0 The Windows Management Framework 3.0 download package updates Windows Management Instrumentation (WMI) providers on Windows Server 2008 . The updated WMI providers let Server Manager collect information about roles and features that are installed on the managed servers. Until the update is applied, servers that are running Windows Server 2008 have a manageability status of Not accessible — verify earlier versions run Windows Management Framework 3.0. — The performance update associated with Knowledge Base article 2682011 lets Server Manager collect performance data from Windows Server 2008 . |
Manage remote computers from a client computer
The Server Manager console is included with Remote Server Administration Tools for Windows 10. Note that when Remote Server Administration Tools is installed on a client computer, you cannot manage the local computer by using Server Manager; Server Manager cannot be used to manage computers or devices that are running a Windows client operating system. You can only use Server Manager to manage Windows-based servers.
| Server Manager Source Operating System | Targeted at Windows Server 2016 | Targeted at Windows Server 2012 R2 | Targeted at Windows Server 2012 | Targeted at Windows Server 2008 R2 or Windows Server 2008 | Targeted at Windows Server 2003 |
|---|---|---|---|---|---|
| Windows 10 or Windows Server 2016 | Full support | Full support | Full support | After Software and configuration requirements are satisfied, can perform most management tasks, but no role or feature installation or uninstallation | Not supported |
| Windows 8.1 or Windows Server 2012 R2 | Not supported | Full support | Full support | After Software and configuration requirements are satisfied, can perform most management tasks, but no role or feature installation or uninstallation | Limited support; online and offline status only |
| Windows 8 or Windows Server 2012 | Not supported | Not supported | Full support | After Software and configuration requirements are satisfied, can perform most management tasks, but no role or feature installation or uninstallation | Limited support; online and offline status only |
To start Server Manager on a client computer
for more information about running Remote Server Administration Tools for Windows 10 to manage remote servers, see Remote Server Administration Tools on the TechNet Wiki.
Configure remote management on servers that you want to manage
Important
By default, Server Manager and Windows PowerShell remote management is enabled in Windows Server 2016.
To perform management tasks on remote servers by using Server Manager, remote servers that you want to manage must be configured to allow remote management by using Server Manager and Windows PowerShell. If remote management has been disabled on Windows Server 2012 R2 or Windows Server 2012 , and you want to enable it again, perform the following steps.
To configure Server Manager remote management on Windows Server 2012 R2 or Windows Server 2012 by using the Windows interface
To enable Server Manager remote management on Windows Server 2012 R2 or Windows Server 2012 by using Windows PowerShell
To enable Server Manager and Windows PowerShell remote management on older operating systems
Tasks that you can perform in Server Manager
Server Manager makes server administration more efficient by allowing administrators to do tasks in the following table by using a single tool. In Windows Server 2012 R2 and Windows Server 2012 , both standard users of a server and members of the Administrators group can perform management tasks in Server Manager, but by default, standard users are prevented from performing some tasks, as shown in the following table.
Administrators can use two Windows PowerShell cmdlets in the Server Manager cmdlet module, Enable-ServerManagerStandardUserremoting and Disable-ServerManagerStandardUserremoting, to further control standard user access to some additional data. The Enable-ServerManagerStandardUserremoting cmdlet can provide one or more standard, non-Administrator users access to event, service, performance counter, and role and feature inventory data.
Important
Server Manager cannot be used to manage a newer release of the Windows Server operating system. Server Manager running on Windows Server 2012 or Windows 8 cannot be used to manage servers that are running Windows Server 2012 R2 .
| Task Description | Administrators (including the built-in Administrator account) | Standard Server Users |
|---|---|---|
| add remote servers to a pool of servers that Server Manager can be used to manage. | Yes | No |
| create and edit custom groups of servers, such as servers that are in a specific geographic location or serve a specific purpose. | Yes | Yes |
| Install or uninstall roles, role services, and features on the local or on remote servers that are running Windows Server 2012 R2 or Windows Server 2012 . For definitions of roles, role services, and features, see Roles, Role Services, and Features. | Yes | No |
| View and make changes to server roles and features that are installed on either local or remote servers. Note: In Server Manager, role and feature data is displayed in the base language of the system, also called the system default GUI language, or the language selected during installation of the operating system. | Yes | Standard users can view and manage roles and features, and perform tasks such as viewing role events, but cannot add or remove role services. |
| start management tools such as Windows PowerShell or mmc snap-ins. You can start a Windows PowerShell session targeted at a remote server by right-clicking the server in the Servers tile, and then clicking Windows PowerShell. You can start mmc snap-ins from the Tools menu of the Server Manager console, and then point the mmc toward a remote computer after the snap-in is open. | Yes | Yes |
| Manage remote servers with different credentials by right-clicking a server in the Servers tile, and then clicking Manage As. You can use Manage As for general server and File and Storage Services management tasks. | Yes | No |
| Perform management tasks associated with the operational lifecycle of servers, such as starting or stopping services; and start other tools that allow you to configure a server’s network settings, users and groups, and Remote Desktop connections. | Yes | Standard users cannot start or stop services. They can change the local server’s name, workgroup, or domain membership and Remote Desktop settings, but are prompted by User Account Control to provide Administrator credentials before they can complete these tasks. They cannot change remote management settings. |
| Perform management tasks associated with the operational lifecycle of roles that are installed on servers, including scanning roles for compliance with best practices. | Yes | Standard users cannot run Best Practices Analyzer scans. |
| Determine server status, identify critical events, and analyze and troubleshoot configuration issues or failures. | Yes | Yes |
| Customize the events, performance data, services, and Best Practices Analyzer results about which you want to be alerted on the Server Manager dashboard. | Yes | Yes |
| Restart servers. | Yes | No |
| Refresh data that is displayed in the Server Manager console about managed servers. | Yes | No |
Note
Server Manager cannot be used to add roles and features to servers that are running Windows Server 2008 R2 or Windows Server 2008 .
start Server Manager
Server Manager starts automatically by default on servers that are running Windows Server 2016 when a member of the Administrators group logs on to a server. If you close Server Manager, restart it in one of the following ways. This section also contains steps for changing the default behavior, and preventing Server Manager from starting automatically.
To start Server Manager from the start screen
To start Server Manager from the Windows desktop
To prevent Server Manager from starting automatically
Restart remote servers
You can restart a remote server from the Servers tile of a role or group page in Server Manager.
Important
Restarting a remote server forces the server to restart, even if users are still logged on to the remote server, and even if programs with unsaved data are still open. This behavior is different from shutting down or restarting the local computer, on which you would be prompted to save unsaved program data, and verify that you wanted to force logged-on users to log off. Be sure that you can force other users to log off of remote servers, and that you can discard unsaved data in programs that are running on the remote servers.
if an automatic refresh occurs in Server Manager while a managed server is shutting down and restarting, refresh and manageability status errors can occur for the managed server, because Server Manager cannot connect to the remote server until it is finished restarting.
To restart remote servers in Server Manager
Export Server Manager settings to other computers
In Server Manager, your list of managed servers, changes to Server Manager console settings, and custom groups that you have created are stored in the following two files. You can reuse these settings on other computers that are running the same release of Server Manager (or Windows 10 with Remote Server Administration Tools installed). Remote Server Administration Tools must be running on Windows client-based computers to export Server Manager settings to those computers.
Note
You can export Server Manager settings, make Server Manager settings portable, or use them on other computers in one of the following two ways.
To export Server Manager settings to other domain-joined computers
To export Server Manager settings to computers in workgroups
-
Review initial considerations and system requirements
-
Tasks that you can perform in Server Manager
-
start Server Manager
-
Restart remote servers
-
Export Server Manager settings to other computers
-
Follow instructions in Remote Server Administration Tools to install Remote Server Administration Tools for Windows 10.
-
On the start screen, click Server Manager. The Server Manager tile is available after you install Remote Server Administration Tools.
-
if neither the Administrative Tools nor the Server Manager tiles are displayed on the start screen after installing Remote Server Administration Tools, and searching for Server Manager on the start screen does not display results, verify that the Show administrative tools setting is turned on. To view this setting, hover the mouse cursor over the upper right corner of the start screen, and then click Settings. If Show administrative tools is turned off, turn the setting on to display tools that you have installed as part of Remote Server Administration Tools.
-
Note
The settings that are controlled by the Configure remote Management dialog box do not affect parts of Server Manager that use DCOM for remote communications.
Do one of the following to open Server Manager if it is not already open.
-
On the Windows taskbar, click the Server Manager button.
-
On the start screen, click Server Manager.
-
-
In the Properties area of the Local Servers page, click the hyperlinked value for the remote management property.
-
Do one of the following, and then click OK.
-
To prevent this computer from being managed remotely by using Server Manager (or Windows PowerShell if it is installed), clear the Enable remote management of this server from other computers check box.
-
To let this computer be managed remotely by using Server Manager or Windows PowerShell, select Enable remote management of this server from other computers.
-
-
Do one of the following.
-
To run Windows PowerShell as an administrator from the start screen, right-click the Windows PowerShell tile, and then click Run as Administrator.
-
To run Windows PowerShell as an administrator from the desktop, right-click the Windows PowerShell shortcut in the taskbar, and then click Run as Administrator.
-
-
type the following, and then press Enter to enable all required firewall rule exceptions.
Configure-SMremoting.exe -Enable
Note
This command also works in a command prompt that has been opened with elevated user rights (Run as Administrator).
if enabling remote management fails, see about_remote_Troubleshooting on Microsoft TechNet for troubleshooting tips and best practices.
-
Do one of the following.
-
To enable remote management on servers that are running Windows Server 2008 R2 , see remote Management with Server Manager in the Windows Server 2008 R2 help.
-
To enable remote management on servers that are running Windows Server 2008 , see Enable and Use remote Commands in Windows PowerShell.
-
- On the Windows start screen, click the Server Manager tile.
- On the Windows taskbar, click Server Manager.
-
In the Server Manager console, on the Manage menu, click Server Manager Properties.
-
In the Server Manager Properties dialog box, fill the check box for Do not start Server Manager automatically at logon. Click OK.
-
Alternatively, you can prevent Server Manager from starting automatically by enabling the Group Policy setting, Do not start Server Manager automatically at logon. The path to this policy setting, in the Local Group Policy editor console, is computer ConfigurationAdministrative TemplatesSystemServer Manager.
-
Open a role or server group home page in Server Manager.
-
select one or more remote servers that you have added to Server Manager. Press and hold Ctrl as you click to select multiple servers at one time. For more information about how to add servers to the Server Manager server pool, see add Servers to Server Manager.
-
Right-click selected servers, and then click Restart Server.
-
%appdata%MicrosoftWindowsServerManagerServerlist.xml
-
%appdata%LocalMicrosoft_CorporationServerManager.exe_StrongName_GUID6.2.0.0user.config
- Manage As (or alternate) credentials for servers in your server pool are not stored in the roaming profile. Server Manager users must add them on each computer from which they want to manage.
- The network share roaming profile is not created until a user logs on to the network, and then logs off for the first time. The Serverlist.xml file is created at this time.
-
To export settings to another domain-joined computer, configure the Server Manager user to have a roaming profile in active directory Users and computers. You must be a Domain Administrator to change user properties in active directory Users and computers.
-
To export settings to another computer in a workgroup, copy the preceding two files to the same location on the computer from which you want to manage by using Server Manager.
-
In active directory Users and computers, open the Properties dialog box for a Server Manager user.
-
On the Profile tab, add a path to a network share to store the user’s profile.
-
Do one of the following.
-
On U.S. English (en-us) builds, changes to the Serverlist.xml file are automatically saved to the profile. Go on to the next step.
-
On other builds, copy the following two files from the computer that is running Server Manager to the network share that is part of the user’s roaming profile.
-
%appdata%MicrosoftWindowsServerManagerServerlist.xml
-
%localappdata%Microsoft_CorporationServerManager.exe_StrongName_GUID6.2.0.0user.config
-
-
-
Click OK to save your changes and close the Properties dialog box.
-
On a computer from which you want to manage remote servers, overwrite the following two files with the same files from another computer that is running Server Manager, and that has the settings you want.
-
%appdata%MicrosoftWindowsServerManagerServerlist.xml
-
%localappdata%Microsoft_CorporationServerManager.exe_StrongName_GUID6.2.0.0user.config
-
This topic supports Remote Server Administration Tools for Windows 10.
Important
Starting with Windows 10 October 2018 Update, RSAT is included as a set of Features on Demand in Windows 10 itself. See When to use which RSAT version below for installation instructions.
RSAT lets IT admins manage Windows Server roles and features from a Windows 10 PC.
Remote Server Administration Tools includes Server Manager, Microsoft Management Console (mmc) snap-ins, consoles, Windows PowerShell cmdlets and providers, and some command-line tools for managing roles and features that run on Windows Server.
Remote Server Administration Tools includes Windows PowerShell cmdlet modules that can be used to manage roles and features that are running on Remote servers. Although Windows PowerShell remote management is enabled by default on Windows Server 2016, it is not enabled by default on Windows 10. To run cmdlets that are part of Remote Server Administration Tools against a Remote server, run Enable-PSremoting in a Windows PowerShell session that has been opened with elevated user rights (that is, Run as Administrator) on your Windows client computer after installing Remote Server Administration Tools.
Remote Server Administration Tools for Windows 10
Use Remote Server Administration Tools for Windows 10 to manage specific technologies on computers that are running Windows Server 2016, Windows Server 2012 R2, and in limited cases, Windows Server 2012 , or Windows Server 2008 R2 .
Remote Server Administration Tools for Windows 10 includes support for remote management of computers that are running the Server Core installation option or the Minimal Server Interface configuration of Windows Server 2016, Windows Server 2012 R2 , and in limited cases, the Server Core installation options of Windows Server 2012. However, Remote Server Administration Tools for Windows 10 cannot be installed on any versions of the Windows Server operating system.
Tools available in this release
for a list of the tools available in Remote Server Administration Tools for Windows 10, see the table in Remote Server Administration Tools (RSAT) for Windows operating systems.
System requirements
Remote Server Administration Tools for Windows 10 can be installed only on computers that are running Windows 10. Remote Server Administration Tools cannot be installed on computers that are running Windows RT 8.1, or other system-on-chip devices.
Remote Server Administration Tools for Windows 10 runs on both x86-based and x64-based editions of Windows 10.
Important
Remote Server Administration Tools for Windows 10 should not be installed on a computer that is running administration tools packs for Windows 8.1, Windows 8, Windows Server 2008 R2, Windows Server 2008, Windows Server 2003 or Windows 2000 Server. Remove all older versions of Administration Tools Pack or Remote Server Administration Tools, including earlier prerelease versions, and releases of the tools for different languages or locales from the computer before you install Remote Server Administration Tools for Windows 10.
To use this release of Server Manager to access and manage Remote servers that are running Windows Server 2012 R2 , Windows Server 2012 , or Windows Server 2008 R2 , you must install several updates to make the older Windows Server operating systems manageable by using Server Manager. For detailed information about how to prepare Windows Server 2012 R2, Windows Server 2012, and Windows Server 2008 R2 for management by using Server Manager in Remote Server Administration Tools for Windows 10, see Manage Multiple, Remote Servers with Server Manager.
Windows PowerShell and Server Manager remote management must be enabled on remote servers to manage them by using tools that are part of Remote Server Administration Tools for Windows 10. Remote management is enabled by default on servers that are running Windows Server 2016, Windows Server 2012 R2, and Windows Server 2012. For more information about how to enable remote management if it has been disabled, see Manage multiple, remote servers with Server Manager.
Use Features on Demand (FoD) to install specific RSAT tools on Windows 10 October 2018 Update, or later
Starting with Windows 10 October 2018 Update, RSAT is included as a set of Features on Demand right from Windows 10. Now, instead of downloading an RSAT package you can just go to Manage optional features in Settings and click Add a feature to see the list of available RSAT tools. Select and install the specific RSAT tools you need. To see installation progress, click the Back button to view status on the Manage optional features page.
See the list of RSAT tools available via Features on Demand. In addition to installing via the graphical Settings app, you can also install specific RSAT tools via command line or automation using DISM /Add-Capability.
One benefit of Features on Demand is that installed features persist across Windows 10 version upgrades!
To uninstall specific RSAT tools on Windows 10 October 2018 Update or later (after installing with FoD)
On Windows 10, open the Settings app, go to Manage optional features, select and uninstall the specific RSAT tools you wish to remove. Note that in some cases, you will need to manually uninstall dependencies. Specifically, if RSAT tool A is needed by RSAT tool B, then choosing to uninstall RSAT tool A will fail if RSAT tool B is still installed. In this case, uninstall RSAT tool B first, and then uninstall RSAT tool A. Also note that in some cases, uninstalling an RSAT tool may appear to succeed even though the tool is still installed. In this case, restarting the PC will complete the removal of the tool.
See the list of RSAT tools including dependencies. In addition to uninstalling via the graphical Settings app, you can also uninstall specific RSAT tools via command line or automation using DISM /Remove-Capability.
When to use which RSAT version
If you have a version of Windows 10 prior to the October 2018 Update (1809), you will not be able to use Features on Demand. You will need to download and install the RSAT package.
Download the RSAT package to install Remote Server Administration Tools for Windows 10
To uninstall Remote Server Administration Tools for Windows 10 (after RSAT package install)
Run Remote Server Administration Tools
Note
After installing Remote Server Administration Tools for Windows 10, the Administrative Tools folder is displayed on the Start menu. You can access the tools from the following locations.
The tools installed as part of Remote Server Administration Tools for Windows 10 cannot be used to manage the local client computer. Regardless of the tool you run, you must specify a remote server, or multiple remote servers, on which to run the tool. Because most tools are integrated with Server Manager, you add remote servers that you want to manage to the Server Manager server pool before managing the server by using the tools in the Tools menu. For more information about how to add servers to your server pool, and create custom groups of servers, see Add servers to Server Manager and Create and manage server groups.
In Remote Server Administration Tools for Windows 10, all GUI-based server management tools, such as mmc snap-ins and dialog boxes, are accessed from the Tools menu of the Server Manager console. Although the computer that runs Remote Server Administration Tools for Windows 10 runs a client-based operating system, after installing the tools, Server Manager, included with Remote Server Administration Tools for Windows 10, opens automatically by default on the client computer. Note that there is no Local Server page in the Server Manager console that runs on a client computer.
To start Server Manager on a client computer
Although they are not listed in the Server Manager console Tools menu, Windows PowerShell cmdlets and Command prompt management tools are also installed for roles and features as part of Remote Server Administration Tools. For example, if you open a Windows PowerShell session with elevated user rights (Run as Administrator), and run the cmdlet Get-Command -Module RDManagement, the results include a list of remote Desktop Services cmdlets that are now available to run on the local computer after installing Remote Server Administration Tools, as long as the cmdlets are targeted at a remote server that is running all or part of the remote Desktop Services role.
To start Windows PowerShell with elevated user rights (Run as administrator)
Note
You can also start a Windows PowerShell session that is targeted at a specific server by right-clicking a managed server in a role or group page in Server Manager, and then clicking Windows PowerShell.
Known issues
Issue: RSAT FOD installation fails with error code 0x800f0954
Impact: RSAT FODs on Windows 10 1809 (October 2018 Update) in WSUS/SCCM environments
Resolution: To install FODs on a domain-joined PC which receives updates through WSUS or SCCM, you will need to change a Group Policy setting to enable downloading FODs directly from Windows Update or a local share. For more details and instructions on how to change that setting, see How to make Features on Demand and language packs available when you’re using WSUS/SCCM.
-
Install RSAT FODs directly from Windows 10, as outlined above: When installing on Windows 10 October 2018 Update (1809) or later, for managing Windows Server 2019 or previous versions.
-
Download and install WS_1803 RSAT package, as outlined below: When installing on Windows 10 April 2018 Update (1803) or earlier, for managing Windows Server, version 1803 or Windows Server, version 1709.
-
Download and install WS2016 RSAT package, as outlined below: When installing on Windows 10 April 2018 Update (1803) or earlier, for managing Windows Server 2016 or previous versions.
-
Download the Remote Server Administration Tools for Windows 10 package from the Microsoft Download Center. You can either run the installer from the Download Center website, or save the download package to a local computer or share.
Important
You can only install Remote Server Administration Tools for Windows 10 on computers that are running Windows 10. Remote Server Administration Tools cannot be installed on computers that are running Windows RT 8.1 or other system-on-chip devices.
-
If you save the download package to a local computer or share, double-click the installer program, WindowsTH-KB2693643-x64.msu or WindowsTH-KB2693643-x86.msu, depending on the architecture of the computer on which you want to install the tools.
-
When you are prompted by the Windows Update Standalone Installer dialog box to install the update, click Yes.
-
Read and accept the license terms. Click I accept.
-
Installation requires a few minutes to finish.
-
On the desktop, click Start, click All Apps, click Windows System, and then click Control Panel.
-
Under Programs, click Uninstall a program.
-
Click View installed updates.
-
Right-click Update for Microsoft Windows (KB2693643), and then click Uninstall.
-
When you are asked if you are sure you want to uninstall the update, click Yes. S
To turn off specific tools (after RSAT package install)
-
On the desktop, click Start, click All Apps, click Windows System, and then click Control Panel.
-
Click Programs, and then in Programs and Features click Turn Windows features on or off.
-
In the Windows Features dialog box, expand Remote Server Administration Tools, and then expand either Role Administration Tools or Feature Administration Tools.
-
Clear the check boxes for any tools that you want to turn off.
Note
If you turn off Server Manager, the computer must be restarted, and tools that were accessible from the Tools menu of Server Manager must be opened from the Administrative Tools folder.
-
When you are finished turning off tools that you do not want to use, click OK.
- The Tools menu in the Server Manager console.
- Control PanelSystem and SecurityAdministrative Tools.
- A shortcut saved to the desktop from the Administrative Tools folder (to do this, right click the Control PanelSystem and SecurityAdministrative Tools link, and then click Create Shortcut).
-
On the Start menu, click All Apps, and then click Administrative Tools.
-
In the Administrative Tools folder, click Server Manager.
-
On the Start menu, click All Apps, click Windows System, and then click Windows PowerShell.
-
To run Windows PowerShell as an administrator from the desktop, right-click the Windows PowerShell shortcut, and then click Run as Administrator.
В данной статье мы рассмотрим базовые настройки Windows Server 2016, которые осуществляются сразу после установки системы и которые обычно обязательные к использованию. Как установить Windows Server 2016 можете ознакомиться в нашей прошлой статье.
Итак, приступим. Для начала нам нужно задать имя нашему серверу, для этого заходим в свойства системы => изменить параметры => изменить. Задаем «Имя компьютера», и если нужно, то имя рабочей группы. После изменения параметров нужно перезагрузиться.
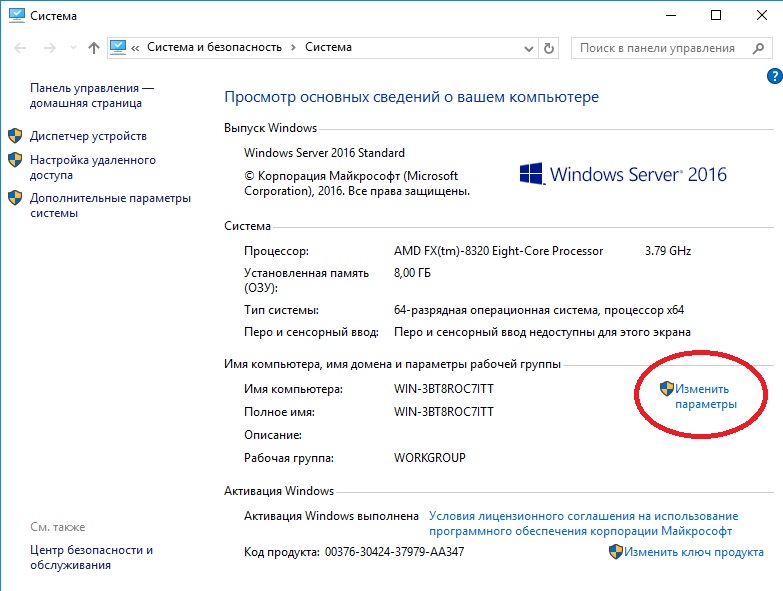
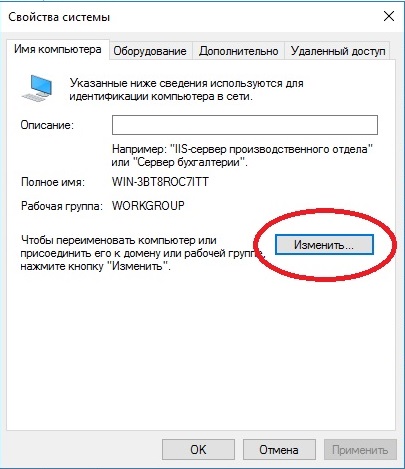
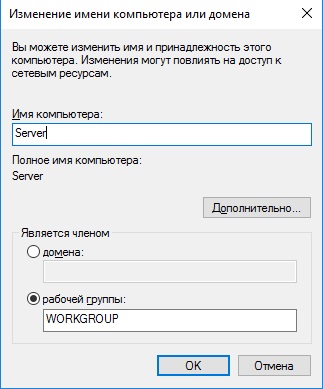
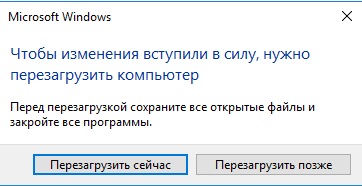
После нам нужно задать сетевые настройки. Если у Вас сервер подключен к маршрутизатору, то задаем IP шлюза, вводим статический адрес, это обязательно для сервера и маску подсети. Информацию об IP адресах в Вашей локальной сети можно посмотреть через командную строку командной «ipconfig». Ниже на скриншотах указаны примеры, у Вас IP адреса будут отличаться.
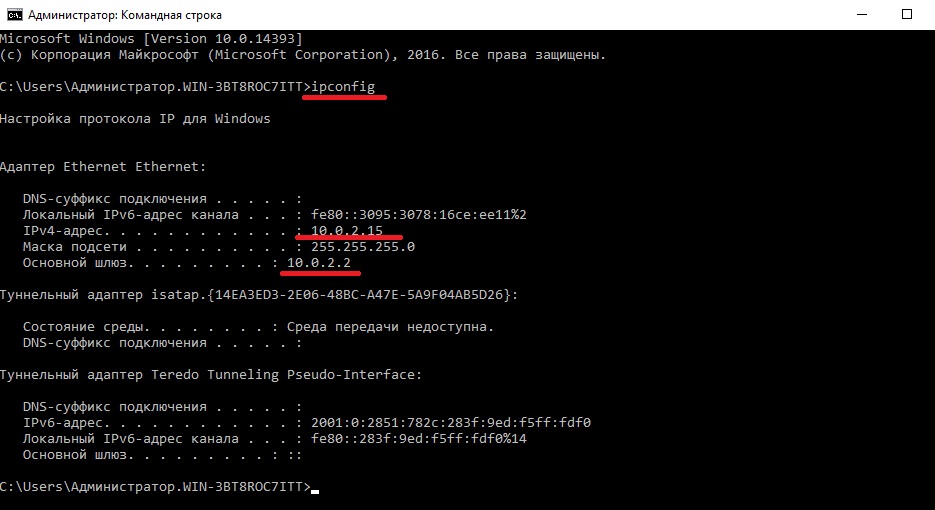
Заходим в настройки сетевых подключений:

Заходим в свойства пункта IPv4.
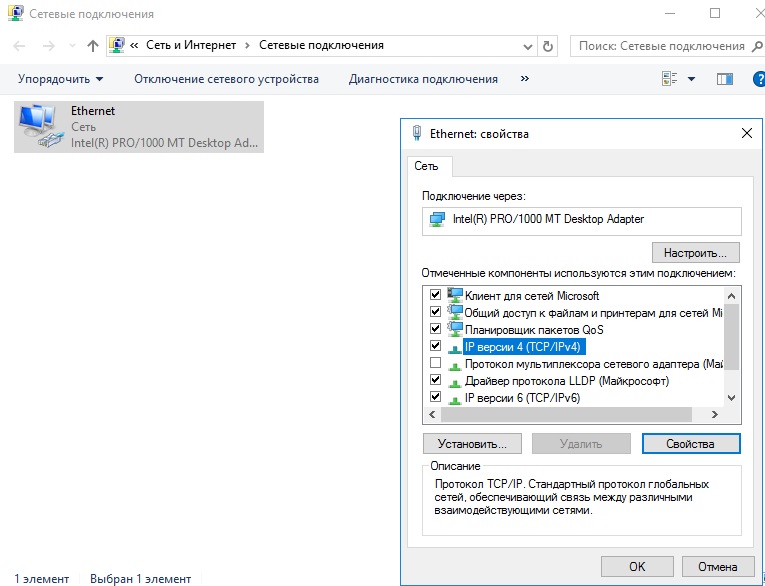
И вводим задаем здесь статические IP адреса. После ставим галку «Подтвердить параметры при выходи», тем самым сохраняя настройки.
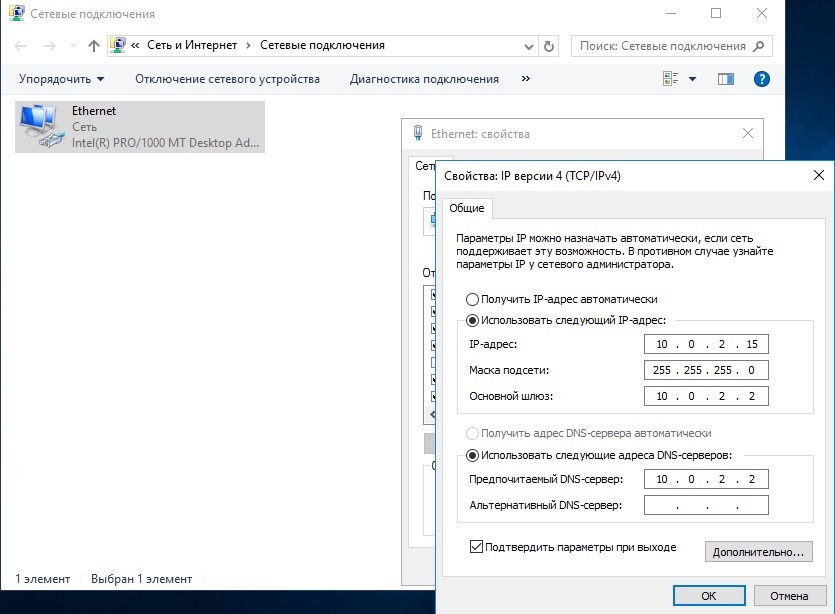
Перейдем наконец к самым главным настройкам, к Active Directory. Меню «Пуск» => Диспетчер серверов.
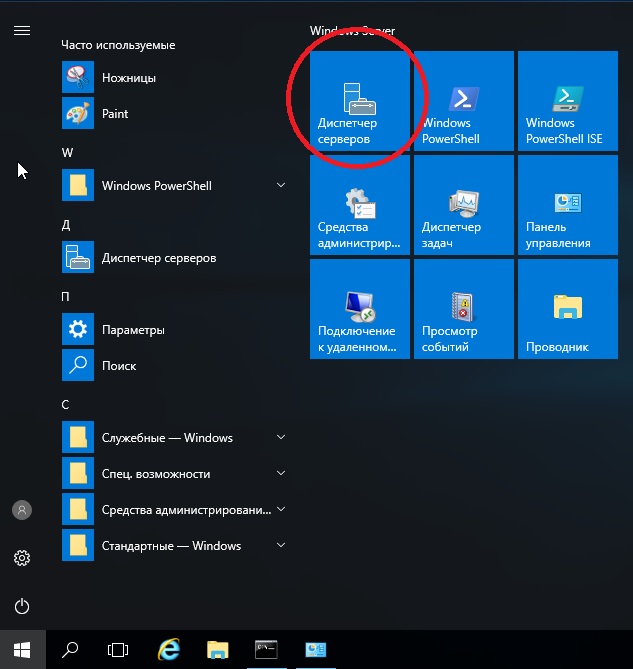
В панели мониторинга => Добавить роли и компоненты.
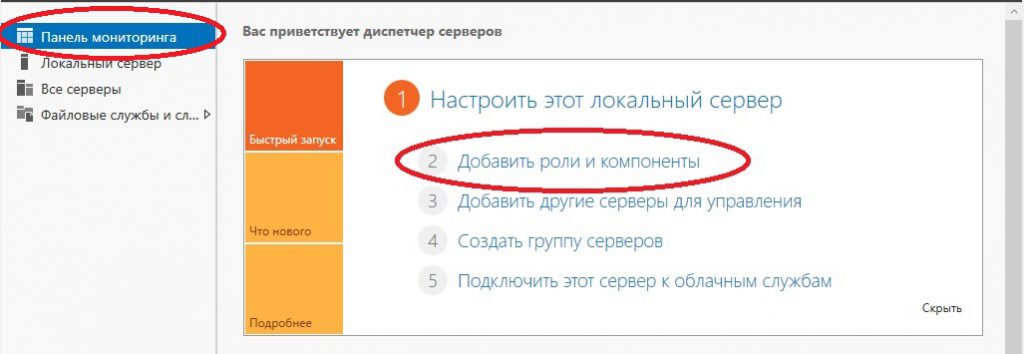
В типе установки выбираем «Установка ролей или компонентов».
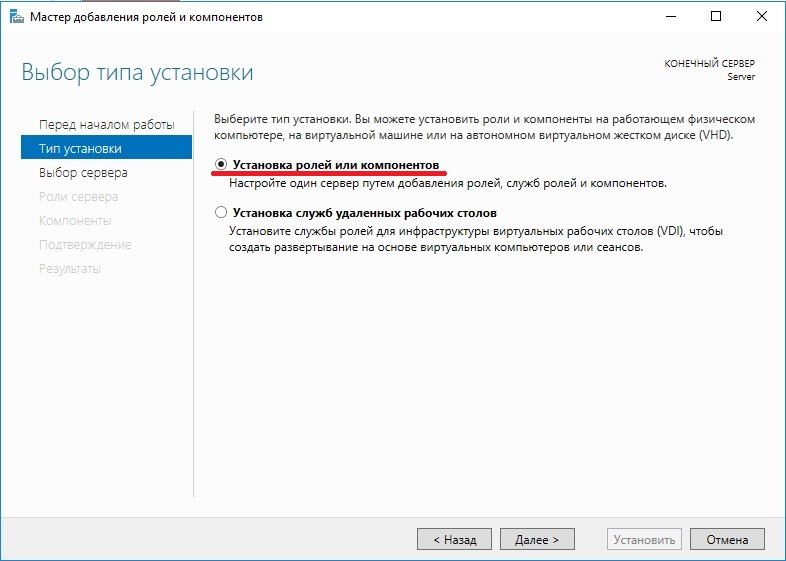
Выбираем нужный сервер в пуле, он будет с именем, который Вы назначили по инструкции выше.
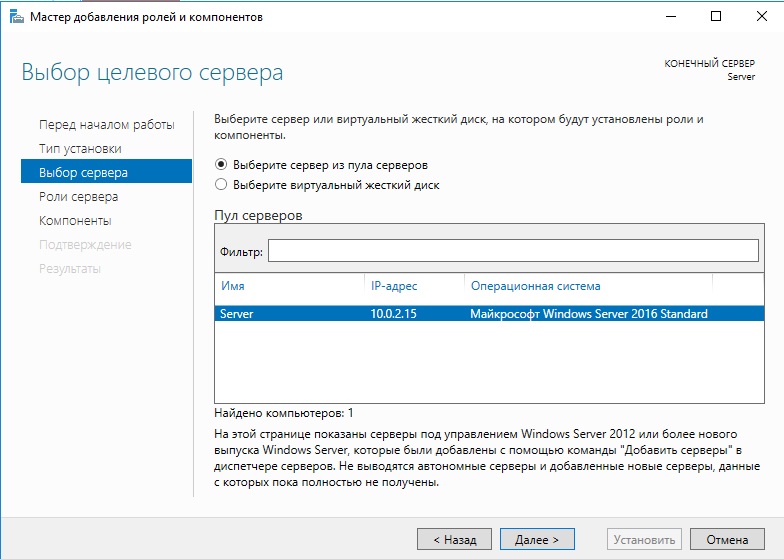
В ролях сервера мы выбираем следующие стандартные роли. Вы можете выбрать что-то еще, если Вам необходимо под Ваши задачи.
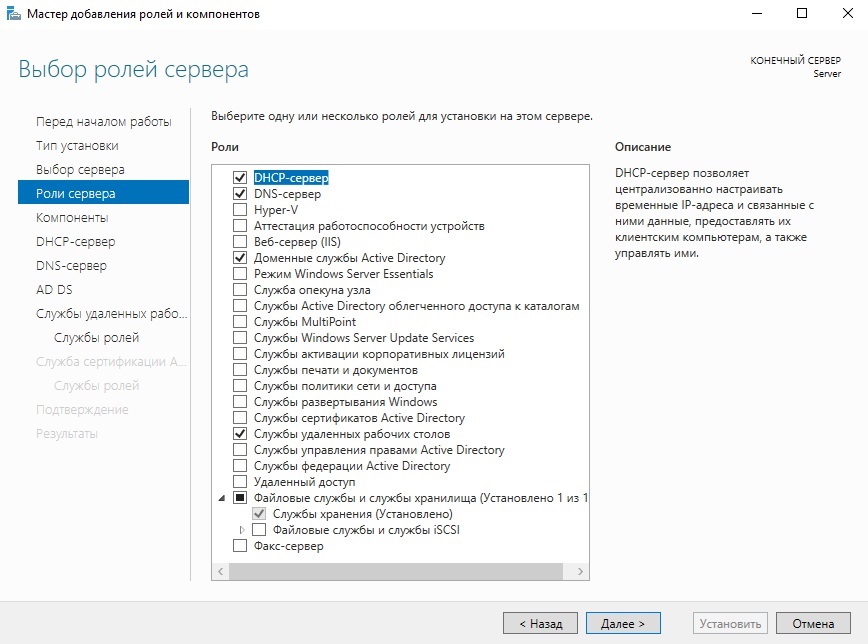
В компонентах оставляем по стандарту следующие пункты. Мы рекомендуем вам дополнительно установить «Службу беспроводной локальной сети», т.к без этой службы на сервер нельзя будет поставить Wi-Fi адаптер и производить настройку беспроводной сети.
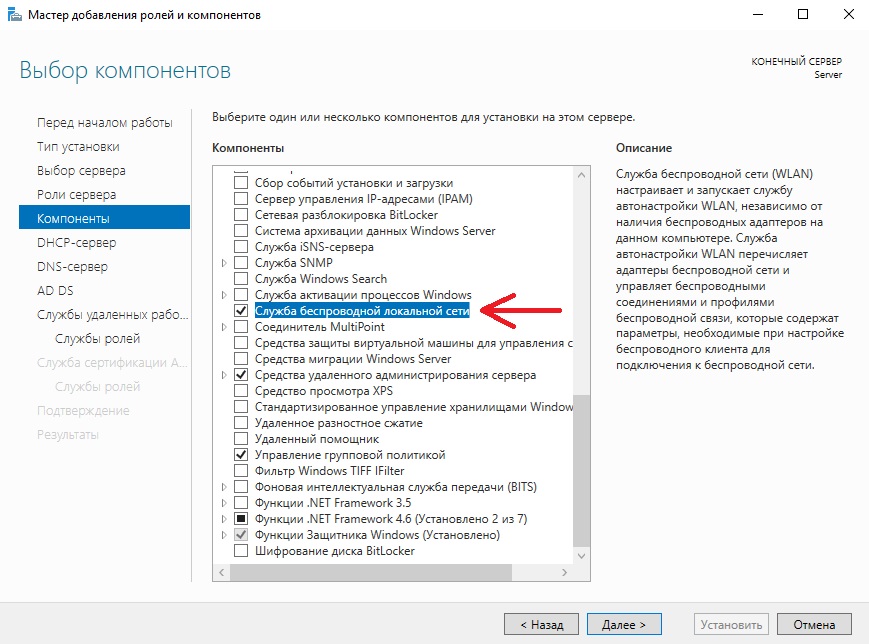
В службе ролей мы выбираем следующие пункты. Далее в инструкции мы будем лицензировать терминальный сервер.
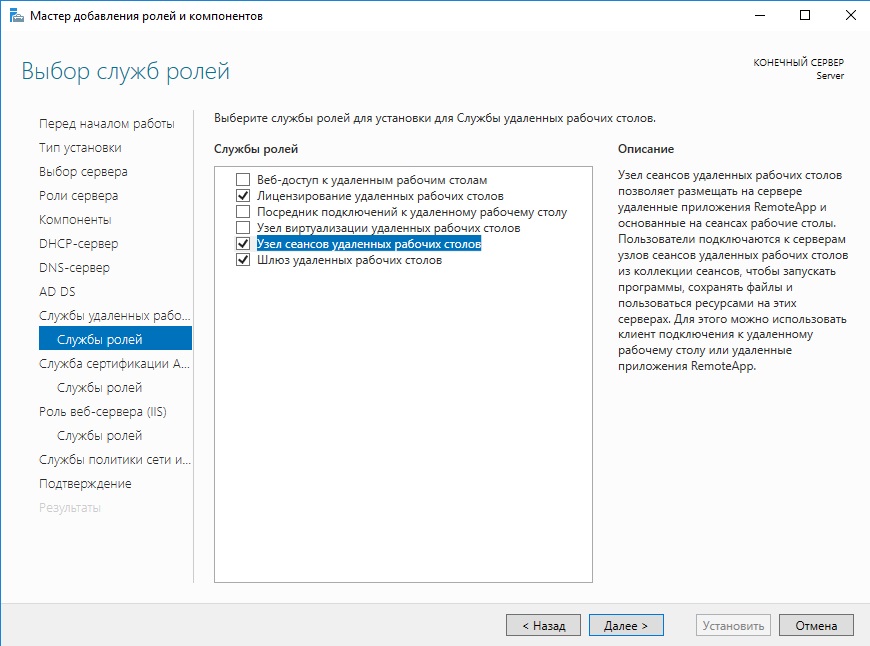
Далее оставляем все по стандарту (если Вам не нужно самим, что-то дополнительно установить). Доходим до пункта «Подтверждение» и устанавливаем.
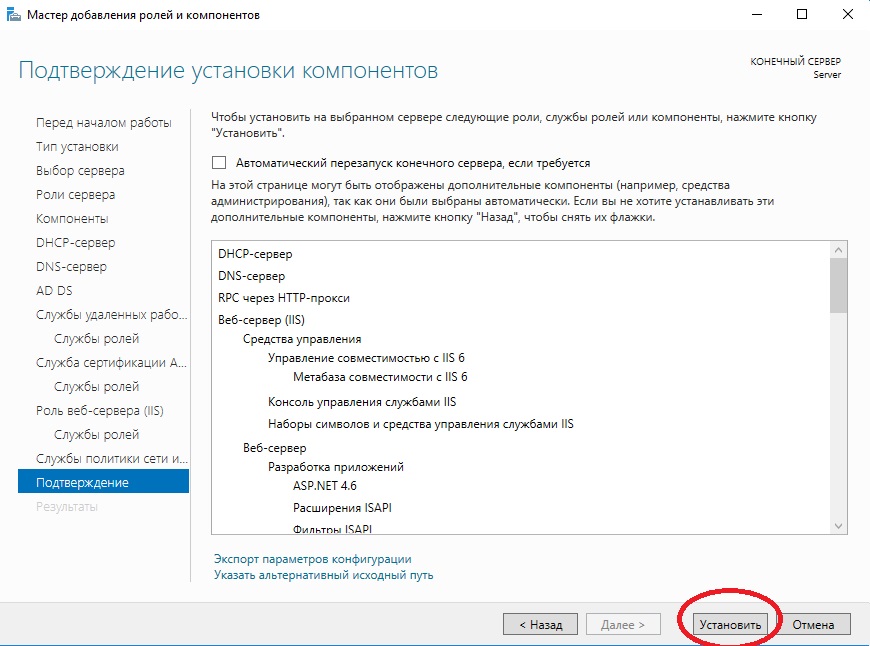
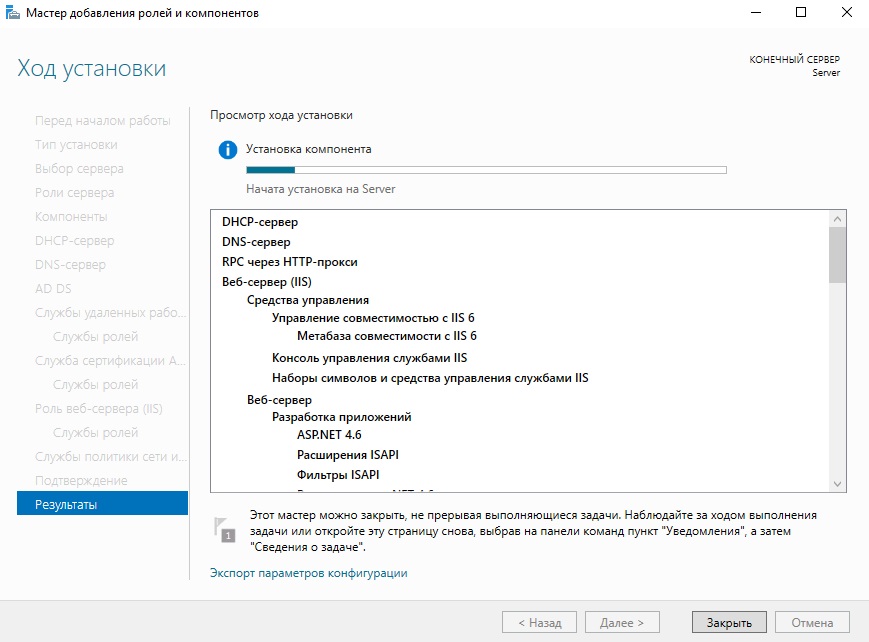
После установки служб нужно перезагрузиться.
Приступаем к настройкам DNS. В Active Directory нажимаем на флажок справа на верху и после заходим в настройки повышения роли этого сервера до контроллера домена.
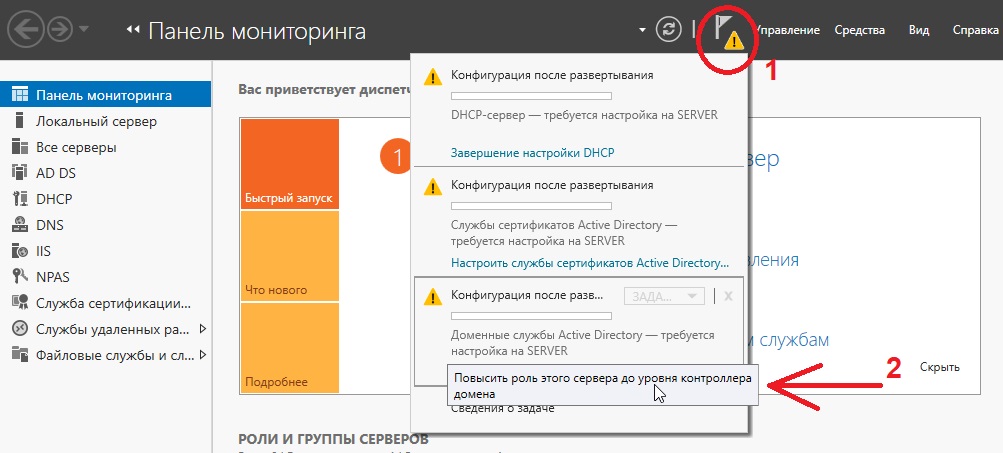
Выбираем пункт «Добавить новый лес» и придумываем имя Вашему домену. На нашем примере это будет «softcomputers».
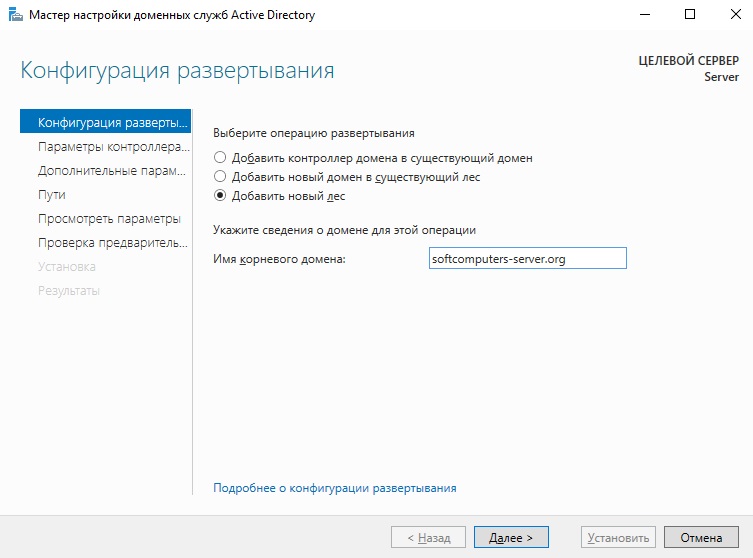
Настройки оставляем по стандарту. Вы должны только придумать пароль для Вашего домена.
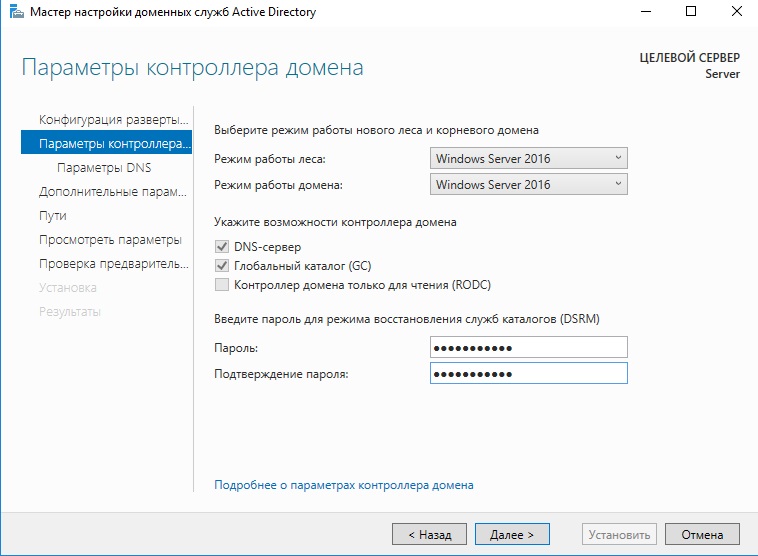
Проходим проверку. Если вы все сделали правильно, то должно установиться все корректно
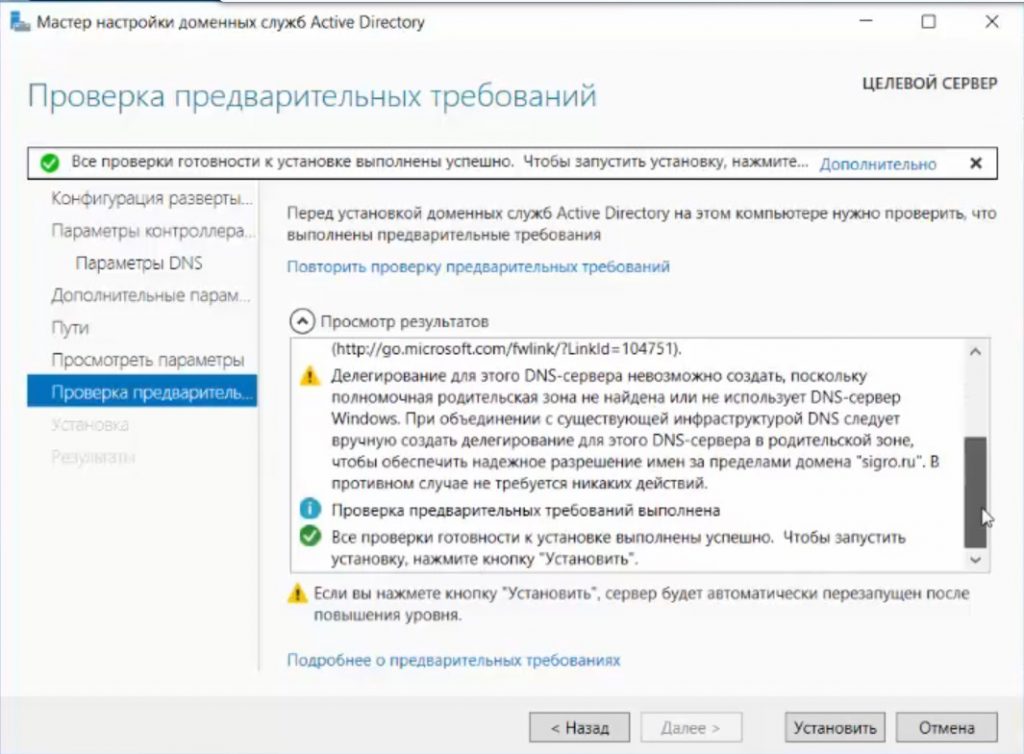
После установки и перезагрузки заходим в меню «Средства» => DNS.
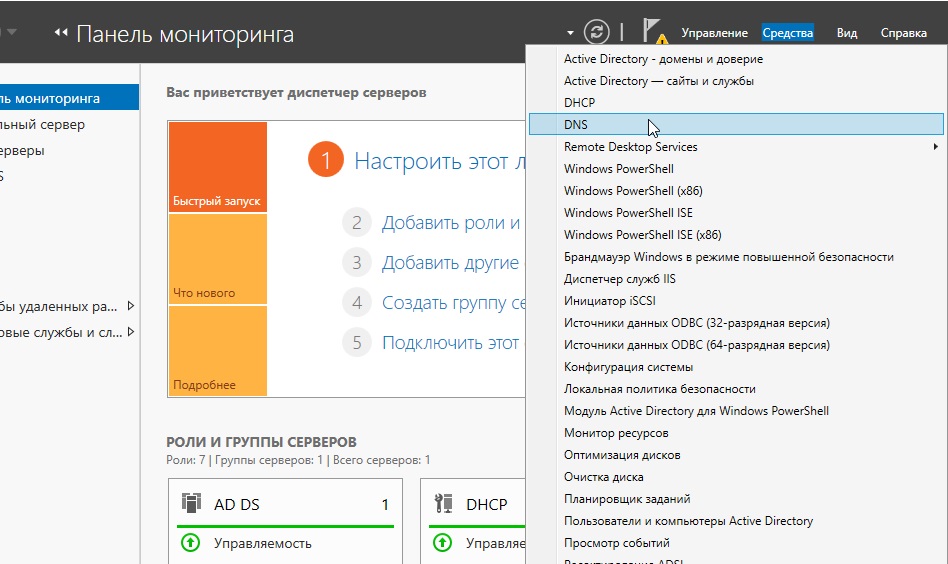
Раскрываем древо DNS => «Имя вашего сервера» => Зоны прямого просмотра => Зоны обратного просмотра => Правой кнопкой мыши на данный пункт и «Создать новую зону».

Выбираем «Основная зона» и далее по скриншотам ниже.
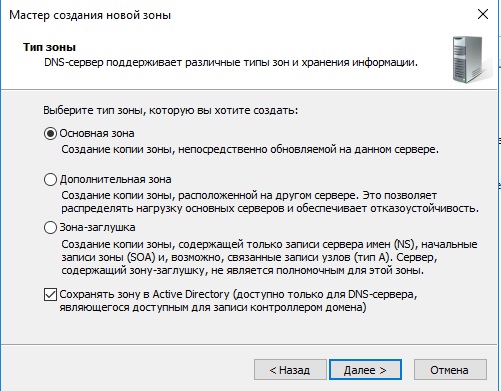
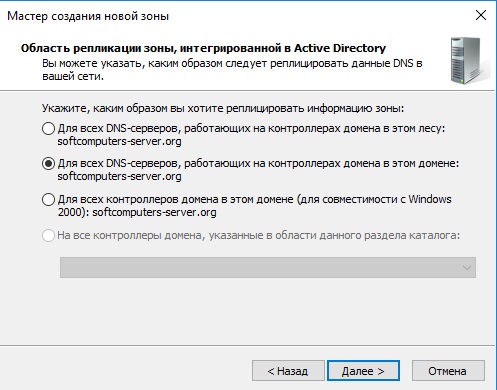
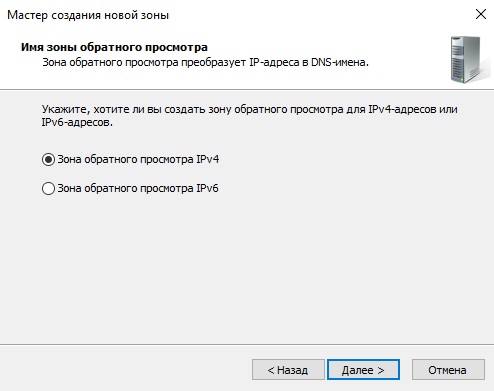
На этом пункте выбираете диапазон Вашей локальной сети. У нас на примере она будет 192.168.0. у Вас она может будет своя (см. cmd => ipconfig).
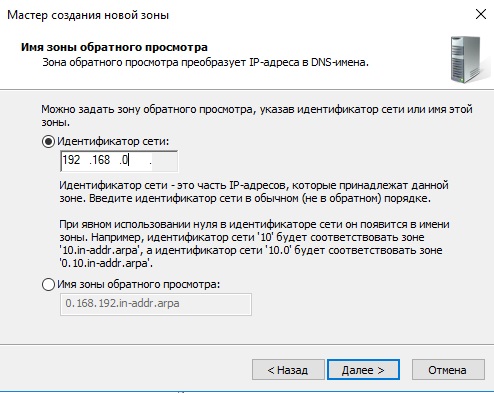
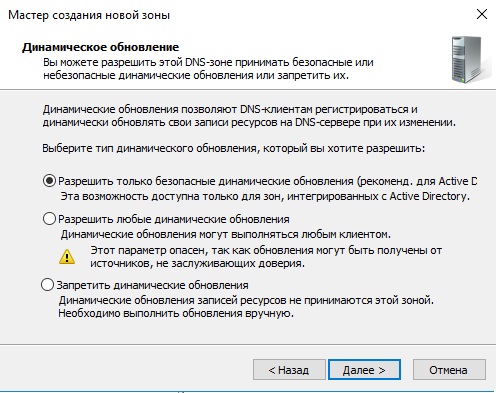
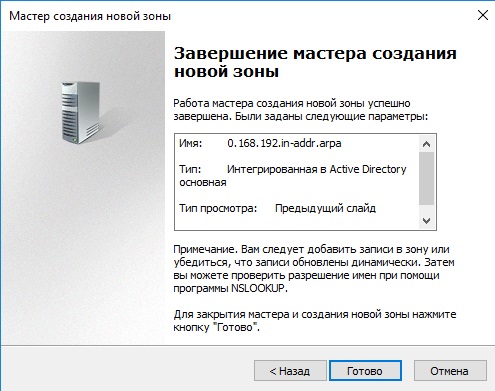
На этом настройки DNS закончены. Приступим к настройкам DHCP. Так же заходим в Active Directory и во флажке справа на верху выбираем соответствующую настройку.
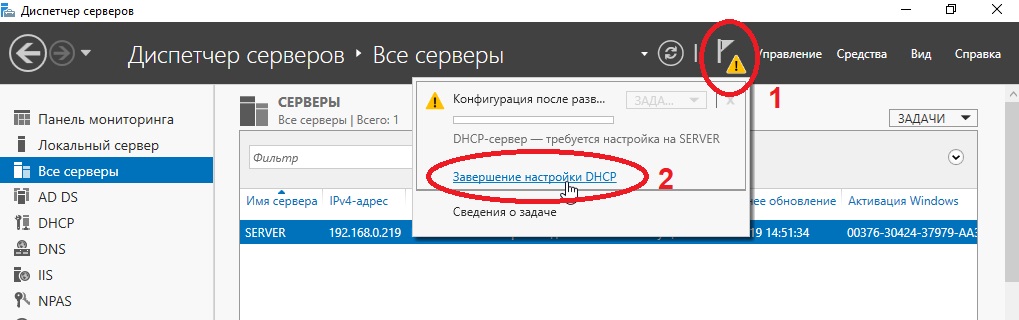
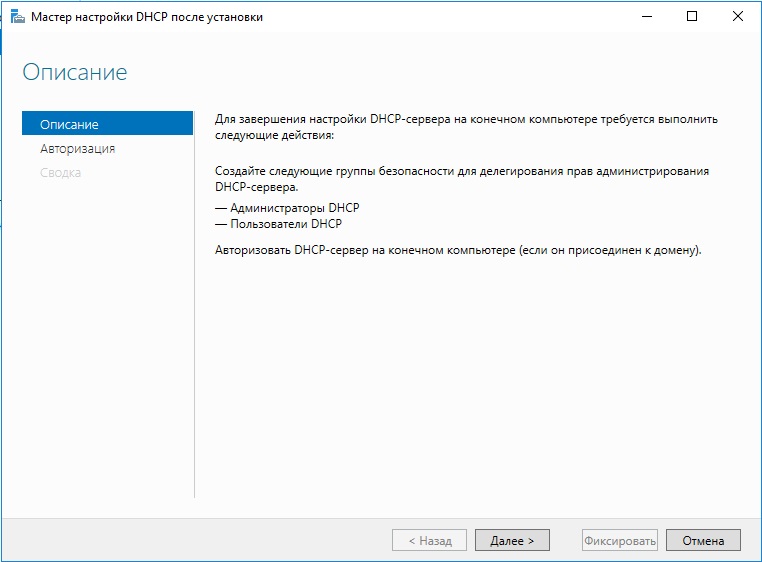
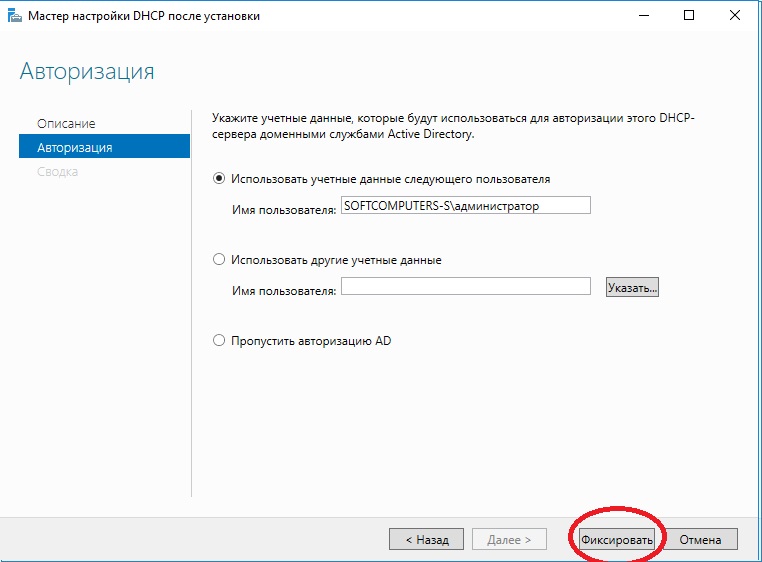
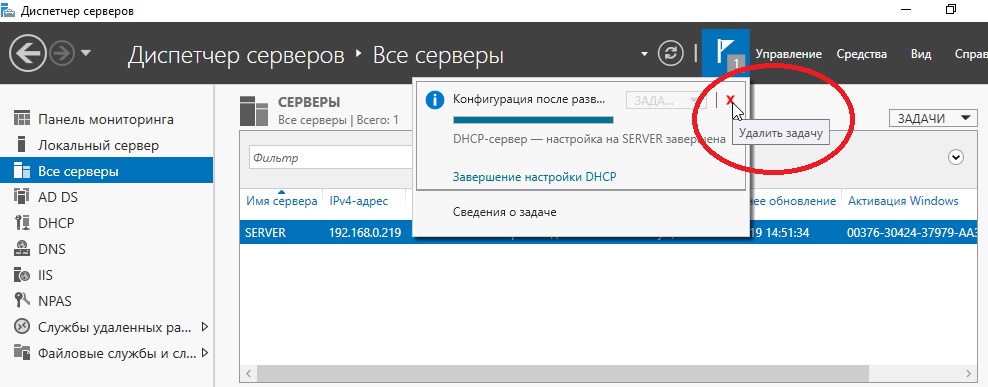
После создания DHCP переходим в меню средства => DHCP для его настройки.
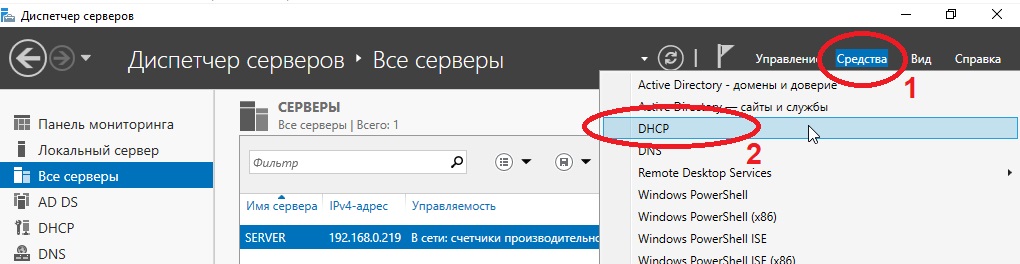
В древе DHCP => Ваш сервер => IPv4 => Правой кнопкой мыши => Создать область.
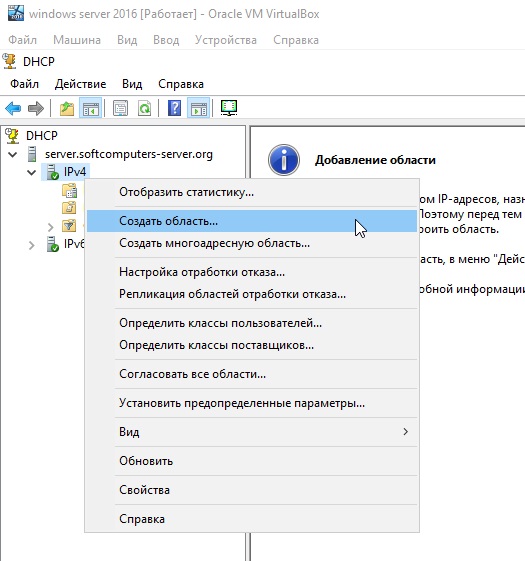
Задаем имя новой области, у нас это будет «basic».
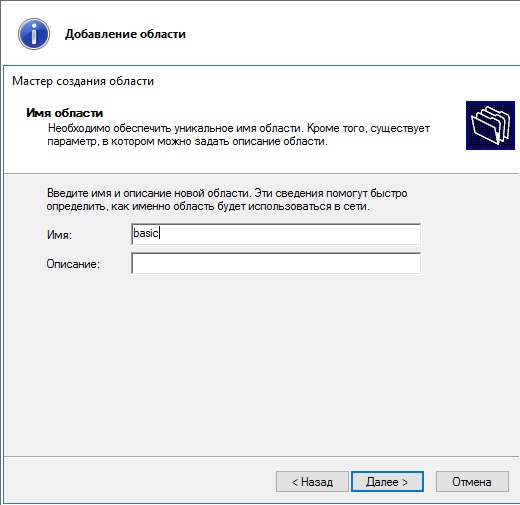
Далее будет меню для исключения диапазона, если нужно исключить что-то можете сделать в этом меню, если не нужно, то пропускаете.

Далее создаем новый диапазон IP адресов, который будет раздавать сервер в локальную сеть. У нас на примере это новый диапазон 192.168.1
Вы можете создать любой другой диапазон на свое усмотрение.
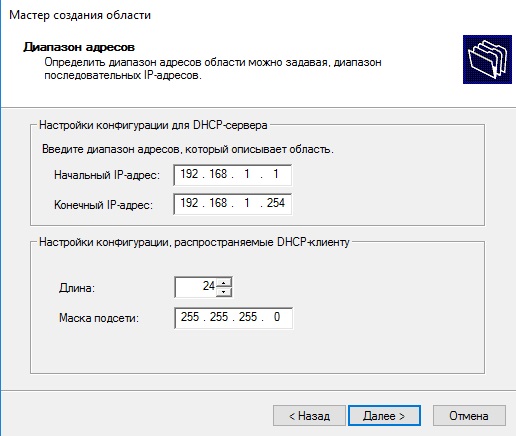
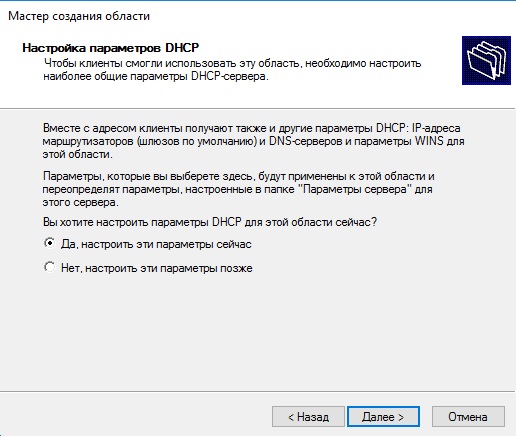
Далее в древе DHCP => Имя сервера => Область => Пул адресов — будет создан новый диапазон.
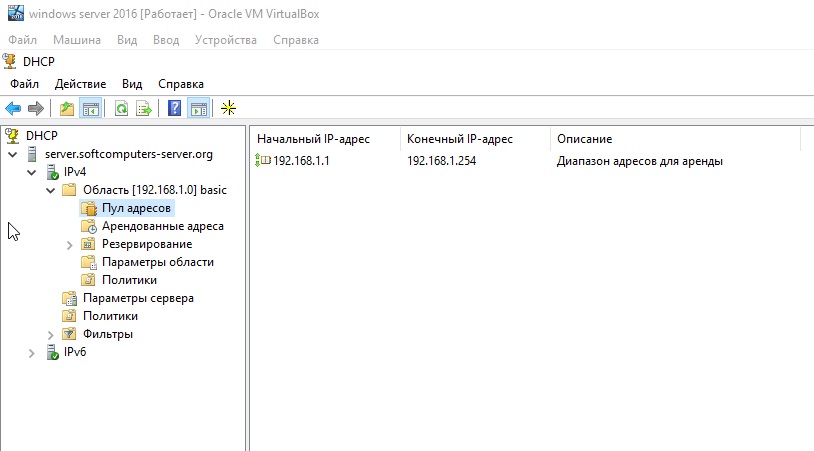
Дальше по списку настроек перейдем к созданию терминального сервера и его лицензирования. Это нужно для того, чтобы пользователи могли подключаться по RDP к серверу по своей учетной записи. (Учетную запись для пользователей будем рассматривать в этой инструкции ниже).
Переходим в «Панель управления» => Администрирование => Remote Desktop Services => Диспетчер лицензирования удаленных рабочих столов.
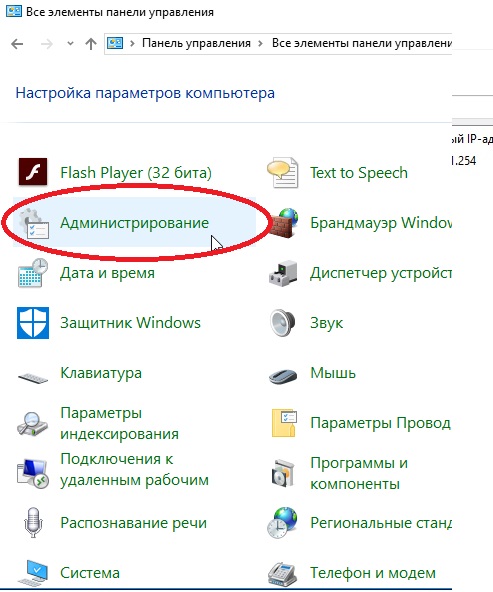
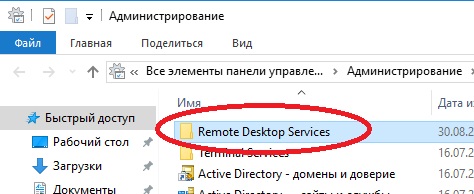
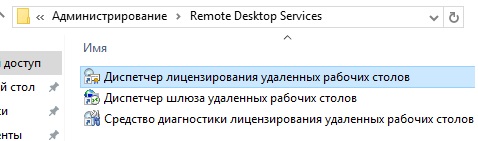
Выбираем пункт во «Все серверы», далее в списке видим имя вашего сервера => правой кнопкой мыши на этот пункт => Активировать сервер.
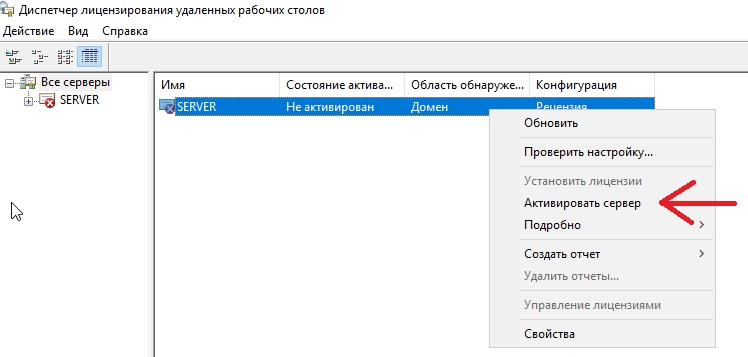
Переходим в «Мастер активации».
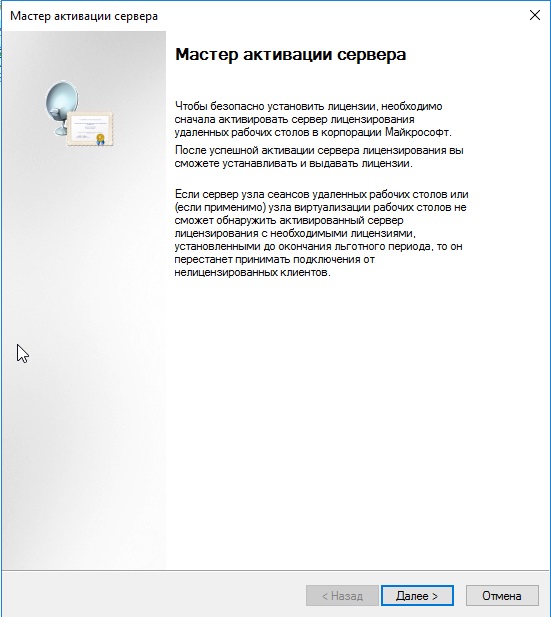
Выбираем «Авто».
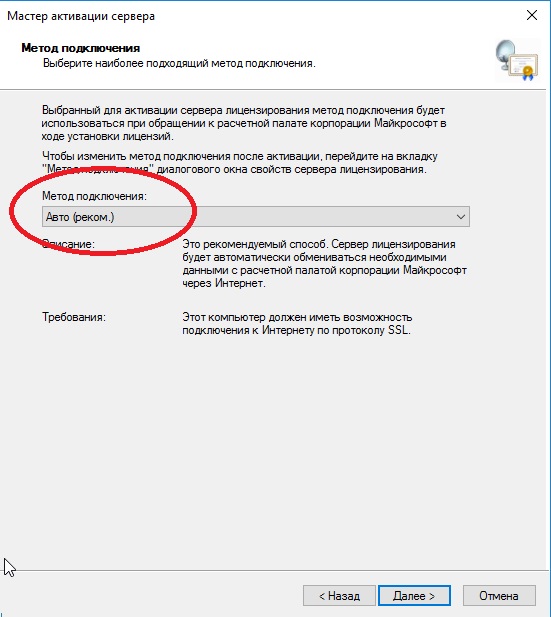
Далее вводите опционально имя и фамилию, название Вашей организации и страну размещения сервера.

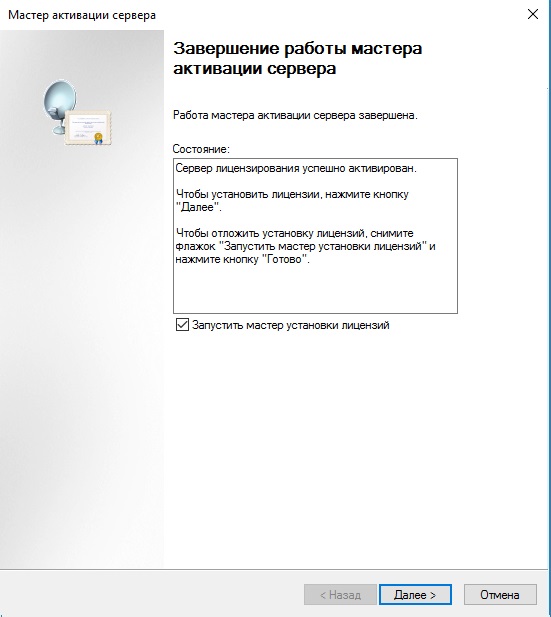
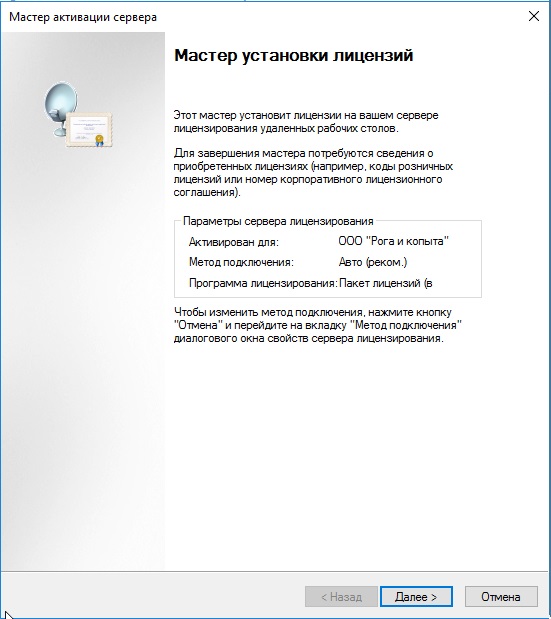
Приступаем к самому лицензированию после регистрации выше. Вам нужен ключ активации для лицензирования терминального сервера — CAL (Client Access Licence) будет в нашем случае. Он обеспечивает подключение 50 пользователей (клиентов) по RDP к серверу Приобрести ключ активации для данной функции можете в нашем интернет-магазине на следующей странице.
Выбираем «Пакет лицензий в розницу» => Далее.
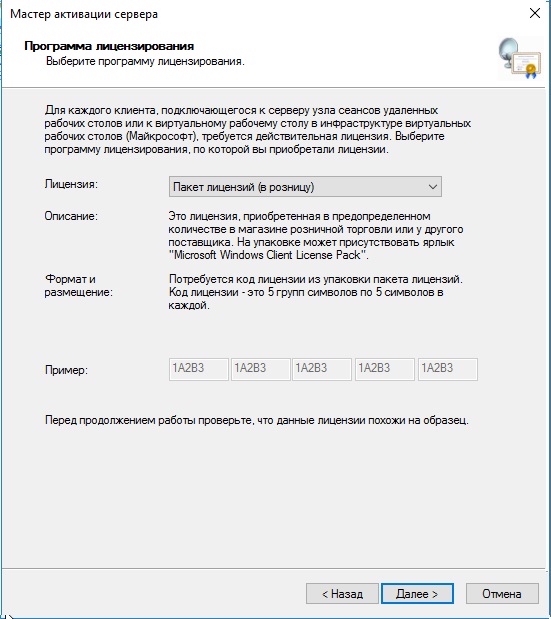
Вводим ключ активации, который Вы приобрели.
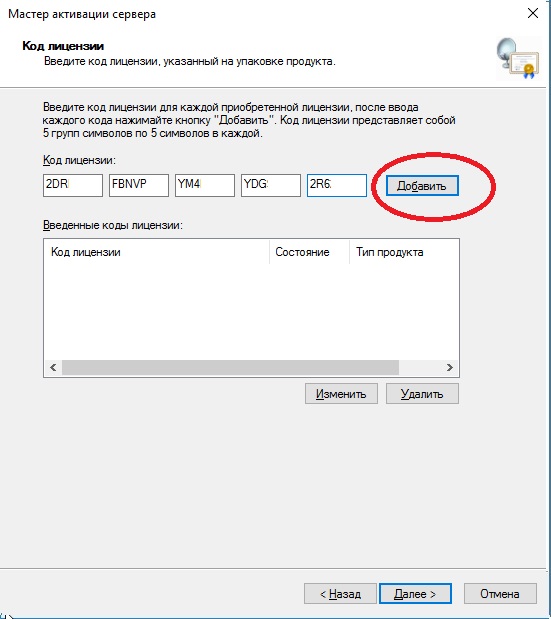
Далее в зависимости от лицензии она может определиться сразу на 50 пользователей, либо Вам нужно будет это указать самим как на скриншоте ниже. (указав больше пользователей, чем позволяет лицензия — данная настройка просто не активируется). Тип лицензии соответственно выбираем «По пользователю».
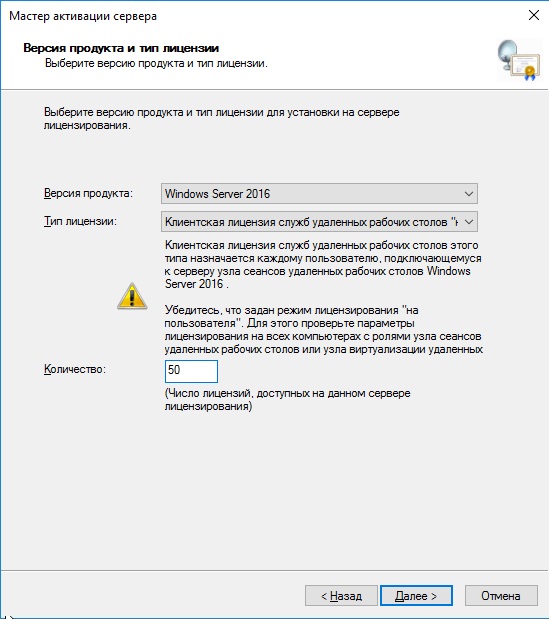
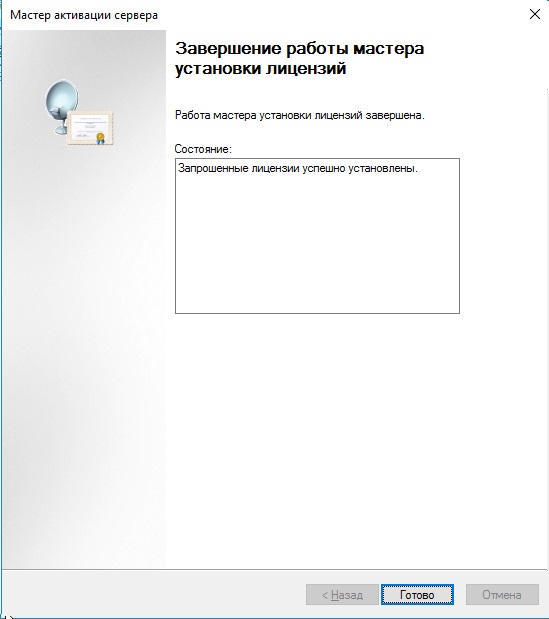
Далее заходим в редактор локальной групповой политики поиск => gpedit.msc => Конфигурация компьютера => Административные шаблоны => Компоненты Windows => Службы удаленных рабочих столов => Узел сеансов удаленных рабочих столов => Лицензирование.
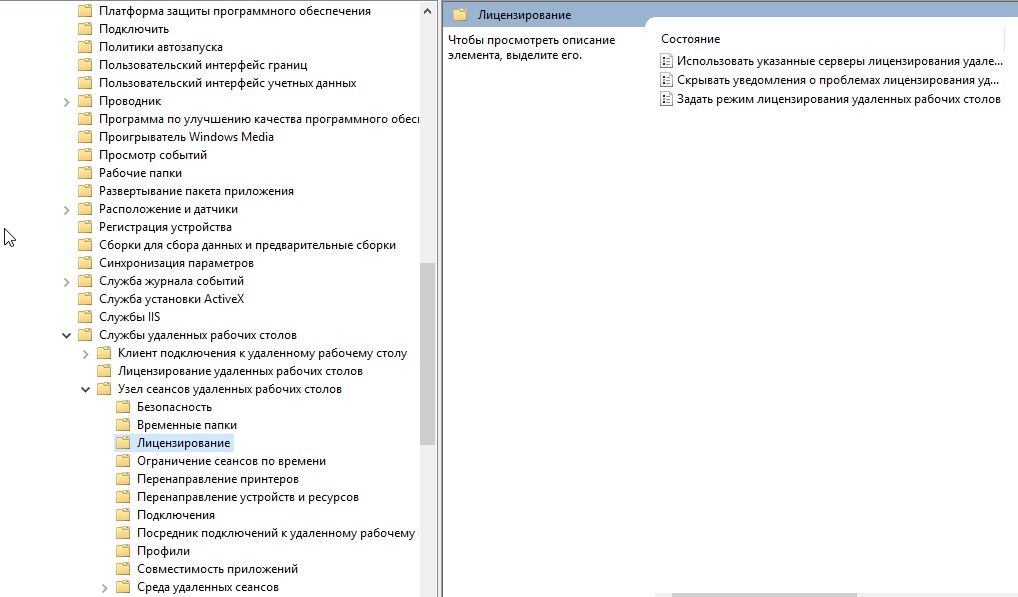
Переходим в меню «Использовать указанные серверы лицензирования удаленных рабочих столов» и вводим в поле имя Вашего сервера, либо его IP.
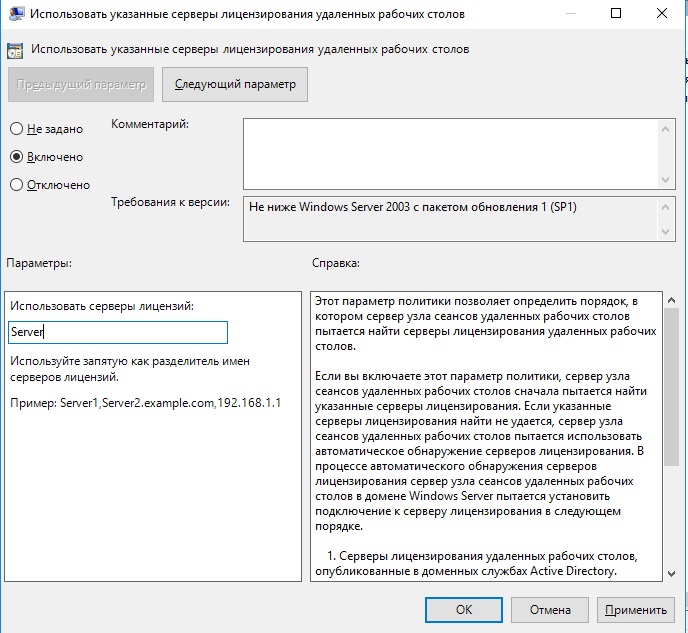
После переходим в меню «Задать режим лицензирования удаленных рабочих столов», в раскрывающемся меню выбираем «На пользователя».
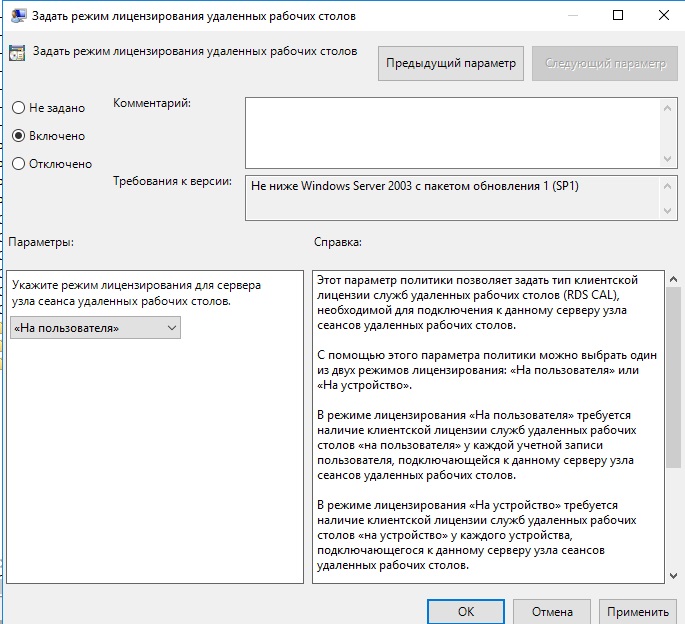
После возвращаемся в диспетчер лицензирования удаленных рабочих столов. И смотрим активирован ли сервер. Если да, то все ок. Но у Вас еще может быть «желтое предупреждение» на иконке сервера. Чтобы устранить проблемы переходим в «Рецензия». В меню данной «Рецензии» могут быть пункты которые нужно отметить, нажмите соответствующие кнопки, если они у вас будут.
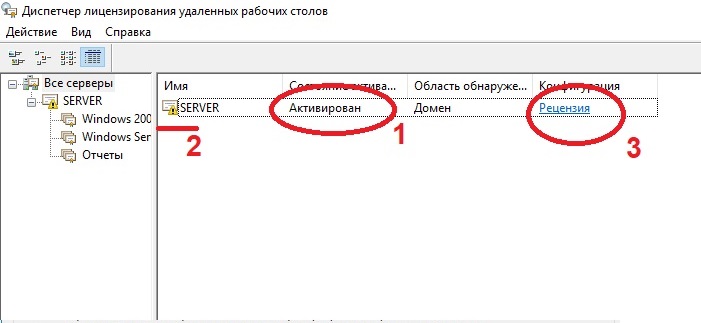
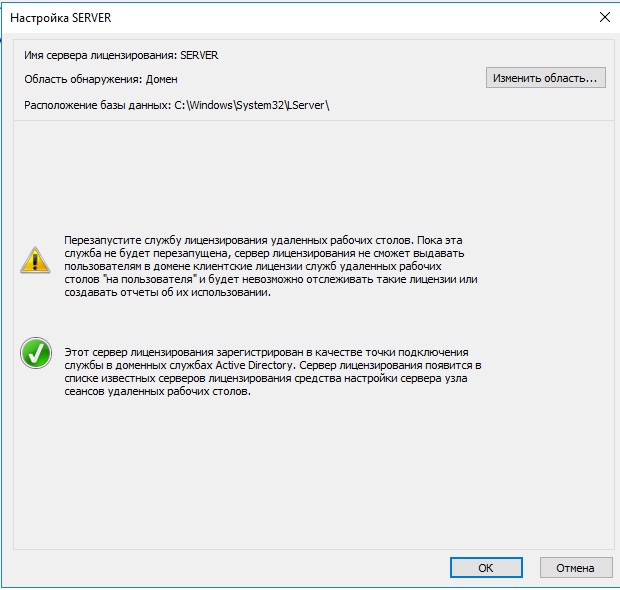
На настройках RDP все. Теперь нам осталось создать первого пользователя, который будет подключен по RDP к этому серверу.
Active Directory => Средства => Пользователи и компьютеры Active Directory.
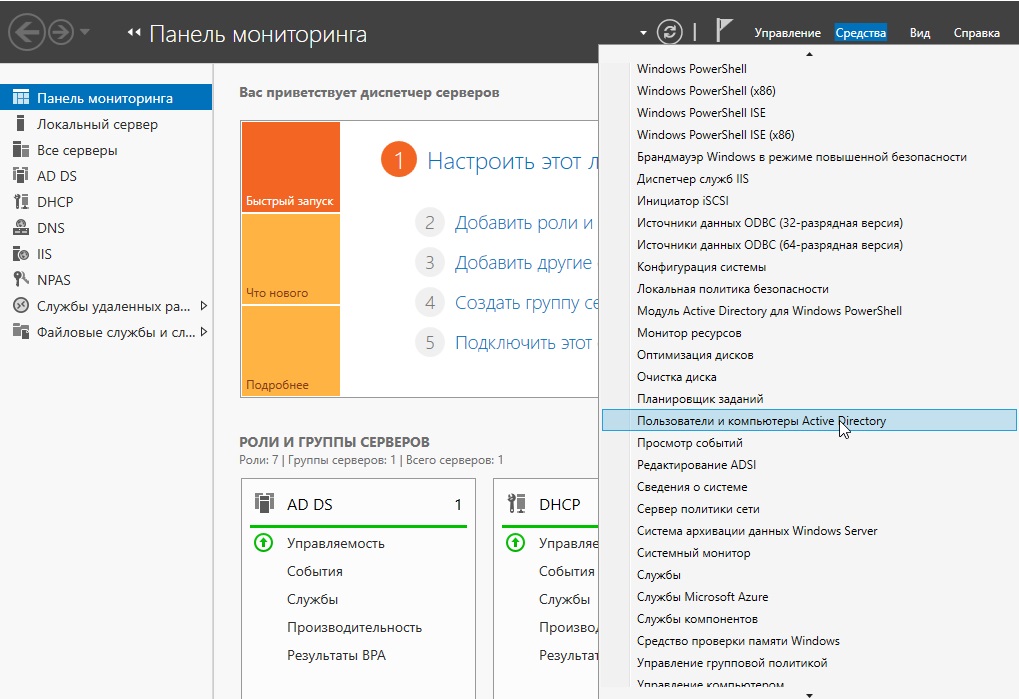
В правом списке выбираете Ваш сервер => Правой кнопкой мыши => Создать => Подраздаление. В этом меню мы создадим пул, в котором будет содержаться список наших пользователей.
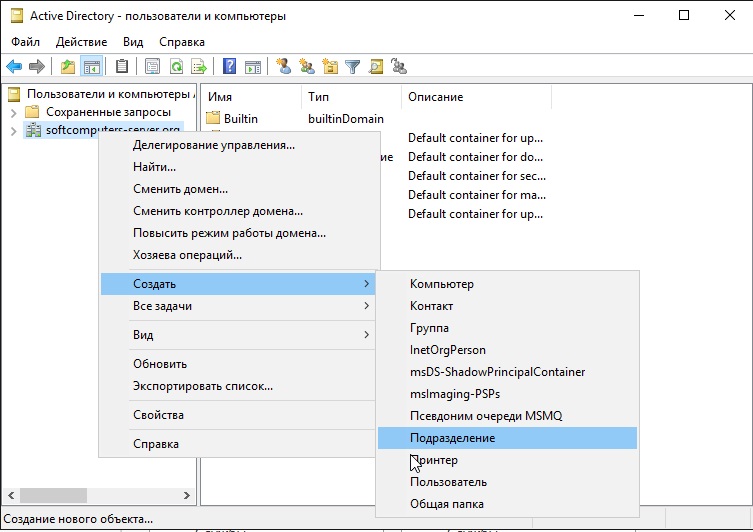
Задаем ему соответствующее имя. На всякий случай поставьте галку для защиты от случайного удаления.
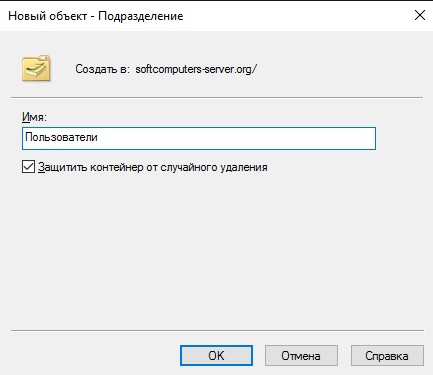
Далее в новой созданной папке слева в списке => Правой кнопкой мыши => Создать => Пользователь.
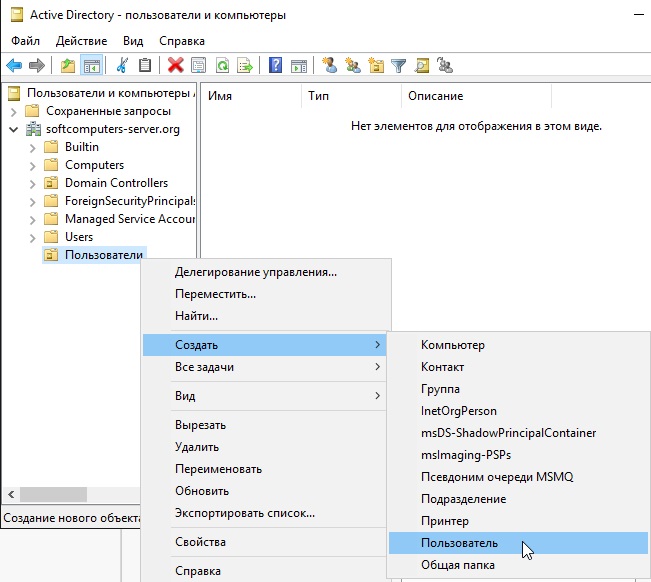
Опционально вводим ФИО пользователя и обязательно имя для входа, желательно это делать на латинице.
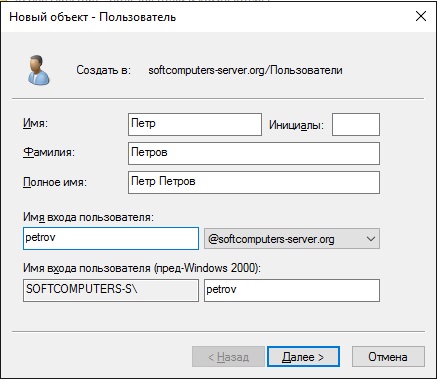
В следующем окне задаем пароль для пользователя поставив соответствующие галки.
В списке в меню «Пользователи» Вы можете управлять пользователями, удалять их, менять им пароль и т.п. Теперь наш новый пользователь «Петр Петров» может зайти по IP сервера, или по его имени в RDP находясь в одной локальной сети с сервером, либо если он добавлен в домен сервера.
На этом с настройками все. Мы рассмотрели самые важные аспекты в настройки и лицензирования Windows Server 2016. Следите за нашим блогом SoftComputers, у нас еще много всего полезного! 🙂
The purpose of this post is to document the steps I had to follow to get my Hyper-V Server 2016 (the free hypervisor) manageable on my Windows Server 2016 GUI server via Server Manager. Both servers are in a workgroup, which means you need to do a number of things to get this working. The same steps would also apply to a Windows Server 2016 Core installation.
- Author
- Recent Posts

Robert is a small business specialist from the UK and currently works as a system administrator. He was a Microsoft MVP for eight years and has worked as a technical reviewer for Microsoft Press. You can follow Robert on Twitter and in his blog.
The GUI server is my production Hyper-V host, and I wanted to use Server Manager to keep an eye on the lab server. There are many, many guides on this out there. However, what I found since the last time I did this was that something is always missing from my notes or the posts I am trying to follow. For example, I had the server showing up and populated correctly in Server Manager, but I was unable to view the storage.
First off, I’ll assume you have completed the installation of the operating system. Once logged in, you will see the SConfig tool. Here, our goal is to configure Windows Remote Management (WinRM) to work over HTTPS. First, we have to enable Remote Desktop.
Choose option 7 (Remote Desktop) and then press E to enable it.
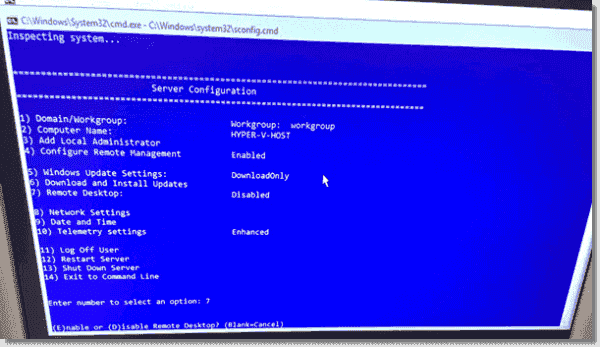
SConfig menu on Server Core
When asked which authentication method to enable, choose option 1.
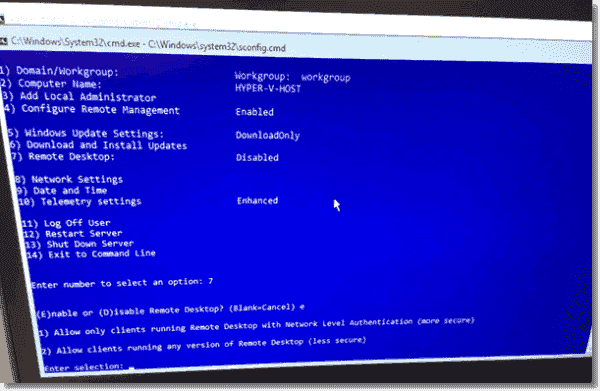
SConfig menu option 7
You should then see a message box indicating it has enabled Remote Desktop.

SConfig menu enabling Remote Desktop
Now you can Remote Desktop to your Core server if you wish.
Once logged in, select the cmd window floating in the background. Enter this command:
winrm e winrm:config:listener
This will show you the current listeners configured by WinRM.

Check WinRM listener
You can see we just have one listener enabled using the default HTTP.
Type PowerShell and press Enter.
Run this command:
get-childitem cert:localmachinemy

Check local certificates
You should receive no output for this, and this means you have no certificates installed on the machine.
Using this post as a guide, we can set up a self-signed certificate and assign it to a WinRM listener.
New-SelfSignedCertificate -DnsName hyper-v-host.sbs.local ‑CertStoreLocation cert:localmachinemy
New-SelfSignedCertificate
Now this certificate is self-signed, so our GUI server won’t trust it. We will need to install this certificate on our GUI server. Make a note of the thumbprint from your new certificate, as we will need that in our next command.
First, we can store our certificate in a variable.
$cert = get-childitem cert:localmachinemy | where { $_.ThumbPrint -eq "E941D147E708A1EA04EEA8E48B7A88328B5AC47D" }
We need to protect our certificate with a password, which we need to store as a secure string.
$password = ConvertTo-SecureString P@ssw0rd -AsPlainText –Force
Now we can export our certificate.
$cert | Export-PfxCertificate -FilePath c:hyper-v-host.pfx -Password $password

Export certificate
We can collect that file later and then install it on our GUI server.
Now we need to set up our WinRM HTTPS listener. Switch back to cmd.
The command we need to enter is quite long and needs two pieces of information: your server’s fully qualified domain name (FQDN) and the thumbprint of the certificate we just generated.
winrm create winrm/config/Listener?Address=*+Transport=HTTPS @{Hostname="hyper-v-host.sbs.local"; CertificateThumbprint="E941D147E708A1EA04EEA8E48B7A88328B5AC47D"}
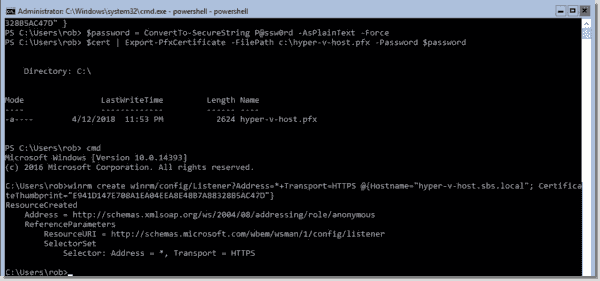
New HTTPS listener
Now we can run our first WinRM command and make sure our listener is enabled.
winrm e winrm/config/listener
We can see here we now have two listeners enabled.

Show HTTPS listeners
Moving over to our GUI server, we need to configure some things before we can connect to the Core server.
We need to store the password for the Core server’s built-in Administrator account in the credential store.
Open a PowerShell window and enter the following:
cmdkey /add:hyper-v-host /user:administrator /pass:P@ssw0rd
cmdkey /add:hyper-v-host.sbs.local /user:administrator /pass:P@ssw0rd
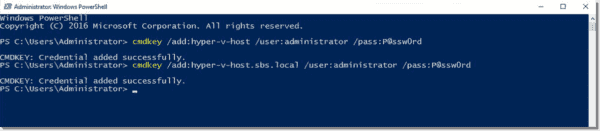
Save credentials
Notice we have saved the credential for the hostname and the FQDN.
Next we can add the Core server as a trusted host.
set-item wsman:localhostclienttrustedhosts -Value hyper-v-host ‑Concatenate
set-item wsman:localhostclienttrustedhosts -Value hyper-v-host.sbs.local ‑Concatenate

Add trusted host
Again we add both the hostname and the FQDN.
We can now use PowerShell remoting to connect to our Core server, which is lucky since we need to do a couple of other bits. We need to configure the firewall for file and print sharing, allow remote access for local accounts, and enable remote firewall management.
Enter-PSSession HYPER-V-HOST
New-ItemProperty -Path HKLM:SoftwareMicrosoftWindowsCurrentVersionPoliciesSystem -Name LocalAccountTokenFilterPolicy -Value 1 -Type DWORD
netsh advfirewall set currentprofile settings remotemanagement enable
netsh advfirewall set rule group="File and Printer Sharing" new enable=Yes
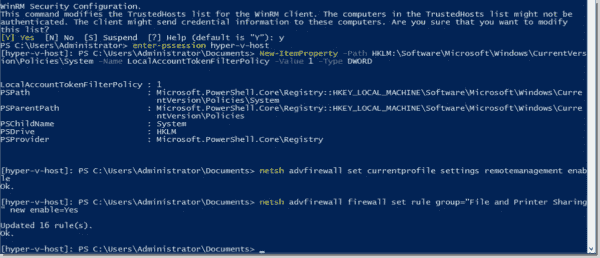
Edit the registry
We can now browse the folders on our Core server.
If we open the c$ share, we can get our certificate and install it.
Right-click the PFX file and follow the Certificate Import Wizard to install the certificate into the Trusted Root Certificate Authorities for the local machine.
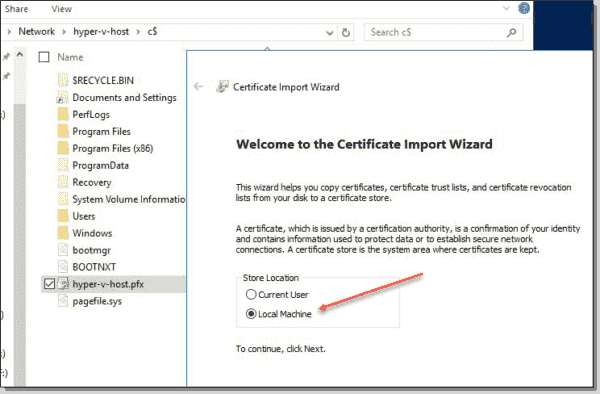
Import PFX
Trusted Root Certificate Authorities store
We should now have done enough to get Server Manager able to manage our Core server remotely.
Open Server Manager and choose option 3 to add other servers.
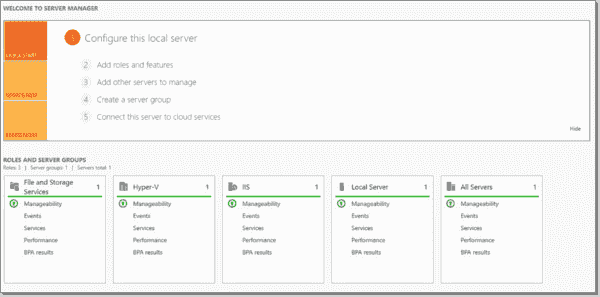
Server Manager
Choose the DNS tab and enter the name of your Core server.
Use the arrow to add it to the list of selected computers and click OK. Server Manager will add the server.

Adding a server
Move to All Servers and we can see our server listed.
Subscribe to 4sysops newsletter!

Server online
You should see Online in the Manageability column, and that’s all there is to it.
![]()
В этой статье я постарался собрать в одном месте основные команды cmd и PowerShell, которые полезны при настройке и управлении Windows Server Core. Думаю, этот гайд будет полезен как новичкам, так и опытным системным администраторам, как справочник по базовым командам Server Core.
Содержание:
- Настройка Windows Server Core с помощью SCONFIG
- Основные команды PowerShell для настройки Server Core
- Установка обновлений в Server Core
- Часто используемые команды в Server Core
Напомним, что Server Core это особый режим установки Windows Server без большинства графических инструментов и оболочек. Управление таким сервером выполняется из командной строки или удаленно.
Преимущества Windows Serve Core:
- Меньшие требования к ресурсам;
- Повышенная стабильность, безопасность, требует установки меньшего количества обновлений (за счет меньшего количества кода и используемых компонентов);
- Идеально подходит для использования в качестве сервера для инфраструктурных ролей (контроллер домена Active Directory, DHCP сервер, Hyper-V сервер, файловый сервер и т.д.).
Server Core лицензируется как обычный физический или виртуальный экземпляр Windows Server (в отличии от Hyper-V Server, который полностью бесплатен).
Для установки Windows Server 2016/2019 в режиме Core нужно выбрать обычную установку. Если вы выберите Windows Server (Desktop Experience), будет установлен GUI версия операционной системы (в предыдущих версиях Windows Server она называлась Server with a GUI).
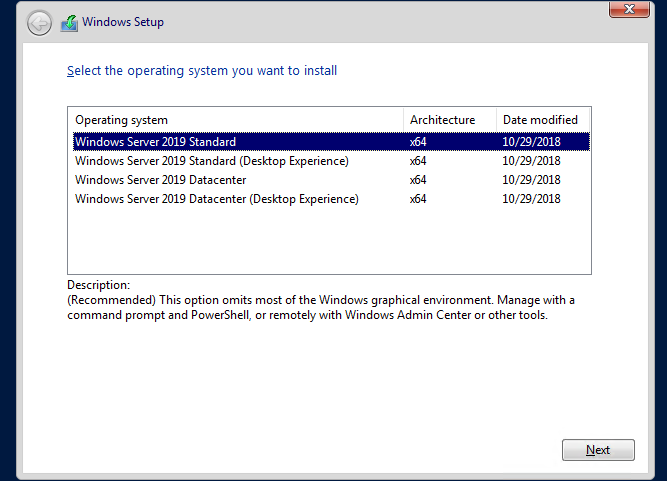
После установки Windows Server Core перед вами появляется командная строка, где нужно задать пароль локального администратора.
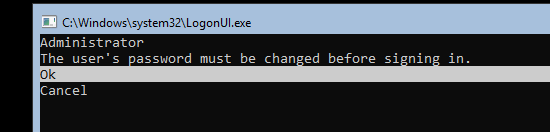
При входе на Server Core открывается командная строка (cmd.exe). Чтобы вместо командной строки у вас всегда открывалась консоль PowerShell.exe, нужно внести изменения в реестр. Выполните команды:
Powershell.exe
Set-ItemProperty -Path 'HKLM:SoftwareMicrosoftWindows NTCurrentVersionWinLogon' -Name Shell -Value 'PowerShell.exe'
И перезагрузите сервер:
Restart-Computer -Force

Если вы случайно закрыли окно командной строки, нажмите сочетание клавиш Ctrl+Alt+Delete, запустите Task Manager -> File -> Run -> выполните
cmd.exe
(или
PowerShell.exe
).
Настройка Windows Server Core с помощью SCONFIG
Для базовой настройки Server Core можно использовать встроенный скрипт sconfig. Просто выполните команду sconfig в консоли. Перед вами появиться меню с несколькими пунктами:
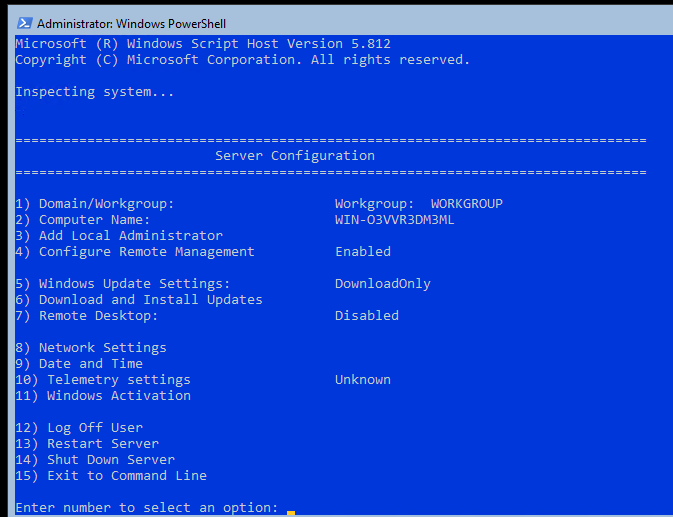
С помощью меню Server Configuration можно настроить:
- Добавить компьютер в домен или рабочую группу;
- Изменить имя компьютера (hostname);
- Добавить локального администратора;
- Разрешить/запретить удаленное управления и ответы на icmp;
- Настроить параметры обновления через Windows Update;
- Установить обновления Windows;
- Включить/отключить RDP;
- Настроить параметры сетевых адаптеров (IP адрес, шлюз, DNS сервера);
- Настроить дату и время;
- Изменить параметры телеметрии;
- Выполнить logoff, перезагрузить или выключить сервер.
Все пункт в меню
sconfig
пронумерованы. Чтобы перейти в определенное меню наберите его номер и Enter.
В некоторых пунктах меню настройки sconfig есть вложенные пункты. Там также, чтобы перейти к определенной настройке, нужно сделать выбор цифры пункта меню.
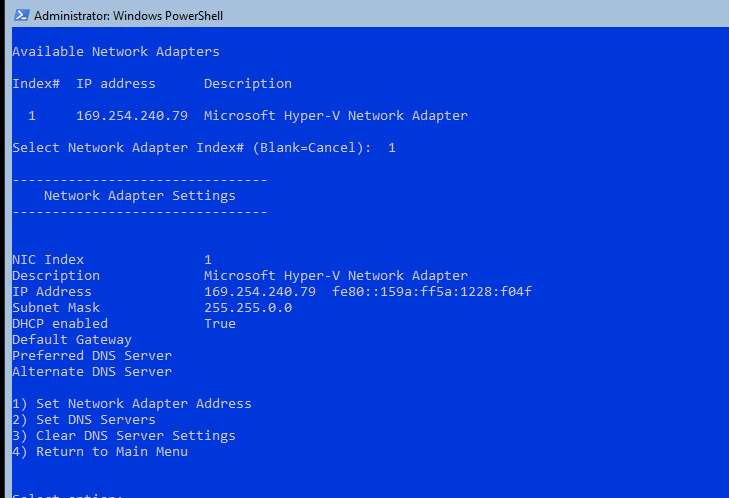
Не будем подробно рассматривать все пункты настройки sconfig, т.к. там все достаточно просто и очевидно. Однако в большинстве случаев администраторы предпочитают использовать для настройки новых хостов с Server Core различные PowerShell скрипты. Это намного проще и быстрее, особенно при массовых развёртываниях.
Основные команды PowerShell для настройки Server Core
Рассмотрим основные команды PowerShell, которые можно использовать для настройки Server Core.
Узнать информацию о версии Windows Server и версии PowerShell:
Get-ComputerInfo | select WindowsProductName, WindowsVersion, OsHardwareAbstractionLayer
$PSVersionTable

Для перезагрузки Server Core нужно выполнить команду PowerShell :
Restart-Computer
Чтобы выполнить выход из консоли Server Core, наберите:
logoff
Настройка параметров сети
Теперь нужно из PowerShell нужно настроить параметры сети (по умолчанию Windows настроена на получение адреса от DHCP). Выведите список сетевых подключений:
Get-NetIPConfiguration
Теперь укажите индекс интерфейса сетевого адаптера (InterfaceIndex), который нужно изменить и задайте новый IP адрес:
New-NetIPaddress -InterfaceIndex 4 -IPAddress 192.168.13.100 -PrefixLength 24 -DefaultGateway 192.168.13.1
Set-DNSClientServerAddress –InterfaceIndex 4 -ServerAddresses 192.168.13.11,192.168.13.
111
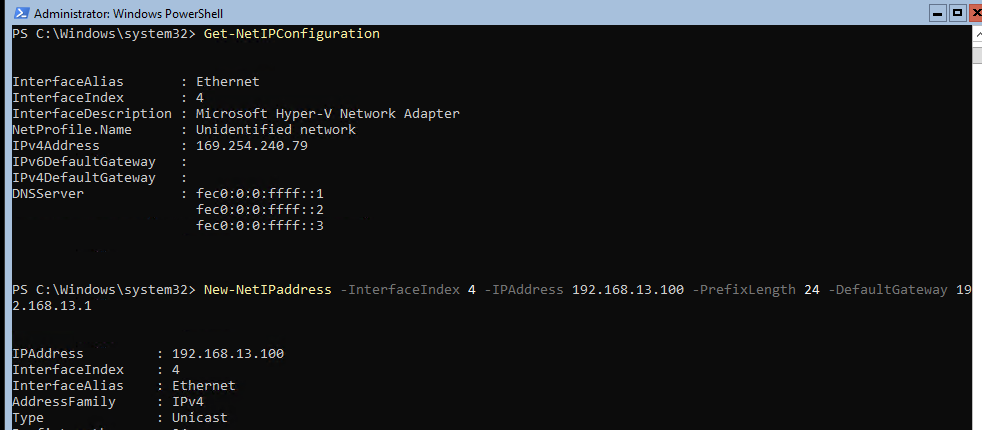
Проверьте текущие настройки:
Get-NetIPConfiguration
Если нужно сбросить IP адрес и вернуться к получению адреса от DHCP, выполните:
Set-DnsClientServerAddress –InterfaceIndex 4 –ResetServerAddresses
Set-NetIPInterface –InterfaceIndex 4 -Dhcp Enabled
Включить/отключить сетевой адаптер:
Disable-NetAdapter -Name “Ethernet0”
Enable-NetAdapter -Name “Ethernet 0”
Включить, отключить, проверить статус поддержки IPv6 для сетевого адаптера:
Disable-NetAdapterBinding -Name "Ethernet0" -ComponentID ms_tcpip6
Enable-NetAdapterBinding -Name "Ethernet0" -ComponentID ms_tcpip6
Get-NetAdapterBinding -ComponentID ms_tcpip6
Настроить winhttp прокси сервер для PowerShell и системных подключений:
netsh Winhttp set proxy <servername>:<port number>
Настройка времени/даты
Вы можете настроить дату, время, часовой пояс с помощью графической утилиты
intl.cpl
или с помощью PowerShell:
Set-Date -Date "09/03/2022 09:00"
Set-TimeZone "Russia Time Zone 3
Задать имя компьютера, добавить в домен, активация
Чтобы изменить имя компьютера:
Rename-Computer -NewName win-srv01 -PassThru

Добавить сервер в домен Active Directory:
Add-Computer -DomainName "corp.winitpro.ru " -Restart
Если нужно добавить дополнительных пользователей в администраторы, можно настроить групповую политику или добавить вручную:
Add-LocalGroupMember -Group "Administrators" -Member "corpanovikov"
Для активации Windows Server нужно указать ваш ключ:
slmgr.vbs –ipk <productkey>
slmgr.vbs –ato
Или можно активировать хост на KMS сервере (например, для Windows Server 2019):
slmgr /ipk N69G4-B89J2-4G8F4-WWYCC-J464C
slmgr /skms kms-server.winitpro.ru:1688
slmgr /ato
Разрешить удаленный доступ
Разрешить удаленный доступ к Server Core через RDP:
cscript C:WindowsSystem32Scregedit.wsf /ar 0
Разрешить удаленное управление:
Configure-SMRemoting.exe –Enable
Enable-NetFirewallRule -DisplayGroup “Windows Remote Management”
Текущие настройки:
Configure-SMRemoting.exe -Get
Разрешить Win-Rm PowerShell Remoting:
Enable-PSRemoting –force
Сервером с Windows Server можно управлять удаленно c другого сервера (с помощью ServerManager.exe), через браузер с помощью Windows Admin Center (WAC), с любой рабочей станции с помощью инструментов администрирования RSAT, подключаться к нему по RDP, PowerShell Remoting или SSH (в современных версиях Windows есть встроенный SSH сервер).
Настройка Windows Firewall
Информация о настройке Windows Firewall есть в статье по ссылке. Здесь оставлю несколько базовых команд.
Включить Windows Defender Firewall для всех профилей:
Set-NetFirewallProfile -Profile Domain,Public,Private -Enabled True
Изменить тип сети с Public на Private:
Get-NetConnectionProfile | Set-NetConnectionProfile -NetworkCategory Private
Полностью отключить Windows Firewall (не рекомендуется):
Get-NetFirewallProfile | Set-NetFirewallProfile -enabled false
Разрешить подключение через инструменты удаленного управления:
Enable-NetFireWallRule -DisplayName “Windows Management Instrumentation (DCOM-In)”
Enable-NetFireWallRule -DisplayGroup “Remote Event Log Management”
Enable-NetFireWallRule -DisplayGroup “Remote Service Management”
Enable-NetFireWallRule -DisplayGroup “Remote Volume Management”
Enable-NetFireWallRule -DisplayGroup “Remote Scheduled Tasks Management”
Enable-NetFireWallRule -DisplayGroup “Windows Firewall Remote Management”
Enable-NetFirewallRule -DisplayGroup "Remote Administration"
Установка обновлений в Server Core
Для управления параметрами обновлений предпочтительно использовать групповые политики Windows Update, но можно задать параметры и вручную.
Отключить автоматическое обновление:
Set-ItemProperty -Path HKLM:SoftwarePoliciesMicrosoftWindowsWindowsUpdateAU -Name AUOptions -Value 1
Автоматически скачивать доступные обновления:
Set-ItemProperty -Path HKLM:SoftwarePoliciesMicrosoftWindowsWindowsUpdateAU -Name AUOptions -Value 3
Получить список установленных обновлений:
Get-Hotfix
Или
wmic qfe list
Для ручной установки обновлений Windows можно использовать утилиту wusa:
Wusa update_name.msu /quiet
Также для установки и управления обновлениями из командной строки удобно использовать PowerShell модуль PSWindowsUpdate.
Управление ролями, службами и процессами Windows
Для получения списка всех доступных ролей в Windows Server Core выполните команду PowerShell:
Get-WindowsFeature
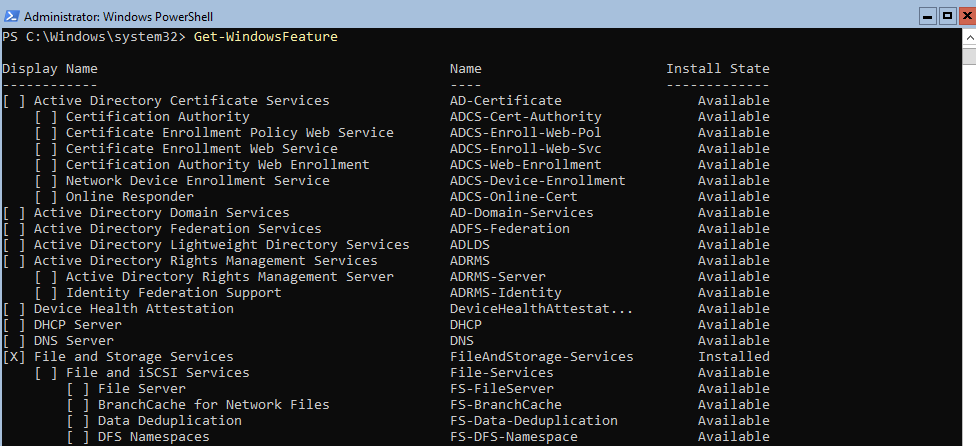
Получить список всех установленных ролей и компонентов в Windows Server(можно быстро понять, для чего используется сервер):
Get-WindowsFeature | Where-Object {$_. installstate -eq "installed"} | ft Name,Installstate
Например, для установки службы DNS воспользуйтесь такой командой:
Install-WindowsFeature DNS -IncludeManagementTools
Список всех служб в Windows:
Get-Service
Список остановленных служб:
Get-Service | Where-Object {$_.status -eq “stopped”}
Перезапустить службу:
Restart-Service -Name spooler
Для управление процессами можно использовать стандартный диспетчер задач (taskmgr.exe) или PowerShell модуль Processes:
Get-Process cmd, proc1* | Select-Object ProcessName, StartTime, MainWindowTitle, Path, Company|ft
Часто используемые команды в Server Core
Ну и наконец, приведу список различных полезных мне команд, которые я периодически использую в Server Core.
Информация о статусе и здоровье физических дисков (используется стандартный модуль управления дисками Storage):
Get-PhysicalDisk | Sort Size | FT FriendlyName, Size, MediaType, SpindleSpeed, HealthStatus, OperationalStatus -AutoSize
Информация о свободном месте на диске:
Get-WmiObject -Class Win32_LogicalDisk |
Select-Object -Property DeviceID, VolumeName, @{Label='FreeSpace (Gb)'; expression={($_.FreeSpace/1GB).ToString('F2')}},
@{Label='Total (Gb)'; expression={($_.Size/1GB).ToString('F2')}},
@{label='FreePercent'; expression={[Math]::Round(($_.freespace / $_.size) * 100, 2)}}|ft
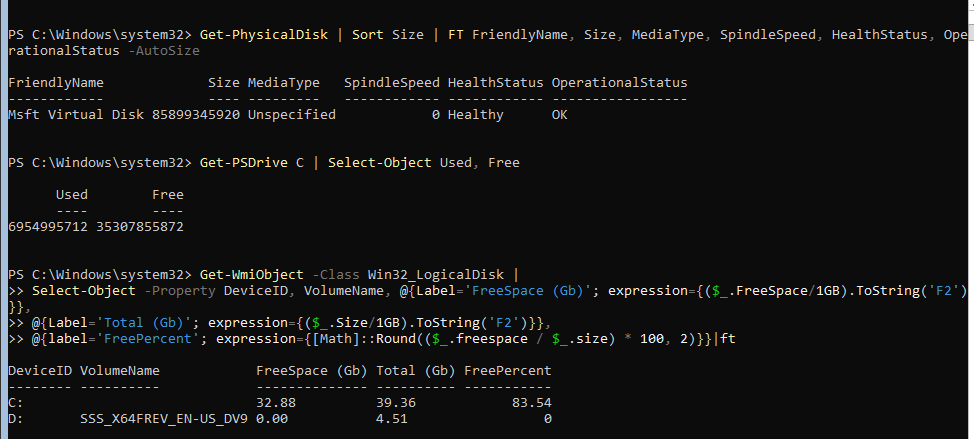
Информация о времени последних 10 перезагрузок сервера:
Get-EventLog system | where-object {$_.eventid -eq 6006} | select -last 10
Список установленных программ:
Get-ItemProperty HKLM:SoftwareWow6432NodeMicrosoftWindowsCurrentVersionUninstall* | Select-Object DisplayName, DisplayVersion, Publisher, InstallDate | Format-Table –AutoSize
Скачать и распаковать zip файл с внешнего сайта:
Invoke-WebRequest https://contoso/test.zip -outfile test.zip
Expand-Archive -path '.test.zip' -DestinationPath C:UsersAdministratorDocuments
Чтобы скопировать все файлы из каталога на удаленный компьютер по сети можно использовать Copy-Item:
$session = New-PSSession -ComputerName remotsnode1
Copy-Item -Path "C:Logs*" -ToSession $session -Destination "C:Logs" -Recurse -Force
Для установки драйвера можно использовать стандартную утилиту:
Pnputil –i –a c:distrhpdp.inf
Также Microsoft предлагает специальный пакет Server Core App Compatibility Feature on Demand (FOD), который позволяет установить в Windows Server 2019 некоторые графические инструменты и консоли (MMC, Eventvwr, Hyper-V Manager, PerfMon, Resmon, Explorer.exe, Device Manager, Powershell ISE). Этот FOD доступен для загрузки в виде ISO при наличии активной подписки. Установка выполняется командой:
Add-WindowsCapability -Online -Name ServerCore.AppCompatibility~~~~0.0.1.0
Установка Server Core App Compatibility Feature on Demand будет использовать дополнительно около 200 Мб оперативной памяти в Server Core.
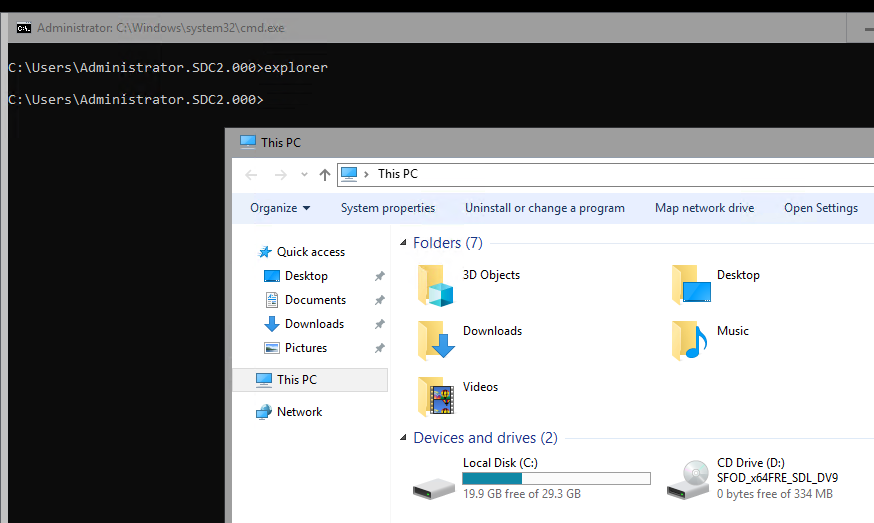
В этой статье я постарался собрать самые нужные команды, которые нужно постоянно держать под рукой при работе с Windows Server Core. Время от времени я буду обновлять статью и добавлять новые команды, которые покажутся мне нужными для повседневной работы.
Table of Contents
- Chapter 1 – Building Our Learning Environment
- Download Windows Server 2016
- What is Virtual Box?
- Downloading VirtualBox
- Installing VirtualBox
- What is a Virtual Machine?
- VirtualBox Overview
- Creating a VM in VirtualBox
- Creating a VirtualBox Host-only Network
- Chapter 2 – Windows Server 2016 Overview
- Installing Windows Server 2016
- Basic Windows Server 2016 Configuration
- Server Manager
- Roles & Features
- Roles
- Features
- Chapter 3 – Building a Windows Domain and Domain Controller
- What is a Windows Domain and Domain Controller?
- Adding the Active Directory Domain Services Role
- Chapter 4 – Joining a Windows 10 Workstation to Our Domain
- Downloading Windows 10
- Installing Windows 10
- Joining our Workstation to our Windows Domain
- Credits
Chapter 1 – Building Our Learning Environment
In this chapter we are going to accomplish a couple of important things:
- Download Windows Server 2016
Windows Server 2016 is an Operating System designed by Microsoft that supports enterprise-level management, data storage, applications, and communications. It is used by countless companies to operate their back-end IT operations.
Pretty much any big company that you can think of uses Windows Server in some way or another although there are alternatives such as Linux Operating systems.
- Download & Install Oracle VM VirtualBox
This program will be our Virtual Machine manager. In later lectures we will cover exactly what a VirtualMachine is and how you will use them. Once we download these two files and install VirtualBox we will be ready to move on
to the next section
Download Windows Server 2016
Now it’s time to download Windows Server 2016. Thankfully Microsoft offers a free trial version for 2016 that anyone can download for evaluation (or in our case, training) purposes. To download Windows Server 2016, open your preferred
web browser and navigate to technet.microsoft.com. Click the “Downloads” page on the navigation menu.

Make sure you select Windows Server 2016, and no the Windows Server 2016 Technical Preview 5:

Again, DO NOT DOWNLOAD Windows Server 2016 Technical Preview 5:

Click on Windows Server 2016 to show the download page. Before you can download Server 2016 you must register and sign in. Click on the “Sign In” button

Once you are brought to the sign-in page you either need to log in or click the “Create One” button to create a new account. Once you are logged in you will be brought back to the download page. Under Windows Server 2016, choose
the file type “ISO” and click “Register to continue”

Now you will be prompted to enter personal information such as your name, email address, etc. Enter in all the required information and click continue. The download will begin and now you just need to wait for the download to finish.
Make sure you know where you are downloading the file so you can access it later.

In the next lecture we are going to open VirtualBox and create the Virtual Machine that we will install Windows Server 2016. If you want to save time go ahead and start the next lecture while this download is running and that way
when the download is complete you will be ready to move on.
What is Virtual Box?
VirtualBox is a powerful x86 and AMD64/Intel64 virtualization product for enterprise as well as home use. Not only is VirtualBox an extremely feature rich, high-performance product for enterprise customers, it is also the only
professional solution that is freely available as Open Source Software under the terms of the GNU General Public License (GPL) version 2. For more information, visit
https://www.VirtualBox.org/wiki/VirtualBox.
Downloading VirtualBox
To download VirtualBox, navigate to
https://www.virtualbox.org/wiki/Downloads. Click on “x86/amd64” for Windows hosts (see screenshot below) or choose the correct option for your operating system.

Save the file to a location on your HDD that will be easy to access
Installing VirtualBox
Once the download completes, launch the downloaded installer file to being the installation. The setup wizard will appear. Click “Next” to start the install.

The following screen will prompt you to the select installation directory and the features you would like to install. If you would like to install VirtualBox in locations other than the default location click “Browse” to do so,
otherwise, click Next and continue.

The next screen will prompt you to select if you would like VirtualBox icons on your desktop or quick launch bar. This is user preference but make sure to leave to box check to register file extensions. Once you have made your
selections click “Next”.

Now you will be prompted that you will lose network connectivity briefly. Make sure that this will not affect anything you are working on before moving forward. Click “Yes” to move forward.

Now you are ready to install click “Install”. During the installation you will see several pop ups asking you to install different types of “device software.” Check the “Always trust software from ‘Oracle Corporation’” checkbox
and click “Install.”

Once the installation is complete all you need to do is leave the “Start Oracle VM VirtualBox 5.0.20 after installation” checkbox checked and click “Finish”.
What is a Virtual Machine?
Now we are going to learn the basics of VirtualBox and its capabilities. VirtualBox will operate our Virtual Machines (VMs) and the virtual network they will operate on. But first, let’s learn what a VM is. The short answer is
that a Virtual Machine is a software computer, or a computer within a computer. A computer that is stored on a physical computers hard-drive. You can use a VM just like you would use any computer or server. You can power it on, install Windows (or Linux),
browse the web, install server applications, connect it to internal and external networks, etc… You may ask why we would want to use a Virtual Machine instead of a physical server? Well, since the VM is stored on the hard disk drive (HDD) of a physical server,
we can copy, duplicate, delete, or move a VM at any time, meaning they are extremely portable and can be sent across the internet if need be. So if you need to transport a virtual server from Washington DC to Hawaii, that is no longer a time or cost issue.
Take a scenario where you need to repeatedly create several servers to perform service (File / Print server, Domain Controller, etc…) to various customer networks each week. You can utilize a Virtual Machine to make this task much faster by creating a single
VM and installing the OS (Operating System), all the required OS and third party updates and any necessary software. You can consider this a baseline VM. Now every time you need to deploy a new server you simply clone your baseline VM with a new name, make
any required tweaks to the VM and you’re ready to go. No more physically assembling a server and completing repetitive steps such as installing the OS, updates, software and boxing and shipping for every new server instance. Keep in mind cloning a virtual
machine is as simple as right-clicking and selecting clone. There are two terms that you must know in order to successfully work with VMs: Host and Guest. The Host is the computer that the Virtual Machine is installed on. The Guest is the VM the runs on the
Host. A Host can run several Guest VMs while a Guest VM generally only operates on one Host computer (unless the hosts are clustered, not covered in this course).

In this example we have a single Host that is running three Guest VMs. You can run as many VMs on the Host as long as the Host computer has physical resources to spare for the VM, meaning that you cannot create a VM that has more
RAM or processing power than your host computer has available. Generally, a VM will only have a fraction of the total storage capacity and processing power that it’s host computer has. For this reason, the host computer is usually a very powerful computer
that is designed to run several VMs at once. Since some of you will be running these VMs at home on your personal computer, you may need to keep some of the VMs powered off while others are turned on or keep the combined VMs processing power as low as possible.
VirtualBox Overview
Now let’s take a look at VirtualBox’s GUI. At the top we have our program options such as File, Group, and Help. Below that we have controls for managing our VMs; New, Settings, Discard, and Start. In the left pane we have a window
that displays all of our VMs and VM Groups. In the middle we have the settings of our VM and a live preview of the VM if it is powered on.

If you click the File dropdown on the menu, the first option you will see is preferences.

Click this option or press Crtl+G to open the preferences menu.

Here we can change several key configurations for VirtualBox. If you want to store your VMs on a drive other than your C drive, you can change the “Default Machine Folder” located under the General tab. Under the Input tab you
can view and change the keyboard shortcuts for both VirtualBox and Virtual Machines. It is worthwhile to look over these shortcuts and memorize those that will be useful to you. For example, Ctrl+F for full screen is a favorite of mine. The Update tab allows
you to specify the interval at which VirtualBox with check for updates. This only relates to VirtualBox and has no effect on Virtual Machine updates. These settings are perfectly fine left at default. If you prefer to use VirtualBox in a language other than
English, you can change those settings under the Language tab. The Display tab allows you to set the maximum screen size although I strongly recommend that you do not change this setting. The Network tab allows us to create and manage Virtual Networks for
either NAT (Network Address Translation) or Host-only Networks. Let me explain the difference between the two: For a reason I cannot understand VirtualBox decided to create a new network type called a “NAT Network”. This is very different from a “NAT” networking
adapter that can be selected on your VMs and you should know they are not the same. On your VMs you will have (among others) two distinct options, NAT and NAT Network. A “NAT Network” and “NAT Adapter” (these are two different things in VirtualBox) are the
easiest way to have internet access from a VM. Generally, neither of these adapters require any configuration from the Host Computer or Guest VM. Keep in mind that a VM that has a “NAT Network” adapter configured cannot communicate with its Host but can communicate
with other VMs on the same NAT network. While if a VM has a NAT Adapter configured, the VM will only be able to reach the internet and not the Host computer or other VMs on the Host computer. A Host-only network allows a VM to communicate with other VMs as
well as the Host computer. A Host-only network does not allow a VM to reach outside of the Host (no internet access). On our VMs we are going to use two networking adapters; a NAT adapter and Host-only adapter allowing us to have internet access as well as
an internal network that our Guest VMs can communicate with each other and the Host computer. The next tab is Extensions. Extension packs are offered by VirtualBox on their
download page and add support for USB 2.0 and 3.0, VirtualBox RDP and PXR boot for Intel Cards. You do not have to install any extension packs if you do not want to. The last option is for proxy settings.
I have no need for this and you probably don’t either, but if you are connected to the internet through a proxy you can enter that information here. Close the Preferences window by either clicking Cancel or the X at the top right hand corner of the screen.
The next feature we are going to talk about is the Import / Exporting Appliance settings.

These can be reached from the File menu on VirtualBox. When VirtualBox refers to “Appliance,” they mean VM. These two options allow you to import or export VMs at any time. This comes in handy when you want to move a VM from one
host to another. Next is the Virtual Media Manager. This tool allows you to manage your VM related files that are being used such as the virtual Hard Disk Drives (HDDs, which are the *.vdi files), mounted ISOs and floppy disks. If you need to detach a virtual
HDD from a VM you can select the file from the list and click “Release”.

There is also the Network Operations Manager which has nothing to do with VirtualBox networks but rather is used when VirtualBox is checking for updates. You may click the “Check for Updates” if you wish but by default VirtualBox
checks for you once every day. Lastly, If you VM warnings you may reset them by clicking the “Reset all Warnings” button.

Next we have the Machine option on the file menu. This is your menu for VM management. You can create, clone, group, modify, start or stop selected VMs from this menu. You may also create a Desktop shortcut on your desktop for
any select VM and you can view the logs of a VM for troubleshooting purposes. It is also worth noting you may click the “Add…” button to add a VM that has not been exported as an appliance yet. You may also clone a VM at any time using either a full clone
or a linked clone. A full clone copies both the VM and the HDD. A linked clone copies a VM but still builds on the original HDD file. Note that a linked clone only builds on top of the HDD file of the cloned machine, and does not actually modify the HDD for
the cloned machine as well.

There are three types of ways to start a VM; Normal, Headless and Detachable. A Normal start is when you launch a VM with a Window that must remain open in order for the VM to operate. A Headless start is when you power on a VM
without a Window. This is useful for Servers that you don’t need to interact with. A detachable start is experimental and is a mix of the two previous start methods.

In theory you should be able to detachably start a VM and a window will open. That window may be closed without powering off the VM by selecting “Continue running in the background.” Keep in mind this is experimental and not all
features work with this type of start (3D acceleration for example). I have been unable to successfully get this feature to work but it’s definitely worth a try. You may also view the files of a VM that is stored on your host computer by selecting the VM and
choosing “Machine > Show in Explorer.”

Creating a VM in VirtualBox
Now it is time to learn the detailed steps of creating a VM in VirtualBox. The objective of this lecture is to create a VirtualMachine that we will install and configure to be our first domain controller. A domain controller is
a Microsoft server that is responsible for security authentication within a Windows Domain – a domain controller can also manage computer and user accounts that are inside of it’s domain. You do can things like remotely deploy software to the computer, change
a user’s desktop background, configure scheduled tasks, Windows updates, and much, much more. The first thing we need to do is open VirtualBox. Next either select the “New” button at the top left-hand corner of the screen, select “Machine > New”, or press
Ctrl + N.

The Create Virtual Machine window will appear. Choose the “Expert Mode” button in the bottom part of the screen and wait for the window to reappear. Now you need to enter the VM name, type, version, memory size and whether or not
you want to create a hard disk.

I am going to put the name as “Windows Server 2016 – DC01”. Note that this is not actually the computer name, but the name that VirtualBox will use when storing the VM in its inventory. The “DC01” part stands for Domain Controller
01, meaning it is the first domain controller in our environment. Notice that I selected “Windows 2012 (64-bit)” as the version. This is because at the time of this writing Server 2016 was released less than a month ago and VirtualBox has not updated their
software to include this version. Do not worry if you only see Windows 2012 as the latest version as it will run the newer OS perfectly fine. I am going to specify 4 GB of Ram since my host computer has 16GB of RAM. I know some students have gotten away with
using much less than 4 GB so use as little as you can but you will certainly at least need 1 GB of RAM. Notice that you cannot allocate more RAM than what your physical system (the VM Host) has. Click “Create” and we are ready to move on to the next screen.

The next screen is asking us to create the virtual hard disk. The important thing is to move the size above 25gb. I strongly recommend that you use dynamically allocated for the method of storing the VM and moving the file size
up to at least 60 GB. Click “Create” and wait for the VM to be VM to be created. Now you can see the VM has been created and is listed in our inventory.

Now let’s learn how to edit the settings of a VM. You may do this by right-clicking the VM and choosing “Settings” or selecting the VM and pressing Crtl+S.


There are a lot of settings here so I am just going to point out what I believe are important. Under the General tab, select Advanced and change the “Shared Clipboard” and “Drag’n’Drop” to bi-directional. This will allow you to
copy / paste and drag and drop between your Host computer and your VM. Be warned, this feature does constantly fail in VirtualBox but it is extremely convenient when it is actually working.

If you would like to add an additional hard disk file, this can be done under the Storage tab by clicking on the

floppy disk with a plus sign icon and choosing “Add Hard Disk.” You may also add additional virtual disk drives if required, but that is not necessary for our purposes. To mount an ISO to the default virtual disk drive, select
the disc icon that reads “empty” and click the disk

dropdown on the right-hand side of the screen and select “Choose Virtual Optical Disk File”.

Next you need to navigate to and select the ISO file you wish to mount. If you have a physical CD that you would like to mount to the VM you can choose the “Host Drive” option instead of the virtual optical disk file. The network
tab allows us to configure VM network adapters as well as add subsequent networking adapters. Notice that the default option is the “NAT.” This is because a NAT adapter is the easiest to use when getting started.

Finally, we have the Shared Folders tab. This allows you to share files from your Host computer between your Guest VM without direct network connectivity. You may create a new shared folder and select a valid path on your Host
PC. Be sure to choose “Auto-mount” for convenience if you choose to use this.

Now you know how to create a VM and manage its properties.
Creating a VirtualBox Host-only Network
In order for our Guest VMs to communicate with other Guest VMs and our Host computer, we need to create a Host-only network. To do this, open VirtualBox and click on File > Preferences. Go under the Network tab and select “Host-only
Networks.” Select the plus button on the right-hand side of the screen to create a new network.

When you are prompted by user account control (UAC) select yes and wait for the network to be created.

VirtualBox is creating a new networking adapter for your VMs to use as a Host-only network. Once this is complete, you will see the new network listed under Host-only Networks. Select the network and choose the

edit icon.

You can see the network settings for our host-only network displayed here. Navigate to the DHCP Server tab and make sure “Enable Server” is un-checked (

), and navigate back to the Adapter Tab. Note that it automatically picks an IPv4 Address from an available subnet on your network but you are free to change this at any time. If you would like to change it to something else, you
need to verify that this network is not already in use on your network. More than likely it is not, but let’s check anyway to be sure. Open command prompt by hitting the Windows Key and searching for CMD. Once command prompt loads, enter the command “ipconfig”.
This will list all of your network adapter configurations.

If you have never viewed this information before, you need to look for each network adapters “IPv4 Address”. I have found two:


The first is my new VirtualBox Host-only network. The second is my Hosts IP that is handed out by my home network. Since I want to make my subnet similar to my host network, I am going to use the following address for my Host-only
network: 192.168.0.1. Close command prompt and return to the VirtualBox Host-only Network Details window. I will enter this IP into the IPv4 Address field and click “OK”.

Select OK on the VirtualBox Preferences window and select “Yes” when you are prompted by UAC. Now we need to connect our Guest VM to our newly created network. To do this open the settings of the VM and navigate to Network. Select
the Adapter 2 tab and check the “Enable Network Adapter” checkbox. Select “Host-only Adapter” from the “Attached to” drop-down list and make sure the name is the same as the network you just created (this will not be an issue if you only created one network).
Click OK to close the Settings window and wait for the settings to save. Now our VM is connected to the Host-only Network and all that will need to be done on the VM is configure its local VM network adapter settings when we install Windows.
Chapter 2 – Windows Server 2016 Overview
Installing Windows Server 2016
We are ready to install Windows Server on our VM. First we need to mount (or attach) the ISO we downloaded earlier to our VM and then we can launch the VM and begin the installation. Right click on the VM and choose settings. Select
the Storage tab and select the “Empty”

followed by the disk

dropdown list. Select “Choose Virtual Optical Disk File…”

Browse to the ISO file you want mount and select “Open”. Now you will see the ISO is mounted to the VM.

Now to begin the installation we simply need to power on the VM. Make sure the VM is selected and click the “Start”

button at the top of the VirtualBox window. In the beginning it will load the Windows files from the disk, this shouldn’t take more than a few minutes.

Once the files have been loaded you will be prompted to select your language and keyboard input method. I will the default options and click Next. On the next screen choose the “Install Now”. You will be brought to the OS installation
screen:

If you have installed Server 2012 right away you will notice that unlike Windows Server 2012, there is no option for “Server with a GUI,” but instead it is now called “Desktop Experience.” If you do not choose a Desktop Experience
version you will install what was known as (Server Core). You will need to use the command line to complete tasks and will not have a user interface (no use of the mouse). In Server 2012, the datacenter and standard versions contained the exact same set of
features and the only difference was the licensing capabilities. This is no longer the case however. With the Standard version you may only have 2 operating system environments while Datacenter is unlimited. The Datacenter version also includes 3 new features
not included with standard; new storage features (Storage Spaces Direct and Storage Replica), shielded Virtual Machines and Host Guardian Service (more secure VMs), a new networking stack (better network performance). Since we are using this as a trial and
do not need to pay for these, I am going to choose the “Datacenter (Desktop Experience)” version – I recommend that you do the same. On the next screen accept the licensing agreement

and click next.

On the next screen you will be prompted for the type of installation you want. If you already have Windows Server 2012 installed you may choose an Upgrade. Upgrades can be nice as they will keep your files and settings intact if
possible, however, even Microsoft claims that you should perform a fresh (Custom) install if at all possible. In my experience I have never had an Upgrade work without having things break later on. Since we do not have an OS installed, we do not have any choice
other than choosing Custom. On the next screen you will be asked choose where you want to install the operating system. If you have more than one HDD mounted to the VM then you will see them listed here. Note that it is also possible to create partitions (subdivisions)
of your HDD if you would like by selecting the drive and choosing the “New”

button and entering the size of the new partition. We have no need to do this so just click “Next” to continue the installation.

Now the installation will begin. This install generally takes at least 20 minutes so now is a good time to take a break and wait for the installation to finish. Once the installation is complete you will be prompted to enter the
password for the built-in account “Administrator.” It is very important that you don’t forget this password so make sure you write the password down if your work policy allows or memorize it and click finish.

The computer will finish the installation and you will be brought to the login screen:

You may login with the Administrator credentials you just created by pressing Right-CRTL + DEL and entering the new password you just created.
Basic Windows Server 2016 Configuration
In this lecture we are going to do some basic configurations. First we are going to install VirtualBox Guest Additions and setup some basic preferences. Setup the computer’s network configuration and make sure it can reach then
internet as well as communicate with our Host computer. Finally, we will change the computer name and reboot the server. Open the VM and Press Right-Crtl+DEL to enter your login credentials. Wait for the server to fully load then at the top of the VM window,
select “Devices > Insert Guest Additions CD image…”.

Open File Explorer by clicking the folder

icon on the task bar. Select “This PC” on the left side of the File Explorer. Under Devices and Drives you should see the VirtualBox Guest Additions CD.

Double click on this CD to launch the installation. Once the welcome appears click next through the prompts and select Install. During the installation process you will be asked to install device software. Click the Install button
to continue.

Once the installation is complete you will be required to reboot the server. Choose the finish button and wait for the server to complete the reboot. Once the computer reboots, log back into your desktop and wait for Windows to
fully load. Once Windows is fully loaded we need to open Server Manager and Command Prompt. To do this, click the windows

button in the bottom left and choose the

server manager button. I recommend that you right-click on this button, choose “More > Pin to taskbar” as you will be using it quite often.

Once you are done with that I also recommend that you pin command prompt to the taskbar. You can find the command prompt launcher by clicking the windows button again and searching for “cmd”.

Now we are going to setup our network connection for our Host-only network. If you are running a physical Server or your particular environment doesn’t use VirtualBox or a Host-only network you can skip this step. However, if you
have been following all of the steps I have done so far continue on and follow these steps. Open command prompt and enter the command “ipconfig”. We are looking for your two ethernet adapters 1 and 2.

If you do not see the same settings I do then you likely do not have the exact same network settings that I have on the Guest VM. Notice the first adapter has an IP address of 10.0.2.15. I have assigned adapter 1 on my VM to be
a NAT adapter. If I attempt to run the command “ping google.com” for example, I can test to see if I have internet connectivity.

I can see I am getting replies from Google.com. This tells me that I am connected to the internet. Now I need to get the second adapter working. Notice the IP is a 169.254.***.*** address. This means that the computer itself was
unable to find a DHCP server on the network and instead assigned a private IP address to itself. We need to configure an IP address the is on the same network as the Host-only network we have created in previous lessons. To do this, we need to exit the full
screen on the VM (Crtl + F) and open File > Preferences on the VirtualBox window. Navigate to Network and select “Host-only Networks”. Select your Host-only network and click the “Edit Selected” button.


Notice if you navigate to the DHCP Server it is turned off. This is what our VM got a 169.254.***.*** address. Do not turn this back on however as we will be creating our own DHCP server on this VM later. We need to give our VM’s
second adapter an IP address in the range of 192.168.0.2-254. Navigate back to your Guest VM and open the Server Manager Window. Choose the “Local Server” tab and edit the settings for “Ethernet 2” by selecting the blue “IPv4…” text to the right.

Right click on the Ethernet 2 Adapter and choose Properties.


Uncheck the “Internet Protocol Version 6” checkbox, select “Internet Protocol Version 4” and choose Properties. Check the “Use the following IP address:” and enter the following information.

Remember, you can use any address between 2 – and 254 for the last octet of your IP address, but I am going to choose .10. Choose the subnet mask and this information will be automatically prefilled. Next, choose the “Default Gateway”.
This will be the address of our network. If you remember, we set this in VirtualBox to be the 192.168.0.1 address. For DNS settings we are going to set the preferred DNS server to a loopback IP address which is 127.0.0.1. This IP address points back to the
local server, and although we haven’t built the DNS server yet we will be doing that in the future. For the alternate IP address we will use Google’s DNS servers which is 8.8.8.8. Select OK and close out of the Properties window. Now before we can communicate
between our other VMs and our Host we need to modify the firewall settings of our local server. Go back to the Server Manager > Local Server and modify the settings for “Windows Firewall”.

Choose Advanced settings on the left hand side of the screen and click “Windows Firewall Properties”.

We need to customize the protected network connections for Domain, Private, and Public profiles. Choose the “Customize” button for “Protected Network Connections” and uncheck your Host-only network which in my case is “Ethernet
2”.

Select OK and repeat these steps for the Private and Public profiles. This will allow traffic on our Host-only network to pass through our network adapter without being blocked or rejected. Now we need to verify that we can communicate
between our Host computer and our Guest VM. To do this we are going to attempt to ping our Guest VM from our Host computer. Exit full-screen on the VM and on your Host Computer open Command Prompt. Attempt to ping the VM by typing the ping command followed
by the IP address of the Server you just configured. In my case I set it to 192.168.0.10 so I will attempt to ping this address.

Here we can see that I can successfully ping the Guest VM. Now we have a VM server that can reach the internet as well as communicate with other VMs and the Host computer. Next we are going to rename the server. By default the
server will be named with a “WIN” prefix. To change your server name, open the Server Manager and navigate to Local Server. Click the computer name to open the System Properties.

Select “Change” and enter a new name. I am going to type in the name “ITFDC01”. ITF stands for my website name, “itFlee” and DC stands for “Domain Controller”. The 01 simply means that this is the first domain controller in this
network.

Click OK and click OK again when you are notified you must restart. Select Close on the “System Properties” and choose “Restart Now” when the window appears.

Now we are done making the basic configuration changes.
Server Manager
The primary way you manage your server is with a program that is included with all versions of Windows Server called “Server Manager”. By default, Server manager will launch when the operating system starts, but if it doesn’t you
can start it by clicking the Windows button and selecting “Server Manager”.

Server manager allows you to manage your local server as well as other servers on your local network. From here you can manage the computer name, IP address, firewall settings, Windows updates, view Events, Services, and much,
much more. On the left pane you will see Dashboard, Local Server, All Servers, and File and Storage Services. The first three items relate to the server or remote servers. The fourth is a server role called “File and Storage Services” (note that this is installed
by default). Whenever you install new server roles they will appear in this pane.

The dashboard gives a quick overview of your server and allows you to configure the server quickly. If there are any issues with the local server or remote servers (such as a service that failed to start) you will see them on this
screen. To see errors with remote servers you need to first add them as a remotely managed server. Errors with remove servers will be shown under the “All Servers” section.

The local server tab will give you detailed information about the server you are currently logged into. If you need to change anything from the computer name, domain membership, firewall, network settings etc, this is the place
to do it. You will also have all of your events and services listed here. There is much more to the local server tab, but this is the most important parts of it. The all servers tab allows you to view the same information on the local server and for remote
servers, but you cannot change the server properties (computer name, domain, firewall settings, etc). The last tab is File and Storage Services. This server role includes technologies that help you set up and manage one or more file servers, which are servers
that provide central locations on your network where you can store files and share them with users.
Roles & Features
Let’s talk about two key terms that you must know in order to successfully work with Windows Server 2016; Roles and Features.
Roles
A server role is a set of software programs that allow a server to provide a specific service to its network. An example of a role would be adding the DHCP role to our server. This will allow the server to act as a DHCP server
Features
Features are individual software programs that are sometimes required to be installed by roles, although they can be independently installed without roles as well. You can add or remove roles and features by selected the Manage
button at the top right-hand corner of the Server Manager window and selecting either “Add” or “Remove Roles and Features”

The windows for adding and removing roles are nearly identical. One allowing you to check checkboxes for roles and the other allowing you to uncheck role checkboxes. If you open the “Add Roles and Features” window you will be presented
with the “Before You Begin” tab. This tab has no functionality and is simply informational so I recommend that you check the “Skip this page by default” checkbox and click next.

The Installation Type tab gives you two options. The first option is the most common and is for installing roles and features on a single server. The second option is for installing roles onto a virtual machine (not related to
VirtualBox). Choose the first option and click next.

If you have added remote servers to manage then they will be listed here. You can also choose to install the roles on a virtual hard disk. Unless you are using Hyper-V (we are using VirtualBox), you likely won’t use this second
option. Click next.

On the Server Roles tab, you can choose any of the roles you would like to add to the server. If you only want to install features, you do not have to check any of these checkboxes. For this lecture, we are going to install and
uninstall roles and features so you understand how it works. Choose the “Fax Server” check box. You will get a popup stating that you need to add required features in order to install this role. Click “Add Features”, and then click Next.

The Features tab looks very similar to Server Roles tab. If we had not selected any roles to install, we would not be able to progress past this screen. It is important for you to know that you do not have to install roles, but
you must at least install features in order to complete this wizard. The features required by the Fax Server role are already checked for installation, so simply click next to continue. The next screen will prompt us about the new Fax Server role we are installing.
Generally when you add a new server role, you will have some type of informational tabs added to the wizard. Click Next through the prompts. When you are brought to the Role Services tab, you can check additional services if you would like them. Since this
role is temporary and just an example, I am not going to include any of these optional role services. Click Next. Now we are brought to the Confirmation tab. If you would like you can check the “restart the destination server…” checkbox but I am going to leave
it unchecked since I plan to uninstall the role immediately. As a general rule, it is a good idea to check this checkbox.

Click Install and you will be brought to the results window.

Note that you may close this wizard at any time, and the installation will still continue. Once the window is closed, you may view the progress by clicking on the flag icon on the top right-hand corner of Server Manager.

Once the installation is complete, refresh Server Manager by either pressing F5 or by pressing the refresh button next to the notifications button.

On the notifications button you will see new notification stating that you must complete the post-deployment configurations.

Just about every role you install will require some type of post-deployment configuration – since we are about to uninstall this role, we do not need to complete this. Now, let’s uninstall the newly installed Server Role. Click
Manage > “Remove Server Roles and Features.” Click next through the prompts, choosing the same settings we did when adding the Server Role. When you get to the Server Roles tab, uncheck the “Fax Server” checkbox.

You will get the popup stating that you can remove the features that were required by the server role. Notice that this list is not exactly the same as the features we were required to install. This is because we will need to uninstall
additional roles as well. Click the Remove Features button and uncheck the “Print and Document Services” checkbox. Again, you will be prompted to remove features that require the role. Click the Remove Features button. Click Next until you reach the confirmation
Window. This time, check the “Restart the Destination Server Automatically if required” checkbox. Select Yes when you receive the warning message about the reboot. Click the Remove button and wait for the uninstall to finish and the Server to reboot.
Chapter 3 – Building a Windows Domain and Domain Controller
What is a Windows Domain and Domain Controller?
Windows Domains have been around since 1993 with the release of Windows NT. They provide System Administrators an efficient way to manage small or large networks. You only need one Domain Controller (DC) to build a Windows Domain
although most Windows Domains contain several servers and computers. A DC is any server that has the Active Directory Domain Services (AD DS) role installed. The server’s job is to handle authentication request across the domain. Domain controllers hold the
tools Active Directory and Group Policy among others — so when you need to create new user accounts or change domain policies, this is all done from a domain controller. You can have several domain controllers within a domain but there is only one primary
or main domain controller. The primary reason for having more than one DC is fault tolerance. The critical information (user, computer account information, etc) is replicated between the DCs so if one goes down the client computers will switch to the other
DC that is still functioning. Domain controllers use a tool called Active Directory Users and Computers, commonly referred to as AD or Active Directory. This tool is used to not only manage user and computer accounts but also acts as a directory service for
resources on your network (like printers, file shares etc). When a domain user searches for a printer to install, they will find all the printers that have been added to the Domain Controller with AD. AD is a tool to manage domain users, computers, printers,
file shares, groups, and more – these are all considered AD objects. Groups contain members which can be any valid AD object (user, computer, etc.). By default, there are several groups that come with AD like Domain Admins, Domain Users, etc. All of these
AD objects are stored within folders called Organizational Units. Group Policy Management (often called GP or Group Policy) is another important tool that is located on a Domain Controller. It allows an administrator to manage all domain users or domain computers
remotely. Group Policy uses GPOs (Group Policy Objects) to manage the settings of valid AD objects. You can target specific AD objects, specific OUs, or the entire domain. Basically anything you want to create a custom setting for, you can do it with Group
Policy – You can configure the desktop backgrounds for certain users and/or computers, manage what websites they can visit (in Internet Explorer only), manage security settings or countless other settings. To recap what we have covered in this lecture; a Windows
Domain allows management of large (or small) computer networks, they use a Windows server called a “DC” or Domain Controller, a DC is any server that has the AD DS role installed, DCs respond to authentication request across the domain, DCs have the tools
AD (Active Directory) and GP (Group Policy), Active Directory contains Objects and OUs (Organizational Units) and GP contains GPOs (Group Policy Objects) and manage settings for AD objects.
Adding the Active Directory Domain Services Role
we are going to create a Domain Controller by installing the Active Directory Domain Services (AD DS) role. Remember that any server running the AD DS role is considered a domain controller. We are going to add this role to our
server and create a new domain called “itflee.com”. This is the name of my website and if you would like you can create any domain name you want. You won’t break any “real” websites since there are no internet DNS servers pointing to the domain that we are
about to create. Finally, once we add the AD DS role we will promote the server as a Domain Controller. You should already know how to install a server role on the server you are currently logged in to but I am going to cover the steps again. Open Server Manager
and select Manage > Add Roles and Features

On the Installation Type Screen leave the default option “Role-based or feature-based…” checkbox check and click next.

On the Server Selection screen choose the server we built earlier called “ITFDC01” and click next.

In the server roles list choose the “Active Directory Domain Services” role

. You will see a popup window stating you cannot install AD DS unless certain role services or features are also installed:

Click the Add Features button

and then click Next to proceed to the Features screen. We do not need any additional features as all the required features were already added. Again click Next. Now you will be brought to the AD DS screen. It tells us that we will
also need install the DNS role if we do not already have it set up.

Click Next and continue on to the Confirmation screen. Here we can see the roles and features we are about to install. Click Install and wait for the installation to finish. Once the installation is complete you will have post-deployment
configuration steps to complete as well:

Click the notification flag next to manage and choose “Promote this server to a domain controller”. The AD DS configuration wizard will appear giving us three options:

The first option, “Add a Domain Controller to an existing domain” is for adding additional domain controllers to a domain you have already created. This option is not suitable for us now because we have not created a domain yet.
The second option, “Add a new domain to an existing forest” is for adding child (also called sub) domains. Let me explain. We are going to create a domain called itflee.com. If that domain already existed we could create a sub (or child) domain called courses.itflee.com.
In theory we could setup this sub domain called courses.itflee.com simply to separate our students and teachers from the administrators who reside in the domain itflee.com.

You could configure this sub domain so that Admins from the itflee.com domain can reach into the courses.itflee.com domain, but students and teachers could not reach back to the resources in the itflee.com. Again this is not an
appropriate option for us because the itflee.com domain does not yet exists. The third option is to “Add a new forest”. This allows us to create and specify a new domain. Choose this option and specify a root domain name.

I am going to enter itflee.com and click next. It will take a second before the Domain Controller Options screen will appear to just be patient while it processes. The first two options Forest Functional Level and Domain Functional
Level specify which operating system the DC will use. You need to specify the OS you are using (in this case it is Windows Server 2016). There is a bug with the latest version of Server 2016 where the developers did not configure this screen to show the latest
version as “Server 2016” but instead show it as the “Windows Server Technical Preview” so I have to choose this options.

Make sure the Domain name System (DNS) server checkbox is checked. If you remember, when we installed the AD DS role it said that we had to install this in order for the DC to function properly. The Global Catalog option means
that the server will list all active directory objects. This is a requirement for a primary domain controller or when we are creating a new domain forest.

If you choose the Read Only Domain Controller option, then the domain controller will not be able to make changes to the domain. We will want to make changes to our domain so do not check this checkbox. Type in a DSRM password
and make sure that you either write it down or memorize it. The DSRM (Directory Services Restore Mode) password allows an administrator to take an instance of AD offline for reasons like maintenance or troubleshooting. This is not a commonly used password
but you will want to keep “just in case”. Click next to proceed on to the DNS options. On the DNS Options screen you will see a warning about the DNS delegation.

This warning means that people on the internet will not be able to resolve local DNS names on your local DNS server (names like itflee.com or ITFDC01 etc). This is fine because we don’t want people on the internet to be able to
access our server for security reasons. Click next and proceed on to the Additional Options. The NetBIOS domain name is populated for us as ITFLEE. The NetBIOS name is an abbreviation of the Fully Qualified Domain Name (FQDN) which is itflee.com. I am going
to leave this at the default of ITFLEE and click continue.

On the Paths screen we can see the default paths chosen for the folders that are required by AD DS. If you would like to choose an alternate drive you can do so by clicking the “…” button

and choosing the alternate path. I recommend that you leave them at the default setting and click next.

We are brought to the Review Options screen where we can see all of the options we have chosen so far. If you would like you can click the “View script” button

and you will be presented with a PowerShell script that you can save in order to later execute and quickly complete the wizard with the same settings we just used. Close the PowerShell script and click next. Now we are brought
to the “Prerequisites Check” window. The wizard is going to go verify that the server is ready to be promoted as a DC. This will take a few minutes before it is ready so just be patient wait for it to complete the checks. Once the checks complete at the top
you will see that all prerequisite checks have passed:

If you have errors, you can address the errors (Google is your friend) and click the rerun prerequisite checks text:

Under the view results window we can see there are various warnings. None of these are critical but it is worth reading through them. We can see that the first one is a security setting stating that anything with crypography not
compatible with Windows NT 4.0 will be blocked. This is not an issue for us because we are not using old servers or old technology. The second is in regards to our first networking adapter not having a static IP address. This is because the first adapter is
connected to our NAT adapter and will not be used for our local domain. This can be ignored. The third warning is about the DNS delegation. Again we do not care if people on the internet can resolve our DNS records within our network.

Click the install button and wait for the installation to complete and the server to reboot. This can take a good while depending on the speed of your server so you will need to be patient while it works. I am going to speed up
this video so you don’t need to sit and watch the entire installation. Once the installation completes and the server reboots, press ctrl+alt+del to log in. The first thing you will notice is the NetBIOS name of our domain precedes the user account we are
logging into (in this case, “ITFLEEAdministrator”). This is in the format of [Domain Name][Domain Username].

If we had multiple domain names we could specify a different domain name by typing the name of the domain we want to use followed by a backslash and the name of the user account you want to log into. Type in the password you used
to create the administrator account when you installed the server and log in. Under the server manager you will see the new server roles of AD DS and DNS.

That is all we have to do to get our Windows Domain and Domain Controller fully operational.
Chapter 4 – Joining a Windows 10 Workstation to Our Domain
Downloading Windows 10
Now we are going to download a Windows 10 ISO installation file from Microsoft. An ISO file is a disc image file that can emulate a CD or DVD. This file cannot be natively opened on Windows, but VirtualBox will be able to read
the ISO and get the Windows installation files from the ISO. It’s important for you to know that we are going to complete this lecture from our Host computer and not from a Virtual Machine. To download Windows 10, open your preferred web-browser on your Host
computer and navigate to google.com. In the search bar type in “Windows 10 Download Tool”. The first result with be
Microsofts software downloads page that allows us to download the Windows 10 Media Creation Tool. Click the
Download tool now button and wait for the download to complete.

Once the download is complete, launch the installer file.


Once the installation has begun, accept the license terms and on the following screen you want to select
Create installation media for another PC and click Next.

On the next screen you can leave the default settings or if you want you could customize them by unchecking the
Use the recommended options for this PC checkbox. I am going to leave them at the default setting and click
Next.

On the next screen choose the ISO file checkbox. This option allows us to download an ISO file that we can later mount to a VM and use to install Windows 10.

Click Next and choose where you want to save the new ISO file. I recommend that you change the name from
Windows.iso to Windows10.iso. We don’t want to be confused between this ISO and Windows Server ISO later on down the road.

Click Save and now we simply need to wait for the download to finish.
Installing Windows 10
Next we need to create a new VM and install Windows 10. The reason why we are doing this is so we can later join the new computer to our Windows Domain and learn how to manage a client computer from a DC. To get started, the first
thing we need to do is create a new Virtual Machine. Open VirtualBox and click on the New button.

The Create Virtual Machine window will appear. If you see the
Expert button at the bottom of the Window, go ahead and switch over to that mode.


I am going to name my VM “Windows 10 VM”. Once I input that name it automatically selects the
Type, Version and Memory Size. Make sure you check the Create a virtual hard disk
now checkbox and click Create. The Create Virtual Hard Disk window will appear. Leave the file location at the default setting. Specify the HDD size you want in gigabytes. I am going to use 80 GB. Make sure
Dynamically Allocated is checked and click Create.

Now we need to mount the Windows 10 ISO we downloaded earlier. To mount an ISO means to virtually insert the disc into the computer (or VM). Right-click on the VM and select Settings. Navigate to the
Storage tab. Select the empty disc icon and under Attributes on the right side of the window click the disc icon and select
Choose Virtual Optical Disk File…

Browse to and open the Windows 10 ISO we downloaded earlier with the Microsoft Media Creation Tool. Now you should see “Windows10.iso” in the CD icon under the
Storage Tree.

The last thing we need to do is put our VM on the Host-only network we previously created for our domain controller. Click on the
Network tab and choose Adapter 2. Check the
Enable Network Adapter checkbox and change the Attached to dropdown list from
NAT to Host-only Adapter. Make sure that the same network you’re using for your DC is listed under
Name.

Click OK to close the settings Window. We are now ready to begin the installation of Windows 10. Right-click on the VM and choose
Start > Normal Start. The VM will begin to power on an it will load the Windows installation files.

Once the initial loading is complete you will be prompted to enter your language, time settings and keyboard method. Make sure you select the correct Keyboard method as this can making using the OS nearly impossible if it is wrong.
Mine is configured correctly by default so I am just going to click Next. On the next screen click
Install now. The following screen will prompt you to enter your license key. If you have one you may enter it now otherwise click the
I don’t have a product key button at the bottom of the screen.

The next screen will ask you what version you want to install. Select the appropriate version you would like to install and click
Next.

You now need to accept the license terms and click Next. Since we do not already have an OS installed that we are upgrading, we need to choose
Custom: Install Windows only (advanced).

The next screen asks us to choose the HDD we want to install the OS on. The default options are fine so I am going to click
Next. Now the installation will begin. This will take about 20 minutes to complete so I am going to speed up this video. You can pause this lecture until your installation is complete and we will complete the installation.

Once the installation completes you will be brought to the
Get going fast screen. Click Use Express settings to continue.

On the next screen you will need to specify who owns the PC. Since we are going to join this computer to a domain you will want to select
My work or school owns it and click Next.

On the next screen we want to choose Join a local Active Directory domain and click
Next.

Now we need to create our local user account for this machine. I am going to use the username paul.hill.local and I will create a password and a hint. Click
Next. Now we need to decide if we want to use Cortana or not. I am going to choose
Not now because I don’t want the computer slowed down unnecessarily by Cortana. Now the desktop will load and we are done install Windows 10. We just need to install VirtualBox Guest Additions. On the VM window, select
Devices > Insert Guest Additions CD Image… Once the CD mounts run the installation just like you did for our Domain Controller and reboot the computer when complete.
Joining our Workstation to our Windows Domain
we are going to join our newly created Windows 10 VM to our itflee.com domain. The first thing we will need to do is manually configure our TCP/IP settings so we can communicate with our DC then we can rename the computer and join
it to our Domain. We will also switch over to our Domain Controller and see where our new computer was automatically placed in Active Directory. In order to complete this lecture, we will need our Domain Controller running so we can join our new Windows 10
VM to the domain. Open your Windows 10 VM and if you still have the “VirtualBox Guest Additions CD Image” mounted we can unmount it by selecting
Devices > Optical Drives > Remove Disk from optical drive. Now we need to log into the VM. Press right-crtl+del and type in your user credentials that you created when you installed the OS. Once you are logged in and Windows has fully loaded,
click the Start button and search for “Network”. Click Network and Sharing Center when it appears.

Select the Ethernet 2 text on the right hand side of the screen.

Choose the Properties button. Uncheck
IPv6 since we are not going to be using this internet protocol. Select
IPv4 and choose Properties.

Select the Use the following IP address checkbox and for the
IP address enter 192.168.0.50 — we could use any unused IP address ending with 2 – 254 but I am going to use .50. Press the tab key and the
Subnet mask will be automatically populated as 255.255.255.0 which is correct. Now under the Default gateway enter 192.168.0.1 which is the same address as the host only network we created in VirtualBox. For the
Preferred DNS server we want to enter the IP of our DC which is 192.168.0.10.

Click OK and close out of the
IPv4 Properties and Ethernet 2 Status windows. Now we want to verify that we can communicate with our DC by attempting to ping it. A ping command sends a message to a target computer and asks for a response. If we get a response, we
know that we can communicate with the target computer. To ping a computer we need to open Command Prompt. Press the start button and type “CMD” in the search box. You will see Command Prompt show up in the results.

Start Command Prompt and enter the command ping “192.168.0.10”.

We can see that we are getting responses back from our DC. Now that we know we are able to communicate with the DC we need to rename this computer and join it to our Windows Domain. Press the Windows button again and search for
“System”. Click the Control Panel System that appears in the search results.

You will see a section called “Computer name, domain, and workgroup settings”. Click the
Change settings text to the right of this.

The System Properties window will appear. Click the
Change… button in the middle of the screen. Enter a computer name. I am going to use “ITFWS001” for ITFLEE WORKSTATION 001. Check the
Domain checkbox and enter the name of the domain you want to join. In my case it is “itflee.com��

Click OK. Now we will be prompted to enter our domain administrative credentials so we can join this computer to the domain. We can use the “Administrator” account we used to create our Domain Controller. Enter
the username “Administrator” and the password you used when creating your domain controller VM.

Click OK. In a moment you will see the “Welcome to the itflee.com domain” message appear. Click
OK and you will then be notified that you must restart the computer. Click
OK and Close the computer settings window. Now you will be asked to reboot your computer. Click
Restart Now and wait for your computer to reboot.

Now while the computer is rebooting let’s switch over to our Domain Controller. If you are in full screen mode on the Windows 10 VM press right-crtl+F to exit full screen mode and switch over to our Domain Controller. Log in to
your DC and once Windows fully loads open Server Manager and select Tools > Active Directory Users and Computers. Navigate to itflee.com > Computers. Notice we can see our new workstation has been added to built-in OU called Computers.

Now our Windows 10 workstation is on the same network as our Domain Controller and we have successfully joined it to the Windows Domain that we created earlier. We can now practice managing the workstation from our Domain Controller
using Active Directory and Group Policy. Spend some time experimenting (change the desktop background with group policy, edit security settings etc…).
Credits
Originally posted at
https://www.itflee.com