
Having reliable remote access is a vital tool for a wide array of business needs- whether that be facilitating remote work options for employees, or providing more efficient customer support.
Remote desktop access has even become a daily necessity for numerous IT professionals who need control over remote devices, or the ability to troubleshoot from afar. Here we will talk about connecting remote desktop Linux to Windows machines and vice versa. Keep reading to get all possible options.
Connect To Linux From Windows
A remote connection is more commonly defined by using software that allows someone to remotely control another machine (like a remote desktop to Linux from Windows, or a remote desktop from Linux to Windows). Remote connections also allow users to access software, applications, and files, as well as to conduct system maintenance and troubleshooting resolution.
The methods outlined below work well for all Linux systems other than Ubuntu- which already has a built-in remote desktop tool that supports both RDP and VNC.
For the initial connection, ensure this feature is set up on the physical Ubuntu machine. After following the installation steps for the built-in Ubuntu-compatible remote desktop option, further installation of any additional software won’t be necessary.
Linux Remote Desktop
We are going to focus on the specifics of using Remote Desktop Protocol (RDP) on Linux-based servers, i.a., client apps you get to choose from, and some nuances of using remote access tools for Linux in cross-platform environments.
Every user of Debian-derived Linux distribution knows that setting up Kali Linux remote access and successful use of remote desktop clients like TeamViewer or AnyDesk can be tricky at times. Mind that, for starters, you’ll need to download and install all the packages required to enable remote desktop Kali capabilities and update the ones you already have to the latest versions.
After that, you can either use a script to enable XFCE and RDP or do it manually (that takes more time but gives you much more control over the process). This will be enough to access your Kali machine from any other device connected to your local network.
Accessing a remote desktop from Linux Mint machines, especially the configuration of the protocols, may seem overly complicated, but in reality, it’s nothing to be stressed about. For one, Linux Mint has a built-in desktop sharing tool available from the Main Menu. Enable remote access to a machine, and it will be available for connections via SSH terminal for everyone who knows this machine’s IP address. If the toolset provided by a standard remote access client isn’t enough, you can install a third-party client tool, like Vinagre or others, and enjoy localized GUIs, SSH tunneling, request listening option, and many more.
Accessing a remote Linux desktop from a Windows machine sharing a network can be done with just a few simple commands, or by installing easy-to-use software like RDP, Xrdp, Xfce4, TeamViewer, Gnome, Remmina, etc.
Note: Some remote access tools even allow you to access a remote printer or scanner.
Here’re some options to access a remote Linux desktop from a local Windows machine:
- • The “Obtain the IP Address” Method
- • The “RDP” Method
- • The “VNC” Method
- • The “SSH” Method
For those using devices that function over the same network, there are multiple open-source options that help users with remote desktop from Windows to Linux access.
The IP Address Method
Before initiating a Windows to Linux remote desktop connection, users will need to obtain the host machine’s IP address before doing anything else.
To find the IP address of the Linux host, log into the Linux machine, open Terminal, and type the following:
ifconfig
This command will display the Linux machine’s IP address. Users can also locate the IP address by connecting to the network’s router, then browsing the devices by their hostname. Use this information while operating your Windows computer to establish a remote connection.
The “RDP” Method
The simplest option to enable remote connections to Linux desktops is by using the remote access tool built directly into the Windows OS: Remote Desktop Protocol (RDP).
Users must install Xrdp software on their Linux machine to use RDP. Complete installation in person, or with the SSH command. Enter the command as shown below:
sudo apt install xrdp
After that, type “rdp” into the search function, then run the Remote Desktop software on the Windows computer.
From within the Remote Desktop Connection pop-up window, type the Linux computer’s IP address, then click connect.
Note: to manage advanced parameters configuration, click “Show Options”.
The “VNC” Method
Another remote desktop option to try is VNC (Virtual Network Connection). Access a remote device using VNC by installing the dedicated software on both computers. One of the most beloved VNC remote access tools is TightVNC, which is also open-source.
How to use TightVNC to access Linux from Windows
Installing TightVNC can also be done in person or by using the SSH command.
-
Step 1: Enter the following command:
sudo apt install tightvncserver -
Step 2: Users should then run using the command:
sudo tightvncserver - Step 3: Users must then set the desired password.
- Step 4: Once the above steps are complete, start the client app on Windows (which can be downloaded from the TightVNC website).
- Step 5: Type the IP address and port number in the TightVNC window on the Windows OS device.
- Step 6: Hit “Connect”, then enter the password that was defined in the SSH command section above.
Use SSH
Even though Secure Shell won’t permit remote desktop connections, it’s still an excellent option for remotely installing the software needed to access a Linux desktop remotely. See below to learn how to do it.
Step 1: From the Windows computer, open the Power Menu.
Step 2: Choose “Windows PowerShell”.
Step 3: Type the following command:
ssh [IP_ADDRESS]
Step 4: After accepting the certificate, enter the appropriate username and password.
The connection is now established.
The options described above are excellent for small businesses, anyone working on a smaller network, or those who don’t need frequent access to a remote device.
Using RDP Clients To Create A Linux to Windows Remote Desktop Connection
This section will help anyone interested in protocols to connect a remote desktop to Windows from Linux.
To start, we’ll begin with using the Windows app, Remote Desktop Connection.
Utilizing the Remote Desktop Protocol (RDP), the Remote Desktop Connection app is included with all Windows OS. RDC allows users to access a Windows PC, or Windows Server remotely.
This is very convenient and cost-effective because organizations can install apps onto one central server, instead of multiple computer systems. Employees can then use those programs by accessing the remote server. This centralization also ensures that maintenance and troubleshooting are much easier processes.
This technology was originally called Terminal Services (TS). In modern times, web systems are far more commonplace- but situations remain where Windows remote applications are still required.
During those instances, Linux users can access Windows computers and servers remotely from their preferred system via RDP client.
There are numerous linux remote desktop clients, and we’ll cover three of them below:
- • Remmina
- • FreeRDP & rdesktop
After reading the features below, users can select the option that suits their unique needs.
Note: there are some instances where users may prefer to use a VPN for their remote access needs, but this article will solely focus on dedicated remote access software.
Enabling remote desktop on Windows
Users must first set up the machine that they wish to connect with remotely.
While operating the Windows computer that will be remotely connected to, follow the steps below:
Step 1: Login as Administrator;
Step 2: Open the Start menu;
Step 3: Click Settings;
Step 4: When the Settings window opens, open the System category > Remote Desktop;
Step 5: Now enable it;

Please note: users can’t connect with computers running Windows Home edition (like Windows 10 Home). This screen details the information, if that is the case:

Remmina
Remmina supports numerous remote access protocols like RDP, VNC, NX, XDMCP, and SSH. Remmina’s main goal is to help system administrators and travelers that work with multiple remote desktops and/or servers. Remmina is included in the Ubuntu Linux distribution as a default remote desktop client.
FreeRDP and rdesktop
Not only was rdesktop the very first Linux RDP client, but it was also the most popular for many years. However, as of November 2019, the project is searching for a new maintainer.
Alternatively, FreeRDP was initially released in 2009 as a fork of rdesktop. This occurred when Microsoft opened the RDP specifications. As time went on, and FreeRDP grew, it became the standard RDP client on systems lacking native Microsoft clients.
Simply double-click on the computer you want remote access to from the list.
Following the Microsoft Open Specifications, FreeRDP is a free implementation of Remote Desktop Protocol. Said implementation offers the server and client applications, as well as a library that permits other applications to utilize RDP protocol. FreeRDP is both an app and a library, providing reusable features for alternative applications. Aside from rdesktop, the clients listed above utilize FreeRDP’s library.
Please note: The inclusion of rdesktop on this list was intended for informational purposes only, and unless users have a specific scenario in mind, we advise another client that is compatible with the FreeRDP library.
Содержание
- Используем RDP-клиенты в Linux
- Вариант 1: Remmina
- Вариант 2: rdesktop
- Вариант 3: freerdp
- Вопросы и ответы

Технология RDP (Remote Desktop Protocol) позволяет пользователям одинаковых или разных версий операционных систем совершать удаленное управление компьютером. Существуют специальные клиенты, отличимые от консольных утилит, где эта опция реализована через графический интерфейс, а это значит, что юзеру предоставляется полный вид рабочего стола, возможность взаимодействовать с клавиатурой и указателем мыши. В рамках сегодняшней статьи мы хотим рассказать об использовании популярных RDP-клиентов в Linux.
Сейчас существует не так много RDP-клиентов, поскольку имеются сложности в реализации технологии, которые связаны и с ее проприетарностью. Однако обычному юзеру на выбор предлагается не менее трех различных вариантов. Далее мы хотим рассказать лишь о самых популярных и надежных из них, а вы, отталкиваясь от инструкций, уже сможете инсталлировать подходящий клиент и производить подключение к серверу.
Вариант 1: Remmina
Remmina — самый популярный клиент удаленного рабочего стола, который по умолчанию предустановлен во многих дистрибутивах Linux. Однако зачастую его версия является устаревшей. Эта программа имеет простой и понятный GUI с огромным количеством вспомогательных инструментов. Освоить ее сможет даже начинающий пользователь, поэтому мы и поместили этот софт на первое место. Давайте пошагово разберем процедуру установки, настройки и подключения в Remmina.
Шаг 1: Установка
Начать следует с установки данного RDP-клиента в операционную систему. Как было сказано ранее, по умолчанию во многих дистрибутивах Remmina уже присутствует, но не помешает обновить ее версию, что не займет много времени.
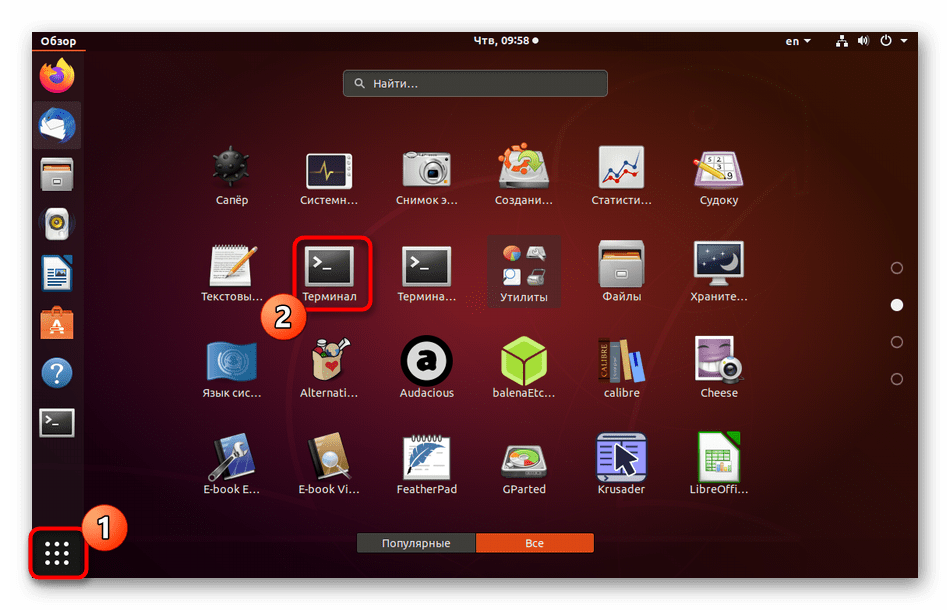
- Если в вашей системе Remmina попросту отсутствует и вы хотите инсталлировать стабильную, но не самую последнюю сборку, для начала запустите «Терминал» удобным способом, например, через меню приложений или зажав комбинацию Ctrl + Alt + T.
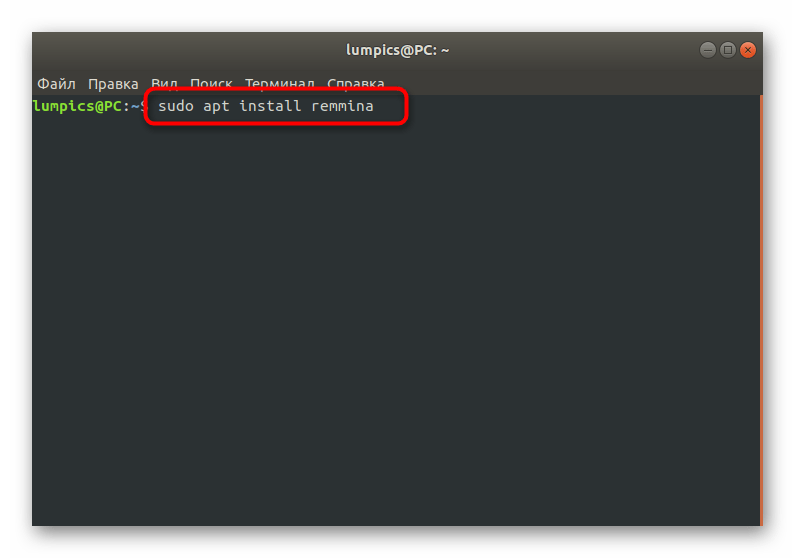
- В открывшейся консоли введите
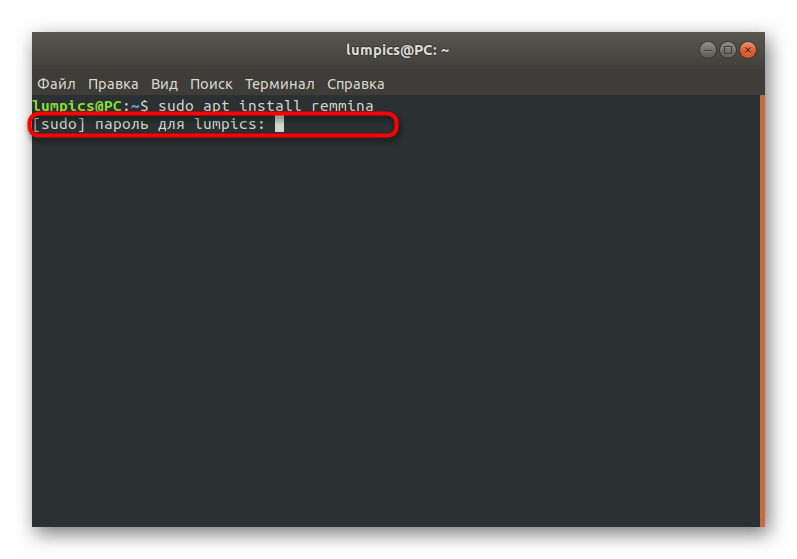
sudo apt install remminaи нажмите на Enter. Замените пакетный менеджер apt на другой, если используете дистрибутив, основанный на RedHat или Fedora. - Всегда действия инсталляции запускаются от имени суперпользователя, поэтому приходится подтверждать их, вводя пароль в новой строке. Эта ситуация не стала исключением.
Далее может потребоваться дополнительное подтверждение расширения занятого дискового пространства. После успешного завершения инсталляции можно переходить к использованию клиента. Если же вы желаете обновить версию, придется задействовать пользовательские хранилища, поскольку на официальные новые сборки не поступают. Реализация будет немного сложнее, а выглядит так:
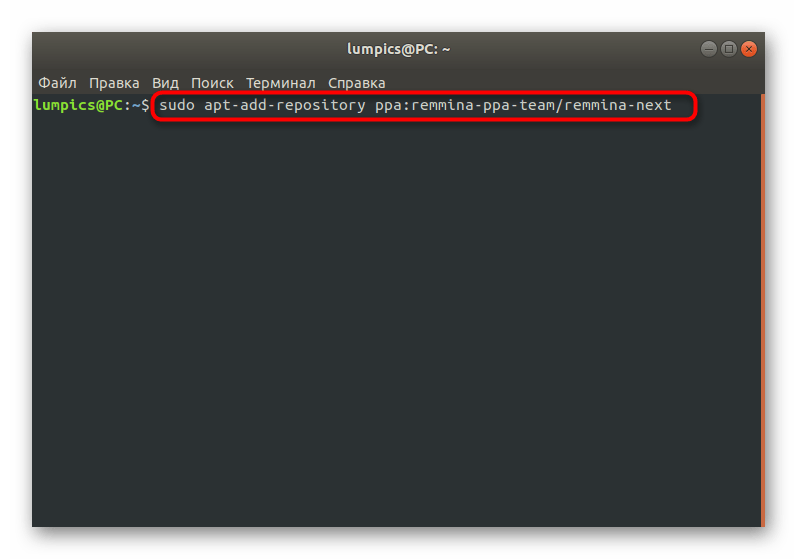
- В консоли введите
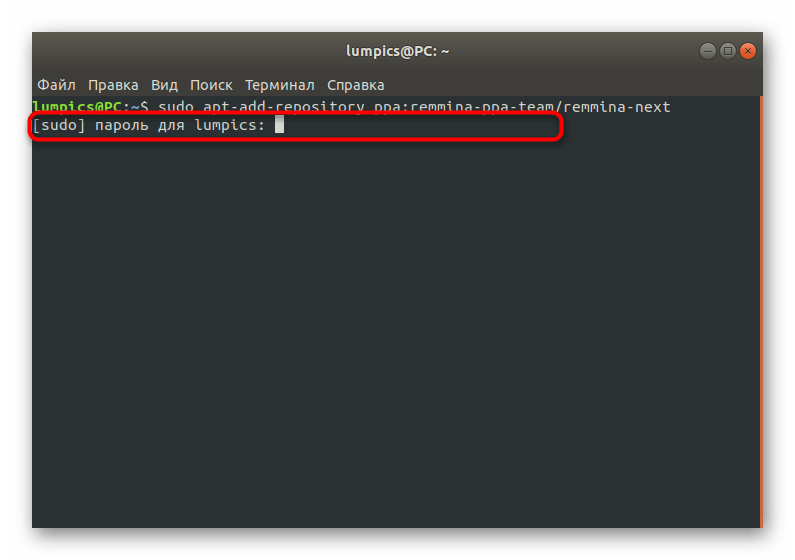
sudo apt-add-repository ppa:remmina-ppa-team/remmina-next, чтобы получить файлы из хранилища. - Подтвердите это действие, написав пароль учетной записи суперпользователя.
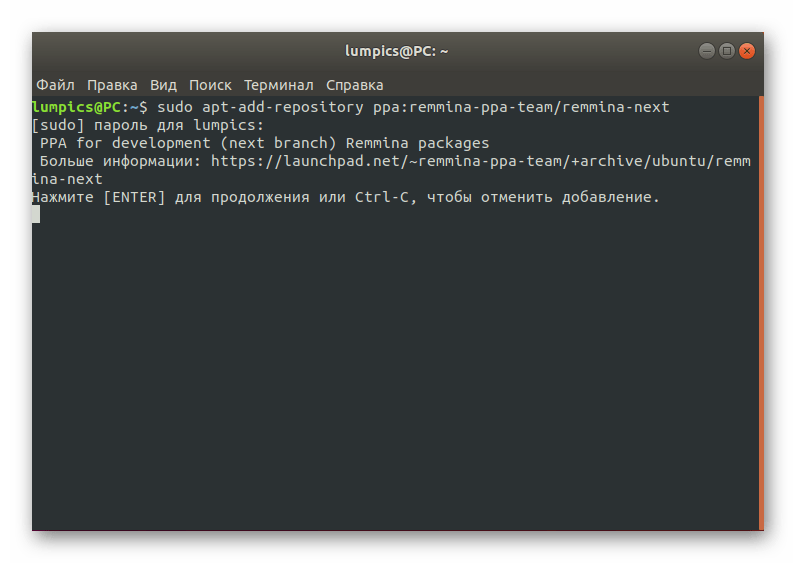
- Вы будете уведомлены о получаемых пакетах. Примите их, нажав на Enter.
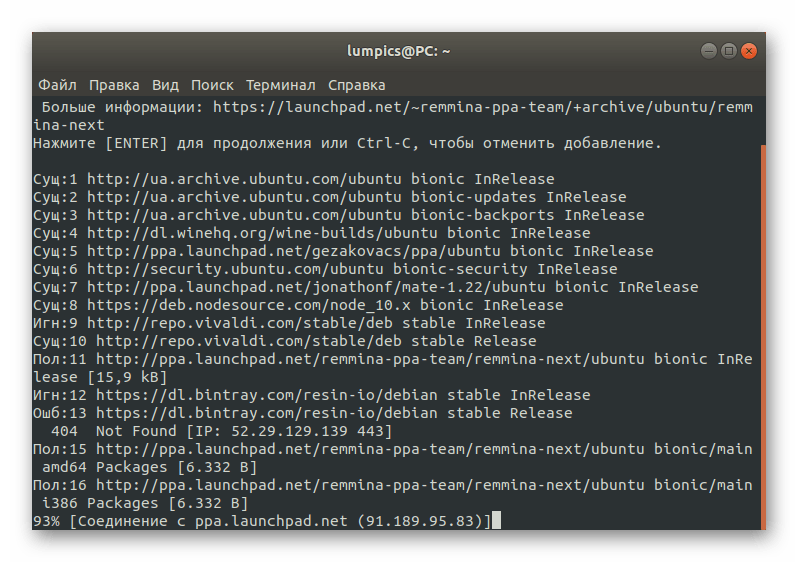
- Ожидайте завершения скачивания файлов. Во время этой операции не закрывайте консоль и не прерывайте соединение с интернетом.
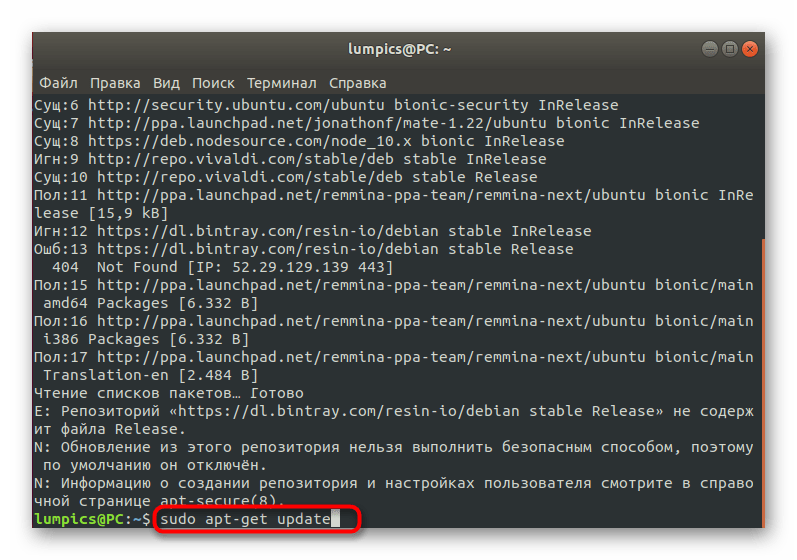
- После этого следует обновить список системных хранилищ через команду
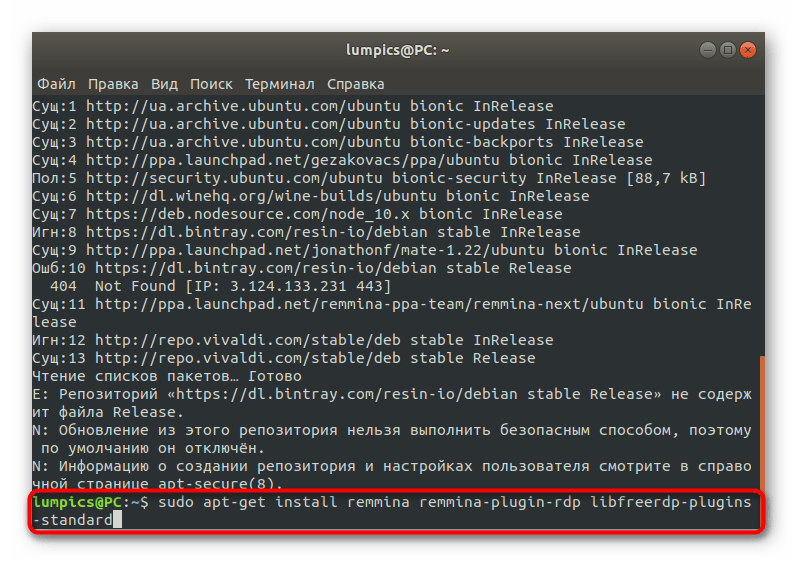
sudo apt-get update. - Остается только произвести инсталляцию RDP-клиента и сопутствующих ему плагинов, введя
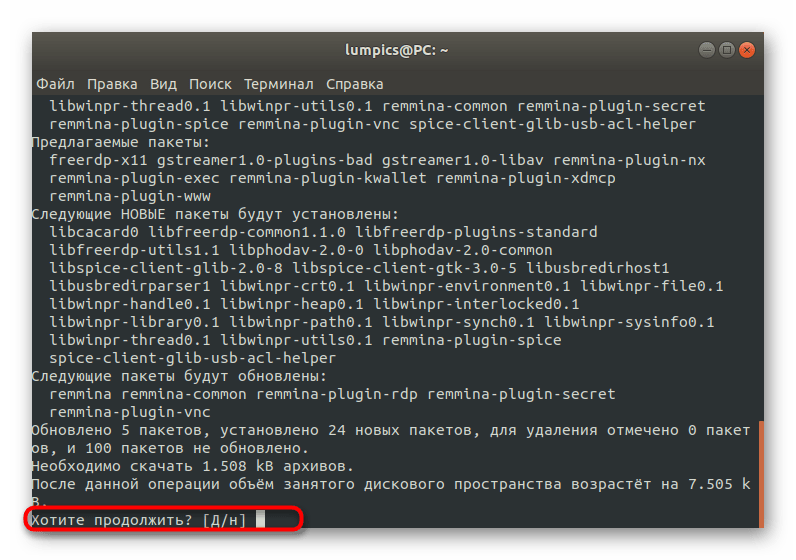
sudo apt-get install remmina remmina-plugin-rdp libfreerdp-plugins-standard. - Подтвердите информацию о занимаемом дисковом пространстве, выбрав ответ Д, и дожидайтесь окончания процедуры.

На этом инсталляция Remmina завершена. Старая версия будет автоматически замещена новой, следовательно, можно закрывать консоль и переходить к первому запуску программного обеспечения.
Шаг 2: Запуск и настройка
С запуском и конфигурацией Remmina разберется даже самый начинающий пользователь, а с последним поможет официальная документация. Однако мы все же хотим остановиться на основных моментах, чтобы при реализации этой задачи не возникло каких-либо трудностей.
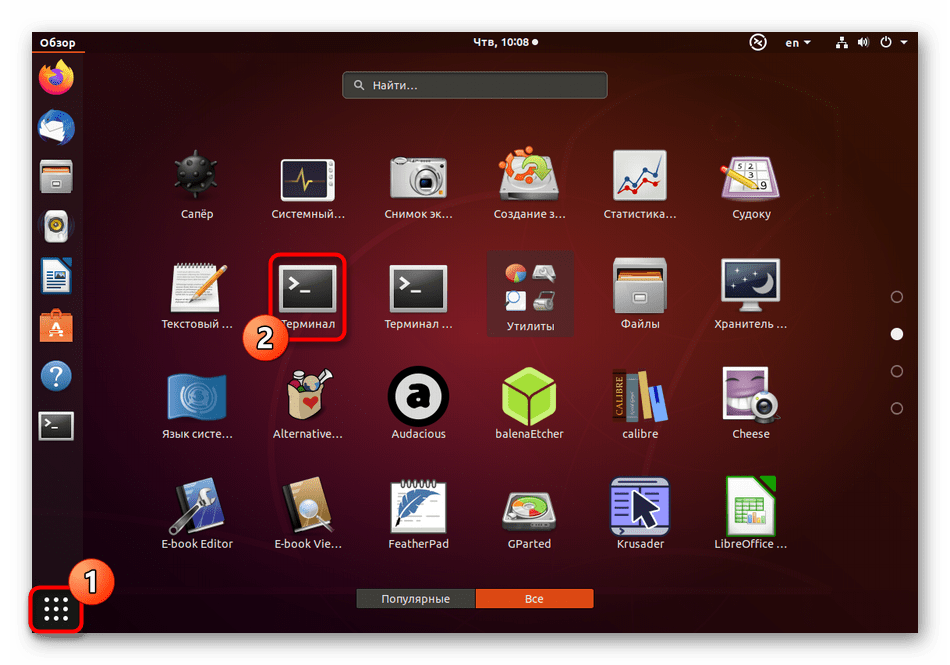
- По умолчанию значок Remmina сразу же после установки будет добавлен в меню приложений. Отыщите его там, прокрутив список или воспользовавшись строкой поиска.
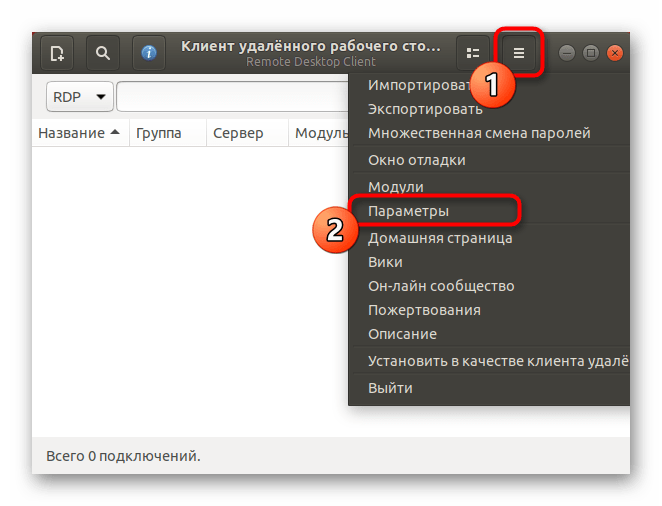
- Для перехода к настройкам кликните по кнопке в виде трех горизонтальных линий и выберите пункт «Параметры».
- Теперь на экране отобразится окно «Настройки Remmina». В нем присутствует огромное количество вкладок, отвечающих за внесения глобальных и пользовательских изменений. Например, здесь можно задать стандартное разрешение экрана, изменить комбинации клавиш, редактировать пункты протокола SSH и безопасности.


Мы не будем останавливаться на каждом присутствующем пункте детально, поскольку разработчики предоставляют официальную информацию по каждой опции, а также интерфейс Remmina имеет русский язык, что поможет самостоятельно во всем разобраться.
Шаг 3: Создание профиля и подключение
После установки оптимальной конфигурации Remmina остается только создать профиль для подключения, используя рассматриваемый протокол, чтобы успешно соединиться с удаленным рабочим столом. Мы предлагаем разобрать основной принцип этой процедуры.
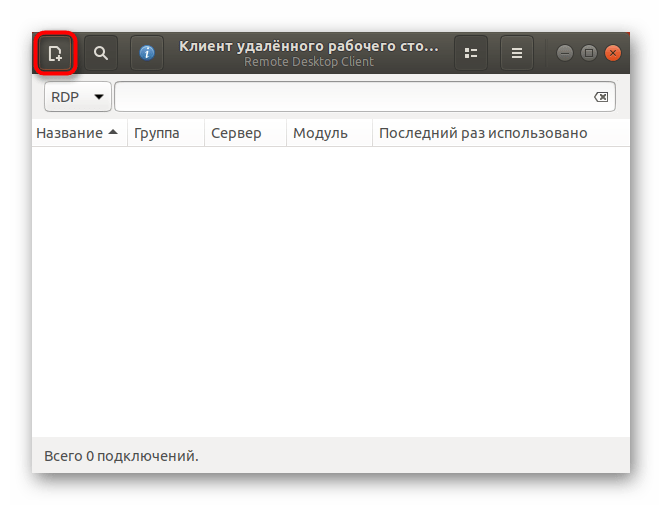
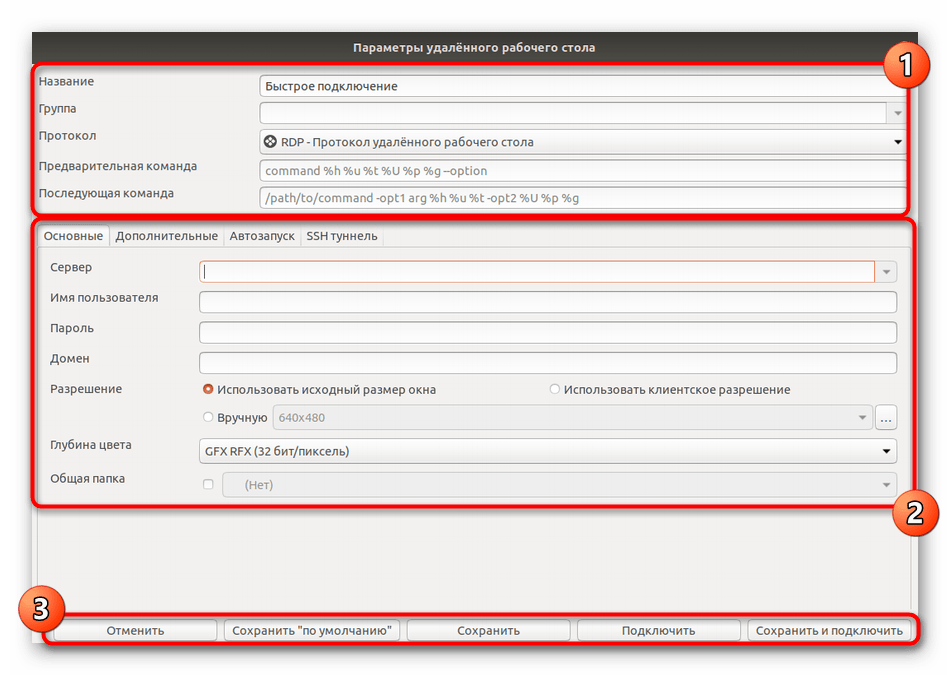
- Найдите на верхней панели соответствующий значок и кликните по нему левой кнопкой мыши, чтобы отобразилась форма создания подключения.
- Заполните все строки в соответствии со своими требованиями. Обязательно перепроверяйте данные учетных записей и адреса серверов. После этого вы можете выбрать действие. Если нажать на «Подключить», указанные настройки сохранены не будут, ведь для этого следует кликнуть на «Сохранить и подключить».
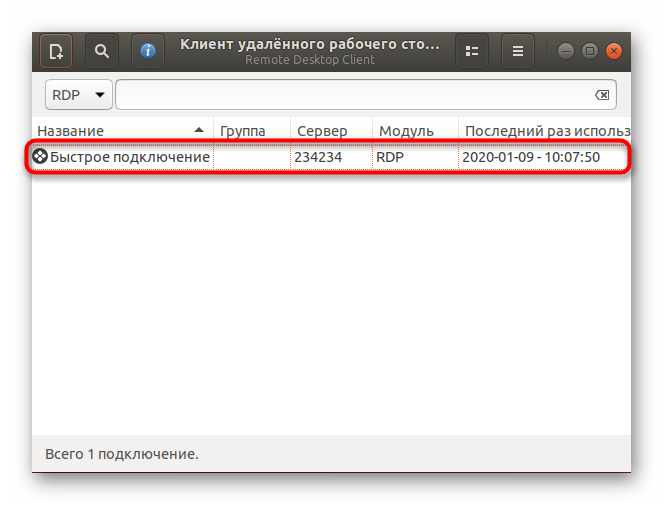
- В будущем сохраненные профили можно запускать прямо через главное меню Remmina. Все доступные подключения отобразятся в виде таблицы с детальной информацией.
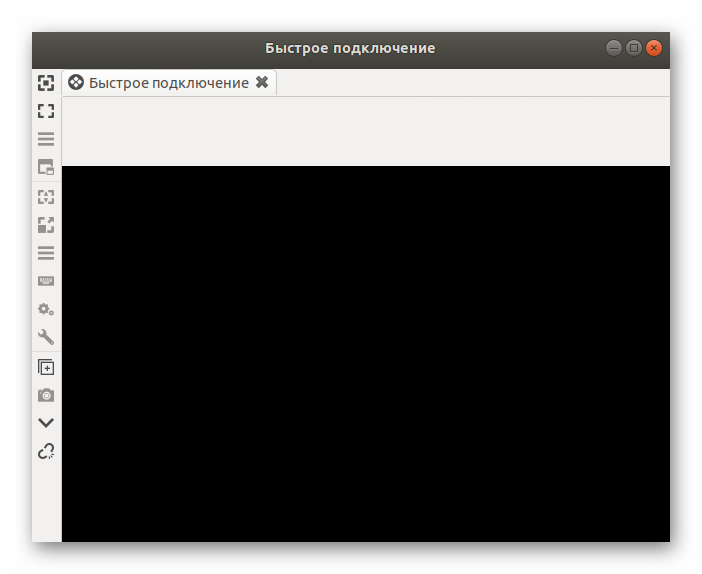
- После запуска откроется отдельное окно с виртуальным рабочим столом. Ожидайте начала загрузки и используйте инструменты на левой панели, чтобы управлять сеансом.
Теперь остается только приступить к взаимодействию с удаленным рабочим столом, выполняя там необходимые действия. Если у вас возникли какие-то вопросы по управлению Remmina, обратите особое внимание на документацию: там в максимально развернутом виде описаны ответы абсолютно на все вопросы пользователей.
Вариант 2: rdesktop
Следующий инструмент под названием rdesktop не является таким популярным среди начинающих пользователей, поскольку все настройки производятся через консоль путем ввода соответствующих команд. Однако это решение стало востребованным среди профессионалов и любителей консольных утилит.
Шаг 1: Установка rdesktop
Вкратце остановимся на самой процедуре инсталляции rdesktop. Данная программа доступа в официальных хранилищах дистрибутивов, благодаря чему юзеру не потребуется скачивать дополнительные файлы или пакеты.
- Откройте «Терминал» любым удобным образом.
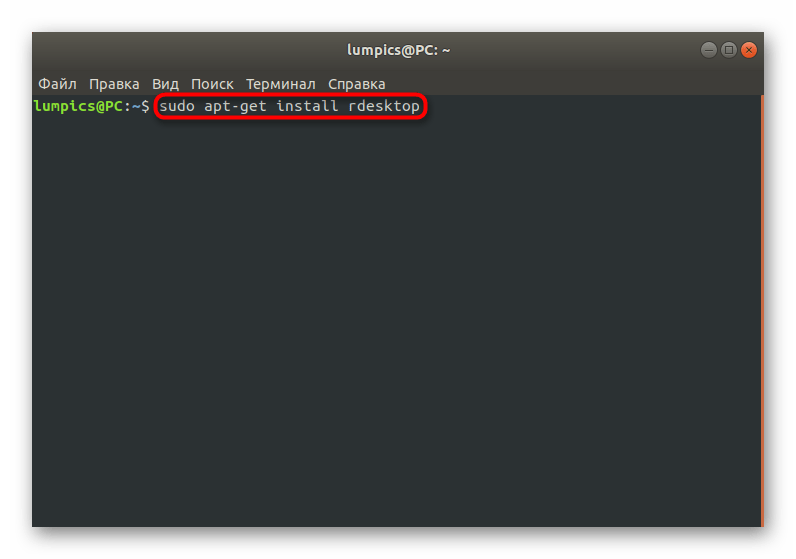
- Введите команду
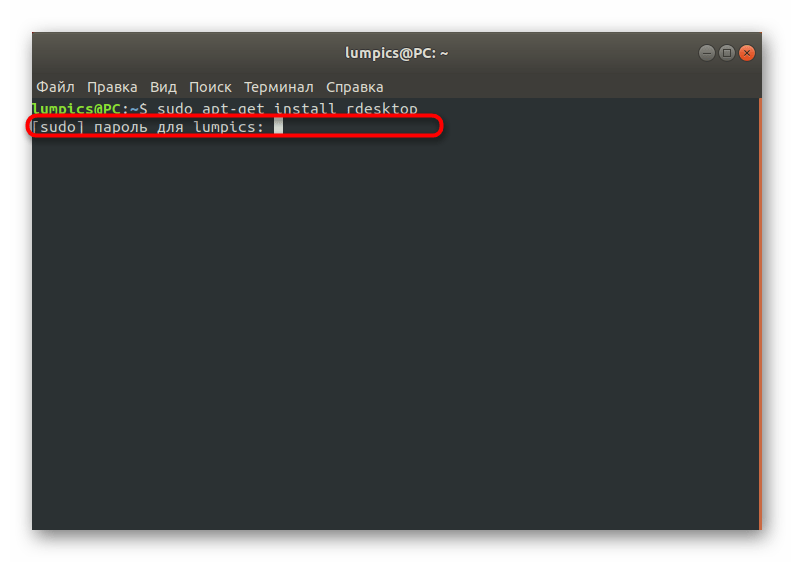
sudo apt-get install rdesktopи нажмите на Enter. - Подтвердите это действие, введя пароль суперпользователя в новой строке.
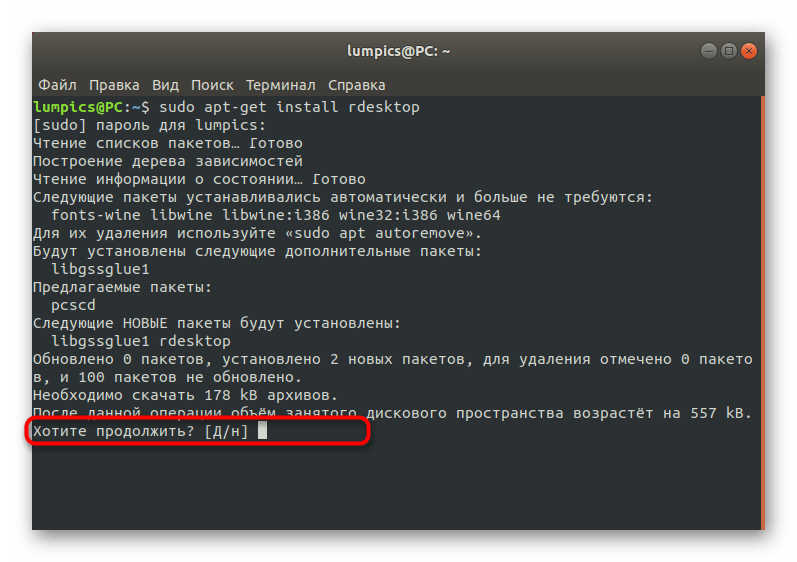
- Установка будет продолжена сразу же после выбора положительного ответа «Д».
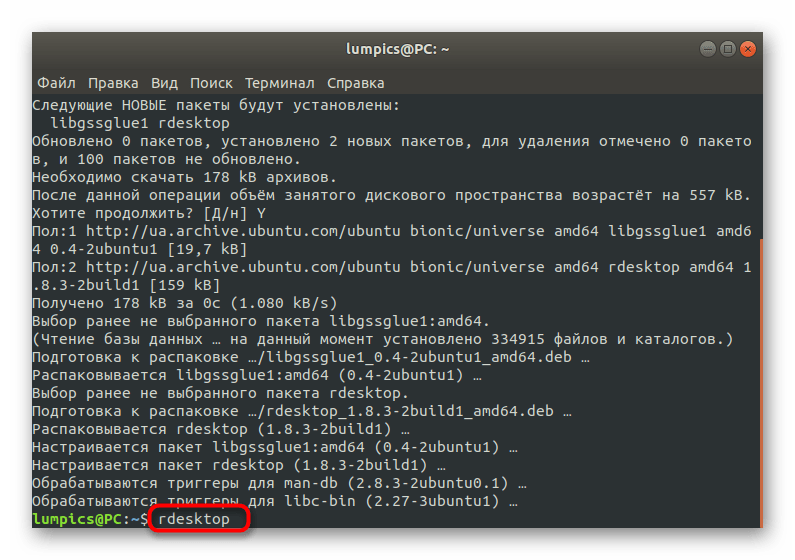
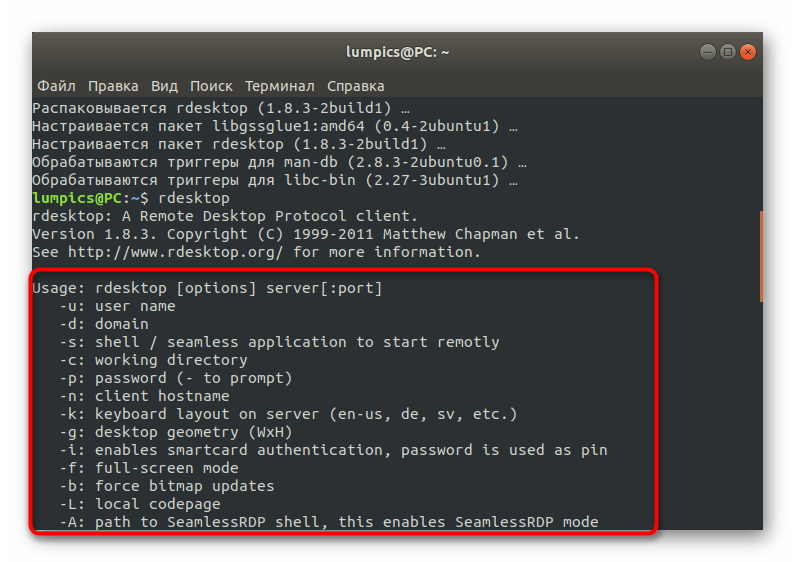
- Запуск данной утилиты тоже осуществляется через «Терминал» через команду
rdesktop.
Если используемый дистрибутив основан не на Debian, аргумент apt-get в команде инсталляции придется заменить на yum или pacman. В остальном же никаких различий со сборками Linux не имеется.
Шаг 2: Запуск и подключение
Если в консоли просто вписать команду rdesktop, следующими строками отобразится краткая сводка о синтаксисе и доступных опциях. Мы рекомендуем изучить появившиеся сведения, чтобы понять, как именно осуществляется соединение с удаленным рабочим столом через эту утилиту.
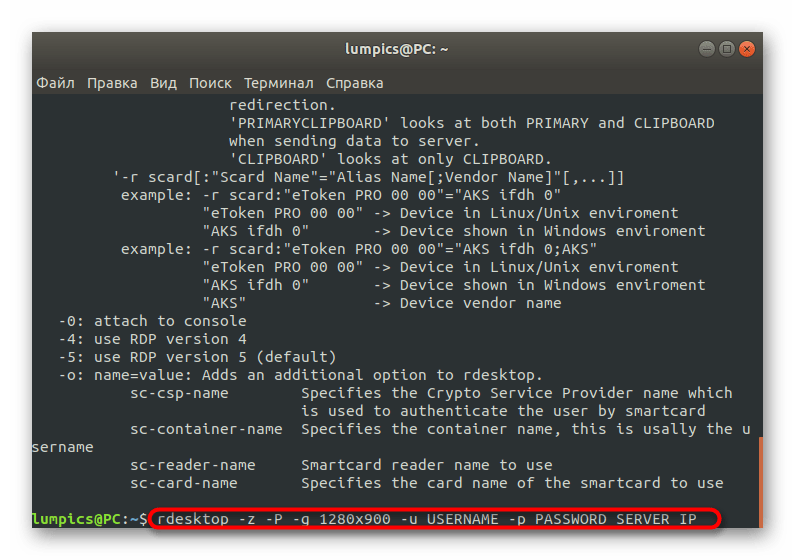
После этого можно осуществлять непосредственное подключение к другому компьютеру. Давайте разберем этот процесс на примере строки rdesktop -z -P -g 1280x900 -u USERNAME -p PASSWORD SERVER_IP.
Здесь следует детально рассмотреть абсолютно каждый аргумент и вписываемую информацию.
-z. Эта опция отвечает за активацию сжатия потока. Используйте ее для оптимизации соединения. Особенно актуально для систем с низкой скоростью интернета.-P. Создает кэширование. Это помогает сохранять некоторую информацию на локальном хранилище, в будущем не обращаясь каждый раз на сервер для ее загрузки.-g. Устанавливает пользовательское разрешение окна рабочего стола. После этой опции введите необходимый параметр, чтобы он был применен.-u. После этой опции укажите имя пользователя, которое будет отображаться на сервере.-p. Данный аргумент необходим в случае присутствия пароля.SERVER_IP. Всегда указывается в конце строки. Вместо этой надписи введите доменное имя сервера, к которому хотите осуществить подключение.
Шаг 3: Обмен файлами между Windows и Linux в текущей сессии
В завершение разбора утилиты rdesktop хотим рассказать об основных действия, выполняемых через ввод команд в консоли. Для начала поговорим о самых востребованных задачах, которые связаны с обменом файлов. Сетевая папка подключается через rdesktop -r disk:share=/home/documents -z -P -g 1280x900 -u USERNAME -p PASSWORD SERVER_IP, где все указанные опции и адреса замените на требуемые.
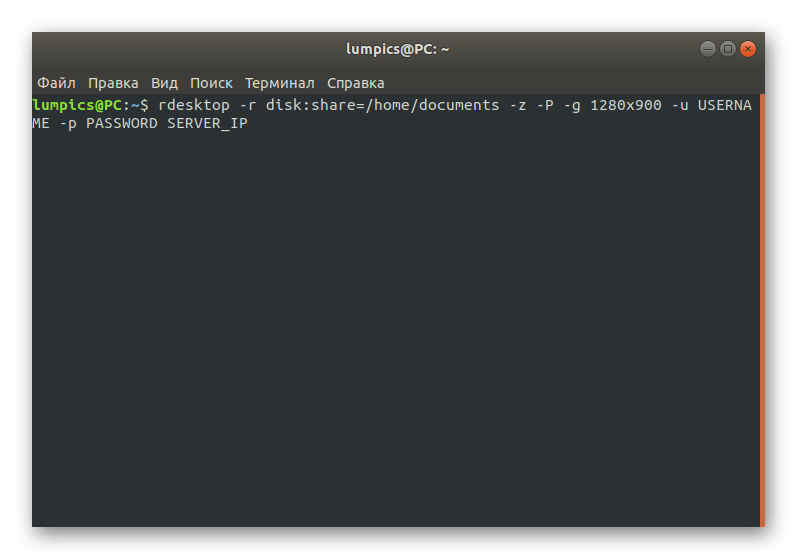
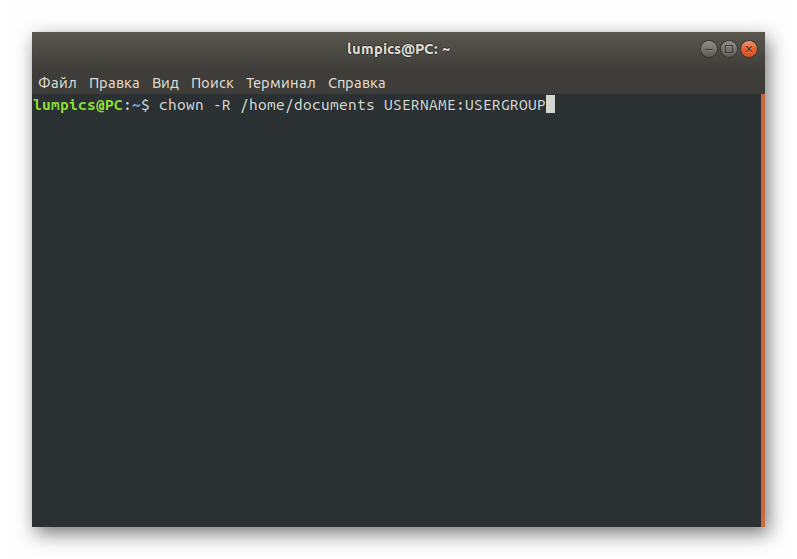
После ввода этой команды папка станет доступна для чтения и записи, что позволит всячески управлять находящимися там файлами. Однако если возникли проблемы с доступом, придется закрыть сессию, активировать команду chown -R /home/documents USERNAME:USERGROUP, а уже потом подключить директорию повторно.
Шаг 4: Создание значка быстрого доступа
При изучении первого RDP-клиента вы могли заметить, что все профили сохраняются в таблице графического меню, что позволяет быстро соединяться и переключаться между ними. К сожалению, в rdesktop такая функция попросту отсутствует, поэтому остается только один альтернативный метод — ручное создание кнопки быстрого доступа для каждого сервера.
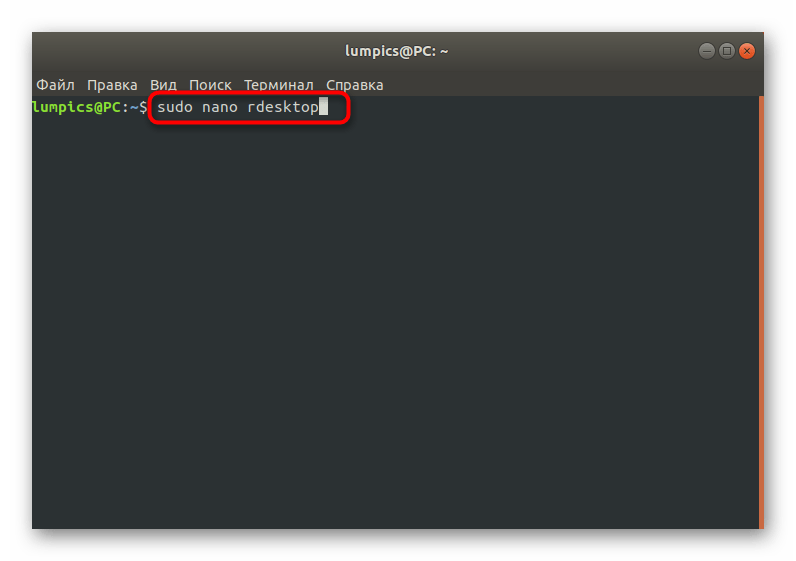
- В консоли создайте пустой текстовый файл с произвольным названием через удобный текстовый редактор. Сама команда обретет примерно такой вид:
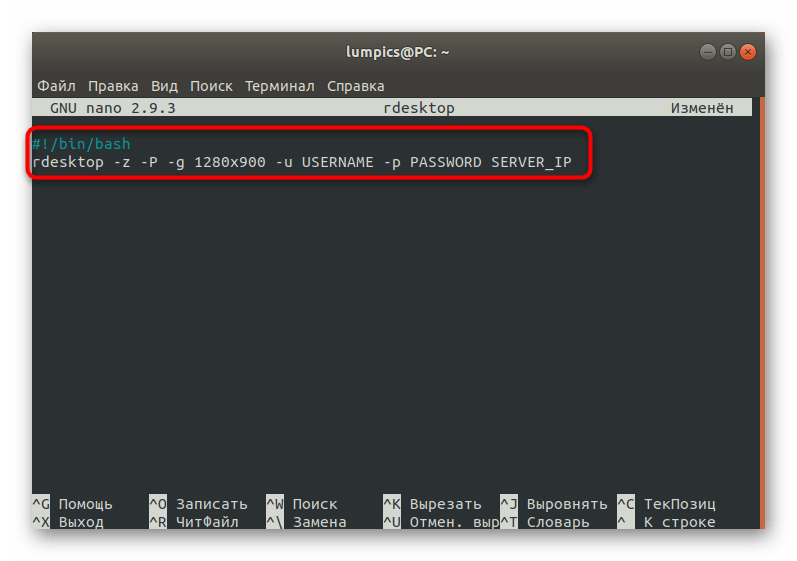
sudo nano rdesktop, где nano — используемый текстовый редактор, а rdesktop — название самого файла. - При появлении окна вставьте две строки, указанные ниже, заменив опции и сведения о сервере на имеющиеся.
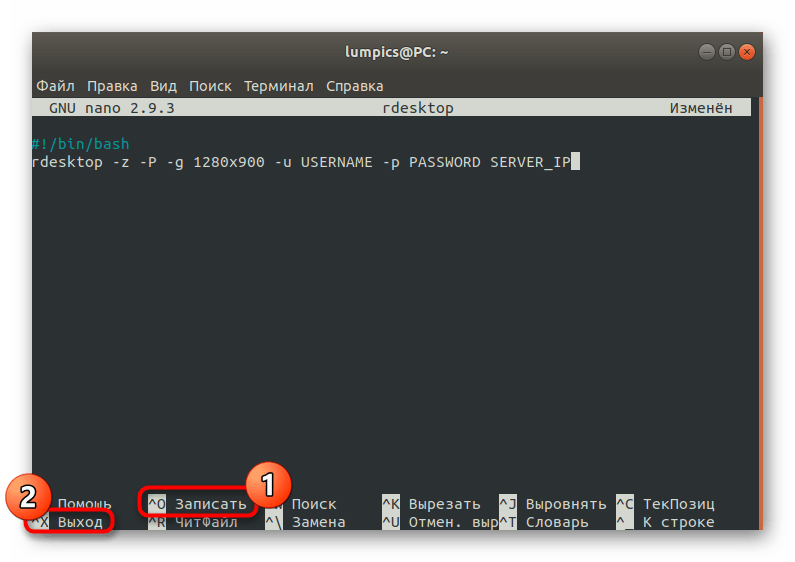
- Сохраните все изменения и завершите работу в текстовом редакторе.
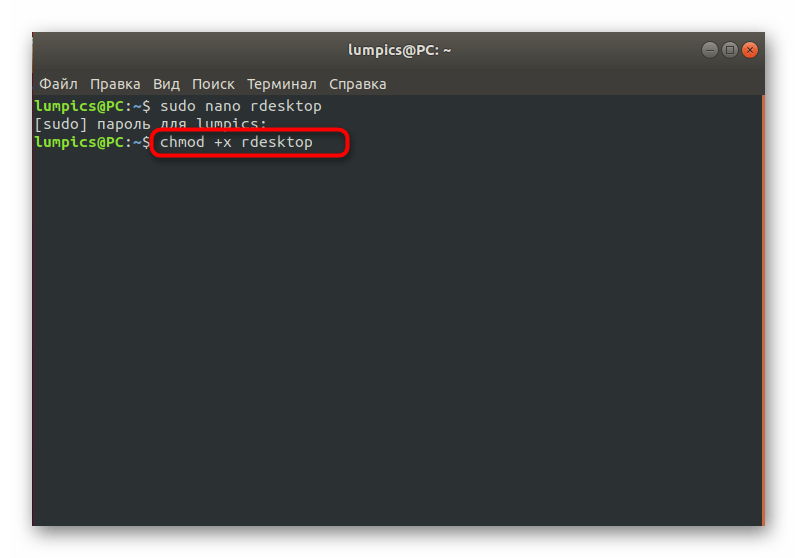
- Введите команду
chmod +x rdesktop, чтобы создать значок быстрого запуска на рабочем столе.
#!/bin/bash

rdesktop -z -P -g 1280x900 -u USERNAME -p PASSWORD SERVER_IP
Все остальные опции и нюансы взаимодействия с rdesktop, о которых мы не поговорили выше, детально описаны в официальной документации или используются довольно редко, поэтому и не нуждаются в объяснениях.
Вариант 3: freerdp
freerdp — самый новый из всех известных RDP-клиентов, который только начинает набирать обороты. Управление им тоже осуществляется в консоли, а функций сейчас мало, поэтому мы и поставили этот вариант на последнее место.
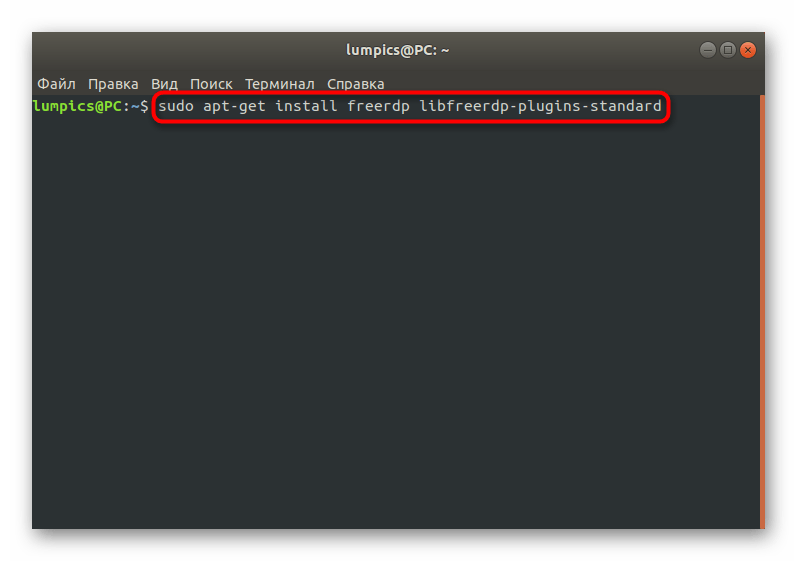
- Инсталлируется freerdp со всеми необходимыми компонентами через команду
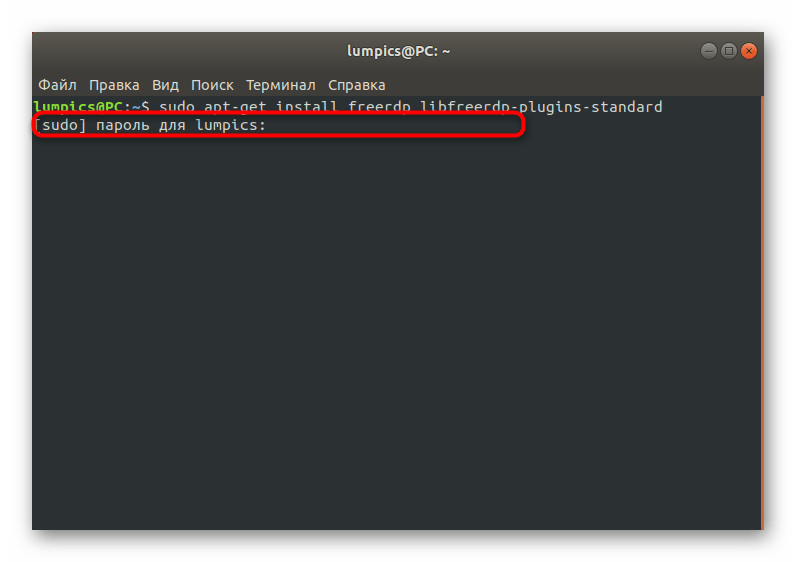
sudo apt-get install freerdp libfreerdp-plugins-standard. - Инсталляция начнется сразу же после подтверждения паролем.
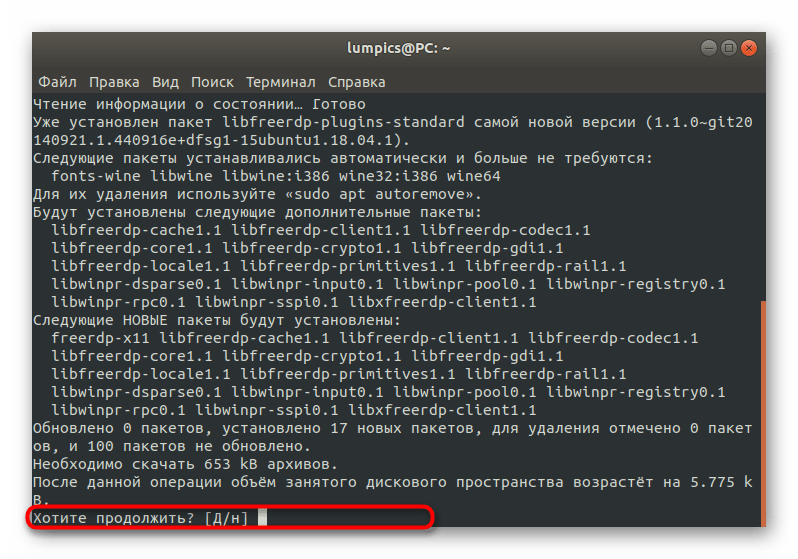
- Выберите ответ Д, чтобы загрузить все архивы.
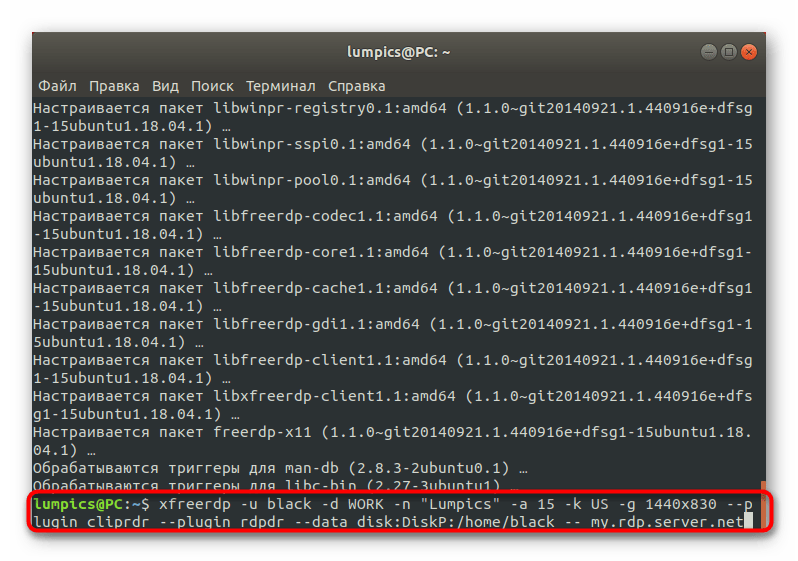
- Используйте строку
xfreerdp -u black -d WORK -n "Lumpics" -a 15 -k US -g 1440x830 --plugin cliprdr --plugin rdpdr --data disk:DiskP:/home/black -- my.rdp.server.net, чтобы запустить соединение с сервером.
Теперь предлагаем изучить все опции, которые вы увидели в предыдущей строке. Они немного схожи с теми, что применялись во втором варианте при взаимодействии с клиентом rdesktop, но и имеют свои особенности.
-u. Отвечает за имя пользователя на сервере. Сразу же после этой опции должен быть вписан соответствующий логин.-d. То же самое, но только с доменом рабочей группы, который определяется заранее и должен быть одинаковым у все участников локальной сети.-n. Определяет имя хоста.-a. После этого аргумента указывается глубина цвета окна. По умолчанию выбирается значение 15.-k. Устанавливает стандартную раскладку клавиатуры, где в качестве параметра указывается код государства.-g. Определяет размер отображаемого окна в пикселях.--plugin cliprdr. Активирует общий буфер обмена с будущим удаленным рабочим столом.--plugin rdpdr --data disk:DiskP:/home/black --. Подключает домашнюю папку как общую сетевую и позволяет обмениваться данными.my.rdp.server.net. Заменяется на имя используемого RDP-сервера.
Выше вы получили общую сводку о трех различных RDP-клиентах для Linux. Как видите, все они имеют свои особенности и подойдут разным пользователям. Каждый из них может соединяться с Windows, поэтому вся сложность выбора заключается лишь в различиях управления и реализации графического интерфейса окна показа удаленного рабочего стола.
Using RDP to Connect to a Windows Computer from Linux
Using RDP to Connect to a Windows Computer from Linux
Due to the unique circumstances at the college due to COVID-19, we have opened up computer labs that are normally available in-person for remote access. The terminal server (ts.cecs.pdx.edu) is not capable of handling the increased remote access demands of this situation, so we kindly request you use the lab computers where possible.
To learn more about this and to find a list of lab computers to connect with, read our guide with the following link:
Using the Remmina RDP Client
For using RDP from Linux, we recommend that you use the Remmina RDP client. This is the default RDP client for Ubuntu Linux and is installed on all MCECS machines running Ubuntu, and is included as part of the standard Ubuntu distro. If you running Linux on your personal computer, download and installation instructions for a variety of Linux distributions can be found at:
https://remmina.org/how-to-install-remmina/
The following image shows the Remmina main page without any saved connections.
![]()
To add a new connection profile, press the button in the upper left corner of the screen that has an icon that looks like a page with a plus in the lower right corner. The following screen will appear. Enter as follows:
- Server field: Use the full domain name of the computer you wish to Remote Desktop (RDP) into. (For this example, we are using “ts.cecs.pdx.edu”.)
- User name and password: Replace username with your MCECS username, and put your MCECS password in the password field.
- Domain: The domain field should be set to “cecs” as shown. In the server field, put the name of the MCECS Windows machine you’re trying to connect to. For this example, the Terminal Server was used.

Once filled out as shown, press the “Connect” button to start the RDP session. If this is a connection you plan to make regularly, you can also press “Save and connect” in order to save the connection for quick access later. If you do this, you may want to change the name field (in the Profile section) to something more meaningful than “Quick Connect”.
A remote desktop, according to Wikipedia, is «a software or operating system feature that allows a personal computer’s desktop environment to be run remotely on one system (usually a PC, but the concept applies equally to a server), while being displayed on a separate client device.»
In other words, a remote desktop is used to access an environment running on another computer. For example, the ManageIQ/Integration tests repository’s pull request (PR) testing system exposes a Virtual Network Computing (VNC) connection port so I can remotely view my PRs being tested in real time. Remote desktops are also used to help customers solve computer problems: with the customer’s permission, you can establish a VNC or Remote Desktop Protocol (RDP) connection to see or interactively access the computer to troubleshoot or repair the problem.
These connections are made using remote desktop connection software, and there are many options available. I use Remmina because I like its minimal, easy-to-use user interface (UI). It’s written in GTK+ and is open source under the GNU GPL license.
In this article, I’ll explain how to use the Remmina client to connect remotely from a Linux computer to a Windows 10 system and a Red Hat Enterprise Linux 7 system.
Install Remmina on Linux
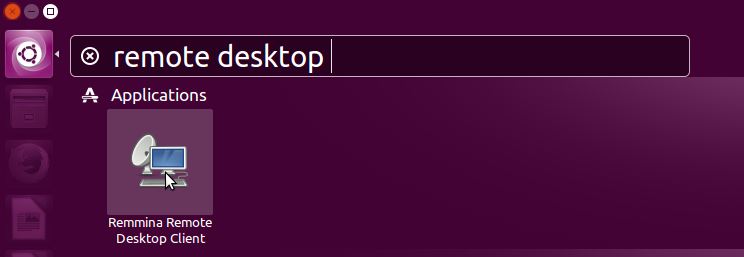
First, you need to install Remmina on the computer you’ll use to access the other computer(s) remotely. If you’re using Fedora, you can run the following command to install Remmina:
sudo dnf install -y remminaIf you want to install Remmina on a different Linux platform, follow these installation instructions. You should then find Remmina with your other apps (Remmina is selected in this image).

Launch Remmina by clicking on the icon. You should see a screen that resembles this:

Remmina offers several types of connections, including RDP, which is used to connect to Windows-based computers, and VNC, which is used to connect to Linux machines. As you can see in the top-left corner above, Remmina’s default setting is RDP.
Connecting to Windows 10
According to Microsoft’s product matrix, Windows 10 Home edition does not include the ability to connect over RDP, so you must be running Pro or Enterprise editions to connect over RDP.
Before you can connect to a Windows 10 computer through RDP, you must change some permissions to allow remote desktop sharing and connections through your firewall.
To enable remote desktop sharing, in File Explorer right-click on My Computer → Properties → Remote Settings and, in the pop-up that opens, check Allow remote connections to this computer, then select Apply.

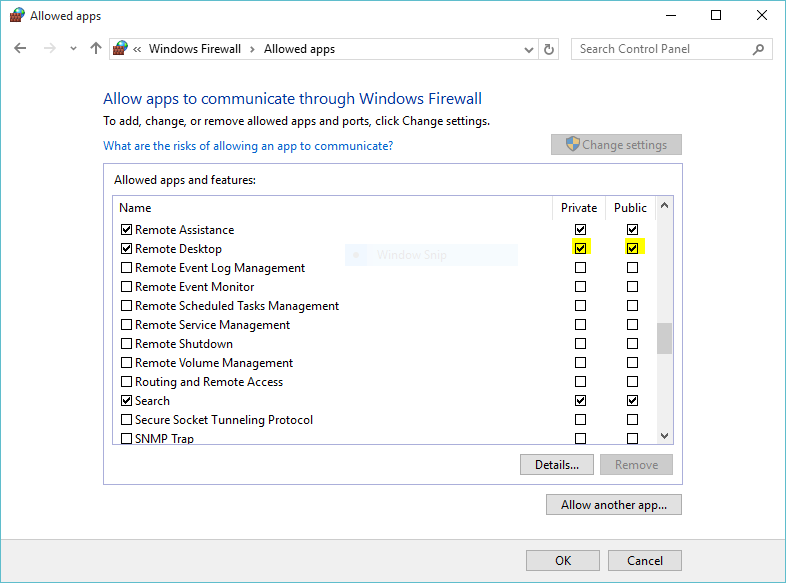
Next, enable remote desktop connections through your firewall. First, search for firewall settings in the Start menu and select Allow an app through Windows Firewall.

In the window that opens, look for Remote Desktop under Allowed apps and features. Check the box(es) in the Private and/or Public columns, depending on the type of network(s) you will use to access this desktop. Click OK.

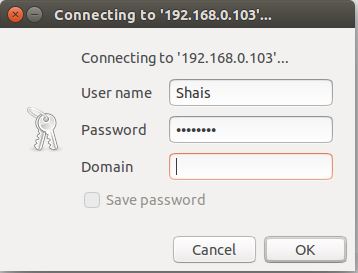
Go to the Linux computer you use to remotely access the Windows PC and launch Remmina. Enter the IP address of your Windows computer and hit the Enter key. (How do I locate my IP address in Linux and Windows 10?) When prompted, enter your username and password and click OK.

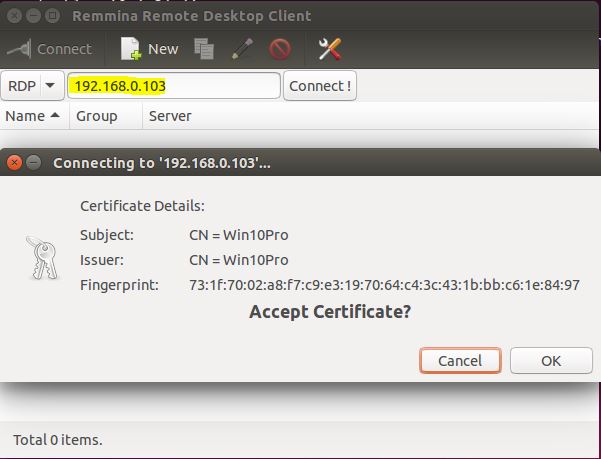
If you’re asked to accept the certificate, select OK.

You should be able to see your Windows 10 computer’s desktop.

Connecting to Red Hat Enterprise Linux
To set permissions to enable remote access on your Linux computer, open Settings from the Activities menu in the top left corner of the GNOME desktop.
Click on the Sharing category.

Enable Screen Sharing (and Allow connections to control screen, when prompted). You can also select between two access options: one that prompts the computer’s primary user to accept or deny the connection request, and another that allows connection authentication with a password. At the bottom of the window, select the network interface where connections are allowed, then close the window.
Next, open Firewall Settings from Applications Menu → Sundry → Firewall.
Next, head to Remmina on your remote computer, enter the IP address of the Linux desktop you want to connect with, select VNC as the protocol, and hit the Enter key.

If you previously chose the authentication option New connections must ask for access, the RHEL system’s user will see a prompt like this:

Select Accept for the remote connection to succeed.
If you chose the option to authenticate the connection with a password, Remmina will prompt you for the password.

Enter the password and hit OK, and you should be connected to the remote computer.

Using Remmina
Remmina offers a tabbed UI, as shown in above picture, much like a web browser. In the top-left corner, as shown in the screenshot above, you can see two tabs: one for the previously established Windows 10 connection and a new one for the RHEL connection.
On the left-hand side of the window, there is a toolbar with options such as Resize Window, Full-Screen Mode, Preferences, Screenshot, Disconnect, and more. Explore them and see which ones work best for you.
You can also create saved connections in Remmina by clicking on the + (plus) sign in the top-left corner. Fill in the form with details specific to your connection and click Save. Here is an example Windows 10 RDP connection:

The next time you open Remmina, the connection will be available.

Just click on it, and your connection will be established without re-entering the details.
Additional info
When you use remote desktop software, all the operations you perform take place on the remote desktop and use its resources—Remmina (or similar software) is just a way to interact with that desktop. You can also access a computer remotely through SSH, but it usually limits you to a text-only terminal to that computer.
You should also note that enabling remote connections with your computer could cause serious damage if an attacker uses this method to gain access to your computer. Therefore, it is wise to disallow remote desktop connections and block related services in your firewall when you are not actively using Remote Desktop.
This article originally published in June 2018 and has been updated by the editor.
 This work is licensed under a Creative Commons Attribution-Share Alike 4.0 International License.
Remotely access from Windows to Windows is easy done with the Remote desktop protocol. But for two different operating system perform with many ways. In this post I have demonstrated to remote access Windows 10 via Ubuntu Linux and as well from Windows 10 to Ubuntu Linux using xRDP.
For connecting Windows 10 Windows try to read the below article.
- Enable Remote Desktop on Windows 10 and Windows Server
The xRDP is an open-source remote desktop protocol (RDP) server using by Linux operating systems.
The process you need to apply for remote desktop configuration from Windows 10 to Linux Ubuntu and from Linux Ubtun to Windows 10.
- Enable remote desktop in Windows 10.
- Configure remote desktop Firewall extension.
- Connect remotely from Windows 10 to Ubuntu.
- Install xRDP on Ubuntu Linux for remote desktop
- Configure Linux remote desktop.
- Connect remotely from Linux Ubuntu to Windows 10
Try to enable remote desktop on Windows 10 using the above article and allow it from Windows firewall for the public network.
The Remote desktop on my Windows 10 is enabled and ready to use. The firewall is also allowing it to access the RDP from outside.
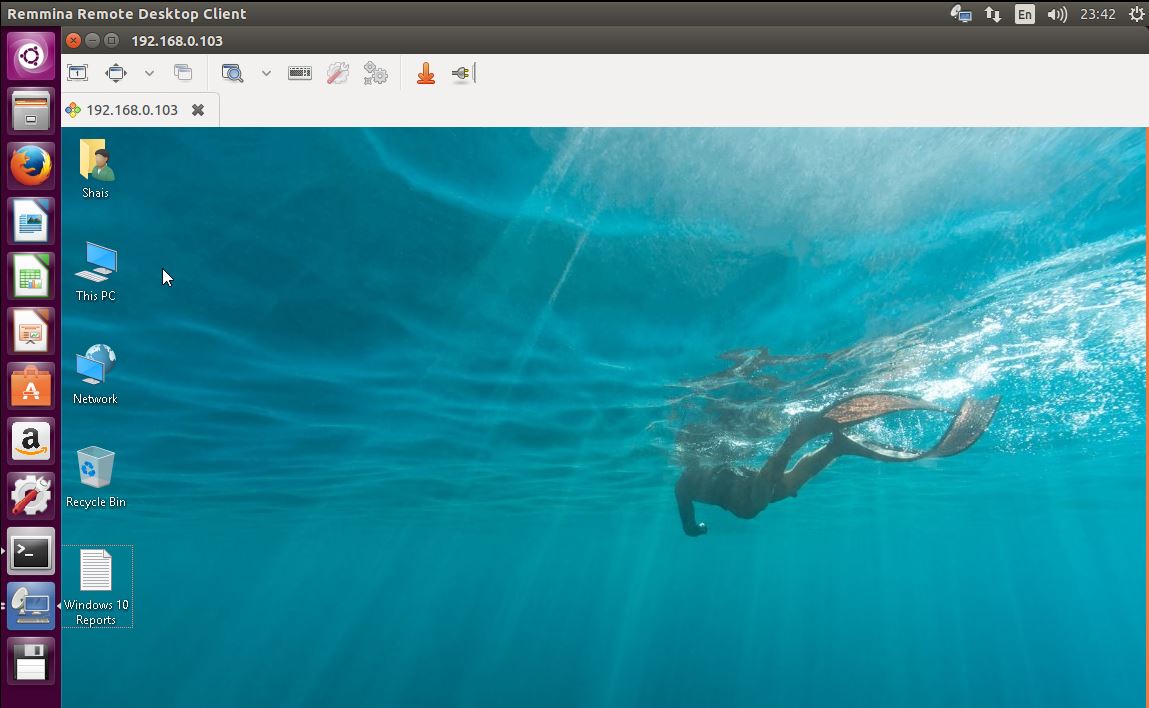
1. From Linux Ubuntu press Windows key and search “Remote Desktop” to find and open the Remmina Remote Desktop Client.
2. Enter the IP address of Windows 10 and click Connect. When prompt you about accepting the certificate, click OK.
3. Type the Windows 10 user name and password then click OK to connect to Windows 10 remotely. Type the user name and password currently, otherwise it will not connect you remotely to Windows 10.
Finally, you have connected to Windows 10 via Linux Ubuntu successfully. Now you can do anything remotely on Windows. From installing, deleting software to make changes and configuring Windows 10 remotely.
OK. We have done the remote access Windows 10 via Ubuntu Linux. Let’s connect remotely from Windows 10 to Ubuntu Linux.
Connect Remotely Ubuntu via Windows 10
First of all try to install xRDP on Linux Ubuntu. Before installing xRDP packages try to update the Ubuntu with “apt-get update” command.
1. While you are login on Ubuntu Linux, press Ctrl+Alt+t to open the Linux Terminal and type “sudo apt-get install xrdp” then press enter. Do it like the below screenshot.
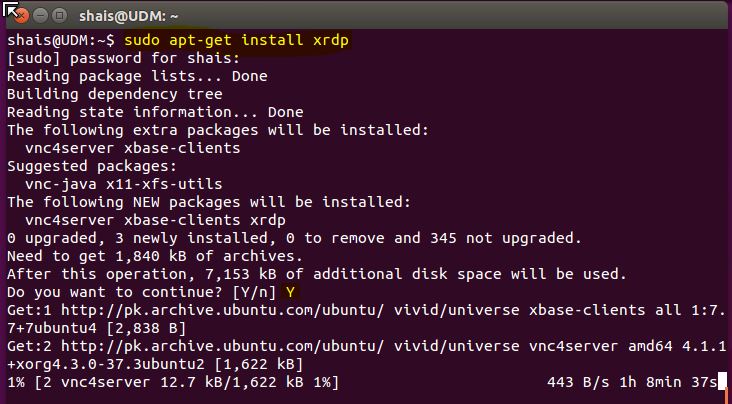
2. Let the xRDP installation process will be finished successfully. When it complete, try to install xfce4 with the “sudo apt-get install xfce4” command.

3. We need to modify the xRDP startup file to make it start automatically. Before editing xRDP startup file, try to create .xsession file in the home directory with below command.
echo xfce4-session >~/.xsession
4. Now the second file we need to edit is the startup file for xRDP, so it will start xfce4 service on startup.
“sudo nano /etc/xrdp/startwm.sh”
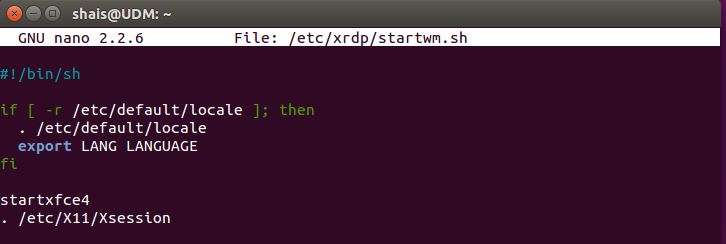
5. On the editor add the startxfce4 at the end of the code and press Ctrl+O to save it. When it’s done, once restart the xRDP service with “sudo service xrdp restart” command.
6. From Windows 10, type “mstsc” on run and press enter to open remote desktop protocol. Then type the IP address of Ubuntu Linux and click Connect.

Finally, type user name and password of Ubuntu Linux to connect it remotely from Windows 10…
This is just a simple way to connect remotely from Windows 10 to Linux and Linux to Windows 10. There is more option that helps you do the remote desktop easily. But I have tested this on xRDP and Windows 10 remote desktop.
If you have any question, just let us know from the comment section.