
Шаги обновления драйвера устройства LSI SAS 9211-8i вручную:
Основные драйверы LSI SAS 9211-8i можно получить через %%os%% или проведя обновление Windows®. Встроенный драйвер поддерживает основные функции оборудования LSI SAS 9211-8i.
Перейдите по этой ссылке, чтобы узнать, как установить эти драйверы LSI Logic.
Порядок выполнения автоматической загрузки и обновления:
Рекомендация: Как правило, большинству пользователь Windows, мы настоятельно рекомендуем выполнять обновление драйверов LSI Logic Контроллер диска с помощью утилиты для обновления драйверов, такой как DriverDoc [DriverDoc — Продукт от Solvusoft]. Данная утилита автоматически скачивает правильную версию LSI SAS 9211-8i драйвера и выполняет его обновление, предотвращая установку неправильных драйверов.
Самая приятная часть в использовании DriverDoc заключается в том, что данная утилита выполняет автоматическое обновление не только драйверов Контроллер диска, но и всех остальных драйверов на вашем ПК. Благодаря постоянно обновляемой базе, насчитывающей более 2 150 000 драйверов, вы можете быть уверены, что у нас имеются все драйверы, необходимые для вашего ПК.
Установить необязательные продукты — DriverDoc (Solvusoft) | Лицензия | Политика защиты личных сведений | Условия | Удаление
![]()
LSI SAS 9211-8i Часто задаваемые вопросы относительно обновления
Какова роль драйверов Контроллер диска LSI Logic?
По сути, драйверы — это небольшие программные приложения, которые позволяют LSI SAS 9211-8i вашего устройства «взаимодействовать» с операционной системой, а также являются залогом функциональности аппаратных средств.
Как обновить драйверы LSI SAS 9211-8i?
Обновления драйверов LSI SAS 9211-8i устройств можно выполнить вручную с помощью Device Manager (диспетчер устройств) или автоматически с помощью утилиты для обновления драйверов.
Какова совместимость операционных систем для драйверов LSI SAS 9211-8i?
Операционные системы, поддерживаемые LSI SAS 9211-8i, включают Windows.
Как узнать, когда обновлять драйверы LSI SAS 9211-8i?
Большинство компьютерных специалистов рекомендуют обновлять драйверы устройств LSI SAS 9211-8i после крупных обновлений Windows.
Осложнения обслуживания водителей
Сообщения об ошибках, связанные с LSI SAS 9211-8i, могут быть вызваны неэффективными или устаревшими драйверами устройств. Когда операционная система, от которой зависит ваше устройство, получает обновление, драйверы могут внезапно перестать работать с ней. Вам не нужно беспокоиться, потому что ваша проблема с Контроллер диска, безусловно, будет ремонтироваться с обновленным драйвером.
Это не просто, чтобы получить драйверы LSI SAS 9211-8i из-за большого и запутанного официального сайта LSI Logic. Даже для тех, кто имеет опыт поиска, загрузки и ручного обновления драйверов LSI SAS 9211-8i, процесс все равно может быть исключительно утомительным и чрезвычайно раздражающим. Установка неправильного драйвера предотвратит запуск Windows вообще или хуже, приведет к абсолютному сбою.
Существует много работы, связанной с обновлением драйверов устройств, поэтому мы настоятельно рекомендуем загрузить и установить утилиту обновления драйверов. Услуги по обслуживанию драйверов убедитесь, что ваши драйверы обновлены и что у вас есть резервная копия текущих драйверов перед загрузкой новых драйверов. Поддержание файла резервной копии драйвера является отличной функцией, которая позволяет вернуть любой драйвер обратно к предыдущей версии, в случае, если происходит что-то катастрофическое.
Топ-3 драйверов, похожих на LSI Logic LSI SAS 9211-8i (303 Модели)
-

21320-IS
-
3ware 7000
-
3ware 8000
Last update:
13.Oct.2020 (added link to download mentioned files, please see remark below; as mentioned I don’t take responsability for whatever you download from this website)
Summary
Took me 6 hours to understand how to boot into the UEFI console and to flash that damn firmware from IR to IT mode but I hope that with these instructions you’ll be able to do it within max 10 minutes (once you manage to boot it will take 30 seconds to perform the flash).
So far I’m very happy with the performance of the card but I haven’t done any hard reliability tests yet (e.g. extract a «live» drive and see how the others behave).
If you’re not interested in the background details just start reading from «Disclaimer & warning».
Requirements
I used so far a veeery old but very reliable Promise TX4 SATA 300 PCI card to have 4 additional SATA HDDs in my PC/server, but due to its bus/controller/whatever the card’s total throughput is limited to 100MB/s, which is kind of ok for casual use but is terrible when using software that does a lot of I/O => as I was replacing in this period old disks and adding as well SSDs I decided to look for a faster card.
As my servers run Linux (Gentoo) I wanted a card that was reliable under Linux and that had good drivers included in the mainline kernel — I definitely did not want to be stuck into the situation of not being able to upgrade the kernel because of the card’s drivers/modules not being compatible with newer versions. This includes applying «patches».
The card had to be able to handle at least 4 devices.
The controller shall not be Marvell!!!!!! (absolutely unreliable controllers, at least in Linux).
Max budget ~200 CHF.
Selection
It was since a couple of years that I didn’t have a look at this kind of hardware and I initially had to accept the fact that nowadays basically only Highpoint (at least in Switzerland) offers PCIE cards that have «normal» SATA-connectors/plugs attached directly to the cards.
As Highpoint’s cards use Marvell controllers and as I absolutely wanted to avoid them (I had all kind of problems with those — data lost and/or the whole array of disks going offline when just 1 had a problem) I was forced to look at those other «weird» cards that have those «SFF»-connectors I never heard about.
I didn’t do a full research but I understood that basically those connectors are just like a «1:n»-plug for HDDs/SSDs/whatever.
I found Adaptec and LSI cards (and some other server cards but I avoided them as they might not react well if they aren’t in their well-known habitat) and I ignored the ones of Adaptec as 1) from what I’ve read in the forums their Linux driver is kind of sad and 2) the driver/module has to be downloaded and compiled separately => no problem about downloading & compiling but this means that the kernel upgrade options would be limited by the compatibility of the external module as mentioned above.
The cheapest cards of LSI were the 9211-4i and the 9211-8i — the forums described them both as being reliable.
I went for the 9211-8i for 270 CHF as I don’t have a PCIEx4 on my motherboard (wouldn’t have been great to waste the PCIEx16 slot for a x4 card) and the price difference between the 4i and the 8i and my budget wasn’t too big.
I had to order additionally 2 «SFF-8087 to 4 SATA cables», for ~60 CHF (~30.- each) as the card does not have any cables included.
I went therefore ~65% over my original budget but at least this setup allowed me to connect up to 8 additional disks.
IT vs IR Firmware
The card («LSI Host Bus Adapter SAS 9211-8i») comes by default with a so-called IR firmware with the possibility to swap it to a so-called IT firmware.
IR: Integrated Raid. The card itself writes extra proprietary informations to the devices => such devices can therefore be read only by compatible HW.
IT: Initiator Target.
With IR the card itself takes control of how the data is written to the disks and how it is presented to the OS.
With IT the card acts as a pure «passthrough» presenting to the OS what is really on the disks.
I wanted to use the IT mode for various reasons (mainly no dependencies towards specific HW + wanted to have full control of performance) and I had therefore to flash the card’s firmware and load the one for the IT-mode.
This sounds very easy and it actually is, if you know how to do it.
If you want to keep using the IR-mode and are happy with the firmware’s version then you don’t have to do anything.
Disclaimer & warning
1)
These are instructions for the specific case of a normal PC having an Asus UEFI bios and SecureBoot not being used. In your specific case you might have to perform additional actions or skip others.
Especially in the case that you use SecureBoot (e.g. likely in the case of Windows10) check first how to deactivate it, deactivate it and once you’re able to boot into Windows try to update the controller’s firmware.
2)
This page is just a hint of what could be done to achieve your own target — if you execute whatever is mentioned in this page you carry the full responsability for the outcome of your actions which might include destroying the controller card and/or all data that is in/directly attached to it and/or other more indirect repercussions involving e.g. destruction of systems that are not under your direct control.
Flashing the firmware 1: preparations
1)
First plug the card into the PC without connecting it to any drives and check if the PC is still able to boot.
The card in the current IR-mode can take up an insane amount of time to start (in my case ~4 minutes in IR-mode, later in IT-mode it takes ~20 seconds), so don’t even start thinking that your PC/server is hanging if you keep staring at the «Avago» boot prompt of the card for less than 5 minutes (I thought so and put it into a second PC getting the same result).
2)
Now that you saw that you PC/server is still able to boot even with the card inserted in its slot, prepare a medium to use to boot the PC/server and update the firmware.
In my case I went for a USB-stick, which I partitioned & formatted as follows (nothing special, just a fat32+vfat partition):
# fdisk -l /dev/sdb
Disk /dev/sdb: 29.8 GiB, 32015679488 bytes, 62530624 sectors
Units: sectors of 1 * 512 = 512 bytes
Sector size (logical/physical): 512 bytes / 512 bytes
I/O size (minimum/optimal): 512 bytes / 512 bytes
Disklabel type: dos
Disk identifier: 0x0004a804

Device     Boot Start      End  Sectors  Size Id Type
/dev/sdb1  *     2048 62530623 62528576 29.8G  c W95 FAT32 (LBA)

# mount | grep -i sdb
/dev/sdb1 on /mnt/source type vfat (rw,noatime,fmask=0022,dmask=0022,codepage=437,iocharset=iso8859-1,shortname=mixed,errors=remount-ro)
3)
You have to download the firmware & bios & flashing program of the LSI card and place them on the root of the partition of the USB-stick.
4)
If you have a very old PC/server that does not have a UEFI bios you can use a normal MSDOS bootable OS like FreeDOS and that should be it.
If you have a UEFI-bios you’ll have to boot into a so-called UEFI-console, which is THE problem for normal users like me => the next instructions are only for users that have a UEFI-bios which doesn’t offer you a standard UEFI-console (apparently some «real» servers can boot on their own and go into a minimal embedded UEFI-console).
5)
Here is how the files and directories are supposed to look on the medium (in my case the USB-stick):
# tree
.
├── 2118it.bin
├── efi
│   └── boot
│       └── bootx64.efi
├── mptbios.txt
├── mptsas2.rom
├── sas2flash.efi
└── sas2flsh.exe
Place everything that you download from the site of LSI (bios + firmware + firmware flash utility) into the root directory.
(the «sas2flsh.exe» is actually not needed in the case of UEFI)
The «/efi/boot/bootx64.efi» was downloaded from here (update 13.Oct.2020: target URL «https://svn.code.sf.net/p/edk2/code/trunk/edk2/EdkShellBinPkg/FullShell/…» became invalid) which is mentioned in this post and which I renamed to «bootx64.efi».
You won’t be able to boot without this mistery-file if your BIOS (server) does not offer to boot directly into a UEFI-console (took me 5.5 hrs to understand this).
I have a private copy of the holy «bootx64.efi» here (update 13.Oct.2020: target URL became invalid) which you can download if the original one in github is not available anymore and you trust my website to not have become corrupted (and you shouldn’t).
UPDATE 13.Oct.2020
a zipfile containing all files that I had on by USBstick can be downloaded here (the firmware version might be old => check on LSI’s website if you can find a newer one).
I moved this site 6 months ago and noticed only now that I lost the files there were referenced in the original article => now you should have everything.
The MD5 hash of the zipfile is supposed to be «07ab8e48c967ba6ccf7297a4e450110e» (but if somebody managed to hack my server and change the zip then that person will probably have changed as well the md5 mentioned here => use this only as a last resort!).
You’re basically done!
Flashing the firmware 2: Boot into the UEFI shell
When you reboot press F8 or whatever to select the device to boot from => you should see your USB-stick listed maybe even twice once as «UEFI: » and just «»
Select the «UEFI»-variantand boot.
Hopefully you’re now in a type shell that you’ve never ever seen before, which is a UEFI-shell?!
If you’re not then you’re on your own (with the exception of SecureBoot — see next line).
BUT if you have SecureBoot enabled maybe your UEFI bios isn’t very happy that you’re trying to boot something that is trying to access it (I don’t really understand the whole theme) and will stop you from booting from the USB-stick => if that’s the case you’ll have to disable SecureBoot (which in my case with Asus I did by telling the BIOS-menu to save my keys (on the same USBstick that I was using to change the card’s firmware) and by deleting the Primary Key and selecting «other OS»).
If you then do a 2nd attempt you should be able to get to the UEFI-shell.
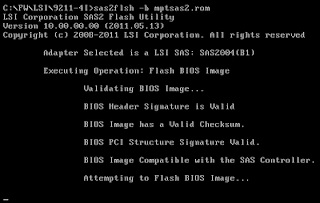
Flashing the firmware 3: flash!
At this point you should finally be in the UEFI-shell, eeeehhhh!
As shown here you should go to the USB stick by typing «fs0:» (similar to when you want to change drive in a Windows cmd prompt with e.g. «d:»).
Then after checking with «dir» that you see all the files that you have originally downloaded from LSI’s website you should check with «sas2flash.efi -list» if you can see your card.
If you do see your card then erase its current firmware with «sas2flash.efi -o -e 6» and then write the new one with «sas2flash.efi -o -f 2118it_hey.bin -b mptsas2_hey.rom» (I have added the «_hey» just to avoid that you flash junk into your card as you might use these instructions e.g. for other card models)
If you have multiple cards then select the appropriate one using the appropriate option (e.g. «-c «)!!
Check the output and check again with «sas2flash.efi -list» that you can see your card and that the versions are all matching your desired result.
Reboot (should be much faster now in IT-mode) and if you want get into the card’s BIOS => it should look very different compared to before.
Took me 6 hours to figure out all this (I always tried to ignore as much as I could about UEFI and SecureBoot).
Linux
The module to use is «mpt3sas«, which as of kernel 4.9.6 is included in the reference kernel (therefore nothing extra to download nor compile) under «Device Drivers —>SCSI device support —>SCSI low-level drivers —>LSI MPT Fusion SAS 3.0 & SAS 2.0 Device Driver».
The command "lspci -k" returns the following for my card:
02:00.0 Serial Attached SCSI controller: LSI Logic / Symbios Logic SAS2008 PCI-Express Fusion-MPT SAS-2 [Falcon] (rev 03)
    Subsystem: LSI Logic / Symbios Logic SAS2008 PCI-Express Fusion-MPT SAS-2 [Falcon]
    Kernel driver in use: mpt3sas
    Kernel modules: mpt3sas
Don’t spontaneously compile the module into the kernel itself otherwise you’ll probably get a kernel panic during boot as the order or devices will be swapped (e.g. «sda» will become «sde», making grub & co. try to find your root partition on the wrong disk).
Cannot say much about performance and temperature — so far the max load on the card were only ~30seconds spikes of ~200MB/s on a single HDD with basically 1% CPU consumption.
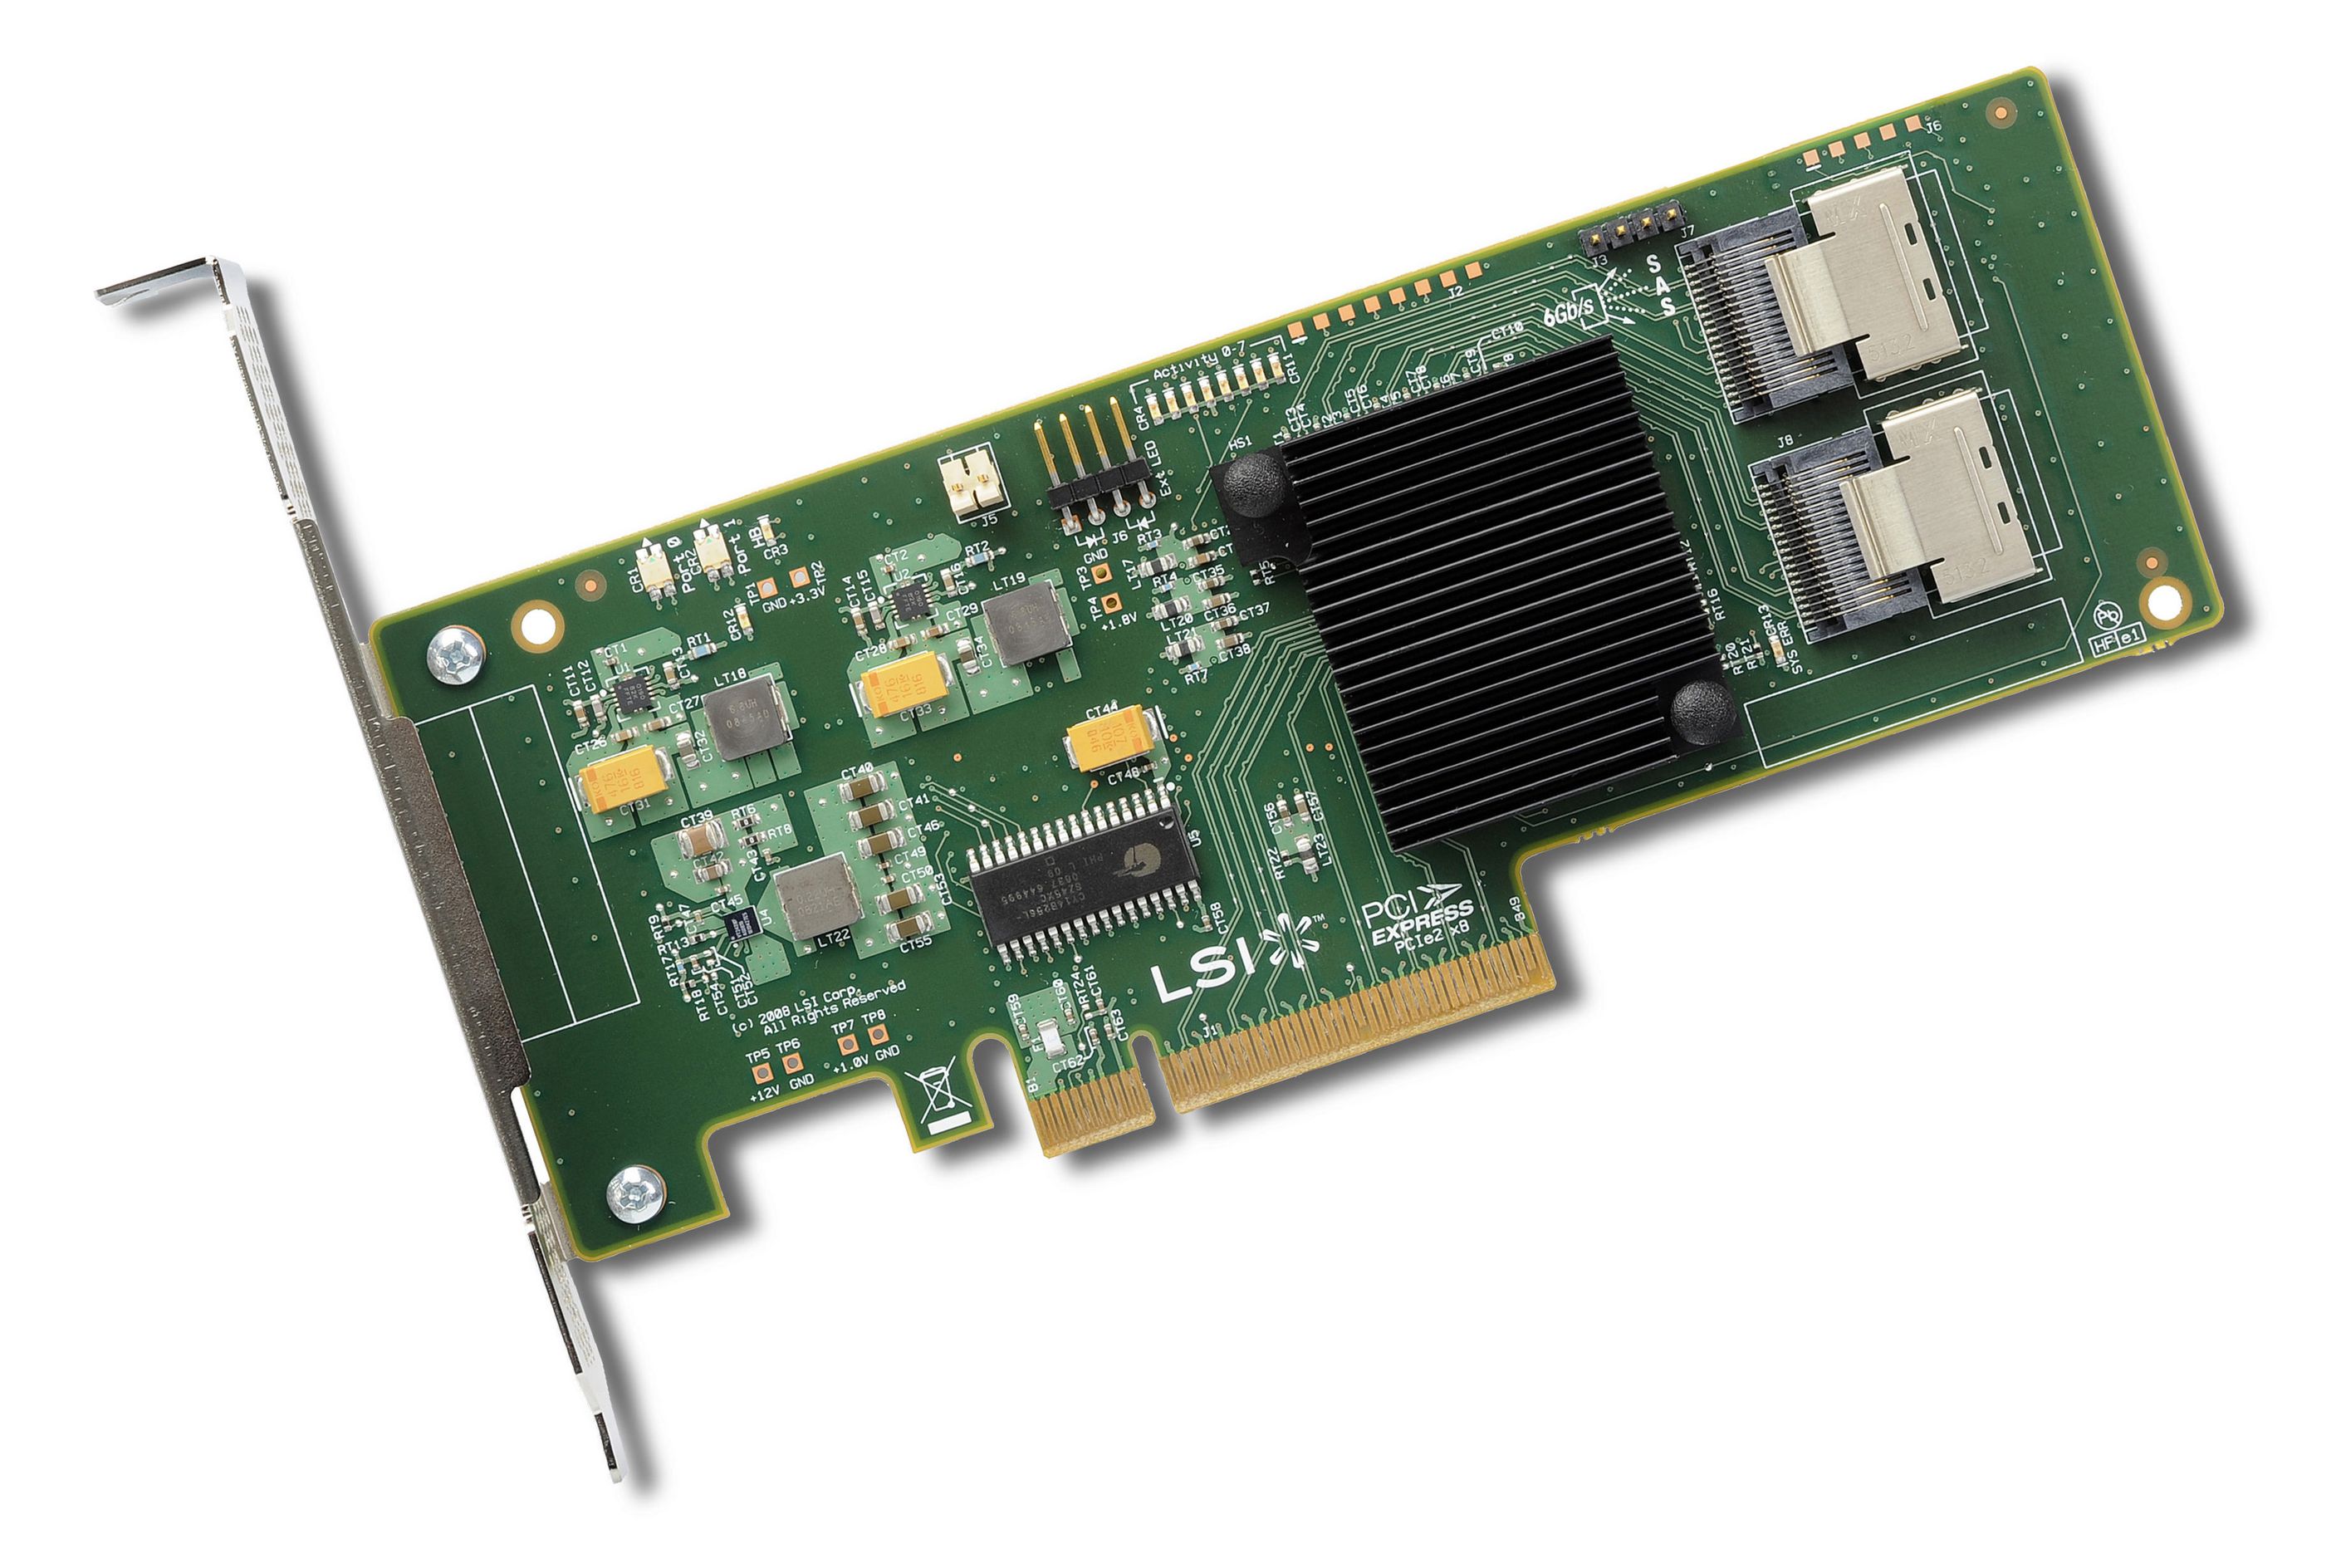
LSI 9211-4/8i: шьем в IT-стек
LSI 9211-4i и 9211-8i — это контроллеры 6Гбит SAS HBA на четыре и восемь портов соответственно, подробнее — тут.

Пользуются популярностью за неприхотливость и хорошую производительность в сочетании с программным RAID (да, все правильно, RAID средствами mdadm или ZFS может быть быстрее аппаратного LSI 9260 в случае использования SSD, т.к. возможности чипа LSI 2108 небезграничны — лимит по IOPS составляет порядка 150000 IOPS при использовании SSD и Fastpath, а у 9211 — 290000 IOPS). Естественно, в случае программного RAID, нам нужен обычный HBA и никакие интегрированные возможности прошивки не нужны.
Контроллеры LSI 9211 поставляются с прошивкой iR, т.е. «Integrated RAID» стеком. IR-стек позволяет создавать массивы RAID 0, 1, 1E, 10 средствами контроллера — аппаратный RAID, но с существенными ограничениями: максимум два массива, максимум 10 дисков в одном массиве, но не больше 14 (12 + 2 hot-spare) всего. С подобными характеристиками напрашивается обычно только одно применение — в недорогих серверах с 4-8 дисками, но возможно и прямо наоборот — производительный NAS или узел SAN под управлением Nexenta или FreeNAS (который в 8-й версии уже не ориентирован на домашнее использование) с несколькими десятками дисков, с SSD в качестве кэша. Создавать RAID средствами контроллера совсем необязательно, но накладные расходы в виде небольшого снижения производительности (порядка 3-5% на чтение и запись малыми блоками) останутся
Все, что нужно сделать для избавления от IR-стека — сменить прошивку на IT-стек (Initiator-Target, т.е. обычный HBA). Итак, порядок действий:
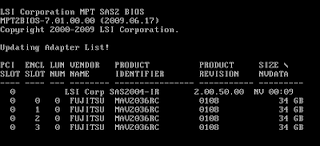
- Качаем свежий firmware пакет с сайта LSI. Для 9211-4i — тут. Прошивать можно из под Windows, Linux, Solaris, VMware ESX и даже EFI оболочки, но самый простой путь — под чистым DOS’ом. Текущая версия firmware-пакета — 10, внутри архива будут: sas2flsh.exe — утилита для работы с контроллерами LSI, образы BIOS и firmware (в контроллерах на базе LSI 2008 bios и fw шьются отдельно

Изначальные версии bios и fw. Обратите внимание на «SAS2004-IR» в колонке «Product Identifier» — контроллер работает с IR-прошивкой - Делаем флешку с DOS’ом, копируем все что нужно и грузимся с нее
- Готовим ручку с блокнотом и запускаем
sas2flsh -o -listsasadd
Данная команда выводит SAS-адрес контроллера — запишите его слитно, на дефисы не обращайте внимания.

- Дальше нужно затереть весь флэш контроллера:
sas2flsh -o -e 7
- Шьем новый firmware:
sas2flsh -o -f 2114it.bin
- Шьем bios:
sas2flsh -b mptsas2.rom
- Так как мы предварительно затерли все, включая MPB блок, то контроллер «забыл» свой SAS WWN. Берем блокнот с записанным SAS адресом и вводим его после команды:
sas2flsh -o -sasadd
- Перезагружаемся


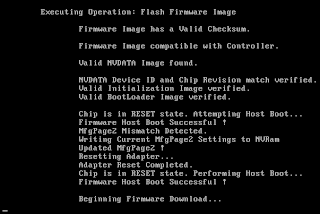

Проверяем версии BIOS и firmware:

Вышеописанная процедура справедлива для SAS контроллеров Supermicro на базе чипа LSI 2008, как отдельных (AOC-USAS2-L8i — поставляется с IR стеком, AOC-USAS2-L8iR — стек iMR, AOC-USAS2-L8E — стек IT), так и интегрированных (поставляются с iR стеком, можно прошить в iMR при наличии аппаратного ключа iButton или в IT стек).
Пакет с firmware лежит на ftp-сервере Supermicro, все вышеописанные процедуры уже прописаны в bat-файлах, единственное отличие: для контроллеров, на которых прошит iMR стек, сначала нужно запустить файл wir.bat для прошивки SBR-блока и перезагрузиться.

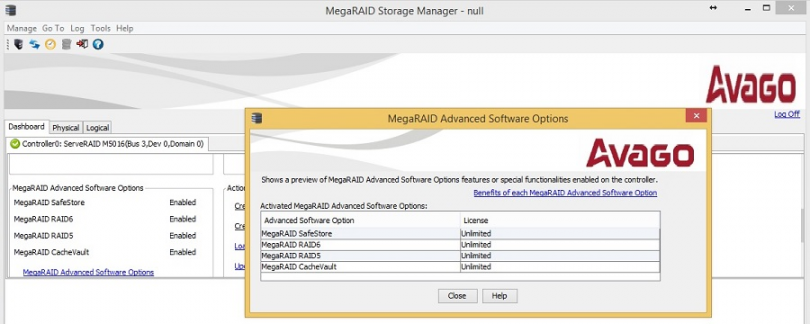
MegaRAID Storage Manager мне нужен для того, чтобы воткнуть в свой комп RAID контроллер и прошить его перед установкой в сервер. Прикрепляю к статье интерактивное руководство. MegaRAID Storage Manager есть под разные операционные системы. Будем устанавливать версию для Windows.
Ссылки
Интерактивное руководство В хроме подглючивает, открываете через Firefox.
Avago MegaRAID SAS 9380-8i8e
Более новая софтина: LSI Storage Authority Software
Установка MegaRAID Storage Manager
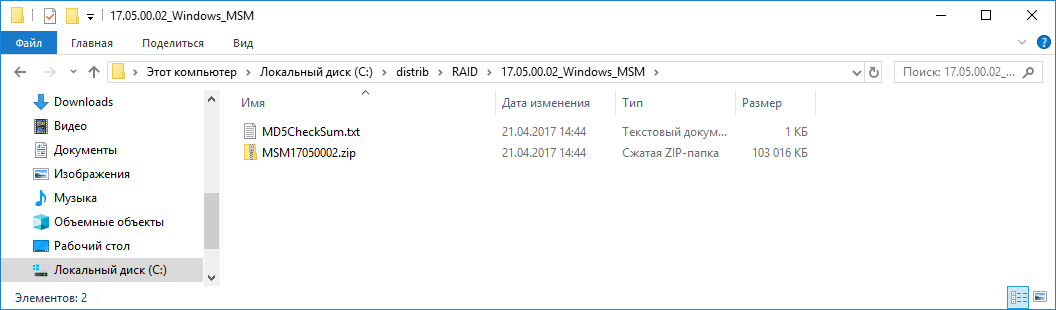
Качаем MegaRAID Storage Manager.
https://www.broadcom.com/products/storage/raid-controllers/megaraid-sas-9380-8i8e#downloads
Я скачал версию 7.05.00.02.

Данная версия поддерживает контроллеры:
- RAID
- MegaRAID SAS 9362-4i
- MegaRAID SAS 9362-8i
- MegaRAID SAS 9361-4i
- MegaRAID SAS 9361-8i
- MegaRAID SAS 9363-4i
- MegaRAID SAS 9380-8e
- MegaRAID SAS 9381-4i4e
- MegaRAID SAS 9361-8iCC
- MegaRAID SAS 9380-8eCC
- MegaRAID SAS 9364-8i
- MegaRAID SAS 9340-8i
- MegaRAID SAS 9341-8i
- MegaRAID SAS 9341-4i
- MegaRAID SAS 9270-8i
- MegaRAID SAS 9271-4i
- MegaRAID SAS 9271-8i
- MegaRAID SAS 9271-8iCC
- MegaRAID SAS 9286-8e
- MegaRAID SAS 9286CV-8e
- MegaRAID SAS 9286CV-8eCC
- MegaRAID SAS 9265-8i
- MegaRAID SAS 9285-8e
- MegaRAID SAS 9240-4i
- MegaRAID SAS 9240-8i
- MegaRAID SAS 9260-4i
- MegaRAID SAS 9260CV-4i
- MegaRAID SAS 9260-8i
- MegaRAID SAS 9260CV-8i
- MegaRAID SAS 9260DE-8i
- MegaRAID SAS 9261-8i
- MegaRAID SAS 9280-4i4e
- MegaRAID SAS 9280-8e
- MegaRAID SAS 9280DE-8e
- MegaRAID SAS 9280-24i4e
- MegaRAID SAS 9280-16i4e
- MegaRAID SAS 9260-16i
- MegaRAID SAS 9266-4i
- MegaRAID SAS 9266-8i
- MegaRAID SAS 9285CV-8e
- MegaRAID SAS 8704ELP
- MegaRAID SAS 8704EM2
- MegaRAID SAS 8708ELP
- MegaRAID SAS 8708EM2
- MegaRAID SAS 8880EM2
- MegaRAID SAS 8888ELP
- MegaRAID SAS 8308ELP*
- MegaRAID SAS 8344ELP*
- MegaRAID SAS 84016E*
- MegaRAID SAS 8408E*
- MegaRAID SAS 8480E*
- MegaRAID SATA 300-8ELP*
- HBA
- LSI SAS 9211
- LSI SAS 9212
- LSI SAS3041E-R
- LSI SAS3041X-R
- LSI SAS3080X-R,
- LSI SAS3081E-R
- LSI SAS3442E-R
- LSI SAS3442X-R
- LSI WarpDrive SLP-300
- 9212 4i4e-R spec
- 9211-8i/4i-R spec
- LSI Nytro WarpDrive WLP4-200
- LSI Nytro WarpDrive WLP4-400
- LSI Nytro WarpDrive BLP4-400
- LSI Nytro WarpDrive BLP4-800
- LSI Nytro WarpDrive BLP4-1600
- LSI Nytro XD BLP4-400
- LSI Nytro XD BLP4-800
- LSI SAS 9207-4i4e
- LSI SAS 9217-4i4e
- LSI SAS 9207-8i
- LSI SAS 9217-8i
- LSI SAS 9207-8e
- LSI SAS 9201-16e
- LSI SAS 9200-8e
* Контроллеры предыдущих версий должны работать, но не тестировались.
Работает в ОС 32 и 64 бит:
- Windows* 2000
- Windows* 2003
- Windows* XP
- Windows* Vista
- Windows* 2008
- Windows* 7
- Windows* 8
Распаковываем архив:
Запускаем setup.exe.
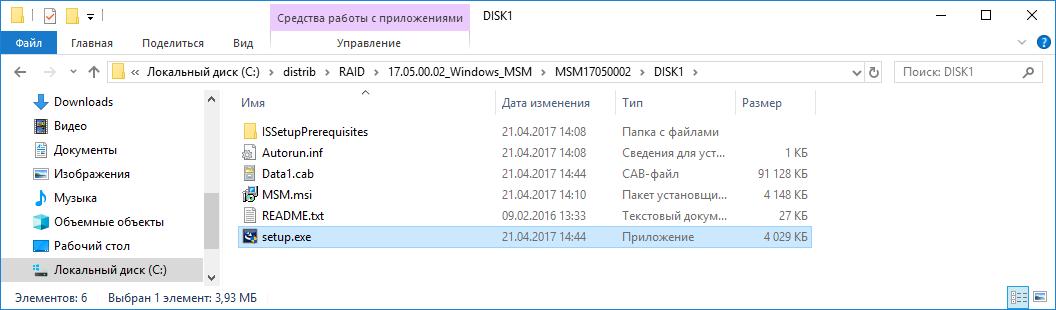
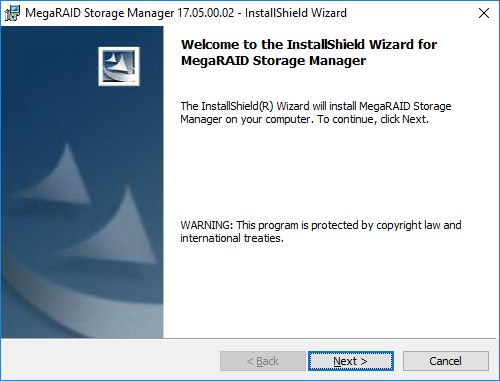
Запускается инсталлятор.
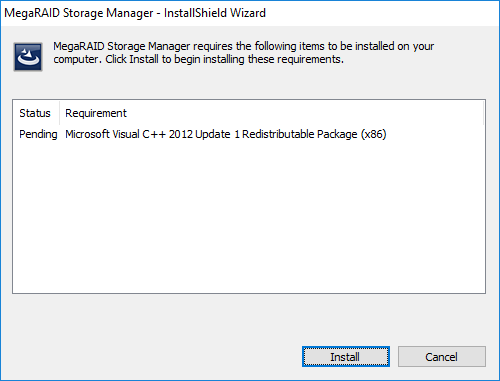
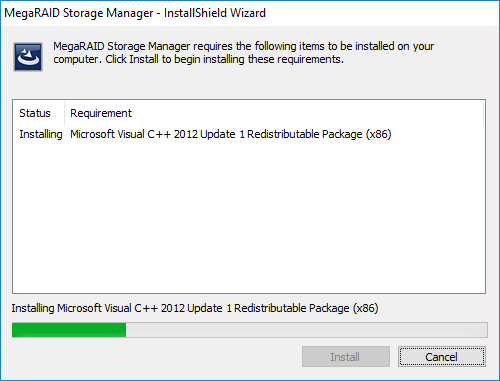
Install. Требуется C++ пакет.
Условия установки соблюдены. Открывается окно мастера установки.
Next.
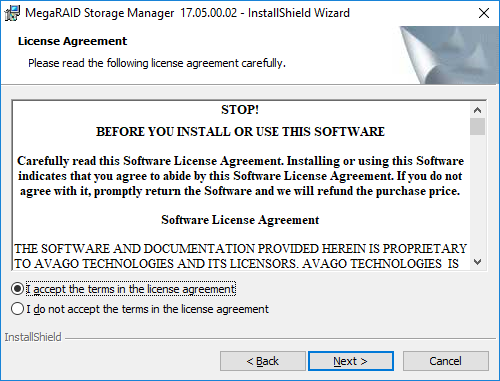
Принимаем лицензионное соглашение. Next.
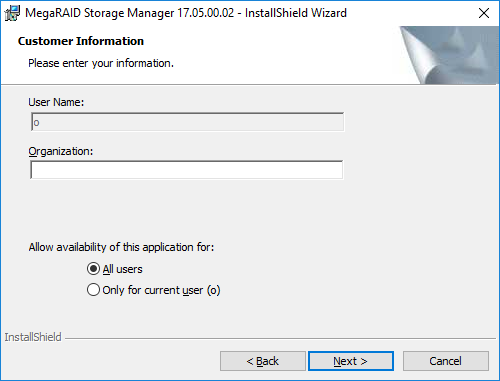
Я выбираю установку для всех пользователей. Next.
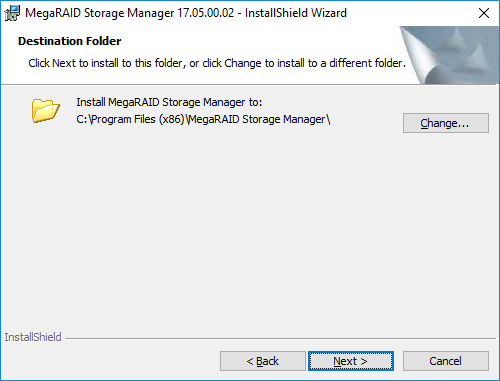
Можно сменить папку установки. Next.
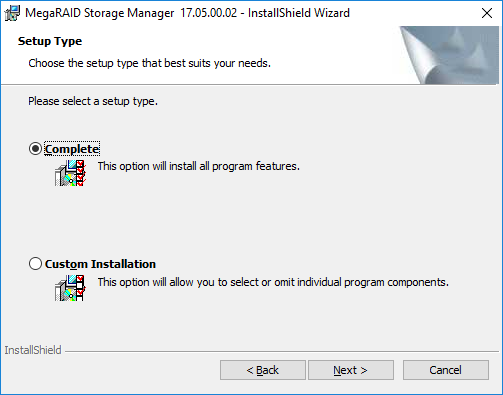
Выбираю обычную установку. Next.
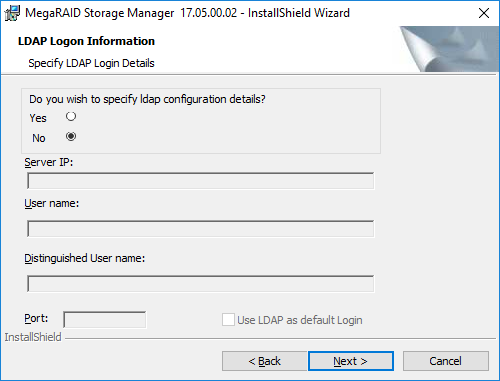
Предлагают настроить LDAP, забиваю. Next.
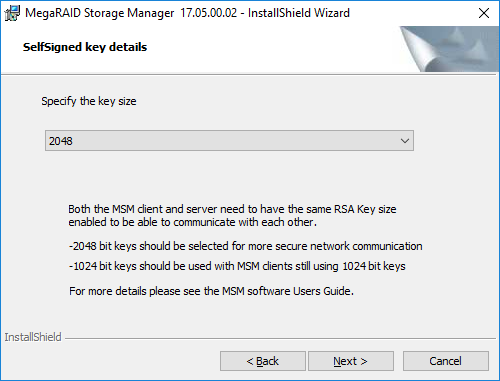
Указываем размер ключа. Поскольку я на своей же машине буду шить контроллер, то эта опция — по барабану. Next.
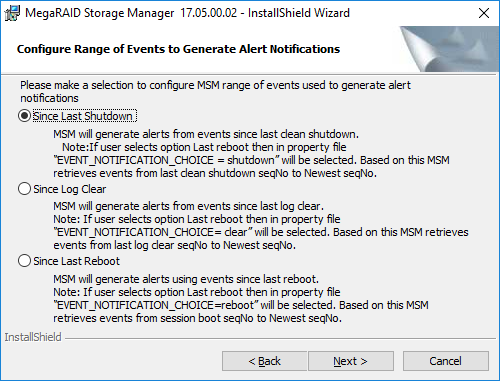
Вот тут я подвис и оставил значение по умолчанию. Это настройка диапазона времени, за которое выводить уведомления. Мне оно не нужно. Next.
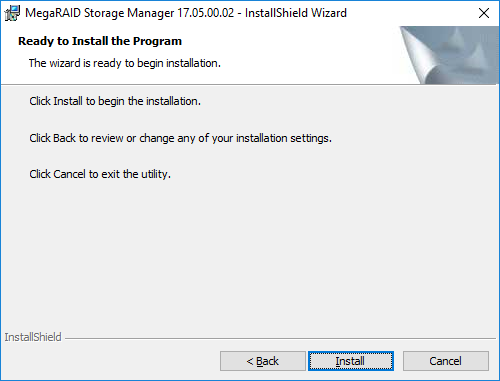
Эта страница предназначена только для того, чтобы нажать кнопку Install или не нажать. Идиотизм.
Начинается установка.
Установка завершена. Finish.
На рабочем столе появляется иконка MegaRAID Storage Manager. Для работу нужна java.