Вторая версия премиального набора Big Sur. От первой отличается более детальной проработкой и несколько переработанными элементами интерфейса. В архиве на данный момент находится исключительно визуальный стиль и две версии обоев: темная и светлая. Позднее, автор опубликует полный релиз с дополнительными ресурсами.
Как и всегда, изначально тема доступна для ограниченного круга лиц и находится в стадии Beta. Полный релиз намечен на октябрь этого года.
UPD 24.11.2020: Обновлены стили для Curtains.
UPD 23.11.2020: Правки для панели задач, а также релиз темы для Stardock Curtains Style.
UPD 22.11.2020: Состоялся общедоступный релиз темы. Обновлен архив, добавлено множество ресурсов.
Поддержка версий Windows 10: 22H2, 21H2, 21H1, 2009, 2004, 1909, 1903
- Скачайте и распакуйте архив big_sur.zip с помощью 7zip.
- Если Вы устанавливаете темы первый раз: пропатчите систему с помощью UltraUXThemePatcher.
- Переместите файлы *.theme, а также папку с содержанием ресурсов *.msstyles по адресу: C:WindowsResourcesThemes.
- Нажмите в пустой области на рабочем столе и выберите пункт «Персонализация» в контекстном меню.
- Перейдите в раздел «Темы» и примените добавленную тему.
- Установка завершена!
Обратите внимание! Для установки кнопки пуск, панели быстрого доступа и других ресурсов Вам потребуются специальные программы. Ссылки на них указаны в блоке «Дополнения». Чтобы узнать версию системы, нажмите сочетание клавиш «Win+R» (где «win» — это кнопка с логотипом windows на клавиатуре), а затем в окне «Выполнить» введите команду «winver» и нажмите Enter (или кнопку «ОК»).
1. Install ThemeTool.exe
Releases · namazso/SecureUxTheme
🎨 A secure boot compatible in-memory UxTheme patcher — namazso/SecureUxTheme
GitHubnamazso
- Run the ThemeTool.exe by Administrator
- Select «Hook LogonUI» only
- Then click on «Install»
- Reboot the computer to apply the changes.
2. Download Big Sur theme
Big Sur Windows 10 Suite — Enable Windows 10 Theme Customization
Do you want new style in your desktop? Here is the new theme for Windows 10 users. This is realy awsome theme, enjoy it and have fun! Operating System Support: Windows 10 : 1903 – 2004 , (Not tested on older and new builds) Author : niivu Note : First it is recommended you make […]
Enable Windows 10 Theme Customization
- Unzip the downloaded zip
- Go to path «ThemesThin Taskbar»
- Copy all theme/files inside the folder
- Paste theme files to «C:WindowsResourcesThemes»
- Open the ThemeTool.exe in the step (1) by Administration again
- Select any «Big Sur» theme you like
- Click «Patch and apply»
3. Change Desktop Background to Mac OS Big Sur 4k Wallpaper
macos big sur wallpaper 4k — Penelusuran Google
Penelusuran Google
4. Change Windows Icons to Big Sur Theme
- Download Macpac Icon Theme
https://www.deviantart.com/niivu/art/macpac-Icon-Theme-801554621
- Unzip the file and remove the file tail «.remove» then the file’s name changed to «.7z»
- Download 7TSP GUI 2019 Edition
https://www.deviantart.com/devillnside/art/7TSP-GUI-2019-Edition-804769422
- Change the file name «.ee» to «.exe» to execute the file.
- Open the file «7tsp GUI v0.6(2019).exe»
- Select «Add a Custom Pack»
- Choice the file «.7z» of Macpac Icon Theme
- Click «Start Patching»
- Reboot the computer to apply the changes.
5. Install Widgets
- Install the Rainmeter
- Download Theme for Rainmeter
https://www.deviantart.com/fediafedia/art/Big-Sur-BETA-3-for-Rainmeter-846882462
- Unzip and click on «BigSur.rmskin» to install the theme.
- Top bar Widget: droptop four by Cariboudjan on DeviantArt
6. Install Dock
- Download Rocket Dock
Punk Labs
We make games, apps, things and stuff.
Punk Labs
- Install Rocket Dock Skin
https://www.deviantart.com/maiguris/art/macOS-BigSur-For-RocketDock-847338077
- Unzip the Rocket Skin zip file then copy all folder to the Rocket Dock skins «C:Program Files (x86)RocketDockSkins»
- Open Dock Setting (by right click) then change Position to «Bottom» and Style to «Big Sur»
- Now you can go to task bar setting and hide it
- Remove the default icon/app in the Dock.
- Copy icons in «macOS BigSur ICONS by Maiguris» (folder inside the skins zip above) to «C:Program Files (x86)RocketDockIcons».
- Add Items to the Dock by Icon and Setting Open Program by Path.
7. Change the Mouse Cursor
https://www.deviantart.com/diamond8fighter/art/macOS-cursors-for-Windows-849162315
- Right click on «.Install.inf» and click «Install»
- Go the the mouse setting (additional mouse options) and change the theme
All software in this post you can easily download here
https://drive.google.com/file/d/1EunXnyq8CGDu9_H7UCczATdi6jHQTUt6/view?usp=sharing
Mac themes are popular with users because they are beautiful, simplistic and functional. Windows users who wish to use Mac themes on their system can install a simple Mac theme pack which will transform Windows into a Mac environment.
Here is a list of the top trending Mac themes that can be applied on your Windows PC to get the full Mac experience. Both Windows 11 and Windows 10 can be customized with these themes.
Table of contents
- Apple Operating Systems with Release Year
- MacOS Themes and Skin Packs for Windows
- MacOS Monterey Skinpack (Lite)
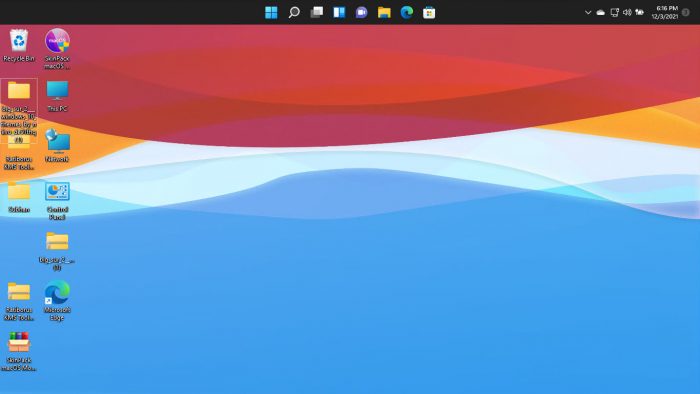
- MacOS Big Sur 2
- MacOS Catalina (Lite)
- MacOS Mojave (Lite)
- MacOS Transformation Pack
- MacOS UX Pack
- Closing Words
Apple Operating Systems with Release Year
The list below states Apple’s operating systems released over the last few years along with its year of release at the time of writing this post, going from the latest to the oldest. This will help you determine the right theme/skin pack for Windows in the next section of this post.
- MacOS Monterey – 2021
- MacOS Big Sur – 2020
- MacOS Catalina – 2019
- MacOS Mojave – 2018
- MacOS High Sierra – 2017
- MacOS Sierra – 2016
- OS X El Capitan – 2015
- OS X Yosemite – 2014
- OS X Mavericks – 2013
- OS X Mountain Lion – 2012
Proceed to the next section to download and install the hottest MacOS themes for Windows that we think you should try out. Please note that we are not discussing themes for all Apple operating systems, only the ones we believe may be suitable for you.
The application of custom themes and skin packs can adversely affect the performance of the system. Therefore, it is recommended that you only use these themes if performance is not your primary concern.
MacOS Themes and Skin Packs for Windows
MacOS Monterey Skinpack (Lite)
You can download the MacOS Monterey Skinpack (Lite) from this link. It is completely free to use. However, the setup file is password protected, therefore, you will also need to download the Password.txt file to view and enter the password.
Once downloaded, run the file to extract it. The setup will then be extracted into the same folder. Run the extracted setup file and follow through with the installation wizard as instructed. When finished, the theme will be installed.
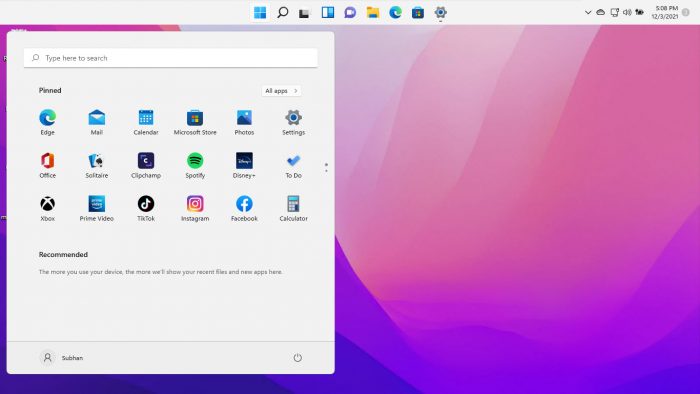
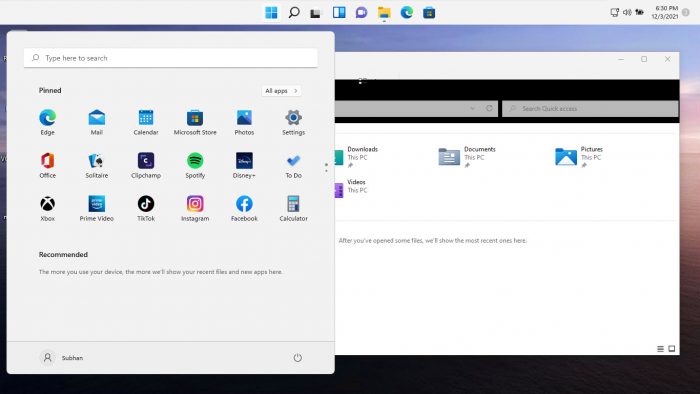
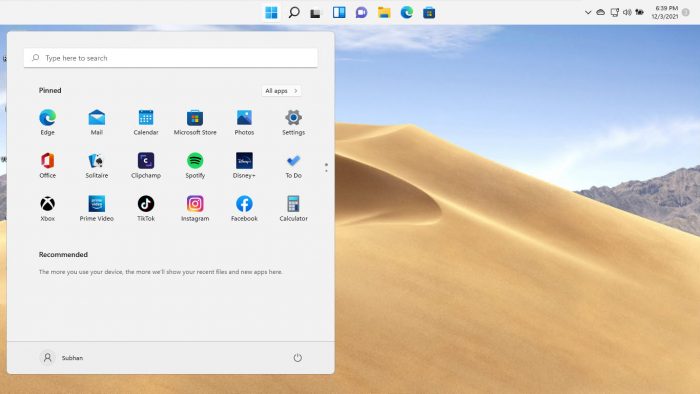
The Monterey skin pack shifts the Taskbar to the bottom and also makes a few changes to the alignment of elements. For example, the Start Menu has been shifted to the left from the previous center alignment in Windows 11.
MacOS Big Sur 2
Installing Big Sur 2 on a Windows computer is a bit different from Monterey Skinpack (Lite). The downloaded contents (compressed) are provided separately. Meaning, mouse cursors are given separately, themes individually, etc. Each component that will modify the Windows default settings for MacOS Big Sur is given separately and will need to be configured through the Settings app.
To download Big Sur 2, visit this DevianArt page. Note that you will need to register on the website (for free) to download this theme.
MacOS Catalina (Lite)
Note: This theme pack has some minor issues which we hope will be fixed in a future release.
MacOS Catalina is the same as the MacOS Monterey Skinpack, which we have discussed earlier. It shifts the Taskbar to the top, realigns the start menu, and changes the mouse cursor/pointer.
You can download MacOS Catalina (Lite) from this link.
MacOS Mojave (Lite)
MacOS Mojave provides a slightly different theme layout than what we have already discussed. Not only that, but it also supports a few other features as the real MacOS does! This includes running widgets, grouping different windows in the task bar of the same type, etc.
To download the MacOS Mojave (Lite) theme, visit this page.
MacOS Transformation Pack
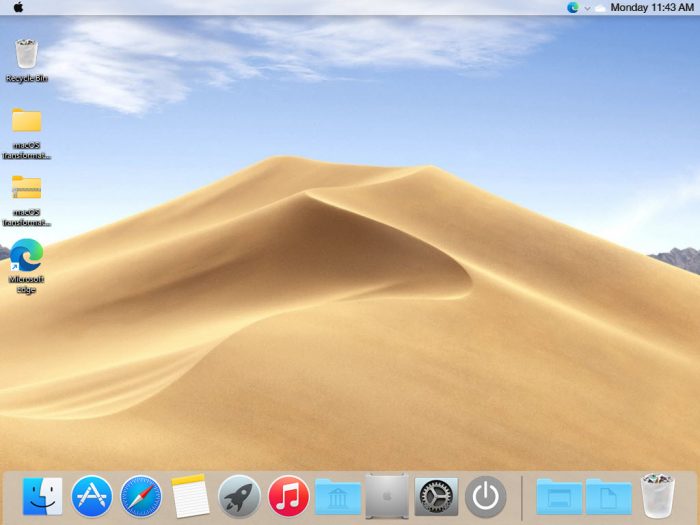
The MacOS Transformation Pack includes Mac themes, wallpapers, fonts, sounds, Dock, Launchpad, and much more. It also brings MacOS default applications to the Windows environment, such as Safari, Finder, etc. It gives the fill Mac experience while providing the functionality of a Windows machine.
Note that this theme pack is relatively larger than the other themes we have discussed so far. Therefore, it may impact your system’s performance more than them. Also, the installation of this pack requires your system to reboot.
To install MacOS Transformation Pack, start by extracting the contents of the file and then running the setup file. You will be asked to reboot your machine. Once it reboots, run the setup file again and follow through with the installation wizard. Once installed, the computer will need to be rebooted again.
You will then be able to see the full capability of this pack. Click here to download MacOS Transformation Pack for Windows. A password will be required to extract the contents of the compressed folder, which is also given on the download page.
MacOS UX Pack
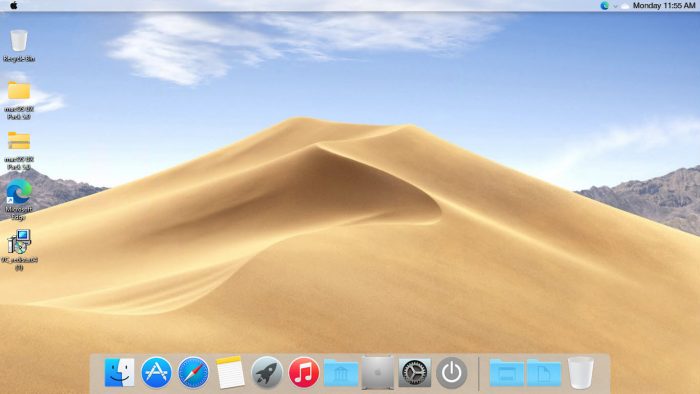
The MacOS UX Pack offers similar features and apps to the MacOS Transformation Pack discussed earlier. However, the UX Pack provides a more Yosemite experience. Furthermore, it also provides themes, logon screens, and iOS 8 pictures.
The contents of the downloaded (compressed) file must be extracted using a password before the installation process. You may then install the MacOS UX Pack. However, it does not require you to reboot your computer.
Click here to download MacOS UX Pack for Windows.
Closing Words
The MacOS themes and skin packs we have discussed in this post are applicable to both Windows 10 and Windows 11, since they both share the same core operating files.
The internet is full of different themes for you to choose from. However, we have only highlighted the ones we thought you should check out for yourself.
If you have gone through the native wallpapers and themes on a Windows machine which that Microsoft offers, it may be time to test these MacOS themes now, just to keep things interesting.
Also see:
Subhan Zafar is an established IT professional with interests in Windows and Server infrastructure testing and research, and is currently working with Itechtics as a research consultant. He has studied Electrical Engineering and is also certified by Huawei (HCNA & HCNP Routing and Switching).
Skip to content
Apple has recently released the new version of their flagship operating system macOS. The new version of macOS is being called Big Sur. If you are not an Apple user and are using a Windows PC, then you can also get some fun by making your Windows 10 PC look like macOS Big Sur.
If you want to make your Windows 10 PC look like the latest version of Apple macOS Big Sur then you can follow these steps:
- Download and install RocketDock from https://punklabs.com/.
- Download macOS Big Sur pack for RocketDock from https://www.deviantart.com/maiguris/art/macOS-BigSur-For-RocketDock-847338077.
- From the downloaded ZIP file, extract all the folders beginning with Big Sur into C:Program Files (x86)RocketDockSkins. Similarly, extract the icons folder from the ZIP to any folder on your hard drive.
- Right-click on RocketDock and choose Dock Settings. In the settings, select Style section and then choose any of the Big Sur themes – Big Sur Light, Big Sur Night, Big Sur RoundedNight, Big Sur RoundedLight.
- Right-click on RocketDock, choose Icon settings, click on the + icon and add the icon folder from step 3. Select the newly added folder and click OK.
- Right-click on Windows Taskbar and select Taskbar settings. Select the option, Automatically hide the taskbar in desktop mode. This will hide the taskbar on your Windows desktop.
- In the RocketDock settings, select Position section and choose Bottom as screen position.
- Download Windows 10 themes from https://www.deviantart.com/niivu/art/Big-Sur-Windows-10-Suite-849525656. Extract the contents of Themes folder from the ZIP into C:WindowsResourcesThemes.
- Download UltraUxThemePatcher from https://mhoefs.eu/software_uxtheme.php. Use this to patch your theme files in Windows 10.
- Restart your Windows PC and choose macOS Big Sur themes by right-clicking on Windows desktop and choosing Personalization.
This is it, now you have macOS Big Sur theme installed on your Windows 10 PC complete with a dock. Now your Windows PC must be looking like macOS Big Sur. For extra effect, you can even change the wallpaper to macOS wallpapers which are available all over the internet.
We use cookies on our website to give you the most relevant experience by remembering your preferences and repeat visits. By clicking “Accept”, you consent to the use of ALL the cookies.


