Содержание
- In-place upgrade recommendations
- Prepare for upgrade
- Battery checks
- Battery check example
- Network/wired connection checks
- Network check example
- Remove incompatible applications
- Remove incompatible drivers
- Remove/suspend third-party security
- Download Package Content task sequence step
- Post-processing
- Apply setup-based drivers
- Install/enable third-party security
- Set Windows default apps and associations
- Apply customizations and personalization
- Rollback
- Run actions on failure
- Collect logs
- Run diagnostic tools
- Other recommendations
- Windows documentation
- Check minimum disk space
- Retry downloading policy
- Do an inline compatibility assessment
- Convert from BIOS to UEFI
- Manage BitLocker
- Remove default apps
- Next steps
- Что нового в развертывании Windows 10
- Требования к оборудованию, совместимость приложений
- Internet Explorer
- Варианты развертывания
- Wipe-and-Load
- In-Place
- Provisioning
In-place upgrade recommendations
Applies to: Configuration Manager (current branch)
The default task sequence template for Windows in-place upgrade includes groups with recommended actions to add before and after the upgrade process. These actions are common among many customers who are successfully upgrading Windows on devices. This article provides information about these recommended steps during different phases of the upgrade process.
Prepare for upgrade
If you have an existing task sequence that doesn’t already have these actions, manually add them to your task sequence in the Prepare for Upgrade group.
Battery checks
Add steps in this group to check whether the computer is using battery, or wired power. This action requires a custom script or utility to run this check.
Battery check example
Use WbemTest and connect to the rootcimv2 namespace. Then run the following query:
If it returns any results, then the device is running on battery. Otherwise, the device is connected to wired power.
Network/wired connection checks
Add steps in this group to check whether the computer is connected to a network, and isn’t using a wireless connection. This action requires a custom script or utility to run this check.
Network check example
Use WbemTest and connect to the rootcimv2 namespace. Then run the following query:
Select * From Win32_NetworkAdapter Where NetConnectionStatus = 2 and PhysicalAdapter = ‘True’ and NetConnectionID = ‘Wi-Fi’
If it returns any results, then the device is running on Wi-Fi. Otherwise, the device is connected to wired network connection.
Remove incompatible applications
Add steps in this group to remove any applications that are incompatible with the target version of Windows. The method to uninstall an application varies.
If the application uses Windows Installer, copy the Uninstall program command line from the Programs tab on the Windows Installer deployment type properties of the application. Then add a Run Command Line step in this group with the uninstall program command line. For example:
Remove incompatible drivers
Add steps in this group to remove any drivers that are incompatible with the target version of Windows.
Remove/suspend third-party security
Add steps in this group to remove or suspend third-party security programs, such as antivirus.
If you’re using a third-party disk encryption program, provide its encryption driver to Windows Setup with the /ReflectDrivers command-line option. Add a Set Task Sequence Variable step to the task sequence in this group. Set the task sequence variable to OSDSetupAdditionalUpgradeOptions. Set the value to /ReflectDrivers with the path to the driver. This task sequence variable appends the Windows Setup command-line used by the task sequence. Contact your software vendor for any further guidance on this process.
Download Package Content task sequence step
Use the Download Package Content step before the Upgrade Operating System step in the following scenarios:
You use a single upgrade task sequence for both x86 and x64 platforms. Include two Download Package Content steps in the Prepare for Upgrade group. Set conditions on each step to detect the client architecture. This condition causes the step to download only the appropriate OS upgrade package. Configure each Download Package Content step to use the same variable, and use the variable for the media path on the Upgrade Operating System step.
To dynamically download an applicable driver package, use two Download Package Content steps with conditions to detect the appropriate hardware type for each driver package. Configure each Download Package Content step to use the same variable. Then use that variable for the Staged content value in the drivers section on the Upgrade Operating System step.
Post-processing
After you create the task sequence, add more steps in the Post-Processing group of the task sequence.
This task sequence isn’t linear. There are conditions on steps that can affect the results of the task sequence. This behavior depends on whether it successfully upgrades the client computer, or if it has to roll back the client computer to the original OS.
The default task sequence template for Windows in-place upgrade includes other groups with recommended actions to add after the upgrade process. These actions in the Post-Processing group are common among many customers who are successfully upgrading Windows on devices. If you have an existing task sequence that doesn’t already have these actions, manually add them to your task sequence in the Post-Processing group.
Apply setup-based drivers
Add steps in this group to install setup-based drivers (.exe) from packages.
Install/enable third-party security
Add steps in this group to install or enable third-party security programs, such as antivirus.
Set Windows default apps and associations
Add steps in this group to set Windows default apps and file associations.
Prepare a reference computer with app associations you want.
Run the following command line to export:
dism /online /Export-DefaultAppAssociations:»%UserProfile%DesktopDefaultAppAssociations.xml»
Add the XML file to a package.
Add a Run Command Line step in this group. Specify the package that contains the XML file, and then specify the following command line:
dism /online /Import-DefaultAppAssociations:DefaultAppAssociations.xml
Apply customizations and personalization
Add steps in this group to apply Start menu customizations, such as organizing program groups. For more information, see Customize the Start layout.
Rollback
When something goes wrong with the upgrade process after the computer restarts, Windows Setup rolls back the system to the previous OS. The task sequence then continues with any steps in the Rollback group. After you create the task sequence, add optional steps in this group as necessary. For example, reverse any changes made to the system in the Prepare for Upgrade group, such as uninstalling incompatible software.
Run actions on failure
The default task sequence template for Windows in-place upgrade includes a group to Run actions on failure. This group includes recommended actions to add in case the upgrade process fails. These actions make it easier to troubleshoot.
Collect logs
To gather logs from the client, add steps in this group.
A common practice is to copy the log files to a network share. To establish this connection, use the Connect to Network Folder step.
To do the copy operation, use a custom script or utility with either the Run Command Line or Run PowerShell Script step.
Files to collect might include the following logs: %_SMSTSLogPath%*.log %SystemDrive%$Windows.
For more information on setupact.log and other Windows Setup logs, see Windows Setup Log files.
For more information on Configuration Manager client logs, see Configuration Manager client logs.
For more information on _SMSTSLogPath and other useful variables, see Task sequence variables.
Run diagnostic tools
To run diagnostic tools, add steps in this group. Automate these tools for collecting additional information from the system right after the failure.
One such tool is Windows SetupDiag. It’s a standalone diagnostic tool to get details about why a Windows upgrade was unsuccessful.
In Configuration Manager, create a package for the tool.
Add a Run Command Line step to this group of your task sequence. Use the Package option to reference the tool. The following string is an example Command line: SetupDiag.exe /Output:»%_SMSTSLogPath%SetupDiagResults.log»
Always use the most recent version of SetupDiag for the latest functionality and fixes to known issues. For more information, see SetupDiag.
Other recommendations
Windows documentation
Review Windows documentation to Resolve Windows client upgrade errors. This article also includes detailed information about the upgrade process.
Check minimum disk space
On the default Check Readiness step, enable Ensure minimum free disk space (MB). Set the value to at least 16384 (16 GB) for a 32-bit OS upgrade package, or 20480 (20 GB) for 64-bit.
Retry downloading policy
Use the SMSTSDownloadRetryCount task sequence variable to retry downloading policy. Currently by default, the client retries twice; this variable is set to two (2). If your clients aren’t on a wired intranet network connection, more retries help the client obtain policy. Using this variable causes no negative side effect, other than delayed failure if it can’t download policy. Also increase the SMSTSDownloadRetryDelay variable from the default 15 seconds.
Do an inline compatibility assessment
Add a second Upgrade Operating System step early in the Prepare for Upgrade group.
Name it Upgrade assessment.
Specify the same upgrade package, and then enable the option to Perform Windows Setup compatibility scan without starting upgrade.
Enable Continue on error on the Options tab.
Immediately following this Upgrade assessment step, add a Run Command Line step. Specify the following command line:
cmd /c exit %_SMSTSOSUpgradeActionReturnCode%
This command causes the command prompt to exit with the specified non-zero exit code, which the task sequence considers a failure.
On the Options tab, add the following condition:
Task Sequence Variable _SMSTSOSUpgradeActionReturnCode not equals 3247440400
This condition means that the task sequence only runs this Run Command Line step if the return code isn’t a success code.
For more information, see the Upgrade operating system task sequence step.
Convert from BIOS to UEFI
If you want to change the device from BIOS to UEFI during this task sequence, see Convert from BIOS to UEFI during an in-place upgrade.
Manage BitLocker
Remove default apps
Some customers remove default provisioned apps in Windows. For example, the Bing Weather app, or the Microsoft Solitaire Collection. In some situations, these apps return after upgrading Windows. For more information, see How to keep apps removed from Windows client from returning during an update.
Add a Run Command Line step to the task sequence in the Prepare for Upgrade group. Specify a command line similar to the following example:
cmd /c reg add «HKLM:SOFTWAREMicrosoftWindowsCurrentVersionAppxAppxAllUserStoreDeprovisionedMicrosoft.BingWeather_8wekyb3d8bbwe» /f
Next steps
For more information, see the following articles:
Источник
Что нового в развертывании Windows 10
До начала распространения RTM Windows 10 остается совсем немного, и в этом посте я хотел бы кратко рассказать о новшествах в развертывании Windows 10, а также о некоторых особенностях в инструментах и процессах установки ОС, на которые стоит обратить внимание. В основном материал предназначен для тех, кто планирует развертывание Windows 10 в корпоративной среде. Дополнительную информацию можно найти в первом модуле курса «Windows 10: развертывание, управление, безопасность».
Требования к оборудованию, совместимость приложений
Формальные требования к оборудованию перечислены здесь. По сути же можно сказать, что если на вашем «железе» работает Windows 7, Windows 8 или Windows 8.1, то будет работать и Windows 10. Есть, пожалуй, одна тонкость, касающаяся 64-битной версии. Начиная с версии 8.1, Windows использует некоторые инструкции процессора, не поддерживаемые Pentium D. На этих процессорах 64-битная версия Windows 10 работать не будет. Впрочем, я надеюсь, таких процессоров у вас давно нет.
С точки зрения совместимости приложений все выглядит весьма неплохо. В Windows 10 довольно много изменений и усовершенствований, но они в массе своей не затрагивают подсистему Win32, в которой запускаются приложения. Мы предполагаем, что не менее 90% имеющихся десктоп-приложений будут без проблем работать и под Windows 10. Но жизнь – штука сложная, а разработчики – люди креативные, поэтому нет, не 100%. К тому же в некоторых случаях, даже если приложение работает нормально, необходимо чтобы компания-разработчик (ISV) официально подтвердила поддержку / сертифицировала свое ПО под новую ОС. Или же выпустила новую версию.
Применительно к приложениям Windows Store разработаны автоматические тесты, которые проверяют совместимость modern-приложений с Windows 10, обнаруживают потенциальные и реальные проблемы и направляют эту информацию в соответствующие команды разработки ОС. Мы уверены, что подавляющее большинство проблем в этом направлении будет устранено еще до того, как вы их увидите.
Internet Explorer
А вот здесь есть несколько важных моментов, на которые стоит обратить внимание.
Во-первых, как вы наверняка знаете, в Windows 10 будет встроено два браузера – Microsoft Edge (ранее Project Spartan) и Internet Explorer 11. Первый – для просмотра современных сайтов с поддержкой HTML5 и новейших стандартов, второй – главным образом для совместимости с имеющимися веб-приложениями. Применение IE11 особенно актуально в корпоративной среде, где применяются собственные кастомизированные порталы и веб-сайты или веб-приложения, использующие Silverlight. Напомню, Microsoft Edge не поддерживает Silverlight.
Во-вторых, c 12 января 2016 года заканчивается поддержка старых версий IE в ОС Microsoft. В таблице ниже приведены комбинации версий ОС и IE, которые будут поддерживаться после 12.01.2016.
| Windows Platform | Internet Explorer Version |
|---|---|
| Windows Vista SP2 | Internet Explorer 9 |
| Windows Server 2008 SP2 | Internet Explorer 9 |
| Windows 7 SP1 | Internet Explorer 11 |
| Windows Server 2008 R2 SP1 | Internet Explorer 11 |
| Windows 8.1 | Internet Explorer 11 |
| Windows Server 2012 | Internet Explorer 10 |
| Windows Server 2012 R2 | Internet Explorer 11 |
Это означает, что если вы спокойно используете Windows 7 скажем с IE9 и даже не планируете переход на «десятку» в ближайшие месяцы, вам необходимо начать тестирование ваших веб-приложений на предмет совместимости с IE11. Потому что с нового года IE11 будет единственной версией Internet Explorer, поддерживаемой на Windows 7.
Варианты развертывания
Второй вариант также не является принципиально новым и представляет собой обновление системы «на месте». В этом случае сохраняются не только пользовательские данные и настройки, но и все установленные приложения.
Третий вариант – provisioning – ноу-хау Windows 10. Предназначен он для «превращения» нового устройства с Windows 10 в устройство корпоративное, с соответствующими настройками, приложениями и редакцией ОС.
Далее чуть более подробно о каждом из вариантов.
Wipe-and-Load
In-Place
In-Place Upgrade доступен на протяжении многих релизов. Не секрет, что ИТ-департаменты предпочитают использовать чистую установку (Wipe-and-Load), особенно после опыта миграции с XP на Vista. Понимая это, команда Windows провела серьезную работу по совершенствованию процесса обновления. Результаты перехода пользователей с Windows 8 на Windows 8.1 показали, что усилия не прошли даром. Кроме того, были проведены пилоты с рядом заказчиков по обновлению «на месте» с Windows 7 до Windows 8.1, выявившие дополнительные векторы приложения усилий разработчиков.
В итоге, «десятка» поддерживает In-Place Upgrade для Windows 7 SP1, Windows 8, Windows 8.1, то есть для большинства поддерживаемых на текущий момент версий клиентской Windows.
Процесс обновления до Windows 10 состоит из 4 фаз.
1. Down-level. Во время первой фазы Setup проверяет соответствие обновляемого компьютера требованиям Windows 10, собирает информацию о драйверах, настройках пользователя, установленных приложениях. Обнаруженные приложения сверяются с Compatibility Database на предмет совместимости. На последнем шаге формируется образ WinRE (winrm.wim), в который при необходимости добавляются boot critical драйверы, специфичные для данного компьютера. По окончанию этой фазы осуществляется первая перезагрузка.

2. WinRE. Машина загружается с помощью образа WinRE (Recovery Environment), некоей минималистской среды, задача которой скопировать файлы исходной (down-level) версии Windows в папку Windows.old, развернуть образ «десятки» из файла install.wim дистрибутива, создать требуемую структуру каталогов, добавить необходимые для первой загрузки новой ОС драйверы и перезагрузить машину. Во время этой фазы компьютер находится в некотором промежуточном состоянии, когда старая версия Windows уже не используется, новая только готовится к использованию.

3. 1st boot to New OS. По своему наполнению фаза очень близка к этапу Specialize в варианте развертывания Wipe-and-Load. В этой фазе происходит первая загрузка уже новой ОС, устанавливаются драйверы, применяются все необходимые настройки, восстанавливаются приложения (копируются соответствующие ветки реестра, бинарные файлы, если в базе совместимости были обнаружены какие-либо инструкции для тех или иных приложений, они применяются и пр.). По окончании происходит еще одна перезагрузка.

4. 2nd boot to New OS. В заключительной фазе завершаются все миграционные процессы, и перед пользователем появляется экран приветствия, известный как OOBE (Out-Of-Box Experience), где как минимум следует принять условия лицензионного соглашения. На этом процесс обновления ОС завершен.

Хотел бы отметить несколько важных моментов, связанных с In-Place Upgrade.
Одно из новшеств заключается в том, что обновление «на месте» на «десятку» обеспечивает возможность отката всех изменений и возврата к исходной версии Windows. Причем откат возможен как во время любой фазы в процессе обновления (например, в случае сбоя), так и после завершения обновления (например, если что-то не устраивает в новой системе).
Как следствие, в первой фазе во время анализа параметров компьютера Setup вычисляет требуемое дисковое пространство с учетом необходимости хранения папки Windows.old для возможного отката. Если пространства на диске не хватает, пользователь может предоставить внешний носитель (и это еще одно новшество), где будет создана Windows.old. И все же на диске C: должно быть достаточно места, чтобы разместить %SystemRoot% самой «десятки».
Для того чтобы выполнять обновление «на месте» в корпоративной среде с помощью традиционных инструментов, в SCCM vNext и MDT 2013 Update 1 добавлена новая последовательность задач (upgrade task sequence). Детали того, как реализовать такую последовательность задач в SCCM 2012 R2 SP1, можно посмотреть здесь.
При использовании MDT или SCCM компании как правило готовят свой преднастроенный образ ОС. Для успешного же обновления «на месте» необходимо применять стандартный install.wim. Основная причина – сохранение установленных приложений при апгрейде. Если ИТ-отдел добавил в образ Windows 10 какое-либо приложение, а на обновляемой машине это приложение (той же или иной версии) уже установлено, то установщик ОС не сможет выполнить корректное слияние файлов и настроек этого приложения. Он прост не умеет этого делать. В результате может быть нарушена ассоциация расширений файлов приложения, приложение может работать не стабильно или не работать вообще.
Provisioning
Суть варианта развертывания provisioning (подготовка) проще всего пояснить на примере. Предположим, для мобильных сотрудников компания закупает несколько новых планшетов с Windows 10 Professional. Чтобы сотрудники могли начать работу на этих планшетах, ИТ-отдел должен применить к новым устройствам ряд настроек: выполнить апгрейд до Enterprise-версии, включить в домен и/или подключить к Microsoft Intune (или другому MDM-решению), применить политики, загрузить необходимые сертификаты, создать профили Wi-Fi и VPN, установить корпоративные приложения и пр.
Практически все это можно реализовать групповыми политиками. Но последние требуют включения машин в домен, а для ряда мобильных сценариев, возможно, удобнее такие устройства оставлять вне домена. Кроме того, включение в домен либо выполняет сотрудник ИТ-отдела, либо сам пользователь, который должен обладать соответствующими полномочиями и знаниями. Скрипт? Вполне возможно. А если задача схожая, но речь идет о смартфонах?
Provisioning позволяет ИТ-администратору подготовить файл, содержащий все необходимые настройки, а если нужно, то и приложения. Такой файл в зависимости от размера можно прислать по электронной почте, расположить на веб-портале, на сетевой папке, на флэшке. Все что требуется от пользователя – запустить такой файл на нужном устройстве двойным щелчком. Настройки, заданные в файле, применяются к системе, и через несколько минут или даже секунд устройство полностью готово к работе.

Этот же подход применим и к смартфонам с Windows 10. Вместо двойного щелчка мышки могут применяться метки NFC, либо смартфон подключается через USB к компьютеру, отображается в виде иконки в проводнике, и требуемый фал просто переносится на иконку с помощью drag-and-drop.

Конфигурационных или provisioning-файлов можно создать столько, сколько нужно, для разных сценариев, разных типов устройств и пр. Для создания таких файлов используется Windows Imaging and Configuration Designer (Windows ICD) – новый инструмент пакета ADK. Принцип использования Windows ICD довольно прост – в левой части экрана отображаются все доступные настройки и параметры, в средней части экране для нужных вам параметров вы задаете значения, в правой части отображаются выбранные и сформированные настройки.

По окончанию редактирования формируется provisioning-файл с расширением ppkg, который остается доставить на устройство любым доступным способом.
Теме Provisioning будет посвящен отдельный пост (возможно, не один), пока же я хотел бы отметить несколько важных моментов.
Самый важный. Provisioning предназначен для устройств, на которых уже установлена Windows 10, но хотелось бы быстро и без особых административных усилий настроить эти устройства для работы в определенных сценариях.
Windows 10 предусматривает возможность апгрейда редакции Professional до Enterprise путем ввода соответствующего ключа, без переустановки системы. Потребуется лишь одна перезагрузка. А ключ можно как раз указать в ppkg-файле.
После того как ppkg-файл применен к устройству, его можно с устройства удалить (если только вы явным образом не запретили пользователю такую операцию). При удалении файла удаляются все политики, которые были к устройству применены в ходе provisioning.

Ppkg-файл может быть применен как в процессе работы устройства (runtime), так и при первом включении нового устройства на этапе OOBE, например, на съемном носителе.
Можно настроить систему так, чтобы ppkg-файл оставался в системе и применялся автоматически после factory reset. Тогда необходимые настройки применятся к устройству даже после сброса к заводским установкам.
Provisioning, таким образом, будет особенно интересен организациям, в которых допускается использование широкого спектра устройств. Подготовка большого количества преднастроенных образов и бесчисленного набора драйверов для таких организаций может оказаться весьма сложной, если вообще выполнимой задачей. Напротив, ppkg-файлы – это разумный баланс возможностей и простоты реализации.
Я надеюсь, у вас сложилось первое представление о том, какие варианты и инструменты развертывания Windows 10 скоро будут или уже в вашем распоряжении. Ну а мы еще не раз вернемся к этой теме в нашем блоге на Хабре, а также в online- и offline-мероприятиях.
Источник
До начала распространения RTM Windows 10 остается совсем немного, и в этом посте я хотел бы кратко рассказать о новшествах в развертывании Windows 10, а также о некоторых особенностях в инструментах и процессах установки ОС, на которые стоит обратить внимание. В основном материал предназначен для тех, кто планирует развертывание Windows 10 в корпоративной среде. Дополнительную информацию можно найти в первом модуле курса «Windows 10: развертывание, управление, безопасность».
Требования к оборудованию, совместимость приложений
Формальные требования к оборудованию перечислены здесь. По сути же можно сказать, что если на вашем «железе» работает Windows 7, Windows 8 или Windows 8.1, то будет работать и Windows 10. Есть, пожалуй, одна тонкость, касающаяся 64-битной версии. Начиная с версии 8.1, Windows использует некоторые инструкции процессора, не поддерживаемые Pentium D. На этих процессорах 64-битная версия Windows 10 работать не будет. Впрочем, я надеюсь, таких процессоров у вас давно нет.
С точки зрения совместимости приложений все выглядит весьма неплохо. В Windows 10 довольно много изменений и усовершенствований, но они в массе своей не затрагивают подсистему Win32, в которой запускаются приложения. Мы предполагаем, что не менее 90% имеющихся десктоп-приложений будут без проблем работать и под Windows 10. Но жизнь – штука сложная, а разработчики – люди креативные, поэтому нет, не 100%. К тому же в некоторых случаях, даже если приложение работает нормально, необходимо чтобы компания-разработчик (ISV) официально подтвердила поддержку / сертифицировала свое ПО под новую ОС. Или же выпустила новую версию.
Применительно к приложениям Windows Store разработаны автоматические тесты, которые проверяют совместимость modern-приложений с Windows 10, обнаруживают потенциальные и реальные проблемы и направляют эту информацию в соответствующие команды разработки ОС. Мы уверены, что подавляющее большинство проблем в этом направлении будет устранено еще до того, как вы их увидите.
Internet Explorer
А вот здесь есть несколько важных моментов, на которые стоит обратить внимание.
Во-первых, как вы наверняка знаете, в Windows 10 будет встроено два браузера – Microsoft Edge (ранее Project Spartan) и Internet Explorer 11. Первый – для просмотра современных сайтов с поддержкой HTML5 и новейших стандартов, второй – главным образом для совместимости с имеющимися веб-приложениями. Применение IE11 особенно актуально в корпоративной среде, где применяются собственные кастомизированные порталы и веб-сайты или веб-приложения, использующие Silverlight. Напомню, Microsoft Edge не поддерживает Silverlight.
Во-вторых, c 12 января 2016 года заканчивается поддержка старых версий IE в ОС Microsoft. В таблице ниже приведены комбинации версий ОС и IE, которые будут поддерживаться после 12.01.2016.
| Windows Platform | Internet Explorer Version |
|---|---|
| Windows Vista SP2 | Internet Explorer 9 |
| Windows Server 2008 SP2 | Internet Explorer 9 |
| Windows 7 SP1 | Internet Explorer 11 |
| Windows Server 2008 R2 SP1 | Internet Explorer 11 |
| Windows 8.1 | Internet Explorer 11 |
| Windows Server 2012 | Internet Explorer 10 |
| Windows Server 2012 R2 | Internet Explorer 11 |
Это означает, что если вы спокойно используете Windows 7 скажем с IE9 и даже не планируете переход на «десятку» в ближайшие месяцы, вам необходимо начать тестирование ваших веб-приложений на предмет совместимости с IE11. Потому что с нового года IE11 будет единственной версией Internet Explorer, поддерживаемой на Windows 7.
Варианты развертывания
Сразу же отмечу, что все привычные подходы и инструменты развертывания, включая Microsoft Deployment Toolkit (MDT) и System Center Configuration Manager (SCCM), вы сможете использовать и для Windows 10. В новой ОС будет доступно три основных варианта развертывания:
- Wipe-and-Load
- In-Place
- Provisioning
Первый, хорошо знакомый вариант, предполагает загрузку машины с помощью подготовленного образа Windows PE, создание/форматирование разделов жесткого диска компьютера, развертывание настроенного образа Windows 10, установку требуемых драйверов, установку необходимого ПО. Если требуется сохранить данные и настройки пользователя, то перед форматированием запускается утилита User State Migration Tool (USMT), которая копирует (например, в сетевую общую папку) файлы и настройки пользователя, а после установки ПО восстанавливает собранные файлы и настройки уже в Windows 10.
Второй вариант также не является принципиально новым и представляет собой обновление системы «на месте». В этом случае сохраняются не только пользовательские данные и настройки, но и все установленные приложения.
Третий вариант – provisioning – ноу-хау Windows 10. Предназначен он для «превращения» нового устройства с Windows 10 в устройство корпоративное, с соответствующими настройками, приложениями и редакцией ОС.
Далее чуть более подробно о каждом из вариантов.
Wipe-and-Load
Как я уже сказал, этот вариант давно и хорошо знаком. И как в случае с предыдущими релизами ОС для поддержки Windows 10 необходимо будет обновить существующие инструменты развертывания. А именно:
- Скачать и развернуть новую версию пакета Windows Assessment and Deployment Kit (ADK), который будет поддерживать Windows 7/8.1/10.
- Если вы используете MDT: поддержка Windows 10 будет добавлена в MDT 2013 Update 1. На момент написания поста доступна preview-версия.
- Если вы используете SCCM: поддержка развертывания и управления Windows 10 будет добавлена в разные версии Configuration Manager. Для SCCM 2012 и SCCM 2012 R2 поддержка Windows 10 уже реализована в SP2 и SP1 соответственно.
| Версия System Center Configuration Manager | Поддерживает управление Windows 10 | Поддерживает развертывание Windows 10 |
|---|---|---|
| System Center Configuration Manager 2007 | Да | Нет |
| System Center 2012 Configuration Manager | Да | Да |
| System Center 2012 R2 Configuration Manager | Да | Да |
| System Center Configuration Manager v.Next | Да | Да |
Только SCCM vNext будет поддерживать все новые возможности Windows 10, однако, как видно из таблицы, развернуть образ и настроить управление можно и с помощью текущих версий SCCM.
In-Place
In-Place Upgrade доступен на протяжении многих релизов. Не секрет, что ИТ-департаменты предпочитают использовать чистую установку (Wipe-and-Load), особенно после опыта миграции с XP на Vista. Понимая это, команда Windows провела серьезную работу по совершенствованию процесса обновления. Результаты перехода пользователей с Windows 8 на Windows 8.1 показали, что усилия не прошли даром. Кроме того, были проведены пилоты с рядом заказчиков по обновлению «на месте» с Windows 7 до Windows 8.1, выявившие дополнительные векторы приложения усилий разработчиков.
В итоге, «десятка» поддерживает In-Place Upgrade для Windows 7 SP1, Windows 8, Windows 8.1, то есть для большинства поддерживаемых на текущий момент версий клиентской Windows.
Процесс обновления до Windows 10 состоит из 4 фаз.
1. Down-level. Во время первой фазы Setup проверяет соответствие обновляемого компьютера требованиям Windows 10, собирает информацию о драйверах, настройках пользователя, установленных приложениях. Обнаруженные приложения сверяются с Compatibility Database на предмет совместимости. На последнем шаге формируется образ WinRE (winrm.wim), в который при необходимости добавляются boot critical драйверы, специфичные для данного компьютера. По окончанию этой фазы осуществляется первая перезагрузка.
2. WinRE. Машина загружается с помощью образа WinRE (Recovery Environment), некоей минималистской среды, задача которой скопировать файлы исходной (down-level) версии Windows в папку Windows.old, развернуть образ «десятки» из файла install.wim дистрибутива, создать требуемую структуру каталогов, добавить необходимые для первой загрузки новой ОС драйверы и перезагрузить машину. Во время этой фазы компьютер находится в некотором промежуточном состоянии, когда старая версия Windows уже не используется, новая только готовится к использованию.
3. 1st boot to New OS. По своему наполнению фаза очень близка к этапу Specialize в варианте развертывания Wipe-and-Load. В этой фазе происходит первая загрузка уже новой ОС, устанавливаются драйверы, применяются все необходимые настройки, восстанавливаются приложения (копируются соответствующие ветки реестра, бинарные файлы, если в базе совместимости были обнаружены какие-либо инструкции для тех или иных приложений, они применяются и пр.). По окончании происходит еще одна перезагрузка.
4. 2nd boot to New OS. В заключительной фазе завершаются все миграционные процессы, и перед пользователем появляется экран приветствия, известный как OOBE (Out-Of-Box Experience), где как минимум следует принять условия лицензионного соглашения. На этом процесс обновления ОС завершен.
Хотел бы отметить несколько важных моментов, связанных с In-Place Upgrade.
Одно из новшеств заключается в том, что обновление «на месте» на «десятку» обеспечивает возможность отката всех изменений и возврата к исходной версии Windows. Причем откат возможен как во время любой фазы в процессе обновления (например, в случае сбоя), так и после завершения обновления (например, если что-то не устраивает в новой системе).
Как следствие, в первой фазе во время анализа параметров компьютера Setup вычисляет требуемое дисковое пространство с учетом необходимости хранения папки Windows.old для возможного отката. Если пространства на диске не хватает, пользователь может предоставить внешний носитель (и это еще одно новшество), где будет создана Windows.old. И все же на диске C: должно быть достаточно места, чтобы разместить %SystemRoot% самой «десятки».
Для того чтобы выполнять обновление «на месте» в корпоративной среде с помощью традиционных инструментов, в SCCM vNext и MDT 2013 Update 1 добавлена новая последовательность задач (upgrade task sequence). Детали того, как реализовать такую последовательность задач в SCCM 2012 R2 SP1, можно посмотреть здесь.
При использовании MDT или SCCM компании как правило готовят свой преднастроенный образ ОС. Для успешного же обновления «на месте» необходимо применять стандартный install.wim. Основная причина – сохранение установленных приложений при апгрейде. Если ИТ-отдел добавил в образ Windows 10 какое-либо приложение, а на обновляемой машине это приложение (той же или иной версии) уже установлено, то установщик ОС не сможет выполнить корректное слияние файлов и настроек этого приложения. Он прост не умеет этого делать. В результате может быть нарушена ассоциация расширений файлов приложения, приложение может работать не стабильно или не работать вообще.
Есть ряд ограничений на использование In-Place Upgrade:
- Как и ранее архитектура ОС должна совпадать – нельзя обновить этим методом 32-битную версию до 64-битной и наоборот.
- Обновление «на месте» не применимо к Windows To Go, а также ОС, загруженной из VHD-файла.
- Обновление «на месте» не применимо, если диск компьютера зашифрован с помощью решений третьих фирм (если используется BitLocker, обновление пройдет корректно).
Резюмируя, вариант развертывания In-Place Upgrade мы в первую очередь рекомендуем для корпоративных сетей… как минимум попробовать. Возможный скепсис вполне понятен. Но мы постарались сделать этот вариант максимально удобным для ИТ, комфортным для пользователя, надежным для системы. Протестируйте на нескольких машинах с типовой конфигурацией железа и софта и принимайте решение.
Provisioning
Суть варианта развертывания provisioning (подготовка) проще всего пояснить на примере. Предположим, для мобильных сотрудников компания закупает несколько новых планшетов с Windows 10 Professional. Чтобы сотрудники могли начать работу на этих планшетах, ИТ-отдел должен применить к новым устройствам ряд настроек: выполнить апгрейд до Enterprise-версии, включить в домен и/или подключить к Microsoft Intune (или другому MDM-решению), применить политики, загрузить необходимые сертификаты, создать профили Wi-Fi и VPN, установить корпоративные приложения и пр.
Практически все это можно реализовать групповыми политиками. Но последние требуют включения машин в домен, а для ряда мобильных сценариев, возможно, удобнее такие устройства оставлять вне домена. Кроме того, включение в домен либо выполняет сотрудник ИТ-отдела, либо сам пользователь, который должен обладать соответствующими полномочиями и знаниями. Скрипт? Вполне возможно. А если задача схожая, но речь идет о смартфонах?
Provisioning позволяет ИТ-администратору подготовить файл, содержащий все необходимые настройки, а если нужно, то и приложения. Такой файл в зависимости от размера можно прислать по электронной почте, расположить на веб-портале, на сетевой папке, на флэшке. Все что требуется от пользователя – запустить такой файл на нужном устройстве двойным щелчком. Настройки, заданные в файле, применяются к системе, и через несколько минут или даже секунд устройство полностью готово к работе.
Этот же подход применим и к смартфонам с Windows 10. Вместо двойного щелчка мышки могут применяться метки NFC, либо смартфон подключается через USB к компьютеру, отображается в виде иконки в проводнике, и требуемый фал просто переносится на иконку с помощью drag-and-drop.
Конфигурационных или provisioning-файлов можно создать столько, сколько нужно, для разных сценариев, разных типов устройств и пр. Для создания таких файлов используется Windows Imaging and Configuration Designer (Windows ICD) – новый инструмент пакета ADK. Принцип использования Windows ICD довольно прост – в левой части экрана отображаются все доступные настройки и параметры, в средней части экране для нужных вам параметров вы задаете значения, в правой части отображаются выбранные и сформированные настройки.
По окончанию редактирования формируется provisioning-файл с расширением ppkg, который остается доставить на устройство любым доступным способом.
Теме Provisioning будет посвящен отдельный пост (возможно, не один), пока же я хотел бы отметить несколько важных моментов.
Самый важный. Provisioning предназначен для устройств, на которых уже установлена Windows 10, но хотелось бы быстро и без особых административных усилий настроить эти устройства для работы в определенных сценариях.
Windows 10 предусматривает возможность апгрейда редакции Professional до Enterprise путем ввода соответствующего ключа, без переустановки системы. Потребуется лишь одна перезагрузка. А ключ можно как раз указать в ppkg-файле.
После того как ppkg-файл применен к устройству, его можно с устройства удалить (если только вы явным образом не запретили пользователю такую операцию). При удалении файла удаляются все политики, которые были к устройству применены в ходе provisioning.
Ppkg-файл может быть применен как в процессе работы устройства (runtime), так и при первом включении нового устройства на этапе OOBE, например, на съемном носителе.
Можно настроить систему так, чтобы ppkg-файл оставался в системе и применялся автоматически после factory reset. Тогда необходимые настройки применятся к устройству даже после сброса к заводским установкам.
Provisioning, таким образом, будет особенно интересен организациям, в которых допускается использование широкого спектра устройств. Подготовка большого количества преднастроенных образов и бесчисленного набора драйверов для таких организаций может оказаться весьма сложной, если вообще выполнимой задачей. Напротив, ppkg-файлы – это разумный баланс возможностей и простоты реализации.
Я надеюсь, у вас сложилось первое представление о том, какие варианты и инструменты развертывания Windows 10 скоро будут или уже в вашем распоряжении. Ну а мы еще не раз вернемся к этой теме в нашем блоге на Хабре, а также в online- и offline-мероприятиях.
We all know, if you’ve multiple issues on your Windows 10, you can either Refresh or Reset your system. These recovery options are covered under following guides/links:
How to Refresh Windows 10
How to Reset Windows 10
An user is supposed to use Refresh when he wants to reinstall Windows but do not want to loose the data. On the other hand, Reset is useful, if you want to completely wipe the data and reinstall Windows 10. Both options are pretty handy to use and preserves your Windows activation for you.
Then comes the term “in-place upgrade“. Using in-place upgrade, you can reinstall Windows 10 within Windows 10 with a flexibility to keep or loose data. In-place upgrade is done to simply reset all the custom settings you’ve made to your Windows 10, for example, to reset Registry Editor to default.
Windows 10 In-Place Upgrade v/s Reset v/s Refresh
This table will clear your understanding about in-place upgrade and show you how it is different from Reset and Refresh options.
| Point of comparison |
Refresh | Reset | In-Place Upgrade |
|---|---|---|---|
| Personal data, apps retained | Yes | No | User select-able |
| Customization retained | Yes | No | No |
| Installed Windows Updates retained | Yes | No | No |
| Windows Activation preserved |
Yes | Yes | Yes |
| Windows 10 install media require | No | No | Yes |
| Windows 10 install media condition | N/A | N/A | Should of same architecture and language, of which Windows is installed currently. It should be of same or a newer Windows 10 build. Older build installation media won’t work and fail to in-place upgrade newer build. |
| Administrative privileges |
Required | Required | Required |
| Minimum free space required |
N/A | N/A | At least 10 GB |
| Processing time |
Medium | Fast | Slow |
So without wasting anymore time, let us start the in-place upgrade.
How To Repair Windows 10 Using In-Place Upgrade
Before you start, make sure:
1. Your Windows 10 device have enough battery (more than 60%).
2. You temporarily uninstall your third-party antivirus program (if exists).
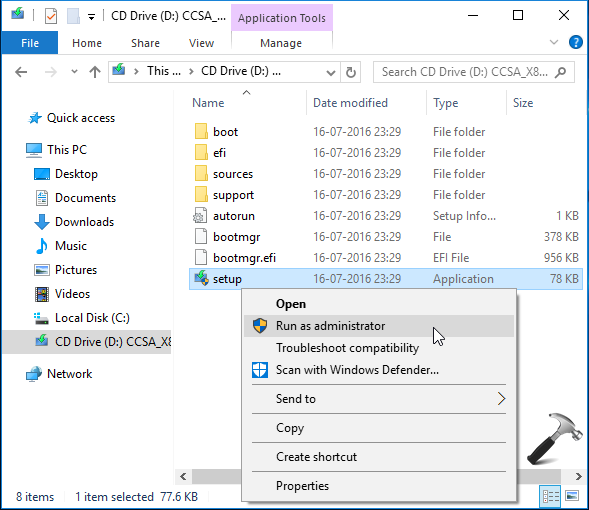
1. Mount the Windows 10 ISO file in File Explorer or plug-in your Windows 10 bootable USB. You should now see CD drive labelled entry under This PC. Click on that entry and then right click on setup.exe file, select Run as administrator.
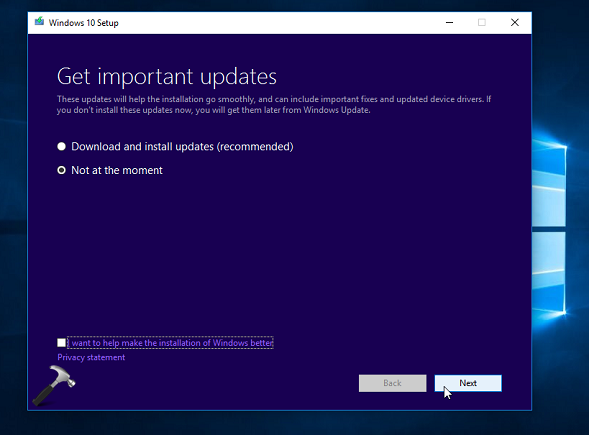
2. Then in Windows 10 Setup screen, choose Not at the moment for Get important updates and click Next.
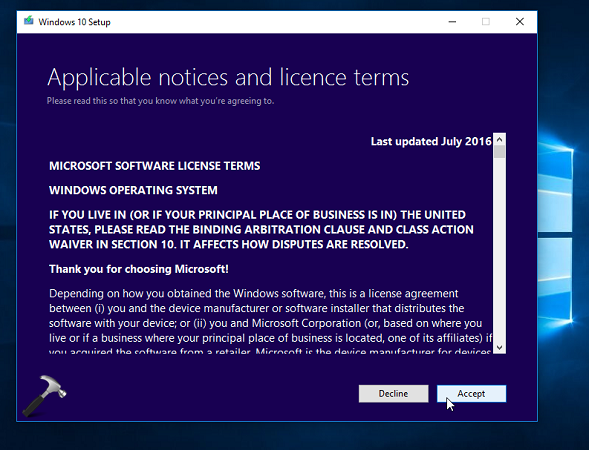
3. Moving on, accept End User Licensing Agreement (EULA) by clicking Accept button here:
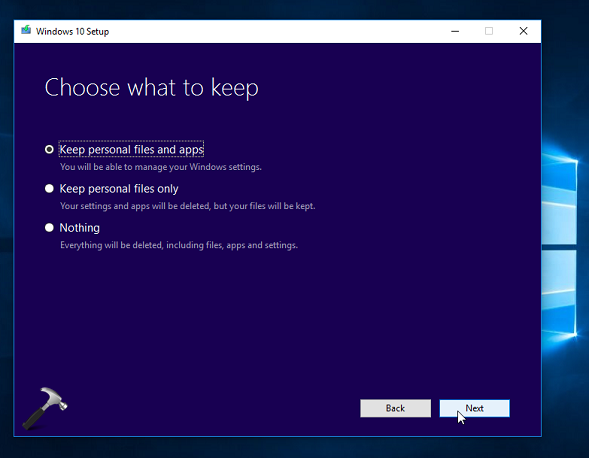
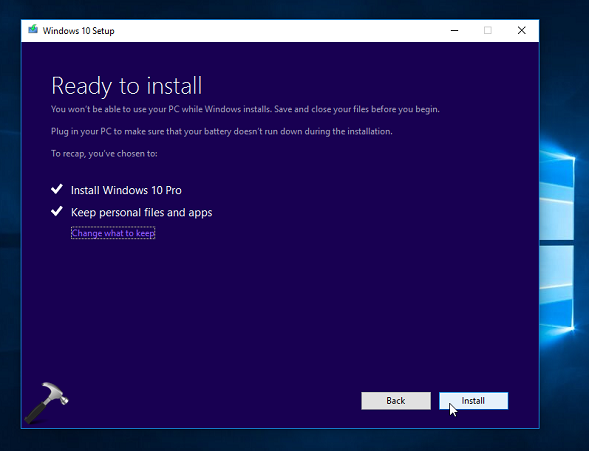
4. Now select if you want to keep your data, since this is in-place upgrade, you must opt for Keep personal files and apps option here. Click Next.
5. Hit Install button to start in-place upgrade.
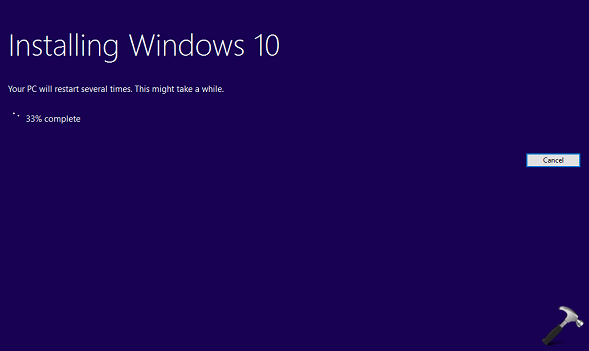
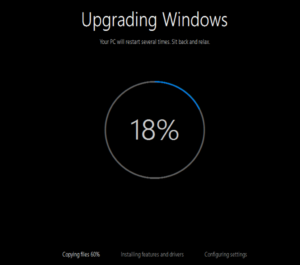
6. Your PC will be reboot itself and then you can see progress of installation here:
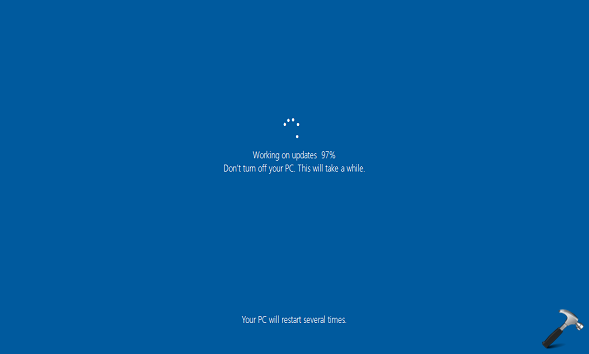
7. After another restart, you’ll see below shown screen, where Windows is performing upgrade. It may take up-to few minutes, so keep patience until it finishes.
8. After reboot, you’ll be able to log-in to your machine with your previously used account. However, if you’ve selected Nothing option at step 4, you’ll need to create new user account to log-in and carry on.
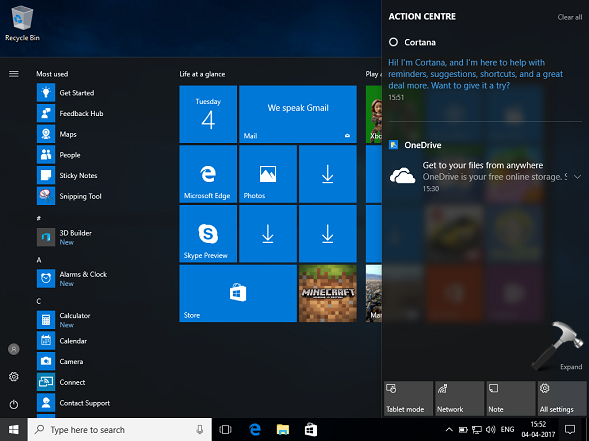
Hence, this completes the in-place upgrade for Windows 10.
Check the live illustration of above steps in this video:
That’s it!
FYI, other options to repair Windows 10 installation:
1. System File Checker
2. Inbox Corruption Repair Using DISM
3. System Restore
4. System Image Backup
READ THESE ARTICLES NEXT
- Fix: Windows Resource Protection found corrupt files in Windows 11
- How to perform repair upgrade in Windows 11
- How to Fix Corrupted Files on Windows 11
- How to repair videos easily with Wondershare Repairit
- How To Repair And Recover Data From Large PST Files In Outlook
- FIX: Windows Resource Protection Found Corrupt Files But Was Unable To Fix Some Of Them
- Repair Windows 10 Using DISM Command-line Tool
- [FIX] DISM Error 14098, The Component Store Has Been Corrupted
- [How To] Perform Automatic Or Startup Repair In Windows 10
- [FIX] There Is System Repair Pending Which Requires Reboot To Complete. Restart Windows And Run SFC Again
Download PC Repair Tool to quickly find & fix Windows errors automatically
There are several ways to upgrade Windows 11/10. You can use Windows Update service to download the feature update, or you can create an ISO, or you can use the Media Creation Tool. The last one helps you perform Windows 11/10 In-place upgrade. In this guide, we will share step by step method to do that.
Before we start, you will need to do the following:
- Ensure you are signed in and have admin privileges.
- Unplug all external peripherals except mouse, keyboard and LAN cable to download.
- Disable or uninstall any third-party antivirus or security solutions.
The term in-place means you can perform it without leaving your computer. When we say Windows 11/10 In-Place upgrade, we mean that you can upgrade your Windows to the next feature update without using any ISO. It is useful when you have an excellent internet connection to download the files.
1] Download Windows 11 or Windows 10 Installation Media

Go to Windows 10 or Windows 11 Download page, and click on Download tool now. It will download an executable file with name MediaCreationTool<version-no>.exe.
Once the download is complete, double click to run the application. This exe file is responsible for downloading the latest version of Windows 10 files and installing it on your computer.
2] Windows In-Place Upgrade Process

Once the process starts, you should see the Microsoft License terms. Accept it. Then the process will kick start a “Getting Ready screen.” Wait for it to complete. This analyzes your computer and then gives you two options-
- Upgrade PC Now
- Create installation media (USB, DVD, or ISO file)
For In-Place upgrade, select the Upgrade PC Now option. Click next, and the tool will start downloading the files. It will take a while, and it depends on the speed of your internet connection
Once the download is complete, you will have the option to keep your personal files or start fresh.
If you are performing an in-place upgrade, I would suggest keeping your files. That way, all your problem with previous installations will be gone, and your files will be there.

Post this, the computer will restart several times, and it will upgrade your existing Windows 10 computer. After its complete, you will be back to the login screen. Here your account will be available.
Log in to the computer, and you will be greeted by the Privacy settings. Make your selections and proceed to the Cortana settings screen. You can follow Cortana’s voice-assisted method to change your language and make other choices. If you do not want to use Cortana, you can do everything manually.
Once it is complete, your Windows 10 has completed the in-upgrade process, and you are all set to use Windows 10 fresh.
It is best to use Windows 10 In-upgrade method to install the latest version of Windows, especially when you are having trouble downloading the feature update.
Read: Windows Fresh Start vs Reset vs Refresh vs Clean install vs In-place Upgrade discussed.
We hope the tutorial was easy to follow, and you were able to perform Windows 11/10 in-upgrade smoothly.

Anand Khanse is the Admin of TheWindowsClub.com, a 10-year Microsoft MVP (2006-16) & a Windows Insider MVP (2016-2022). Please read the entire post & the comments first, create a System Restore Point before making any changes to your system & be careful about any 3rd-party offers while installing freeware.
-
MiniTool
-
MiniTool News Center
- Windows 10 In-Place Upgrade: a Step-by-Step Guide
By Stella | Follow |
Last Updated November 26, 2020
![]()
You have more than one choice to update your Windows 10 like using Windows update service, the ISO image, or Windows 10 in-place upgrade. In this post, MiniTool Software will show you how to perform Windows 10 in-place upgrade. It is especially useful when the Windows update service is unavailable.
What Is Windows 10 In-Place Upgrade?
The ways to update Windows 10 on your computer are various. For example:
- You can go to Settings > Update &security to check for updates and then upgrade your Windows 10.
- You can also create an ISO image and then use it to clean upgrade your Windows 10.
- Additionally, you can download the Media Creation Tool and then use it to perform Windows 10 in-place upgrade.
In this post, we will focus on the last method: in-place upgrade Windows 10.
The term in-place means that you need to do the job without leaving your computer. Windows 10 In-Place upgrade means that you can update your Windows 10 to the new feature update without using the ISO file.
You can choose to use Windows 10 in-place upgrade if there are some issues when downloading the Windows update.
Preparations before In-Place Upgrade Windows 10
Before performing Windows 10 in-place upgrade, you need to do these things:
- Make sure that you have signed in and own the admin privileges.
- Disable or uninstall all third-party antivirus software and security applications.
- Before downloading, you need to remove all the external peripherals besides mouse, keyboard and LAN cable.
Then, it’s time to in-place upgrade your Windows 10.
How to In-place Upgrade Windows 10
Step 1: Download the Windows 10 Installation Media Tool on Your Computer
1. Go to the Windows 10 download page.
2. Click Download tool now. That tool, which is named as MediaCreationTool<version-no>.exe, will be downloaded on your computer.
3. After the downloading process ends completely, you need to click the tool to run it.
Step 2: Perform Windows 10 In-Place Upgrade on Your PC
- After clicking the tool, the Windows 10 in-place upgrade process will begin. When seeing the Applicable notices and license terms, you need to accept it.
- Wait until the Getting Ready screen disappears.
- You will see two options: Upgrade this PC Now and Create installation media (USB flash drive, DVD, or ISO file) for another PC. You need to select the Upgrade this PC Now option to perform the in-place upgrade.
- Click Next. Then the tool begins to download the needed files. It will take a while to finish the job. You need to be patient.
- After downloading, you need to choose to keep your personal files or start fresh. For Windows 10 in-place upgrade, you should keep your files on your computer. That is, after Windows 10 upgrade, the issues on your previous installed applications will be disappeared. But you still have your personal files on the PC.
- Then, the screen will remind you that Your computer will restart several times. This might take a while. Please be patient.
- You will go back to the login screen when the restart processes end. Then, you need to log into Windows 10 and make the needed settings, like Privacy settings, Cortana settings, language settings, and more.
When the whole process ends, the Windows 10 in-place upgrade is also finished. Then, you can use the latest Windows version on your computer.
About The Author

Position: Columnist
Stella has been working in MiniTool Software as an English Editor for more than 4 years. Her articles mainly cover the fields of data recovery including storage media data recovery and phone data recovery, YouTube videos download, partition management, and video conversions.
Many of you have probably thought about deploying Windows 10 in your organization and are already looking into the different options that Microsoft with their new operating system have brought to the table. The traditional ways of deploying a new operating system included methods like Wipe and Load, Refresh and Replace. Now with Windows 10, not for the first time though, you have the option to perform an In-Place upgrade. What’s different this time around is that it actually works, and it works really well.
For those of you out there looking to deploy Windows 10 in your organization, and are interested the In-Place Upgrade scenario, this is the post for you. I will cover the requirements and limitations for the scenario including a basic overview of how the In-Place Upgrade feature actually works under the hood. Additionally I’ll go through the process of using In-Place Upgrade with ConfigMgr vNext, and upgrade the post when the new version of ConfigMgr has been released (if there are any changes of course).
Overview
With previously released version of Windows, the In-Place Upgrade scenario was never considered a reliable option to deploy the latest version. But in Windows 10, Microsoft has put in enormous efforts to make the scenario the first choice for organizations when deploying the new version of Windows. This time around, it’s not only steady and reliable, it also features an automatic roll-back feature if any issues would occur during the deployment process, without the need of any IT-staff involvement. This scenario could also be considered faster than the traditional deployment scenarios, since applications and drivers do not need to be re-installed as part of the process. Although, there are some limitations as to how you can leverage the In-Place Upgrade scenario, which I will mention in this post.
When should you consider using the In-Place Upgrade scenario? The following scenarios describe that a bit more in detail:
- When you want to keep all (or at least most) existing applications
- When you do not plan to significantly change the device configuration (for example, BIOS to UEFI) or operating system configuration (for example, x86 to x64, language changes, Administrators to non-Administrators, Active Directory domain consolidations)
- To migrate from Windows 10 to a later Windows 10 release
The latter of those statements becomes really important, and improves the future upgrades to the latest versions of Windows when Microsoft releases them. I assume that you’ve heard about the Windows as a Service terminology? If not, the picture below illustrates how the new versions of Windows will be made available through branches during different stages:
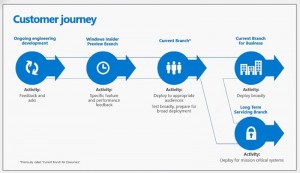
Whenever a new version is released, organizations can leverage the In-Place Upgrade scenario to test and deploy the latest version in their environment. In my opinion, this is killing blow for the traditional methods of introducing a new version of Windows in the organization, and improves the process enormously including keeping the deployment time at a minimal.
What are the upgrade paths available?
| Current Operating System | Upgraded version |
| Windows 7 | Windows 10 |
| Windows 8 | Windows 10 |
| Windows 8.1 | Windows 10 |
| Windows 10 | Windows 10 |
Requirements for In-Place Upgrade
One of the questions I believe that many administrators are asking themselves is, what do I need in order to leverage In-Place Upgrade in a deployment scenario for deploying Windows 10? Below is a table of things to consider and that you need to be aware of. It’s important that you are familiar with the scenario and what the requirements are.
| Requirement | Detailed information |
| Default image | You’re not able to use a custom image of Windows 10 for the In-Place Upgrade scenario. You’d have to use the install.wim image provided with the latest Windows 10 media that Microsoft has released. |
| Internet Explorer 11 | While this may not be a requirement prior upgrading to Windows 10, it’s recommended that you deploy Internet Explorer 11 in your environment and make sure that your applications works since that’s the only supported version of Internet Explorer in Windows 10. It’s also good to know that earlier versions than Internet Explorer 11 will become unsupported in January of 2016. |
| Deployment solution | This is a no brainer, since you’ll of course need some kind of deployment solution to deliver Windows 10 to your devices. Supported tools are:
|
Limitations with In-Place Upgrade
Until now, everything seems great and you probably want to get started with deploying Windows 10 using the In-Place Upgrade scenario. But before you do that, there’s a few scenarios you need to be aware of when you cannot leverage In-Place Upgrade:
| Situation | Details |
| Operating system architecture switch | The upgrade process cannot change from a 32-bit operating system to a 64-bit due to the possible complications with drivers and applications it may bring. |
| BIOS to UEFI switch | When changing from BIOS to UEFI based capabilities, a new disk layout is required and therefor not supported by the upgrade process. It also includes any type of disk layout change, even without changing from BIOS to UEFI. |
| Operating system language change | You cannot leverage the upgrade process when attempting to go from one operating system base language to another. |
| Changing SKU | Changing the operating system version is not supported. You can only go from the same version or higher, e.g. when upgrading from Professional to Enterprise, or Enterprise to Enterprise. |
| Third-party disk encryption | While BitLocker encrypted devices can easily be upgraded, more work is necessary for third-party disk encryption tools. Some vendors provide information on how to implement their software in the upgrade process. |
| Dual-boot or multi-boot systems | The upgrade process is designed for devices running a single operating system. |
There are some other limitations when not to use the In-Place upgrade scenario, like for instance with Windows To Go devices and when using Boot from VHD, but in my opinion they’re barely used in a organization.
How In-Place Upgrade work
In my opinion, you’d have to familiarize yourself with how the In-Place Upgrade process actually works. Perhaps not on a 500 level, but at least have an understanding of the different phases during the process. When you’re upgrading from your current operating system, Microsoft refers to this as the Down-Level operating system. In terms of the operating system being installed, they refer to that as the new operating system.
These are the following items that will be migrated to the new operating system during the upgrade process:
- Applications
- Drivers
- User accounts and settings
Basically, you can look at it this way, you’ll end up with exactly what you already have on the device (except for unsupported items that are not eligible for Windows 10).
The upgrade process consists of four different phases. During my visit to Ignite in Chicago in May earlier this year, I attended the Windows 10 In-Place Upgrade deep dive session. From that session, the following was presented in terms of the four phases and what’s going on behind the scenes:
Phase 1 – Down-level phase
When setup.exe is executed on the down-level operating system, the following tasks are performed (prerequisites and compatibility checks):
- System checks
- Inventory Applications
- Inventory Drivers
- Assess compatibility
- Prepare WinRE
Phase 2 – Boot to WinRE
WinRE (Windows Recovery Environment) is executed, and has less functionality than WinPE. Possible to recover to the down-level operating system. Tasks that are being performed are:
- Both new and down-level operating systems are offline
- Backup down-level operating system to Windows.old
- Lay down new operating system
- Prepare new operating system
- Inject Drivers
- Some migration (unfortunately the session did not provide any more details on this part)
Phase 3 – First boot to new operating system
New operating system is launched for the first time, but not shown to the end user. This is the configuration phase of the new operating system and it’s possible to recover to the down-level operating system. Tasks that are being performed are:
- Binding new operating system with the down-level operating system
- New operating system gets an identity
- Specialize to the machine
- Install drivers
- Migrate applications
- More migration (unfortunately this part was also not documented further during the session)
Phase 4 – Second boot to the new operating system
During this phase the new operating system is being booted to for the second time. User is taken directly to the Out-of-box-Experience once the finalization is complete. Tasks that are being performed are:
- Finalizing the whole In-place Upgrade process
- Welcome the user back with OOBE
As for the whole upgrade process, it’s much more complicated than described above, but I wanted to highlight the four phases and give you an idea of what’s going on. Now that we have a better understanding of In-Place Upgrade with Windows 10, lets go ahead and prepare for an In-Place Upgrade scenario with ConfigMgr vNext.
As of writing this post, it’s possible to upgrade from any of the supported upgrade paths with the most current version of ConfigMgr 2012 R2 SP1. Although, this version requires a custom made task sequence (one that Microsoft has already provided for us, available here). Instead I’ll go ahead and demonstrate how the real (hopefully) task sequence will look like by using ConfigMgr vNext TP3 and a task sequence template called Upgrade an operating system from upgrade package.
NOTE! This is still in preview and might change. If the process is updated in the final release, I’ll update this post accordingly.
The scenario I’m going to demonstrate in this post involves a Windows 7 SP1 Enterprise domain joined device that will be upgraded to Windows 10 Enterprise. Before I go ahead and start creating anything, I’d need to download the source media of Windows 10 from MVLSC and extract the content of the ISO.
Add an Operating System Upgrade Package
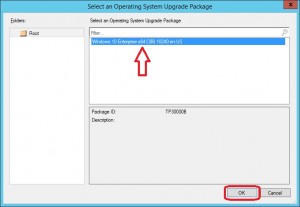
1. Open the ConfigMgr console and go to Software Library. Expand Operating Systems, right click on Operating System Upgrade Packages and select AddOperating System Upgrade Package.
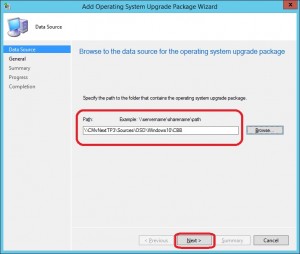
2. Specify the path to where you’ve downloaded the source content from the latest Windows 10 build available on MVLSC and click Next.
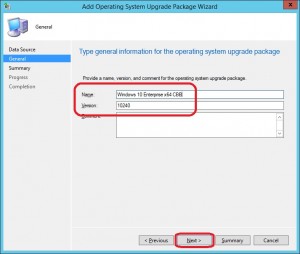
3. Specify a name of the upgrade package and a version (I suggest that you specify the build version in the version field). Click Next.
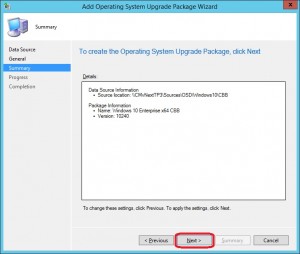
4. On the Summary page, click Next.
5. On the Completion page, click Close.
6. Distribute the Operating System Upgrade Package to your Distribution Points.
Create an Upgrade task sequence
1. Right click on Task Sequences and select Create Task Sequence.
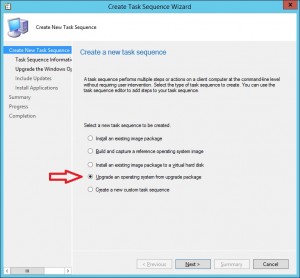
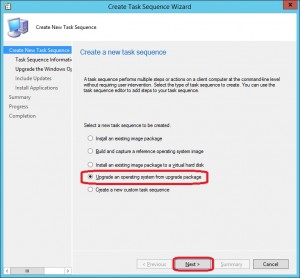
2. Select Upgrade an operating system from upgrade package and click Next.
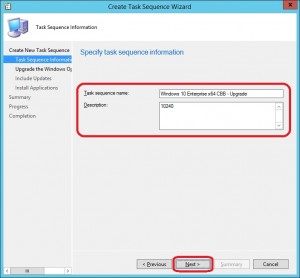
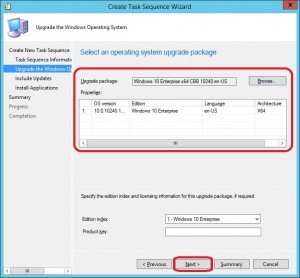
3. Enter a task sequence name and a description and click Next.
4. Next to the Upgrade package field, click Browse and select the new created upgrade package and click OK.
5. Back on the Upgrade the Windows Operating System page, click Next.
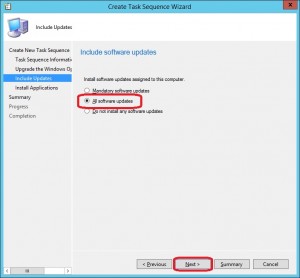
6. Select to install All software updates and click Next.
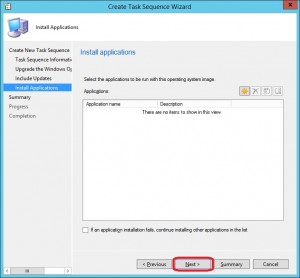
7. Decide whether or not to have the task sequence installing any additional applications, click Next.
8. On the Summary page, click Next.
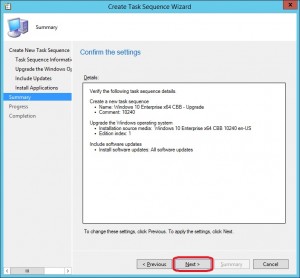
9. On the Completion page, click Close.
We now have the upgrade package containing the latest build of Windows 10 together with an upgrade task sequence ready for deployment to our Windows 7 device. The next step would be to deploy the task sequence to a collection containing the Windows 7 device. I’ll assume that you’re familiar with deploying a task sequence, so I will not cover those steps in this post. For the purpose of demonstration and for you to follow along, I’ll deploy this task sequence with a purpose of Available to my Windows 7 device.
You should of course decide whether to make this available to your devices or if you should at some point require it. In terms of the Windows as a Service, and keeping up with the latest version in your organization so that your devices are supported, perhaps a good idea would be to make it available for your organization a certain time before the build runs out of support. And at the end of the support time frame, make it required. This is something that Microsoft is currently working on with ConfigMgr vNext and what they’re calling Windows 10 servicing plans.
NOTE! In the Technical Preview 3 of ConfigMgr vNext, I had to re-distribute the upgrade package so that it got a version 2 for it to work.
Execute In-Place Upgrade
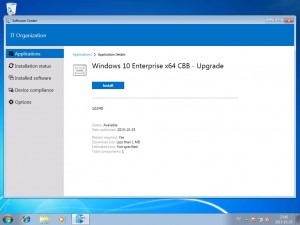
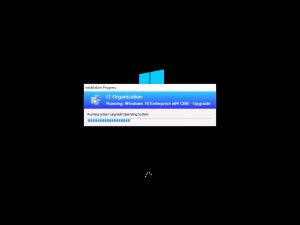
1. On the Windows 7 device, opening up Software Center I’ll now see the new upgrade task sequence available under Applications and click Install.
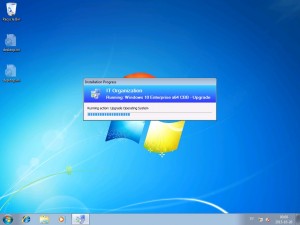
2. The In-Place Upgrade process will now start where the first phase will run, checking for readiness and compatibility.
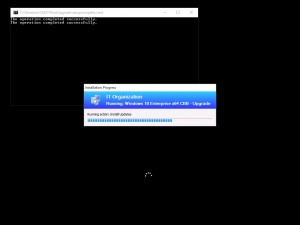
3. The device is booted into WinRE.

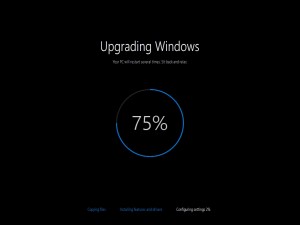
4. After a reboot, Windows 10 is being specialized in addition to other tasks as mentioned above.

5. A second reboot occurs and Windows 10 is being configured and launched for the first time.
6. After the third reboot Windows 10 is upgraded from Windows 7 and we’re back in the task sequence engine.
7. Software Updates are installed.
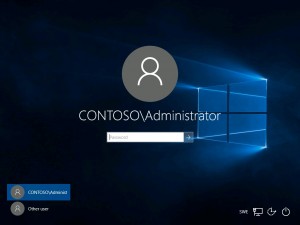
8. We’re finally presented with the logon screen after a final reboot.
After we’ve logged in, Windows 10 will setup your apps and perform a few other tasks where it eventually will present you with the desktop. The whole upgrade process is now complete and your device have successfully been upgraded from Windows 7 to Windows 10 by using the In-Place Upgrade scenario.
(35842)
Click here for an overview of the blog serie “Windows 10 und ConfigMgr Deployment Serie”
Why using In-Place Upgrade?
In the past, the migration process of operating systems including user settings and files was performed by using Configuration Manager / MDT and USMT (User State Migration Tools). This wipe and load approach worked very well.
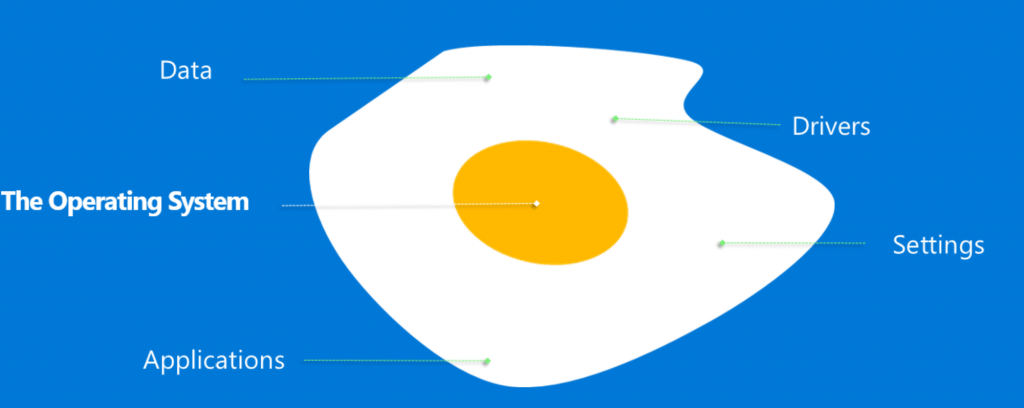
With the release of Windows 10, Microsoft provided a powerful feature called “In-Place Upgrade”. This will upgrade your operating system while the user data will remain untouched.
When not to use In-Place Upgrade?
For Enterprise purposes, there is a reason why you would not this upgrade process.
The Windows 10 image must be untouched, so you cannot use a customized image by your organization.
You need to consider the language settings of the running OS and the image, language packs cannot be downloaded by the In-Place upgrade process
How does the In-Place Upgrade work?
The upgrade process replaces the operating system. Drivers, applications, user settings and user data will be untouched.
Preferred options (Enterprise):
- System Center Configuration Manager or MDT
- Windows 7, 8, 8.1
- Use the standard Windows 10 image (Windows 10 Setup files)
Important In-Place upgrade LogFiles:
The most important LogFile is the setupact.log which is located here
- %Systemdrive%$Windows.~BTsourcespanther (during upgrade process)
- %Systemdrive%Windowspanther (after upgrade process and OOBE)
- %Systemdrive%WindowspantherunattendGC (after OOBE and first Logon)
If anything went wrong, the setuperr.log could be helpful, the location is nearby the setupact.log.
The four primary upgrade process phases

Down Level phase
- Current operating system Windows 7 / Windows 8 / Windows 8.1
- System check for compliance
- Inventory of applications
- Inventory of drivers
- Analyze the operating system components
- Download updates (not required for upgrade process)
- Prepare WinRE
Running operating system
The In-Place upgrade process can be performed from Windows 7 / 8 / 8.1
System check for compliance
The first upgrade step checks the current operating system hardware for compliance, this contains the following devices.
- CPU
- RAM (at this moment 1 Gigabyte for Windows 10 x86 and 2 Gigabyte for Windows 10 x64)
- Available Disk Space (for OS installation and recovery), If the disc space is below the actual needed capacity, it could be expanded by using external devices like thumb drives. This is important for Tablets with limited disk space. On ordinary devices the upgrade process tries to compress the file system.
- Critical Drivers (Storage and network class drivers)
- UEFI Version (The required UEFI Version is 2.3.1)
- The current operating system must not be a Windows ToGo Stick or a VHD-Boot Machine
The setupact.log (%Systemdrive%$WINDOWS.~BTSourcesPanther) describes this process on a very detailed level:
The compliance checks starts at:
|
1 |
|
And ends with:
|
1 |
|
The results is stored in an XML File:
|
1 |
|
Content of CompatData_2016_03_22_10_29_24_3_00000021.xml:
|
1 2 3 4 5 6 7 8 9 10 11 12 13 14 15 16 17 18 19 20 21 22 23 24 25 26 27 |
|
Example of failed compatibility check (mismatched language):
|
1 2 3 4 5 6 7 8 9 10 11 12 13 14 15 16 17 18 19 20 21 22 23 24 25 |
|
Inventory of applications
The application inventory contains three basic steps:
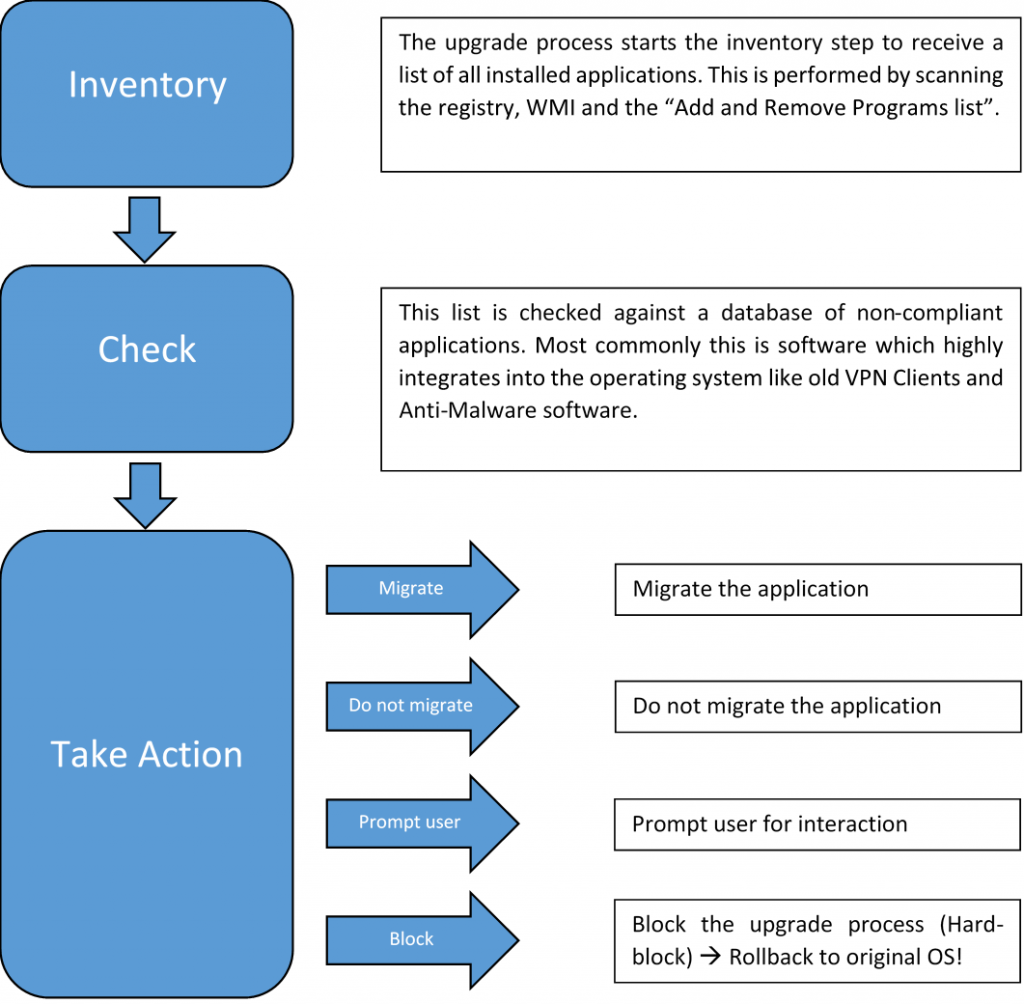
Some Windows components will not be migrated, like Windows Media Center, because it’s not available in Windows 10.
During the upgrade process, a database with compatible applications which is stored on the installation media of Windows 10 will be used. If the upgrade process is performed in “online” mode, the latest version of this Database will be downloaded by the process. This list is available here:
https://sysdev.microsoft.com/en-us/hardware/lpl/
The upgrade process shows the application inventory data in a xml File in %Systemdrive%$WINDOWS.~BTSourcesPanther<…>_APPRAISER_ApplicationInventory.xml
|
1 2 3 4 5 6 7 8 9 10 11 12 13 14 15 16 17 18 19 20 21 22 23 24 25 26 27 28 29 30 31 32 33 34 35 36 37 38 39 40 41 42 43 44 45 46 47 48 49 50 51 52 53 54 55 56 57 58 59 60 61 62 63 64 65 66 67 68 69 70 71 72 |
|
Inventory of Drivers
Similar to the application inventory process, drivers are also checked regarding their compatibility.

The device driver inventory is stored in a xml file:
%Systemdrive%$WINDOWS.~BTSourcesPanther <…>_APPRAISER_DeviceInventory.xml
|
1 2 3 4 5 6 7 8 9 10 11 12 13 14 15 16 17 18 19 20 21 22 23 24 25 26 27 28 29 30 31 32 33 34 35 36 37 38 39 40 |
|
Analyze the operating system components
The upgrade process scans the system for operating system components. In summary, the process scans over 10 000 components and its manifests.
Download Updates
If the upgrade process is performed in “online” mode, it downloads the latest cumulative updates for Windows 10 from windows update. If you use Configuration Manager or MDT, the updates can be downloaded from the local update server as well.
The setupact.log file describes the process:

The process does not only look for Windows updates, it also searches for driver updates on windows update. If it finds one, it will download the latest version of the device driver at this step.
Prepare WindowsRE
The preparing process for WinRE:
The upgrade process mounts the wim file of WinRE and injects all the necessary drivers which are needed during the WinRE phase. The wimfile is stored under %Systemdrive%$WINDOWS.~BTSourcesSafeOS.
During the first phase, nothing is being migrated, the process just gathers data. The migration processes will be performed in the second, third and fourth step of the whole upgrade process.
After preparing the WinRE image, the upgrade process reboots the system and launches WinRE.
WinRE phase
The Windows RE phase contains three steps:
- Backup down-level OS (current OS)
- Lay down and prepare new OS
- Prepare new OS
After booting into WinRE this screen appears:
At this moment, neither the old nor the new operating system is online.
Backup down-level OS
The backup process just moves the old operating System and its components to the %Systemdrive%Windows.old Folder.
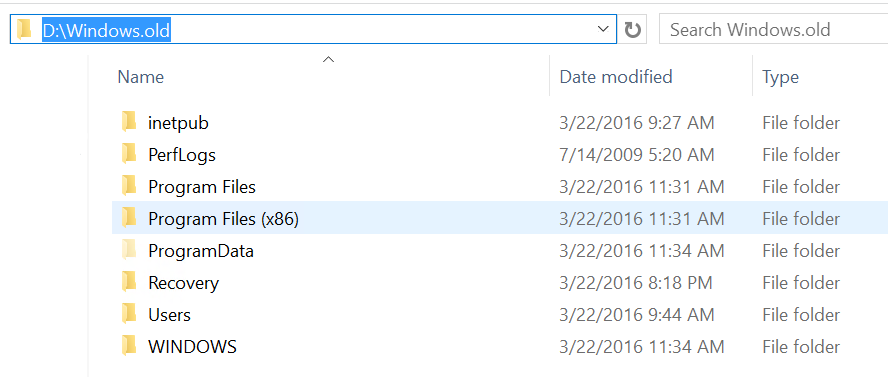
The setupact.log describes the process:
|
1 2 3 4 5 6 7 8 9 10 11 12 13 14 15 16 17 18 19 20 21 22 23 24 25 26 27 28 29 30 31 32 33 34 35 36 37 38 39 40 41 42 43 44 45 46 47 48 49 50 |
|
Lay down and prepare new OS
- The new OS gets applied to %Systemdrive%$Windows~BTNewOS.
|
1 2 3 4 5 6 7 8 9 |
|
- The inventoried drivers and applications get integrated into the new OS. The migration of applications is similar to the technology that USMT uses.
- Modern Apps are migrated, if the current operating system has modern apps installed, the progress will check if Windows 10 contains a newer version of these.
- After that, the NewOS Folder gets redirected to %Systemdrive%.
- Every folder which conflicts with the folder structure of the Windows 10 WIM File will be copied.
|
1 2 3 4 5 6 7 8 9 10 11 12 13 14 15 16 17 18 19 20 21 22 23 24 25 26 27 28 29 30 31 32 |
|
The Windows.Old is scanned by the process and every file which might be necessary will be “copied” in the running operating system. It’s basically not a copy job, the process just set hard links to the new location.
|
1 2 3 4 5 |
|
First Boot to new OS
The location of setupact.log has changed, the new location is %Systemdrive%Windowspanther.
This phase contains these steps:
- Set up windows components
- Install APPX Packages
- Install Device Drivers
- Set user settings
Set up windows components
The upgrade process starts to enable the Windows components.
Install APPX Packages
Now the installer activates the APPX packages:
|
1 2 3 4 5 6 7 8 9 |
|
Install Device Drivers
The process installs the drivers, if drivers were download from windows update, the upgrade process will install these drivers.
Set user settings
The process sets the user specific settings, such as user specified App settings or Windows settings.
After these four steps, the system reboots again to the fourth Upgrade phase.
Second boot to new OS
The second boot to the new OS contains two small steps:
- Finalize the upgrade
- Welcome the user and OOBE
In the fourth phase, the setupact.log is moved to %Systemdrive%WindowspantherunattendGC
Finalize the upgrade
The upgrade process is finished.
Welcome the user and OOBE
The User welcome screen appears, which is similar to the screen after an ordinary Windows 10 installation. After the first logon, the user will see the Out of the box experience which performs the customization of windows.
How do I know the upgrade was successful?
At first, when Windows 10 boots up and the user was able to logon, the upgrade was basically successful. If any problems appear during the process, the system will be recovered to the old OS.
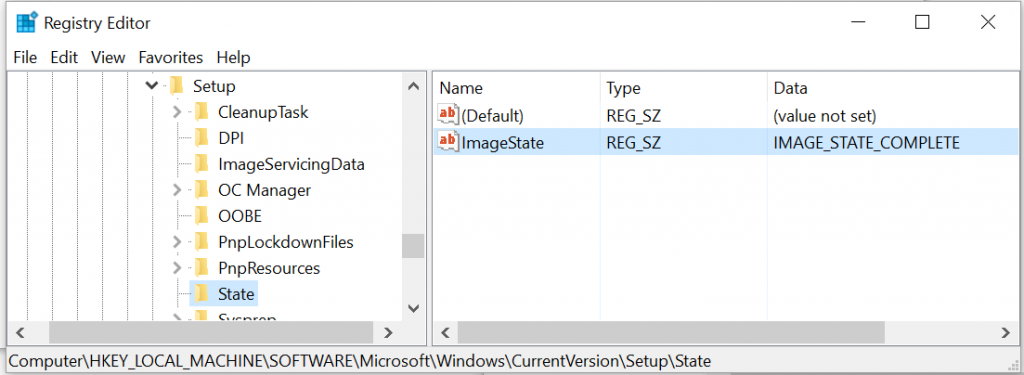
The System creates a registry key, that’s all.
Of course the setupact.log (%Systemdrive%WindowspantherunattendGC) describes the process:
|
1 |
|
Recover the system
If “something went wrong” during the upgrade process, the system will be recovered. This recovery can be performed out of any of the four upgrade process phases and beyond the first login.

Recover the system automatically by the process
Let’s see how the recovery process runs out of the four (five) phases:
Down Level
Basically the Down Level phase just gathered data. There is nothing more to do than cleaning up the system. If something causes a “hard block”, the system will be cleaned up.
WinRE
If something went wrong in the WinRE Phase, the upgrade process reboots into the original OS and cleans up the gathered data.
First Boot to new OS
If something went wrong iIn this phase, there is much more to do than just cleaning up, because the new OS is already running. So the process needs to reverse all the changes.
- Reboot to WinRE
- Remove the files and folders from the Systemdrive
- Move the files and folders out of the Windows.Old folder to their original location
- Cleanup the system
- Reboot to original OS
Second boot to new OS
Basically in the fourth phase, all recovery steps of phase three will be performed in this phase.
- Reboot to WinRE
- Remove the files and folders from the Systemdrive
- Move the files and folders out of the Windows.Old folder to their original location
- Cleanup the system
- Reboot to original OS
First Logon
If the process was fully successful and the user is able to login for the first time. If anything went wrong in this case, the system will reboot and reverse the system to its original state. The process proves that someone actually can login to the new Operating System.
Recover the system manually
It might happen, that the upgrade process completes successful and the user is able to use the new operating system at first glance, but later it turns out that a critical application does not work as expected when running on the new OS.
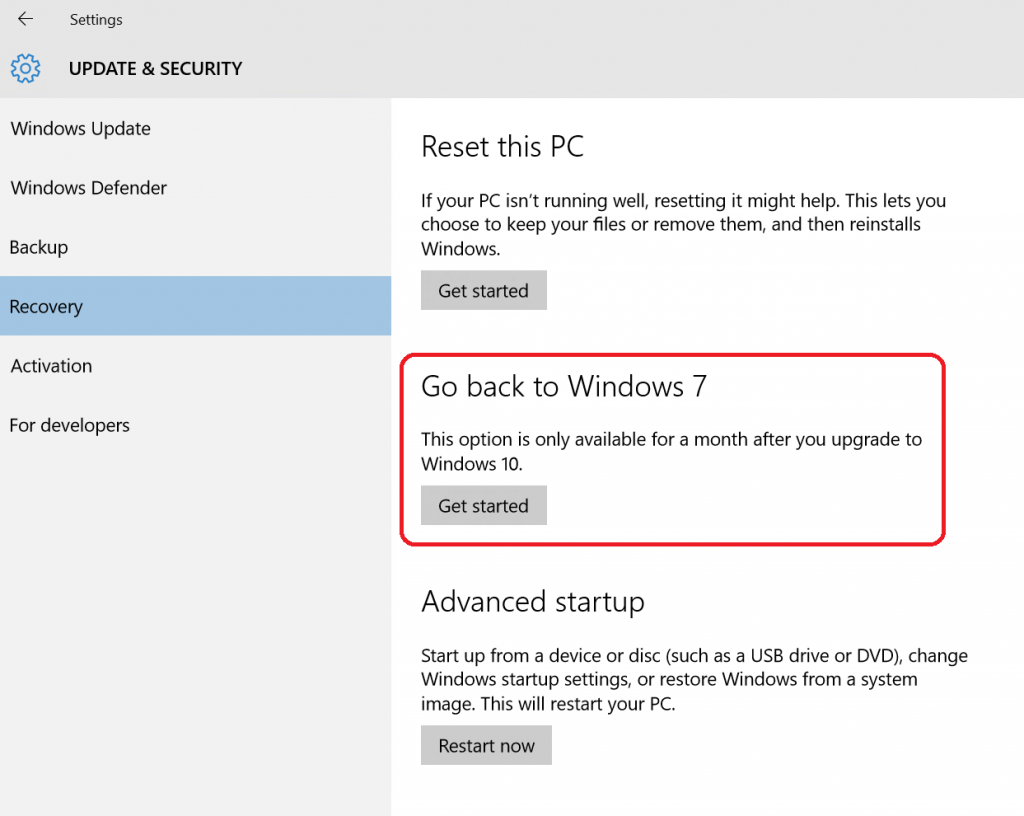
On order to support these scenarios, Windows 10 lets the user decide to recover the system by himself. For that purpose, the Windows.Old folder remains on the local hard disk for 30 days.
The user can start the recovery out of the system settings:
The recovery process which starts is basically the same as in the last to upgrade phases:
- Reboot to WinRE
- Remove the files and folders from the Systemdrive
- Move the files and folders out of the Windows.Old folder to their original location
- Cleanup the system
- Reboot to original OS