It’s fairly easy to create bootable USB installation media for Windows 10 when using Microsoft’s Media creation tool. Unfortunately this tool is not available for macOS. This post explains you how to do this without using a Windows-based PC or VM and without using BootCamp assistant. This can come in handy when trying to install Windows on your mac or when there is simply only an Apple Mac available and you need to boot the Windows installer for various reasons.
YouTube Video
If you are interested, I also created a YouTube video from this blogpost. If you prefer classic text, you can just follow the rest of this article:
Introduction
Unfortunately, since some time, it became a bit more complicated to create this USB drive from macOS. The main reason for this is because macOS supports only FAT32 as filesystem that is compatible with Windows (and ExFat but that causes issues to boot from). FAT32 has a file size limit of 4GB while the installation ISO now contains one file that is larger.
To overcome this, we will need to use a tool, Wimlib, which is able to split this file in two parts. More about this later.
In case you’re looking for the instructions to create a bootable USB drive to install Windows 11 instead, have a look at the following article: https://jensd.be/1740/windows/create-a-bootable-windows-11-installation-usb-on-macos
Download the Windows 10 ISO
Let’s start by downloading the ISO from Microsoft. This can be done from: https://www.microsoft.com/en-us/software-download/Windows10ISO. When you open this link on macOS, it should show you the ability to download the ISO rather than the Media Creation tool, which is shown when opening the same on a Windows-based PC.
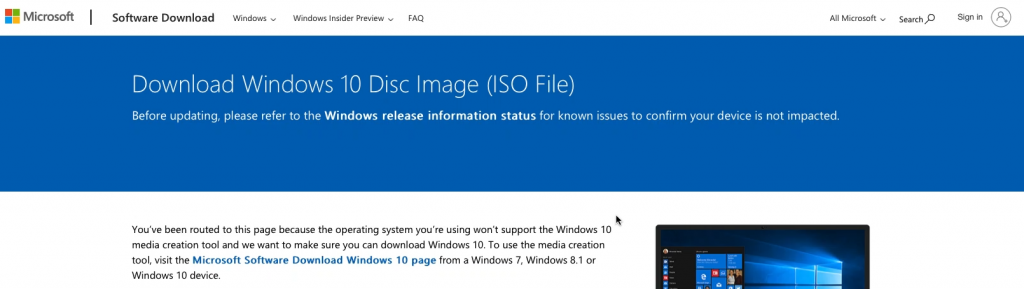
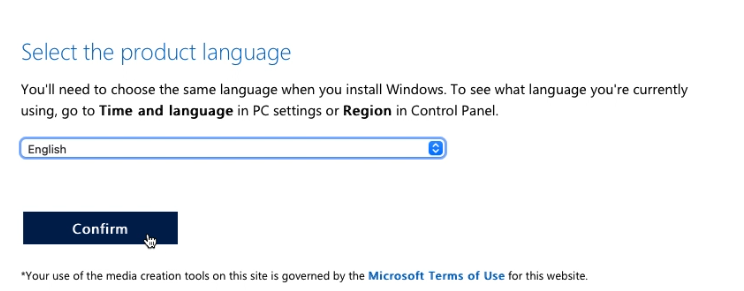
Choose for Windows 10, then select the preferred language, go for the “64-bit Download” and wait for the download to complete to get the .iso file on your Mac:
Prepare the USB drive
While the ISO is downloading, we can prepare our USB drive. You will need one that is at least 8GB. Insert the drive in your Mac and start Disk Utility.
In Disk Utility, choose to show all devices:
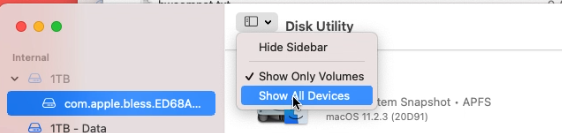
Then, on the left side, select your USB drive from the list and click Erase on the top right menu. In the dialog, enter a name for the drive (WINUSB here), choose to format as “MS-DOS (FAT)” and “Master Boot Record” as scheme. Finally click “Erase” to complete the process.

Copy all smaller files to the USB drive
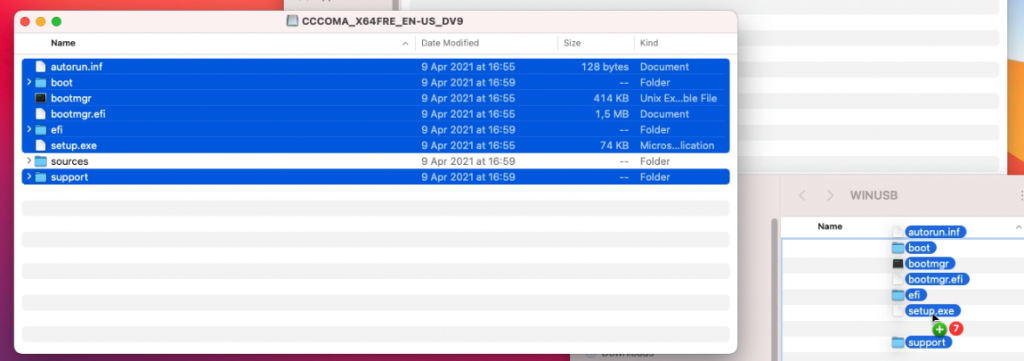
After the previous step, our USB drive is prepared. Once the ISO file is download as well, double click the ISO file to mount it. Then open it in Finder. As you can see, the sources folder contains one large file: install.wim which is over 4GB and will not fit on the FAT32-formatted USB drive:
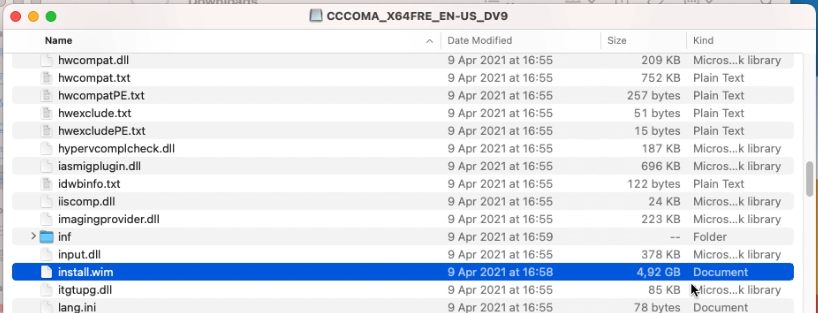
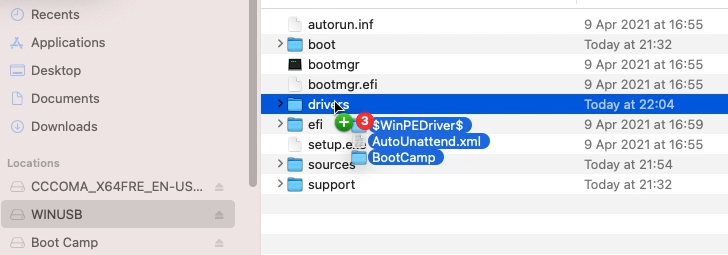
We will take care of that later so for now, copy all remaining files to the USB drive using Finder.
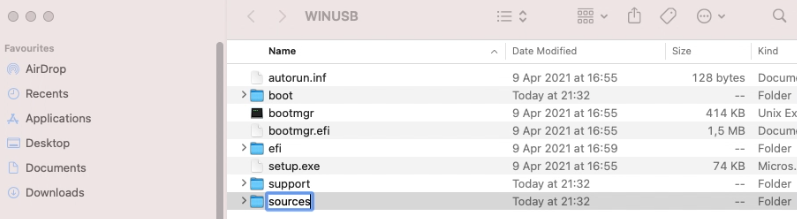
I typically start by copying all separate files and folders, except for the sources folder:
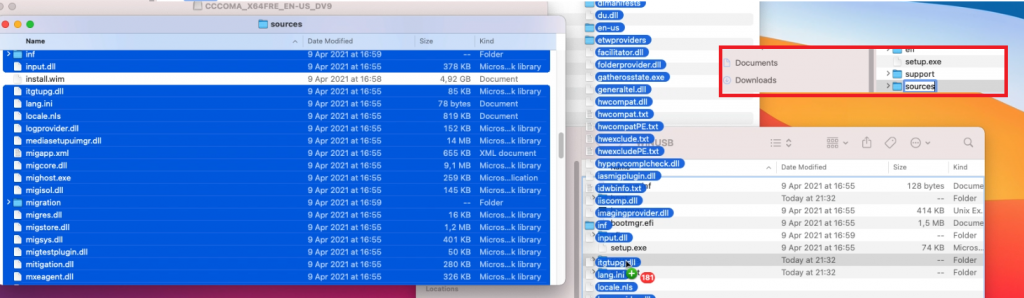
Then I create the sources folder and copy all files from sources with the exception of install.wim:
Prepare to split install.wim
So far things were pretty straightforward and if it wouldn’t be for that large file it would be a piece of cake. Unfortunately we have to work around that by splitting the file in two parts, smaller than the limit of our file system on the USB drive.
To accomplish this, we can use Wimlib (https://wimlib.net/). This is a tool that is developed to work with, and modify, .wim files. The easiest way to get this installed on your Mac is by using Brew (https://brew.sh/).
So, as just mentioned, we start by installing Brew. As is instructed on the Brew website, copy and paste the mentioned line in a terminal and execute it.
user@users-iMac ~ % /bin/bash -c "$(curl -fsSL https://raw.githubusercontent.com/Homebrew/install/HEAD/install.sh)" ==> Checking forsudoaccess (which may request your password). Password: ==> This script will install: /usr/local/bin/brew /usr/local/share/doc/homebrew ... ==> Next steps: Runbrew helpto get started Further documentation: https://docs.brew.sh user@users-iMac ~ %
Once Brew is installed, we can use it to install Wimlib:
user@users-iMac ~ % brew install wimlib
 ==> Downloading https://ghcr.io/v2/homebrew/core/openssl/1.1/manifests/1.1.1k
...
==> Installing wimlib
==> Pouring wimlib--1.13.4.big_sur.bottle.tar.gz
🍺  /usr/local/Cellar/wimlib/1.13.4: 65 files, 2.7MB
user@users-iMac ~ %
Split install.wim and get it on the USB drive
Now that we have Wimlib installed, we can use it to split the large install.wim file and copy it to our USB drive. In the same or a new Terminal session, execute the following:
user@users-iMac ~ % wimlib-imagex split /Volumes/CCCOMA_X64FRE_EN-GB_DV9/sources/install.wim /Volumes/WINUSB/sources/install.swm 4000
Splitting WIM: 4654 MiB of 4654 MiB (100%) written, part 2 of 2
Finished splitting "/Volumes/CCCOMA_X64FRE_EN-GB_DV9/sources/install.wim"
In the command above, we told to execute the wimlib-imagex tool (part of Wimlib) and passed some arguments:
- “split” to indicate that we want to split this larger file
- “/Volumes/CCCOMA_X64FRE_EN-GB_DV9/sources/install.wim” which is the source file to split. Keep in mind that the name under /Volumes depends on the ISO name so you need to adjust this accordingly. Just do ls /Volumes from the terminal to see what is there.
- “/Volumes/WINUSB/sources/install.swm” the destination of where the split files should end. As with the ISO name, here WINUSB is the volume label I gave to my USB drive when erasing it with Disk Utility. Adjust this as well when you chose something different earlier.
- 4000 the max. size of the destination file, so the file will be split in a part of 4000MB and the rest.
After this command completes, you can see that now two files were created on the USB drive:

The Windows 10 installer knows how to deal with these and will just work fine.
That should be all you need to create a bootable USB drive for Windows 10 installation.
(Optionally) download Windows 10 drivers for your Mac
If you plan to use the USB drive, which you created with the above steps, on a regular PC then you can skip this step. If you, on the other hand, plan to use this for installation on a Mac, it is a good idea to go through these additional steps.
The goal of this is to fetch the necessary drivers for use on Mac. As I did from Windows in a previous article, I will use Brigadier for this. Brigadier, which is basically a script, works just from macOS directly as well.
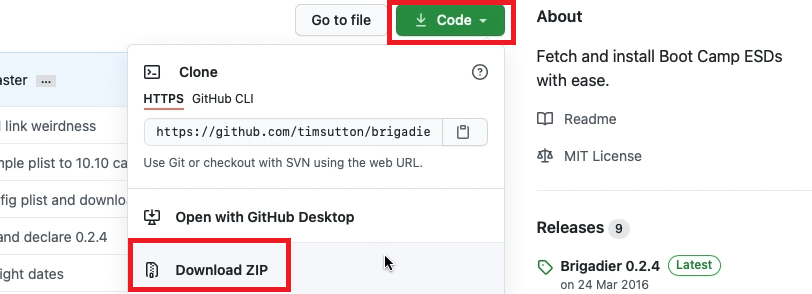
From the author’s Github page: https://github.com/timsutton/brigadier, click the green Code button then choose to “Download ZIP”
Once the file is downloaded, open a fresh Terminal session and navigate to the “brigadier-master” in your Downloads folder, then simply execute it using ./brigadier:
user@user-iMac ~ % cd Downloads/brigadier-master
user@user-iMac brigadier-master % ./brigadier
Using Mac model: iMac13,1
...
Expanding flat package...
Extracting Payload...
Extracted to /Users/user/Downloads/brigadier-master/BootCamp-041-84821/WindowsSupport.dmg
user@user-iMac brigadier-master %
As you can see in the output, executing brigadier automatically detected the model identifier of the mac which we executed this on. If you want to download the required drivers for another model, you can simply pass it using the –model parameter. The files got downloaded as a subfolder of brigadier-master as WindowsSupport.dmg
All that is left to do is to navigate to the folder using Finder, then to open WindowsSupport.dmg to mount it and to copy those files to the USB drive:
After going through the installation, executing BootCamp/setup.exe will install most of the required drivers or at least enough to continue the rest of the driver installation using Windows update.
Boot from the USB drive
As the final step, now that the USB drive is prepared, with or without additional drivers for your Mac, you can boot from it.
On a regular PC, this is usually done by pressing a key at BIOS time to bring up a boot menu (F11 is often used for this) or, for some older BIOS, by changing the boot order from the BIOS setup.
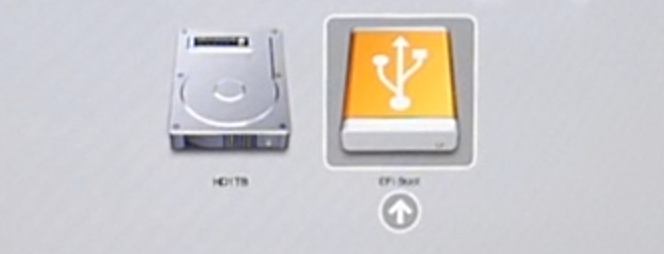
On a Mac, you can choose to boot from USB by holding down the Alt key on boot and to select the USB drive from the boot loader:
Создайте загрузочную флешку Windows без помощи компьютерного мастера или знакомого, который разбирается в технике. Напишу о разных способах, подходящих новичкам.
При составлении данного пошагового руководства исхожу из того, что образ системы вы уже:
- Загрузили с сайта разработчика ОС
- Сохранили на жестком диске или SSD
Если это еще не сделано, начните чтение с подробной инструкции по загрузке ISO. Рассмотренная в материале по ссылке программа Media Creation Tool от Microsoft может применяться для скачивания с последующей записью образа на накопитель. И это первый метод создания загрузочной флешки.
Для скачивания образа может применяться:
- Настольный компьютер или ноутбук под управлением Windows
- ПК с Линуксом
- Mac
- Android-телефон
- Планшет
Создать загрузочную флешку, предназначенную для дальнейшей установки Windows вы можете на ПК с ОС:
- macOS
- Linux
- Windows
Обратите внимание, что некоторые методы работают только в ОС от Microsoft.
Теперь рассмотрю наиболее простые и универсальные способы. Для входа на веб-сайты использую Microsoft Edge. Вы можете воспользоваться другим браузером. Возможны отличия в интерфейсе.
Загрузочная флешка Windows на Mac, Windows- или Linux-компьютере
Содержание
- Загрузочная флешка Windows на Mac, Windows- или Linux-компьютере
- Rufus
- WinSetupFromUSB
- UltraISO
Программный инструмент balenaEtcher привлекателен для новичков, поскольку в нем отсутствуют шаги, требующие компьютерных знаний и навыков.
Перейдите на официальный сайт balenaEtcher, программы для записи ISO-образов на карты памяти SD и накопители, подключаемые к разъему USB (флешки). Обратите внимание: в окне браузера показан интерфейс утилиты.

Прокрутите страницу. Нажмите кнопку «Download for Windows» для загрузки версии, совместимой с операционными системами от Microsoft.

Если загрузочный накопитель будет создаваться на ПК под управлением другой ОС:
- Щелкните по стрелке вниз, расположенной на салатовом фоне справа

- Выберите версию для платформы: macOS или Linux
- Скачайте на HDD или SSD версию для своей ОС

В Edge вам предлагается:
- «Выполнить»: запустить исполняемый файл сразу после скачивания
- «Сохранить»: разместить файл по указанному вами пути на накопителе ПК
- Отменить загрузку
Первый вариант удобнее для начинающих пользователей, поскольку в нем меньше шагов. При втором варианте скачанную программу нужно запустить из того каталога, в который она сохранена.

После проверки безопасности загружаемого EXE-файла…

…стартует мастер установки утилиты. Программа будет работать только после принятия пользователем условий лицензионного соглашения. Внимательно ознакомьтесь с текстом перед тем, как нажать кнопку «Принимаю».

Установка инструмента займет некоторое время.

Если используете Linux, Windows или Mac и предпочитаете устанавливать программное обеспечение с применением команд, обратите внимание на строку под перечнем версий утилиты для разных платформ.
Щелкните по ссылке: «Debian (.deb) packages» если ваша ОС основана на Debian. К таким системам в том числе относятся Ubuntu и Linux Mint. «Red Hat (.rpm) packages» — ссылка для пользователей Линуксов, поддерживающих установку софта из RPM-пакетов. Пример: Fedora. Обе ссылки ведут на одну страницу с описанием процесса установки для разных ОС.

По ссылкам содержатся инструкции по установке и удалению утилиты:
- для DEB

- для RPM

- для Solus (GNU/Linux x64)

- через Brew Cask в macOS

- через Chocolatey в Windows

В правой верхней части окна программы — значок настроек («шестеренка»). Щелкните по нему.

Оставьте настройки предлагаемые по умолчанию, если не требуются особые опции, о которых вы точно знаете. Единственный параметр, на который стоит обратить внимание — первая строка перечня. Предлагает пользователю отправлять отчеты об ошибках и использовании инструмента. Исходно опция включена, но может быть отключена вами. Для этого нужно снять «птичку» слева от текста.
Вторая снизу опция — автоматическое обновление программы.

Процесс создания флешки для последующей установки операционной системы состоит из трех шагов.
Первый («Select image»). Укажите путь к образу (ISO-файлу) ОС:
- Windows 10
- Windows 7
- Linux Mint
- Ubuntu
- Другого дистрибутива Линукс
Второй («Select target»). Выберите чистую подключенную к USB-порту ноутбука или настольного ПК флешку. Она и станет загрузочной после завершения третьего шага работы программного инструмента.
Третий («Flash!»). Запись образа системы на флеш-накопитель. Дождитесь завершения работы программы.

Извлеките созданный загрузочный накопитель из разъема. В дальнейшем используйте его в качестве источника для установки системы.
Rufus
Перейдите на официальный сайт утилиты Rufus.
В правом верхнем углу страницы — список.

Выберите из него язык. Подтвердите выбор щелчком мыши.

Прокрутите страницу вниз до надписи «Скачать». Под надписью выберите версию:
- Rufus (надо устанавливать)
- Переносная версия (достаточно запустить скачанный исполняемый файл)
Чуть выше отображается дата свежайшего обновления программного инструмента. Рекомендую остановиться на версии, не требующей установки, то есть дополнительного шага на пути к конечному результату — работоспособному загрузочному USB-накопителю. Щелкните по ссылке выбранной версии программы.

В браузере Microsoft Edge, в нижней части окна приложения, появится перечень доступных действий с файлом. Упростите себе задачу — нажмите «Выполнить». Утилита начнет работу сразу после загрузки без дополнительных действий. Предусмотрена возможность сначала «Сохранить» ее на жесткий диск, а затем — запустить ее.

Система спросит у вас: «Разрешить этому приложению вносить изменения на вашем устройстве?» Примите решение. Продолжение работы программы возможно только после нажатия пользователем кнопки «Да».

Определитесь, необходима ли вам автоматическая проверка обновлений программного инструмента («Да»). В большинстве случаев работа с более свежей версией ПО предпочтительна, поскольку в ней исправлены известные ошибки.

Программа удобна тем, что у нее всего одно окно. Все настройки и параметры указываются в нем.
Определите «Устройство». Выберите из списка флешку. Перед этим ее нужно подключить к USB-порту компьютера.
Не забудьте подписаться на наш Дзен
«Методом загрузки» является ISO-образ Windows, путь к которому необходимо указать.
«Схема раздела»:
- GPT
- MBR
Выбор «Целевой системы» зависит от того, используется ли на ПК современный интерфейс UEFI или классический BIOS.
Из списка «Файловая система» рекомендую выбрать «FAT32», а «Размер кластера» оставить предлагаемый по умолчанию — 16 килобайт.

Поочередно щелкните по надписям: «Показать расширенные свойства диска» и «Показать расширенные параметры форматирования». Отобразятся предназначенные для опытных пользователей дополнительные опции утилиты. Кроме случаев, когда вы абсолютно уверены в необходимости дополнительных настроек, не меняйте ничего в этих разделах.

После завершения установки параметров:
- Нажмите кнопку «Старт»
- Дождитесь завершения создания загрузочного накопителя
- Извлеките флешку из USB-порта
- Используйте ее для установки ОС

Метод удобен для начинающих пользователей, поскольку сложные настройки в программе отсутствуют.
WinSetupFromUSB
Программа для операционных систем Windows предназначена для создания загрузочных (в том числе и мультизагрузочных) флешек операционных систем:
- Windows (начиная с версий 2000/XP)
- Linux
- BSD
Созданный с ее помощью загрузочный накопитель может использоваться на компьютерах с (U)EFI и классическим BIOS.
Перейдите на домашнюю страницу утилиты.
Щелкните по пункту «Downloads» меню веб-сайта.

Для загрузки предлагается наиболее свежая на момент посещения веб-сайта версия. Щелкните по ссылке с названием EXE-файла.

Нажмите кнопку «Download» для того, чтобы загрузить программу.

В самораспаковывающемся архиве содержатся версии для 32- и 64-битных компьютеров.

Запустите версию, соответствующую архитектуре центрального процессора вашего ПК. В единственном окне программы:
- Выберите из списка «USB disk selection and format tools» флешку, которая станет установочной
- Добавьте один или несколько образов для последующей записи на загрузочный носитель (в блоке «Add to USB disk»)
- Нажмите кнопку «GO»

Мощный инструмент для опытных пользователей, которым нужна возможность загрузки и установки нескольких ОС с одного накопителя. Несложен и для начинающих.
UltraISO
Запускается на компьютерах под управлением Windows:
- 98/98SE
- NT 4.0(SP6a)
- XP
- 2003
- Vista
- 2008
- 7
- 8
- 8.1
- 10
Предусмотрена возможность создания загрузочных CD операционных систем Windows NT, 2000, XP. Инструмент поможет пользователям, которым нужно создать загрузочный накопитель старой ОС на древнем компьютере.
Применяется также для редактирования компакт-дисков с аудитоконтентом. Обрабатывает образы Audio CD в формате .NRG(Nero). Предусмотрена возможность определения метки диска и названия песни.
Перейдите на официальный сайт программы UltraISO.
Откроется домашняя страница утилиты. Обратите внимание, что это платный программный продукт. Посетителям сайта предлагается скачать триал-версию UltraISO Premium.

Для этого нажмите на кнопку «Free Trial». Edge предложит «Выполнить» или «Сохранить» исполняемый файл. Первый вариант удобнее, поскольку ПО запустится сразу после загрузки.

Чтобы начать работу с приложением, ему необходимо предоставить разрешение на внесение изменений на устройстве (кнопка «Да»).

Установка начнется только после того, как пользователь примет условия лицензионного соглашения. Перед тем, как выбирать этот вариант (первый в выделенном блоке) и нажимать кнопку «Далее», внимательно прочитайте текст. Если предпочитаете воспользоваться одним из ранее рассмотренных методов — прервите установку (второй вариант).

Будет предложена папка, в которую устанавливается программный инструмент для создания загрузочного накопителя. Вы можете указать другую. Для этого используйте кнопку «Обзор». Нажмите «Далее» для установки утилиты в выбранный каталог.

Мастер установки спросит, в какой папке главного меню создать ярлык программы и предложит выбрать другой каталог. Жмите «Далее», чтобы перейти к следующему шагу установки.

Вам предлагается:
- Создать значок программы на Рабочем столе
- Открывать ISO-файлы в ней по умолчанию
- Установить эмулятор дисков для ISO
Опции по умолчанию активны. Отключите вторую, если не пока не уверены, станете ли использовать утилиту в качестве основного инструмента для создания загрузочных флешек.

Нажмите кнопку «Установить».

Если оставить «птичку» перед опцией запуска, программный инструмент откроется после нажатия кнопки «Завершить».

В стартовом окне указана цена программы. Предлагается ввести регистрационный ключ или купить ПО. Доступна также опция «Пробный период».

Откроется окно инструмента.

В меню «Файл» выберите пункт «Открыть». Укажите путь к ранее скачанному образу операционной системы.

Щелкните по подпункту «Записать образ жесткого диска» из меню «Самозагрузка».

Выберите из списка флешку и нажмите «Записать». Не меняйте никаких настроек, кроме случаев, когда точно уверены, какие параметры нужно переопределить.

Подробную инструкцию по установке Windows 10 читайте дополнительно.
Какой метод создания загрузочной флешки предпочитаете вы?
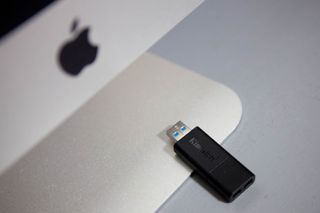
We previously showed you how to create a Windows 10 USB installation media when performing a clean install of Windows 10, but there might be an instance where the only machine you have available is a Mac. We’ll show you to create a bootable USB flash drive with the Windows 10 installer from a Mac. It’s easier than you think, thanks to the built-in Boot Camp Assistant from Apple.
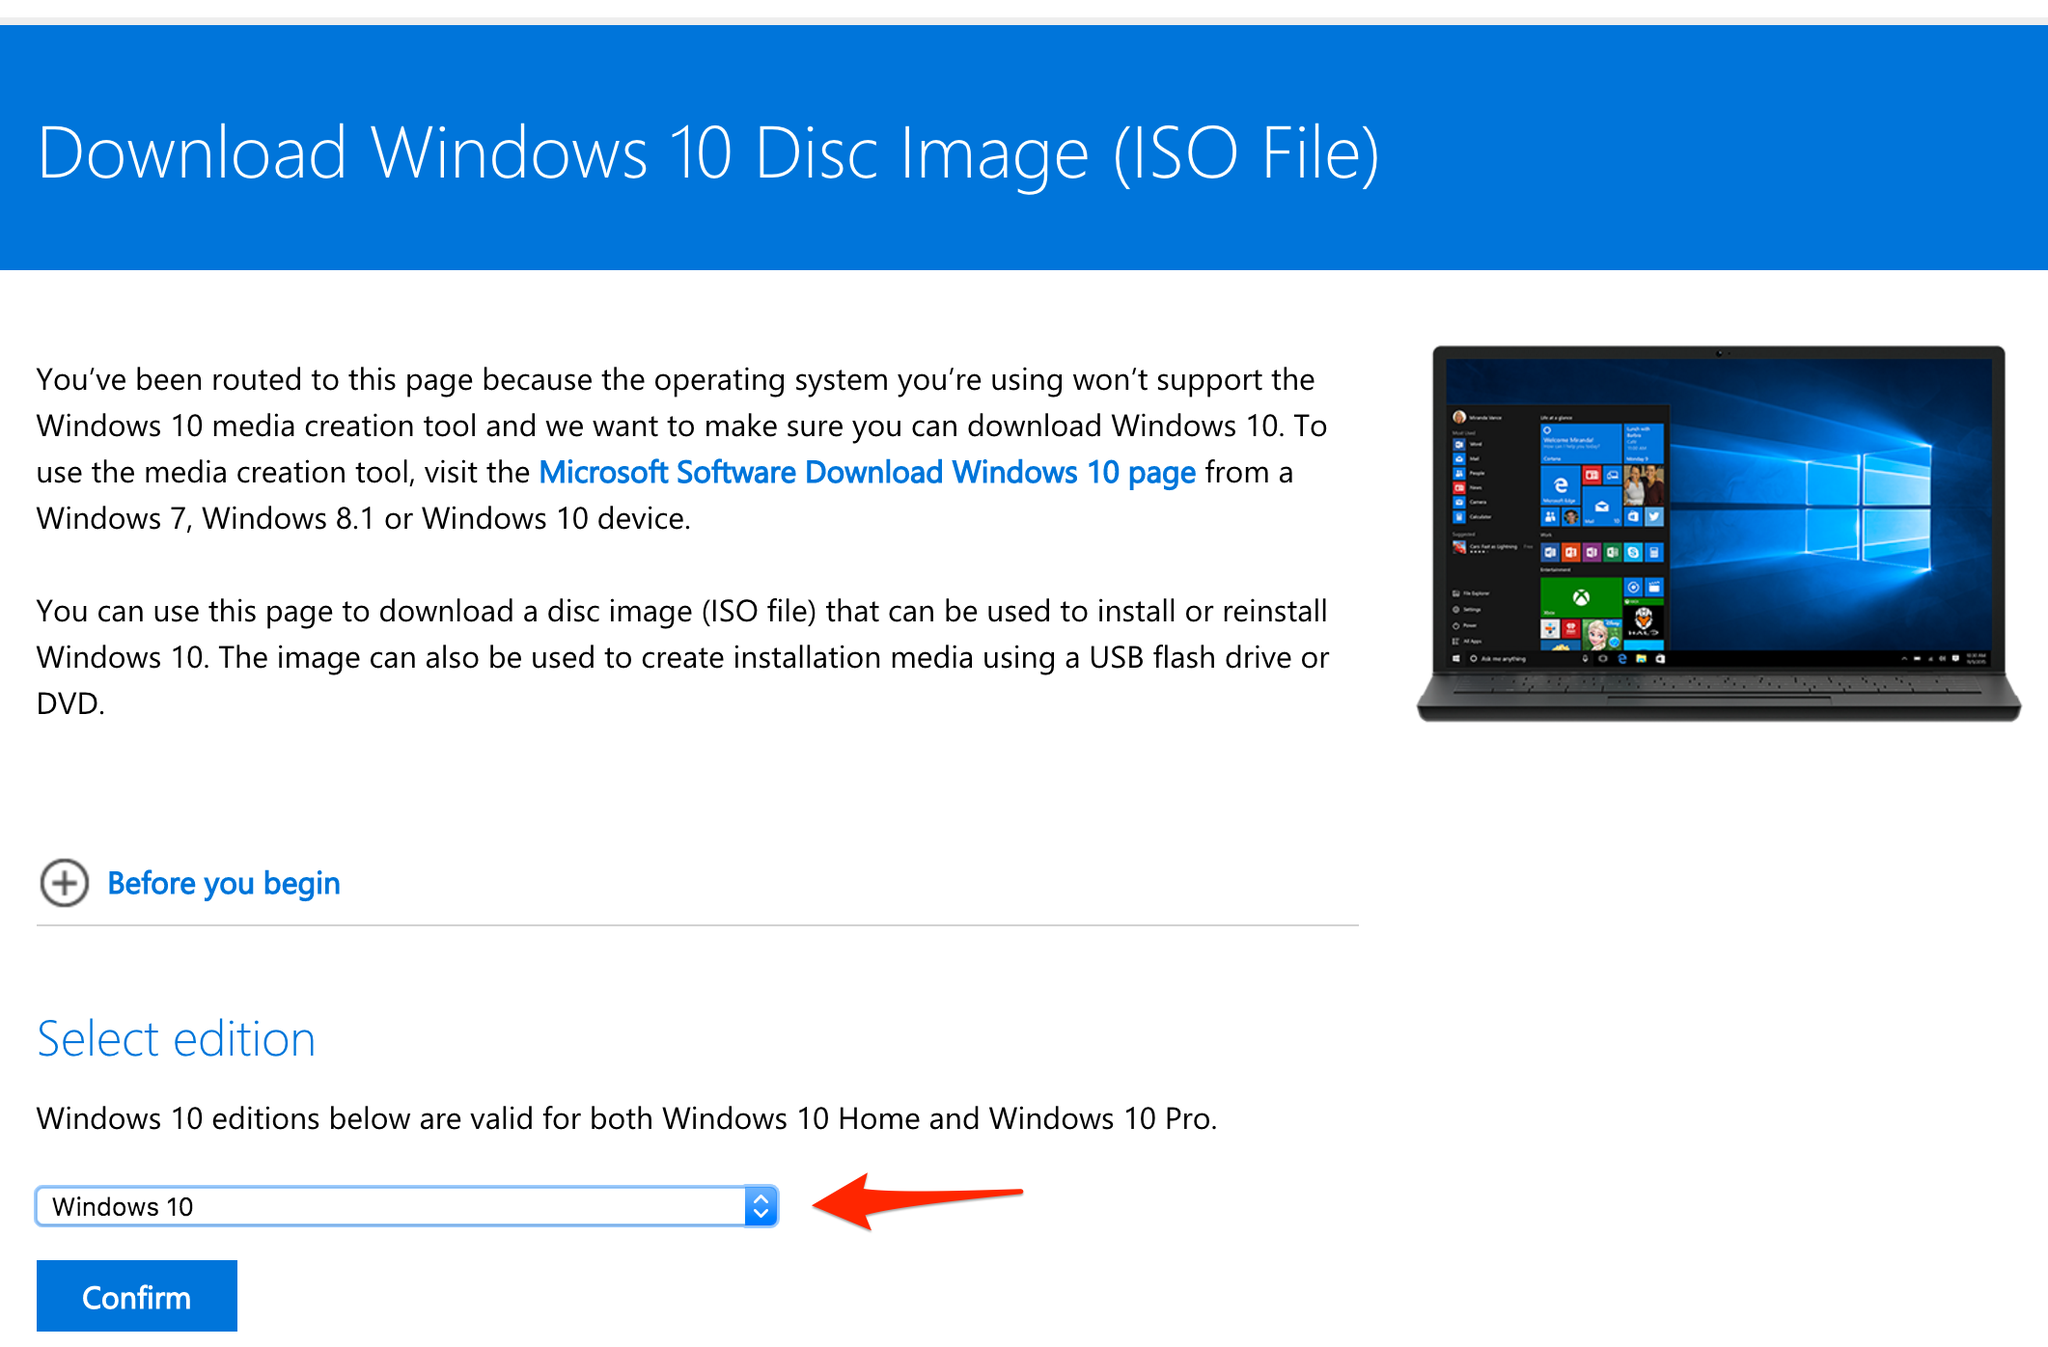
Download Windows 10 Disc Image
First, you need to download the Windows 10 ISO file. Go to the download page and select the proper edition of Windows 10 in the dropdown menu. If you don’t know what K, KN, or Single Language edition stands for, just select Windows 10 in the list.
Download Windows 10 ISO (opens in new tab)
Create USB installer with Boot Camp Assistant
After downloading the ISO file, you’ll need to use Boot Camp Assistant to move it to a bootable USB drive.
- Insert a USB flash drive to your Mac. Make sure it’s at least 8GB, which is usually marked on the USB stick. You can also check by right-clicking the USB drive on your desktop and clicking Get Info. Check if the number next to Capacity is at least 8GB. All the files in the drive will be deleted, so make sure there are no important documents inside.
- Open Boot Camp Assistant. The easiest way to launch it is through Spotlight Search, which you can bring up by pressing Command and Spacebar. Press Enter to launch the app.
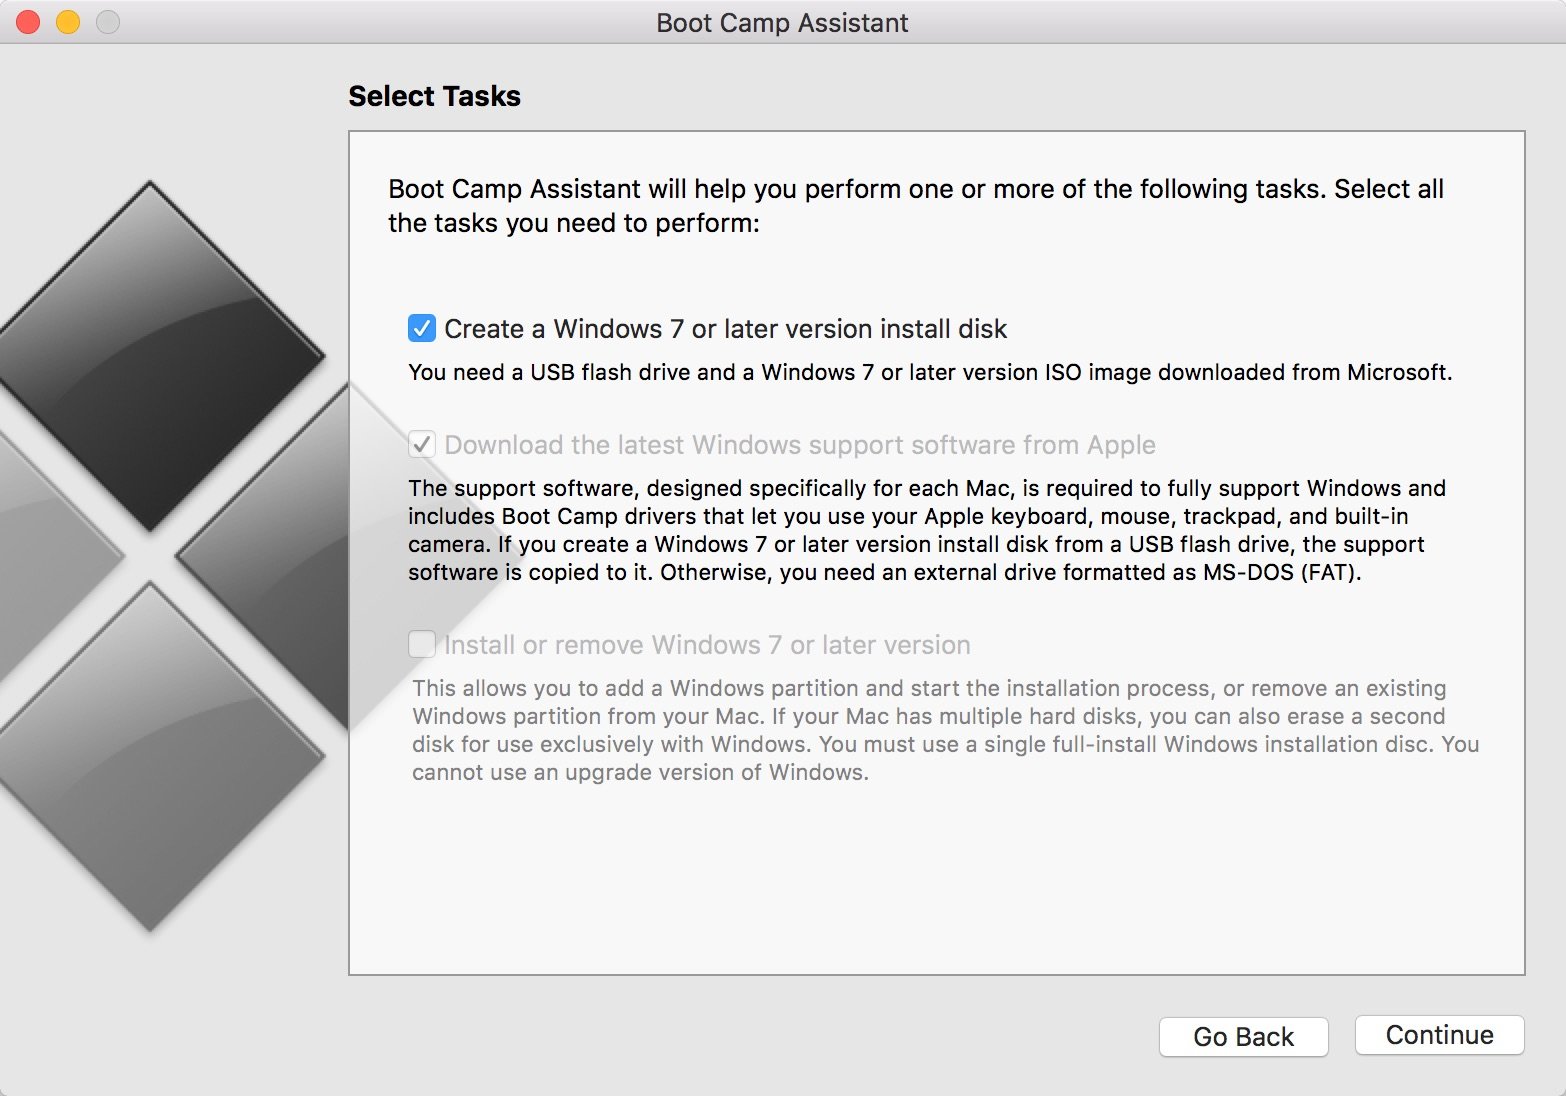
- Check the box for «Create a Windows 7 or later version install disk» and deselect «Install Windows 7 or later version.»
- Click Continue to proceed.
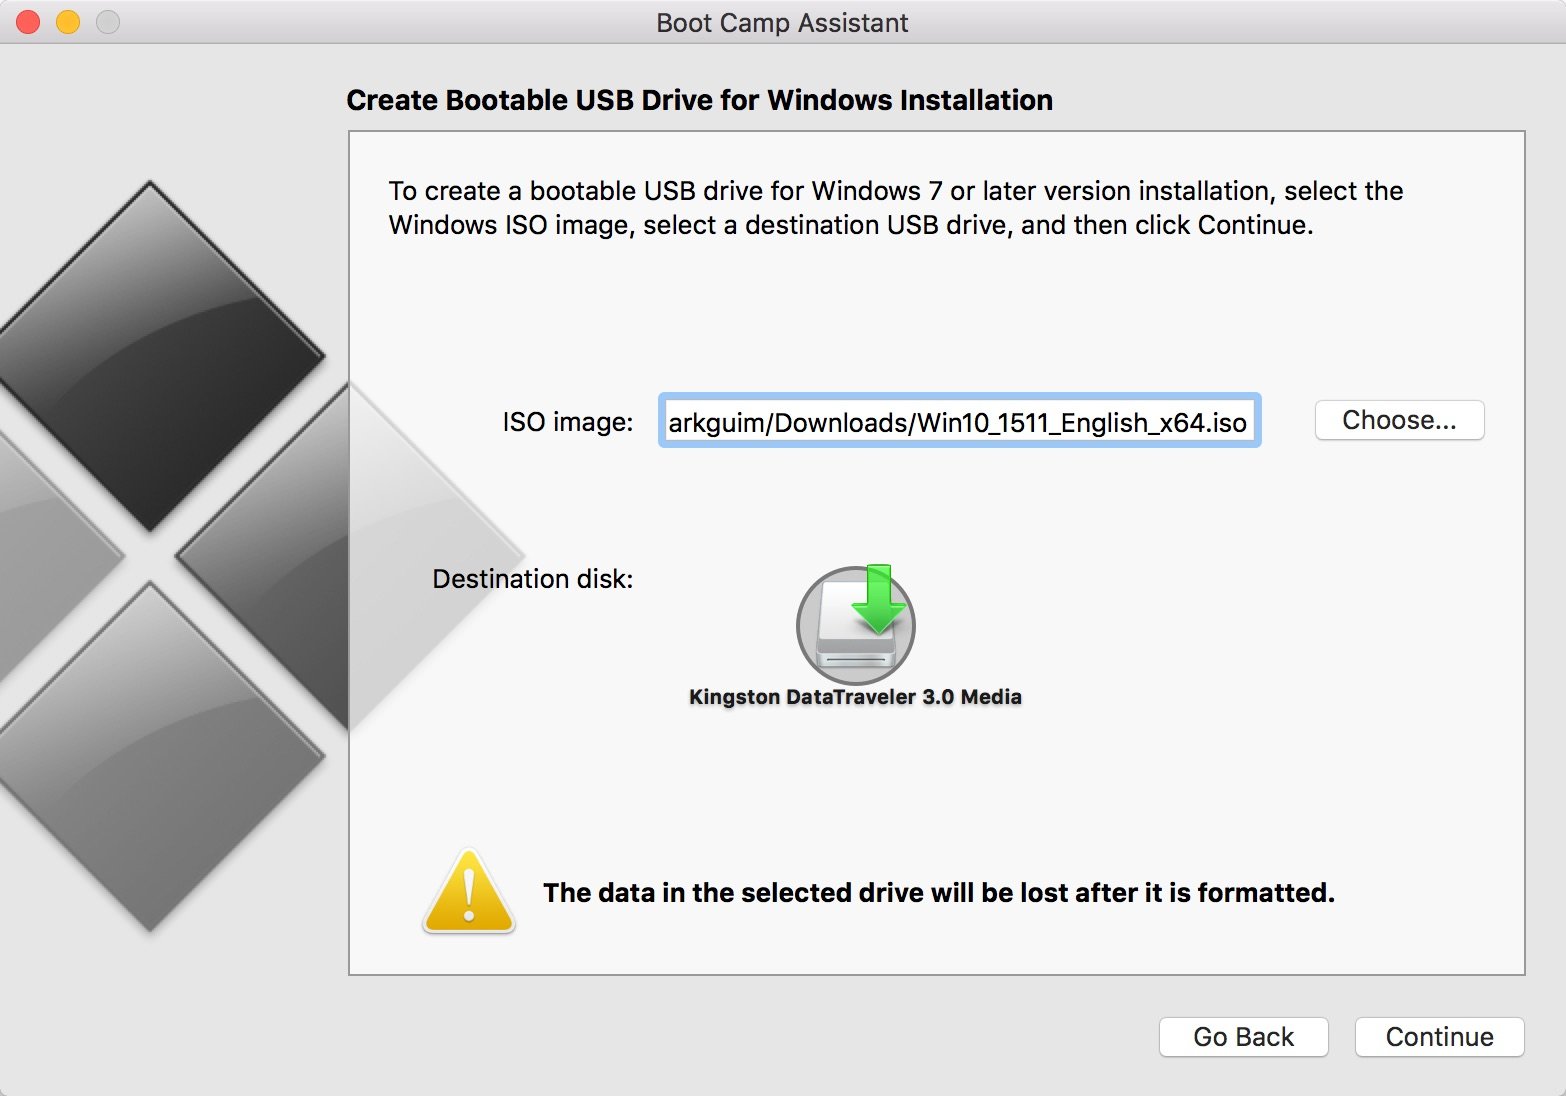
- Boot Camp Assistant will automatically locate the ISO file from your downloads folder, but make sure it is the right file. Click the «Choose…» button and locate the ISO file. Make sure the destination disk is the USB thumb drive you’ve inserted.
- Click Continue. It can take about 20 minutes to format and set up the USB installer on the Mac.
- When Boot Camp Assistant is done, the USB drive will be renamed to WININSTALL. Click Quit to close the app and then Eject the USB drive.
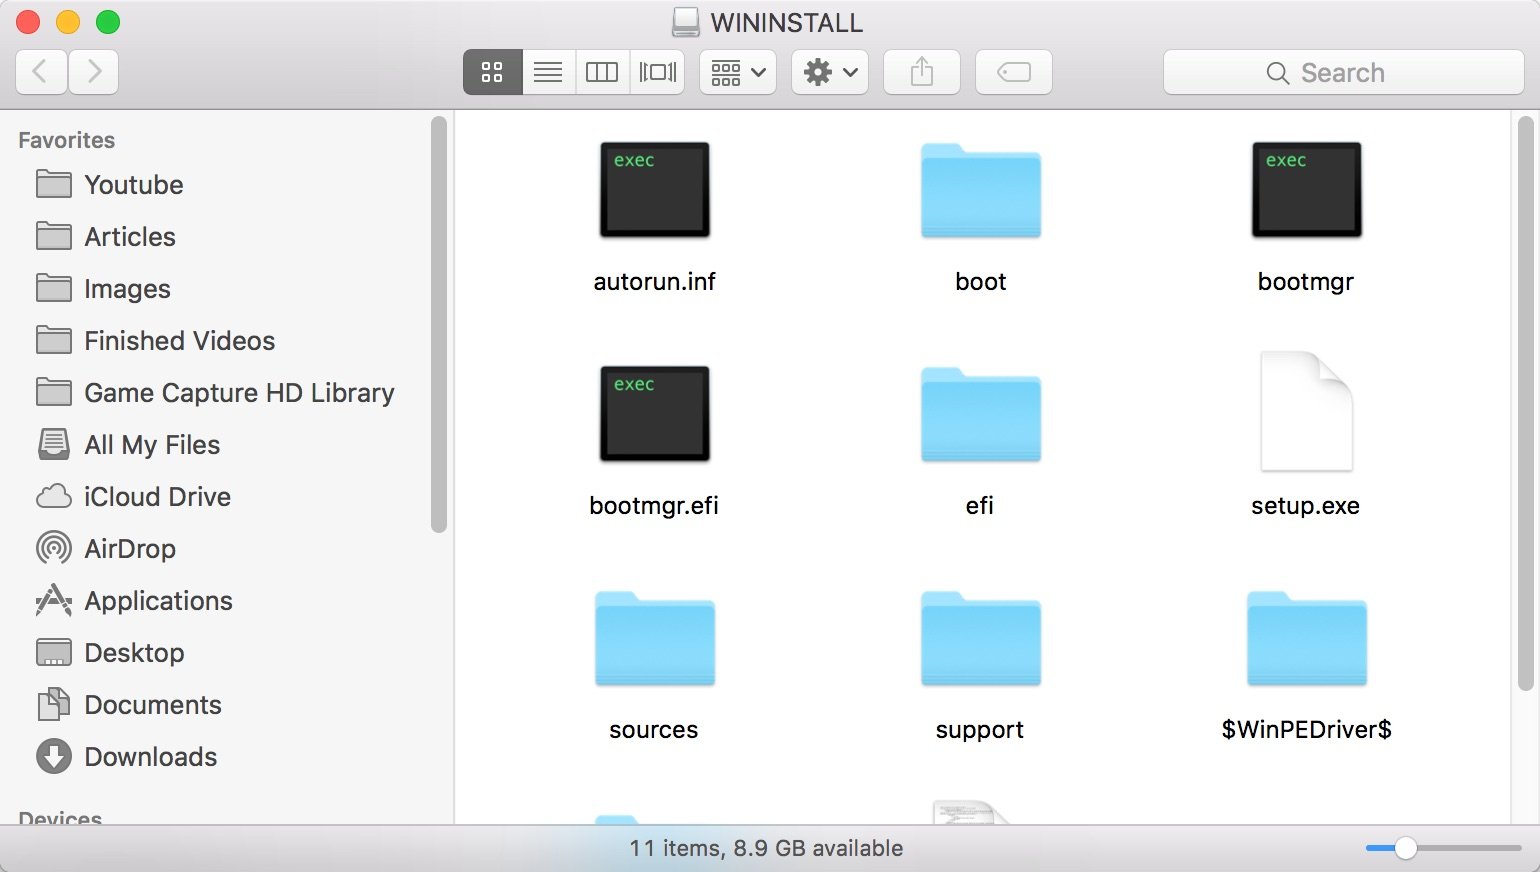
That’s it! You now have a bootable USB drive with the Windows 10 installer. You can use it to configure new Windows 10 PCs from scratch. We told you it was easy!
Have you tried creating a Windows 10 installer USB drive from a Mac before? Did you encounter any issues? Let us know your experience in the comments.
 Fast USB Storage
(opens in new tab)
SanDisk 32GB Ultra Flair USB 3.0 Flash Drive
Our go-to for USB storage.
This compact USB flash drive provides affordable USB 3.0 storage flexing steady transfer speeds up to 150MB/s. Ideal for portable data storage, including any Windows installation.
Get the best of Windows Central in in your inbox, every day!
Mark Guim is Video Editor at Windows Central. He switched to Windows because the MacBook Pro isn’t Pro enough. You can follow him on Twitter at @markguim.
Содержание
- How to create a Windows 10 installer USB drive from a Mac
- Download Windows 10 Disc Image
- Create USB installer with Boot Camp Assistant
- Fast USB Storage
- SanDisk 32GB Ultra Flair USB 3.0 Flash Drive
- Excited for Age of Empires 4? Here’s everything you need to know.
- New VAIO SX12 and SX14: Speedy PCIe 4 storage, big battery life, and more
- Monoprice sneak-launches Dark Matter 32 gaming monitor
- The NFL is back! Check out these must-have Windows apps for football fans
- Download Windows 10
- Windows 10 May 2022 Update
- Create Windows 10 installation media
- Download Windows 10
- Windows 10 May 2022 Update
- Create Windows 10 installation media
- Windows 10 Media Creation Tool for Mac
- What is Windows 10 Media Creation Tool
- Does Windows 10 Media Creation Tool Have a Mac Version?
- Windows 10 Media Creation Tool for Mac Alternative 1: UUByte ISO Editor
- Step 1: Download
- Step 2: Load Windows 10 ISO
- Step 3: Create Windows 10 Bootable USB
- Windows 10 Media Creation Tool for Mac Alternative 2: Boot Camp Assistant
- Windows 10 Media Creation Tool for Mac Alternative 3: Etcher
- Windows 10 Media Creation Tool for Mac Alternative 4: Virtual Machine
- Conclusion
- MediaCreationTool.bat: Скачать ISO-образы Windows 11 и обход проверки совместимости
- Обход проверки совместимости
How to create a Windows 10 installer USB drive from a Mac

We previously showed you how to create a Windows 10 USB installation media when performing a clean install of Windows 10, but there might be an instance where the only machine you have available is a Mac. We’ll show you to create a bootable USB flash drive with the Windows 10 installer from a Mac. It’s easier than you think, thanks to the built-in Boot Camp Assistant from Apple.
Download Windows 10 Disc Image
First, you need to download the Windows 10 ISO file. Go to the download page and select the proper edition of Windows 10 in the dropdown menu. If you don’t know what K, KN, or Single Language edition stands for, just select Windows 10 in the list.

Create USB installer with Boot Camp Assistant
After downloading the ISO file, you’ll need to use Boot Camp Assistant to move it to a bootable USB drive.
Click Continue to proceed.
Boot Camp Assistant will automatically locate the ISO file from your downloads folder, but make sure it is the right file. Click the «Choose…» button and locate the ISO file. Make sure the destination disk is the USB thumb drive you’ve inserted.
Click Continue. It can take about 20 minutes to format and set up the USB installer on the Mac.
When Boot Camp Assistant is done, the USB drive will be renamed to WININSTALL. Click Quit to close the app and then Eject the USB drive.

That’s it! You now have a bootable USB drive with the Windows 10 installer. You can use it to configure new Windows 10 PCs from scratch. We told you it was easy!
Have you tried creating a Windows 10 installer USB drive from a Mac before? Did you encounter any issues? Let us know your experience in the comments.
Fast USB Storage

SanDisk 32GB Ultra Flair USB 3.0 Flash Drive
Our go-to for USB storage.
This compact USB flash drive provides affordable USB 3.0 storage flexing steady transfer speeds up to 150MB/s. Ideal for portable data storage, including any Windows installation.
We may earn a commission for purchases using our links. Learn more.
![]()
Excited for Age of Empires 4? Here’s everything you need to know.
Age of Empires 4 is finally here, and real-time strategy fans are diving in. Here’s what you need to know about the games as it enters the RTS scene.
![]()
New VAIO SX12 and SX14: Speedy PCIe 4 storage, big battery life, and more
Two new VAIO SX laptops are here. They pack remarkably speedy SSDs, big battery life, and high price tags.
![]()
Monoprice sneak-launches Dark Matter 32 gaming monitor
Monoprice soft-launched its Dark Matter 32 gaming monitor today. It features a 165Hz refresh rate, 1 ms response time, and supports Adaptive Sync.
![]()
The NFL is back! Check out these must-have Windows apps for football fans
After months of waiting through the offseason, the NFL is finally back this week. With these Windows 10 apps, you won’t miss a snap of the NFL action.
Источник
Download Windows 10
Before updating, please refer to the Windows release information status for known issues to confirm your device is not impacted.
Windows 10 May 2022 Update
The Update Assistant can help you update to the latest version of Windows 10. To get started, click Update now.
To get started, you will first need to have a licence to install Windows 10. You can then download and run the media creation tool. For more information on how to use the tool, see the instructions below.

Here’s when to use these instructions:
If you are installing Windows 10 on a PC running Windows XP or Windows Vista, or if you need to create installation media to install Windows 10 on a different PC, see Using the tool to create installation media (USB flash drive, DVD, or ISO file) to install Windows 10 on a different PC section below.
Note: Before you install Windows 10, check to make sure your PC meets the system requirements for Windows 10. We also recommend going to the PC manufacturer’s website for any additional info about updated drivers and hardware compatibility.
Follow these steps to create installation media (USB flash drive or DVD) you can use to install a new copy of Windows 10, perform a clean installation, or reinstall Windows 10.
Before you download the tool make sure you have:
Check a few things on the PC where you want to install Windows 10:
If you have Office 2010 or earlier and choose to perform a clean install of Windows 10, you will need to locate your Office product key. For tips on locating your product key, check Find your Office 2010 product key or Enter the product key for your Office 2007 program.
Using the tool to create installation media:
Select the language, edition, and architecture (64-bit or 32-bit) for Windows 10. This table will help you decide which edition of Windows 10 you’ll choose:
After completing the steps to install Windows 10, please check that you have all the necessary device drivers installed. To check for updates now, select the Start button, and then go to Settings > Update & Security > Windows Update, and select Check for updates. You may also wish to visit your device manufacturer’s support site for any additional drivers that may be needed.
Note: Drivers for Surface devices may be found on the Download drivers and firmware for Surface page.
Before you install Windows 10, it’s a good idea to save any work and back up your PC before you start. If you used the media creation tool to download an ISO file for Windows 10, you’ll need to burn it to a DVD before following these steps.
If your PC does not automatically boot to the USB or DVD media, you might have to open a boot menu or change the boot order in your PC’s BIOS or UEFI settings. To open a boot menu or change the boot order, you’ll typically need to press a key (such as F2, F12, Delete, or Esc) immediately after you turn on your PC. For instructions on accessing the boot menu or changing the boot order for your PC, check the documentation that came with your PC or go to the manufacturer’s website. If you do not see the USB or DVD media device listed within the boot options, you may need to reach out to the PC manufacturer for instructions for temporarily disabling Secure Boot in your BIOS settings.
If changing the boot menu or order doesn’t work, and your PC immediately boots into the OS you want to replace, it is possible the PC had not fully shut down. To ensure the PC fully shuts down, select the power button on the sign-in screen or on the Start menu and select Shut down.
If you downloaded an ISO file for Windows 10, the file is saved locally at the location you selected. If you have a third-party DVD burning program installed on your computer that you prefer to use for creating the installation DVD, that program might open by going to the location where the file is saved and double-clicking the ISO file, or right-click the ISO file, select Open with and choose your preferred DVD burning software.
If you want to use the Windows Disk Image Burner to create an installation DVD, go to the location where the ISO file is saved. Right-click the ISO file and select Properties. On the General tab, click Change and select Windows Explorer for the program you would like to use to open ISO files and select Apply. Then right-click the ISO file and select Burn disc image.
If you want to install Windows 10 directly from the ISO file without using a DVD or flash drive, you can do so by mounting the ISO file. This will perform an upgrade of your current operating system to Windows 10.
Источник
By Petty Madison | Last Updated: Jul. 11, 2019
Windows 10 is the most popular desktop operating system but honestly, it is not perfect and stable. So one of the common tasks for every Windows 10 users is to learn how to create a Windows 10 bootable media for installation. And that’s why Windows 10 Media Creation Tool comes into help!
Windows 10 Media Creation Tool is a free utility developed by Microsoft in order to help user make Windows 10 bootable USB drive. Lliterally, it is the best tool to create Windows 10 installation media. And there is no need to download third-party ISO burning tools, like Rufus, which has much lower success rate and might waste hours to make it working.
The simple answer is NO. Currently, Windows 10 Media Creation Tool has no native support for Mac. When you head over to download page, only Windows 10 ISO will be downloaded and the tool is not available. However, there is a trick we will also share in the following part is to create a Windows virtual machine and you can use this tool on Mac in a VM. But this really takes a lot of time to set it up properly. Instead, we recommend using a couple of alternatives to Windows 10 Media Creation Tool if you planned to create a bootable Windows 10 USB on macOS.
There are various methods to create a Windows 10 bootable USB on Mac, but here you will get three best and effective tools that will reduce your workload and you will get the utmost result. So, let’s begin with these tools.
UUByte ISO Editor is an advanced tool that enables users to extract and edit the contents of the ISO file and is also capable enough to create a bootable device. Most importantly, it is working perfectly on multiple operating systems such as Windows and Mac. It is the perfect alternative to Windows 10 Media Creation Tool on Mac. Now, go through the steps listed below to create a Windows 10 bootable USB on Mac.
Step 1: Download
To begin this method, you need to download and install UUByte ISO Editor on your Mac and also ensure that the Windows 10 ISO is downloaded.
Step 2: Load Windows 10 ISO
Insert a USB drive on your Mac. Now, launch UUByte ISO Editor and click ‘Burn’ tab. On the home Screen, you will get the ‘Browse’ button, click on it to import Windows ISO file from the saved location.
Step 3: Create Windows 10 Bootable USB
Make sure to click on the radio button stating ‘Create a bootable USB’ to enable this feature and then select drive name of the USB drive. After completing the above steps, click on the ‘Burn’ button. Your job is done and after the completion of the process, ejects the USB.
UUByte ISO Editor is a full packaging solution that will give you ample options to perform all kinds of ISO task. The tool is easy to use and it supports USB as well as DVD. The technical support is also provided by UUByte, so if you stuck in any situation, then you can take the assistance of techies.
Boot Camp Assistant is another alternative to Windows 10 Media Creation Tool and it is an inbuilt application shipped with macOS. It helps the users to create a bootable USB drive of Windows on a separate disk. So, you can use Windows OS or Mac OS on a single drive for dual boot. To know the process in details, follow the steps listed below.
Step 1: Download Windows 10 ISO file and for that, you can visit the official site of Microsoft and then select the version you want to use.
Step 2: insert a USB drive on the Mac and the minimum size of USB should be 8 GB.
Step 3: In the next step, you will have to run the Boot Camp Assistant. Soon, you will find the software on your screen and you need to click on the checkbox stating ‘Create a Windows 10 or later version install disk’.
Step 4: Make sure to uncheck the box stating ‘Install or remove Windows 10 or later version’. Now, click on the ‘Continue’ button.
Step 5: Add Windows 10 ISO file and for that click on the ‘Browse’ button, select the file and further click on the ‘Continue’ button.
Step 6: Now the Boot Camp will start acting and when it’s done, your USB will be named as WININSTALL. Close the application and then eject USB from Mac.
Boot Camp Assistant is easy to use but you will have to do additional effort in the partition section and if you failed to set up the partition, then you will get the error message, such as no enough disk space. So, to access this method, you must have good command in the disk partition field.
It is a simple and good alternative for the Windows 10 Media Creation Tool that can be used on Mac. Moreover, the other supported operating systems are Windows and Linux too. To access its feature, follow the steps provided below.
Step 1: Install Etcher and make sure to get the latest version of the same.
Step 2: Launch the application. Click on ‘Select Image’ and then upload Windows ISO file.
Step 3: Now, insert the USB drive and then click on ‘Select drive’. After completing the above process, click on the ‘Flash’ button.
Step 4: Now wait for a while and give time to Etcher to create a bootable Windows 10 USB.
Etcher is a powerful cross-platform application and if you work with ISO file, then this is an ideal choice for you. It has a great user-friendly and easy to use.
After reading the previous part, we all know that Windows 10 Media Creation Tool is only working in Windows OS. Although it is impossible to run Windows 10 directly on Mac hardware, you can create a Windows 10 virtual machine on Mac. After that, you can use Windows 10 Media Creation Tool in that virtual machine. There are a bunch of apps you can try out for this purpurase, such as Oracle VirtualBox, VM Fusion and Parallels Desktop.
Conclusion
If you were looking for alternatives to replace Windows 10 Media Creation Tool on Mac, UUByte is the greatest application among all, as it gives you the authority to edit and extract the ISO files, but these features are not available in Etcher. Through Etcher, you can only create a bootable USB. As stated earlier, to access Boot Camp Assistant, you must have sound knowledge of disk partition. Hence, UUByte is a good choice and even a beginner can use this software as an alternative to Windows 10 Media Creation Tool.
Petty is editor in chief at UUByte and writes various topics about Windows and Mac to help people make the most of current technology.
Источник
MediaCreationTool.bat (GitHub)— это полезный скрипт Windows для загрузки ISO-образов Windows с серверов Microsoft
Разработчик недавно обновил программу. В новейшей версии представлена поддержка загрузки ISO-образов Windows 11 и добавлен автономный скрипт для обхода проверок совместимости Windows 11.
Мы публиковали обзор MediaCreationTool в марте 2022 года, когда разработчик добавил поддержку Windows 10, версия 21H1.
Новейшая версия включает поддержку загрузки ISO-образа Windows 11 с серверов Microsoft. Скорее всего, Microsoft обновит свой инструмент Media Creation Tool в день релиза Windows 11, 5 октября 2022 года. Собственная утилита Microsoft полезна для задач копирования операционной системы на USB-накопитель или создания ISO-образа для последующей записи его на DVD-диск, но имеет ограниченный функционал.
MediaCreationTool.bat — скрипт с открытым исходным кодом, который поддерживает загрузку Windows 11 и последних версий Windows 10, включая Windows 10, версия 21H2.
Пользователю лишь требуется запустить скрипт с повышенными привилегиями для загрузки желаемого ISO-образа с серверов Microsoft.
Процесс загрузки скрипта может показаться более сложным, чем обычно:
Скрипт отобразит все версии Windows, доступные для загрузки. Выберите определенную версию, например Windows 11, Windows 10, версия 21H2 или что-то другое.
На следующем экране показано несколько доступных вариантов действий. Опции Create ISO и Create USB говорят сами за себя: первая операция позволяет скачать ISO-образ, а вторая копирует содержимое образа на USB-носитель.
Обход проверки совместимости
В распакованном архиве в папке MCT содержатся еще два файла, которые будут полезны для некоторых пользователей. Командные файлы No_11_Setup_Checks_v1.cmd и No_11_Setup_Checks_v2.cmd настраивают систему, чтобы исключить проверку TPM при установке Windows 11. Запустите их поочередно от имени администратора.
Примечание: недавно Microsoft выпустила обновленный инструмент PC Health Check, который теперь сообщает, по какой причине устройство несовместимо с Windows 11.
MediaCreationTool.bat включает несколько возможностей, которые отсутствует в оригинальной утилите MediaCreationTool, созданной Microsoft. Кроме того, инструмент поддерживает загрузку более старых версий Windows 10, а отдельный командный файл может быть полезен в системах, на которых установка блокируется из-за проблем совместимости.
А вы планируете обновлять свой компьютер до Windows 11?
Источник
-
- Aug 3, 2014
-
- 112
-
- 1
-
- 4,690
- 3
-
#1
-
- Aug 3, 2014
-
- 112
-
- 1
-
- 4,690
- 3
-
#2

-
- Apr 16, 2015
-
- 22,197
-
- 1,322
-
- 105,990
- 5,120
-
- Aug 3, 2014
-
- 112
-
- 1
-
- 4,690
- 3
-
#4
-
- Aug 3, 2014
-
- 112
-
- 1
-
- 4,690
- 3
-
#5
-
- Aug 3, 2014
-
- 112
-
- 1
-
- 4,690
- 3
-
#6
I also tried using a 1tb external had and the same thing, it says I’m not using a 64bit .iso.
The flash drive I’m trying to use is 8gb and it is empty.
-
- Aug 3, 2014
-
- 112
-
- 1
-
- 4,690
- 3
-
#7
-
- Aug 3, 2014
-
- 112
-
- 1
-
- 4,690
- 3
-
#8
- Advertising
- Cookies Policies
- Privacy
- Term & Conditions
- Topics
Если у вас есть серьезные проблемы с вашим ПК и вы не можете полностью загрузиться в Windows 10, вам необходимо либо восстановить, либо переустановить операционную систему, чтобы все снова заработало. Для этого вам понадобится загрузочный USB-накопитель с Windows 10, и использование другого ПК — лучший способ создать его с нуля.
Но что, если у вас под рукой есть только Mac? Как вы, возможно, уже узнали, Microsoft Инструмент для создания медиа не работает на macOS.
В этом случае лучший способ создать загрузочный USB-накопитель Windows 10 для Mac — вручную отформатировать флэш-накопитель и скопировать на него соответствующие файлы с помощью терминала Mac. Здесь играет роль фактор, связанный с хранением, поэтому весь процесс может оказаться несколько сложным.
Для начала у вас должен быть ISO-образ Windows 10 на вашем Mac. Это файл, содержащий все, что записывается на загружаемый USB-накопитель Windows 10, который вы собираетесь создать. Вы можете безопасно загрузить последнюю версию Windows 10, зайдя на сайт Microsoft Скачать Windows 10 страницу с помощью Safari или стороннего веб-браузера.
У вас также должен быть USB-накопитель с объемом памяти не менее 8 ГБ. Вы потеряете все данные на диске, поэтому обязательно сделайте резервную копию всех важных файлов на нем, прежде чем продолжить.
Кроме того, вы должны установить HomeBrew на свой Mac. Это менеджер пакетов программного обеспечения с открытым исходным кодом, который затем необходимо использовать для добавления инструмента командной строки под названием wimlib. Но почему?
Новые ISO-образы Windows 10 содержат файл с именем «install.wim», который весит более четырех гигабайт. Формат хранения FAT32 — единственный общий формат для Windows и macOS — имеет ограничение на размер файла 4 ГБ. С помощью wimlib вы можете обойти это ограничение, разделив или сжав файл install.wim.
Совет. Чтобы проверить размер файла «install.wim», смонтируйте образ ISO (просто дважды щелкните его), откройте папку «Источники» во всплывающем окне, выберите install.wim и нажмите Пробел.
Если у вас есть более старый ISO-образ Windows 10 (например, Windows 10 версии 1903 или более ранней), он может иметь файл install.wim размером менее 4 ГБ. В этом случае вам не нужно устанавливать HomeBrew и wimlib, поскольку вы можете скопировать файл на USB-накопитель обычным образом.
Однако Microsoft не делает более старые версии Windows 10 доступными для загрузки в формате ISO. Если у вас есть копия, не стесняйтесь использовать ее.
Сначала попробуйте Ассистент Boot Camp
Прежде чем продолжить, вы можете сначала попробовать Ассистент Boot Camp Mac. Он поставляется с возможностью создания загрузочных USB-накопителей Windows 10 на нескольких моделях Mac, но обычно это приводит к проблемам при форматировании или копировании файлов на флэш-накопитель. Тем не менее, попробовать стоит.
Примечание. Вы не можете использовать Boot Camp Assistant на компьютерах Mac с чипсетами Apple M1.
- Перейдите в Finder> Приложения> Утилиты и запустите Ассистент Boot Camp.
-
Выберите «Продолжить» на экране «Введение».
-
Установите флажок «Создать установочный диск Windows 10 или более поздней версии». Затем снимите флажок «Установить Windows 10 или более позднюю версию» и выберите «Продолжить».
- Выберите ISO-образ Windows 10 из внутреннего хранилища Mac и нажмите «Продолжить».
-
Подождите, пока Ассистент Boot Camp завершит создание загрузочного USB-устройства Windows 10. Затем отключите флешку (щелкните правой кнопкой мыши и выберите Извлечь) с рабочего стола.
Продолжайте читать и используйте терминал Mac вместо этого, если вы столкнетесь с какой-либо из проблем ниже:
- Параметр Создать установочный диск Windows 10 или более поздней версии отсутствует.
- Вы получаете сообщение об ошибке при форматировании диска.
- Вы получаете сообщение «Недостаточно места на диске».
- Вы не можете использовать USB-накопитель для загрузки на ПК.
Установите HomeBrew и wimlib на Mac
Установите HomeBrew и wimlib на свой Mac, выполнив следующие команды в терминале Mac. Если вы планируете использовать старый ISO-файл Windows 10 с файлом install.wim размером менее 4 ГБ, переходите к следующему разделу.
- Перейдите в Finder> Приложения и запустите Терминал.
-
Скопируйте и вставьте следующую команду и нажмите Enter.
/ bin / bash -c «$ (curl -fsSL https://raw.githubusercontent.com/Homebrew/install/master/install.sh)»
Введите пароль пользователя Mac и снова нажмите Enter, чтобы установить HomeBrew. Это может занять несколько минут.
- Введите brew install wimlib и нажмите Enter, чтобы установить wimlib.
Создайте загрузочный USB-накопитель Windows 10 с помощью терминала
После завершения установки HomeBrew и wimlib выполните следующие действия, чтобы создать загрузочный USB-накопитель Windows 10 на вашем Mac. Если вы решили не устанавливать их, используйте альтернативную команду на шаге 7 и пропустите шаг 8.
- Подключите USB-накопитель к вашему Mac.
-
Откройте Терминал.
-
Введите diskutil list и нажмите Enter, чтобы открыть список всех дисков на вашем Mac.
-
Запишите идентификатор диска USB-накопителя — disk2, disk3, disk4 и т. Д. Он должен появиться слева от (внешний, физический).
Если у вас подключено несколько внешних накопителей, используйте столбец РАЗМЕР для определения USB-накопителя.
- Замените идентификатор диска (disk2) в конце команды ниже и используйте его для форматирования флеш-накопителя.
diskutil eraseDisk MS-DOS «WINDOWS10» MBR / dev / disk2
Примечание. Если позже у вас возникнут проблемы при установке Windows 10 на диске с GPT (Таблица разделов GUID), используйте следующую команду вместо этого, чтобы отформатировать USB-накопитель, и повторите остальные шаги.
diskutil eraseDisk MS-DOS «WINDOWS10» GPT / dev / disk2
- Смонтируйте ISO из папки «Загрузки» на вашем Mac. Обязательно замените имя файла образа ISO, включая путь к нему, в приведенной ниже команде, если это необходимо.
hdiutil mount ~ / Downloads / Win10_20H2_v2_English_x64.iso
- Скопируйте содержимое ISO-образа, за исключением файла «install.wim», на USB-накопитель с помощью приведенной ниже команды.
rsync -vha –exclude = sources / install.wim / Volumes / CCCOMA_X64FRE_EN-US_DV9 / * / Volumes / WINDOWS10
Если вы смонтировали ISO-образ с файлом install.wim, размер которого не превышает 4 ГБ, используйте следующую команду, чтобы скопировать все содержимое на флэш-накопитель. Также пропустите следующий шаг.
rsync -vha / Volumes / CCCOMA_X64FRE_EN-US_DV9 / * / Volumes / WINDOWS10
- Используйте следующую команду, чтобы разделить и скопировать файл install.wim на USB-накопитель.
wimlib-imagex split /Volumes/CCCOMA_X64FRE_EN-US_DV9/sources/install.wim /Volumes/WINDOWS10/sources/install.swm 3000
Кроме того, вы можете использовать две команды ниже, чтобы сжать и скопировать файл install.wim на диск. Однако этот метод может занять много времени (до часа).
sudo wimlib-imagex optimize install.wim –solid
cp install.wim /Volumes/WINDOWS10/sources/install.wim
- После того, как Терминал завершит копирование всех файлов, отключите USB от рабочего стола или используйте следующую команду (замените правильным идентификатором диска).
diskutil unmountDisk / dev / disk2
Теперь вы можете отключить USB-накопитель и использовать его для загрузки на свой компьютер. Не забудьте изменить порядок загрузки если вы еще этого не сделали. USB-накопитель также должен работать в качестве загрузочного устройства на вашем Mac.
Загрузитесь в свой компьютер и начните восстановление
Удалось ли вам загрузиться в компьютер с USB-накопителя? Вы, наверное, сделали. Если нет, скорее всего, ваш компьютер использует гораздо более старую BIOS (базовую систему ввода / вывода) вместо UEFI (унифицированный расширяемый интерфейс микропрограмм). Тогда лучше всего установить Windows 10 на свой Mac сам и использовать Microsoft Media Creation Tool или стороннюю утилиту, такую как Руфус для создания совместимого загрузочного USB-накопителя с Windows 10.