MEGASync
для Windows

MEGASync — приложение, которое предоставляет простую автоматическую синхронизацию данных между вашим компьютером и безопасным облачным хранилищем MEGA. Из особенностей данного инструмента, следует отметить возможность транслировать любой файл из вашего облака MEGA или по ссылке прямо в ваш любимый плеер, а также хранение удалённых данных.
Кроме того в арсенале приложения имеется мощный диспетчер передач, позволяющий управлять активными и завершёнными передачами: приоритизация, пауза/возобновление, открытие, создание ссылок и пр., простая автоматическая синхронизация, интеграция с браузером, файловый менеджер и многое другое.
Ключевые особенности MEGASync:
- Трансляция файлов напрямую из MEGA .
- Хранение удалённых данных.
- Прямое управление ссылками.
- Управление сетевыми параметрами.
- Полное управление передачами.
- Расширенная поддержка режимов выборочной и полной синхронизации.
- Полное сквозное шифрование для всех передач.
- Исключение выбранных типов файлов.
- Интеграция с браузером.
- Интеграция со стандартными файловыми проводниками для всех платформ.
- Версии файлов.
Бесплатно приложение предоставляет 20 ГБ надежного хранилища. При желании можно приобрести платный Pro-аккаунт, и расширить облачное хранилище с 200 ГБ до 4 ТБ.
- MEGA для Android
ТОП-сегодня раздела «Сравнение, Синхронизация»
 Folder Size 5.3.0.2
Folder Size — программа для анализа жестких дисков компьютера, которая отображает размер всех файлов и папок на них…
 SyncToy 2.1
SyncToy — удобная, легко настраиваемая программа для автоматизации процессов копирования, перемещения и синхронизации файлов в различных папках…
 FreeFileSync 11.29
FreeFileSync — бесплатная утилита для сравнения и синхронизации файлов в каталогах. Отличается быстродействием и удобным понятным интерфейсом…
 Compare It! 4.2
Compare It! — Утилита сравнения и слияния текстовых файлов. 2 панели, подсветка различий в…
Allway Sync 21.1.5
Allway Sync бесплатная программа для синхронизации файлов и каталогов. Allway Sync использует…
Отзывы о программе MEGASync
 Admin
Admin
Отзывов о программе MEGASync 4.7.2 пока нет, можете добавить…
v4.8.7.0_Win
- Detected crashes on Windows, Linux, and macOS fixed.
v4.8.7.0_OSX
- Detected crashes on Windows, Linux, and macOS fixed.
v4.8.6.0_Win
- Detected crashes on Windows, Linux, and masOS fixed.
- Less device memory will be used by accounts with large amounts of data stored.
- Application performance improved.
- Translation issues fixed.
v4.8.6.0_OSX
- Detected crashes on Windows, Linux, and masOS fixed.
- Less device memory will be used by accounts with large amounts of data stored.
- Application performance improved.
- Translation issues fixed.
v4.8.5.0_Win
- Detected crashes on Windows, Linux, and masOS fixed.
- Less device memory will be used by accounts with large amounts of data stored.
- Application performance improved.
- Translation issues fixed.
v4.8.5.0_OSX
- Detected crashes on Windows, Linux, and masOS fixed.
- Less device memory will be used by accounts with large amounts of data stored.
- Application performance improved.
- Translation issues fixed.
v4.8.1.0_Win
- Support for Flexi Pro accounts.
- New backups feature.
- Fixed issues detected with macOS Ventura.
- Fixed detected crashes on Windows, Linux, and macOS.
- Fixed translation issues.
- Improved performance.
v4.8.1.0_OSX
- Support for Flexi Pro accounts.
- New backups feature.
- Fixed issues detected with macOS Ventura.
- Fixed detected crashes on Windows, Linux, and macOS.
- Fixed translation issues.
- Improved performance.
v4.8.0.0_Win
- Support for Flexi Pro accounts.
- New backups feature.
- Fixed issues detected with macOS Ventura.
- Fixed detected crashes on Windows, Linux, and macOS.
- Fixed translation issues.
- Improved performance.
v4.8.0.0_OSX
- Support for Flexi Pro accounts.
- New backups feature.
- Fixed issues detected with macOS Ventura.
- Fixed detected crashes on Windows, Linux, and macOS.
- Fixed translation issues.
- Improved performance.
Each software is released under license type that can be found on program pages as well as on search or category pages. Here are the most common license types:
Freeware
Freeware programs can be downloaded used free of charge and without any time limitations. Freeware products can be used free of charge for both personal and professional (commercial use).
Open Source
Open Source software is software with source code that anyone can inspect, modify or enhance. Programs released under this license can be used at no cost for both personal and commercial purposes. There are many different open source licenses but they all must comply with the Open Source Definition — in brief: the software can be freely used, modified and shared.
Free to Play
This license is commonly used for video games and it allows users to download and play the game for free. Basically, a product is offered Free to Play (Freemium) and the user can decide if he wants to pay the money (Premium) for additional features, services, virtual or physical goods that expand the functionality of the game. In some cases, ads may be show to the users.
Demo
Demo programs have a limited functionality for free, but charge for an advanced set of features or for the removal of advertisements from the program’s interfaces. In some cases, all the functionality is disabled until the license is purchased. Demos are usually not time-limited (like Trial software) but the functionality is limited.
Trial
Trial software allows the user to evaluate the software for a limited amount of time. After that trial period (usually 15 to 90 days) the user can decide whether to buy the software or not. Even though, most trial software products are only time-limited some also have feature limitations.
Paid
Usually commercial software or games are produced for sale or to serve a commercial purpose.
![]()
Загрузить PDF
![]()
Загрузить PDF
Клиент MEGA Sync позволяет просматривать, управлять и синхронизировать файлы между рабочим столом и облачным хранилищем MEGA. Благодаря этому настольному приложению вам больше не придется пользоваться браузером для поиска, загрузки и скачивания файлов в интернете. Синхронизация файлов между компьютером и облачным хранилищем будет проходить в фоновом режиме. Чтобы начать пользоваться клиентом MEGA Sync на компьютере Windows, скачайте и установите клиент, а затем настройте его согласно своим предпочтениям. Настроив клиент, можно сразу приступать к работе с локальными файлами и папками.
-

1
Перейдите на сайт MEGA. Перейдите по адресу https://mega.co.nz/#sync, и найдите ссылку для загрузки приложения на компьютер Windows.
-
2
Скачайте клиент MEGA Sync. Нажмите на ячейку с логотипом Windows и текстом «Бесплатная загрузка на Windows», чтобы перейти к загрузке установочного файла.
-
3
Установите клиент MEGA Sync. Когда загрузка завершится, найдите установочный файл на компьютере. Файл будет называться «MEGAsyncSetup.exe». Нажмите на этот файл двойным щелчком левой кнопкой мыши, чтобы начать установку приложения.
Реклама


-
1
Войдите в аккаунт. Перед завершением установки вас попросят войти в свой аккаунт. Программа использует аккаунт для доступа к файлам из облачного хранилища. Введите свой адрес электронной почты и пароль, а затем нажмите «Далее».
-
2
Выберите тип установки. Подтвердив аккаунт, выберите тип установки: «Полная синхронизация» или «Выборочная синхронизация».
- «Полная синхронизация» синхронизирует весь облачный диск с компьютером. «Выборочная синхронизация» синхронизирует только выбранные папки.
- Выберите тип установки и нажмите «Далее».
-
3
Завершите настройку. Закончив с настройкой, нажмите на кнопку «Готово». Облачный диск будет автоматически синхронизирован с компьютером.
-
4
Синхронизируйте файлы. Пока клиент работает, его можно найти на панели уведомлений в правом нижнем углу рабочего стола. Его можно узнать по логотипу в виде буквы М в красном круге. Пока клиент работает, он будет автоматически синхронизировать все файлы в локальной папке MEGA или на облачном диске.
Реклама


-
1
Добавьте файлы. Если вы хотите добавить файлы в аккаунт для хранения, резервного копирования и синхронизации, скопируйте файлы в папку «MEGA» с помощью стандартных команд Windows. Перетащите файлы в папку или скопируйте и вставьте их с помощью комбинаций клавиш.
- Файлы, которые вы поместите в папку, будут автоматически загружены и сохранены в облачном хранилище.
-
2
Переместите файлы. Как и в первом шаге, скопируйте файлы в папку при помощи команд Windows. Нажмите на файл, после чего скопируйте (CTRL + C) или вырежьте (CTRL + X) его, а затем вставьте (CTRL + V).
- Все изменения в локальной папке будут обновлены и отражены в облачном хранилище.
-
3
Удалите файлы. Аналогично первому шагу с помощью команд Windows можно удалять файлы. Выделите файл, а затем нажмите клавишу «Del» на клавиатуре. Или просто перетащите файл в Корзину.
- Файлы, которые были удалены из папки, также будут удалены и из облачного хранилища.
Реклама


-
1
Добавьте папки. Если вы хотите добавить папки в свой облачный диск, чтобы лучше упорядочить файлы, добавьте папки в основную папку MEGA с помощью команд Windows. Нажмите правой кнопкой мыши на пустую область в папке, а затем выберите в контекстном меню опцию «Создать», а затем «Папку». После этого будет создана новая папка, которую можно как-то назвать.
- Новые папки, которые вы создадите внутри папки «MEGA», тоже будут загружены и отражены в облачном хранилище. В созданной папке можно вставлять, перемещать и копировать файлы (как в шаге 3).
-
2
Переместите папки. Подобно первому шагу, с помощью команд Windows в папке «MEGA» можно перемещать и копировать папки. Если вы не хотите вставлять файлы по одному, переместите или скопируйте целую папку.
- Все файлы внутри этой папки также будут скопированы в новую папку. Все изменения, внесенные в локальную папку «MEGA», будут обновлены и отражены в облачном хранилище.
-
3
Удалите папки с помощью команд Windows. Выделите папку, а затем нажмите на клавишу «Del» на клавиатуре. Или просто переместите папку в Корзину.
- Все файлы внутри удаленной папки будут удалены из локальной папки «MEGA» и из облачного хранилища.
Реклама


Об этой статье
Эту страницу просматривали 12 755 раз.
Была ли эта статья полезной?
Удобная программа для простой синхронизации файлов между ПК и учетной записью MEGA в автоматическом режиме.
MEGAsync облегчит загрузку ваших файлов на защищенное облачное хранилище. С её помощью, вы сможете настроить автоматическую синхронизацию файлов, а также получите быстрый и безопасный доступ к важным файлам в любой момент.
При помощи этой программы, вы сможете синхронизировать как всю учетную запись MEGA, так и выбрать отдельные элементы и папки для синхронизации. Также, программа позволяет с лёгкостью управлять загрузками из диспетчера передач: загружать определенные файлы с ПК на облачное хранилище вручную, либо импортировать ссылки MEGA для загрузки на компьютер.
Приятной особенностью программы MEGAsync является функция автоматического создания резервных копий. Это означает, что вы в любой момент сможете сделать откат к предыдущей версии нужных вам файлов.
Стоит отметить, что программа перемещает удаленные файлы в специальные папки на вашем ПК, чтобы их можно было восстановить в случае необходимости.
С нашего сайта вы также можете скачать мобильные клиенты MEGA для Android и MEGA для iOS.
Используете безопасное облачное хранилище MEGA? Тогда скачайте MEGAsync и с легкостью настройте автоматическую синхронизацию файлов между облаком и вашим ПК.
![]()
Download Article
![]()
Download Article
MEGA Sync Client allows you to access, manage, and sync your files from your Windows desktop with your MEGA cloud drive. With the desktop app, you don’t need to use your web browser, navigate through your files online, and manually upload or download your files. The syncing of your files between your desktop and the cloud drive will be done in the background for you. To use MEGA Sync Client on Windows, download, install, and set up the app according to your preferences; after setting up, you can manage MEGA’s local files and local folders.
-
1
-
2
Download MEGA Sync Client. Click the box with the Windows logo and text “Free Download for Windows.” The setup file will be downloaded.
Advertisement
-
3
Install MEGA Sync Client. After the download, look for the setup file on your computer. The filename should be “MEGAsyncSetup.exe.” Double-click on this file to begin the installation.


Advertisement
-
1
Log in. Before the installation completes, you will be asked for your MEGA account. The program will use this to fetch your files from your MEGA cloud drive. Key in your email address and password, then click the “Next” button.
-
2
Choose the install type. Once your account has been verified, you will be asked to choose between a “Full account sync” or a “Selective sync.”
- “Full account sync” syncs your whole MEGA cloud drive to your local computer. “Selective sync” only syncs selected folders from your MEGA cloud drive.
- Click on the radio button for your choice and click the “Next” button.
-
3
Finish the setup. Once everything’s configured, click the “Finish” button. Your MEGA cloud drive will now be automatically synchronized or mirrored to the specified local folder.
-
4
Let MEGA sync. As long as MEGA Sync Client is running, it will reside in your notification toolbar on the lower right corner of your desktop. You can identify it by its logo of a red circled “M.” While it’s running, it will automatically sync all the files on your local MEGA folder and on your MEGA cloud drive.


Advertisement
-
1
Add files. If you want to add files to your MEGA account for storage, backup, and syncing, just use the normal Windows operations to add files into the MEGA folder. You can drag files into the folder or use the keyboard shortcuts to copy or move.
- All the files you put into this folder will automatically be uploaded and stored in your MEGA cloud drive.
-
2
Move files. Similar to Step 1, the normal Windows operations are used to move and copy files in and around your MEGA folder. You can click on a file and do the basic copy (CTRL + C) or cut (CTRL + X) then paste (CTRL + V) actions.
- All the changes you in your local MEGA folder will be updated and reflected in your MEGA cloud drive.
-
3
Delete files. Similar to Step 1, the normal Windows operations are used to delete files in your MEGA folder. You can click on a file and press “Delete” on your keyboard. You can also click and drag the file to your Recycle Bin.
- All the files you removed from this folder will also be removed from your MEGA cloud drive.


Advertisement
-
1
Add folders. If you want to add folders to your MEGA cloud drive for better file organization and structure, just use the normal Windows operations to add folders into the main MEGA folder. You can right-click on the folder and select “New” then “Folder” from the context menu. A new folder will be created, which you can now name.
- The new folders you create locally inside the MEGA folder will also be uploaded and reflected in your MEGA cloud drive. Once the folder has been created, you can add, move, or copy files into it, as in Part 3.
-
2
Move folders. Similar to Step 1, the normal Windows operations are used to move and copy folders in and around your MEGA folder. If you don’t want to add files one by one to your MEGA folders, you can move or copy a whole folder.
- All the files inside that folder will also be moved or copied together. All the changes you in your local MEGA folder will be updated and reflected in your MEGA cloud drive.
-
3
Delete folders. Similar to Step 1, the normal Windows operations are used to delete folders in your MEGA folder. You can click on a folder and press “Delete” on your keyboard. You can also click and drag the folder to your Recycle Bin.
- All the files inside the folder you’ve deleted will also be removed from your local MEGA folder and from your MEGA cloud drive.


Advertisement
Add New Question
-
Question
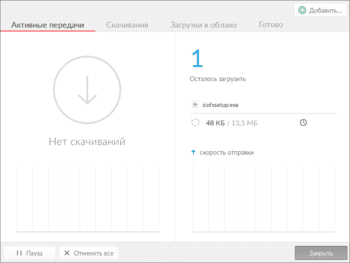
Where can I see how long it will take to sync, and what the download speed will be?

With Windows 7, click on the icon in the tray to see download/upload statistics.
-
Question
Someone gave me a link. How would I go about getting what’s inside the link by using mega sync?
Open the link in the browser and then you will see an option to download it via MEGA sync.
-
Question
Once I’ve «transferred» or downloaded a file, how can I move it to my desktop or a folder on my PC?
You can open the folder where the file is currently located and drag it into the folder you would like to store it in permanently. To move it to your desktop, simply drag the new file to a place on your desktop.
See more answers
Ask a Question
200 characters left
Include your email address to get a message when this question is answered.
Submit
Advertisement
Thanks for submitting a tip for review!
About This Article
Thanks to all authors for creating a page that has been read 202,109 times.
Is this article up to date?
![]()
Download Article
![]()
Download Article
MEGA Sync Client allows you to access, manage, and sync your files from your Windows desktop with your MEGA cloud drive. With the desktop app, you don’t need to use your web browser, navigate through your files online, and manually upload or download your files. The syncing of your files between your desktop and the cloud drive will be done in the background for you. To use MEGA Sync Client on Windows, download, install, and set up the app according to your preferences; after setting up, you can manage MEGA’s local files and local folders.
-
1
-
2
Download MEGA Sync Client. Click the box with the Windows logo and text “Free Download for Windows.” The setup file will be downloaded.
Advertisement
-
3
Install MEGA Sync Client. After the download, look for the setup file on your computer. The filename should be “MEGAsyncSetup.exe.” Double-click on this file to begin the installation.
Advertisement
-
1
Log in. Before the installation completes, you will be asked for your MEGA account. The program will use this to fetch your files from your MEGA cloud drive. Key in your email address and password, then click the “Next” button.
-
2
Choose the install type. Once your account has been verified, you will be asked to choose between a “Full account sync” or a “Selective sync.”
- “Full account sync” syncs your whole MEGA cloud drive to your local computer. “Selective sync” only syncs selected folders from your MEGA cloud drive.
- Click on the radio button for your choice and click the “Next” button.
-
3
Finish the setup. Once everything’s configured, click the “Finish” button. Your MEGA cloud drive will now be automatically synchronized or mirrored to the specified local folder.
-
4
Let MEGA sync. As long as MEGA Sync Client is running, it will reside in your notification toolbar on the lower right corner of your desktop. You can identify it by its logo of a red circled “M.” While it’s running, it will automatically sync all the files on your local MEGA folder and on your MEGA cloud drive.
Advertisement
-
1
Add files. If you want to add files to your MEGA account for storage, backup, and syncing, just use the normal Windows operations to add files into the MEGA folder. You can drag files into the folder or use the keyboard shortcuts to copy or move.
- All the files you put into this folder will automatically be uploaded and stored in your MEGA cloud drive.
-
2
Move files. Similar to Step 1, the normal Windows operations are used to move and copy files in and around your MEGA folder. You can click on a file and do the basic copy (CTRL + C) or cut (CTRL + X) then paste (CTRL + V) actions.
- All the changes you in your local MEGA folder will be updated and reflected in your MEGA cloud drive.
-
3
Delete files. Similar to Step 1, the normal Windows operations are used to delete files in your MEGA folder. You can click on a file and press “Delete” on your keyboard. You can also click and drag the file to your Recycle Bin.
- All the files you removed from this folder will also be removed from your MEGA cloud drive.
Advertisement
-
1
Add folders. If you want to add folders to your MEGA cloud drive for better file organization and structure, just use the normal Windows operations to add folders into the main MEGA folder. You can right-click on the folder and select “New” then “Folder” from the context menu. A new folder will be created, which you can now name.
- The new folders you create locally inside the MEGA folder will also be uploaded and reflected in your MEGA cloud drive. Once the folder has been created, you can add, move, or copy files into it, as in Part 3.
-
2
Move folders. Similar to Step 1, the normal Windows operations are used to move and copy folders in and around your MEGA folder. If you don’t want to add files one by one to your MEGA folders, you can move or copy a whole folder.
- All the files inside that folder will also be moved or copied together. All the changes you in your local MEGA folder will be updated and reflected in your MEGA cloud drive.
-
3
Delete folders. Similar to Step 1, the normal Windows operations are used to delete folders in your MEGA folder. You can click on a folder and press “Delete” on your keyboard. You can also click and drag the folder to your Recycle Bin.
- All the files inside the folder you’ve deleted will also be removed from your local MEGA folder and from your MEGA cloud drive.
Advertisement
Add New Question
-
Question
Where can I see how long it will take to sync, and what the download speed will be?
With Windows 7, click on the icon in the tray to see download/upload statistics.
-
Question
Someone gave me a link. How would I go about getting what’s inside the link by using mega sync?
Open the link in the browser and then you will see an option to download it via MEGA sync.
-
Question
Once I’ve «transferred» or downloaded a file, how can I move it to my desktop or a folder on my PC?
You can open the folder where the file is currently located and drag it into the folder you would like to store it in permanently. To move it to your desktop, simply drag the new file to a place on your desktop.
See more answers
Ask a Question
200 characters left
Include your email address to get a message when this question is answered.
Submit
Advertisement
Thanks for submitting a tip for review!
About This Article
Thanks to all authors for creating a page that has been read 202,109 times.
Is this article up to date?
Программы для хранения файлов в облаке пользуются большой популярностью среди пользователей. Люди выгружают туда свои файлы и документы, фото и видео. Цели у них совершенно разнообразные: освобождение места на устройстве, желание иметь доступ к контенту в любое время и с любого девайса. В любом случае, облачные хранилища стали неотъемлемой частью жизни каждого. MegaSync – клиент для хранения данных в виртуальном пространстве и их синхронизации. При использовании представленной программы вам откроется немалое количество опций и возможностей, которые облегчат вашу жизнь и оптимизируют работу с имеющимся на вашем компьютере контенте.
Совместимость
Представленная утилита предназначена для работы на ПК и ноутбуках под управлением операционной системы Виндовс. Проверьте совместимость вашего устройства с представленными минимальными требованиями:
- ОС Виндовс XP, Vista, 7, 8, 10, 11 разрядность 32/64 бит;
- процессор на 800 MHz;
- 256 Мб оперативной памяти;
- 14 Мб свободного места на жестком диске.
Основные функции
Приложение MegaSync дает пользователям доступ к месту в облачном хранилище и ко множеству полезных функций и опций:
- Работайте в безопасности и без риска. Ни один киберпреступник не сможет похитить ваши данные и документы во время их выгрузки в виртуальное пространство или во время синхронизации. Сложная, многоуровневая система защиты позаботится о вас и вашем контенте.
- Пользователям доступна возможность загрузки в облако не только всей имеющейся информации на компьютере или ноутбуке, но и возможность выбора отдельных папок и документов, которые нужно отправить в сеть. Удобство представленной функции заключается в том, что ненужная информация не будет захламлять облако и снижать эффективность работы в нем.
- Храните в облачном хранилище информацию объемом до 50 ГБ. Утилита предоставляет довольно большое пространство для хранения данных. Пользователи способны загружать любой фото и видео-контент, а также текстовые документы и файлы.
- Теперь доступ ко всем вашим файлам и данным доступен с любого устройства, на котором вы можете зайти в аккаунт Mega. Синхронизируйте информацию на одном компьютере или ноутбуке и открывайте на другом устройстве. С помощью этой функции можно с легкостью переносить файлы с одного ПК на другой.
Заключение
MegaSync поможет вам синхронизировать информацию между ПК или ноутбуком и облачным хранилищем. Оптимизируйте свою работу с устройством путем выгрузки данных в виртуальное пространство. Скачайте MegaSync бесплатно с нашего сайта и убедитесь в профессиональности программы.