I’m trying to enable kernel debugging in Windows Server 2008 R2 Standard (running in Hyper-V on Windows Server 2012 R2):
bcdedit /dbgsettings 1394 channel:32
bcdedit /debug ON
shutdown /r /f /t 0
But when I run in WinDbg:
File -> Kernel Debug -> Local -> Ok
I see message box:
--------------------------- WinDbg:6.12.0002.633 AMD64
--------------------------- The system does not support local kernel debugging.

Local kernel debugging requires Windows XP, Administrative
privileges, and is not supported by WOW64.
Only a single local kernel debugging session can run at a time.
Local kernel debugging is disabled by default in Windows Vista, you must run 'bcdedit -debug on' and reboot to enable it.
--------------------------- OK ---------------------------
bcdedit’s output:
Windows Boot Manager
--------------------
identifier              {bootmgr}
device                  partition=DeviceHarddiskVolume1
description             Windows Boot Manager
locale                  en-US
inherit                 {globalsettings}
default                 {current}
resumeobject            {22afa782-ce1f-11e2-824a-de42722e0fff
displayorder            {current}
toolsdisplayorder       {memdiag}
timeout                 30

Windows Boot Loader
-------------------
identifier              {current}
device                  partition=C:
path                    Windowssystem32winload.exe
description             Windows Server 2008 R2
locale                  en-US
inherit                 {bootloadersettings}
recoverysequence        {22afa784-ce1f-11e2-824a-de42722e0fff
recoveryenabled         Yes
testsigning             Yes
osdevice                partition=C:
systemroot              Windows
resumeobject            {22afa782-ce1f-11e2-824a-de42722e0fff
nx                      OptOut
debug                   Yes
Обновлено 16.10.2016

Как анализировать синий экран dump memory в Windows-01
Синий экран смерти или как его еще называют BSOD, может изрядно подпортить жизнь как компьютеру так и серверу, а еще выяснилось и виртуальной машине. Сегодня расскажу как анализировать синий экран dump memory в Windows, так как правильная диагностика и получение причины из за чего не работает ваша система, 99 процентов ее решения, тем более системный инженер, просто обязан уметь это делать, да и еще в кратчайшие сроки, так как от этого бизнес может в следствии простоя сервиса, терять кучу денег.
BSOD расшифровка
Давайте для начала разберем, что означает данная аббревиатура, BSOD от английского Blue Screen of Death или еще режим STOP ошибки.
Ошибки синего экрана смерти возникают по разным причинам, среди которых могут быть проблемы с драйверами, может быть какое то сбойное приложение, или сбойный модуль оперативной памяти. Как только у вас появился синий экран в Windows, то ваша система автоматически создаст файл crash memory dump, который мы и будем анализировать.
Как настроить создание memory dump
По умолчанию windows при синем экране создает аварийный дамп файл memory.dmp, сейчас покажу как он настраивается и где хранится, я буду показывать на примере Windows Server 2008 R2, так как у меня недавно была задача по изучению вопроса синего экрана в виртуальной машине. Для того чтобы узнать где настроен dump memory windows, открываем пуск и щелкаем правым кликом по значку Компьютер и выбираем свойства.

Как анализировать синий экран dump memory в Windows-Свойства компьютера
Далее идем в пункт Дополнительные параметры системы

Как анализировать синий экран dump memory в Windows-параметры системы
Переходим во вкладку Дополнительно-Загрузка и восстановление. Жмем кнопку Параметры

Как анализировать синий экран dump memory в Windows-Загрузка и восстановление
Где хранится файл memory.dmp
и видим, что во первых стоит галка выполнить автоматическую перезагрузку, для записи отладочной информации, выбрано Дамп памяти ядра и ниже есть пусть куда сохраняется дамп памяти %SystemRoot%MEMORY.DMP

Как анализировать синий экран dump memory в Windows-05
Перейдем в папку c:windows и найдем файл MEMORY.DMP в нем содержаться коды синего экрана смерти

Как анализировать синий экран dump memory в Windows-memory.dmp
Как настроить mini dump
В малый дамп памяти тоже записываются ошибки синего экрана смерти, настраивается он там же, нужно только его выбрать.

Как анализировать синий экран dump memory в Windows-07
Хранится он в папке c:windowsminidump. Преимущество в том, что он занимает меньше места и на каждый синий экран создается отдельным файлом. Всегда можно просмотреть историю появлений синего экрана.

Как анализировать синий экран dump memory в Windows-08
Теперь когда мы разобрались где искать файл memory dump, нужно научиться его интерпритировать и понимать причину из за чего происходит синий экран смерти. В решении этой задачи нам поможет Microsoft Kernel Debugger. Скачать Microsoft Kernel Debugger можно с официального сайта, главное выберите нужную версию ОС если кому то влом, то можете скачать с яндекс диска по прямой ссылке. Так же он входит в состав ADK.
Как установить Microsoft Kernel Debugger
Скачиваем Microsoft Kernel Debugger, в итоге у вас будет маленький файл который позволит скачать из интернета все что вам нужно. Запускаем его.
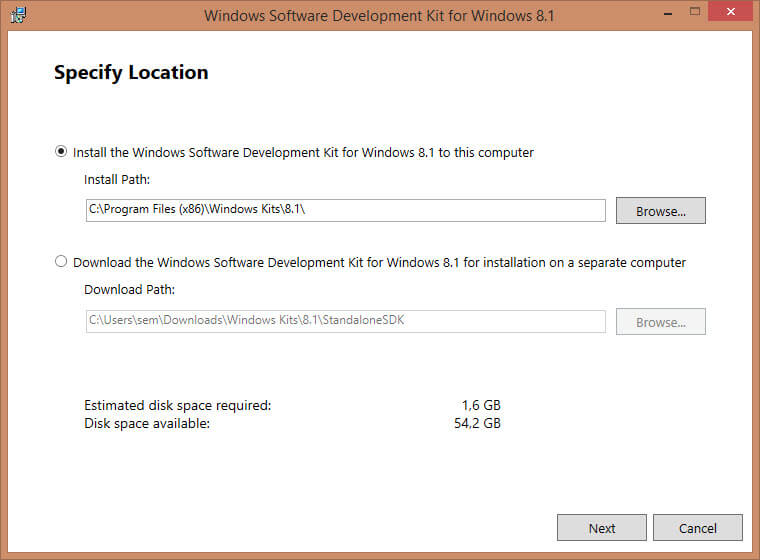
Как установить Microsoft Kernel Debugger-01
присоединяться к программе по улучшению качества участвовать не будем
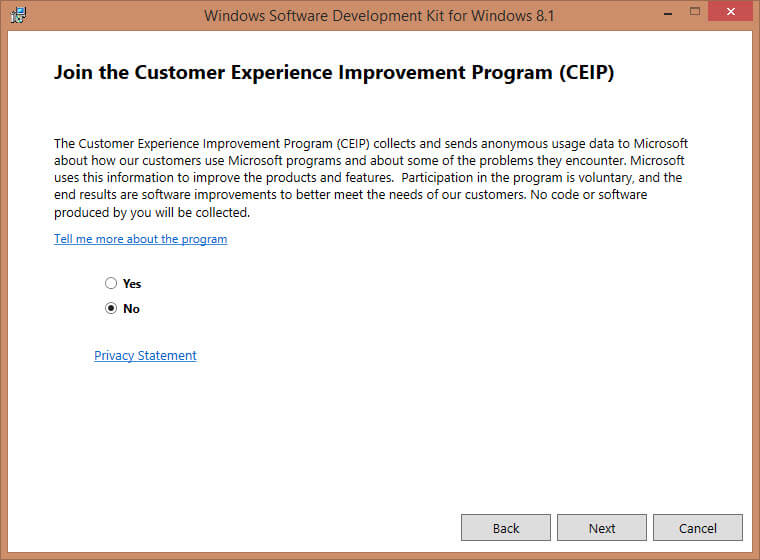
Как установить Microsoft Kernel Debugger-02
жмем Accept и соглашаемся с лицензией
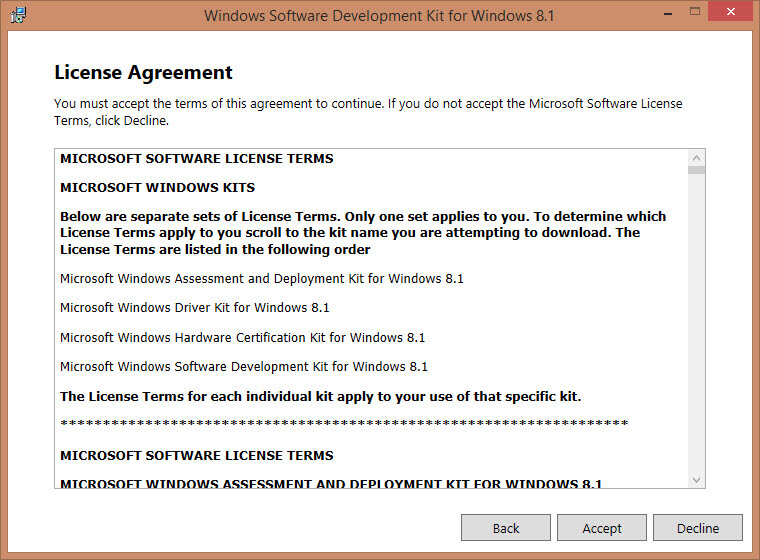
Как установить Microsoft Kernel Debugger-соглашаемся с лицензией
Далее выбираем компонент и жмем install
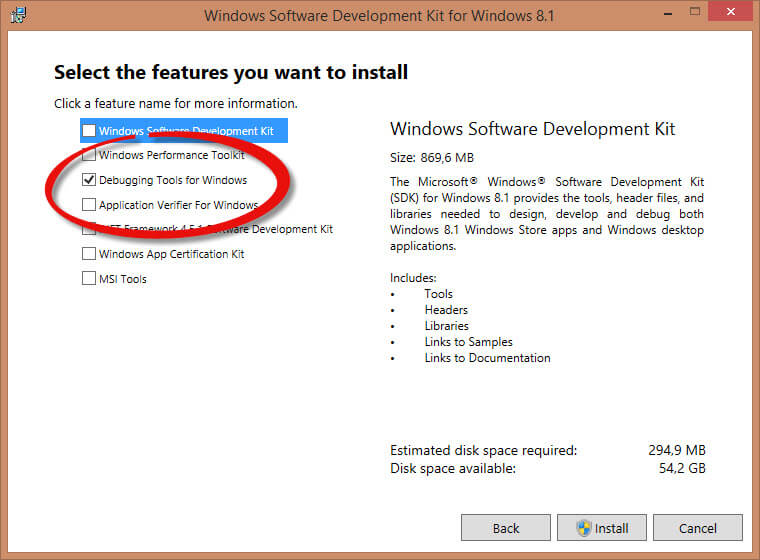
Как установить Microsoft Kernel Debugger-04
начнется установка Microsoft Kernel Debugger
Как установить Microsoft Kernel Debugger-установка MKD
Видим, что Microsoft Kernel Debugger успешно установлен
Как установить Microsoft Kernel Debugger-06
После чего видим, что в пуске появилась папка Debugging Tools for Windows как для 32 так и для 64 битных систем.
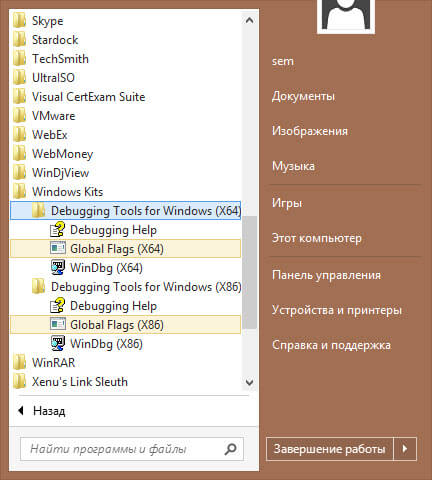
Как установить Microsoft Kernel Debugger-07
Помимо самого пакета Debugging Tools for Windows, также понадобятся набор отладочных символов — Debugging Symbols. Набор отладочных символов специфичен для каждой ОС, на которой был зафиксирован BSoD. Потому придется загрузить набор символов для каждой ОС, анализировать работу которой Вам придется. Для 32-разрядной Windows XP потребуются набор символов для Windows XP 32-бит, для 64-разрядной ОС потребуются набор символов для Windows XP 64-бит. Для других ОС семейства Windows наборы символов подбираются сообразно такому же принципу. Загрузить отладочные символы можно отсюда. Устанавливать их рекомендуется по адресу %systemroot%symbols хотя мне нравится устанавливать их в отдельные папки и не захламлять папку Windows.
Анализ синего экрана в Debugging Tools
После установки Debugging Symbols под систему на которой был синий экран смерти запускаем Debugging Tools
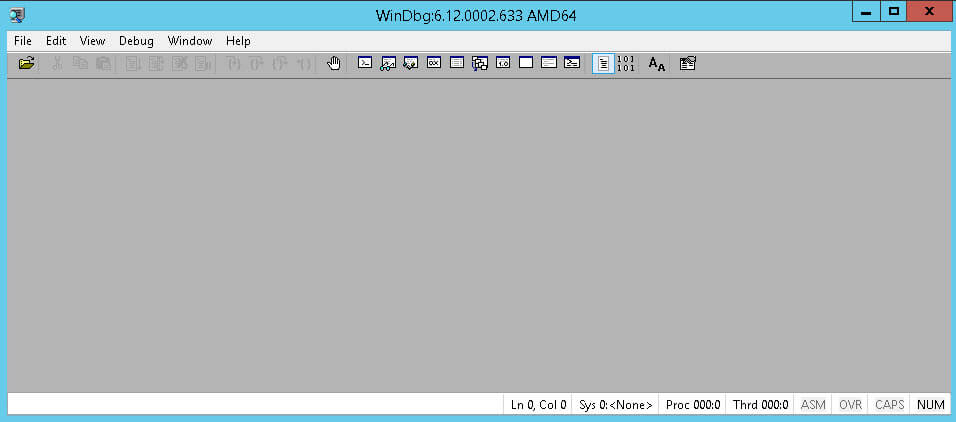
Как установить Microsoft Kernel Debugger-Запуск
Перед анализом содержимого дампа памяти, потребуется провести небольшую настройку отладчика. Конкретно — сообщить программе, по какому пути следует искать отладочные символы. Для этого выбираем в меню File > Symbol File Path…
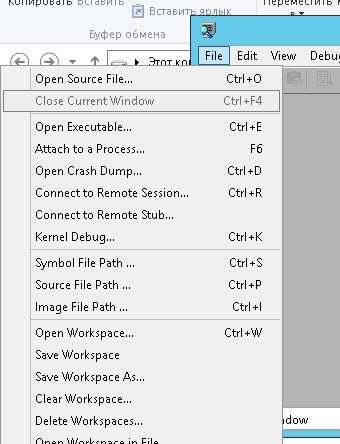
Как установить Microsoft Kernel Debugger-09
Нажимаем кнопку Browse…
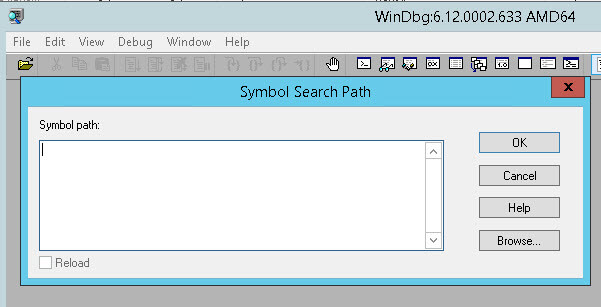
Как установить Microsoft Kernel Debugger10
и указываем папку, в которую мы установили отладочные символы для рассматриваемого дампа памяти, можно указать несколько папок через запятую и можно запрашивать информацию о требуемых отладочных символах прямо через Интернет, с публичного сервера Microsoft. Таким образом у вас будет самая новая версия символов. Сделать это можно следующим образом — в меню File > Symbol File Path… вводим:
SRV*%systemroot%symbols*http://msdl.microsoft.com/download/symbols
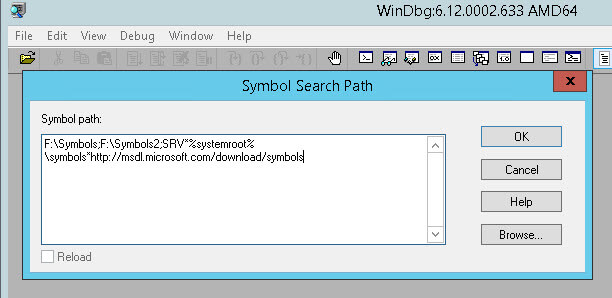
Как установить Microsoft Kernel Debugger-11
Как анализировать синий экран смерти
Копируем с компьютера где выскочил синий экран, файл memory.dmp или minidump, и открываем его, выбираем в меню File > Open Crash Dump… и выбираем требуемый для рассмотрения файл.

Как анализировать синий экран смерти-01
Выбираем для примера minidump

Как анализировать синий экран смерти-открываем minidump
Начнется анализ минидампа, видим появилась ссылка на ошибку, щелкаем по ней для более детальной информации о синем экране.

Как анализировать синий экран смерти-03
И видим сбойное приложение которое крушит вашу систему, так же можно еще детальнее посмотреть в чем дело, ткнув ссылку.

Как анализировать синий экран смерти-04
Получите более детальную информацию по причине синего экрана.

Как анализировать синий экран смерти-05
Если открыть memory.dmp то вы получите подобную картину и видим почему синий экран у вас появился.

Как анализировать синий экран смерти-06
Ткнув по ссылке в логе вы получаете самую детальную информацию об ошибке.

Как анализировать синий экран смерти-07
Вот так вот просто диагностировать и устранить синий экран смерти.
Материал сайта pyatilistnik.org
Remote Kernel Debugging Using Namepipe
Feb 8th 2012
Summary
How to use debugging tools to perform remote kernel debug?. This document explains the debuggers used and the steps needed to attach and perform live debugging. Windows Operating system consists
of 2 modes User mode and Kernel mode. User mode applications such as Wordpad , Notepad , managed applications , unmanaged applications executes at User mode and Operating system core components such as File system drivers, Network stack , Interrupt controllers
, Memory management, Graphics , GDI are managed at kernel level.
There are many instances where an Engineer has to perform live debugging on a non-responsive operating system or debug an application remotely to understand the interaction between user application
and kernel mode subsystem or driver. This article will help Engineers to perform live debugging from Host to the Target using Namepipe
Scenarios
Scenario A:
Organization is running virtual infrastructure with SCVMM managing virtual machines hosted on Microsoft Hyper-v server. Users connect to the virtual machines via Thin client and launch their applications
to perform day-to-day task and in the event of Blue screen, Client OS hang, Application hang, there is always a need to understand the root cause of the problem. With the help of Microsoft Debuggers in place, engineers can hook the debugger to the session
and perform the debugging.
Scenario B:
In a VDI infrastructure which spans across multiple regions , Users are connected to either Static Desktops or Pooled desktops via Citrix and these clients are managed by SCVMM hosted on Hyper-v
server. There would be need to debug the Static desktops which might exhibit Blue Screen, OS hang or Application hang respectively. Installing debugging tools on non-responsive systems might not be the valid choice and the hang is always unpredictable.
During the above situations, Engineers can make use of Windows Debugger KD or Windbg to perform Remote kernel debugging using Namepipes.
System Requirements
In my setup, I have the below system configuration used for Remote debugging.
|
Role |
Description |
|
Windows Server 2008 R2 w/ Sp1 |
Host computer installed with Debugger |
|
Hyper-v |
Used to manage Virtual machines |
|
Windows 7 Operating System |
Target computer |
Tools Used
a)
Windows Debugger / Windbg
You can install and configure the debugging tools using the below link
http://msdn.microsoft.com/en-us/windows/hardware/gg463009
b)
Process Explorer
You can install and configure Process explorer from the below link
http://technet.microsoft.com/en-us/sysinternals/bb842062
Procedure
Preparing Host Computer:
Step1: Once you install and configure Windbg tool, make sure you download the relevant symbol files and point Windbg to correct symbol path. The symbol packages
for different operating system can be find from the below link.
http://msdn.microsoft.com/en-us/windows/hardware/gg463028
Step2: On the Windows Server 2008 R2 Sp1l, with Hyper-v installed, navigate to Hyper-v Manager and right click on the Windows 7 client, configure the Namepipe
as shown below. Notice that when you enter the pipe name , the Name Pipe Path
would automatically get populated.
Example: In my below example, I have used
DEBUGWIN7 as pipe name and the path would look like \.pipeDEBUGWIN7

Figure1 : Hyper-V Client COM settings
Preparing Target Computer:
Step1: Logon to Windows 7 operating system with administrative privileges to modify the
BCDEdit configuration. In an Enterprise infrastructure, appropriate worker segmentations would be made to distinguish between Administrator and Standard User along with the User Access Control rights configured on the virtual machine. Hence it is required
to logon with the proper administrative account which has permission to modify system level settings.
Step2: Open the command prompt in an elevated mode and enter the below command

To verify the setting, run the following command
bcdedit /enum

From the output we can see that
Debug option under windows Boot loader is set to Yes.
Step3: Next run the below command which will enable the debugger to use COM port

Step4: Restart the Target / Windows 7 operating system.
Remote Debugging:
The below procedure explains the steps involved to initiate windows debugger and perform break into the Target operating system.
Step1: Launch Windbg and navigate to
File à Kernel Debugging
and set the following as shown in the diagram

You should make sure the following settings are in place
a)
Check Pipe option
b)
Populate the setting under Port: , this is the namepipe being configured at the virtual machine
c)
Check Reconnect option
Save the workspace and you might see the below error message

To resolve the problem, you should open the windows debugger in
elevated mode / Run as Administrator. And perform the kernel debugging
Step2: After successfully starting kernel debugging, you should see the below screen

Step3: Navigate to Debug tab and hit
Break or Ctrl+Break which would cause server to break into the debugger. Please note that during this state the Target operating system will not be responding and at the KD> prompt, please enter
g and hit enter.
The Go command will resume the Target OS from halt state and user can perform further tasks.

Fixing Symbols:
There has been always a challenge to manage the symbol files , the below commands will simply the process and ensure that windbg is able to load the symbols appropriately.
Once the debugger is in KD mode, enter the below commands to validate the symbol path
Step1: Use
Symfix command with the following syntax .Symfix < location of the symbol file >
Step2:
.reload this would reload User symbols and Kernel symbols
Testing:
To Test, you can enter
!process 0 0 which should give the running processes on the Target operating system. Note that the above command only gets executed at the Kernel mode. Once you have verified the running processes you can perform
various tasks depending on the issue or behavior of Operating system / driver / application.
To debug custom applications, make sure you get the .PDB files of the application and ensure the symbol folder is populated with the same, if not you will not be able to read the functions defined
for the executable or the DLL.
Conclusion:
This article shows the procedure to setup remote debugging using NamePipe which is equivalent to perform remote debugging using Null Model cable. As we are performing debugging on virtual machines, it is impossible to use the
Null model cable connecting to serial ports.
About the Original Author:
Sainath is a MVP for Directory Services and works for Avanade Asia Pte Ltd, Singapore. He is an active Speaker at Microsoft Singapore Windows User Group and blogs about Directory services ,
Winternals and Virtualization. He is the Reviewer of Microsoft Operations Framework for Active Directory , Windows Server, Hyper-v and Certificate Services and beta tester for Windows Server 2008 R2 , SCVMM.
Kernel Debugging & WinDbg Cheat Sheet
My personal cheat sheet for using WinDbg for kernel debugging.
This cheat sheet / mini guide will be updated as I do new stuff with WinDbg.
Kernel Debugging Setup
Installing the debugging tools
- To use windbg, you have to install the Windows Debugging Tools.
- I recommend to install Windbg Preview from the Windows Store.
Setting a VM
Create a VM in Vmware Workstation and install Windows from ISO.
Disable Windows Defender
When setting up a VM for debugging, it’s useful to disable Windows Defender. It’s recommended
for a couple of reasons:
- To save resources in the VM
- In case you want to execute malicious software, you don’t want defender to prevent it’s execution.
Follow these steps:
- Turn it off from it’s settings: Virus & Threat protection, Real-time protection, turn off.
Windows defender will start again in case you reboot, so we need to perform additional steps. - We can disable Windows Defender using gpedit.msc. In case your setup is Windows Home, gpedit
is disabled, so you need to download and run GPEdit Enabler. Run as admin and make sure you have an internet connection. - Run «gpedit.msc» -> Computer Configuration > Administrative Templates > Windows Components > Windows Defender -> Turn Off Windows Defender -> Enabled
Install VirtualKd
VirtualKd enables you to debug a VM by connecting over a named pipe.
- Download VirtualKd Redux
- The redux version is a newer version that supports Vmware 15 and has a few bugfixes.
- Extract VirtualKd in the host in any location you like (I like c:toolsvirtualkd)
- Run the «target» executable inside the guest
- Run vmmon64.exe / vmmon.exe on the host (According to the host’s architecture)
- Configure the path of Windbg / Windbg Preview in vmmon.
- Make sure «Start Debugger Automatically» is not marked.
Configure VM for debugging
Run the following commands in an admin command line.
bcdedit /set testsigning onbcdedit /debug onbcdedit /dbgsettings serial debugport:1 baudrate:115200
Connecting to the debugger
After these preparations, we can connect to the debugger by doing these steps:
- Restart VM. click F8 and choose «Disable Device Signing Enforcement» — that will allow your driver to be load.
- At that point the VM will stuck. It will wait for the debugger to connect. Click «Run Debugger» in VMMON to connect
Configuring Windbg
Now, the debugger should be connected to the VM. We need to setup some configurations in the
debugger:
-
Setup symbols server: There are 2 ways to setup symbols path:
- Environment Variable: This is the easier way I typically use. Set a new environment variable named _NT_SYMBOL_PATH with the
following value:srv*c:symbolssym*http://msdl.microsoft.com/download/symbols" - You can also configure the symbols using a debugger command like this:
.sympath srv*c:symbolssym*http://msdl.microsoft.com/download/symbols"
- Environment Variable: This is the easier way I typically use. Set a new environment variable named _NT_SYMBOL_PATH with the
-
If the debugger crashes / closes, you can just open a new debugger by clicking the «run debugger» button
-
Arrange the windows / font however you like.
If you use the old Windbg, you should use «Save Workspace» after arranging the windows in the way you like, so next time you open WinDbg it will save this arrangement. It will also restore the symbol path.
Configuring DbgPrint output
When debugging a driver, It’s useful to be able to call DbgPrintEx and see messages in the debugger
window. By default, all DbgPrint calls are filtered out. There are 3 ways to enable debugger messages:
- In windbg, run
ed nt!Kd_DEFAULT_MASK 0xF. Kd_DEFAULT_MASK is a global variable inside
ntoskrnl that is checked before printing messages to the debugger. If you write 0xF to this variable it means you want to get all messages. You will need to do this every time the machine reboots. - If you don’t want to edit this variable every time the machine reboots, you can configure this
via registry. Run the following command (THIS REQUIRES A REBOOT.)
reg add "HKLMSYSTEMCurrentControlSetControlSession ManagerDebug Print Filter" /ve /t REG_DWORD /d 15
Because we use the «default mask» here you’ll start to see every DbgPrint from all drivers so it can become pretty noisy. The other option is to filter by ComponentId. When you call DbgPrintEx, the first argument is a component id. Instead of setting the Kd_DEFAULT_MASK variable, you can
set a component-specific mask. For example:
- Make sure that when you call DbgPrintEx, you specify the
DPFLTR_IHVDRIVER_IDcomponent. - Run the following command, to edit this component’s mask:
ed nt!Kd_IHVDRIVER_Mask 0xf - You can do it in the registry too, run the following command:
reg add "HKLMSYSTEMCurrentControlSetControlSession ManagerDebug Print Filter" /v IHVDRIVER /t REG_DWORD /d 15
Initialization Commands
- !sym noisy — this will allow you to understand better why the debugger is stuck:)
- .kdfiles — this will save you some time by automatically loading the .sys file from the host machine,
this way you won’t need to copy the .sys file. The downside is that it doesn’t work with user mode executables,
so you need to find another method for them (copy pasting or using some kind of share) - .reload — this will referesh the symbols.
Installing and Loading Device Drivers
Installing a driver is done by registering it in the registry under the services key. Loading the driver is done by calling the
NtLoadDriver syscall.
You can either:
- Use Osr Loader — This works on win 7-10
- Use builtin SC tool (only win10)
- Use «sc create <REG_KEY_NAME> type= kernel binPath= <FULL_PATH>» to install the driver
- Use «sc start <REG_KEY_NAME>» to load the driver
If there the DriverEntry function returns an error status, it will be returned to «sc» / OsrLoader and the driver will be unloaded without
calling DriverUnload.
To debug your own driver, move it into the virtual machine and install it. Then you are welcome to put a breakpoint on the DriverEntry
by using «bu DriverName!DriverEntry» and then start the driver. If you want to update the code (say you found a bug..) then you can
stop the driver, recompile, move the files into the VM, and start the driver again.
General WinDbg
.<command>— run a command. This command is built-into the debugger!<command>— run an extension. Some extensions arrive by default, like «!process»- Control-Break — Abort Long Running Operation / Debug Break
Exploring Modules And Symbols
Symbols are important when examining modules. When examining a certain module we always need to verify it’s symbols
are loaded. We can use the lm command to see which modules are loaded right now — for each module we can see the
status of the symbols. Basically information about loaded modules is not ‘updated’ unless .reload is used before.
use .reload when changing the process context or when you’re missing a specific modules in the list.
.reloadto reload symbols of loaded modules. Typically used to load symbols of modules that weren’t loaded before- You may want to use
!sym noisyto diagnose symbol loading errors. .reload /u— unload symbols. This is used to release the .pdb file of compiled code.- Sometimes it’s needed to forcefully close handles to PDB files because WinDbg does not close them.
(using process explorer or process hacker..)
- Sometimes it’s needed to forcefully close handles to PDB files because WinDbg does not close them.
lm(List Modules): Prints list of loaded modulesx(Examine): Prints loaded symbols —x <module_name>!<symbol_name>— you can use wildcard on both sides- Search for a function by name:
x MyDllName!FunctionName - Search for a function with wildcards
x MyDllName!*Func(ends with Func)
- Search for a function by name:
Source Navigation
.open -a <symbol>— open the source file with this symbol
Breakpoints
These are the commands for int3 breakpoints.
-
bp — normal breakpoint
-
Breakpoint On DriverEntry — If your driver is not loaded yet, you cannot use «bp MyDriver!DriverEntry» because this symbol
is not known yet. You can use the «bu» command, this allows to put a breakpoint on the driver entry because those breakpoints are calculated when a driver is loaded. Another trick to break at the load of drivers (Useful in case you don’t have symbols) is breaking
in ntoskrnl.exe where DriverEntry is called. (For example, IopLoadDriver) -
bl— list breakpoints -
bc */bc <breakpoint_id>— clear breakpoint -
bp /1 <location>— temporary breakpoint (break 1 time..) -
Breaking on source lines —
- You can use F9 while placing the cursor on a specific line of code.
- Old Method: Find the source line using the status bar and run
bp<sourcefile>:<line> - Sometimes this method is too slow because it cannot know which module you are trying to break on, so it’ll
start downloading symbols of other modules…. bp `module_name!file.cpp:206`is better — specifies the name of the module
-
bp /p <EPROCESS address> <breakpoint address>— Break on a specific process —
say you want your breakpoint to be on only for a specific process, you can use /p to do it -
bp /t <ETHREAD address> <breakpoint address>— same as above, for threads. -
bp <options> "<command">— this will run a windbg command after breaking. You can combine multipile commands using ‘;’ for example:
This command will break at line 385 in the ProcessProtector.c file in the ProcessProtector module and it will print
basic process information, a stack trace, and it will continue on.
Limit the number of times the breakpoint hits to prevent floods:
bp /5 `ProcessProtector!ProcessProtector.c:385` "!process -1 0; k; g"
Break right before the process entry point in kernel debugging:
bp ntdll!LdrpInitializeProcess "bp /1 KERNEL32!BaseThreadInitThunk; g"
Conditional breakpoints
Conditional breakpoints allows you to break if a some DX expression evaluates to true.
Analyzing BugChecks
analyze -v: Shows detailed information about the exception
Tracing and Stepping
- (F5)
g: (go) continue - (F10) : step over
- (F11) : step into
tt— Trace until next return
Analyzing Program State
- Use memory window to see raw memory
- use «dt» to see observe data structures
- use «dx» to evaluate C++ Expressions
k— stack trace!stacks— Inspect the stacks of all of the running threads.!stacks 1 <filter_string>can be used to filter based on some string in the stack
Function arguments
When debugging, it’s useful to see the function arguments.
The first 4 arguments are in: rcx, rdx, r8, r9. Also, the caller allocates a shadow space for them, but the caller does not
store the arguments in this space (it’s reserved for the callee)
kd> dq /c1 rsp
fffffd08`ee125dc8  fffff801`71222935 --> the return address. only relevant inside the function
fffffd08`ee125dd0  00000025`196fdb50 --> arg1 shadow
fffffd08`ee125dd8  00000000`00000000 --> arg2 shadow
fffffd08`ee125de0  00000000`00000000 --> arg3 shadow
fffffd08`ee125de8  00000000`00000000 --> arg4 shadow
fffffd08`ee125df0  00007fff`00000002 --> arg5
fffffd08`ee125df8  00000025`196fda48 --> arg6
fffffd08`ee125e00  ffffb484`5254e080 --> arg7
fffffd08`ee125e08  fffff801`71449ebf --> ar8
fffffd08`ee125e10  00000000`00000000 -->....
fffffd08`ee125e18  00000000`00000000
It’s also useful to be able to extract function arguments of previous calls in the callstack. In 32 bit, windbg supports reading function
arguments from the stack using the ‘kv’ command. Say we are debugging this code:
#include <stdio.h>

typedef struct OBJ {
    int a;
    int b;
    int c;
} OBJ, *POBJ;

int AddValues1(int a, int b)
{
    return a + b;
}

int AddValues2(int a, int b)
{
    return AddValues1(a, b);
}

OBJ AddObjects(POBJ Obj1, POBJ Obj2)
{
    OBJ Obj3 = { 0 };
    Obj3.a = AddValues2(Obj1->a, Obj2->a);
    return Obj3;
}

int main()
{
    OBJ Obj1 = { 0 };
    OBJ Obj2 = { 0 };

    Obj1.a = 1;
    Obj1.b = 2;
    Obj1.c = 3;
    Obj2.a = 4;
    Obj2.b = 5;
    Obj2.c = 6;

    printf("Obj1 Address: 0x%pn", &Obj1);
    printf("Obj2 Address: 0x%pn", &Obj2);

    AddObjects(&Obj1, &Obj2);

    return 0;
}
The following example will show how to extract the 32 bit arguments:
0:000> bp AddValues1
0:000> g
Breakpoint 0 hit
eax=00000004 ebx=01059000 ecx=00000001 edx=00000001 esi=00891a40 edi=0133fc58
eip=008910c0 esp=0133fb80 ebp=0133fc58 iopl=0         nv up ei pl zr na pe nc
cs=0023  ss=002b  ds=002b  es=002b  fs=0053  gs=002b             efl=00000246
Project1!AddValues1:
008910c0 55              push    ebp
0:000> kv
 # ChildEBP RetAddr  Args to Child
00 0133fb7c 00891145 00000001 00000004 0133fd4c Project1!AddValues1 (FPO: [Non-Fpo]) (CONV: cdecl)
01 0133fc58 0089104e 00000001 00000004 0133fe80 Project1!AddValues2+0x35 (FPO: [Non-Fpo]) (CONV: cdecl)
02 0133fd4c 008912d8 0133fd70 0133fe6c 0133fe58 Project1!AddObjects+0x4e (FPO: [Non-Fpo]) (CONV: cdecl)
03 0133fe80 008919e3 00000001 015f5db8 015fb990 Project1!main+0xa8 (FPO: [Non-Fpo]) (CONV: cdecl)
04 0133fea0 008918b7 fdf471b3 00891a40 00891a40 Project1!invoke_main+0x33 (FPO: [Non-Fpo]) (CONV: cdecl)
05 0133fefc 0089175d 0133ff0c 00891a48 0133ff1c Project1!__scrt_common_main_seh+0x157 (FPO: [Non-Fpo]) (CONV: cdecl) [d:agent_work3ssrcvctoolscrtvcstartupsrcstartupexe_common.inl @ 288]
06 0133ff04 00891a48 0133ff1c 768f6359 01059000 Project1!__scrt_common_main+0xd (FPO: [Non-Fpo]) (CONV: cdecl) [d:agent_work3ssrcvctoolscrtvcstartupsrcstartupexe_common.inl @ 331]
07 0133ff0c 768f6359 01059000 768f6340 0133ff78 Project1!mainCRTStartup+0x8 (FPO: [Non-Fpo]) (CONV: cdecl) [d:agent_work3ssrcvctoolscrtvcstartupsrcstartupexe_main.cpp @ 17]
08 0133ff1c 77738964 01059000 5f9cd80a 00000000 KERNEL32!BaseThreadInitThunk+0x19 (FPO: [Non-Fpo])
09 0133ff78 77738934 ffffffff 7775a0de 00000000 ntdll!__RtlUserThreadStart+0x2f (FPO: [SEH])
0a 0133ff88 00000000 00891a40 01059000 00000000 ntdll!_RtlUserThreadStart+0x1b (FPO: [Non-Fpo])
0:000> dx (OBJ*)0x0133fd70 <<<<<< This is the "hidden" return value argument, as expected it has garbage
(OBJ*)0x0133fd70                 : 0x133fd70 [Type: OBJ *]
    [+0x000] a                : -858993460 [Type: int]
    [+0x004] b                : -858993460 [Type: int]
    [+0x008] c                : -858993460 [Type: int]
0:000> dx (OBJ*)0x0133fe6c  <<<<<< This is arg1 from the call to AddObjects
(OBJ*)0x0133fe6c                  : 0x133fe6c [Type: OBJ *]
    [+0x000] a                : 1 [Type: int]
    [+0x004] b                : 2 [Type: int]
    [+0x008] c                : 3 [Type: int]
0:000> dx (OBJ*)0x0133fe58  <<<<<< This is arg2
(OBJ*)0x0133fe58                   : 0x133fe58 [Type: OBJ *]
    [+0x000] a                : 4 [Type: int]
    [+0x004] b                : 5 [Type: int]
    [+0x008] c                : 6 [Type: int]
In 64 bit things are a bit more complicated because the calling conventions do not pass the 4 first arguments on the stack, but on registers.
The KV command still tries to read the arguments from the stack, from the shadow space of passed arguments. So, if the file is compiled
in debug mode, it can have valid arguments when using KV. In case the arguments are not saved in the shadow space, we can still try to extract
them by tracing the flow of register usage and seeing whether the value is saved in the stack somewhere. In some cases the parameter is lost because
it’s not saved anywhere on the stack. If we are lucky the parameter is saved somewhere and we can read it.
The way I typically do this is to disassemble the function from the callstack, and see if the arguments are saved in the shadow space. If they are I use
the KV command to extract the arguments, or use the Child SP value with dq /c1 @rsp
Processes
- cid — CID in the windows structures means client id. Most of the time it refers to a ProcessId or a ThreadId but
sometimes it’s both in the same struct. (The struct CLIENT_ID contains UniqueProcessId and UniqueThreadId)
Current Process
!process— Dump current process information
kd> !process
PROCESS ffff8906293a1080
    SessionId: 1  Cid: 0f3c    Peb: 2063b93000  ParentCid: 122c
    DirBase: 72810002  ObjectTable: ffffb088f57cedc0  HandleCount:  33.
    Image: WindowsInspector.Controller.exe
    VadRoot ffff89062992fac0 Vads 22 Clone 0 Private 354. Modified 0. Locked 0.
    DeviceMap ffffb088f43ed730
    Token                             ffffb088f745d060
    ElapsedTime                       00:00:00.233
    UserTime                          00:00:00.000
    KernelTime                        00:00:00.000
    QuotaPoolUsage[PagedPool]         24560
    QuotaPoolUsage[NonPagedPool]      3256
    Working Set Sizes (now,min,max)  (847, 50, 345) (3388KB, 200KB, 1380KB)
    PeakWorkingSetSize                814
    VirtualSize                       4143 Mb
    PeakVirtualSize                   4143 Mb
    PageFaultCount                    849
    MemoryPriority                    BACKGROUND
    BasePriority                      8
    CommitCharge                      540

        THREAD ffff890628533080  Cid 0f3c.0de0  Teb: 0000002063b94000 Win32Thread: 0000000000000000 RUNNING on processor 0
Listing processes
.tlist — <process_id>:<process_name>
0n17636 chrome.exe
0n17744 chrome.exe
0n13076 chrome.exe
0n17148 chrome.exe
0n17516 chrome.exe
0n10776 chrome.exe
0n13176 cmd.exe
!process 0 0
PROCESS ffff89062943c080
    SessionId: 1  Cid: 09e0    Peb: 9780215000  ParentCid: 03ac
    DirBase: 6ce90002  ObjectTable: ffffb088f57cad80  HandleCount: 309.
    Image: RuntimeBroker.exe

PROCESS ffff8906297ce080
    SessionId: 1  Cid: 06f8    Peb: 3877758000  ParentCid: 122c
    DirBase: 77800002  ObjectTable: ffffb088f3ac8880  HandleCount:  33.
    Image: WindowsInspector.Controller.exe
/
!process 0 0 <process_name>
kd> !process 0 0 WindowsInspector.Controller.exe
PROCESS ffff8906297ce080
    SessionId: 1  Cid: 06f8    Peb: 3877758000  ParentCid: 122c
    DirBase: 77800002  ObjectTable: ffffb088f3ac8880  HandleCount:  33.
    Image: WindowsInspector.Controller.exe
    VadRoot ffff890629929300 Vads 22 Clone 0 Private 353. Modified 0. Locked 257.
    DeviceMap ffffb088f43ed730
    Token                             ffffb088f6f88060
    ElapsedTime                       00:53:33.825
    UserTime                          00:00:00.000
    KernelTime                        00:00:00.000
    QuotaPoolUsage[PagedPool]         24560
    QuotaPoolUsage[NonPagedPool]      3256
    Working Set Sizes (now,min,max)  (846, 50, 345) (3384KB, 200KB, 1380KB)
    PeakWorkingSetSize                814
    VirtualSize                       4143 Mb
    PeakVirtualSize                   4143 Mb
    PageFaultCount                    849
    MemoryPriority                    BACKGROUND
    BasePriority                      8
    CommitCharge                      540

        THREAD ffff890629432080  Cid 06f8.0c6c  Teb: 0000003877759000 Win32Thread: 0000000000000000 RUNNING on processor 0
This is how to show a little bit information about the current process:
kd> !process -1 0
PROCESS ffff8e8aa3781080
    SessionId: 1  Cid: 0a20    Peb: 62982f2000  ParentCid: 13ec
    DirBase: 6b280002  ObjectTable: ffffc68158f6da00  HandleCount: 486.
    Image: PROCEXP64.exe
Searching for processes
- Use the «!process» command with wildcards:
!process "Windows*"
Moving to the context of a certain process
Moving between process contexts allows placing breakpoints on the process (in user mode), seeing the state of the process,
searching symbols (because the symbols are loaded)
- Get the EPROCESS address :
!process 0 0 myproc.exe - Use the address to switch context:
.process /i - Continue until the scheduler switches to the desired process context:
g
kd> .process /i ffff998ba6f6e280
You need to continue execution (press 'g' <enter>) for the context
to be switched. When the debugger breaks in again, you will be in
the new process context.
kd> g
Invalid parameter passed to C runtime function.
Break instruction exception - code 80000003 (first chance)
rax=0000000000000000 rbx=00000000000000bd rcx=0000000000000007
rdx=0000000000000000 rsi=0000000000000000 rdi=ffff998ba6f6e280
rip=fffff8041be59240 rsp=ffff840136f67a58 rbp=ffff998ba6f6e280
 r8=ffff998ba557b0e8  r9=7ffff8041c60c600 r10=ffff840136f67a90
r11=0000000000000000 r12=0000000000000700 r13=0000000000000000
r14=0000000000000000 r15=fffff8041c1fb200
iopl=0         nv up ei ng nz na pe nc
cs=0010  ss=0018  ds=002b  es=002b  fs=0053  gs=002b             efl=00000282
nt!DbgBreakPointWithStatus:
fffff804`1be59240 cc              int     3
kd> !process
PROCESS ffff998ba6f6e280
    SessionId: 0  Cid: 08e4    Peb: 00684000  ParentCid: 032c
    DirBase: 5e3d0002  ObjectTable: ffffbf8f1ddf8740  HandleCount: 397.
    Image: vmtoolsd.exe
    VadRoot ffff998ba57e97a0 Vads 176 Clone 0 Private 1675. Modified 7635. Locked 0.
    DeviceMap ffffbf8f19413600
    Token                             ffffbf8f1d65c060
    ElapsedTime                       02:23:51.459
    UserTime                          00:00:00.015
    KernelTime                        00:00:00.031
    QuotaPoolUsage[PagedPool]         205840
    QuotaPoolUsage[NonPagedPool]      24888
    Working Set Sizes (now,min,max)  (1560, 50, 345) (6240KB, 200KB, 1380KB)
    PeakWorkingSetSize                5419
    VirtualSize                       4236 Mb
    PeakVirtualSize                   4245 Mb
    PageFaultCount                    22400
    MemoryPriority                    BACKGROUND
    BasePriority                      13
    CommitCharge                      2308
That allows us to put breakpoints in the context of this process.
Debugging User Mode Code From a Kernel Debugging Session
Note that the Timestamp and Checksum of the image must be valid. If the image doesn’t have a valid checksum/timestamp, windbg will not
be able to load the symbols. Compiling the executable with vs2019 results in an invalid checksum by default (on debug builds) because
of a feature called «incremental build». It’s best to debug the process with release builds or disable incremental builds.
Add the .pdb path of your user mode application into the source file path. Without doing so, WinDbg might get stuck if you use reload /f
while trying to get the symbols (https://stackoverflow.com/questions/38062216/windbg-cant-find-microsoft-symbols).
After that, perform .reload to reload symbols (in the context of this process). Then, «lm» should show the user mode
image that you are debugging.
That will allow to put breakpoints by using symbols from this image. 
Debugging RPC
- Set a breakpoint on RPC method invocation:
bp RPCRT4!Invoke
To get the THREAD id, use the following structures:
PTHREAD ThreadPtr = Teb->ReservedForNtRpc ^ 0x0ABABABABDEDEDEDE;

class THREAD {
	ULONGLONG ThreadId; // 0x10
	RpcCallState* RpcMessage; // 0x20
}


class RpcCallState {
	RpcConnectionInformation* RpcConnectionInfo; // 0x130
	PPORT_MESSAGE PortMessage; // 0x1b8
}

class RpcConnectionInformation {
	AlpcConnectionInformation* AlpcConnectionInformation; // 0x38
}

class AlpcConnectionInformation {
	HANDLE PortHandle; // 0xd0
}
Threads
!thread
Pool Allocation Breakpoint
This trick is very useful — it can be used to break when a certain tag is used in an allocation.
dd nt!PoolHitTag L1 — read the current pool tag hit
ed nt!PoolHitTag 'eliF' — set the current pool tag hit to ‘File’. Each time a file will be allocated, we’ll break
Debugger Expressions
the dx command is one of the most useful commands of windbg. It can be used to evaluate a C++ like expressions in the debugger.
The reason it’s so powerfull is that it let’s you access symbol information and javascript windbg scripts.
Some simple examples (More examples later)
Windbg Scripting
..
..
..
Dotnet Debugging
- .NET Internals: https://docs.microsoft.com/en-us/archive/msdn-magazine/2005/may/net-framework-internals-how-the-clr-creates-runtime-objects
The SOS (Son Of Strike) Windbg extension can be used to debug .NET processes.
Origin of the name
The original name of the CLR team (chosen by team founder and former Microsoft Distinguished Engineer Mike Toutonghi) was «Lighting». Larry Sullivan’s dev team created an ntsd extension dll to help facilitate the bootstrapping of v1.0. We called it strike.dll (get it? «Lightning Strike»? yeah, I know, ba’dump bum). PSS really needed this in order to give us information back to the team when it was time to debug nasty stress failures, which are almost always done with the Windows debugger stack. But we didn’t want to hand out our full strike.dll, because it contained some «dangerous» commands that if you really didn’t have our source code could cause you confusion and pain (even to other Microsoft teams). So I pushed the team to create «Son of Strike» (Simon from our dev takes credit/blame for this), and we shipped it with the product starting with Everett (aka V1.1).
Loading the SOS plugin
The SOS windbg extension is loaded from the .NET runtime DLL. First we have to make sure mscorlib is loaded into the process. if not (or, it’s a dump) We first put a breakpoint on the MSCORLIB DLL (A .NET DLL that provides the .NET standard libraries)
For example:
ntdll!RtlUserThreadStart:
00007ffb`0290ce30 4883ec78        sub     rsp,78h
0:007> sxe ld:mscorlib
0:007> g
...
...
ModLoad: 00007ffa`d3500000 00007ffa`d43e4000   C:windowsassemblyNativeImages_v2.0.50727_64mscorlib712d042affe876859328e2d4029c7297mscorlib.ni.dll
ntdll!NtMapViewOfSection+0x14:
00007ffb`0293c574 c3              ret
After that, we can run a command to load the SOS plugin from the runtime DLL. the name of the runtime DLL was changed in .NET 4, so we have to specify a different name.
This command means: Load the «sos» plugin from a loaded DLL.
To determine the version of .NET, you can run ‘lm’ and see which DLL is loaded:
- mscorwks: .NET 2
- clr: .NET 4
.NET 2
.NET 4+
Load SOS in a dump file
In dump files you get from other computers, you need to load dll using an absolute path. So first, you need to find the .net directory that matches the .NET version that you debug (2 vs 4) — then, you need to load sos.dll from this path. For example:
.load C:WindowsMicrosoft.NETFramework64v4.0.30319sos.dll
Loading into a Wow64 dump
There’s a bug in sos.dll that it cannot load correctly into a wow64 dump because it «thinks» the target architecture is incorrect.
To solve this, you can use this Windbg plugin: https://github.com/poizan42/soswow64
- Load the dump into a Windbg x86 debugger. (It sometimes works with Windbgx64 debuggers too)
- load sos.dll
- load soswow64.dll
- switch to wow64 (wow64exts.sw)
- have fun!
example:
0:000> .load C:WindowsMicrosoft.NETFrameworkv2.0.50727SOS.dll
0:000> .load C:Toolssoswow64soswow64.dll
Successfully hooked IDebugControl::GetExecutingProcessorType.
Successfully patched DbgEng!X86MachineInfo::ConvertCanonContextToTarget.
0:000> !wow64exts.sw
Switched to Guest (WoW) mode
0:000:x86> !clrstack
OS Thread Id: 0x1b20 (0)
ESP       EIP
0010fd70 0000002b [InlinedCallFrame: 0010fd70] System.Windows.Forms.UnsafeNativeMethods.WaitMessage()
0010fd6c 6e5a8e08 System.Windows.Forms.Application+ComponentManager.System.Windows.Forms.UnsafeNativeMethods.IMsoComponentManager.FPushMessageLoop(Int32, Int32, Int32)
0010fe08 6e5a88f7 System.Windows.Forms.Application+ThreadContext.RunMessageLoopInner(Int32, System.Windows.Forms.ApplicationContext)
0010fe5c 6e5a8741 System.Windows.Forms.Application+ThreadContext.RunMessageLoop(Int32, System.Windows.Forms.ApplicationContext)
0010fe8c 6eabe7f2 System.Windows.Forms.Application.Run()
.......
.......
Finding information about a method/type
!dumpdomain— List all application domains.!name2ee * <full method/type/assembly name>can be used to find methods/types/assemblies- Sometimes classes are missing when using !name2ee. Not sure why.
!dumpmt -md <method_table_address>— List all the methods in a method table. Each object has a method table!DumpMD /d <method_descriptor_address>— Show information about a method descriptor.!ip2md <address>— get method descriptor by address.!dumpil <descriptor>— output IL disassembly of a method!clrstack— show stack trace for CLR ONLY.!dumpstack— show combined stack trace for CLR and native code.- This command is not so reliable — it can sometimes show unrelated functions
!do <object_address>— Dump a managed object!dso— Dump the objects on the stack!threads— list the managed threads and can be used to change context to a different thread!dumpmodule -mt <module>— List method tables in a module
Managed breakpoints
There are 2 ways to put a breakpoint on a managed method:
- Find the address of jitted code using
!dumpmdand use the regularbpcommand. - If the method is not jitted yet, you can use the
!bpmdcommand.
Minifilter Debugging
….
TODO
- dps
- .reload /f
- kdfiles: drvmap
- kdinit
- disassembly: u, uf, uf /c
- !pte
- .formats
- dv
- .f+ / .f- (Or Ctrl Up/Down)
- !thread
- !handle
- error
- !devobj
- !drvobj
- !object
- !error <win32_error>
- !error nt
- !devnode 0 1
- lmu
- ?? (_EPROCESS*)@@masm(nt!PsInitialSystemProcess)
- .reload -user
- dd, dq, dds, dqs dps
.shell - .kdfiles -m file c:hostdirfile.sys << instead of creating a drv map file
- dt poi(nt!PsLoadedModuleList) nt!_LDR_DATA_TABLE_ENTRY -l InLoadOrderLinks.Flink BaseDllName EntryPoint
- dt -l — if you are mistaken in the name of the flink member,
it will show you only the first element in the list. - dt nt!_LDR_DATA_TABLE_ENTRY poi(nt!PsLoadedModuleList)
- !poolfind
- !kp, !kc
- .frame
- !gflag +ksl, sxe ld dll_name
- !ioctldecoder
- %…%WindowsAppsMicrosoft.WinDbg_8wekyb3d8bbweWinDbgX.exe -k com:pipe,resets=0,reconnect,port=$(pipename) -c «$$< c:toolsvirtualkdkdinit»
- CTRL-ALT-K — Enable boot breakpoint — remember to use «Restart Guest» and not simply a reset to keep the same windbg process
- For vmware 15: https://github.com/4d61726b/VirtualKD-Redux
- Use DbgKit for object exploration: http://www.andreybazhan.com/dbgkit.html
- Use «dx» to explore processes, threads, ..
- Use «bp /w» to set smart conditional breakpoints
- Jump to address: r rip = fffff802`64c763f0
- dx -id 0, 0, <process_object>
- Change the value of register: r <reg_name> = <reg_value>
- .pagein
- Breakpoint in process by name after DLLs are loaded:
bp /w "@$curprocess.Name.ToLower() == "apcinjector.exe"" nt!NtTestAlert ".reload;bp /t 1 apcinjector!main;g"
- Wow64 Debugging: https://docs.microsoft.com/en-us/windows/win32/winprog64/debugging-wow64
- .thread — set register context
- Replace existing system drivers with kdfiles: https://kobyk.wordpress.com/2008/07/04/replacing-boot-load-drivers-with-the-windows-boot-debugger/
Debugging Tools for Windows — Инструменты отладки кода операционных систем Windows. Представляют собой набор свободно распространяемых программ от Microsoft, предназначенных для отладки кода пользовательского режима и режима ядра: приложений, драйверов, служб, модулей ядра. В состав инструментария входят отладчики консольного и GUI- режимов, утилиты для работы с символами, файлами, процессами, утилиты для обеспечения удаленной отладки. Инструментарий содержит в себе утилиты, с помощью которых можно находить причины сбоев в различных компонентах системы. Debugging Tools for Windows с определенного момента недоступны для скачивания в форме автономного дистрибутива и входят в состав Windows SDK (Windows Software Development Kit). Набор инструментальных средств Windows SDK, в свою очередь, доступен в виде части программы подписки MSDN или же может быть свободно загружен в качестве отдельного дистрибутива с сайта msdn.microsoft.com. По заявлению разработчиков, последняя и самая актуальная версия Debugging Tools for Windows содержится именно в Windows SDK.
Debugging Tools for Windows обновляются и выкладываются в публичный доступ достаточно часто и процесс этот никак не зависит от выпуска операционных систем. Поэтому, периодически проверяйте наличие новых версий.
Давайте теперь посмотрим, что же, в частности, позволяют нам средства Debugging Tools for Microsoft Windows:
- Отлаживать локальные приложения, службы (сервисы), драйвера и ядро;
- Отлаживать по сети удаленные приложения, службы (сервисы), драйвера и ядро;
- Отлаживать работающие приложения в режиме реального времени;
- Анализировать файлы дампов памяти приложений, ядра и системы в целом;
- Работать с системами на базе архитектур x86/x64/Itanium;
- Отлаживать программы пользовательского режима и режима ядра;
Доступны следующие версии Debugging Tools for Windows: 32-bit x86, Intel Itanium, 64-bit x64. Нам потребуются две из них: x86 либо x64.
Доступны несколько способов установки Debugging Tools for Windows, в данной же статье мы будем рассматривать лишь основные из них:
- Установка посредством web-инсталлятора.
- Установка Debugging Tools for Windows с ISO-образа Windows SDK.
- Установка Debugging Tools for Windows непосредственно из пакетов dbg_amd64.msi/dbg_x86.msi.
Остается неясен еще во какой момент, зачем мне инсталлировать отладочный инструментарий на компьютер? Зачастую ведь сталкиваешься с ситуацией, когда вмешательство в рабочую среду крайне нежелательно! И уж тем более что инсталляция нового продукта, то есть внесение изменений в реестр/файлы системы, может быть совершенно недопустима. Примерами могут служить критически-важные сервера. Почему бы разработчикам не продумать вариант с портабельными (portable) версиями приложений, не требующих установки?
От версии к версии процесс установки пакета Debugging Tools for Windows претерпевает некоторые изменения. Давайте теперь перейдем непосредственно к процессу установки и рассмотрим способы, которыми можно установить инструментарий.
Установка Debugging Tools for Windows при помощи web-инсталлятора
Переходим на страницу Архив Windows SDK и находим раздел под названием Windows 10 и ниже пункт «Windows 10 SDK (10586) и эмулятор устройства с Windows 10 Mobile (Майкрософт) (версия 10586.11)».

Щелкаем по пункту УСТАНОВИТЬ ПАКЕТ SDK. После щелчка скачиваем и запускаем файл sdksetup.exe, который и инициирует процесс онлайн-установки Windows SDK. На начальном этапе инсталятор проверит наличие в системе установленного пакета .NET Framework последней версии (в данный момент это 4.5). Если пакет отсутствует, что будет предложена установка и по окончании выполнена перезагрузка станции. Сразу после перезагрузки, на этапе авторизации пользователя, стартует процесс инсталляции уже непосредственно Windows SDK.

Зачастую, при выборе всех без исключения компонентов пакета, в процессе установки могут возникнуть ошибки. В этом случае рекомендуется устанавливать компоненты выборочно, минимально необходимый набор.
После завершения инсталляции Debugging Tools for Windows расположение файлов отладки при данном методе инсталляции у нас будет следующим:
- 64-битные версии: C:Program Files (x86)Windows Kitsx.xDebuggersx64
- 32-битные версии: C:Program Files (x86)Windows Kitsx.xDebuggersx86
* где x.x — определенная версия комплекта разработки;
Заметили, что версии 8 и выше, пути инсталляции заметно отличаются от классических для всех предыдущих версий средств отладки?
Огромным плюсом данного способа установки Debigging Tools for Windows является установка версий отладочных средств сразу всех архитектур.
Установка Debugging Tools for Windows с ISO-образа Windows SDK
Данный метод подразумевает установку Debugging Tools for Windows с использованием полного инсталляционного образа Windows SDK (Software Developers Kit). До определенного времени, скачать образ ISO для соответствующей системы можно было на странице Архив Windows SDK. Однако, в данный момент, получить ISO-образ SDK можно через запуск web-инсталлятора sdksetup.exe, и выбора пункта Download the Windows Software Development Kit в стартовом окне инсталлятора:

Как было выяснено, предыдущий метод установки при помощи веб-инсталлятора достаточно капризен и зачастую завершается ошибкой. На чистых системах устанавливается без проблем, однако на достаточно уже нагруженных возникают многочисленные проблемы. Если у Вас именно такой случай, то воспользуйтесь данным методом.
Соответственно, на странице необходимо подобрать требуемый дистрибутив, для меня (да и думаю для многих) в данный момент это «Пакет Windows SDK для Windows 7 и .NET Framework 4» и чуть ниже нажать на ссылку «Получить ISO-образ DVD-диска».
При работе с сайтом msdn.microsoft.com советую воспользоваться браузером Internet Explorer, поскольку были замечены случаи неработоспособности конкурирующих продуктов!
Далее у нас имеется выбор между тремя вариантами образа:
| Имя | Назначение |
|---|---|
| GRMSDK_EN_DVD.iso | Образ SDK для систем с архитектурой x86 (32-битных). |
| GRMSDKIAI_EN_DVD.iso | Образ SDK для систем с архитектурой ia64. |
| GRMSDKX_EN_DVD.iso | Образ SDK для систем с архитектурой x64 (64-битных). |
Соответственно, необходимо выбрать исключительно по необходимости. Обычно разрядность Debugging Tools for Windows совпадает с разрядностью системы. У меня исследуемые системы, в основном, 64-битные, поэтому я в большинстве случаев скачиваю образ для 64-битной системы GRMSDKX_EN_DVD.iso.
Затем, после скачивания образа, нам необходимо с имеющимся ISO-образом как-то работать. Традиционным способом является, конечно же, запись компакт-диска, но ведь это достаточно долгий и иногда затратный метод. Предлагаю воспользоваться бесплатными утилитами по созданию в системе виртуальных дисковых устройств. Лично я для этой цели предпочитаю пользоваться программой DEAMON Tools Lite. У кого-то могут быть и другие предпочтения, более прямые или легковесные утилиты, на вкус и цвет, как говорится.. После инсталляции DAEMON Tools Lite, я просто щелкаю два раза на файл образа GRMSDKX_EN_DVD.iso и в системе у меня появляется новый виртуальный компакт диск:

Уже затем двойным щелчком активирую автозагрузку и запускаю инсталляцию Windows SDK:

Когда подходит очередь выбирать устанавливаемые компоненты из списка, то отключаем абсолютно все опции кроме помеченных на скриншоте. Это поможет избежать ненужных нам сейчас ошибок.

Все именно так, на скриншоте отмечено две опции: «Windows Performance Toolkit» и «Debugging Tools for Windows». Выбирайте обе, потому как Windows Performance Toolkit Вам непременно пригодится в работе! Далее, после нажатия кнопки «Next» инсталляция продолжается в обычном режиме. И в конце вы увидите надпись «Installation Complete».
По окончании инсталляции рабочие директории комплекта Debugging Tools for Windows будут следующими:
- Для версии x86: C:Program Files (x86)Debugging Tools for Windows (x86)
- Для версии x64: C:Program FilesDebugging Tools for Windows (x64)
На этом установку Debugging Tools for Windows можно считать оконченной.
Установка Debugging Tools for Windows через .msi файл
В случае возникновения проблем при инсталляции Debugging Tools for Windows двумя предыдущими способами, у нас в запасе остается еще один, самый надежный и проверенный временем, выручавший, так сказать, не раз. Когда-то, до интеграции в Windows SDK, Debugging Tools for Windows были доступны в виде отдельного инсталлятора .msi, который и сейчас можно найти, однако уже в недрах дистрибутива Windows SDK. Поскольку у нас на руках имеется уже ISO-образ Windows SDK, то мы можем не монтировать его в систему, а просто открыть при помощи всем уже хорошо знакомого архиватора WinRAR, ну или любого другого продукта, работающего с содержимым ISO-дисков.

После открытия образа нам необходимо пройти в каталог «Setup», находящийся в корне и далее выбрать одну из директорий:
- Для установки 64-битной версии: SetupWinSDKDebuggingTools_amd64 и распаковать из этого каталога файл
dbg_amd64.msi. - Для установка 32-битной версии: SetupWinSDKDebuggingTools и распаковать из этого каталога файл
dbg_x86.msi.
Далее, запускаем распакованный только что .msi файл и стартуем установку Debugging Tools for Windows.

По окончании инсталляции рабочие директории комплекта Debugging Tools for Windows будут следующими:
- Для версии x86: C:Program Files (x86)Debugging Tools for Windows (x86)
- Для версии x64: C:Program FilesDebugging Tools for Windows (x64)
На этом установку Debugging Tools for Windows можно считать выполненной.
Дополнительные сведения
Не знаю с чем это связано, быть может с моей невнимательностью, но после инсталляции Отладочных средств для Windows, инсталлятор не прописывает в системную переменную пути Path путь к каталогу с отладчиком. Это накладывает определенные ограничения на запуск различных отладочных задач напрямую из консоли. Поэтому, в случае отсутствия пути, я самостоятельно прописываю в окне Переменные среды путь к отладочным средствам:
- C:Program Files (x86)Windows Kits10Debuggersx86
- C:Program Files (x86)Windows Kits10Debuggersx64
* В вашем случае пути могут отличаться как по причине использования ОС другой разрядности, так и по причине использования SDK другой версии.
Утилиты пакета Debugging Tools for Windows могут работать в качестве переносных приложений, достаточно просто скопировать с рабочей системы каталог Microsoft Windows Performance Toolkit и использовать его в качестве портабельной версии на рабочем сервере. Но не забывайте учитывать разрядность системы!! Если Вы даже произвели полную инсталляцию пакета на критически-важную систему, то работать можно начинать прямо после инсталляции, перезагрузка не требуется.
Состав Debugging Tools for Windows
И теперь напоследок приведем состав Debugging Tools for Windows:
| Файл | Назначение |
|---|---|
| adplus.doc | Документация по утилите ADPlus. |
| adplus.exe | Консольное приложение, которое автоматизирует работу отладчика cdb для создания дампов, лог-файлов для одного или нескольких процессов. |
| agestore.exe | Утилита для удаления устаревших файлов из хранилища, используемого сервером символов или сервером исходников. |
| breakin.exe | Утилита, которая позволяет посылать процессам комбинацию пользовательского останова (break), аналогичное нажатию CTRL+C. |
| cdb.exe | Консольный отладчик пользовательского режима. |
| convertstore.exe | Утилита для конвертирования символов из уровня 2-tier в уровень 3-tier. |
| dbengprx.exe | Рипитер (прокси сервер) для удаленной отладки. |
| dbgrpc.exe | Утилита для отображения информации о состоянии вызова RPC. |
| dbgsrv.exe | Процесс сервера, используемый для удаленной отладки. |
| dbh.exe | Утилита для вывода информации о содержимом файла символов. |
| dumpchk.exe | Утилита проверки дампа. Утилита для быстрой проверки дамп-файла. |
| dumpexam.exe | Утилита для анализа дампа памяти. Результат выводится в %SystemRoot%MEMORY.TXT. |
| gflags.exe | Редактор глобальных флагов системы. Утилита управляет ключами реестра и другими настройками. |
| i386kd.exe | Обертка к kd. Когда то так назывался kd для систем на базе Windows NT/2000 для x86 машин? Вероятно, оставлено из соображений совместимости. |
| ia64kd.exe | Обертка к kd. Когда то так назывался kd для систем на базе Windows NT/2000 для ia64 машин? Вероятно, оставлено из соображений совместимости. |
| kd.exe | Консольный отладчик режима ядра. |
| kdbgctrl.exe | Инструмент управления отладки ядра. Утилита для управление и конфигурирования kernel debugging connection. |
| kdsrv.exe | Сервер соединений для KD. Утилита представляет собой небольшое приложений, которое запускается и ждет удаленных соединений. kd запускается на клиенте и подсоединяется к этому серверу для удаленной отладки. И сервер и клиент должны быть из одной сборки Debugging Tools. |
| kill.exe | Утилита для завершения процессов. |
| list.exe | Утилита для вывода содержимого файла на экран. В комплекте эта миниатюрная утилита оказалась с одной целью — просмотр больших текстовых или лог-файлов. Занимает немного места в памяти, поскольку грузит текст частями. |
| logger.exe | Миниатюрный отладчик, который может работать только с одним процессом. Утилита внедряет logexts.dll в пространство процесса, которая записывает все вызовы функций и другие действия исследуемой программы. |
| logviewer.exe | Утилита для просмотра логов, записанных отладчиком logger.exe. |
| ntsd.exe | Microsoft NT Symbolic Debugger (NTSD). Отладчик, идентичный cdb, за исключением того, что он создает текстовое окно при запуске. Как и cdb, ntsd способен отлаживать и консольные приложения и графические приложения. |
| pdbcopy.exe | Утилита для удаления приватных символов из файла символов, контроля за публичными символами, включенными в файл символов. |
| remote.exe | Утилита для удаленной отладки и удаленного контроля любого консольного отладчика KD, CDB и NTSD. Позволяет запускать все эти консольные отладчики удаленно. |
| rtlist.exe | Удаленный просмотрщик задач. Утилита используется для вывода списка запущенных процессов через процесс сервера DbgSrv. |
| symchk.exe | Утилита для загрузки символов с сервера символов Microsoft и создания локального кеша символов. |
| symstore.exe | Утилита для создания сетевого или локального хранилища символов (2-tier/3-tier). Хранилище символов — специализированная директория на диске, которая строится в соответствии с определенной структурой и содержит символы. В корневой директории символов создается структура подпапок с названиями, идентичными названию компонентов. В свою очередь, в каждой из этих подпапок находятся вложенные подпапки, имеющие специальные наименования, получаемые методом хеширования бинарных файлов. Утилита symstore сканирует папки с компонентами и добавляет новые компоненты в хранилище символов, откуда их может получить любой клиент. Говорится что symstore служит для получения символов из хранилища уровня 0-tier и выкладывания их в хранилище уровня 2-tier/3-tier. |
| tlist.exe | Просмотрщик задач. Утилита для вывода списка всех запущенных процессов. |
| umdh.exe | User-mode dump heap utility. Утилита для анализа куч (heap) выбранного процесса. Позволяет выводить различные параметры для кучи. |
| usbview.exe | Просмотрщик USB. Утилита для просмотра USB устройств, подключенных к компьютеру. |
| vmdemux.exe | Демультиплексор виртуальной машины. Для одного COM-соединения создает несколько именованных каналов. Каналы используются для отладки различных компонентов виртуальной машины |
| windbg.exe | Отладчик режима пользователя и режима ядра с графическим интерфейсом. |