Windows Server, Windows Vista, Windows XP, Программное обеспечение
- 19.03.2018
- 16 737
- 9
- 04.10.2021
- 38
- 37
- 1
- Содержание статьи
- Установка PowerShell в Windows
- Комментарии к статье ( 9 шт )
- Добавить комментарий
Установка PowerShell в Windows
PowerShell — это современная замена командной строки в Windows, альтернатива Bash от Microsoft и просто мощный инструмент в умелых руках. Тем не менее, есть он далеко не во всех операционных системах Windows — первой операционной системой, в которой был встроен PowerShell, была Windows 7. К счастью, установить его можно и на более старые системы — такие как Windows XP, Vista и их серверные аналоги. Делается это с помощью установки комплекта Windows Management Framework.
Программная часть компьютера при этом должна соответствовать следующим требованиям:
Операционная система:
Windows XP с установленным Service Pack 3
Windows Server 2003 с установленными Service Pack 2
Windows Vista с установленными Service Pack 1 или Service Pack 2
Windows Server 2008 с установленными Service Pack 1 или Service Pack 2
Установленный Microsoft .NET Framework 2 (так же подходит .NET Framework 3 и .NET Framework 3.5).
Скачать обновления для нужной операционной системы, содержащие в себе Windows Management Framework, в том числе Windows PowerShell 2.0 и WinRM 2.0 можно по следующим ссылкам:
Windows XP и Windows Embedded (обновление KB968930):
- Скачать с Каталога Центра обновлений Майкрософт (для русской версии)
- Скачать с Каталога Центра обновлений Майкрософт (для английской версии)
Windows Server 2003 (обновление KB968930):
- Скачать с Каталога Центра обновлений Майкрософт (для русской версии)
- Скачать с Каталога Центра обновлений Майкрософт (для английской версии)
Windows Server 2003 x64 (обновление KB968930):
- Скачать с Каталога Центра обновлений Майкрософт (для русской версии)
- Скачать с Каталога Центра обновлений Майкрософт (для английской версии)
Windows Vista (обновление KB968930):
- Скачать с официального сайта Microsoft
Windows Vista x64 (обновление KB968930):
- Скачать с официального сайта Microsoft
Windows Server 2008 (обновление KB968930):
- Скачать с официального сайта Microsoft
Windows Server 2008 x64 (обновление KB968930):
- Скачать с официального сайта Microsoft
После установки, исполняемый файл PowerShell можно будет найти по адресу C:WINDOWSsystem32WindowsPowerShellv1.0, а так же в меню Пуск.
January 28th, 2011
Summary: Learn how to install Windows PowerShell 2.0 on Windows XP, and how to distribute files between two folders.
In this Post:
- Where Can I Download Windows PowerShell 2.0 for Windows XP?
- How to Distribute Files Between Folders
Where Can I Download Windows PowerShell 2.0 for Windows XP?
Hey, Scripting Guy! I’m new to Windows PowerShell. Currently, I am using Windows XP. I have had no luck with downloading Windows PowerShell for Windows XP yet. Could you please give me a specific link so that I can download it? Many thanks.
— KB
Hello KB,
Microsoft Scripting Guy Ed Wilson is here. I am sorry you are having a problem downloading and installing Windows PowerShell 2.0 for Windows XP. This is the download page for Windows PowerShell 2.0. Unfortunately, it is not called “Download page for Windows PowerShell 2.0”; it is called TechNet Support Article 968929, and the title on the page says Windows Management Framework. I guess the only clue is the stuff in the parentheses where it says Windows PowerShell 2.0, WinRM 2.0, and Bits 4.0.
After you get to the download page, you will need to go all the way down to the bottom of the page. This is because this page contains links to all of the different packages that are required for everything from Windows Server 2008 to Windows Vista 64-bit. The package you want is a bit confusing, because it is for both Windows XP and Windows embedded. (To be honest, when the Scripting Wife asked me if it was the right package, I was not entirely certain. I just told her to download it and to try it, hoping that it would include a version check and that the installation would fail, if it were the wrong package). I have included a picture that points to the exact package you want.
My wife, the Scripting Wife, also had a bit of difficulty downloading and installing Windows PowerShell 2.0. You may want to take a look at her article, as it goes through the process step by step.
After you get it up and running, you may want to look at all the Scripting Wife articles, because she details her experience getting ready for the 2010 Scripting Games. She was an accountant, and though she is knowledgeable about computers, she is not a computer professional. Start at the beginning of the articles and read them forward. They kind of become her scripting diary.
Hope this helps.
How to Distribute Files Between Folders
Hey, Scripting Guy! Hello, maybe you can help me out. I am desperate. This is probably a stupid question, but I am currently trying to write a script that copies files from one source directory based on the number of files in the source to two different directory destinations. For example, if I have eight files in the source directory (A), I want to copy four of the eight files in destination directory (B) and copy the other four files in destination directory (C). I cannot seem to figure this out anywhere! I currently have this as my script.
CopyFiles_DoesNotWork.ps1
# Define source directory and destination directories to copy files:
$SQL01=»C:SQL01Source»
$DESTSQL02=»C:SQL02″
$DESTSQL03=»C:SQL03″
# Get directory items number and divide number received:
(get-childitem $SQL01).count /2
#Copy items to destination folders:
copy-item $SQL01 $DESTSQL02 -recurse
I am stuck! Your help would be greatly appreciated!
— JT
Hello JT,
The first thing I needed to do was to create a couple of folders (a, b, and c off the root). After I did that, I needed to create eight files. I used this line of code to create my eight files:
1..8 | % {New-Item -Path «c:a» -ItemType file -Name «file$_» -Value «file$_»}
After I created my test environment, it was a simple matter of writing a quick script to copy the files. It is significant that you said you wanted to copy the files, instead of moving them. With a copy, you will still have your eight original files in the original location, and in your two destination folders, you will have a copy of the first four files, and a copy of the second four files in the second destination folder. The trick to accomplishing your task is to add a bit of logic to the code so that it will know how many files have been copied to the first destination folder. When half of the files have been copied to the first destination, the script needs to switch to using the second destination folder. Whenever I have a script that needs to make a decision, I use a decision type of code structure—in this example, it is an If/Else type of code.
JT, I wrote the DivideAndCopyFiles.ps1 script to illustrate using this type of technique in your situation. The complete script appears here.
DivideAndCopyFiles.ps1
$source = «C:a»
$destination1 = «c:b»
$destination2 = «C:c»
$i = 1
$files = Get-ChildItem -Path $source -Recurse
Foreach($file in $files)
{
if($i -le $files.count/2)
{ Copy-Item -Path $file.fullname -Destination $destination1 }
Else
{ Copy-Item -Path $file.fullname -Destination $destination2 }
$i++
}
In the first section of the script, I declare a bunch of variables. These are pretty self-explanatory, except for the $i variable. The $i variable is a counter variable that is used to keep track of our progress in copying the files. It is important to initialize it to the value of 1, because if it were not initialized and the script were run a second time in the Windows PowerShell ISE, the script would not work properly because of the counter value being greater than the number of files in the collection. The variable portion of the script is shown here:
$source = «C:a»
$destination1 = «c:b»
$destination2 = «C:c»
$i = 1
Next, I gather up all of the files from the source folder. To do this, I use the Get-ChildItem cmdlet. I store the returned objects in the $files variable. The recurse parameter is used to tell the Get-ChildItem cmdlet to retrieve items that may reside in a subdirectory. This command appears here:
$files = Get-ChildItem -Path $source -Recurse
Next, I use the foreach statement to walk through the collection of objects that are stored in the $files variable. The $file variable is used to keep my place in the collection of files. Following the foreach statement, I open the script block by using a curly bracket (brace). This portion of the script appears here:
Foreach($file in $files)
{
The next thing I need to do is to add a bit of logic. The If statement is used to evaluate a condition. The condition I am interested in is if the value of the variable $i is less than or equal to half of the total number of files in the $files collection. Luckily, the count property exists to tell me how many files I have to work with. As long as the number of files is less than half, I copy the files to the path stored in the $destination1 variable. If the value of the $i variable is greater than half the number of files in the $files variable, I copy them to the path stored in the $destination2 variable.
When I am copying files, I need to supply the path parameter with the path to the file that is to be copied. The fullname property of a fileinfo object contains the file name, as well as the path to the file. When I am using the Copy-Item cmdlet, I do not need to specify a file name on the destination side of things because the cmdlet is smart enough to obtain that. All I need to do is to give it the destination folder. This portion of the script appears here:
if($i -le $files.count/2)
{ Copy-Item -Path $file.fullname -Destination $destination1 }
Else
{ Copy-Item -Path $file.fullname -Destination $destination2 }
Finally, after copying a file, I increment the value of the $i variable and close out the script block:
$i++
}
Well, this concludes another edition of Quick-Hits Friday. Join me tomorrow for the Weekend Scripter as I delve into the mysteries of using the Write-Progress cmdlet.
I would love you to follow me on Twitter and Facebook. If you have any questions, send email to me at scripter@microsoft.com, or post your questions on the Official Scripting Guys Forum. See you tomorrow. Until then, peace.
Ed Wilson, Microsoft Script
ing Guy
on
May 30, 2007, 12:00 AM PDT
Get started with Windows PowerShell 1.0 for Windows XP Pro
Windows PowerShell is a new scripting tool that allows you to perform simple or complex tasks from a centralized interface. Here’s how to add this new extension to your Windows XP Pro system.
Microsoft planned to add a new command-line interface and
scripting language (code name “Monad”) to Windows Vista but decided
to make it a standalone utility called Windows PowerShell
1.0. It is designed primarily for system administrators, but it also provides
benefits to home and small business network users using the Professional OS.
Users can add Windows PowerShell to Windows XP, Windows
Server 2003, and Windows Vista.
Rather than being composed of a series of standalone
commands, Windows PowerShell is made up of object-oriented
programs called cmdlets (pronounced “command
lets”), which can only run from within the PowerShell
command interface. Cmdlets perform a single task and
are designed to work together to perform more complex tasks.
In order to take advantage of Windows PowerShell
on your Windows XP Pro machine, you must download and install it. Follow these
steps:
- Go
to the How
to Get Windows PowerShell 1.0 page. - Download
and install .NET Framework 2.0 if it’s not already installed on your system. - After
.NET Framework 2.0 is installed, download and install the Windows XP Service
Pack 2 — Windows PowerShell 1.0 version that matches
your platform (x86 or x64).
Once
Windows PowerShell is installed, go to the Scripting with
Windows PowerShell page and take a look at the
resources in the Getting Started section. If you want to see sample Windows PowerShell
scripts, check out the Script
Center Script Repository.
Note: This tip is for
Windows XP Professional only.
Miss a tip?
Check out the Windows XP archive, and catch up on our most recent Windows XP tips.
Stay on top of the latest XP tips and tricks with our free Windows XP newsletter, delivered each Thursday. Automatically sign up today!
-
Microsoft
| Purchase and download the full PDF version of this PowerShell eBook for only $8.99
|
The objective of this chapter of Windows PowerShell 1.0 Essentials is to cover the steps necessary to install Windows Powershell on Windows XP, Windows Vista and Windows Server 2008 systems.
Installing Windows PowerShell on Windows Server 2008
Windows PowerShell is included as a standard feature with Windows Server 2008, although the feature is not installed by default. The PowerShell feature may be added using the Server Manager tool which is invoked by selecting the Start -> Server Manager menu option. Once Server Manager is running, select Features from the left hand pane and in the Features Summary section of the main panel click on Add Features to invoke the Add Features Wizard. The first screen displayed will list all available features in alphabetical order. Scroll down the list and select the checkbox next to Windows PowerShell and click Next to proceed to the installation screen. Clicking Install will initiate the installation process. After a few minutes the installation will complete and the wizard may be closed using the Close button.
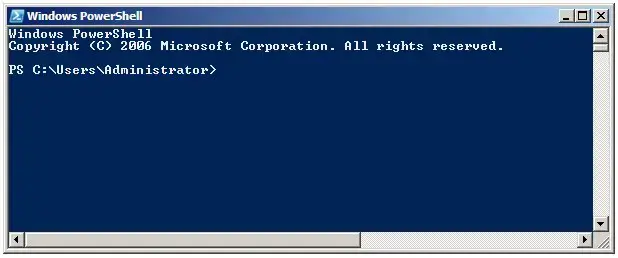
To launch Windows PowerShell, select Start -> All Programs -> Windows PowerShell 1.0 -> Windows PowerShell. Once loaded, a new window will appear displaying the Windows PowerShell PS> prompt at which commands may be entered:

Performing a Windows Server 2008 PowerShell Command Line Installation
The installation of PowerShell on a Windows Server 2008 may be performed from the command prompt using the servermanagercmd command. To achieve this, invoke the command prompt with elevated privileges (right click on the Command Prompt entry in the Start menu and select Run as administrator) and execute servermanagercmd -install powershell as follows:
C:UsersAdministrator>servermanagercmd -install powershell
....

Start Installation...
[Installation] Succeeded: [Windows PowerShell].
<100/100>

Success: Installation succeeded.
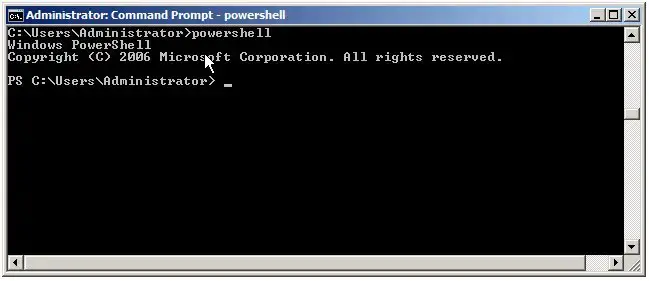
Once installed, PowerShell may be run from the command prompt simply by entering powershell:

Installing PowerShell on Windows Server 2003, XP and Vista Systems
Unlike Windows Server 2008, other Windows versions do not ship with PowerShell 1.0 bundled as a feature. As such, it is necessary to download and install PowerShell from the Microsoft Download Center. Pre-requisites for installing PowerShell 1.0 are as follows:
- Windows Server 2003 Service Pack 1 (SP1) or later
- Windows XP Service Pack 2 (SP2) or later
- .Net Framework 2.0 or later (available for download from the Microsoft MSDN web site
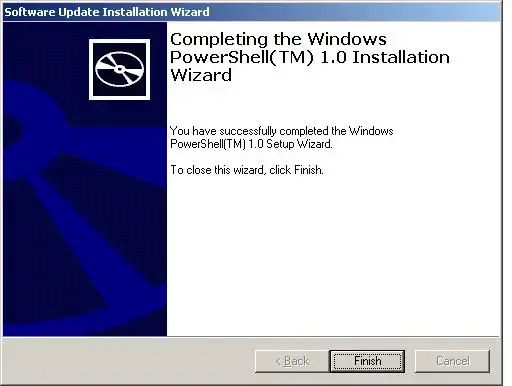
Assuming the above pre-requisites have been met, Windows PowerShell may be downloaded from the Microsoft PowerShell download page. Once the installation package has been downloaded, double click on it to begin the installation and follow the instructions. Once installation is complete, the following dialog will be displayed by the install wizard:

Once installation is complete, PowerShell may be launched from the Start menu by selecting All Programs -> Windows PowerShell 1.0 -> Windows PowerShell. Alternatively, launch PowerShell from a command prompt window by typing:
powershell
<google>BUY_WPS_BOTTOM</google>
Автоматизировать управление ОС Windows и других приложений .
Microsoft Windows PowerShell 1.0 for Windows XP Рейтинг редакции
FromMicrosoft: Microsoft Windows PowerShell 1.0 для Windows XP является новым оболочка командной строки и язык сценариев для системного администрирования и автоматизации. Она включает в себя более 130 средства командной строки (они называются «командлетами») для выполнения общих задач системного администрирования, таких как управление услуг, процессов, журналы событий, сертификатов, реестра и с помощью инструментария управления Windows (WMI). Средства командной строки предназначены для проста в освоении и проста в использовании со стандартными соглашениями об именах и общими параметрами, и простых инструментов для сортировки, фильтрации и форматирования данных и объектов .
Скачать (1.61MB)
Similar Suggested Software
Intel System Studio
Определите узкие места в производительности, уменьшите потребление энергии и быстрее переходите от прототипа к продукту
I wrote a batch file (for use with Windows XP only) that installs PowerShell 2.0. Here are the three things you need to know about it:
- The batch file installs PowerShell 2.0 only if it is not already installed
- If service pack 3 for Windows is not installed, the batch file exits
- If .NET Framework 2.0 (at least service pack 1) is not installed, the batch file automatically installs the x86 version of .NET Framework 2.0 service pack 1
Here are the two files used by the batch file:
- Microsoft .NET Framework 2.0 Service Pack 1 (x86)
- Update for Windows XP (KB968930): includes Windows PowerShell 2.0 and Windows Remote Management (WinRM) 2.0
Here is the code for the batch file:
@ECHO OFF

REM Make sure this batch file is being run with Windows XP
VER | FINDSTR /L "5.1." > NUL
IF %ERRORLEVEL% NEQ 0 ECHO It appears that you're not using Windows XP, so this batch file will exit now.&GOTO EOF

REM See if PowerShell is installed
FOR /F "tokens=3" %%A IN ('REG QUERY "HKLMSOFTWAREMicrosoftPowerShell1" /v Install ^| FIND "Install"') DO SET PowerShellInstalled=%%A
CLS

IF NOT "%PowerShellInstalled%"=="0x1" ECHO PowerShell doesn't appear to be installed.&GOTO CheckPrerequisites

REM PowerShell is installed, so now see which version it is
FOR /F "tokens=3" %%A IN ('REG QUERY "HKLMSOFTWAREMicrosoftPowerShell1PowerShellEngine" /v PowerShellVersion ^| FIND "PowerShellVersion"') DO SET PowerShellVersion=%%A
CLS

IF "%PowerShellVersion%"=="" (
 ECHO PowerShell appears to be installed, but the version number was unable to be
 ECHO determined.
 GOTO CheckPrerequisites
)

ECHO PowerShell %PowerShellVersion% appears to be installed.
IF %PowerShellVersion%==2.0 GOTO EOF

:CheckPrerequisites
ECHO.
ECHO Version 2 will now be installed.
ECHO.

REM Make sure service pack 3 for Windows is installed
REG QUERY "HKLMSOFTWAREMicrosoftWindows NTCurrentVersion" /v CSDVersion | FIND "Service Pack 3" > NUL
IF %ERRORLEVEL% EQU 0 GOTO CheckNETFramework2SP
CLS

ECHO It appears that you're using Windows XP, but without service pack 3. Please
ECHO install service pack 3 and then run this batch file again.
ECHO.
GOTO EOF

:CheckNETFramework2SP
REM Service pack 3 for Windows is installed, so now make sure .NET Framework 2.0 (at least SP1) is installed
FOR /F "tokens=3" %%A IN ('REG QUERY "HKLMSOFTWAREMicrosoftNET Framework SetupNDPv2.0.50727" /v SP ^| FIND "SP"') DO SET NETFramework2SP=%%A
CLS

IF NOT "%NETFramework2SP%"=="" IF NOT "%NETFramework2SP%"=="0x0" GOTO InstallPowerShell2

ECHO Installing .NET Framework 2.0 SP1...
START "" /WAIT NetFx20SP1_x86.exe /q /norestart
ECHO.

:InstallPowerShell2
ECHO Installing PowerShell 2.0...
START "" /WAIT WindowsXP-KB968930-x86-ENG.exe /quiet /passive /norestart

:EOF
Archived Forums 901-920
>
Windows PowerShell
-
Question
-
0
Sign in to vote
Can PowerShell V3 be installed on Windows XP ?
Wednesday, July 31, 2013 4:01 PM
Answers
-
1
Sign in to vote
Nope.
http://www.microsoft.com/en-us/download/details.aspx?id=34595
http://blogs.msdn.com/b/powershell/archive/2012/09/17/windows-management-framework-3-0-available-for-download.aspx?Redirected=true
Don’t retire TechNet!
-
Marked as answer by
Larry Weiss
Wednesday, July 31, 2013 4:42 PM
Wednesday, July 31, 2013 4:09 PM
-
Marked as answer by


