Содержание
- Multilingual user interface mui pack 1 for windows standard embedded 7
- Русификация windows 7 professional или Home
- Виды русификации Windows 7
- Установка языкового пакета MUI
- Как русифицировать windows 7 с помощью Vistalizator
- WWW.LUSHNIKOV.NET
- windows
- Windows Embedded Standard 7 и как ее правильно готовить
- Где взять бесплатно
- Какой дистрибутив лучше выбрать
- Как приготовить
- Ставим
- Ставим Toolkit
- Запускаем
- Интегрируем русский язык
- Делаем установочный диск с полной Distribution Share
- Готовим свой дистрибутив.
- Как сделать загрузочный DVD
- Comments
- Adding Multilingual User Interface Support to an Application
- Overview
- The Idea Behind Hello MUI
- Setting up the Hello MUI Solution
- Platform Requirements
- Prerequisites
- Step 0: Creating the Hard-coded Hello MUI
- Step 1: Implementing the Basic Resource Module
- Step 2: Building the Basic Resource Module
- Splitting the Various Language Resource Modules: An Overview
- Splitting the Various Language Resource Modules: Creating the Files
- Step 3: Creating a Resource-Savvy «Hello MUI»
- Step 4: Globalizing «Hello MUI»
- Step 5: Customizing «Hello MUI»
- Additional Considerations for MUI
- Support for Console Applications
- Determination of Languages to Support at Run-Time
- Complex Script Support in Versions Prior to Windows Vista
- Summary
Multilingual user interface mui pack 1 for windows standard embedded 7

Добрый день уважаемые читатели и гости блога, если обратиться к статистике операционных систем за май 2017, то вы увидите, что Windows 7, прочно укрепила свои позиции среди пользователей, и думаю такая тенденция еще долгое время сохранится. Материал по данной ОС, все так же актуален. Не так давно, мне на почту пришло несколько вопросов, как русифицировать windows 7, их владельцам достались ноутбуки, как я понял они из США, и я решил написать об этом статью, тем более я недавно, опять локализовывал Windows Server 2012 R2 и все освежил в памяти, ну что приступим.
Русификация windows 7 professional или Home
Виды русификации Windows 7
Существуют два вида изменить язык вашей операционной системы:
Установка языкового пакета MUI
Так как у большинства людей, чаще всего установлены, либо домашняя версия, либо профессиональная, то я начну именно со способа установки дополнительного пакета. Первое, что вам потребуется сделать, это определить разрядность вашей семерки, делается это для того, чтобы скачать нужную версию пакета. И так я буду русифицировать windows 7 professional.
Скачиваем нужную версию MUI, я выкладываю, только для SP1, так как думаю уже никто не использует семерку без первого сервис пака.
Почему я не даю ссылок на официальный сайт MIcrosoft, все просто если вы зайдете по официальному адресу (https://support.microsoft.com/en-us/help/14236/language-packs), то на против русского языка увидите надпись «Windows Update», отсылающую вас в «Центр обновления Windows», позволяющий в ряде случаев установить русский язык на windows 7.
Я использую 64 битную версию и загружаю пакет под нее.

Запускаем файл windows6.1-kb2483139-x64-ru-ru_0587eb296a2f04e0d3699650d39b53ee18b97a79.exe, если все хорошо, то вы увидите мастер установки, который займет минут 10-15, после чего потребуется перезагрузка.

А, что делать если ничего не происходит после запуска данного MUI, как русифицировать windows 7? Такое то же очень часто встречается, и проблема тут в том, что языковой пакет может не соответствовать вашей редакции. Например вы спокойно в логах просмотра событий, вы легко обнаружите сообщение:

В сообщении вам скажут, что ваш language pack поврежден и возможно это так, для примера вы можете его спокойно попробовать распаковать архиватором, если будут ошибки, то так оно и есть, вам придется его перекачать.

Если с вашим пакетом windows6.1-kb2483139-x64-ru-ru_0587eb296a2f04e0d3699650d39b53ee18b97a79.exe все хорошо, то делаем следующее. В момент его запуска, в той папке, где он лежит вы на пару мгновений можете обнаружить файл lp.cab. Данный файл это сокращенное название language pack.


Продолжаем нашу русификацию windows 7, теперь имея файл lp.cab, вам необходимо открыть:
Именно lp.setup поможет локализовать вашу семерку.

В открывшемся окне, выберите пункт «install display langueges» (установить язык интерфейса)

Далее мастер русификации вас попросит выбрать ваш файл lp.cab, делается это через кнопку «Browse»

Нажимаем кнопку «next» и «install» после соглашения с лицензией. Если у вас выскочило предупреждение и кнопка «next» не активна, то читаем ниже.

Вам сообщат, что это пакет для версии Enterprise или Ultimate, не спешите расстраиваться, тут же говориться, что вы можете установить LIP пакет.

Не спешите расстраиваться, все это можно обмануть, делаем вот что. Открываем командную строку от имени администратора, описано тут и вводит вот такую команду:
DISM /Online /Add-Package /PackagePath:
bcdedit /set locale ru-RU
bcdboot %WinDir% /l ru-RU
— это путь до вашего lp.cab файла
Когда напишете команду и запустите русификацию, вы можете встретить вот такую ошибку: Error 87, связана она с тем, что в названии папки есть пробелы, либо ее переименуйте, например, в lp или заключите в двойные кавычки

Еще на некоторых редакция виндоус, вы можете увидеть ошибку: An error occurred trying to open. Error: 0x80070003, Тут попробуйте в пути
не писать ссылку на файл lp.cab.

Все начинается локализация системы и вы увидите процент выполнения операции по русификации.

Дожидаемся выполнения распаковки language pack и после чего выполняем команды bcdboot, описанные выше.

Затем вы запускаете редактор реестра виндоус (описано тут) и переходите в ветку из которой удаляете папку en-US и перезагружаетесь.

В итоге у вас в системе появится русский язык, но это еще не все, вам необходимо закончить русифицировать windows 7 professional. Открываете «Панель управления» пункт «Язык и региональные стандарты»

Проверяете, что на вкладке «Форматы» установлен русский.

На вкладке «Расположение» установлен русский формат

И в пункте «Изменить язык системы» установлен пункт русский.

Теперь можно считать, что русификация windows 7 завершена.
Как русифицировать windows 7 с помощью Vistalizator
Чтобы была произведена, более легкая русификация windows 7 я вам предложу утилиту Vistalizator. Как видите установить русский язык на windows 7 очень просто.
Запускаем Vistalizator, видим, что у нас только английский язык.

Нажимаем кнопку «Add langueges» и указываем путь до нашего языкового пакета, который скачан заранее, ссылки в начале статьи.

Нажимаем «install langueges»

Начинается процесс локализации виндоус 7, придется подождать минут 20.

После чего перезагружаемся и проверяем пункт «Язык и региональные стандарты», описанный выше. Все русификация закончена и можно пользоваться новой системой.
Источник
WWW.LUSHNIKOV.NET
windows
Windows Embedded Standard 7 и как ее правильно готовить
Windows Embedded Standard 7 это операционная система, ориентированная на встраиваемые устройства. Она выглядит, как обычная Windows 7. Запускает те же программы, что и обычная Windows 7. Так что согласно утиному тесту, это обычная Windows 7. Но с нюансами:
Где взять бесплатно
Важная оговорка: в интернет уплыли несколько OEM-ключей от некоторых крупных производителей оборудования. Эти ключи постоянные и не ограниченные по времени, но использование таких ключей нарушает лицензионное соглашение.
Какой дистрибутив лучше выбрать
Через DreamSpark распространяется дистрибутив с 32битной ОС, без SP1, но с возможностью выбрать русский язык. Поставить SP1 в уже установленную систему не получится, но можно интегрировать его в дистрибутив. Всё бы ничего, но после инсталяции такая система скачает несколько обновлений, после одного из которых будет грузиться только в черный экран. Совсем не годится.
Вместе с 30тидневным триалом скачиваются два дистрибутива: 32bit и 64bit. Оба с SP1, но без русского языка. Отдельно MUI скачивается тут для 32bit, тут для 64bit и может быть как добавлен после инсталяции, так и интегрирован в дистрибутив. Все необходимые для интеграции инструменты есть на третьем диске (Toolkit).
Как приготовить
Ставим
Итак, можно просто взять дистрибутив и установить с него систему (пункт Build an Image). В процессе установки будет предложено выбрать готовый шаблон (например, Application Compatibility, это наиболее полный вариант) и отталкиваясь от него настроить систему по своему вкусу.


Но ведь интереснее сделать свой дистрибутив.
Ставим Toolkit
Берем любую машину с Windows (например, виртуальную), подключаем к ней диск Standard 7 SP1 Toolkit.iso и запускаем setup.exe. При установке в качестве Setup Type стоит выбрать Custom. Тогда появится вот такое меню:

Самое время решить, какой именно версии и битности дистрибутив мы будем варить. Набор необходимых для сборки файлов называется Distribution Share. Доступны на выбор с сервис-паком и без него, 32 и 64 бит. Скопированы они будут в каталог C:Program Files (x86)Windows Embedded Standard 7 в виде подкаталогов с именами DS, DS64, DSSP1 и DS64SP1. Предположим, что нам нужен AMD64 SP1 Distribution Share. Ставим только его. Для продолжения установки потребуется вставить диск Standard 7 SP1 64bit IBW.iso.
Запускаем
Первое, что надо сделать, это подключить Distribution Share:


Интегрируем русский язык
Файл с русским языком входит в состав MUI, ссылка на который была выше. Имя файла – lp.cab.

Делаем установочный диск с полной Distribution Share
Из того, что получилось, уже можно приготовить диск, с которого возможна установка системы. Меню выбора компонентов системы так же будет доступным.

Указываем папку, в которую надо полжить файлы, указываем битность (x64) и жмем OK. Из того, что получится, можно сразу делать загрузочный диск. Об одном из способов создать загрузочный DVD – в конце статьи.
Готовим свой дистрибутив.
В качестве отправной точки я предлагаю использовать шаблон Application Compatibility. Для SP1 64bit все шаблоны лежат в каталоге C:Program Files (x86)Windows Embedded Standard 7DS64SP1TemplatesIBW. Берем оттуда Application Compatibility.xml и копируем под новым именем на рабочий стол, например.

Во вкладке Validation окна Messages останется всего одно сообщение об ошибке. Кликаем на него два раза и узнаем, что из неразрешенных зависимостей остались только языковые пакеты. Выбираем русский и английский, жмем OK. Повторный запуск валидации (например, кнопкой F5) ошибок не выявит.


Удаляем лишние пакеты. Например, я никогда не использовал Speech and Text. Находим его в колонке Answer File и раскрываем группу:
Кликаем на нее правой кнопкой и выбираем Delete. Таким же способом можно избавить дистрибутив от практически любого компонента. Периодически рекомендую нажимать F5, чтобы убедиться, что случайно не отключили что-то действительно необходимое. В этом случае на вкладке Validation появится сообщение об ошибке, двойной клик на котором откроет окно, в котором эту ошибку можно будет исправить.

Сохраняем получившийся Answer File:
Теперь его можно обратно скопировать в Distribution Share и снова сделать загрузочный диск, как в предыдущем пункте. Наш Answer File появится в списке тимплейтов при установке системы.
А можно сразу приготовить дистрибутив, который окажется компактнее и не будет задавать лишних вопросов при инсталяции:
Указываем папку, в которую надо полжить файлы и жмем OK.
Как сделать загрузочный DVD
Проще всего воспользоваться программой WBI Creator. Интерфейс прост, назначение полей и кнопок очевидно. На выходе из программы получится iso, который можно сразу писать на болванку.


Кроме того, можно создать загрузочную флешку этим или этим.
Приветствую, спасибо за развернутую статью, случайно не осталось рабочей версии WBI Creator, ваши ссылки умерли. Если можно поделитесь софтиной
Источник
Adding Multilingual User Interface Support to an Application
This tutorial demonstrates how to take a monolingual application and make it world-ready. This application is in the form of a complete solution that is built within Microsoft Visual Studio.
Overview
Beginning with WindowsВ Vista, the Windows operating system itself was built from the ground up to be a multilingual platform, with additional support that enables you to create multilingual applications that use the Windows MUI resource model.
This tutorial illustrates this new support for multilingual applications by covering the following aspects:
These links help provide a quick refresher on the concepts on internationalization and MUI:
The Idea Behind Hello MUI
You are probably familiar with the classic Hello World application, which illustrates basic programming concepts. This tutorial takes a similar approach to illustrate how to use the MUI resource model to update a monolingual application to create a multilingual version called Hello MUI.
The tasks in this tutorial are described in detailed steps because of the precision with which these activities must be performed, and the need to explain the details to developers who have little experience with these tasks.
Setting up the Hello MUI Solution
These steps outline how to prepare to create the Hello MUI solution.
Platform Requirements
You must compile the code samples in this tutorial using the Windows Software Development Kit (SDK) for WindowsВ 7 and Visual Studio 2008. The WindowsВ 7 SDK will install on WindowsВ XP, WindowsВ Vista and WindowsВ 7, and the sample solution can be built on any of these operating system versions.
All code samples in this tutorial are designed to be executed on x86 and x64 versions of WindowsВ XP, WindowsВ Vista and WindowsВ 7. Specific parts that will not work on WindowsВ XP are called out where appropriate.
Prerequisites
Install Visual Studio 2008.
Install the Windows SDK for WindowsВ 7.
You can install it from the Windows SDK page of the Windows Developer Center. The SDK includes utilities to develop applications for OS versions starting from WindowsВ XP through the most recent.
If you are not installing the package to the default location, or if you are not installing on the system drive, which is usually the C drive, make note of the install path.
Configure the Visual Studio command line parameters.
Install the Microsoft NLS downlevel APIs add-on package.
In the context of this tutorial, this package is necessary only if you will be customizing the application to run on Windows versions prior to WindowsВ Vista. See Step 5: Customizing Hello MUI.
Download and install the package from its download site.
As with the Windows SDK, if you are not installing the package to the default location, or if you are not installing on the system drive, which is usually the C drive, make note of the install path.
If your development platform is WindowsВ XP or Windows ServerВ 2003, confirm that Nlsdl.dll is installed and registered correctly.
If you develop an application that uses MUI and that must run on Windows versions prior to WindowsВ Vista, Nlsdl.dll must be present on the destination Windows platform. In most cases, this means that the application needs to carry and install the redistributable Nlsdl installer (and not merely copy Nlsdl.dll itself).
Step 0: Creating the Hard-coded Hello MUI
This tutorial begins with the monolingual version of the Hello MUI application. The application assumes the use of the C++ programming language, wide character strings, and the MessageBoxW function for output.
Begin by creating the initial GuiStep_0 application, as well as the HelloMUI solution, which contain all of the applications in this tutorial.
In Visual Studio 2008, create a new project. Use the following settings and values:
Configure the project threading model:
In the Solution Explorer, right-click the project GuiStep_0, and then select Properties.
In the project Property Pages dialog box:
Replace the contents of GuiStep_0.cpp with the following code:
Build and run the application.
The straightforward source code above makes the simplistic design choice of hard-coding, or embedding, all the output the user will see—in this case the text «Hello MUI». This choice limits the utility of the application for users who don’t recognize the English word «Hello.» Because MUI is a technology-based English acronym, it is assumed for this tutorial that the string remains «MUI» for all languages.
Step 1: Implementing the Basic Resource Module
Microsoft Win32 has long exposed the capability for application developers to separate their UI resource data from application source code. This separation comes in the form of the Win32 resource model, in which strings, bitmaps, icons, messages and other items normally displayed to a user are packaged into a distinct section of the executable, separated from executable code.
To illustrate this separation between executable code and resource data packaging, in this step the tutorial places the previously hard-coded «Hello» string (the «en-US» resource) into the resource section of a DLL module in the HelloModule_en_us project.
This Win32В DLL could also contain library type executable functionality (as any other DLL might). But to help focus on the Win32 resource-related aspects, we leave the run-time DLL code stubbed out in dllmain.cpp. Subsequent sections of this tutorial make use of the HelloModule resource data being built here and also present appropriate runtime code.
To construct a Win32 resource module, start by creating a DLL with a stubbed out dllmain:
Add a new project to the HelloMUI solution:
Configure this project’s threading model:
In the Solution Explorer, right-click the project HelloModule_en_us and select Properties.
In the project’s Property Pages dialog box:
Examine dllmain.cpp. (You may want to add the UNREFERENCED_PARAMETER macros to the generated code, as we have here, to enable it to compile at warning level 4.)
Add a resource-definition file HelloModule.rc to the project:
Under the project HelloModule_en_us, right-click the Resource Files folder, and select Add, and then select New Item.
In the Add New Item dialog box, choose the following:
Specify that the new HelloModule.rc file is to be saved as Unicode:
Add a string table containing the «Hello» string:
In the Resource View, right-click HelloModule.rc and select Add Resource.
Select String Table.
Add a string to the String Table:
If you view HelloModule.rc as text now, you will see various pieces of resource-specific source code. The one of greatest interest is the section that describes the «Hello» string:
This «Hello» string is the resource that needs to be localized (that is, translated) into every language that the application hopes to support. For example, the HelloModule_ta_in project (which you will create in the next step) will contain its own localized version of HelloModule.rc for «ta-IN»:
Build the HelloModule_en_us project to be sure there are no errors.
Create six more projects in the HelloMUI solution (or as many of them as you wish) to create six more resource DLLs for additional languages. Use the values in this table:
Step 2: Building the Basic Resource Module
Using previous resource models, building any one of the seven HelloModule projects would result in seven separate DLLs. Each DLL would contain a resource section with a single string localized into the appropriate language. Although appropriate for the historic Win32 resource model, this design does not take advantage of MUI.
In the WindowsВ Vista SDK and later, MUI provides the ability to split executables into source code and localizable content modules. With the additional customization that is covered later in Step 5, applications can be enabled for multi-lingual support to run on versions prior to WindowsВ Vista.
The primary mechanisms available to split resources from executable code, starting with WindowsВ Vista, are:
See Resource Utilities for more information.
For the sake of simplicity, this tutorial uses muirct.exe to split the «Hello MUI» executable.
Splitting the Various Language Resource Modules: An Overview
A multi-part process is involved in splitting the DLLs into one executable HelloModule.dll, plus a HelloModule.dll.mui for each of the seven supported languages within this tutorial. This overview describes the required steps; the next section presents a command file that performs those steps.
First, split the English-only HelloModule.dll module by using the command:
Similarly, muirct.exe is invoked to create a HelloModule.dll.mui file for each of the other languages. However, in those cases the language-neutral DLL is discarded, as only the first one created will be needed. The commands that process the Spanish and French resources look like this:
Splitting the Various Language Resource Modules: Creating the Files
For this tutorial you create a command file containing the commands to split the various DLLs, and you invoke it manually. Note that in actual development work, you could reduce the potential for build errors by including these commands as pre-build or post-build events in the HelloMUI solution, but that is beyond the scope of this tutorial.
Create the files for the debug build:
Create a command file DoReverseMuiLoc.cmd containing the following commands:
Create an xml file DoReverseMuiLoc.rcconfig containing the following lines:
Copy DoReverseMuiLoc.cmd and DoReverseMuiLoc.rcconfig to ProjectRootDirectoryHelloMUIDebug.
Open the Visual Studio 2008 command prompt and navigate to the Debug directory.
When you create a release build, you copy the same DoReverseMuiLoc.cmd and DoReverseMuiLoc.rcconfig files to the Release directory and run the command file there.
Step 3: Creating a Resource-Savvy «Hello MUI»
Building on the initial hard-coded GuiStep_0.exe example from above, you could extend the reach of the application to multiple language users by choosing to incorporate the Win32 resource model. The new run-time code presented in this step includes the module loading (LoadLibraryEx) and string retrieval (LoadString) logic.
Add a new project to the HelloMUI solution (using the menu selection File, Add, and New Project) with the following settings and values:
Set this project to run from within Visual Studio, and configure its threading model:
In the Solution Explorer, right-click the project GuiStep_1 and select Set as StartUp Project.
Right-click it again and select Properties.
In the project’s Property Pages dialog box:
Replace the contents of GuiStep_1.cpp with the following code:
Build and run the application. The output will be displayed in the language currently set as the display language of the computer (provided it is one of the seven languages we have built).
Step 4: Globalizing «Hello MUI»
Although the previous example is able to display its output in different languages, it falls short in a number of areas. Perhaps the most noticeable is that the application is only available in a small subset of languages when compared to the Windows operating system itself. If, for example, the GuiStep_1 application from the previous step were installed on a Japanese build of Windows, resource location failures would be likely.
To address this situation, you have two primary options:
The other option of allowing for configurable language preferences and loading resources based on this user-defined hierarchy can greatly increase customer satisfaction. Unfortunately, it also complicates the functionality needed within the application.
This step of the tutorial uses a simplified text file mechanism to enable custom user language configuration. The text file is parsed at run-time by the application, and the parsed and validated language list is used in establishing a custom fallback list. After the custom fallback list is established, the Windows APIs will load resources according to the language precedence set forth in this list. The remainder of the code is similar to that found in the preceding step.
Add a new project to the HelloMUI solution (using the menu selection File, Add, and New Project) with the following settings and values:
Set this project to run from within Visual Studio, and configure its threading model:
In the Solution Explorer, right-click the project GuiStep_2 and select Set as StartUp Project.
Right-click it again and select Properties.
In the project’s Property Pages dialog box:
Replace the contents of GuiStep_2.cpp with the following code:
Create a Unicode text file langs.txt containing the following line:
Be sure to save the file as Unicode.
Copy langs.txt to the directory from which the program will run:
Build and run the project. Try editing langs.txt so that different languages appear at the front of the list.
Step 5: Customizing «Hello MUI»
A number of the run-time features mentioned so far within this tutorial are available only on WindowsВ Vista and later. You may wish to re-use the effort invested in localizing and splitting resources by making the application work on downlevel Windows operating system versions, such as WindowsВ XP. This process involves adjusting the previous example in two key areas:
The language management and language fallback order support offered in pre-WindowsВ Vista versions of the Windows operating system differs significantly from that in WindowsВ Vista and later. For this reason, applications that allow user-configured language fallback must adjust their language management practices:
Create a project that can use the localized resource modules on any version of Windows:
Add a new project to the HelloMUI solution (using the menu selection File, Add, and New Project) with the following settings and values:
Set this project to run from within Visual Studio, and configure its threading model. Also, configure it to add the necessary headers and libraries.
The paths used in this tutorial assume that the WindowsВ 7 SDK and the Microsoft NLS downlevel APIs package were installed to their default directories. If that is not the case, modify the paths appropriately.
In the Solution Explorer, right-click the project GuiStep_3 and select Set as StartUp Project.
Right-click it again and select Properties.
In the project’s Property Pages dialog box:
In the top left drop-down, set Configuration to All Configurations.
Under Configuration Properties expand C/C++, select Code Generation, and set Runtime Library: Multi-threaded Debug (/MTd).
Select General and add to Additional Include Directories:
Select Language and set Treat wchar_t as Built-in Type: No (/Zc:wchar_t-).
Select Advanced and set Calling Convention: _stdcall (/Gz).
Under Configuration Properties expand Linker, select Input, and add to Additional Dependencies:
Replace the contents of GuiStep_3.cpp with the following code:
Create or copy langs.txt to the appropriate directory, as previously described in Step 4: Globalizing «Hello MUI».
Build and run the project.
If the application should run on Windows versions prior to WindowsВ Vista, be sure to read the documents that came with the Microsoft NLS downlevel APIs package on how to redistribute Nlsdl.dll.
Additional Considerations for MUI
Support for Console Applications
The techniques covered in this tutorial can also be used in console applications. However, unlike most standard GUI controls, the Windows command window cannot display characters for all languages. For this reason, multilingual console applications require special attention.
Calling the APIs SetThreadUILanguage or SetThreadPreferredUILanguages with specific filtering flags causes the resource loading functions to remove language resource probes for specific languages that are not normally displayed within a command window. When these flags are set, the language-setting algorithms allow only those languages that will display properly in the command window to be on the fallback list.
For more information on using these APIs to build a multilingual console application, see the remarks sections of SetThreadUILanguage and SetThreadPreferredUILanguages.
Determination of Languages to Support at Run-Time
You can adopt one of the following design suggestions to determine which languages your application should support at run-time:
During installation, enable the end user to select the preferred language from a list of supported languages
Read a language list from a configuration file
Some of the projects in this tutorial contain a function used to parse a langs.txt configuration file, which contains a language list.
Because this function takes external input, validate the languages that are provided as input. See the IsValidLocaleName or DownLevelLocaleNameToLCID functions for more details on performing that validation.
Query the operating system to determine which languages are installed
This approach helps the application use the same language as the operating system. Although this does not require user prompting, if you choose this option, be aware that operating system languages can be added or removed at any time and can change after the user installs the application. Also, be aware that in some cases, the operating system is installed with limited language support, and the application offers more value if it supports languages that the operating system does not support.
For more information on how to determine the currently installed languages in the operating system, see the EnumUILanguages function.
Complex Script Support in Versions Prior to Windows Vista
When an application that supports certain complex scripts runs on a version of Windows prior to WindowsВ Vista, text in that script may not display properly in GUI components. For example, in the downlevel project within this tutorial, hi-IN and ta-IN scripts may not display in the message box due to issues with processing complex scripts and the lack of related fonts. Normally, problems of this nature present themselves as square boxes in the GUI component.
More information about how to enable complex script processing can be found at Script and Font Support in Windows.
Summary
This tutorial globalized a monolingual application and demonstrated the following best practices.
Источник
Скачать официальные языковые пакеты (Language Packs) Windows 7 SP1.
Системные требования:
Разрядность: x32/x64
Поддержка версий: Windows 7 Ultimate (Максимальная) и Windows 7 Enterprise (Корпоративная).
Обновление: Установка возможна только при наличие обновления SP1. Установка обновления по инструкции.
Для корректной установки языкового дополнения, мы рекомендуем использовать только оригинальные дистрибутивы Windows 7. Скачать оригинальные MSDN дистрибутивы Windows 7 можете в нашем каталоге.
Скачать официальные языковые пакеты (Language Packs) для Windows 7 SP1 x32:
Arabic / Арабский: Скачать с сервера Microsoft / Скачать с сервера SofComputers (51,2 Мб)
Bulgarian / Болгарский: Скачать с сервера Microsoft / Скачать с сервера SofComputers (40,7 Мб)
Chinese (Simplified) / Китайский упрощенный: Скачать с сервера Microsoft / Скачать с сервера SofComputers (144 Мб)
Chinese (Traditional) / Китайский традиционный: Скачать с сервера Microsoft / Скачать с сервера SofComputers (116 Мб)
Croatian / Хорватский: Скачать с сервера Microsoft / Скачать с сервера SofComputers (46,2 Мб)
Czech / Чешский: Скачать с сервера Microsoft / Скачать с сервера SofComputers (53,7 Мб)
Danish / Датский: Скачать с сервера Microsoft / Скачать с сервера SofComputers (48,4 Мб)
Dutch / Нидерландский: Скачать с сервера Microsoft / Скачать с сервера SofComputers (51,9 Мб)
English / Английский: Скачать с сервера Microsoft / Скачать с сервера SofComputers (156,9 Мб)
Estonian / Эстонский: Скачать с сервера Microsoft / Скачать с сервера SofComputers (38,6 Мб)
Finnish / Финский: Скачать с сервера Microsoft / Скачать с сервера SofComputers (53 Мб)
French / Французский: Скачать с сервера Microsoft / Скачать с сервера SofComputers (91,8 Мб)
German / Немецкий: Скачать с сервера Microsoft / Скачать с сервера SofComputers (112 Мб)
Greek / Греческий: Скачать с сервера Microsoft / Скачать с сервера SofComputers (52 Мб)
Hebrew / Иврит: Скачать с сервера Microsoft / Скачать с сервера SofComputers (44,4 Мб)
Hungarian / Венгерский: Скачать с сервера Microsoft / Скачать с сервера SofComputers (50,7 Мб)
Italian / Итальянский: Скачать с сервера Microsoft / Скачать с сервера SofComputers (49,2 Мб)
Japanese / Японский: Скачать с сервера Microsoft / Скачать с сервера SofComputers (100 Мб)
Korean / Корейский: Скачать с сервера Microsoft / Скачать с сервера SofComputers (57,4 Мб)
Latvian / Латышский: Скачать с сервера Microsoft / Скачать с сервера SofComputers (35,6 Мб)
Lithuanian / Литовский: Скачать с сервера Microsoft / Скачать с сервера SofComputers (40 Мб)
Norwegian / Норвежский: Скачать с сервера Microsoft / Скачать с сервера SofComputers (55,3 Мб)
Polish / Польский: Скачать с сервера Microsoft / Скачать с сервера SofComputers (55,2 Мб)
Portuguese (Brazil) / Португальский (Бразилия): Скачать с сервера Microsoft / Скачать с сервера SofComputers (51,7 Мб)
Portuguese / Португальский: Скачать с сервера Microsoft / Скачать с сервера SofComputers (52 Мб)
Romanian / Румынский: Скачать с сервера Microsoft / Скачать с сервера SofComputers (44,9 Мб)
Russian / Русский: Скачать с сервера Microsoft / Скачать с сервера SofComputers (54,5 Мб)
Serbian (Latin) / Сербский на латинице: Скачать с сервера Microsoft / Скачать с сервера SofComputers (48,2 Мб)
Slovak / Словацкий: Скачать с сервера Microsoft / Скачать с сервера SofComputers (40 Мб)
Slovenian / Словенский: Скачать с сервера Microsoft / Скачать с сервера SofComputers (39,4 Мб)
Spanish / Испанский: Скачать с сервера Microsoft / Скачать с сервера SofComputers (97,5 Мб)
Swedish / Шведский: Скачать с сервера Microsoft / Скачать с сервера SofComputers (51,9 Мб)
Thai / Тайский: Скачать с сервера Microsoft / Скачать с сервера SofComputers (41,3 Мб)
Turkish / Турецкий: Скачать с сервера Microsoft / Скачать с сервера SofComputers (45,4 Мб)
Ukrainian / Украинский: Скачать с сервера Microsoft / Скачать с сервера SofComputers (42,3 Мб)
Скачать официальные языковые пакеты (Language Packs) для Windows 7 SP1 x64:
Arabic / Арабский: Скачать с сервера Microsoft / Скачать с сервера SofComputers (66,9 Мб)
Bulgarian / Болгарский: Скачать с сервера Microsoft / Скачать с сервера SofComputers (49,4 Мб)
Chinese (Simplified) / Китайский упрощенный: Скачать с сервера Microsoft / Скачать с сервера SofComputers (166 Мб)
Chinese (Traditional) / Китайский традиционный: Скачать с сервера Microsoft / Скачать с сервера SofComputers (187 Мб)
Croatian / Хорватский: Скачать с сервера Microsoft / Скачать с сервера SofComputers (54,7 Мб)
Czech / Чешский: Скачать с сервера Microsoft / Скачать с сервера SofComputers (65,5 Мб)
Danish / Датский: Скачать с сервера Microsoft / Скачать с сервера SofComputers (59,5 Мб)
Dutch / Нидерландский: Скачать с сервера Microsoft / Скачать с сервера SofComputers (63,2 Мб)
English / Английский: Скачать с сервера Microsoft / Скачать с сервера SofComputers (164 Мб)
Estonian / Эстонский: Скачать с сервера Microsoft / Скачать с сервера SofComputers (46,9 Мб)
Finnish / Финский: Скачать с сервера Microsoft / Скачать с сервера SofComputers (64,4 Мб)
French / Французский: Скачать с сервера Microsoft / Скачать с сервера SofComputers (104 Мб)
German / Немецкий: Скачать с сервера Microsoft / Скачать с сервера SofComputers (123 Мб)
Greek / Греческий: Скачать с сервера Microsoft / Скачать с сервера SofComputers (64,4 Мб)
Hebrew / Иврит: Скачать с сервера Microsoft / Скачать с сервера SofComputers (55,9 Мб)
Hungarian / Венгерский: Скачать с сервера Microsoft / Скачать с сервера SofComputers (62,2 Мб)
Italian / Итальянский: Скачать с сервера Microsoft / Скачать с сервера SofComputers (60,3 Мб)
Japanese / Японский: Скачать с сервера Microsoft / Скачать с сервера SofComputers (123 Мб)
Korean / Корейский: Скачать с сервера Microsoft / Скачать с сервера SofComputers (81,6 Мб)
Latvian / Латышский: Скачать с сервера Microsoft / Скачать с сервера SofComputers (44 Мб)
Lithuanian / Литовский: Скачать с сервера Microsoft / Скачать с сервера SofComputers (48,5 Мб)
Norwegian / Норвежский: Скачать с сервера Microsoft / Скачать с сервера SofComputers (66,3 Мб)
Polish / Польский: Скачать с сервера Microsoft / Скачать с сервера SofComputers (66,9 Мб)
Portuguese (Brazil) / Португальский (Бразилия): Скачать с сервера Microsoft / Скачать с сервера SofComputers (63,4 Мб)
Portuguese / Португальский: Скачать с сервера Microsoft / Скачать с сервера SofComputers (63,4 Мб)
Romanian / Румынский: Скачать с сервера Microsoft / Скачать с сервера SofComputers (53,1 Мб)
Russian / Русский: Скачать с сервера Microsoft / Скачать с сервера SofComputers (67,5 Мб)
Serbian (Latin) / Сербский на латинице: Скачать с сервера Microsoft / Скачать с сервера SofComputers (56,9 Мб)
Slovak / Словацкий: Скачать с сервера Microsoft / Скачать с сервера SofComputers (48,3 Мб)
Slovenian / Словенский: Скачать с сервера Microsoft / Скачать с сервера SofComputers (47,9 Мб)
Spanish / Испанский: Скачать с сервера Microsoft / Скачать с сервера SofComputers (109 Мб)
Swedish / Шведский: Скачать с сервера Microsoft / Скачать с сервера SofComputers (63,3 Мб)
Thai / Тайский: Скачать с сервера Microsoft / Скачать с сервера SofComputers (49,8 Мб)
Turkish / Турецкий: Скачать с сервера Microsoft / Скачать с сервера SofComputers (56,6 Мб)
Ukrainian / Украинский: Скачать с сервера Microsoft / Скачать с сервера SofComputers (51 Мб)
Technical information about “Windows Embedded Standard 7 Service Pack 1 for Multilingual User Interface Pack (x86) — DVD (English)” available from MSDN Subscriber Downloads. You cannot download this file from msdn.su but you can use the information below to find and download it from official sources.
| File Name | en_windows_embedded_standard_7_sp1_for_mui_x86_dvd_669659.iso |
|---|---|
| File Rating |
100 (2 votes) |
| SHA-1 Hash | 82715971C7373FC9B47250514DEF5C38761E581B |
| File Size | 1.04GB |
| Release Date | 5 May 2011 |
| Operating System | Windows |
| Computer Architecture | 64-bit |
| File Format | ISO |
| Language | English |
| MSDN Product Category | Developer Tools |
| MSDN Product Family | Windows Embedded Standard 7 |
| MSDN File ID | 46706 |
| MSDN File Description | Windows Embedded Standard 7 Service Pack 1 for Multilingual User Interface Pack (x86) — DVD (English) |
| MSDN Subscriptions |
|
Item Preview
There Is No Preview Available For This Item
This item does not appear to have any files that can be experienced on Archive.org.
Please download files in this item to interact with them on your computer.
Show all files
441
Views
2
Favorites
DOWNLOAD OPTIONS
Uploaded by
v-v
on September 8, 2021
SIMILAR ITEMS (based on metadata)
- Sign up
- Sign in
- HP Community
- Desktops
- Business PCs, Workstations and Point of Sale Systems
- Changing OS Language Windows 7 32 bit embedded
![]()

Create an account on the HP Community to personalize your profile and ask a question
Your account also allows you to connect with HP support faster, access a personal dashboard to manage all of your devices in one place, view warranty information, case status and more.

05-19-2021
06:33 AM

HP Recommended
- Mark as New
- Bookmark
- Subscribe
- Permalink
- Flag Post
Product: HP t520 Flexible Series TC Thin Client
Operating System: Microsoft Windows 7 (32-bit)
Hello community,
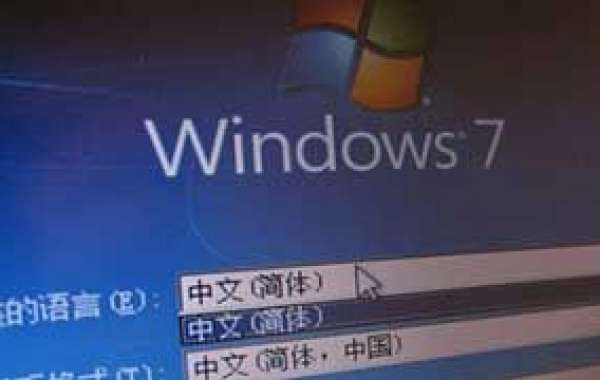
I like to change the language of the Windows 7 32 bit embedded operating system on a HP t520 flexible Series Thin Client from german to english.
Unfortunately the normal way for changing the Windows output language does not work (see picture).
If I click on the link for adding aditional languages nothing happens.
I’m not sure if this is a point of Windows 7 embedded or if it is blocked by HP tools.
Is there a way for including/changing the language of this Windows OS to english?
Thanks for all feedbacks
- HP t520 Flexible Series TC Thin Client
- Microsoft Windows 7 (32-bit)
- Microsoft Windows 7 32 Bit Embedded Standard
- Windows language
View All (4)
1 ACCEPTED SOLUTION

DGroves
5,541
1,195
522
622
Level 12
Was this reply helpful?
Yes
No
9 REPLIES 9
DGroves
5,541
1,195
522
726
Level 12
05-19-2021
04:06 PM
HP Recommended
- Mark as New
- Bookmark
- Subscribe
- Permalink
- Flag Post
this version HP version of the OS does not permit language changes as i recall
while some WES7 does include a language pack HP does not however you may be able to add it if you can find it as it’s no longer available from MS
For details, please refer to the following link
Multilingual User Interface (MUI) Pack 1 for Windows Embedded Standard 7 SP1 & POSReady 7 (32-bit)
https://www.hmisource.com/otasuke/download/common/wes7lang.htm
Was this reply helpful?
Yes
No

Magkro
Author
8
0
0
706
Level 1
05-20-2021
12:05 AM
— edited
05-20-2021
12:06 AM
HP Recommended
- Mark as New
- Bookmark
- Subscribe
- Permalink
- Flag Post
Thanks for your answer and teh information.
Unfortunately the windows setting is not available on the hp t520 thin client, see picture in the first post.
The converting the language exe file with exe2cab results in an error that the fiile can not be converted.
As I understand it is not possible to change the language  .
.
Or is there idea how could it be possible?
Was this reply helpful?
Yes
No
DGroves
5,541
1,195
522
696
Level 12
05-20-2021
01:51 AM
HP Recommended
- Mark as New
- Bookmark
- Subscribe
- Permalink
- Flag Post
i suggest that you actually READ the linked page i provided on language packs it includes step by step directions on how to add the desired language pack(s
Was this reply helpful?
Yes
No
Magkro
Author
8
0
0
692
Level 1
05-20-2021
02:00 AM
HP Recommended
- Mark as New
- Bookmark
- Subscribe
- Permalink
- Flag Post
Hello,
thanks for your reply agian.
Maybe I missed something in your posted link.
I don`t have the windows setting install/uninstall languages.
Compare the picture in my first post and the picture in the step 5 of the step by step manual.
Was this reply helpful?
Yes
No
DGroves
5,541
1,195
522
687
Level 12
Was this reply helpful?
Yes
No
Magkro
Author
8
0
0
685
Level 1
05-20-2021
02:18 AM
HP Recommended
- Mark as New
- Bookmark
- Subscribe
- Permalink
- Flag Post
Yes, I saw the manual.
But the setting in step 5 is different to the setting on my HP t520 thin client.
Or did I understand something wrong?
Was this reply helpful?
Yes
No
DGroves
5,541
1,195
522
677
Level 12
Was this reply helpful?
Yes
No
Magkro
Author
8
0
0
672
Level 1
05-20-2021
02:53 AM
HP Recommended
- Mark as New
- Bookmark
- Subscribe
- Permalink
- Flag Post
May there is a possibility to change the output language before buying a new thin client.
But actually I don`t see a way with your posted link.
Thanks for your time and informations.
Was this reply helpful?
Yes
No
DGroves
5,541
1,195
522
623
Level 12
Was this reply helpful?
Yes
No
![]()
Be alert for scammers posting fake support phone numbers and/or email addresses on the community.
If you think you have received a fake HP Support message, please report it to us by clicking on «Flag Post».
† The opinions expressed above are the personal opinions of the authors, not of HP. By using this site, you accept the Terms of Use and Rules of Participation.

-
English
Open Menu

† The opinions expressed above are the personal opinions of the authors, not of HP. By using this site, you accept the <a href=»https://www8.hp.com/us/en/terms-of-use.html» class=»udrlinesmall»>Terms of Use</a> and <a href=»/t5/custom/page/page-id/hp.rulespage» class=»udrlinesmall»> Rules of Participation</a>.
Для удобства просто оставлю — это здесь! 
Языковые пакеты (локализации) для Windows 7 Service Pack 1 64-bit
| Язык | Ссылка | Размер |
|---|---|---|
| Арабский (Arabic) | Скачать | 66.87 MB |
| Болгарский (Bulgarian) | Скачать | 49.44 MB |
| Китайский упрощённый (Chinese Simplified) | Скачать | 166.5 MB |
| Китайский традиционный (Chinese Traditional) | Скачать | 187.4 MB |
| Хорватский (Croatian) | Скачать | 54.71 MB |
| Чешский (Czech) | Скачать | 65.5 MB |
| Датский (Danish) | Скачать | 59.54 MB |
| Голандский (Dutch) | Скачать | 63.18 MB |
| Английский (English) | Скачать | 163.57 MB |
| Эстонский (Estonian) | Скачать | 46.88 MB |
| Финский (Finnish) | Скачать | 64.42 MB |
| Французский (French) | Скачать | 103.68 MB |
| Немецкий (German) | Скачать | 123.48 MB |
| Греческий (Greek) | Скачать | 64.61 MB |
| Иврит (Hebrew) | Скачать | 55.9 MB |
| Венгерский (Hungarian) | Скачать | 62.17 MB |
| Итальянский (Italian) | Скачать | 60.33 MB |
| Японский (Japanese) | Скачать | 123.35 MB |
| Корейский (Korean) | Скачать | 81.61 MB |
| Латвийский (Latvian) | Скачать | 44.01 MB |
| Литовский (Lithuanian) | Скачать | 48.48 MB |
| Norwegian | Скачать | 66.27 MB |
| Польский (Polish) | Скачать | 66.86 MB |
| Португальский Бразилия (Portuguese Brazil) | Скачать | 63.39 MB |
| Португальский Португалия (Portuguese Portugal) | Скачать | 63.37 MB |
| Румунский (Romanian) | Скачать | 53.1 MB |
| Русский (Russian) | Скачать | 67.47 MB |
| Сербский латиница (Serbian Latin) | Скачать | 56.86 MB |
| Словацкий | Скачать | 48.27 MB |
| Словенский (Slovenian) | Скачать | 47.94 MB |
| Испанский (Spanish) | Скачать | 108.87 MB |
| Шведский (Swedish) | Скачать | 63.26 MB |
| Тайский (Thai) | Скачать | 49.79 MB |
| Турецкий (Turkish) | Скачать | 56.65 MB |
| Украинский (Ukrainian) | Скачать | 50.96 MB |
Языковые пакеты (локализации) для Windows 7 Service Pack 1 32-bit
| Язык | Ссылка | Размер |
|---|---|---|
| Язык | Ссылка | Размер |
| Арабский (Arabic) | Скачать | 51.17 MB |
| Болгарский (Bulgarian) | Скачать | 40.7 MB |
| Китайский упрощённый (Chinese Simplified) | Скачать | 144.29 MB |
| Китайский традиционный (Chinese Traditional) | Скачать | 116.11 MB |
| Хорватский (Croatian) | Скачать | 46.15 MB |
| Чешский (Czech) | Скачать | 53.66 MB |
| Датский (Danish) | Скачать | 48.37 MB |
| Голандский (Dutch) | Скачать | 51.9 MB |
| Английский (English) | Скачать | 155.75 MB |
| Эстонский (Estonian) | Скачать | 38.57 MB |
| Финский (Finnish) | Скачать | 53.04 MB |
| Французский (French) | Скачать | 91.82 MB |
| Немецкий (German) | Скачать | 111.74 MB |
| Греческий (Greek) | Скачать | 51.97 MB |
| Иврит (Hebrew) | Скачать | 44.39 MB |
| Венгерский (Hungarian) | Скачать | 50.7 MB |
| Итальянский (Italian) | Скачать | 49.17 MB |
| Японский (Japanese) | Скачать | 100.47 MB |
| Корейский (Korean) | Скачать | 57.35 MB |
| Латвийский (Latvian) | Скачать | 35.57 MB |
| Литовский (Lithuanian) | Скачать | 39.98 MB |
| Norwegian | Скачать | 55.32 MB |
| Польский (Polish) | Скачать | 55.16 MB |
| Португальский Бразилия (Portuguese Brazil) | Скачать | 51.7 MB |
| Португальский Португалия (Portuguese Portugal) | Скачать | 51.98 MB |
| Румунский (Romanian) | Скачать | 44.87 MB |
| Русский (Russian) | Скачать | 54.49 MB |
| Сербский латиница (Serbian Latin) | Скачать | 48.24 MB |
| Словацкий | Скачать | 39.97 MB |
| Словенский (Slovenian) | Скачать | 39.42 MB |
| Испанский (Spanish) | Скачать | 97.46 MB |
| Шведский (Swedish) | Скачать | 51.93 MB |
| Тайский (Thai) | Скачать | 41.28 MB |
| Турецкий (Turkish) | Скачать | 45.37 MB |
| Украинский (Ukrainian) | Скачать | 42.29 MB |