- 1. Have downloaded the SPI and Firmware files from the official website,how to update them?
Please don’t unzip the files, copy them to SD card or USB disk root directory, connect to your Enjoy TV Box/Dongle and run
Upgrade app, select Local update. Find SPI to update first,then Firmware.
- 2. No update files found in Upgrade app->local update option?
Make sure your external devices have been mounted on your Enjoy TV Box/Dongle firstly.If yes, but still no files found, please
press menu button on remote control for 8 times continued, it will search all files again.
- 3. If meet below problems, please try to do factory reset.
a. Pre-installed apps can’t be run normally;
b. Function of the system suddenly doesn’t work,such as Wi-Fi can not be connected.
c. The system runs slow suddenly;
d. The issues that still can’t be fixed after restarting Enjoy TV Box/Dongle; When you meet above problems ,please try to do factory reset in Settings->Backup & reset,but note that this will de1ete all your personal data and apps.
- 4. Enjoy TV Box/Dongle can’t start normally.
Try to enter into recovery mode and force to restore factory settings as below steps:
a. Use needles to press and hold the upgrade button at the back/bottom of Enjoy TV Box/Dongle.
b. Plug in power adapter, hold the button for 5 seconds;
c. Normally you will see recovery interface;
d. Then, loosen the button and press up/down button on IR remote control/USB keyboard to find Wipe data/factory reset and select Yes to wipe. wipe media partition,cache partition are necessary sometimes.
e. Choose Reboot the system now option, and the system will restart automatically.
- 5. I have already connected Enjoy TV Box to my old TV via CVBS/Ypbpr cable,but no any image appear on TV screen,shows No Signal?
If your Enjoy TV Box is dual core box with Android 4.1 system,please check below:
a. About CVBS:
Firstly, you have to connect the Enjoy TV Box to a TV which has HDMI,go to Setting->Display and select the output mode to lower resolution(480i),then,change the output to CVBS in setting->CVBS/YUV,choose CVBS and save the setting. Then, connect Enjoy TV Box to your old TV,make sure TV source is CVBS, you will get the android screen on TV.
b. About Ypbpr:
Make sure TV source is on component/YPbPr. Connect the Enjoy TV Box to your TV via component/Ypbpr directly(did not do anything like above a, default output mode is HDMI 720p),as long as the HDMI output mode is 720P. Ypbpr also can output image.If no any screen, have to do like above a to select YUV mode in Enjoy TV Box setting, then, try again.
If your Enjoy TV Box is dual core box with android 4.2 or quad core box with android 4.4 system, just make sure CVBS/ Ypbpr (no HDMI cable plugged) cable is connected, then, power on the box and you will get the image on TV screen.
- 6. Remote control doesn’t work.
a. Try to replace the batteries;
b. Try to restart your Enjoy TV Box/Dongle;
c. If it is 2.4G wireless remote control,try another USB port. If Infrared remote control, make sure your remote control is pointed to the infrared receiver on box/dongle(external receiver cable on dongle)
d. If your remote is KR100,please try to initialize:
a) Press ESC and G key on the keyboard together, LED keeps shining, after 5 seconds, LED will be off and on again.
b) Press Y and ” key on the keyboard together, LED keeps shining, after 5 seconds,LED will be off and enter into checking codes status.
- 7. About standby,wakeup and power off.
a: Press the power button on infrared remote control, the box/dongle will enter into standby mode, press power button again, will wakeup.
b: Press the power button on 2.4G wireless remote control, the box/dongle will enter into standby mode, if you want to wake it up, have to press the power button on box, because there is no power supply for external remote control in standby mode.
c: Press the power button for one time on hardware to get standby and wakeup.
d: Press the power button for 3 seconds continued on hardware, it will power off(depends on hardware, some models have no this function), re-plug the power adapter, the box will start up.
- 8. Bluetooth option can not be turned on.
a. If your box/dongle is using dual band Wi-Fi module which supports Bluetooth, the option can be turned on.
b. If your box/dongle is using single band Wi-Fi module, you have to connect an external USB Bluetooth dongle(only for Geniatech android 4.0/4.1 firmware)
- 9. Can not type “&” “%” via my 2.4G remote control/keyboard.
Try to change the default input method to Engliah(US) in Settings->Language&input->default.
- 10. How to use Airplay function?
Make sure your box/dongle and iphone/ipad are working within the same network, run MediaCanter app on the box/dongle, enable Airplayer and automatically Start option(if your box/dongle is Android 4.0/4.1 system,the AirPlayer is enabled by default).
Then, run the online/local media application on iphone/ipad, select the file and find the box/dongle device, click to push.
- 11. How to use my Android phone to control the TVbox?
Please install the RemoteIME app www.geniatech.com/down-eng/androidtvbox/RemoteIME.zip on your android phone,make sure your phone and Enjoy TV Box/Dongle are working in the same network, run RemoteIME and press the search button ,you will see the IP address of Enjoy TV Box/Dongle,click IP to connect,and then,your phone will be a remote control for our box. You also can install the 3rd party such kind of app in market.
- 12. How to use Skype video call?
Connect one external USB camera/webcam to the Enjoy TV Box/Dongle, run Skype and enable video call in Skype setting, then, starting video call.
- 13. How to use Miracast function(only for Geniatech Android 4.2 and 4.4 system )?
a: Make sure your android phone supports Miracast function;
b: Enable Wi-Fi on both box/dongle and phone, run Miracast app on box/dongle, find the Screen Mirroring/Cast Screen/Screen output option ect(different mobile phone has different name for this function),box/dongle and phone will be searched with each other, click and accept the connection,then, you will see the whole screen of the phone mirrored to the TV screen.
- 14. How to use XBMC to watch movies?
a.l ocal videos: connect your external devices to the box/dongle,run XBMC app,select Videos -> Files -> Add videos -> Browse -> Root filesystem -> mnt(press down button on remote control to find “mnt”) -> choose your external devices,maybe sda1/sdb1 ect and click OK to save the setting, the files folder will be added into Files options in XBMC.
b. Online video:You can download and install add-ons in Videos->Add-ons->Get More,or search for add-ons zip files in XBMC forums,or install the zip file in System->Settings->Add-ons->Install from zip file(from external storage)..
- 15. Why no enough flash memory in setting->storage.
We divided the flash memory into several partitions, one for system, one for cache, one for data and so on(different system has different partitions), so, the storage size in setting->storage is only one part of the whole flash.
Important note
In order to receive DVB-T2 HD 1080p/50 & 1080i HEVC/ HDTV support, windows 10 as well as a 2.5 GHz Intel Core i5 processor (or comparable Ryzon CPU), with 4GB RAM is required.
This software currently only supports the MyGica tuner products
- MyGica PT362
- MyGica T230C
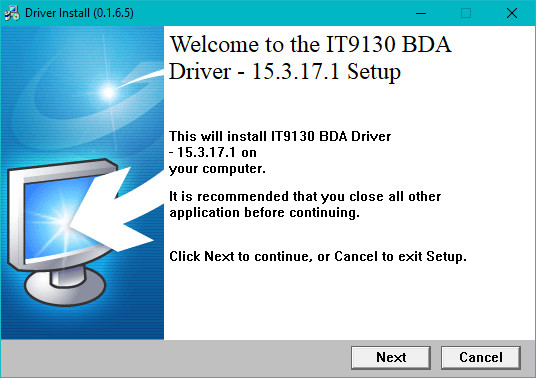
Installation
If this is the first time you have launched the MyGica Windows, you will be asked to enter an activation key you received with your MyGica tuner.
Once you have activated the MyGica Windows, a setup assistant will guide you through the setup and configuration of the MyGica Windows. You should complete each step of the MyGica Windows setup assistant. When prompted, please select your country and let the MyGica Windows auto-tune for channels.
Keep your activation keys in a safe place in case you need to reinstall the MyGica windows software.
For a relaxed television experience, we continuously improve our MyGica software. Therefore, please check for updates regularly or visit or software page here.
Download MyGica version 1.7.0.0
*Please note that a license key is required to activate the software. The key will be provided to you when purchasing the software license or one of our MyGica products.
Поиск по ID
MyGica T119/T230C TV Tuner Drivers v.1.32.1748.0 Windows XP / Vista / 7 / 8 / 8.1 / 10 32-64 bits
Подробнее о пакете драйверов:Тип: драйвер |
Драйверы для DVB-T/T2/C/S/S2 ТВ-тюнеров — T119, T230 и T230C от компании MyGica. Предназначены для автоматической установки на Windows XP, Windows Vista, Windows 7, Windows 8, Windows 8.1, Windows 10 32-64 бита.
Версия драйверов:
- cydtv.inf — v.1.32.1748.0 от 28.06.2017
- cydtv.inf — v.1.32.1146.0 от 11.06.2017
Внимание! Перед установкой драйвера MyGica T119/T230C TV Tuner Drivers рекомендутся удалить её старую версию. Удаление драйвера особенно необходимо — при замене оборудования или перед установкой новых версий драйверов для видеокарт. Узнать об этом подробнее можно в разделе FAQ.
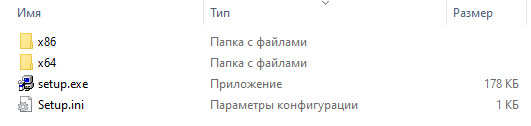
Скриншот файлов архива

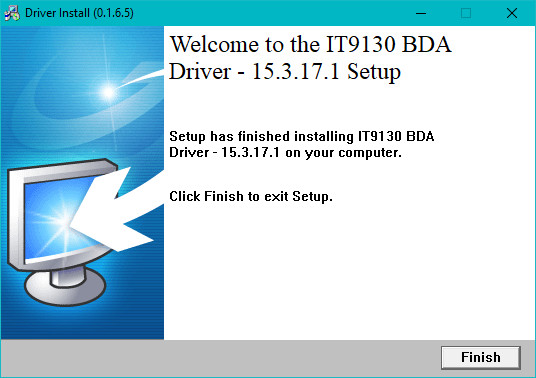
Скриншоты с установкой MyGica T119/T230C TV Tuner Drivers

Файлы для скачивания (информация)
Поддерживаемые устройства (ID оборудований):
| USBVID_0572&PID_86D6 | China DMB-TH Stick (D680) |
| USBVID_0572&PID_D320 | China DMB-TH USB Stick (D320) |
| USBVID_0572&PID_D685 | China DMB-TH USB Stick (D685) |
| USBVID_0572&PID_D688 | China DMB-TH USB Stick (D688) |
| USBVID_0572&PID_C680 | China DVB-T/C USB Stick (TC680_DVB ) |
| USBVID_0572&PID_D687 | China DMB-TH USB Stick (D687_DMB) |
| USBVID_1F4D&PID_2000 | China DVB-S USB Box (SU2000) |
| USBVID_1F4D&PID_3000 | China DVB-S/S2 USB Box (SU3000) |
| USBVID_1F4D&PID_8000 | China DVB-S2 USB Box (SU8000) |
| USBVID_0572&PID_D811 | China DMB-TH USB Stick (D811_DMB) |
| USBVID_1F4D&PID_D675 | China DMB-TH USB Stick (D675_DMB) |
| USBVID_0572&PID_C682 | China DVB-T/T2/C USB Box (TC682_DVB ) |
| USBVID_0572&PID_C684 | China DVB-T/T2/C USB Stick (TC684_DVB ) |
| USBVID_1F4D&PID_D220 | G-Tek Electronics Group Geniatech T220 DVB-T2 TV Stick |
| USBVID_0572&PID_C686 | Conexant Systems (Rockwell), Inc. Geniatech T220A DVB-T2 TV Stick |
| USBVID_0572&PID_C688 | Conexant Systems (Rockwell), Inc. Geniatech T230 DVB-T2 TV Stick |
| USBVID_0572&PID_E687 | China DVB-T/T2/C USB Stick (RD687_DVB ) |
| USBVID_1F4D&PID_A681 | China ATSC USB Stick (RD686_DVB ) |
| USBVID_0572&PID_C689 | China DVB-T/T2/C USB Stick (TC689_DVB ) |
| USBVID_0572&PID_D812 | China DMB-TH USB Stick (RD688_DVB ) |
| USBVID_0572&PID_C68A | China DVB-T/T2/C USB Stick (TC68A_DVB ) |
| USBVID_0572&PID_C699 | China DVB-T/T2 USB Stick (TC699_DVB ) |
| USBVID_0572&PID_A683 | China ATSC 3.0 USB Stick (RD631_DVB ) |
| USBVID_0572&PID_C69A | China DVB-T/T2 USB Stick (TC69A_DVB ) |
Другие драйверы от MyGica
Сайт не содержит материалов, защищенных авторскими правами. Все файлы взяты из открытых источников.
© 2012-2023 DriversLab | Каталог драйверов, новые драйвера для ПК, скачать бесплатно для Windows
kamtizis@mail.ru
Страница сгенерирована за 0.045026 секунд
![]()

Info:
Model: MyGica T119/T230C TV Tuner Drivers
Vendor: MyGica
Version: 1.32.1748.0
Operating system: Windows XP, Windows Vista, Windows 7, Windows 8, Windows 8.1, Windows 10
Bits: 32-bit (x86), 64-bit (x64)
Driver Date: 2017-06-28
Size: 20.6 mb
Driver description
Download driver MyGica T119/T230C TV Tuner Drivers version 1.32.1748.0 for Windows XP, Windows Vista, Windows 7, Windows 8, Windows 8.1, Windows 10 32-bit (x86), 64-bit (x64).
Screenshot of files
Installation screenshots MyGica T119/T230C TV Tuner Drivers

File Name
T119-T230_Driver.zip — T119 (20.6 mb) v.1.32.1748.0 — 28.06.2017
T230C_Win10_driver.zip — T230C (9.4 mb) v.1.32.1146.0 — 11.06.2017
Link to file:
Please, enter the answer to the following question
Содержание
- SUPPORT
- Support-Downloads & Documentation
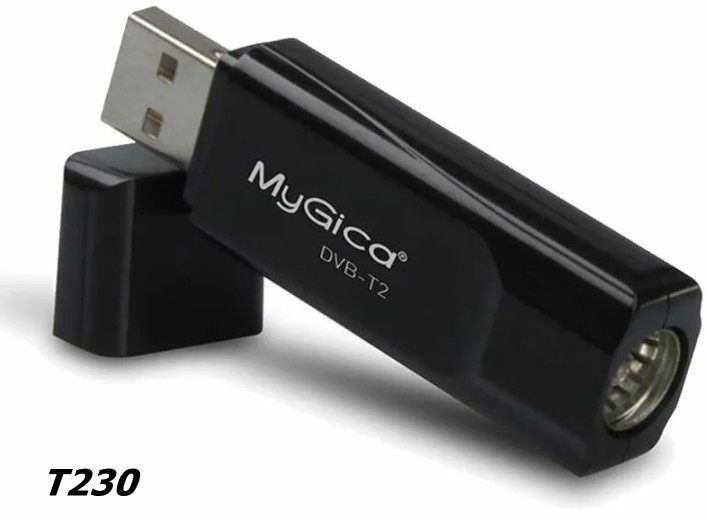
- DVB-T2 тюнер GENIATECH MyGica T230.
- Подключение и настройка
- Нстройка
- DVB-T 2
- Установщик драйверов:
- Список драйверов:
- Поддерживаемые модели ноутбуков
- Mygica dvb t2 драйвера для windows 10
- DVB T TV Stick Drivers Download
- Find All DVB T TV Stick Drivers
- Recent Help Articles
- Popular Driver Updates for DVB T TV Stick
- How to Install Drivers
- Open Device Manager
- Install Drivers With Device Manager
- Install Drivers Automatically
- Benefits of Updated Drivers
SUPPORT

Support-Downloads & Documentation
Please don’t unzip the files, copy them to SD card or USB disk root directory, connect to your Enjoy TV Box/Dongle and run
Upgrade app, select Local update. Find SPI to update first,then Firmware.
Make sure your external devices have been mounted on your Enjoy TV Box/Dongle firstly.If yes, but still no files found, please
press menu button on remote control for 8 times continued, it will search all files again.
Try to enter into recovery mode and force to restore factory settings as below steps:
a. Use needles to press and hold the upgrade button at the back/bottom of Enjoy TV Box/Dongle.
b. Plug in power adapter, hold the button for 5 seconds;
c. Normally you will see recovery interface;
d. Then, loosen the button and press up/down button on IR remote control/USB keyboard to find Wipe data/factory reset and select Yes to wipe. wipe media partition,cache partition are necessary sometimes.
e. Choose Reboot the system now option, and the system will restart automatically.
If your Enjoy TV Box is dual core box with Android 4.1 system,please check below:
a. About CVBS:
Firstly, you have to connect the Enjoy TV Box to a TV which has HDMI,go to Setting->Display and select the output mode to lower resolution(480i),then,change the output to CVBS in setting->CVBS/YUV,choose CVBS and save the setting. Then, connect Enjoy TV Box to your old TV,make sure TV source is CVBS, you will get the android screen on TV.
b. About Ypbpr:
Make sure TV source is on component/YPbPr. Connect the Enjoy TV Box to your TV via component/Ypbpr directly(did not do anything like above a, default output mode is HDMI 720p),as long as the HDMI output mode is 720P. Ypbpr also can output image.If no any screen, have to do like above a to select YUV mode in Enjoy TV Box setting, then, try again.
If your Enjoy TV Box is dual core box with android 4.2 or quad core box with android 4.4 system, just make sure CVBS/ Ypbpr (no HDMI cable plugged) cable is connected, then, power on the box and you will get the image on TV screen.
a. Try to replace the batteries;
b. Try to restart your Enjoy TV Box/Dongle;
c. If it is 2.4G wireless remote control,try another USB port. If Infrared remote control, make sure your remote control is pointed to the infrared receiver on box/dongle(external receiver cable on dongle)
d. If your remote is KR100,please try to initialize:
a) Press ESC and G key on the keyboard together, LED keeps shining, after 5 seconds, LED will be off and on again.
b) Press Y and ” key on the keyboard together, LED keeps shining, after 5 seconds,LED will be off and enter into checking codes status.
a: Press the power button on infrared remote control, the box/dongle will enter into standby mode, press power button again, will wakeup.
b: Press the power button on 2.4G wireless remote control, the box/dongle will enter into standby mode, if you want to wake it up, have to press the power button on box, because there is no power supply for external remote control in standby mode.
c: Press the power button for one time on hardware to get standby and wakeup.
d: Press the power button for 3 seconds continued on hardware, it will power off(depends on hardware, some models have no this function), re-plug the power adapter, the box will start up.
a. If your box/dongle is using dual band Wi-Fi module which supports Bluetooth, the option can be turned on.
b. If your box/dongle is using single band Wi-Fi module, you have to connect an external USB Bluetooth dongle(only for Geniatech android 4.0/4.1 firmware)
Try to change the default input method to Engliah(US) in Settings->Language&input->default.
Make sure your box/dongle and iphone/ipad are working within the same network, run MediaCanter app on the box/dongle, enable Airplayer and automatically Start option(if your box/dongle is Android 4.0/4.1 system,the AirPlayer is enabled by default).
Then, run the online/local media application on iphone/ipad, select the file and find the box/dongle device, click to push.
Connect one external USB camera/webcam to the Enjoy TV Box/Dongle, run Skype and enable video call in Skype setting, then, starting video call.
a: Make sure your android phone supports Miracast function;
b: Enable Wi-Fi on both box/dongle and phone, run Miracast app on box/dongle, find the Screen Mirroring/Cast Screen/Screen output option ect(different mobile phone has different name for this function),box/dongle and phone will be searched with each other, click and accept the connection,then, you will see the whole screen of the phone mirrored to the TV screen.
We divided the flash memory into several partitions, one for system, one for cache, one for data and so on(different system has different partitions), so, the storage size in setting->storage is only one part of the whole flash.
Источник
DVB-T2 тюнер GENIATECH MyGica T230.

Решил немного проапгрейдить свой HTPC, на базе HP t610 Plus и LibreELEC, установкой DVB-T2 тюнера, с последующей возможностью просмотра эфирного ТВ на любом устройстве в локальной сети. После поисков в интернете и изучения списка совместимых тюнеров выбор встал между GENIATECH MyGica T230 и GENIATECH MyGica T230С. GENIATECH MyGica T230С более новая модель и поддержка этого тюнера появилась только в восьмой версии LibreELEC, которая вышла на днях. У меня же установлена LibreELEC версии 7.0.3, поэтому решил искать именно MyGica T230.
Сейчас, к сожалению, найти MyGica T230 становится сложнее, большинство продавцов продают именно MyGica T230С. Различить их можно по ID оборудования у T230 он 0572:c688 а у T230C 0572:c689. Этот параметр и следует уточнять у продавца перед покупкой. На AliExpress нашелся только один продавец который с уверенностью смог сказать, что у него именно T230. Продавец очень общительный, ответил на все мои вопросы, и согласился предоставить небольшую скидку.

Тюнер пришел в красивой картонной коробке. 
Внутри которой находится сам тюнер, руководство по эксплуатации, диск с ПО и драйверами и коробка с аксессуарами. 
Комплектация, как по мне, очень хорошая. В комплект входят: антенна, два вида крепления, USB удлинитель и пульт ДУ. 
Пульт стандартный для таких устройств, батарейки в комплект не входят. 
Антенна поставляется с двумя видами крепления.
На стекло 
На крышку ноутбука 
Сам тюнер выполнен из глянцевого пластика. На одной стороне — логотип 
На другой — серийный номер. 
Разъем для подключения антенны стандартный. 
Подключение и настройка
Нстройка
Все настройки производятся на LibreELEC версии 7.0.3 
Для работы ТВ тюнера в LibreELEC необходимо установить приложение Tvheadend, это сервер для стриминга и записи потокового телевидения, который поддерживает: DVB-S, DVB-S2, DVB-C, DVB-T, ATSC, ISDB-T, IPTV, SAT> IP и HDHomeRun в качестве входных источников.
Установим и активируем дополнения Tvheadend и Tvheadend HTSP Client. Оба они присутствуют в официальном репозитории LibreELEC. 


Поле чего переходим по адресу:
где ip-address это адрес приставки где установлен сервер Tvheadend.
Далее я приведу минимальные настройки для быстрого запуска программы. Более подробную информацию можно найти на официальном сайте.
Перейдем в раздел «Конфигурация» и выберем вкладку «Сети». Нажимаем кнопку «Добавить» и создаем сеть так, как показано ниже. 
После чего переходим на вкладку «TV адаптеры», выбираем из списка необходимый адаптер и настраиваем его так, как показано ниже. Не забываем нажать кнопку «Сохранить», после завершения настройки. 
На территории России цифровое ТВ передается двумя пакетами РТРС-1 и РТРС-2. Несущие частоты этих пакетов в разных регионах отличаются. Для того чтобы узнать какие частоты вещания в вашем регионе. необходимо перейти на сайт Российской телевизионной и радиовещательной сети, выбрать ваш регион и найти на карте ближайшую вышку, как показано на скриншоте. 
Далее, в WEB интерфейсе Tvheadend, перейдем на вкладку «Муксы», где создадим «Мукс» для каждой из частот РТРС-1 и РТРС-2.
Вписываем частоту несущей, ширину канала и PLP ID.
С PLP ID есть один нюанс, для того чтобы смотреть «Россия 1» и «Россия 24» необходимо создать отдельные Муксы с частотой несущей РТРС-1 и с PLP ID «1» и «2» соответственно.
Если все сделано правильно, то в столбце «Результат Сканирования», должно отобразиться сообщение «ОК», а в столбце «Каналы» количество найденных каналов. 
Далее переходим на вкладку «Сервисы» и выберем пункт меню «Map all services». 
Теперь на вкладке «Электронный Программный Гид» мы должны увидеть все каналы и их программы. 
Все, теперь перейдя в пункт меню «ТВ», на главном экране Kodi, можно наслаждаться просмотром эфирного телевидения.
UPD
В комментариях возникли вопросы по одновременному просмотру разных каналов.
Можно посматривать несколько каналов на разных устройствах в пределах одного мультиплекса, т.е. либо каналы из РТРС-1 либо из РТРС-2. Одновременно просматривать каналы из разных мулитиплексов невозможно.
Источник
DVB-T 2
Установщик драйверов:
В случае, когда вы не хотите тратить время на поиск нужного драйвера для вашего ПК, к вашим услугам представлен автоматический установщик, который самостоятельно подберет нужные и самые актуальные драйвера для всех устройств вашей системы. Скачать Outbyte Drivers Installer вы можете перейдя по этой ссылке Установить драйвера автоматически
| Устройство: | DVB-T 2 Drivers Installer |
| Версия драйвера: | 2.0.0.18 |
| Дата драйвера: | 2022-10-31 |
| Размер файла: | 1.12 Mb |
| Поддерживаемые ОС: | Windows 2000, Windows XP, Windows Vista, Windows 7, Windows 8 |
| Установить драйвера автоматически |
Список драйверов:
Найдено драйверов для устройства «DVB-T 2»: 5. Для загрузки необходимого драйвера, выберите его из списка ниже и перейдите по ссылке «Скачать». Пожалуйста, убедитесь в соответствии выбранной версии драйвера вашей операционной системе для обеспечения корректности его работы.
Поддерживаемые модели ноутбуков
Мы собрали список популярных моделей ноутбуков на которых устанавливается оборудование «DVB-T 2». Выбрав интересующую вас модель ноутбука вы можете посмотреть полный список совместимых устройств.
Источник
Mygica dvb t2 драйвера для windows 10

Краткое описание:
Прием DVB-T и DVB-T2 на телефоне с помощью USB-тюнера.
Описание:
С Aerial TV вы можете смотреть цифровое ТВ на вашем Android-устройстве. Вам не нужен мобильный интернет, WIFI-соединение или даже мобильная связь. Aerial TV работает принимая местные DVB каналы через обычную ТВ-антенну.
Наконец, убедитесь, что ваше Android-устройство поддерживает подключение внешних USB-устройств через OTG. Если не уверены, поищите в интернете или посмотрите в руководстве на устройство. Также, проверьте, что есть DVB-T вещание в вашем регионе. DVB-T отсутствует в подавляющем большинстве стран Южной и Северной Америки, поэтому Aerial TV не будет там работать (пока, может). Большинство стран Европы, Азии и Африки имеют DVB-T вещание. Если неуверены, поищите в интернете и убедитесь, что DVB-T телевидение доступно в вашем регионе.
Это приложение может принимать DVB-T2 вещание с помощью подключенного DVB-T2 совместимого приемника (такого, как RTL2832 с R828D).
— RTL-SDR devices (RTL2832 and RTL2832U)
— Astrometa DVB-T2
— Unbranded Android DVB-T dongles (AF9035 based)
— ASUS My Cinema-U3100Mini Plus V2
— Compro VideoMate U620F and U650F
— Crypto ReDi PC 50 A
— Dexatek DK DVB-T Dongle
— Dexatek DK mini DVB-T Dongle
— DigitalNow Quad DVB-T Receiver
— EVOLVEO XtraTV stick
— G-Tek Electronics Group Lifeview LV5TDLX DVB-T
— GIGABYTE U7300
— Genius TVGo DVB-T03
— GoTView MasterHD 3
— Leadtek WinFast DTV Dongle mini
— Leadtek WinFast DTV2000DS Plus
— Leadtek Winfast DTV Dongle Mini D
— MSI DIGIVOX Micro HD
— MaxMedia HU394-T
— MyGica Pad TV Tuner PT360
— MyGica T230 DVB-T/T2/C
— PCTV AndroiDTV (78e)
— Peak DVB-T USB
— Sveon STV20, STV21 and STV27
— TURBO-X Pure TV Tuner DTT-2000
— TerraTec Cinergy T Stick/+ (Black, RC Rev. 3)
— TerraTec NOXON DAB Stick (rev 1, 2 and 3)
— Trekstor DVB-T Stick Terres 2.0
Требуется Android: 4.1 и выше
Русский интерфейс: Да
Скачать: версия: 1.4  Aerial TV DVB T receiver_v1.4_apkpure.com.apk ( 11,97 МБ )
Источник
DVB T TV Stick Drivers Download
Download the latest version of the DVB T TV Stick driver for your computer’s operating system. All downloads available on this website have been scanned by the latest anti-virus software and are guaranteed to be virus and malware-free.
Find All DVB T TV Stick Drivers
Recent Help Articles
Popular Driver Updates for DVB T TV Stick
If you have had recent power outages, viruses or other computer problems, it is likely that the drivers have become damaged. Browse the list above to find the driver that matches your hardware and operating system. To see more matches, use our custom driver search engine to find the exact driver.
DriverGuide maintains an extensive archive of Windows drivers available for free download. We employ a team from around the world which adds hundreds of new drivers to our site every day.
How to Install Drivers
Once you download your new driver, then you need to install it. To install a driver in Windows, you will need to use a built-in utility called Device Manager. It allows you to see all of the devices recognized by your system, and the drivers associated with them.
Open Device Manager
In Windows 10 & Windows 8.1, right-click the Start menu and select Device Manager
Install Drivers With Device Manager
Locate the device and model that is having the issue and double-click on it to open the Properties dialog box.
Select the Driver tab.
Click the Update Driver button and follow the instructions.
In most cases, you will need to reboot your computer in order for the driver update to take effect.
Visit our Driver Support Page for helpful step-by-step videos
Install Drivers Automatically
If you are having trouble finding the right driver, stop searching and fix driver problems faster with the Automatic Driver Update Utility. Automatic updates could save you hours of time.
The Driver Update Utility automatically finds, downloads and installs the right driver for your hardware and operating system. It will Update all of your drivers in just a few clicks, and even backup your drivers before making any changes.
Once you download and run the utility, it will scan for out-of-date or missing drivers:
When the scan is complete, the driver update utility will display a results page showing which drivers are missing or out-of-date: 
Next, update individual drivers or all of the necessary drivers with one click.
Benefits of Updated Drivers
Many computer problems are caused by missing or outdated device drivers, especially in Windows 10. If your deskttop or laptop is running slow, or keeps crashing or hanging, there is a good chance that updating your drivers will fix the problem.
Ensures your hardware runs at peak performance.
Fixes bugs so your system will have fewer crashes.
Unlocks new features and configuration options in your devices, especially with video cards and gaming devices.
Источник