Содержание
- Malwarebytes не будет обновляться в Windows 10
- Malwarebytes не удается обновить? Вот что вам нужно сделать
- 1: установить обновления вручную
- 2. Проверьте брандмауэр Windows
- 3: переустановите Malwarebytes
- 4: обновить Windows
- Проблемы с Malwarebytes Anti-Malware и способы их решения.
- Severnyj
- Malwarebytes won’t install, run or update – How to fix it
- 1. Malwarebytes won’t install
- 1.1 Before saving Malwarebytes Anti-malware rename it first
- 1.2 Change Malwarebytes Anti-malware installation file extension
- 2. Malwarebytes Anti-malware won’t run
- 2.1 Rename the main executable file
- 2.2 Boot your computer in the Safe mode
- 2.3 Log in Windows using a new created user account
- 2.4 Run TDSSKiller
- 2.5 Use Inherit.exe to fix inappropriate permissions
- 3. Malwarebytes Anti-malware won’t update
- 3.1 Manually download and install Malwarebytes Anti-malware update
- 3.2 Copy the Malwarebytes Anti-malware definitions (rules.ref) from a clean computer
- 4. Cannot use the Internet and download Malwarebytes Anti-malware
- Remove “There is a Recommended Update for this PC” Pop-up Scam (Guide)
- What is “There is a Recommended Update for this PC”?
- Why am I seeing the “There is a Recommended Update for this PC” pop-up ads?
- How to remove “There is a Recommended Update for this PC” (Virus Removal Guide)
- To remove the “There is a Recommended Update for this PC” fake error messages, follow these steps:
- STEP 1: Uninstall the malicious programs from Windows
- Windows 10
- Windows 8
- Windows 7
- STEP 2: Use Malwarebytes Free to remove “There is a Recommended Update for this PC” adware
- STEP 3: Use HitmanPro to scan for malware and unwanted programs
- STEP 4: Double-check for malicious programs with AdwCleaner
- STEP 5: Reset the browser settings to remove “There is a Recommended Update for this PC” pop-ups
- Google Chrome
- Mozilla Firefox
- Microsoft Edge
- Internet Explorer
Malwarebytes не будет обновляться в Windows 10
Всеобщий защитный характер Malwarebytes ставит его на вершину рынка бесплатных антивирусных инструментов. Основной пакет Malwarebytes, помимо работы с этими надоедливыми вирусами, также занимается PuP и рекламным ПО. С бесплатными и премиальными вариантами люкса. Однако интеграция с Windows 10 (как и со многими сторонними решениями) проваливается пользователями. А именно, некоторые из них не могут обновить клиент Malwarebytes даже после нескольких попыток.
Мы провели поиск и предоставили вам несколько жизнеспособных решений. Дайте им попытку и сообщите нам, если они работают.
Malwarebytes не удается обновить? Вот что вам нужно сделать
1: установить обновления вручную
Во-первых, нам нужно сделать одну вещь перед установкой обновлений вручную. Первое, что вы должны сделать, это подтвердить, что Защитник Windows отключен. Две службы защиты от вредоносных программ с включенной защитой в режиме реального времени и работающие одновременно, не совсем хорошая идея.
При первоначальной установке система автоматически отключает Защитника, но это может измениться после серьезного обновления. Перейдите к Защитнику Windows> Защита от вирусов и угроз> Параметры защиты от вирусов и угроз и отключите постоянную защиту.
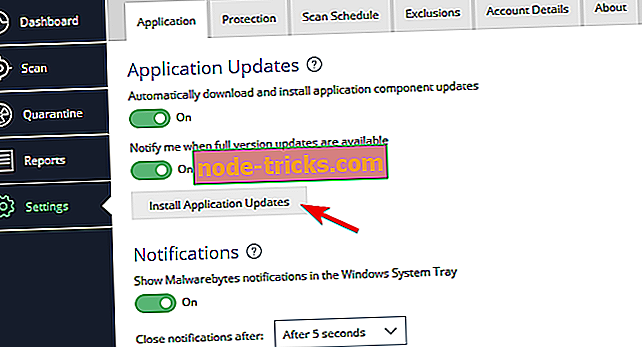
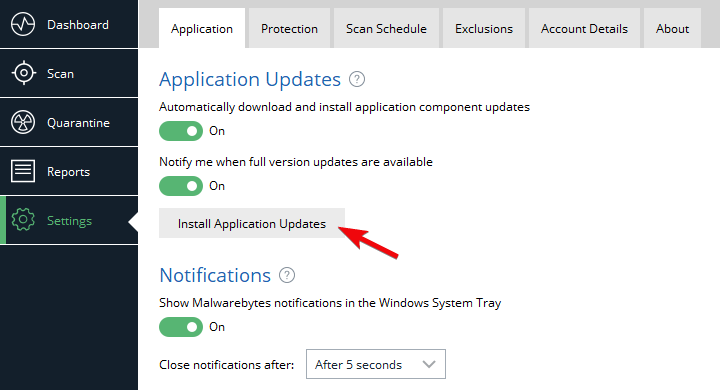
После этого перезагрузите компьютер и откройте Malwarebytes. Перейдите в «Настройки» и на вкладке «Приложение» нажмите «Установить обновления приложения».

2. Проверьте брандмауэр Windows
Еще одна вещь, которую стоит проверить – это брандмауэр Windows. Как мы уже упоминали на предыдущем шаге, серьезное обновление действительно может внести некоторые существенные изменения в вашу систему. Это включает в себя вмешательство в ваши разрешения брандмауэра. По этой причине мы рекомендуем вам перейти к настройкам брандмауэра Windows и разрешить Malwarebytes свободно общаться с сервером обновлений.
Вот что вам нужно сделать:
3: переустановите Malwarebytes
Теперь, если вы когда-либо устанавливали предыдущую версию Malwarebytes (или любого другого программного обеспечения для защиты от вредоносных программ), оставшиеся связанные файлы могут повредить текущую установку. Таким образом, некоторые из основных функций могут работать не так, как задумано. Это требует полной переустановки приложения.
Но, как мы уже говорили, антивирус интегрируется гораздо глубже, чем ваша обычная сторонняя программа. Вот почему хорошие люди из Malwarebytes предлагают специальный инструмент, который должен помочь вам очистить все связанные файлы. После этого вы можете установить пакет Malwarebytes и, надеюсь, иметь возможность обновляться без проблем.
Вот что вам нужно сделать:
Наконец, вы можете использовать файл журнала, чтобы поделиться своими проблемами с разработчиком. Вы можете опубликовать его в виде вложения на официальном форуме. Если предыдущие шаги не смогли решить проблему, конечно.
4: обновить Windows
И, как последнее замечание, мы должны напомнить вам о наиболее распространенной причине неудачных обновлений. Основные обновления Windows 10 известны как взломанные сторонние инструменты. Большинство сообщений о проблемах обновления Malwarebytes появилось после серьезного обновления (в частности, Creators Update).
Имея это в виду, вы должны установить системные исправления и обновления как можно скорее.Надеюсь, один из них поможет вам решить проблему под рукой. Чтобы убедиться, что все обновления установлены, мы рекомендуем вам проверять наличие обновлений вручную. Выполните следующие действия, чтобы проверить наличие обновлений для Windows 10:
Это оно. Если вы все еще страдаете от той же ошибки и не можете получить последние обновления от Malwarebytes, не забудьте поделиться своими проблемами на их специальном форуме. Кроме того, если у вас есть какие-либо вопросы или предложения, не стесняйтесь размещать их в разделе комментариев ниже.
Источник
Проблемы с Malwarebytes Anti-Malware и способы их решения.

Severnyj
1. Проблемы с установкой и запуском.
Некоторые типы вредоносных программ препятствуют установке Malwarebytes Anti-Malware и других средств безопасности. Если, при попытке установить MBAM, установка не начинается, в первую очередь попытайтесь переименовать файл установщика, например в explorer.exe или winlogon.exe. Если это не поможет, то можно попытаться изменить расширение файла на .scr, .com, .pif, или .bat и запустить установку щелчком по explorer.com (или другому файлу, во что вы его переименовали). Возможно еще попробовать скачать и переименовать установщик на заведомо чистом компьютере, а затем перенести его на флэшке или CD на зараженный.
Примечание: Malwarebytes Anti-Malware использует Inno Setup, а не Службу установщика Windows, если продолжение установки в нормальном режиме приводит к сбою, попробуйте установить программу и произвести сканирование в безопасном режиме. Делать этого обычно не рекомендуется, так как в безопасном режиме теряется некоторая эффективность обнаружения и удаления вредоносных программ. После сканирования и удаления вредоносных программ в безопасном режиме, рекомендуется удалить Malwarebytes Anti-Malware, затем перезагрузиться в нормальный режим и повторить установку и сканирование.
Если после установки MBAM не запускается, перейдите в папку C:Program FilesMalwarebytes’ Anti-Malware и попробуйте переименовать файл mbam.exe, как это было указано выше для файла установщика.
Вредоносные программы также могут нарушать ассоциацию запуска .exe-файлов. При нарушении ассоциации запуск любых программ становится невозможным. Для восстановления ассоциации скачайте файл FixExe.reg и сохраните его на рабочем столе. Запустите скаченный файл двойным щелчком и согласитесь на предупреждение о внесении данных в реестр нажатием кнопки Да.
Еще одним способом запуска MBAM будет использование инструмента Rkill. Этот инструмент завершает определенные процессы и блокирует запись в некоторые ветви реестра, тем самым препятствуя вредоносным программам влиять на MBAM и другие утилиты.
Скачайте Rkill по одной из указанных ссылок и сохраните его на рабочем столе
Зеркало 1
Зеркало 2
Зеркало 3
Зеркало 4
Зеркало 5
Зеркало 6
Зеркало 7
2. Проблемы с обновлением.
Бывает, что вредоносные программы блокируют доступ к серверу обновлений, и при попытке обновить базы MBAM будет сообщать об ошибке. В таком случае можно скачать файл установки обновлений (MBAM-rules.exe) здесь и запустить установку обновлений двойным щелчком по скаченному файлу. Следует помнить, что обновления, распространяемые таким образом выходят реже, чем для функции обновления баз, встроенных в программу. При блокировании вредоносными программами этих адресов, можно скачать файл обновлений на заведомо чистом компьютере и перенести на флэшке или CD на зараженный.
Другим способом обновления является перенос файла определений rules.ref с незараженного компьютера. Дле этого необходимо выполнить следующие шаги.
— Установите MBAM на заведомо чистом компьютере.
— Запустите из меню Обновление баз.
— После окончания обновления закройте MBAM.
— Перейдите в папку (данная папка имеет атрибут «Скрытый«, поэтому перед переходом включите отображение скрытых файлов)
— Windows XP: C:Documents and SettingsAll UsersApplication DataMalwarebytesMalwarebytes’ Anti-Malware
— Windows Vista/Seven: C:Documents and SettingsUsersAll UsersMalwarebytesMalwarebytes’ Anti-Malware
— Скопируйте файл rules.ref на флэшку или запишите на CD и перенесите по такому же пути на зараженный компьютер.
Многие другие проблемы рассмотрены на официальном форуме (информация на английском языке)
Источник
Malwarebytes won’t install, run or update – How to fix it
If Malwarebytes Anti-malware won’t install, run or update, then you’ve probably got malware or the effects of malware on the computer (some types of malware will disable Malwarebytes Anti-malware and other security tools). The following instructions is a guide that will help you to solve the most common problems when you install, run and update Malwarebytes.
1. Malwarebytes won’t install
1.1 Before saving Malwarebytes Anti-malware rename it first
Once you have clicked to a download link you will see a Save dialog like below.

Change file name MBSetup.exe to explorer.exe like a screen below.

Then click on Save and save it to your desktop.
Double Click explorer to install the application.
Note: several good names that you can use: explorer.exe, iexplore.exe, firefox.exe, userinit.exe, myapp.exe or use any random name
1.2 Change Malwarebytes Anti-malware installation file extension
You need turn on “show file extensions for known file types” before doing it.
Click Start, then click Computer as shown below.

This will open a Computer screen.

Click to Organize and select Folder and Search options like a screen below.

After the new window appears select the View tab. You will see a window as shown below.

Remove the checkmark from the checkbox labeled “Hide file extensions for known file types” and press the Apply button and then the OK button. Now your computer is configured to show file extensions for known file types.
Right-click on an installation file (MBSetup.exe for Malwarebytes Anti-malware) and select Rename.


Press Enter and then double-click on it to run.
2. Malwarebytes Anti-malware won’t run
2.1 Rename the main executable file
Click Start, type in Search field %ProgramFiles% (if you using Windows 2000/XP, Click Start, Run, then type in Open field) as shown below.

Press Enter. It will open a contents of ProgramFiles folder.

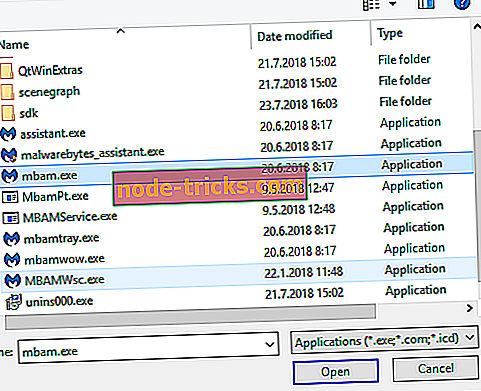
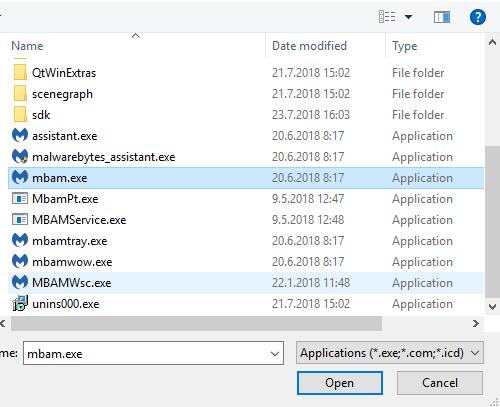
Next, open Malwarebytes Anti-Malware folder. Right-click on the mbam.exe file and select Rename option as a screen below.

Type explorer.exe and press Enter. Double-click on it to run.
Note: several good names that you can use: explorer.exe, iexplore.exe, firefox.exe, userinit.exe, myapp.exe or use any random name
2.2 Boot your computer in the Safe mode
Run Malwarebytes Anti-malware once again.
2.3 Log in Windows using a new created user account
Run Malwarebytes Anti-malware or your security program.
2.4 Run TDSSKiller
Probably your computer is infected with TDSS trojan/rootkit. It may block various antivirus and antispyware programs from running.
Download TDSSKiller from the link below and unzip it to your desktop.
https://support.kaspersky.com/downloads/utils/tdsskiller.zip
Open tdsskiller folder and run TDSSKiller. Follow the prompts.
2.5 Use Inherit.exe to fix inappropriate permissions
Use this fix, when you see a box that states “Windows cannot not access the specified device, path, or file. You may have inappropriate permissions to access the item”.
Download the Inherit.exe tool from the following link:
https://download.bleepingcomputer.com/sUBs/MiniFixes/Inherit.exe
Save it next to mbam.exe (this file is located in the Malwarebytes Anti-malware home folder). Once done, drag and drop mbam.exe into Inherit.exe. Click OK and attempt to run Malwarebytes Anti-malware once again.
3. Malwarebytes Anti-malware won’t update
3.1 Manually download and install Malwarebytes Anti-malware update
3.2 Copy the Malwarebytes Anti-malware definitions (rules.ref) from a clean computer
You can update through MBAM’s interface from a clean computer, copy the definitions (rules.ref) located in C:Documents and SettingsAll UsersApplication DataMalwarebytesMalwarebytes’ Anti-Malware (Windows XP and 2000) or C:ProgramDataMalwarebytesMalwarebytes’ Anti-Malwarerules.ref (Windows Vista and Windows 7) from that system to a usb stick or CD and then copy it to the infected machine.
4. Cannot use the Internet and download Malwarebytes Anti-malware
You will need access to another computer that has a connection.
From the computer download and save a setup package (installation file) to a flash, usb, jump drive or CD. Now transfer it to the infected machine, then install and run the program.
If you cannot transfer to or install on the infected machine, try running the setup package (installation file) directly from the flash drive or CD by double-clicking on the file so it will install on the hard drive.

 (4 votes, average: 4.00 out of 5)
Источник
Malwarebytes won’t install, run or update – How to fix it
If Malwarebytes Anti-malware won’t install, run or update, then you’ve probably got malware or the effects of malware on the computer (some types of malware will disable Malwarebytes Anti-malware and other security tools). The following instructions is a guide that will help you to solve the most common problems when you install, run and update Malwarebytes.
1. Malwarebytes won’t install
1.1 Before saving Malwarebytes Anti-malware rename it first
Once you have clicked to a download link you will see a Save dialog like below.
Change file name MBSetup.exe to explorer.exe like a screen below.
Then click on Save and save it to your desktop.
Double Click explorer to install the application.
Note: several good names that you can use: explorer.exe, iexplore.exe, firefox.exe, userinit.exe, myapp.exe or use any random name
1.2 Change Malwarebytes Anti-malware installation file extension
You need turn on “show file extensions for known file types” before doing it.
Click Start, then click Computer as shown below.
This will open a Computer screen.
Click to Organize and select Folder and Search options like a screen below.
After the new window appears select the View tab. You will see a window as shown below.
Remove the checkmark from the checkbox labeled “Hide file extensions for known file types” and press the Apply button and then the OK button. Now your computer is configured to show file extensions for known file types.
Right-click on an installation file (MBSetup.exe for Malwarebytes Anti-malware) and select Rename.
Press Enter and then double-click on it to run.
2. Malwarebytes Anti-malware won’t run
2.1 Rename the main executable file
Click Start, type in Search field %ProgramFiles% (if you using Windows 2000/XP, Click Start, Run, then type in Open field) as shown below.
Press Enter. It will open a contents of ProgramFiles folder.
Next, open Malwarebytes Anti-Malware folder. Right-click on the mbam.exe file and select Rename option as a screen below.
Type explorer.exe and press Enter. Double-click on it to run.
Note: several good names that you can use: explorer.exe, iexplore.exe, firefox.exe, userinit.exe, myapp.exe or use any random name
2.2 Boot your computer in the Safe mode
Run Malwarebytes Anti-malware once again.
2.3 Log in Windows using a new created user account
Run Malwarebytes Anti-malware or your security program.
2.4 Run TDSSKiller
Probably your computer is infected with TDSS trojan/rootkit. It may block various antivirus and antispyware programs from running.
Download TDSSKiller from the link below and unzip it to your desktop.
https://support.kaspersky.com/downloads/utils/tdsskiller.zip
Open tdsskiller folder and run TDSSKiller. Follow the prompts.
2.5 Use Inherit.exe to fix inappropriate permissions
Use this fix, when you see a box that states “Windows cannot not access the specified device, path, or file. You may have inappropriate permissions to access the item”.
Download the Inherit.exe tool from the following link:
https://download.bleepingcomputer.com/sUBs/MiniFixes/Inherit.exe
Save it next to mbam.exe (this file is located in the Malwarebytes Anti-malware home folder). Once done, drag and drop mbam.exe into Inherit.exe. Click OK and attempt to run Malwarebytes Anti-malware once again.
3. Malwarebytes Anti-malware won’t update
3.1 Manually download and install Malwarebytes Anti-malware update
3.2 Copy the Malwarebytes Anti-malware definitions (rules.ref) from a clean computer
You can update through MBAM’s interface from a clean computer, copy the definitions (rules.ref) located in C:Documents and SettingsAll UsersApplication DataMalwarebytesMalwarebytes’ Anti-Malware (Windows XP and 2000) or C:ProgramDataMalwarebytesMalwarebytes’ Anti-Malwarerules.ref (Windows Vista and Windows 7) from that system to a usb stick or CD and then copy it to the infected machine.
4. Cannot use the Internet and download Malwarebytes Anti-malware
You will need access to another computer that has a connection.
From the computer download and save a setup package (installation file) to a flash, usb, jump drive or CD. Now transfer it to the infected machine, then install and run the program.
If you cannot transfer to or install on the infected machine, try running the setup package (installation file) directly from the flash drive or CD by double-clicking on the file so it will install on the hard drive.
(4 votes, average: 4.00 out of 5)
Источник
Remove “There is a Recommended Update for this PC” Pop-up Scam (Guide)
The “There is a Recommended Update for this PC” pop-up is a browser-based scam that displays fake error messages to trick you into installing potentially unwanted programs on your computer. What is “There is a …
Written by: Stelian Pilici
Published on: October 23, 2019
The “There is a Recommended Update for this PC” pop-up is a browser-based scam that displays fake error messages to trick you into installing potentially unwanted programs on your computer.
 Image: There is a Recommended Update for this PC – Fake Error Messages
What is “There is a Recommended Update for this PC”?
The “There is a Recommended Update for this PC” fake error message is a scam that pretends to be from Microsoft to trick you into thinking your computer has crashed or that a virus has been detected on the computer. It does this to try and scare you into downloading and installing malicious programs on your computer.
The “There is a Recommended Update for this PC” fake error messages will display this alert:
There is a Recommended Update for this PC.
Based on your update settings, this PC is entitled to an upgrade.
Click here to cancel the scheduled upgrade.
Get the fresh and new intuitive Chromium browser.
Yahoo Provided Search on all of your compatible browsers.
Direct and safe access to all of your favorite sites.
Accept the Yahoo Terms of Use and Privacy policy, and the Chromium Terms and Privacy policy
As you can imagine, this fake error message is not from Microsoft and anything it states is just a scam to try and scare you into downloading and installing potentially unwanted programs on your computer.
Why am I seeing the “There is a Recommended Update for this PC” pop-up ads?
You are seeing the “There is a Recommended Update for this PC” pop-up ads because you are either infected with adware or another web site is redirecting you to them.
This guide was written to help users remove malware from their devices, so if you’re just looking for a way to block the “There is a Recommended Update for this PC” redirect on a specific site, you can use a free browser extension like Adblock.
When it comes to adware, these malicious programs are bundled with other free software that you download off of the Internet. Unfortunately, some free downloads do not adequately disclose that other software will also be installed and you may find that you have installed adware without your knowledge.
Here are a few typical signs that you have adware on your system:
You should always pay attention when installing software because often, a software installer includes optional installs. Be very careful what you agree to install.
Always opt for the custom installation and deselect anything that is not familiar, especially optional software that you never wanted to download and install in the first place. It goes without saying that you should not install software that you don’t trust.
To check your computer for adware and remove it for free, please use the guide below.
How to remove “There is a Recommended Update for this PC” (Virus Removal Guide)
To remove the “There is a Recommended Update for this PC” fake error messages, follow these steps:
STEP 1: Uninstall the malicious programs from Windows
In this first step, we will try to identify and remove any malicious program that might be installed on your computer.
Go to “Programs and Features”.
Windows 10
Windows 8

Windows 7
Find the malicious program and uninstall it.
The “Programs and Features” screen will be displayed with a list of all the programs installed on your PC. Scroll through the list until you find the malicious program, then click to highlight it, then click the “Uninstall” button that appears on the top toolbar.
Look out for any suspicious program that could be behind all the drama – anything you don’t remember downloading or that doesn’t sound like a genuine program.Here are some known malicious programs: PDFPoof, BatBitRst, MessengerNow, SearchAd, MyPrintableCoupons, Reading Cursors, ProMediaConverter, PDFOnline-express, See Scenic Elf, Clickware, Easy Speedtest, or WebDiscover.
The malicious program may have a different name on your computer. If you cannot find any malicious programs on your computer, you can continue with STEP 2.

Follow the on-screen prompts to uninstall the program.
In the next message box, confirm the uninstall process by clicking on Yes, then follow the prompts to uninstall the program.
Make sure to read all of the prompts carefully, because some malicious programs try to sneak things in hoping that you won’t read closely.
STEP 2: Use Malwarebytes Free to remove “There is a Recommended Update for this PC” adware
Malwarebytes Free is one of the most popular and most used anti-malware software for Windows, and for good reasons. It is able to destroy many types of malware that other software tends to miss, without costing you absolutely nothing. When it comes to cleaning up an infected device, Malwarebytes has always been free and we recommend it as an essential tool in the fight against malware.
It is important to note that Malwarebytes Free will run alongside antivirus software without conflicts.
Download Malwarebytes Free.
You can download Malwarebytes by clicking the link below.
Double-click on the Malwarebytes setup file.
When Malwarebytes has finished downloading, double-click on the MBSetup file to install Malwarebytes on your computer. In most cases, downloaded files are saved to the Downloads folder.

You may be presented with an User Account Control pop-up asking if you want to allow Malwarebytes to make changes to your device. If this happens, you should click “Yes” to continue with the Malwarebytes installation. 
Follow the on-screen prompts to install Malwarebytes.
When the Malwarebytes installation begins, you will see the Malwarebytes setup wizard which will guide you through the installation process. The Malwarebytes installer will first ask you on what type of computer are you installing this program, click either Personal Computer or Work Computer. 
On the next screen, click “Install” to install Malwarebytes on your computer. 
When your Malwarebytes installation completes, the program opens to the Welcome to Malwarebytes screen. Click the “Get started” button.
Select “Use Malwarebytes Free”.
After installing Malwarebytes, you’ll be prompted to select between the Free and the Premium version. The Malwarebytes Premium edition includes preventative tools like real-time scanning and ransomware protection, however, we will use the Free version to clean up the computer.
Click on “Use Malwarebytes Free“. 
To scan your computer with Malwarebytes, click on the “Scan” button. Malwarebytes will automatically update the antivirus database and start scanning your computer for malware. 
Wait for the Malwarebytes scan to complete.
Malwarebytes will scan your computer for adware and other malicious programs. This process can take a few minutes, so we suggest you do something else and periodically check on the status of the scan to see when it is finished. 
Click on “Quarantine”.
When the scan has completed, you will be presented with a screen showing the malware infections that Malwarebytes has detected. To remove the malicious programs that Malwarebytes has found, click on the “Quarantine” button. 
Malwarebytes will now remove all the malicious files and registry keys that it has found. To complete the malware removal process, Malwarebytes may ask you to restart your computer. 
When the malware removal process is complete, you can close Malwarebytes and continue with the rest of the instructions.
STEP 3: Use HitmanPro to scan for malware and unwanted programs
HitmanPro is a second opinion scanner that takes a unique cloud-based approach to malware scanning. HitmanPro scans the behavior of active files and also files in locations where malware normally resides for suspicious activity. If it finds a suspicious file that’s not already known, HitmanPro sends it to their clouds to be scanned by two of the best antivirus engines today, which are Bitdefender and Kaspersky.
You can download HitmanPro by clicking the link below.
When HitmanPro has finished downloading, double-click on “hitmanpro.exe” (for 32-bit versions of Windows) or “hitmanpro_x64.exe” (for 64-bit versions of Windows) to install this program on your PC. In most cases, downloaded files are saved to the Downloads folder. 
You may be presented with an User Account Control pop-up asking if you want to allow HitmanPro to make changes to your device. If this happens, you should click “Yes” to continue with the installation. 
Follow the on-screen prompts.
When HitmanPro starts you will be presented with the start screen as shown below. Click on the “Next” button to perform a system scan.


Wait for the HitmanPro scan to complete.
HitmanPro will now begin to scan your computer for malicious programs. This process will take a few minutes. 
When HitmanPro has finished the scan, it will display a list of all the malware that the program has found. Click on the “Next” button to remove the malicious programs. 
Click on “Activate free license”.
Click on the “Activate free license” button to begin the free 30 days trial and remove all the malicious files from your PC. 

When the process is complete, you can close HitmanPro and continue with the rest of the instructions.
STEP 4: Double-check for malicious programs with AdwCleaner
AdwCleaner is a free popular on-demand scanner which can detect and remove malware that even the most well-known anti-virus and anti-malware applications fail to find.
While the Malwarebytes and HitmanPro scans are more than enough, we’re recommending AdwCleaner to users who still have malware related issues or just want to make sure their computer is 100% clean.
You can download AdwCleaner by clicking the link below.
Double-click on the setup file.
Double-click on the file named “adwcleaner_7.x.x.exe” to start AdwCleaner. In most cases, downloaded files are saved to the Downloads folder. 
You may be presented with a User Account Control dialog asking you if you want to run this file. If this happens, you should click “Yes” to continue with the installation. 
When AdwCleaner will start, click on the “Scan Now” button to perform a system scan. 
Wait for the AdwCleaner scan to complete.
AdwCleaner will now scan your PC for malicious files. This process can take a few minutes. 
Click on “Clean & Repair”.
When AdwCleaner has finished it will display a list of all the malware that the program found. Click on the “Clean & Repair” button to remove the malicious files from your computer. 
Click on “Clean & Restart Now”
When the malware removal process is complete, AdwCleaner may need to restart your device. Click on the “Clean & Restart Now” button to finish the removal process. 
When the process is complete, you can close Adwcleaner and continue with the rest of the instructions.
STEP 5: Reset the browser settings to remove “There is a Recommended Update for this PC” pop-ups
If your computer is still being redirected to the “There is a Recommended Update for this PC” pop-ups, we will need to reset the web browser settings to their original defaults. This step should be performed only if your issues have not been solved by the previous steps.
Google Chrome
Click the menu icon, then click on “Settings”.
Click on Chrome’s menu button, represented by three horizontal lines. When the drop-down menu appears, select the option labeled “Settings“. 
Chrome’s “Settings” should now be displayed in a new tab or window, depending on your configuration. Next, scroll to the bottom of the page and click on the “Advanced” link. 
Click “Reset settings to their original defaults”.
Scroll down until the “Reset and clean up” section is visible, as shown in the example below. Click on “Reset settings to their original defaults“. 
Click “Reset Settings”.
A confirmation dialog should now be displayed, detailing the components that will be restored to their default state should you continue on with the reset process. To complete the restoration process, click on the “Reset Settings” button. 
Mozilla Firefox
Click the menu icon, then click on “Help”.
Click on Firefox’s main menu button, represented by three horizontal lines. When the drop-down menu appears, select the option labeled “Help“. 
Click “Troubleshooting Information”.
From the Help menu, click on “Troubleshooting Information“. 
Click on “Refresh Firefox”
Click the “Refresh Firefox” button in the upper-right corner of the “Troubleshooting Information” page. 
To continue, click on the “Refresh Firefox” button in the new confirmation window that opens. 
Firefox will close itself and will revert to its default settings. When it’s done, a window will list the information that was imported. Click on “Finish“.
Your old Firefox profile will be placed on your desktop in a folder named “Old Firefox Data“. If the reset didn’t fix your problem you can restore some of the information not saved by copying files to the new profile that was created. If you don’t need this folder any longer, you should delete it as it contains sensitive information.
Microsoft Edge
Go to “Apps and Features”.
Right-click on the Start button in the lower-left corner and select “Apps and Features“. This will take you directly to your list of installed programs. 
Find Microsoft Edge, then select “Advanced Options”.
The “App and Features” screen will be displayed with a list of all the programs installed on your PC. Scroll through the list until you find “Microsoft Edge”, click it, and then click on the “Advanced options” link. 
The “Advanced Options” screen will now be displayed. Scroll down until the “Reset” section is visible, as shown in the example below. Next, click on the “Reset” button. 
Internet Explorer
Go to “Internet Options”.
Open Internet Explorer, click on the gear icon in the upper right part of your browser, then select “Internet Options“.
Select the “Advanced” tab, then click “Reset”
In the “Internet Options” dialog box, select the “Advanced” tab, then click on the “Reset” button.
In the “Reset Internet Explorer settings” section, select the “Delete personal settings” checkbox, then click on the “Reset” button.
When Internet Explorer has completed its task, click on the “Close” button in the confirmation dialogue box.
You will now need to close your browser, and then you can open Internet Explorer again.
Your computer should now be free of the “There is a Recommended Update for this PC” malicious program. If your current antivirus allowed this malicious program on your computer, you may want to consider purchasing the full-featured version of Malwarebytes Anti-Malware to protect against these types of threats in the future.
If you are still having problems with your computer after completing these instructions, then please follow one of the steps:
If we have managed to help you, please share this guide to help others.
Источник
Всеобщий защитный характер Malwarebytes ставит его на вершину рынка бесплатных антивирусных инструментов. Основной пакет Malwarebytes, помимо работы с этими надоедливыми вирусами, также занимается PuP и рекламным ПО. С бесплатными и премиальными вариантами люкса. Тем не менее, интеграция с Windows 10 (как и со многими сторонними решениями) терпит неудачу пользователей. А именно, некоторые из них не могут обновить клиент Malwarebytes даже после нескольких попыток.
Мы провели поиск и предоставили вам несколько жизнеспособных решений. Дайте им попытку и сообщите нам, если они работают.
- Установить обновления вручную
- Проверьте брандмауэр Windows
- Переустановите Malwarebytes
- Обновление Windows
1: установить обновления вручную
Во-первых, нам нужно сделать одну вещь, прежде чем устанавливать обновления вручную. Первое, что вы должны сделать, это подтвердить, что Защитник Windows отключен. Две службы защиты от вредоносных программ с включенной защитой в реальном времени и работающие одновременно, не совсем хорошая идея.
При первоначальной установке система автоматически отключает Защитника, но это может измениться после серьезного обновления. Перейдите к Защитнику Windows> Защита от вирусов и угроз> Параметры защиты от вирусов и угроз и отключите постоянную защиту.
После этого перезагрузите компьютер и откройте Malwarebytes. Перейдите в «Настройки» и на вкладке «Приложение» нажмите «Установить обновления приложения».
2. Проверьте брандмауэр Windows
Еще одна вещь, которую стоит проверить — это брандмауэр Windows. Как мы уже упоминали на предыдущем шаге, серьезное обновление действительно может внести некоторые существенные изменения в вашу систему. Это включает в себя вмешательство в ваши разрешения брандмауэра. По этой причине мы рекомендуем вам перейти к настройкам брандмауэра Windows и разрешить Malwarebytes свободно общаться с сервером обновлений.
Вот что вам нужно сделать:
- На панели поиска Windows введите Разрешить и откройте Разрешить приложение через брандмауэр Windows .

- Нажмите на кнопку « Изменить настройки ».
- Нажмите « Разрешить другое приложение ».
- Перейдите в папку установки Malwarebytes и добавьте исполняемый файл .
- Разрешить ему свободно общаться с государственными и частными сетями.
- Подтвердите изменения и перезагрузите компьютер.
- Попробуйте обновить Malwarebytes еще раз.

3: переустановите Malwarebytes
Теперь, если вы когда-либо устанавливали предыдущую версию Malwarebytes (или любого другого программного обеспечения для защиты от вредоносных программ), оставшиеся связанные файлы могут повредить текущую установку. Таким образом, некоторые из основных функций могут работать не так, как задумано. Это требует полной переустановки приложения.
Но, как мы уже говорили, антивирус интегрируется гораздо глубже, чем ваша обычная сторонняя программа. Вот почему хорошие люди из Malwarebytes предлагают специальный инструмент, который должен помочь вам очистить все связанные файлы. После этого вы можете установить пакет Malwarebytes и, надеюсь, иметь возможность обновиться без проблем.
Вот что вам нужно сделать:
- Загрузите Malwarebytes Cleanup Utility здесь.
- Запустите инструмент и примите условия лицензионного соглашения.
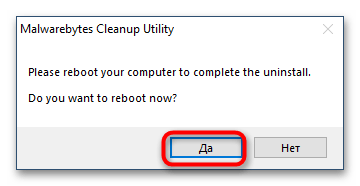
- Утилита запустит процедуру удаления и, в конце концов, запросит перезагрузку.
- Перезагрузите компьютер.
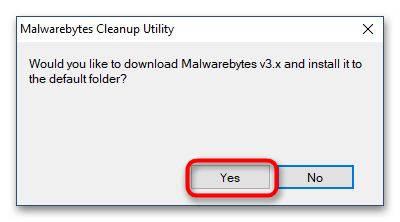
- После перезагрузки выберите установку последней версии Malwarebytes.
Примечание: если у вас была бесплатная версия Malwarebytes, мы настоятельно рекомендуем вам приобрести полную версию, так как она поддерживается намного лучше, чем бесплатная версия.
Наконец, вы можете использовать файл журнала, чтобы поделиться своими проблемами с разработчиком. Вы можете опубликовать его в виде вложения на официальном форуме. Если предыдущие шаги не смогли решить проблему, конечно.
4: обновить Windows
И, как последнее замечание, мы должны напомнить вам о наиболее распространенной причине неудачных обновлений. Крупные обновления Windows 10 известны как взломанные сторонние инструменты. Большинство сообщений о проблемах обновления Malwarebytes появилось после серьезного обновления (в частности, Creators Update).
Имея это в виду, вы должны установить системные исправления и обновления как можно скорее. Надеюсь, один из них поможет вам решить проблему под рукой. Чтобы убедиться, что все обновления установлены, мы рекомендуем вам проверить наличие обновлений вручную. Выполните следующие действия, чтобы проверить наличие обновлений для Windows 10:
- Откройте Настройки .
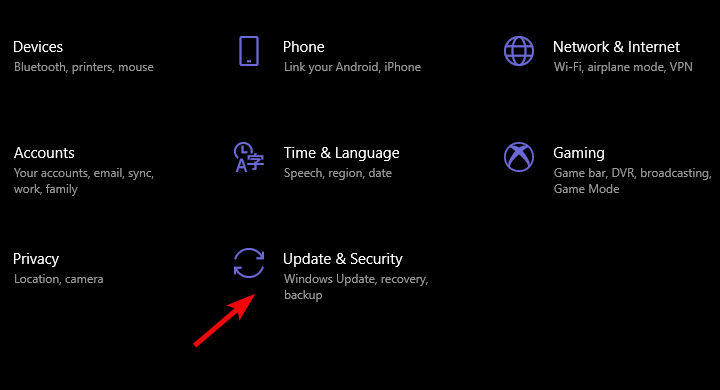
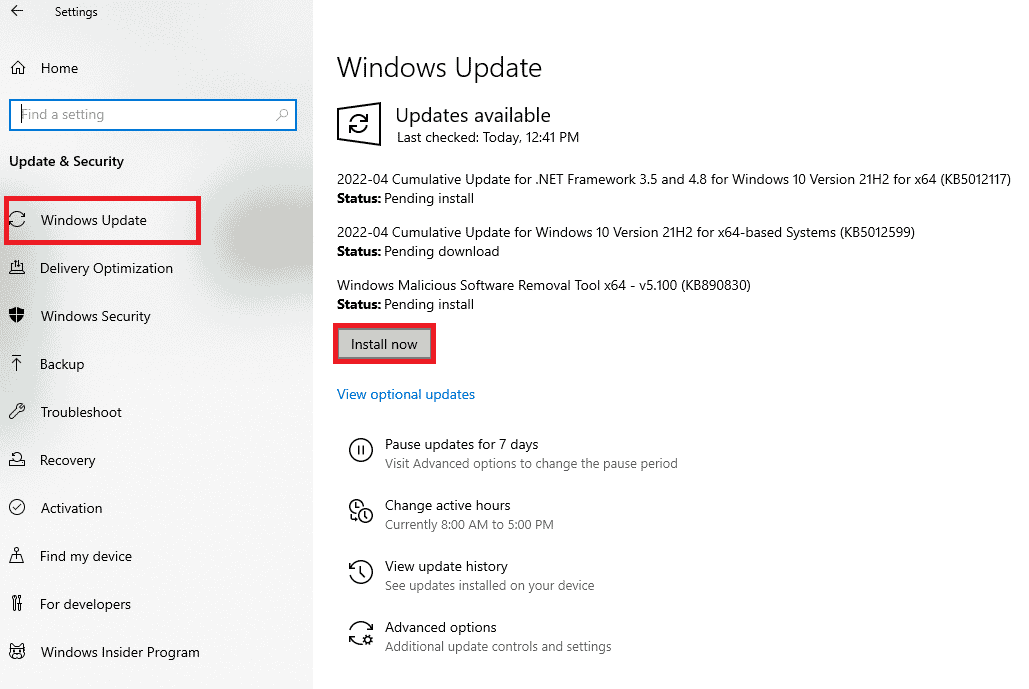
- Выберите « Обновление и безопасность» .
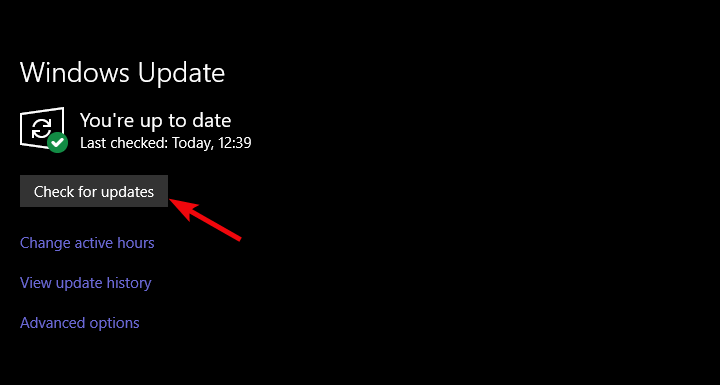
- Нажмите Проверить наличие обновлений .
- Установите все доступные обновления и перезагрузите компьютер.
- Проверьте, может ли клиент Malwarebytes обновить.


Вот и все. Если вы все еще страдаете от той же ошибки и не можете получить последние обновления от Malwarebytes, не забудьте поделиться своими проблемами на их специализированном форуме. Кроме того, если у вас есть какие-либо вопросы или предложения, не стесняйтесь размещать их в разделе комментариев ниже.
by Aleksandar Ognjanovic
Aleksandar’s main passion is technology. With a solid writing background, he is determined to bring the bleeding edge to the common user. With a keen eye, he always… read more
Updated on March 1, 2022
- Many users had encountered the error message: Malwarebytes won’t install in Windows 10.
- This error can be fixed once a user installs the latest updates for the Malwarebytes software.
- Be sure to check the settings in your Windows Firewall if this anti-malware program doesn’t update.
- Using third-party software fixes the error when Malwarebytes fails to update.
The all-around protective nature of Malwarebytes put it at the top of the free antivirus tools market. The main Malwarebytes suite, besides dealing with those pesky viruses, also deals with PuPs and adware.
With both free and premium variations of the suite. However, the integration with Windows 10 (like with so many 3rd-party solutions) is failing users.
Namely, some of them are unable to update the Malwarebytes client, even after multiple tries.
We conveyed a search and provided you with some viable solutions. Give them a try and inform us if they work.
- Install updates manually
- Check Windows Firewall
- Use third-party software
- Update Windows
- Reinstall Malwarebytes
How can I fix the Malwarebytes fails to update error?
1. Install updates manually
Firstly, we need you to do one thing before installing updates manually. The first thing you should do is confirm that Windows Defender is disabled.
Two antimalware services with real-time protection enabled and working at the same time isn’t exactly a good idea.
With the initial installation, the system disables the Defender automatically, but that can change after a major update. Navigate to Windows Defender > Virus & threat protection > Virus & threat protection settings and disable Real-time protection.
After that, restart your PC and open Malwarebytes. Navigate to Settings and, under the Application tab, click Install application updates.
2. Check Windows Firewall
- In the Windows Search bar, type Allow and open Allow an app through Windows Firewall.

- Click on the Change settings button.
- Click Allow another app.
- Navigate to the Malwarebytes installation folder and add the executable file.

- Allow it to communicate freely with Public and Private networks.
- Confirm changes and restart your PC.
- Try updating Malwarebytes again.

Another thing worth inspecting is Windows Firewall. As we already mentioned in the preceding step, a major update can really make some essential changes to your system.
This includes meddling with your Firewall permissions. Some users reported instances when their VPN didn’t work as it was blocked by the Windows Firewall.
For that reason, we encourage you to navigate to Windows Firewall settings and allow Malwarebytes to freely communicate to an update server.
3. Use third-party software
When you encounter the issue when Malwarebytes won’t install in Windows 10, we recommend third-party software that will solve this problem.
There is a chance your operating system might be infected with viruses or malware.
Hence, using professional tools should clean your computer of any malicious apps and leave it in an optimized state.
Once the software has scanned and cleaned your Windows 10 of viruses, you are free to either use Malwarebytes again or keep using this application.
Some PC issues are hard to tackle, especially when it comes to corrupted repositories or missing Windows files. If you are having troubles fixing an error, your system may be partially broken.
We recommend installing Restoro, a tool that will scan your machine and identify what the fault is.
Click here to download and start repairing.
Whenever you browse the Internet, there are lots of online threats that can damage your operating system and cause your computer to have a poor performance.
Your privacy may also be compromised by unauthorized third parties.
You and all other modern users should benefit from advanced online protection against malicious software. Do not worry about your privacy when you use the online space to work, communicate, shop or do online banking with this performant solution.
⇒ Get ESET Internet Security
4. Update Windows
- Open Settings.
- Choose Update & Security.

- Click Check for updates.

- Install all available updates and reboot your PC.
- Check whether the Malwarebytes client can update.
And, as a final note, we must remind you of the most usual cause of failing updates. Major Windows 10 updates are known for breaking third-party tools.
Most reports regarding the Malwarebytes updating issues emerged after a major update (specifically, Creators Update).
With that in mind, you should install system patches and updates as soon as possible. Hopefully, one of them should help you resolve the issue at hand.
To make sure that all updates are on point, we encourage you to check for updates manually. Follow the steps shown in this solution to check for Windows 10 updates.
5. Reinstall Malwarebytes
- Download Malwarebytes Cleanup Utility.
- Run the tool and accept the EULA terms.
- The tool with start with the uninstall procedure and will, eventually, ask for a reboot.
- Restart your PC.
- After the restart, choose to install the latest version of Malwarebytes.
Now, if you’ve ever installed a previous version of Malwarebytes (or any other antimalware software), the remaining associated files might corrupt the current installation.
Thus, some of the main features might not work as intended. This requires a complete reinstallation of the application.
But, as we already stated, the antivirus integrates much deeper than your usual third-party program. That’s why the good folks from Malwarebytes offer a special tool that should help you clean all the associated files.
Afterward, you can install the Malwarebytes suite and, hopefully, be able to update without any issues.
Finally, you can use the log file to share your concerns with the developer. You can post it as an attachment on the official forum. If the prior steps failed to resolve the issue, of course.
⇒ Get Malwarebytes
That’s it. If you’re still plagued by the same error and unable to retrieve the latest updates from Malwarebytes, make sure to share your concerns on their dedicated forum.
In addition, if you have any questions or suggestions, don’t shy away from posting them in the comments section below.
 Protect your PC now!
Don’t leave your PC unprotected! Get one of the best antivirus tools in the world and navigate the Internet without worries! ESET Antivirus comes with all the security tools that you may ever need to protect your data and privacy, including:
- Webcam protection
- Multi-platform support
- Low system requirements
- Top-notch anti-malware protection
![]()
Newsletter
by Aleksandar Ognjanovic
Aleksandar’s main passion is technology. With a solid writing background, he is determined to bring the bleeding edge to the common user. With a keen eye, he always… read more
Updated on March 1, 2022
- Many users had encountered the error message: Malwarebytes won’t install in Windows 10.
- This error can be fixed once a user installs the latest updates for the Malwarebytes software.
- Be sure to check the settings in your Windows Firewall if this anti-malware program doesn’t update.
- Using third-party software fixes the error when Malwarebytes fails to update.
The all-around protective nature of Malwarebytes put it at the top of the free antivirus tools market. The main Malwarebytes suite, besides dealing with those pesky viruses, also deals with PuPs and adware.
With both free and premium variations of the suite. However, the integration with Windows 10 (like with so many 3rd-party solutions) is failing users.
Namely, some of them are unable to update the Malwarebytes client, even after multiple tries.
We conveyed a search and provided you with some viable solutions. Give them a try and inform us if they work.
- Install updates manually
- Check Windows Firewall
- Use third-party software
- Update Windows
- Reinstall Malwarebytes
How can I fix the Malwarebytes fails to update error?
1. Install updates manually
Firstly, we need you to do one thing before installing updates manually. The first thing you should do is confirm that Windows Defender is disabled.
Two antimalware services with real-time protection enabled and working at the same time isn’t exactly a good idea.
With the initial installation, the system disables the Defender automatically, but that can change after a major update. Navigate to Windows Defender > Virus & threat protection > Virus & threat protection settings and disable Real-time protection.
After that, restart your PC and open Malwarebytes. Navigate to Settings and, under the Application tab, click Install application updates.
2. Check Windows Firewall
- In the Windows Search bar, type Allow and open Allow an app through Windows Firewall.
- Click on the Change settings button.
- Click Allow another app.
- Navigate to the Malwarebytes installation folder and add the executable file.
- Allow it to communicate freely with Public and Private networks.
- Confirm changes and restart your PC.
- Try updating Malwarebytes again.
Another thing worth inspecting is Windows Firewall. As we already mentioned in the preceding step, a major update can really make some essential changes to your system.
This includes meddling with your Firewall permissions. Some users reported instances when their VPN didn’t work as it was blocked by the Windows Firewall.
For that reason, we encourage you to navigate to Windows Firewall settings and allow Malwarebytes to freely communicate to an update server.
3. Use third-party software
When you encounter the issue when Malwarebytes won’t install in Windows 10, we recommend third-party software that will solve this problem.
There is a chance your operating system might be infected with viruses or malware.
Hence, using professional tools should clean your computer of any malicious apps and leave it in an optimized state.
Once the software has scanned and cleaned your Windows 10 of viruses, you are free to either use Malwarebytes again or keep using this application.
Some PC issues are hard to tackle, especially when it comes to corrupted repositories or missing Windows files. If you are having troubles fixing an error, your system may be partially broken.
We recommend installing Restoro, a tool that will scan your machine and identify what the fault is.
Click here to download and start repairing.
Whenever you browse the Internet, there are lots of online threats that can damage your operating system and cause your computer to have a poor performance.
Your privacy may also be compromised by unauthorized third parties.
You and all other modern users should benefit from advanced online protection against malicious software. Do not worry about your privacy when you use the online space to work, communicate, shop or do online banking with this performant solution.
⇒ Get ESET Internet Security
4. Update Windows
- Open Settings.
- Choose Update & Security.
- Click Check for updates.
- Install all available updates and reboot your PC.
- Check whether the Malwarebytes client can update.
And, as a final note, we must remind you of the most usual cause of failing updates. Major Windows 10 updates are known for breaking third-party tools.
Most reports regarding the Malwarebytes updating issues emerged after a major update (specifically, Creators Update).
With that in mind, you should install system patches and updates as soon as possible. Hopefully, one of them should help you resolve the issue at hand.
To make sure that all updates are on point, we encourage you to check for updates manually. Follow the steps shown in this solution to check for Windows 10 updates.
5. Reinstall Malwarebytes
- Download Malwarebytes Cleanup Utility.
- Run the tool and accept the EULA terms.
- The tool with start with the uninstall procedure and will, eventually, ask for a reboot.
- Restart your PC.
- After the restart, choose to install the latest version of Malwarebytes.
Now, if you’ve ever installed a previous version of Malwarebytes (or any other antimalware software), the remaining associated files might corrupt the current installation.
Thus, some of the main features might not work as intended. This requires a complete reinstallation of the application.
But, as we already stated, the antivirus integrates much deeper than your usual third-party program. That’s why the good folks from Malwarebytes offer a special tool that should help you clean all the associated files.
Afterward, you can install the Malwarebytes suite and, hopefully, be able to update without any issues.
Finally, you can use the log file to share your concerns with the developer. You can post it as an attachment on the official forum. If the prior steps failed to resolve the issue, of course.
⇒ Get Malwarebytes
That’s it. If you’re still plagued by the same error and unable to retrieve the latest updates from Malwarebytes, make sure to share your concerns on their dedicated forum.
In addition, if you have any questions or suggestions, don’t shy away from posting them in the comments section below.
Protect your PC now!
Don’t leave your PC unprotected! Get one of the best antivirus tools in the world and navigate the Internet without worries! ESET Antivirus comes with all the security tools that you may ever need to protect your data and privacy, including:
- Webcam protection
- Multi-platform support
- Low system requirements
- Top-notch anti-malware protection
![]()
Newsletter
На чтение 6 мин. Просмотров 694 Опубликовано 28.04.2021
Malwarebytes – отличный антивирусный сканер с большой базой данных, который стал популярным благодаря своей эффективности и способности находить вирусы там, где другие сканеры вредоносных программ не работают. Однако с инструментом есть некоторые проблемы. Пользователи сообщают, что Malwarebytes вообще не открывается в Windows, даже без отображения сообщения об ошибке. 
Опыт пользователей указал на несколько полезных методов, которые могут решить эту проблему и снова заставить Malwarebytes работать правильно. Ознакомьтесь с ними ниже и убедитесь, что вы внимательно следуете инструкциям, чтобы, надеюсь, решить проблему.
Содержание
- Что вызывает проблемы с открытием Malwarebytes в Windows?
- Решение 1. Возможные инфекции
- Решение 2. Выполните чистую установку of Malwarebytes
- Решение 3. Используйте другую учетную запись пользователя
Что вызывает проблемы с открытием Malwarebytes в Windows?
Существует несколько различных причин, по которым Malwarebytes может не открываться на вашем компьютере. Причины варьируются от серьезных до мелких, и важно действовать немедленно. Ознакомьтесь со списком возможных причин, который мы подготовили ниже, и определите только ту, которая может соответствовать вашему сценарию:
- Заражение вредоносным ПО – Если ваш компьютер был заражен вредоносным ПО, возможно, вирус вообще заблокировал запуск исполняемого файла mbam.exe. Переименование может помочь решить проблему.
- Поврежденная учетная запись пользователя . Использование поврежденной или неисправной учетной записи пользователя в вашей ОС Windows довольно опасно и может помешать вам используя множество различных программ, в том числе Malwarebytes. Попробуйте переключиться на другой профиль пользователя!
Решение 1. Возможные инфекции
Вредоносные файлы часто мешают запускать различные инструменты защиты от вредоносных программ, просто блокируя запуск исполняемых файлов с одинаковыми именами. Это означает, что если вы действительно заражены, вы не сможете открыть Malwarebytes, потому что имя его исполняемого файла заблокировано вредоносным ПО. Этого можно избежать, просто переименовав исполняемый файл.
- Найдите папку установки инструмента вручную, щелкнув правой кнопкой мыши его ярлык на рабочем столе или в другом месте и выбрав Открыть файл расположение в меню.
- Найдите файл mbam. exe в папке установки Malwarebytes, щелкните его правой кнопкой мыши и выберите в контекстном меню параметр Переименовать .

- Убедитесь, что вы выбрали имя, которое соответствует некоторым основным процессам Windows, таким как exe или explorer.exe. , чтобы убедиться, что имя файла не заблокировано вирусом.
- Попробуйте запустить Malwarebytes, чтобы проверить, открывается ли он. Выберите параметр Сканировать , доступный на главном экране инструмента.

- Malwarebytes, вероятно, запустит процесс обновления, чтобы обновить свою вирусную базу данных, а затем продолжит сканирование. Подождите, пока процесс не завершится, что определенно может занять некоторое время. Если на вашем компьютере обнаружено вредоносное ПО, подтвердите его удаление или карантин .
- Перезагрузите компьютер после завершения процесса сканирования и проверьте, не возникают ли проблемы с вредоносным ПО на вашем компьютере!
Решение 2. Выполните чистую установку of Malwarebytes
Многие пользователи сказали, что переустановка Malwarebytes с нуля навсегда устранила их проблему, и это то, что вы должны попробовать как самый безопасный и самый длительный метод. Однако, если вы приобрели Премиум-версии инструмента вам нужно будет найти способ получить свой идентификатор активации и ключ.
- Введите « regedit » в Поиск панель, к которой вы должны получить доступ, щелкнув меню «Пуск» или кнопку «Поиск» рядом с ним. Вы также можете использовать комбинацию клавиш Windows + R , которая должна открывать диалоговое окно «Выполнить» , где вы можете ввести « regedit ”И нажмите

- Используйте одно из мест в реестре, представленных ниже, для получения вашего идентификатора и ключа, в зависимости от архитектуры вашего ПК:
Местоположение для Windows x86 32 -Bit
HKEY_LOCAL_MACHINE SOFTWARE Malwarebytes 'Anti-Malware
Расположение для 64-разрядной версии Windows x64
HKEY_LOCAL_MACHINE SOFTWARE Wow6432Node Malwarebytes 'Anti-Malware
После того, как вы получили свой идентификатор и ключ, вы можете приступить к фактическому процессу переустановки. Внимательно следуйте инструкциям, если вы хотите продолжить работу с версией Premium после удаления.
- Откройте MBAM >> Моя учетная запись и нажмите Деактивировать . Перейдите в Настройки >> Расширенные настройки и снимите флажок рядом с параметром « Включить модуль самозащиты ».

- Закройте MBAM и загрузите « mbam-clean.exe »С сайта Malwarebytes (загрузка начнется сразу после нажатия кнопки). Закройте все открытые программы и временно отключите все другие инструменты безопасности, которые могут быть у вас открыты.
- Запустите инструмент mbam-clean.exe и следуйте инструкциям, которые появятся на экран. При появлении соответствующего запроса перезагрузите компьютер.

- Загрузите последнюю версию MBAM со своего сайта и установите ее, следуя инструкциям на экране..
- Снимите флажок рядом с Пробной версией . После запуска программы нажмите кнопку с надписью Активация . Если вы использовали пробную версию, не помешает снова загрузить пробную версию и пропустить следующий шаг!
- Скопируйте и вставьте ID и Ключ , полученный вами из реестра, в диалоговом окне, которое должно автоматически активировать вашу лицензию.

- Наслаждайтесь использованием Malwarebytes Anti-Malware Premium и, надеюсь, ошибка, касающаяся защиты в реальном времени, исчезнет.
Если это не так. используя версию MBAM Premium или Pro, просто выполните шаги 3-6 и наслаждайтесь обновленной версией MBAM без ошибок.
Решение 3. Используйте другую учетную запись пользователя
Эта проблема часто возникает из-за поврежденной учетной записи пользователя, которую вы используете для входа в Windows. Эта проблема может проявляться по-разному при использовании других программ, и всегда лучше просто создать новую учетную запись пользователя и просто продолжать использовать все. Ваша учетная запись пользователя часто привязана только к вашим личным файлам, которые можно довольно легко перенести.
- Используйте комбинацию клавиш Windows + R в , чтобы открыть диалоговое окно Выполнить . Введите « cmd » в открывшемся диалоговом окне и используйте комбинацию клавиш Ctrl + Shift + Enter для командной строки администратора.

- Введите команду ниже, чтобы перейти к пользователю Учетные записи . Не забудьте после этого нажать Enter:
control userpasswords2
- Нажмите Добавить и следуйте инструкциям, которые появятся на экране. Убедитесь, что вы создали учетную запись не Microsoft, выбрав параметр Войти без учетной записи Microsoft (не рекомендуется) в нижней части окна.

- Нажмите Далее и подтвердите свой выбор, нажав Локальная учетная запись в следующем окне. После этого введите другую информацию, такую как имя и пароль, и перейдите по ней.
- После создания новой учетной записи вернитесь в окно командной строки и используйте следующую команду для выхода из системы. текущая учетная запись:
shutdown –L
- Войдите в учетную запись, которую вы только что создали, и теперь Malwarebytes должен запуститься без проблем!
Содержание
- Способ 1: Отключение антивируса
- Способ 2: Удаление старой версии Malwarebytes
- Способ 3: Переименование файла установщика
- Способ 4: Установка в безопасном режиме
- Вопросы и ответы
Способ 1: Отключение антивируса
Одной из вероятных причин проблем с установкой Malwarebytes Anti-malware может быть конфликт программы с установленным на компьютере сторонним антивирусом. Удалять его не нужно, просто отключите на время защиту в режиме реального времени и попробуйте установить Malwarebytes. Однако, если вы собираетесь использовать Malwarebytes в качестве основного антивируса, уже установленную антивирусную программу всё же лучше удалить. Исключение составляет встроенный «Защитник Windows», который является частью операционной системы.
Если вы столкнулись с проблемой при установке новой версии Malwarebytes поверх старой, удалите последнюю, воспользовавшись фирменной утилитой Malwarebytes Clean Uninstall Tool, предназначенной для тщательной деинсталляции программных продуктов Malwarebytes. Последняя версия инструмента была выпущена в 2018 году, но работает она столь же эффективно.
Скачать Clean Uninstall Tool с официального сайта
- Скачав утилиту по прямой ссылке с сервера разработчика, запустите ее от имени администратора. Нажмите в открывшемся окошке «Yes».
- Дождитесь завершения фоновой процедуры деинсталляции и перезагрузите компьютер, нажав в окошке Clean Uninstall Tool кнопку «Да».
- После загрузки вам будет предложено скачать актуальную версию Malwarebytes и установить ее в папку по умолчанию. Нажмите в окошке с сообщением кнопку «Yes».

Способ 3: Переименование файла установщика
Некоторые вредоносные программы могут блокировать установку Malwarebytes, используя фильтр возможных названий исполняемого файла антивируса. Обойти это ограничение можно путем простого переименования файла установки MBSetup. Название файлу можно дать произвольное. Если приложение все равно не устанавливается (не запускается), попробуйте переименовать расширение его исполняемого файла, заменив EXE на COM, SCR, BAT или PIF.
Способ 4: Установка в безопасном режиме
В случае проблем с установкой антивируса в штатном режиме можно попробовать установить программу в безопасном режиме, минимизировав влияние на процесс инсталляции вредоносного программного обеспечения.
Подробнее: Способы входа в безопасный режим Windows 10
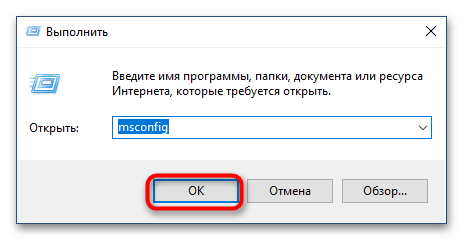
- Вызовите окошко быстрого выполнения команд нажатием комбинации клавиш Win + R и выполните в нем команду
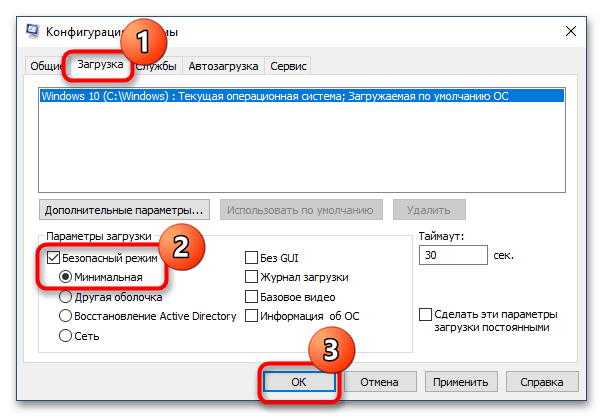
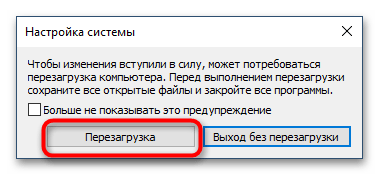
msconfig. - Переключитесь в открывшемся окне утилиты «Конфигурация системы» на вкладку «Загрузка», активируйте опцию «Безопасный режим» и нажмите «OK».
- Подтвердите действие в диалоговом окошке.
- Запустите установочный файл Malwarebytes и установите программу, проследовав указаниям мастера-инсталлятора.
- Если установка завершится без ошибок, опять запустите утилиту «Конфигурация системы» и на этот раз на вкладке «Общие» выберите «Обычный запуск». Перезагрузите компьютер.
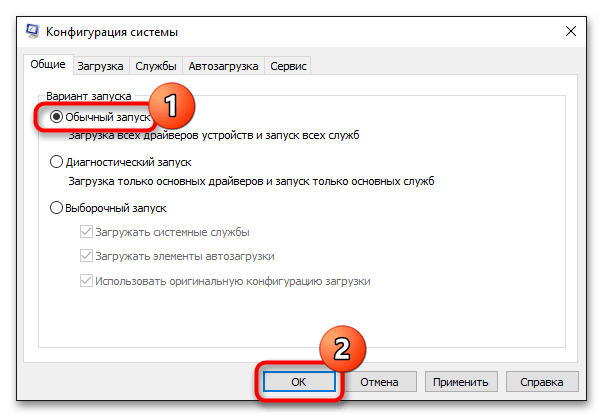
Если рассматриваемая проблема не связана с повреждением файлов самой операционной системы или файла установщика Malwarebytes, программа должна установиться.

Еще статьи по данной теме:
Помогла ли Вам статья?
Malwarebytes, если вы используете программное обеспечение для защиты ПК, которое работает аналогично антивирусной программе. Это служебное программное обеспечение поставляется с бесплатной пробной версией и премиум-версией. Обе версии обеспечивают постоянную защиту вашего ПК. Однако программу необходимо регулярно обновлять, чтобы защитить вашу систему. Если у вас есть проблемы с обновлением Malwarebytes на вашем ПК, не беспокойтесь! Мы предлагаем вам идеальное руководство, которое решит ваш вопрос о том, как исправить проблему с обновлением Malwarebytes. Итак, продолжайте читать статью!
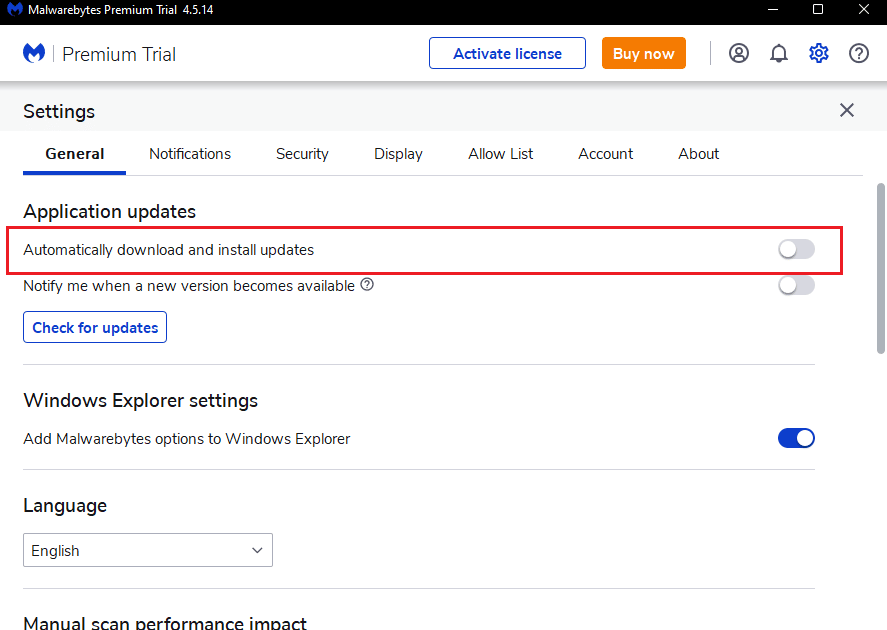
Утилита Malwarebytes имеет различные функции для защиты вашего ПК от вирусов и вредоносных программ. Он также имеет функцию конфиденциальности в Интернете для безопасного просмотра Интернета из веб-браузера. Но приложение нужно регулярно обновлять. Если вы столкнулись с проблемой, что Malwarebytes не обновляется в Windows 10, это может быть связано со следующими причинами.
- Автоматические обновления отключены.
- Брандмауэр Windows блокирует приложение.
- Устаревшая ОС Windows.
- Поврежденная установка приложения.
Вот методы устранения неполадок, чтобы исправить проблему с обновлением Malwarebytes.
Способ 1: включить автоматическое обновление
Чтобы решить ваш вопрос о том, как исправить проблему с отсутствием обновления вредоносных байтов, вы можете включить функцию автоматического обновления в настройках приложения. Для этого выполните следующие действия.
1. Откройте служебное приложение Malwarebytes.
2. Щелкните значок шестеренки, чтобы открыть настройки.
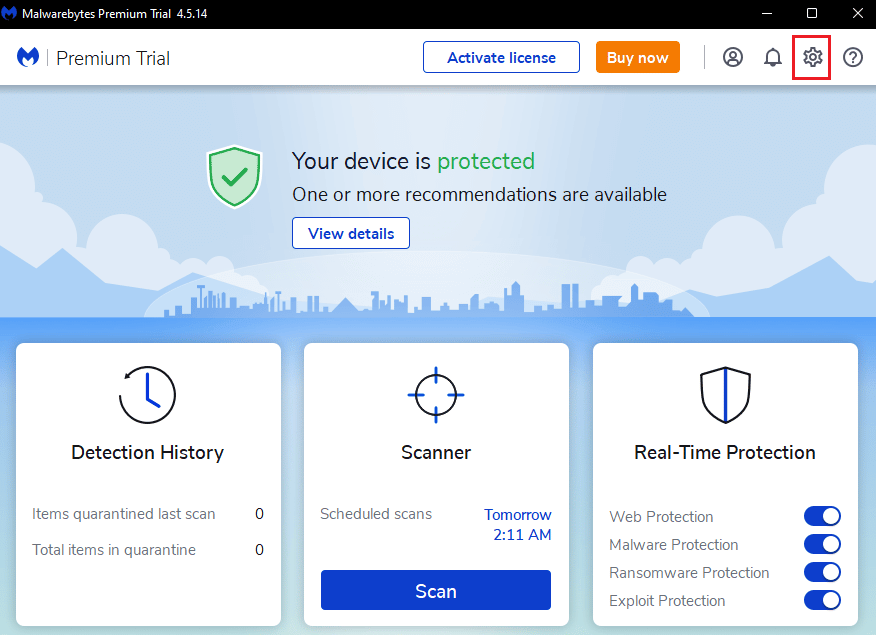
3. Теперь включите параметр «Автоматическое обновление».
4. Теперь обновления будут автоматически устанавливаться на ваш компьютер.

Способ 2: установка обновлений вручную
Если включение функции автоматического обновления не устраняет проблему с отсутствием обновлений Malwarebytes, попробуйте установить обновления вручную. Выполните шаги, перечисленные ниже, чтобы вручную загрузить и установить обновления.
1. Запустите приложение Malwarebytes.
2. Перейдите в Настройки.
3. Здесь нажмите «Проверить наличие обновлений».
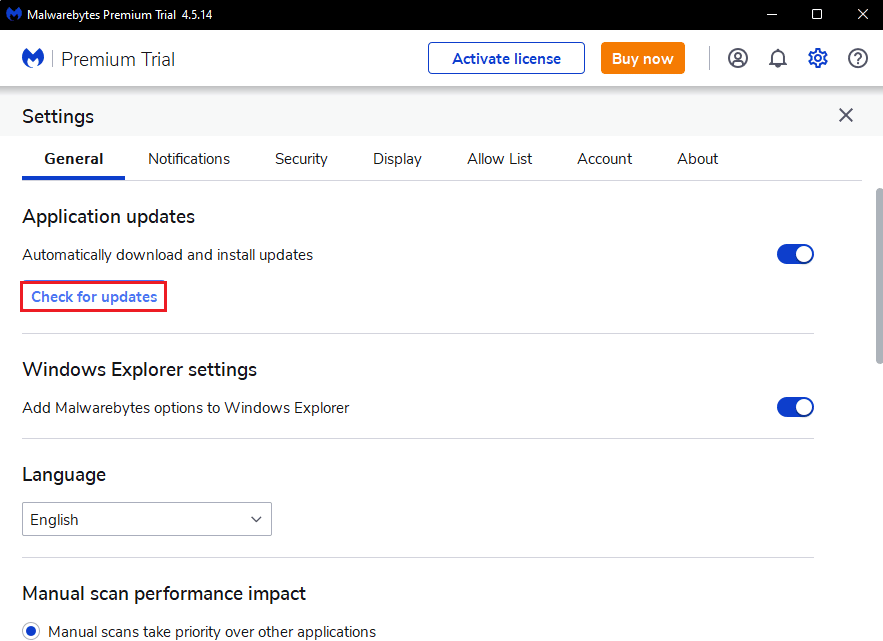
4. Malwarebytes начнет загрузку и установку обновлений, если таковые имеются.
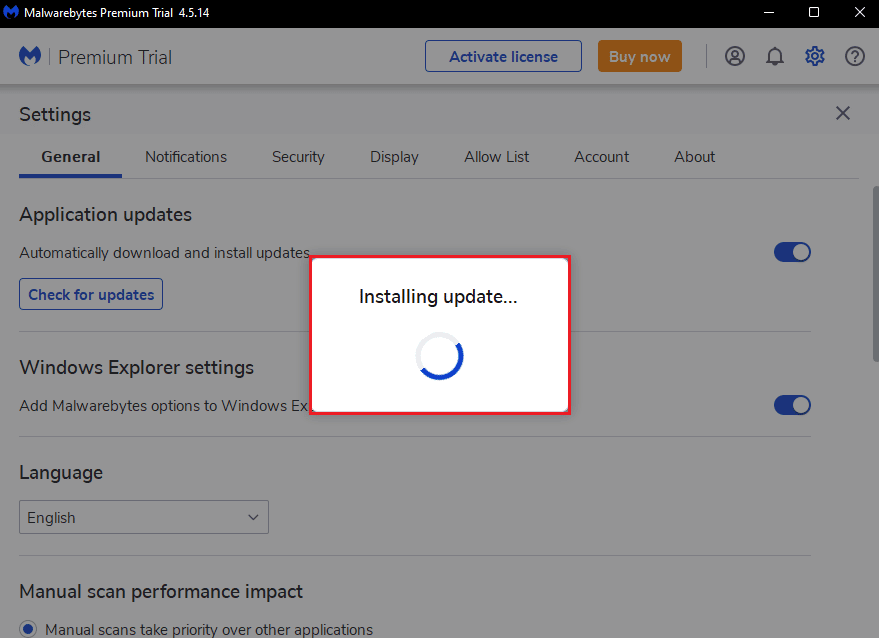
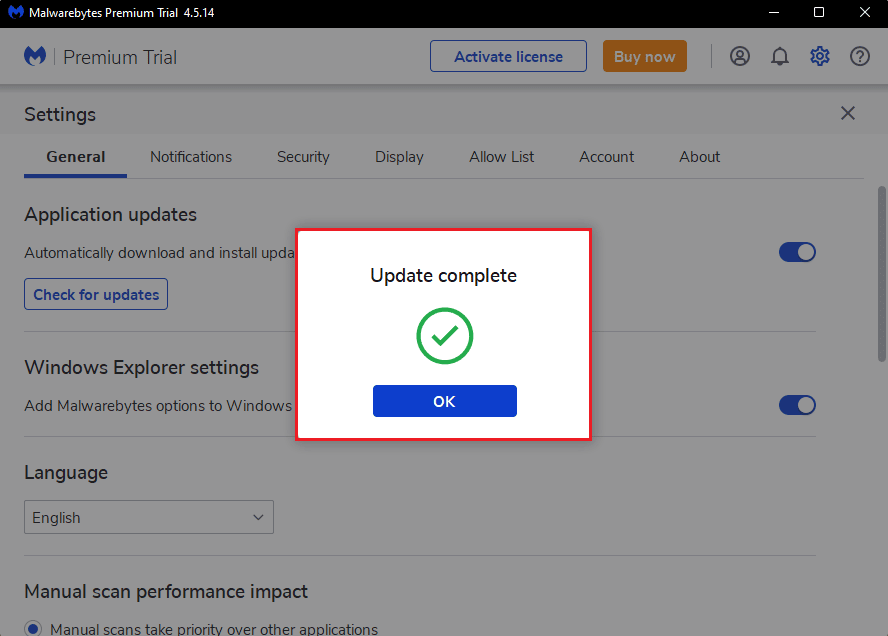
5. После установки обновления вы получите сообщение «Обновление завершено», нажмите «ОК».
Способ 3: белый список вредоносных программ в брандмауэре Windows
Если вы не можете обновить приложение Malwarebytes на своем ПК, это может быть связано с блокировкой приложения брандмауэром Windows. Иногда для защиты вашей системы от угроз брандмауэр блокирует сторонние приложения. Таким образом, внесение Malwarebytes в белый список в брандмауэре Windows может решить, что Malwarebytes не будет обновляться при проблеме с Windows 10. Чтобы разрешить Malwarebytes в брандмауэре Защитника Windows, следуйте нашему руководству Разрешить или заблокировать приложения через брандмауэр Windows и выполните шаги в соответствии с инструкциями.

Способ 4: обновить Windows
Устаревшая ОС Windows может создавать проблемы со сторонними приложениями. Если ваша операционная система не обновлена, у Malwarebytes могут быть ошибки и ошибки, которые приведут к тому, что Malwarebytes не будет обновляться при проблеме с Windows 10. Таким образом, вы должны обновлять свой компьютер. Прочтите наше руководство о том, как загрузить и установить последнее обновление Windows 10.
Способ 5: переустановите Malwarebytes
Из-за поврежденной установки приложения вы можете столкнуться с проблемой отсутствия обновления Malwarebytes в Windows 10. Вы можете переустановить приложение на своем ПК, чтобы решить эту проблему.
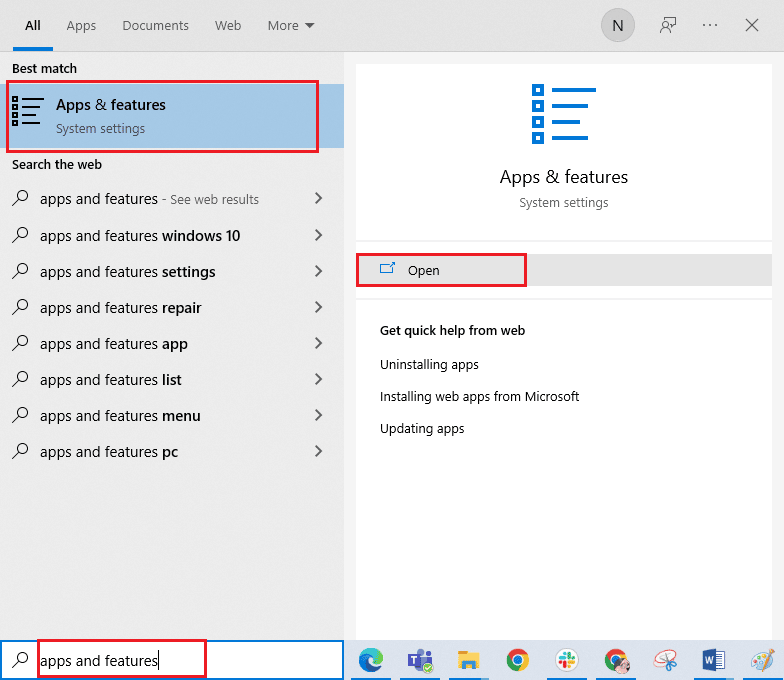
1. Нажмите клавишу Windows и введите приложения и функции, затем нажмите «Открыть».
2. Теперь найдите в списке приложение Malwarebytes и нажмите на него. Затем выберите опцию «Удалить».
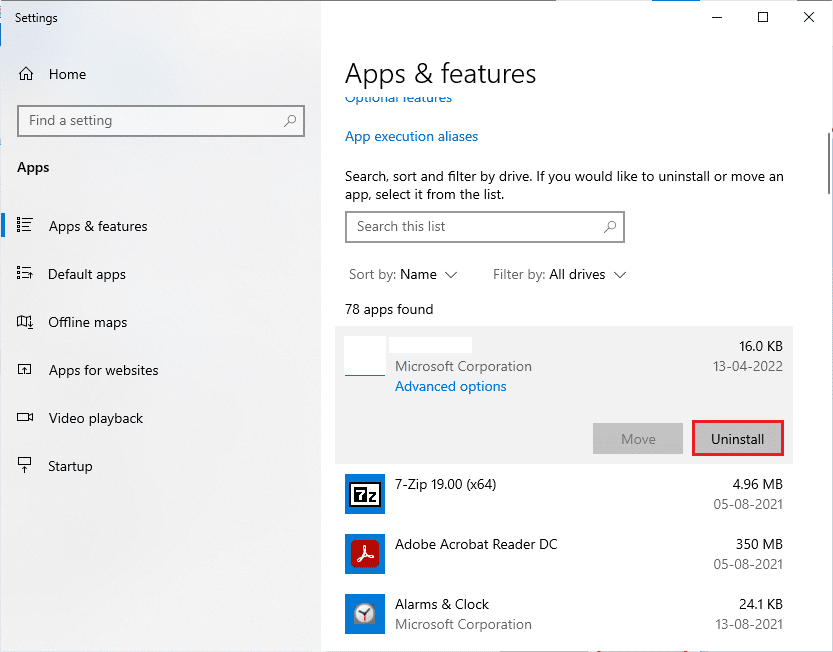
3. При появлении запроса снова нажмите «Удалить».
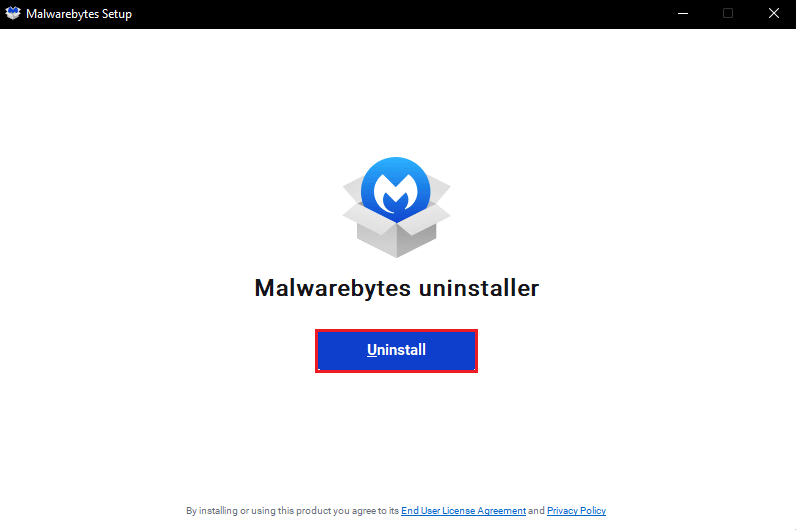
4. Нажмите «Удалить» в окне программы удаления Malwarebytes.
5. Дождитесь окончания процесса удаления.
6. Затем нажмите Готово и перезагрузите компьютер.
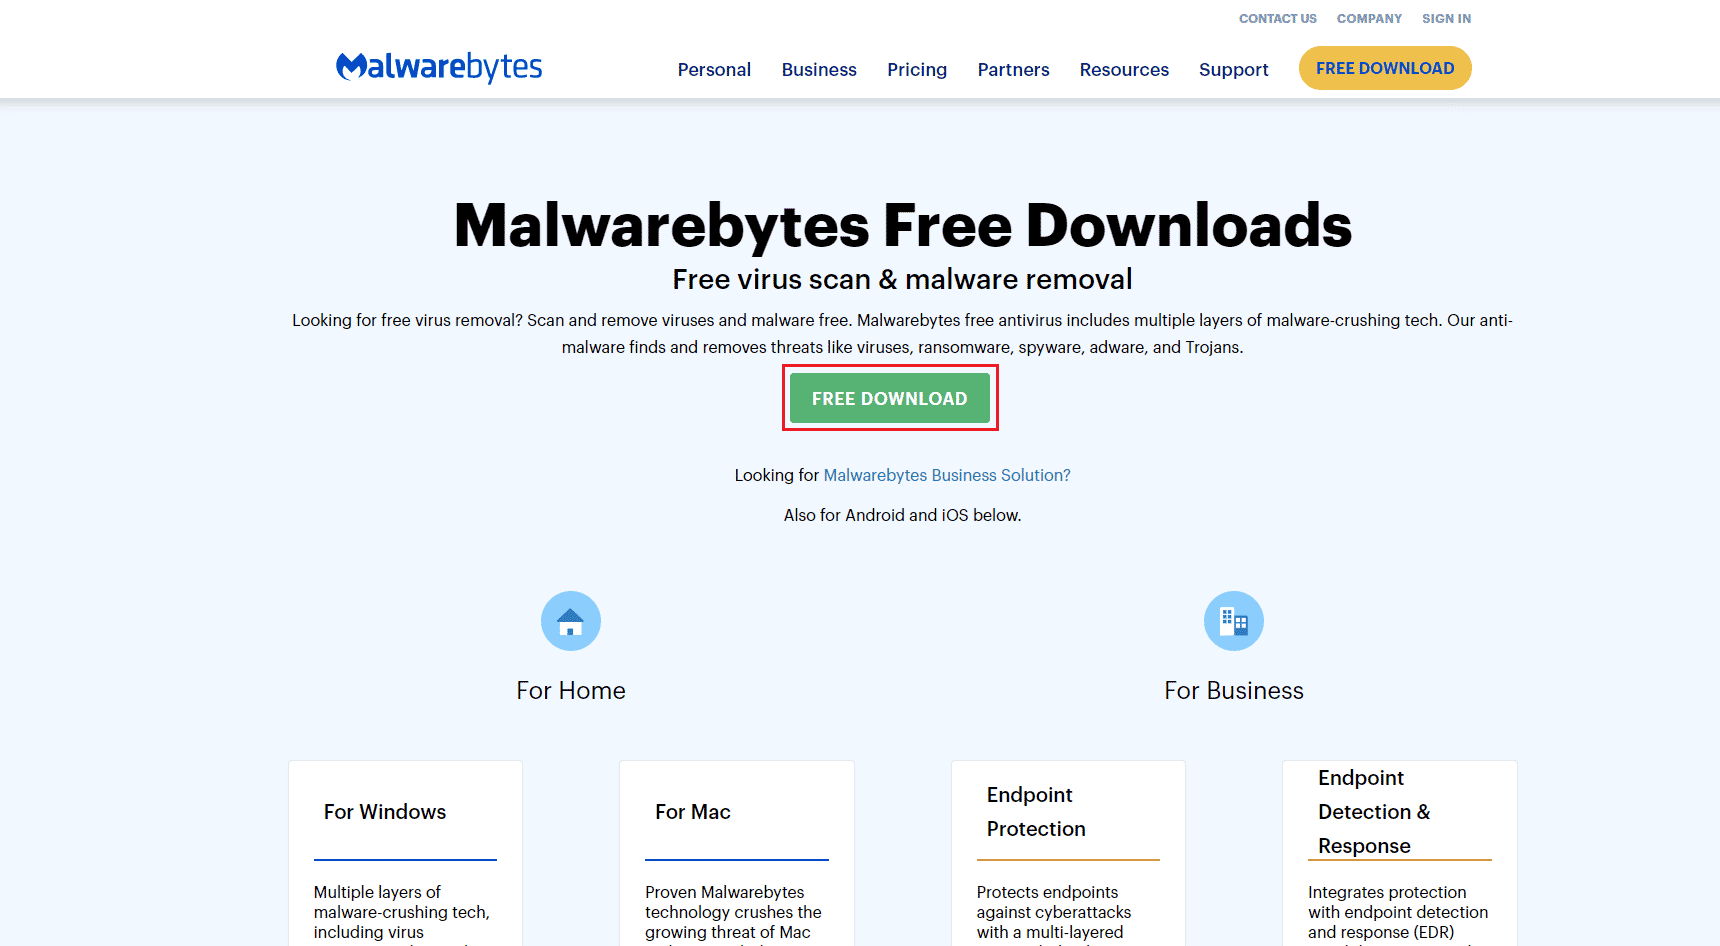
7. Теперь посетите Malwarebytes страница загрузки и загрузите последнюю версию приложения, чтобы исправить проблему с отсутствием обновления Malwarebytes.
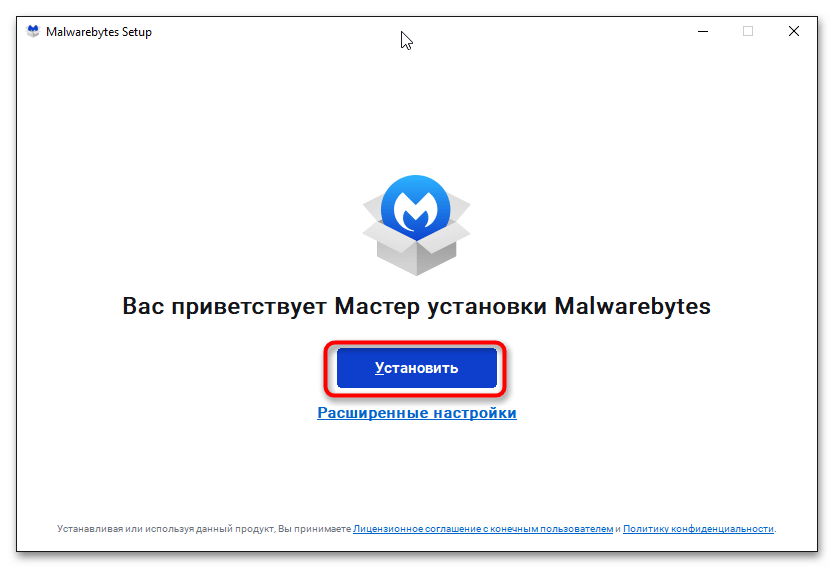
8. После загрузки запустите файл установки Malwarebytes.
9. Нажмите кнопку «Установить».
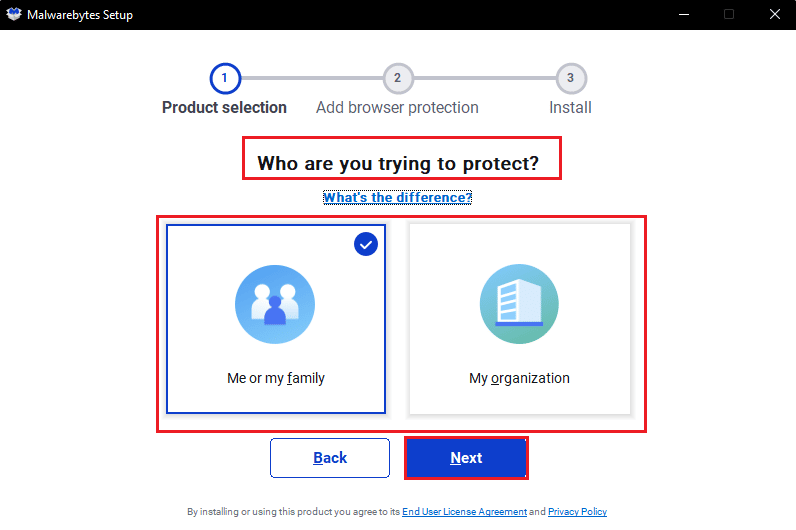
10. Выберите «Кого вы пытаетесь защитить» из предложенных вариантов и нажмите кнопку «Далее».
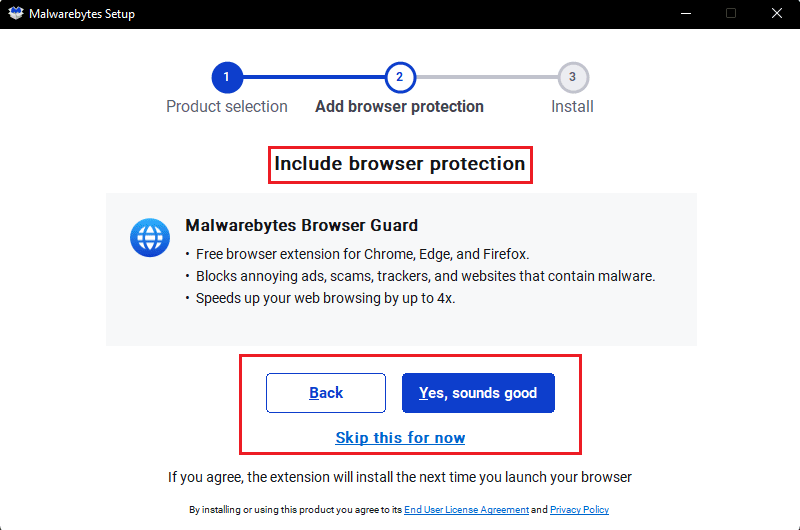
11. Вы также можете включить защиту браузера в настройках установки.
12. Дождитесь завершения процесса установки.
13. Наконец, вы получите сообщение об успешной установке, нажмите «Готово».
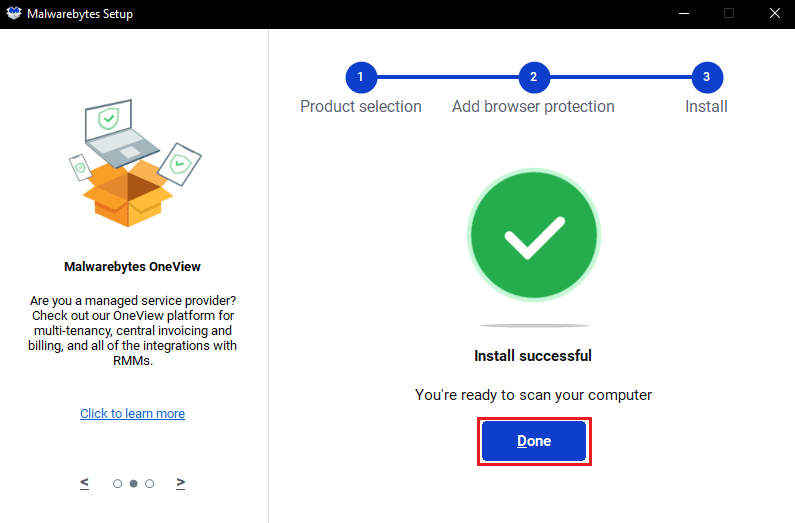
Переустановка приложения решит проблему отсутствия обновления Malwarebytes в Windows 10.
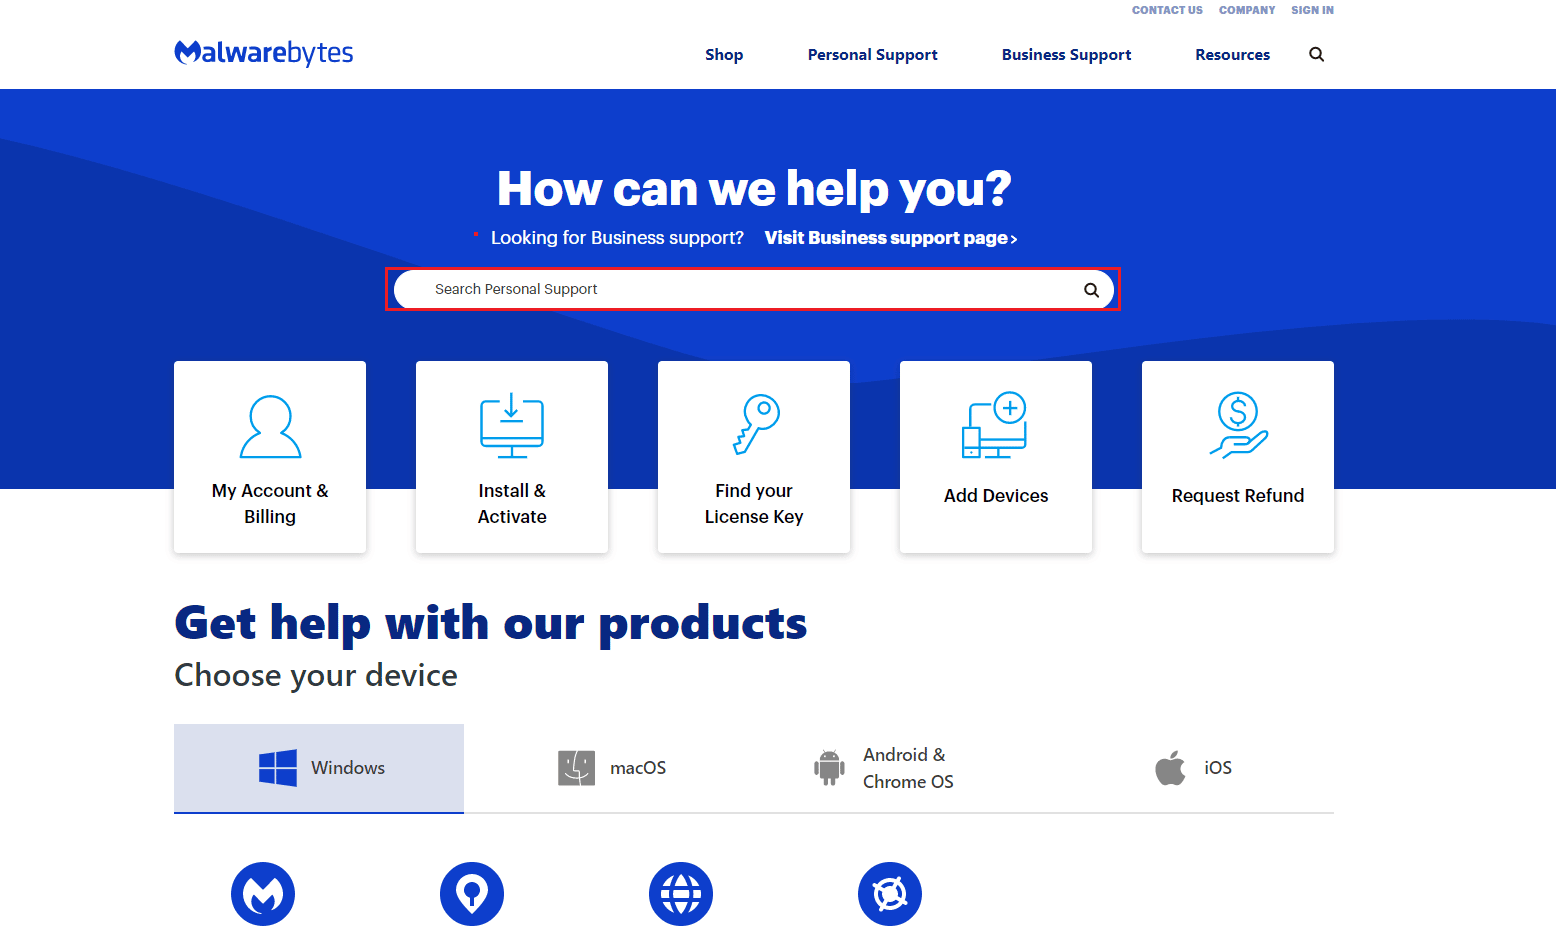
Способ 6: посетите службу поддержки Malwarebytes
Наконец, вы можете попробовать посетить Malwarebytes Страница личной поддержки и найдите свой запрос о том, как исправить проблему с обновлением вредоносных байтов. Следуйте инструкциям там, чтобы решить проблему.
***
Мы надеемся, что это руководство было полезным, и вы смогли исправить ошибку Malwarebytes, которая не обновлялась в Windows 10. Сообщите нам, какой метод сработал для вас лучше всего. Кроме того, если у вас есть какие-либо вопросы/предложения, не стесняйтесь оставлять их в разделе комментариев.
|
1 / 1 / 0 Регистрация: 14.02.2021 Сообщений: 29 |
|
|
1 |
|
|
31.10.2021, 23:22. Показов 7749. Ответов 25
Добрый вечер уважаемые эксперты киберфорума. Миниатюры
Изображения
__________________
0 |

|
11098 / 6334 / 1310 Регистрация: 06.09.2009 Сообщений: 24,072 |
|
|
31.10.2021, 23:41 |
2 |
|
Скачайте AV block remover.
0 |
|
1 / 1 / 0 Регистрация: 14.02.2021 Сообщений: 29 |
|
|
01.11.2021, 18:57 [ТС] |
3 |
|
Всё сделал. Миниатюры
0 |
|
1 / 1 / 0 Регистрация: 14.02.2021 Сообщений: 29 |
|
|
04.11.2021, 17:50 [ТС] |
4 |
|
Прошу прощения, мне кажется моя тема затерялась.
0 |
|
19094 / 14721 / 2778 Регистрация: 08.10.2012 Сообщений: 59,829 |
|
|
04.11.2021, 17:53 |
5 |
|
Avira был удален и остаточные файлы была тоже удалены в безопасном режиме программой Avira RegistryCleaner По-прежнему виден в логах. Повторите ещё раз очистку. Дополнительно: Примечание: необходимо выбрать версию, совместимую с Вашей операционной системой. Если Вы не уверены, какая версия подойдет для Вашей системы, скачайте обе и попробуйте запустить. Только одна из них запустится на Вашей системе. Нажмите кнопку Сканировать (Scan).
1 |

|
1 / 1 / 0 Регистрация: 14.02.2021 Сообщений: 29 |
|
|
04.11.2021, 18:25 [ТС] |
6 |
|
Повторил очистку в безопасном режиме, не дало результатов. Миниатюры
Вложения
0 |
|
11098 / 6334 / 1310 Регистрация: 06.09.2009 Сообщений: 24,072 |
|
|
04.11.2021, 20:56 |
7 |
|
1. Выделите следующий код и скопируйте в буфер обмена (правая кнопка мыши – Копировать) Код Start::
CreateRestorePoint:
HKLMSOFTWAREPoliciesMicrosoftWindows Defender: Ограничение <==== ВНИМАНИЕ
HKUS-1-5-21-2053910982-2364415472-4191585366-1001...Policiessystem: [shell] explorer.exe <==== ВНИМАНИЕ
Policies: C:ProgramDataNTUSER.pol: Ограничение <==== ВНИМАНИЕ
HKLMSOFTWAREPoliciesMozillaFirefox: Ограничение <==== ВНИМАНИЕ
ShellIconOverlayIdentifiers: [ OneDrive1] -> {BBACC218-34EA-4666-9D7A-C78F2274A524} => -> Нет файла
ShellIconOverlayIdentifiers: [ OneDrive2] -> {5AB7172C-9C11-405C-8DD5-AF20F3606282} => -> Нет файла
ShellIconOverlayIdentifiers: [ OneDrive3] -> {A78ED123-AB77-406B-9962-2A5D9D2F7F30} => -> Нет файла
ShellIconOverlayIdentifiers: [ OneDrive4] -> {F241C880-6982-4CE5-8CF7-7085BA96DA5A} => -> Нет файла
ShellIconOverlayIdentifiers: [ OneDrive5] -> {A0396A93-DC06-4AEF-BEE9-95FFCCAEF20E} => -> Нет файла
ShellIconOverlayIdentifiers: [ OneDrive6] -> {9AA2F32D-362A-42D9-9328-24A483E2CCC3} => -> Нет файла
ShellIconOverlayIdentifiers: [ OneDrive7] -> {C5FF006E-2AE9-408C-B85B-2DFDD5449D9C} => -> Нет файла
ShellIconOverlayIdentifiers-x32: [ OneDrive1] -> {BBACC218-34EA-4666-9D7A-C78F2274A524} => -> Нет файла
ShellIconOverlayIdentifiers-x32: [ OneDrive2] -> {5AB7172C-9C11-405C-8DD5-AF20F3606282} => -> Нет файла
ShellIconOverlayIdentifiers-x32: [ OneDrive3] -> {A78ED123-AB77-406B-9962-2A5D9D2F7F30} => -> Нет файла
ShellIconOverlayIdentifiers-x32: [ OneDrive4] -> {F241C880-6982-4CE5-8CF7-7085BA96DA5A} => -> Нет файла
ShellIconOverlayIdentifiers-x32: [ OneDrive5] -> {A0396A93-DC06-4AEF-BEE9-95FFCCAEF20E} => -> Нет файла
ShellIconOverlayIdentifiers-x32: [ OneDrive6] -> {9AA2F32D-362A-42D9-9328-24A483E2CCC3} => -> Нет файла
ShellIconOverlayIdentifiers-x32: [ OneDrive7] -> {C5FF006E-2AE9-408C-B85B-2DFDD5449D9C} => -> Нет файла
AlternateDataStreams: C:UsersВадимLocal Settings:String [148]
AlternateDataStreams: C:UsersВадимAppDataLocal:String [148]
AlternateDataStreams: C:UsersВадимAppDataLocalApplication Data:String [148]
FirewallRules: [{A3C452F3-0568-41E5-9353-D07A388C0185}] => (Block) C:gameshotah3hota hd.exe => Нет файла
FirewallRules: [{B2A2D803-09CF-4E9C-8AC7-D5BC7ACBE4C4}] => (Block) C:gameshotah3hota hd.exe => Нет файла
FirewallRules: [UDP Query User{08D49EA3-AF33-48CC-AC14-FBC2618D23AA}C:gameshotah3hota hd.exe] => (Allow) C:gameshotah3hota hd.exe => Нет файла
FirewallRules: [TCP Query User{11677200-2711-4C23-9E36-EAF50DB70D23}C:gameshotah3hota hd.exe] => (Allow) C:gameshotah3hota hd.exe => Нет файла
FirewallRules: [{27DF237B-0FC4-44FF-A9A9-BA51FA6821FA}] => (Allow) C:Program Files (x86)AnyDeskAnyDesk.exe => Нет файла
FirewallRules: [{B0E1B64A-9908-48CA-900E-E7C8A6FC2CD5}] => (Allow) C:Program Files (x86)AnyDeskAnyDesk.exe => Нет файла
FirewallRules: [{84FD34E8-F525-44A5-B264-3B83A7E6188B}] => (Allow) C:Program Files (x86)AnyDeskAnyDesk.exe => Нет файла
FirewallRules: [{EA4351FD-2F0E-4008-86C0-C8CDCA4A62D4}] => (Allow) C:Program Files (x86)AnyDeskAnyDesk.exe => Нет файла
FirewallRules: [{56263629-B657-4F4D-9DF7-FA5D8BD65AFB}] => (Allow) C:Program Files (x86)AnyDeskAnyDesk.exe => Нет файла
FirewallRules: [{D1A61805-C2BF-43B6-973D-29FDDB3C94F5}] => (Allow) C:Program Files (x86)AnyDeskAnyDesk.exe => Нет файла
FirewallRules: [TCP Query User{A52377B7-4D52-4560-8E73-F15F3F0FB23F}C:usersвадимappdatalocalgamecentergamecenter.exe] => (Allow) C:usersвадимappdatalocalgamecentergamecenter.exe => Нет файла
FirewallRules: [UDP Query User{CDEB52AF-0084-42FD-B117-36EACB0EFFEA}C:usersвадимappdatalocalgamecentergamecenter.exe] => (Allow) C:usersвадимappdatalocalgamecentergamecenter.exe => Нет файла
FirewallRules: [{7DBAE923-8CC3-4016-A6EC-C30D35259993}] => (Block) C:usersвадимappdatalocalgamecentergamecenter.exe => Нет файла
FirewallRules: [{5CE6CB1D-680F-4397-9683-8D02AF5B7755}] => (Block) C:usersвадимappdatalocalgamecentergamecenter.exe => Нет файла
FirewallRules: [{ED258615-499A-438B-BE46-AC6B7A7D232C}] => (Allow) C:UsersВадимAppDataLocalGameCenterGameCenter.exe => Нет файла
FirewallRules: [{D04138EA-BCF1-4609-9D80-961DE51A6D35}] => (Allow) C:UsersВадимAppDataLocalGameCenterGameCenter.exe => Нет файла
FirewallRules: [TCP Query User{CC47BFCB-54AD-4121-8F7F-23A9B51C622C}C:usersвадимdownloadsanydesk.exe] => (Allow) C:usersвадимdownloadsanydesk.exe => Нет файла
FirewallRules: [UDP Query User{A9CBC322-A2D1-4B19-8ECE-E9C2C6ABDBE5}C:usersвадимdownloadsanydesk.exe] => (Allow) C:usersвадимdownloadsanydesk.exe => Нет файла
FirewallRules: [TCP Query User{F7724276-34BA-4B3C-A3DC-2CBC8DE94355}C:program files (x86)utorrentutorrent.exe] => (Allow) C:program files (x86)utorrentutorrent.exe => Нет файла
FirewallRules: [UDP Query User{29B14DAA-A0BE-4425-BB98-3C7D0D73C429}C:program files (x86)utorrentutorrent.exe] => (Allow) C:program files (x86)utorrentutorrent.exe => Нет файла
FirewallRules: [{A0153C01-9578-4883-BBE4-D01AF109ED23}] => (Block) C:program files (x86)utorrentutorrent.exe => Нет файла
FirewallRules: [{CBAE85E2-798A-4782-AC7A-5997AA9A4831}] => (Block) C:program files (x86)utorrentutorrent.exe => Нет файла
FirewallRules: [{62F4E480-C109-42B0-9074-81F845EEA3CD}] => (Block) C:Program Files (x86)AviraSoftwareUpdateravirasoftwareupdatertoastnotificationsbridge.exe => Нет файла
FirewallRules: [{2053659E-04DF-4ADC-9976-8C2D84B49AD5}] => (Allow) C:Program Files (x86)AviraSoftwareUpdateravirasoftwareupdatertoastnotificationsbridge.exe => Нет файла
FirewallRules: [{539CABD1-DAD2-4CC0-853E-A90C28D7062A}] => (Allow) C:Program Files (x86)AviraSoftwareUpdateravirasoftwareupdatertoastnotificationsbridge.exe => Нет файла
FirewallRules: [{44A090F9-62E6-48E4-816C-D39FA0029C06}] => (Allow) C:UsersВадимAppDataRoamingBitTorrentBitTorrent.exe => Нет файла
FirewallRules: [{A5CC0DD5-7001-44A2-91B3-5D9D9C2FB674}] => (Allow) C:UsersВадимAppDataRoamingBitTorrentBitTorrent.exe => Нет файла
FirewallRules: [TCP Query User{13250D4D-1790-4D91-B244-98FAAE8FE316}C:gamesage of empires ii hd editionaok hd.exe] => (Allow) C:gamesage of empires ii hd editionaok hd.exe => Нет файла
FirewallRules: [UDP Query User{78CB68CC-F3B0-42AA-A600-3C77EF34AF40}C:gamesage of empires ii hd editionaok hd.exe] => (Allow) C:gamesage of empires ii hd editionaok hd.exe => Нет файла
FirewallRules: [TCP Query User{28273F51-F459-444B-AF75-D70C80FBF76A}C:gamesheroes3_hotah3hota hd.exe] => (Allow) C:gamesheroes3_hotah3hota hd.exe => Нет файла
FirewallRules: [UDP Query User{56B394FA-3E98-4AC0-B86A-295B1A271960}C:gamesheroes3_hotah3hota hd.exe] => (Allow) C:gamesheroes3_hotah3hota hd.exe => Нет файла
FirewallRules: [{6A8E134A-F22D-41CA-B293-218E8CD0B32B}] => (Block) C:gamesheroes3_hotah3hota hd.exe => Нет файла
FirewallRules: [{826173CE-2C92-4E86-816A-3B89BB4B9651}] => (Block) C:gamesheroes3_hotah3hota hd.exe => Нет файла
Reboot:
End::
2. Запустите Farbar Recovery Scan Tool.
0 |
|
1 / 1 / 0 Регистрация: 14.02.2021 Сообщений: 29 |
|
|
04.11.2021, 21:46 [ТС] |
8 |
|
Всё сделал
0 |
|
11098 / 6334 / 1310 Регистрация: 06.09.2009 Сообщений: 24,072 |
|
|
05.11.2021, 16:44 |
9 |
|
Антивирус установился?
0 |
|
1 / 1 / 0 Регистрация: 14.02.2021 Сообщений: 29 |
|
|
06.11.2021, 16:07 [ТС] |
10 |
|
К сожалению, нет, запустил установку через минуту появилось данное окно после нажатия ноутбук ушел в перезагрузку, сама программа в папке не отвечает, так же удалял следы Avira в безопасном, следы так же остаются в диспетчере.
0 |
|
11098 / 6334 / 1310 Регистрация: 06.09.2009 Сообщений: 24,072 |
|
|
07.11.2021, 21:44 |
11 |
|
Решение1. Выделите следующий код и скопируйте в буфер обмена (правая кнопка мыши – Копировать) Код Start:: CreateRestorePoint: CHR HKLM...ChromeExtension: [nppllibpnmahfaklnpggkibhkapjkeob] - C:Program Files (x86)Norton Identity SafeEngine2014.7.11.42ExtsChrome.crx <не найдено> R2 AntivirProtectedService; C:Program Files (x86)AviraAntivirusProtectedService.exe [538000 2021-06-25] (Avira Operations GmbH & Co. KG -> Avira Operations GmbH & Co. KG) C:Program Files (x86)Avira R0 avdevprot; C:WINDOWSSystem32DRIVERSavdevprot.sys [78936 2019-06-07] (Avira Operations GmbH & Co. KG -> Avira Operations GmbH & Co. KG) 2021-10-31 23:15 - 2021-08-03 17:55 - 000000000 ____D C:ProgramDataMalwarebytes 2021-10-31 23:15 - 2021-08-03 17:54 - 000000000 ____D C:Program FilesMalwarebytes 2021-11-01 19:16 - 2018-07-02 17:09 - 000000000 ____D C:UsersВадимAppDataLocalAVAST Software Reboot: End:: 2. Запустите Farbar Recovery Scan Tool.
1 |
 Сообщение было отмечено darkin52 как решение
|
1 / 1 / 0 Регистрация: 14.02.2021 Сообщений: 29 |
|
|
09.11.2021, 06:53 [ТС] |
12 |
|
Всё сделал.
0 |
|
11098 / 6334 / 1310 Регистрация: 06.09.2009 Сообщений: 24,072 |
|
|
10.11.2021, 18:14 |
13 |
|
Что теперь с установкой?
0 |
|
1 / 1 / 0 Регистрация: 14.02.2021 Сообщений: 29 |
|
|
11.11.2021, 13:22 [ТС] |
14 |
|
Программа установилась, спасибо большое всё функционирует.
0 |
|
11098 / 6334 / 1310 Регистрация: 06.09.2009 Сообщений: 24,072 |
|
|
11.11.2021, 18:30 |
15 |
|
Загрузите SecurityCheck by glax24 & Severnyj и сохраните утилиту на Рабочем столе.
0 |
|
1 / 1 / 0 Регистрация: 14.02.2021 Сообщений: 29 |
|
|
11.11.2021, 18:35 [ТС] |
16 |
|
Вот пожалуйста.
0 |
|
11098 / 6334 / 1310 Регистрация: 06.09.2009 Сообщений: 24,072 |
|
|
12.11.2021, 21:08 |
17 |
|
Avira Antivirus (включен и обновлен) зачем столько защитного ПО + еще и Malwarebytes установили?
0 |
|
1 / 1 / 0 Регистрация: 14.02.2021 Сообщений: 29 |
|
|
12.11.2021, 23:22 [ТС] |
18 |
|
зачем столько защитного ПО + еще и Malwarebytes установили? На данный момент установлен только AVG. Avira и Avast скорее всего остались только следы в системы от прошлого раза когда компьютер был заражен вирусом который блокировал установку Avira а после того как он не установился я скачал Avast пока не попал на форум.Странная работа компьютера, проблема с установкой антивируса Avira Malwarebytes был установлен в системе, а сейчас его не оказалось только нерабочий ярлык и не устанавливалась программа. (Я хотел опять просканировать компьютер Malwarebytes как по совету из прошлой темы по ссылке выше.)
0 |
|
11098 / 6334 / 1310 Регистрация: 06.09.2009 Сообщений: 24,072 |
|
|
13.11.2021, 00:02 |
19 |
|
Так Вы же написали, что установился Malwarebytes
0 |
|
1 / 1 / 0 Регистрация: 14.02.2021 Сообщений: 29 |
|
|
13.11.2021, 07:36 [ТС] |
20 |
|
Всё верно, а после того как скачал игру с торрента и установил, программа пропала, и когда увидел в диспетчере следы Аvira насторожило, хотел просканировать Malwarebytes на наличие подозрительных файлов а её нет на компьютере и устанавливаться не хочет. Поэтому я опять тут.
0 |
Re my Windows 7 Ultimate SP1 update situation, I can definitely confirm that installing only KB4474419 was enough for Malwarebytes to update itself to 4.4.4.126, 1.0.43778 Update package , 1.0.1404 Component Package.
Previously, I was all set to install every update noted in Advanced Setup‘s post. From his list, the only update I already had was 3140245. I was missing 3020369 (tho I have 3020370), as well as 3125574 and 4490628. The list also shows 4516655 and 4516065, following 4474419. I haven’t bothered with those two, but maybe they might be required for some future Malwarebytes update?
Re the update process itself, it’s a while since I’ve been in the thick of PC work, and have somewhat lost the plot (81 y.o) but I managed to run the msu for KB4474419 that you’d linked and it was only necessary to get offline, then re-liven Windows Updates (which has been off for 2-3 years) after which Windows found the msu without me pointing to it, and installed it. After rebooting I got back online and Malwarebytes updated itself. Quite painless! Thanks Imacri, Porthos and Advanced Setup 🖖. Live long and prosper!
Edited August 1, 2021 by byteback