- Tutorial
- Virtualization Station
Last modified date: 2017-03-20
This tutorial describes how to use virtual machines (VMs) which are installed in Windows Server 2012 R2 as nodes for Windows Failover Cluster. By using QNAP Virtualization Station, creating a VM as a node of a cluster, you can easy to build a failover clustering and protect mission-critical applications running on Windows Server 2012 R2. For instance, if you have an AD server in your IT environment, the QNAP NAS allows you to create a VM as a backup server. When the AD server is down, the VM can take over the service throughout the Windows failover clustering.
Please note: a shared storage is necessary for creating a Windows Server 2012 failover cluster so we are going to use NAS iSCSI targets as shared storage in this tutorial.
What is a failover cluster?
It is a group of servers (physical or virtualized) that can maintain high availability of applications and services. A server can be seen as a node of a cluster. If one of the servers fails, another server (node) in the cluster can take over its workload and ensure critical application services will not be interrupted, and to minimize downtime. This mechanism is known as failover. (Rouse 2012)
Prerequisites
- Windows Server 2012 R2 VM is installed in the Virtualization Station and similar configurations with your product server. As shown below, the selected orange area displays the Windows Server VM installed in the QNAP NAS and uses the Virtual Switch to connect the network interfaces. (More information about Virtual Switches.)
- An additional network connection is required to connect two Windows Servers in the cluster and the NAS shared storage. The yellow connection below is used to communicate each node of the cluster; while a blue one connects the nodes to the NAS shared storage.

NAS Settings
-
Create iSCSI Storage
For shared storage, we are using the iSCSI storage of NAS for the failover clustering. There are two iSCSI storage should be added, with “Quorum” and “Data”. The quorum is used to determine if the cluster has stopped running if the number of nodes drops below the majority, which is the minimal number of nodes of a cluster. In a simple action, the quorum will tell the cluster which node should be active at any given time, and intervenes if communication fails between the nodes (Microsoft 2011). On the other hand, Data is a normal shared storage for the nodes used.The minimal requirement for the Quorum is 512 MB (we will use 1GB in the tutorial), while there is no limited capacity for the Data volume and it depends on your needs.
For a more detailed demonstration, please refer to How to link iSCSI targets to VMs of Virtualization Station
Virtualization Station Settings
-
Install Windows Server 2012 R2
Upload the Windows Server 2012 R2 ISO image to the NAS. In Virtualization Station, go to Create VM > Create Custom VM. You can specify the VM resources including CPU cores, memory and storage capacity. For more information about creating a VM, please click here.

-
Configure the VM Network Settings
Due to the demands of shared storage, we need an additional Virtual Switch to connect a NAS Ethernet interface which is connected to the network where the shared storage is. Go to Network Setting > Add Virtual Switch”. There are three different networking modes, and select “Set up as Bridged Networking”. Select the interface which can access the shared storage and click Create. For instance, the Ethernet interface of NAS shown on the above illustration is 172.17.100.101 and the shared storage is also in the same subnet (172.17.100.xxx). For more information regarding networking modes, please click here.
-
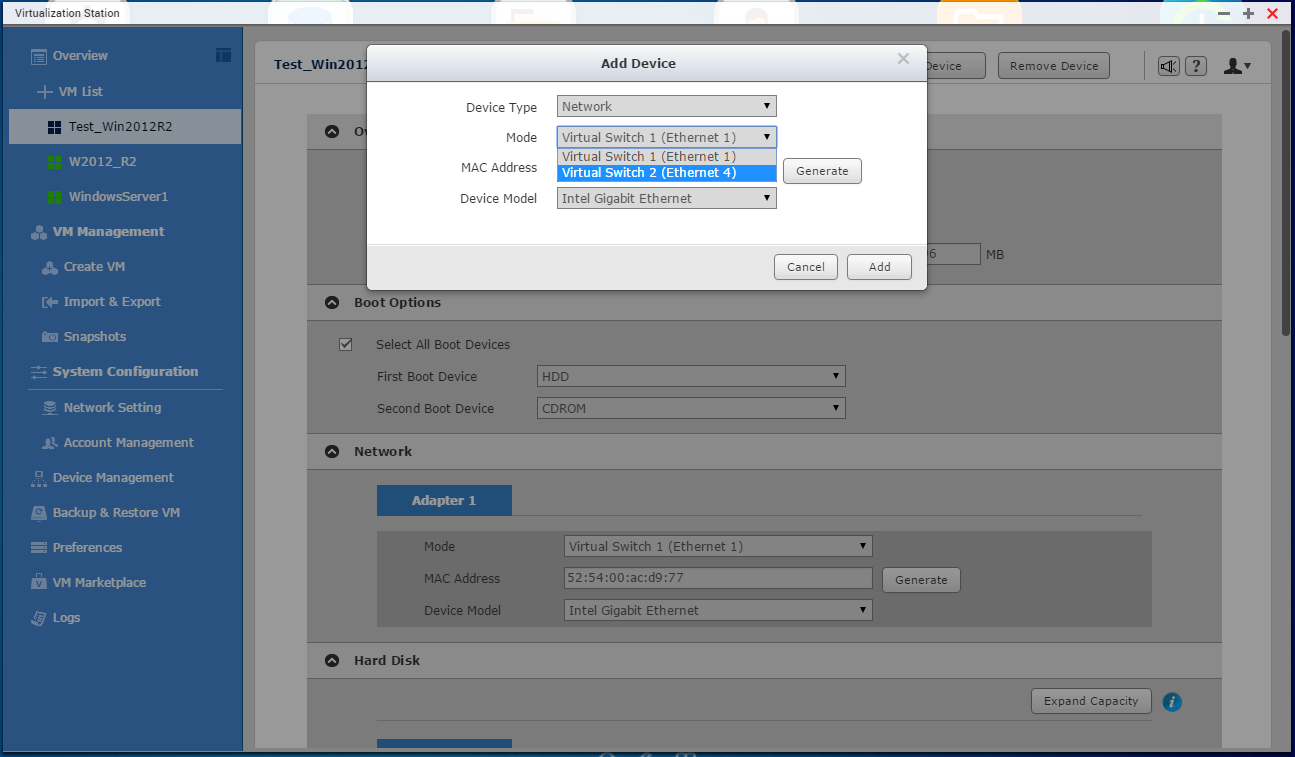
Add a virtual network interface controller (NIC) for the VM to connect to the shared storage.
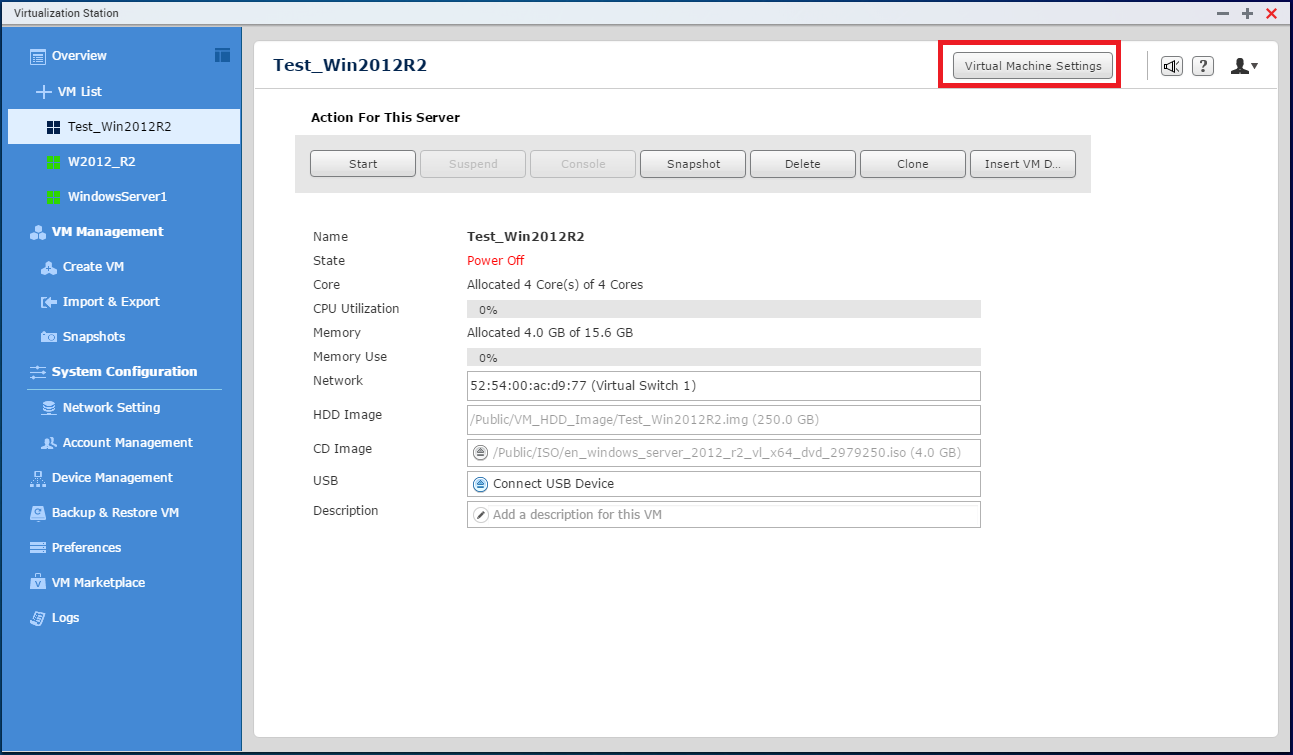
The virtual NIC of the VM should be attached to the Virtual Switch in which the network can access the shared storage. Click the VM on the main menu > Virtual Machine Settings > Add Device, and select the Virtual Switch 2 which we added in the previous step.
-
Add the VM to the Domain
The domain controller server is needed for creating the failover clustering so you need to add the VM in the domain.
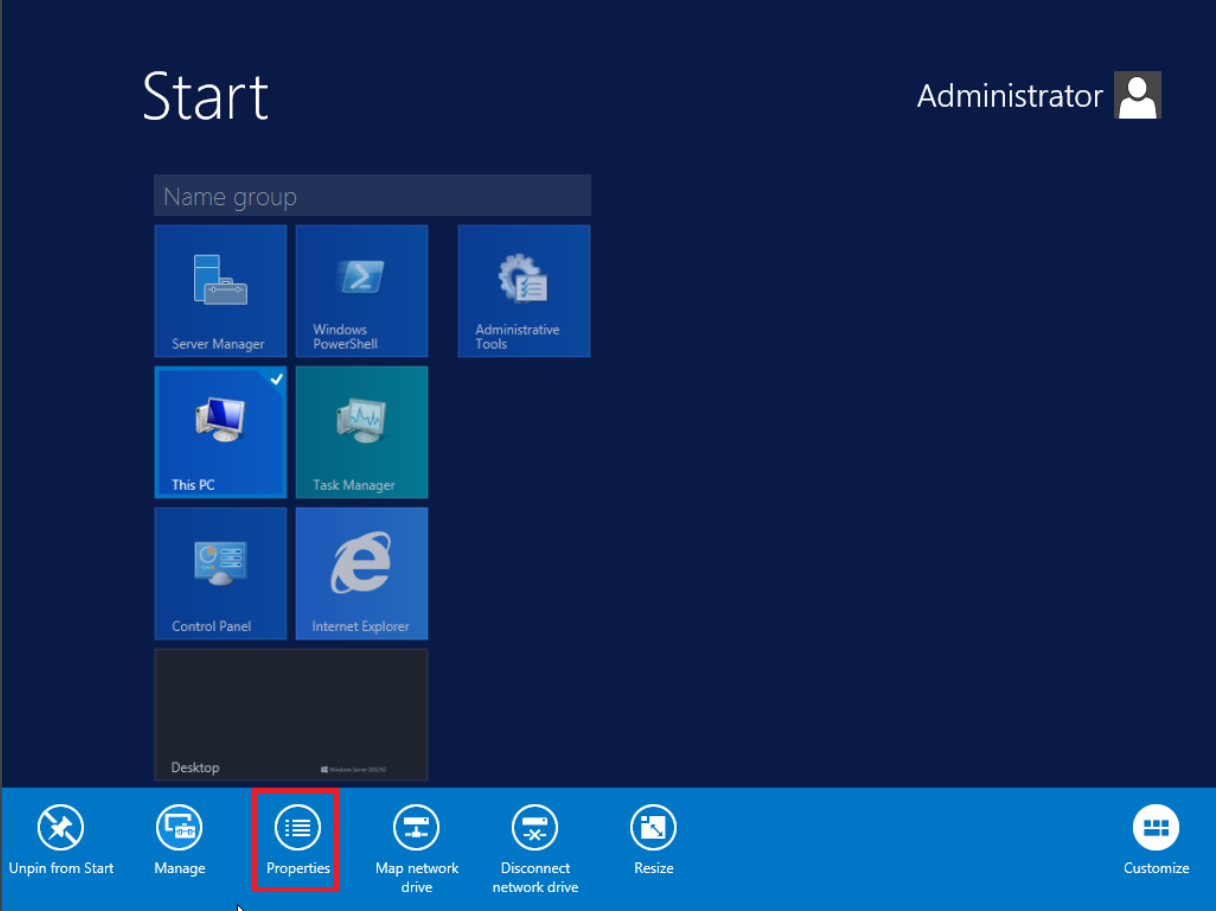
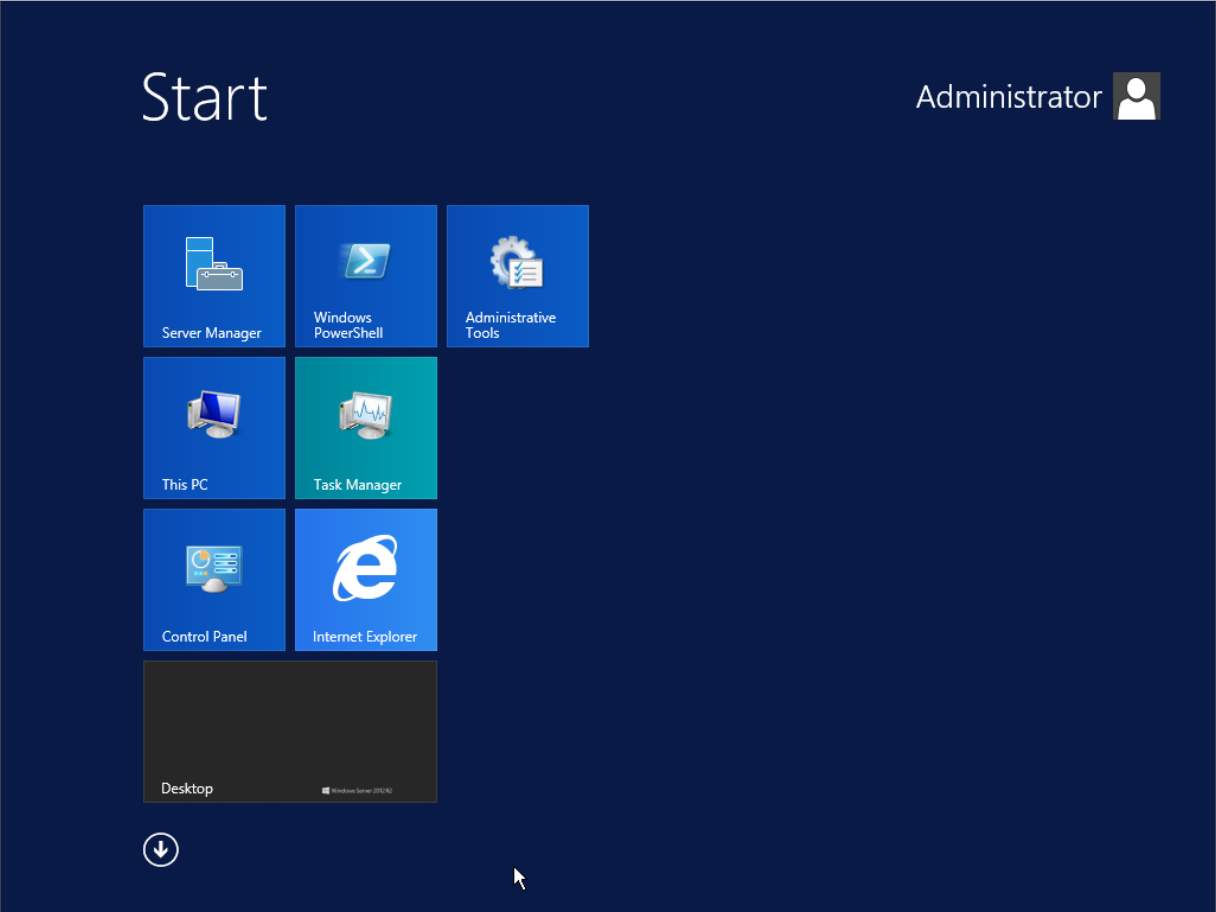
Click Start, right click on “This PC”, go to Properties > Change settings > Change, and choose “Domain” then insert the domain name.

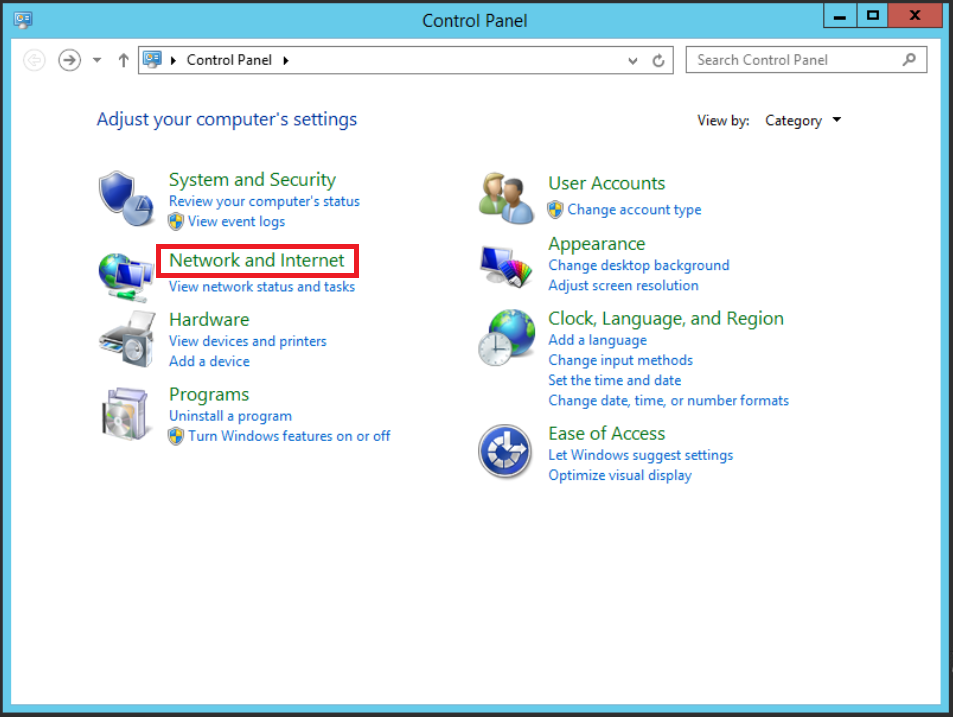
Please note: in some cases, you may need to manually set the DNS before your server is added to the domain. Click Start > Control Panel > Network and Internet > Network and Sharing Center.
Click Ethernet > Properties > Internet Protocol Version 4 (TCP/IPv4), and choose “Use the following DNS server addresses:” then enter the IP address of the DNS server.
-
Install Failover Clustering
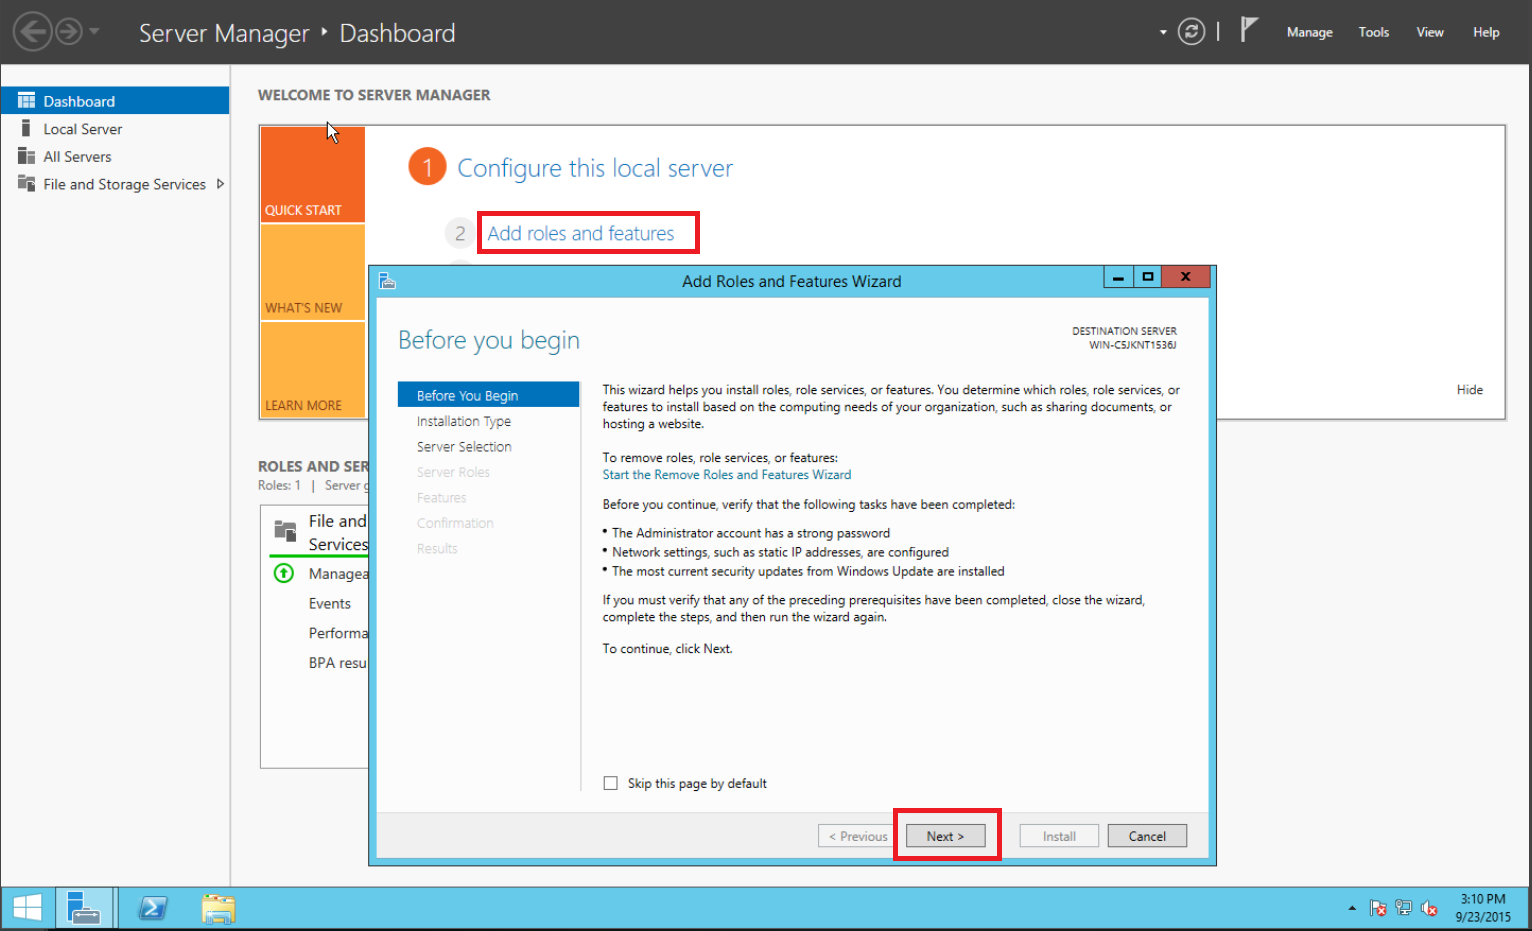
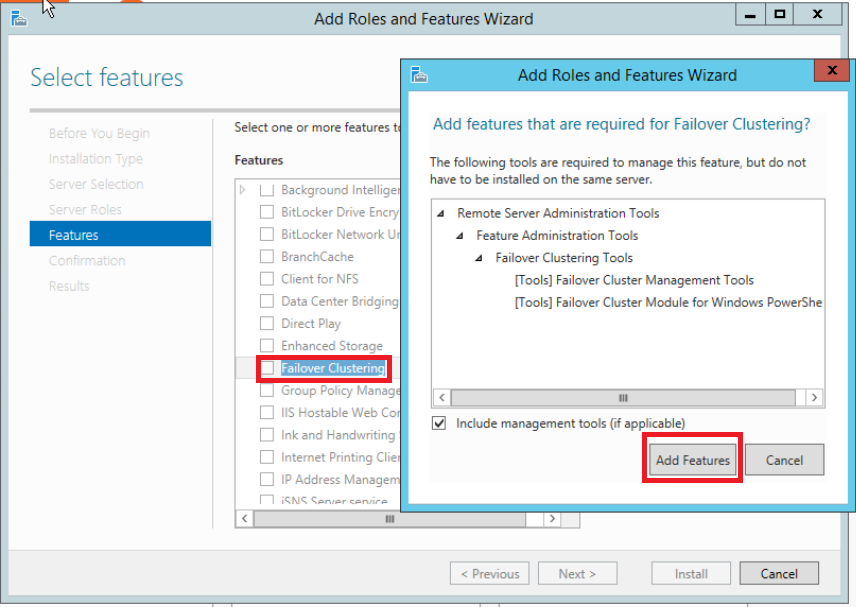
For being a node of cluster, the server should first have the Failover Clustering feature installed. Click “Add roles and features” then click Next.
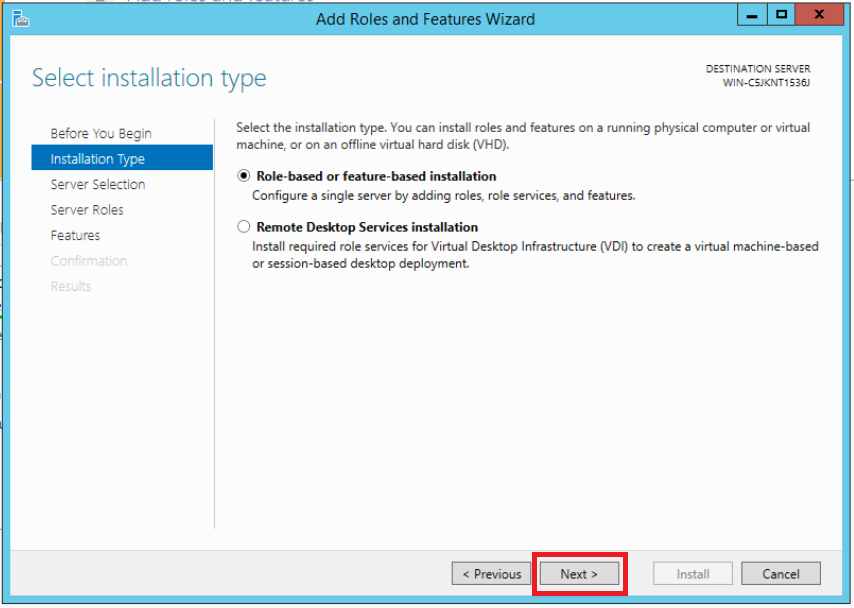
Choose “Role-based or feature-based installation and click Next.
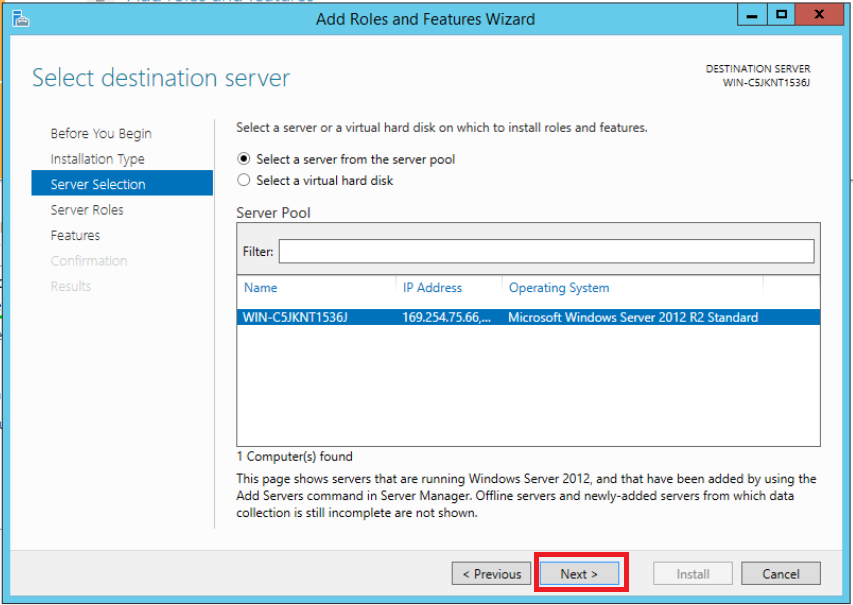
Click Next.
Click Next.
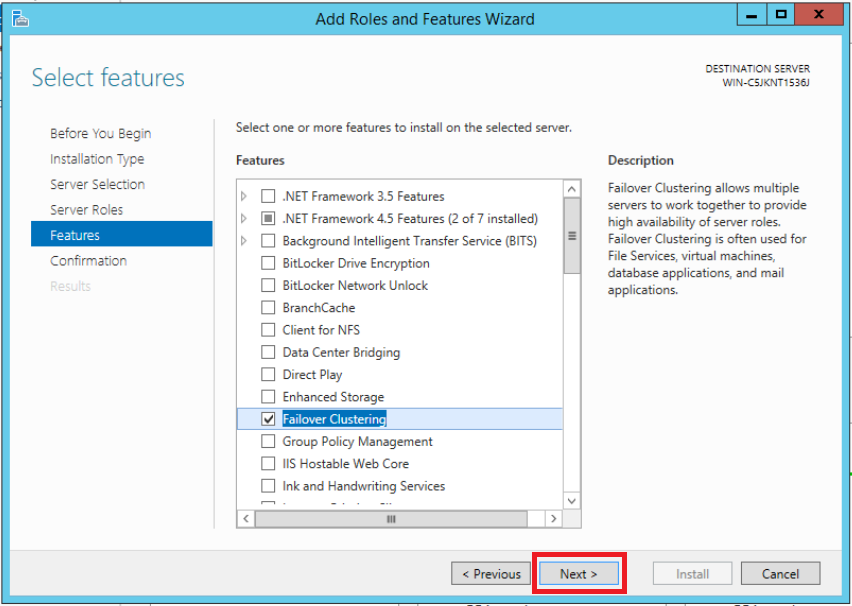
Select “Failover Clustering” and click “Add Features”.
Click Next.
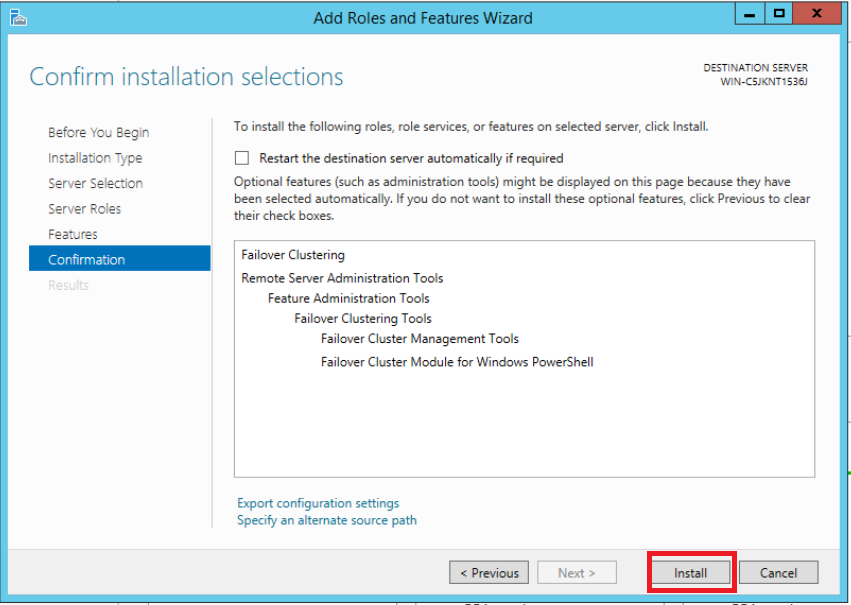
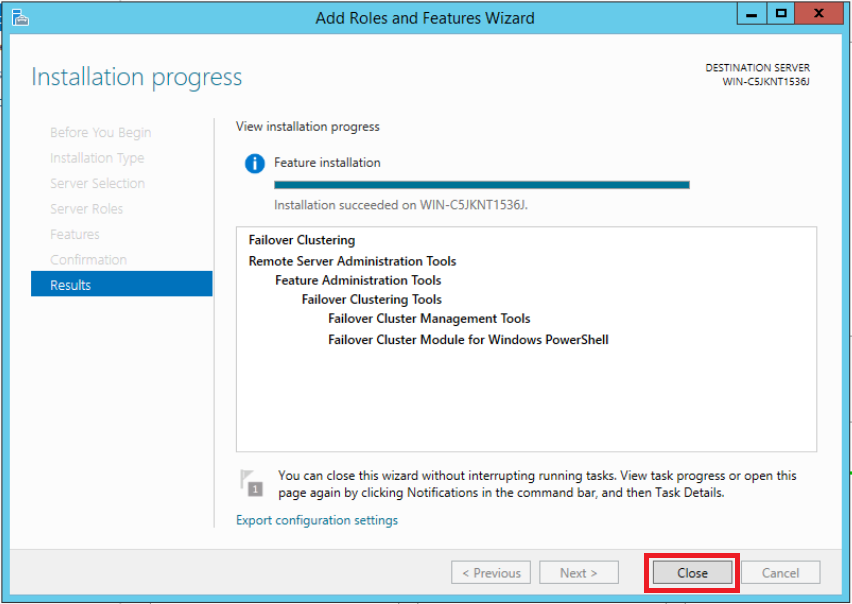
Click “Install” then click “Close” when the installation is finished.
-
Connect to the NAS iSCSI storage
The iSCSI targets, Quorum and Data, should be added.
Click “Tools” and choose “iSCSI Initiator”.
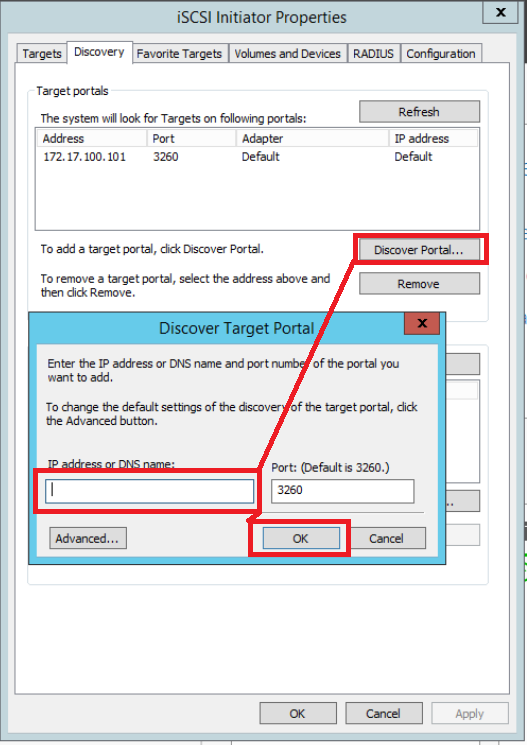
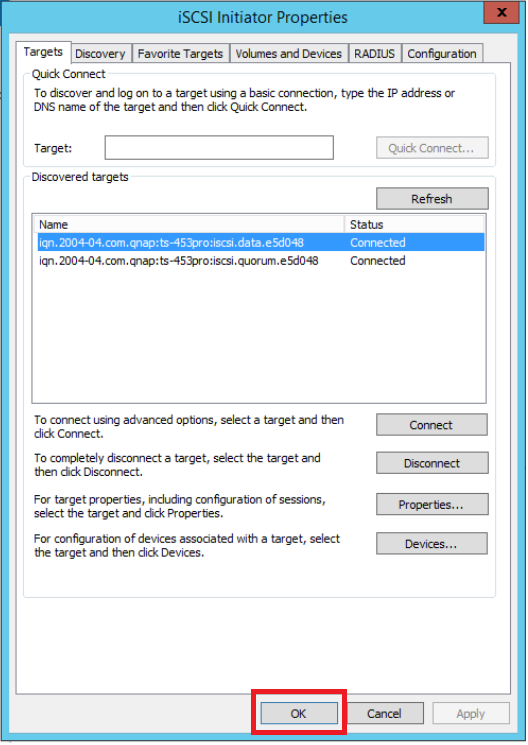
Choose “Discovery” and click “Discover Portal…”. Enter the NAS IP address (e.g. 172.17.100.101) and click “OK”. Go back to “Targets”, and two iSCSI targets will be inactive. Select them and click “Connect”. When they are connected, click “OK”.

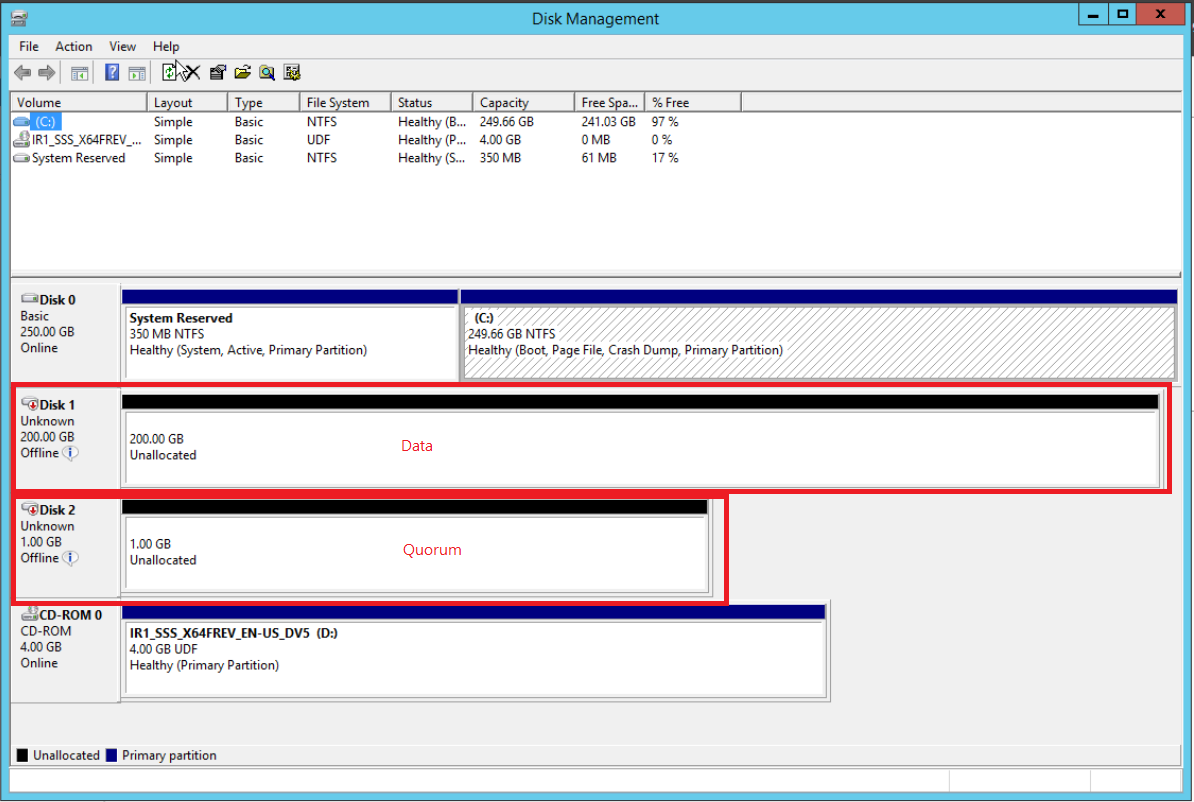
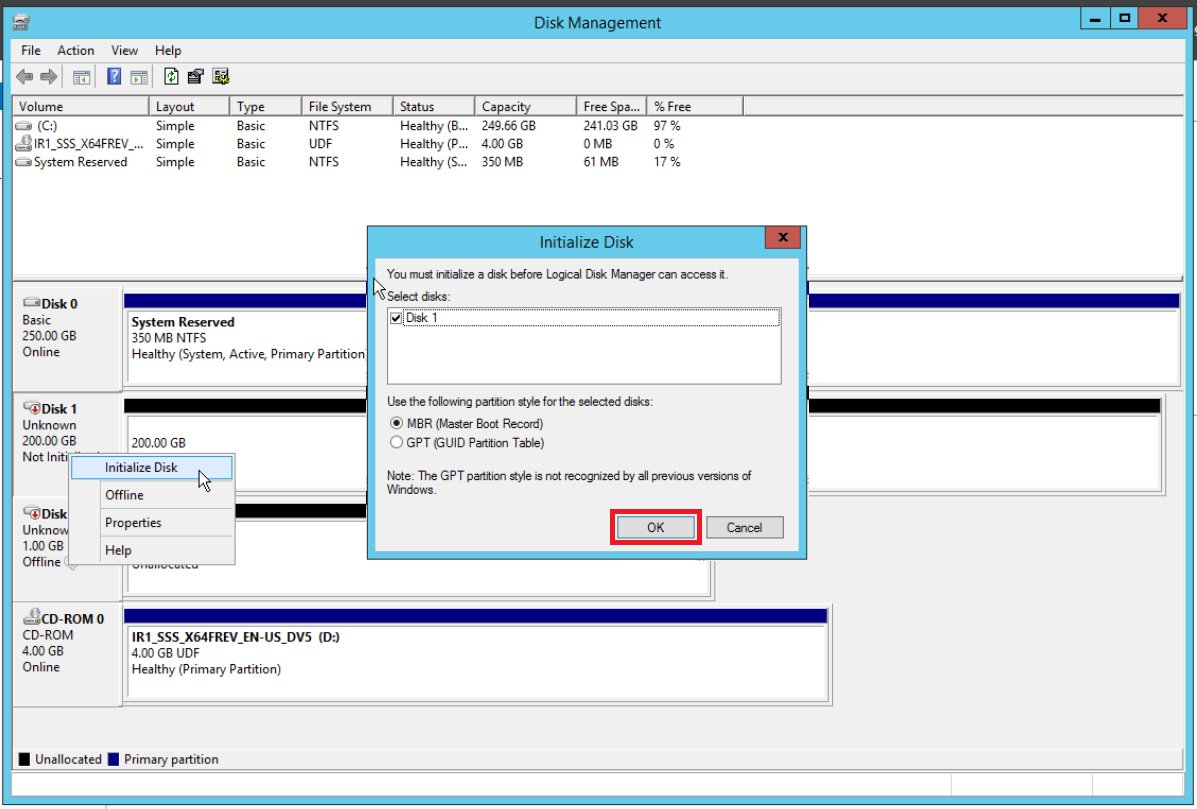
Right click on “Start” and select “Disk Management”. The Quorum and Data iSCSI targets will be listed.
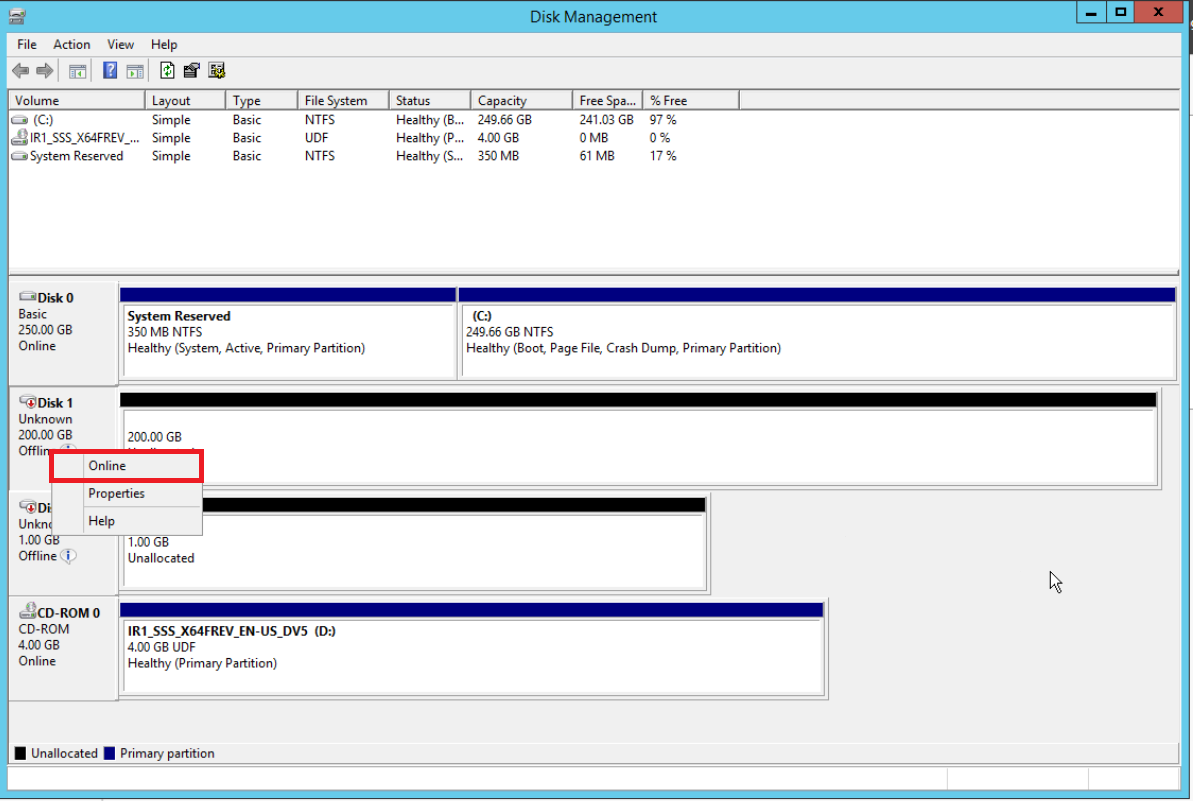
Right click on the disk, select “Online”, and then click “OK”.
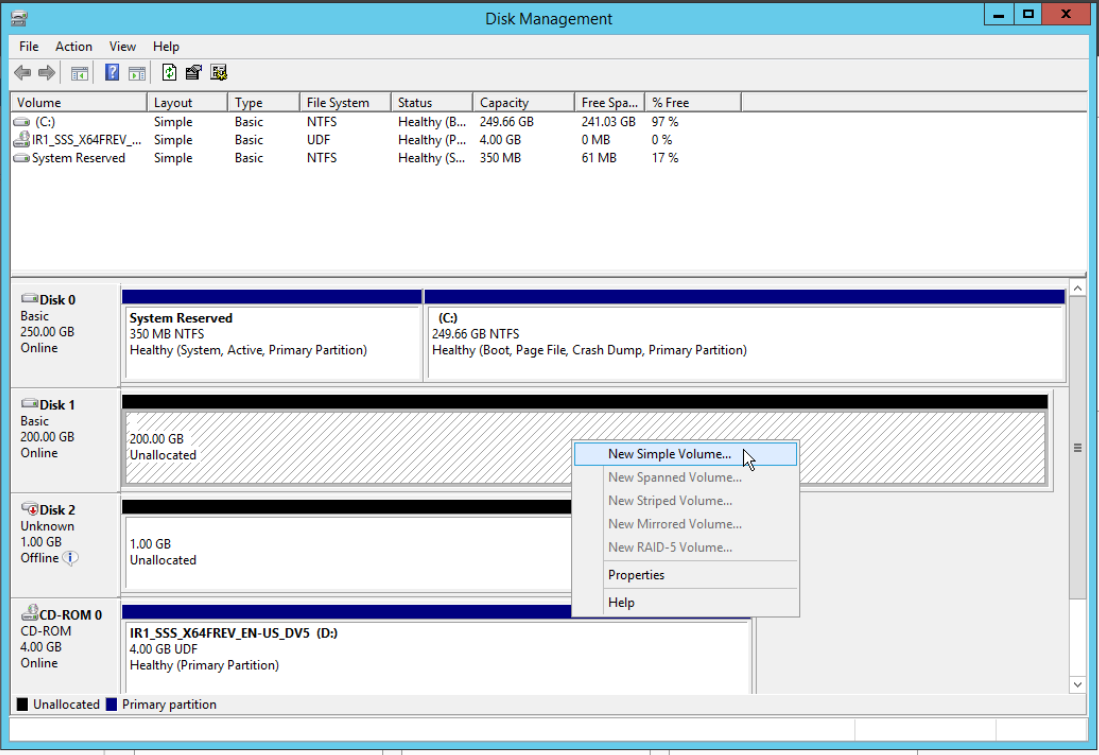
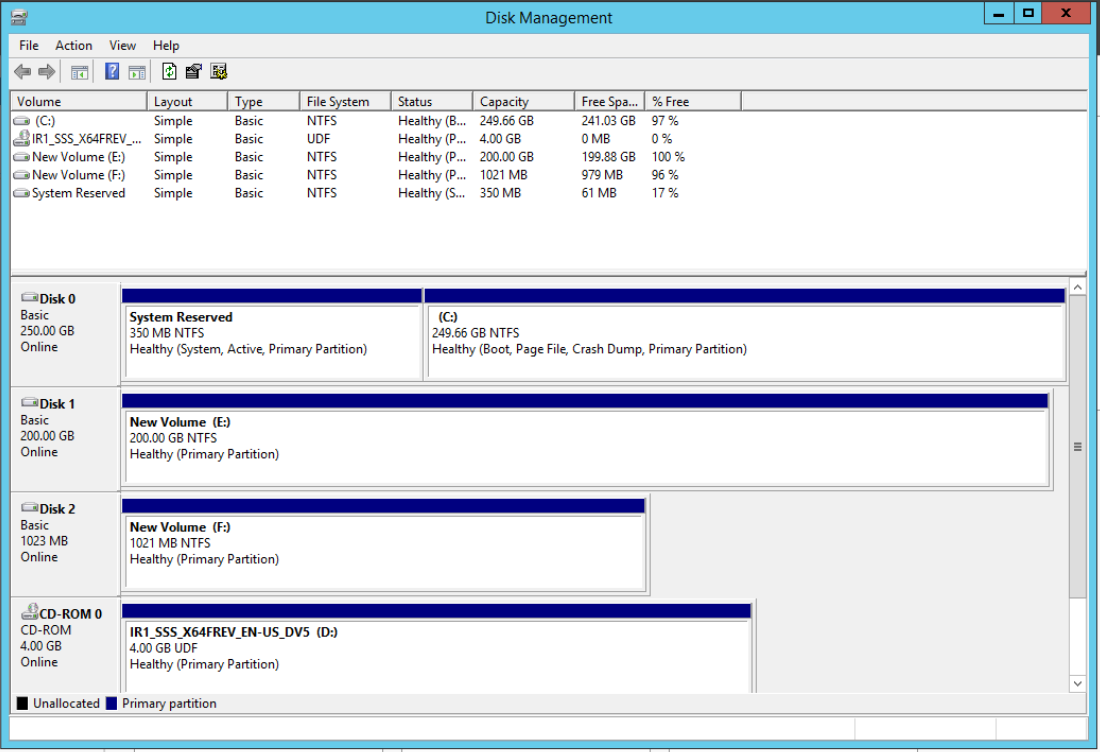
Right click on the disk and choose “New Simple Volume…”. Then configure the volume settings. For further steps, please click here.
Please repeat step 6 on your Windows Server 2012 R2. Instead of formatting the disks (Quorum and Data) again, you just need to make them online.


Setup Failover Clustering
-
Install the Failover Cluster Manager
After preparing the NAS VM, you have two Windows Servers in the same domain and sharing the NAS storage. We have to prepare another Windows Server to install the Failover Clustering Manager.Before installing the Failover Cluster Manager, the Failover Clustering feature must first be installed. Please refer to step 5 of NAS Settings.
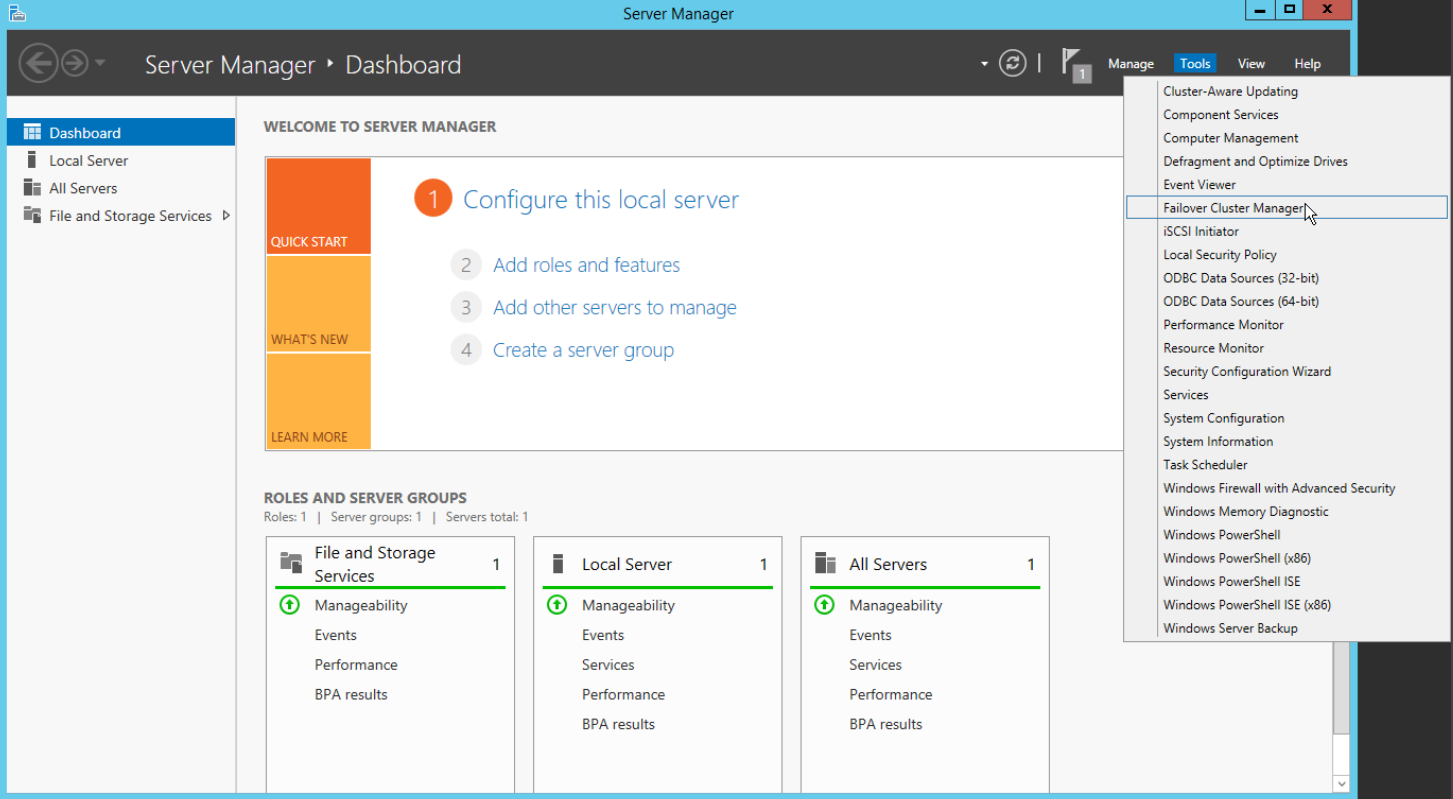
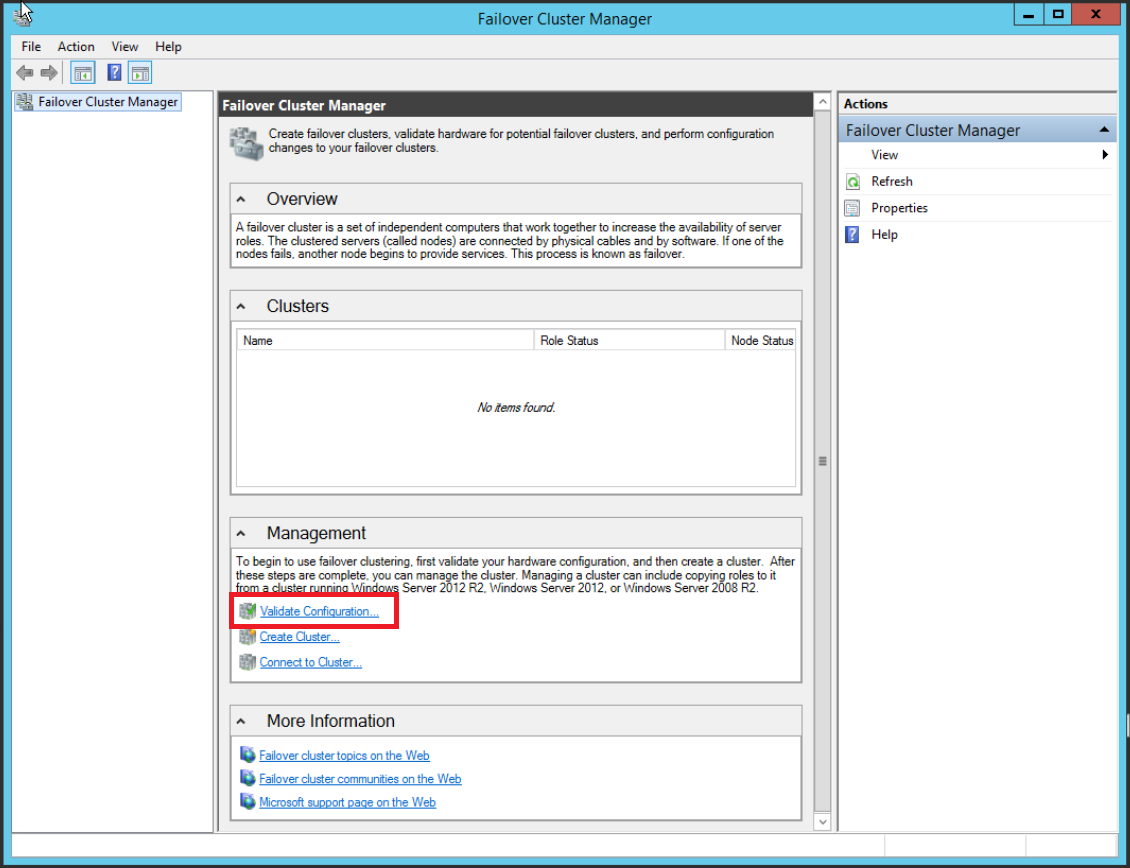
Click “Tools” and select “Failover Cluster Manager” in the Server Manager.
-
Validate the Failover Clustering
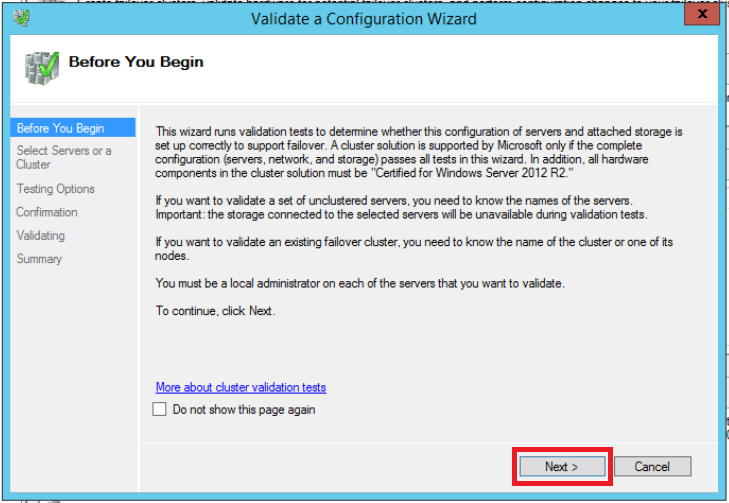
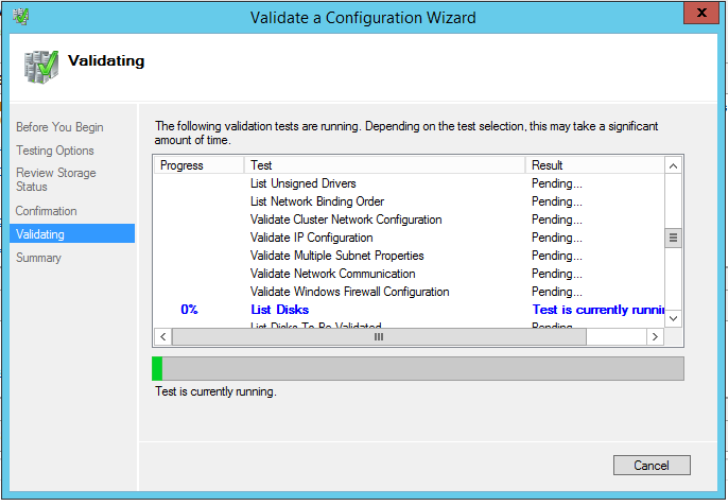
Click “Validate Configuration” and click “Next”.
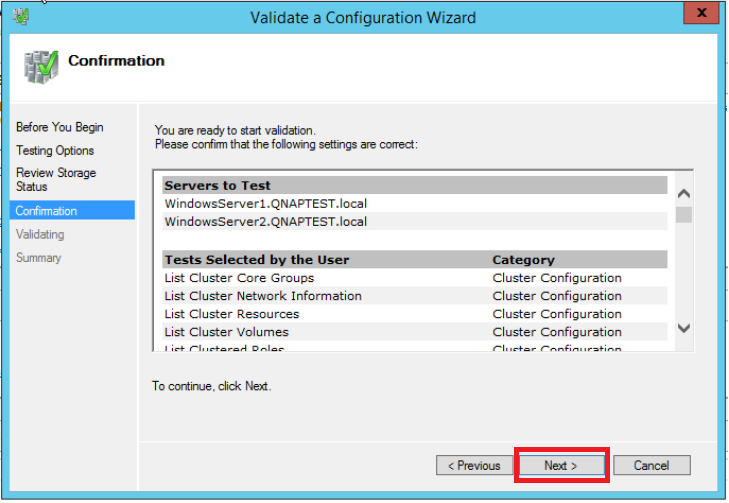
Enter the name of the servers.
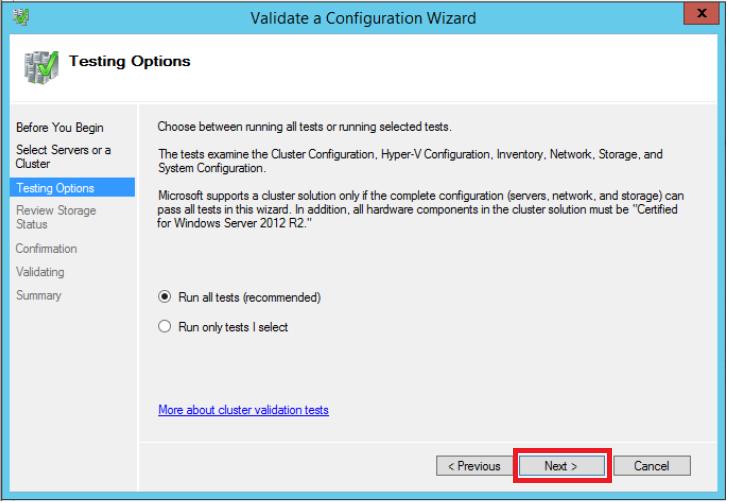
Select “Run all tests (recommended)” and click “Next”.
Check both Cluster Disks (Quorum and Data) and click “Next”.
After validating the failover clustering, the system will provide a report including all parameter checks.
Choose “Nodes” in the category and you can observe the status of the Windows Servers.


References
Rouse, M. (2012). failover cluster definition. Available:
http://searchwindowsserver.techtarget.com/definition/failover-cluster. Last accessed 21st Sept 2015.
Microsoft. (2011). Understanding Quorum Configurations in a Failover Cluster. Available:
https://technet.microsoft.com/en-us/library/cc731739.aspx. Last accessed 23rd Sept 2015.
Was this article helpful?
88% of people think it helps.
Thank you for your feedback.
Please tell us how this article can be improved:
If you want to provide additional feedback, please include it below.
Записки IT специалиста
Технический блог специалистов ООО»Интерфейс»
Настройка iSCSI-хранилища в Windows Server 2012 R2
Продолжая тему создания систем высокой доступности, в данном материале мы рассмотрим настройку iSCSI-хранилищ в современной версии серверных ОС от Microsoft. Мы не будем повторяться и снова обсуждать общие вопросы, поэтому, если вы только начинаете работать с iSCSI, то настоятельно рекомендуем ознакомиться с вступительной частью к нашему предыдущему материалу.
Широкое распространение виртуализации и потребности в создании отказоустойчивых систем даже при небольших внедрениях заставили компанию Microsoft пересмотреть свое отношение к доступным из коробки ролям Windows Server и политике лицензирования. Если раньше iSCSI Target предлагался только в редакции Windows Storage Server, то начиная с Server 2008 R2 он стал доступен в виде отдельно устанавливаемого компонента, а с выходом Windows Server 2012 закономерно стал частью ОС.
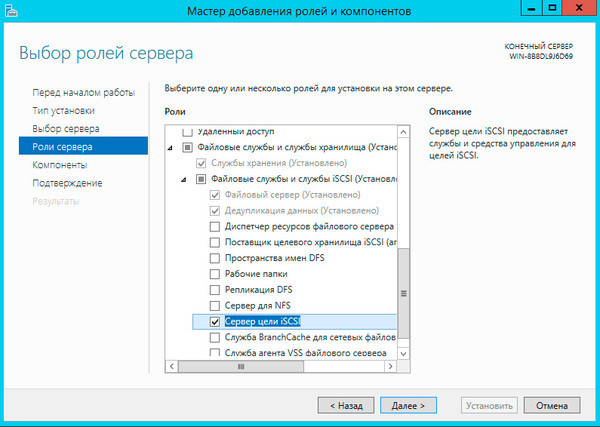
Для установки роли Cервера цели iSCSI запустите Мастер добавления ролей и компонентов, затем последовательно разверните пункты Файловые службы и службы хранилища — Файловый службы и службы iSCSI и укажите одноименную роль.
 Перезагрузки сервера не требуется и по завершении работы мастера можно сразу переходить к настройке сервера целей. Для этого в левом меню Диспетчера серверов выберите Файловые службы и службы хранилища и перейдите в раздел iSCSI.
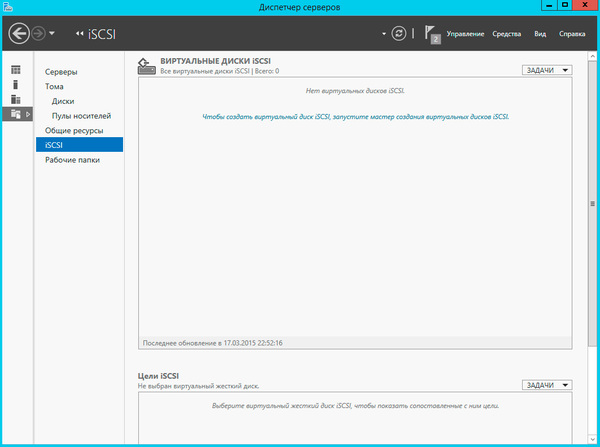 Для создания нового виртуального диска щелкните соответствующую ссылку или выберите соответствующий пункт из меню Задачи, откроется Мастер создания виртуальных дисков iSCSI, который в первую очередь попросит вас указать расположение хранилища.
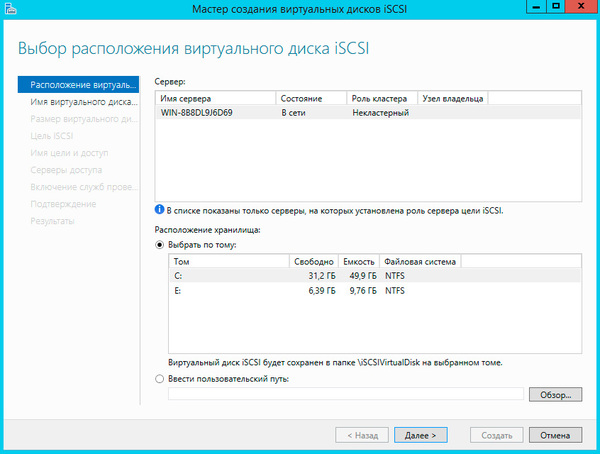 Помните, что производительность дисковой подсистемы хранилища должна соответствовать предполагаемым нагрузкам, также вы должны обеспечить серверу цели достаточную пропускную способность сетевых интерфейсов. Мы рекомендуем выделять для сети хранения данных (SAN) отдельную сеть, не связанную с сетью предприятия.
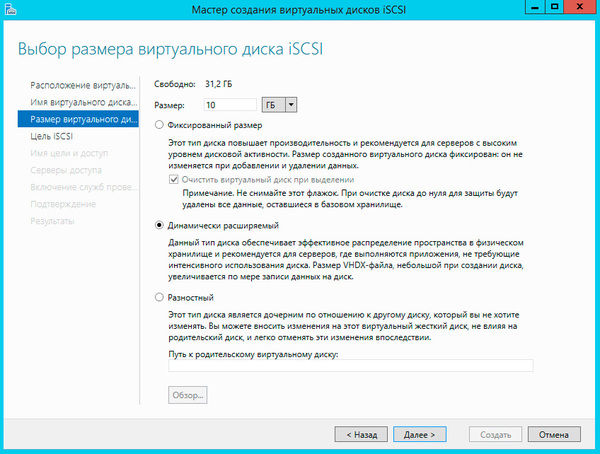
Следующим шагом укажите имя и размер создаваемого диска. Windows Server 2012 поддерживает новый формат виртуальных дисков — VHDX, а также динамически расширяемые диски. Если доступные ранее диски фиксированного размера резервировали дисковое пространство хранилища сразу при создании, то динамически расширяемые диски увеличивают размер согласно реально записанным в них данным. Это позволяет существенно экономить дисковое пространство хранилища, нарезая виртуальные диски с запасом.
Не рекомендуется данный тип дисков для систем с высокой дисковой активностью, так как за счет возможной фрагментации и операций по приращению размера диска производительность будет ниже, чем у дисков фиксированного размера. В тоже время динамически расширяемые диски неплохо подходят для файловых хранилищ, резервного копирования и т.п. задачам, где в первую очередь требуется хранение данных, а не скорость доступа к ним.
Еще один поддерживаемый тип дисков — разностный, когда все изменения пишутся не на исходный виртуальный диск, а на вновь созданный, к использованию в производственных средах не рекомендуется ввиду существенно более низкой производительности, но может оказаться полезным при отладке и разного рода экспериментах, когда надо иметь возможность быстро откатиться к исходному состоянию.
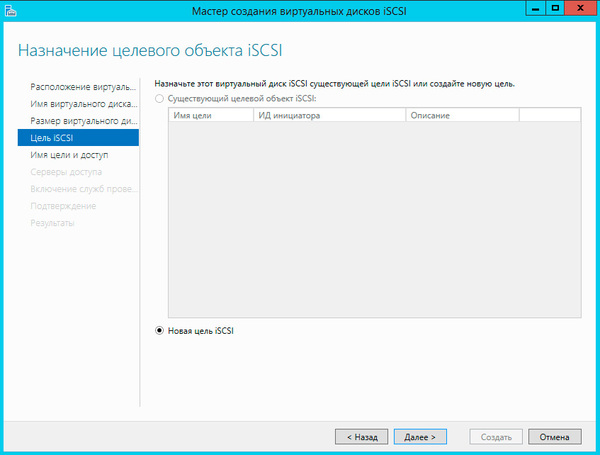
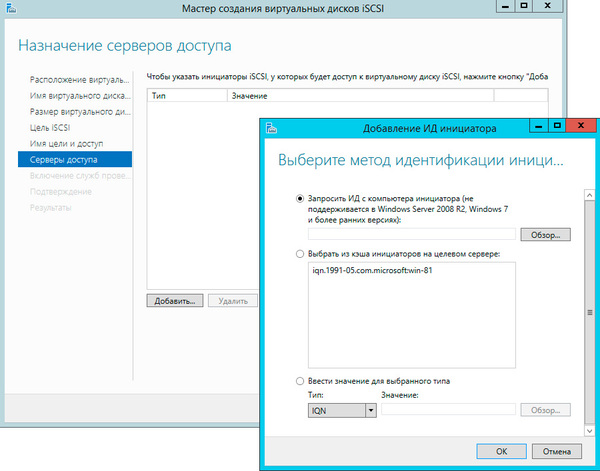
 Созданный виртуальный диск можно назначить как уже существующей цели (таргету), так и создать новый, в этом случае просто укажите имя цели, IQN будет сформирован автоматически.
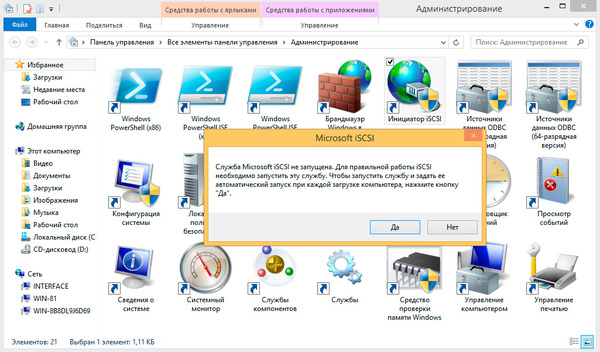
 Затем потребуется указать инициаторы, которым будет разрешен доступ к этой цели. IQN инициатора можно посмотреть на клиенте, для этого откройте Панель управления — Администрирование — Инициатор iSCSI, на вопрос об автоматическом запуске службы ответьте утвердительно.
 IQN ткущего инициатора можно посмотреть на закладке Конфигурация:
 Но можно поступить проще, перейдите на закладку Конечные объекты и выполните Быстрое подключение к Cерверу цели, подключиться по понятным причинам не получится, но IQN инициализатора останется в кэше сервера.

Вернемся на сервер и нажав кнопку Добавить выберем IQN инициатора из кэша, для современных систем вы также можете получить IQN инициатора выполнив подключение к нему по IP-адресу или имени хоста:
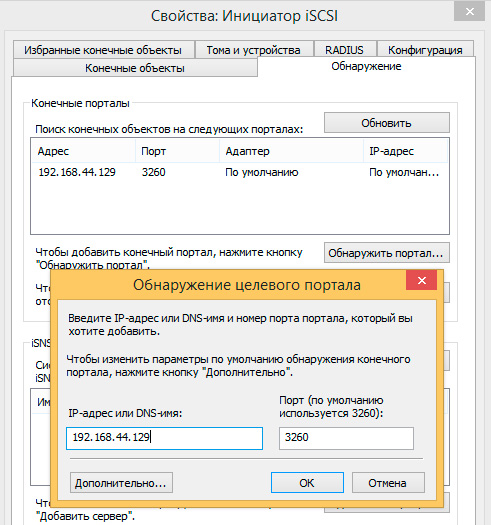
 На остальных шагах оставляем значения по умолчанию, после чего работа мастера будет завершена, виртуальный диск создан и назначен соответствующей цели. Теперь следует подключить созданный диск к целевой системе. Можно воспользоваться функцией быстрого подключения, тогда все диски цели будут подключены с параметрами по умолчанию, что не всегда правильно. Поэтому перейдите на закладку Обнаружение и нажмите кнопку Обнаружить портал:
 Возвращаемся на закладку Конечные объекты и выполняем ручное подключение найденных дисков, при этом, нажав на кнопку Дополнительно, можно самостоятельно настроить параметры подключения, например, выбрать сетевой адаптер, обслуживающий сеть SAN.
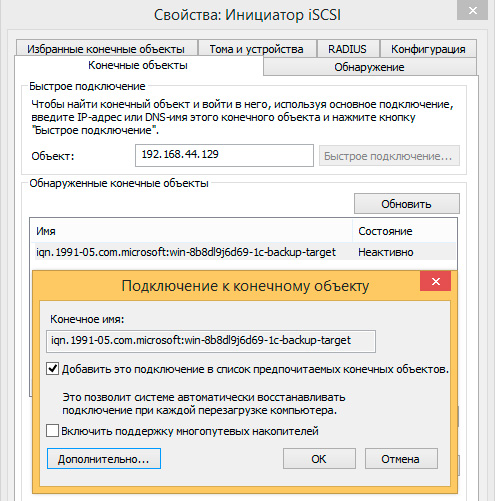
Если вам потребуется изменить параметры подключения уже подключенного объекта, то его следует отключить и подключить заново. После выполнения всех этих действий подключенное устройство будет обнаружено системой как еще один локальный диск и последующая работа с ним ничем не отличается от работы с обычным жестким диском.
Источник
Установка и конфигурирование Windows Server 2012 R2 Essentials
Всем добрый день. Хотелось бы рассказать о установке и конфигурировании Windows Server 2012 R2 Essentials. Эта статья не является призывом к повсеместной установке Windows или пропагандой продуктов Microsoft. Хотелось бы просто рассказать об интересном продукте и возможно кого-то данный продукт заинтересует и пригодится в работе. Статью я старался писать для неподготовленного читателя, поэтому минимум терминологии и максимум обобщения некоторых понятий.
Немножко о редакции Essentials
Windows Server 2012 R2 Essentials – это одна из редакция серверной операционной системы от компании Microsoft. Однако имеет множество отличий от редакций Standard и Datacenter. Что же умеет Essentials:
- Авторизация и аутентификация пользователей вашей сети (домен контроллер службы каталогов Active Directory)
- Файловое хранилище (роль файлового сервера)
- Удаленный доступ к корпоративной сети (VPN и DirectAccess сервер)
- Удаленный доступ к файловому хранилищу через Web-интерфейс (настроенный для этого IIS)
- Удаленный доступ к рабочем столам клиентских машин (шлюз удаленных рабочих столов)
- Резервное копирование клиентских машин (windows backup)
- Резервное копирование самого сервера (windows backup)
- Интеграция с облачными технологиями Microsoft (Office 365, Azure backup и т.д.)
- Консоль единой настройки Essentials, которая позволит настроить возможности описанные выше даже не подготовленному системному администратору.
Если обобщить, то редакция Essentials имеет большинство ролей Windows Server. Некоторые из этих ролей настроены, некоторые доступны в полном объеме, некоторые как например Hyper-V с серьезными ограничениями. Компенсацией за эти все ограничения является более низкая цена, включенных 25 клиентских лицензий, централизованная и простая настройка. Хочу так же отметить, что процесс лицензирования серьезно отличается. Вы можете использовать эту редакцию только для организаций, где число пользователей не превышает 25. Но повторюсь вам не нужно приобретать какие-либо клиентские лицензии.
Таким образом Essentials очень хорошо подходит для малых организаций, которые бы хотели пользоваться большинством современных решений для обеспечения безопасности корпоративной сети, хранения документов, удаленного доступа, возможно, почтовые системы. Для тех организаций, которые не хотели бы тратить много денег как на саму ИТ инфраструктуру, так и на работу высококвалифицированных системных администраторов.
Установка и первоначальная настройка
Установка данной ОС вполне стандартная процедура. Если вы хоть раз устанавливали Windows Vista /7/8/8.1, то вы без проблем установите и Essentials. Однако, если вы не устанавливали ни вышеперечисленных ОС ни любую из последних версий серверных ОС, то я рекомендую или довериться профессионалу или как минимум студенту второкурснику.
Единственное, что я бы рекомендовал в момент установки, если у вас один жёсткий диск, разбить его на два раздела. Т.е. сделать так чтобы после установки в системе был второй уже отформатированный жесткий диск. Безусловно это только рекомендация, вы сможете подготовить второй диск в последующем, однако придется переносить некоторые папки.
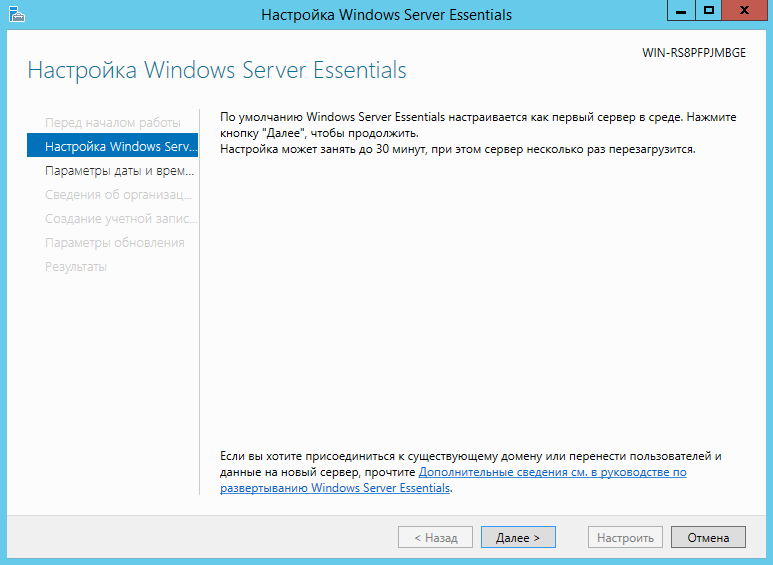
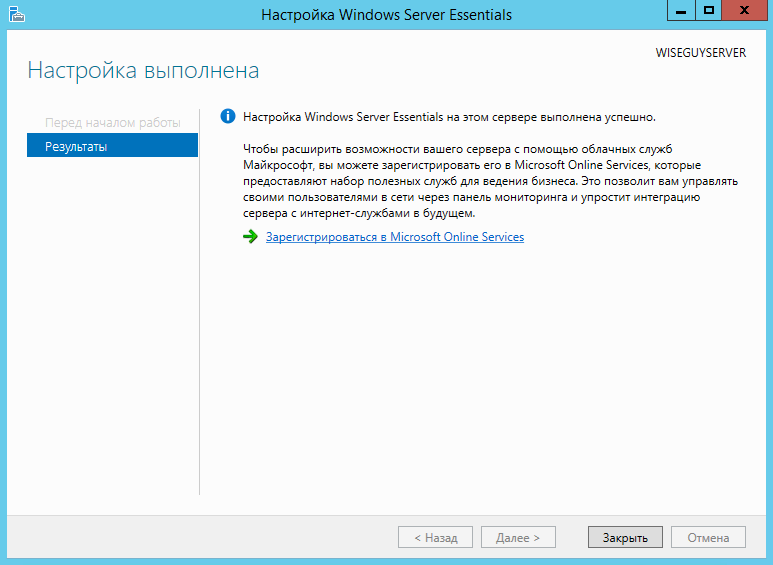
После первого входа в свежеустановленную ОС запустится мастер «Настройка Windows Server Essentials», который поможет произвести первоначальную настройку.
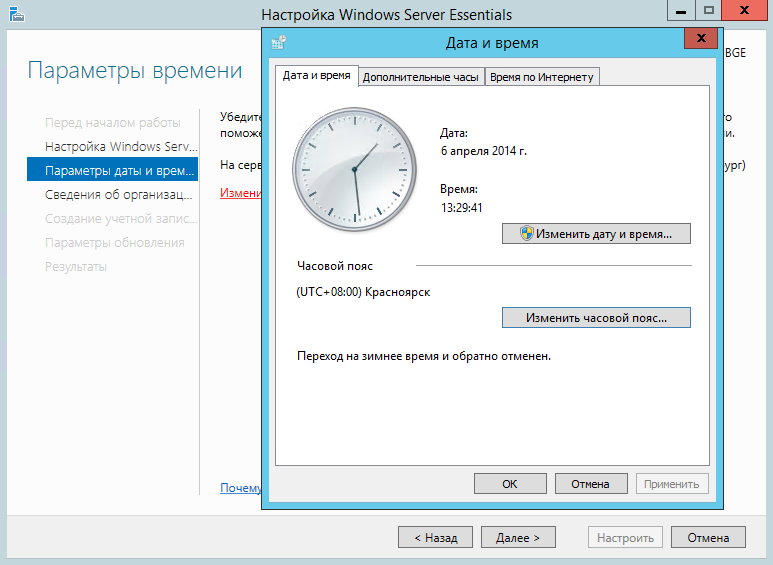
На первом шаге вам необходимо задать настройки даты и времени.
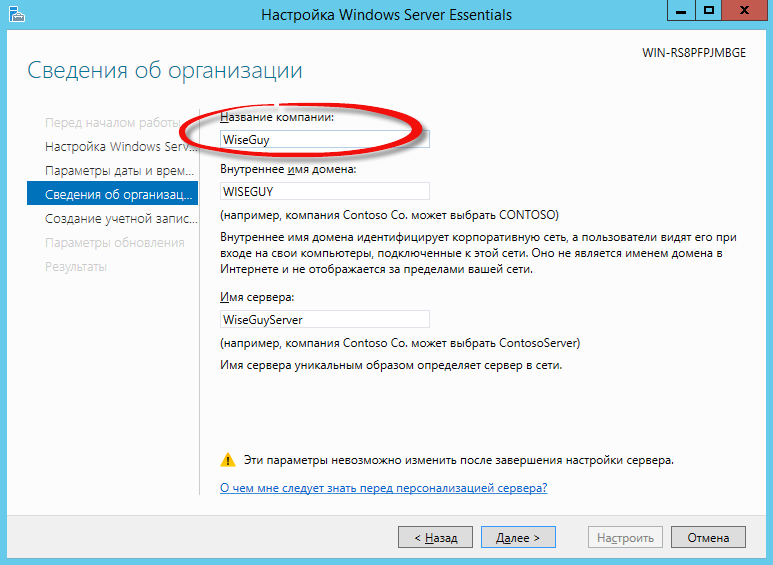
На втором шаге вам необходимо заполнить на английском языке название компании. Имя домена и имя сервера будут в таком случая сгенерированы автоматически, хотя конечно вы можете поменять их.
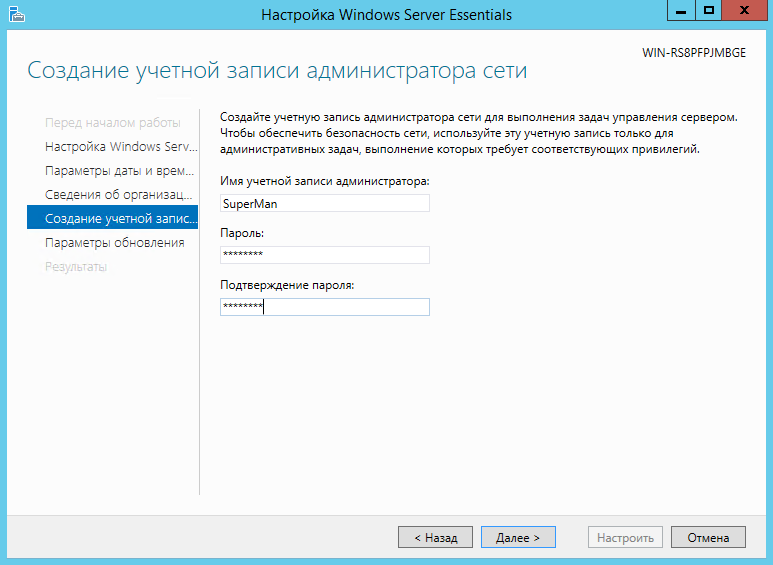
На следующем шаге вам необходимо заполнить имя администратора и задать его пароль.
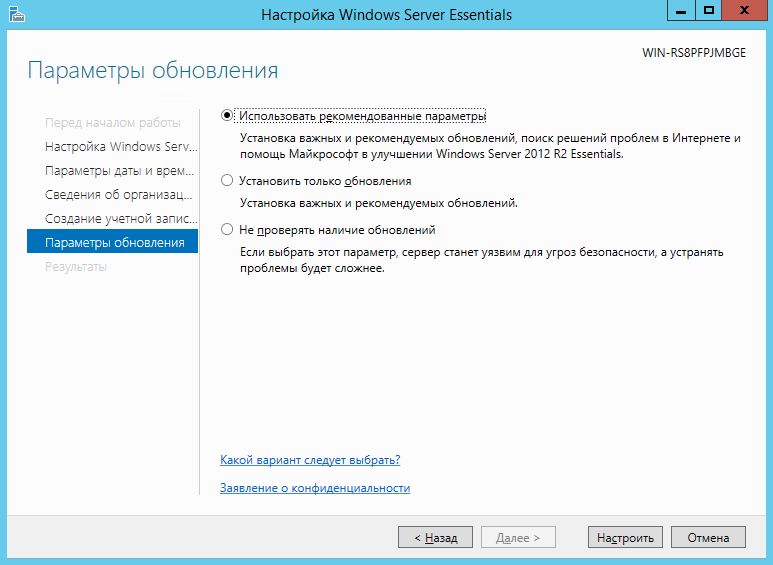
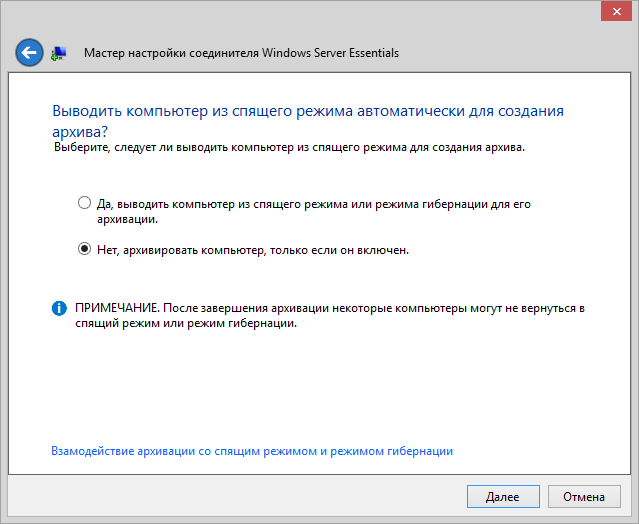
На последнем шаге необходимо указать способ обновления операционной системы и нажать настроить
После этого запустится процесс, который произведет все необходимые первоначальные настройки. Это займет около 30 минут и потребует несколько перезагрузок. За это время ОС успеет в частности установить необходимые роли и настроить сервер в качестве домен контроллера для нового домена.
Настройка
Продукт весьма большой и обширный, я хотел бы рассказать о самых базовых возможностях настройки, такие как создание пользователей, настройка удаленного доступа, создание папок, подключение клиентов.
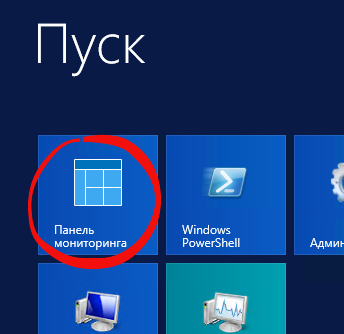
Вся настройка происходит в панели мониторинга, доступ к ней есть с рабочего стола, панели быстрого запуска и стартового экрана.
Создание пользователей
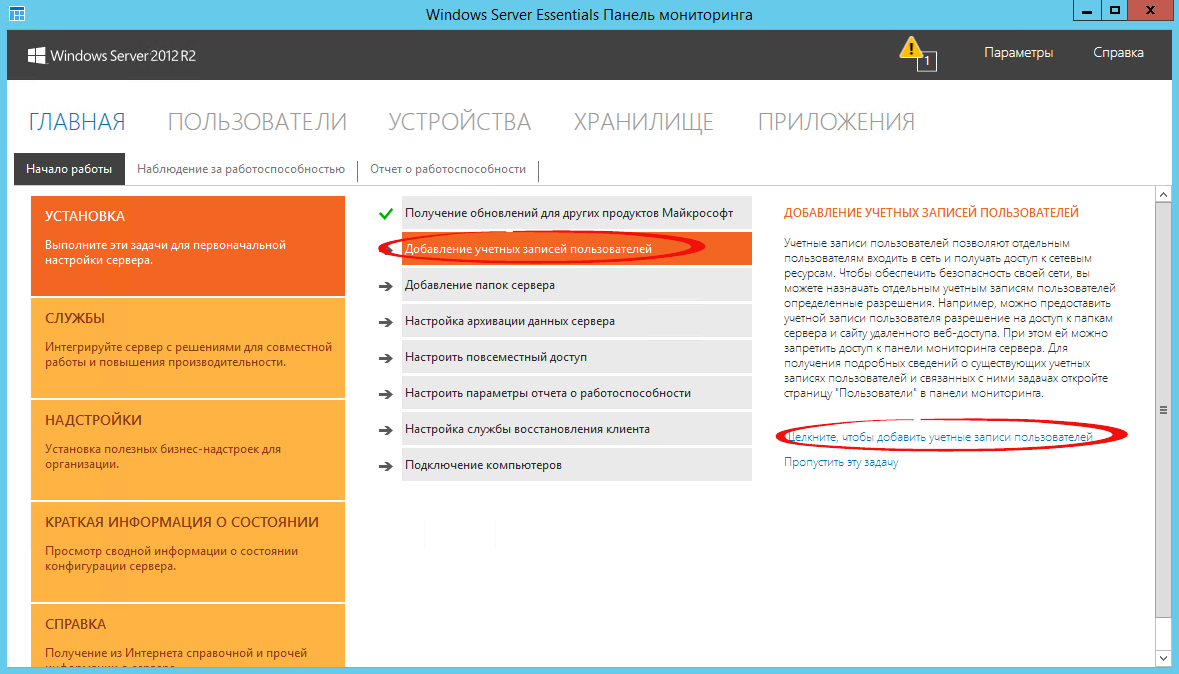
При первом запуске данной панели вам откроется вкладка установка, на которой можно выполнить ряд задач по настройке сервера.
Я начну с добавления пользователей. Щелкаем ссылку для добавления учетных записей.
Заполняем поля формы и нажимаем далее

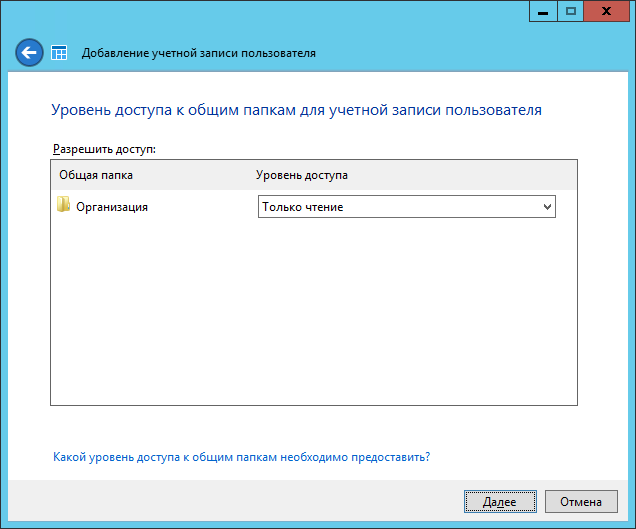
Выбираем уровень доступа к общим папкам, которые были созданы. На начальном этапе существует лишь одна – Организация. В дальнейшем вы можете менять разрешения на доступ как из свойств пользователя, так и из свойств папки.
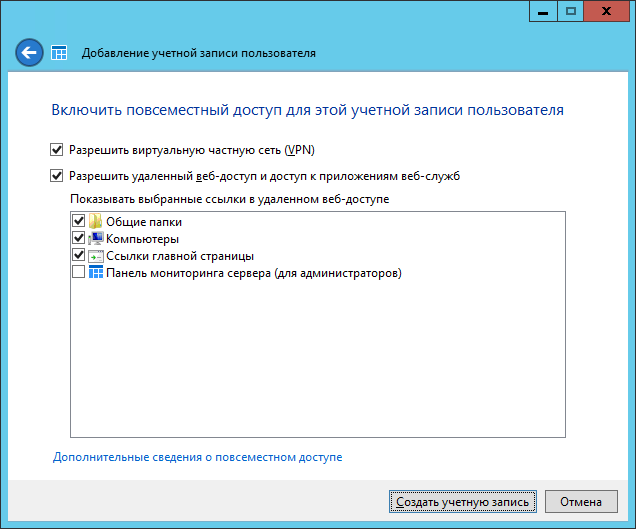
Далее устанавливаем, что будет доступно для пользователя удаленно. Про удаленный доступ расскажу чуть позже.
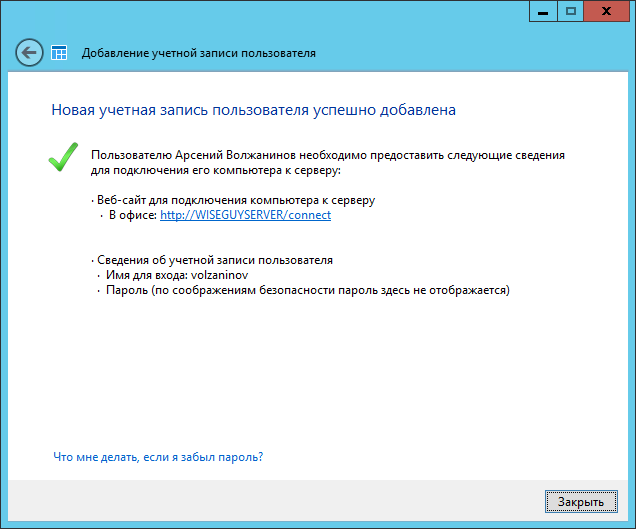
Учетная запись создана. Жмем закрыть.
Подобным образом можно создать множество учетных записей. Безусловно, Вы можете пользоваться и привычным и знакомым для вас интерфейсом Active Directory Users and Computers, но в таком случае выдавать разрешения на доступ вам придется ручками.
Добавление папок сервера
Для добавление папок существует другой мастер, который поможет и создать папку на диске, и общий доступ для нее настроить, и разрешения выдать. Для его запуска необходимо щелкнуть соответствующую ссылку в панели мониторинга. 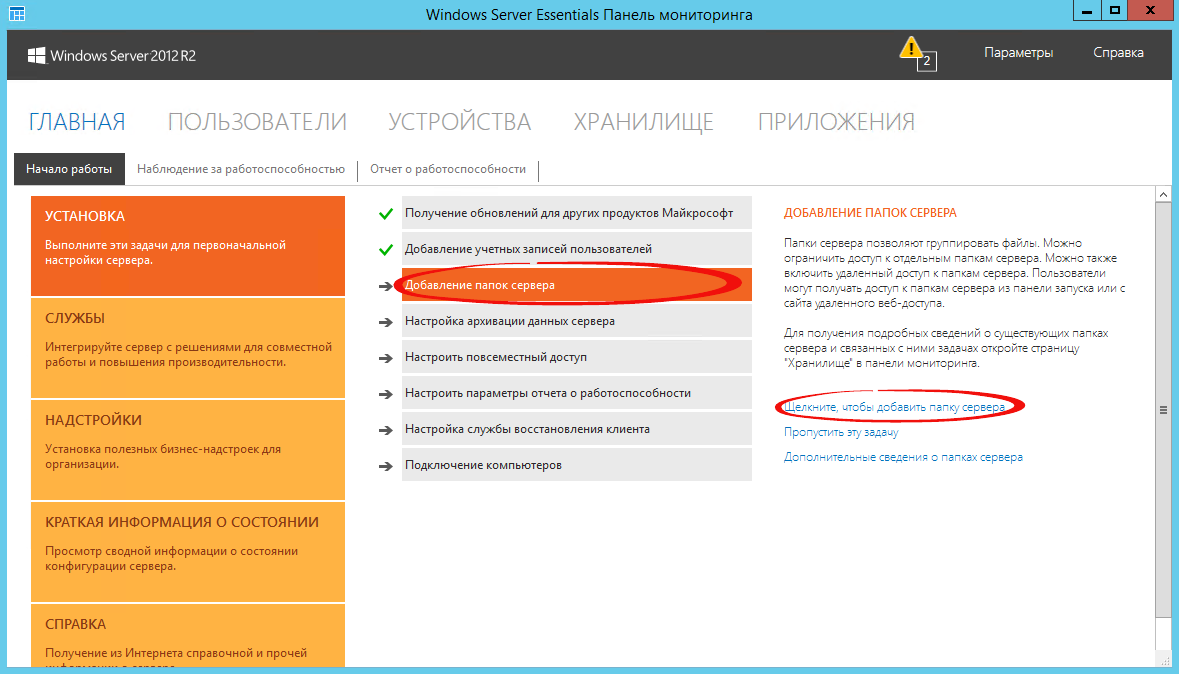
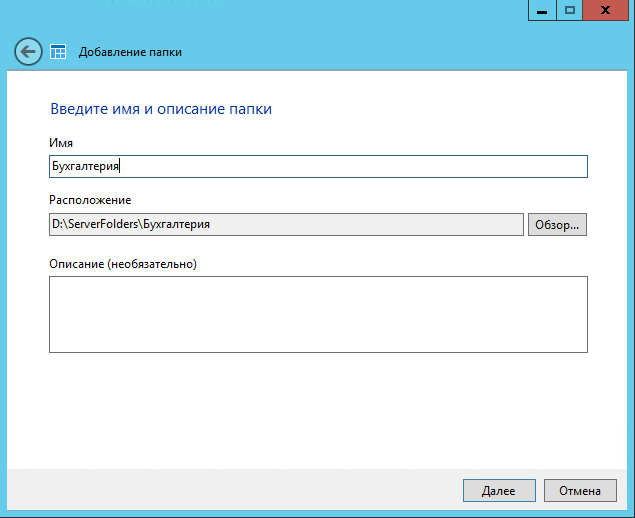
В открывшемся окне мастера вводим название. Можно изменить расположение и добавить описание. Нажимаем далее.
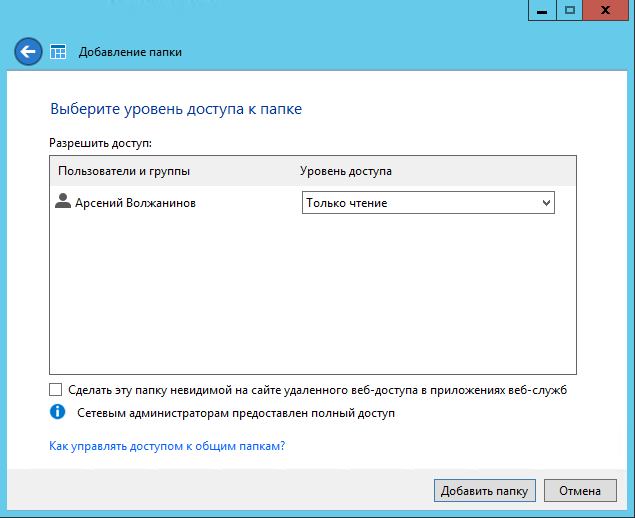
На следующей странице указываем необходимые разрешения. При необходимости делаем ее недоступной при удаленном доступе.
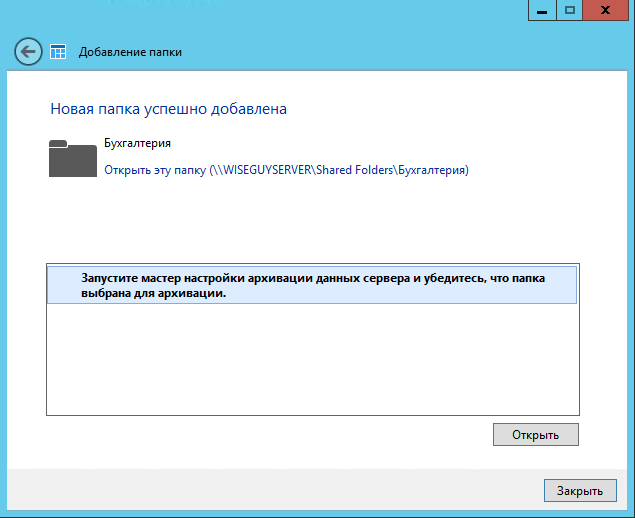
С последнего шага данного мастера можно запустить мастер настройки архивации. Нажимаем закрыть.
Настройка удаленного доступа
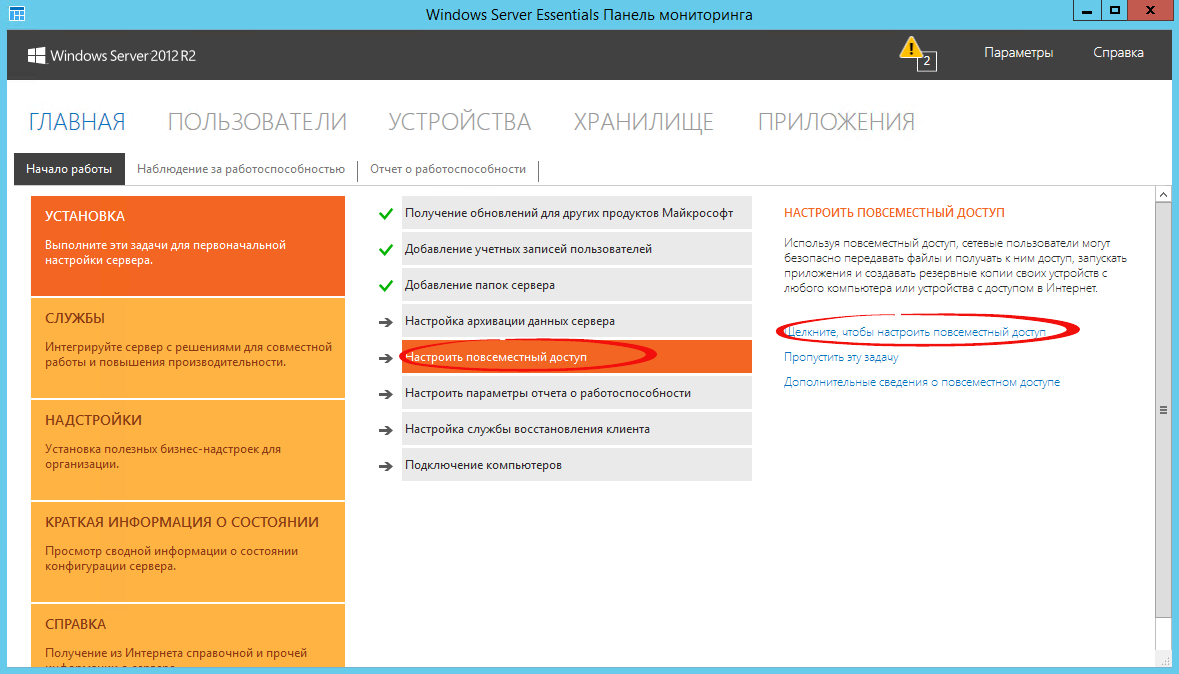
Один, наверное, из самых сложных этапов настройки Windows Server 2012R2 Essentials. Настройка так же происходит с помощью мастера. Мастер традиционно запускается из панели мониторинга.
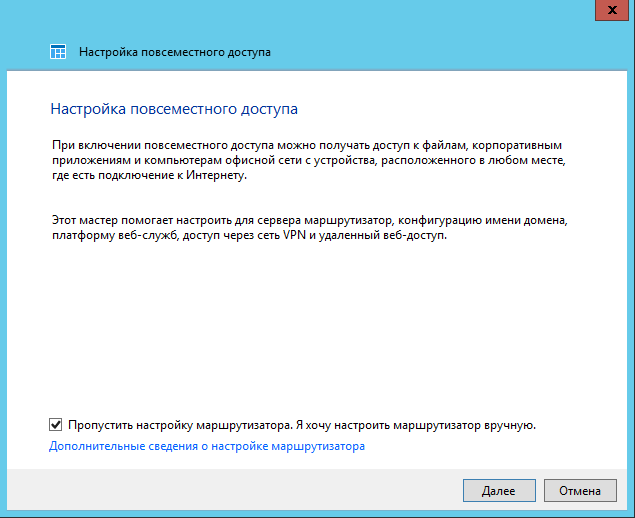
Первое что Вам необходимо настроить это ваш маршрутизатор – об этом Вам сообщает мастер. На самом деле Вам необходимо настроить перенаправление портов на маршрутизаторе. Для этого у маршрутизатора должен быть «белый» IP адрес. А на самом сервере лучше настроить статический IP адрес. Перенаправить нужно следующие порты 80, 443, 1723, 987 на IP адрес вашего сервера. В общем то процедуру настройки может выполнить и сам мастер, если ваш маршрутизатор поддерживает UPnP. Я делал настройку ручками, поэтому пропустил данный шаг.
После этого открывается новый мастер настройки доменного имени. Нажимаем далее.
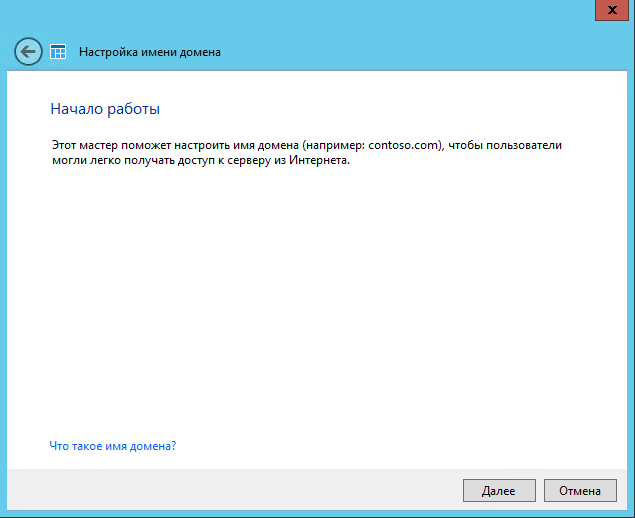
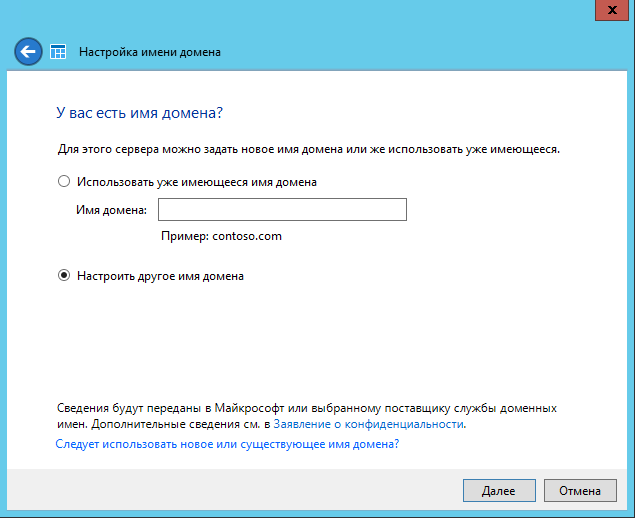
Мастер предложит ввести имя внешнего домена или создать новый. Для собственного домена Вам понадобится сертификат, поэтому рассмотрим тут вариант настройки с использованием домена Microsoft. Выбираем другое имя домена и щелкаем далее.
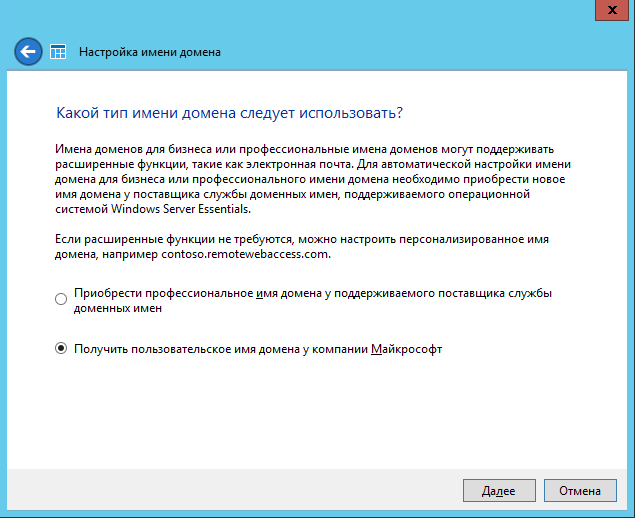
Рассмотрим вариант с доменом компании Microsoft.
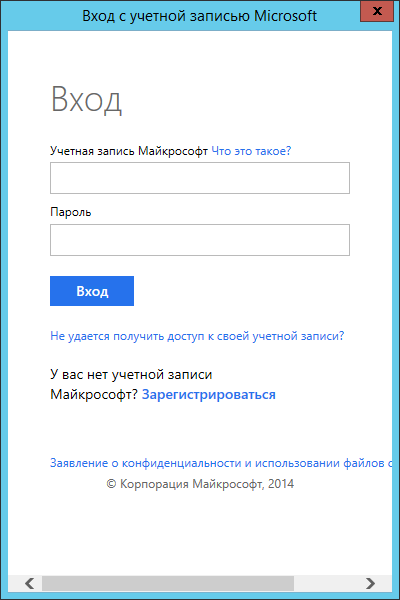
Тут попросит авторизоваться в Microsoft Account.
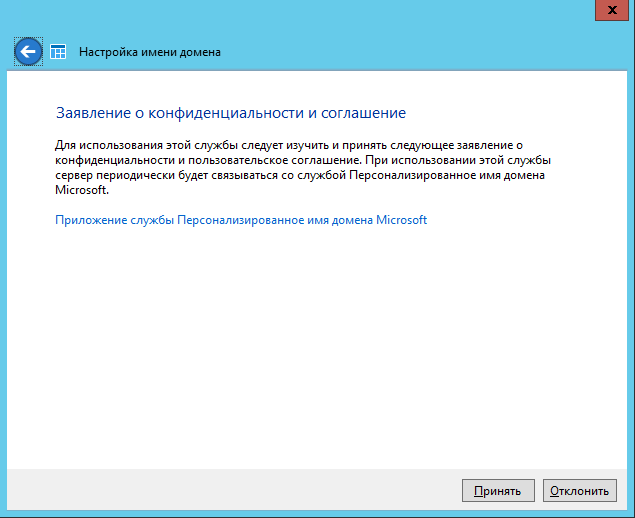
После авторизации принимаем заявление о конфиденциальности.
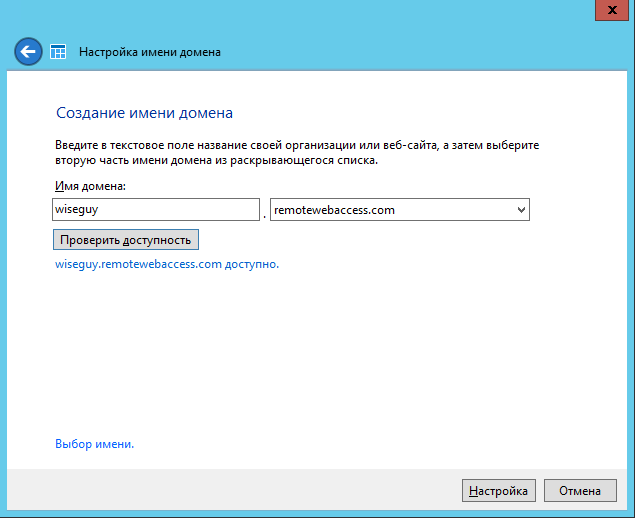
Вводим имя домена и проверяем доступность, жмем настроить.
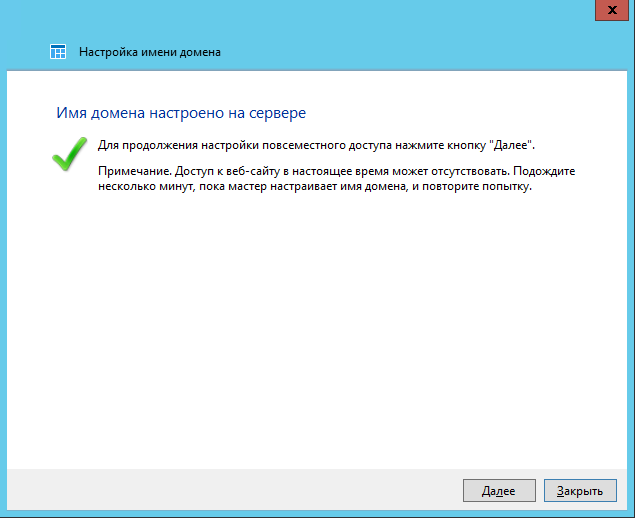
Ну что с именем домена разобрались. Продолжаем — далее.
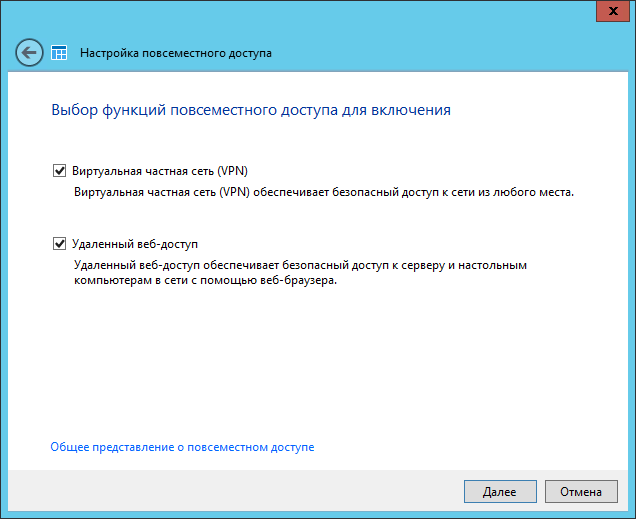
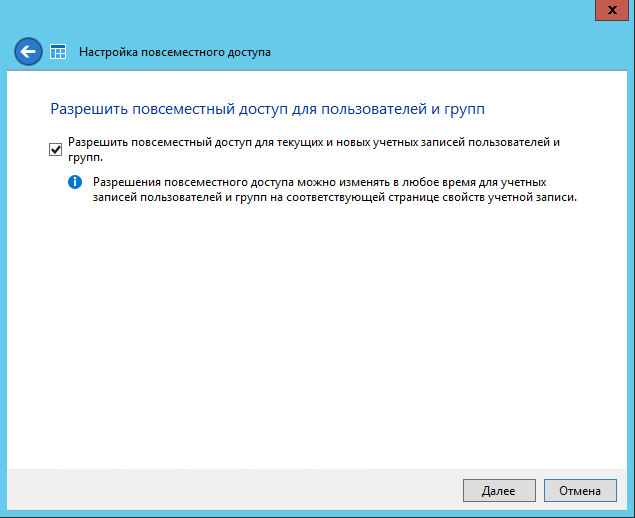
Выбираем какие именно возможности будут доступны.
Выбираем будет ли доступен удаленный доступ для текущих пользователей.
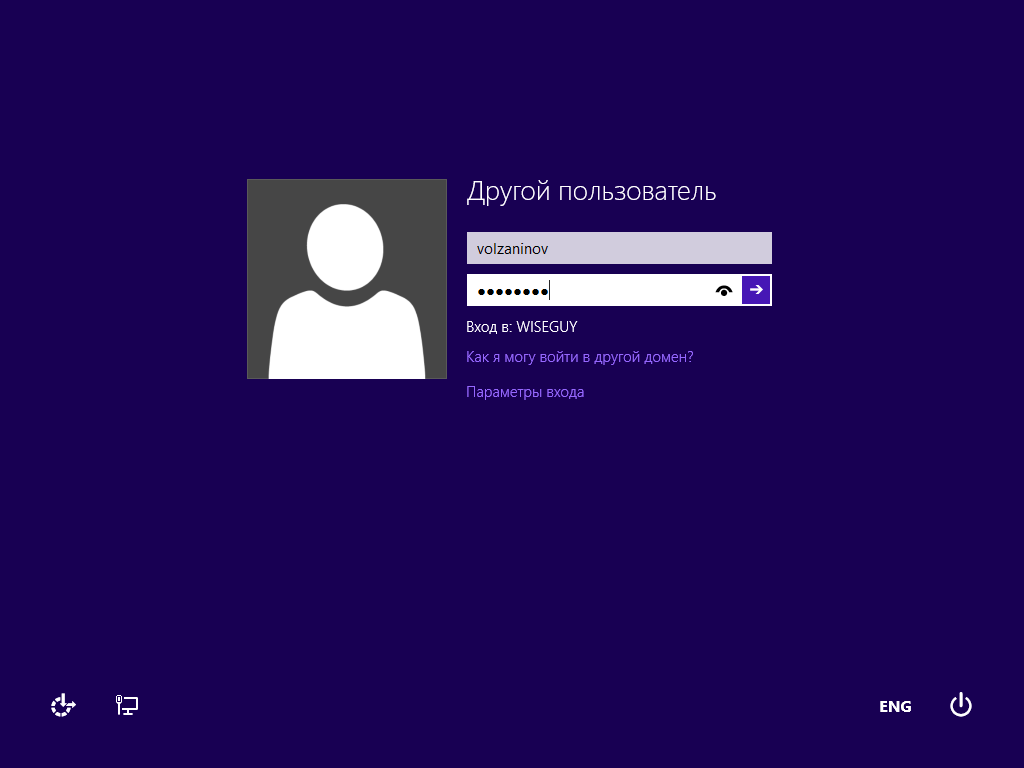
Ну вот и все можете попробовать зайти на сайт wiseguy.remoteweaccess.com.
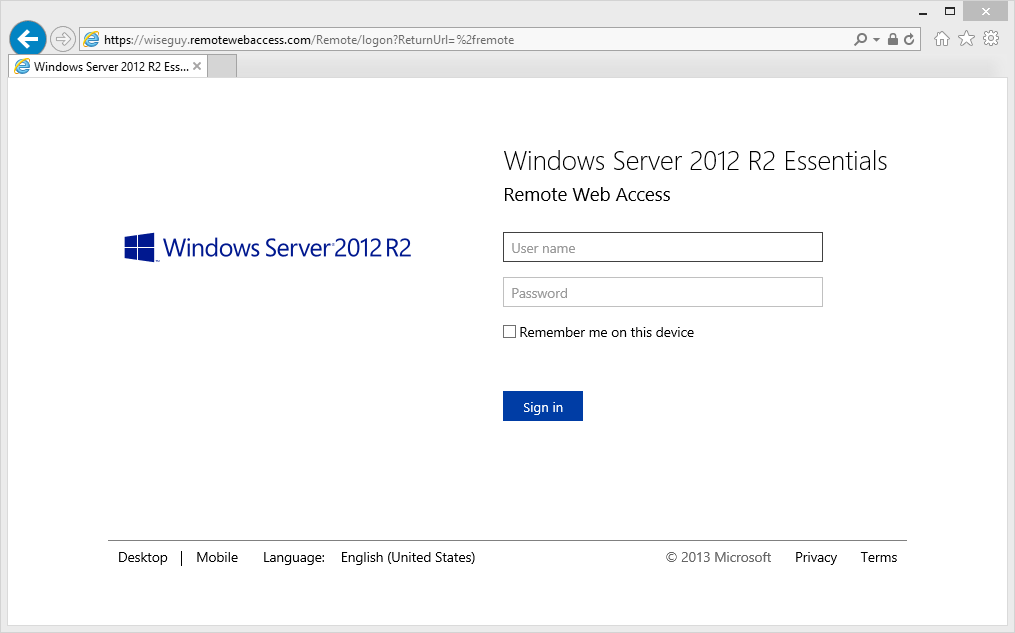
C данного веб сайта есть возможность доступа к общим папкам и доступ к рабочим столам пользователей.
Подключение рабочих станций
Если мы и на этот раз откроем панель мониторинга и перейдем на страницу подключение компьютеров, то увидим там лишь инструкцию к действию
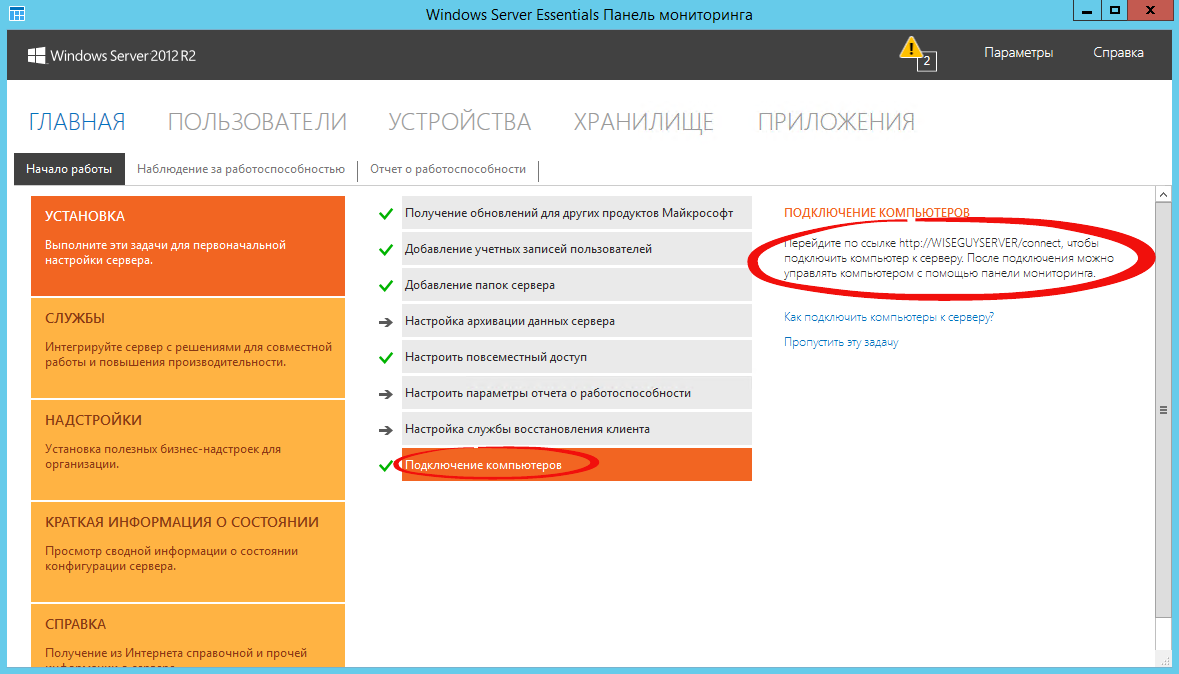
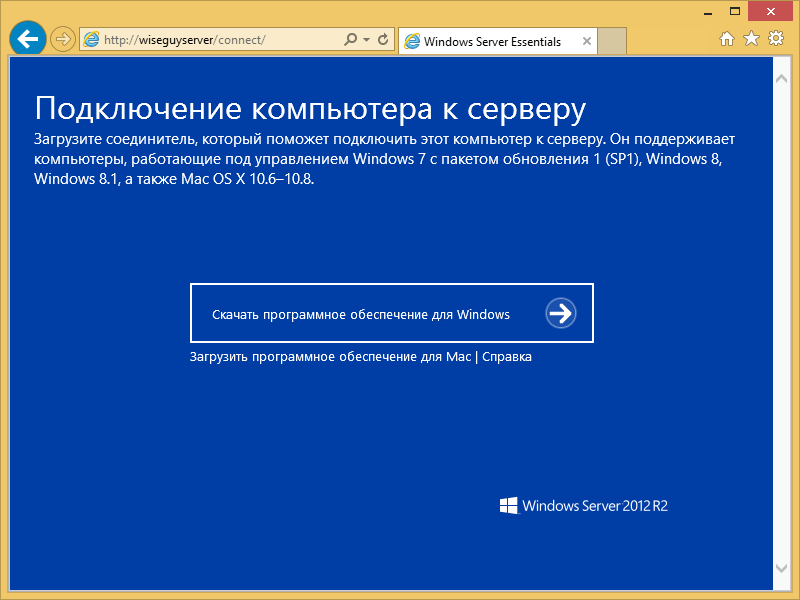
Следуя инструкции на клиенте в браузере открываем страничку http:// /connect. Нажимаем ссылку для скачивания.
Выбираем выполнить. 
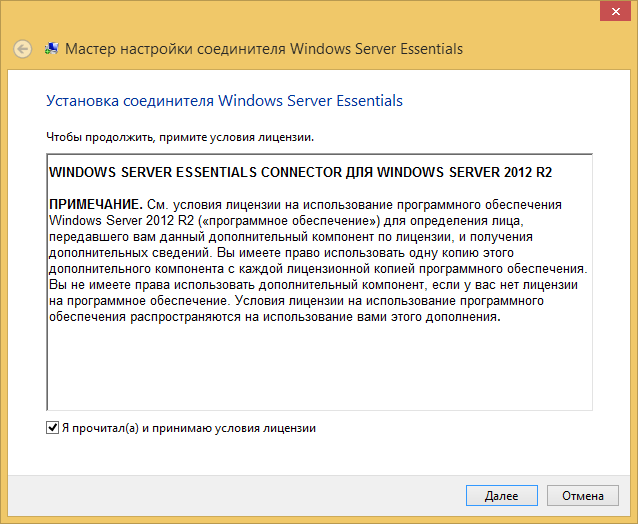
Принимаем лицензию и ждем.
Вводим имя пользователя и пароль пользователя данного компьютера или администратора. Я вводил учетку пользователя.

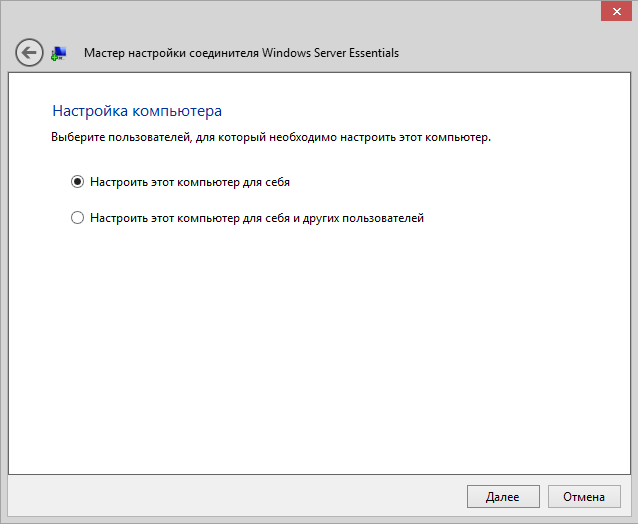
Выбираем, кто будет пользоваться компьютером.
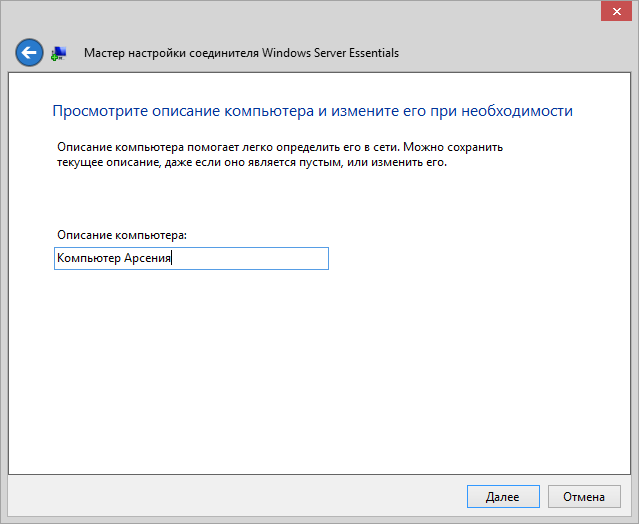
Вводим описание компьютера.

Заходим на компьютер под учетной записью пользователя.
Можно работать. На рабочем столе уже есть все необходимые ярлыки.
Источник
![]() Возможно каждый ИТ специалист в какой-то момент сталкивается с необходимостью создания тестовой среды. По моему мнению, на сегодняшний день тестовая среда — это неотъемлемая часть сетевой инфраструктуры. Как сказали в одном ИТ вебинаре: “лучше чтобы их было две”
Возможно каждый ИТ специалист в какой-то момент сталкивается с необходимостью создания тестовой среды. По моему мнению, на сегодняшний день тестовая среда — это неотъемлемая часть сетевой инфраструктуры. Как сказали в одном ИТ вебинаре: “лучше чтобы их было две” 
Будьте в курсе актуальных новостей в мире ИТ: https://t.me/ITKBnews. Также будем рады видеть Вас участниками групп https://vk.com/blogitkb и https://www.fb.com/blog.it.kb
Одним из основополагающих критериев тестовой среды чаще всего является относительно невысокая стоимость решения.
Вопросы, которые могут совмещаться с тестовой средой:
- расположение виртуальной среды;
- хранение редко используемых, малонагруженных по IOPs, но объемных данных (образы, дистрибутивы, базы Консультант Плюс и т.д.);
- расположение архивных копий (например, систему резервного копирования от компании Microsoft System Center Data Protection Manager 2012 R2).
В качестве примера рассмотрим вариант тестовой среды для виртуализации на основе Hyper-V операционной системы Windows Server 2012 R2 и сетевой системы хранения данных (NAS) от компании NETGEAR ReadyNAS 3220 (хотя описание настройки также подходит к моделям ReadyNAS 102/104/312/314/316/516/2120/3220/4220/716X).
Выбор пал на данного производителя по следующим причинам:
- Стоимость;
- Монтаж в стойку;
- Поддержка рейд: 0,1,5,10;
- Гарантия в городе использования;
- Поддержка iSCSI (SMB) – универсальное решение для подключения к разным серверам;
- Поддержка горячей замены дисков;
- Резервирование портов;
- совместимость дисков и их гарантия;
Подключение к родительскому разделу Hyper-V согласно требованиям к тестовой среде происходило по iSCSI (также рассматривался вариант по SMB 3.0, т.к. Windows Server 2012 R2 и NETGEAR ReadyNAS 3220 с приложением SMB Plus поддерживают 3-ю версию протокола).
Подключение напрямую и первоначальная настройка (включая прошивку на официальную версию 6.1.8 с портала) согласно документации производителя NETGEAR к серверу не составили трудностей.
Далее как и в любом другом проекте шел этап тестирования. Выбор пал на знакомый уже IOmeter версии iometer-1.1.0-rc1-win32.i386-bin с параметрами паттернов:
| Тип нагрузки (паттерн) | Размер блока | Write/Read, % | Random/Seq, % | Align I/Os on | #Outstanding I/O* |
| VDI on Hyper-V | 4 Kb | 80/20 | 80/20 | 128 Kb | от 2 до 32 по экспоненте |
| MS SQL on Hyper-V | 16Kb | 66/34 | 100/0 | 128 Kb | от 2 до 32 по экспоненте |
| MS SQL Log on Hyper-V | 64 Kb | 100/0 | 100/0 | 128 Kb | от 2 до 32 по экспоненте |
| Exchange 2007 on Hyper-V | 8 Kb | 55/45 | 80/20 | 128 Kb | от 2 до 32 по экспоненте |
| Тип нагрузки (паттерн) | Размер блока | % Access | Write/Read, % | Random/Seq, % | Align I/Os on | #Outstanding I/O* |
| Fileserver | 512 byte | 10 | 20/80 | 100 | 128 Kb | от 2 до 32 по экспоненте |
| 1 Kb | 5 | 20/80 | 100 | 128 Kb | ||
| 2 Kb | 5 | 20/80 | 100 | 128 Kb | ||
| 4 Kb | 60 | 20/80 | 100 | 128 Kb | ||
| 8 Kb | 2 | 20/80 | 100 | 128 Kb | ||
| 16 Kb | 4 | 20/80 | 100 | 128 Kb | ||
| 32 Kb | 4 | 20/80 | 100 | 128 Kb | ||
| 64 Kb | 10 | 20/80 | 100 | 128 Kb |
Также были установлены и подключены к NAS три виртуальные машины на базе Hyper-V Windows Server 2012 R2.
Результаты были мягко говоря слабоватыми в конфигурации 6 дисков SATA, подключенному напрямую по 1Гб-ому каналу к серверу.

Очень высокий показатель “Response time” (более 50 мс).
Удивление было вызвано причиной официальной поддержки NAS в качестве проверенного (сертифицирована на совместимость) компанией решения для виртуализации Hyper-V или vSphere.
Поискав более подробной информации по настройке ReadyNAS, пришлось обратиться в техподдержку через личный кабинет, которая не заставила себя ждать!
После общения сразу со второй линией поддержки на русском языке перешли на третью на английском
Результатом диагностики стало применение новой прошивки 6.1.9, которой еще нет на официальном сайте компании и рекомендаций по настройке.
ReadyNASOS 6.1.9 [RC5]
Latest beta: ReadyNASOS 6.1.9-RC5
- ARM (102 / 104 / 2120)
- x86_64 (312 / 314 / 316 / 516 / 716 / 3220 / 4220)
To install: Click on appropriate link above for your system to download firmware image.
Then upload that image from the management UI’s System->Settings->Update->Install Firmware section.
Notable changes since ReadyNASOS 6.1.8
1. [RC1] Update kernel with various filesystem and iSCSI improvements.
2. [RC2] Make Richcomm-based UPS devices work.
3. [RC2] Add DLNA support for FLV.
4. [RC2] Avoid issue with too many open file descriptors in some odd AD environments.
5. [RC3] Various security updates. (OpenSSL, GNUTLS)
6. [RC4] Fix periodic log truncation.
7. [RC5] Add UI option to configure sync policy for iSCSI LUNs.
***
Рекомендации сотрудников компании NETGEAR: для максимальной производительности использование RAID 10 и дисков 1Тб вместо 4Тб.
Для того чтобы сохранить место на ТЕСТОВОМ СТЕНДЕ, было принято решение оставить RAID 5 с настроенными Jumbo Frames (NAS и адаптер родительского раздела Hyper-V).
Список наиболее производительных RAID (по уменьшению):
1- RAID 10 – наиболее производительный, большой объем на резерв
2- RAID 5+0
3- RAID 6+0
4- RAID 5
5- RAID 6 – наименее производительный


- Remove From My Forums
-
Question
-
Hi,
We have an HP Nas as a cluster of 2 nodes handling all our shares, but we are looking in adding another NAS, and before going to HP again, I was wondering if we could use Windows Storage server 2012 R2 as a NAS.
The goal will be to have 2 Windows servers as a clustered NAS, and having both servers with internal disks, in case of failure of 1 server, to keep the shares in the cluster up and running. If it’s possible, does Windows server handle the data replication
between the 2 servers or do we need to get a 3rd party software for that. Also if it’s possible, could we use SSD Sata disks and not SCSI disks?Thank you for any insight you can give, and if there is any blogs or walkthrough somewhere that you can share, I would appreciate it.
Thanks.
-Mehdi
Answers
-
Thank you for your reply, I think however Windows 10 is not an option for us as it seems to be lacking features and stability.
I would be more interested in option 1 or 3.
Regarding option 3, do I have to use Hyper-V?
Is it a valid scenario to have 2 physical servers with starwind software installed on each? Or do I have to install starwind on a VM?
[ /// ]
For 1) there are many options. Just make sure they are HCLed and listed here:
Windows Server 2012 R2 HCL: Storage Spaces
http://www.windowsservercatalog.com/results.aspx?&chtext=&cstext=&csttext=&chbtext=&bCatID=1642&cpID=0&avc=10&ava=0&avq=0&OR=1&PGS=25&ready=0
…or you’ll have issues passing them thru support in case of an issue.
For 3) you can use bare metal Window Server (very popular setup for Scale-Out File Servers and non-virtualized SQL Server or Exchange). We prefer to run inside so-called «parent partition» (where actual Windows OS runs) to have shorter I/O path.
But running inside a guest VM (like HP VSA) is also possible. Give a try to a FREE offering (if you have proper title) maybe it would be enough for you
Good luck
Hyper-V Shared Nothing Cluster. Only two Hyper-V hosts needed.
-
Proposed as answer by
Thursday, February 26, 2015 7:44 AM
-
Marked as answer by
MedicalSMicrosoft contingent staff
Friday, February 27, 2015 2:56 AM
-
Proposed as answer by

Windows Storage Server NAS setup
can you do a how to setup Windows Storage Server as a NAS in the home for a competent DIY? Not just buying off the shelf but going to it diy. Windows Storage Server std can be bought off eBay for a reasonable price 200 stage. HDD are reasonable. surely it is a reasonable project for a well-versed person in windows? even a crossover person from Linux.
Here are some setup instructions from Seagate WSS NAS, but it will be the same process for any other Windows-based NAS. Either its Buffalo, Thecus or WD it will be the same setup.
Seagate Business Storage NAS Windows Server | How to Create a New User Account and a New Share
WSS NAS | How to Create Users and Shares_Workgroup
Getting started
This is Seagate created manual for configuring RAID and volumes etc. The very same setup will apply to Buffalo and Thecus NAS.
Installation
Your Windows WSS NAS’s installation is divided into two parts:
- Hardware setup
- Windows WSS NAS Setup Assistant
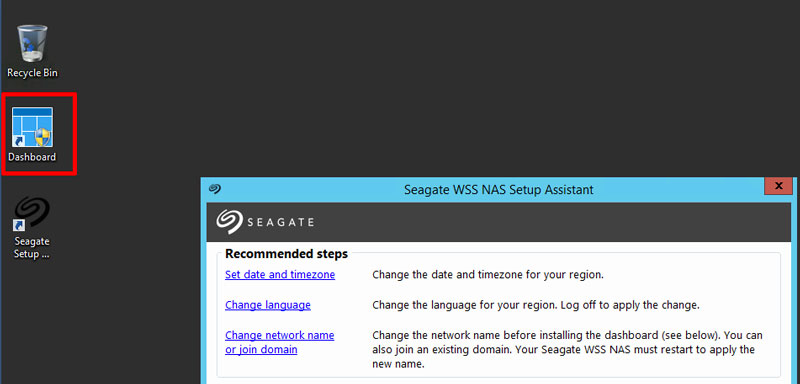
Windows WSS NAS Setup Assistant
The Windows Storage Sever 2012 R2 Essentials dashboard is a critical management tool for your WSS NAS. However, it is not available when you first log into the NAS. Follow the required steps in the Windows WSS NAS Setup Assistant to make certain that the dashboard is properly installed.
First login
You can access the WSS NAS using Remote Desktop Connection.
- From a PC on the same network as the WSS NAS, launch Remote Desktop Connection.
- Enter the default login: administrator
- Enter the default password: admin
- Choose Connect
Two popup windows appear when you first log into the NAS:
- Windows WSS NAS Setup Assistant
- Windows Networks (to the right).
You can choose Yes for the Windows Networks popup window.
Windows WSS NAS Setup Assistant: recommended and required
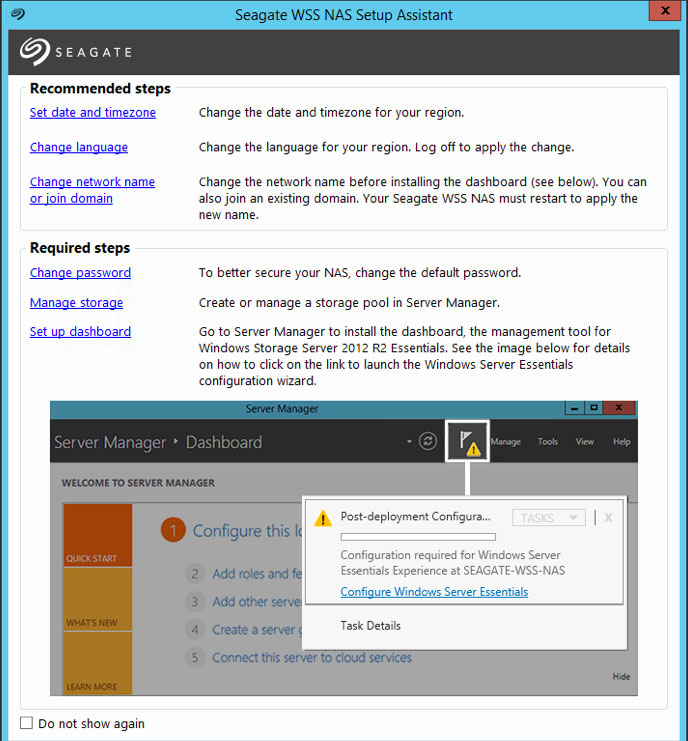
The Windows WSS NAS Setup Assistant launches automatically each time you boot the NAS. Once you complete the initial setup and confirm that the dashboard is available, you can choose to stop the Setup Assistant from launching by checking the box on the lower left: Do not show again.
The Windows WSS NAS Setup Assistant includes a list of recommended and required steps to complete the installation. If the recommended steps are applicable to you, make certain to complete them before moving to the required steps.
Recommended steps
- Set date and timezone–The default timezone is Pacific Standard Time (PST). Click this option to change the timezone for your region.
- Change language–The default language is English. Click this option to change the language for your environment.
- Change network name or join domain–The WSS NAS’s default network name is Windows-nas-wss. Click this option to change the network name. If applicable, you can also join your WSS NAS to a domain on your network.
Required steps
- Change password–A second administration account must be created when running the Windows Server Essentials wizard (see Setup dashboard below). However, the password for the default user, Administrator, remains admin unless it is changed. For security reasons, change the password.
- Manage storage–Models sold with hard drives can skip this step. For diskless models, choose this option to create a storage pool and choose the best storage space to protect your data. For further explanation and step-by-step instruction, see Manage storage: storage spaces below.
- Set up dashboard–Perform this step last. Click the link to launch the Server Manager and review the instructions at Dashboard setup: Configure Windows Server Essentials. The Windows Server Essentials configuration wizard walks you through creating a new domain for the WSS NAS. The domain is required to use the dashboard.
Manage storage: storage spaces
Windows Server 2012 introduced storage spaces to better optimize hard drive capacity and performance. Hard drives in your WSS NAS are collected into one or more storage pools that work together to manage and protect data. For further information on storage pools/spaces, see the Microsoft Technet overview.
Review the instructions below to create one or more:
- Storage pools–Combine the WSS NAS hard drives into one or more groups.
- Virtual disks–Use the storage pool’s available capacity to create virtual disks for the storage pool.
- Volumes–A volume appears on your WSS NAS as a disk. Add server folders to a volume to store and access data on the network.
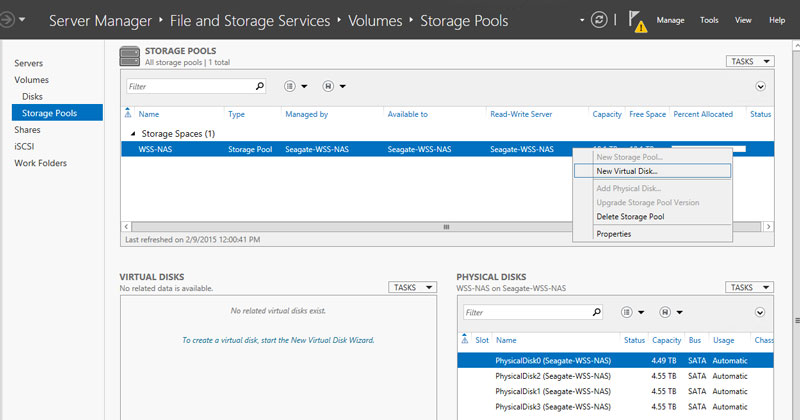
Storage pools
You can create one or more storage pools using the hard drives in the WSS NAS. For enhanced storage capacity, Windows recommends combining all the hard drives into a single storage pool.
Create a storage pool
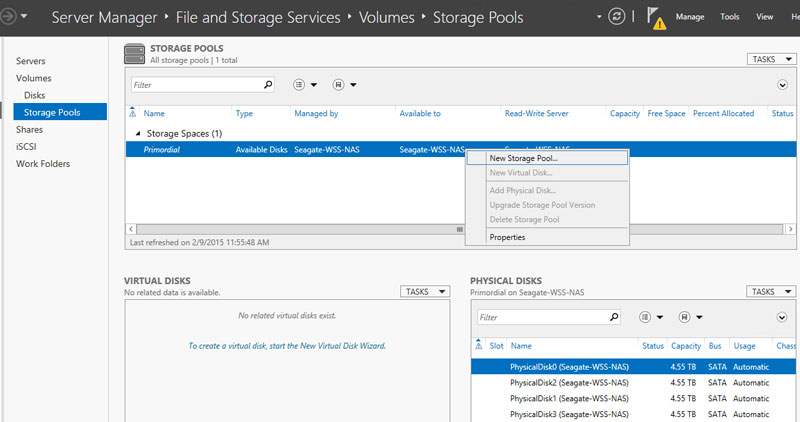
- From the Windows WSS NAS Setup Assistant, click the link Manage storage.
- In the Storage Pools window, right click Primordial below Storage Spaces.
- Choose New Storage Pool.
- Choose Next.
- At the Storage Pool Name window, enter a name for your storage pool and choose Next.
- Choose the hard drives for the new storage pool and choose Next.
- Review the Confirmation page and choose Create.
Virtual disks
The New Virtual Disk wizard asks you to assign the following:
- A level of data protection
- A level of storage provisioning
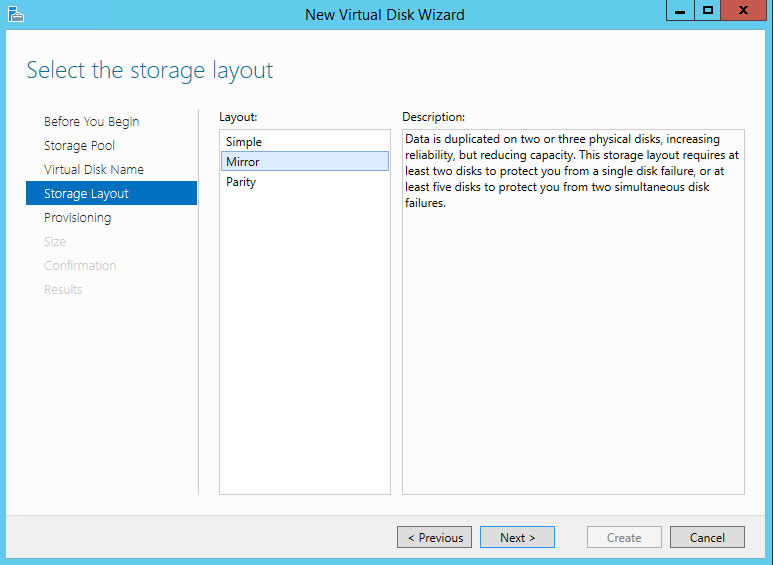
Data protection
Use one of the resiliency types below:
- Mirror (recommended)–One or two extra copies of each file are written across a stripe that includes two or more hard drives. Mirroring hard drives reduces capacity by as much as 50% but it also offers enhanced performance when compared to parity.
- Parity–Parity information is written alongside data across a stripe that includes three or more hard drives. Parity offers greater capacity than mirroring but performance is reduced. Parity is a very good option for archival environments.
- Simple (No data protection)–Though it provides the best performance, choosing Simple can lead to data loss should a hard drive fail.
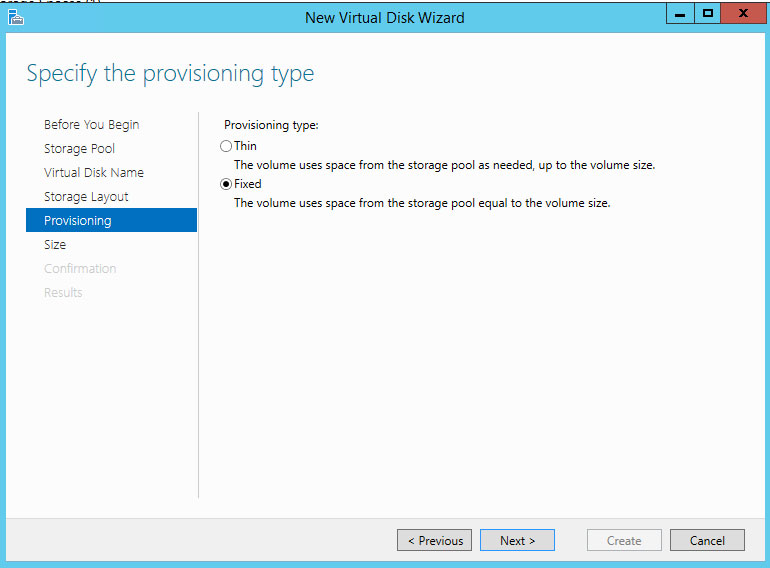
Storage provisioning
Windows Storage Server 2012 R2 Essentials offers two types of provisioning:
- Fixed (recommended)–Storage space is used based upon the total capacity assigned to the virtual disk.
- Thin–Storage space is used as it is needed, up to the volume size. The volume size can be expanded when adding an amount of hard drives equal to the storage pool.
Thin provisioning is an advanced storage configuration that can be used to great effect with enclosures that house a large amount of hard drives. Windows recommends using Fixed for the WSS NAS. To learn more about thin provisioning, see the Microsoft Technet overview.
Create a storage pool
- In the Storage Pools window, right click the newly created storage pool. It is listed below Storage Spaces.
- Choose Next.
- If applicable, choose a storage pool and select Next.
- At the Virtual Disk Name window, enter a name and choose Next.
- Choose your level of data protection.
Important: Windows recommends mirror for performance and protection while parity is a good choice for archival environments. Windows does not recommend simple since it will not protect your data if a hard drive fails.
- Choose Next.
- Choose a provisioning type.
Important info: Windows recommends fixed for the WSS NAS.
- Choose Next
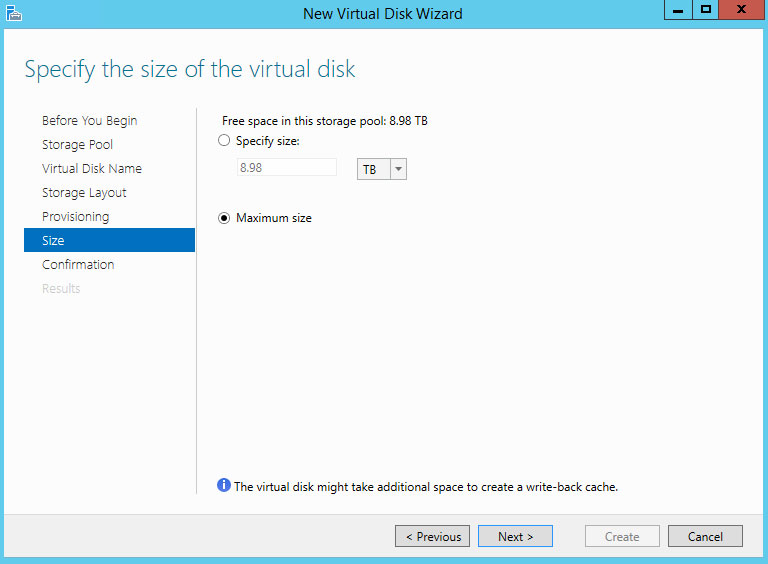
- Enter the capacity for the virtual disk. If you are creating a single virtual disk with fixed provisioning, you can choose Maximum size.
- Choose Next.
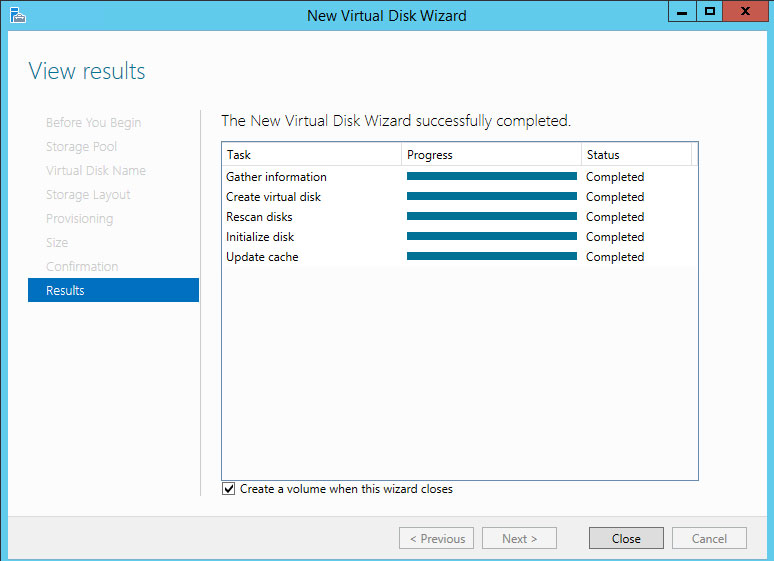
- Review the Confirmation page and choose Create.
Volume
The New Volume wizard may open automatically following the creation of a virtual disk. You can confirm that it launches automatically by reviewing the final step of the New Virtual Disk wizard. The box is checked next to Create a volume when this wizard closes.
Volume format
When creating the volume, you can format using:
- NTFS (recommended)
- ReFS
ReFS has many advantages, including efficient error correction and corrupt file handling. However, it is not possible to know if all client applications support ReFS. Therefore, Windows recommends NTFS.
To learn more about ReFS, see the Microsoft Technet overview.
Create a volume
If the New Volume wizard is open, skip step 1.
- In Server Manager > File and Storage Services > Volumes > Storage Pools, right click on the virtual disk and choose New Volume.
- Choose Next.
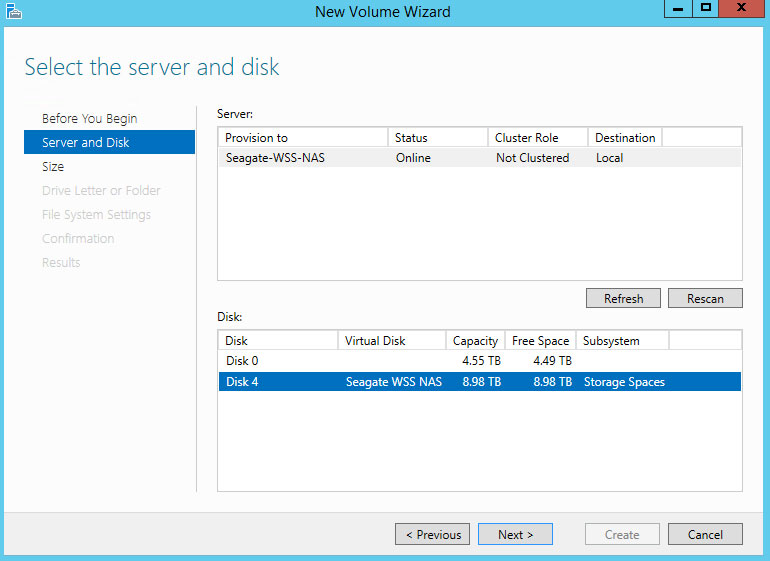
- Click the virtual disk that will host the volume and choose Next.
- Enter the size of the volume. In this example, the full capacity is used for the volume.
- Choose Next.
- Choose the drive letter and select Next.
- Choose the file system. Windows recommends NTFS.
- Enter a name for the volume in the volume label field.
- Choose Next.
- Review the Confirmation window and choose Create.

The volume is visible in an Explorer window.

Dashboard setup: configure Windows Server Essentials
The dashboard is the central management tool for Windows Storage Server 2012 R2 Essentials. You can use the dashboard to add users, create user groups, review storage health and much more. To enable the dashboard, you must create a new domain for the WSS NAS. The Windows Server Essentials setup wizard helps you create the domain.
To learn more about domains, see the Microsoft Technet overview.
Important info: The network name for your WSS NAS cannot be changed after the Windows Server Essentials setup wizard. Consider changing the name before following the directions below. To change the name, go to System Properties > Computer Name and click Change.
Important info: If you intend to join the WSS NAS to an existing domain, you must do it before running the Windows Server Essentials setup wizard.
Follow the steps below to create a domain:
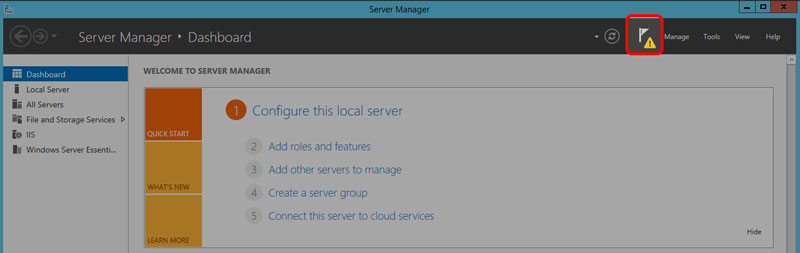
- From the Windows WSS NAS Setup Assistant, click the link Set up dashboard. The Server Manage launches.
- Click the notification flag on the top right of Server Manager.
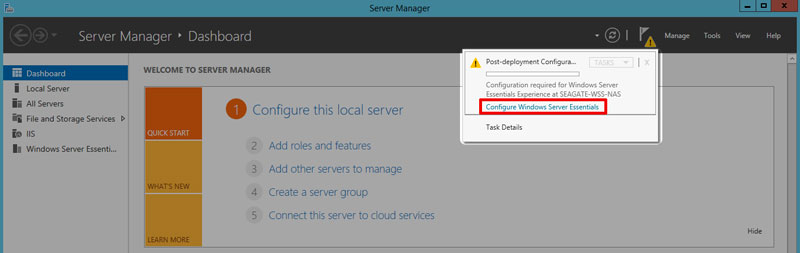
- Click the link Configure Windows Server Essentials.
- Click Next.
- Enter your company name (optional) and the name for the domain.
Important: PCs connected to the WSS NAS are associated with the domain name you choose in this step. It is very complicated to change.
- Click Next.
- Create a new administration account name and password for the WSS NAS domain. The credentials should be different than the default account.
Important: This is your domain’s administrator account. Use it to manage users, user groups, server folders, permissions and all features related to the WSS NAS.
- Click Next. The server must reboot one or more times to add the domain.
- Check the power button LED to determine when you can log in. When it is solid white, launch Remote Desktop from a PC on the network. Enter the new domain’s administrator credentials to log in.
Note: Preparing the dashboard can take up to 15 minutes.
- Launch Server Manager by clicking its icon on the lower left.
- Server Manager completes the update. Choose Next.
- (Optional) You can click the link to register your WSS NAS with Microsoft online services for business.
Review dashboard notifications
Following the domain creation, you can use dashboard to manage your WSS NAS. To begin, check Health Monitoring for notifications on the health of your WSS NAS. When first reviewing notifications, there are two messages to resolve. See the instructions below.
To launch dashboard, click twice on its icon, located on the upper left of the desktop.
Notification: Windows update
- In dashboard, go to Home > Health Monitoring.
- Right click the critical message and choose Troubleshoot this issue.
- The Windows Update Control panel opens. Windows recommends selecting Turn on automatic updates to receive the latest versions of software.
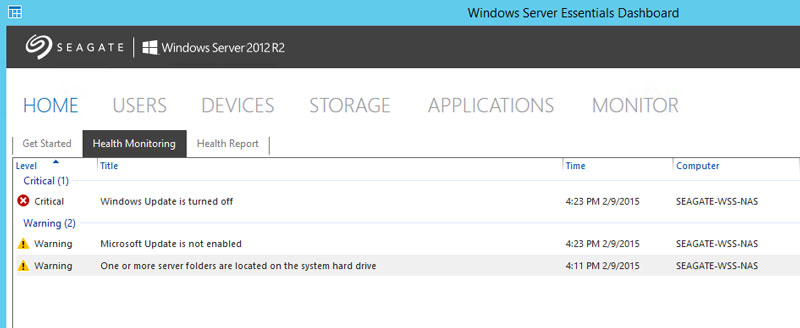
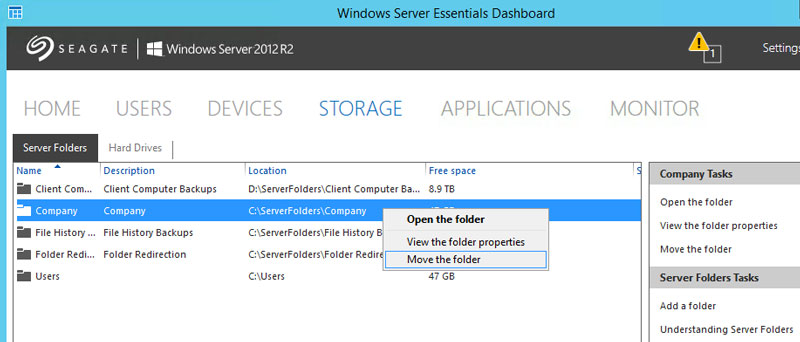
Notification: server folders
By default, the server folders remain on the system hard drive. It is recommended to move them to a larger volume.
-
- In the dashboard, go to Storage > Server Folders.
- Right click on any folder except Users.
- Choose Move the folder.
- Choose Next.
- Choose the drive to store the folder and select Move folder.
- Choose Close.
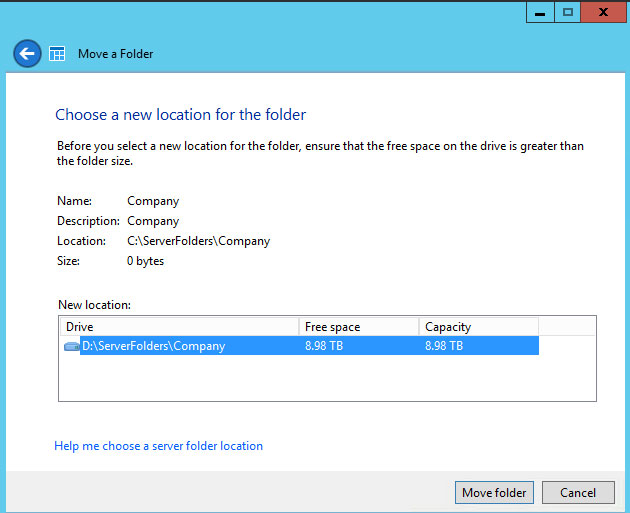
Repeat the steps for all folders except Users. The Users folder is always active and cannot be moved. Since it cannot be moved, dashboard notifications will continue to post warnings that folders are on the system hard drive. As long as you make certain to keep all other server folders on non-system volumes, the warning can be disregarded.
Some more info about Buffalo Windows NAS:
Windows based OS NAS – WSS NAS
All pages contain links to Amazon. These links will take you to some of the products mentioned in today’s article. As an Amazon Associate, we earn from qualifying purchases.