Java Development Kit (сокр. JDK) – комплект разработки приложений для работы с языком программирования java. Включает в себя: интерпретатор, облегченный интерпретатор jre, компилятор, отладчик, java библиотеки классов, программу сбора документации, диcассемблер, программу архивации и сжатия jar.
- Загрузка с сайта пакета JDK (Java Development Kit)
- Установка JDK (Java Development Kit)
- Настройка переменных окружения
Как установить Java JDK (Java Development Kit) в Windows 11
1. Загрузка с сайта пакета JDK (Java Development Kit)
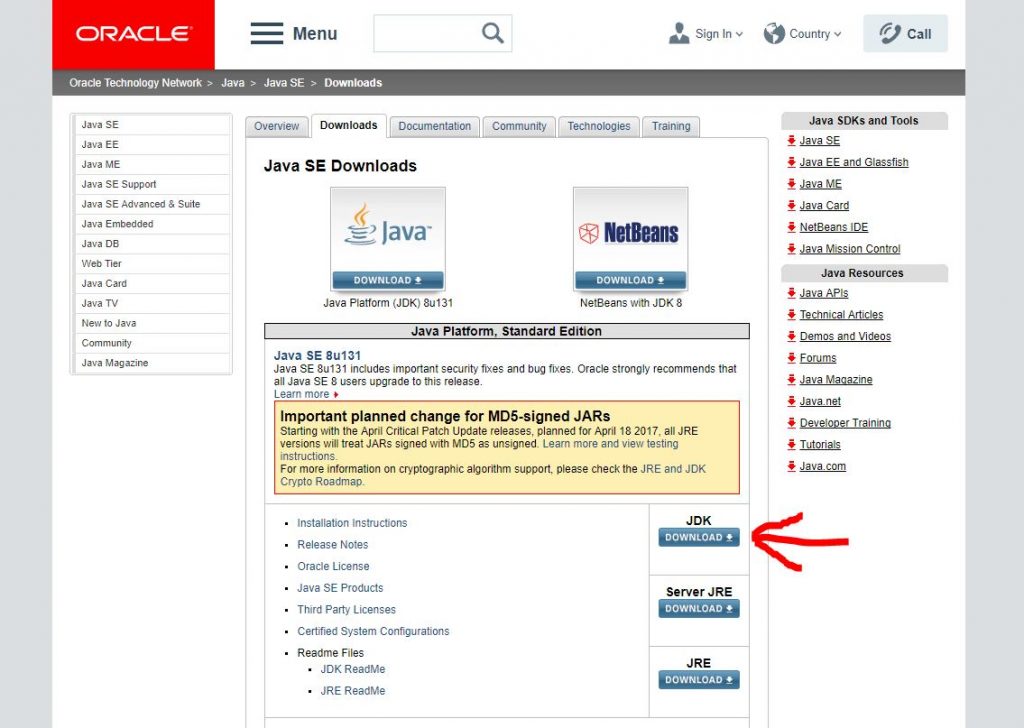
Переходим на сайт Oracle по ссылке и выбираем JDK (Download)
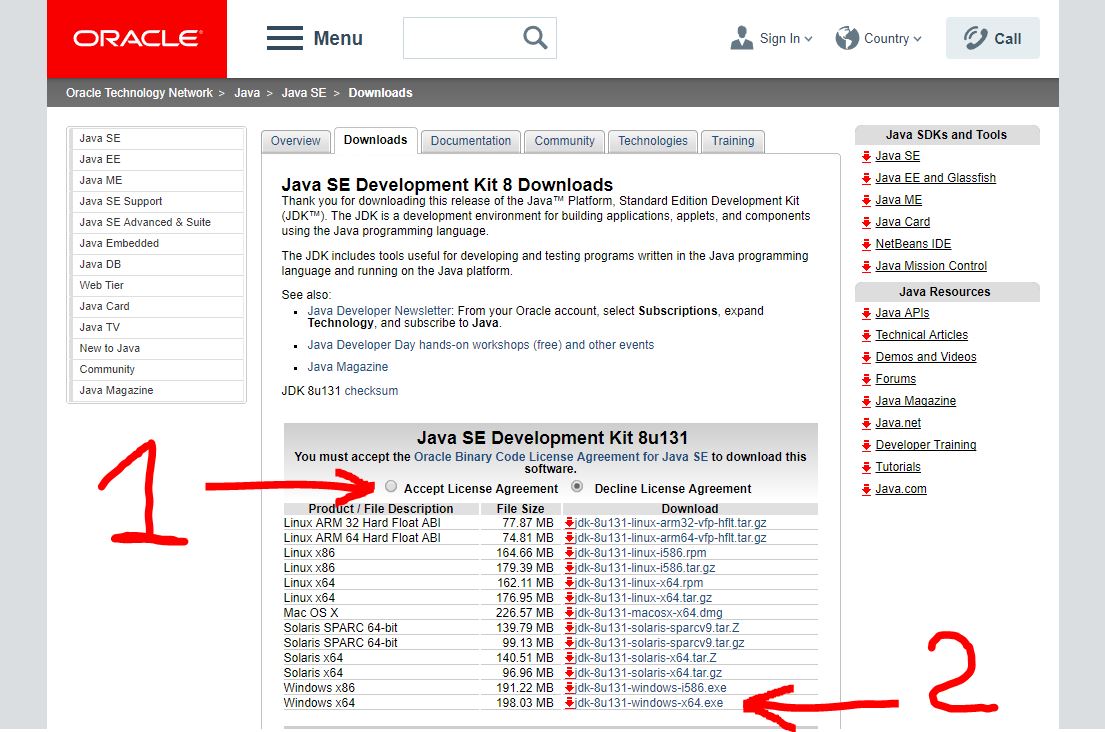
На следующей странице нужно согласится с условиями и загрузить пакет соответствующий нашей ОС. В моём случае это 64-разрядная Windows 10.
2. Установка JDK (Java Development Kit)
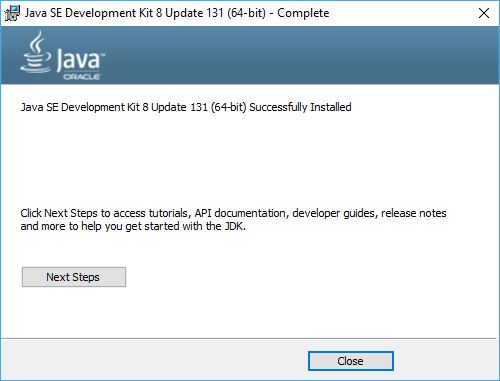
Запускаем установщик с правами администратора и устанавливаем всё по умолчанию, ничего не меняя в процессе.
3. Настройка переменных окружения
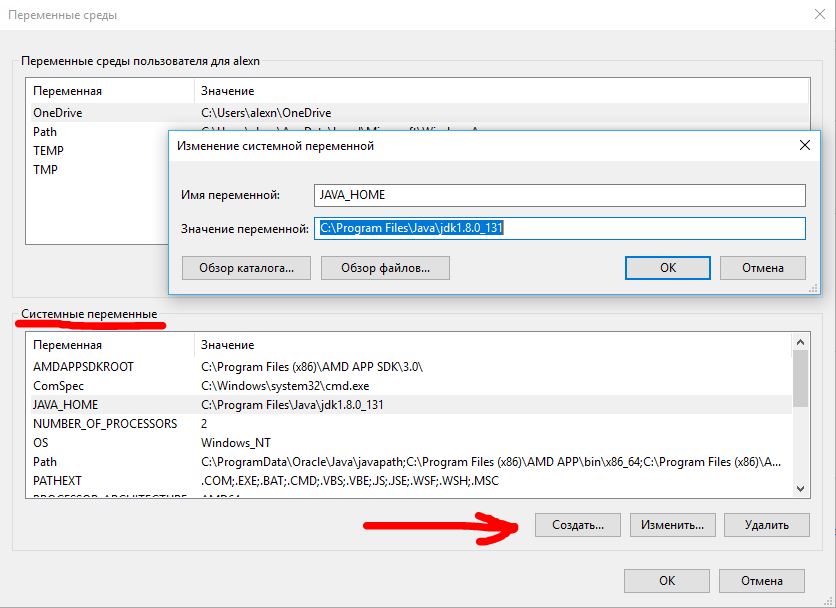
Инсталлятор Java не выполняет настройку переменных окружения, поэтому придётся нам это делать вручную после установки.
JAVA_HOME — переменная, указывающая на директорию, в которую установлена Java. Программы её используют чтобы определить, где установлена Java.
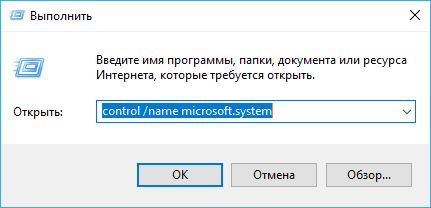
Для этого комбинацией клавиш Win+R открываем окно «Выполнить«. Набираем команду: «control /name microsoft.system« без кавычек.
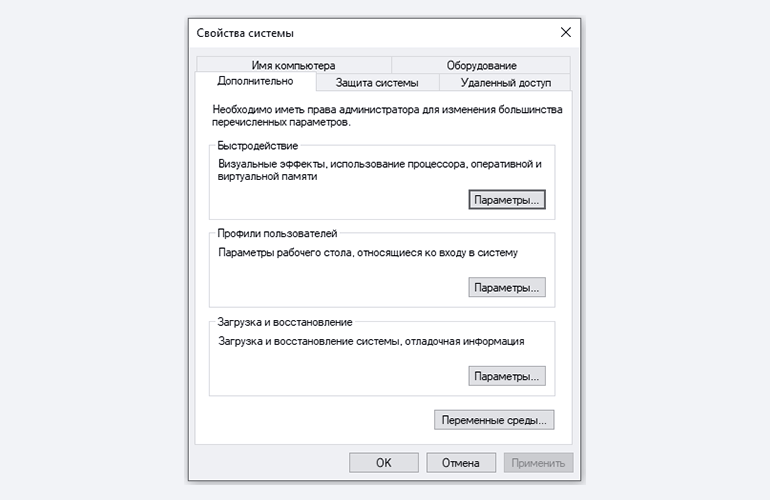
Затем нужно выбрать «Дополнительные параметры системы» и в открывшемся окне «Свойства системы» нажимаем кнопку «Переменные среды«. Если Вы ничего не меняли при установке JDK, то путь будет таким: «C: Program Files Java jdkНомерВерсии».
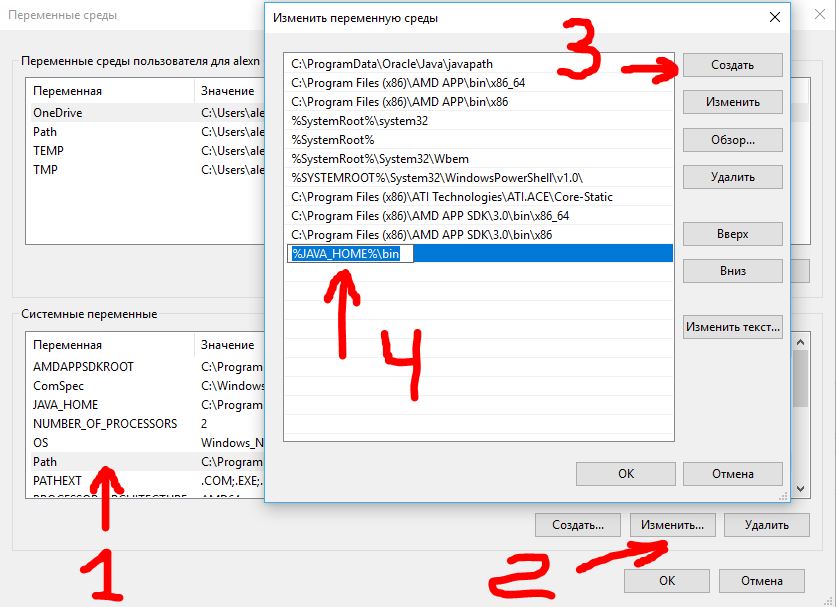
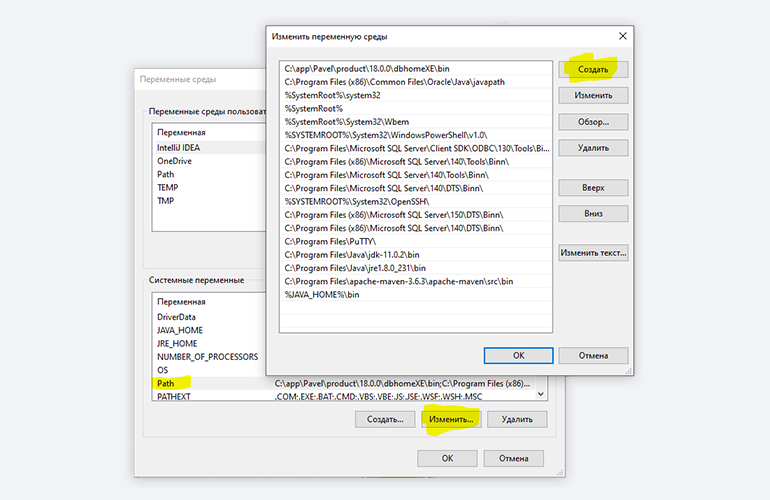
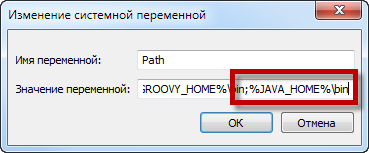
Далее необходимо отредактировать значение переменной PATH, добавив туда путь к директории, где находятся исполняемые файлы Java, то есть
%JAVA_HOME%bin
4. Тест конфигурации
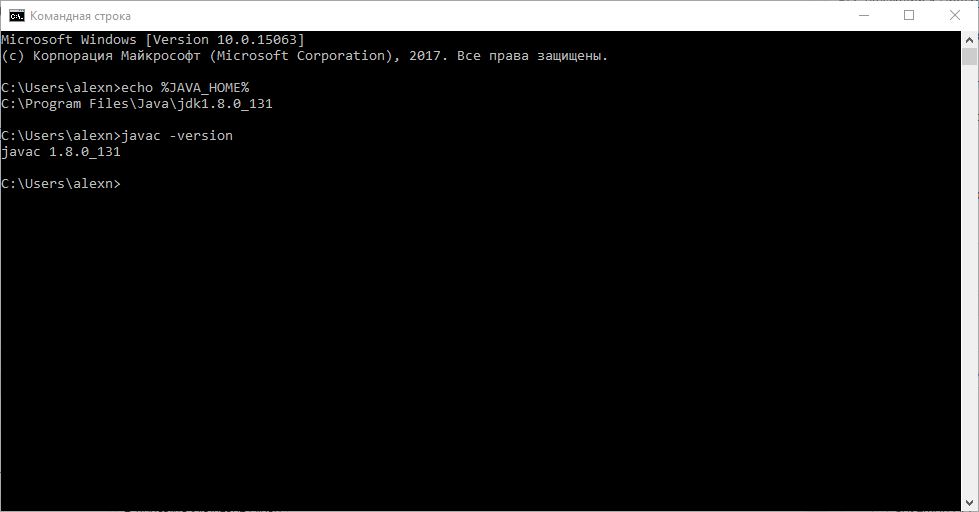
Открываем командную строку и вводим:
echo %JAVA_HOME%
Выводит директорию где установлено Java JDK.
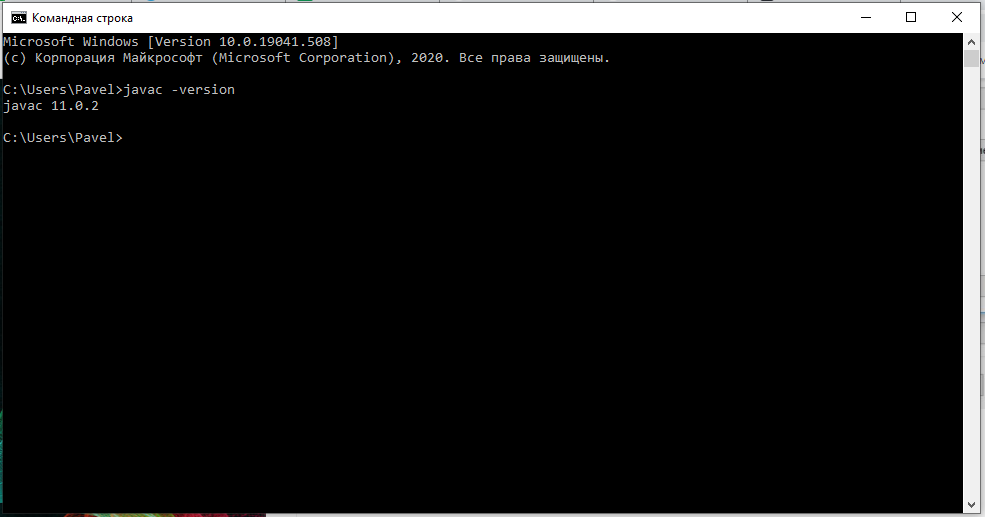
javac -version
Выведет версию java-компилятора, если переменная PATH установлена правильно.
ADVERTISEMENT
Read Next
7 сентября, 2022 EDT at 12:09 дп
Как просматривать машины Linux из сети Windows 10 с помощью службы WSD
5 мая, 2022 EDT at 12:51 дп
Microsoft Defender сильно влияет на производительность системы
27 апреля, 2022 EDT at 3:15 дп
Windows 10 KB5011831 исправляет черный экран и другие критические ошибки
22 января, 2022 EST at 4:40 пп
Как установить Java JDK (Java Development Kit) в Windows 11
4 марта, 2020 EST at 3:31 пп
Что делать если Radeon Settings Host Application сильно грузит процессор?
#База знаний
- 18 фев 2021
-

14
Начинаем разрабатывать на Java: где взять, как установить и настроить всё, что нужно.
vlada_maestro / shutterstock

Пишет на Java. Верит в Agile. Пьёт много кофе и не любит грязный код.
Чтобы начать программировать на Java, нужно установить комплект разработчика приложений (SDK). Он позволит запускать, отлаживать и исполнять наши первые программы. Также нам понадобится среда разработки (IDE), где мы и будем писать код.
Пройдём через это вместе. Установим JDK в Windows, Ubuntu и macOS, и IntelliJ IDEA тоже в Windows, Ubuntu и macOS. Поехали!
Java Development Kit (JDK) — это комплект ПО для разработчиков приложений на Java. Стандартная установка включает в себя интерпретатор, облегчённый интерпретатор JRE, компилятор, библиотеку Java-классов, отладчик, средства архивации и сжатия jar и другое.
Чтобы установить JDK в Windows, нужно:
- загрузить актуальную версию пакета,
- установить его,
- настроить переменные окружения.
Нам нужна бесплатная версия — AdoptOpenJDK (она есть под Windows, macOS, Ubuntu и другие платформы).
Идём сюда и выбираем версию JDK (актуальны версии 8+), виртуальную Java-машину (JVM) и свою платформу.
Я выбрал OpenJDK 11 (LTS), HotSpot и Windows x64 jdk соответственно:
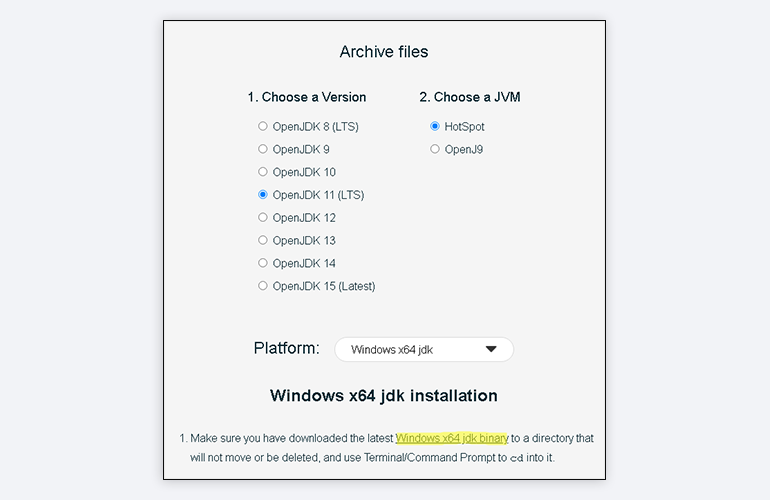
Скачиваем файл по появившейся ссылке (я выделил её жёлтым на скрине выше).
Извлекаем скачанный архив в папку C:Program FilesJava
При этом будет создана подпапка jdk-*номер версии*, а внутри неё появится папка bin.
В результате полный путь до папки bin у меня выглядит так:
C:Program FilesJavajdk-11.0.2bin
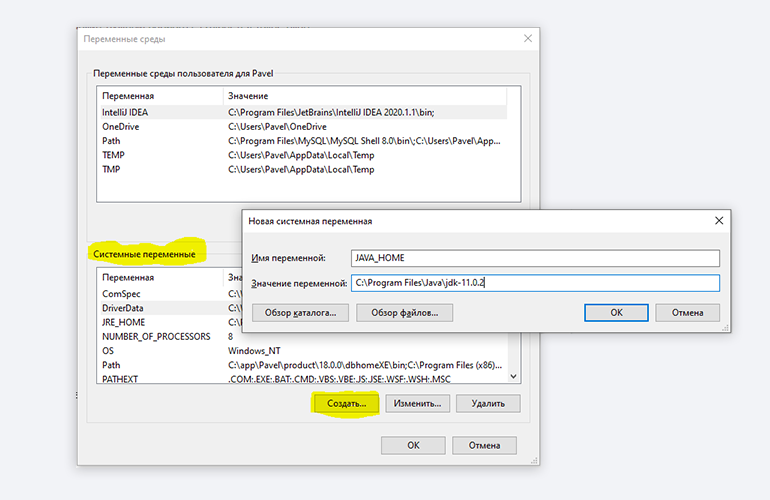
Нам нужно создать системную переменную JAVA_HOME, которая будет хранить путь до нашей версии JDK. Это понадобится программам для работы с проектами Java.
Заходим в Панель управления → Система → Дополнительные параметры системы → Дополнительно
А можно и прямо в Панели управления вбить в поиск слово «переменных» (без кавычек). ОС предложит варианты, из которых выбирайте «Изменение системных переменных среды».
У вас откроется окно:
Здесь жмём на кнопку «Переменные среды».
В новом окне для раздела «Системные переменные» кликаем «Создать». В «Имя переменной» вводим JAVA_HOME (именно так, латиницей в верхнем регистре), а в поле «Значение переменной» подставляем наш путь C:Program FilesJavajdk-*номер версии*:
Далее в разделе «Переменные среды…» редактируем системную переменную Path. Нужно добавить в неё путь к папке с исполняемыми файлами Java, а именно: %JAVA_HOME%bin (соблюдайте регистр символов):
Перезагружаем Windows.
Запускаем Командную строку Windows. Для этого нажимаем Win + R, а в появившемся окне вводим cmd.exe и жмём на Enter.
В открывшейся консоли набираем javac -version и жмём ввод.
Если установка прошла успешно, то ответ покажет версию вашего компилятора:
Рассмотрим установку JDK на одном из самых популярных дистрибутивов Linux — Ubuntu 20.04 (LTS).
Проще всего установить версию, которая входит в пакет Ubuntu. По умолчанию в Ubuntu 20.04 входит версия Open JDK 11.
Открываем терминал сочетанием клавиш Ctrl + Alt + T и обновляем базу данных пакетов с помощью APT:
Проверяем ранее установленные версии командой:
Если установка уже выполнялась, то мы увидим что-то такое:

Для запуска любых приложений Java нужна JRE (Java Runtime Environment — среда выполнения для языка Java). Но для компиляции и разработки программ требуется JDK (Java Development Kit).
Чтобы установить JRE, вводим в консоль:
$ sudo apt install default-jre
Для установки JDK — команду:
$ sudo apt install default-jdk
Вводим команду:
Ответ должен выглядеть примерно так:
Этот способ установки использует HomeBrew (менеджер недостающих пакетов для macOS).
Прежде всего нужно добавить репозиторий в HomeBrew. Для этого открываем терминал (Cmd + N) и вводим:
$ brew tap AdoptOpenJDK/openjdk
Устанавливаем OpenJDK 11 командой:
$ brew cask install adoptopenjdk11
Вводим:
Ответ должен выглядеть примерно так:
openjdk version "11.0.2" 2019-01-15
OpenJDK Runtime Environment AdoptOpenJDK (build 11.0.2+9)
OpenJDK 64-Bit Server VM AdoptOpenJDK (build 11.0.2+9, mixed mode)
IntelliJ IDEA — это интегрированная среда разработки (IDE), то есть система программных средств для создания проектов на разных языках программирования.
Сегодня это самая популярная IDE для языка Java. А ещё есть Eclipse, NetBeans и немало других, но мы рекомендуем именно IDEA, потому что даже её бесплатная версия обладает широкой функциональностью, подходит для профессиональной разработки и вообще делает Java проще в использовании.
В IDE обязательно входят:
- текстовый редактор для написания кода (он знает синтаксис нужных языков);
- компилятор;
- отладчик.
IntelliJ IDEA доступна в бесплатной (Community) и платной (Ultimate) версиях. Чем они различаются, видно на скрине ниже:

Пока что нам хватит возможностей бесплатной версии.
На заметку: IntelliJ предлагает студентам и преподавателям свободный доступ к своим продуктам.
Заходим сюда и качаем версию для Windows.
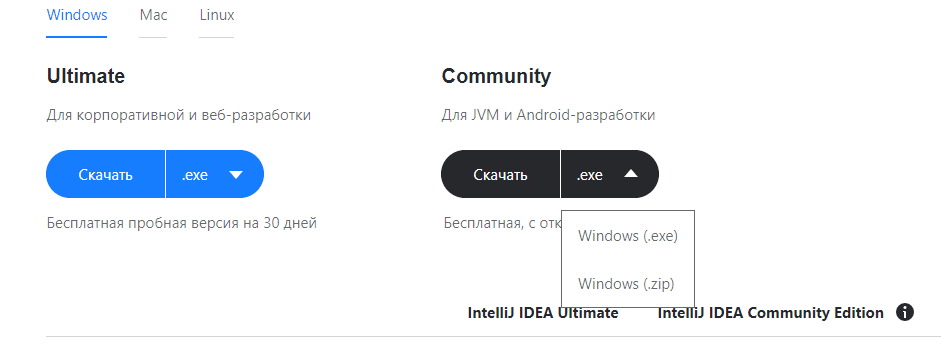
Запускаем скачанный файл .exe:
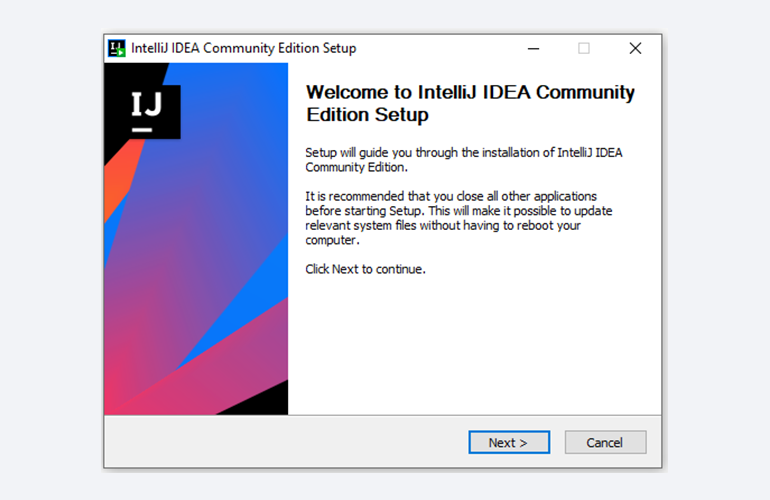
Жмём Next (Далее) и выбираем путь для установки:
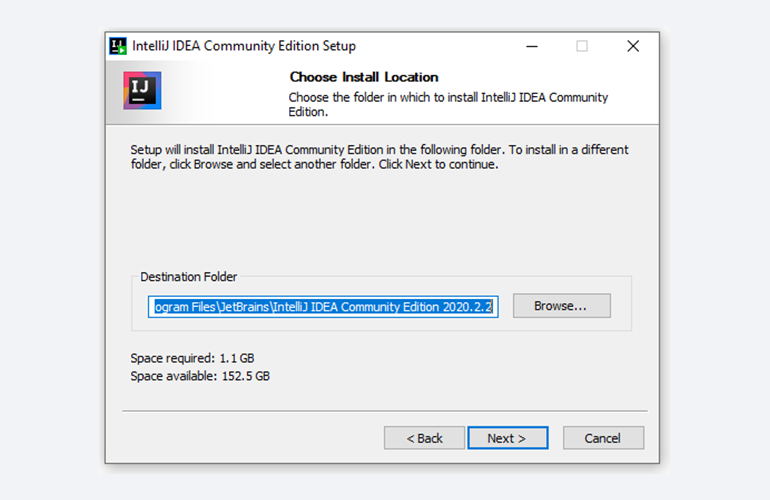
Снова Next, и настраиваем параметры установки:
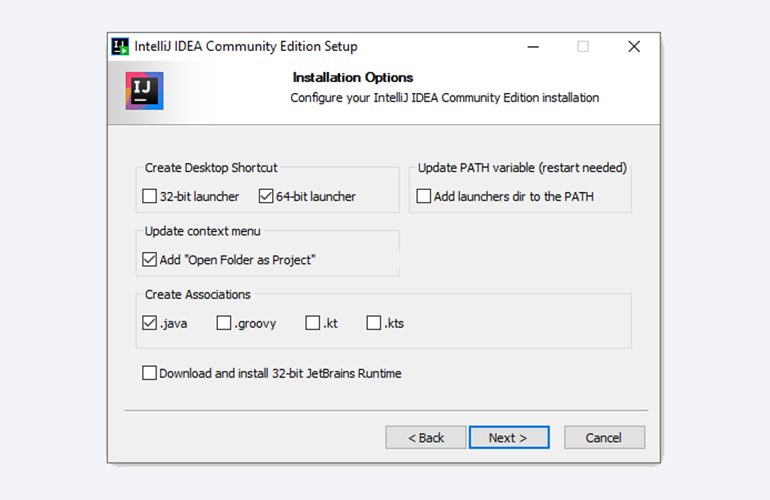
В общем случае это:
- 64-bit launcher — для запуска 64-разрядной версии приложения (будет создан ярлык на рабочем столе);
- Add ”Open Folder as Project“» — позволяет открывать папки с исходниками как проекты прямо через контекстное меню;
- .java — файлы такого типа (с таким расширением) будет открывать IDEA (по умолчанию и через контекстное меню).
Кликаем Next (Далее) и выбираем папку для ярлыков IDEA (оставляем по умолчанию):
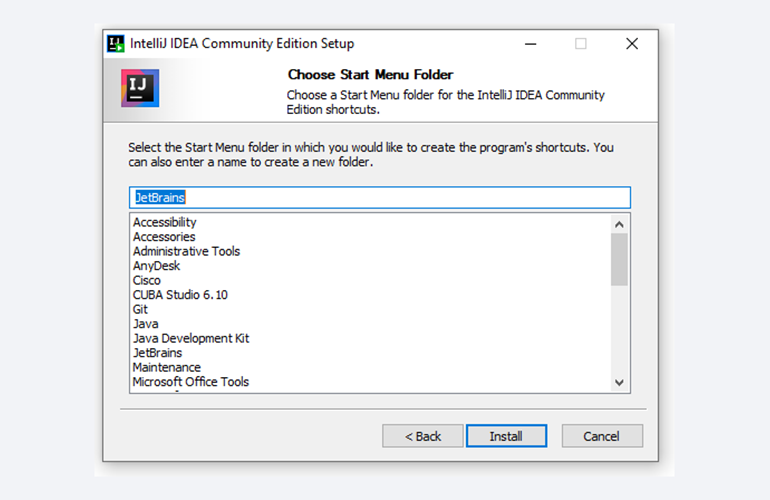
Нажимаем Install (Установить), после чего стартует установка:

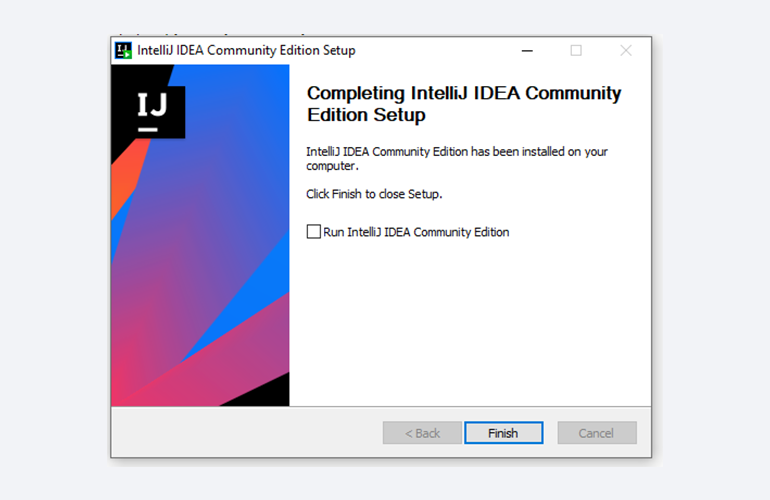
Дожидаемся её окончания и жмём Finish (Завершить):
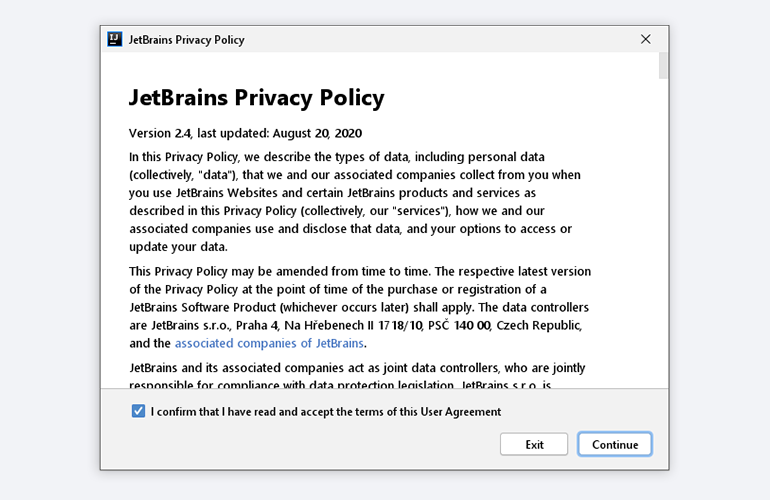
При первом запуске принимаем пользовательское соглашение и нажимаем Continue (Продолжить):
Далее выбираем тему оформления (доступны тёмная и светлая):
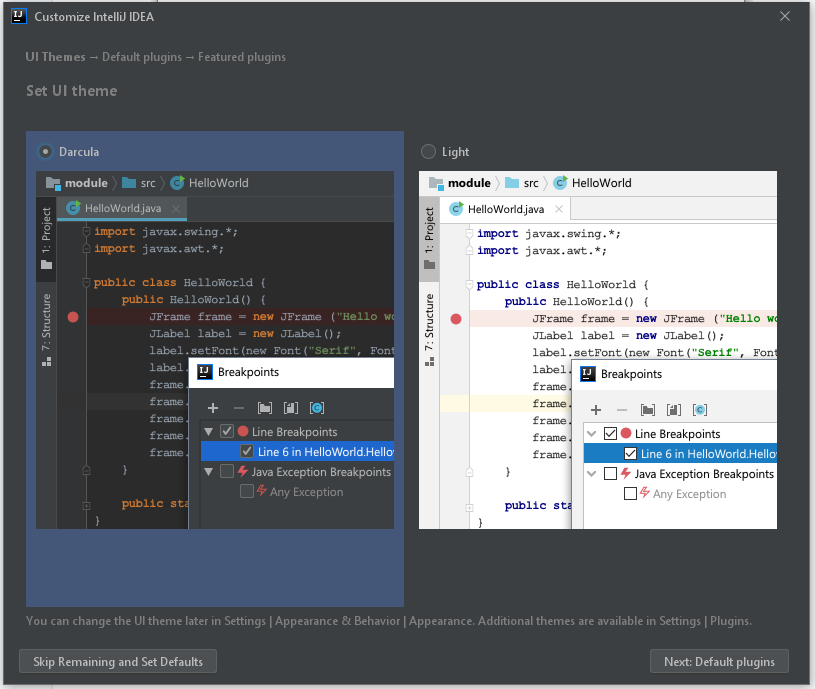
Жмём Next: Default plugins и переходим к выбору устанавливаемых плагинов:
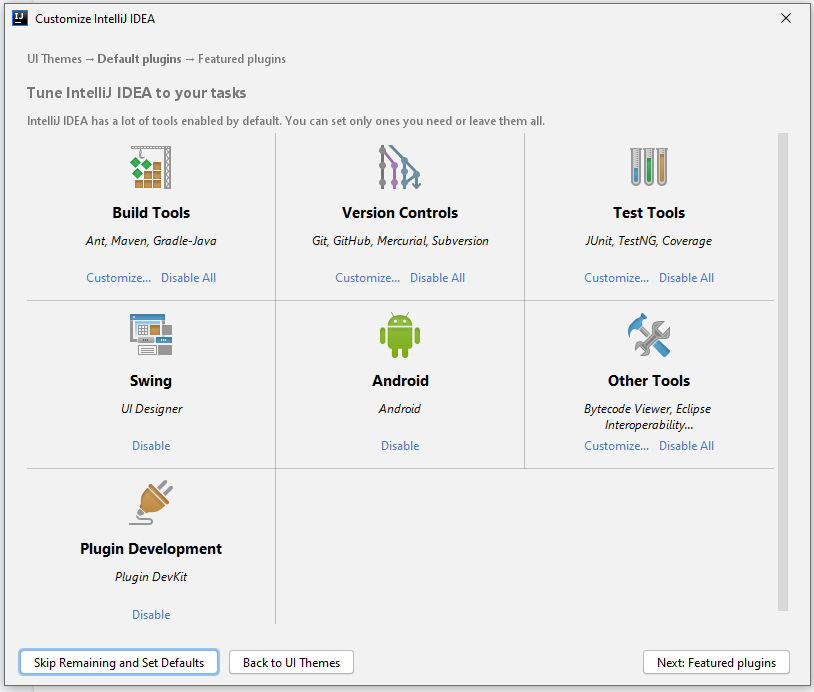
Если не знаете, что вам точно пригодится, — оставляйте всё как есть. А если, например, с Андроидом вам не работать — выключите соответствующий пункт.
Не волнуйтесь, если надобавляете лишнего или о чём-то забудете. Всё можно будет переиграть — в настройках среды.
После чего нажмите на кнопку Next: featured plugins и выберите другие нужные плагины (или оставляйте всё по умолчанию):
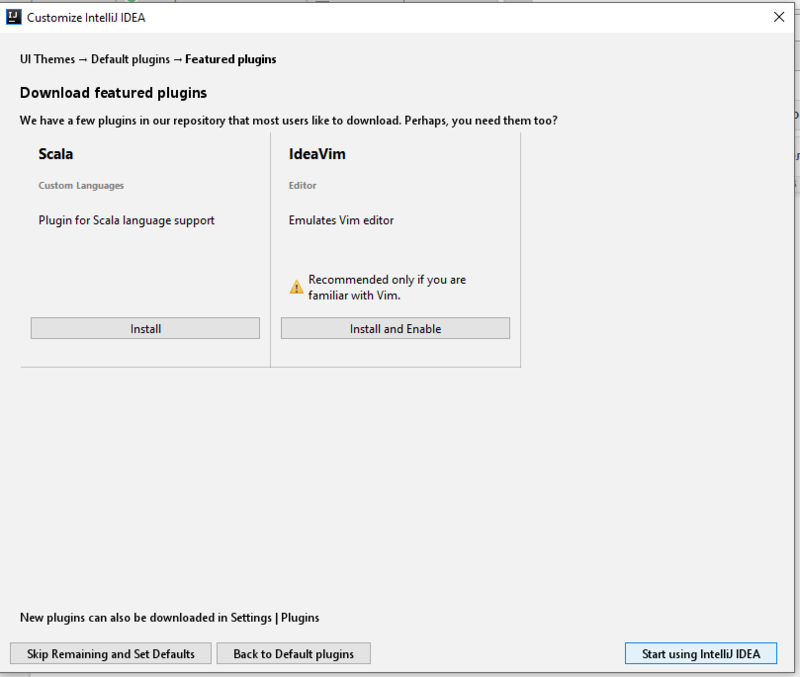
И наконец, нажимаем Start using IntelliJ IDEA.
Вас встретит начальный экран среды разработки (Welcome screen). Здесь можно создать новый проект, открыть или импортировать существующий, а также скачать проект из системы контроля версий:
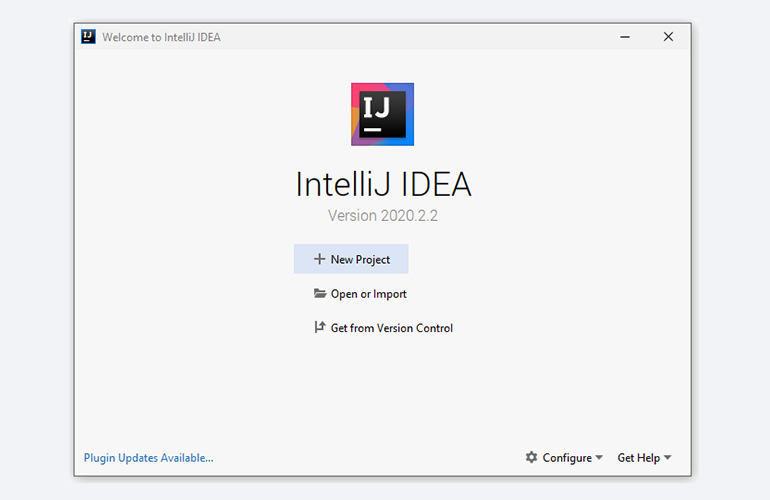
Если вы видите такой же экран — поздравляю, установка и настройка прошли успешно! Приятного обучения!
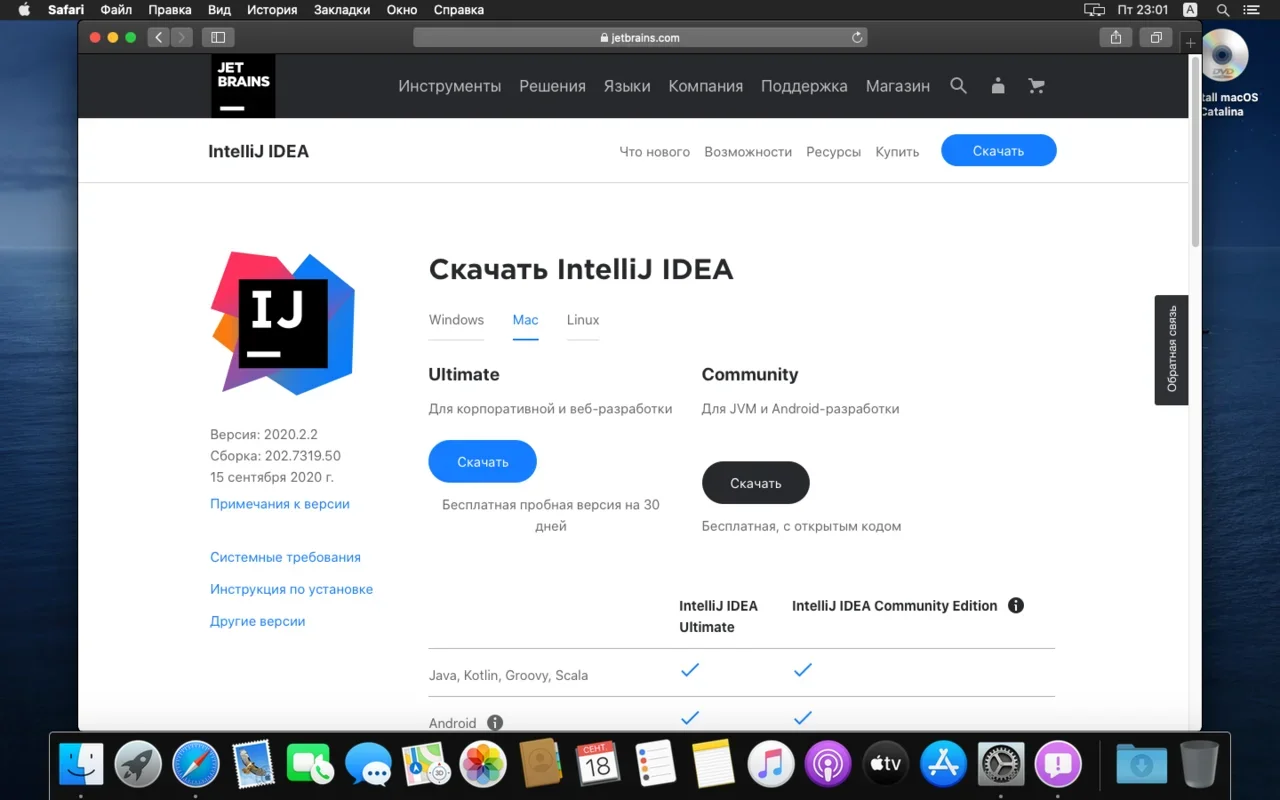
Здесь всё даже легче, чем в Windows. Для начала качаем версию для macOS отсюда (о различии между редакциями Community и Ultimate читайте выше — в пункте про установку на Windows):
Открываем скачанный файл .dmg:
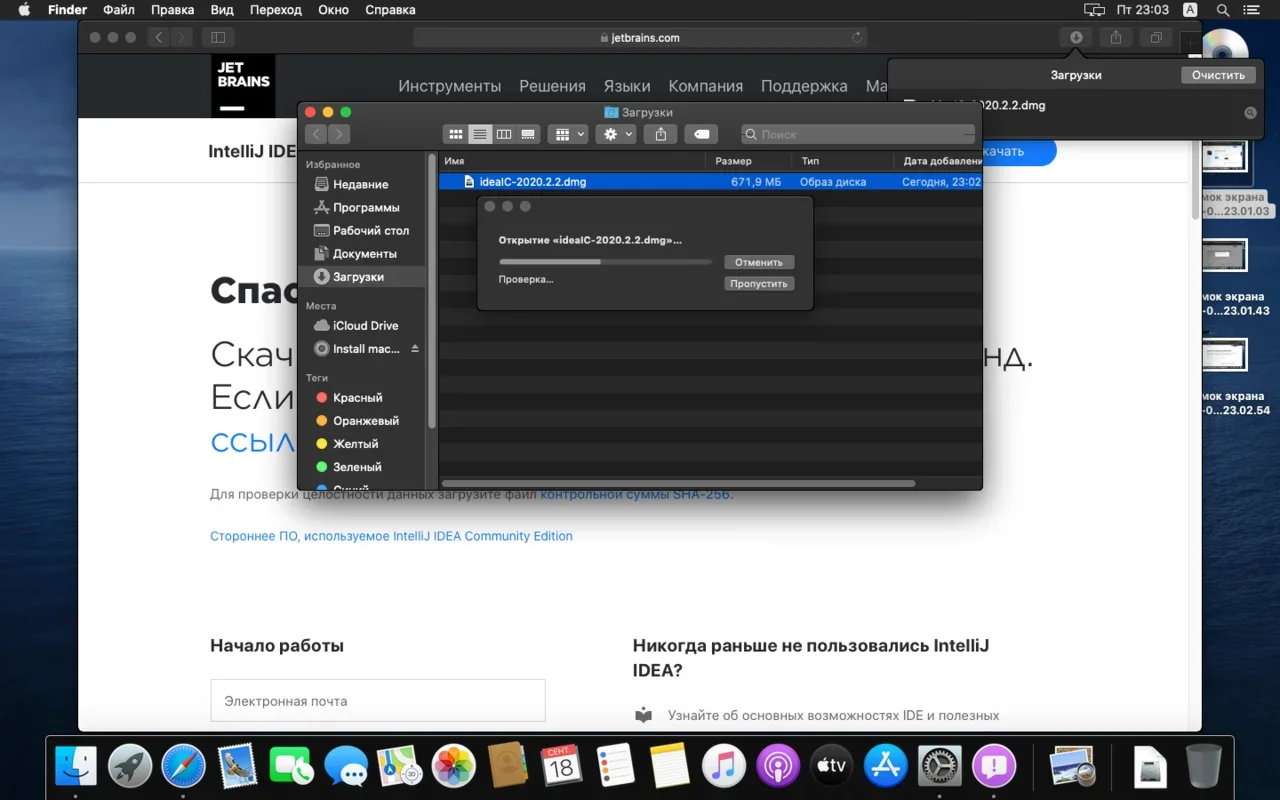
Копируем файл в «Программы»:
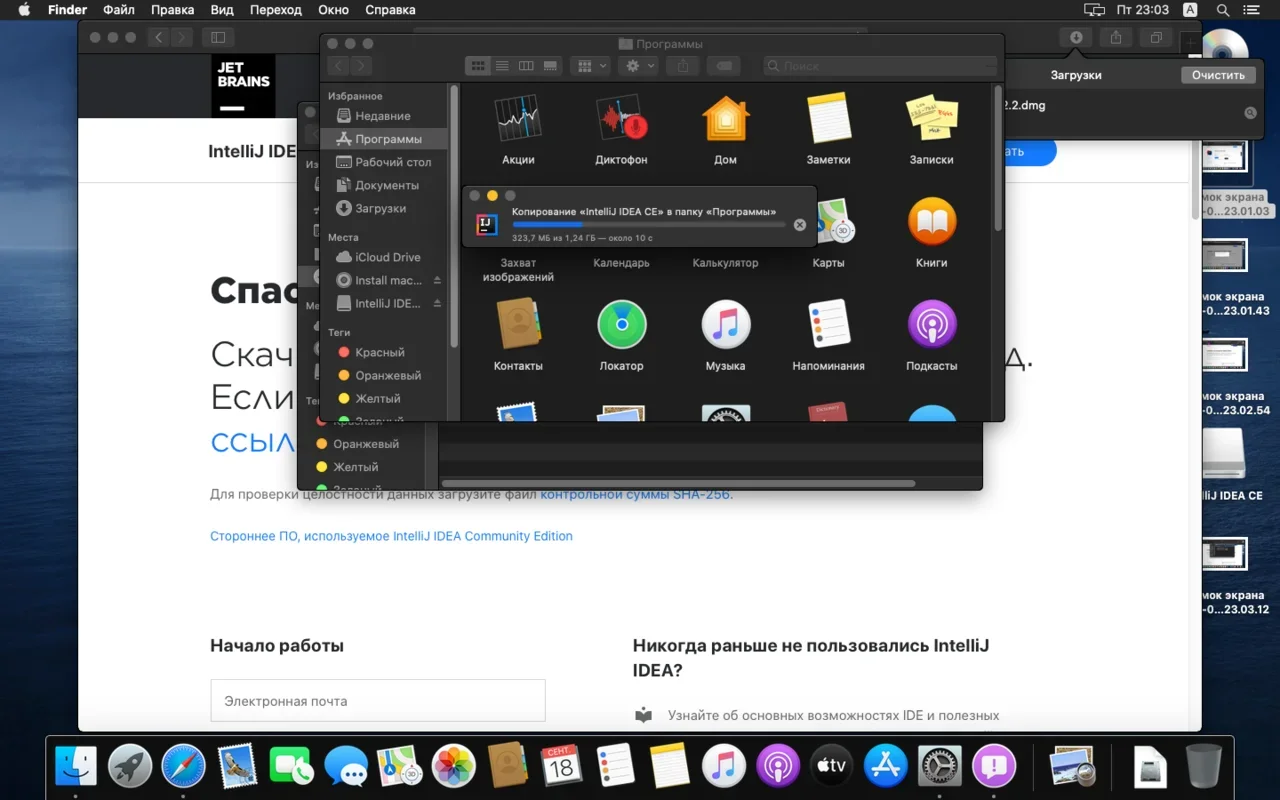
Читаем предупреждение ОС и жмём «Открыть»:
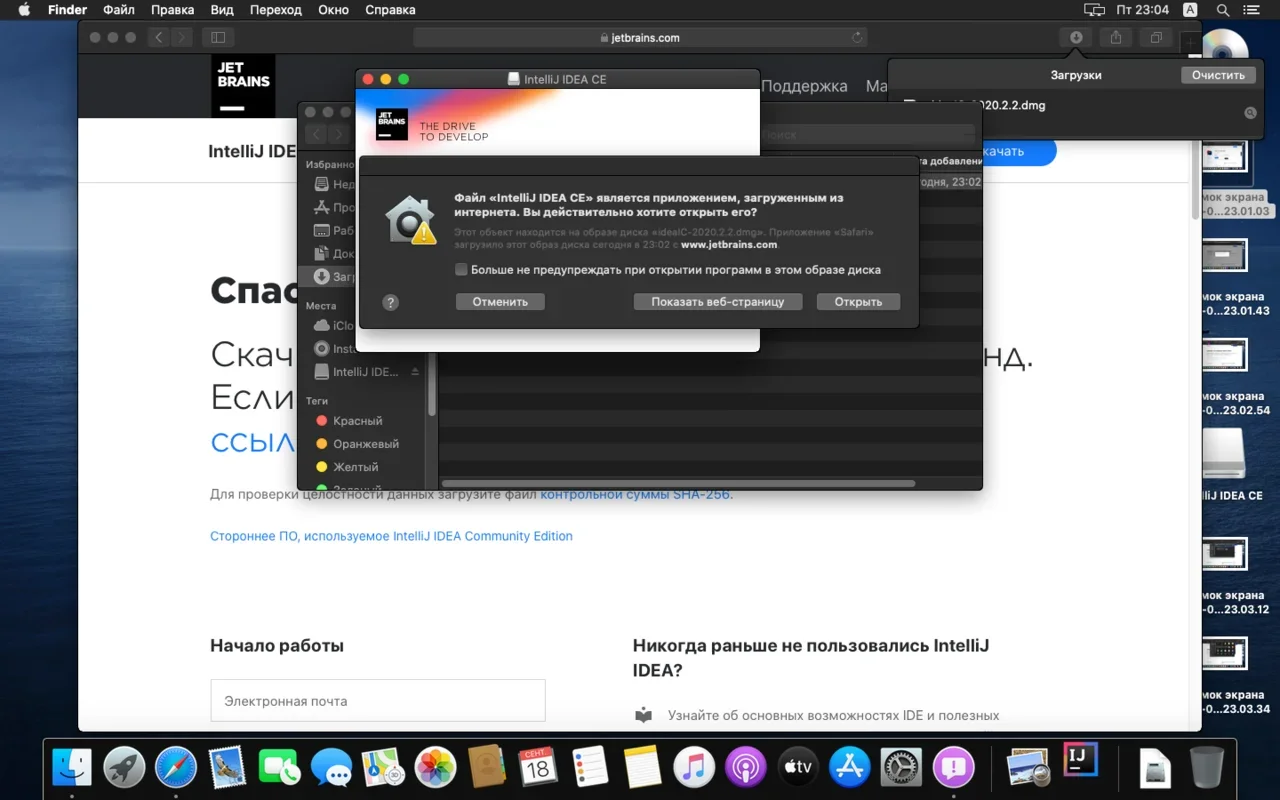
Принимаем пользовательское соглашение и жмём кнопку Continue (Продолжить):

Теперь приложением можно пользоваться. Приятного обучения!
Для установки IntelliJ IDEA открываем Центр приложений Ubuntu:
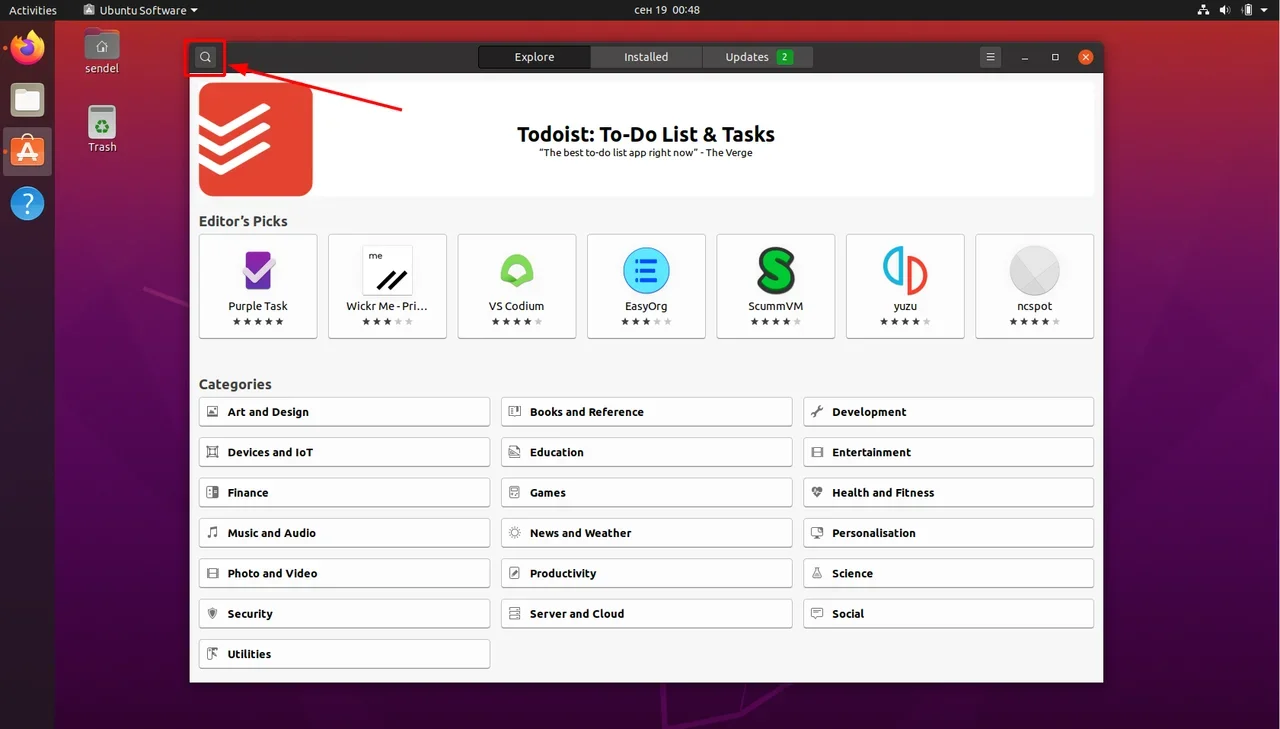
Вводим в поиск слово «Intellij» (без кавычек). Нам нужна IDEA Community (о различии между редакциями Community и Ultimate читайте выше — в пункте про установку на Windows):
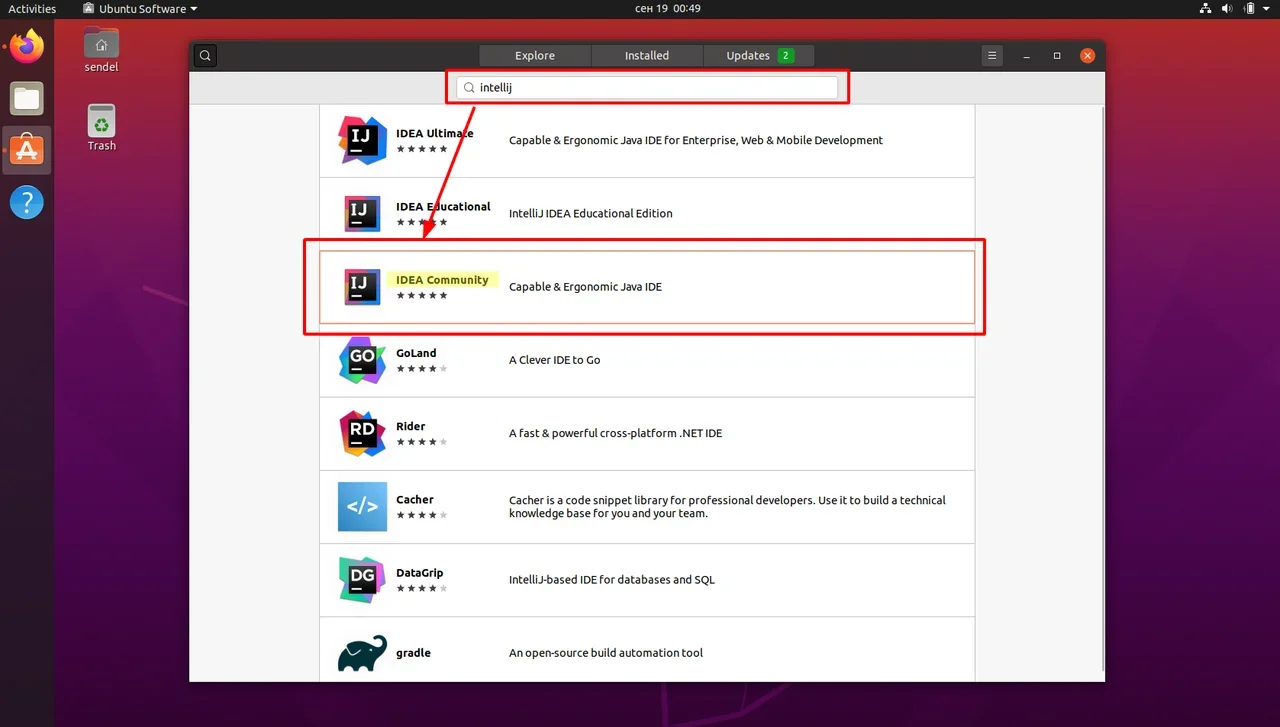
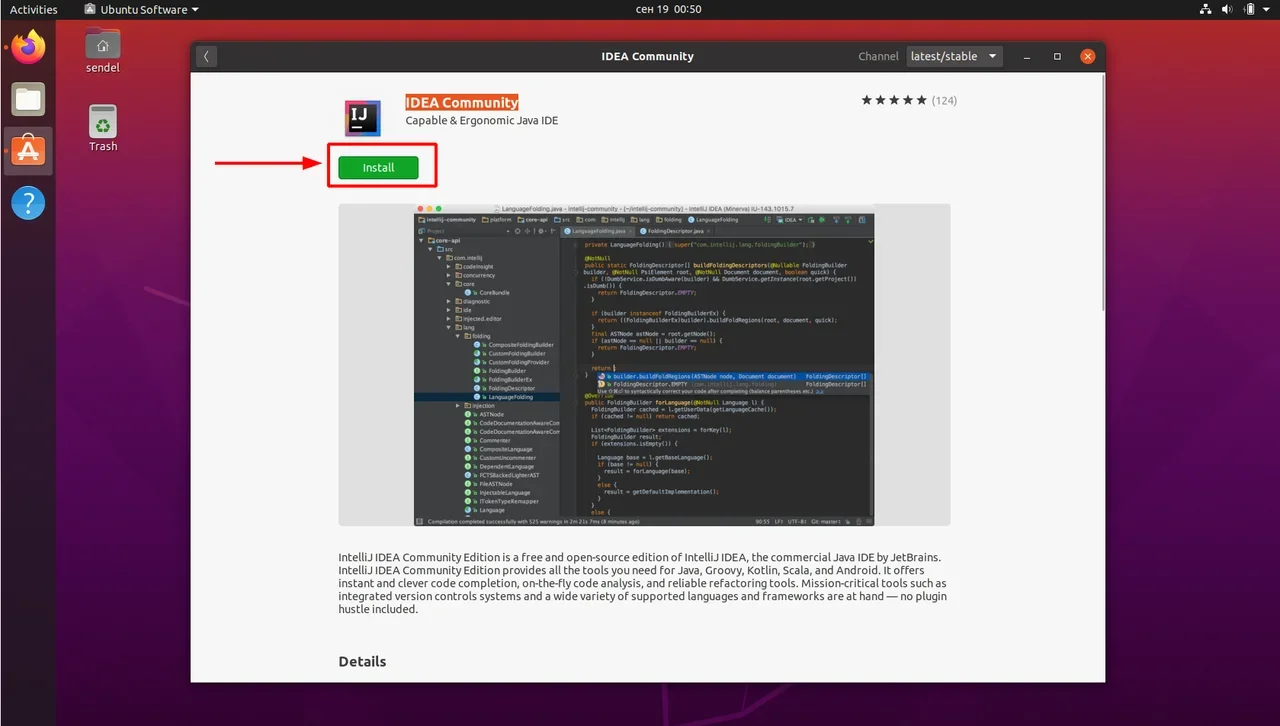
Выбираем версию и нажимаем кнопку Install (Установить):
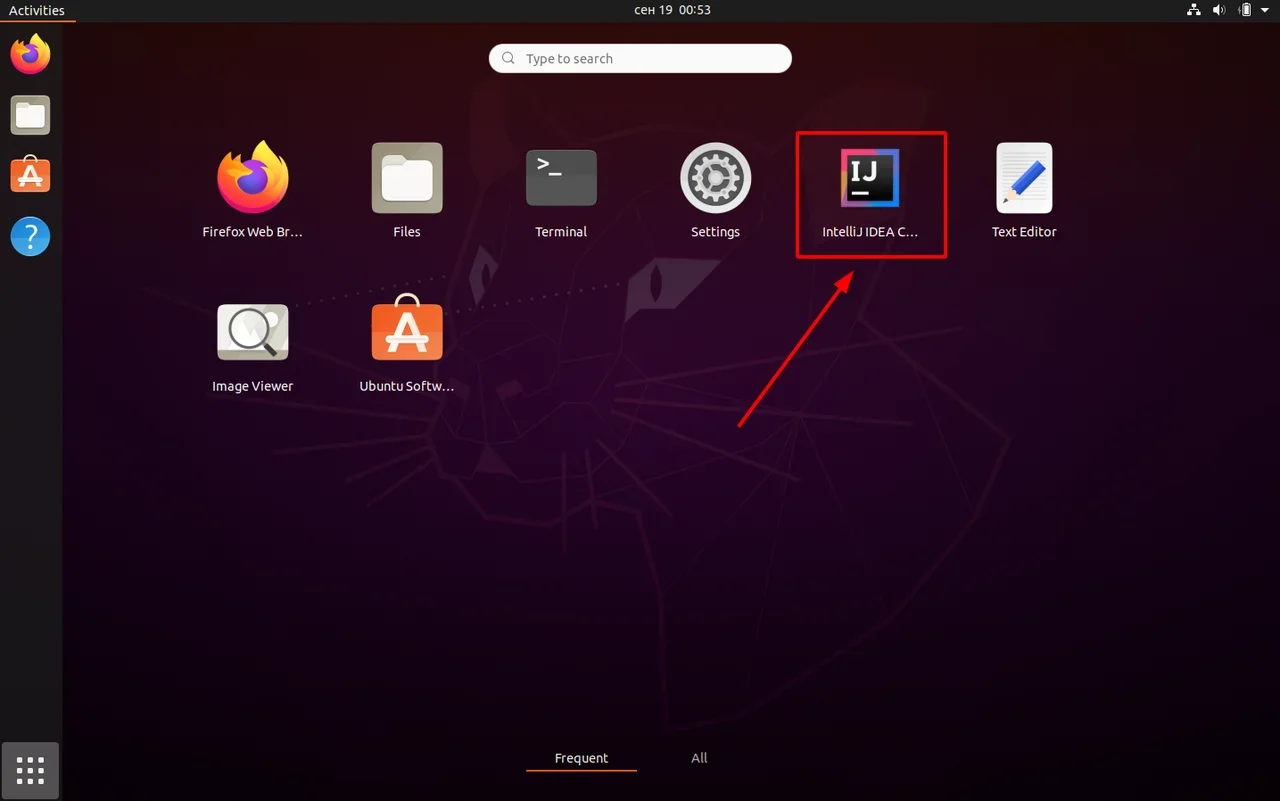
После установки видим IDEA в меню программ:
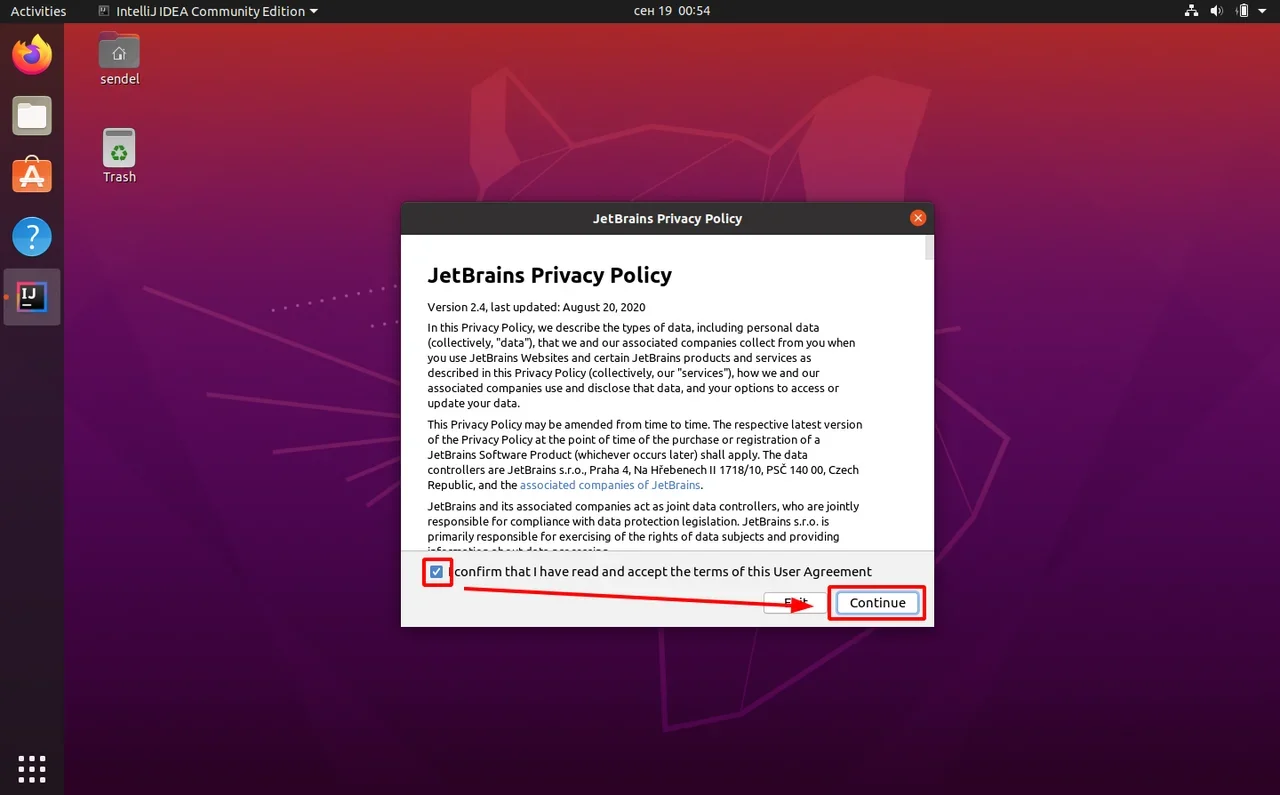
Запускаем, принимаем пользовательское соглашение и нажимаем кнопку Continue (Продолжить):
Вы увидите экран загрузки:
Далее вас встретит начальный экран (Welcome screen). Здесь можно создать новый проект, открыть или импортировать существующий, а также скачать проект из системы контроля версий.
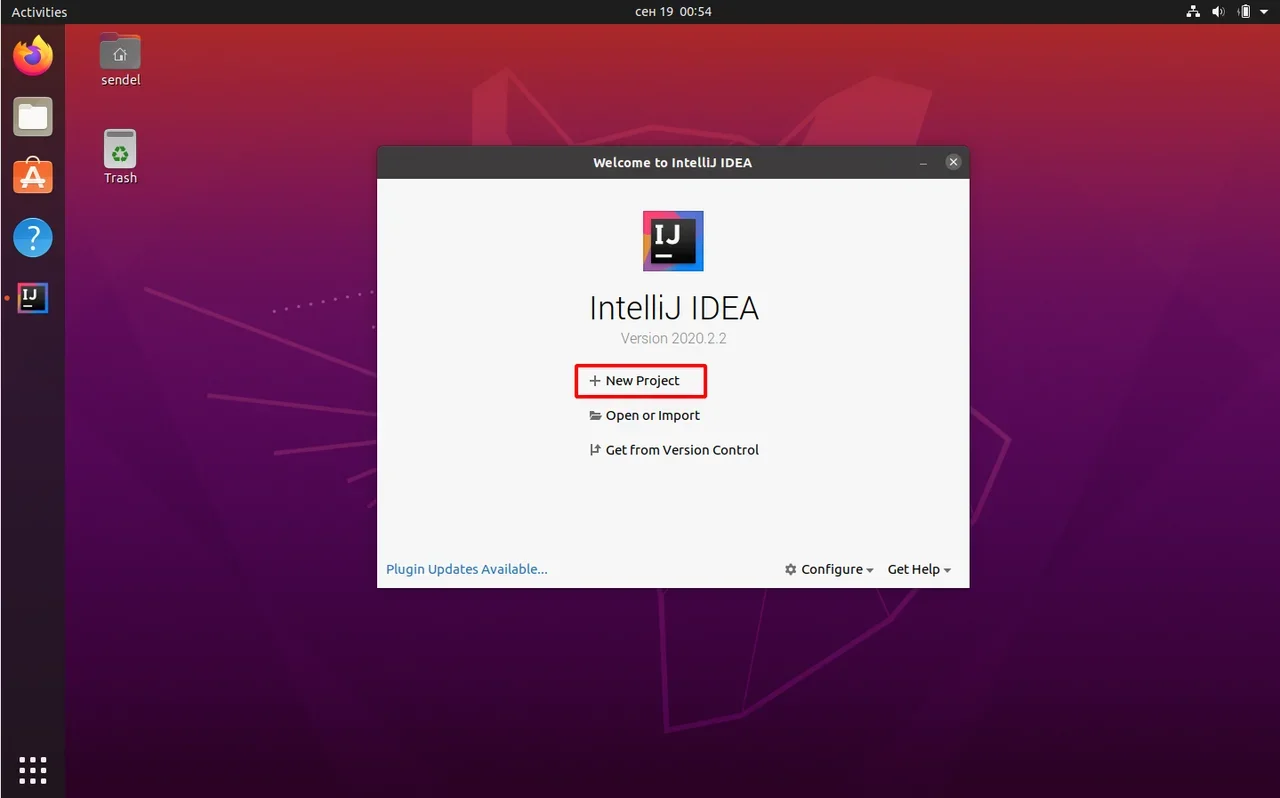
Если вы видите такой же экран — поздравляю, установка и настройка прошли успешно! Приятного обучения!

Учись бесплатно:
вебинары по программированию, маркетингу и дизайну.
Участвовать

Школа дронов для всех
Учим программировать беспилотники и управлять ими.
Узнать больше
I got a new laptop with Windows 10 and I want to set it up so I can use java and javac from the command line.
I have searched online but all the guides are for previous versions, and I don’t want to mess around with something I don’t understand.
![]()
informatik01
15.8k10 gold badges74 silver badges103 bronze badges
asked Aug 27, 2015 at 5:13
![]()
0
Just set the path variable to JDK bin in environment variables.
Variable Name : PATH
Variable Value : C:Program FilesJavajdk1.8.0_31bin
But the best practice is to set JAVA_HOME and PATH as follow.
Variable Name : JAVA_HOME
Variable Value : C:Program FilesJavajdk1.8.0_31

Variable Name : PATH
Variable Value : %JAVA_HOME%bin
answered Aug 27, 2015 at 5:31
![]()
isurujayisurujay
1,33610 silver badges15 bronze badges
3
Here are the typical steps to set JAVA_HOME on Windows 10.
- Search for Advanced System Settings in your windows Search box. Click on Advanced System Settings.
- Click on Environment variables button: Environment Variables popup will open.
- Goto system variables session, and click on New button to create new variable (HOME_PATH), then New System Variables popup will open.
- Give Variable Name: JAVA_HOME, and Variable value : Your Java SDK home path. Ex: C:Program Filesjavajdk1.8.0_151 Note: It should not include bin. Then click on OK button.
- Now you are able to see your JAVA_HOME in system variables list. (If you are not able to, try doing it again.)
- Select Path (from system variables list) and click on Edit button, A new pop will opens (Edit Environment Variables). It was introduced in windows 10.
- Click on New button and give %JAVA_HOME%bin at highlighted field and click Ok button.
You can find complete tutorials on my blog :
How to set JAVA_HOME in 64 bit Windows 10 OS
![]()
answered Dec 20, 2017 at 8:51
![]()
0
- Right click Computer
- Click the properties
- On the left pane select Advanced System Settings
- Select Environment Variables
- Under the System Variables, Select PATH and click edit,
and then click new and add path as C:Program
FilesJavajdk1.8.0_131bin (depending on your installation path)
and finally click ok - Next restart your command prompt and open it and try javac
answered Jun 7, 2017 at 7:40
![]()
0
To find the env vars dialog in Windows 10:
Right Click Start
>>  Click Control Panel  (Or you may have System in the list)
>>  Click System
>>  Click Advanced system settings
>>  Go to the Advanced Tab
>>  Click the "Environment Variables..." button at the bottom of that dialog page.
answered Mar 24, 2016 at 10:31
![]()
theINtoytheINtoy
3,2681 gold badge35 silver badges59 bronze badges
1
Its still the same concept, you’ll need to setup path variable so that windows is aware of the java executable and u can run it from command prompt conveniently
Details from the java’s own page: https://java.com/en/download/help/path.xml
That article applies to: •Platform(s): Solaris SPARC, Solaris x86, Red Hat Linux, SUSE Linux, Windows 8, Windows 7, Vista, Windows XP, Windows 10
answered Aug 27, 2015 at 5:21
![]()
2
if you have any version problems (javac -version=15.0.1, java -version=1.8.0)
windows search : edit environment variables for your account
then delete these in your windows Environment variable: system variable: Path
C:Program Files (x86)Common FilesOracleJavajavapath
C:Program FilesCommon FilesOracleJavajavapath
then if you’re using java 15
environment variable: system variable : Path
add path C:Program FilesJavajdk-15.0.1bin
is enough
if you’re using java 8
environment variable: system variable : JAVA_HOME
JAVA_HOME = C:Program FilesJavajdk1.8.0_271
add path = %JAVA_HOME%bin
answered Nov 27, 2020 at 8:27
![]()
1
Эта инструкция устарела, используйте вместо неё более новую
Во многих моих тренингах так или иначе используется Java, либо как язык программирования для разработки автотестов, либо как виртуальная машина для запуска приложений, написанных на Java — инструментов тестирования, сред разработки, и даже клиент системы видеоконференций GotoWebinar требует наличия Java.
Поэтому я решил описать процедуру установки Java для операционной системы Windows и последующей настройки системы, потому что, к сожалению, недостаточно просто “запустить инсталлятор и всегда нажимать кнопку Next”.
1. Где взять Java?
На официальном сайте Oracle Java.
2. Какую версию выбрать?
Разумеется, последнюю доступную (на момент написания инструкции это Java 8).
Выбирая из 32-битной и 64-битной версий, берите 64-битную, если ваша операционная система это позволяет, потому что у неё менее строгие ограничения по памяти, доступной исполняемым Java-приложениям.
3. Что устанавливать, JRE или JDK?
Java Runtime Environment, или JRE — это виртуальная машина, позволяющая запускать приложения, написанные на языке программирования Java.
Java Development Kit, или JDK — это набор инструментов, для разработки программ на языке программирования Java (компилятор, архиватор, генератор документации и прочие). JRE разумеется тоже входит в дистрибутив JDK.
Правило очень простое: если вы собираетесь что-нибудь писать на языке программирования Java, значит вам потребуется JDK. А если только запускать готовые программы — тогда достаточно JRE.
4. Установка Java
Вот тут, действительно, всё просто — нужно запустить инсталлятор и следовать указаниям визарда. Можно просто всё время нажимать кнопку Next.
5. Настройка переменных окружения
К сожалению, инсталлятор Java не выполняет настройку переменных окружения, поэтому придётся сделать это вручную после установки.
Во-первых, необходимо установить переменную JAVA_HOME, которая должна указывать на директорию, в которую установлена Java. Многие программы используют эту переменную, чтобы определить, где находится Java.
Во-вторых, надо в переменную PATH добавить путь к директории %JAVA_HOME%bin. Эта переменная указывает операционной системе список директорий, в которых нужно искать исполняемые файлы, и чтобы можно было запускать Java из консоли, переменная PATH должна быть правильно настроена.
Для установки переменных окружения сначала нужно открыть свойства компьютера, либо использовав сочетание клавиш Win-Pause, либо через меню “Пуск”:
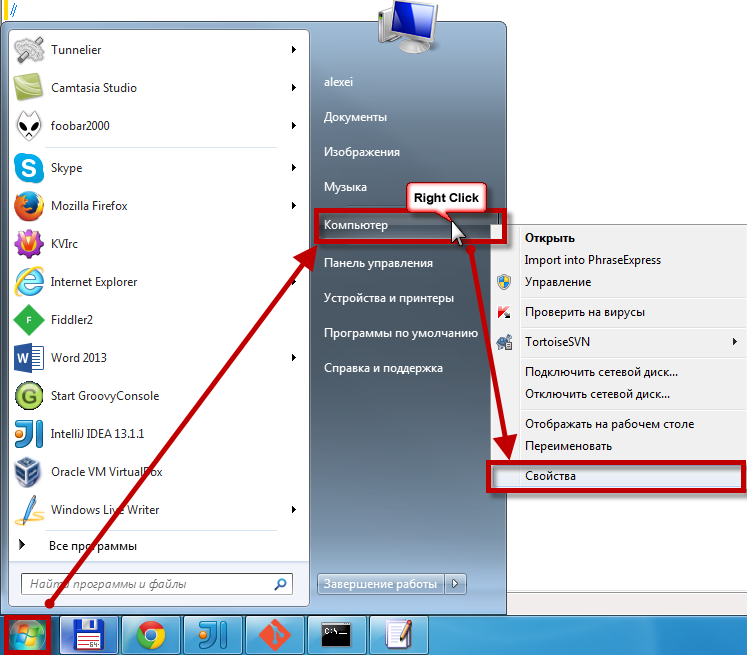
Затем нужно выбрать “Дополнительные параметры системы”, в открывшемся диалоге перейти на вкладку “Дополнительно” и нажать кнопку “Переменные среды”, после чего появится диалог настройки переменных окружения.
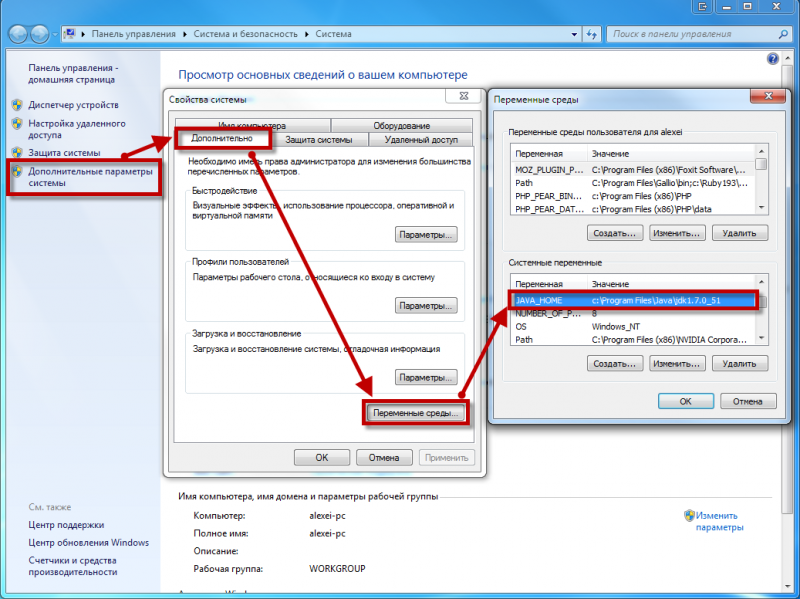
Если у вас уже есть переменная окружения JAVA_HOME — надо её отредактировать, если нет — создать новую. В качестве значения нужно указать путь к директории, куда установлена Java, то есть, например c:Program FilesJavajdk1.8.0_25, если вы установили JDK, либо c:Program FilesJavajre1.8.0_25, если вы установили только JRE.
После того, как вы установили значение переменной JAVA_HOME, необходимо отредактировать значение переменной PATH, добавив туда путь к директории, где находятся исполняемые файлы Java, то есть %JAVA_HOME%bin
И сохранить всё это, закрыв все открытые диалоги в обратном порядке кнопками OK.
Обратите внимание, что если вы устанавливаете JDK, то в названии директории указывается номер версии, поэтому впоследствии, когда вы решите установить более новую версию, не забудьте поменять значение переменной окружения JAVA_HOME.
После того, как вы изменили переменные окружения, новые значения будут действительны только для новых запускаемых программ, уже запущенные программы не узнают о том, что переменные окружения поменялись. Поэтому если вы, например, пытались запустить Java из консоли и у вас не получилось из-за неправильных настроек переменной PATH, вам придётся перезапустить консоль после того, как вы поменяли значение переменной.
6. Удаление лишних файлов
Запустите консоль (cmd) и выполните в ней команду where java.
В результате вы должны увидеть путь к исполняемому файлу java.exe, который операционная система должна успешно обнаружить в том месте, куда вы установили Java. Если файл не нашёлся — значит неправильно настроена переменная PATH и нужно вернуться к предыдущему пункту.
Однако иногда бывает и наоборот, находятся «лишние» исполняемые файлы:
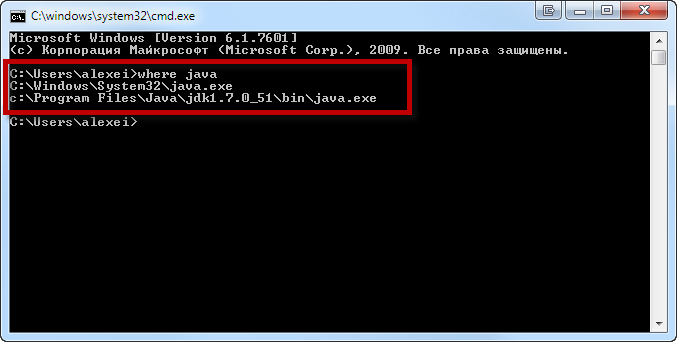
Происходит это из-за того, что инсталлятор Java вместо того, чтобы правильно настроить переменные окружения, пытается положить исполняемые файлы в директорию C:Windowssystem32
Это не очень хорошо — засоряется системная директория, может возникнуть рассогласование версий Java (в разных директориях разные версии). Поэтому надо удалить из каталога C:Windowssystem32 исполняемые файлы java.exe, javaw.exe и javaws.exe, если они там обнаружатся.
Вот и всё, теперь можно пользоваться Java. Только не забывайте о том, что после установки новой версии надо будет обновить переменную окружения JAVA_HOME!
C: Users Имя пользователя AppData LocalLow Sun Java Deployment кэш
папка в формате JAR. Вы можете установить уровень сжатия для этих файлов JAR и даже установить сумму, которая будет выделена для хранения этих файлов.
Вы можете просмотреть файлы, нажав кнопку Просмотр . 
Чтобы удалить эти временные файлы JAR Java, нажмите Удалить файлы . Теперь вы можете выбрать, какие файлы вы хотите удалить, и нажмите кнопку ОК.
Чтобы очистить кэш Java с помощью командной строки, откройте окна командной строки, введите следующую команду и нажмите Enter:
Мы склонны игнорировать обновление нашей Java. Но очень важно, чтобы мы всегда были уверены, что вы используете последнюю версию Java, поскольку уязвимости в Java часто используются для компрометации вашего компьютера. Последняя версия Java содержит важные улучшения для повышения безопасности, производительности и стабильности приложений Java, которые работают на вашем компьютере. Всякий раз, когда дыры в безопасности обнаруживаются, они исправляются, и поэтому обязательно убедитесь, что у вас установлена последняя версия java, поскольку она включает исправления уязвимостей.
Вы можете настроить параметры обновления Java, нажав на вкладку Обновить .
Убедитесь, что Автоматически проверять наличие обновлений . Нажав на кнопку Дополнительно , вы сможете установить частоту проверок обновлений.
Кстати, я заметил, что прошло много времени с тех пор, как я обновил Java. Поэтому я нажал на Обновить сейчас , чтобы начать процесс обновления. Это запустит процесс juscheck.exe , который проверит наличие обновлений и, соответственно, проинформирует вас.
Нажав на кнопку «Установить», вы начнете процесс обновления. По завершении нажмите «Закрыть».
Вкладка Java позволяет просматривать и управлять версиями и настройками среды выполнения Java для приложений и апплетов Java.
Вкладка Безопасность позволяет просматривать типы сертификатов, позволяющие идентифицировать себя.
На вкладке Дополнительно можно настроить другие параметры.
Хранение старых и неподдерживаемых версий Java в вашей системе представляет серьезную угрозу безопасности.
Более старые версии SunJava (до JRE 6 с обновлением 7) действительно сохранялись при установке обновлений и должны быть удалены, так как более старые версии SunJava очень уязвимы для Winfixer/Vundo. С 2005 года вплоть до обновления в конце прошлого года до обновления 10 JRE 6 для SunMicrosystems и Sun Microsystems, чтобы автообновление SunJava удаляло предыдущие (уязвимые) версии программы. Обновления от JRE 6 Update 10 forward находятся в автономной папке «jre6», которая перезаписывается, если установлена новая JRE. Даже при использовании самой последней версии SunJava, если на вашем компьютере все еще находятся более ранние, уязвимые версии, они уязвимы для заражения.К сожалению, простое использование программ «Установка и удаление программ» для удаления старых версий неэффективно.
Мы предлагаем вам попробовать JavaRa. После обновления Java до его последней версии сегодня я запустил JavaRa и использовал его для удаления старых версий Java.

Он обнаружил две старые версии на моем компьютере, которые я затем удалил.

ПРИМЕЧАНИЕ. Мой коллега по MVP и мод Corrine TWCF добавляет: JavaRa не была обновлена для поддержки удаления JRE 7 и, по-видимому, фактически имеет проблемы после JRE 6u32. Он перешел на SingularLabs.com. Кроме того, Пол Маклейн больше не поддерживает JavaRa, а Фриде Фрис все еще поддерживает.
Java Скачать
Вы можете скачать и установить Java для Windows вручную с Java.com здесь.
Надеюсь, вы узнали что-то новое здесь, в этом посте. Если у вас есть что добавить, пожалуйста, сделайте это в разделе комментариев.
9 Installation of the JDK and the JRE on Microsoft Windows Platforms
System Requirements for Installing the JDK and the JRE on 64-Bit Windows Platform
The JDK and the JRE have minimum processor, disk space, and memory requirements for 64-bit Windows platform.
Before installing the JDK or the JRE on your 64-bit Windows platform, you must verify that it meets the following minimum processor, disk space, and memory requirements.
Both the JDK and JRE require at minimum a Pentium 2 266 MHz processor.
Disk Space Requirements
For JDK 10 , you are given the option of installing the following features:
Public Java Runtime Environment
When you install 64-bit JDK, then 64-bit public JRE also gets installed. The following table provides the disk requirements for the installed features:
| JDK | Installed Image |
|---|---|
| Development Tools: 64-bit platform | 500 MB |
| Source Code | 54.2 MB |
| JRE | Installed Image |
|---|---|
| Public Java Runtime Environment | 200 MB |
| Java Update | 2 MB |
On Windows 64-bit operating systems, the Java runtime requires a minimum of 128 MB of memory.
The minimum physical RAM is required to run graphically based applications. More RAM is recommended for applets running within a browser using the Java Plug-in. Running with less memory may cause disk swapping, which has a severe effect on performance. Very large programs may require more RAM for adequate performance.
JDK and JRE Installation Instruction Notation for Windows
For any text in this document that contains the following notation, you must substitute the appropriate update version number:
If you are downloading the JDK installer for 64-bit systems for update 10 Interim 0, Update 2, and Patch 1, then the file name jdk- 10 . interim.update.patch _windows-x64_bin.exe becomes jdk- 10 .0.2.1_windows-x64_bin.exe .
If you are downloading the JRE installer for 64-bit systems for update 10 Interim 0, Update 2, and Patch 1, then the file name jre- 10 . interim.update.patch _windows-x64_bin.exe becomes jre- 10 .0.2.1_windows-x64_bin.exe .
JDK Installation Instructions for Windows
You run a self-installing executable file to unpack and install the JDK on Windows computers.
Install JDK on Windows computers by performing the actions described in the following topics:
Downloading the JDK Installer
In a browser, go to the Java SE Development Kit 10 Downloads page and click Accept License Agreement . Under the Download menu, click the Download link that corresponds to the .exe for your version of Windows.
Download the file jdk- 10 . interim.update.patch _windows-x64_bin.exe .
Verify the successful completion of file download by comparing the file size on the download page and your local drive.
Running the JDK Installer
- Start the JDK 10 installer by double-clicking the installer’s icon or file name in the download location.
- Follow the instructions provided by the Installation wizard.
Installing the JDK Silently
Instead of double-clicking or opening the JDK installer, you can perform a silent, noninteractive, JDK installation by using command-line arguments.
The following table lists example installation scenarios and the commands required to perform them. The notation jdk stands for the downloaded installer file base name, such as jdk- 10 _windows-x64_bin.exe .
| Installation Scenario | Command |
|---|---|
| Install JDK and public JRE in silent mode. | |
| Install development tools and source code in silent mode but not the public JRE. | |
| Install development tools, source code, and the public JRE in silent mode. | |
| Install the public JRE in the specified directory C:test in silent mode. |
Setting the PATH Environment Variable
It is useful to set the PATH variable permanently for JDK 10 so that it is persistent after rebooting.
The PATH variable is set automatically for the JRE. This topic only applies to the JDK.
If you do not set the PATH variable, then you must specify the full path to the executable file every time that you run it. For example:
- Select Control Panel and then System .
- Click Advanced and then Environment Variables .
- Add the location of the bin folder of the JDK installation to the PATH variable in System Variables .
The PATH environment variable is a series of directories separated by semicolons (;) and is not case-sensitive. Microsoft Windows looks for programs in the PATH directories in order, from left to right.
You should only have one bin directory for a JDK in the path at a time. Those following the first instance are ignored.
If you are not sure where to add the JDK path, append it.
The new path takes effect in each new command window that you open after setting the PATH variable.
The following is a typical value for the PATH variable:
JRE Installation Instructions for Windows
When installing JRE on Windows computers, you must select the JRE installer that is appropriate for your Windows system.
The 64-bit Windows operating systems come with a 64-bit Internet Explorer (IE) browser as the standard (default) for viewing web pages.
Install JRE on Windows computers by performing the actions described in the following topics:
JRE Proxy Settings and Authentication
To use the Windows Online Installer, you must be connected to the internet.
If you are running behind a proxy server, then you must have your proxy settings correctly configured. If they are not configured, or are incorrectly configured, then the installer will terminate with the following message:
The installer cannot proceed with the current Internet Connection settings.
Please visit the following website for more information.
If you see this message, check your proxy settings:
In the Control Panel , double-click Internet Options , select the Connections tab, and click the LAN Settings .
If you do not know what the correct settings should be, check with your internet provider or system administrator.
Downloading the JRE Installer
The JRE Installer is located on the Java SE Runtime Environment 10 Downloads page.
- In a browser, go to the Java SE Runtime Environment 10 Downloads page.
The following JRE installers are available for you to download:
Windows Offline: jre- 10 . interim.update.patch _windows-x64_bin.exe
Windows Tar: jre- 10 . interim.update.patch _windows-x64_bin.tar.gz
The Windows Offline installer and Windows installer contains everything that is required to install the JRE.
The Microsoft Windows Installer (MSI) Enterprise JRE Installer is also available, which enables you to install the JRE across your enterprise. It requires a commercial license for use in production.
Running the JRE Installer
- Start the JRE 10 Installer by double-clicking the installer’s icon or file name in the download location.
- Follow the instructions provided by the Installation wizard.
The private JRE installed with the JDK is not registered. To register the JRE, you must set the PATH environment variable to point to JAVA_HOME bin , where JAVA_HOME is the location where you installed the private JRE . See Setting the PATH Environment Variable.
By default, the Java Access Bridge is disabled. To enable it, see Enabling and Testing Java Access Bridge in the Java Platform, Standard Edition Java Accessibility Guide .
To access essential Java information and functions in Microsoft Windows 7 and Windows 10 machines, after installation, click the Start menu and then select Java . The Java directory provides access to Help, Check for Updates, and Configure Java.
The Microsoft Windows 8 and Windows 8.1 do not have a Start menu. However, the Java information is available in the following Start directory: %ALLUSERSPROFILE%MicrosoftWindowsStart MenuPrograms .
Windows Registry Settings
The installation program for the Microsoft Windows version of the Java SE Runtime Environment uses the registry to store path and version information.
It creates the following registry keys:
This key contains the string CurrentVersion , with a value that is the highest installed version on the system.
JavaHome : the full path name of the directory in which the JRE is installed
RuntimeLib : the full path name of the Java runtime DLL
HKEY_LOCAL_MACHINESoftwareJavaSoftJava Web Start
This key is created for Java Web Start.
If there are two versions of JDK or JRE installed on a system, one with the new version-string format introduced in JDK 10 , and the other with the older version format, then there will be two different CurrentVersion registry key values. For example, if JDK 1.8.0 and JDK 10 are installed, then the following registry keys are created:
«HKEY_LOCAL_MACHINESOFTWAREJavaSoftJava Development Kit» for JDK 1.8.0 and «HKEY_LOCAL_MACHINESOFTWAREJavaSoftJDK» for JDK 10 .
The registry layout for this example is:
The @CurrentVersion is a registry string in the «JDK» or «Java Development Kit» key.
For the same example, if the JRE is installed, then the registry layout is:
The @CurrentVersion is a registry string in the «JRE» or «Java Runtime Environment» key.
Beginning to Use the JDK
Use the Java item in the Windows Start menu to access essential Java information and functions, including Help, API documentation, the Java Control Panel, checking for updates, and Java Mission Control.
Java Start Menu Installed by JDK
During JDK install, Java menu items are added to the Windows Start menu to provide easy access to Java resources and a Java Development Kit folder is created in the Windows Start menu, which contains the following items:
Reference Documentation : Opens the Online API documentation web page.
Java Mission Control : Opens the Java Mission Control profiling and diagnostics tools suite.
Java Mission Control is a commercial feature available to users with a Java SE Advanced license.
During JDK installation and uninstallation processes, the appropriate start menu items are updated so that they are associated with the latest JDK version on the system
The Windows 7 and Windows 10 have a Start menu; however, the menu is not available in Windows 8 and Windows 8.1. The JDK and Java information in Windows 8 and Windows 8.1 is available in the following Start directory: %ALLUSERSPROFILE%MicrosoftWindowsStart MenuPrograms .
Java Start Menu Installed by JRE
During JRE installation, Java menu items are added to the Windows Start menu to provide easy access to Java resources and a Java folder is created in the Windows Start menu, which contains the following items:
About Java : Opens the Java Control Panel with focus on the General tab. The tab displays the latest JRE version installed on the system.
Check for Updates : Opens the Java Control Panel with focus on the Update tab
Configure Java : Opens the Java Control Panel with focus on the General tab
Get Help : Opens the Java Help Center
Visit Java.com : Opens the Java Download page
During JRE installation and uninstallation processes, the appropriate start menu items are updated so that they are associated with the latest JRE version on the system.
The Windows 7 and Windows 10 have Start menu, however the menu is not available in Windows 8 and Windows 8.1. The JRE and Java information in Windows 8 and Windows 8.1 is available in the following Start directory: %ALLUSERSPROFILE%MicrosoftWindowsStart MenuPrograms .
Java Web Start
Java Web Start is an application-deployment technology that gives you the power to run full-featured applications with a single click from your web browser.
With Java Web Start, you can download and run applications, such as a complete spreadsheet program or an internet chat client, without going through complicated installation procedures. With Java Web Start, you run applications simply by clicking a web page link. If the application is not present on your computer, Java Web Start automatically downloads all necessary files. It then caches the files on your computer so that the application is always ready to be run anytime that you want — either from an icon on your desktop or from the browser link. No matter which method you use to run the application, the most current, available version of the application is always presented to you.
Upgrading from Previous Versions
If you have a previous version of Java Web Start, do not uninstall it. Uninstalling it will cause the download cache to be cleared, and all previously installed Java Web Start application data will have to be downloaded again. The new version will write over previous installations and automatically update browsers to use the new version. The configuration files and the program files folder used by Java Web Start have changed, but all your settings will remain intact after the upgrade because Java Web Start will translate your settings to the new form.
The only way to uninstall Java Web Start is to uninstall the JDK or JRE. Uninstalling the JDK or JRE will not, however, remove the cache for previous versions of Java Web Start. Previous releases have separate uninstallation instructions for Java Web Start.
You may see a misleading message if you do the following:
Download and cache a Java Web Start application with the JDK or JRE.
Remove the JDK or JRE using Add or Remove Programs from the Windows Control Panel .
Remove the Java Web Start application using Add or Remove Programs .
When you remove the application, you see an Uninstaller Error dialog box saying:
An error occurred while trying to remove Java-Application: name App. It may have already been uninstalled. Would you like to remove Java-Application: name App from the Add or Remove program list?
If you say Yes to this, then you will see another Uninstaller Error dialog box saying:
You do not have sufficient access to remove Java-Application: name App from the Add or Remove Program list. Please contact your system administrator.
The message is displayed when you have removed the Java Web Start application while uninstallating the JDK or JRE, but this is not reflected in the Add or Remove Programs . Refresh the Add or Remove Programs by pressing F5 or reopen the panel.
To avoid seeing the misleading message, either press F5 or reopen the dialog box. Any Java Web Start application that was downloaded and cached with the JDK or JRE will no longer appear in the list of currently installed programs.
Java Plug-in
Java Plug-in technology, included as part of the JRE, establishes a connection between popular browsers and the Java platform. This connection enables applets on websites to be run within a browser on the desktop.
The Java Plug-in is automatically enabled for supported web browsers during installation of the JRE. No user intervention is necessary.
In Java SE 10 , the version of the Java Plug-in that is available in versions of the JRE prior to Java SE 6 Update 10 has been deprecated. However, this earlier version of the Java Plug-in is still shipped with Java SE 10 for compatibility purposes but is no longer fully supported. It will be removed in a future release.
Option to Disable the JRE Out-of-Date Warning
When the installed JRE falls below the security baseline or passes its built-in expiration date, an additional warning is shown to users to update their installed JRE to the latest version. For businesses that manage the update process centrally, users attempting to update their JRE individually, may cause problems.
A deployment property, deployment.expiration.check.enabled is available that can be used to disable the JRE out of date warning. To suppress this specific warning message, add the following entry in the deployment properties file:
To disable automatic updates, on the Update tab of the Java Control Panel, deselect the Check for Updates Automatically check box.
Uninstalling the JDK on Windows
Uninstalling the JRE on Windows
Use either of the following ways to uninstall JRE:
Go to Add/Remove Programs utility in the Microsoft Windows Control Panel and uninstall the older versions of JRE.
Remove JRE using the online Java Uninstall Tool.
The Java Removal Tool is integrated with the JRE installer. After JRE 10 is installed, the Java Removal Tool provides the list of outdated Java versions in the system and helps you to remove them.
The Java Uninstall tool will not run if your system administrator specified a deployment rule set in your organization.
A deployment rule set enables enterprises to manage their Java desktop environment directly and continue using legacy business applications in an environment of ever-tightening Java applet and Java Web Start application security policies. A deployment rule set enables administrators to specify rules for applets and Java Web Start applications; these rules may specify that a specific JRE version must be used. Consequently, the Java Uninstall tool will not run if it detects a deployment rule set to ensure that no required JREs are uninstalled.
See Deployment Rule Set in the Java Platform, Standard Edition Deployment Guide .
JDK Installation Troubleshooting
The following sections provide tips for working around problems that are sometimes seen during or while following installation instructions.
System Error During Decompression
If you see the error message system error during decompression , then you might not have enough space on the disk that contains your TEMP directory.
Program Cannot Be Run in DOS Mode
If you see the error message This program cannot be run in DOS mode , then do the following:
Open the MS-DOS shell or command prompt window.
Right-click the title bar.
Select the Program tab.
Ensure that the item Prevent MS-DOS-based programs from detecting Windows is not selected.
Select OK again.
Exit the MS-DOS shell.
Restart your computer.
Source Files in Notepad
In Microsoft Windows, when you create a new file in Microsoft Notepad and then save it for the first time, Notepad usually adds the .txt extension to the file name. Therefore, a file that you name Test.java is actually saved as Test.java.txt . Note that you cannot see the .txt extension unless you turn on the viewing of file extensions (in Microsoft Windows Explorer, deselect Hide file extensions for known file types under Folder Options ). To prevent the .txt extension, enclose the file name in quotation marks, such as «Test.java» when entering information in the Save As dialog box.
Characters That Are Not Part of the System Code Page
It is possible to name directories using characters that are not part of the system locale’s code page. If such a directory is part of the installation path, then generic error 1722 occurs, and installation is not completed. Error 1722 is a Windows installer error code. It indicates that the installation process has failed. The exact reason for this error is not known at this time.
To prevent this problem, ensure that the user and system locales are identical, and that the installation path contains only characters that are part of the system locale’s code page. User and system locales can be set in the Regional Options or Regional Settings control panel.
The associated bug number is 4895647.
Windows Online Installation and Java Update FAQ
These are frequently asked questions about JDK 10 and JRE 10 online installation and Java updates on Windows computers.
1. I downloaded the installer and it is less than 1 megabyte. Why is it so small?
The Windows Online Installer for the JRE will download more installer files. Using this installer helps users to avoid downloading unnecessary files.
2. I had the Java Control Panel open for Java Update and the About tab showed the version of the JRE installed in my computer. Then I ran Java Update, and the version of the JRE that the Java Control Panel is showing has not changed. Why is this?
You need to close and restart the Java Control Panel to get the updated Control Panel.
3. Netscape/Mozilla is not working correctly with Java Plug-in. Why?
First, close all the browsers sessions. If this does not work, reboot the system and try again.
4. I try to install on the D: drive and Java Update is still installing files onto the C: drive. Why?
Regardless of whether an alternate target directory was selected, Java Update needs to install some files on the Windows system drive.
5. How can I uninstall the Java Update version that I just installed?
If you want to uninstall the JRE, then use the Add/Remove Programs utility in the Microsoft Windows . Select the Control Panel and then Add/Remove Programs .
6. After the JRE bootstrap installer is downloaded and executed, why does the message «This installer cannot proceed with the current Internet Connection settings of your system. In your Windows Control Panel, please check Internet Options -> Connections to make sure the settings and proxy information are correct.» appear?
The JRE bootstrap installer uses the system Internet Connection settings to connect to the web for downloading extra files. If you are behind a firewall and require proxy settings, then ensure that the proxy settings in Internet Options/Internet Properties are set up properly (select Start , then Control Panel , then Internet Options/Internet Properties , then Connections , and then LAN Settings ). If you can browse the external web (for example, outside the firewall) with Internet Explorer, then your proxy settings are properly set up. The installer does not understand the proxy settings specified in Netscape/Mozilla.
7. I found the jusched.exe process running in the background of my system after installing JRE. Is there a way to shut it down?
The jusched.exe is the scheduler process of Java Update. This process runs automatically. To shut in the Java Control Panel on the Update tab, deselect the Check for Updates Automatically check box.
8. When I click the Update Now button from the Java Control Panel, it complains about the system being «offline.» What does that mean?
Java Update can be run only if the system is connected to the network. A system that is not connected to the network is referred to as being offline. When the Update Now is clicked, it will check the online/offline status of your system. If your computer does not have internet access, then the error message is displayed. Check that your system is currently connected to the internet and try again.
9. I followed the instructions to install a specific version of the JRE. After the installation, a message is displayed from system tray saying an update is available for download. What should I do?
The message is part of the Java Auto Update mechanism, which detects at user login time if a newer version of the JRE is available for download. In the system tray, click the Java Update icon to download and install the update.
10. I encountered the error «This installation package could not be opened. Contact the application vendor to verify that this is a valid Windows Installer package.» when running the Java SE installer.
There are several possible reasons for this error to be displayed; a few are listed:
Network connection fails.
Download manager software interrupts the download process.
Another application, such as an antivirus application, may interrupt the installation process.
To address these problems, ensure that the third-party downloader applications are turned off and the network connection is configured properly. Also, if a proxy is in use, then ensure that the proxy authentication is turned off.
11. I encountered the error «Error 1722. There is a problem with this Windows installer package. A program run as part of the setup did not finish as expected. Contact your support personnel or package vendor.»
See Error 1722: Problem with Windows Installer Package. If you encounter any other errors or issues, then you can access Java Help Center, which contains solutions for issues that you might encounter when downloading and installing Java on your system. In particular, you can search for solutions by error number. Searching for «Error 1722» returns a solution to this issue.
. как установить Java на Windows?
Во многих моих тренингах так или иначе используется Java, либо как язык программирования для разработки автотестов, либо как виртуальная машина для запуска приложений, написанных на Java — инструментов тестирования, сред разработки, и даже клиент системы видеоконференций GotoWebinar требует наличия Java.
Поэтому я решил описать процедуру установки Java для операционной системы Windows и последующей настройки системы, потому что, к сожалению, недостаточно просто “запустить инсталлятор и всегда нажимать кнопку Next”.
1. Где взять Java?
2. Какую версию выбрать?
Разумеется, последнюю доступную (на момент написания инструкции это Java 8).
Выбирая из 32-битной и 64-битной версий, берите 64-битную, если ваша операционная система это позволяет, потому что у неё менее строгие ограничения по памяти, доступной исполняемым Java-приложениям.
3. Что устанавливать, JRE или JDK?
Java Runtime Environment, или JRE — это виртуальная машина, позволяющая запускать приложения, написанные на языке программирования Java.
Java Development Kit, или JDK — это набор инструментов, для разработки программ на языке программирования Java (компилятор, архиватор, генератор документации и прочие). JRE разумеется тоже входит в дистрибутив JDK.
Правило очень простое: если вы собираетесь что-нибудь писать на языке программирования Java, значит вам потребуется JDK. А если только запускать готовые программы — тогда достаточно JRE.
4. Установка Java
Вот тут, действительно, всё просто — нужно запустить инсталлятор и следовать указаниям визарда. Можно просто всё время нажимать кнопку Next.
5. Настройка переменных окружения
К сожалению, инсталлятор Java не выполняет настройку переменных окружения, поэтому придётся сделать это вручную после установки.
Во-первых, необходимо установить переменную JAVA_HOME , которая должна указывать на директорию, в которую установлена Java. Многие программы используют эту переменную, чтобы определить, где находится Java.
Во-вторых, надо в переменную PATH добавить путь к директории %JAVA_HOME%bin . Эта переменная указывает операционной системе список директорий, в которых нужно искать исполняемые файлы, и чтобы можно было запускать Java из консоли, переменная PATH должна быть правильно настроена.
Для установки переменных окружения сначала нужно открыть свойства компьютера, либо использовав сочетание клавиш Win-Pause, либо через меню “Пуск”:

Затем нужно выбрать “Дополнительные параметры системы”, в открывшемся диалоге перейти на вкладку “Дополнительно” и нажать кнопку “Переменные среды”, после чего появится диалог настройки переменных окружения.

Если у вас уже есть переменная окружения JAVA_HOME — надо её отредактировать, если нет — создать новую. В качестве значения нужно указать путь к директории, куда установлена Java, то есть, например c:Program FilesJavajdk1.8.0_25 , если вы установили JDK, либо c:Program FilesJavajre1.8.0_25 , если вы установили только JRE.
После того, как вы установили значение переменной JAVA_HOME , необходимо отредактировать значение переменной PATH, добавив туда путь к директории, где находятся исполняемые файлы Java, то есть %JAVA_HOME%bin

И сохранить всё это, закрыв все открытые диалоги в обратном порядке кнопками OK.
Обратите внимание, что если вы устанавливаете JDK, то в названии директории указывается номер версии, поэтому впоследствии, когда вы решите установить более новую версию, не забудьте поменять значение переменной окружения JAVA_HOME .
После того, как вы изменили переменные окружения, новые значения будут действительны только для новых запускаемых программ, уже запущенные программы не узнают о том, что переменные окружения поменялись. Поэтому если вы, например, пытались запустить Java из консоли и у вас не получилось из-за неправильных настроек переменной PATH , вам придётся перезапустить консоль после того, как вы поменяли значение переменной.
6. Удаление лишних файлов
Запустите консоль ( cmd ) и выполните в ней команду where java .
В результате вы должны увидеть путь к исполняемому файлу java.exe , который операционная система должна успешно обнаружить в том месте, куда вы установили Java. Если файл не нашёлся — значит неправильно настроена переменная PATH и нужно вернуться к предыдущему пункту.
Однако иногда бывает и наоборот, находятся «лишние» исполняемые файлы:

Происходит это из-за того, что инсталлятор Java вместо того, чтобы правильно настроить переменные окружения, пытается положить исполняемые файлы в директорию C:Windowssystem32
Это не очень хорошо — засоряется системная директория, может возникнуть рассогласование версий Java (в разных директориях разные версии). Поэтому надо удалить из каталога C:Windowssystem32 исполняемые файлы java.exe , javaw.exe и javaws.exe , если они там обнаружатся.
Вот и всё, теперь можно пользоваться Java. Только не забывайте о том, что после установки новой версии надо будет обновить переменную окружения JAVA_HOME !

Автор: Алексей Баранцев
Если вам понравилась эта статья, вы можете поделиться ею в социальных сетях (кнопочки ниже), а потом вернуться на главную страницу блога и почитать другие мои статьи.
Ну а если вы не согласны с чем-то или хотите что-нибудь дополнить – оставьте комментарий ниже, может быть это послужит поводом для написания новой интересной статьи.
9 Installation of the JDK and the JRE on Microsoft Windows Platforms
System Requirements for Installing the JDK and the JRE on 64-Bit Windows Platform
The JDK and the JRE have minimum processor, disk space, and memory requirements for 64-bit Windows platform.
Before installing the JDK or the JRE on your 64-bit Windows platform, you must verify that it meets the following minimum processor, disk space, and memory requirements.
Both the JDK and JRE require at minimum a Pentium 2 266 MHz processor.
Disk Space Requirements
For JDK 10 , you are given the option of installing the following features:
Public Java Runtime Environment
When you install 64-bit JDK, then 64-bit public JRE also gets installed. The following table provides the disk requirements for the installed features:
| JDK | Installed Image |
|---|---|
| Development Tools: 64-bit platform | 500 MB |
| Source Code | 54.2 MB |
| JRE | Installed Image |
|---|---|
| Public Java Runtime Environment | 200 MB |
| Java Update | 2 MB |
On Windows 64-bit operating systems, the Java runtime requires a minimum of 128 MB of memory.
The minimum physical RAM is required to run graphically based applications. More RAM is recommended for applets running within a browser using the Java Plug-in. Running with less memory may cause disk swapping, which has a severe effect on performance. Very large programs may require more RAM for adequate performance.
JDK and JRE Installation Instruction Notation for Windows
For any text in this document that contains the following notation, you must substitute the appropriate update version number:
If you are downloading the JDK installer for 64-bit systems for update 10 Interim 0, Update 2, and Patch 1, then the file name jdk- 10 . interim.update.patch _windows-x64_bin.exe becomes jdk- 10 .0.2.1_windows-x64_bin.exe .
If you are downloading the JRE installer for 64-bit systems for update 10 Interim 0, Update 2, and Patch 1, then the file name jre- 10 . interim.update.patch _windows-x64_bin.exe becomes jre- 10 .0.2.1_windows-x64_bin.exe .
JDK Installation Instructions for Windows
You run a self-installing executable file to unpack and install the JDK on Windows computers.
Install JDK on Windows computers by performing the actions described in the following topics:
Downloading the JDK Installer
In a browser, go to the Java SE Development Kit 10 Downloads page and click Accept License Agreement . Under the Download menu, click the Download link that corresponds to the .exe for your version of Windows.
Download the file jdk- 10 . interim.update.patch _windows-x64_bin.exe .
Verify the successful completion of file download by comparing the file size on the download page and your local drive.
Running the JDK Installer
- Start the JDK 10 installer by double-clicking the installer’s icon or file name in the download location.
- Follow the instructions provided by the Installation wizard.
Installing the JDK Silently
Instead of double-clicking or opening the JDK installer, you can perform a silent, noninteractive, JDK installation by using command-line arguments.
The following table lists example installation scenarios and the commands required to perform them. The notation jdk stands for the downloaded installer file base name, such as jdk- 10 _windows-x64_bin.exe .
| Installation Scenario | Command |
|---|---|
| Install JDK and public JRE in silent mode. | |
| Install development tools and source code in silent mode but not the public JRE. | |
| Install development tools, source code, and the public JRE in silent mode. | |
| Install the public JRE in the specified directory C:test in silent mode. |
Setting the PATH Environment Variable
It is useful to set the PATH variable permanently for JDK 10 so that it is persistent after rebooting.
The PATH variable is set automatically for the JRE. This topic only applies to the JDK.
If you do not set the PATH variable, then you must specify the full path to the executable file every time that you run it. For example:
- Select Control Panel and then System .
- Click Advanced and then Environment Variables .
- Add the location of the bin folder of the JDK installation to the PATH variable in System Variables .
The PATH environment variable is a series of directories separated by semicolons (;) and is not case-sensitive. Microsoft Windows looks for programs in the PATH directories in order, from left to right.
You should only have one bin directory for a JDK in the path at a time. Those following the first instance are ignored.
If you are not sure where to add the JDK path, append it.
The new path takes effect in each new command window that you open after setting the PATH variable.
The following is a typical value for the PATH variable:
JRE Installation Instructions for Windows
When installing JRE on Windows computers, you must select the JRE installer that is appropriate for your Windows system.
The 64-bit Windows operating systems come with a 64-bit Internet Explorer (IE) browser as the standard (default) for viewing web pages.
Install JRE on Windows computers by performing the actions described in the following topics:
JRE Proxy Settings and Authentication
To use the Windows Online Installer, you must be connected to the internet.
If you are running behind a proxy server, then you must have your proxy settings correctly configured. If they are not configured, or are incorrectly configured, then the installer will terminate with the following message:
The installer cannot proceed with the current Internet Connection settings.
Please visit the following website for more information.
If you see this message, check your proxy settings:
In the Control Panel , double-click Internet Options , select the Connections tab, and click the LAN Settings .
If you do not know what the correct settings should be, check with your internet provider or system administrator.
Downloading the JRE Installer
The JRE Installer is located on the Java SE Runtime Environment 10 Downloads page.
- In a browser, go to the Java SE Runtime Environment 10 Downloads page.
The following JRE installers are available for you to download:
Windows Offline: jre- 10 . interim.update.patch _windows-x64_bin.exe
Windows Tar: jre- 10 . interim.update.patch _windows-x64_bin.tar.gz
The Windows Offline installer and Windows installer contains everything that is required to install the JRE.
The Microsoft Windows Installer (MSI) Enterprise JRE Installer is also available, which enables you to install the JRE across your enterprise. It requires a commercial license for use in production.
Running the JRE Installer
- Start the JRE 10 Installer by double-clicking the installer’s icon or file name in the download location.
- Follow the instructions provided by the Installation wizard.
The private JRE installed with the JDK is not registered. To register the JRE, you must set the PATH environment variable to point to JAVA_HOME bin , where JAVA_HOME is the location where you installed the private JRE . See Setting the PATH Environment Variable.
By default, the Java Access Bridge is disabled. To enable it, see Enabling and Testing Java Access Bridge in the Java Platform, Standard Edition Java Accessibility Guide .
To access essential Java information and functions in Microsoft Windows 7 and Windows 10 machines, after installation, click the Start menu and then select Java . The Java directory provides access to Help, Check for Updates, and Configure Java.
The Microsoft Windows 8 and Windows 8.1 do not have a Start menu. However, the Java information is available in the following Start directory: %ALLUSERSPROFILE%MicrosoftWindowsStart MenuPrograms .
Windows Registry Settings
The installation program for the Microsoft Windows version of the Java SE Runtime Environment uses the registry to store path and version information.
It creates the following registry keys:
This key contains the string CurrentVersion , with a value that is the highest installed version on the system.
JavaHome : the full path name of the directory in which the JRE is installed
RuntimeLib : the full path name of the Java runtime DLL
HKEY_LOCAL_MACHINESoftwareJavaSoftJava Web Start
This key is created for Java Web Start.
If there are two versions of JDK or JRE installed on a system, one with the new version-string format introduced in JDK 10 , and the other with the older version format, then there will be two different CurrentVersion registry key values. For example, if JDK 1.8.0 and JDK 10 are installed, then the following registry keys are created:
«HKEY_LOCAL_MACHINESOFTWAREJavaSoftJava Development Kit» for JDK 1.8.0 and «HKEY_LOCAL_MACHINESOFTWAREJavaSoftJDK» for JDK 10 .
The registry layout for this example is:
The @CurrentVersion is a registry string in the «JDK» or «Java Development Kit» key.
For the same example, if the JRE is installed, then the registry layout is:
The @CurrentVersion is a registry string in the «JRE» or «Java Runtime Environment» key.
Beginning to Use the JDK
Use the Java item in the Windows Start menu to access essential Java information and functions, including Help, API documentation, the Java Control Panel, checking for updates, and Java Mission Control.
Java Start Menu Installed by JDK
During JDK install, Java menu items are added to the Windows Start menu to provide easy access to Java resources and a Java Development Kit folder is created in the Windows Start menu, which contains the following items:
Reference Documentation : Opens the Online API documentation web page.
Java Mission Control : Opens the Java Mission Control profiling and diagnostics tools suite.
Java Mission Control is a commercial feature available to users with a Java SE Advanced license.
During JDK installation and uninstallation processes, the appropriate start menu items are updated so that they are associated with the latest JDK version on the system
The Windows 7 and Windows 10 have a Start menu; however, the menu is not available in Windows 8 and Windows 8.1. The JDK and Java information in Windows 8 and Windows 8.1 is available in the following Start directory: %ALLUSERSPROFILE%MicrosoftWindowsStart MenuPrograms .
Java Start Menu Installed by JRE
During JRE installation, Java menu items are added to the Windows Start menu to provide easy access to Java resources and a Java folder is created in the Windows Start menu, which contains the following items:
About Java : Opens the Java Control Panel with focus on the General tab. The tab displays the latest JRE version installed on the system.
Check for Updates : Opens the Java Control Panel with focus on the Update tab
Configure Java : Opens the Java Control Panel with focus on the General tab
Get Help : Opens the Java Help Center
Visit Java.com : Opens the Java Download page
During JRE installation and uninstallation processes, the appropriate start menu items are updated so that they are associated with the latest JRE version on the system.
The Windows 7 and Windows 10 have Start menu, however the menu is not available in Windows 8 and Windows 8.1. The JRE and Java information in Windows 8 and Windows 8.1 is available in the following Start directory: %ALLUSERSPROFILE%MicrosoftWindowsStart MenuPrograms .
Java Web Start
Java Web Start is an application-deployment technology that gives you the power to run full-featured applications with a single click from your web browser.
With Java Web Start, you can download and run applications, such as a complete spreadsheet program or an internet chat client, without going through complicated installation procedures. With Java Web Start, you run applications simply by clicking a web page link. If the application is not present on your computer, Java Web Start automatically downloads all necessary files. It then caches the files on your computer so that the application is always ready to be run anytime that you want — either from an icon on your desktop or from the browser link. No matter which method you use to run the application, the most current, available version of the application is always presented to you.
Upgrading from Previous Versions
If you have a previous version of Java Web Start, do not uninstall it. Uninstalling it will cause the download cache to be cleared, and all previously installed Java Web Start application data will have to be downloaded again. The new version will write over previous installations and automatically update browsers to use the new version. The configuration files and the program files folder used by Java Web Start have changed, but all your settings will remain intact after the upgrade because Java Web Start will translate your settings to the new form.
The only way to uninstall Java Web Start is to uninstall the JDK or JRE. Uninstalling the JDK or JRE will not, however, remove the cache for previous versions of Java Web Start. Previous releases have separate uninstallation instructions for Java Web Start.
You may see a misleading message if you do the following:
Download and cache a Java Web Start application with the JDK or JRE.
Remove the JDK or JRE using Add or Remove Programs from the Windows Control Panel .
Remove the Java Web Start application using Add or Remove Programs .
When you remove the application, you see an Uninstaller Error dialog box saying:
An error occurred while trying to remove Java-Application: name App. It may have already been uninstalled. Would you like to remove Java-Application: name App from the Add or Remove program list?
If you say Yes to this, then you will see another Uninstaller Error dialog box saying:
You do not have sufficient access to remove Java-Application: name App from the Add or Remove Program list. Please contact your system administrator.
The message is displayed when you have removed the Java Web Start application while uninstallating the JDK or JRE, but this is not reflected in the Add or Remove Programs . Refresh the Add or Remove Programs by pressing F5 or reopen the panel.
To avoid seeing the misleading message, either press F5 or reopen the dialog box. Any Java Web Start application that was downloaded and cached with the JDK or JRE will no longer appear in the list of currently installed programs.
Java Plug-in
Java Plug-in technology, included as part of the JRE, establishes a connection between popular browsers and the Java platform. This connection enables applets on websites to be run within a browser on the desktop.
The Java Plug-in is automatically enabled for supported web browsers during installation of the JRE. No user intervention is necessary.
In Java SE 10 , the version of the Java Plug-in that is available in versions of the JRE prior to Java SE 6 Update 10 has been deprecated. However, this earlier version of the Java Plug-in is still shipped with Java SE 10 for compatibility purposes but is no longer fully supported. It will be removed in a future release.
Option to Disable the JRE Out-of-Date Warning
When the installed JRE falls below the security baseline or passes its built-in expiration date, an additional warning is shown to users to update their installed JRE to the latest version. For businesses that manage the update process centrally, users attempting to update their JRE individually, may cause problems.
A deployment property, deployment.expiration.check.enabled is available that can be used to disable the JRE out of date warning. To suppress this specific warning message, add the following entry in the deployment properties file:
To disable automatic updates, on the Update tab of the Java Control Panel, deselect the Check for Updates Automatically check box.
Uninstalling the JDK on Windows
Uninstalling the JRE on Windows
Use either of the following ways to uninstall JRE:
Go to Add/Remove Programs utility in the Microsoft Windows Control Panel and uninstall the older versions of JRE.
Remove JRE using the online Java Uninstall Tool.
The Java Removal Tool is integrated with the JRE installer. After JRE 10 is installed, the Java Removal Tool provides the list of outdated Java versions in the system and helps you to remove them.
The Java Uninstall tool will not run if your system administrator specified a deployment rule set in your organization.
A deployment rule set enables enterprises to manage their Java desktop environment directly and continue using legacy business applications in an environment of ever-tightening Java applet and Java Web Start application security policies. A deployment rule set enables administrators to specify rules for applets and Java Web Start applications; these rules may specify that a specific JRE version must be used. Consequently, the Java Uninstall tool will not run if it detects a deployment rule set to ensure that no required JREs are uninstalled.
See Deployment Rule Set in the Java Platform, Standard Edition Deployment Guide .
JDK Installation Troubleshooting
The following sections provide tips for working around problems that are sometimes seen during or while following installation instructions.
System Error During Decompression
If you see the error message system error during decompression , then you might not have enough space on the disk that contains your TEMP directory.
Program Cannot Be Run in DOS Mode
If you see the error message This program cannot be run in DOS mode , then do the following:
Open the MS-DOS shell or command prompt window.
Right-click the title bar.
Select the Program tab.
Ensure that the item Prevent MS-DOS-based programs from detecting Windows is not selected.
Select OK again.
Exit the MS-DOS shell.
Restart your computer.
Source Files in Notepad
In Microsoft Windows, when you create a new file in Microsoft Notepad and then save it for the first time, Notepad usually adds the .txt extension to the file name. Therefore, a file that you name Test.java is actually saved as Test.java.txt . Note that you cannot see the .txt extension unless you turn on the viewing of file extensions (in Microsoft Windows Explorer, deselect Hide file extensions for known file types under Folder Options ). To prevent the .txt extension, enclose the file name in quotation marks, such as «Test.java» when entering information in the Save As dialog box.
Characters That Are Not Part of the System Code Page
It is possible to name directories using characters that are not part of the system locale’s code page. If such a directory is part of the installation path, then generic error 1722 occurs, and installation is not completed. Error 1722 is a Windows installer error code. It indicates that the installation process has failed. The exact reason for this error is not known at this time.
To prevent this problem, ensure that the user and system locales are identical, and that the installation path contains only characters that are part of the system locale’s code page. User and system locales can be set in the Regional Options or Regional Settings control panel.
The associated bug number is 4895647.
Windows Online Installation and Java Update FAQ
These are frequently asked questions about JDK 10 and JRE 10 online installation and Java updates on Windows computers.
1. I downloaded the installer and it is less than 1 megabyte. Why is it so small?
The Windows Online Installer for the JRE will download more installer files. Using this installer helps users to avoid downloading unnecessary files.
2. I had the Java Control Panel open for Java Update and the About tab showed the version of the JRE installed in my computer. Then I ran Java Update, and the version of the JRE that the Java Control Panel is showing has not changed. Why is this?
You need to close and restart the Java Control Panel to get the updated Control Panel.
3. Netscape/Mozilla is not working correctly with Java Plug-in. Why?
First, close all the browsers sessions. If this does not work, reboot the system and try again.
4. I try to install on the D: drive and Java Update is still installing files onto the C: drive. Why?
Regardless of whether an alternate target directory was selected, Java Update needs to install some files on the Windows system drive.
5. How can I uninstall the Java Update version that I just installed?
If you want to uninstall the JRE, then use the Add/Remove Programs utility in the Microsoft Windows . Select the Control Panel and then Add/Remove Programs .
6. After the JRE bootstrap installer is downloaded and executed, why does the message «This installer cannot proceed with the current Internet Connection settings of your system. In your Windows Control Panel, please check Internet Options -> Connections to make sure the settings and proxy information are correct.» appear?
The JRE bootstrap installer uses the system Internet Connection settings to connect to the web for downloading extra files. If you are behind a firewall and require proxy settings, then ensure that the proxy settings in Internet Options/Internet Properties are set up properly (select Start , then Control Panel , then Internet Options/Internet Properties , then Connections , and then LAN Settings ). If you can browse the external web (for example, outside the firewall) with Internet Explorer, then your proxy settings are properly set up. The installer does not understand the proxy settings specified in Netscape/Mozilla.
7. I found the jusched.exe process running in the background of my system after installing JRE. Is there a way to shut it down?
The jusched.exe is the scheduler process of Java Update. This process runs automatically. To shut in the Java Control Panel on the Update tab, deselect the Check for Updates Automatically check box.
8. When I click the Update Now button from the Java Control Panel, it complains about the system being «offline.» What does that mean?
Java Update can be run only if the system is connected to the network. A system that is not connected to the network is referred to as being offline. When the Update Now is clicked, it will check the online/offline status of your system. If your computer does not have internet access, then the error message is displayed. Check that your system is currently connected to the internet and try again.
9. I followed the instructions to install a specific version of the JRE. After the installation, a message is displayed from system tray saying an update is available for download. What should I do?
The message is part of the Java Auto Update mechanism, which detects at user login time if a newer version of the JRE is available for download. In the system tray, click the Java Update icon to download and install the update.
10. I encountered the error «This installation package could not be opened. Contact the application vendor to verify that this is a valid Windows Installer package.» when running the Java SE installer.
There are several possible reasons for this error to be displayed; a few are listed:
Network connection fails.
Download manager software interrupts the download process.
Another application, such as an antivirus application, may interrupt the installation process.
To address these problems, ensure that the third-party downloader applications are turned off and the network connection is configured properly. Also, if a proxy is in use, then ensure that the proxy authentication is turned off.
11. I encountered the error «Error 1722. There is a problem with this Windows installer package. A program run as part of the setup did not finish as expected. Contact your support personnel or package vendor.»
See Error 1722: Problem with Windows Installer Package. If you encounter any other errors or issues, then you can access Java Help Center, which contains solutions for issues that you might encounter when downloading and installing Java on your system. In particular, you can search for solutions by error number. Searching for «Error 1722» returns a solution to this issue.
Понимать и управлять настройками Java в Windows 10/8/7
Adobe Flash и Java – это две загрузки, которые большинство из нас установили на наших компьютерах с Windows, поскольку они дают нам больше возможностей для работы в Интернете и просмотра веб-страниц. Мы уже видели, как управлять настройками Adobe Flash .
Сегодня мы узнаем о настройках Java в Windows 10/8/7.
Что такое Java
Java – это язык программирования и вычислительная платформа, которая поддерживает самые современные программы, включая утилиты, игры и бизнес-приложения. Он позволяет играть в онлайн-игры, общаться с людьми по всему миру, просматривать изображения в 3D и многое другое.
Панель управления Java
Программное обеспечение Java или среда выполнения Java также называются средой выполнения Java, средой выполнения, средой выполнения, JRE, виртуальной машиной Java и т. Д. Им можно управлять из панели управления Java. Чтобы получить доступ к панели управления Java, откройте панель управления и нажмите «Java». Здесь вы сможете получить информацию о номере версии, а также просмотреть файлы.

Удалить временные файлы Java
Когда вы просматриваете Интернет, всякий раз, когда ваш браузер использует Java, файлы Java хранятся в специальных папках для более быстрого выполнения в дальнейшем.
Чтобы просмотреть местоположение папки и другие сведения, нажмите кнопку Настройки .

По умолчанию эти временные файлы Java хранятся в
C: Users Имя пользователя AppData LocalLow Sun Java Deployment кэш
папка в формате JAR. Вы можете установить уровень сжатия для этих файлов JAR и даже установить сумму, которая будет выделена для хранения этих файлов.
Вы можете просмотреть файлы, нажав кнопку Просмотр .
Чтобы удалить эти временные файлы JAR Java, нажмите Удалить файлы . Теперь вы можете выбрать, какие файлы вы хотите удалить, и нажмите кнопку ОК.
Очистить кеш Java с помощью командной строки
Чтобы очистить кэш Java с помощью командной строки, откройте окна командной строки, введите следующую команду и нажмите Enter:
Обновление Java
Мы склонны игнорировать обновление нашей Java. Но очень важно, чтобы мы всегда были уверены, что вы используете последнюю версию Java, поскольку уязвимости в Java часто используются для компрометации вашего компьютера. Последняя версия Java содержит важные улучшения для повышения безопасности, производительности и стабильности приложений Java, которые работают на вашем компьютере. Всякий раз, когда дыры в безопасности обнаруживаются, они исправляются, и поэтому обязательно убедитесь, что у вас установлена последняя версия java, поскольку она включает исправления уязвимостей.
Вы можете настроить параметры обновления Java, нажав на вкладку Обновить .
Убедитесь, что Автоматически проверять наличие обновлений . Нажав на кнопку Дополнительно , вы сможете установить частоту проверок обновлений.
Кстати, я заметил, что прошло много времени с тех пор, как я обновил Java. Поэтому я нажал на Обновить сейчас , чтобы начать процесс обновления. Это запустит процесс juscheck.exe , который проверит наличие обновлений и, соответственно, проинформирует вас.
Нажав на кнопку «Установить», вы начнете процесс обновления. По завершении нажмите «Закрыть».
Другие настройки Java
Вкладка Java позволяет просматривать и управлять версиями и настройками среды выполнения Java для приложений и апплетов Java.
Вкладка Безопасность позволяет просматривать типы сертификатов, позволяющие идентифицировать себя.
На вкладке Дополнительно можно настроить другие параметры.
Удалить старые версии Java
Хранение старых и неподдерживаемых версий Java в вашей системе представляет серьезную угрозу безопасности.
Более старые версии SunJava (до JRE 6 с обновлением 7) действительно сохранялись при установке обновлений и должны быть удалены, так как более старые версии SunJava очень уязвимы для Winfixer/Vundo. С 2005 года вплоть до обновления в конце прошлого года до обновления 10 JRE 6 для SunMicrosystems и Sun Microsystems, чтобы автообновление SunJava удаляло предыдущие (уязвимые) версии программы. Обновления от JRE 6 Update 10 forward находятся в автономной папке «jre6», которая перезаписывается, если установлена новая JRE. Даже при использовании самой последней версии SunJava, если на вашем компьютере все еще находятся более ранние, уязвимые версии, они уязвимы для заражения.К сожалению, простое использование программ «Установка и удаление программ» для удаления старых версий неэффективно.
Мы предлагаем вам попробовать JavaRa. После обновления Java до его последней версии сегодня я запустил JavaRa и использовал его для удаления старых версий Java.
Он обнаружил две старые версии на моем компьютере, которые я затем удалил.
ПРИМЕЧАНИЕ. Мой коллега по MVP и мод Corrine TWCF добавляет: JavaRa не была обновлена для поддержки удаления JRE 7 и, по-видимому, фактически имеет проблемы после JRE 6u32. Он перешел на SingularLabs.com. Кроме того, Пол Маклейн больше не поддерживает JavaRa, а Фриде Фрис все еще поддерживает.
Java Скачать
Вы можете скачать и установить Java для Windows вручную с Java.com здесь.
Надеюсь, вы узнали что-то новое здесь, в этом посте. Если у вас есть что добавить, пожалуйста, сделайте это в разделе комментариев.


Содержание
- Шаг 1: Загрузка установщика с официального сайта
- Шаг 2: Инсталляция JDK
- Шаг 3: Настройка операционной системы
- Шаг 4: Проверка работы JDK
- Вопросы и ответы

Начинающие разработчики, изучающие язык программирования Java, сталкиваются с надобностью установки на свой компьютер фирменного компонента под названием JDK (Java Development Kit), ведь в нем присутствует необходимый компилятор и стандартные библиотеки, позволяющие реализовывать привычные функции на этом ЯП. Большинство даже самых неопытных программистов знают, как инсталлировать подобные файлы на свой компьютер, однако некоторые сталкиваются с трудностями при попытке установки и настройки компонента. Поэтому сегодня мы хотим затронуть эту тему, детально расписав процесс добавления JDK в Windows 10.
Шаг 1: Загрузка установщика с официального сайта
Весь процесс начинается с загрузки всего одного файла формата EXE с официального сайта. Если вы уже сделали это или прекрасно знаете, как производится подобная задача, просто переходите к следующему шагу. В противном случае ознакомьтесь с этой инструкцией.
Перейти на официальный сайт Oracle
- Воспользуйтесь ссылкой выше, чтобы попасть на официальный сайт Oracle. Там вас интересует строка «JDK Download». Нажмите по ней левой кнопкой мыши, чтобы начать загрузку компонента.
- Следующим этапом будет выбор версии для своей операционной системы. В нашем случае будет выбран «Windows x64 Installer». Обратите внимание, что на 32-битных системах Java Development Kit не поддерживается.
- После нажатия по соответствующей кнопке откроется всплывающее окно, где следует подтвердить лицензионное соглашение, а уже потом кликнуть по активной кнопке, чтобы начать скачивание исполняемого файла.
- Ожидайте завершения загрузки, а затем запустите полученный объект прямо из браузера или папки, куда он был помещен.
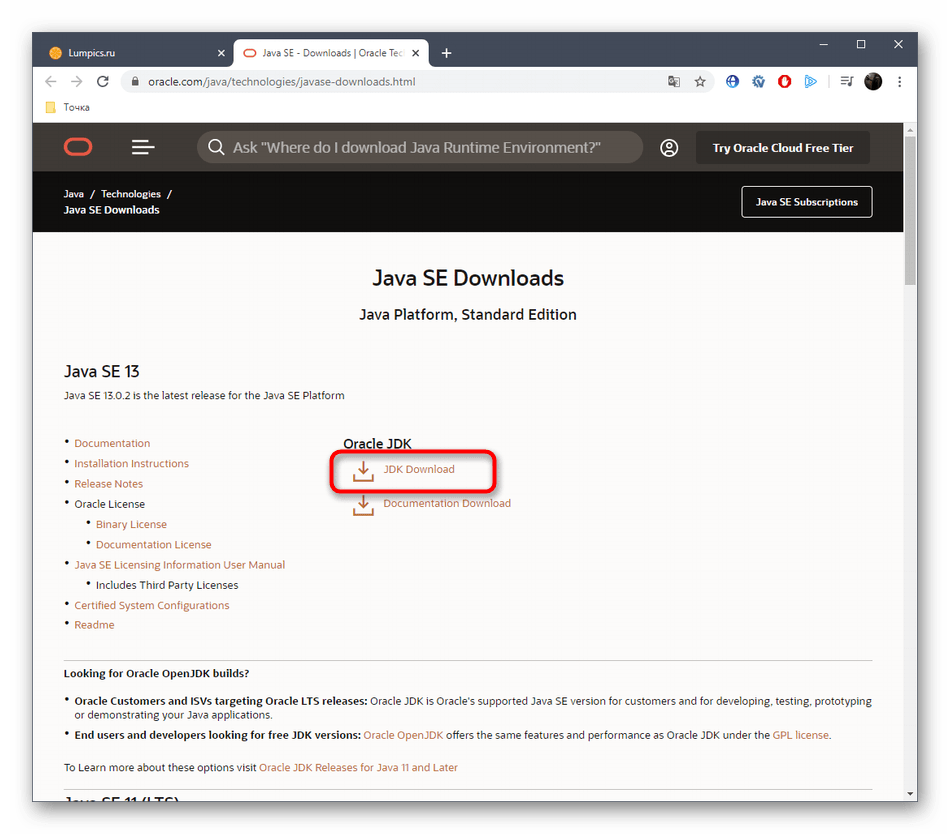
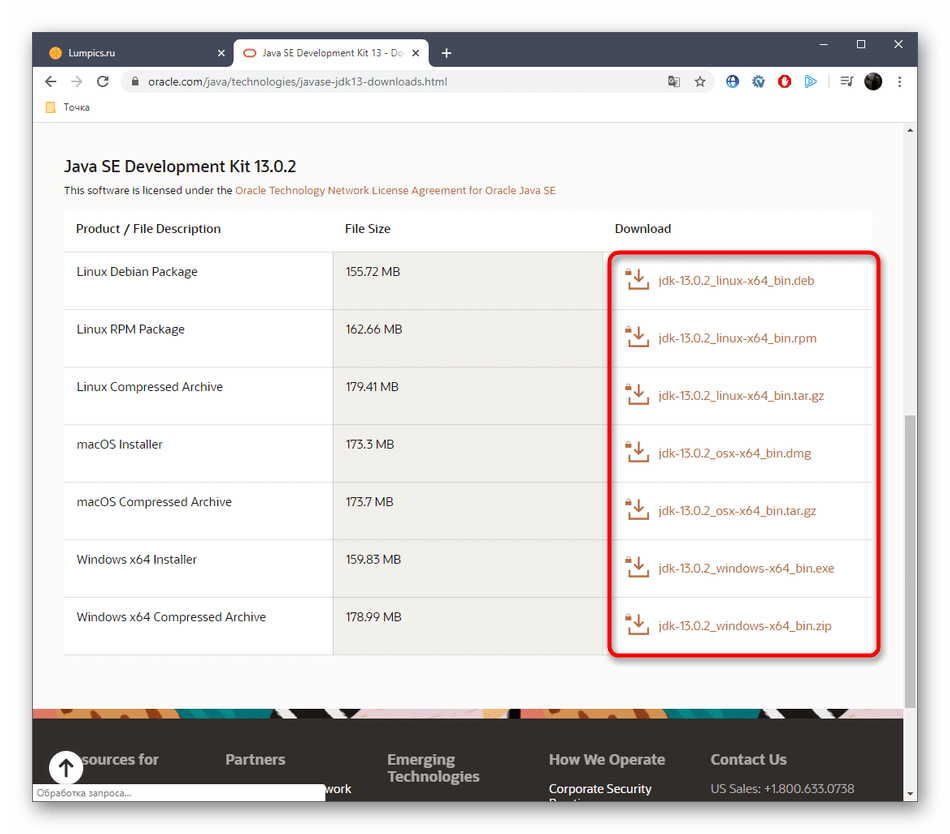
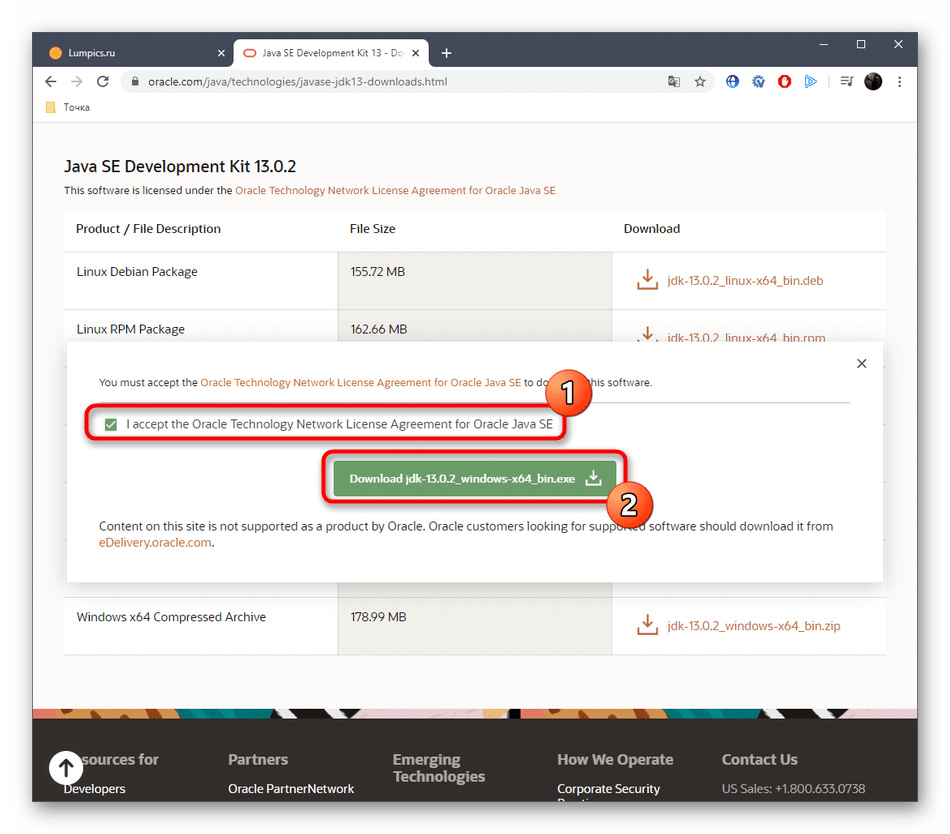
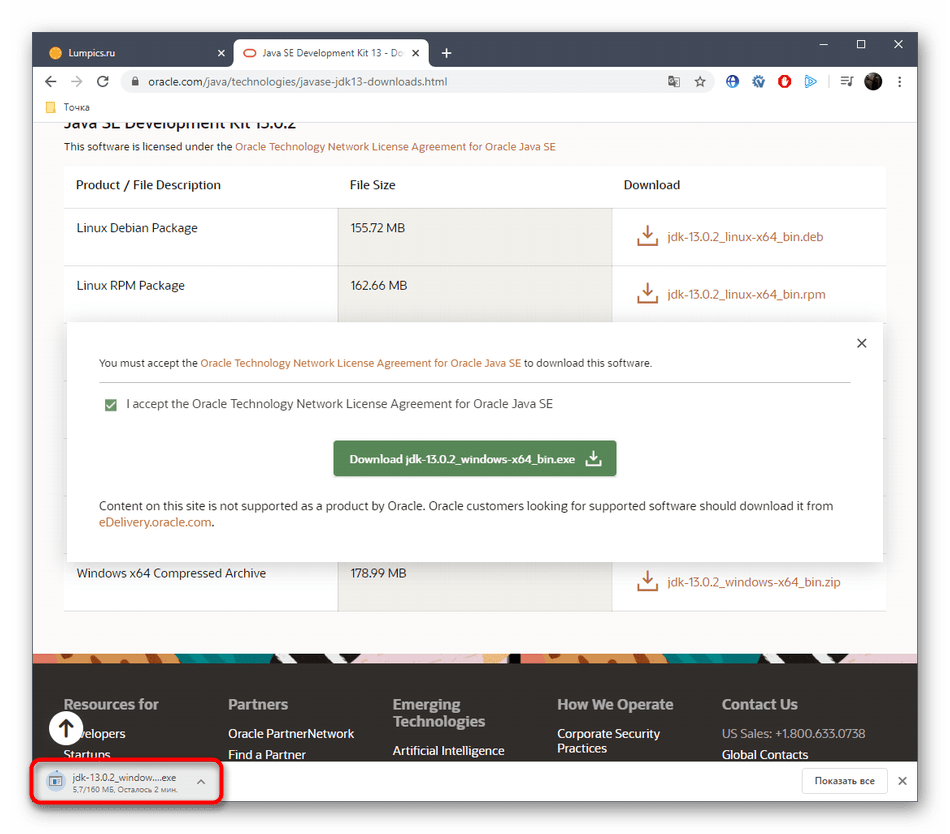
Этот этап выполняется еще проще предыдущего, поскольку от пользователя требуется только следовать инструкциям, отобразившимся в открытом окне. Однако давайте на нем тоже остановимся более детально, чтобы больше ни у кого не возникло вопросов по этой теме.
- После открытия исполняемого файла начнется подготовка к инсталляции. Это не займет много времени, а вам нужно лишь не закрывать активное окно.
- При открытии приветственного меню переходите к следующему шагу, щелкнув по кнопке «Next».
- Убедитесь в правильности выбранной папки для инсталляции. По умолчанию JDK будет установлен на системный раздел жесткого диска. Вы можете изменить путь, если это необходимо.
- Начнется процедура установки, занимающая несколько минут. Продолжительность зависит от скорости жесткого диска и общего быстродействия операционной системы.
- Вы получите уведомление о том, что инсталляция прошла успешно. В этом же окне находится кнопка «Next Steps». При нажатии на нее откроется страница в браузере, где будет находиться вся сопутствующая документация и уроки по взаимодействию с установленным компонентом.
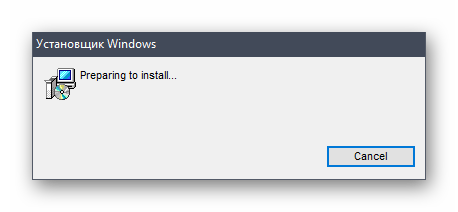
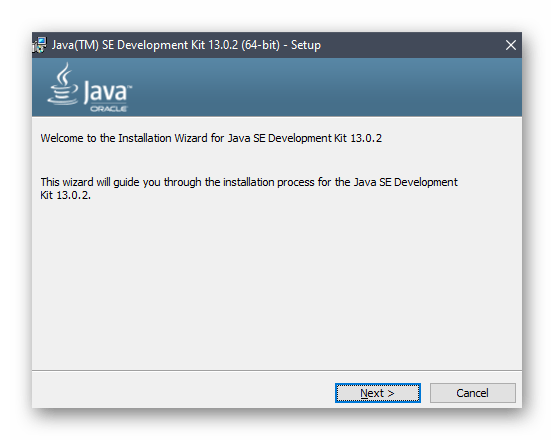
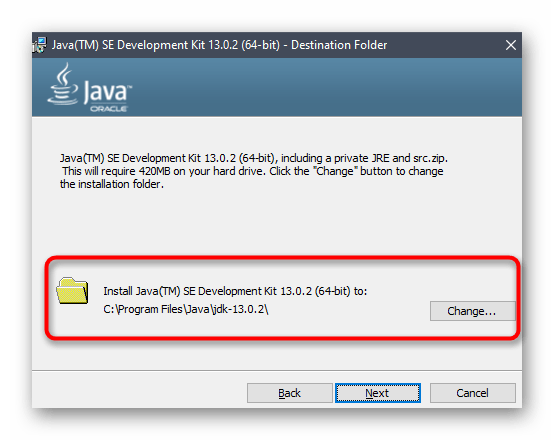
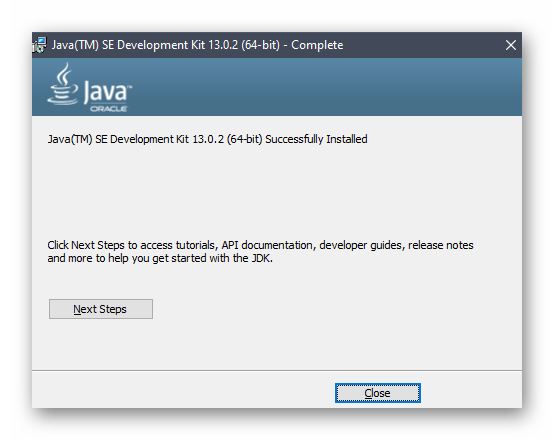
Шаг 3: Настройка операционной системы
Этот этап считается самым важным и сложным, поскольку именно от него зависит корректность функционирования установленного компонента в дальнейшем. Суть заключается во внесении новых переменных окружения, что позволит работать компилятору и встроенным в JDK библиотекам. Производится конфигурация следующим образом:

- Откройте «Пуск» и перейдите в меню «Параметры», кликнув по специально отведенной кнопке на левой панели.
- Здесь вам нужен раздел «Система».
- Опуститесь вниз и выберите категорию «О системе».
- Внизу окна находится надпись «Сведения о системе», по которой и следует нажать для перехода в необходимое меню.
- Откроется категория Панели управления «Система». Здесь на левой панели щелкните по кликабельной надписи «Дополнительные параметры системы».
- Отобразится окно «Свойства системы», где на первой же вкладке «Дополнительно» воспользуйтесь кнопкой «Переменные среды».
- Добавьте новую переменную для системы, кликнув по кнопке «Создать».
- Задайте ей название. По умолчанию используется «JAVA_HOME», поэтому и мы рекомендуем придерживаться этого правила. В поле «Значение переменной» вставьте путь к папке JDK. Стандартно он имеет вид
C:Program Filesjavajdk-13.0.2, где 13.0.2 — номер установленной версии компонента. - Сохраните изменения и убедитесь в том, что новая строка появилась в блоке «Системные переменные».
- После этого там же отыщите переменную «Path» и щелкните по ней дважды, чтобы открыть окно редактирования.
- Пропишите там
%JAVA_HOME%bin, указав тем самым только что созданную переменную, и сохраните изменения.
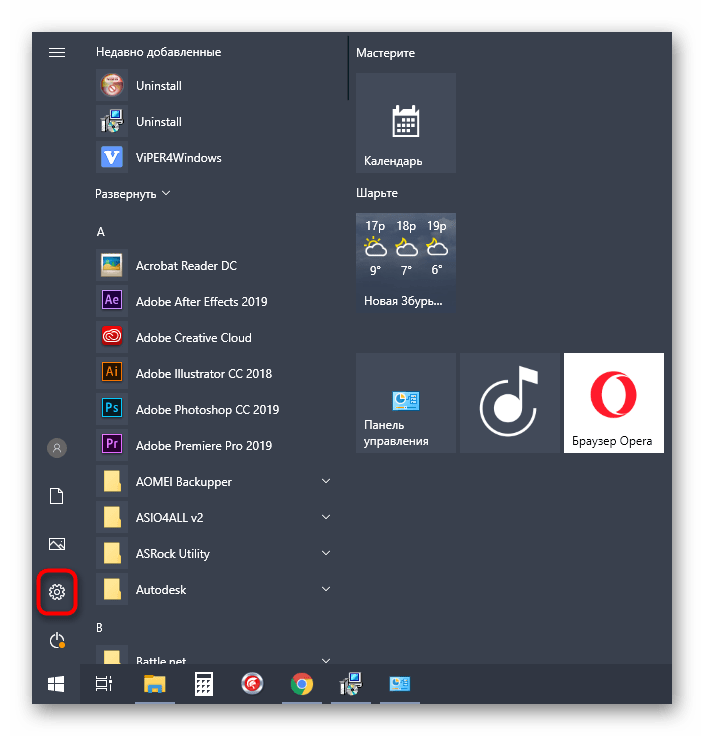
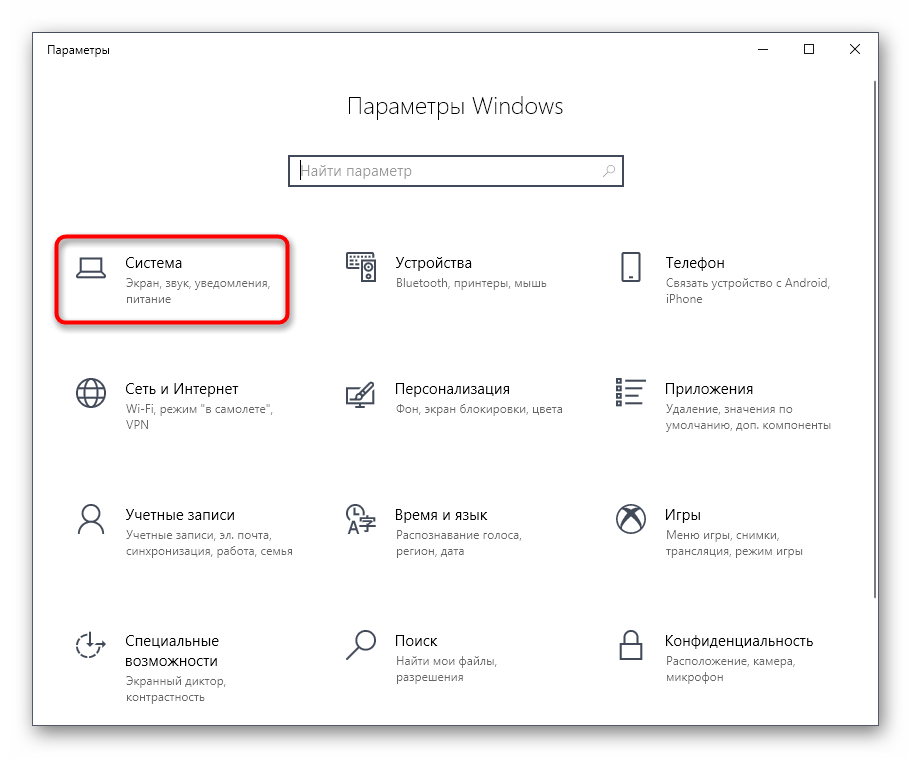
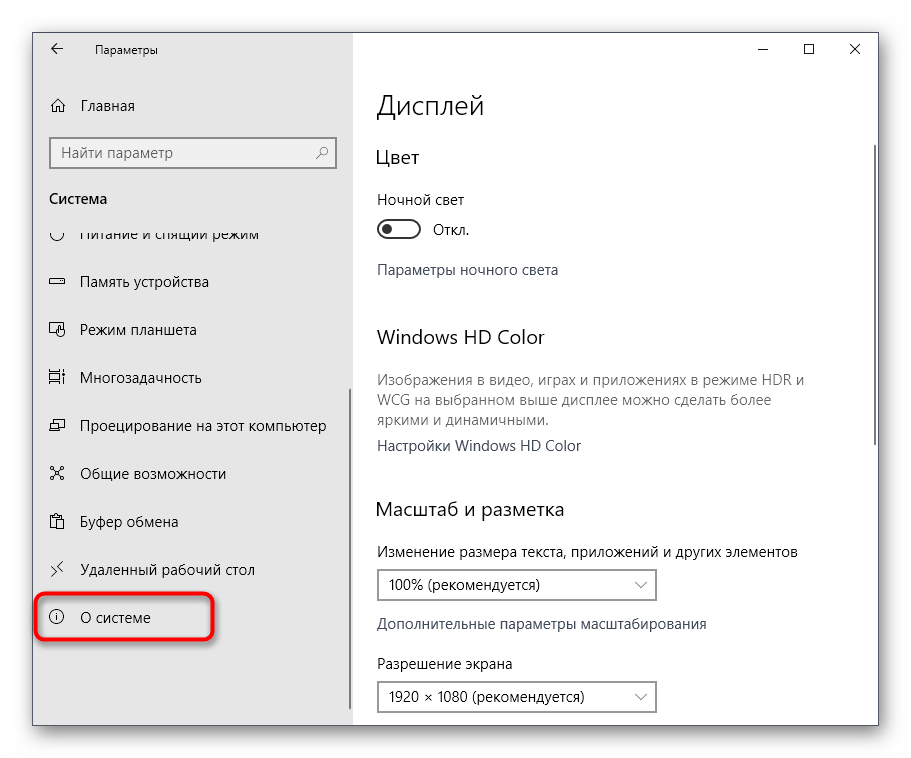
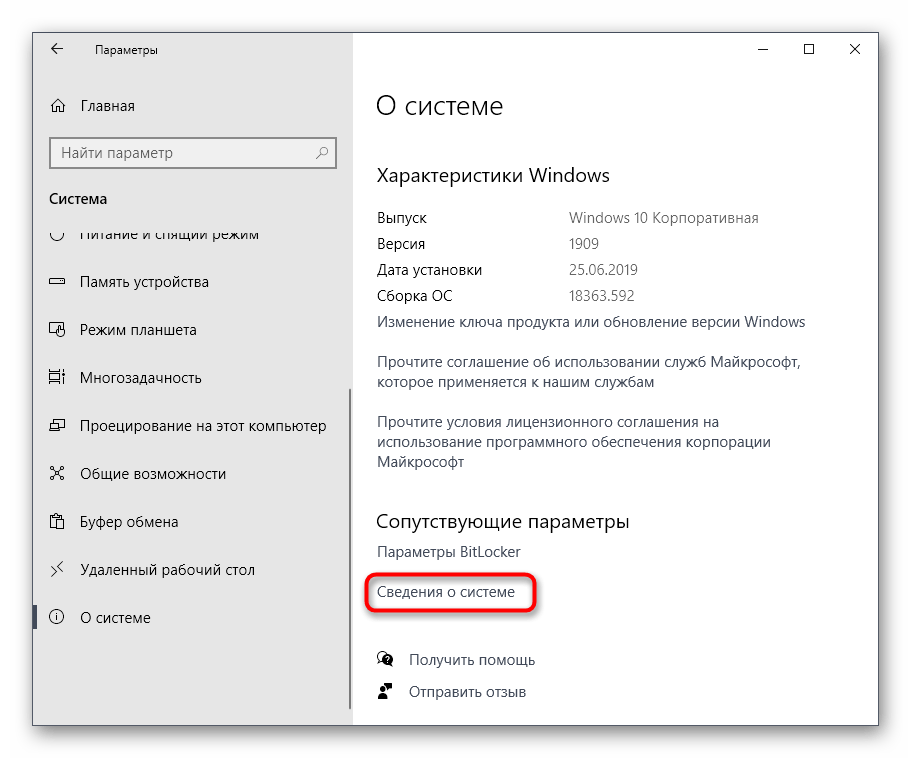
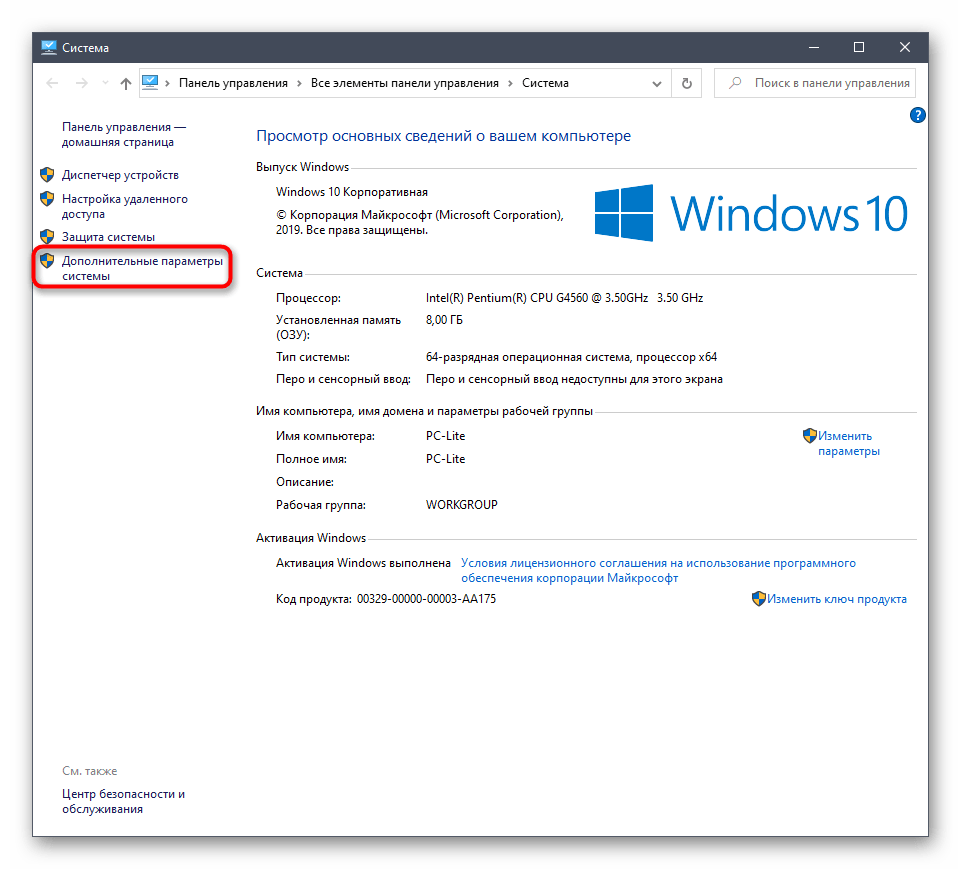
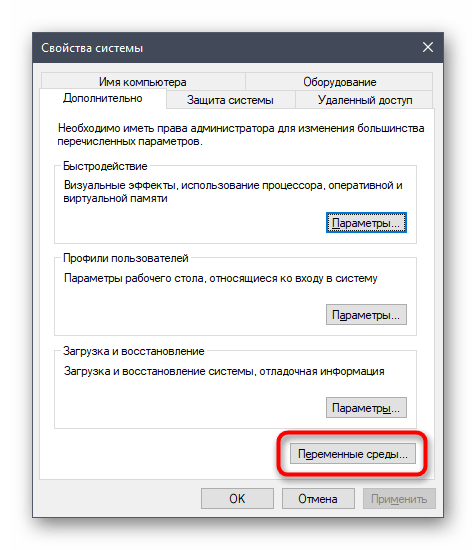

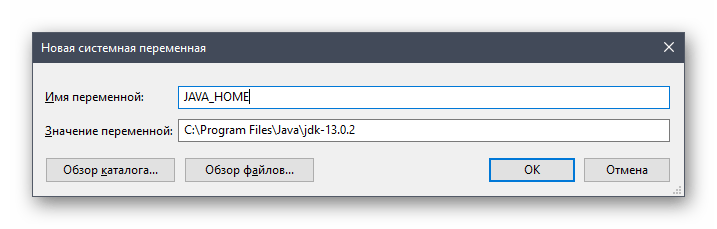
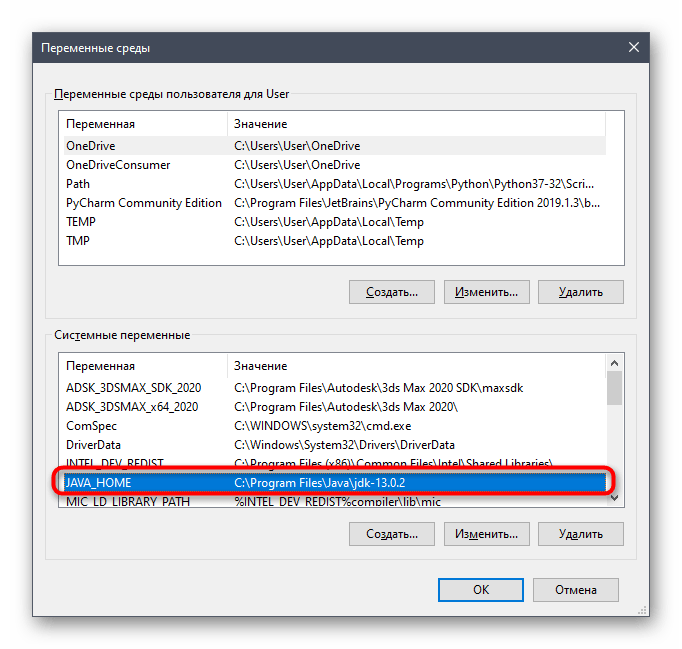
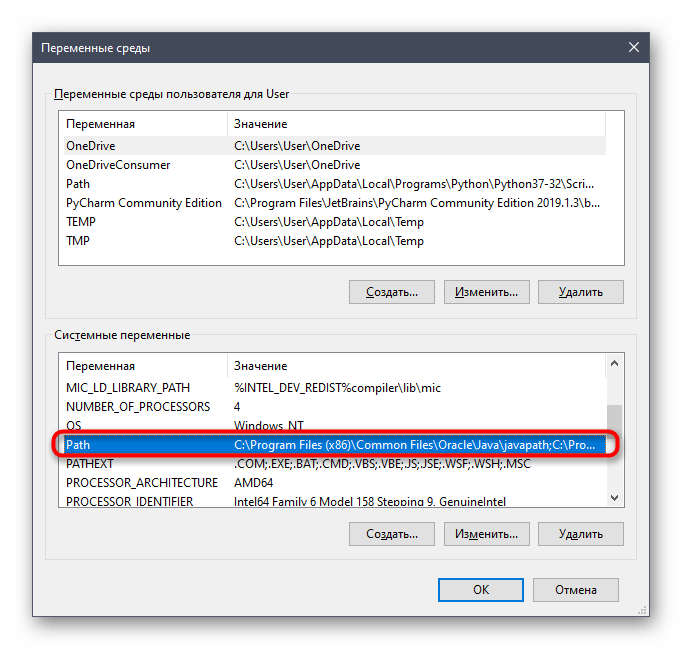
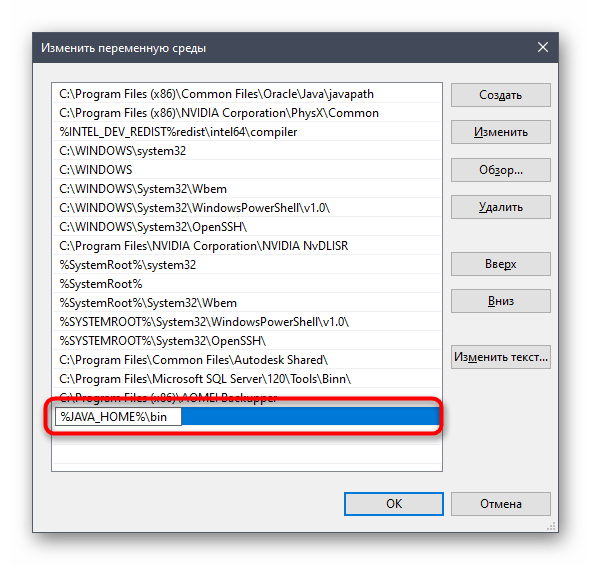
По завершении данной операции рекомендуется перезагрузить компьютер, чтобы все изменения вступили в силу. Уже после этого можно смело переходить к тестированию функционирования JDK или сразу к работе с языком программирования, если проверка работоспособности не требуется.
Шаг 4: Проверка работы JDK
Завершающий этап сегодняшнего материала заключается в проверке работоспособности Java Development Kit, что иногда требуется сделать для подтверждения корректной обработки запросов компилятором и успешной интеграции библиотек. Осуществляется эта задача через стандартную консоль путем ввода всего двух команд.
- Откройте приложение «Командная строка» любым удобным методом, например, отыскав ее через «Пуск».
- Введите там echo
%JAVA_HOME%и нажмите на клавишу Enter для активации команды. - Следующей строкой отобразится место сохранения всех файлов компонента и будет означать то, что переменная функционирует корректно.
- Далее напишите
javac -versionи снова активируйте эту команду. - В результате вы получите строку с информацией о текущей рабочей версии JDK.
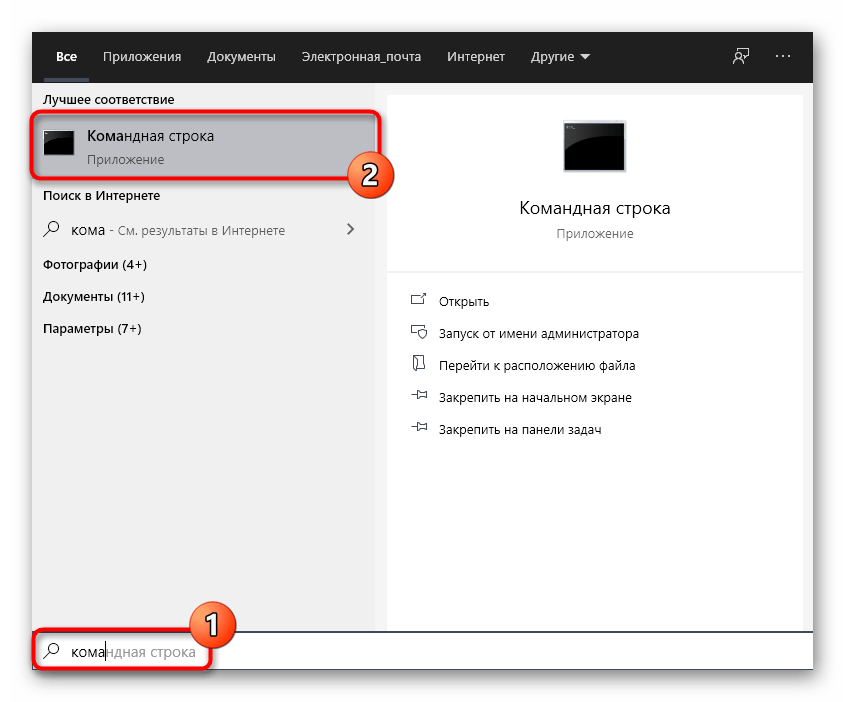

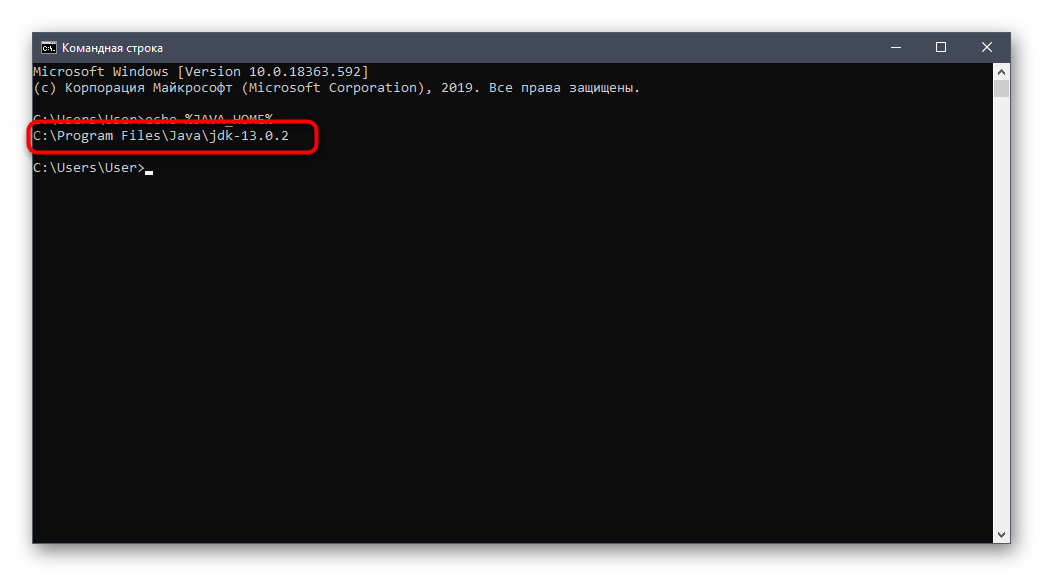
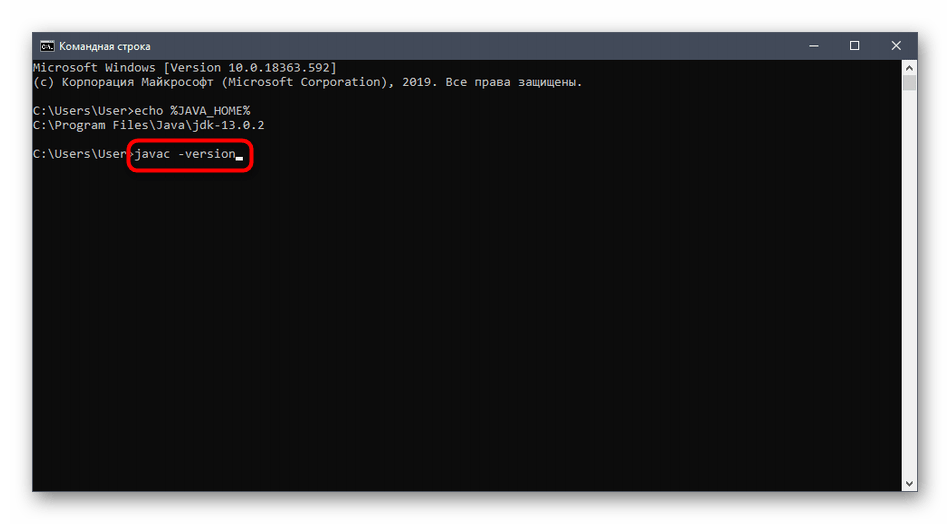
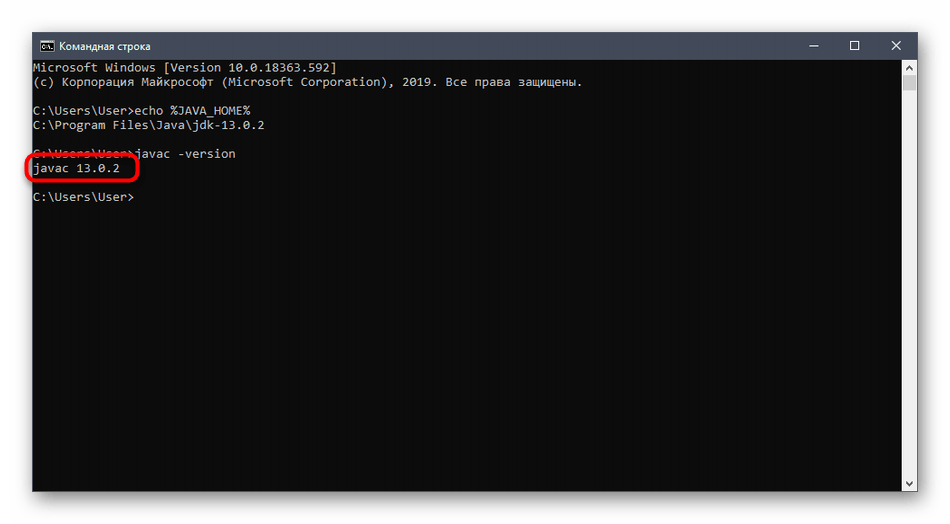
Установка JDK не займет много времени и в большинстве случаев производится без каких-либо дополнительных трудностей. Сразу после этого можно приступать к написанию кода на Java и быть уверенным в том, что он корректно скомпилируется, а библиотеки будут подключены.
Еще статьи по данной теме: