How to use an external hard drive? In this article, you can know how to add an external drive to your computer. In addition, you are offered the way to manage, use and maintain an external hard drive. MiniTool Partition Wizard is a good tool to help you to manage the drive.
What Is an External Hard Drive
An external hard drive is a portable storage device that can be attached to a computer wirelessly,or through a USB FireWire connection. It becomes more and more popular in computer users for the following benefits:
- It is portable. An external hard drive can be connected to almost all computers because they have a USB port. Therefore, you can easily pick up your external hard drive, take it out and connect it to another computer.
- It comes with a high storage capacity. An external hard drive can store much larger data than a USB flash drive. It helps a lot if you are found of videos or audios, whichtake up a large amount of disk space. In addition, you can use it to store lots of photos, entire programs, and more on it.
- It is a safe Backup Device. To avoid data loss, you can use an external hard drive to back up your files and programs. After system crashes, you can easily connect the external hard drive to another computer so that you can recover important data.
- It is easy to be upgraded. If your external hard drive is running out of storage space for your backup files, you can easily replace it with a bigger one.
- It can prevent your computer from getting clogged up with downloads and large files. You could transfer large files from your computer to an external hard driveto improve
How to Add an External Hard Drive to Your Computer
If you get a new external hard drive, you need to add it to your computer before you can use it. Here is how to do it.
Step 1: Plug one end of the external hard drive’s cable (usually the larger end) into the USB port on the housing to see whether it works.
Tip: There are three types of USB port: USB-A, USB-B and USB-C. If the cable shipped with the external hard drive is not matched with the USB port on your computer, you can solve it by buying a USB adapter, for example, a USB-C to USB-A adapter.
Step 2: Plug the other end of the cable into your external hard drive.
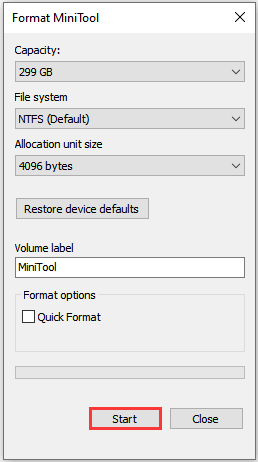
Step 3: Now you need to format the external hard drive.
- Double click This PC.
- Right-click your external hard drive and choose Format…from menu.
- Uncheck Quick Formatand select a file system. Then click Start.
Tip: Unchecking Quick Format means that you choose Full Format, which will scan the drive for bad sectors while formatting. Click quick format vs. full format to know more.
After formatting the external hard drive, you should partition the drive reasonably for better management. As for partitioning tool, you can choose freeware MiniTool Partition Wizard.
How to Use an External Hard Drive in Windows 10
Extra Storage Device
It has been mentioned that an external hard drive has many benefits. The basic one is to use it as an extra storage device, especially when you need to free up disk space.
You can transfer files to an external hard drive after you connect it to your computer. Here is a tutorial on how to use an external hard drive in Windows 10.
Step 1: Press Win + E to open File Explorer.
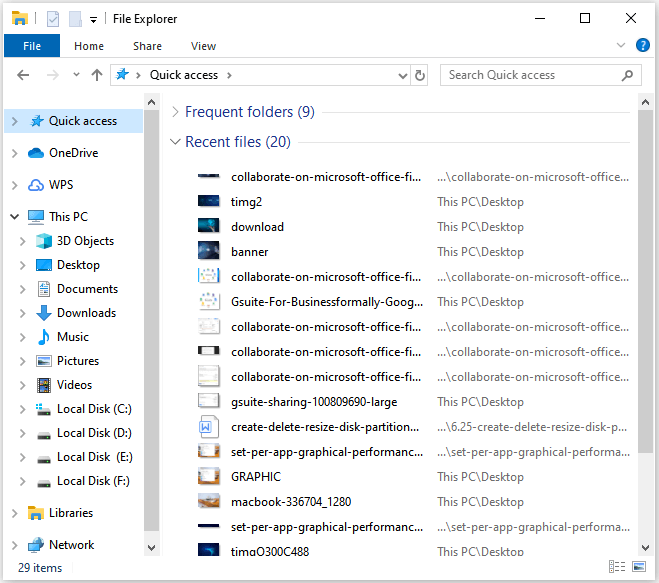
Step 2: Select the folders or files you want to move and press Ctrl + X to cut them.
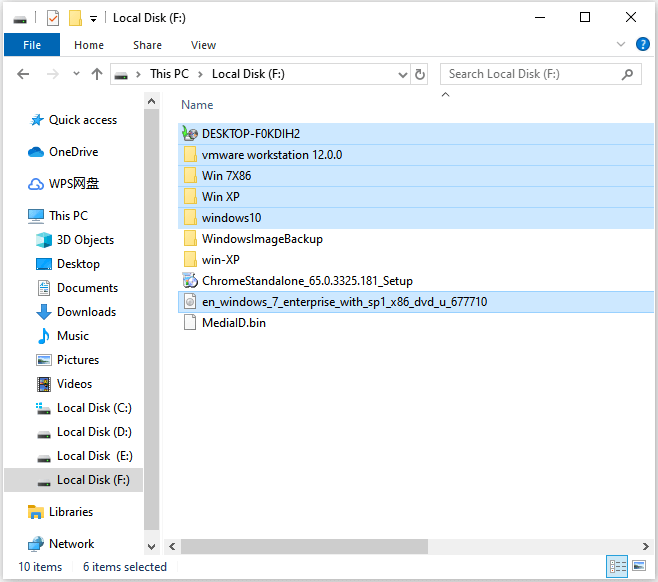
Step 3: Click your external hard drive from the left action panel to access the external hard drive and press Ctrl + V to paste the folders and files.
Data Backup Device
Do you know your data is in danger? If you don’t have more than one backup solution, plenty of critical information includes photos, music, videos, financial and official documents could be lost when your computer dies due to hardware failure, natural disaster, system crashes or viruses attacks.
Clearly, the more copies you have, the less risk of data loss you face. Thus, just create as many copies as you entail. In other words, you’d better protect the original data with two backups.
Usually, cloud backup can be a good choice,such as Google Cloud Storage, Microsoft Onedrive, etc.
However, they are not the best solutions.They may cost you much. Some cloud services such as iCloud and IDrive just offer you a storage capacity about 5 GB for free, and most cloud services need you to pay for month. What’s more, it will be troublesome if you decide to shift among these services.
In addition, it may take much time to download everything from a cloud-based backup service if you want to manage large files or large quantities of files.
On the other hand, data stored in a cloud service is possible to be attacked by a hack. So, you can store your backup in an external hard drive, which is portable and safer. Some external devices come with security features like fingerprint recognition, which prevents other people from gaining access to the stored data.
With MiniTool Partition Wizard,a free backup tool, you can easily back up your partitions or the whole disk to your external hard drive. Here is how to use an external hard drive for backup.
Step 1: Click the following button to download and install the tool.
Free Download
Tip: If you need to back up the system disk, you need to upgrade to MiniTool Partition Wizard Pro Edition.
Step 2: Make a backup.
- To copy disk, just right-click the disk you want to back up and choose Copy from menu.
- To copy partition, you can click the Copy Partition Wizard from action panel and choose the partition you want to back up.
- Then follow the instructions to finish the copy
Tip: Please make sure there is no important data in the external hard drive because the disk coping process will erase all the data on the destination disk.

Create a Windows To Go Workplace
Windows To Go is a feature in Windows 10 that allows you to boot and run Windows from USB flash drives or external hard disk drives so that you can take it to anywhere.
Note: You need to pay attention that the Windows To Go feature is only available in Windows 8/8.1/10 Enterprise, Education versions.
To create a portable Windows, you need to prepare a device with requirements as follows:
- With 32 GB capacity at least
- With USB 2.0 and faster USB connections.
With an external hard drive, you can easily achieve it. Here is how to do it.
Step 1: Connect your external hard drive to the computer.
Step 2: Search for Windows To Go in Windows and click it from the results.
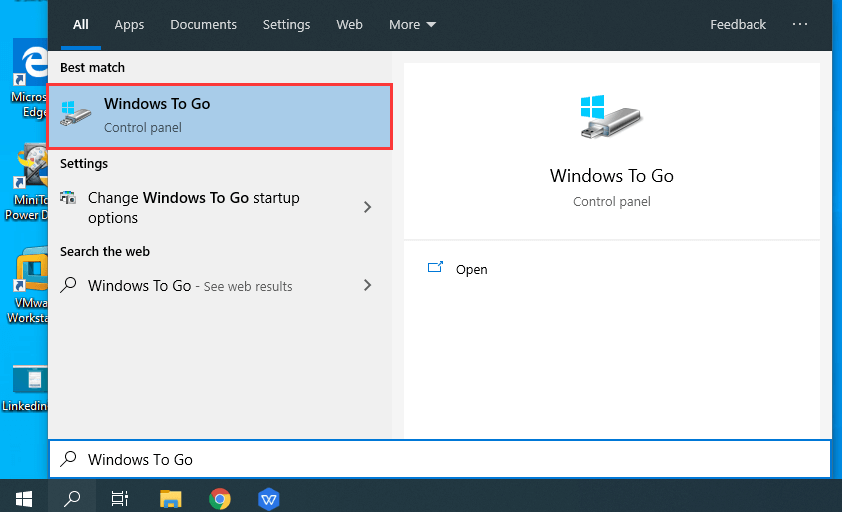
Step 3: Choose your external hard drive to create a Windows To Go workplace and follow the guide to complete the process.
Then you can connect the external hard drive to another computer and boot Windows from the external drive when you go out.
How to Use an External Hard Drive for Longer
You may be aware that an external hard drive is necessary for you. However, it is easy to be broken if you don’t maintain it in the right way. To avoid decreasing the life of it, you can read these tips on how to use an external hard drive for longer.
- To protect your external hard drive, you’d better place it on a stable, flat and hard surface. Considering that the hard disk is a mechanical device, it can be damaged by vibrations. And you should also be careful to prevent it from falling off the table.
- You need to make sure that it will not be banged around or treated roughly. Since the external hard drive is a portable device, you should treat it carelessly when you take it out.
- You have to avoid getting your hard drive wet or exposing it to liquid.
- Do not place your external hard drive in a restrictive area where there is no air flow. Similar to the internal hard disk in your computer, the external hard drive also gets hot when it works too long. To avoid overheating, which can damage the disk, you need to place it in an open area to dissipate the buildup of heat.
- Check error before you transfer files to an external hard drive. It can fix disk errors and ensure that you are starting with a well-functioning drive.To do that, you can use the error checking tool in Windows.
- Always eject the drive before you unplug it from your computer. It ensures data still stored in the cache memory will be removed, which prevents existing data on the disk from being damaged.
- The best way to protect your data in the external hard drive is to back up it as much as possible. Hard drive failure may happen to your external hard drive.To ensure the security of your files, you’d better prepare a second external drive to back up it.
Save Lost Data from an External Hard Drive
Similar to internal hard drivers, an external hard drive may also lose data due to various reasons, such as mistaken deletion or hard drive failure when you manage it.
If you have a backup for the data in the external hard drive, you can restore your data with the backup.
If you unfortunately find that your files or programs stored in the external hard drive is lost and you have no backup for the drive, you need to stop using it right now and try to recover files from the external drive with a third-party software as soon as possible.
MiniTool Partition Wizard is powerful in recovering deleted files and data from formatted or virus attacked disk. It is worth trying.
Buy Now
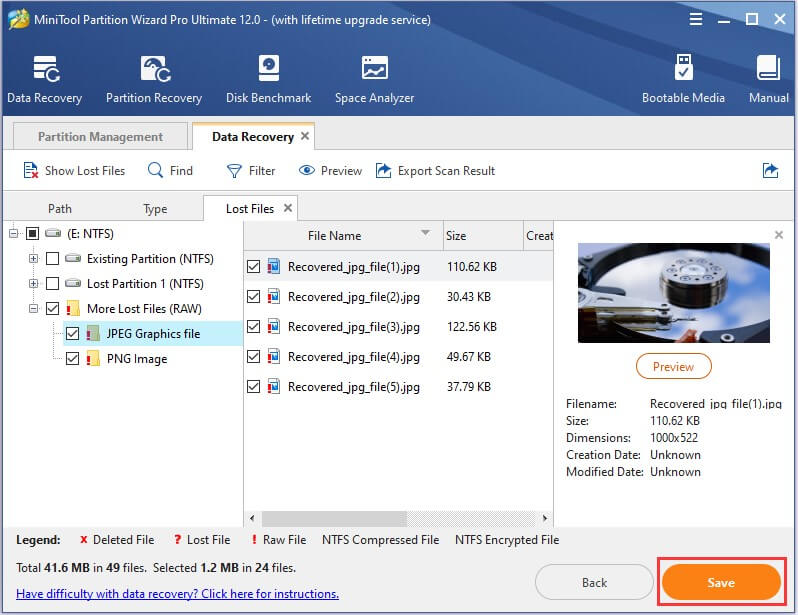
Step 1: Launch MiniTool Partition Wizard.
Step 2: Click Data Recovery from the tool bar and select your external hard drive in This PC. And then click Scan.
Step 3: Now you just need to check the files you want to recover and then click Save to place the recovered files into a safe position.
Tip: Make sure that you save recovered files in another disk to avoid a secondary data loss.
If it is the first time to recover files from an external drive, you may be a little confused. To know more details, you can read the following article: The Full Guide to SSD File Recovery on Windows 10/8/7/XP.
Here is an article about how to use an external drive. It enables me to free up the storage space of my computer and I can go out with my files. I’d like to share it with you!Click to Tweet
Bottom Line
You can benefit a lot from an external hard drive. With the high storage capacity, you can store a huge number of videos, photos and programs, and it is a proper device for data backup.
This article helps you to know how to add an external hard drive to your computer, how to use an external hard drive in Windows 10, and how to maintain it to use it longer.
If you still have any questions about the external hard drive, you can contact [email protected] or post it in the comment section below.
Do you want to try it now?
How to Use an External Hard Drive FAQ
What does an external hard drive do?
An external hard drive, which can be connected to a computer through a USB or wirelessly, is a portable storage device. It’s usually used to serve as extra storage or back up computers.
What are the advantages of an external hard drive?
- It has large storage capacity.
- It’s portable so that you can take it anywhere.
- It’s a safe backup device.
- It can be used for a long time.
How do I download a program to an external hard drive?
- Plug the external hard drive into the computer.
- Press Win + E to open File Explorer.
- Navigate to your program setup file and double-click it.
- Follow the onscreen instructions to install the program, and when you are asked where you want to save the program, choose on location on your external hard drive.
What do I do when my external hard drive is not detected?
The reasons for external hard drive not recognized or not showing up could be various. If you are facing the problem, you can try the 10 solutions mentioned in the following article: 10 Cases: External Hard Drive Not Showing up & Best Fixes.
How to use an external hard drive? In this article, you can know how to add an external drive to your computer. In addition, you are offered the way to manage, use and maintain an external hard drive. MiniTool Partition Wizard is a good tool to help you to manage the drive.
What Is an External Hard Drive
An external hard drive is a portable storage device that can be attached to a computer wirelessly,or through a USB FireWire connection. It becomes more and more popular in computer users for the following benefits:
- It is portable. An external hard drive can be connected to almost all computers because they have a USB port. Therefore, you can easily pick up your external hard drive, take it out and connect it to another computer.
- It comes with a high storage capacity. An external hard drive can store much larger data than a USB flash drive. It helps a lot if you are found of videos or audios, whichtake up a large amount of disk space. In addition, you can use it to store lots of photos, entire programs, and more on it.
- It is a safe Backup Device. To avoid data loss, you can use an external hard drive to back up your files and programs. After system crashes, you can easily connect the external hard drive to another computer so that you can recover important data.
- It is easy to be upgraded. If your external hard drive is running out of storage space for your backup files, you can easily replace it with a bigger one.
- It can prevent your computer from getting clogged up with downloads and large files. You could transfer large files from your computer to an external hard driveto improve
How to Add an External Hard Drive to Your Computer
If you get a new external hard drive, you need to add it to your computer before you can use it. Here is how to do it.
Step 1: Plug one end of the external hard drive’s cable (usually the larger end) into the USB port on the housing to see whether it works.
Tip: There are three types of USB port: USB-A, USB-B and USB-C. If the cable shipped with the external hard drive is not matched with the USB port on your computer, you can solve it by buying a USB adapter, for example, a USB-C to USB-A adapter.
Step 2: Plug the other end of the cable into your external hard drive.
Step 3: Now you need to format the external hard drive.
- Double click This PC.
- Right-click your external hard drive and choose Format…from menu.
- Uncheck Quick Formatand select a file system. Then click Start.
Tip: Unchecking Quick Format means that you choose Full Format, which will scan the drive for bad sectors while formatting. Click quick format vs. full format to know more.
After formatting the external hard drive, you should partition the drive reasonably for better management. As for partitioning tool, you can choose freeware MiniTool Partition Wizard.
How to Use an External Hard Drive in Windows 10
Extra Storage Device
It has been mentioned that an external hard drive has many benefits. The basic one is to use it as an extra storage device, especially when you need to free up disk space.
You can transfer files to an external hard drive after you connect it to your computer. Here is a tutorial on how to use an external hard drive in Windows 10.
Step 1: Press Win + E to open File Explorer.
Step 2: Select the folders or files you want to move and press Ctrl + X to cut them.
Step 3: Click your external hard drive from the left action panel to access the external hard drive and press Ctrl + V to paste the folders and files.
Data Backup Device
Do you know your data is in danger? If you don’t have more than one backup solution, plenty of critical information includes photos, music, videos, financial and official documents could be lost when your computer dies due to hardware failure, natural disaster, system crashes or viruses attacks.
Clearly, the more copies you have, the less risk of data loss you face. Thus, just create as many copies as you entail. In other words, you’d better protect the original data with two backups.
Usually, cloud backup can be a good choice,such as Google Cloud Storage, Microsoft Onedrive, etc.
However, they are not the best solutions.They may cost you much. Some cloud services such as iCloud and IDrive just offer you a storage capacity about 5 GB for free, and most cloud services need you to pay for month. What’s more, it will be troublesome if you decide to shift among these services.
In addition, it may take much time to download everything from a cloud-based backup service if you want to manage large files or large quantities of files.
On the other hand, data stored in a cloud service is possible to be attacked by a hack. So, you can store your backup in an external hard drive, which is portable and safer. Some external devices come with security features like fingerprint recognition, which prevents other people from gaining access to the stored data.
With MiniTool Partition Wizard,a free backup tool, you can easily back up your partitions or the whole disk to your external hard drive. Here is how to use an external hard drive for backup.
Step 1: Click the following button to download and install the tool.
Free Download
Tip: If you need to back up the system disk, you need to upgrade to MiniTool Partition Wizard Pro Edition.
Step 2: Make a backup.
- To copy disk, just right-click the disk you want to back up and choose Copy from menu.
- To copy partition, you can click the Copy Partition Wizard from action panel and choose the partition you want to back up.
- Then follow the instructions to finish the copy
Tip: Please make sure there is no important data in the external hard drive because the disk coping process will erase all the data on the destination disk.
Create a Windows To Go Workplace
Windows To Go is a feature in Windows 10 that allows you to boot and run Windows from USB flash drives or external hard disk drives so that you can take it to anywhere.
Note: You need to pay attention that the Windows To Go feature is only available in Windows 8/8.1/10 Enterprise, Education versions.
To create a portable Windows, you need to prepare a device with requirements as follows:
- With 32 GB capacity at least
- With USB 2.0 and faster USB connections.
With an external hard drive, you can easily achieve it. Here is how to do it.
Step 1: Connect your external hard drive to the computer.
Step 2: Search for Windows To Go in Windows and click it from the results.
Step 3: Choose your external hard drive to create a Windows To Go workplace and follow the guide to complete the process.
Then you can connect the external hard drive to another computer and boot Windows from the external drive when you go out.
How to Use an External Hard Drive for Longer
You may be aware that an external hard drive is necessary for you. However, it is easy to be broken if you don’t maintain it in the right way. To avoid decreasing the life of it, you can read these tips on how to use an external hard drive for longer.
- To protect your external hard drive, you’d better place it on a stable, flat and hard surface. Considering that the hard disk is a mechanical device, it can be damaged by vibrations. And you should also be careful to prevent it from falling off the table.
- You need to make sure that it will not be banged around or treated roughly. Since the external hard drive is a portable device, you should treat it carelessly when you take it out.
- You have to avoid getting your hard drive wet or exposing it to liquid.
- Do not place your external hard drive in a restrictive area where there is no air flow. Similar to the internal hard disk in your computer, the external hard drive also gets hot when it works too long. To avoid overheating, which can damage the disk, you need to place it in an open area to dissipate the buildup of heat.
- Check error before you transfer files to an external hard drive. It can fix disk errors and ensure that you are starting with a well-functioning drive.To do that, you can use the error checking tool in Windows.
- Always eject the drive before you unplug it from your computer. It ensures data still stored in the cache memory will be removed, which prevents existing data on the disk from being damaged.
- The best way to protect your data in the external hard drive is to back up it as much as possible. Hard drive failure may happen to your external hard drive.To ensure the security of your files, you’d better prepare a second external drive to back up it.
Save Lost Data from an External Hard Drive
Similar to internal hard drivers, an external hard drive may also lose data due to various reasons, such as mistaken deletion or hard drive failure when you manage it.
If you have a backup for the data in the external hard drive, you can restore your data with the backup.
If you unfortunately find that your files or programs stored in the external hard drive is lost and you have no backup for the drive, you need to stop using it right now and try to recover files from the external drive with a third-party software as soon as possible.
MiniTool Partition Wizard is powerful in recovering deleted files and data from formatted or virus attacked disk. It is worth trying.
Buy Now
Step 1: Launch MiniTool Partition Wizard.
Step 2: Click Data Recovery from the tool bar and select your external hard drive in This PC. And then click Scan.
Step 3: Now you just need to check the files you want to recover and then click Save to place the recovered files into a safe position.
Tip: Make sure that you save recovered files in another disk to avoid a secondary data loss.
If it is the first time to recover files from an external drive, you may be a little confused. To know more details, you can read the following article: The Full Guide to SSD File Recovery on Windows 10/8/7/XP.
Here is an article about how to use an external drive. It enables me to free up the storage space of my computer and I can go out with my files. I’d like to share it with you!Click to Tweet
Bottom Line
You can benefit a lot from an external hard drive. With the high storage capacity, you can store a huge number of videos, photos and programs, and it is a proper device for data backup.
This article helps you to know how to add an external hard drive to your computer, how to use an external hard drive in Windows 10, and how to maintain it to use it longer.
If you still have any questions about the external hard drive, you can contact [email protected] or post it in the comment section below.
Do you want to try it now?
How to Use an External Hard Drive FAQ
What does an external hard drive do?
An external hard drive, which can be connected to a computer through a USB or wirelessly, is a portable storage device. It’s usually used to serve as extra storage or back up computers.
What are the advantages of an external hard drive?
- It has large storage capacity.
- It’s portable so that you can take it anywhere.
- It’s a safe backup device.
- It can be used for a long time.
How do I download a program to an external hard drive?
- Plug the external hard drive into the computer.
- Press Win + E to open File Explorer.
- Navigate to your program setup file and double-click it.
- Follow the onscreen instructions to install the program, and when you are asked where you want to save the program, choose on location on your external hard drive.
What do I do when my external hard drive is not detected?
The reasons for external hard drive not recognized or not showing up could be various. If you are facing the problem, you can try the 10 solutions mentioned in the following article: 10 Cases: External Hard Drive Not Showing up & Best Fixes.
Если Windows не распознает внешний жесткий диск, у этого может быть множество причин. В большинстве случаев их легко найти и устранить, чтобы использовать диск без проблем. Тем не менее, дефекты самого железа также могут помешать вам получить доступ к внешнему накопителю. Здесь мы рассказывали, как понять, что жесткий диск скоро сломается.
Мы советуем проверить все возможные причины неполадок, шаг за шагом пройдя через каждый пункт этой инструкции.
1 Проверьте разъемы жесткого диска
Если ваш компьютер вообще не отображает внешний жесткий диск, проверьте, точно ли он подключен к нужному USB-порту и достаточно ли электропитания он получает. Большинство внешних жестких дисков имеют интерфейс USB 3.0. Это значит, что они должны быть подключены к соответствующему порту компьютера. Он, как правило, окрашен в синий цвет и, соответственно, хорошо виден.
Впрочем, серьезно навредить оборудованию, подключив его в неверный порт, вы не сможете, потому что стандарты USB 1.0, 2.0 и 3.0 совместимы друг с другом. Это значит, что ваш жесткий диск распознается и при подключении к порту более старого стандарта, но будет работать значительно медленнее. Если же накопитель вообще не работает, возможно, порт неисправен.
Часто для обнаружения жесткого диска помогает простое переключение в другой слот USB. Перезагрузка компьютера также может исправить ошибку. Если есть возможность, попробуйте подключить другой провод. Есть USB-кабели, которые предназначены только для зарядки и не позволяют передавать данные.
Также может помочь отключение USB-устройств, которые вы не используете сейчас, чтобы освободить необходимые USB-ресурсы в системе. Это происходит потому, что каждый USB-контроллер может работать с ограниченным количеством устройств.
В зависимости от используемого жесткого диска может оказаться, что он должен быть подключен не только к компьютеру через USB, но еще и через адаптер питания к электросети. В этом случае убедитесь, что вы используете правильный блок питания, и что жесткий диск питается от него.
Если с портами и проводами все в порядке, необходимо продолжить поиск и устранение причин неполадки, чтобы компьютер снова отображал жесткий диск.
2 Просмотр жесткого диска в «Управлении дисками»
Если ваш внешний жесткий диск больше не распознается, стоит проверить, видит ли Windows ваш внешний носитель в «Управлении дисками».
- Откройте «Управление дисками Windows», например, введя в поиске «Управление дисками», и щелкните на результат поиска «Создание и форматирование разделов жесткого диска».
- После того, как вы откроете это меню, вы увидите обзор всех подключенных дисков и соответствующих разделов на компьютере. Если Windows успешно распознала ваш внешний жесткий диск, он должен отображаться в списке. Обычно он указывается как съемный носитель.
- Попробуйте идентифицировать диск, который вы ищете, используя информацию о его размере, отображенную в нижней части экрана. С помощью индикатора состояния (выше) вы можете увидеть, не возникла ли с ним какая-то проблема.
3. Назначение буквы
Если Windows распознала ваш внешний жесткий диск в разделе «Управление дисками», вы можете исключить, по крайней мере, возможный дефект кабеля USB, и будете знать, что ваш внешний носитель сам по себе работает без проблем. Поэтому теперь проверьте, была ли вообще назначена буква вашему внешнему жесткому диску. Такое назначение обязательно.
Если внешний накопитель был распознан системой, он будет указан в «Управлении дисками». Теперь там вы сможете увидеть обозначение диска, но у него может отсутствовать буква, например — (E). Чтобы ее назначить, сделайте следующее:
- Щелкните правой кнопкой мыши основной раздел жесткого диска (синяя полоска).
- Выберите команду «Изменить буквы и пути диска». Вы увидите, что буква диска не отображается.
- Перейдите на «Добавить» и выберите свободную букву. Занятые будут не доступны для выбора.
- Теперь вашему внешнему жесткому диску будет назначена литера, и он снова станет доступен.
4 Инициализация диска и создание тома
Кроме того, перед первым использованием может потребоваться инициализация жесткого диска. Опять же, вы сможете это сделать с помощью «Управления дисками».
- Найдите внешний жесткий диск в разделе «Управление дисками». Он должен быть представлен с пометкой «Не распределен».
- Щелкните правой кнопкой мыши по серому прямоугольнику слева от него. Здесь вы увидите номер диска, например «Диск 4».
- В контекстном меню выберите «Инициализация диска».
- В новом окне вам будет предложено определить стиль раздела. Здесь для дисков от 2 терабайт рекомендуем выбрать «GPT». Часто можно просто оставить то, что предложено по умолчанию.
- Подтвердите операцию.
Шаги 2-й и 3-й могут быть пропущены, если уже установлен подходящий стиль раздела.
В конце щелкните нераспределенную область в управлении дисками и выберите «Новый простой том». Следуйте инструкциям, чтобы настроить жесткий диск.
5 Форматирование внешнего жесткого диска
Если предыдущий шаг не дал желаемого результата, то возможно, что жесткий диск неправильно отформатирован для вашей операционной системы, и процесс форматирования надо повторить. Помните, что при этом все данные на накопителе будут удалены.
- Вернитесь в «Управление дисками» и нажмите команду «Форматировать».
- Введите имя жесткого диска и выберите подходящую файловую систему. В большинстве случаев вы можете оставить активной опцию «Выполнить быстрое форматирование».
- Подождите, пока процесс не будет завершен. После этого у вас снова будет доступ к внешнему жесткому диску.
6 В крайнем случае: купите новый внешний жесткий диск
Если всё это не помогает, ваш жесткий диск, скорее всего, неисправен. Но вам не придется тратить целое состояние на приобретение новой модели: загляните в наш рейтинг недорогих внешних накопителей.
Читайте также:
- Топ-5 аксессуаров, которые расширят возможности вашего ноутбука
- Топ-6 пауэрбанков с с беспроводной зарядкой: от простых моделей до инновационных
Нажмите Windows + X и выберите Управление дисками.. В «Управлении дисками» вы можете увидеть список всех обнаруженных дисков. Если вы видите, что ваш внешний жесткий диск указан в списке, но не имеет буквы диска, вы можете щелкнуть диск правой кнопкой мыши и выбрать «Изменить букву диска и пути».
Могу ли я использовать внешний жесткий диск для установки Windows 10?
Как вы знаете, хотя можно установить Windows на внешний жесткий диск, вы не можете установить его на внешний жесткий диск с настройками по умолчанию. Установка Windows 10 на внешний жесткий диск — непростая задача для обычных пользователей.
Как заставить мой компьютер распознавать внешний жесткий диск?
Что делать, если внешний жесткий диск не отображается
- Убедитесь, что он подключен и включен. Western Digital Моя книга. …
- Попробуйте другой порт USB (или другой компьютер)…
- Обновите свои драйверы. …
- Включите и отформатируйте диск в управлении дисками. …
- Очистите диск и начните с нуля. …
- Снимите и проверьте неизолированный диск.
Как мне установить внешний жесткий диск на свой компьютер?
Подключить USB-кабель к жесткому диску, если он еще не подключен, а другой конец — к USB-порту компьютера. Подключите другой конец USB-кабеля к USB-порту компьютера. После подключения внешнего жесткого диска к компьютеру он должен автоматически распознаваться операционной системой вашего компьютера.
Как мне исправить Windows, не обнаруживающую мой жесткий диск?
Чтобы проверить, является ли это причиной того, что BIOS не определяет жесткий диск, выполните следующие действия:
- Выключите компьютер.
- Откройте корпус компьютера и отсоедините кабель для передачи данных от жесткого диска. Это остановит отправку любых команд энергосбережения.
- Включите систему. Проверьте, не вращается ли жесткий диск.
Почему мой внешний жесткий диск не отображается в проводнике файлов?
Это может быть вызвано любой из следующих причин: Вашему диску не назначена буква диска в управлении дисками.. Диск может быть отключен или отключен. Ваш USB-драйвер может быть поврежден.
Могу ли я запустить Windows с внешнего жесткого диска?
Загрузка и запуск Windows 10 с USB-накопителя — удобный вариант, когда вы используете компьютер с более старой версией Windows. … Затем вы можете использовать Утилита Windows USB чтобы настроить USB-накопитель с Windows 10. Как только вы закончите, вы сможете загрузиться с накопителя, чтобы запустить Windows 10.
Может ли операционная система работать с внешнего диска?
Есть ли недостатки в хранении вашей операционной системы на внешнем диске? Вообще есть без недостатков. Практически: внешний диск, подключенный через ESATA, тоже работает. Внешний диск SAS или внешний диск SCSI также подойдут.
Как мне перейти на Windows 10 с нехваткой места на диске?
3. Установите Windows 10 на компьютер с нехваткой места на диске
- Проверьте место на жестком диске. …
- Если у вас недостаточно места на диске, используйте Ashampoo WinOptimizer, чтобы освободить место.
- Как только у вас будет хотя бы 10 ГБ свободного места, начнется установка Windows 10.
- Терпеливо подождите и следуйте инструкциям на экране.
Как загрузить игры с компьютера на внешний жесткий диск?
Подключите внешний жесткий диск к компьютеру. Откройте проводник Windows и создайте новую папку на внешнем жестком диске. Шаг 2. Откройте Steam, затем нажмите Steam> Настройки> Загрузки> Папки библиотеки Steam> Добавить папку библиотеки> Выберите папку на внешнем жестком диске.
Как увеличить объем памяти на моем ПК?
Как увеличить место для хранения на ПК
- Удалите программы, которыми вы никогда не пользуетесь. В Windows® 10 и Windows® 8 щелкните правой кнопкой мыши кнопку «Пуск» (или нажмите клавиши Windows + X), выберите Панель управления, затем в разделе «Программы» выберите «Удалить программу». …
- Резервное копирование редко используемых данных на внешний жесткий диск. …
- Запустите утилиту очистки диска.
В чем главное преимущество диска 2.5 перед диском 3.5?
Кроме того, имейте в виду, что пластины внутри жестких дисков корпоративного класса 2.5 дюйма и 3.5 дюйма на самом деле имеют одинаковый диаметр, что говорит нам о том, что основное преимущество 3.5 дюймов над 2.5 дюйма заключается в вместимость четырех или более тарелок.
Содержание
- Добавление HDD в Windows 10
- Вариант 1: Новый жесткий диск
- Вариант 2: Виртуальный накопитель
- Вопросы и ответы
Жесткий диск является неотъемлемой частью любого современного компьютера, в том числе работающего на операционной системе Windows 10. Однако иногда места на ПК становится недостаточно и требуется подключить дополнительный накопитель. Про это мы и расскажем далее в настоящей статье.
Нами будет пропущена тема подключения и форматирования нового жесткого диска при отсутствии старого и работоспособной системы в целом. Если вас это интересует, может ознакомиться с инструкцией по теме переустановки Windows 10. Все варианты далее будут нацелены на добавление накопителя при уже имеющейся системе.
Подробнее: Как установить Windows 10 на ПК
Вариант 1: Новый жесткий диск
Подключение нового HDD можно разделить на два этапа. Однако даже учитывая это, второй шаг не является обязательным и в некоторых отдельных случаях может быть пропущен. При этом работоспособность диска напрямую зависит от его состояния и соблюдения правил при подключении к ПК.
Шаг 1: Подключение
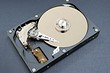
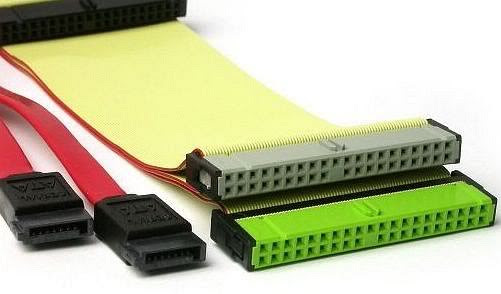
- Как сказано ранее, сначала накопитель требуется подключить к компьютеру. Большинство современных дисков, в том числе и для ноутбуков, имеет интерфейс SATA. Но также встречаются и другие разновидности, например, IDE.
- С учетом интерфейса диск подключается к материнской плате с помощью кабеля, варианты которого были представлены на изображении выше.
Примечание: Вне зависимости от интерфейса подключения процедуру необходимо производить при отключенном питании.
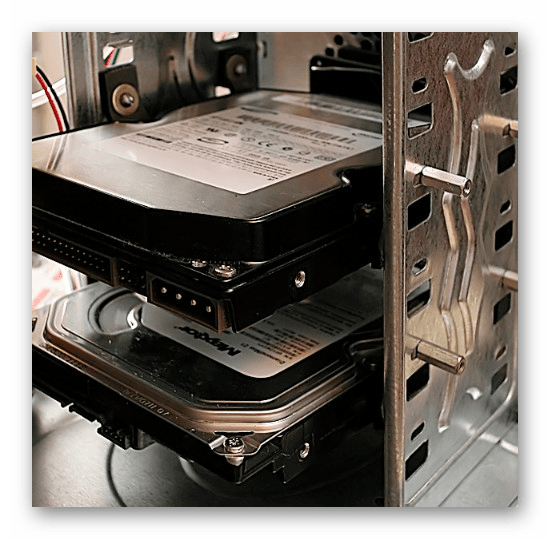
- Важно при этом четко зафиксировать устройство в одном неизменном положении в специальном отсеке корпуса. В противном случае вибрация, вызванная работой диска, может негативно отразиться на работоспособности в будущем.
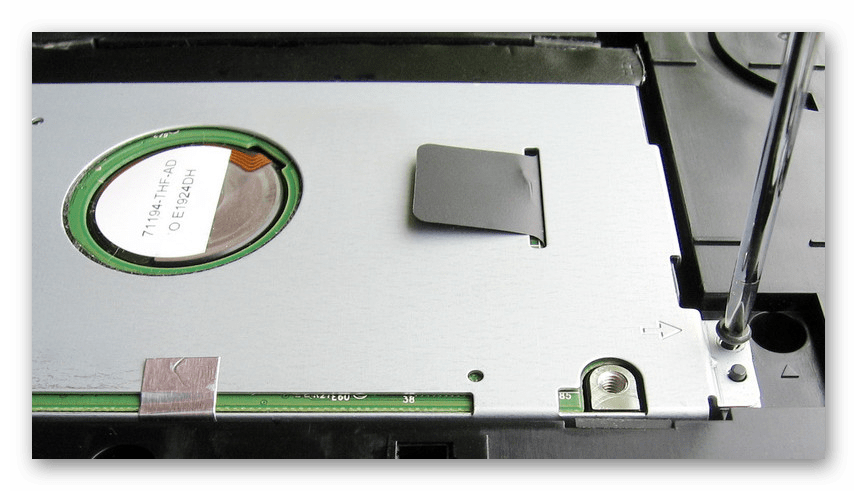
- На ноутбуках используется меньший по размерам жесткий диск и для его установки зачастую не требуется разборка корпуса. Устанавливается он в отведенный для этого отсек и фиксируется металлической рамкой.
Читайте также: Как разобрать ноутбук

Шаг 2: Инициализация
В большинстве случаев после подключения диска и запуска компьютера ОС Windows 10 автоматически настроит его и сделает доступным для использования. Однако иногда, например, вследствие отсутствия разметки, для его отображения надо произвести дополнительную настройку. Эта тема была нами раскрыта в отдельной статье на сайте.


Подробнее: Как инициализировать жесткий диск
После инициализации нового HDD потребуется создать новый том и на этом процедуру можно считать завершенной. Однако дополнительно следует произвести диагностику, чтобы избежать возможных проблем. В особенности, если при использовании устройства замечены какие-либо неисправности.
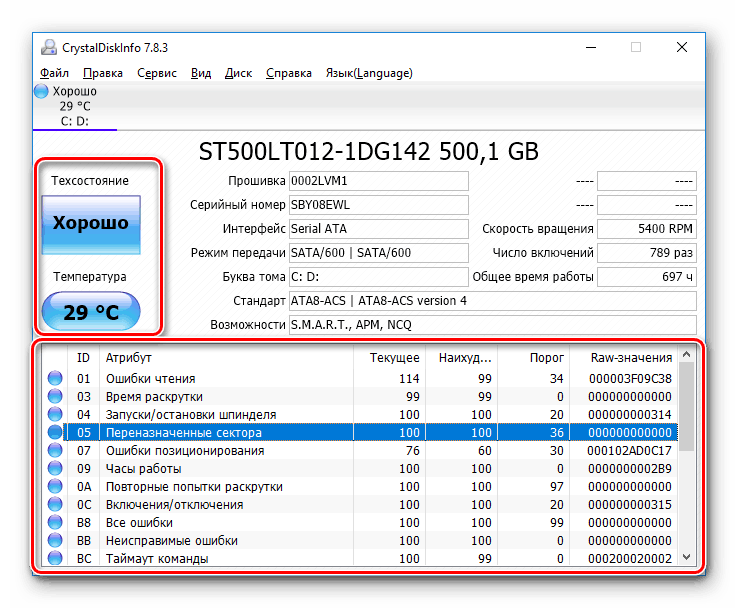
Читайте также: Диагностика жесткого диска в Windows 10
Если после ознакомления с описанным руководством диск работает неправильно или вовсе остается неопознанным для системы, ознакомьтесь с инструкцией по устранению проблем.
Подробнее: Не работает жесткий диск в Windows 10
Вариант 2: Виртуальный накопитель
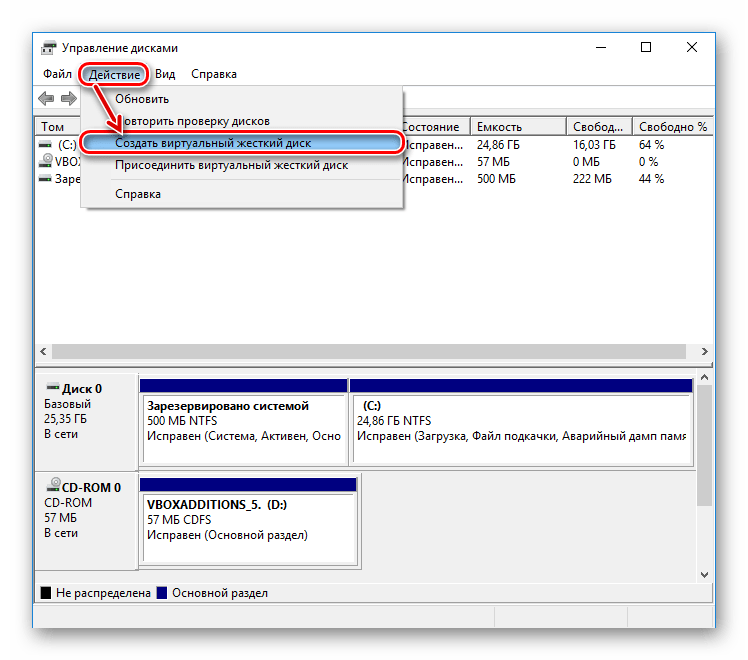
Помимо установки нового диска и добавления локального тома Windows 10 позволяет создавать виртуальные накопители в виде отдельных файлов, которые можно использовать в определенных программах для хранения различных файлов и даже рабочих операционных систем. Максимально детально создание и добавление подобного диска нами рассмотрено в отдельной инструкции.
Подробнее:
Как добавить и настроить виртуальный жесткий диск
Установка Windows 10 поверх старой
Отключение виртуального жесткого диска
Описанное подключение физического накопителя полностью применимо не только к HDD, но и твердотельным дисками (SSD). Единственное отличие при этом сводится к используемым креплениям и не связано с версией операционной системы.
Еще статьи по данной теме: