Последнее обновление: 07/04/2022
[Время на прочтение статьи: 5 мин.]
Файлы Windows Executable, такие как ntvdm.exe, используют расширение EXE. Файл считается файлом Win16 EXE (Windows Executable) и впервые был создан компанией Microsoft для пакета ПО Windows 10.
Первая версия ntvdm.exe была выпущена для операционной системы Windows XP 10/25/2001 в составе Windows XP.
Последним обновлением версии [v10] для Windows является 10, выпущенное 07/29/2015.
Файл ntvdm.exe включен в Windows 10, Windows 8.1 и Windows 8.
Ниже приведены исчерпывающие сведения о файле, инструкции для простого устранения неполадок, возникших с файлом EXE, и список бесплатных загрузок ntvdm.exe для каждой из имеющихся версий файла.
Что такое сообщения об ошибках ntvdm.exe?
ntvdm.exe — ошибки выполнения
Ошибки выполнения — это ошибки Windows, возникающие во время «выполнения». Термин «выполнение» говорит сам за себя; имеется в виду, что данные ошибки EXE возникают в момент, когда происходит попытка загрузки файла ntvdm.exe — либо при запуске приложения Windows, либо, в некоторых случаях, во время его работы. Ошибки выполнения являются наиболее распространенной разновидностью ошибки EXE, которая встречается при использовании приложения Windows.
В большинстве случаев ошибки выполнения ntvdm.exe, возникающие во время работы программы, приводят к ненормальному завершению ее работы. Большинство сообщений об ошибках ntvdm.exe означают, что либо приложению Windows не удалось найти этот файл при запуске, либо файл поврежден, что приводит к преждевременному прерыванию процесса запуска. Как правило, Windows не сможет запускаться без разрешения этих ошибок.
Таким образом, крайне важно, чтобы антивирус постоянно поддерживался в актуальном состоянии и регулярно проводил сканирование системы.
Поиск причины ошибки ntvdm.exe является ключом к правильному разрешению таких ошибок. Несмотря на то что большинство этих ошибок EXE, влияющих на ntvdm.exe, происходят во время запуска, иногда ошибка выполнения возникает при использовании Windows 10. Причиной этого может быть недостаточное качество программного кода со стороны Microsoft, конфликты с другими приложениями, сторонние плагины или поврежденное и устаревшее оборудование. Кроме того, эти типы ошибок ntvdm.exe могут возникать в тех случаях, если файл был случайно перемещен, удален или поврежден вредоносным программным обеспечением. Таким образом, крайне важно, чтобы антивирус постоянно поддерживался в актуальном состоянии и регулярно проводил сканирование системы.
Как исправить ошибки ntvdm.exe — 3-шаговое руководство (время выполнения: ~5-15 мин.)
Если вы столкнулись с одним из вышеуказанных сообщений об ошибке, выполните следующие действия по устранению неполадок, чтобы решить проблему ntvdm.exe. Эти шаги по устранению неполадок перечислены в рекомендуемом порядке выполнения.
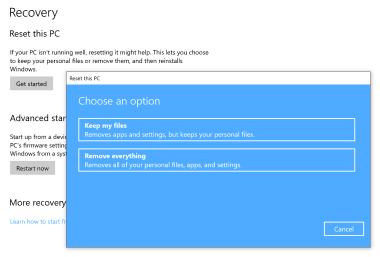
Шаг 1. Восстановите компьютер до последней точки восстановления, «моментального снимка» или образа резервной копии, которые предшествуют появлению ошибки.
Чтобы начать восстановление системы (Windows XP, Vista, 7, 8 и 10):
- Нажмите кнопку «Пуск» в Windows
- В поле поиска введите «Восстановление системы» и нажмите ENTER.
- В результатах поиска найдите и нажмите «Восстановление системы»
- Введите пароль администратора (при необходимости).
- Следуйте инструкциям мастера восстановления системы, чтобы выбрать соответствующую точку восстановления.
- Восстановите компьютер к этому образу резервной копии.
Если на этапе 1 не удается устранить ошибку ntvdm.exe, перейдите к шагу 2 ниже.

Шаг 2. Запустите средство проверки системных файлов (System File Checker), чтобы восстановить поврежденный или отсутствующий файл ntvdm.exe.
Средство проверки системных файлов (System File Checker) — это утилита, входящая в состав каждой версии Windows, которая позволяет искать и восстанавливать поврежденные системные файлы. Воспользуйтесь средством SFC для исправления отсутствующих или поврежденных файлов ntvdm.exe (Windows XP, Vista, 7, 8 и 10):
- Нажмите кнопку «Пуск» в Windows
- В поле поиска введите cmd, но НЕ НАЖИМАЙТЕ ENTER.
- Нажмите и удерживайте CTRL-Shift на клавиатуре, одновременно нажимая ENTER.
- Появится диалоговое окно запроса разрешения.
- В поле нажмите «ДА».
- Должен отображаться черный экран с мигающим курсором.
- На этом черном экране введите sfc /scannow и нажмите ENTER.
- Средство проверки системных файлов (System File Checker) начнет поиск неполадок, связанных с ntvdm.exe, а также других неполадок с системными файлами.
- Для завершения процесса следуйте инструкциям на экране.
Следует понимать, что это сканирование может занять некоторое время, поэтому необходимо терпеливо отнестись к процессу его выполнения.
Если на этапе 2 также не удается устранить ошибку ntvdm.exe, перейдите к шагу 3 ниже.
Шаг 3. Выполните обновление Windows.
Когда первые два шага не устранили проблему, целесообразно запустить Центр обновления Windows. Во многих случаях возникновение сообщений об ошибках ntvdm.exe может быть вызвано устаревшей операционной системой Windows. Чтобы запустить Центр обновления Windows, выполните следующие простые шаги:
- Нажмите кнопку «Пуск» в Windows
- В поле поиска введите «Обновить» и нажмите ENTER.
- В диалоговом окне Центра обновления Windows нажмите «Проверить наличие обновлений» (или аналогичную кнопку в зависимости от версии Windows)
- Если обновления доступны для загрузки, нажмите «Установить обновления».
- После завершения обновления следует перезагрузить ПК.
Если Центр обновления Windows не смог устранить сообщение об ошибке ntvdm.exe, перейдите к следующему шагу. Обратите внимание, что этот последний шаг рекомендуется только для продвинутых пользователей ПК.

Если эти шаги не принесут результата: скачайте и замените файл ntvdm.exe (внимание: для опытных пользователей)
Если ни один из предыдущих трех шагов по устранению неполадок не разрешил проблему, можно попробовать более агрессивный подход (примечание: не рекомендуется пользователям ПК начального уровня), загрузив и заменив соответствующую версию файла ntvdm.exe. Мы храним полную базу данных файлов ntvdm.exe со 100%-ной гарантией отсутствия вредоносного программного обеспечения для любой применимой версии Windows . Чтобы загрузить и правильно заменить файл, выполните следующие действия:
- Найдите версию операционной системы Windows в нижеприведенном списке «Загрузить файлы ntvdm.exe».
- Нажмите соответствующую кнопку «Скачать», чтобы скачать версию файла Windows.
- Копировать файл в соответствующий каталог вашей версии Windows:
- Перезагрузите компьютер.
Windows 10: C:WindowsSystem32
Windows 8.1: C:WindowsSystem32
Windows 8: C:WindowsSystem32
Windows XP: C:WINDOWSsystem32dllcache
Windows XP: C:WindowsSystem32
Если этот последний шаг оказался безрезультативным и ошибка по-прежнему не устранена, единственно возможным вариантом остается выполнение чистой установки Windows 10.
СОВЕТ ОТ СПЕЦИАЛИСТА: Мы должны подчеркнуть, что переустановка Windows является достаточно длительной и сложной задачей для решения проблем, связанных с ntvdm.exe. Во избежание потери данных следует убедиться, что перед началом процесса вы создали резервные копии всех важных документов, изображений, установщиков программного обеспечения и других персональных данных. Если вы в настоящее время не создаете резервных копий своих данных, вам необходимо сделать это немедленно.
Скачать файлы ntvdm.exe (проверено на наличие вредоносного ПО — отсутствие 100 %)
ВНИМАНИЕ! Мы настоятельно не рекомендуем загружать и копировать ntvdm.exe в соответствующий системный каталог Windows. Microsoft, как правило, не выпускает файлы Windows EXE для загрузки, поскольку они входят в состав установщика программного обеспечения. Задача установщика заключается в том, чтобы обеспечить выполнение всех надлежащих проверок перед установкой и размещением ntvdm.exe и всех других файлов EXE для Windows. Неправильно установленный файл EXE может нарушить стабильность работы системы и привести к тому, что программа или операционная система полностью перестанут работать. Действовать с осторожностью.
Файлы, относящиеся к ntvdm.exe
Файлы EXE, относящиеся к ntvdm.exe
| Имя файла | Описание | Программа (версия) | Размер файла (байты) | Расположение файла |
|---|---|---|---|---|
| rmttpmvscmgrsvr.exe | TPM Virtual Smart Card Manager DCOM Server | Microsoft® Windows® Operating System (6.2.9200.16384) | 81408 | C:WindowsSystem32 |
| forfiles.exe | Windows Executable | Windows Vista | 43520 | C:WindowsSysWOW64 |
| iexpress.exe | Wizard | Windows® Internet Explorer (10.00.9200.16384) | 150528 | C:WindowsSystem32 |
| ilasm.exe | Windows Executable | Windows 8.1 | 297024 | C:WindowsMicrosoft.NETFrameworkv4.0.30319 |
| qappsrv.exe | Query Terminal Server Utility | Microsoft® Windows® Operating System (6.0.6002.18005) | 22528 | C:WindowsSystem32 |
Вы скачиваете пробное программное обеспечение. Для разблокировки всех функций программного обеспечения требуется покупка годичной подписки, стоимость которой оставляет 39,95 долл. США. Подписка автоматически возобновляется в конце срока (Подробнее). Нажимая кнопку «Начать загрузку» и устанавливая «Программное обеспечение», я подтверждаю, что я прочитал (-а) и принимаю Лицензионное соглашение и Политику конфиденциальности компании Solvusoft.
BlockWOWIdle
BuildGlobalDpmStuffForWow
CurrentMonitorTeb
DBGNotifyDebugged
DBGNotifyNewTask
DBGNotifyRemoteThreadAddress
DispatchInterrupts
Dos_Flag_Addr
DpmiSetIncrementalAlloc
ExpLdt
FlatAddress
FreeTaskDpmSupport
GetDOSAppName
InitGlobalDpmTables
InitTaskDpmSupport
IsCdRomFile
MGetVdmPointer
RedirectLongFileName
RedirectShortFileName
RegisterWOWIdle
ResumeTimerThread
SelectorLimit
SetShadowDescriptorEntries
ShortPathEnvVar
Sim32pGetVDMPointer
SoftPcEoi
SuspendTimerThread
VDDAllocMem
VDDAllocateDosHandle
VDDAssociateNtHandle
VDDDeInstallIOHook
VDDDeInstallMemoryHook
VDDDeInstallUserHook
VDDExcludeMem
VDDFreeMem
VDDIncludeMem
VDDInstallIOHook
VDDInstallMemoryHook
VDDInstallUserHook
VDDQueryDMA
VDDReleaseDosHandle
VDDReleaseIrqLine
VDDRequestDMA
VDDReserveIrqLine
VDDRetrieveNtHandle
VDDSetDMA
VDDSimulate16
VDDTerminateVDM
VdmDbgAttach
VdmGetParametersInfoError
VdmMapFlat
VdmParametersInfo
VdmTraceEvent
WOWSysErrorBox
WaitIfIdle
call_ica_hw_interrupt
cmdCheckTemp
cmdCheckTempInit
cpu_createthread
demClientErrorEx
demFileDelete
demFileFindFirst
demFileFindNext
demGetFileTimeByHandle_WOW
demGetPhysicalDriveType
demIsShortPathName
demLFNCleanup
demLFNGetCurrentDirectory
demSetCurrentDirectoryGetDrive
demWOWLFNAllocateSearchHandle
demWOWLFNCloseSearchHandle
demWOWLFNEntry
demWOWLFNGetSearchHandle
demWOWLFNInit
fSeparateWow
getAF
getAH
getAL
getAX
getBH
getBL
getBP
getBX
getCF
getCH
getCL
getCS
getCX
getDF
getDH
getDI
getDL
getDS
getDX
getEAX
getEBP
getEBX
getECX
getEDI
getEDX
getEFLAGS
getEIP
getES
getESI
getESP
getFS
getGS
getIF
getIP
getIntelRegistersPointer
getMSW
getOF
getPF
getSF
getSI
getSP
getSS
getZF
host_CreateThread
host_ExitThread
host_com_close
host_direct_access_error
host_simulate
pDeviceChain
setAF
setAH
setAL
setAX
setBH
setBL
setBP
setBX
setCF
setCH
setCL
setCS
setCX
setDF
setDH
setDI
setDL
setDS
setDX
setEAX
setEBP
setEBX
setECX
setEDI
setEDX
setEFLAGS
setEIP
setES
setESI
setESP
setFS
setGS
setIF
setIP
setMSW
setOF
setPF
setSF
setSI
setSP
setSS
setZF
- unable to initialize heap

- unable to open console device

Runtime error
Иногда система Windows отображает сообщения об ошибках поврежденных или отсутствующих файлов ntvdm.exe. Подобные ситуации могут возникнуть, например, во время процесса установки программного обеспечения. Каждая программа требует определенных ресурсов, библиотек и исходных данных для правильной работы. Поэтому поврежденный или несуществующий файл ntvdm.exe может повлиять на неудачное выполнение запущенного процесса.
Файл был разработан Microsoft для использования с программным обеспечением Windows. Здесь вы найдете подробную информацию о файле и инструкции, как действовать в случае ошибок, связанных с ntvdm.exe на вашем устройстве. Вы также можете скачать файл ntvdm.exe, совместимый с устройствами Windows 10, Windows 8, Windows XP, Windows 8.1, которые (скорее всего) позволят решить проблему.

Совместим с: Windows 10, Windows 8, Windows XP, Windows 8.1
Популярность пользователя
Исправьте ошибки ntvdm.exe
- 1 Информация о файле ntvdm.exe
- 2 Ошибки, связанные с файлом ntvdm.exe
- 3 Как исправить ошибки, связанные с ntvdm.exe?
- 3.1 Сканирование на наличие вредоносных программ
- 3.2 Обновление системы и драйверов
- 3.3 Инструмент проверки системных файлов
- 3.4 Восстановление системы
- 4 Скачать ntvdm.exe
- 4.1 Список версий файла ntvdm.exe
Информация о файле
| Основная информация | |
|---|---|
| Имя файла | ntvdm.exe |
| Расширение файла | EXE |
| Тип | Executable Application |
| Описание | Windows Executable |
| Программного обеспечения | |
|---|---|
| программа | Windows 10 |
| Программного обеспечения | Windows |
| автор | Microsoft |
| Версия программного обеспечения | 10 |
| подробности | |
|---|---|
| Размер файла | 8960 |
| Самый старый файл | 2008-04-14 |
| MIME тип | application/octet-stream |
Наиболее распространенные проблемы с файлом ntvdm.exe
Существует несколько типов ошибок, связанных с файлом ntvdm.exe. Файл ntvdm.exe может находиться в неправильном каталоге файлов на вашем устройстве, может отсутствовать в системе или может быть заражен вредоносным программным обеспечением и, следовательно, работать неправильно. Ниже приведен список наиболее распространенных сообщений об ошибках, связанных с файлом ntvdm.exe. Если вы найдете один из перечисленных ниже (или похожих), рассмотрите следующие предложения.
- ntvdm.exe поврежден
- ntvdm.exe не может быть расположен
- Ошибка выполнения — ntvdm.exe
- Ошибка файла ntvdm.exe
- Файл ntvdm.exe не может быть загружен. Модуль не найден
- невозможно зарегистрировать файл ntvdm.exe
- Файл ntvdm.exe не может быть загружен
- Файл ntvdm.exe не существует
ntvdm.exe
![]()
Не удалось запустить приложение, так как отсутствует файл ntvdm.exe. Переустановите приложение, чтобы решить проблему.
OK
Проблемы, связанные с ntvdm.exe, могут решаться различными способами. Некоторые методы предназначены только для опытных пользователей. Если вы не уверены в своих силах, мы советуем обратиться к специалисту. К исправлению ошибок в файле ntvdm.exe следует подходить с особой осторожностью, поскольку любые ошибки могут привести к нестабильной или некорректно работающей системе. Если у вас есть необходимые навыки, пожалуйста, продолжайте.
Как исправить ошибки ntvdm.exe всего за несколько шагов?
Ошибки файла ntvdm.exe могут быть вызваны различными причинами, поэтому полезно попытаться исправить их различными способами.
Шаг 1.. Сканирование компьютера на наличие вредоносных программ.
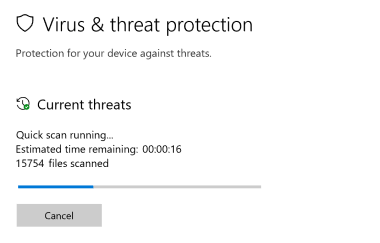
Файлы Windows обычно подвергаются атаке со стороны вредоносного программного обеспечения, которое не позволяет им работать должным образом. Первым шагом в решении проблем с файлом ntvdm.exe или любыми другими системными файлами Windows должно быть сканирование системы на наличие вредоносных программ с использованием антивирусного инструмента.
Если по какой-либо причине в вашей системе еще не установлено антивирусное программное обеспечение, вы должны сделать это немедленно. Незащищенная система не только является источником ошибок в файлах, но, что более важно, делает вашу систему уязвимой для многих опасностей. Если вы не знаете, какой антивирусный инструмент выбрать, обратитесь к этой статье Википедии — сравнение антивирусного программного обеспечения.
Шаг 2.. Обновите систему и драйверы.
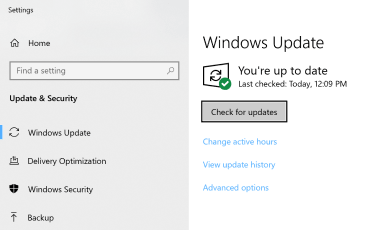
Установка соответствующих исправлений и обновлений Microsoft Windows может решить ваши проблемы, связанные с файлом ntvdm.exe. Используйте специальный инструмент Windows для выполнения обновления.
- Откройте меню «Пуск» в Windows.
- Введите «Центр обновления Windows» в поле поиска.
- Выберите подходящую программу (название может отличаться в зависимости от версии вашей системы)
- Проверьте, обновлена ли ваша система. Если в списке есть непримененные обновления, немедленно установите их.
- После завершения обновления перезагрузите компьютер, чтобы завершить процесс.
Помимо обновления системы рекомендуется установить последние версии драйверов устройств, так как драйверы могут влиять на правильную работу ntvdm.exe или других системных файлов. Для этого перейдите на веб-сайт производителя вашего компьютера или устройства, где вы найдете информацию о последних обновлениях драйверов.
Шаг 3.. Используйте средство проверки системных файлов (SFC).
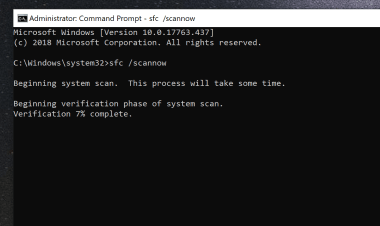
Проверка системных файлов — это инструмент Microsoft Windows. Как следует из названия, инструмент используется для идентификации и адресации ошибок, связанных с системным файлом, в том числе связанных с файлом ntvdm.exe. После обнаружения ошибки, связанной с файлом %fileextension%, программа пытается автоматически заменить файл ntvdm.exe на исправно работающую версию. Чтобы использовать инструмент:
- Откройте меню «Пуск» в Windows.
- Введите «cmd» в поле поиска
- Найдите результат «Командная строка» — пока не запускайте его:
- Нажмите правую кнопку мыши и выберите «Запуск от имени администратора»
- Введите «sfc / scannow» в командной строке, чтобы запустить программу, и следуйте инструкциям.
Шаг 4. Восстановление системы Windows.
Другой подход заключается в восстановлении системы до предыдущего состояния до того, как произошла ошибка файла ntvdm.exe. Чтобы восстановить вашу систему, следуйте инструкциям ниже
- Откройте меню «Пуск» в Windows.
- Введите «Восстановление системы» в поле поиска.
- Запустите средство восстановления системы — его имя может отличаться в зависимости от версии системы.
- Приложение проведет вас через весь процесс — внимательно прочитайте сообщения
- После завершения процесса перезагрузите компьютер.
Если все вышеупомянутые методы завершились неудачно и проблема с файлом ntvdm.exe не была решена, перейдите к следующему шагу. Помните, что следующие шаги предназначены только для опытных пользователей
Загрузите и замените файл ntvdm.exe
Последнее решение — вручную загрузить и заменить файл ntvdm.exe в соответствующей папке на диске. Выберите версию файла, совместимую с вашей операционной системой, и нажмите кнопку «Скачать». Затем перейдите в папку «Загруженные» вашего веб-браузера и скопируйте загруженный файл ntvdm.exe.
Перейдите в папку, в которой должен находиться файл, и вставьте загруженный файл. Ниже приведен список путей к каталогу файлов ntvdm.exe.
- Windows 10: C:WindowsSystem32
- Windows 8: 1: C:WindowsSystem32
- Windows XP: C:WINDOWSsystem32dllcache
- Windows 8.1: —
Если действия не помогли решить проблему с файлом ntvdm.exe, обратитесь к профессионалу. Существует вероятность того, что ошибка (и) может быть связана с устройством и, следовательно, должна быть устранена на аппаратном уровне. Может потребоваться новая установка операционной системы — неправильный процесс установки системы может привести к потере данных.
Список версий файлов

Имя файла
ntvdm.exe
система
Windows 10
Размер файла
8960 bytes
Дата
2013-08-22
| Подробности файла | ||
|---|---|---|
| MD5 | 9a355b75137e8a5f3c384c999cc6dbbc | |
| SHA1 | 2be21636f3c2899f1217c289351b106118a5e197 | |
| SHA256 | 126a00e34a6516c0d382a221071ab4084031c2a89ccb6144cab960ce1f86ee2c | |
| CRC32 | 2b4e36e7 | |
| Пример расположения файла | C:WindowsSystem32 |

Имя файла
ntvdm.exe
система
Windows 8
Размер файла
533504 bytes
Дата
2012-07-26
| Подробности файла | ||
|---|---|---|
| MD5 | 96d0ab1d458d5eb1919ad2aa39aa4ff5 | |
| SHA1 | 8ff91cf597b22104f88265a733e652f75021f737 | |
| SHA256 | daa80a84a45985b6b981eb71624392f41861f79c2c2a207818a42fd25bdc06a3 | |
| CRC32 | 1224797d | |
| Пример расположения файла | 1: C:WindowsSystem32 |

Имя файла
ntvdm.exe
система
Windows XP
Размер файла
420864 bytes
Дата
2008-04-14
| Подробности файла | ||
|---|---|---|
| MD5 | 681b807e53bdada337735c28c0e48a1b | |
| SHA1 | df36cf59f700fc0b3b60c009b8b877d6233fdd72 | |
| SHA256 | a0be52e7d076ed8e33a4b5ab309cd23ad0272570c7e87fe6e3444712ad467d62 | |
| CRC32 | dd26b7ba | |
| Пример расположения файла | C:WINDOWSsystem32dllcache |

Имя файла
ntvdm.exe
система
Windows 8.1
Размер файла
8960 bytes
Дата
2013-08-22
| Подробности файла | ||
|---|---|---|
| MD5 | 9a355b75137e8a5f3c384c999cc6dbbc | |
| SHA1 | 2be21636f3c2899f1217c289351b106118a5e197 | |
| SHA256 | 126a00e34a6516c0d382a221071ab4084031c2a89ccb6144cab960ce1f86ee2c | |
| CRC32 | 2b4e36e7 | |
| Пример расположения файла | — |
For the impatient ones, who don't want to read:
ntvdmpatchdocautobuild.txt should be the fastest way to get NTVDMx64 compiled.

What is it?
===========
NTVDMx64 is a port of the well-known Windows NTVDM, which is used by windows
to run DOS-Applications, to 64bit Windows, so that you can run your
DOS-Applications on 64bit Windows too.
This is a proof-of-concept that it is possible to run the NTVDM on 64bit
Windows and Microsoft was just too lazy to port it over and have disabled it
for unknown reasons. More specifically, it's a set of patches to the
sourcecode of original Microsoft NTVDM from NT4 in order to work on 64bit
Windows.

Motivation
==========
The first question that may come now is: Why porting NTVDM when DosBox is
working even better and more accurate in x64 Windows.
There are mainly 2 reasons:

1) DosBox doesn't have a good interaction with the windows console.
Specifically it's not possible to start Windows Applications from within the
DOS-programs, redirect their output, and other useful interactions that are
possible with Windows' own NTVDM.
Over time my DOS-Applications have grown to interact with various Windows
Applications and Interfaces and that wouldn't work with DosBox for instance.

2) Simply as a proof-of-concept that it would technically be possible and to
encourage Microsoft to maybe take my patches and incorporate them into future
Windows releases in order to bring back proper NTVDM Support on x64
(still x32 is a lot faster because of V86 mode, but on machines with lots of
RAM, which may be required to run x64, there may be use for this).

How does it work?
=================
I never thought that it would be possible at all, as NTVDM on Win32 uses V86
mode of the CPU for fast code execution which isn't available in x64 long
mode.
However I stumbled upon the leaked Windows NT 4 sourcecode and the guys from
OpenNT not only released the source but also patched it and included all
required build tools so that it can be compiled without installing anything
but their installation package.
The code was a pure goldmine and I was curious how the NTVDM works.

It seems that Microsoft bought the SoftPC solution from Insignia, a company
that specialised in DOS-Emulators for UNIX-Systems. I found out that it also
existed on MIPS, PPC and ALPHA Builds of Windows NT 4 which obviously don't
have a V86 mode available like Intel x86 has. It turned out that Insignia
shipped SoftPC with a complete emulated C-CPU which also got used by Microsoft
for MIPS, PPC and ALPHA-Builds.
For V86 mode, Microsoft implemented some facility called "Monitor" which is
the piece of Software that interacts with the V86 part in the NT Kernel.
However they assumed that i386 build = built with Monitor, therefore the
sourcecode had to be patched to distinguish between a i386 build with CCPU
and one with MONITOR.
But there are a lot of other pitfalls too, which are to overcome. One major
problem is that NTVDM uses calls to the Console and CSRSS Subsystem which
are only used by the NTVDM and are therefore not working out of the box on
x64 systems. Also stuff like Page allocation granularity poses a problem to
EMM memory management on x64 systems.
And last but not least, the way NTVDM is invoked is rather complicated,
because it is done by the loader code of kernel32/kernelbase which registers
the NTVDM and the requested application with the console server and the
builds a commandline to execute NTVDM with the appropriate parameters
(when I have more time, I may write how this all works in more detail).
But fortunately as there still are 32bit Versions of Windows, Microsoft still
has the code available in their x64 Windows Versions, as they are compiling
the same codebase as on Win32. This enables us to use these facilities also
on 64bit Windows, but structures have to be converted forward and back
between 32bit and 64bit structures as NTVDM is 32bit code and therefore
runs inside WOW64. WOW64.dll generally has transformations for a lot of
calls by 32bit applications, but Microsoft didn't implement the ones that are
necessary for NTVDM (as they are just used by this one application).
Additionally they broke some functions on x64 builds simply by introducing
bugs or not properly converting them, i.e. for console graphics.

So all these difficulties require the system to be patched in order to
support the calls of NTVDM and let it load properly with the CCPU.
One solution would be binary patches of the Windows system files, but this
is problematic as these files can change with various upgrades and there is
also a nasty Patchguard in Windows which doesn't allow system files to be
modified. Therefore the way to go here is a DLL that gets loaded into every
process and patched the operating system DLLs in memory right after loading
the application. The patcher also has to replicate between 32bit and 64bit
processes which is another challenging task.
The method that has been chosen by me is creating 2 DLLs, one for 32bit and
one for 64bit (as they required different code for replication and
modification). These DLLs get loaded into every process as AppInit-DLL, which
is a nice mechanism by Windows that allows DLLs to be injected into every
GUI process.
Unfortunately these DLLs nowadays have a signature enforcement in order to
get loaded, but this can be turned off in registry. As far as I know this
only works if "Secure Boot" is off OR if Windows is in Testsigning mode,
which therefore is a requirement for this all to work.
Starting with Windows 11, "Secure Boot" cannot be disabled out of the box,
therefore we use AppCert.DLL approach on Win 11 loader.
Fortunately, the Windows 11 loader can also be used under Windows 10, so
it is now possible to also use ntvdmx64 without Secure Boot.
AppInit-DLLs only get injected to GUI processes by the
CSRSS, but injection is also required into CLI processes as these are even
more likely to launch a DOS application. Therefore the AppInit-DLL also has
to invade the console server and inject into created console applications
from there (WinEvent hook).
Of course this mess could be all avaoided if Microsoft would implement all
the required patches from the AppInit-DLL into their WOW64 and into NTDLL
(which wouldn't hurt anyway). Further technical details will be provided
later.

With the help of the mentioned AppInit hook loader it is possible to start
the NTVDM when a user tries to launch a DOS-Application.
The NTVDM.EXE has to reside within SYSTEM32 and SysWow64 directories, as
it gets searched and called from 32- and 64bit appliations. As NTVDM.EXE
is a 32bit application, all its support files need to be in SysWow64
directory as this is the SYSTEM32 directory seen by 32bit applications.

Futhermore the way how the windows console works changed with Windows 7.
In earlier times, this was all managed by the CSRSS, but nowadays it is done
with the conHost.exe Console host process, which processes the calls to the
console. The calls are transparent for the caller, so this shouldn't be a
problem, but there are 2 different ConHost DLLs that implement 2 versions
of the console server. Only version 1 of the Console supports direct console
I/O by the NTVDM. On Windows 10 for instance, a registry entry forces the
conhost to use Console V2, so this has to be changed to use V1 console so
that NTVDM can interact with it, but this fortunately is just a matter of
setting a registry key.

Some registry keys also need to be set to show that the NTVDM is present and
can get called.
So this is all rather complex, but it sort of works with some patches to
the operating system. It's enough as a proof-of-concept and to use it for
most business applications and even some games.

Cool, where can I get it?
=========================
Redistribution of the compiled NTVDM is probematic, as it is based on leaked
Windows NT 4 sourcecode, which is (C) by Insignia and Microsoft, so I'm
legally not allowed to redistribute the code.
However I published the code and compiled versions of the loader that
enables you to run the patched NTVDM, as this is my own code.
As the OpenNT project released the sourcecode, copyright issues are up to
them, I can just say that you need the old-src.trunk.r687.20150728.7z
source package released by them (Google and web.archive.org are your
friends) if you want to try it out.
Depending on the build flavour you choose, you also need the appropriate
SDK package.
I'm providing patchfiles that patch the sourcecode to compile your own
version of NTVDM which works on x64, publishing patches shouldn't be a
copyright issue, I hope. And therefore you can try to patch the source
and compile it yourself.
Of course it would be nice if Microsoft would do that themselves to provide
x64 Windows users a NTVDM again, but I'm not very positive that this
will happen, they seem to forget about us DOS-users. :-(

There are various "flavours" of NTVDM that can be built:
 * old-src  [!DO NOT USE!]
   The original NT4 NTVDM. Maybe the easiest version to build, but
   it doesn't have multilanguage and lacks some features like LFN
   This has been the default repository until Feb/2020 where
   development has been switched to MINNT tree.
   This build method therefore is DEPRECATED in favour of the
   MINNT build systemand will not receive any future updates!
   This build is left unmaintained and unchecked, so don't complain
   if it doesn't build anymore.
   Please note that you need Windows XP for building.
   Build instructions in: docold-src.txt
 * HAXM
   Instead of using the emulated CCPU, it uses HAXM VT-x hardware
   accelleration (CPU needs to support it), so it is significally
   faster in textmode.
   But it will probably never support graphics, as it is technically
   impossible to emulate a real VGA card with sufficient performance on VT-x
   Works with minnt and old-src build.
   Build instructions in: dochaxm.txt
 * MINNT
   This is the most recent NTVDM source code, it supports multiple
   languages, but is probably harder to build.
   It is planned to continue development on this source tree as of
   Feb/2020
   Build instructions in: docminnt.txt

To make building easier, there is an automated build system available.
Please refer to docautobuild.txt for details.

In case you want a fully compiled build, I recommend Googling for ntvdmx64

How to install
==============
Now you can install the NTVDM on the destination machine:
Run install.bat so that all files will be installed on
the target machine and Registry patches will get applied.
Afterwards you may need to reboot the machine to get the AppInit-DLL loaded
into explorer, but it should already get loaded into the next GUI process
you start (as long as it's a loader based on AppInitDLLs which is true for
Windows Versions <10 and Windows 10 with Secure Boot disabled),
so if you start a DOS-Application from this process, it should also work.

You must also ensure, that the machine is connected to the Internet during
the first run of a DOS-Application, because the loader code needs to fetch
symbols from the Microsoft Symbol server so that it can call OS internal
functions in order to properly start NTVDM. When the symbols are once
fetched for the current user, they won't be fetched again, until either
the Temp-folder is cleared or the OS files are upgraded.

Debugging
=========
Name of debugger Master Yoda is.
Compiling frontend in mvdmsoftpc.newdebugger you do.
Like Gandalf, debugger master Yoda smokes pipe in \.pipesoftpc
Therefore writing REG_SZ Key named PIPE containing
   \.pipesoftpc
to HKEY_LOCAL_MACHINESYSTEMCurrentControlSetControlWOWCpuEnv
you need.
Setting empty REG_SZ named TRACE to CpuEnv you must.
After running vdmdebug.exe, you will be enlighted by running vdmdebug.
Do not call Yoda, Yoda will call you.

Known bugs
==========
Currently there are crashes with some DPMI programs like i.e
dpmi.exe, but most programs should work, I hope.

Tested on
=========
Windows Server 2003 x64
Windows 7 x64
Windows 8 x64
Windows Server 2008 x64
Windows 10 x64
Windows 11 x64

You are invited to improve this project to bring back DOS to Windows.


FAQ
===
NTVDMx64 stops working after Patch Tuesday updates, what shall I do?
---------------------------------------------------------------------------
It always takes some time (up to 7 days) after new symbols for updated dll
files required by the loader get released.
So the only thing you can do in such a situation is to wait until the new
symbols appear. The loader should start working again automatically, after
the symbols become available and you have an Internet connection available
that allows downloads from the Microsoft Symbol Server.

You can verify if the missing symbosl are the problem by checking the
loader output via DebugView.

I want to have a proper soundcard emulation
---------------------------------------------------------------------------
MINNT build supports AdLib soundcard emulation by incorporating code parts
of SoundFX2000 into NTVDM SB20 emulation.

To make it more clear:
  As MUSIC device, select AdLib
  As SOUND device, select Soundblaster 2.0

But you can also try to use the real

http://www.softsystem.co.uk/products/soundfx.htm

To remove time limit (as it's free nowadays anyway), please
see:
#40 (comment)

But it sometimes causes applications to hang and not react to keyboard
input, so only try it if the NTVDM internal sound emulation isn't good
enough for your needs.


The PC speaker output is choppy and generally inaccurate, I want my PC
speaker sound back
---------------------------------------------------------------------------
This is not NTVDMx64's fault, it is related to a bad design change in
Windows starting with Windows 7.
It can be solved by installing a proper PC Speaker driver:
https://www.vogons.org/viewtopic.php?f=46&t=58233


I want to run 16bit Windows applications
---------------------------------------------------------------------------
As of 05/2020, NTVDMx64 now generally supports WOW32, so your applications
should run.
However, they currently only work with the CCPU build and we know that the
CCPU is slow, so I still recommend wineVDM:
	https://github.com/otya128/winevdm
The loader tries to detect if winevdm is installed and if so, it gets
precedence over NTVDMx64. If you restore original registry entries, WOW32
will be handled by NTVDMx64 again.
The crucial registry key for the check is:
HKEY_LOCAL_MACHINESOFTWAREMicrosoftWindows NTCurrentVersionNtVdm64OTVDM
If it is present, NTVDMx64 won't load its WOW32 implementation.
Please note, that detection of the key is done upon inital load of ldntvdm.dll
into the process address space, so if you toggle the 0OTVDM, the process where
you are launching your 16 bit application from needs to be restarted.
If unsure, you can reboot your machine after installation/uninstallation of
WineVDM handlers.

To debug wow32, before launching your application:
set WOWTRACE=C:log.txt
set WOWLOGLVL=16

For more detailled information about debugging, please refer to
docdebug-wow.txt


Is there a way to enlarge the graphics window?
---------------------------------------------------------------------------
You can use the EyeStrain parameter for this.
Just execute regeyestrain.reg from the release-folder of NTVDMx64 and
as soon as the parameter is set, you can switch between 3 variants of
graphics display (Standard - Big - Huge) by pressing the "Scroll Lock" key.
This only works in graphics mode!

Here is how it works:
The .reg file creates a REG_SZ key named "EyeStrain" under
HKEY_LOCAL_MACHINESYSTEMCurrentControlSetControlWOWCpuEnv
which contains the string representatino of a hex value of the VK_
virtual key code that needs to be checked for in order to switch between
magnificaton sizes. The .reg file contains "91" as value, as 0x91 is the
VK_SCROLL.
You can find a list of Virtual keycodes here and change it accordingly:
https://nehe.gamedev.net/article/msdn_virtualkey_codes/15009/

Further explanation how it used to work on MIPS/Alpha builds:
#95 (comment)


I want to use more than 16MB of DPMI memory
---------------------------------------------------------------------------
NTVDM is patched to obey DPMI memory size from .PIF file. However, its size
is limited to maximum of 64MB due to .PIF specification. If you want to
use more, you must set a registry key under:

  HKEY_LOCAL_MACHINESYSTEMCurrentControlSetControlWOWCpuEnv

Create a REG_SZ value named DPMIMEM with the requested size of DPMI memory
in KB, i.e. 131070 for 128MB of DPMI memory max.

You can just execute the regdpmimem.reg from the release-folder of NTVDMx64
to set 128MB of DPMI mem.


I want to use my mouse in my textmode application and not select text
---------------------------------------------------------------------------
You forgot to disable QuickEdit mode of the windows console.
See: #80


When launching a DOS program from a user's console, it doesn't start on
first launch and on second launch, I get System Error 4001h
---------------------------------------------------------------------------
This is due to the fact that the ForceV2 key of the Windows console is on
a per-user basis, not systemwide, so it resides in HKEY_CURRENT_USERConsole
Do you need to set the DWORD ForceV2 key in mentioned path to 0.

You can just execute regconhost.reg from the release-folder of NTVDMx64
as the correct user to fix that key.


I want to print to my windows GDI printer or a network printer
---------------------------------------------------------------------------
Use DOSPR.ZIP, see here: #161


I have trouble printing to a printer which has been redirected via "net use"
---------------------------------------------------------------------------
You may need to use SMBv1 and disable SMBv2.
See:
#161
https://docs.microsoft.com/en-us/windows-server/storage/file-server/troubleshoot/detect-enable-and-disable-smbv1-v2-v3
I still suggest you use DOSPR.ZIP


I want to completely disable error messages regarding direct disk access etc.
---------------------------------------------------------------------------
There is a non-standard extension as this feature was requested by a user.
Under

  HKEY_LOCAL_MACHINESYSTEMCurrentControlSetControlWOW

create a new REG_DWORD value called TlsDirectErrorDefault
There you must use a bitmask which error messages you want to suppress
(OR the values together):

Hex Flag               An application has attempted to....
-------------------------------------------------------------------------
1        D_A_FLOPPY,   "directly access an incompatible diskette format"
2        D_A_HARDDISK, "directly access the hard disk"
4        D_A_DRIVER,   "load a 16-bit Dos device driver"
8        D_A_ILLBOP,   "perform an unknown internal 'BOP' opcode"
10       D_A_NOLIM,    "allocate Expanded Memory"
20       D_A_MOUSEDRVR "use a third party mouse driver"

i.e., if you want to suppress the first 2 errors, set it to 3.


I have a HASP/HARDLOCK dongle for my DOS application and want to get it
working with NTVDMx64
---------------------------------------------------------------------------
Use the HASPNT64 driver: https://github.com/leecher1337/haspnt64


Why doesn't QUAKE work?
---------------------------------------------------------------------------
See: http://www.delorie.com/djgpp/v2faq/faq18_6.html


Are there any documents that describe the inner workings of the NTVDM
subsystem?
---------------------------------------------------------------------------
Not much documentation available, but this slide may be interesting to you:
https://documents.pub/document/2013-syscan360-wang-yuntvdm.html


For other questions, I recommend looking at the Issue tracker:
https://github.com/leecher1337/ntvdmx64
Windows 10
Windows XP
Windows 7
Windows XP x64
Windows 7 x64
Android Studio
3ds Max 2012
Adobe
iTunes
Warcraft
GTA
Counter-Strike 1.6
Macromedia Dreamweaver
Epson Print
Download Master
K-lite Codec
Skype
World of Tanks
World of Warcraft
Delphi 7
Borland Turbo Pascal 7.0
Power Archiver
Xara Photo Graphic Designer
Miscellanea
| Категория: Pop Type Описание: Original exe file Размер файла: 434 Kb Дата создания: 01.07.2017 15:20 Версия файла: 5.2.3790.3959 (srv03_sp2_rtm.070216-1710) Внутреннее имя: NTVDM.EXE Оригинальное название файла: NTVDM.EXE Наименование: Systиme d’exploitation Microsoft® Windows® Версия: 5.2.3790.3959 Компания: Microsoft Corporation Проверка на вирусы: скачать ntvdm.exe скачать ntvdm.exe.7z Как установить ntvdm.exe: |
Скопируйте файл ntvdm.exe в директорию с программой которую Вы хотите восстановить с помощью файла ntvdm.exe.
Если это не сработает, попробуйте скопировать файл ntvdm.exe в системную директорию. Обычно, это:
Для Windows 95/98/Me — C:WindowsSystem
Для Windows NT/2000 — C:WINNTSystem32
Для Windows XP, Vista, 7, 10 — C:WindowsSystem32
Если Вы используете 64-bit версию Windows, скопируйте файл ntvdm.exe в C:WindowsSysWOW64
Сделайте запасные копии файлов которые собираетесь заменить
Замените существующие файлы
Перезагрузите компьютер.
Если проблема не решилась попробуйте следующее:
Нажмите пуск и выберите «Выполнить…».
Напечатайте CMD и нажмите Enter (или если у Вас Windows ME, напечатайте COMMAND)
Теперь напечатайте regsvr32 ntvdm.exe и нажмите Enter.
Если Вы не смогли найти папку windows:
Нажмите пуск и выберите «Выполнить…».
Напечатайте CMD и нажмите Enter (или если у Вас Windows ME, напечатайте COMMAND)
Теперь напечатайте %WINDIR% и нажмите Enter.
Другие версии данного файла:
| ntvdm.exe 4.00 398kb. |
22.09.1995 | |
| ntvdm.exe 9kb. |
23.04.2022 | |
| ntvdm64 (2).dll 6.1.7601.17651 (win7sp1_gdr.110715-1504) 16kb. |
16-bit Emulation on NT64 | 16.07.2011 |
| ntvdm64 (3).dll 6.1.7601.21772 (win7sp1_ldr.110715-1506) 16kb. |
16-bit Emulation on NT64 | 16.07.2011 |
| ntvdm64 (4).dll 6.1.7601.21772 (win7sp1_ldr.110715-1506) 14kb. |
16-bit Emulation on NT64 | 16.07.2011 |
| ntvdm64 (5).dll 6.1.7601.17651 (win7sp1_gdr.110715-1504) 14kb. |
16-bit Emulation on NT64 | 16.07.2011 |
| ntvdm64 (6).dll 6.1.7601.17651 (win7sp1_gdr.110715-1504) 14kb. |
16-bit Emulation on NT64 | 16.07.2011 |
| ntvdm64.dll 5.2.3790.1830 (srv03_sp1_rtm.050324-1447) 17kb. |
16-bit Emulation on NT64 | 24.03.2005 |
| ntvdm64.dll 6.1.7601.17651 (win7sp1_gdr.110715-1504) 16kb. |
16-bit Emulation on NT64 | 16.07.2011 |
| ntvdm64.dll 6.1.7600.16385 (win7_rtm.090713-1255) 16kb. |
16-bit Emulation on NT64 | 14.07.2009 |
| ntvdm64.dll 6.1.7600.16385 (win7_rtm.090713-1255) 14kb. |
16-bit Emulation on NT64 | 14.07.2009 |
| ntvdm64.dll 10.0.17134.1 (WinBuild.160101.0800) 19kb. |
16-bit Emulation on NT64 | 12.04.2018 |
| ntvdm64.dll 10.0.14393.0 (rs1_release.160715-1616) 16kb. |
16-bit Emulation on NT64 | 28.01.2022 |
| ntvdm64.dll 10.0.14393.0 (rs1_release.160715-1616) 18kb. |
16-bit Emulation on NT64 | 30.01.2023 |
| ntvdmd.dll 5.1.2600.5512 (xpsp.080413-2111) 15kb. |
14.04.2008 | |
| ntvdmd.dll 9kb. |
17.08.2022 |
ntvdm:
| wntvdm64.dll 5.2.3790.1830 (srv03_sp1_rtm.050324-1447) 13kb. |
16-bit Emulation on NT64 | 24.03.2005 |