В этой статье мы рассмотрим, как обновить версию Windows PowerShell до актуальной 5.1 и установить (обновить) PowerShell Core 7.1. В предыдущей статье мы рассказывали, что на данный момент есть две ветки PowerShell: старая версия Windows PowerShell (максимальная версия 5.1, которая более не развивается) и новая платформа PowerShell Core (сейчас доступна версия 7.1). Несмотря на то, что нумерация версий PowerShell продолжается с 5.1 (6.0, 6.1, 7.0 и т.д.), это две разные платформы. Соответственно мы рассмотрим отдельно как обновить Windows PowerShell и PowerShell Core.
В PowerShell Core 7.0 разработчики добавили максимальную совместимость с Windows PowerShell. Т.е. вы можете без проблем запускать свои старые скрипты, командлеты в PowerShell Core.
Содержание:
- Обновление Windows PowerShell до 5.1
- Установка/обновление PowerShell Core 7.1
- Установка PowerShell Core через Microsoft Store
- Обновление PowerShell Core с помощью GPO
- Обновление PowerShell на удаленных компьютерах
Обновление Windows PowerShell до 5.1
Попробуем обновить версию Windows PowerShell в Windows Server 2012 R2 до версии 5.1.
По-умолчанию Windows Server 2012 R2 (Windows 8.1) устанавливается с версией 4.0.
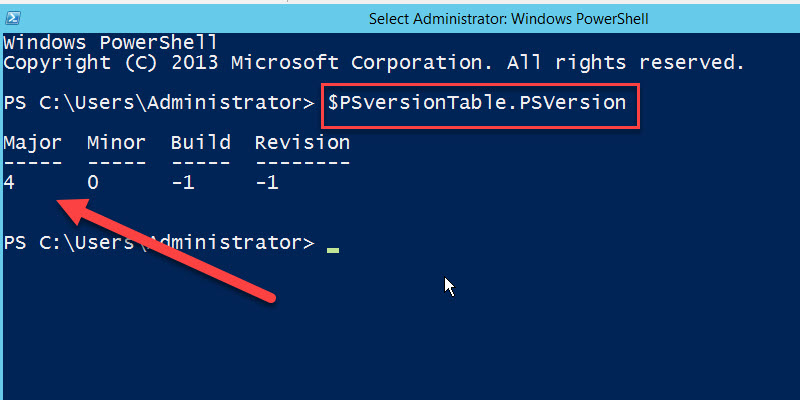
Сначала проверим текущую версию PowerShell (на скриншоте видно, что это PowerShell 4.0):
$PSVersionTable.PSVersion
Чтобы обновить вашу версию PowerShell до 5.1, нужно установить пакет Windows Management Framework 5.1, который в свою очередь требует наличия .NET Framework 4.5.2 (или более поздней версии). Убедитесь, что у вас установлена версий .NET 4.5.2 или выше командой:
(Get-ItemProperty ‘HKLM:SOFTWAREMicrosoftNET Framework SetupNDPv4Full’ -Name Release).Release
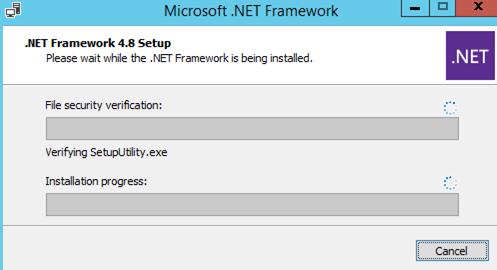
В моем случае код 378675 говорит о том, что установлена версия .NET 4.5.1. Поэтому мне нужно скачать и установить более новую .NET Framework 4.8 (ссылка на офлайн установщик https://go.microsoft.com/fwlink/?linkid=2088631 —
ndp48-x86-x64-allos-enu.exe
).
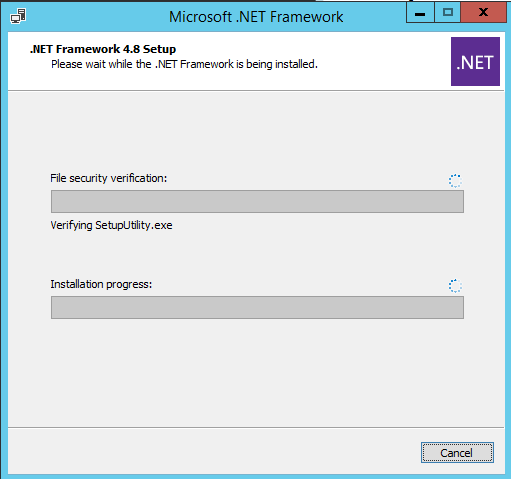
Установите .NET 4.8 (потребуется перезагрузка).
Если установить WMF 5.1, но не установить .NET 4.5.2 (или более новый), часть функций PowerShell не будет работать.
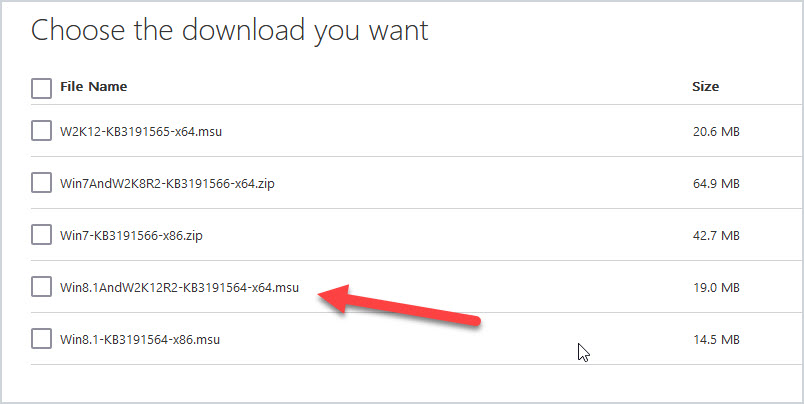
Скачайте WMF 5.1 для Windows Server 2012 R2 —
Win8.1AndW2K12R2-KB3191564-x64.msu
(https://go.microsoft.com/fwlink/?linkid=839516).
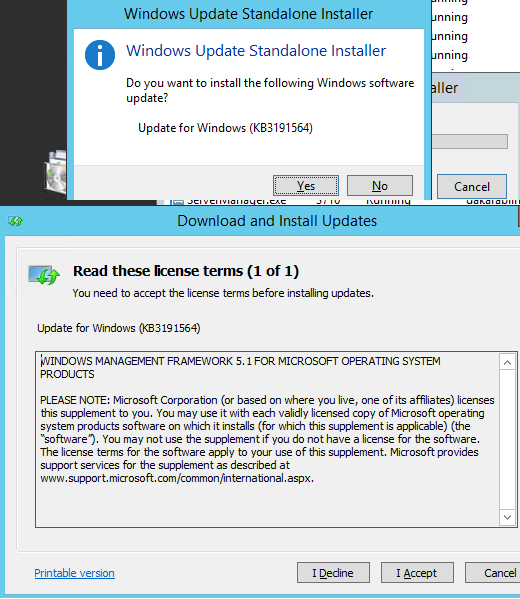
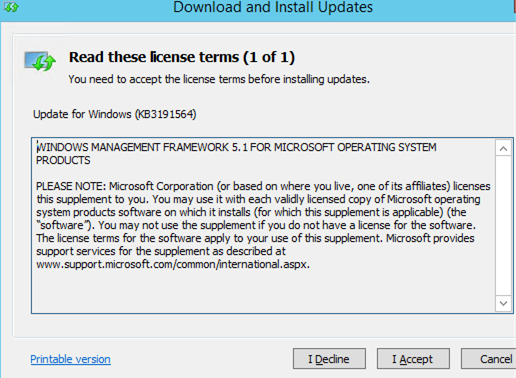
Установите MSU файл Windows Management Framework 5.1.
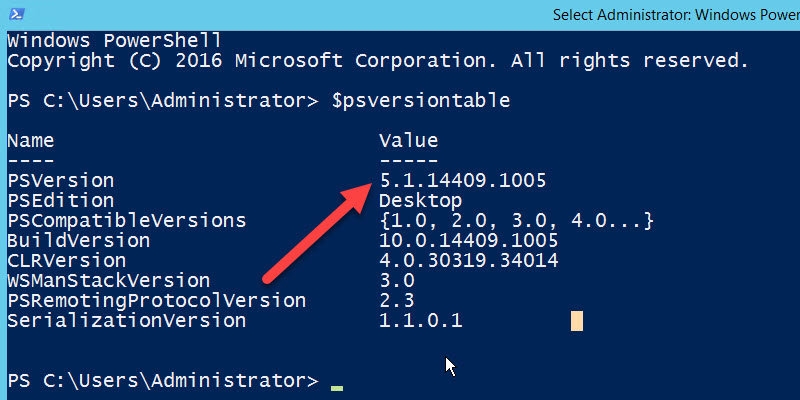
После перезагрузки сервера, запустите консоль PS и убедитесь, что версия была обновлена до PowerShell 5.1.
Если у вас остались снятые с поддержки Windows Server 2008 R2 и Windows 7, вы можете обновить в них версию PowerShell с 2.0 до 5.1 аналогичным способом. Сначала устанавливается .Net Framework 4.5.2 или выше, затем WMF 5.1 (ссылки загрузки будут другими, чем для Windows Server 2012 R2).
Установка/обновление PowerShell Core 7.1
Обратите внимание, что последняя версия Windows PowerShell, устанавливаемая в Windows 10 и Windows Server 2019 — PowerShell 5.1. Вместо нее Microsoft начала разрабатывать кроссплатформенную версию PowerShell Core. На данный момент доступны версии PowerShell Core 6.0, 6.1, 6.2, 7.0 и 7.1. По сути, PowerShell Core это новая платформа, которая устанавливается в системе вместе с Windows PowerShell. Т.е. нельзя обновить PowerShell 5.1 до PowerShell Core 7.1. PowerShell 7 устанавливается на компьютере отдельно от Windows PowerShell 5.1.
Если у вас уже установлен PowerShell Core 6.0, вы можете обновить версию PowerShell на своем компьютере до последней версии PowerShell Core 7.1 (либо можно установить PowerShell Core 7.1 рядом с Windows PowerShell 5.1). В этом примере мы попробуем обновить версию PowerShell Core в Windows 10 20H2. Есть два способа обновления:
- Можно вручную скачать msi установщик PowerShell Core на GitHub;
- Можно скачать и запустить установку (обновление) непосредственно из консоли PowerShell.
Последние релизы PowerShell Core можно установить на всех версиях Windows, начиная с Windows 7 SP1, Server 2008 R2 и выше.
Если вы хотите установить PowerShell Core с помощью MSI пакета, перейдите на старицу проекта https://github.com/PowerShell/PowerShell, найдите последний стабильный релиз (на момент написания статьи это v7.1.3 Release of PowerShell от 4 марта. Доступны также более новые v7.2.0-preview Release of PowerShell, но лучше пока не ставить их до выхода стабильной версии. Разверните список Assets и найдите пакет для вашей версии Windows (PowerShell-7.1.3-win-x64.msi или PowerShell-7.1.3-win-x86.msi).
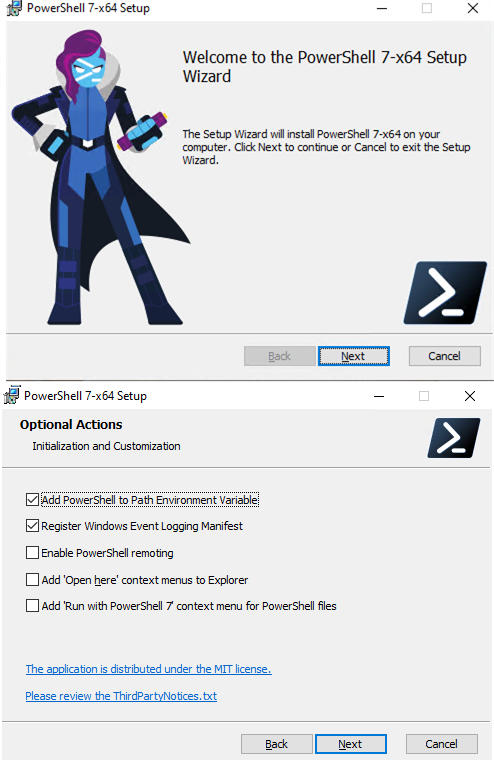
Скачайте msi файл и установите его.
Для установки PowerShell Core из MSI пакета средствами SCCM/MDT/скриптами в тихом режиме можно использовать команду с такими параметрами:
msiexec.exe /package PowerShell-7.1.3-win-x64.msi /quiet ADD_EXPLORER_CONTEXT_MENU_OPENPOWERSHELL=1 ENABLE_PSREMOTING=1 REGISTER_MANIFEST=1
Вы можете обновить PowerShell непосредственно из консоли.
Обновим (установим) последнюю версию PoSh Core с помощью команды:
iex "& { $(irm https://aka.ms/install-powershell.ps1) } -UseMSI"
Данная команда загружает установочный MSI файл PowerShell 7.1 с GitHub и запускает установку, затем запускается установка через MSI Installer.
Можно использовать дополнительные параметры установки:
- -Destination – каталог установки PowerShell Core
- -Preview – установка Preview версии
- -Quiet – тихая установка
- -AddToPath – добавить путь к каталогу установки PowerShell Core в переменные окружения
После окончания установки открывается окно PowerShell Core (pwsh.exe), проверьте версию PowerShell и убедитесь, что теперь это PoSh 7.1.3.
Если у вас установлен пакетный менеджер WinGet, вы можете установить или обновить версию PowerShell до актуальной командой:
winget install --id=Microsoft.PowerShell -e
Либо можно установить конкретную версию PowerShell Core:
winget install --id=Microsoft.PowerShell -v "7.1.2" -e
При использовании менеджера пакетов Chocolatey, используйте команды (для 5.1):
choco install powershell -y
choco upgrade powershell -y
Для обновления PowerShell 7.x:
choco upgrade pwsh -y
Обратите внимание на каталоги различных версий PowerShell:
- Windows PowerShell 5.1:
$env:WINDIRSystem32WindowsPowerShellv1.0 - PowerShell Core 6.x:
$env:ProgramFilesPowerShell6 - PowerShell 7.x:
$env:ProgramFilesPowerShell7
Если на компьютере был установлен PowerShell 6.x, то при установке PowerShell 7.1 каталог
$env:ProgramFilesPowerShell6
автоматически удаляется.
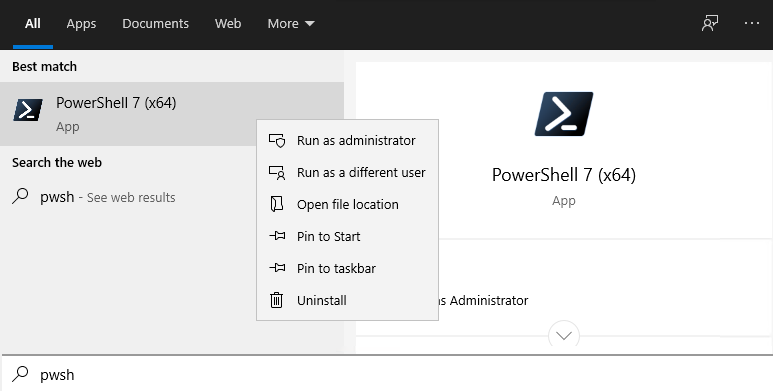
Обратите внимание, что имя исполняемого файла среды PowerShell изменился. Теперь это
c:Program FilesPowerShell7pwsh.exe
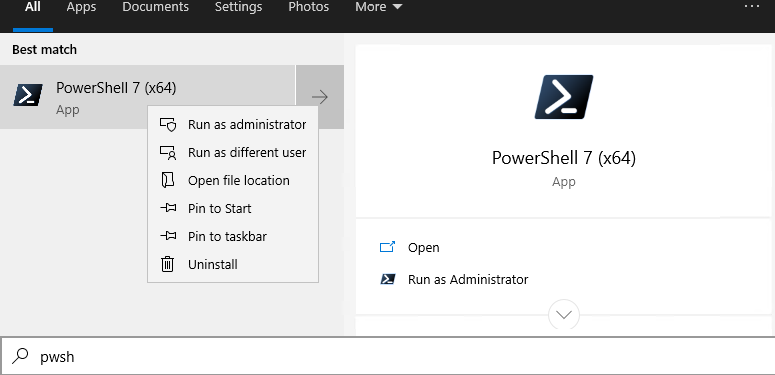
. У него собственная иконка в меню Start.
- Для запуска Windows PowerShell, основанного на .NET Framework используется команда
powershell.exe - Для запуска PowerShell Core, основанного на .NET Core, нужно использовать команду
pwsh.exe
Т.е. теперь на этом компьютере есть две версии: Windows PowerShell 5.1 и PowerShell Core 7.1.
Чтобы узнать версию PowerShell на удаленном компьютере можно проверять версию файла pwsh.exe:
(Get-Command 'C:Program FilesPowerShell7pwsh.exe').Version
Так можно проверить на удаленном компьютере:
Invoke-Command -Computername computer1 -Scriptblock {(Get-Command 'C:Program FilesPowerShell7pwsh.exe').Version}
Чтобы запустить предыдущую версию PowerShell, например 4, используйте команду:
C:WindowsSystem32WindowsPowerShellv1.0powershell.exe -Version 4
Установка PowerShell Core через Microsoft Store
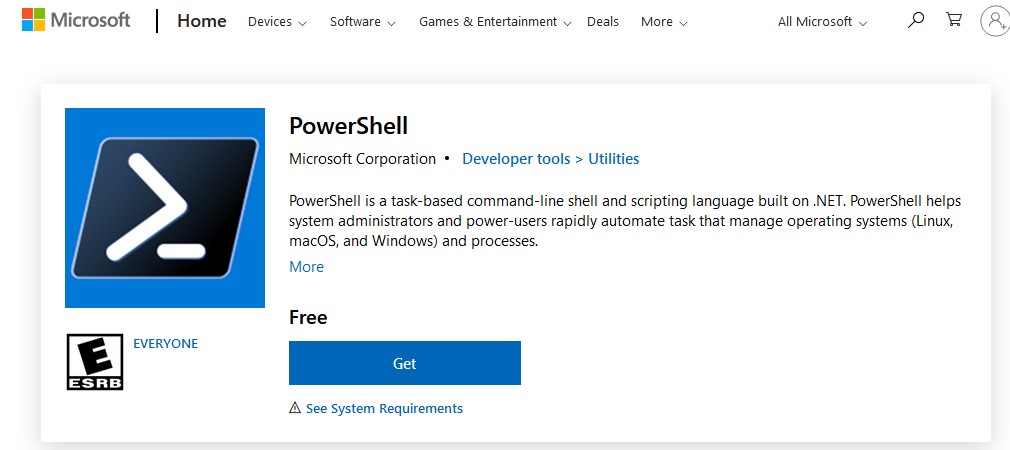
В Windows 10 вы можете установить или обновить PowerShell через магазин приложений Microsoft Store. Приложение PowerShell можно найти в магазине вручную или воспользуйтесь этой ссылкой. Преимущество такого способа установки – приложение Store будет автоматически контролировать установленную версию PowerShell и автоматически устанавливать обновления по мере появления.
Но есть и недостатки, связанные с тем, что такой PowerShell будет запускаться в песочнице.
Обновление PowerShell Core с помощью GPO
В домене Active Directory вы можете централизованно установить и обновить PowerShell Core с помощью групповой политики. Воспользуйтесь возможностями GPO по установке MSI пакетов.
- Скачайте установочный MSI файл PowerShell и скопируйте его в каталог SYSVOL на контроллере домена;
- Откройте консоль управления доменными GPO (
gpmc.msc
), создайте новую GPO и назначьте ее на OU с компьютерами и серверами; - Перейдите в раздел GPO Computer Configuration –> Software Settings, создайте новые пакет и укажите для него путь к установочному MSI файлу PowerShell в SYSVOL;
Для более тонкого нацеливания политики на клиентов можно использовать WMI фильтры GPO.
- Для обновления групповых политик установки ПО нужно перезагрузить компьютеры. Во время загрузки на всех компьютерах будет установлена новая версия PowerShell.
Обновление PowerShell на удаленных компьютерах
Для обновления PowerShell на удаленных компьютерах через командную строку можно воспользоваться одним из следующих способов.
Первый способ позволяет удаленно обновить PowerShell на компьютере с помощью MSI установщика в сетевом каталоге:
Invoke-Command -ComputerName dc01 -ScriptBlock {Start-Process msiexec.exe -ArgumentList '/package "\srv1sharePowerShell-7.1.3-win-x64.msi" /quiet ADD_EXPLORER_CONTEXT_MENU_OPENPOWERSHELL=1 ENABLE_PSREMOTING=1 REGISTER_MANIFEST=1' -Wait}
Следующий скрипт позволит выбрать все активные компьютеры с Windows 10 из домена Active Directory и запустить на каждом из них загрузку и установку PowerShell Core:
$creds = $(Get-Credential)
$computers = Get-ADComputer -Filter 'operatingsystem -like "*Windows 10*" -and enabled -eq "true"'
ForEach ($computer in $computers) {
Invoke-Command -ComputerName $computer -Credential $creds {iex "& { $(irm https://aka.ms/install-powershell.ps1) } -UseMSI -Quiet"}
}
Будьте внимательными при использовании команд PowerShell Remoting при подключении к удаленным компьютерам (Enter-PSSession, Invoke-Command). Если вам нужно подключиться к точке управления PowerShell 7.1 нужно использовать команду:
Enter-PSSession -ComputerName dc01 -ConfigurationName "powershell.7.1.3"
Иначе вы подключитесь к точке PowerShell Remoting 5.1.
Обновление PowerShell в Linux дистрибутивах чаще проще всего выполняется через нативный менеджер пакетов.
Skip to content
По умолчанию в только что установленной ОС из дистрибутива SW_DVD9_Windows_Svr_Std_and_DataCtr_2012_R2_64Bit_English_-4_MLF_X19-82891.iso Windows Server 2012 R2 Std версия PowerShell имеет версию 4.0, а чтобы поставить версию 5.1 нужно установить пакет .NET Framework 4.7.1
Действия ниже выполняю при авторизации в системе с правами Администратора (Login: ekzorchik):
Win + X → Command prompt (Admin)
C:Windowssystem32>powershell
PS C:Windowssystem32> get-host | findstr /I “Version”
Version: 4.0
устанавливаю NDP471-KB4033342-x86-x64-AllOS-ENU.exe, не перезагружаюсь после, а выбираю Restart Later
а после
windowsblue-kb3191564-x64_91d95a0ca035587d4c1babe491f51e06a1529843.msu
и вот только после нужно отправить систему в перезагрузку
нажимаю на Restart Now от инсталлятора пакета обновления KB3191564
проверяю
Win + X → Command prompt (Admin)
C:Windowssystem32>powershell
PS C:Windowssystem32> get-host | findstr /I “Version”
Version: 5.1.14409.1005
Отлично, что мне и требовалось. Ну а далее, уже перехожу к настройке системы на дальнейшее использования.
На этом моя заметка для себя завершена и уже не нужно искать по заметкам на компьютере, что и как нужно сделать дабы обновить PowerShell на Windows Server 2012 R2 Std, тут просто открываю свой блок и знаю от и до, что нужно сделать. С уважением, автор блога Олло Александр aka ekzorchik.
In this article, we will show how to update your Windows PowerShell version to the latest 5.1 and install (upgrade to) PowerShell Core 7.1. In the previous article, we told that there are currently two versions of PowerShell: a classic Windows PowerShell (the latest version is 5.1 and it is no longer developed) and a new PowerShell Core platform (version 7.1 is available now). Despite that the PowerShell version numbering goes on from 5.1 (6.0, 6.1, 7.0, 7.1, etc.), these are two different platforms. So, we’ll show how to update both Windows PowerShell and PowerShell Core.
Contents:
- Upgrading to Windows PowerShell 5.1
- How to Install or Update to PowerShell Core 7?
- Installing PowerShell Core via Microsoft Store
- Deploying PowerShell Core with Group Policy
- Updating PowerShell Remotely
Upgrading to Windows PowerShell 5.1
PowerShell 4.0 is installed by default on Windows Server 2012 R2 (Windows 8.1). Let’s try to update the Windows PowerShell version to 5.1 on Windows Server 2012 R2.
First of all, check the current PowerShell version (the screenshot shows PowerShell 4.0 is installed):
$PSVersionTable.PSVersion

To upgrade your PowerShell version to 5.1, install the Windows Management Framework 5.1, which requires the .NET Framework 4.5.2 (or newer). Make sure that .NET 4.5.2 or higher is installed using this command:
(Get-ItemProperty ‘HKLM:SOFTWAREMicrosoftNET Framework SetupNDPv4Full’ -Name Release).Release
In my case, the release version 378675 means that .NET Framework version 4.5.1 is installed. So, I have to download and install the latest .NET Framework 4.8 (here is the link to the offline installer: https://go.microsoft.com/fwlink/?linkid=2088631 — ndp48-x86-x64-allos-enu.exe).
Install the .NET 4.8 (you will have to reboot your computer):
If you install WMF 5.1 without .NET 4.5.2, some PowerShell features will not be available.
Download WMF 5.1 for Windows Server 2012 R2 — Win8.1AndW2K12R2-KB3191564-x64.msu (https://go.microsoft.com/fwlink/?linkid=839516).
Install the Windows Management Framework 5.1 MSU file.
After the server restart, open the PS console and make sure that the PowerShell version has been updated to 5.1.
If you have unsupported Windows 7 or Windows Server 2008 R2, you can upgrade the PowerShell version from 2.0 to 5.1 in the same way. First, install .Net Framework 4.5.2 (or newer), then WMF 5.1 (the download links will be different from those for Windows Server 2012 R2).
How to Install or Update to PowerShell Core 7?
Note that the latest Windows PowerShell version installed in Windows 10 and Windows Server 2019 is PowerShell 5.1. Microsoft started to develop a cross-platform PowerShell Core version instead. Currently, PowerShell Core 6.0, 6.1, 6.2, 7.0 and 7.1 are available. PowerShell Core is essentially a new platform that is installed on the computer along with Windows PowerShell. It means that you cannot upgrade PowerShell 5.1 to PowerShell Core 7.1. PowerShell 7 is installed on a computer separately from Windows PowerShell 5.1.
In PowerShell 7.1, the developers added maximum compatibility with Windows PowerShell. So, you can easily run your old PS1 scripts and cmdlets in PowerShell Core.
If you have PowerShell Core 6.0 installed, you can update the PowerShell version on your computer to the latest PowerShell 7.1 Core (or you can install PowerShell Core 7.1 together with Windows PowerShell 5.1). In this example, we will try to update PowerShell Core in Windows 10 20H2. There are two ways to upgrade:
- You can download the PowerShell Core MSI installer manually from GitHub;
- You can download and install (update) it directly from the PowerShell console.
The latest releases of PowerShell Core can be installed on all versions of Windows starting with Windows 7 SP1, Server 2008 R2, and newer.
If you want to install PowerShell Core using the MSI package, go to the project page https://github.com/PowerShell/PowerShell, find the latest stable release. At the time of this writing, this is the March 4, 2021 release of PowerShell v7.1.3. The higher preview Release of PowerShell v7.2.0 is also available, but you’d better wait for a more stable version. Expand the Assets list and find a package for your Windows version (PowerShell-7.1.3-win-x64.msi or PowerShell-7.1.3-win-x86.msi).
Download the MSI file and install it.
To install PowerShell Core from an MSI package using SCCM/MDT/scripts in quiet mode, you can use a command with the following parameters:
msiexec.exe /package PowerShell-7.1.0-win-x86.msi /quiet ADD_EXPLORER_CONTEXT_MENU_OPENPOWERSHELL=1 ENABLE_PSREMOTING=1 REGISTER_MANIFEST=1
You can update the PowerShell right from the PS cli.
Let’s update (install) the latest PowerShell Core version using the command:
iex "& { $(irm https://aka.ms/install-powershell.ps1) } -UseMSI"
This command downloads the PowerShell 7.1 MSI distribution file from GitHub and then starts the installation via the MSI installer.
You can also use other installation parameters:
- -Destination – change the default PowerShell Core installation folder
- -Preview – install the latest Preview PowerShell version
- -Quiet – a quiet installation mode
- -AddToPath – adds a path to the PowerShell Core installation directory to the environment variables
After the installation is finished, the PowerShell Core (pwsh.exe) window appears. Check the PowerShell version here to make sure it is PoSh 7.1.3.
If you have the WinGet package manager installed, you can install or update your PowerShell version to the latest command:
winget install --id=Microsoft.PowerShell -e
Or, you can install a specific version of PowerShell Core:
winget install --id=Microsoft.PowerShell -v "7.1.2" -e
If you have Chocolatey package manager installed, use the commands:
choco install powershell -y

choco upgrade powershell -y
or for PowerShell 7.x:
choco install pwsh -y

choco install pwsh -y
Pay attention to the directories of different PowerShell versions:
- Windows PowerShell 5.1:
$env:WINDIRSystem32WindowsPowerShellv1.0 - PowerShell Core 6.x:
$env:ProgramFilesPowerShell6 - PowerShell Core 7.x:
$env:ProgramFilesPowerShell7
If PowerShell 6.x was installed on your computer, the $env:ProgramFilesPowerShell6 directory is automatically removed when you install PowerShell 7.1.
Note that the name of the PowerShell executable has changed. In PowerShell Core it is c:Program FilesPowerShell7pwsh.exe. It has its own icon in the Start menu.
- To run .NET Framework-based Windows PowerShell, the
powershell.execommand is used - To run .NET Core-based PowerShell Core, use the
pwsh.exe
This means that you have both Windows PowerShell 5.1 and PowerShell Core 7.1 installed on your computer.
In order to find out the version and build of PowerShell installed on your device, you can check the version of the pwsh.exe file:
(Get-Command 'C:Program FilesPowerShell7pwsh.exe').Version
This is how you can check the version of a file on a remote computer:
Invoke-Command -Computername computer1 -Scriptblock {(Get-Command 'C:Program FilesPowerShell7pwsh.exe').Version}
Windows PowerShell provides a special backward compatibility mode that allows you to run an older version of PowerShell even if you have newer versions installed. You can start PowerShell of a specific version (for example 4.0) with the following command:
C:WindowsSystem32WindowsPowerShellv1.0powershell.exe -Version 4
Installing PowerShell Core via Microsoft Store
On Windows 10, you can install or update PowerShell via the Microsoft Store. You can manually find the PowerShell app in the Store or use this link. The advantage of this installation method is that the Store app will track the installed version of PowerShell and automatically install app updates as they become available.
But there are also disadvantages to the fact that such a PowerShell instance will run in a sandbox.
Deploying PowerShell Core with Group Policy
In the Active Directory domain, you can centrally deploy and update PowerShell Core using Group Policy. Use the GPO’s features to install MSI packages.
- Download the PowerShell MSI installation file and copy it to the SYSVOL directory on the domain controller;
- Open the Domain Group Policy Management Console (
gpmc.msc), create a new GPO and link it to the OU with computers and servers; - Go to the GPO section Computer Configuration -> Software Settings, create a new package, and specify the path to the PowerShell MSI installation file in the SYSVOL folder in the domain (use the UNC path);
You can use the GPO WMI filters to more accurately target your policy to domain devices.
- To update the software installation Group Policy settings, you need to restart the computers. The new version of PowerShell will be installed on all computers at startup.
Updating PowerShell Remotely
You can use one of the following methods to update PowerShell on remote computers via the command prompt.
The first method allows you to remotely update PowerShell on the computer using the MSI installer in the shared network folder:
Invoke-Command -ComputerName mun-srv01 -ScriptBlock {Start-Process msiexec.exe -ArgumentList '/package "\mun-fs01installPowerShell-7.1.3-win-x64.msi" /quiet ADD_EXPLORER_CONTEXT_MENU_OPENPOWERSHELL=1 ENABLE_PSREMOTING=1 REGISTER_MANIFEST=1' -Wait}
The following script will select all active Windows 10 computers from the Active Directory domain and start downloading and installing PowerShell Core on each of them:
$ADComputers = Get-ADComputer -Filter 'operatingsystem -like "*Windows 10*" -and enabled -eq "true"'

ForEach ($computer in $ADcomputers) {

Invoke-Command -ComputerName $computer {iex "& { $(irm https://aka.ms/install-powershell.ps1) } -UseMSI -Quiet"}

}
Be careful when using the PowerShell Remoting commands when connecting to remote computers (with the Enter-PSSession and Invoke-Command cmdlets). If you need to connect to a PowerShell 7.1 endpoint, you need to use the command:
Enter-PSSession -ComputerName dc01 -ConfigurationName "powershell.7.1.3"
Otherwise, you will connect to the PowerShell Remoting 5.1 endpoint.
Comments
-
1 Nov 2013 9:37 PM
Thanks Richard.
-
6 May 2014 7:20 AM
Biswajit a small note: PowerShell 4.0 will not work on Windows 7 W E S with .NET 4.5.1 — It requires .NET 4.5 — Please refer this post
social.technet.microsoft.com/…/how-to-hide-user-name-in-sharepoint-blog-site
-
15 May 2014 9:49 AM
Might be, I have installed Powershell v 4 in win7 Professional SP1. Here is the artifact.
PS C:> $psversiontable
Name Value
—- ——
PSVersion 4.0
WSManStackVersion 3.0
SerializationVersion 1.1.0.1
CLRVersion 4.0.30319.18408
BuildVersion 6.3.9600.16406
PSCompatibleVersions {1.0, 2.0, 3.0, 4.0}
PSRemotingProtocolVersion 2.2
PS C:> GWMI win32_OperatingSystem -cn . | Select-Object -ExpandProperty Version
6.1.7601
PS C:> GWMI win32_operatingsystem -cn . | select-object -ExpandProperty Caption
Microsoft Windows 7 Professional
PS C:>
-
15 Aug 2014 7:25 AM
Thanks..
-
5 Sep 2014 12:31 AM
We no need to install the ISE for insalling the version WMF 4 . If we are installed WMF 4; ISE will be installed in background. Manual installation of ISE does not required.
-
6 Sep 2014 10:18 AM
thanks for sharing
In this tutorial, you will learn how to update PowerShell on Windows to the latest version. I’ll also show you how to upgrade PowerShell version 5.1 to PowerShell Core 7.
If you are new to PowerShell it can be confusing to know that there are two different versions. I’ll explain the difference and which version you should be using.
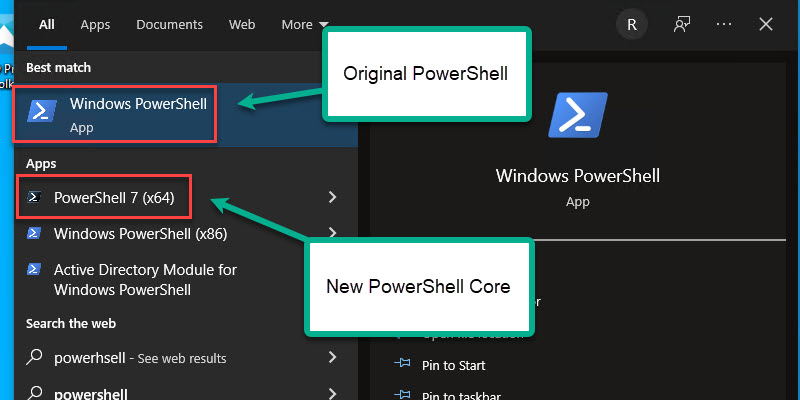
I reference the two PowerShell versions as the original PowerShell (old) and PowerShell Core (new).
Contents:
- PowerShell 5.1 vs PowerShell Core 7.1
- Update PowerShell to Version 5.1
- How to Upgrade to PowerShell Core 7
- Update PowerShell on Multiple Computers (GPO)
- Frequently Asked Questions
PowerShell 5.1 vs PowerShell Core 7
Microsoft has created a mess in my opinion.
Microsoft released PowerShell for Windows in 2006 and it has become very popular with the Windows community. In 2016 Microsoft released a new PowerShell version that is open source and cross-platform, this version is called “PowerShell Core”. PowerShell was originally created as a scripting language for Microsoft systems. Then Microsoft makes it cross-platform because Linux doesn’t have a scripting language? Anyways, that is beyond the scope of this article.
Here are the key differences:
- The original PowerShell is no longer being developed. Its latest version is PowerShell 5.1.
- PowerShell 5.1 is the default version installed with Windows 10 1607 and up, Windows 11, Server 2016 and later versions.
- The original Powershell can only be used with Windows operating systems.
- PowerShell Core is open source and can be installed on various operating systems (Linux, osx, etc.)
- PowerShell Core is installed separately from PowerShell 5.1 (side by side)
- PowerShell Core uses .Net core runtime environment
- You cannot use PowerShell ISE with PowerShell Core (insert sad emoji)
- Visual Studio Code is recommended for development with PowerShell Core.
Here are the steps for updating to the latest original PowerShell version 5.1. In this example, I have a 2012 Windows Server that comes with PowerShell version 4.0.
You can quickly check your PowerShell version with the command below:
$PSVersionTable.PSVersionIn the screenshot above you can see my server is running PowerShell version 4.
Here are the steps to upgrade to PowerShell 5.1
Step 1: Download Windows Management Framework 5.1
Click here to download WMF 5.1 from Microsoft.
Note: WMF 5.1 requires .NET Framework 4.5.2 (or above). You can install WMF 5.1 on server 2012 without .NET 4.5.2 but key PowerShell features will fail until you upgrade.
On the download page pick the install file for your operating system.
Step 2: Install and Reboot
Next, install the WMF 5.1 package. This will require a reboot.
All done. Now open PowerShell and check the version again.
$PSVersionTableWindows 10 (1607 and up) and Windows 11 come with PowerShell 5.1 by default so no need to upgrade. Windows Server 2016 and later also come with PowerShell 5.1.
How to Upgrade to PowerShell Core 7
PowerShell Core is a different platform than the original Windows PowerShell. This means you cannot upgrade the original PowerShell to PowerShell Core 7. PowerShell Core will install separately from the original PowerShell and runs side by side.
In this example, I will install the latest version of PowerShell 7 on a Windows 10 computer. This will install alongside the original PowerShell 5.1 that is already installed with Windows 10.
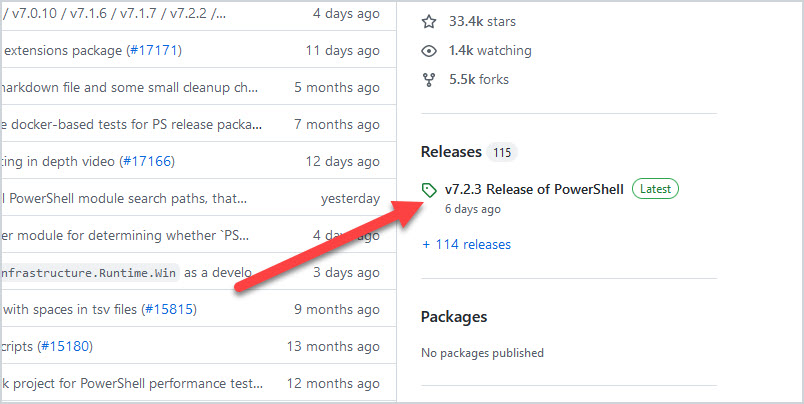
On the download page look at the right-hand side and you will see a releases section. Click on the latest release version.
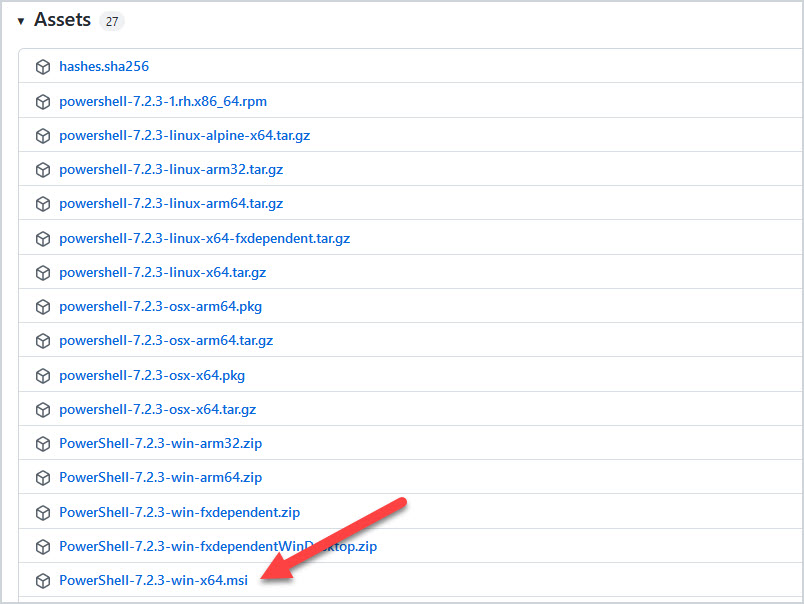
Then scroll down to Assets and pick the file that matches your OS.
I’m downloading the win-x64 installer. As you can see there are installer files for other operating systems such as Linux.
Step 2: Install PowerShell Core
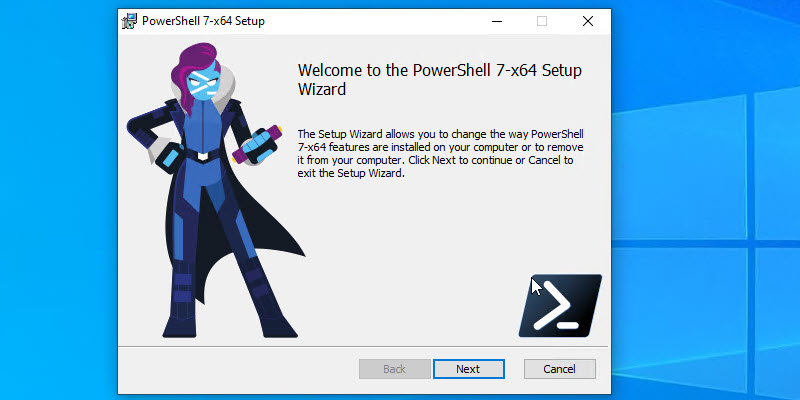
Next, run the installer file. It will walk you through an install wizard.
When complete you will have PowerShell Core and the original PowerShell 5.1 installed.
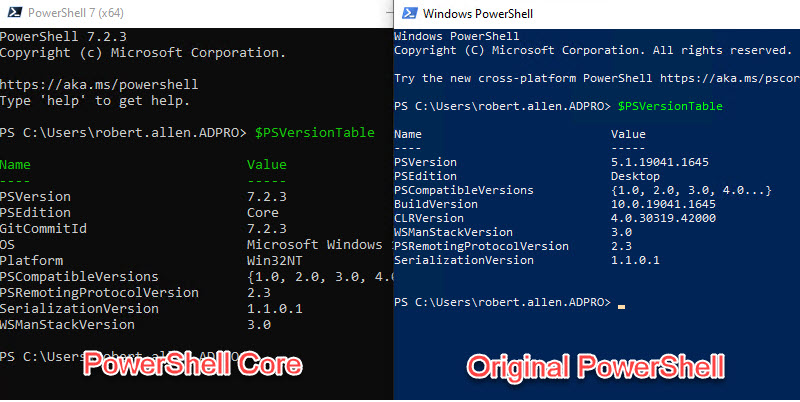
To check which version you have installed you will need to open them separately and run the $PSVersionTable command.
Above you can see the PowerShell Core version on the left and the original on the right.
A faster option for installing PowerShell Core is to use the Winget command.
First, search for the latest PowerShell version with the command below.
winget search Microsoft.PowerShellNext, Install PowerShell by using the ID from the command output.
winget install --id Microsoft.Powershell --source wingetUpdate PowerShell Core 6.x to PowerShell 7
If you have PowerShell 6 installed, you can directly update to the latest version of PowerShell 7.
Kind of a mess hu?
Well if you have used Microsoft for very long, you know they change stuff up all the time. It can be frustrating, but there is not much you can do about it.
Update PowerShell on Multiple Computers (GPO)
Since Microsoft provides PowerShell Core as an MSI file you can use group policy to deploy it to multiple computers.
I wrote a guide on how to deploy software using group policy that includes step by step instructions and examples. It’s very easy here is a quick summary of the article.
- Download MSI install file
- Create a network share that is available to users. Place the MSI install file here
- Create and link a GPO to target devices
- Wait for GPO update on remote computers.
If you use a 3rd party product to push out updates and software packages then I’d recommend using that over group policy.
Frequently Asked Questions
Should I use Powershell 5.1 or PowerShell Core 7?
PowerShell 5.1 is still installed by default on Windows client and server operating systems. Microsoft has no plans to remove 5.1, it will be around for a long time.
Unless PowerShell 7 introduces a needed feature or fix then you should be fine sticking with 5.1. It does include several performance improvements so that might be a reason alone to upgrade.
If you want to move to PowerShell 7 then make sure you test…..test and test. Who knows what it might break, it might not be compatible with a module provided by a vendor or one you created so testing is critical. Microsoft has a module compatibility list of modules known to support PowerShell 7.
I don’t recommend upgrading every machine to 7 just to be on the latest version. I would only upgrade when needed. For personal use however, I see no problem with upgrading to PowerShell 7.
Why upgrade to PowerShell Core 7?
PowerShell 7 does include many features that are long overdue.
- Pipeline can access multiple scripts at once – This will speed up performance
- Built in SSH remoting – Allows you to connect to Linux based systems
- Supports docker containers
- Cross platform
- Long term support
- Secure Credential support – Securely use credentials from local or remove credential store
- Centralized logging – This was a mess prior to PowerShell core
- Can be updated via Windows update. – Nice but can also be dangerous
Does Windows 11 have PowerShell Core?
Yes, but the original PowerShell 5.1 is installed by default. You can use the steps in this guide to install PowerShell core on Windows 11.
There you have it. That is how you update PowerShell to the latest version.
Do you use PowerShell 7 or still use 5.1? Let me know in the comments below.
You have to write your own script to do this. The is nothing pre-written that will do this for you with no effort from you. Downloading and installing files from the web is a very common practice. There are lots of online instructions and videos on how to do this.
Translation:
- You have to go to the URL Alexandr points you to.
- Click download to go to the next page to get to the direct URL and
save that link. - Then use the PowerShell web cmdlets, to download that file
- Then use the cmdlets to start an install or silent install.
There many examples on the web on the topic of how to download files from the web. Even pre-built samples that you can review and tweak for your effort.
See the MS PowerShell Gallery as your starting point.
- https://www.powershellgallery.com
Or look at the PowerShell built-in and or online help for examples.
# Get parameters, examples, full and Online help for a cmdlet or function

(Get-Command -Name Invoke-WebRequest).Parameters
Get-help -Name Invoke-WebRequest -Examples
Get-help -Name Invoke-WebRequest -Full
Get-help -Name Invoke-WebRequest -Online

(Get-Command -Name Invoke-Command).Parameters
Get-help -Name Invoke-Command -Examples
Get-help -Name Invoke-Command -Full
Get-help -Name Invoke-Command -Online

(Get-Command -Name Start-Process).Parameters
Get-help -Name Start-Process -Examples
Get-help -Name Start-Process -Full
Get-help -Name Start-Process -Online
Update
The OP specifically asked for …
My present need is to update from PS 4 to PS 5 on a Windows server 2012R2.
…, not PowerShell Core.
Though changing to another accepted answer is fine, and I am not here just to collect points, the answer that ‘Ariel D’ is not valid for Windows PowerShell updating.
That command, as stated in the reference article he points to is for PowerShell Core (PSv6 and beyond). That command will not update PSv4 to PSv5. It will directly install/Update PowerShell Core to the latest version.
Windows PowerShell requires full .Net, PSCore only requires .Net core. That command will install PowerShell Core that latest version, and that does not upgrade or replace Windows PowerShell.
Also to run PowerShell core its executable is pwsh.exe, not powershell.exe. This install will not change your Windows PowerShell shortcuts, menu options, et all to PowerShell Core. It will create a new icon/shortcut for it, leaving all the default Windows PowerShell icons/shortcuts/settings, et all.
To make pwsh be your default, there are several Windows Menu and registry hacks you will have to make.
Windows PowerShell and PSCore are two separate environments, designed to run side-by-side and PSCore does not yet have full compatibility with Windows PowerShell.
Lastly, depending on what you were doing in your Windows PowerShell script 5x and below, that may not work in PowerShell Core at all, due to the backward compatibility. So, you will need to refactor/rewrite them.
For Example on Windows with both WinPS and PSCore installed, Get-WmiObject will still come up as a cmdlet, but in PowerShell Core, that will fail, since PowerShell Core does not support those cmdlets.
Example:
$PSVersionTable.PSVersion

Major  Minor  Patch  PreReleaseLabel BuildLabel
-----  -----  -----  --------------- ----------
7      0      2

 Get-Command -Name '*WMI*' | Format-Table -AutoSize

CommandType Name                    Version      Source
----------- ----                    -------      ------
Function    Get-WmiClassKeyProperty 1.3.6        PowerShellCookbook
Function    Search-WmiNamespace     1.3.6        PowerShellCookbook
Cmdlet      Get-WmiObject           3.1.0.0      Microsoft.PowerShell.Management
Cmdlet      Invoke-WmiMethod        3.1.0.0      Microsoft.PowerShell.Management
Cmdlet      Register-WmiEvent       3.1.0.0      Microsoft.PowerShell.Management
Cmdlet      Remove-WmiObject        3.1.0.0      Microsoft.PowerShell.Management
Cmdlet      Set-WmiInstance         3.1.0.0      Microsoft.PowerShell.Management
Application nvwmi64.exe             0.0.0.0      C:Windowssystem32nvwmi64.exe
Application WMIADAP.exe             10.0.18362.1 C:WindowsSystem32WbemWMIADAP.exe
Application WmiApSrv.exe            10.0.18362.1 C:WindowsSystem32WbemWmiApSrv.exe
Application WMIC.exe                10.0.18362.1 C:WindowsSystem32WbemWMIC.exe
Application WmiMgmt.msc             0.0.0.0      C:Windowssystem32WmiMgmt.msc
Application WmiPrvSE.exe            10.0.18362.1 C:WindowsSystem32WbemWmiPrvSE.exe

 Get-WmiObject -class Win32_OperatingSystem | Select-Object -Property Caption
Get-WmiObject: The term 'Get-WmiObject' is not recognized as the name of a cmdlet, function, script file, or operable program.
Check the spelling of the name, or if a path was included, verify that the path is correct and try again.
 Get-CimInstance -ClassName Win32_OperatingSystem | Select-Object -Property Caption

Caption
-------
Microsoft Windows 10 Pro
Also, some of the aliases you are used to in Windows PowerShell also don’t exist in PowerShell Core.
For Example:
Windows PowerShell

 $PSVersionTable.PSVersion

Major  Minor  Build  Revision
-----  -----  -----  --------
5      1      18362  752


 Get-Alias -Definition Invoke-WebRequest

CommandType     Name                                               Version    Source
-----------     ----                                               -------    ------
Alias           curl -> Invoke-WebRequest
Alias           iwr -> Invoke-WebRequest
Alias           wget -> Invoke-WebRequest


 Get-Alias -Name curl

CommandType     Name                                               Version    Source
-----------     ----                                               -------    ------
Alias           curl -> Invoke-WebRequest
PowerShell Core
$PSVersionTable.PSVersion

Major  Minor  Patch  PreReleaseLabel BuildLabel
-----  -----  -----  --------------- ----------
7      0      2

 Get-Alias -Definition Invoke-WebRequest

CommandType     Name                                               Version    Source
-----------     ----                                               -------    ------
Alias           iwr -> Invoke-WebRequest

 Get-Alias -Name curl
Get-Alias: This command cannot find a matching alias because an alias with the name 'curl' does not exist.
 Get-Command -Name 'curl'

CommandType     Name                                               Version    Source
-----------     ----                                               -------    ------
Application     curl.exe                                           7.55.1.0   C:Windowssystem32curl.exe
Обновлено 14.03.2021
Добрый день! Уважаемые читатели и гости IT блога Pyatilistnik.org. В прошлый раз мы с вами научились определять версию PowerShell, которая установлена в вашей операционной системе. У вас она могла быть устаревшей, и я вам обещал, это исправить. В сегодняшней заметке, я вам покажу быстрый процесс, как обновить PowerShell версию в любой из операционных систем ,семейства Windows. Данные методы займут у вас не более нескольких минут. Как сказал Гагарин, поехали.
Что дает обновление версии PowerShell ?
Компания Microsoft вкладывает огромные силы для развития и поддержки своего продукта по управлению всем, что только можно в мире Windows. Поэтому, чтобы иметь возможность делать работу по автоматизации быстрее, лучше и профессиональнее, необходимо всегда следить за последними версиями командлетов и их ключами, так как от этого зависит их функционал. Каждый новый релиз PowerShell, это по сути как переход с одной операционной системы на другую, более продвинутую и лучшую. С каждой новой версией появляются десятки, а то и сотни новых командлетов для различных сценариев.
Алгоритм обновления версии PowerShell
Хочу отметить, что алгоритм обновления будет одинаков для всех версий Windows начиная с 7 SP1, если у вас ниже, то установите сервисный пакет Service Pack 1 на семерку и двигайтесь дальше.
- Определяете свою версию PowerShell
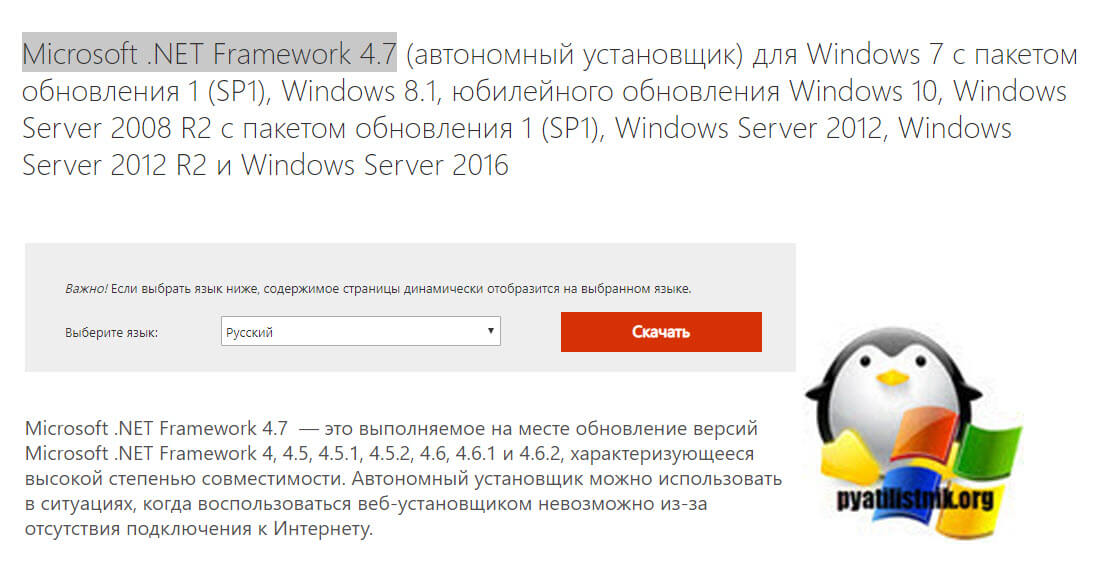
- Проверяете наличие у вас пакета Microsoft .NET Framework 4.7, если нет, то устанавливаете его
- Скачиваете пакет PowerShell 5.1
- Устанавливаете пакет PowerShell 5.1
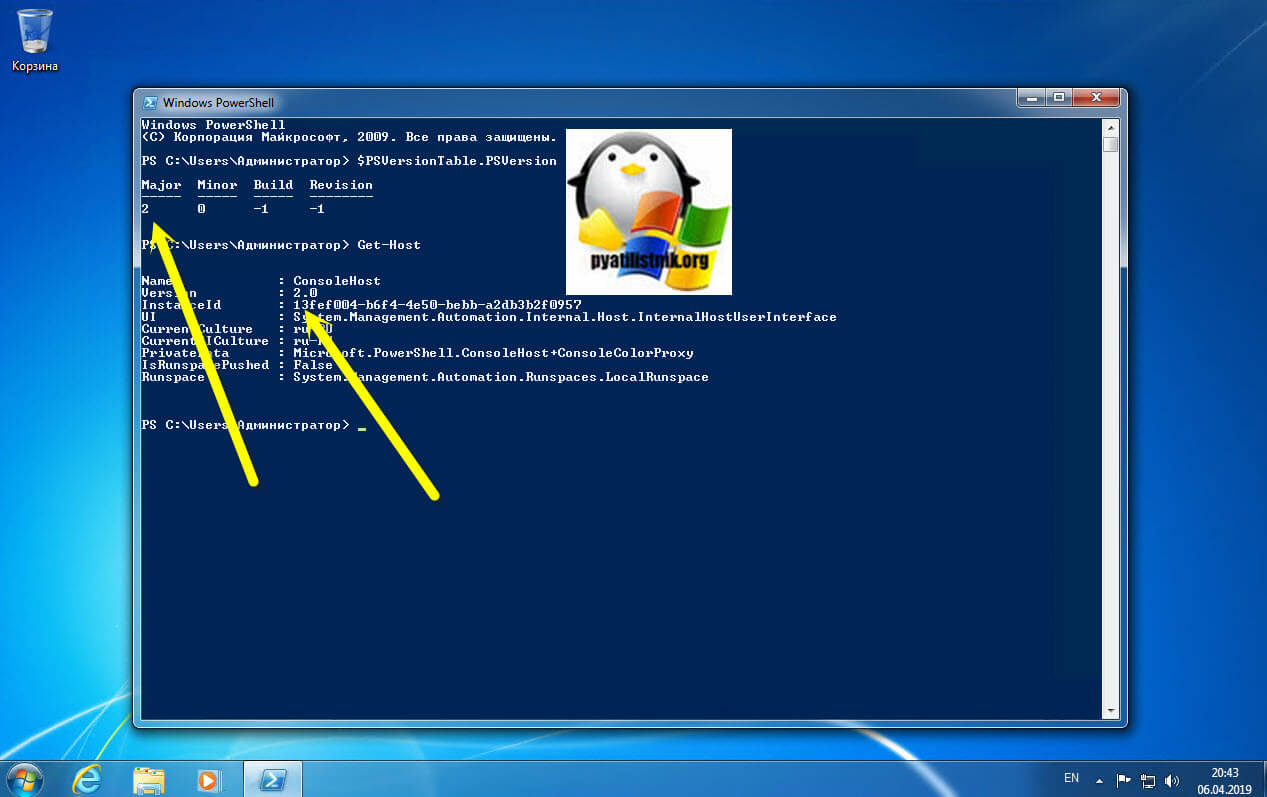
В моем примере я буду обновлять PowerShell в Windows 7 SP1. Моя текущая версия 2.0.
Далее я вам рассказывал, как проверить версию Microsoft .NET Framework 4.7. Если она у вас не установлена, то сделать, это можно по ссылке:
https://www.microsoft.com/ru-RU/download/details.aspx?id=55167
Данный пакет подойдет:
- Windows 7 с пакетом обновления 1 (SP1) (x86 и x64)
- Windows 8.1 (x86 и x64)
- Юбилейное обновление Windows 10 (x86 и x64)
- Windows Server 2008 R2 с пакетом обновления 1 (SP1) (x64)
- Windows Server 2012 (x64)
- Windows Server 2012 R2 (x64)
- Windows Server 2016 (x64)
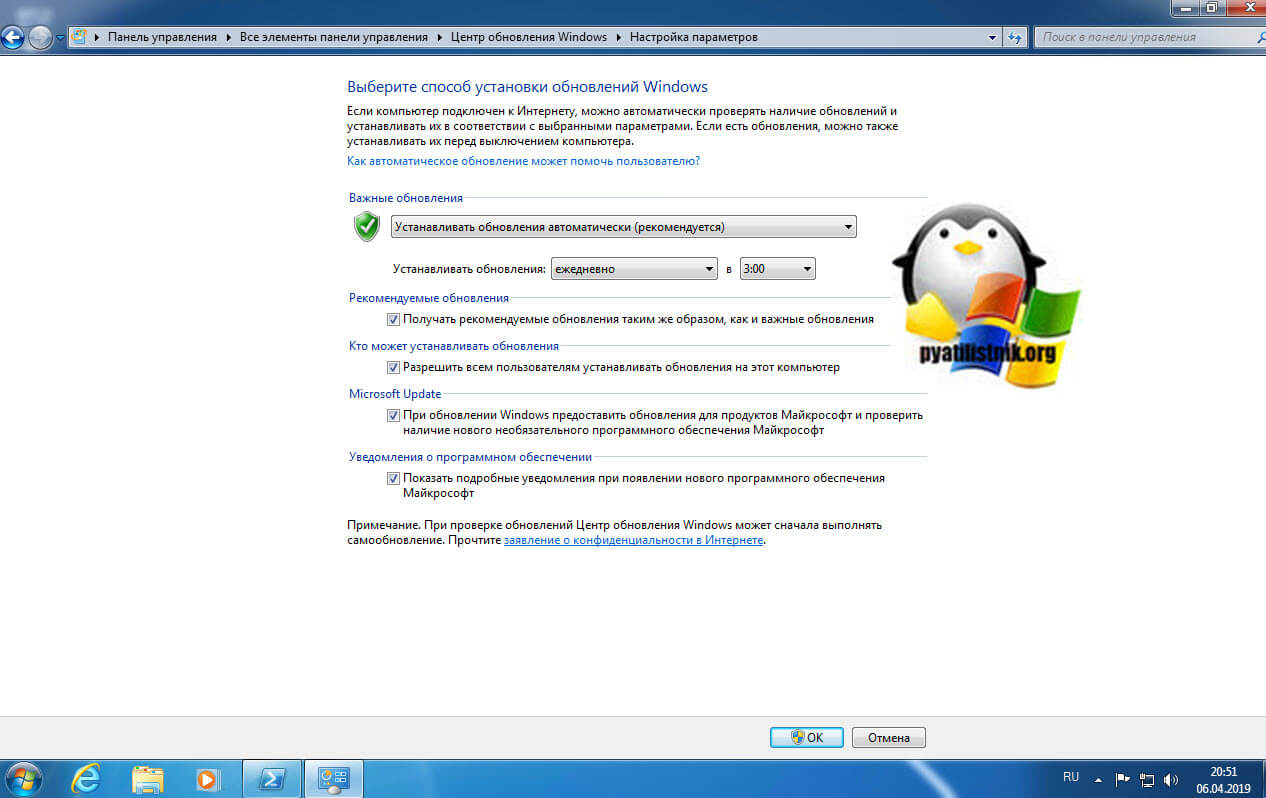
Так же советую вам произвести установку всех доступных обновлений, которые есть у вас в операционной системе, а так же убедиться, что вы получаете и дополнительные обновления. Для этого в перейдите по пути «Панель управленияВсе элементы панели управленияЦентр обновления WindowsНастройка параметров». Убедитесь, что у вас установлены галки:
- Получать рекомендуемые обновления таким же образом, как и важные обновления
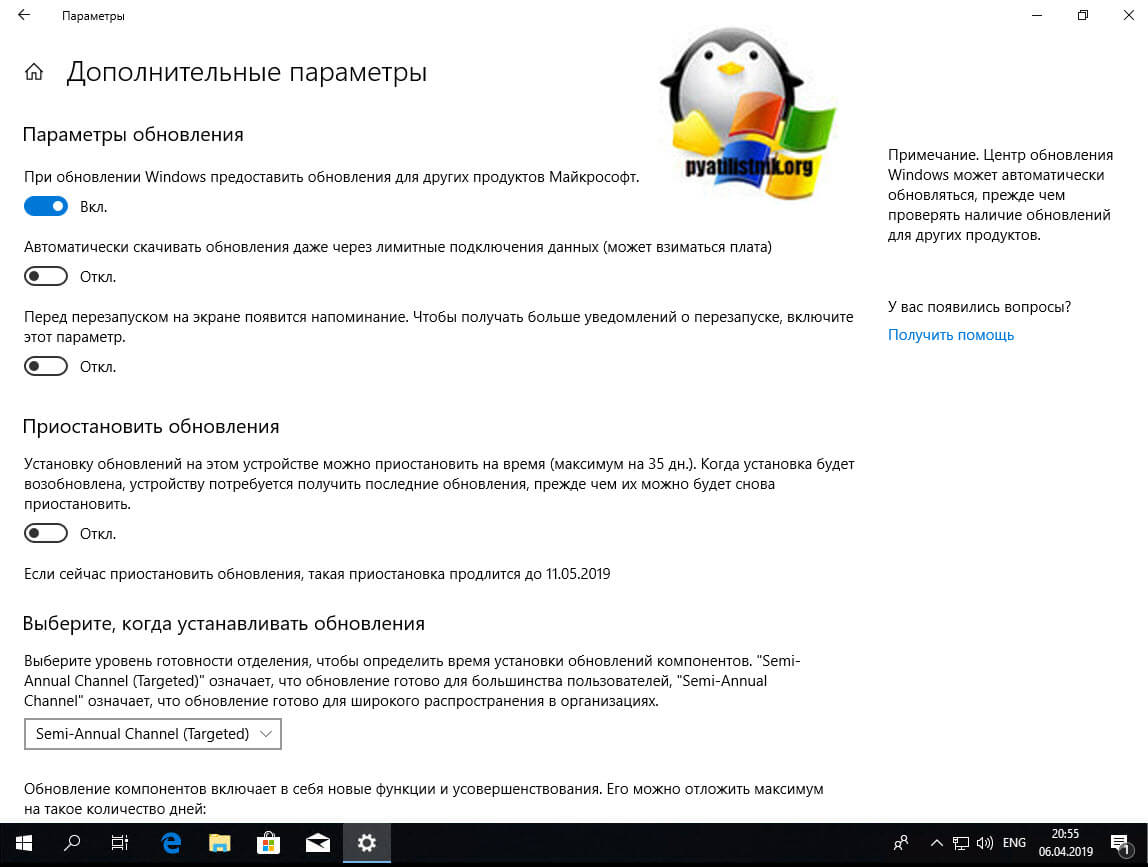
- При обновлении Windows предоставлять обновления для других продуктов Майкрософт и проверить наличие нового необязательного программного обеспечения Майкрософт. Сюда и попадут Microsoft .NET Framework 4.7.
В Windows 10, данный пункт можно найти по пути «Параметры Windows — Обновление и безопасность — Центр обновления Windows — Дополнительные параметры»
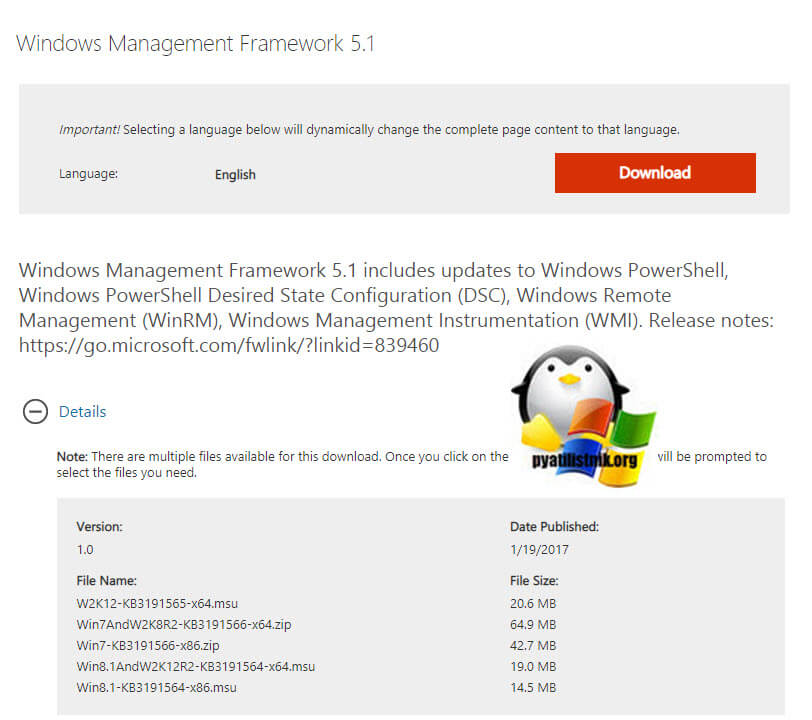
Далее, когда все обновления у вас установлены, вы можете скачивать автономный пакет PowerShell 5.1, пройдите по ссылке:
https://www.microsoft.com/en-us/download/details.aspx?id=54616 если ссылка будет не работать, то загрузить пакет PowerShell 5.1 можно и у меня, думаю MS не обидится
Нажимаем кнопку «Download».
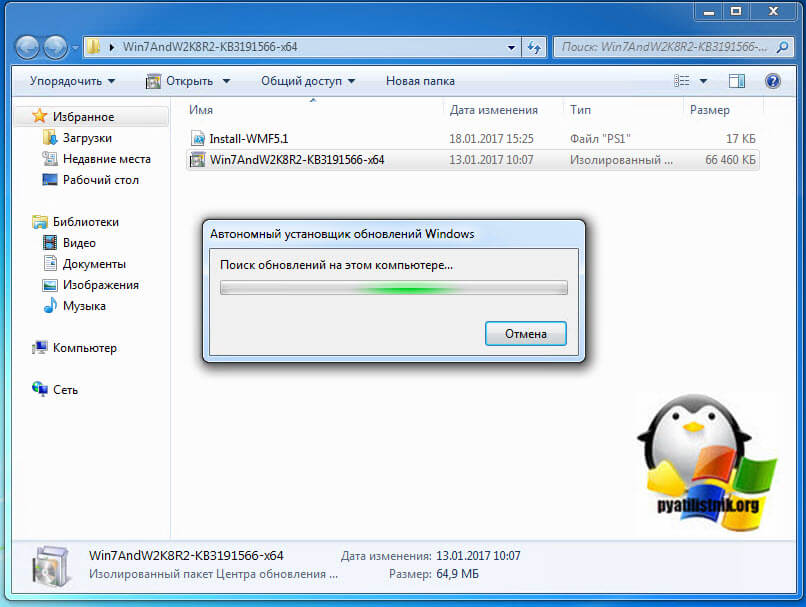
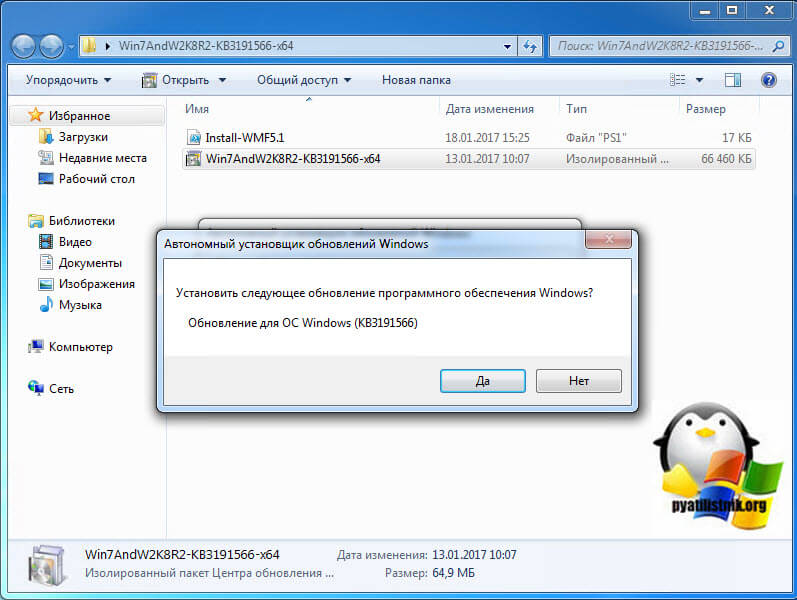
У вас появится всплывающее окно, где вас попросят выбрать для какой операционной системы вы хотите скачать пакет, по первому названию цифр понятно, для какой версии пакет, так же обратите внимание на разрядность x86 и x64. В моем случае Windows 7 64-х битная. Для обновления версии PowerShell запускаем соответствующий автономный пакет обновления Windows. У меня это Win7AndW2K8R2-KB3191566-x64.zip, единственное вам нужно его распаковать. Запустив пакет, он проверит нет ли уже данного обновления или более свежего.
Так как пакета в Windows 7 не оказалось, то вам предлагают установить KB3191566, соглашаемся.
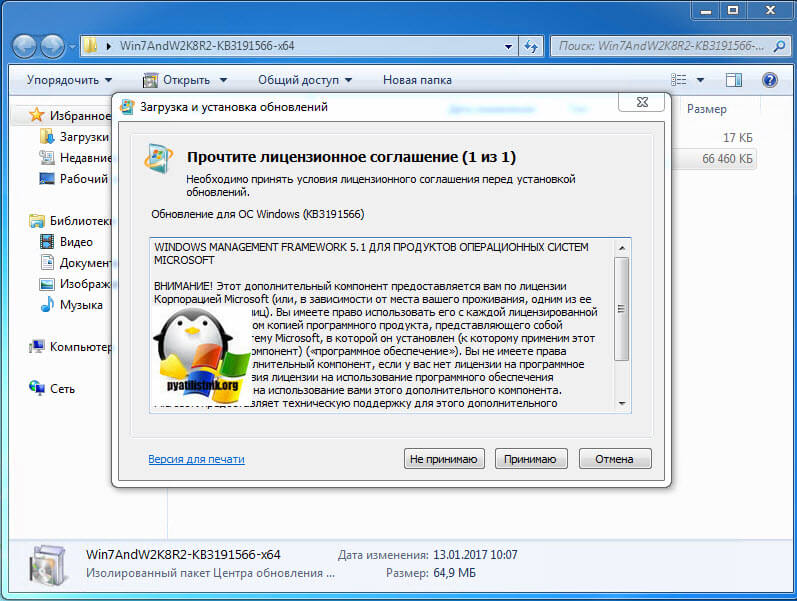
Принимаем лицензионное соглашение.
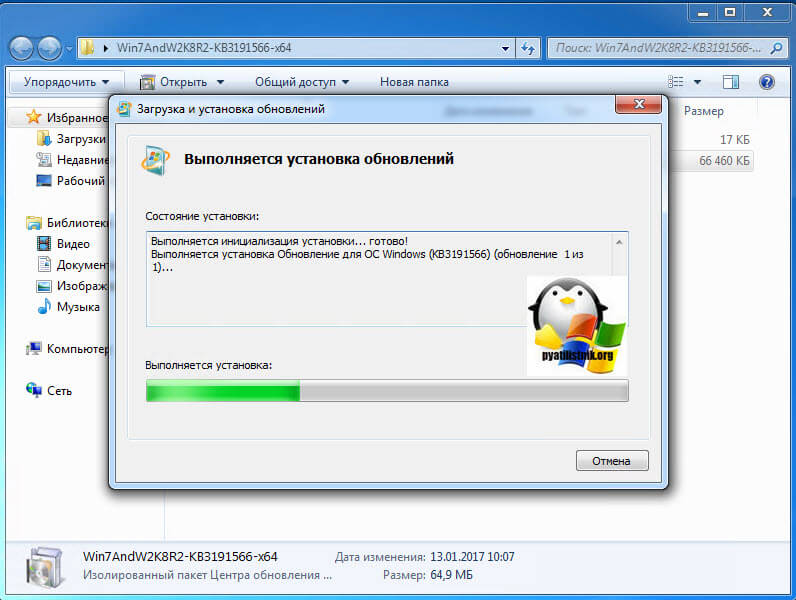
Установка пакета с PowerShell 5.1 занимает пару минут.
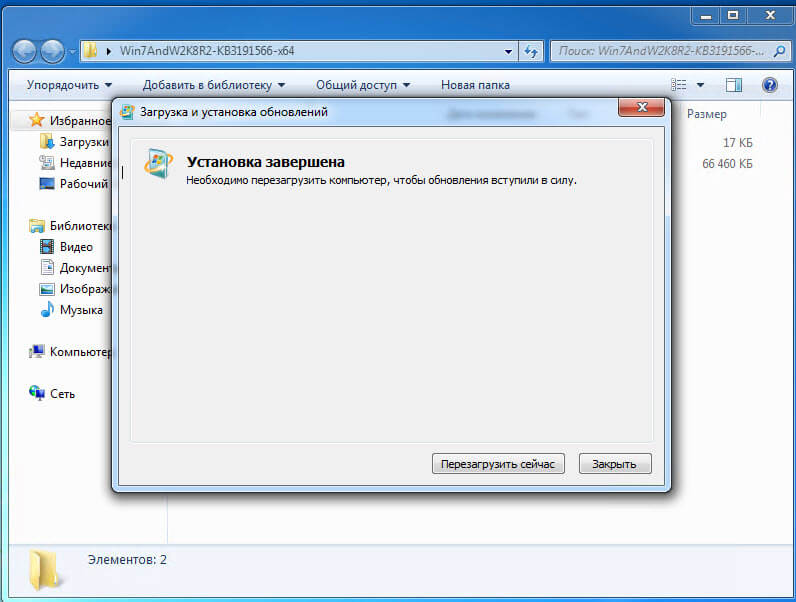
После чего потребуется обязательная перезагрузка вашей системы.
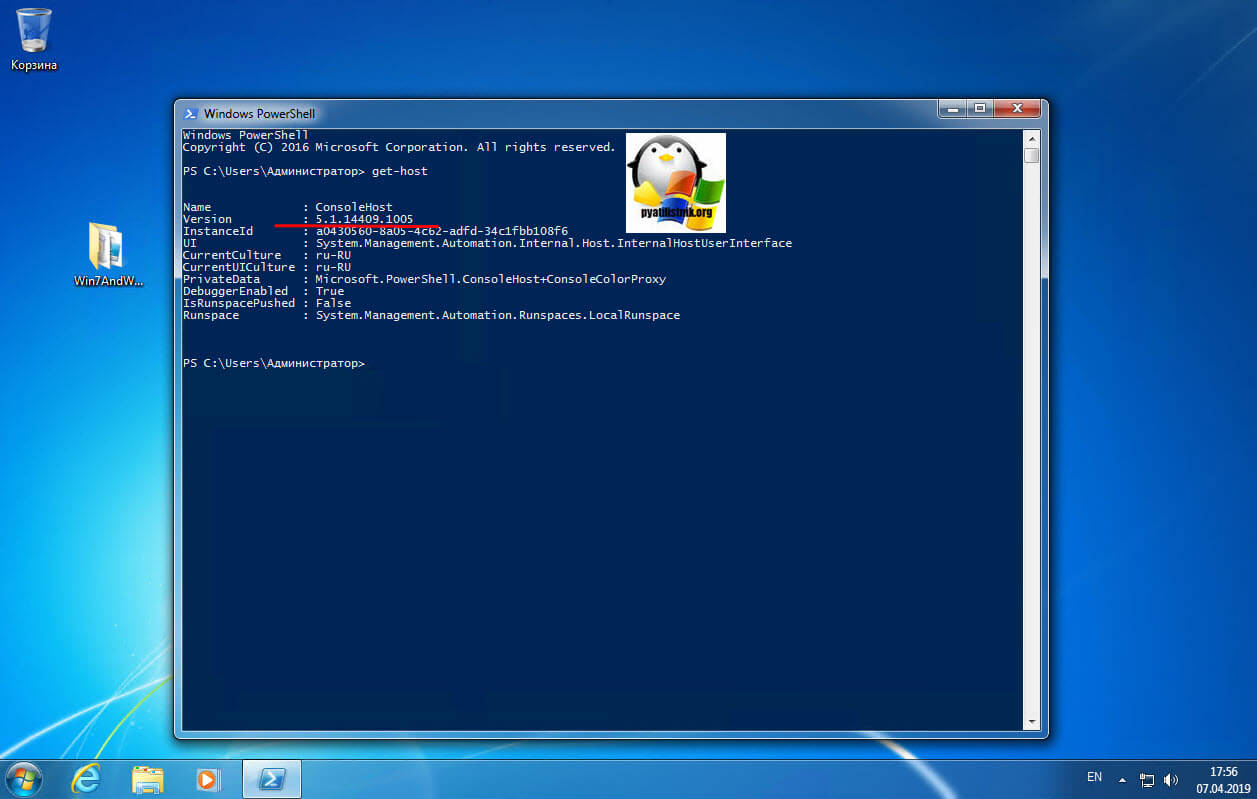
После перезагрузки, открыв оболочку PowerShell и выполнив команду Get-Host вы видите, что версия PowerShell 2 превратилась в 5.1.14409.1005
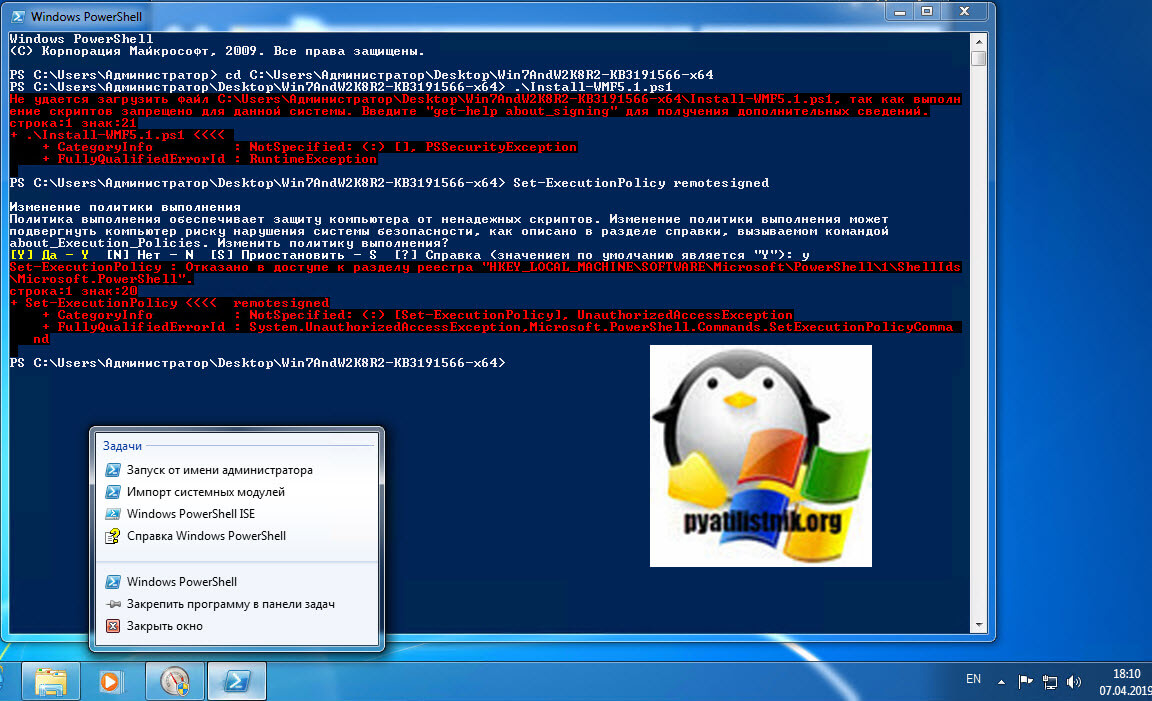
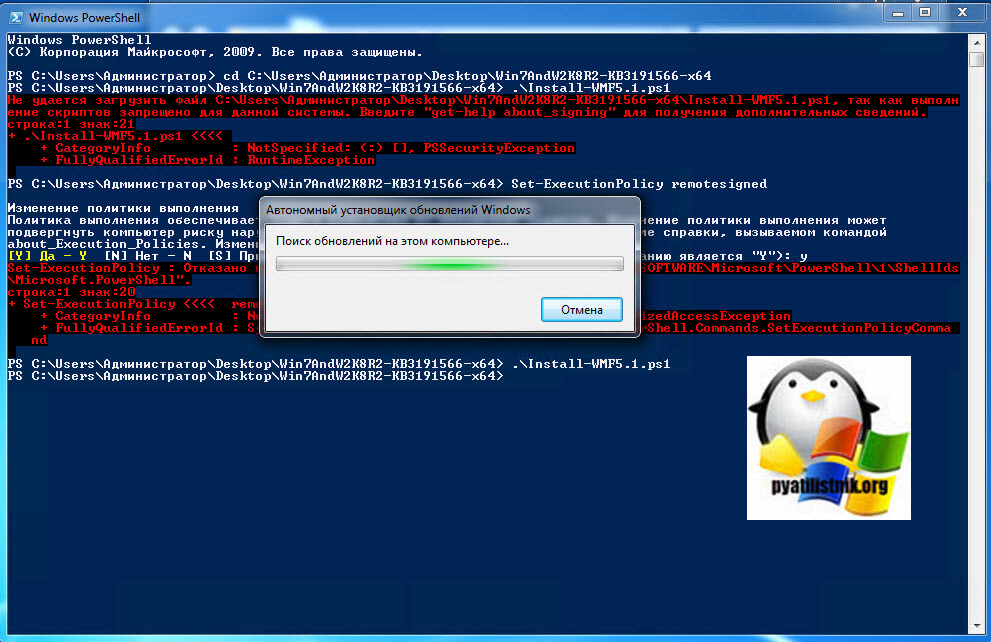
Так же вы наверняка обратили внимание, что совместно с пакетом обновления в архиве лежит скрипт Install-WMF5.1.ps1. В задачи данного скрипта входит проверка вашей текущей версии и поиск зависимостей в виде пакетов .NET Framework. Если их не будет, то вас об этом уведомят. Так, что можете смело щелкать правым кликом по скрипту и так же выполнять его. Если у вас в системе не разрешено выполнение неподписанных цифровой подписью сценариев, то вы увидите ошибку «Выполнение скриптов запрещено», как это обходить посмотрите по ссылке, там я приводил команду Set-ExecutionPolicy remotesigned.
Так же может выскочить уведомление, что запрещено изменять раздел реестра, это из-за того, что оболочка PowerShell запущена не из под админана. Запустите ее в режиме администратора.
После чего скрипт у вас успешно отработает.
Установка Windows Management Framework and PowerShell 5.1.14409.20180811 через репозиторий choco
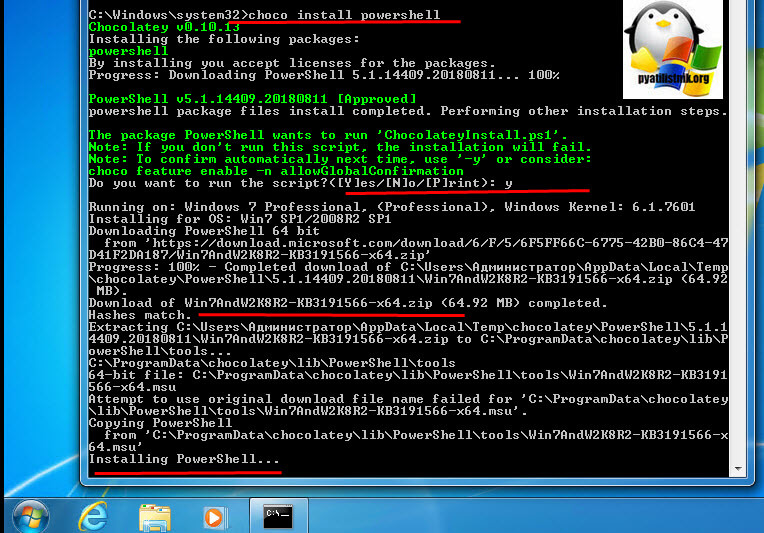
Есть такой офигенный репозиторий choco, который позволяет одной командой всегда иметь самые последние официальные версии продуктов и утилит, и PowerShell тут не исключение. Как подключать в Windows репозиторий choco я рассказывал, можете посмотреть. Когда он у вас есть вы открываете командную строку cmd , обязательно от имени администратора и вводите команду:
Вот так вот просто. В итоге запуститься удаленный скрипт из репозитория, вам покажут какая версия PowerShell самая последняя и спросят, хотите ли вы ее установить, нажимаете Y и тут начинается магия автоматической установки со всеми зависимостями и пакетами KB обновлений.
Осталось перезагрузить вашу систему и проверить новую, установленную версию PowerShell.
На этом у меня все, если остались вопросы или другие методы, о которых я не упомянул, то жду их в комментариях. С вами был Иван Семин, автор и создатель IT блога Pyatilistnik.org.


