Topic Overview
----------------

 1.) Introduction
 2.) Prerequisites
 3.) Build Machine Setup
 4.) Build OpenSSL v1.1.1m
 5.) Build LZO v2.10 DLL
 6.) Build PKCS11-Helper v1.28 DLL
 7.) Build OpenVPN v2.5.4 include files
 8.) Build OpenVPN v2.5.4
 9.) Build OpenVPN-GUI v11.26 include files
10.) Build OpenVPN-GUI v11.26
11.) Build TAP-Driver v9.9.2
12.) Build NSIS-Installer
13.) OpenVPN configuration file changes for Windows XP
14.) Test if OpenVPN is working correctly
15.) OpenVPN v2.5.4 Windows XP SP3 bug
16.) Version and download link


1.) Introduction
------------------

OpenVPN v2.3.18 was the last version that officially supports Windows XP and Windows Server 2003.
We lately had the need to use the newer version 2.5.4 of OpenVPN to support stronger data ciphers
like AES-256-CBC. Therefore we decided to rebuild the whole package from the ground up to make it
compatible with Windows XP and Windows Server 2003. The following article describes in detail how
you can rebuild OpenVPN v2.5.4 for use on these older operating systems. The build process was a
long journey, because it seems that all official build instructions are partly useless and lead to
a dead end most of the time. For example the official instructions state that OpenVPN for Windows
is cross compiled on Linux, which is not true at all. We checked the binary and can say for sure
that it is a native Windows Visual Studio build!

The benefits of this new version include:

- support of stronger data ciphers like AES-256-CBC
- new TAP-Driver with a network speed of 1 GBit/s instead of 10 MBit/s
- severe bug on Windows XP SP3 solved where we can't connect to the VPN server

If you don't care about the build steps simply install OpenVPN v2.5.4 on Windows XP and Windows
Server 2003 by running the installer package "OpenVPN-v2.5.4.exe" in the root of this archive.

Important: The following steps to build OpenVPN can be done completely in offline mode. You do not
need an internet connection at all.


2.) Prerequisites
-------------------

We included all prerequisite packages in the download archive with the exception of the operating
system, compiler suite and an unpacker for 7-Zip archives. We used the following listed packages to
build the dependencies.

OpenSSL v1.1.1m
- Operating System: Windows 10 x64 Build 21H2
- Compiler Suite: Visual Studio 2019
- OpenSSL_v1.1.1mActivePerl-5.20.2.2002-MSWin32-x86-64int-299195.msi
- OpenSSL_v1.1.1mdmake-4.11.20080107.ppd
- OpenSSL_v1.1.1mdmake-4.11.20080107.tar.gz
- OpenSSL_v1.1.1mnasm-2.15.05-installer-x86.exe
- OpenSSL_v1.1.1mopenssl-v1.1.1m.7z

LZO v2.10 DLL
- Operating System: Windows 10 x64 Build 21H2
- Compiler Suite: Visual Studio 2019
- LZO_v2.10lzo-2.10.7z

PKCS11-Helper v1.28 DLL
- Operating System: Windows 10 x64 Build 21H2
- Compiler Suite: Visual Studio 2019
- PKCS11-Helper_v1.28.0pkcs11-helper-1.28.0.7z

OpenVPN v2.5.4 include files
- Operating System: Windows 10 x64 Build 21H2
- Compiler Suite: Visual Studio 2019
- OpenVPN_v2.5.4openvpn-2.5.4.7z

OpenVPN v2.5.4
- Operating System: Windows 10 x64 Build 21H2
- Compiler Suite: Visual Studio 2019
- OpenVPN_v2.5.4block_dns.c
- OpenVPN_v2.5.4config-msvc-version.h
- OpenVPN_v2.5.4openvpn-2.5.4.7z
- OpenVPN_v2.5.4route.c
- OpenVPN_v2.5.4tap-windows.h
- OpenVPN_v2.5.4tap-windows-master_for_XP.7z
- OpenVPN_v2.5.4tun.c
- OpenVPN_v2.5.4versionhelpers.h

OpenVPN-GUI v11.26 include files
- Operating System: Windows 10 x64 Build 21H2
- Compiler Suite: Visual Studio 2019
- MSYS2msys2-i686-20160205.exe
- MSYS2packages_20160205.7z
- OpenVPN-GUI_v11.26openvpn-gui-11.7z

OpenVPN-GUI v11.26
- Operating System: Windows 10 x64 Build 21H2
- Compiler Suite: Visual Studio 2019
- OpenVPN-GUI_v11.26config.h
- OpenVPN-GUI_v11.26openvpn-gui-11.7z
- OpenVPN-GUI_v11.26versionhelpers.h

TAP-Driver v9.9.2
- Operating System: Windows XP SP3 or Windows Server 2003 R2 SP2
- Compiler Suite: Windows Driver Development Kit v7.1.0 (7600.16385.1)
- NSIS-Installernsis-2.50-setup.exe
- TAP-Driver_v9.9.2tap-windows-master_for_XP.7z

NSIS-Installer for OpenVPN v2.5.4
- Operating System: Windows XP SP3 or Windows Server 2003 R2 SP2
- NSIS-Installernsis-2.50-setup.exe
- NSIS-Installeropenvpn.nsi
- NSIS-Installeropenvpn-build-release-2.3.7z
- NSIS-InstallerOpenVPN-v2.3.18_last_version_for_XP.exe
- NSIS-InstallerVC-Redistributable_v14.27.29114.0_x86.exe


3.) Build Machine Setup
-------------------------

We need two machines for building OpenVPN v2.5.4. The first one with "Windows XP SP3 x86" or
"Windows Server 2003 R2 SP2 x86" and "Windows Driver Development Kit v7.1.0 (7600.16385.1)", the
second one with "Windows 10 x64 Build 21H2" and "Visual Studio Enterprise 2019 Version 16.0.1".
On both machines we need an unpacker for 7-Zip archives.

Packages build on first machine

- TAP-Driver v9.9.2
- NSIS-Installer for OpenVPN v2.5.4

Packages build on second machine

- OpenSSL v1.1.1m
- LZO v2.10 DLL
- PKCS11-Helper v1.28 DLL
- OpenVPN v2.5.4 include files
- OpenVPN v2.5.4
- OpenVPN-GUI v11.26 include files
- OpenVPN-GUI v11.26

Install Visual Studio 2019 on the second machine with the following workloads:

- Desktop development with C++
- on the "Installation details" on the right side check:
  - MSVC v141 - VS 2017 C++ x64/x86 build tools (v14.16)
- choose tab "Individual components" and select the following on the left side under the category
  "Compilers, build tools, and runtimes":
  - C++ Windows XP Support for VS 2017 (v141) tools [Deprecated]


4.) Build OpenSSL v1.1.1m
---------------------------

- Operating System: Windows 10 x64 Build 21H2
- Compiler Suite: Visual Studio 2019
- install "OpenSSL_v1.1.1mActivePerl-5.20.2.2002-MSWin32-x86-64int-299195.msi" to "C:Perl"
- install "OpenSSL_v1.1.1mnasm-2.15.05-installer-x86.exe" to "C:Program Files (x86)NASM"
- copy "OpenSSL_v1.1.1mdmake-4.11.20080107.ppd" to "C:dmake-4.11.20080107.ppd"
- copy "OpenSSL_v1.1.1mdmake-4.11.20080107.tar.gz" to "C:dmake-4.11.20080107.tar.gz"
- unpack "OpenSSL_v1.1.1mopenssl-v1.1.1m.7z" to "C:openssl-v1.1.1m"
- to build the shared release version open an administrative command prompt and type the following
  commands:
  REM change directory to root of drive C:
  cd C:

  REM install DMAKE Perl package
  ppm install dmake-4.11.20080107.ppd

  REM run VS2019 x86 command line and set correct variables
  "C:Program Files (x86)Microsoft Visual Studio2019EnterpriseVCAuxiliaryBuildvcvars32.bat"

  REM add NASM assembler to path variable
  set "PATH=C:Program Files (x86)NASM;%PATH%"

  REM change current directory to OpenSSL source code directory
  cd C:openssl-v1.1.1m

  REM We have to use the configure parameter "-D_WIN32_WINNT=0x0501" for Windows XP and Windows
  REM Server 2003.
  perl Configure VC-WIN32 -D_WIN32_WINNT=0x0501 --prefix=C:openssl-v1.1.1m-shared

  REM starts the build process and compiles all OpenSSL libraries and files
  nmake

  REM tests the inner workings of the OpenSSL libraries, this should be run mandatory to be sure
  REM that everything works as designed later on
  nmake test

  REM After this command the installation can be found in the directory "C:Program FilesOpenSSL".
  nmake install

After these steps the OpenSSL files will be present in the directory which you specified with the
"--prefix" parameter for the perl Configure command. In our case the shared release DLLs of OpenSSL
are present in the directory "C:openssl-v1.1.1m-shared". The include files we need are placed in
"C:openssl-v1.1.1m-sharedincludeopenssl". The library files we need are placed in
"C:openssl-v1.1.1m-sharedlib". We packed the complete directory into the included archive named
"OpenSSL_v1.1.1mopenssl-v1.1.1m-shared.7z".


5.) Build LZO v2.10 DLL
-------------------------

- Operating System: Windows 10 x64 Build 21H2
- Compiler Suite: Visual Studio 2019
- unpack "LZO_v2.10lzo-2.10.7z" to "C:lzo-2.10"
- to build the DLL release version open an administrative command prompt and type the following
  commands:

  REM run VS2019 x86 command line and set correct variables
  "C:Program Files (x86)Microsoft Visual Studio2019EnterpriseVCAuxiliaryBuildvcvars32.bat"

  REM change current directory to LZO source code directory
  cd C:lzo-2.10

  REM This will build the shared DLLs.
  Bwin32vc_dll.bat

We packed the complete directory into the included archive named "LZO_v2.10lzo-2.10-shared-DLL.7z".


6.) Build PKCS11-Helper v1.28 DLL
-----------------------------------

- Operating System: Windows 10 x64 Build 21H2
- Compiler Suite: Visual Studio 2019
- unpack "PKCS11-Helper_v1.28.0pkcs11-helper-1.28.0.7z" to "C:pkcs11-helper-1.28.0"
- to build the DLL release version open an administrative command prompt and type the following
  commands:

  REM run VS2019 x86 command line and set correct variables
  "C:Program Files (x86)Microsoft Visual Studio2019EnterpriseVCAuxiliaryBuildvcvars32.bat"

  REM change current directory to PKCS11-Helper source code directory
  cd C:pkcs11-helper-1.28.0lib

  REM starts the build process and compiles the PKCS11-Helper library
  nmake -f Makefile.w32-vc OPENSSL=1 OPENSSL_HOME=C:openssl-v1.1.1m-shared

We packed the complete directory into the included archive named "PKCS11-Helper_v1.28.0pkcs11-helper-1.28.0-shared-DLL.7z".
The DLL we use is located at "PKCS11-Helper_v1.28.0pkcs11-helper-1.28.0-shared-DLL.7zliblibpkcs11-helper-1.dll".


7.) Build OpenVPN v2.5.4 include files
----------------------------------------

The include file config-msvc-version.h is auto generated by the Visual Studio solution of OpenVPN.
The standard OpenVPN source code does not include this file, which is absolutely necessary to build
OpenVPN. In the following steps we describe how to generate the include file config-msvc-version.h.
The generated include file by this procedure is already present in the directory "OpenVPN_v2.5.4".

- Operating System: Windows 10 x64 Build 21H2
- Compiler Suite: Visual Studio 2019
- unpack "OpenVPN_v2.5.4openvpn-2.5.4.7z" to "C:openvpn-2.5.4"
- to build the file "config-msvc-version.h" open an administrative command prompt and type the
  following commands:

  REM change current directory to OpenVPN msvc-generate source code directory
  cd C:openvpn-2.5.4buildmsvcmsvc-generate

  REM run the java script file with parameters
  cscript //Nologo msvc-generate.js --config="C:openvpn-2.5.4version.m4" --input="C:openvpn-2.5.4config-msvc-version.h.in" --output="C:openvpn-2.5.4config-msvc-version.h"

After these steps the resulting file is located at "C:openvpn-2.5.4config-msvc-version.h".

Pay attention: This file does contain errors! It seems the PRODUCT_VERSION_PATCH has a wrong value
of ".4" instead of simply "4". Therefore also the PACKAGE_VERSION and PRODUCT_VERSION are wrong and
have both the value "2.5..4". This error is triggered by the file "C:openvpn-2.5.4version.m4" which
has the following define:

define([PRODUCT_VERSION_PATCH], [.4])

If we correct this line and remove the point, we get another error in the config-msvc-version.h file.
After this change the PACKAGE_STRING is "OpenVPN 2.54", which is missing a point, but both the
PACKAGE_VERSION and PRODUCT_VERSION are correct. We already corrected these errors manually in the
included file "OpenVPN_v2.5.4config-msvc-version.h".

The file tap-windows.h is copied from the archive "OpenVPN_v2.5.4tap-windows-master_for_XP.7zsrctap-windows.h".
The file versionhelpers.h is copied from the Windows 10 SDK version 10.0.17763.0 which comes with
Visual Studio 2019. We slightly modified it to make it work without additional include files like
winapifamily.h. The original file is located at "C:Program Files (x86)Windows Kits10Include
10.0.17763.0umVersionHelpers.h" after Visual Studio 2019 is installed.


8.) Build OpenVPN v2.5.4
--------------------------

- Operating System: Windows 10 x64 Build 21H2
- Compiler Suite: Visual Studio 2019
- unpack "OpenVPN_v2.5.4openvpn-2.5.4.7z" to "C:openvpn-2.5.4"
  This step is not necessary if you compiled OpenVPN v2.5.4 include files before!
- start Visual Studio 2019 > Create a new project > Empty Project > Next >
  Project name: openvpn
  Location: C:UsersPublic
  Solution name: openvpn
  check "Place solution and project in the same directory"
  > Create
- copy all files and directories from "C:openvpn-2.5.4srcopenvpn" to "C:UsersPublicopenvpn"
  Do not overwrite the files "openvpn.vcxproj" and "openvpn.vcxproj.filters".
- delete the following files from the directory "C:UsersPublicopenvpn":
  Makefile.am
  Makefile.in
- copy the file "C:openvpn-2.5.4config-msvc.h" to "C:UsersPublicopenvpn"
- copy the file "C:openvpn-2.5.4includeopenvpn-msg.h" to "C:UsersPublicopenvpn"
- copy the file "C:openvpn-2.5.4includeopenvpn-plugin.h" to "C:UsersPublicopenvpn"
- copy the file "OpenVPN_v2.5.4block_dns.c" to "C:UsersPublicopenvpn" and overwrite
  the existing file
  This newly created C source file contains code to support DNS leak blocking for Windows XP.
- copy the file "OpenVPN_v2.5.4config-msvc-version.h" to "C:UsersPublicopenvpn"
- copy the file "OpenVPN_v2.5.4route.c" to "C:UsersPublicopenvpn" and overwrite the
  existing file
  This changes the function get_default_gateway_ipv6 and simply returns, because Windows XP does not
  support IPv6 at all correctly without a dual stack in combination with IPv4. We can discard this
  completely and simply return from the function. The implementation of GetBestRoute in Windows XP
  does not support IPv6 at all.
- copy the file "OpenVPN_v2.5.4tap-windows.h" to "C:UsersPublicopenvpn"
- copy the file "OpenVPN_v2.5.4tun.c" to "C:UsersPublicopenvpn" and overwrite the
  existing file
  This changes the function windows_set_mtu to compile on Windows XP. The patch and function will
  not work at all. We tried several methods to set the MTU without success. Read the comments inside
  the code for more details.
- copy the file "OpenVPN_v2.5.4versionhelpers.h" to "C:UsersPublicopenvpn"
- copy "C:openssl-v1.1.1m-shared" to "C:UsersPublicopenvpnOpenSSL_v1.1.1m"
- delete the following directories:
  C:UsersPublicopenvpnOpenSSL_v1.1.1mbin
  C:UsersPublicopenvpnOpenSSL_v1.1.1mhtml
- copy "C:lzo-2.10" to "C:UsersPublicopenvpnlzo-2.10"
- delete all files and directories in the folder "C:UsersPublicopenvpnlzo-2.10"
  except "include", "lzo2.dll" and "lzo2.lib"
- copy "C:pkcs11-helper-1.28.0" to "C:UsersPublicopenvpnpkcs11-helper-1.28.0"
- delete all files and directories in the folder "C:UsersPublicopenvpnpkcs11-helper-1.28.0"
  except "include" and "lib"
- delete the following files:
  C:UsersPublicopenvpnpkcs11-helper-1.28.0includeMakefile.am
  C:UsersPublicopenvpnpkcs11-helper-1.28.0includeMakefile.in
  C:UsersPublicopenvpnpkcs11-helper-1.28.0includepkcs11-helper-1.0Makefile.am
  C:UsersPublicopenvpnpkcs11-helper-1.28.0includepkcs11-helper-1.0Makefile.in
  C:UsersPublicopenvpnpkcs11-helper-1.28.0includepkcs11-helper-1.0pkcs11h-version.h.in
- delete all files in the folder "C:UsersPublicopenvpnpkcs11-helper-1.28.0lib" except
  "libpkcs11-helper-1.dll" and "pkcs11-helper.dll.lib"
- in VS2019 Solution Explorer right click on openvpn "Header Files" > Add > Existing Item... > in the
  "File name" field enter "*.h" and press Enter > select first header file press Shift and click on
  the last header file > Add
- right click on openvpn "Resource Files" > Add > Existing Item... > select "openvpn_win32_resources.rc" > Add
- right click on openvpn "Source Files" > Add > Existing Item... > in the "File name" field enter "*.c" and
  press Enter > select first C source file press Shift and click on the last C source file > Add
- in Solution Explorer right click on "Solution 'openvpn' (1 project)" > Add > New Project... >
  Empty Project > Next >
  Project Name: compat
  Location: C:UsersPublic
  > Create
- copy all files from "C:openvpn-2.5.4srccompat" to "C:UsersPubliccompat"
  Do not overwrite the files "openvpn.vcxproj" and "openvpn.vcxproj.filters".
- delete the following files from the directory "C:UsersPubliccompat":
  Debug.props
  Makefile.am
  Makefile.in
  PropertySheet.props
  Release.props
- copy the file "C:openvpn-2.5.4config-msvc.h" to "C:UsersPubliccompat"
- copy the file "OpenVPN_v2.5.4config-msvc-version.h" to "C:UsersPubliccompat"
- in VS2019 Solution Explorer right click on compat "Header Files" > Add > Existing Item... > in the
  "File name" field enter "*.h" and press Enter > select first header file press Shift and click on
  the last header file > Add
- right click on compat "Source Files" > Add > Existing Item... > in the "File name" field enter "*.c" and
  press Enter > select first C source file press Shift and click on the last C source file > Add
- in Solution Explorer select compat > Menu > Project > Properties > choose Configuration:
  All Configurations > Platform: All Platforms and change the following values:
  Configuration Properties > General
  - Platform Toolset: Visual Studio 2017 - Windows XP (v141_xp)
  - Configuration Type: Static library (.lib)
  Configuration Properties > C/C++ > Preprocessor
  - Preprocessor Definitions > choose arrow > <Edit...> > enter
    _CRT_SECURE_NO_WARNINGS
    > OK
  Configuration Properties > C/C++ > Command Line
  - Additional Options > enter
    /D_WIN32_WINNT=0x0501
  Configuration Properties > Linker > Manifest File
  - Generate Manifest: No (/MANIFEST:NO)
  > OK
- open the file "C:UsersPubliccompatconfig-msvc.h" and change code line 1 from
  #include <config-msvc-version.h>
  to
  #include "config-msvc-version.h"
  in addition add a new line before line 172 and insert the following code
  #define _WIN32_WINNT_VISTA 0x0600
- to solve the warning "Support for targeting Windows XP is deprecated and will not be present in
  future releases of Visual Studio." do the following steps:
  In Solution Explorer select compat > Menu > View > Property Manager > right click "compat" >
  Add New Project Property Sheet... > Add > expand "compat" > expand "Debug | Win32" > right
  click on PropertySheet > Properties > Common Properties > User Macros > button "Add Macro":
  Name: XPDeprecationWarning
  Value: false
  > 2 x OK
  This property sheets gets added to every build configuration automatically.
- in Solution Explorer select openvpn > Menu > Project > Properties > choose Configuration:
  All Configurations > Platform: All Platforms and change the following values:
  Configuration Properties > General
  - Platform Toolset: Visual Studio 2017 - Windows XP (v141_xp)
  Configuration Properties > VC++ Directories
  - Include Directories > choose arrow > <Edit...> > choose a new line for every value listed here > enter
    ..compat
    $(SolutionDir)lzo-2.10include
    $(SolutionDir)OpenSSL_v1.1.1minclude
    $(SolutionDir)pkcs11-helper-1.28.0include
    > OK
  - Library Directories > choose arrow > <Edit...> > choose a new line for every value listed here > enter
    $(OutDir)
    This is used for compat.lib static library, otherwise the library is not found.
    $(SolutionDir)lzo-2.10
    $(SolutionDir)OpenSSL_v1.1.1mlib
    $(SolutionDir)pkcs11-helper-1.28.0lib
    > OK
  Configuration Properties > C/C++ > General
  - Warning Level: Level2 (/W2)
    This will suppress 238 warnings. The developers also do this in the original openvpn VS2019 solution.
  Configuration Properties > C/C++ > Preprocessor
  - Preprocessor Definitions > choose arrow > <Edit...> > enter
    _CRT_NONSTDC_NO_DEPRECATE
    _CRT_SECURE_NO_WARNINGS
    > OK
  Configuration Properties > C/C++ > Command Line
  - Additional Options > enter
    /D_WIN32_WINNT=0x0501
  Configuration Properties > Linker > Input
  - Additional Dependencies > choose arrow > <Edit...> > enter
    compat.lib
    libssl.lib
    libcrypto.lib
    lzo2.lib
    pkcs11-helper.dll.lib
    gdi32.lib
    ws2_32.lib
    wininet.lib
    crypt32.lib
    iphlpapi.lib
    winmm.lib
    rpcrt4.lib
    setupapi.lib
    advapi32.lib
    > OK
  Configuration Properties > Linker > Manifest File
  - Generate Manifest: No (/MANIFEST:NO)
  > OK
- in Solution Explorer select openvpn > Menu > Project > Project Dependencies... > tab Dependencies
  > Project: choose openvpn > Depends on: check compat > OK
- open the file "C:UsersPublicopenvpnconfig-msvc.h" and change code line 1 from
  #include <config-msvc-version.h>
  to
  #include "config-msvc-version.h"
  in addition add a new line before line 172 and insert the following code
  #define _WIN32_WINNT_VISTA 0x0600
- open file "C:UsersPublicopenvpntun.h" and change the code line 29 from
  #include <tap-windows.h>
  to
  #include "tap-windows.h"
- open file "C:UsersPublicopenvpnwin32.c" and change the code line 50 from
  #include <versionhelpers.h>
  to
  #include "versionhelpers.h"
- open file "C:UsersPublicopenvpnsyshead.h" and change the code line 586 from
  #define ENABLE_CRYPTOAPI
  to
  //#define ENABLE_CRYPTOAPI
- open file "C:UsersPublicopenvpnconsole_systemd.c" and change the code line 30 from
  #include "config.h"
  to
  //#include "config.h"
- open file "C:UsersPublicopenvpnssl_ncp.h" and change code line 53 from
  check_pull_client_ncp(struct context *c, int found);
  to
  check_pull_client_ncp(struct context *c, const int found);
- open file "C:UsersPublicopenvpnauth_token.c" and change code line 62 from
  const char *state;
  to
  const char *state = "Invalid";
- open file "C:UsersPublicopenvpnpkcs11-helper-1.28.0includepkcs11-helper-1.0pkcs11.h"
  and change code line 1213 from
  struct ck_interface **interface,
  to
  struct ck_interface **Interface,
- to solve the warning "Support for targeting Windows XP is deprecated and will not be present in
  future releases of Visual Studio." do the following steps
  In Solution Explorer select openvpn > Menu > View > Property Manager > right click "openvpn" >
  Add New Project Property Sheet... > Add > expand "openvpn" > expand "Debug | Win32" > right
  click on PropertySheet > Properties > Common Properties > User Macros > button "Add Macro":
  Name: XPDeprecationWarning
  Value: false
  > 2 x OK
  This property sheets gets added to every build configuration automatically.
- choose Menu > Build > Configuration Manager... > Active solution configuration: Release >
  Active solution platform: x86 > Close
- in Solution Explorer select compat > Menu > Project > Properties > choose Configuration:
  Active(Release) > Platform: Active(Win32) and change the following values:
  Configuration Properties > C/C++ > Optimization
  - Optimization: Maximum Optimization (Favor Size) (/O1)
  - Enable Intrinsic Functions: No
  - Favor Size Or Speed: Favor small code (/Os)
  > OK
- in Solution Explorer select openvpn > Menu > Project > Properties > choose Configuration:
  Active(Release) > Platform: Active(Win32) and change the following values:
  Configuration Properties > C/C++ > Optimization
  - Optimization: Maximum Optimization (Favor Size) (/O1)
  - Enable Intrinsic Functions: No
  - Favor Size Or Speed: Favor small code (/Os)
  Linker > Debugging
  - Generate Debug Info: No
  > OK
- choose Menu > Build > Rebuild Solution

We can now compile the debug and release configuration for Windows XP without any errors or warnings.
The final source code package is located at "OpenVPN_v2.5.4openvpn_v2.5.4_20220123_for_XP.7z".


9.) Build OpenVPN-GUI v11.26 include files
--------------------------------------------

The include file config.h is auto generated on Linux platforms. The standard OpenVPN-GUI source code
does not include this file, which is absolutely necessary to build the OpenVPN-GUI. In the following
steps we describe how to generate the include file config.h. The generated include file by this
procedure is already present in the directory "OpenVPN-GUI_v11.26".

- Operating System: Windows 10 x64 Build 21H2
- Compiler Suite: Visual Studio 2019
- install "MSYS2msys2-i686-20160205.exe" to "C:msys32" > uncheck "Run MSYS2 32 bit now." after
  installation is finished > Finish
  Attention: We need at least 2 to 3 GB free space on drive C: to install MSYS2 with all necessary
  packages!
- unpack "MSYS2packages_20160205.7z" to "C:packages_20160205"
- copy all packages from "C:packages_20160205all-in-one" directory to "C:msys32varcachepacmanpkg"
  directory
- run "C:msys32mingw32_shell.bat" as Administrator
- run the following command in MINGW32 shell:
  pacman -S autoconf automake libtool make mingw-w64-i686 mingw-w64-i686-toolchain mingw-w64-x86_64 mingw-w64-x86_64-toolchain nasm pkg-config
  Press 4 x Enter and 'Y' to install all packages.
  This will install all 129 packages which are present inside the pkg directory.
- now we can delete all files in the directory "C:msys32varcachepacmanpkg"
- unpack "OpenVPN-GUI_v11.26openvpn-gui-11.7z" to "C:msys32homeUserNameopenvpn-gui"
- run the following commands in MINGW32 shell:
  cd openvpn-gui
  autoreconf -i -v
  ./configure --prefix=/ --host=i686-w64-mingw32 --build=i686-pc-mingw32 --program-prefix='' OPENSSL_CRYPTO_CFLAGS="-I /home/UserName/openssl-v1.1.1m/include/" OPENSSL_CRYPTO_LIBS="-L /home/UserName/openssl-v1.1.1m/lib/ -lcrypto"

It does not matter if the OpenSSL directory is present or not for the configure command. After
this configure command the file "C:msys32homeUserNameopenvpn-guiconfig.h" is created. If we only
want to build the OpenVPN-GUI on Visual Studio 2019 we can stop here. It is recommended to stop here
an not try to build the OpenVPN-GUI with MSYS2, because even if we would manage to get a working
executable this is at least double the size of the Windows executable build with Visual Studio 2019.

The file versionhelpers.h is copied from the Windows 10 SDK version 10.0.17763.0 which comes with
Visual Studio 2019. We slightly modified it to make it work without additional include files like
winapifamily.h. The original file is located at "C:Program Files (x86)Windows Kits10Include
10.0.17763.0umVersionHelpers.h" after Visual Studio 2019 is installed.


10.) Build OpenVPN-GUI v11.26
-------------------------------

- Operating System: Windows 10 x64 Build 21H2
- Compiler Suite: Visual Studio 2019
- unpack "OpenVPN-GUI_v11.26openvpn-gui-11.7z" to "C:openvpn-gui"
- start Visual Studio 2019 > Create a new project > Empty Project > Next >
  Project name: openvpn-gui
  Location: C:UsersPublic
  Solution name: openvpn-gui
  check "Place solution and project in the same directory"
  > Create
- copy all files and directories from "C:openvpn-gui" to "C:UsersPublicopenvpn-gui"
- delete the following files from the directory "C:UsersPublicopenvpn-gui":
  aclocal.m4
  compile
  config.guess
  config.h.in
  config.sub
  configure
  configure.ac
  COPYING
  COPYRIGHT.GPL
  depcomp
  install-sh
  Makefile.am
  Makefile.in
  missing
- move all files from the directory "C:UsersPublicopenvpn-guires" to
  "C:UsersPublicopenvpn-gui"
- delete the directory "C:UsersPublicopenvpn-guires"
- copy the file "OpenVPN-GUI_v11.26config.h" to "C:UsersPublicopenvpn-gui"
- copy the file "OpenVPN-GUI_v11.26versionhelpers.h" to "C:UsersPublicopenvpn-gui"
- delete the directory "C:OpenSSL_v1.1.1m" if it is present
- unpack "OpenSSL_v1.1.1mopenssl-v1.1.1m-shared.7z" to "C:OpenSSL_v1.1.1m"
- copy "C:OpenSSL_v1.1.1m" to "C:UsersPublicopenvpn-guiOpenSSL_v1.1.1m"
- delete the following directories:
  C:UsersPublicopenvpn-guiOpenSSL_v1.1.1mbin
  C:UsersPublicopenvpn-guiOpenSSL_v1.1.1mhtml
- in VS2019 Solution Explorer right click on openvpn-gui "Header Files" > Add > Existing Item... >
  in the "File name" field enter "*.h" and press Enter > select first header file press Shift and
  click on the last header file > Add
- right click on "Resource Files" > Add > Existing Item... > select "openvpn-gui-res.rc" > Add
- right click on "Source Files" > Add > Existing Item... > in the "File name" field enter "*.c" and
  press Enter > select first C source file press Shift and click on the last C source file > Add
- in Solution Explorer select openvpn-gui > Menu > Project > Properties > choose Configuration:
  All Configurations > Platform: All Platforms and change the following values:
  Configuration Properties > General
  - Platform Toolset: Visual Studio 2017 - Windows XP (v141_xp)
  - Character Set: Use Unicode Character Set
  Configuration Properties > VC++ Directories
  - Include Directories > choose arrow > <Edit...> > choose New Line > enter
    $(SolutionDir)OpenSSL_v1.1.1minclude
    > OK
  - Library Directories > choose arrow > <Edit...> > choose New Line > enter
    $(SolutionDir)OpenSSL_v1.1.1mlib
    > OK
  Configuration Properties > C/C++ > Preprocessor
  - Preprocessor Definitions > choose arrow > <Edit...> > enter
    _CRT_NONSTDC_NO_DEPRECATE
    _CRT_SECURE_NO_WARNINGS
    > OK
  Configuration Properties > C/C++ > Command Line
  - Additional Options > enter
    /D "HAVE_CONFIG_H"  /D "WIN32_LEAN_AND_MEAN" /D_WIN32_WINNT=0x0501
  Configuration Properties > Linker > Input
  - Additional Dependencies > choose arrow > <Edit...> > enter
    ws2_32.lib
    libcrypto.lib
    libssl.lib
    secur32.lib
    netapi32.lib
    comctl32.lib
    wininet.lib
    wtsapi32.lib
    crypt32.lib
    shlwapi.lib
    winhttp.lib
    > OK
  Configuration Properties > Linker > Manifest File
  - Generate Manifest: No (/MANIFEST:NO)
  Configuration Properties > Linker > System
  - SubSystem: Windows (/SUBSYSTEM:WINDOWS)
  Configuration Properties > Resources > Command Line
  - Additional Options > enter
    /D "HAVE_CONFIG_H"
  > OK
- Menu > Build > Rebuild Solution > Menu > View > Error List
- click on all errors "Cannot open include file: 'config.h': No such file or directory" and change
  the line from
  #include <config.h>
  to
  #include "config.h"
- click on all errors "'wcstok': too few arguments for call" and change the first code location from
  pch = wcstok(buf, L"rn");
  to
  wchar_t *state;
  pch = wcstok(buf, L"rn", &state);
  change the second code location from
  pch = wcstok(NULL, L"rn");
  to
  pch = wcstok(NULL, L"rn", &state);
- Menu > Build > Rebuild Solution > Menu > View > Error List
- click on all errors "'wcstok': too few arguments for call" and change the first code location from
  LPWSTR token = wcstok(proxy_str, delim);
  to
  wchar_t *state;
  LPWSTR token = wcstok(proxy_str, delim, &state);
  change the second code location from
  token = wcstok(NULL, delim);
  to
  token = wcstok(NULL, delim, &state);
- click on error "'AURL_ENABLEURL': undeclared identifier" and change the code from
  SendMessage(hmsg, EM_AUTOURLDETECT, AURL_ENABLEURL, 0);
  to
  #define AURL_ENABLEURL 1
  SendMessage(hmsg, EM_AUTOURLDETECT, AURL_ENABLEURL, 0);
- click on both errors "Cannot open include file 'versionhelpers.h': No such file or directory" and
  change the code location from
  #include <versionhelpers.h>
  to
  #include "versionhelpers.h"
- click on error "Cannot open include file 'combaseapi.h': No such file or directory" and change the
  code location from
  #include <combaseapi.h>
  to
  //#include <combaseapi.h>
- Menu > Build > Rebuild Solution > Menu > View > Error List
- click on warning "formal parameter 2 different from declaration" right click on the function
  IsUserInGroup > Go To Declaration > change code location from
  static BOOL IsUserInGroup(PSID sid, PTOKEN_GROUPS token_groups, const WCHAR *group_name);
  to
  static BOOL IsUserInGroup(PSID sid, const PTOKEN_GROUPS token_groups, const WCHAR *group_name);
- click on warning "'CompareStringOrdinal' undefined; assuming extern returning int" and change the
  code location from
  int cmp = CompareStringOrdinal(nameval1, (int)len1, nameval2, (int)len2, ignore_case);
  to
  //int cmp = CompareStringOrdinal(nameval1, (int)len1, nameval2, (int)len2, ignore_case);
  int cmp = wcsncmp(nameval1, nameval2, (len1 > len2 ? len2 : len1));
- click on warning "'=': conversion from 'DWORD' to 'LANGID', possible loss of data" and change code
  location from
  gui_language = ( value != 0 ? value : GetUserDefaultUILanguage() );
  to
  gui_language = (LANGID)( value != 0 ? value : GetUserDefaultUILanguage() );
- click on warning "formal parameter 2 different from declaration" and change code location from
  LoadLocalizedStringBuf(PTSTR buffer, int bufferSize, const UINT stringId, ...)
  to
  LoadLocalizedStringBuf(PTSTR buffer, const int bufferSize, const UINT stringId, ...)
- click on warning "'function': conversion from 'DWORD' to 'u_short', possible loss of data and
  change code location from
  c->manage.skaddr.sin_port = htons(o.mgmt_port_offset + config);
  to
  c->manage.skaddr.sin_port = htons((u_short)o.mgmt_port_offset + config);
- click on warning "'RegGetValueW' undefined; assuming extern returning int" and change code location
  from
  if (RegGetValueW (regkey, NULL, L"version", RRF_RT_REG_BINARY, NULL, v, &len)
  to
  //if (RegGetValueW (regkey, NULL, L"version", RRF_RT_REG_BINARY, NULL, v, &len)
  if (RegQueryValueEx(regkey, L"version", NULL, NULL, (LPBYTE)v, &len)
- click on warning "'RegCopyTree' undefined; assuming extern returning int" and change code location
  from
  status = RegCopyTree (regkey_nilings, NULL, regkey_proxy);
  to
  //status = RegCopyTree (regkey_nilings, NULL, regkey_proxy);
  status = SHCopyKey(regkey_nilings, NULL, regkey_proxy, 0);
- click on warning "'RegDeleteTree' undefined; assuming extern returning int" and change code
  location from
  RegDeleteTree (HKEY_CURRENT_USER, GUI_REGKEY_HKCU); /* delete all values and subkeys */
  to
  //RegDeleteTree (HKEY_CURRENT_USER, GUI_REGKEY_HKCU); /* delete all values and subkeys */
  SHDeleteKey(HKEY_CURRENT_USER, GUI_REGKEY_HKCU); /* delete all values and subkeys */
- go to the start of the C source file registry.c and place the following include after <shlobj.h>
  #include <shlwapi.h>
- Menu > Build > Rebuild Solution > Menu > View > Error List
- click on error "'TTI_ERROR_LARGE': undeclared identifier" and change the code location from
  bt.ttiIcon = TTI_ERROR_LARGE;
  to
  #define TTI_ERROR_LARGE 6
  bt.ttiIcon = TTI_ERROR_LARGE;
- click on error "'IID_IFileOpenDialog': undeclared identifier", comment out the complete
  function "BrowseFolder" and add the following replacement functions
  INT CALLBACK BrowseCallbackProc(HWND hwnd, UINT uMsg, LPARAM lp, LPARAM pData)
  {
      if (uMsg == BFFM_INITIALIZED) SendMessage(hwnd, BFFM_SETSELECTION, TRUE, pData);
      return 0;
  }

  static BOOL BrowseFolder(const WCHAR * initial_path, WCHAR * selected_path, size_t selected_path_size)
  {
      HRESULT initResult = CoInitializeEx(NULL, COINIT_APARTMENTTHREADED);
      if (FAILED(initResult))
      {
          return false;
      }

      BROWSEINFO br;
      ZeroMemory(&br, sizeof(BROWSEINFO));
      br.lpfn = BrowseCallbackProc;
      br.ulFlags = BIF_RETURNONLYFSDIRS | BIF_NEWDIALOGSTYLE;
      br.hwndOwner = NULL;
      br.lParam = (LPARAM)initial_path;

      LPITEMIDLIST pidl = NULL;
      if ((pidl = SHBrowseForFolder(&br)) != NULL)
      {
          wchar_t path[MAX_PATH];
          if (SHGetPathFromIDList(pidl, path))
          {
              wcsncpy(selected_path, path, wcslen(path));
          }
      }

      CoUninitialize();

      return true;
  }
- Menu > Build > Rebuild Solution > Menu > View > Error List
- click on error "cannot open include file '../openvpn-gui-res.h'." and change the code location
  from
  #include "../openvpn-gui-res.h"
  to
  #include "openvpn-gui-res.h"
- click on warning "'function': conversion from 'time_t' to 'unsigned int', possible loss of data"
  and change the code location from
  srand(time(NULL));
  to
  srand((unsigned int)time(NULL));
- click on warning "'initializing': conversion from 'unsigned __int64' to 'double', possible loss of
  data" and change the code location from
  double x = c;
  to
  double x = (double)c;
- click on warning "'function': conversion from 'time_t' to 'unsigned int', possible loss of data"
  and change the code location from
  srand(time(NULL));
  to
  srand((unsigned int)time(NULL));
- click on warning "'function': different 'const' qualifiers" and change the code location from
  void *tmp = realloc(options->auto_connect, sizeof(wchar_t *)*options->max_auto_connect);
  to
  void *tmp = realloc((void*)options->auto_connect, sizeof(wchar_t *)*options->max_auto_connect);
- to solve the warning "Support for targeting Windows XP is deprecated and will not be present in
  future releases of Visual Studio." do the following steps:
  Menu > View > Property Manager > right click "openvpn-gui" > Add New Project Property Sheet... >
  Add > expand "openvpn-gui" > expand "Debug | Win32" > right click on PropertySheet > Properties >
  Common Properties > User Macros > button "Add Macro":
  Name: XPDeprecationWarning
  Value: false
  > 2 x OK
  This property sheets gets added to every build configuration automatically.
- choose Menu > Build > Configuration Manager... > Active solution configuration: Release >
  Active solution platform: x86 > Close
- in Solution Explorer select openvpn-gui > Menu > Project > Properties > choose Configuration:
  Active(Release) > Platform: Active(Win32) and change the following values:
  Configuration Properties > C/C++ > Optimization
  - Optimization: Maximum Optimization (Favor Size) (/O1)
  - Enable Intrinsic Functions: No
  - Favor Size Or Speed: Favor small code (/Os)
  Linker > Debugging
  - Generate Debug Info: No
  > OK
- choose Menu > Build > Rebuild Solution

We can now compile the debug and release configuration for Windows XP without any errors or warnings.
The final source code package is located at "OpenVPN-GUI_v11.26openvpn-gui_v11.26_20220123_for_XP.7z".


11.) Build TAP-Driver v9.9.2
------------------------------

We have to rebuild the TAP-Driver for Windows XP, because the original driver of OpenVPN v2.3.18
does only support a speed of 10 MBit/s. This limits our connection dramatically. Therefore we
implemented a patch to support 1 GBit/s, although the theoretical VPN limit would be around 250 to
300 MBit/s.

- Operating System: Windows XP SP3 or Windows Server 2003 R2 SP2
- Compiler Suite: Windows Driver Development Kit v7.1.0 (7600.16385.1)
- install "NSIS-Installernsis-2.50-setup.exe"
- unpack "TAP-Driver_v9.9.2tap-windows-master_for_XP.7z" to "C:tap"
- open file "C:tapsrctapdrvr.c" and change code line 1142 from
  l_Query.m_Long = 100000; // rate / 100 bps
  to
  l_Query.m_Long = 10000000; // rate / 100 bps
- to build the release driver open an administrative command prompt and type the following commands:

  REM change current directory to TAP-Driver source code directory
  cd C:tap

  REM configure TAP-Driver
  configure.bat

  REM build TAP-Driver
  build.bat

- the resulting NSIS-Installer package is located at "C:taptap-windows-9.9.2.exe"

The final source code package is located at "TAP-Driver_v9.9.2tap_v9.9.2_20220123_for_XP.7z".


12.) Build NSIS-Installer
---------------------------

- Operating System: Windows XP SP3 or Windows Server 2003 R2 SP2
- install "NSIS-Installernsis-2.50-setup.exe"
- create the directory "C:nsis"
- unpack "NSIS-InstallerOpenVPN-v2.3.18_last_version_for_XP.exe" to "C:nsisOpenVPN-v2.3.18"
- unpack "NSIS-Installeropenvpn-build-release-2.3.7z" to "C:nsisopenvpn-build-release-2.3"
- copy "C:nsisopenvpn-build-release-2.3windows-nsisinstall-whirl.bmp" to "C:nsis"
- copy "C:nsisopenvpn-build-release-2.3windows-nsisnsProcess.dll" to "C:nsis"
- copy "C:nsisopenvpn-build-release-2.3windows-nsisnsProcess.nsh" to "C:nsis"
- copy "NSIS-InstallerVC-Redistributable_v14.27.29114.0_x86.exe" to "C:nsis"
- delete the directory "C:nsisOpenVPN-v2.3.18$PLUGINSDIR"
- delete the file "C:nsisOpenVPN-v2.3.18$TEMPtap-windows.exe"
- delete all files and directories in the folder "C:nsisOpenVPN-v2.3.18bin" except "openvpnserv.exe"
- unpack "OpenSSL_v1.1.1mopenssl-v1.1.1m-shared.7z" to "C:OpenSSL_v1.1.1m"
- copy "C:OpenSSL_v1.1.1mbinlibcrypto-1_1.dll" to "C:nsisOpenVPN-v2.3.18bin"
- copy "C:OpenSSL_v1.1.1mbinlibssl-1_1.dll" to "C:nsisOpenVPN-v2.3.18bin"
- copy "C:OpenSSL_v1.1.1mbinopenssl.exe" to "C:nsisOpenVPN-v2.3.18bin"
- unpack "PKCS11-Helper_v1.28.0pkcs11-helper-1.28.0-shared-DLL.7z" to "C:pkcs11-helper-1.28.0"
- copy "C:pkcs11-helper-1.28.0liblibpkcs11-helper-1.dll" to "C:nsisOpenVPN-v2.3.18bin"
- unpack "LZO_v2.10lzo-2.10-shared-DLL.7z" to "C:lzo-2.10"
- copy "C:lzo-2.10lzo2.dll" to "C:nsisOpenVPN-v2.3.18bin"
- unpack "OpenVPN_v2.5.4openvpn_v2.5.4_20220123_for_XP.7z" to "C:openvpn_v2.5.4_20220123_for_XP"
- copy "C:openvpn_v2.5.4_20220123_for_XPbinopenvpn.exe" to "C:nsisOpenVPN-v2.3.18bin"
- unpack "OpenVPN-GUI_v11.26openvpn-gui_v11.26_20220123_for_XP.7z" to "C:openvpn-gui_v11.26_20220123_for_XP"
- copy "C:openvpn-gui_v11.26_20220123_for_XPbinopenvpn-gui.exe" to "C:nsisOpenVPN-v2.3.18bin"
- copy "C:taptap-windows-9.9.2.exe" to "C:nsisOpenVPN-v2.3.18$TEMPtap-windows.exe"
- delete the directory "C:nsisopenvpn-build-release-2.3"
- copy "NSIS-Installeropenvpn.nsi" to "C:nsisopenvpn.nsi"
- Start > Programs > NSIS > Compile NSI scripts
- Menu > File > Load Script... > choose file "C:nsisopenvpn.nsi" > Open > the NSI script is
  compiled automatically we should not see any errors at the end of compilation > Close > close NSIS
  compiler window

The newly created OpenVPN installer is located at "C:nsisOpenVPN-v2.5.4.exe". The final source
code package is located at "NSIS-InstallerNSIS_Installer_Package_20220123_for_XP.7z".


13.) OpenVPN configuration file changes for Windows XP
--------------------------------------------------------

We should change the following 3 parameters in the OpenVPN configuration file for Windows XP:

- block-outside-dns
- route-ipv6 ::/0
- auth-nocache

The parameter "block-outside-dns" is used to block DNS traffic and remove a potential DNS leak. If
this parameter is commented out in your VPN configuration file you should enable it.

To completely disable IPv6 routing we should comment out the parameter "route-ipv6 ::/0". Otherwise
we see the following error message:

ERROR: Windows route add ipv6 command failed: returned error code 1

We also should enable the additional parameter "auth-nocache". This disables password caching in
memory. Without this parameter we see the following error message in the log:

WARNING: this configuration may cache passwords in memory -- use the auth-nocache option to prevent this

A correct example configuration file section will look like follows:

block-outside-dns
#route-ipv6 ::/0
auth-nocache


14.) Test if OpenVPN is working correctly
-------------------------------------------

To test the correct working of OpenVPN we can use the following 3 internet sites:

- https://hide.me/en/check
  Checks the IP address and the provider that uses this address. This should display only servers
  of your VPN network.
- https://www.dnsleaktest.com
  Checks for DNS leaks. DNS leaks can show the internet browsing history if the traffic is not
  routed correctly.
- https://ipleak.net
  Checks for DNS leaks and WebRTC leaks.

To disable a potential WebRTC leak in your browser do the following steps based on your browser:

- Mozilla Firefox: Type "about:config" in the address bar, scroll down to "media.peerconnection.enabled",
  double click to set it to false
- Google Chrome: Install Google official extension WebRTC Network Limiter
- Opera: Type "about:config" in the address bar or go to "Settings", select "Show advanced settings"
  and click on "Privacy & security". At "WebRTC" mark select "Disable non-proxied UDP".


15.) OpenVPN v2.5.4 Windows XP SP3 bug
----------------------------------------

OpenVPN v2.5.4 contains a severe bug on Windows XP SP3. If we try to connect to the VPN server, we
see the following buffer size error in the log file:

2022-01-09 14:24:02 open_tun
2022-01-09 14:24:02 MANAGEMENT: Client disconnected
2022-01-09 14:24:02 fatal buffer size error, size=2089877947
2022-01-09 14:24:02 Exiting due to fatal error

The buffer size of 2089877947 can change randomly. This error is caused by the source code file
"tun.c" and the function "get_device_instance_id_interface". The call to CM_Get_Device_Interface_List_Size
returns CR_SUCCESS and a random interface list size, which is invalid and based on the value of the
variable dev_interface_list_size on function entry. That is the reason why the following call to
alloc_buf_gc fails, because the specified buffer size is too big. To solve this problem we have to
simply change code line 3672 from

ULONG dev_interface_list_size;

to

ULONG dev_interface_list_size = 0;

This initializes the device interface list size with zero and the returned list size is 1 on Windows
XP SP3 for an empty list. The error does not occur on Windows Server 2003 R2 SP2, where a valid list
size is returned without any problems.


16.) Version and download link
--------------------------------

The complete OpenVPN package with all necessary files can be downloaded from Sourceforge
(https://sourceforge.net/projects/OpenVPN-for-Windows-XP).

Thanks for your attention and interest in this topic.
Greets Kai Schtrom

Version 1.0 January 23, 2022
The OpenVPN community project team is proud to release OpenVPN 2.6.0. This is a new stable release with some major new features.
For details see: Changes.rst
The Changes document also contains a section with workarounds for common problems encountered when using OpenVPN with OpenSSL 3.
New features and improvements in 2.6.0 compared to 2.5.8:
- Data Channel Offload (DCO) kernel acceleration support for Windows, Linux, and FreeBSD.
- OpenSSL 3 support.
- Improved handling of tunnel MTU, including support for pushable MTU.
- Outdated cryptographic algorithms disabled by default, but there are options to override if necessary.
- Reworked TLS handshake, making OpenVPN immune to replay-packet state exhaustion attacks.
- Added —peer-fingerprint mode for a more simplistic certificate setup and verification.
- Added Pre-Logon Access Provider support to OpenVPN GUI for Windows.
- Improved protocol negotiation, leading to faster connection setup.
- Included openvpn-gui updated to 11.36.0.0. See CHANGES.rst.
- Updated easy-rsa3 bundled with the installer on Windows.
- Various bug fixes.
Windows 64-bit MSI installer |
GnuPG Signature | OpenVPN-2.6.0-I003-amd64.msi |
Windows ARM64 MSI installer |
GnuPG Signature | OpenVPN-2.6.0-I003-arm64.msi |
Windows 32-bit MSI installer |
GnuPG Signature | OpenVPN-2.6.0-I003-x86.msi |
Source zip |
GnuPG Signature | openvpn-2.6.0.tar.gz |
The OpenVPN community project team is proud to release OpenVPN 2.5.4. This release include a number of fixes and small improvements. One of the fixes is to password prompting on windows console when stderr redirection is in use — this breaks 2.5.x on Win11/ARM, and might also break on Win11/amd64. Windows executable and libraries are now built natively on Windows using MSVC, not cross-compiled on Linux as with earlier 2.5 releases. Windows installers include updated OpenSSL and new OpenVPN GUI. The latter includes several improvements, the most important of which is the ability to import profiles from URLs where available. Installer version I602 fixes loading of pkcs11 files on Windows. Installer version I603 fixes a bug in the version number as seen by Windows (was 2.5..4, not 2.5.4). Installer I604 fixes some small Windows issues.
Source tarball (gzip) |
GnuPG Signature | openvpn-2.5.4.tar.gz |
Source tarball (xz) |
GnuPG Signature | openvpn-2.5.4.tar.xz |
Source zip |
GnuPG Signature | openvpn-2.5.4.zip |
Windows 32-bit MSI installer |
GnuPG Signature | OpenVPN-2.5.4-I604-x86.msi |
Windows 64-bit MSI installer |
GnuPG Signature | OpenVPN-2.5.4-I604-amd64.msi |
Windows ARM64 MSI installer |
GnuPG Signature | OpenVPN-2.5.4-I604-arm64.msi |
Overview of changes since OpenVPN 2.4
Faster connections
Crypto specific changes
- ChaCha20-Poly1305 cipher in the OpenVPN data channel (Requires OpenSSL 1.1.0 or newer)
- Improved TLS 1.3 support when using OpenSSL 1.1.1 or newer
- Client-specific tls-crypt keys (—tls-crypt-v2)
- Improved Data channel cipher negotiation
- Removal of BF-CBC support in default configuration (see below for possible incompatibilities)
Server-side improvements
- HMAC based auth-token support for seamless reconnects to standalone servers or a group of servers.
- Asynchronous (deferred) authentication support for auth-pam plugin
- Asynchronous (deferred) support for client-connect scripts and plugins
Network-related changes
- Support IPv4 configs with /31 netmasks now
- 802.1q VLAN support on TAP servers
- IPv6-only tunnels
- New option —block-ipv6 to reject all IPv6 packets (ICMPv6)
Linux-specific features
- VRF support
- Netlink integration (OpenVPN no longer needs to execute ifconfig/route or ip commands)
Windows-specific features
- Wintun driver support, a faster alternative to tap-windows6
- Setting tun/tap interface MTU
- Setting DHCP search domain
- Allow unicode search string in —cryptoapicert option
- EasyRSA3, a modern take on OpenVPN CA management
- MSI installer
Important notices
BF-CBC cipher is no longer the default
Cipher handling for the data channel cipher has been significantly changed between OpenVPN 2.3/2.4 and v2.5, most notably there are no «default cipher BF-CBC» anymore because it is no longer considered a reasonable default. BF-CBC is still available, but it needs to be explicitly configured now.
For connections between OpenVPN 2.4 and v2.5 clients and servers, both ends will be able to negotiate a better cipher than BF-CBC. By default they will select one of the AES-GCM ciphers, but this can be influenced using the —data-ciphers setting.
Connections between OpenVPN 2.3 and v2.5 that have no —cipher setting in the config (= defaulting to BF-CBC and not being negotiation-capable) must be updated. Unless BF-CBC is included in —data-ciphers or there is a «—cipher BF-CBC» in the OpenVPN 2.5 config, a v2.5 client or server will refuse to talk to a v2.3 server or client, because it has no common data channel cipher and negotiating a cipher is not possible. Generally, we recommend upgrading such setups to OpenVPN 2.4 or v2.5. If upgrading is not possible we recommend adding data-ciphers AES-256-GCM:AES-128-GCM:AES-128-CBC (for v2.5+) or cipher AES-128-CBC (v2.4.x and older) to the configuration of all clients and servers.
If you really need to use an unsupported OpenVPN 2.3 (or even older) release and need to stay on BF-CBC (not recommended), the OpenVPN 2.5 based client will need a config file change to re-enable BF-CBC. But be warned that BF-CBC and other related weak ciphers will be removed in coming OpenVPN major releases.
Connectivity to some VPN service provider may break
Connecting with an OpenVPN 2.5 client to at least one commercial VPN service that
implemented their own cipher negotiation method that always reports back that it is using BF-CBC to the client is broken in v2.5. This has always caused warning about mismatch ciphers. We have been in contact with some service providers and they are looking into it. This is not something the OpenVPN community can fix. If your commercial VPN does not work with a v2.5 client, complain to the VPN service provider.
More details on these new features as well as a list of deprecated features and user-visible changes are available in Changes.rst.
The OpenVPN community project team is proud to release OpenVPN 2.5.3. Besides a number of small improvements and bug fixes, this release fixes a possible security issue with OpenSSL config autoloading on Windows (CVE-2021-3606). Updated OpenVPN GUI is also included in Windows installers.
Source tarball (gzip) |
GnuPG Signature | openvpn-2.5.3.tar.gz |
Source tarball (xz) |
GnuPG Signature | openvpn-2.5.3.tar.xz |
Source zip |
GnuPG Signature | openvpn-2.5.3.zip |
Windows 32-bit MSI installer |
GnuPG Signature | OpenVPN-2.5.3-I601-x86.msi |
Windows 64-bit MSI installer |
GnuPG Signature | OpenVPN-2.5.3-I601-amd64.msi |
Windows ARM64 MSI installer |
GnuPG Signature | OpenVPN-2.5.3-I601-arm64.msi |
Overview of changes since OpenVPN 2.4
Faster connections
- Connections setup is now much faster
Crypto specific changes
- ChaCha20-Poly1305 cipher in the OpenVPN data channel (Requires OpenSSL 1.1.0 or newer)
- Improved TLS 1.3 support when using OpenSSL 1.1.1 or newer
- Client-specific tls-crypt keys (—tls-crypt-v2)
- Improved Data channel cipher negotiation
- Removal of BF-CBC support in default configuration (see below for possible incompatibilities)
Server-side improvements
- HMAC based auth-token support for seamless reconnects to standalone servers or a group of servers.
- Asynchronous (deferred) authentication support for auth-pam plugin
- Asynchronous (deferred) support for client-connect scripts and plugins
Network-related changes
- Support IPv4 configs with /31 netmasks now
- 802.1q VLAN support on TAP servers
- IPv6-only tunnels
- New option —block-ipv6 to reject all IPv6 packets (ICMPv6)
Linux-specific features
- VRF support
- Netlink integration (OpenVPN no longer needs to execute ifconfig/route or ip commands)
Windows-specific features
- Wintun driver support, a faster alternative to tap-windows6
- Setting tun/tap interface MTU
- Setting DHCP search domain
- Allow unicode search string in —cryptoapicert option
- EasyRSA3, a modern take on OpenVPN CA management
- MSI installer
Important notices
BF-CBC cipher is no longer the default
Cipher handling for the data channel cipher has been significantly changed between OpenVPN 2.3/2.4 and v2.5, most notably there are no «default cipher BF-CBC» anymore because it is no longer considered a reasonable default. BF-CBC is still available, but it needs to be explicitly configured now.
For connections between OpenVPN 2.4 and v2.5 clients and servers, both ends will be able to negotiate a better cipher than BF-CBC. By default they will select one of the AES-GCM ciphers, but this can be influenced using the —data-ciphers setting.
Connections between OpenVPN 2.3 and v2.5 that have no —cipher setting in the config (= defaulting to BF-CBC and not being negotiation-capable) must be updated. Unless BF-CBC is included in —data-ciphers or there is a «—cipher BF-CBC» in the OpenVPN 2.5 config, a v2.5 client or server will refuse to talk to a v2.3 server or client, because it has no common data channel cipher and negotiating a cipher is not possible. Generally, we recommend upgrading such setups to OpenVPN 2.4 or v2.5. If upgrading is not possible we recommend adding data-ciphers AES-256-GCM:AES-128-GCM:AES-128-CBC (for v2.5+) or cipher AES-128-CBC (v2.4.x and older) to the configuration of all clients and servers.
If you really need to use an unsupported OpenVPN 2.3 (or even older) release and need to stay on BF-CBC (not recommended), the OpenVPN 2.5 based client will need a config file change to re-enable BF-CBC. But be warned that BF-CBC and other related weak ciphers will be removed in coming OpenVPN major releases.
Connectivity to some VPN service provider may break
Connecting with an OpenVPN 2.5 client to at least one commercial VPN service that
implemented their own cipher negotiation method that always reports back that it is using BF-CBC to the client is broken in v2.5. This has always caused warning about mismatch ciphers. We have been in contact with some service providers and they are looking into it. This is not something the OpenVPN community can fix. If your commercial VPN does not work with a v2.5 client, complain to the VPN service provider.
More details on these new features as well as a list of deprecated features and user-visible changes are available in Changes.rst.
The OpenVPN community project team is proud to release OpenVPN 2.5.2. It fixes two related security vulnerabilities (CVE-2020-15078) which under very specific circumstances allow tricking a server using delayed authentication (plugin or management) into returning a PUSH_REPLY before the AUTH_FAILED message, which can possibly be used to gather information about a VPN setup. In combination with «—auth-gen-token» or a user-specific token auth solution it can be possible to get access to a VPN with an otherwise-invalid account. OpenVPN 2.5.2 also includes other bug fixes and improvements. Updated OpenSSL and OpenVPN GUI are included in Windows installers.
Source tarball (gzip) |
GnuPG Signature | openvpn-2.5.2.tar.gz |
Source tarball (xz) |
GnuPG Signature | openvpn-2.5.2.tar.xz |
Source zip |
GnuPG Signature | openvpn-2.5.2.zip |
Windows 32-bit MSI installer |
GnuPG Signature | OpenVPN-2.5.2-I601-x86.msi |
Windows 64-bit MSI installer |
GnuPG Signature | OpenVPN-2.5.2-I601-amd64.msi |
Overview of changes since OpenVPN 2.4
Faster connections
- Connections setup is now much faster
Crypto specific changes
- ChaCha20-Poly1305 cipher in the OpenVPN data channel (Requires OpenSSL 1.1.0 or newer)
- Improved TLS 1.3 support when using OpenSSL 1.1.1 or newer
- Client-specific tls-crypt keys (—tls-crypt-v2)
- Improved Data channel cipher negotiation
- Removal of BF-CBC support in default configuration (see below for possible incompatibilities)
Server-side improvements
- HMAC based auth-token support for seamless reconnects to standalone servers or a group of servers.
- Asynchronous (deferred) authentication support for auth-pam plugin
- Asynchronous (deferred) support for client-connect scripts and plugins
Network-related changes
- Support IPv4 configs with /31 netmasks now
- 802.1q VLAN support on TAP servers
- IPv6-only tunnels
- New option —block-ipv6 to reject all IPv6 packets (ICMPv6)
Linux-specific features
- VRF support
- Netlink integration (OpenVPN no longer needs to execute ifconfig/route or ip commands)
Windows-specific features
- Wintun driver support, a faster alternative to tap-windows6
- Setting tun/tap interface MTU
- Setting DHCP search domain
- Allow unicode search string in —cryptoapicert option
- EasyRSA3, a modern take on OpenVPN CA management
- MSI installer
Important notices
BF-CBC cipher is no longer the default
Cipher handling for the data channel cipher has been significantly changed between OpenVPN 2.3/2.4 and v2.5, most notably there are no «default cipher BF-CBC» anymore because it is no longer considered a reasonable default. BF-CBC is still available, but it needs to be explicitly configured now.
For connections between OpenVPN 2.4 and v2.5 clients and servers, both ends will be able to negotiate a better cipher than BF-CBC. By default they will select one of the AES-GCM ciphers, but this can be influenced using the —data-ciphers setting.
Connections between OpenVPN 2.3 and v2.5 that have no —cipher setting in the config (= defaulting to BF-CBC and not being negotiation-capable) must be updated. Unless BF-CBC is included in —data-ciphers or there is a «—cipher BF-CBC» in the OpenVPN 2.5 config, a v2.5 client or server will refuse to talk to a v2.3 server or client, because it has no common data channel cipher and negotiating a cipher is not possible. Generally, we recommend upgrading such setups to OpenVPN 2.4 or v2.5. If upgrading is not possible we recommend adding data-ciphers AES-256-GCM:AES-128-GCM:AES-128-CBC (for v2.5+) or cipher AES-128-CBC (v2.4.x and older) to the configuration of all clients and servers.
If you really need to use an unsupported OpenVPN 2.3 (or even older) release and need to stay on BF-CBC (not recommended), the OpenVPN 2.5 based client will need a config file change to re-enable BF-CBC. But be warned that BF-CBC and other related weak ciphers will be removed in coming OpenVPN major releases.
Connectivity to some VPN service provider may break
Connecting with an OpenVPN 2.5 client to at least one commercial VPN service that
implemented their own cipher negotiation method that always reports back that it is using BF-CBC to the client is broken in v2.5. This has always caused warning about mismatch ciphers. We have been in contact with some service providers and they are looking into it. This is not something the OpenVPN community can fix. If your commercial VPN does not work with a v2.5 client, complain to the VPN service provider.
More details on these new features as well as a list of deprecated features and user-visible changes are available in Changes.rst.
The OpenVPN community project team is proud to release OpenVPN 2.5.1. It includes several bug fixes and improvements as well as updated OpenSSL and OpenVPN GUI for Windows.
Source tarball (gzip) |
GnuPG Signature | openvpn-2.5.1.tar.gz |
Source tarball (xz) |
GnuPG Signature | openvpn-2.5.1.tar.xz |
Source zip |
GnuPG Signature | openvpn-2.5.1.zip |
Windows 32-bit MSI installer |
GnuPG Signature | OpenVPN-2.5.1-I601-x86.msi |
Windows 64-bit MSI installer |
GnuPG Signature | OpenVPN-2.5.1-I601-amd64.msi |
Overview of changes since OpenVPN 2.4
Faster connections
- Connections setup is now much faster
Crypto specific changes
- ChaCha20-Poly1305 cipher in the OpenVPN data channel (Requires OpenSSL 1.1.0 or newer)
- Improved TLS 1.3 support when using OpenSSL 1.1.1 or newer
- Client-specific tls-crypt keys (—tls-crypt-v2)
- Improved Data channel cipher negotiation
- Removal of BF-CBC support in default configuration (see below for possible incompatibilities)
Server-side improvements
- HMAC based auth-token support for seamless reconnects to standalone servers or a group of servers.
- Asynchronous (deferred) authentication support for auth-pam plugin
- Asynchronous (deferred) support for client-connect scripts and plugins
Network-related changes
- Support IPv4 configs with /31 netmasks now
- 802.1q VLAN support on TAP servers
- IPv6-only tunnels
- New option —block-ipv6 to reject all IPv6 packets (ICMPv6)
Linux-specific features
- VRF support
- Netlink integration (OpenVPN no longer needs to execute ifconfig/route or ip commands)
Windows-specific features
- Wintun driver support, a faster alternative to tap-windows6
- Setting tun/tap interface MTU
- Setting DHCP search domain
- Allow unicode search string in —cryptoapicert option
- EasyRSA3, a modern take on OpenVPN CA management
- MSI installer
Important notices
BF-CBC cipher is no longer the default
Cipher handling for the data channel cipher has been significantly changed between OpenVPN 2.3/2.4 and v2.5, most notably there are no «default cipher BF-CBC» anymore because it is no longer considered a reasonable default. BF-CBC is still available, but it needs to be explicitly configured now.
For connections between OpenVPN 2.4 and v2.5 clients and servers, both ends will be able to negotiate a better cipher than BF-CBC. By default they will select one of the AES-GCM ciphers, but this can be influenced using the —data-ciphers setting.
Connections between OpenVPN 2.3 and v2.5 that have no —cipher setting in the config (= defaulting to BF-CBC and not being negotiation-capable) must be updated. Unless BF-CBC is included in —data-ciphers or there is a «—cipher BF-CBC» in the OpenVPN 2.5 config, a v2.5 client or server will refuse to talk to a v2.3 server or client, because it has no common data channel cipher and negotiating a cipher is not possible. Generally, we recommend upgrading such setups to OpenVPN 2.4 or v2.5. If upgrading is not possible we recommend adding data-ciphers AES-256-GCM:AES-128-GCM:AES-128-CBC (for v2.5+) or cipher AES-128-CBC (v2.4.x and older) to the configuration of all clients and servers.
If you really need to use an unsupported OpenVPN 2.3 (or even older) release and need to stay on BF-CBC (not recommended), the OpenVPN 2.5 based client will need a config file change to re-enable BF-CBC. But be warned that BF-CBC and other related weak ciphers will be removed in coming OpenVPN major releases.
Connectivity to some VPN service provider may break
Connecting with an OpenVPN 2.5 client to at least one commercial VPN service that
implemented their own cipher negotiation method that always reports back that it is using BF-CBC to the client is broken in v2.5. This has always caused warning about mismatch ciphers. We have been in contact with some service providers and they are looking into it. This is not something the OpenVPN community can fix. If your commercial VPN does not work with a v2.5 client, complain to the VPN service provider.
More details on these new features as well as a list of deprecated features and user-visible changes are available in Changes.rst.
The OpenVPN community project team is proud to release OpenVPN 2.5.0 which is a new major release with many new features.
Source tarball (gzip) |
GnuPG Signature | openvpn-2.5.0.tar.gz |
Source tarball (xz) |
GnuPG Signature | openvpn-2.5.0.tar.xz |
Source zip |
GnuPG Signature | openvpn-2.5.0.zip |
Windows 32-bit MSI installer |
GnuPG Signature | OpenVPN-2.5.0-I601-x86.msi |
Windows 64-bit MSI installer |
GnuPG Signature | OpenVPN-2.5.0-I601-amd64.msi |
Overview of changes since OpenVPN 2.4
Faster connections
- Connections setup is now much faster
Crypto specific changes
- ChaCha20-Poly1305 cipher in the OpenVPN data channel (Requires OpenSSL 1.1.0 or newer)
- Improved TLS 1.3 support when using OpenSSL 1.1.1 or newer
- Client-specific tls-crypt keys (—tls-crypt-v2)
- Improved Data channel cipher negotiation
- Removal of BF-CBC support in default configuration (see below for possible incompatibilities)
Server-side improvements
- HMAC based auth-token support for seamless reconnects to standalone servers or a group of servers.
- Asynchronous (deferred) authentication support for auth-pam plugin
- Asynchronous (deferred) support for client-connect scripts and plugins
Network-related changes
- Support IPv4 configs with /31 netmasks now
- 802.1q VLAN support on TAP servers
- IPv6-only tunnels
- New option —block-ipv6 to reject all IPv6 packets (ICMPv6)
Linux-specific features
- VRF support
- Netlink integration (OpenVPN no longer needs to execute ifconfig/route or ip commands)
Windows-specific features
- Wintun driver support, a faster alternative to tap-windows6
- Setting tun/tap interface MTU
- Setting DHCP search domain
- Allow unicode search string in —cryptoapicert option
- EasyRSA3, a modern take on OpenVPN CA management
- MSI installer
Important notices
BF-CBC cipher is no longer the default
Cipher handling for the data channel cipher has been significantly changed between OpenVPN 2.3/2.4 and v2.5, most notably there are no «default cipher BF-CBC» anymore because it is no longer considered a reasonable default. BF-CBC is still available, but it needs to be explicitly configured now.
For connections between OpenVPN 2.4 and v2.5 clients and servers, both ends will be able to negotiate a better cipher than BF-CBC. By default they will select one of the AES-GCM ciphers, but this can be influenced using the —data-ciphers setting.
Connections between OpenVPN 2.3 and v2.5 that have no —cipher setting in the config (= defaulting to BF-CBC and not being negotiation-capable) must be updated. Unless BF-CBC is included in —data-ciphers or there is a «—cipher BF-CBC» in the OpenVPN 2.5 config, a v2.5 client or server will refuse to talk to a v2.3 server or client, because it has no common data channel cipher and negotiating a cipher is not possible. Generally, we recommend upgrading such setups to OpenVPN 2.4 or v2.5. If upgrading is not possible we recommend adding data-ciphers AES-256-GCM:AES-128-GCM:AES-128-CBC (for v2.5+) or cipher AES-128-CBC (v2.4.x and older) to the configuration of all clients and servers.
If you really need to use an unsupported OpenVPN 2.3 (or even older) release and need to stay on BF-CBC (not recommended), the OpenVPN 2.5 based client will need a config file change to re-enable BF-CBC. But be warned that BF-CBC and other related weak ciphers will be removed in coming OpenVPN major releases.
Connectivity to some VPN service provider may break
Connecting with an OpenVPN 2.5 client to at least one commercial VPN service that
implemented their own cipher negotiation method that always reports back that it is using BF-CBC to the client is broken in v2.5. This has always caused warning about mismatch ciphers. We have been in contact with some service providers and they are looking into it. This is not something the OpenVPN community can fix. If your commercial VPN does not work with a v2.5 client, complain to the VPN service provider.
More details on these new features as well as a list of deprecated features and user-visible changes are available in Changes.rst.
The OpenVPN community project team is proud to release OpenVPN 2.4.11. It fixes two related security vulnerabilities (CVE-2020-15078) which under very specific circumstances allow tricking a server using delayed authentication (plugin or management) into returning a PUSH_REPLY before the AUTH_FAILED message, which can possibly be used to gather information about a VPN setup. This release also includes other bug fixes and improvements. The I602 Windows installers fix a possible security issue with OpenSSL config autoloading on Windows (CVE-2021-3606). Updated OpenSSL and OpenVPN GUI are included in Windows installers.
Source Tarball (gzip) |
GnuPG Signature | openvpn-2.4.11.tar.gz |
Source Tarball (xz) |
GnuPG Signature | openvpn-2.4.11.tar.xz |
Source Zip |
GnuPG Signature | openvpn-2.4.11.zip |
Windows 7/8/8.1/Server 2012r2 installer (NSIS) |
GnuPG Signature | openvpn-install-2.4.11-I602-Win7.exe |
Windows 10/Server 2016/Server 2019 installer (NSIS) |
GnuPG Signature | openvpn-install-2.4.11-I602-Win10.exe |
A summary of the changes is available in Changes.rst, and a full list of changes is available here.
Please note that LibreSSL is not a supported crypto backend. We accept patches and we do test on OpenBSD 6.0 which comes with LibreSSL, but if newer versions of LibreSSL break API compatibility we do not take responsibility to fix that.
Also note that Windows installers have been built with NSIS version that has been patched against several NSIS installer code execution and privilege escalation problems. Based on our testing, though, older Windows versions such as Windows 7 might not benefit from these fixes. We thus strongly encourage you to always move NSIS installers to a non-user-writeable location before running them.
Please note that OpenVPN 2.4 installers will not work on Windows XP. The last OpenVPN version that supports Windows XP is 2.3.18, which is downloadable as 32-bit and 64-bit versions.
If you find a bug in this release, please file a bug report to our Trac bug tracker. In uncertain cases please contact our developers first, either using the openvpn-devel mailinglist or the developer IRC channel (#openvpn-devel at irc.libera.chat). For generic help take a look at our official documentation, wiki, forums, openvpn-users mailing list and user IRC channel (#openvpn at irc.libera.chat).
Important: you will need to use the correct installer for your operating system. The Windows 10 installer works on Windows 10 and Windows Server 2016/2019. The Windows 7 installer will work on Windows 7/8/8.1/Server 2012r2. This is because of Microsoft’s driver signing requirements are different for kernel-mode devices drivers, which in our case affects OpenVPN’s tap driver (tap-windows6).
This is primarily a maintenance release with bugfixes and small improvements. Windows installers include the latest OpenSSL version (1.1.1i) which includes security fixes.
A summary of the changes is available in Changes.rst, and a full list of changes is available here.
Please note that LibreSSL is not a supported crypto backend. We accept patches and we do test on OpenBSD 6.0 which comes with LibreSSL, but if newer versions of LibreSSL break API compatibility we do not take responsibility to fix that.
Also note that Windows installers have been built with NSIS version that has been patched against several NSIS installer code execution and privilege escalation problems. Based on our testing, though, older Windows versions such as Windows 7 might not benefit from these fixes. We thus strongly encourage you to always move NSIS installers to a non-user-writeable location before running them.
Please note that OpenVPN 2.4 installers will not work on Windows XP. The last OpenVPN version that supports Windows XP is 2.3.18, which is downloadable as 32-bit and 64-bit versions.
If you find a bug in this release, please file a bug report to our Trac bug tracker. In uncertain cases please contact our developers first, either using the openvpn-devel mailinglist or the developer IRC channel (#openvpn-devel at irc.libera.chat). For generic help take a look at our official documentation, wiki, forums, openvpn-users mailing list and user IRC channel (#openvpn at irc.libera.chat).
Important: you will need to use the correct installer for your operating system. The Windows 10 installer works on Windows 10 and Windows Server 2016/2019. The Windows 7 installer will work on Windows 7/8/8.1/Server 2012r2. This is because of Microsoft’s driver signing requirements are different for kernel-mode devices drivers, which in our case affects OpenVPN’s tap driver (tap-windows6).
Source Tarball (gzip) |
GnuPG Signature | openvpn-2.4.10.tar.gz |
Source Tarball (xz) |
GnuPG Signature | openvpn-2.4.10.tar.xz |
Source Zip |
GnuPG Signature | openvpn-2.4.10.zip |
Windows 7/8/8.1/Server 2012r2 installer (NSIS) |
GnuPG Signature | openvpn-install-2.4.10-I601-Win7.exe |
Windows 10/Server 2016/Server 2019 installer (NSIS) |
GnuPG Signature | openvpn-install-2.4.10-I601-Win10.exe |
Instructions for verifying the signatures are available here.
This release is also available in our own software repositories for Debian and Ubuntu, Supported architectures are i386 and amd64. For details. look here.
The Windows installers are bundled with OpenVPN-GUI — its source code is available on its project page and as tarballs on our alternative download server.
This is primarily a maintenance release with bugfixes and improvements. This release also fixes a security issue (CVE-2020-11810, trac #1272) which allows disrupting service of a freshly connected client that has not yet not negotiated session keys. The vulnerability cannot be used to inject or steal VPN traffic.
A summary of the changes is available in Changes.rst, and a full list of changes is available here.
Please note that LibreSSL is not a supported crypto backend. We accept patches and we do test on OpenBSD 6.0 which comes with LibreSSL, but if newer versions of LibreSSL break API compatibility we do not take responsibility to fix that.
Also note that Windows installers have been built with NSIS version that has been patched against several NSIS installer code execution and privilege escalation problems. Based on our testing, though, older Windows versions such as Windows 7 might not benefit from these fixes. We thus strongly encourage you to always move NSIS installers to a non-user-writeable location before running them. We are moving to MSI installers in OpenVPN 2.5, but OpenVPN 2.4.x will remain NSIS-only.
Compared to OpenVPN 2.3 this is a major update with a large number of new features, improvements and fixes. Some of the major features are AEAD (GCM) cipher and Elliptic Curve DH key exchange support, improved IPv4/IPv6 dual stack support and more seamless connection migration when client’s IP address changes (Peer-ID). Also, the new —tls-crypt feature can be used to increase users’ connection privacy.
OpenVPN GUI bundled with the Windows installer has a large number of new features compared to the one bundled with OpenVPN 2.3. One of major features is the ability to run OpenVPN GUI without administrator privileges. For full details, see the changelog. The new OpenVPN GUI features are documented here.
Please note that OpenVPN 2.4 installers will not work on Windows XP. The last OpenVPN version that supports Windows XP is 2.3.18, which is downloadable as 32-bit and 64-bit versions.
If you find a bug in this release, please file a bug report to our Trac bug tracker. In uncertain cases please contact our developers first, either using the openvpn-devel mailinglist or the developer IRC channel (#openvpn-devel at irc.libera.chat). For generic help take a look at our official documentation, wiki, forums, openvpn-users mailing list and user IRC channel (#openvpn at irc.libera.chat).
Important: you will need to use the correct installer for your operating system. The Windows 10 installer works on Windows 10 and Windows Server 2016/2019. The Windows 7 installer will work on Windows 7/8/8.1/Server 2012r2. This is because of Microsoft’s driver signing requirements are different for kernel-mode devices drivers, which in our case affects OpenVPN’s tap driver (tap-windows6).
Source Tarball (gzip) |
GnuPG Signature | openvpn-2.4.9.tar.gz |
Source Tarball (xz) |
GnuPG Signature | openvpn-2.4.9.tar.xz |
Source Zip |
GnuPG Signature | openvpn-2.4.9.zip |
Windows 7/8/8.1/Server 2012r2 installer (NSIS) |
GnuPG Signature | openvpn-install-2.4.9-I601-Win7.exe |
Windows 10/Server 2016/Server 2019 installer (NSIS) |
GnuPG Signature | openvpn-install-2.4.9-I601-Win10.exe |
NOTE: the GPG key used to sign the release files has been changed since OpenVPN 2.4.0. Instructions for verifying the signatures, as well as the new GPG public key are available here.
We also provide static URLs pointing to latest releases to ease automation. For a list of files look here.
This release is also available in our own software repositories for Debian and Ubuntu, Supported architectures are i386 and amd64. For details. look here.
You can use EasyRSA 2 or EasyRSA 3 for generating your own certificate authority. The former is bundled with Windows installers. The latter is a more modern alternative for UNIX-like operating systems.
The Windows installers are bundled with OpenVPN-GUI — its source code is available on its project page and as tarballs on our alternative download server.
This is primarily a maintenance release with bugfixes and improvements. The Windows installers (I601) have several improvements compared to the previous release:
- New tap-windows6 driver (9.24.2) which fixes some suspend and resume issues
- Latest OpenVPN-GUI
- Considerable performance boost due to new compiler optimization flags
A summary of the changes is available in Changes.rst, and a full list of changes is available here.
Please note that LibreSSL is not a supported crypto backend. We accept patches and we do test on OpenBSD 6.0 which comes with LibreSSL, but if newer versions of LibreSSL break API compatibility we do not take responsibility to fix that.
Also note that Windows installers have been built with NSIS version that has been patched against several NSIS installer code execution and privilege escalation problems. Based on our testing, though, older Windows versions such as Windows 7 might not benefit from these fixes. We thus strongly encourage you to always move NSIS installers to a non-user-writeable location before running them. We are moving to MSI installers in OpenVPN 2.5, but OpenVPN 2.4.x will remain NSIS-only.
Compared to OpenVPN 2.3 this is a major update with a large number of new features, improvements and fixes. Some of the major features are AEAD (GCM) cipher and Elliptic Curve DH key exchange support, improved IPv4/IPv6 dual stack support and more seamless connection migration when client’s IP address changes (Peer-ID). Also, the new —tls-crypt feature can be used to increase users’ connection privacy.
OpenVPN GUI bundled with the Windows installer has a large number of new features compared to the one bundled with OpenVPN 2.3. One of major features is the ability to run OpenVPN GUI without administrator privileges. For full details, see the changelog. The new OpenVPN GUI features are documented here.
Please note that OpenVPN 2.4 installers will not work on Windows XP. The last OpenVPN version that supports Windows XP is 2.3.18, which is downloadable as 32-bit and 64-bit versions.
If you find a bug in this release, please file a bug report to our Trac bug tracker. In uncertain cases please contact our developers first, either using the openvpn-devel mailinglist or the developer IRC channel (#openvpn-devel at irc.libera.chat). For generic help take a look at our official documentation, wiki, forums, openvpn-users mailing list and user IRC channel (#openvpn at irc.libera.chat).
Important: you will need to use the correct installer for your operating system. The Windows 10 installer works on Windows 10 and Windows Server 2016/2019. The Windows 7 installer will work on Windows 7/8/8.1/Server 2012r2. This is because of Microsoft’s driver signing requirements are different for kernel-mode devices drivers, which in our case affects OpenVPN’s tap driver (tap-windows6).
Source Tarball (gzip) |
GnuPG Signature | openvpn-2.4.8.tar.gz |
Source Tarball (xz) |
GnuPG Signature | openvpn-2.4.8.tar.xz |
Source Zip |
GnuPG Signature | openvpn-2.4.8.zip |
Windows 7/8/8.1/Server 2012r2 installer (NSIS) |
GnuPG Signature | openvpn-install-2.4.8-I602-Win7.exe |
Windows 10/Server 2016/Server 2019 installer (NSIS) |
GnuPG Signature | openvpn-install-2.4.8-I602-Win10.exe |
NOTE: the GPG key used to sign the release files has been changed since OpenVPN 2.4.0. Instructions for verifying the signatures, as well as the new GPG public key are available here.
We also provide static URLs pointing to latest releases to ease automation. For a list of files look here.
This release is also available in our own software repositories for Debian and Ubuntu, Supported architectures are i386 and amd64. For details. look here.
You can use EasyRSA 2 or EasyRSA 3 for generating your own certificate authority. The former is bundled with Windows installers. The latter is a more modern alternative for UNIX-like operating systems.
The Windows installers are bundled with OpenVPN-GUI — its source code is available on its project page and as tarballs on our alternative download server.
This is primarily a maintenance release with bugfixes and improvements. One of the big things is enhanced TLS 1.3 support. A summary of the changes is available in Changes.rst, and a full list of changes is available here.
Please note that LibreSSL is not a supported crypto backend. We accept patches and we do test on OpenBSD 6.0 which comes with LibreSSL, but if newer versions of LibreSSL break API compatibility we do not take responsibility to fix that.
Also note that Windows installers have been built with NSIS version that has been patched against several NSIS installer code execution and privilege escalation problems. Based on our testing, though, older Windows versions such as Windows 7 might not benefit from these fixes. We thus strongly encourage you to always move NSIS installers to a non-user-writeable location before running them. We are moving to MSI installers in OpenVPN 2.5, but OpenVPN 2.4.x will remain NSIS-only.
Compared to OpenVPN 2.3 this is a major update with a large number of new features, improvements and fixes. Some of the major features are AEAD (GCM) cipher and Elliptic Curve DH key exchange support, improved IPv4/IPv6 dual stack support and more seamless connection migration when client’s IP address changes (Peer-ID). Also, the new —tls-crypt feature can be used to increase users’ connection privacy.
OpenVPN GUI bundled with the Windows installer has a large number of new features compared to the one bundled with OpenVPN 2.3. One of major features is the ability to run OpenVPN GUI without administrator privileges. For full details, see the changelog. The new OpenVPN GUI features are documented here.
Please note that OpenVPN 2.4 installers will not work on Windows XP. The last OpenVPN version that supports Windows XP is 2.3.18, which is downloadable as 32-bit and 64-bit versions.
If you find a bug in this release, please file a bug report to our Trac bug tracker. In uncertain cases please contact our developers first, either using the openvpn-devel mailinglist or the developer IRC channel (#openvpn-devel at irc.libera.chat). For generic help take a look at our official documentation, wiki, forums, openvpn-users mailing list and user IRC channel (#openvpn at irc.libera.chat).
Important: you will need to use the correct installer for your operating system. The Windows 10 installer will not work on Windows 7/8/8.1/Server 2012r2. This is because Microsoft’s driver signing requirements and tap-windows6. For the same reason you need to use an older installer with Windows Server 2016. This older installer has a local privilege escalation vulnerability issue which we cannot resolve for Windows Server 2016 until tap-windows6 passes the HLK test suite on that platform. In the meanwhile we recommend Windows Server 2016 users to avoid installing OpenVPN/tap-windows6 driver on hosts where all users can’t be trusted. Users of Windows 7-10 and Server 2012r2 are recommended to update to latest installers as soon as possible.
Source Tarball (gzip) |
GnuPG Signature | openvpn-2.4.7.tar.gz |
Source Tarball (xz) |
GnuPG Signature | openvpn-2.4.7.tar.xz |
Source Zip |
GnuPG Signature | openvpn-2.4.7.zip |
Windows 7/8/8.1/Server 2012r2 installer (NSIS) |
GnuPG Signature | openvpn-install-2.4.7-I607-Win7.exe |
Windows 10 installer (NSIS) |
GnuPG Signature | openvpn-install-2.4.7-I607-Win10.exe |
Windows Server 2016 installer (NSIS) |
GnuPG Signature | openvpn-install-2.4.7-I603.exe |
NOTE: the GPG key used to sign the release files has been changed since OpenVPN 2.4.0. Instructions for verifying the signatures, as well as the new GPG public key are available here.
We also provide static URLs pointing to latest releases to ease automation. For a list of files look here.
This release is also available in our own software repositories for Debian and Ubuntu, Supported architectures are i386 and amd64. For details. look here.
You can use EasyRSA 2 or EasyRSA 3 for generating your own certificate authority. The former is bundled with Windows installers. The latter is a more modern alternative for UNIX-like operating systems.
The Windows installers are bundled with OpenVPN-GUI — its source code is available on its project page and as tarballs on our alternative download server.
This is primarily a maintenance release with minor bugfixes and improvements, and one security relevant fix for the Windows Interactive Service. Windows installer includes updated OpenVPN GUI and OpenSSL. Installer I601 included tap-windows6 driver 9.22.1 which had one security fix and dropped Windows Vista support. However, in installer I602 we had to revert back to tap-windows 9.21.2 due to driver getting reject on freshly installed Windows 10 rev 1607 and later when Secure Boot was enabled. The failure was due to the new, more strict driver signing requirements. The 9.22.1 version of the driver is in the process of getting approved and signed by Microsoft and will be bundled in an upcoming Windows installer.
Please note that LibreSSL is not a supported crypto backend. We accept patches and we do test on OpenBSD 6.0 which comes with LibreSSL, but if newer versions of LibreSSL break API compatibility we do not take responsibility to fix that.
Also note that Windows installers have been built with NSIS version that has been patched against several NSIS installer code execution and privilege escalation problems. Based on our testing, though, older Windows versions such as Windows 7 might not benefit from these fixes. We thus strongly encourage you to always move NSIS installers to a non-user-writeable location before running them. Our long-term plan is to migrate to using MSI installers instead.
Compared to OpenVPN 2.3 this is a major update with a large number of new features, improvements and fixes. Some of the major features are AEAD (GCM) cipher and Elliptic Curve DH key exchange support, improved IPv4/IPv6 dual stack support and more seamless connection migration when client’s IP address changes (Peer-ID). Also, the new —tls-crypt feature can be used to increase users’ connection privacy.
A summary of the changes is available in Changes.rst, and a full list of changes is available here.
OpenVPN GUI bundled with the Windows installer has a large number of new features compared to the one bundled with OpenVPN 2.3. One of major features is the ability to run OpenVPN GUI without administrator privileges. For full details, see the changelog. The new OpenVPN GUI features are documented here.
Please note that OpenVPN 2.4 installers will not work on Windows XP.
If you find a bug in this release, please file a bug report to our Trac bug tracker. In uncertain cases please contact our developers first, either using the openvpn-devel mailinglist or the developha er IRC channel (#openvpn-devel at irc.libera.chat). For generic help take a look at our official documentation, wiki, forums, openvpn-users mailing list and user IRC channel (#openvpn at irc.libera.chat).
Source Tarball (gzip) |
GnuPG Signature | openvpn-2.4.6.tar.gz |
Source Tarball (xz) |
GnuPG Signature | openvpn-2.4.6.tar.xz |
Source Zip |
GnuPG Signature | openvpn-2.4.6.zip |
Windows installer (NSIS) |
GnuPG Signature | openvpn-install-2.4.6-I602.exe |
NOTE: the GPG key used to sign the release files has been changed since OpenVPN 2.4.0. Instructions for verifying the signatures, as well as the new GPG public key are available here.
We also provide static URLs pointing to latest releases to ease automation. For a list of files look here.
This release is also available in our own software repositories for Debian and Ubuntu, Supported architectures are i386 and amd64. For details. look here.
You can use EasyRSA 2 or EasyRSA 3 for generating your own certificate authority. The former is bundled with Windows installers. The latter is a more modern alternative for UNIX-like operating systems.
The Windows installers are bundled with OpenVPN-GUI — its source code is available on its project page and as tarballs on our alternative download server.
You can download Windows developments snapshots (MSI installers) from here (Index of /downloads/snapshots/github-actions/openvpn2/ ). Those are automatically built from commits to OpenVPN master branch and include functionality which will be available in the next release. Development snapshots are less stable than releases, so use at your own risk.
- Technology
- Help
- FAQ
- Prices
- Contacts
- Buy
For customisation of OpenVPN-connection the personal login and the password, and also the certificate for confirmation of authenticity is required to you. We give you a complete account for short-term testing of connection. Together with it, you receive ip-address of server OpenVPN, and also the address of a DNS-server without логирования inquiries. For successful customisation of OpenVPN-connection, fulfil all steps in this manual. In case of occurrence of any questions, access in tools technical support.
- OpenVPN-connection demands presence of the own client. We suggest to download the last version OpenVPN 2.0 in which manufacturers allow to store a login and the password in a separate file. We care, that nobody has picked up this information, therefore we create difficult enough accounts. In later versions of the client which has been laid out on an official site it is forbidden to be authorised by means of a file — all information is entered online. The recompiled version of the client (with option ENABLE_PASSWORD_SAVE) is to http://confs.openvpn.ru/openvpn-2.0.9-instal.exe address (or a fresh beta: http://confs.openvpn.ru/openvpn-2.1_rc7-instal.exe). If for you the version from a site is installed, and you do not wish to put recommended, follow the notes specified further.
- To instal the driver it is recommended in c:program filesopenvpn. However, if there is no such possibility, instal in any directory (in this case will pay attention to further notes). In a driver installation time, WinXP operating systems and Win2003 can produce messages on the unsigned driver. It is necessary to continue installation contrary to all guidelines MicroSoft. Anything terrible in this message is not present.
- Load the certificate with the customised configuration file (a link on the customised config and the certificate technical support will give) and unsqueeze archive in a folder c:vpn. The config will be already customised, therefore in it of anything it is not necessary to change. If you used the official version of the OpenVpn-client contrary to our instructions, change in a config string auth-user-pass «pass» on auth-user-pass and enter a login with the password manually after connection start.
- If you do not wish to start OpenVPN with GUI (graphic interface) carry out OpenVPN-connection start даблкликом under the scenario start.bat. If wish to use GUI click shortcut OpenVPNGUI.lnk (in a folder c:vpn), then make right cliques on «мониторчикам», appeared in трее and select VPN-> Connect. It you initialize VPN-соединениеЕсли all normal, last string will look as: Initialisation Sequence Completed. It means that connection is started also all traffic перенаправляется through an OpenVPN-server. For check of operation of tools, access to page http://leader.ru/secure/who.html. In the report you can see current ip-address. After the termination of operation with VPN, make active a window with connection and press a key «F4». At occurrence of problems, questions, complaints and sentences — access in ICQ 244436, or in ours FAQ (http://openvpn.ru/faq.html).
Openvpn — виртуальная частная сеть. С ее помощью мы можем:
- Создать защищенный канал свзязи, в то время, когда мы сидим с бесплатного Wi-Fi в кафе.
- Обмениваться файлами между участниками сети.
- Раздавать интернет используя общий шлюз.
Основные преимущества:
- Простота настройки.
- Безопасность.
- Не требует дополнительного оборудования.
- Высокая скорость и стабильность.
Для чего это использую я ? Есть у меня офис с белым IP адресом, где стоит сервер, и базы данных 1С и много чего. И есть удаленный офис, где с этими базами данных нужно работать. На сервер я поставил OpenVPN и на филиале — клиент. И виртуально соединил офис и филиал в одну локальную сеть.
Теперь подробно:
Скачиваем дистрибутив.
На момент написания статьи доступная версия 2.3.2. Качаем отсюда Windows installer 32-х или 64-х битную версию под разрядность вашей операционной системы.
Установка.
При установке обязательно отметьте все пункты птичками, на предложение установить драйвер отвечаем утвердительно. В системе появится новый виртуальный сетевой адаптер.
Создание сертификатов и ключей.
Когда-то этот пункт меня останавливал, мол ну их эти ключи, пойду поищу что попроще. Но, увы, ничего лучшего не нашел. Итак, переходим в C:Program filesOpenVPNeasy-rsa, запускаем init-config.bat, появится vars.bat, открываем его в блокноте. Нас интересуют строчки в самом низу, их нужно заполнить как угодно. Например:
set KEY_COUNTRY=RU
set KEY_PROVINCE=Baldur
set KEY_CITY=Piter
set KEY_ORG=OpenVPN
set KEY_EMAIL=my@sobaka.ru
set KEY_CN=server
set KEY_NAME=server
set KEY_OU=ouou
Там где написано server не трогаем. Сохранили.
Теперь открываем openssl-1.0.0.cnf и ищем строчку default_days 365, ставим 3650. Это продлит жизнь наших сертификатов на 10 лет. Сохраняем. Далее открываем командную строку в пуск-стандартные-командная строка (на Windows Vista/7/8 от имени администратора), пишем последовательно:
cd C:OpenVPNeasy-rsa
vars
clean-all
В ответ должно написать два раза «Скопировано файлов: 1». Значит, все окей. В этом же окне набираем:
build-dh
Создаст ключ Диффи-Хельмана.
build-ca
Создаст основной сертификат.
Будут заданы вопросы, просто нажимаем Enter пока не увидите путь C:Program filesOpenVPNeasy-rsa. Далее набираем:
build-key-server server
На вопросы также жмем Enter, только не торопитесь! В конце будут два вопроса: «Sign the certificate?» и «1 out of 1 certificate requests certified, commit?», на оба вопроса отвечаем Y. Теперь создадим сертификат клиента:
build-key client
Тут нужно быть внимательней, при вопросе Common Name (eg, your name or your server’s hostname) нужно ввести client. В конце также два раза Y. Для каждого клиента нужно создавать новый сертификат, только с другим именем, например, build-key client1 и также указывать его в common name. Если все сделали правильно, можете выдохнуть! Самое сложное позади. В папке C:Program FilesOpenVPNeasy-rsakeys забираем: ca.crt, dh1024.pem, server.crt, server.key и кладем их в C:Program FilesOpenVPNconfig.
Создаем конфиги.
Переходим в C:Program FilesOpenVPNconfig, создаем текстовой документ, вставляем:
# Поднимаем L3-туннель
dev tun
# Протокол
proto udp
# Порт который слушает впн
port 12345
# Ключи и сертификаты
ca ca.crt
cert server.crt
key server.key
dh dh1024.pem
# Грубо говоря экономим адреса
topology subnet
# Пул адресов
server 10.8.0.0 255.255.255.0
# Метод шифрования
cipher AES-128-CBC
# Сжатие
comp-lzo
# Немного улучшит пинг
mssfix
# Время жизни клиентов, если не откликнулся — отключает
keepalive 10 120
# Уровень отладки
verb 3
Сохраняем файл как server.ovpn. Это наш конфиг сервера. Теперь пробуем запустить сервер. На рабочем столе будет ярлык OpenVPN Gui. После запуска в трее появится красный значок. Кликаем по нему дважды, если загорелся зеленым, значит, все хорошо, если нет, тогда смотрим лог в папке log.
Теперь конфиг клиента:
client
dev tun
proto udp
# Адрес и порт сервера
remote адрес 12345
# Ключи должны лежать в папке с конфигом
ca ca.crt
cert client.crt
key client.key
cipher AES-128-CBC
nobind
comp-lzo
persist-key
persist-tun
verb 3
Сохраняем как client.ovpn. Создаем любую папку и кладем туда конфиг client.ovpn и сертификаты ca.crt, client.crt, client.key которые лежат в C:Program filesOpenVPNeasy-rsa. Сам клиент для Windows качаем здесь. На клиентской машине устанавливаем, переносим папку с конфигом и сертификатом и запускаем client.ovpn. Если подключились, пробуем в командной строке набрать ping 10.8.0.1. Пакеты пошли? Поздравляю! Сервер готов! Теперь идем в панель управления-администрирование-службы, ищем там OpenVPN, дважды щелкаем и выставляем автоматически. Теперь сервер будет сам стартовать после перезагрузки.
Дорабатываем конфиг или каждому свое.
Теперь я расскажу как раздавать интернет и другие мелочи связанные с настройкой. Начнем с мелочей. Все манипуляции будем проводить с конфигом сервера.
Если хотите, чтобы клиенты «видели» друг друга т.е. могли обмениваться информацией, тогда в конфиг впишите
client-to-client.
Если нужно, чтобы клиентам выдавались статические адреса, тогда в папке config создайте файл ip.txt и впишите в конфиг
ifconfig-pool-persist ip.txt
Неохота создавать каждому сертификаты? Тогда пишем duplicate-cn, но учтите, с этой опцией не работает ifconfig-pool-persist.
Теперь о конфиге клиента. Можно не передавать файлы сертификатов, а вписать сразу в конфиг, только делать это лучше не с блокнота, а с AkelPad’а или Notepad++ например. Открываем ca.crt и выделяем от ——BEGIN CERTIFICATE—— до ——END CERTIFICATE——. В конфиге будет выглядеть так:
<ca>
——BEGIN CERTIFICATE——
сертификат
——END CERTIFICATE——</ca><cert>
——BEGIN CERTIFICATE——
сертификат
——END CERTIFICATE——</cert><key>
——BEGIN PRIVATE KEY——
ключ
——END PRIVATE KEY——</key>
Раздаем интернет
Для этого в конфиг сервера вписываем:
push «redirect-gateway def1»
push «dhcp-option DNS 8.8.8.8»
push «dhcp-option DNS 8.8.4.4»
DNS-адреса подставляем те, что даны в настройках. Посмотреть можно зайдя в панель управления-сетевые подключения, дважды кликнув на адаптере который смотрит в интернет. Для Win7 Панель управления-Сеть и Интернет-Центр управления сетями и общим доступом-изменение параметров адаптера. Далее, заходим в свойства этого же адаптера, вкладка доступ, ставим птичку напротив «Разрешить другим пользователям сети…» и в выпадающем списке, если есть, выбираем виртуальный адаптер vpn. Затем заходим в свойства адаптера vpn, свойства ipv4 и выставляем получение ip и dns автоматически.
Источник: http://habrahabr.ru/post/197744/
Проверено, все работает.
Openvpn настроен и подключение клиент — сервер поднялось, но, возникла след проблема: Когда подключается второй клиент он получает тот же ip адрес что и первый, как настроить что бы они получали разные адреса?
Конфиг сервера:
port 1194
proto udp
dev tun
ca ca.crt
cert server.crt
key server.key
dh dh1024.pem
tls-server
tls-auth «C:\Program Files\Openvpn\config\ta.key» 0
auth MD5
server 10.8.0.0 255.255.255.0
ifconfig 10.8.0.1 10.8.0.2
ifconfig-pool 10.8.0.4 10.8.0.251
route 10.8.0.0 255.255.255.0
push «route 10.8.0.0 255.255.255.0»
;ifconfig-pool-persist ipp.txt
push «route gateway 10.8.0.1»
push «route 192.168.158.0 255.255.255.0»
push «dhcp-option DNS 10.8.0.1»
push «dhcp-option WINS 10.8.0.1»
keepalive 10 120
comp-lzo
persist-key
persist-tun
verb 3
route-method exe
route-delay
В логе клиента пишет след:
PUSH: Received control message: ‘PUSH_REPLY,route 10.8.0.0 255.255.255.0,route gateway 10.8.0.1,route 192.168.158.0 255.255.255.0,dhcp-option DNS 10.8.0.1,dhcp-option WINS 10.8.0.1,ping 10,ping-restart 120,ifconfig 10.8.0.6 10.8.0.5’
И все клиенты получают адрес 10.8.0.6, не понимаю почему этот адрес а не 10.8.0.4 как сказано на сервере?
Заранее спасибо за помощь.
OpenVPN – это набор open source программ, который заслуженно является одним из самых популярных и легких решений для реализации защищенной VPN сети. OpenVPN позволяет объединить в единую сеть сервер и клиентов (даже находящиеся за NAT или файерволами), или объединить сети удаленных офисов. Серверную часть OpenVPN можно развернуть практически на всех доступных операционных системах (пример настройки OpenVPN на Linux). Вы можете установить OpenVPN сервер даже на обычный компьютер с десктопной редакцией Windows 10.
В этой статье, мы покажем, как установить OpenVPN сервер на компьютер с Windows 10, настроить OpenVPN клиент на другом Windows хосте и установить защищенное VPN подключение.
Содержание:
- Установка службы OpenVPN сервера в Windows
- Создаем ключи шифрования и сертификаты для OpenVPN
- Конфигурационный файл OpenVPN сервера в Windows
- Настройка OpenVPN клиента в Windows
Установка службы OpenVPN сервера в Windows
Скачайте MSI установщик OpenVPN для вашей версии Windows с официального сайта (https://openvpn.net/community-downloads/). В нашем случае это OpenVPN-2.5.5-I602-amd64.msi (https://swupdate.openvpn.org/community/releases/OpenVPN-2.5.5-I602-amd64.msi).
Запустите установку.
Если вы планируете, OpenVPN сервер работал в автоматическом режиме, можно не устанавливать OpenVPN GUI. Обязательно установите OpenVPN Services.
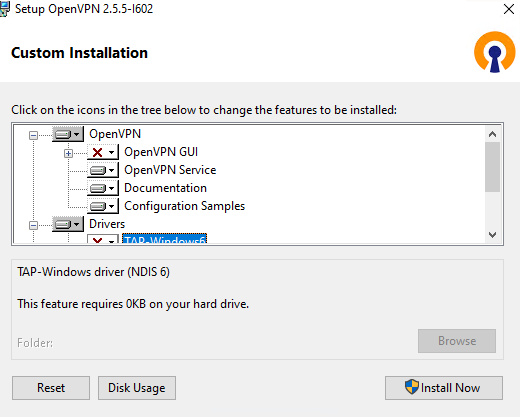
Начиная с версии OpenVPN 2.5, поддерживается драйвер WinTun от разработчиков WireGuard. Считается, что этот драйвер работает быстрее чем классический OpenVPN драйвер TAP. Установите драйвер Wintun, откажитесь от установки TAP-Windows6.
Установите OpenSSL утилиту EasyRSA Certificate Management Scripts.
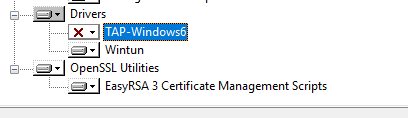
Запустите установку.
По умолчанию OpenVPN устаналивается в каталог C:Program FilesOpenVPN.
После окончания установки появится новый сетевой адаптер типа Wintun Userspace Tunnel. Этот адаптер отключен, если служба OpenVPN не запущена.
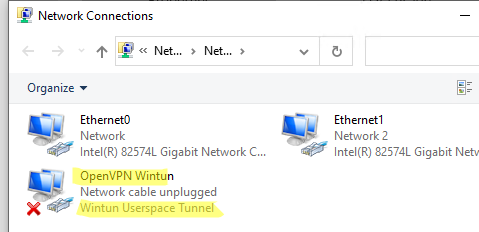
Создаем ключи шифрования и сертификаты для OpenVPN
OpenVPN основан на шифровании OpenSSL. Это означает, что для обмена трафиком между клиентом и серверов VPN нужно сгенерировать ключи и сертификаты с использованием RSA3.
Откройте командную строку и перейдите в каталог easy-rsa:
cd C:Program FilesOpenVPNeasy-rsa
Создайте копию файла:
copy vars.example vars
Откройте файл vars с помощью любого текстового редактора. Проверьте пути к рабочим директориям.
Обязательно поправьте переменную EASYRSA_TEMP_DIR следующим образом:
set_var EASYRSA_TEMP_DIR "$EASYRSA_PKI/temp"

Можете заполнить поля для сертификатов (опционально)
set_var EASYRSA_REQ_COUNTRY "RU"
set_var EASYRSA_REQ_PROVINCE "MSK"
set_var EASYRSA_REQ_CITY "MSK"
set_var EASYRSA_REQ_ORG "IT-Company"
set_var EASYRSA_REQ_EMAIL " [email protected] "
set_var EASYRSA_REQ_OU " IT department "

Срок действия сертификатов задается с помощью:
#set_var EASYRSA_CA_EXPIRE 3650
#set_var EASYRSA_CERT_EXPIRE 825
Сохраните файл и выполните команду:
EasyRSA-Start.bat
Следующие команды выполняются в среде EasyRSA Shell:
Инициализация PKI:
./easyrsa init-pki
Должна появится надпись:
init-pki complete; you may now create a CA or requests.
Your newly created PKI dir is: C:/Program Files/OpenVPN/easy-rsa/pki
Теперь нужно сгенерировать корневой CA:
./easyrsa build-ca
Задайте дважды пароль для CA:
CA creation complete and you may now import and sign cert requests.
Данная команда сформировала:
- Корневой сертификат центра сертификации: «C:Program FilesOpenVPNeasy-rsapkica.crt»
- Ключ центра сертификации «C:Program FilesOpenVPNeasy-rsapkiprivateca.key»
Теперь нужно сгенерировать запрос сертификата и ключ для вашего сервера OpenVPN:
./easyrsa gen-req server nopass
Утилита сгенерирует два файла:
req: C:/Program Files/OpenVPN/easy-rsa/pki/reqs/server.req
key: C:/Program Files/OpenVPN/easy-rsa/pki/private/server.key
Подпишем запрос на выпуск сертификата сервера с помощью нашего CA:
./easyrsa sign-req server server
Подтвердите правильность данных, набрав yes.
Затем введите пароль CA от корневого CA.
В каталоге issued появится сертификат сервера («C:Program FilesOpenVPNeasy-rsapkiissuedserver.crt»)

Теперь можно создать ключи Диффи-Хеллмана (займет длительное время):
./easyrsa gen-dh
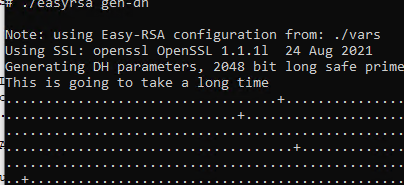
Для дополнительной защиты VPN сервера желательно включить tls-auth. Данная технология позволяет использовать подписи HMAC к handshake-пакетам SSL/TLS, инициируя дополнительную проверку целостности. Пакеты без такой подписи будут отбрасываться VPN сервером. Это защитит вас от сканирования порта VPN сервера, DoS атак, переполнения буфера SSL/TLS.
Сгенерируйте ключ tls-auth:
cd C:Program FilesOpenVPNbin
openvpn --genkey secret ta.key
Должен появиться файл «C:Program FilesOpenVPNbinta.key». Переместите его в каталог C:Program FilesOpenVPNeasy-rsapki
Теперь можно сформировать ключи для клиентов OpenVPN. Для каждого клиента, который будет подключаться к вашему серверу нужно создать собственные ключи.
Есть несколько способов генерации ключей и передачи их клиентам. В следующем примере, мы создадим на сервере ключ клиента и защитим его паролем:
./easyrsa gen-req kbuldogov
./easyrsa sign-req client kbuldogov

Данный ключ («C:Program FilesOpenVPNeasy-rsapkiprivatekbuldogov.key») нужно передать клиенту и сообщить пароль. Клиент может снять защиту паролем для ключа:
openssl rsa -in "C:Program FilesOpenVPNeasy-rsapkiprivatekbuldogov.key"-out "C:Program FilesOpenVPNeasy-rsapkiprivatekbuldogov_use.key"

Если вы хотите сгенерировать ключ, не защищенный паролем, нужно выполнить команду:
./easyrsa gen-req имяклиента nopass
На сервере с OpenVPN вы можете создать неограниченное количество ключей и сертификатов для пользователей. Аналогичным образом сформируйте ключи и сертфикаты для других клиентов.
Вы можете отохвать скомпрометированные сертификаты клиентов:
cd C:Program FilesOpenVPNeasy-rsa
EasyRSA-Start.bat
./easyrsa revoke kbuldogov
Итак, мы сгенерировали набор ключей и сертификатов для OpenVPN сервера. Теперь можно настроить и запустить службу OpenVPN.
Конфигурационный файл OpenVPN сервера в Windows
Скопируйте типовой конфигурационный файл OpenVPN сервера:
copy "C:Program FilesOpenVPNsample-configserver.ovpn" "C:Program FilesOpenVPNconfig-autoserver.ovpn"
Откройте файл server.ovpn в любом текстовом редакторе и внесите свои настройки. Я использую следующий конфиг для OpenVPN:
# Указываем порт, протокол и устройство
port 1194
proto udp
dev tun
# Указываем пути к сертификатам сервера
ca "C:\Program Files\OpenVPN\easy-rsa\pki\ca.crt"
cert "C:\Program Files\OpenVPN\easy-rsa\pki\issued\server.crt"
key "C:\Program Files\OpenVPN\easy-rsa\pki\private\server.key"
dh "C:\Program Files\OpenVPN\easy-rsa\pki\dh.pem"
# Указываем настройки IP сети, адреса из которой будет будут получать VPN клиенты
server 10.24.1.0 255.255.255.0
#если нужно разрешить клиентам подключаться под одним ключом, нужвно включить опцию duplicate-cn (не рекомендуется)
#duplicate-cn
# TLS защита
tls-auth "C:\Program Files\OpenVPN\easy-rsa\pki\ta.key" 0
cipher AES-256-GCM
# Другая параметры
keepalive 20 60
persist-key
persist-tun
status "C:\Program Files\OpenVPN\log\status.log"
log "C:\Program Files\OpenVPN\log\openvpn.log"
verb 3
mute 20
windows-driver wintun
Сохраните файл.
OpenVPN позволяет использовать как TCP, так и UDP для подключения. В этом примере я запустил OpenVPN на 1194 UDP. Рекомендуется использовать протокол UDP, это оптимально как с точки зрения производительности, так и безопасности.
Не забудьте открыть на файерволе порты для указанного вами порта OpenVPN на клиенте и на сервере. Можно открыть порты в Windows Defender с помощью PowerShell.
Правило для сервера:
New-NetFirewallRule -DisplayName "AllowOpenVPN-In" -Direction Inbound -Protocol UDP –LocalPort 1194 -Action Allow
Правило для клиента:
New-NetFirewallRule -DisplayName "AllowOpenVPN-Out" -Direction Outbound -Protocol UDP –LocalPort 1194 -Action Allow
Теперь нужно запустить службу OpenVPN и изменить тип ее запуска на автоматический. Воспользуйтесь таким командами PowerShell, чтобы включить службу:
Set-Service OpenVPNService –startuptype automatic –passthru
Get-Service OpenVPNService| Start-Service
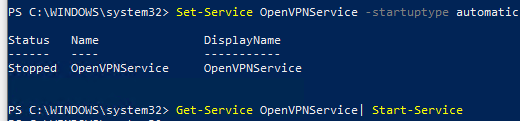
Откройте панель управления, и убедитесь, что виртуальный сетевой адаптер OpenVPN Wintun теперь активен. Если нет, смотрите лог «C:Program FilesOpenVPNlogserver.log»
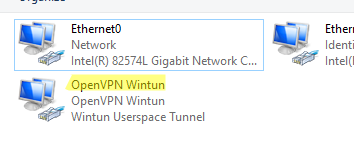
Если при запуске OpenVPN вы видите в логе ошибку:
Options error: In C:Program FilesOpenVPNconfig-autoserver.ovpn:1: Maximum option line length (256) exceeded, line starts with..
Смените в файле server.ovpn символы переноса строки на Windows CRLF (в notepad++ нужно выбрать Edit -> EOL Conversion -> Windows CR LF). Сохраните файл, перезапустите службу OpevVPNService.
Данный конфиг позволит удаленным клиентам получить доступ только к серверу, но другие компьютеры и сервисы в локальной сети сервера для них недоступны. Чтобы разрешить клиентам OpenVPN получить доступ к внутренней сети нужно:
Включить опцию IPEnableRouter в реестре (включает IP маршрутизацию в Windows, в том числе включает маршрутизацию меду сетями Hyper-V): reg add «HKLMSYSTEMCurrentControlSetServicesTcpipParameters» /v IPEnableRouter /t REG_DWORD /d 1 /f
Добавьте в конфгурационный файл сервера OpenVPN маршруты до внутренней IP сети:
push "route 10.24.1.0 255.255.255.0"
push "route 192.168.100.0 255.255.255.0"
Если нужно, назначьте клиенту адреса DNS серверов:
push "dhcp-option DNS 192.168.100.11"
push "dhcp-option DNS 192.168.100.12"
Если нужно завернуть все запросы клиента (в том числе Интернет трафик) на ваш OpenVPN сервер, добавьте опцию:
push "redirect-gateway def1"
Настройка OpenVPN клиента в Windows
Создайте на сервере шаблонный конфигурационный файла для клиента VPN (на базе iшаблона client.ovpn) со следующими параметрами (имя файла kbuldovov.ovpn)
client
dev tun
proto udp
remote your_vpn_server_address 1194
resolv-retry infinite
nobind
persist-key
persist-tun
ca ca.crt
cert kbuldogov.crt
key kbuldogov.key
remote-cert-tls server
tls-auth ta.key 1
cipher AES-256-GCM
connect-retry-max 25
verb 3
В директиве remote указывается публичный IP адрес или DNS имя вашего сервера OpenVPN.
Скачайте и установите клиент OpenVPN Connect для Windows (https://openvpn.net/downloads/openvpn-connect-v3-windows.msi).
Теперь на компьютер с клиентом OpenVPN нужно с сервера скопировать файлы:
- ca.crt
- kbuldogov.crt
- kbuldogov.key
- dh.pem
- ta.key
- kbuldogov.ovpn

Теперь импортируйте файл с профилем *.ovpn и попробуйте подключиться к вашему VPN серверу.
Если все настроено правильно, появится такая картинка. 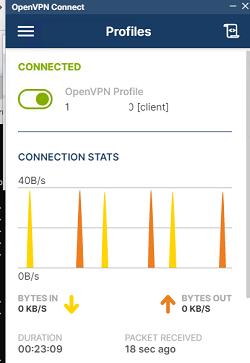
Проверьте теперь лог OpenVPN на клиенте «C:Program FilesOpenVPN Connectagent.log»
Mon Dec 27 08:09:30 2021 proxy_auto_config_url
Mon Dec 27 08:09:31 2021 TUN SETUP
TAP ADAPTERS:
guid='{25EE4A55-BE90-45A0-88A1-8FA8FEF24C42}' index=22 name='Local Area Connection'
Open TAP device "Local Area Connection" PATH="\.Global{25EE4A55-BE90-45A0-88A1-8FA8FEF24C42}.tap" SUCCEEDED
TAP-Windows Driver Version 9.24
ActionDeleteAllRoutesOnInterface iface_index=22
netsh interface ip set interface 22 metric=1
Ok.
netsh interface ip set address 22 static 10.24.1.6 255.255.255.252 gateway=10.24.1.5 store=active
IPHelper: add route 10.24.1.1/32 22 10.24.1.5 metric=-1
Клиент успешно подключится к OpenVPN серверу и получил IP адрес 10.24.1.6.
Проверьте теперь лог на сервере («C:Program FilesOpenVPNlogopenvpn.log»). Здесь также видно, что клиент с сертификатом kbuldogov успешно подключится к вашему серверу.
2021-12-27 08:09:35 192.168.13.202:55648 [kbuldogov] Peer Connection Initiated with [AF_INET6]::ffff:192.168.13.202:55648
2021-12-27 08:09:35 kbuldogov/192.168.13.202:55648 MULTI_sva: pool returned IPv4=10.24.1.6, IPv6=(Not enabled)
2021-12-27 08:09:35 kbuldogov/192.168.13.202:55648 MULTI: Learn: 10.24.1.6 -> kbuldogov/192.168.13.202:55648
2021-12-27 08:09:35 kbuldogov/192.168.13.202:55648 MULTI: primary virtual IP for kbuldogov/192.168.13.202:55648: 10.24.1.6
Описание установки OpenVPN сервера, создание ключей для сервера и клиента и пример конфигурации клиента.
2019-12-23 Опубликована свежая статья с упрощённым изложением OpenVPN — это просто
2014-08-04
Статья в процессе переделки и дополнений по мере освоения.
Дописать:
- Использовать на одном сервере tun0 для объединения серверов и tun1 для подключения клиентов. Соответственно для серверов: iptables forward прозрачный для tun0 и запреты только на INPUT для соответствующих подсетей. Для рядовых клиентов tun1 запреты уже при входе в сеть. Например, только 3389 порт. Для админа пока отдельный gw.
- TLS и DH индивидуальны для разных openvpn-серверов и подключающихся к ним клиентов. Ещё лучше TLS и DH разные для демона подключений серверов и демона подключений клиентов.
- Для объединения серверов указывать исходящий порт?
- Песочница для openvpn демона.
- Разобраться с автоматическим mtu.
- float для серверов из сетей с меняющимся ip.
- Единая система именования выданных файлов: Орг-ca.crt (.key), ОргСрв-ta.key, ОргСрв-dh2048.pem, ОргСрв.crt (.key), ОргКлн.crt (.key). Маршруты проталкивать только клиентам. На серверах маршруты настраиваются без openvpn push.
- Переделать всю статью. Может так: Центр сертификации отдельно. Генерация и настройка сервера отдельно. Генерация и настройка клиента отдельно.
Оглавление
- Введение
- Установка openvpn сервера
- Подготовка
- Генерация файлов центра сертификации
- Генерация TLS ключа
- Генерация ключа и сертификата openvpn сервера
- Генерация файл DH
- Генерация сертификата и личного ключа клиента
- Настройка openvpn сервера
- Объединение сетей
- Отзыв сертификата openvpn-клиента
- Отзыв сертификата openvpn-сервера
- Настройка файрвола для работы openvpn сервера
- Возникшие проблемы и пути их решения
Введение
Openvpn работает по схеме шифрования с открытыми ключами. Каждый участник openvpn-сети имеет открытый (public) и закрытый (private) ключ. Открытый ключ можно найти в файле-сертификате с расширением .crt. Закрытый (private) ключ лежит в файле с расширением .key. Я несколько лет назад прочитал отличную книгу по истории криптографии, поэтому тема мне знакома и здесь разжёвывать её сейчас не буду. (Найти книгу и привести название. “Книга шифров”?) Саймон Сингх: Книга шифров: Тайная история шифров и их расшифровки.
Если кратко, то сначала сервер и клиент обмениваются своими публичными ключами. Кстати, они несекретны и могут храниться открыто. Потом обеими сторонами проводится проверка полученных ключей на предмет легитимности, то есть срок действия, проверка подписи CA, проверка в списке отозванных ключей и т.д. Если всё отлично, то начинается обмен данными:
- отправляемый пакет шифруется с помощью открытого ключа получателя;
- потом пакет подписывается закрытым ключом отправителя;
пакет улетает на другую сторону; - у получаемого пакета проверяется подпись с помощью открытого ключа отправителя;
- если подпись верна, то пакет расшифровывается с помощью закрытого ключа получателя.
Третья сторона, имея на руках закрытые ключи обеих сторон, может на лету просматривать закриптованный трафик. Именно поэтому закрытый ключ чрезвычайно секретен и при подозрении на его кражу, должен быть отозван.
В идеальной конфигурации, для организации openvpn-сетки необходимо минимум два сервера. Один сервер, максимально защищённый от вторжений/не подключённый к интернету, имеет роль центра сертификации (CA) и не учавствует в организации удалённого доступа. Второй сервер (а при необходимости их может быть несколько) является openvpn-сервером и обеспечивает возможность подключения удалённых клиентов.
Центр сертификации представляет собой отдельную папку на винчестере, в которой лежат:
- пара файликов
ca.keyиca.crt– ключ и сертификат центра сертификации; - простейшая база данных из двух файлов:
- файл
serial– счётчик, - файл
index.txt– список выданных сертификатов.
- файл
- файлы уже выданных сертификатов (
*.crt) для возможности их отзыва; - файл
crl.pem, в котором накапливается информация об отозванных ключах; - несколько скриптов для генерации новых ключей и сертификатов.
При необходимости автоматизации выдачи ключей и сертификатов, к этой папке прикручивают web-морду (в инете я видел готовые конструкции различной степени сложности). Обычный человек изредка сталкивается с этими конструкциями, например, при работе с банк-клиентами, так как шифрование с открытыми ключами широко используется в ИТ.
В моём случае нецелесообразно организовывать отдельный сервер-CA для редких генераций сертификатов и ключей для новых openvpn-серверов и клиентов. Поэтому папку центра сертификации я храню в секретном месте и, по мере необходимости, раскрываю крипто-контейнер на свободной машине, чтобы произвести необходимые процедуры.
Установка openvpn-сервера
Устанавливаем openvpn:
Теперь надо сгенерировать несколько файлов, которые позволят нам быстро ввести в строй первый openvpn-сервер.
Одноразово создаём два файла центра сертификации, с помощью которых мы будем выдавать все прочие сертификаты и ключи для openvpn-серверов и клиентов:
ca.crt– главный CA сертификат, этот файл нужен всем клиентам и всем openvpn-серверам (и центру сертификации? Ясен пень. Хотя бы для последующей раздачи клиентам.). С помощью него договаривающиеся стороны (сервер и клиент) проверяют подписи полученных публичных ключей на предмет принадлежности нашей организации;
ca.key– главный CA ключ. Этот файл нужен только центру сертификации, так как им подписываются все публичные ключи-сертификаты организации. Он не учавствует в обеспечении безопасного канала. Он нужен эпизодически только для выпуска ключей (шибко СЕКРЕТНЫЙ файл). Хочу заметить, что открытое хранение этого файла на openvpn-сервере позволит вероятному злоумышленнику украсть этот файл и выпустить произвольное количество ключей, с помощью которых можно будет беспрепятственно подключаться к нашим openvpn-серверам.
Одноразово делаем файл для дополнительной безопасности openvpn-канала:ta.key– TLS-ключ, который нужен и openvpn-клиентам и openvpn-серверам для пущей безопасности. Можно и без него, но он помогает блокировать DoS атаки и UDP флудинг на открытый порт сервера.
Ещё сделаем три файла для конкретного openvpn-сервера. Эти файлы необходимо сгенерировать для каждого openvpn-сервера в нашей сетке. В принципе, можно изменить имена этих файлов в соответствии с сетевыми именами openvpn-серверов. Но, как мне кажется, в целях унификации конфигурационного файла и прочих настроек, которые мы можем централизованно распространять на все openvpn-сервера, будет удобней не изменять имена этих файлов:
server.crt– сертификат сервера, нужен только серверу;server.key– ключ сервера, нужен только серверу (СЕКРЕТНЫЙ файл);dh1024.pem– ключ имени Диффи и Хельмана. Этот файл нужен только серверу. Наверное, используется на этапе предварительного обмена открытыми ключами (сертификатами).
И ещё надо сгенерировать пару файлов для первого клиента. Обычно, имена этих файлов соответствуют имени клиента, указанному при генерации. Поэтому для удобства идентификации клиента, необходимо выработать систему присвоения имён, чтобы потом было проще ориентироваться в логах и прочих моментах. Например, в моём случае, я раздаю людям готовые openvpn-комплекты для каждого из их компьютеров. Поэтому придумываю имя исходя из такого правила – idорганизации-idклиента-idмашины. И когда приходит время отозвать ключи определённого юзера, то в папке с выданными сертификатами, при обычной сортировке по имени файла, я увижу все сертификаты юзера идущими по порядку. Ну а в данном опусе, не заморачиваясь, укажу:
client.crt– сертификат клиента. Этот файл нужен клиенту для установки соединения с openvpn-сервером;client.key– ключ клиента, нужен только клиенту (СЕКРЕТНЫЙ файл).
Надо поподробней почитать мануал и выяснить конкретную роль каждого файла и этапы установки и работы канала.
Подготовка центра сертификации
Создаём необходимые папки и копируем сюда скрипты для генерации ключей, которые идут вместе с установленным комплектом openvpn. Замечу, что на FreeBSD я столкнулся с отсутствием скриптов в установленном пакете последней доступной версии программы openvpn. Следуя разъяснению на сайте openvpn.net, скрипты можно взять здесь – https://github.com/OpenVPN/easy-rsa/releases.
В общем случае, папка easy-rsa и является центром сертификации:
mkdir /etc/openvpn/easy-rsa
mkdir /etc/openvpn/easy-rsa/keys
touch /etc/openvpn/easy-rsa/keys/index.txt
echo "00">/etc/openvpn/easy-rsa/keys/serial
В этих двух файлах – index.txt и serial – будет накапливаться статистика по выданным ключам. И без этих файлов не будет работать выдача и аннулирование сертификатов и ключей.
Собственно копирование всего необходимого для дальнейшей работы:
cp /usr/share/doc/openvpn/examples/easy-rsa/2.0/* /etc/openvpn/easy-rsa
Редактируем соответствующие строки в конце файла /etc/openvpn/easy-rsa/vars, содержащего различные переменные, которые будут загружаться в командную оболочку перед каждым сеансом генерации сертификатов и ключей. По желанию меняем страну, город и прочее. Или оставляем всё, как есть, так как при генерации сертификатов всё равно будет запрос на изменение этих полей.
Для себя я ещё не решил по каким правилам заполнять эти поля. Вероятно проще будет указывать RU, Moscow, чем выяснять в каком городе чужой страны находится сервер. Да и данные эти не несут, в моём случае, полезной информации.
Переходим в папку /etc/openvpn/easy-rsa и смотрим наличие файла openssl.cnf, так как без этого файла, в некоторых случаях, генерация ключей невозможна.
Несколько раз я наблюдал четыре разных файла:
openssl-0.9.6.cnfopenssl-0.9.8.cnfopenssl-1.0.0.cnfopenssl-1.0.0.cnf-old-copy. Проверив командойaptitude show opensslверсию установленной у меня библиотекиopenssl, я сделал копию нужной версии файла:# cp openssl-1.0.0.cnf openssl.cnf
Интересно, что во FreeBSD 9 произошёл автоматический выбор правильного файла
openssl*.cnf, вследствии отработки скриптаwhichopensslcnf, без необходимости переименовывания! Вероятно, надо брать последнюю версиюeasy-rsaпо ссылке с сайта openvpn?
Всё готово для генерации различных ключей и сертификатов.
Генерация файлов центра
Загружаем переменные source ./vars (или . ./vars — символ точка – синоним команды source, которая выполняет указанный файл сценария.)
(разобраться с правами на файлы и папки и написать подробно)
Создаём приватный ключ и сертификат центра сертификации, на основе которых будут сертифицироваться прочие выдаваемые ключи:
# ./build-ca
Generating a 1024 bit RSA private key
............................................................++++++
.........++++++
writing new private key to 'ca.key'
-----
You are about to be asked to enter information that will be incorporated
into your certificate request.
What you are about to enter is what is called a Distinguished Name or a DN.
There are quite a few fields but you can leave some blank
For some fields there will be a default value,
If you enter '.', the field will be left blank.
-----
Country Name (2 letter code) [RU]:
State or Province Name (full name) [MO]:
Locality Name (eg, city) [Moscow]:
Organization Name (eg, company) [M]:
Organizational Unit Name (eg, section) []:
Common Name (eg, your name or your server's hostname) [L CA]:server-ca
Email Address [me ar) myhost [dot] mydomain]:
Поле “Common Name” обязательно к заполнению.
В /etc/openvpn/easy-rsa/keys теперь лежат сертификат центра сертификации ca.crt и приватный ключ центра сертификации ca.key.
Сертификат центра сертификации находится как на стороне сервера, так и на стороне клиента и учавствует в создании туннеля.
Приватный ключ центра сертификации чрезвычайно секретный и не должен попасть в чужие руки. В создании туннеля он не используется. Если я правильно понимаю, то приватным ключом центра сертификации подписываются ключи новых клиентов, поэтому файл ca.key желательно изымать из этой папки после окончания генерации ключей, затирая убитую копию shred’ом. Или же папку easy-rsa размещать в секретном криптохранилище, где и производить по необходимости эпизодические работы по выпуску ключей. Или отдельный компьютер для выпуска ключей. Кто во что горазд.
Генерация TLS ключа
Генерируем TLS ключ:
openvpn --genkey --secret /etc/openvpn/easy-rsa/keys/ta.key
Генерация ключа и сертификата openvpn сервера
Генерация ключей происходит в папке /etc/openvpn/easy-rsa. В дальнейшем, перед каждым сеансом генерации ключей не забываем загружать переменные в текущую командную оболочку:
Генерируем ключ сервера:
./build-key-server server1
Придумываем пароль и соглашаемся на подпись. Пароль не пригодится. Он используется, если я правильно понимаю, при использовании автоматизированного web-портала для запроса, генерации и выдачи ключей самими пользователями.
Может произойти ошибка wrong number of fields on line 1 (looking for field 6, got 1, '' left). Причина в не пустом файле /etc/openvpn/easy-rsa/keys/index.txt. Решение: cat /dev/null > /etc/openvpn/easy-rsa/keys/index.txt
Ключи для сервера сгенерированы. В директории keys появились новые файлы с запросом на сертификат, сертификатом и приватным ключом сервера.
В файле keys/index.txt появилась строка с описанием нашего выданного ключа. В keys/serial номер увеличился на единицу.
Генерация файл DH
Создаём параметр DH (Алгоритм Диффи — Хеллмана):
Generating DH parameters, 1024 bit long safe prime, generator 2
This is going to take a long time
..................................
Генерация сертификата и личного ключа клиента
Генерация ключей происходит в папке /etc/openvpn/easy-rsa. Перед каждым сеансом генерации ключей не забываем загружать переменные в память:
Генерируем безпарольный ключ клиента:
или ключ с парольной защитой:
или ключ в формате pkcs12 (таким пока не пользовался, но по слухам, его можно хранить в электронных хранилищах, например, в USB-токенах):
./build-key-pkcs12 sterva-on-wks-home
После данной процедуры клиенту передаются файлы:
- Сертификат сервера
ca.crt;
- Приватный ключ клиента
wks-1.key; - Сертификат клиента (или правильнее сертификат к приватному ключу клиента?)
wks-1.crt; - TLS-ключ сервера
ta.key;
Файл настройки клиента, где должны быть указаны:
- адрес сервера;
- порт, который слушает openvpn сервер;
- использующийся шифр: BF-CBC или, например, AES-512-CBC.
Важно сохранить сертификаты клиентов (но не приватные ключи! клиентов) для возможности их последующего отзыва. Не забываем, что имя файла содержащего сертификат и имя сертификата могут отличаться. Естественно, проверить это соответствие можно простым просмотром файла. Проверить последствия ручного редактирования файла сертификата с целью изменения имени сертификата, чтобы ввести в заблуждение администратора. Как узнать реальное имя сертификата?
Приватный ключ клиента должен держаться в секрете и быть, в идеале, в единственном экземпляре, так как им подписываются пакеты бегущие от клиента к серверу и тем самым удостоверяющие (поправка: подпись этих пакетов производится с помощью сертификата сервера), что к нашему серверу подсоединяется наш человек. Если есть подозрение, что приватный ключ попал в чужие руки, то необходимо провести процедуру отзыва скомпрометированных ключей с помощью сохранённых сертификатов.
Настройка openvpn
Делаем отдельную папку keys в папке openvpn и копируем туда необходимые для работы сервера файлы:
mkdir /etc/openvpn/keys
cd /etc/openvpn/easy-rsa/keys/
cp ca.crt ca.key /etc/openvpn/keys/
mv server1.crt server1.key dh1024.pem ta.key /etc/openvpn/keys/
Запросы на генерацию сертификата можно удалить:
Копируем примерный файл настройки сервера openvpn:
gzip -cd /usr/share/doc/openvpn/examples/sample-config-files/server.conf.gz > /etc/openvpn/server.conf
В принципе, внутри этого файла всё описано. Если не знаешь английский, то смотри http://www.lissyara.su/doc/man/safety/openvpn/.
Естественно, можно сделать два или больше одновременно работающих openvpn-сервера добавлением конфигурационных файлов с разными именами. Надо только не забывать развешивать их по разным портам, использовать разные внутренние ip-подсети и файлы статуса.
Редактируем те опции, которые нам нужны. Будем использовать TUN-интерфейс, который умеет маршрутизировать ip-пакеты. TAP-интерфейс используется для маршрутизации не ip-протоколов или при необходимости рассылки широковещательных запросов, но TAP для своей работы требует больше ресурсов, чем TUN.
Вот мой пример:
# адрес на котором слушать входящие запросы.
# закомментированно, значит на всех
;local a.b.c.d
port 11194
proto udp
dev tun0
ca keys/ca.crt
cert keys/server1.crt
key keys/server1.key
dh keys/dh1024.pem
# Из этой сети – 192.168.1.0/24 – сервер возьмёт для своих нужд два ip-адреса
# 192.168.1.1 и 192.168.1.2, а оставшийся диапазон поделит на
# подсетки по 4 ip-адреса и будет отдавать клиентам.
# Первому клиенту будет отдана подсеть 192.168.1.4/30
# и назначен ip-адрес 192.168.1.6.
# Второму – 192.168.1.8/30 и назначен ip-адрес 192.168.1.10
server 192.168.1.0 255.255.255.0
# В этом файлике хранятся пары: имя клиента, ip-подсеть назначенная клиенту.
# Перед ручным вмешательством надо остановить демон.
ifconfig-pool-persist ipp.txt
# Тут мы проталкиваем клиенту маршрут в нашу внутреннюю подсеть:
push "route 192.168.0.0 255.255.255.0"
keepalive 10 120
tls-auth keys/ta.key 0
cipher BF-CBC
comp-lzo
max-clients 30
user nobody
group nogroup
persist-key
persist-tun
# В этом файлике мы будем видеть текущую картину подключений:
status openvpn-status.log
verb 3
На этом установка и настройка openvpn-сервера закончена и можно перезапустить сервис:
Объединение сетей
Исходная диспозиция:
- Внешний ip-адрес неважен;
- Наша внутренняя сеть – 192.168.0.0/24;
- Наша openvpn-подсетка, из которой выделяются ip-адреса обычным openvpn-клиентам – 192.168.1.0/24;
- К нашему серверу должен подключаться шлюз, который маршрутизирует пакеты в 192.168.10.0/24
Создаём папку, где будут храниться конфигурации для подключающихся серверов-шлюзов, за которыми есть подсети:
В файл конфигурации нашего сервера /etc/openvpn/server.conf добавляем директиву, включающую способность назначать клиентам определённый ip-адрес из нашей openvpn-подсети и определять для клиента целую подсеть: client-config-dir-ccd
Добавляем директивы, отвечающие за объявление клиентам списка сетей, которые подключаются к нашему openvpn-сервер:
route 192.168.10.0 255.255.255.0
Этот раздел в процессе написания…
Отзыв сертификата openvpn-клиента
http://openvpn.net/index.php/open-source/documentation/howto.html#revoke
Так как на предварительном этапе установления связи, стороны обмениваются своими открытыми ключами (сертификатами), то существует возможность заблокировать скомпрометированные ключи и недопустить их использование.
Например, человека уволили и надо аннулировать его ключи. Приватный ключ wks1.key остался у юзера, но он нам и не нужен. У нас, в центре сертификации, в наличии есть открытый ключ-сертификат. Сертификат клиента wks1.crt лежит в /etc/openvpn/easy-rsa/keys.
cd /etc/openvpn/easy-rsa
source ./vars
./revoke-full wks-1
Using configuration from /etc/openvpn/easy-rsa/openssl.cnf
Revoking Certificate 01.
Data Base Updated
Using configuration from /etc/openvpn/easy-rsa/openssl.cnf
wks1.crt: /C=RU/ST=MO/L=Moscow/O=L/CN=wks1/name=wks1/[email protected]
error 23 at 0 depth lookup:certificate revoked
Последняя строка с ошибкой означает успешный отзыв сертификата (проверка на легитимность вызвала ошибку). В файле /etc/openvpn/easy-rsa/keys/index.txt можно увидеть, что соответствующая строка видоизменилась.
Было:
V 210525072904Z 01 unknown /C=RU/ST=MO/L=Moscow/O=L/CN=wks1/name=wks1/[email protected]
Стало:
R 210525072904Z 120531133006Z 01 unknown /C=RU/ST=MO/L=Moscow/O=L/CN=wks1/name=wks1/[email protected]
В папке /etc/openvpn/easy-rsa/keys появился файлик crl.pem. В дальнейшем в этом файле будет накапливаться информация. Этот файл необходимо скопировать в:
cp /etc/openvpn/easy-rsa/keys/crl.pem /etc/openvpn/
Для включения на сервере проверки клиентов на благонадёжность, добавляем опцию crl-verify crl.pem в конфигурационный файл server.conf. Перезапускаем демон:
После включения опции проверки сертификатов на отзыв, уже не нужно перезапускать демон при изменении файла crl.pem, так как демон читает этот файл при каждом подключении клиента и, по умолчанию, один раз в час при установленной связи с клиентом? Естественно, если надо немедленно отключить ревокнутого клиента от сервера, то придётся перезапустить демон.
Краем глаза где-то зацепил, что если сертификата отключаемого клиента нет в наличии, то существует способ получить его на этапе аутентификации клиента на openvpn-сервере, запустив демон openvpn со специальными параметрами.
Отзыв сертификата openvpn-сервера
Отзыв сертификата сервера производится по аналогии с отзывом сертификата клиента. Ничего сложного нет, за исключением проблемы распространения файла crl.pem по клиентам и соответствующей настройки их конфигурационных файлов. В принципе, сам файл crl.pem, содержащий информацию об отозванных серверных и клиентских сертификатах, не секретный. Его можно разместить в публичном месте, откуда он может скачиваться каким-нибудь скриптом при запуске openvpn-программы на клиентском компьютере. Естественно, необходимо ещё на этапе раздачи клиентских настроечных пакетов предусмотреть использование этого файла в файле конфигурации.
Настройка файрвола для работы openvpn сервера
Далее настраиваем iptables для приёма входящих запросов и форвардинга во внутреннюю сеть. Например:
# eth0 - внутренний интерфейс 192.168.0.0/24
# tun  - сетка 192.168.1.0/24 для openvpn-клиентов
iptables -A INPUT  -p udp -m udp --dport 11194 -j ACCEPT
iptables -A OUTPUT -p udp -m udp --sport 11194 -j ACCEPT -m conntrack --ctstate ESTABLISHED,RELATED
iptables -A FORWARD -s 192.168.1.0/24 -d 192.168.0.0/24 -i tun+ -o eth0 -p icmp -j ACCEPT
iptables -A FORWARD -s 192.168.0.0/24 -d 192.168.1.0/24 -i eth0 -o tun+ -p icmp -j ACCEPT
iptables -A FORWARD -s 192.168.1.0/24 -d 192.168.0.0/24 -i tun+ -o eth0 -p tcp -m tcp -m multiport --dports 22,3389 -j ACCEPT
iptables -A FORWARD -s 192.168.0.0/24 -d 192.168.1.0/24 -i eth0 -o tun+ -p tcp -m tcp -m multiport --sports 22,3389 -j ACCEPT -m conntrack --ctstate ESTABLISHED,RELATED
Добавить ремарки для прозрачности, так как уже не помню зачем icmp из внутренней сетки, когда лучше разрешить icmp для определения максимального mtu из сетки tun? И насколько помню, то ныне, для правил с icmp необходимо указывать тип и код.
Клиента настраивать легко по аналогии…
Если в настроечном файле openvpn мы указали определённое название интерфейса tun (например, я, при использовании нескольких openvpn-демонов на одном сервере, присваиваю имя по номеру назначаемой сети: tun32 – 192.168.32.0/24), то и в iptables мы можем манипулировать этим именем, без использования tun+, подразумевающего под собой все интерфейсы, начинающиеся на tun. Это можно использовать, как один из способов разграничения подключающихся клиентов.
Я пока не заморачивался с запросами логинов/паролей при подключении openvpn-клиента и динамическом назначении для него определённых файрвольных правил.
Возникшие проблемы и пути их решения
На windows xp и windows server 2003 использовал http://openvpn.se/. На вин-сервере установил режим запуска службы openvpn в авто и после перезагрузки системы, windows 2003 автоматом присоединилась к дебиану. Выдёргивал кабели для проверки и через минуту или две связь восстанавливалась.
А в некоторых случаях вин2003 сервер конкретно подвисала и я попробовал:
Проблема при установленном RRAS на сервере:
http://itdoc.com.ua/showthread.php?t=5
Не происходит добавление маршрута в таблицу маршрутизации, вероятно при включенной службе RRAS (чаще всего возникает на серверных ОС, например, Windows Server 2003, но встречал и на XP) — ошибка:
"NOTE: FlushIpNetTable failed on interface [2] {427E6BDF-F41F-4E7A-B8C4-4F12B25A6C11} (status=1413) : Invalid index."
Похоже дело в Win-довом глюке, по API-команде windows должна добавить маршрут, при этом если в конфиг OpenVPN вставить show-net-up, то OpenVPN запросит windows через API всю таблицу маршрутизации и выведет её в лог, там нужный маршрут будет. А если сделать route print, то маршрута не будет…
Решение: route-method exe в конфиг.файле — это указывает OpenVPN-у, что добавление маршрута надо делать не через API, а через route.exe. Кроме того, может потребоваться небольшая задержка перед добавлением маршрута через route.exe (встречалось, что без задержки route.exe ещё не видит только что появившийся интерфейс и не добавляет маршрут), это делается route-delay 10 (на серверах лично меня “не напрягает” задержка 10 секунд, на клиентах можно уменьшить до экспериментально вычисленного предела)
Но это не помогло. Поэтому сделал левого юзера и из под него запускается батник с такой строкой:
openvpn --config "C:Program FilesOpenVPNconfigclient.ovpn"
Задача поставлена на запуск при загрузке системы. ОпенВПН сам переподключится при разрыве связи.
OpenVPN-клиент находящийся за NAT
Один из openvpn-клиентов недоступен через openvpn-канал.
На шлюзе, через который клиент выходит в инет, если упрощённо, следующие правила iptables:
iptables -t nat -A POSTROUTING -s 192.168.10.0/24 -o eth1 -j SNAT --to-source 192.168.1.2 #1.2 - внешний ip-адрес
iptables -A FORWARD -m state --state INVALID -j DROP
iptables -A FORWARD -i eth0 -o eth1 -j ACCEPT
iptables -A FORWARD -i eth1 -o eth0 -m conntrack --ctstate RELATED,ESTABLISHED -j ACCEPT
Добавил правило для ip-адреса этого клиента:
iptables -A FORWARD -d 192.168.10.2/32 -i eth1 -o eth0 -j ACCEPT
Клиент тут же запинговался и стал доступен. Видимо «-m conntrack –ctstate RELATED,ESTABLISHED` отрубало необходимые пакеты.
Для безопасности в добавленном правиле надо прописать ip-адрес и шлюз openvpn-сервера:
iptables -A FORWARD -p udp -m udp -i eth1 -s 192.168.254.254 --sport 1194 -o eth0 -d 192.168.10.2 -j ACCEPT
Надо сниффер запустить и посмотреть что отсекалось, чтобы внести ясность в этот вопрос.
Для заметки:
- Можно использовать ключи для клиентов с запросом пароля.
- Можно использовать ключи в формате pkcs12 для usb-хранилищ.
Смотрел поток wireshark’ом. Внешне обычные udp-пакеты с мешаниной в дата-сегменте. Если смотреть tun интерфейс, то тут уже видим человеческие пакеты.
Private-key – это личный закрытый секретный ключ, а public-key – это открытый ключ, строго соотносящийся с закрытым ключом. Сертификат – это подписанный каким-либо центром сертификации публичный ключ. CA — центр сертификации.
Если я правильно понимаю, то процесс создания клиентских ключа и сертификата, так и ключа и сертификата для сервера, состоит из нескольких этапов:
клиент с помощью математических операций генерирует закрытый файл-ключ (key);
на основании этого приватного ключа (и публичного ключа центра сертификации?) клиент создаёт файл-запрос (csr), содержащий публичный ключ, к центру сертификации на выдачу сертификата;
файл-запрос (csr) отправляется в центр сертификации;
на основании полученного запроса центр сертификации создаёт файл-сертификат (crt) и подписывает его своим приватным ключом (тоже математика?);
файл-сертификат (crt), содержащий открытый ключ, подписанный центром сертификации, отправляется клиенту.
А значит, чисто гипотетически, достаточно иметь один неизвлекаемый приватный ключ в каком-нибудь рутокене. А открытый ключ, от этого закрытого ключа, направлять на подпись к различным центрам сертификации и, получив соответствующие сертификаты, подключаться к своему банку, к своему vpn-серверу, заходить в личный кабинет на госуслугах и т.д.
Гипотетически потому, что к разным “дверям” лучше иметь разные закрытые ключи. И ещё мне пока непонятно с алгоритмами шифрования. Можно ли подписать ГОСТовским закрытым ключом публичный ключ RSA.
…….статья в процессе написания
Ссылки:
http://www.lissyara.su/articles/freebsd/security/openvpn/